Blog

  • Ricotta Pomegranate Stuffed Chicken

    Ricotta Pomegranate Stuffed Chicken


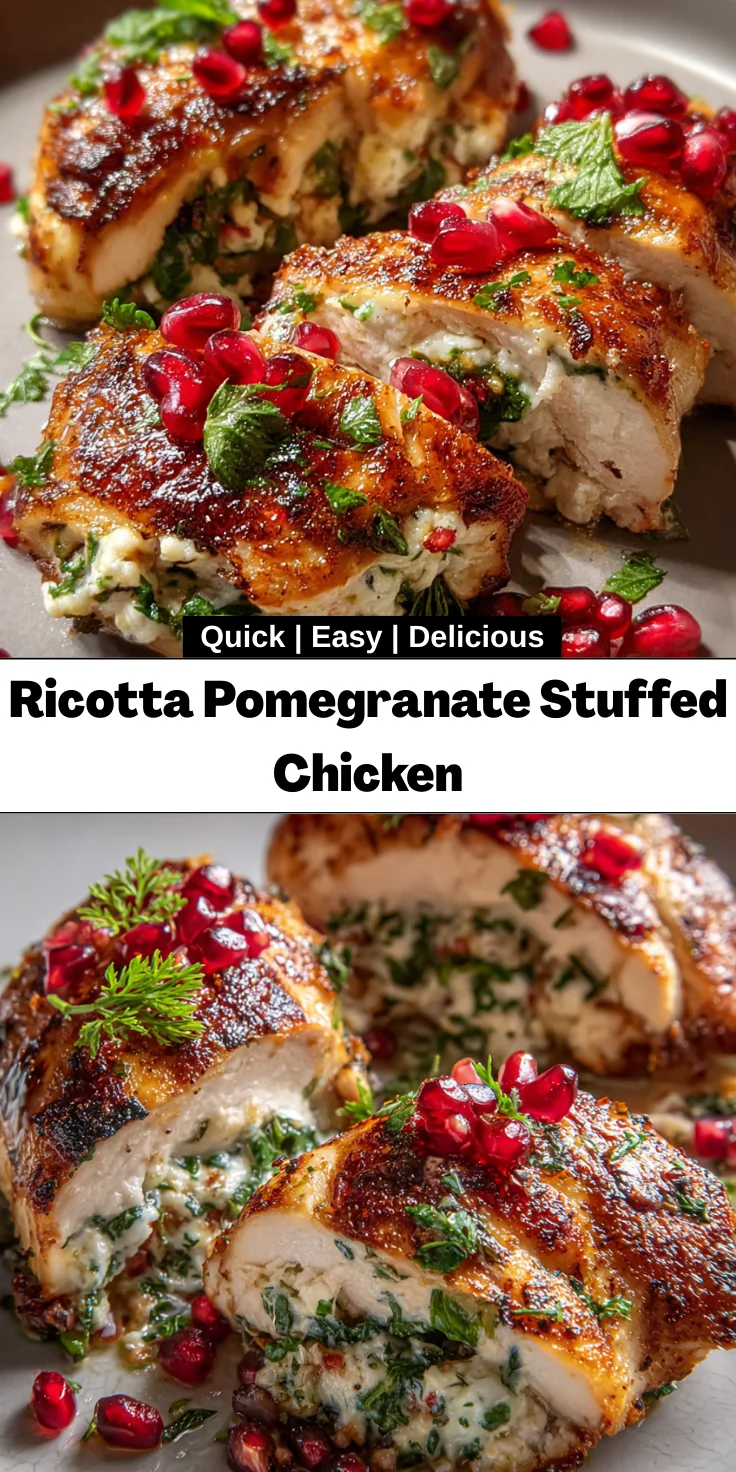
    Introduction to Ricotta Pomegranate Stuffed Chicken

    As a passionate home cook, I understand the joy of preparing a meal that feels special yet doesn’t consume your entire day. Let me introduce you to my Ricotta Pomegranate Stuffed Chicken—a delightful dish that bursts with flavor and elegance. This recipe is perfect for busy evenings when you crave something extraordinary for your loved ones. It effortlessly combines the creamy richness of ricotta cheese with the bright, juicy pop of pomegranate. Trust me, this dish will not only impress your family but also make your cooking experience a delightful adventure.

    Why You’ll Love This Ricotta Pomegranate Stuffed Chicken

    This Ricotta Pomegranate Stuffed Chicken is a showstopper that doesn’t require hours in the kitchen. It’s incredibly easy to prepare, which is a blessing for busy moms and professionals like us. The combination of flavors—creamy ricotta mixed with tart pomegranate—creates a gourmet taste without the fuss. Plus, it’s a wholesome meal that delights your family and guests, making it a go-to recipe for any occasion. Enjoy the simplicity and satisfaction!

    Ingredients for Ricotta Pomegranate Stuffed Chicken

    To create this mouthwatering Ricotta Pomegranate Stuffed Chicken, you’ll need some beautifully simple ingredients that come together to create a delightful dish. Let’s check them out:

    • Boneless, skinless chicken breasts: The canvas for our stuffing, tender and easy to work with.
    • Olive oil: A drizzle adds richness and helps keep the chicken moist while baking.
    • Salt and freshly ground black pepper: Essential for enhancing the flavors of every ingredient.
    • Ricotta cheese: Creamy and slightly tangy, it forms the heart of the stuffing.
    • Pomegranate seeds: These little jewels provide a burst of sweetness and a lovely crunch, adding color and texture.
    • Fresh parsley & basil: Aromatic herbs that brighten the dish with freshness.
    • Lemon zest: A hint of citrus elevates the flavor, making each bite refreshing.
    • Garlic: One clove, minced, brings in that savory depth we love in savory dishes.
    • Optional ingredients: You can experiment with other herbs, like thyme or oregano, to suit your taste.

    For exact measurements, refer to the bottom of the article where you’ll find all the details available for printing. Gather these ingredients, and let’s get started on this delicious adventure!

    How to Make Ricotta Pomegranate Stuffed Chicken

    Now that we have the ingredients ready, let’s dive into the heart of the recipe! Making this Ricotta Pomegranate Stuffed Chicken is straightforward and fun. Follow these simple steps to ensure a delightful dish that will wow your family!

    Step 1: Preheat the Oven

    First, preheat your oven to 200°C (400°F). Preheating ensures that the chicken cooks evenly and thoroughly. While your oven warms up, lightly grease a baking dish with a touch of olive oil. This will keep your chicken from sticking and help create a delicious crust.

    Step 2: Prepare the Filling

    In a mixing bowl, combine the creamy ricotta cheese with pomegranate seeds, chopped parsley, chopped basil, lemon zest, and minced garlic. Add 0.5 teaspoon of salt and 0.25 teaspoon of black pepper for flavor. Mix everything until well combined. Pro tip: use a fork to make the mixing super easy, ensuring a creamy consistency!

    Step 3: Stuff the Chicken

    Using a sharp knife, carefully cut a horizontal pocket in each chicken breast. Be sure not to slice all the way through! Spoon the ricotta mixture into each pocket evenly. If you’re worried about spillage, secure the opening with toothpicks. This keeps the filling snug inside while baking.

    Step 4: Season the Chicken

    Brush the stuffed chicken breasts with olive oil, ensuring they’re well coated. This not only adds flavor but also helps in getting that beautiful golden color. Sprinkle each piece with salt and pepper to taste. Seasoning is key to bringing out the dish’s wonderful flavors!

    Step 5: Bake the Chicken

    Now, it’s time to bake! Place the seasoned chicken breasts in your greased baking dish. Bake for 25 to 30 minutes, or until the internal temperature reaches 74°C (165°F). To check doneness, poke the thickest part of the chicken; the juices should run clear.

    Step 6: Rest and Garnish

    Once baked, remove the chicken from the oven and let it rest for about 5 minutes. This resting time allows the juices to redistribute, making each bite more succulent. Garnish your beautiful dish with extra pomegranate seeds and fresh herbs before serving. Enjoy the beautiful presentation!

    Tips for Success

    • Make sure to pound the chicken breasts to an even thickness for more consistent cooking.
    • For extra flavor, try marinating the chicken with your favorite spices before stuffing.
    • Keep an eye on the baking time to avoid overcooking; every oven is a bit different!
    • Consider making extra filling to serve as a side; it’s a delicious addition!
    • Enjoy experimenting with fresh herbs—you can’t go wrong!

    Equipment Needed

    • Baking dish: A 9×13 inch dish works perfectly. If you don’t have one, any oven-safe dish will do!
    • Mixing bowl: Grab a medium-sized bowl. A sturdy plate can also serve in a pinch for mixing the filling.
    • Sharp knife: To cut the chicken pockets. A sturdy pair of kitchen scissors can be helpful too.
    • Spoon: For stuffing the chicken. A spatula can also help with mixing and scooping!

    Variations

    • Spinach and Feta: Swap out the ricotta for creamy feta cheese and add some sautéed spinach for a Mediterranean twist.
    • Sun-Dried Tomato Pesto: Mix in sun-dried tomato pesto with the ricotta for a zesty, tangy burst of flavor that pairs beautifully with chicken.
    • Quinoa-Stuffed Chicken: For a heartier option, consider adding cooked quinoa to the ricotta mixture. It adds great texture and makes the dish even more filling.
    • Herbed Chicken: Experiment with different fresh herbs, like thyme or dill, to create a unique flavor profile that suits your palate.
    • Dairy-Free Option: Substitute ricotta with a plant-based cheese alternative for a dairy-free version that everyone can enjoy.

    Serving Suggestions

    • Pair with a fresh salad: A simple mixed greens salad with a light vinaigrette complements the richness of the chicken.
    • Roasted vegetables: Serve alongside roasted asparagus, zucchini, or bell peppers for a colorful and healthy plate.
    • Wine pairing: Enjoy with a chilled glass of white wine, like Sauvignon Blanc, to enhance the flavors.
    • Presentation: Arrange the stuffed chicken on a beautiful platter and garnish with extra pomegranate seeds for an eye-catching display.

    FAQs about Ricotta Pomegranate Stuffed Chicken

    As with any delicious dish, questions are bound to pop up! Here are some frequently asked questions about my Ricotta Pomegranate Stuffed Chicken that may help you in your culinary adventure:

    Can I prepare the Ricotta Pomegranate Stuffed Chicken in advance?
    Absolutely! You can stuff the chicken breasts a few hours ahead of time. Just cover them and refrigerate until you’re ready to bake. This can save precious time during busy evenings!

    What sides pair best with this dish?
    This stuffed chicken shines when accompanied by a fresh salad or roasted vegetables. The vibrant flavors complement each other beautifully, making for a well-balanced meal.

    How do I know when the chicken is fully cooked?
    Using a meat thermometer is the best way. The internal temperature should reach 74°C (165°F). If you’re in doubt, poke the thickest part of the chicken; the juices should run clear!

    Can I freeze leftovers of this stuffed chicken?
    Yes, you can freeze the leftovers! Just place them in an airtight container, and they can last for up to 3 months. Reheat in the oven for best results.

    What if someone doesn’t like pomegranate?
    No worries! You can swap pomegranate seeds for dried cranberries or even add sun-dried tomatoes for a delicious twist. Feel free to get creative based on your family’s preferences!

    Final Thoughts

    Cooking has always been my escape, a way to bring joy to my family and share love through food. This Ricotta Pomegranate Stuffed Chicken embodies that spirit beautifully. Each bite offers a delightful contrast of creamy and tangy flavors, making it a satisfying dish after a long day. Whether you’re preparing a cozy family dinner or hosting a special gathering, this recipe promises to elevate the occasion. I hope you find as much joy in creating this meal as I do. Trust me, it’s not just food; it’s a delicious memory waiting to happen!


    Print

    clock clock iconcutlery cutlery iconflag flag iconfolder folder iconinstagram instagram iconpinterest pinterest iconfacebook facebook iconprint print iconsquares squares iconheart heart iconheart solid heart solid icon

    Description

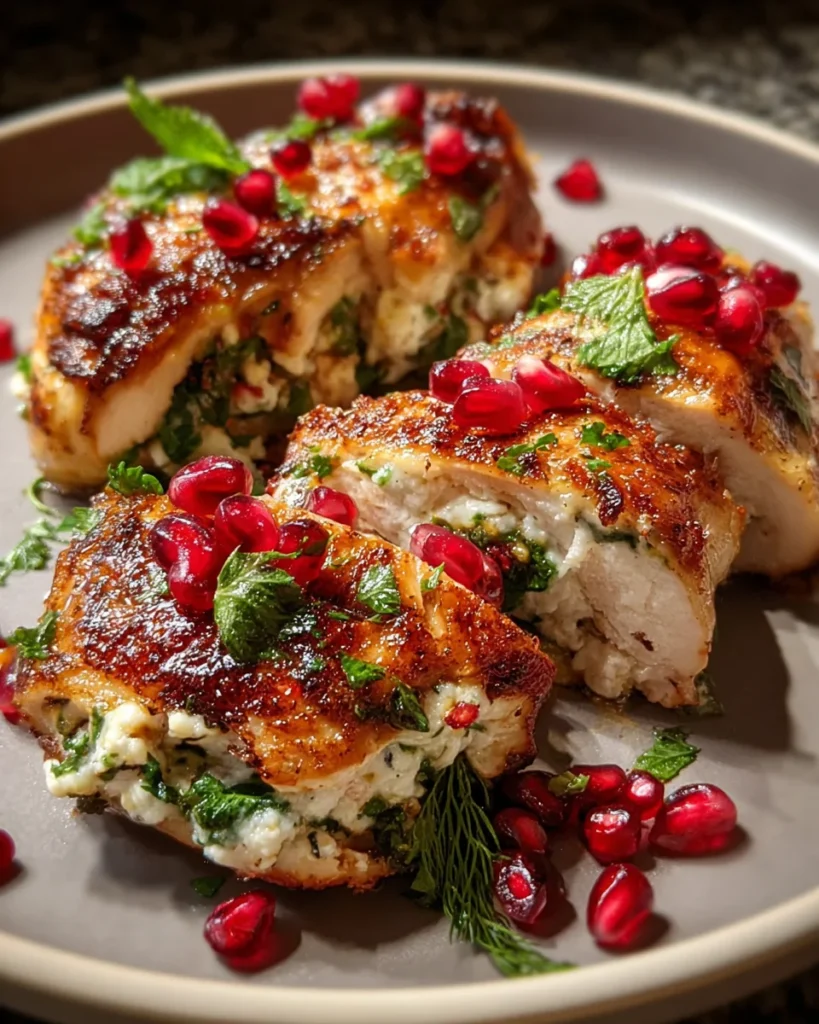
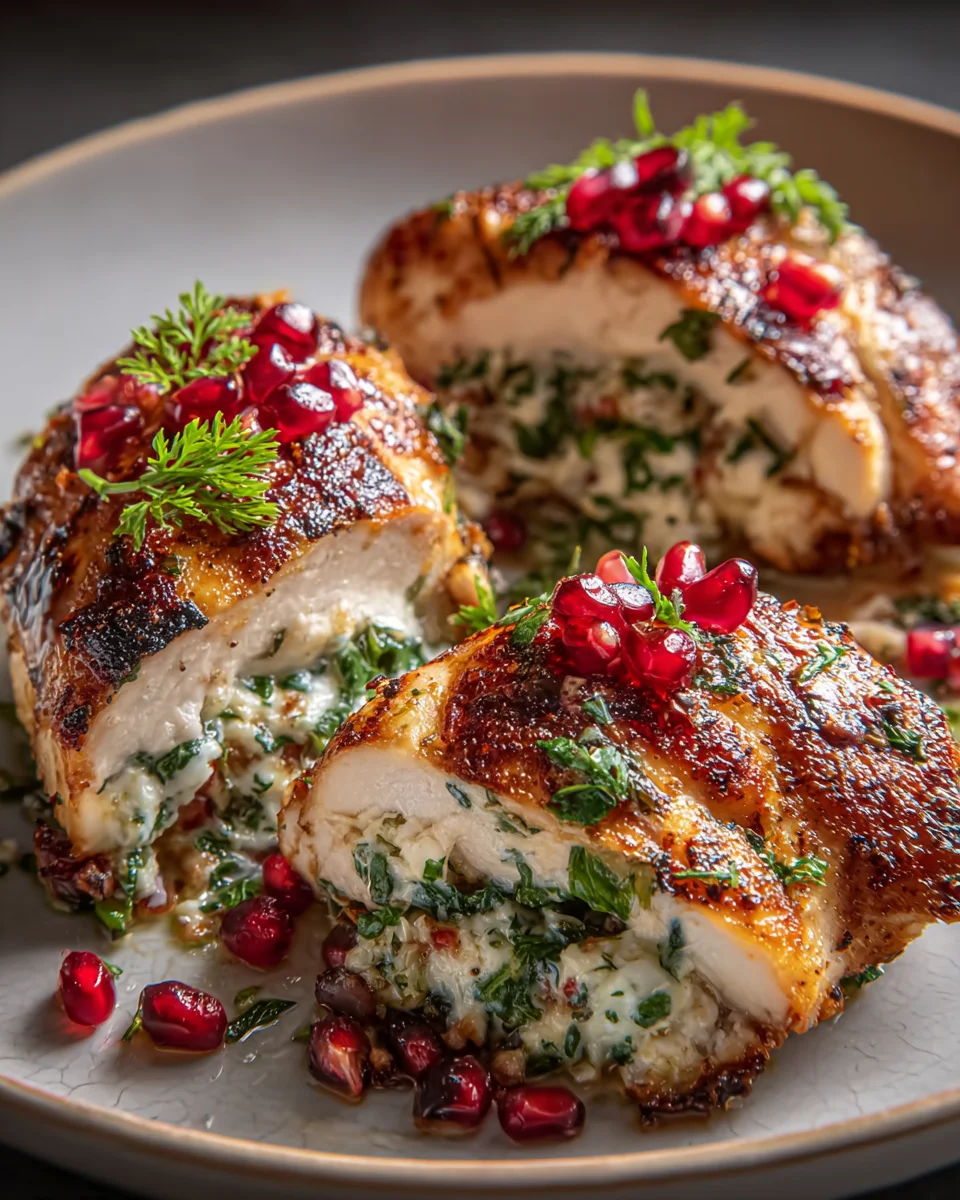
    A delectable dish featuring chicken breasts stuffed with a creamy ricotta and pomegranate mixture, garnished with fresh herbs.


    • 4 large boneless, skinless chicken breasts
    • 1 tablespoon olive oil
    • 1 teaspoon salt
    • 0.5 teaspoon freshly ground black pepper
    • 250 grams ricotta cheese
    • 60 grams pomegranate seeds
    • 2 tablespoons fresh parsley, chopped
    • 1 tablespoon fresh basil, chopped
    • 1 teaspoon lemon zest
    • 1 garlic clove, minced
    • 0.5 teaspoon salt
    • 0.25 teaspoon ground black pepper
    • 1 tablespoon olive oil, for drizzling
    • 2 tablespoons pomegranate seeds, for garnish
    • Fresh basil or parsley, for garnish

    1. Preheat the oven to 200°C. Lightly grease a baking dish.
    2. In a mixing bowl, combine the ricotta cheese, 60 grams pomegranate seeds, chopped parsley, chopped basil, lemon zest, minced garlic, 0.5 teaspoon salt, and 0.25 teaspoon black pepper. Stir until the mixture is well blended.
    3. Using a sharp knife, cut a horizontal pocket into each chicken breast, ensuring not to cut all the way through.
    4. Fill each chicken pocket with the ricotta mixture, dividing it evenly among the breasts. Secure with toothpicks if necessary.
    5. Brush the stuffed chicken breasts with 1 tablespoon olive oil and season with 1 teaspoon salt and 0.5 teaspoon black pepper. Place them in the prepared baking dish and drizzle with the remaining olive oil.
    6. Bake for 25 to 30 minutes, or until the chicken reaches an internal temperature of 74°C and the juices run clear.
    7. Remove any toothpicks and let the chicken rest for 5 minutes. Garnish with extra pomegranate seeds and fresh herbs before serving.

    Notes

    • This dish pairs well with a side salad or roasted vegetables.
    • To ensure even cooking, pound the chicken breasts to an even thickness before stuffing.
    • Leftovers can be stored in an airtight container in the refrigerator for up to 3 days.
    • Prep Time: 15 minutes
    • Cook Time: 30 minutes
    • Category: Main Course
    • Method: Baking
    • Cuisine: Mediterranean

    Nutrition

    • Serving Size: 1 stuffed chicken breast
    • Calories: 350
    • Sugar: 2g
    • Sodium: 600mg
    • Fat: 18g
    • Saturated Fat: 5g
    • Unsaturated Fat: 10g
    • Trans Fat: 0g
    • Carbohydrates: 7g
    • Fiber: 1g
    • Protein: 45g
    • Cholesterol: 120mg

    Sharing is caring!

  • Chicken Rice Feta Casserole

    Chicken Rice Feta Casserole


    Introduction to Chicken Rice Feta Casserole

    Ah, the joys of a comforting home-cooked meal! Let me introduce you to my new favorite, the Chicken Rice Feta Casserole. This delightful dish combines juicy chicken, fluffy rice, and creamy feta cheese into a baked masterpiece.

    It’s perfect for busy moms like me, who often juggle work, kids, and a million other tasks while aiming to put a warm meal on the table.

    With its straightforward preparation and comforting flavors, this casserole guarantees to bring smiles to your loved ones’ faces. Plus, it fills the kitchen with a mouthwatering aroma that beckons everyone to gather around the dinner table.

    Why You’ll Love This Chicken Rice Feta Casserole

    This Chicken Rice Feta Casserole is the ultimate comfort food! Its warm flavors wrap around you like a cozy blanket, making it perfect for any family gathering.

    What I adore is how quick it is to whip together. In under an hour, you can serve a hearty meal that’s ready to be customized to your taste. From extra veggies to your favorite cheeses, this dish morphs seamlessly to suit all preferences. Enjoy the aroma wafting through the house as it bakes; it’s a real crowd-pleaser!

    Ingredients Chicken Rice Feta Casserole

    Here’s what you’ll need to create this delicious Chicken Rice Feta Casserole:

    • Cooked chicken breast: Shredded or diced, it’s the protein powerhouse that adds substance to this dish.
    • Long-grain white rice: This keeps the casserole fluffy and acts as a perfect base for all the flavors.
    • Feta cheese: Crumbled to provide a tangy twist, which elevates the overall taste.
    • Whole milk: This adds creaminess, ensuring every bite is rich.
    • Sour cream: Extra creaminess and a slight tang, always a welcome ingredient.
    • Shredded mozzarella cheese: Melty, gooey goodness that binds everything together.
    • Onion and garlic: For an aromatic base, infusing the dish with rich flavors.
    • Baby spinach: A nutritious add-in that helps balance out the meal.
    • Red bell pepper: Sweet and vibrant, putting a splash of color on your plate.
    • Chicken broth: A flavorful liquid that keeps the rice moist.
    • Dried oregano and thyme: Herbs that add depth and warm flavors.
    • Black pepper and salt: Essential seasonings that enhance all the flavors.
    • Breadcrumbs (optional): A crunchy topping that adds texture.
    • Olive oil (optional): Used for sautéing, it introduces healthy fats and flavor.

    Considering substitutions? Feel free to swap veggies or use different cheeses based on your preferences. Exact measurements can be found at the bottom of the article.

    How to Make Chicken Rice Feta Casserole

    Ready to create a hearty Chicken Rice Feta Casserole that will undoubtedly become a family favorite? Let’s dive into the simple yet satisfying steps to assemble this delightful baked casserole!

    Step 1: Prepare the Oven and Casserole Dish

    First off, let’s get that oven going! Preheat it to 190°C (375°F). While your oven heats up, grab a 23×33 cm casserole dish and grease it lightly. This is crucial—you want to avoid that dreaded sticking situation. A little olive oil or cooking spray can work wonders here.

    Step 2: Sauté Vegetables

    Now, let’s bring some flavor to life! Heat a drizzle of olive oil in a large skillet over medium heat. Toss in the finely chopped onion and diced red bell pepper. Sauté them for about 4 to 5 minutes until they soften and become fragrant. This step enhances their natural sweetness, totally transforming the dish!

    Step 3: Cook Spinach

    Next, it’s time to add the baby spinach. Stir it into the same skillet and watch it wilt down in seconds. Cooking it quickly retains its vibrant color and essential nutrients while adding a touch of freshness to our baked casserole.

    Step 4: Combine Main Ingredients

    In your large mixing bowl, combine your cooked chicken, uncooked rice, sautéed vegetables, crumbled feta, and shredded mozzarella. As you mix everything, you’ll notice the textures and colors come together beautifully. The chewy chicken mingles with the creamy cheeses and the subtle crunch of the peppers. It’s a feast for the eyes right there!

    Step 5: Prepare Creamy Mixture

    In a separate bowl, whisk together whole milk, sour cream, and chicken broth until smooth. This creamy blend provides the perfect consistency that will keep your rice tender and the casserole moist. Each scoop will deliver a luscious, savory experience!

    Step 6: Combine and Ready for Baking

    Pour that delightful mixture of milk and broth over the chicken and rice medley, stirring gently to combine everything thoroughly. Once mixed, transfer it to your greased casserole dish, leveling the surface nicely. If you want that crunchy topping, mix breadcrumbs with a splash of olive oil and sprinkle it evenly over the top. This will add a delicious texture contrast!

    Step 7: Baking Time

    Now, cover the dish with aluminum foil and slide it into the preheated oven. Bake for 30 minutes. After this, remove the foil and let it bake for another 15 minutes. Keep an eye on it; you’ll know it’s done when it’s bubbling and the top has a gorgeous golden brown color. The aroma wafting through your home at this point? Pure magic!

    Tips for Success

    Want your Chicken Rice Feta Casserole to shine? Here are some quick tips to keep in mind:

    • Ensure your chicken is cooked thoroughly before adding it to the mixture.
    • Feel free to swap in any vegetables you have on hand for added flavor.
    • Add a bit more sour cream for an even creamier texture.
    • For more crunch, sprinkle extra breadcrumbs on top before baking.

    Equipment Needed

    Gather these essential tools to make your Chicken Rice Feta Casserole a breeze:

    • Large skillet: A big frying pan works too!
    • Casserole dish: Any size or shape will do, just ensure it’s oven-safe.
    • Mixing bowls: Grab a couple for easy mixing.
    • Whisk: For blending the creamy mixture, a fork works in a pinch!
    • Measuring cups: Helpful for precise ingredients.

    Variations

    Looking to switch things up? Here are some delightful variations to customize your Chicken Rice Feta Casserole:

    • Vegetarian option: Replace chicken with roasted chickpeas or lentils for a protein-packed meatless meal.
    • Cheese swaps: Try goat cheese for a tangy flavor or different cheeses like cheddar for a rich twist.
    • Veggie overload: Add zucchini, mushrooms, or broccoli for extra nutrition and beautiful color.
    • Spicy kick: Incorporate jalapeños or crushed red pepper flakes for a fiery touch.
    • Herb infusion: Use fresh herbs like basil or parsley to elevate flavor freshness.

    Serving Suggestions

    To elevate your Chicken Rice Feta Casserole, consider these delightful accompaniments:

    • Side salad: A fresh arugula salad with lemon vinaigrette complements the richness.
    • Garlic bread: Serve with warm, crusty garlic bread for a hearty meal.
    • Wine pairing: Chardonnay or a light Pinot Noir pairs beautifully.
    • Presentation: Garnish with fresh herbs for a pop of color!

    FAQs about Chicken Rice Feta Casserole

    Got questions about this delicious Chicken Rice Feta Casserole? Here are some common ones I often hear!

    Can I use leftover chicken for this casserole?

    Absolutely! In fact, leftover chicken is not only convenient but also enhances the flavor. Just shred or dice it before mixing it into the casserole. It saves time without sacrificing taste!

    How do I store leftover casserole?

    Let it cool completely, then store it tightly covered in the refrigerator for up to 3 days. It reheats beautifully—just pop it into the oven or microwave until heated through. Perfect for busy days!

    Can I freeze the Chicken Rice Feta Casserole?

    You sure can! Freeze it before baking. Prepare it in advance, cover it tightly, and store it for up to 3 months. Just thaw it in the fridge overnight and bake as directed when you’re ready to enjoy!

    What can I substitute for feta cheese?

    If feta isn’t your style, go for goat cheese or a bit of cream cheese for creaminess. Each option brings a different flavor profile, so feel free to experiment!

    Can I add extra vegetables to the casserole?

    Definitely! This recipe is wonderfully versatile. Feel free to toss in zucchini, mushrooms, or even broccoli. It’s an excellent way to sneak some extra nutrition in without losing the comforting vibe.

    Final Thoughts

    As I look back at all the delightful moments shared over my Chicken Rice Feta Casserole, my heart swells with warmth. This dish isn’t just a meal; it’s a gathering point, where laughter and stories flow as freely as the flavors.

    Each bite is like a hug, reminding us of the importance of togetherness. Busy days may pull us in different directions, but a simple casserole can bring us all back to the table, creating cherished memories that linger long after meal times.

    So, roll up your sleeves and dive into this recipe, and watch as it becomes a beloved tradition in your home!


    Print

    clock clock iconcutlery cutlery iconflag flag iconfolder folder iconinstagram instagram iconpinterest pinterest iconfacebook facebook iconprint print iconsquares squares iconheart heart iconheart solid heart solid icon

    Description

    A delicious comfort dish combining chicken, rice, and feta baked to perfection.


    • 300 g cooked chicken breast, shredded or diced
    • 200 g long-grain white rice, uncooked
    • 150 g feta cheese, crumbled
    • 240 ml whole milk
    • 120 ml sour cream
    • 100 g mozzarella cheese, shredded
    • 1 medium onion, finely chopped
    • 2 cloves garlic, minced
    • 150 g baby spinach, roughly chopped
    • 1 red bell pepper, diced
    • 475 ml chicken broth
    • 1 tsp dried oregano
    • 0.5 tsp dried thyme
    • 0.5 tsp black pepper
    • 0.5 tsp salt, or to taste
    • 25 g breadcrumbs (optional)
    • 2 tbsp olive oil (optional)

    1. Preheat oven to 190°C. Grease a 23×33 cm casserole dish.
    2. In a large skillet over medium heat, sauté onion and red bell pepper in a drizzle of olive oil for 4 to 5 minutes until softened. Add garlic and cook for an additional minute until fragrant.
    3. Add chopped spinach to the skillet and cook just until wilted. Remove from heat.
    4. In a large mixing bowl, combine cooked chicken, uncooked rice, sautéed vegetables, crumbled feta, shredded mozzarella, oregano, thyme, salt, and black pepper.
    5. In a separate bowl, whisk together whole milk, sour cream, and chicken broth. Pour over the chicken and rice mixture and stir until thoroughly combined.
    6. Transfer the mixture to the prepared casserole dish and level the surface.
    7. If desired, combine breadcrumbs with olive oil and sprinkle evenly over the surface.
    8. Cover with aluminium foil and bake for 30 minutes. Remove foil and continue baking for 15 minutes, or until bubbling and the top is golden brown.
    9. Allow to rest for 5 to 10 minutes before serving.

    Notes

    • Make sure your chicken is cooked before adding it to the casserole.
    • You can substitute with other vegetables like zucchini or mushrooms as per your preference.
    • For a creamier texture, you can add extra sour cream.
    • Prep Time: 20 minutes
    • Cook Time: 45 minutes
    • Category: Main Course
    • Method: Baking
    • Cuisine: Mediterranean

    Nutrition

    • Serving Size: 1 serving
    • Calories: 450
    • Sugar: 3 g
    • Sodium: 600 mg
    • Fat: 22 g
    • Saturated Fat: 10 g
    • Unsaturated Fat: 8 g
    • Trans Fat: 0 g
    • Carbohydrates: 38 g
    • Fiber: 2 g
    • Protein: 30 g
    • Cholesterol: 90 mg

    Sharing is caring!

  • Cinnamon spiced chocolate lava cakes

    Cinnamon spiced chocolate lava cakes


    Introduction to Cinnamon Spiced Chocolate Lava Cakes

    There’s something magical about a warm dessert that spills gooey chocolate when you cut into it. These cinnamon spiced chocolate lava cakes are just that—a delightful treat you can whip up in under 30 minutes! Perfect for busy moms or professionals like me, they crowd-please with minimal effort.
    When I crave something quick yet impressive for unexpected guests or family movie nights, these molten delights are my go-to. The sweet embrace of chocolate blended with the warmth of cinnamon wraps around you like a loving hug. Let’s dive into this easy, soul-warming recipe!

    Why You’ll Love This Cinnamon Spiced Chocolate Lava Cakes

    These cinnamon spiced chocolate lava cakes are the answer to your dessert dreams! They’re super easy to make, perfect for anyone juggling a busy schedule. In just 27 minutes, you can impress your family or friends with a stunning dessert. Plus, the warm, gooey center combined with a hint of cinnamon adds a comforting twist that takes your taste buds on a delightful adventure. It’s pure indulgence in a ramekin!

    Ingredients for Cinnamon Spiced Chocolate Lava Cakes

    To create these heavenly cinnamon spiced chocolate lava cakes, you’ll need a handful of simple ingredients that are easy to find in any local grocery store. Each component plays a vital role in crafting that rich, gooey center wrapped in a tender outer shell.

    • Dark chocolate: I recommend using chocolate that is at least 60% cocoa. It adds the depth of flavor and richness that makes these cakes irresistible.
    • Unsalted butter: This ensures the perfect balance of flavor without added salt. Plus, butter is the magic ingredient that keeps our cakes moist.
    • Whole milk: A splash of milk helps to create a smoother batter and enhances the creamy texture of the molten center.
    • All-purpose flour: This classic ingredient gives structure to the cakes. Just the right amount is needed to achieve a perfect balance.
    • Powdered sugar: For sweetness, it blends seamlessly into the batter. It’s also a wonderful choice for a light dusting on top!
    • Ground cinnamon: The star of the show! This spice adds warmth and a lovely depth of flavor that pairs beautifully with chocolate.
    • Salt: Just a pinch to enhance the overall flavors, making the sweetness pop.
    • Eggs and egg yolks: Essential for binding and creating that light, airy texture that makes every bite delicious. The yolks add richness.
    • Optional powdered sugar: For a decorative touch on top after baking, it looks lovely on a plate.
    • Optional vanilla ice cream or whipped cream: Serve alongside the lava cakes for a delightful contrast to the warm chocolate. It’s like a cherry on top of an indulgent sundae!

    For exact measurements, check the end of the article where you’ll find a printable ingredient list. Happy baking!

    How to Make Cinnamon Spiced Chocolate Lava Cakes

    Are you ready to embark on a delightful baking adventure? Let’s dive into the step-by-step process of creating these irresistible cinnamon spiced chocolate lava cakes. With each step, I’ll sprinkle in some pro tips from my own kitchen to help you achieve that perfect molten magic!

    Preheat and Prepare

    First things first—preheat your oven to a toasty 220°C (430°F). This is key to achieving that perfect gooey center.

    Next, grab four ramekins of 180ml capacity. Generously butter each one. I like to use a pastry brush for an even coating. Then, lightly dust them with flour, making sure to remove any excess. This prevents sticking and guarantees a flawless release. Trust me, you want every bit of that delightful chocolate lava to come out!

    Melt the Chocolate and Butter

    Now, let’s create the dreamy chocolate base! Set up a heatproof bowl over a pot of simmering water—this double boiler method allows for gentle melting, keeping our chocolate smooth.

    Add the dark chocolate and unsalted butter into the bowl, stirring occasionally until they are fully melted and glossy.

    This method not only helps control the temperature but also ensures no clumps remain. Once melted, remove from heat and stir in the whole milk, bringing everything together like a happy family!

    Whisk the Eggs and Sugar

    In a separate bowl, whisk together the eggs, egg yolks, and powdered sugar until the mixture becomes thick and pale—this is where the magic begins!

    A handheld mixer works wonders here, creating air bubbles that help the batter rise beautifully.

    Your goal is a light and frothy concoction that should look like sunshine in a bowl!

    Combine Chocolate and Egg Mixtures

    Now for the fun part! Gently fold the melted chocolate mixture into the thick egg mixture.

    Use a spatula to scrape down the sides as you combine—this ensures even flavor throughout.

    Be careful not to deflate the eggs; we want to keep that lovely airiness. Think of it as a gentle hug rather than a big bear squeeze!

    Fold in the Dry Ingredients

    It’s time to add the star players: all-purpose flour, cinnamon, and a pinch of salt.

    Sift these over the batter for an even distribution and to avoid lumps. Then, gently fold them in until just integrated.

    This step is delicate—over-mixing can lead to dense cakes rather than our desired fluffy texture. Less is more!

    Distribute and Bake

    Now, let’s fill those prepared ramekins. Spoon the batter evenly into each one, filling them about three-quarters full.

    This allows room for the cakes to rise without overflowing. Place them on a baking sheet for easy transfer to the oven.

    Bake for 11 to 12 minutes, keeping a close eye. The edges should be set, but the centers must remain soft to achieve that signature lava effect!

    Cool and Serve

    After baking, allow the cakes to cool for one minute. This step is crucial for avoiding any gooey disasters during serving!

    Run a knife around the edges to loosen them. Invert each ramekin onto a plate—voilà! You’ve got yourself a decadent lava cake.

    For a finishing touch, dust with powdered sugar and serve promptly. A scoop of vanilla ice cream or a dollop of whipped cream makes this dessert even more special. Enjoy each warm, mouthwatering bite!

    Tips for Success

    • Keep an eye on the cakes while baking. Every oven is different!
    • Don’t over-mix the batter after adding dry ingredients to maintain a light texture.
    • Run the knife around the edges gently for easy release.
    • For best results, serve immediately to enjoy the molten center.
    • Experiment with different toppings like berries or flavored creams for a twist!

    Equipment Needed

    • Ramekins: Four 180ml ramekins are essential. You can also use muffin tins if needed.
    • Heatproof bowl: A glass or metal bowl that can sit on top of a pot for melting chocolate.
    • Mixing bowls: At least two bowls for combining the chocolate and egg mixtures.
    • Whisk: A hand whisk or electric mixer for aerating the eggs and sugar.
    • Spatula: To gently fold in ingredients without deflating the batter.

    Variations on Cinnamon Spiced Chocolate Lava Cakes

    • Nutty Delight: Add chopped walnuts or pecans to the batter for a crunchy texture that pairs beautifully with the soft chocolate.
    • Fruity Twist: Incorporate fresh raspberries or diced strawberries inside the batter for a tart flavor burst with every gooey bite.
    • Spice It Up: Experiment with cardamom or nutmeg for a unique spice combo that adds a different depth to the chocolate.
    • Gluten-Free: Substitute all-purpose flour with almond flour or a gluten-free blend to make these cakes gluten-free.
    • Dairy-Free: Use coconut oil or a dairy-free butter alternative along with a dairy-free milk for a completely dairy-free treat.

    Serving Suggestions for Cinnamon Spiced Chocolate Lava Cakes

    • Pair with Ice Cream: A scoop of vanilla ice cream melts beautifully against the warm chocolate, creating a delicious contrast.
    • Top with Berries: Fresh raspberries, strawberries, or blueberries add a refreshing burst of flavor and color.
    • Drizzle some Caramel: A rich caramel sauce drizzled over the top adds a sweet finish.
    • Serve with Coffee: A cup of black coffee balances the sweetness and enhances the chocolate flavor.
    • Presentation: Dust with cocoa powder or powdered sugar for a gorgeous presentation that impresses!

    FAQs about Cinnamon Spiced Chocolate Lava Cakes

    I often get a few questions when I share my cinnamon spiced chocolate lava cakes. Here are some common ones that I hope will help you along your baking journey!

    Can I make the batter ahead of time?

    Absolutely! You can prepare the batter in advance and store it in the fridge for up to 24 hours. Just give it a good stir before filling the ramekins and baking.

    What if I don’t have ramekins?

    No worries! You can use muffin tins as an alternative. The baking time may vary slightly, so keep an eye on them to ensure that gooey center!

    Can I freeze the lava cakes?

    Yes, you can freeze the unbaked filled ramekins! Just cover them tightly, and when you’re ready, bake them straight from the freezer, though you may need to add a few extra minutes.

    How can I tell when they’re done baking?

    Check for set edges and a soft center. A toothpick inserted should come out with a few moist crumbs, not wet batter. Remember, the magic happens after you remove them from the oven!

    What can I serve alongside these cakes?

    I love serving these with vanilla ice cream or whipped cream for an indulgent experience. Fresh berries also add a delightful touch of freshness that contrasts beautifully with the rich chocolate.

    Final Thoughts

    Baking these cinnamon spiced chocolate lava cakes brings such joy—not just for the palate but for the heart as well. The warm, melty chocolate centers are like little treasures that surprise with every bite. It’s a dessert that creates unforgettable moments, whether shared with family at dinner or savored alone after a long day.

    In just under 30 minutes, you can whip up a gourmet dish that feels special. So, roll up your sleeves, embrace the process, and enjoy the delightful rewards of your culinary adventure. Trust me, every mouthful is pure happiness!


    Print

    clock clock iconcutlery cutlery iconflag flag iconfolder folder iconinstagram instagram iconpinterest pinterest iconfacebook facebook iconprint print iconsquares squares iconheart heart iconheart solid heart solid icon

    Description

    Delicious and indulgent cinnamon spiced chocolate lava cakes that are sure to impress your taste buds with their molten center.


    • 120 g dark chocolate (minimum 60% cocoa), chopped
    • 100 g unsalted butter, plus additional for greasing
    • 2 tablespoons whole milk
    • 60 g all-purpose flour
    • 100 g powdered sugar
    • 1 teaspoon ground cinnamon
    • Pinch of salt
    • 2 large eggs
    • 2 large egg yolks
    • Powdered sugar, for dusting (optional)
    • Vanilla ice cream or whipped cream (optional)

    1. Preheat the oven to 220°C. Generously butter four 180 ml ramekins and dust them lightly with flour, removing any excess.
    2. Using a heatproof bowl over a pot of simmering water, melt the dark chocolate and unsalted butter together, stirring until smooth. Remove from heat and incorporate the whole milk.
    3. In a separate bowl, whisk eggs, egg yolks, and powdered sugar together until the mixture becomes thick and pale.
    4. Gently fold the melted chocolate mixture into the whisked egg mixture until smoothly combined.
    5. Sift flour, ground cinnamon, and salt over the batter. Fold in these dry ingredients until just integrated.
    6. Evenly distribute the batter into the prepared ramekins.
    7. Bake in the oven for 11 to 12 minutes, or until the edges are set but the centers remain soft.
    8. Allow to cool for 1 minute. Run a knife around the edges to loosen, then invert each cake onto a plate.
    9. Dust with powdered sugar and serve promptly, optionally accompanied by vanilla ice cream or whipped cream.

    Notes

    • Keep an eye on the cakes while baking to ensure the centers stay molten.
    • Serve immediately for the best lava effect.
    • Prep Time: 15 minutes
    • Cook Time: 12 minutes
    • Category: Dessert
    • Method: Baking
    • Cuisine: American

    Nutrition

    • Serving Size: 1 cake
    • Calories: 450
    • Sugar: 30 g
    • Sodium: 150 mg
    • Fat: 25 g
    • Saturated Fat: 15 g
    • Unsaturated Fat: 10 g
    • Trans Fat: 0 g
    • Carbohydrates: 50 g
    • Fiber: 2 g
    • Protein: 6 g
    • Cholesterol: 150 mg

    Sharing is caring!

  • Oreo Macarons

    Oreo Macarons


    Introduction to Oreo Macarons

    Ah, Oreo Macarons! Just the name brings a smile to my face. If you’re like me—balancing the whirlwind of family, work, and life—you’ll appreciate how these delightful French pastries can transform any ordinary day. The creamy Oreo filling nestled between those delicate shells is pure bliss. Not only are they a quick solution for a busy day, but they also make for a stunning treat to impress loved ones. Trust me, once you master this recipe, you’ll hear requests for “more macarons” coming your way. Let’s dive into this delicious adventure together!

    Why You’ll Love This Oreo Macarons

    What’s not to love about Oreo Macarons? They’re not only incredibly tasty but simple to make, even for the busiest moms or professionals. With just a handful of ingredients, you can whip up these delightful treats in no time. Plus, their elegant look, paired with that rich Oreo flavor, makes them a showstopper at gatherings. It’s a sweet way to bring a little joy to your day!

    Ingredients for Oreo Macarons

    To create your very own Oreo Macarons, you’ll need a mix of staple baking ingredients and some delicious elements to truly embody that iconic Oreo flavor. Let’s break it down:

    • Superfine Almond Flour: This is the base of your macarons. It gives them that delicate and chewy texture we all love. If you can’t find it, you can pulse regular almond flour in a food processor to achieve a finer consistency.
    • Powdered Sugar: Essential for adding sweetness and making your macarons smooth. No substitutions needed here—powdered sugar is a must for that flawless finish!
    • Crushed Oreos: These provide the signature flavor. Feel free to add more if you’re a big Oreo fan; they’re what makes this dessert truly special!
    • Aged Egg Whites: The heart of the meringue. Using aged whites (left out in the fridge overnight) helps achieve the perfect structure and stability. It’s a simple trick that can make a big difference!
    • Cream of Tartar: Optional, but it helps stabilize your egg whites if you’re feeling unsure. It’s a little insurance policy for your meringue!
    • Granulated Sugar: This sweetener will turn the egg whites into glossy peaks. It’s the magic that transforms your mix into a beautiful meringue.
    • Unsalted Butter: For the Oreo Buttercream. Using unsalted provides better control over the sweetness of your frosting.
    • Vanilla Extract or Vanilla Bean Paste: A small drop enhances the overall flavor of the buttercream. Trust me, a dash of vanilla does wonders!
    • Fine Salt: A pinch may seem small, but it heightens the flavors and balances the sweetness beautifully.
    • Heavy Whipping Cream: This adds richness to the frosting. If you don’t have it, half-and-half can work in a pinch, but cream truly takes the taste over the top!

    Exact measurements for each ingredient can be found at the bottom of this article for printing convenience. Happy baking!

    How to Make Oreo Macarons

    Ready to create your very own Oreo Macarons? Follow these straightforward steps, and soon you’ll be indulging in these scrumptious French treats. Let’s get started!

    Prepare the Meringue

    First things first: get your aged egg whites into a bowl. I like using a stand mixer for this part. Mix them on medium speed until tiny bubbles form on the surface. This is when you’ll want to add a pinch of cream of tartar. It’s optional, but it really helps stabilize those beautiful whites.

    Now, boost the mixer’s speed to medium-high and gradually add in granulated sugar. Keep whisking until you reach stiff, glossy peaks. If you’ve ever whipped cream to perfection, you know how satisfying this stage is!

    Combine Dry Ingredients

    Time to sift together the dry ingredients. Grab a fine mesh sieve and combine superfine almond flour, powdered sugar, and that all-important crushed Oreos. Sifting is crucial here—don’t skip it! It ensures a smooth batter without any lumps.

    Fold and Pipe the Batter

    With your dry ingredients sifted, it’s time for the fun part: folding! Gently add the dry mix into the meringue using a spatula. The goal is to combine them until your batter flows in a thick ribbon when lifted. When you can draw a few figure eights without breaking the batter, you’ve hit the sweet spot!

    Now, grab a piping bag fitted with a medium round tip. Pipe your batter onto prepared baking sheets, making 1 1/4 inch rounds. Ensure you leave about an inch of space between each one. This gives them room to spread during baking.

    Bake the Macarons

    It’s time to release those pesky air bubbles! Bang the pans gently on your kitchen counter. This simple trick helps create that signature smooth top we all admire. Also, pop any remaining bubbles with a toothpick.

    Let your macarons rest for around 30 minutes or until they form a skin. This will help them rise perfectly. While they’re resting, preheat your oven to 315°F.

    Bake one tray at a time for 15-18 minutes, rotating halfway through. Your kitchen will soon be filled with an irresistible aroma. Once they’re done, take them out and let them cool for about 15 minutes. Then, gently lift them off the baking mat!

    Make Oreo Buttercream

    Now for the creamy filling! Start by beating room-temperature unsalted butter on medium speed until it’s nice and smooth. This step adds a wonderful texture to your buttercream.

    Next, incorporate the crushed Oreos, vanilla, and a pinch of fine salt at a lower speed. That boost of flavor will make each bite heavenly! Gradually mix in your powdered sugar and heavy whipping cream. Adjust the consistency as needed. You want it velvety yet firm for piping!

    Assemble the Macarons

    It’s finally assembly time! Pair up your macaron shells by selecting matching sizes. Pipe a generous dollop of that delectable Oreo buttercream onto the bottom of one shell. Place the second shell gently on top, creating a beautiful sandwich.

    If you’re feeling fancy, drizzle dark and white chocolate over each macaron. Finish with a sprinkle of crushed Oreo crumbs for that extra flair. Store your creations in an airtight container, ideally in the fridge overnight. Let them sit at room temperature for 15 minutes before devouring!

    Tips for Success

    • Always use aged egg whites; it makes a world of difference in the meringue.
    • Make sure your baking sheets are lined with parchment paper or a silicone mat for easy removal.
    • Avoid overmixing the batter when folding; it can lead to flat macarons.
    • Use a kitchen scale for accurate measurements, especially with almond flour and sugar.
    • Practice patience! Allow macarons to rest before baking for the best results.

    Equipment Needed for Oreo Macarons

    • Stand Mixer: Essential for whipping egg whites. A handheld mixer works too!
    • Fine Mesh Sieve: Great for sifting dry ingredients. If you don’t have one, a regular strainer can work in a pinch.
    • Piping Bags: Perfect for shaping your macarons. Ziplock bags with a corner cut can serve as a good alternative.
    • Baking Sheets: Needed for baking. Use rimmed trays for better stability.
    • Silicone Baking Mat or Parchment Paper: Ensures easy removal of macarons. Either will do the job!

    Variations of Oreo Macarons

    • Mint Oreo Macarons: Add a few drops of peppermint extract to the buttercream for a refreshing twist!
    • Peanut Butter Oreo Macarons: Substitute half the butter in the frosting with creamy peanut butter for a nutty delight.
    • Chocolate Macarons: Replace some of the almond flour with cocoa powder to create chocolate-flavored shells, pairing beautifully with the Oreo filling.
    • Gluten-Free Option: Instead of almond flour, use finely ground sunflower seeds for those with nut allergies, while maintaining that delicious flavor.
    • Colorful Macarons: Incorporate food coloring into the macaron batter for a fun and bright presentation. Perfect for parties!
    • Spice It Up: Add a pinch of cinnamon or nutmeg to the buttercream for a warm, seasonal flavor that surprises your taste buds.

    Serving Suggestions for Oreo Macarons

    • Pair your Oreo Macarons with a steaming cup of coffee or herbal tea for a delightful afternoon treat.
    • Serve them on a decorative platter, garnished with fresh mint leaves for an elegant touch.
    • For a party, arrange the macarons in a colorful display with other desserts to create a sweet feast.
    • Drizzle some chocolate syrup on the plate for a beautiful presentation and added indulgence.
    • Offer them alongside a scoop of vanilla ice cream for a decadent dessert experience!

    FAQs about Oreo Macarons

    Curious about making these scrumptious Oreo Macarons? Here are some common questions I often hear from fellow bakers:

    Can I use regular eggs instead of aged egg whites?

    While fresh egg whites can work, aged egg whites are preferred for macarons. They whip up better, creating that perfect meringue texture you need for those delicate shells.

    What if my macarons crack while baking?

    Cracked macarons can often be traced back to too much moisture or high oven temperature. Ensure your macarons have rested adequately before baking, and consider checking your oven calibration for accuracy.

    How do I store my Oreo Macarons?

    Store them in an airtight container in the fridge for up to five days. For the best flavor, enjoy them at room temperature after letting them sit out for about 15 minutes.

    Can I freeze Oreo Macarons?

    Yes! Macarons freeze beautifully. Place them in an airtight container, separating layers with parchment paper. Just let them come to room temperature before savoring!

    What’s the ideal temperature for baking macarons?

    Baking at 315°F (157°C) strikes the perfect balance for achieving that lovely chewy texture while giving your macarons a beautiful rise. Every oven is different, so keep an eye on them!

    Final Thoughts

    Making Oreo Macarons is more than just whipping up a delightful treat; it’s about creating memories in your kitchen. Each cookie holds a little bit of joy, especially when shared with family and friends. The smooth shells, complemented by that irresistible Oreo buttercream, will make anyone’s day a little sweeter. Whether you’re an experienced baker or just starting, this recipe lets you explore the world of French pastries. Dive into this culinary adventure, and prepare to be showered with compliments! Trust me; once you experience the joy of these macarons, you’ll want to share them with everyone you love!


    Print

    clock clock iconcutlery cutlery iconflag flag iconfolder folder iconinstagram instagram iconpinterest pinterest iconfacebook facebook iconprint print iconsquares squares iconheart heart iconheart solid heart solid icon

    Description

    Oreo Macarons are delicious French pastries made with almond flour and filled with a creamy Oreo buttercream frosting. These treats are perfect for any occasion!


    • 63 g superfine almond flour – blanched (1/2 cup + 1 Tbsp)
    • 63 g powdered sugar (1/2 cup)
    • 7 g crushed Oreos (1 Tbsp)
    • 55 g aged egg whites, room temperature (about 2 large eggs)
    • pinch cream of tartar (optional)
    • 55 g granulated sugar (1/4 cup + 1 tsp)
    • Oreo Buttercream Frosting:
    • 56 g unsalted butter, room temperature (1/4 cup)
    • 14 g crushed Oreo cookies (2 Tbsp)
    • 4 g vanilla extract or vanilla bean paste (1 tsp)
    • 1 g fine salt (1/8 tsp)
    • 125 g powdered sugar (1 cup)
    • 15 g heavy whipping cream, room temperature (1 Tbsp)

    1. Pour 55g of aged egg whites into the bowl of a stand mixer with a whisk and mix on medium speed until the surface is covered in small bubbles. Add a pinch of cream of tartar and continue mixing until it reaches the soft peak stage.
    2. Add 55g of granulated sugar into the eggs and mix on medium speed for 30 seconds, then increase speed to medium-high until stiff, glossy peaks form.
    3. Sift 63g almond flour, 63g powdered sugar and 7g crushed Oreos into the meringue.
    4. Fold the dry ingredients into the meringue until a thick ribbon of batter runs off the spatula. It should be able to draw a couple of figure 8’s when lifted.
    5. Pour the batter into a piping bag fitted with a medium-sized round tip and pipe 1 1/4 inch rounds on prepared baking sheets, spacing them 1 inch apart.
    6. Bang the pans on the counter to release air bubbles and pop any remaining bubbles with a toothpick.
    7. Let the macarons rest for 30 minutes, or until they develop a skin. Preheat the oven to 315 F / 157 C.
    8. Bake one tray at a time for 15-18 minutes, rotating the pan halfway through.
    9. Remove from the oven and let cool on the pan for 15 minutes, then gently remove from the silpat mat.
    10. For the Oreo Buttercream, beat 56g of room-temperature butter on medium speed for 1-2 minutes until smooth.
    11. Mix in 14g crushed Oreos, 4g vanilla extract, and 1g salt on low speed.
    12. Slowly mix in 125g powdered sugar and 15g heavy cream on low speed. Adjust consistency as needed.
    13. Place in a piping bag with a small round tip.
    14. Assemble the macaron shells by pairing them up, piping a thick dollop of frosting on one, and gently pressing a second shell on top.
    15. Optional: drizzle dark and white chocolate over each macaron and sprinkle with crushed Oreo crumbs.
    16. Store in an airtight container and chill in the fridge overnight, then let sit at room temperature for 15 minutes before enjoying.

    Notes

    • Make sure to use aged egg whites for better results.
    • Ensure the oven is properly calibrated for accurate baking.
    • Macarons can be made ahead and stored in the fridge for a few days.
    • Prep Time: 30 minutes
    • Cook Time: 18 minutes
    • Category: Dessert
    • Method: Baking
    • Cuisine: French

    Nutrition

    • Serving Size: 1 macaron
    • Calories: 100
    • Sugar: 10g
    • Sodium: 50mg
    • Fat: 4g
    • Saturated Fat: 2g
    • Unsaturated Fat: 1g
    • Trans Fat: 0g
    • Carbohydrates: 15g
    • Fiber: 0g
    • Protein: 1g
    • Cholesterol: 20mg

    Sharing is caring!

  • Cinnamon Swirl Ricotta Pancakes

    Cinnamon Swirl Ricotta Pancakes


    Introduction to Cinnamon Swirl Ricotta Pancakes

    There’s something enchanting about waking up to the smell of freshly made Cinnamon Swirl Ricotta Pancakes wafting through the house. Whether it’s a slow Sunday morning or a hectic weekday, this delightful treat has a way of bringing warmth and joy to your breakfast table. Packed with creamy ricotta and a sweet cinnamon ribbon, these pancakes are not only quick to whip up, but they also impress everyone, from kids to brunch-loving friends. Trust me, your loved ones will think you’ve turned into a gourmet chef overnight!

    Why You’ll Love This Cinnamon Swirl Ricotta Pancakes

    These Cinnamon Swirl Ricotta Pancakes are a game-changer in the kitchen. They’re easy to make, requiring just 30 minutes from start to finish. The taste? Oh, it’s a heavenly combination of creaminess and warmth, like a big hug on your plate. Plus, they’re versatile enough to please even the pickiest eaters at your breakfast table, making any morning feel special without a fuss. Isn’t that what we all need?

    Ingredients for Cinnamon Swirl Ricotta Pancakes

    To make these mouthwatering Cinnamon Swirl Ricotta Pancakes, you’ll need a handful of ingredients that come together beautifully. Here’s a peek at what you’ll require:

    • Ricotta cheese: This creamy delight offers a rich texture and a boost of protein.
    • Whole milk: It adds moisture and richness, ensuring every bite is soft and fluffy.
    • Eggs, separated: You’ll use the yolks for richness and the whites to create a fluffy batter.
    • Vanilla extract: A splash of vanilla enhances the flavor, making your pancakes taste even better.
    • All-purpose flour: This is the base that holds everything together, giving structure to your pancakes.
    • Granulated sugar: A little sweetness goes a long way, balancing flavors perfectly.
    • Baking powder and baking soda: These leavening agents help your pancakes rise to fluffy perfection.
    • Salt: A pinch of salt elevates the flavors and balances the sweetness.
    • Unsalted butter: Melting this into the batter gives a delicious buttery flavor.
    • Cinnamon swirl mixture: Combine melted butter, brown sugar, and cinnamon for that sweet, spiral effect.
    • Cooking butter or oil: For greasing your skillet, ensuring the pancakes don’t stick.
    • Maple syrup: The perfect drizzle atop these pancakes adds a sweet finishing touch.

    If you’re feeling adventurous, feel free to swap in flavored ricotta or even whole wheat flour for a healthier twist. Don’t hesitate to experiment with extras like chocolate chips or nuts for a delightful crunch!

    For exact measurements and the full recipe, be sure to check the bottom of the article where all the details are neatly presented for you to print.

    How to Make Cinnamon Swirl Ricotta Pancakes

    Prepare the Ricotta Mixture

    Start by grabbing a medium bowl and whisking together the ricotta cheese, milk, egg yolks, and vanilla extract. You want a smooth consistency, so take your time mixing! Be sure to use a sturdy whisk to get rid of any lumps. Each ingredient plays its role: the ricotta brings creaminess, the milk adds moisture, and the egg yolks provide richness. It’s an irresistible base that sets the stage for a delicious pancake adventure!

    Combine the Dry Ingredients

    Next, in a separate bowl, combine your all-purpose flour, granulated sugar, baking powder, baking soda, and salt. Give these dry ingredients a quick whisk to ensure they’re well mixed. When you’re ready, gently fold the dry mixture into the ricotta mixture using a spatula. You want to incorporate everything without overmixing; a few lumps are perfectly fine. This folding technique keeps your pancakes light and fluffy, which is exactly what we want!

    Whip the Egg Whites

    Now comes the fun part—getting those egg whites fluffy! In another clean bowl, beat the egg whites using a hand mixer or whisk until soft peaks form. This might take a few minutes, but it’s well worth the effort. Once those peaks are just right, gently fold the whipped egg whites into your batter using a spatula. This step adds an airy texture that will make your pancakes rise beautifully while cooking!

    Make the Cinnamon Swirl

    For that magical cinnamon swirl, mix melted butter, brown sugar, and ground cinnamon in a small bowl. Stir until it’s smooth and creamy. To make piping easier, transfer this mixture to a piping bag or a zip-top bag with the corner snipped off. This swirl is the secret weapon to elevating your pancakes, and I promise it’s worth the little extra effort. The sweet ribbon of cinnamon will swirl gracefully into your pancakes!

    Cook the Pancakes

    Preheat a large nonstick skillet or griddle over medium heat and brush it lightly with butter or oil. Pour about 1/4 cup of batter into the skillet for each pancake. Here’s where the fun begins—pipenet a spiral of that luscious cinnamon mixture right on top of the batter. After about 2–3 minutes, watch for bubbles forming on the surface; that means it’s time to flip! Cook for another 1–2 minutes until golden brown. Trust me, the scent will be heavenly!

    Serve with Love

    Once your pancakes are cooked to perfection, it’s time to serve! Stack them high on a warm plate and drizzle generously with maple syrup. You could also sprinkle some extra cinnamon on top for flair. If you’re feeling fancy, a dollop of whipped cream or fresh fruit can take it to the next level! Remember, food is all about love, so serve your pancakes with a smile and watch your family’s faces light up!

    Tips for Success

    • Use fresh ricotta for the best flavor and texture.
    • Don’t overmix the batter; a few lumps are okay!
    • Keep your skillet at medium heat for even cooking.
    • For fluffier pancakes, whip the egg whites just until soft peaks form.
    • Experiment with additional toppings like berries or nuts for extra deliciousness.

    Equipment Needed

    • Medium mixing bowls: You can use glass or stainless steel; both work beautifully.
    • Whisk: A hand whisk or electric mixer will do the job.
    • Spatula: A flexible silicone spatula is great for folding.
    • Skillet or griddle: A nonstick skillet makes flipping easy.
    • Piping bag or zip-top bag: For creating that lovely cinnamon swirl.

    Variations of Cinnamon Swirl Ricotta Pancakes

    • Banana Nut Twist: Add mashed ripe bananas and chopped walnuts or pecans to the batter for added sweetness and crunch.
    • Chocolate Chip Delight: Fold in semi-sweet chocolate chips for a rich and indulgent treat that chocolate lovers will adore!
    • Berry Blast: Toss in fresh or frozen blueberries, strawberries, or raspberries for a fruity flair that brightens the pancakes.
    • Gluten-Free Option: Substitute the all-purpose flour with a gluten-free flour blend to make these pancakes friendly for those with dietary restrictions.
    • Vegan Variation: Use almond milk and a plant-based egg replacer in place of ricotta and eggs for a dairy-free delight.

    Serving Suggestions for Cinnamon Swirl Ricotta Pancakes

    • Pair with crispy bacon or sausage for a classic breakfast combo.
    • Serve alongside fresh fruit, like sliced strawberries or bananas, for a colorful plate.
    • Drizzle honey or agave syrup for an alternative to maple syrup.
    • Offer whipped cream or Greek yogurt for added creaminess.
    • A sprinkle of chopped nuts adds extra crunch and nutrition.

    FAQs about Cinnamon Swirl Ricotta Pancakes

    Can I make these pancakes ahead of time?

    Absolutely! You can prepare the batter in advance and store it in the fridge for up to 24 hours. Just give it a gentle stir before cooking. This makes breakfasts even smoother on busy mornings!

    What can I substitute for ricotta cheese?

    If you don’t have ricotta, you can try cottage cheese blended until smooth or even Greek yogurt for a tangy twist. Just keep in mind, the texture might change slightly with these alternatives.

    How do I store leftover pancakes?

    Store any uneaten Cinnamon Swirl Ricotta Pancakes in an airtight container in the fridge for up to 3 days. Simply reheat in the microwave or on a skillet for a quick breakfast treat!

    Can I freeze the pancakes?

    Yes, you can freeze them! Place the cooled pancakes between layers of parchment paper, wrap them in plastic, and store in the freezer. Just pop them in the toaster or microwave when you’re ready to enjoy a fluffy pancake again.

    What can I use as a topping besides maple syrup?

    The sky’s the limit! You can top your pancakes with fresh fruit, whipped cream, yogurt, or even a sprinkle of powdered sugar. Get creative with your favorite toppings for a delightful twist on these cinnamon treats!

    Final Thoughts

    Creating these mouthwatering Cinnamon Swirl Ricotta Pancakes is more than just whipping up breakfast; it’s about sharing joy with loved ones. Picture them gathering around the table, savoring every fluffy bite while laughter fills the air. This recipe invites warmth into your home, transforming a simple morning into a cherished memory. The fragrant swirl of cinnamon and the creamy ricotta make each pancake a little work of art. Whether it’s a day of celebration or just another busy morning, these pancakes offer a slice of happiness that can brighten anyone’s day. Enjoy every delicious moment!


    Print

    clock clock iconcutlery cutlery iconflag flag iconfolder folder iconinstagram instagram iconpinterest pinterest iconfacebook facebook iconprint print iconsquares squares iconheart heart iconheart solid heart solid icon

    Description

    Cinnamon Swirl Ricotta Pancakes are a delightful breakfast treat featuring a creamy ricotta batter with a sweet cinnamon swirl, perfect for a cozy morning.


    • 1 cup (250 g) ricotta cheese
    • 1 cup (240 ml) whole milk
    • 2 large eggs, separated
    • 1 teaspoon vanilla extract
    • 1 cup (125 g) all-purpose flour
    • 2 tablespoons granulated sugar
    • 1 teaspoon baking powder
    • 1/2 teaspoon baking soda
    • 1/4 teaspoon salt
    • 2 tablespoons unsalted butter, melted
    • 3 tablespoons unsalted butter, melted (for cinnamon swirl)
    • 1/3 cup (65 g) light brown sugar, packed
    • 1 tablespoon ground cinnamon
    • Butter or oil, for cooking
    • Maple syrup, for serving

    1. In a medium bowl, whisk together the ricotta cheese, milk, egg yolks, and vanilla extract until smooth.
    2. In a separate bowl, combine flour, sugar, baking powder, baking soda, and salt.
    3. Gently fold the dry ingredients into the ricotta mixture until just combined.
    4. In another clean bowl, beat the egg whites until soft peaks form. Gently fold the egg whites into the batter, followed by the melted butter. Do not overmix.
    5. For the cinnamon swirl, mix together melted butter, brown sugar, and cinnamon in a small bowl until smooth. Transfer to a small piping bag or a zip-top bag with the corner snipped off.
    6. Heat a large nonstick skillet or griddle over medium heat and brush with a thin layer of butter or oil.
    7. Pour about 1/4 cup of batter for each pancake onto the skillet. Immediately pipe a spiral of the cinnamon mixture on top of each pancake.
    8. Cook for 2–3 minutes, until bubbles form on the surface and the edges begin to set. Flip carefully and cook for another 1–2 minutes, until golden brown and cooked through.
    9. Repeat with remaining batter and cinnamon swirl, greasing pan as needed. Serve warm with maple syrup.

    Notes

    • Make sure not to overmix the batter to keep the pancakes fluffy.
    • You can adjust the amount of cinnamon in the swirl to your taste.
    • Serve immediately for the best texture.
    • Prep Time: 15 minutes
    • Cook Time: 15 minutes
    • Category: Breakfast
    • Method: Stovetop
    • Cuisine: American

    Nutrition

    • Serving Size: 1 pancake
    • Calories: 210
    • Sugar: 8 g
    • Sodium: 230 mg
    • Fat: 9 g
    • Saturated Fat: 5 g
    • Unsaturated Fat: 2 g
    • Trans Fat: 0 g
    • Carbohydrates: 27 g
    • Fiber: 1 g
    • Protein: 6 g
    • Cholesterol: 62 mg

    Sharing is caring!

  • Peach Cobbler Cinnamon Rolls

    Peach Cobbler Cinnamon Rolls


    Introduction to Peach Cobbler Cinnamon Rolls

    There’s something magical about the combination of peaches and cinnamon, isn’t there? These Peach Cobbler Cinnamon Rolls are a delightful twist on your classic breakfast treats, blending sweet fruit with warm spices. As a busy mom, I know how precious time is. That’s why this recipe is perfect for a quick weekend brunch or a special dessert to impress your family. Even better, you can easily whip these up, filling your kitchen with a mouthwatering aroma that feels like a warm hug. Get ready to savor each fluffy, sweet bite!

    Why You’ll Love This Peach Cobbler Cinnamon Rolls

    These Peach Cobbler Cinnamon Rolls are not just a treat; they’re about bringing joy into your kitchen. You’ll love how simple and quick they are to make, perfect for those busy mornings. The tender dough, packed with peachy goodness and warm cinnamon, creates a flavor explosion that your family will crave. Plus, the fragrant cream cheese icing on top takes them to a whole new level, making them irresistible at any gathering!

    Ingredients for Peach Cobbler Cinnamon Rolls

    To create these scrumptious Peach Cobbler Cinnamon Rolls, you’ll need a mix of simple ingredients that come together to create a big impact. Here’s what you’ll need:

    • Milk: Acts as the base of the dough, bringing moisture and richness.
    • Active dry yeast: This helps the dough rise, giving it that fluffy texture we love.
    • Eggs: They add flavor and help bind the dough, making it more tender.
    • All-purpose flour: The backbone of the rolls, providing structure and chewiness.
    • Salt: Enhances flavor and controls yeast activity for perfect rolls.
    • White granulated sugar: This sweetens the dough, balancing the cinnamon’s warmth.
    • Unsalted butter: Adds richness and flavor; opt for room temperature for easier mixing.
    • Brown sugar: Brings a deeper sweetness to the filling, working beautifully with peaches.
    • Ground cinnamon: The beloved spice here, creating a comforting aroma and flavor.
    • Peaches: Fresh or canned, they infuse juicy sweet goodness into each roll.
    • Lemon juice: A splash brightens the flavor of the peach filling, enhancing its taste.
    • Cream cheese: This is the star of the icing, providing a creamy, tangy finish.
    • Powdered sugar: Needed for sweetening and thickening the cream cheese icing.
    • Vanilla extract: A dash in the icing adds a delightful depth of flavor.
    • Optional ingredients: Consider using store-bought peach jam in a pinch. And for a nutty twist, you could mix in some chopped pecans or walnuts into the cinnamon filling.

    For exact measurements, don’t worry! You can find them at the bottom of the article, ready for you to print or jot down.

    How to Make Peach Cobbler Cinnamon Rolls

    Now, let’s dive into the oh-so-delicious process of making these Peach Cobbler Cinnamon Rolls. I promise, it’s as enjoyable as it sounds! Follow along, and soon you’ll be savoring warm, gooey rolls straight from your oven.

    Prepare the Dough

    First things first: warm up that milk! Microwave it until it reaches about 110°F. Then, sprinkle the active dry yeast on top and give it a little time to bloom, around 10 minutes.

    In a large bowl, combine flour, salt, and sugar. Grab your room temperature butter and cut it into the mixture. You can use a pastry cutter or even your fingers. I often enjoy getting right in there—it brings back fond baking memories!

    Once that’s combined, add your milk and yeast mixture along with the lightly beaten eggs. If you have a stand mixer, use the dough hook to mix on low until a dough begins to form, then knead for about 5 minutes. If you don’t, get ready for a workout and knead it by hand until it’s smooth. Trust me, it’ll be worth it!

    Make the Peach Jam

    Next, let’s create that luscious peach jam. In a medium saucepan, mix your peaches, sugar, and lemon juice over medium heat. Cook for about 5-10 minutes, stirring often, until the mixture thickens. This gooey goodness will add a delightful surprise to your rolls!

    Once it’s jam-like, let it cool. No one wants it too hot when we assemble our rolls, right?

    Prepare the Cinnamon Filling

    While your jam is cooling, whip up the cinnamon filling. In a mixing bowl, beat together the softened unsalted butter, brown sugar, cinnamon, and salt until it’s smooth like a creamy dream. This filling is going to give each bite a cozy hug; trust me!

    Assemble the Rolls

    Now onto the fun part! Roll out your dough on a floured surface until it’s about 1/4 inch thick. Spread the cinnamon filling generously over the dough, leaving just a little border. Then, carefully spread your cooled peach jam on top, and sprinkle half of the crumb topping (we’ll get to that soon!).

    Time to roll ’em up! Start from one edge and roll the dough tightly into a log. Cut your log into 12 even pieces with a sharp knife. Place them cut-side up in a sprayed 9×13-inch pan and let them rise for about 20 minutes. Watch them puff up!

    Bake the Rolls

    Preheat your oven to 375°F while your rolls are rising. Once they’ve puffed up, pop them in the oven and bake for 23-26 minutes until they’re golden and delightful. Your kitchen is about to smell heavenly!

    Make the Cream Cheese Icing

    While the rolls are baking, let’s prepare the icing. In a bowl, beat together room-temperature cream cheese and unsalted butter until smooth. Then, add in the powdered sugar and vanilla extract. Mix until it’s creamy and heavenly. If it’s too thick, add a splash of milk to reach your desired consistency.

    Once you pull those gorgeous rolls from the oven, spread the icing generously over the top, and finish with the remaining crumb topping. Seriously, you might want to eat them right then and there! But I recommend waiting just a bit so they’re warm and sensational when served.

    Tips for Success

    • Be patient with the yeast. A good bloom will create soft, fluffy rolls.
    • Room temperature ingredients mix better. Try to take out butter and eggs in advance.
    • Don’t skip the cooling step for the peach jam; it helps maintain the roll’s structure.
    • Use a sharp knife for cutting the rolls to ensure clean edges.
    • Enjoy these rolls warm—you won’t regret it!

    Equipment Needed

    • Mixing bowls: Any size will work, but a large bowl is ideal for the dough.
    • Stand mixer (optional): If you don’t have one, use your hands to knead the dough.
    • Rolling pin: Essential for flattening your dough. A wine bottle can work in a pinch!
    • Sharp knife: For cutting the rolls cleanly.
    • 9×13-inch pan: If you don’t have it, a similar size baking dish will do.

    Variations

    • Peach and Blueberry: Add a cup of fresh or frozen blueberries to the peach jam for a delightful berry twist.
    • Nuts Galore: Mix in chopped pecans or walnuts into the cinnamon filling for added crunch and flavor.
    • Vegan Option: Substitute dairy milk with almond or oat milk, and use flax eggs instead of regular eggs for a vegan-friendly version.
    • Extra Spicy: Elevate the cinnamon flavor by adding nutmeg and cardamom to the filling for a warm spiced profile.
    • Orange Zest: Incorporate some fresh orange zest into the peach jam for a citrusy zing that pairs beautifully with peaches.

    Serving Suggestions

    • Pair with Coffee: A hot cup of coffee or tea complements the sweetness perfectly.
    • Fresh Fruit Salad: Serve with a side of mixed berries or a refreshing fruit salad for a vibrant addition.
    • Cinnamon Butter: Whip up some cinnamon butter to spread on warm rolls for an extra indulgence.
    • Gather Friends: Present these rolls on a beautiful platter to share during brunch or gatherings.

    FAQs about Peach Cobbler Cinnamon Rolls

    As with any delightful recipe, questions are bound to pop up! Here are some frequently asked questions about these Peach Cobbler Cinnamon Rolls that can help you on your baking adventure.

    Can I use frozen peaches in the jam?

    Absolutely! Frozen peaches work just as well as fresh. Just make sure to thaw and drain them before cooking to avoid excess moisture.

    How can I store leftover Peach Cobbler Cinnamon Rolls?

    Store them in an airtight container at room temperature for up to 3 days. You can also refrigerate them for a week, but they taste best when warmed up!

    Can I make the dough ahead of time?

    Yes, you can prepare the dough a day in advance. Just place it in the refrigerator after the first rise. Let it come back to room temperature before rolling out the cinnamon filling.

    What can I substitute for cream cheese in the icing?

    If you’re not a fan of cream cheese, try using mascarpone or a simple vanilla glaze made from powdered sugar and milk for a lighter option.

    Can I freeze these rolls?

    Definitely! Just freeze the baked rolls (without icing) in a single layer, then transfer to an airtight container. Reheat in the oven for a tasty treat later.

    Final Thoughts

    These Peach Cobbler Cinnamon Rolls are truly a labor of love, bringing sweet joy to any table. Each fluffy roll, with its warm peach filling and generous cream cheese icing, is a delicious treat that feels like a hug from the inside out. Whether for breakfast, brunch, or dessert, you’ll create wonderful memories as you share them with family and friends. So when life gets hectic, just remember these rolls are a simple way to add a sprinkle of happiness to your day. Give them a whirl, and watch as smiles unfold with every bite!


    Print

    clock clock iconcutlery cutlery iconflag flag iconfolder folder iconinstagram instagram iconpinterest pinterest iconfacebook facebook iconprint print iconsquares squares iconheart heart iconheart solid heart solid icon

    Description

    Delightful Peach Cobbler Cinnamon Rolls topped with cream cheese icing, combining the flavors of sweet peaches and cinnamon.


    • DOUGH
    • 1 cup Milk, warmed to 110°F
    • 2 1/4 tsp Active dry yeast, 1 packet or 11 grams
    • 2 Large eggs, slightly beaten room temperature
    • 4 1/2 cups All-purpose flour
    • 1 tsp Salt
    • 1/4 cup White granulated sugar
    • 10 TBSP Unsalted butter, room temperature
    • CINNAMON FILLING
    • 1/2 cup Unsalted butter, room temperature
    • 1/2 cup Brown sugar, packed light or dark
    • 1/2 TBSP Ground cinnamon
    • 1/8 tsp Salt
    • PEACH JAM
    • 16 oz Peaches, or 34 medium peaches, peeled and sliced
    • 3/4 cup White granulated sugar
    • 1 TBSP Lemon juice
    • CINNAMON CRUMB TOPPING
    • 1/2 cup Brown sugar, packed light or dark
    • 1/4 cup White granulated sugar
    • 1/2 TBSP Ground cinnamon
    • 1/4 tsp Salt
    • 1 1/4 cup All-purpose flour
    • 1/2 cup Unsalted butter, melted
    • PEACH CREAM CHEESE ICING
    • 4 oz Cream cheese, room temperature
    • 4 TBSP Unsalted butter, room temperature
    • 2 tsp Pure vanilla extract
    • 1 cup Powdered sugar, sifted
    • 12 TBSP Milk

    1. Warm the milk in the microwave until 110°F. Sprinkle the yeast on top and let sit for 10 minutes.
    2. In a large bowl, mix the flour, salt, and sugar. Add the cubed butter. Use a pastry cutter, a fork, or your fingers to cut the butter into the flour.
    3. Add the milk/yeast mixture and the lightly beaten eggs. Use a stand mixer with a dough hook and mix on low until a dough starts to form, then knead for 5 minutes.
    4. Preheat the oven to 200°F. Place the dough in a sprayed bowl, cover, and let it rise for 1 hour until doubled in size.
    5. In a medium saucepan, mix the peaches, sugar, and lemon juice over medium heat. Cook for 5-10 minutes until it becomes a jam. Let cool.
    6. Preheat oven to 350°F. Mix the crumb topping ingredients and bake for 8 minutes. Let cool completely.
    7. Using a mixer, beat the filling ingredients until smooth. Roll out the dough and spread the filling on top, followed by the cooled jam and half of the crumb topping.
    8. Roll the dough into a log and cut into 12 even rolls. Place in a sprayed 9X13-inch pan and let rise for 20 minutes.
    9. Preheat oven to 375°F and bake the rolls for 23-26 minutes until golden.
    10. For icing, beat butter and cream cheese, then add powdered sugar and vanilla, mixing until smooth. Add milk until desired consistency is reached.
    11. Spread icing on hot rolls and sprinkle with remaining crumb topping. Serve warm.

    Notes

    • For the dough, you can also make it by hand if you don’t have a stand mixer.
    • Feel free to use store-bought peach jam as a shortcut.
    • The rolls can be served warm for the best taste experience.
    • Prep Time: 1 hour 30 minutes
    • Cook Time: 40 minutes
    • Category: Breakfast/Dessert
    • Method: Baking
    • Cuisine: American

    Nutrition

    • Serving Size: 1 roll
    • Calories: 350
    • Sugar: 18g
    • Sodium: 220mg
    • Fat: 15g
    • Saturated Fat: 8g
    • Unsaturated Fat: 4g
    • Trans Fat: 0g
    • Carbohydrates: 51g
    • Fiber: 2g
    • Protein: 5g
    • Cholesterol: 60mg

    Sharing is caring!

  • One Pan Sweet Tangy BBQ Sausage

    One Pan Sweet Tangy BBQ Sausage


    Introduction to One Pan Sweet Tangy BBQ Sausage

    Hey there, fellow home cooks! If you’re like me, juggling a million tasks every day, you know how precious a quick and delicious meal can be. That’s where my One Pan Sweet Tangy BBQ Sausage steps in—it’s a delightful dish that merges mouthwatering sausage, colorful veggies, and fluffy rice all in one skillet. Picture this: a bubbling, savory feast that means less time cleaning up and more time enjoying with your loved ones. Trust me, this simple recipe will quickly become a cherished favorite in your household!

    Why You’ll Love This One Pan Sweet Tangy BBQ Sausage

    This One Pan Sweet Tangy BBQ Sausage is truly a lifesaver for busy families! It’s not just quick to make—taking only about 40 minutes from start to finish—but the flavors are absolutely tantalizing. You’ll love the perfect balance of the hearty sausage with sweet and tangy barbecue sauce, enhancing each bite. Plus, everything cooks together, giving you less hassle in the kitchen and more time to savor dinner with your loved ones.

    Ingredients for One Pan Sweet Tangy BBQ Sausage

    Gathering the right ingredients for my One Pan Sweet Tangy BBQ Sausage makes all the difference in flavor and enjoyment. Here’s what you’ll need:

    • Italian or Smoked Sausage: The star of this dish! Choose your favorite type for richness—Italian for a herby kick, or smoked for that lovely depth of flavor.
    • Long-Grain White Rice: This rice cooks up fluffy and absorbs the delicious barbecue sauce beautifully. Feel free to use brown rice if you prefer a nuttier flavor and more fiber.
    • Chicken Broth: This adds savory depth to your dish. For a vegetarian option, vegetable broth works just as well!
    • Barbecue Sauce: The sweet and tangy elements come from this sauce. Choose your favorite brand, or even better, make your own for a personalized touch.
    • Onion: Diced onion brings a subtle sweetness and depth to the sauté mix. Yellow or white works perfectly.
    • Bell Pepper: Adds crunch and color. You can use any color, or mix them up for a vibrant look.
    • Garlic: Minced garlic infuses your dish with aromatic essence. Fresh garlic is always best, but garlic powder can work in a pinch!
    • Olive Oil: This is what you’ll use to sauté. It’s healthy and helps in browning the sausage adequately. Any neutral oil would work in its place.
    • Smoked Paprika: This spice adds a warm, smoky flavor that elevates the taste of the entire dish. You can use regular paprika if needed.
    • Ground Black Pepper: A must for seasoning. Adjust according to your taste preference!
    • Salt: Just a pinch to enhance all the flavors; remember, sausage and broth can be salty, so add slowly.
    • Fresh Parsley: For garnish and a fresh touch! It’s optional, but it adds a pop of color and freshness at the end.

    Check out the bottom of the article for specific measurements, perfect for printing out to have in your kitchen! Happy cooking!

    How to Make One Pan Sweet Tangy BBQ Sausage

    Now that you’ve gathered all your ingredients, let’s dive into the cooking process of my One Pan Sweet Tangy BBQ Sausage! Each step builds on the last, creating a flavorful harmony that’ll make your kitchen smell divine. So grab your skillet and let’s get started!

    Step 1: Brown the Sausage

    First things first, heat a splash of olive oil in a large skillet over medium heat.

    Once the oil shimmers, add your sliced sausage. Sauté them for about 4 to 5 minutes, turning occasionally, until they’re beautifully browned. This brings out their flavor! After they’re golden, remove them from the skillet and set aside. Trust me; this step gets the savory ball rolling!

    Step 2: Sauté the Vegetables

    In the same skillet, toss in the diced onion and bell pepper. Sauté for 3 to 4 minutes until they soften up and fill your kitchen with their sweet aroma.

    Next, add the minced garlic and cook just until fragrant. That’s only about 30 seconds! Garlic can burn quickly, so keep an eye on it. Your veggies will be singing with flavor in no time!

    Step 3: Toast the Rice

    Now, sprinkle in the smoked paprika and black pepper. Stir them into the veggies.

    Then, toss in your uncooked long-grain white rice. Toasting the rice for 1 to 2 minutes helps it absorb all those fantastic flavors later. Make sure to gently stir, ensuring the rice is well-coated with the spices and veggies. This will elevate your dish to the next level!

    Step 4: Combine Broth and Sauce

    Here’s where the magic happens! Pour in the chicken broth along with the barbecue sauce, and give everything a good stir.

    Return the browned sausage to the skillet, mixing it all together. This is where the dish starts to come together, and you might feel like you’re a culinary magician!

    Step 5: Simmer

    Bring the entire mixture to a boil, then cover the skillet. Reduce the heat to low, letting it simmer for 20 to 22 minutes. The rice should be tender, and that sweet tangy barbecue goodness will envelop every bite.

    During this time, you could prep a simple salad or set the table. Dinner will be done before you know it!

    Step 6: Fluff and Serve

    Once time’s up, remove the skillet from heat and let it rest for about 5 minutes. This helps the rice settle and the flavors to meld.

    Finally, fluff the rice with a fork, adjust the salt to your taste, and sprinkle with fresh parsley for that final touch. Dish it out warm and enjoy all the delighted faces around the table!

    Tips for Success

    • Always use fresh ingredients for the best flavor; they really make a difference!
    • Don’t rush the browning process of the sausage; this develops flavor!
    • Adjust the amount of barbecue sauce according to your taste buds; more for tanginess, less for subtlety.
    • If short on time, prep ingredients the night before to speed things up.
    • Cook it all in one pan for easy cleanup—your kitchen will thank you!

    Equipment Needed

    • Large Skillet: A good-quality non-stick or cast iron skillet works wonders for this recipe.
    • Wooden Spoon or Spatula: Perfect for stirring and ensuring nothing sticks to the bottom.
    • Measuring Cups and Spoons: Essential for measuring out your rice, broth, and sauce accurately.
    • Cutting Board and Knife: Necessary for chopping your veggies and sausage.

    Variations for One Pan Sweet Tangy BBQ Sausage

    • Veggie-Packed Version: Add corn, peas, or even spinach for an extra boost of nutrients and color.
    • Spicy Kick: Toss in some chopped jalapeños or a dash of hot sauce to amp up the heat!
    • Gluten-Free Option: Ensure your barbecue sauce is gluten-free, and choose a gluten-free sausage for a perfect fit.
    • Different Proteins: Substitute sausage with diced chicken or turkey for a lighter version of the dish.
    • Herb Infusion: Add fresh herbs like thyme or rosemary during the cooking process for aromatic depth.
    • Sweetener Variance: Consider using honey or maple syrup in the barbecue sauce for distinct sweetness!

    Serving Suggestions for One Pan Sweet Tangy BBQ Sausage

    • Fresh Green Salad: Pair with a light green salad for a refreshing crunch.
    • Garlic Bread: Serve warm garlic bread on the side for dipping in the delicious sauce.
    • Iced Tea: Enjoy with a chilled glass of sweet iced tea for a delightful contrast.
    • Colorful Plating: Garnish with fresh parsley and serve in vibrant bowls for a stunning presentation.
    • Roasted Veggies: Consider a side of roasted seasonal vegetables for a wholesome touch.

    FAQs about One Pan Sweet Tangy BBQ Sausage

    Can I use a different type of sausage for this recipe? Absolutely! Feel free to swap in your favorite sausage—chicken, turkey, or even plant-based options work beautifully. Each will bring its unique taste to the dish!

    How can I make this recipe healthier? You can easily enhance the health factor by choosing turkey sausage and adding more vegetables, like zucchini or carrots. Swapping in brown rice can also boost the fiber content.

    Can I prepare this dish ahead of time? Yes, you can! Prep your ingredients the night before, and simply follow the cooking steps when you’re ready to eat. This makes it a fantastic option for busy weeknights!

    What if my kids don’t like vegetables? Don’t worry; you can sneak in veggies without them noticing! Finely chop them or use milder options like bell peppers. The barbecue sauce helps mask their taste!

    How should I store leftovers? Store any leftovers in an airtight container in the fridge for up to three days. When ready to reheat, simply warm it on the stove or in the microwave, adding a splash of broth if needed to revive that moist texture.

    Final Thoughts

    As I put the finishing touches on my One Pan Sweet Tangy BBQ Sausage, I can’t help but smile at how simple yet rewarding this dish is. It’s a wonderful choice for busy nights, bringing family together over hearty flavors and laughter. The sweet and savory notes wrap everyone in a warm hug, making dinner less of a chore and more of an adventure. I hope this dish brings as much joy to your table as it does to mine. Here’s to less time in the kitchen and more moments spent enjoying delicious food with those we love!


    Print

    clock clock iconcutlery cutlery iconflag flag iconfolder folder iconinstagram instagram iconpinterest pinterest iconfacebook facebook iconprint print iconsquares squares iconheart heart iconheart solid heart solid icon

    Description

    One Pan Sweet Tangy BBQ Sausage is an easy and flavorful dish that combines sausage, rice, and colorful vegetables in a delicious barbecue sauce.


    • 450 g Italian or smoked sausage, sliced into rounds
    • 200 g long-grain white rice, uncooked
    • 480 ml chicken broth
    • 120 ml barbecue sauce
    • 1 small onion, diced
    • 1 bell pepper, diced
    • 2 cloves garlic, minced
    • 15 ml olive oil
    • 1 teaspoon smoked paprika
    • 0.5 teaspoon ground black pepper
    • Salt, to taste
    • Fresh parsley, chopped, for garnish

    1. In a large skillet, heat olive oil over medium heat. Add sausage slices and cook for 4 to 5 minutes, turning occasionally, until browned. Remove sausage from skillet and set aside.
    2. Add diced onion and bell pepper to the same skillet. Sauté for 3 to 4 minutes until softened. Stir in minced garlic and cook for 30 seconds until fragrant.
    3. Add smoked paprika and black pepper to the vegetables. Stir in uncooked rice, and toast for 1 to 2 minutes, ensuring the grains are well coated.
    4. Pour in chicken broth and barbecue sauce. Stir thoroughly to combine. Return the browned sausage to the skillet and mix with the rice and vegetables.
    5. Bring the mixture to a boil. Cover, reduce heat to low, and simmer for 20 to 22 minutes, or until the rice is tender and the liquid has been absorbed.
    6. Remove the skillet from heat and let rest for 5 minutes. Fluff the rice gently with a fork, adjust salt to taste, and finish with fresh parsley before serving warm.

    Notes

    • Ensure to use quality sausage for best flavor.
    • You can add other vegetables like corn or peas if desired.
    • Adjust barbecue sauce based on your taste preference.
    • Prep Time: 10 min
    • Cook Time: 30 min
    • Category: Main Course
    • Method: Skillet
    • Cuisine: American

    Nutrition

    • Serving Size: 1 serving
    • Calories: 500
    • Sugar: 5 g
    • Sodium: 900 mg
    • Fat: 22 g
    • Saturated Fat: 7 g
    • Unsaturated Fat: 12 g
    • Trans Fat: 0 g
    • Carbohydrates: 53 g
    • Fiber: 2 g
    • Protein: 18 g
    • Cholesterol: 55 mg

    Sharing is caring!

  • Strawberry Chicken Salad

    Strawberry Chicken Salad


    Introduction to Strawberry Chicken Salad

    As the warm sun sets and summer beckons, I can’t help but crave fresh, vibrant flavors. That’s where my go-to Strawberry Chicken Salad comes into play. It’s not just a salad; it’s a delightful mix of juicy strawberries, tender grilled chicken, and crunchy apples. Whether you’re juggling a busy day or wanting to impress guests, this refreshing dish is a quick solution. The best part? You can whip it up in just 30 minutes! So, let’s dive into this culinary adventure that will brighten your table and your taste buds.

    Why You’ll Love This Strawberry Chicken Salad

    There’s something special about this Strawberry Chicken Salad that makes it a favorite in my kitchen. It’s incredibly quick to prepare, perfect for those hectic evenings when time is scarce. The explosion of flavors is delightful—tender chicken, sweet strawberries, and tangy apples create a vibrant symphony in every bite. Plus, it’s a healthful choice packed with nutrition, making you feel good about what you’re serving your family. You’ll adore it!

    Ingredients for Strawberry Chicken Salad

    Gathering the right ingredients is the heart of any great dish. For this Strawberry Chicken Salad, you’ll be using a rainbow of fresh produce and wholesome items.

    • Chopped romaine lettuce: This crisp base adds a refreshing crunch.
    • Boneless skinless chicken breasts: A lean protein that grilles beautifully, yielding juicy bites.
    • Fresh strawberries: Their natural sweetness brightens up the salad, bringing a fragrant burst of flavor.
    • Gala apple: This variety offers a crisp texture and sweet-tart taste that pairs wonderfully with the strawberries.
    • Craisins (dried cranberries): Adding a chewy element to the salad, these offer a tangy contrast.
    • Shredded mozzarella cheese: Creamy and mild, this ingredient melds perfectly with the other flavors.
    • Crushed walnuts: A delightful crunch and an added boost of healthy fats.
    • Olive oil, salt, and pepper: Essential for seasoning, bringing all the flavors together.
    • Dressing (creamy poppyseed or raspberry vinaigrette): Choose your favorite to tie everything together delectably.

    Keep in mind, you can easily customize this salad by swapping in your favorite ingredients. For example, marinate the chicken for an extra flavor kick or use a dairy-free cheese alternative to cater to dietary preferences. All the exact quantities you need are listed at the bottom of the article for your convenience, just a click away for printing!

    How to Make Strawberry Chicken Salad

    Creating this vibrant Strawberry Chicken Salad is a breeze! Follow my simple steps, and you’ll have a refreshing meal that’s packed with flavor and goodness.

    Prepare the Lettuce

    First things first, let’s prep our lettuce. Take 6 cups of fresh chopped romaine and divide it into two bowls. This creates a hearty base for your salad.

    To keep it crisp, pop those bowls into the refrigerator while you get everything else ready. Chilled lettuce makes the salad refreshing and inviting!

    Grill the Chicken

    Next up, grab your boneless chicken breasts. Drizzle them with olive oil and sprinkle a little salt and pepper to taste. I love using a grill for this step—it adds a delicious smoky flavor!

    Grill the chicken for about 6-8 minutes on each side, or until they’re fully cooked (165°F). Once done, let them rest for a few minutes. Resting is crucial; it helps keep your chicken juicy!

    Slice the Fruits

    While the chicken is resting, it’s time to slice those fruits. Take your fresh strawberries and gala apple—these vibrant beauties will bring your salad to life!

    Cut the strawberries into quarters and the apple into thin slices. Distribute them evenly over the chilled lettuce. Their colors and flavors will complement each other perfectly!

    Assemble the Salad

    Now comes the fun part! Slice your grilled chicken and arrange it on top of the salad mix.

    Sprinkle over the craisins for a burst of sweetness, add the shredded mozzarella for creaminess, and top it all off with crushed walnuts for a satisfying crunch.

    Finally, drizzle your favorite dressing—be it creamy poppyseed or raspberry vinaigrette—over each bowl. Give it a gentle toss to mix or leave it layer for a beautiful presentation. Enjoy every bite of your Strawberry Chicken Salad!

    Tips for Success

    • Marinate the chicken for at least 30 minutes to enhance flavor and tenderness.
    • Use fresh, ripe strawberries for the best flavor; frozen won’t give the same delightful sweetness.
    • Experiment with different nuts or fruits—like pecans or blueberries—for added variety.
    • Make the dressing ahead of time and store it in the fridge for even easier meal prep.
    • Adjust the dressing amount based on your taste preference; less is sometimes more!

    Equipment Needed

    • Grill or grill pan: If you don’t have a grill, a skillet or oven can do the trick.
    • Sharp knife: A good knife is key for slicing fruits and chicken with ease.
    • Cutting board: A sturdy surface is essential for safe and efficient chopping.
    • Mixing bowls: Any large bowl will work to combine your ingredients.
    • Meat thermometer: This tool ensures your chicken reaches the perfect temperature for safety.

    Variations for Strawberry Chicken Salad

    • Swap grilled chicken for tofu or chickpeas for a vegetarian or vegan option while keeping the protein punch.
    • Add avocado slices for an extra creamy texture and healthy fats that enhance the salad’s richness.
    • Incorporate spinach or kale along with romaine for added nutrients and a pop of color.
    • Try different fruits like blueberries or peaches to mix up the flavor while keeping it seasonal.
    • For a spicy kick, add diced jalapeños or sprinkle red pepper flakes over the assembled salad.

    Serving Suggestions for Strawberry Chicken Salad

    • Pair the salad with a light, herb-infused sparkling water for a refreshing drink that complements the flavors.
    • Serve with crusty whole-grain bread or pita chips for added crunch and heartiness.
    • Garnish with fresh mint leaves to elevate presentation and add a hint of freshness.
    • For a colorful display, arrange the salad on a large platter instead of individual bowls.

    FAQs about Strawberry Chicken Salad

    Let’s address some common questions about this delicious Strawberry Chicken Salad. I love when readers reach out, so don’t hesitate to ask more if you’ve got them!

    Can I make Strawberry Chicken Salad ahead of time?

    Absolutely! You can grill the chicken and slice the fruits ahead, keeping everything in the fridge. Just assemble it fresh before serving to maintain crunch and flavor.

    What can I use instead of chicken?

    If you’re looking for a meatless option, try grilled tofu, chickpeas, or even a hearty bean mix. They’ll add protein and flavor without missing out!

    How can I make this salad more filling?

    For a heartier meal, serve the salad with a side of quinoa or brown rice. It adds a lovely nutty flavor and keeps you fuller longer.

    Is Strawberry Chicken Salad gluten-free?

    Yes! This delightful salad is naturally gluten-free as long as you check the dressing ingredients. Just ensure it meets your dietary preferences!

    Can I use frozen strawberries?

    I recommend fresh strawberries for the best taste and texture. Frozen strawberries can be mushy once thawed. However, if they’re all you have, drain excess liquid and use them sparingly!

    Final Thoughts

    As summer rolls in, my Strawberry Chicken Salad has become a staple in my kitchen, offering both joy and satisfaction in every bite. It’s more than just a meal; it’s a vibrant celebration of fresh ingredients and simple preparation. Sharing this dish feels like a warm hug, wrapping loved ones in delicious flavors and nourishing goodness. Whether it’s a family dinner or a gathering with friends, this salad is sure to brighten any table. So, gather your ingredients and create your own memorable moments with this delightful dish. You won’t regret it!


    Print

    clock clock iconcutlery cutlery iconflag flag iconfolder folder iconinstagram instagram iconpinterest pinterest iconfacebook facebook iconprint print iconsquares squares iconheart heart iconheart solid heart solid icon

    Description

    A refreshing summer salad featuring grilled chicken, fresh strawberries, apples, and a delicious dressing.


    • 6 cups chopped romaine lettuce
    • 2 small boneless skinless chicken breasts
    • 1 cup fresh strawberries
    • 1 gala apple
    • 1/3 cup craisins (dried cranberries)
    • 1/2 cup shredded mozzarella cheese
    • 3 tablespoons crushed walnuts
    • Olive oil, salt, and pepper (to taste)
    • Dressing: creamy poppyseed or raspberry vinaigrette

    1. Prepare the lettuce by dividing it among two bowls and chilling in the refrigerator.
    2. Season chicken with olive oil, salt, and pepper; grill until cooked through (165°F). Rest before slicing.
    3. Slice strawberries and apples while the chicken rests; distribute evenly in bowls with the lettuce.
    4. Top each bowl with craisins, mozzarella cheese, walnuts, and sliced chicken. Drizzle with your preferred dressing.

    Notes

    • For added flavor, marinate the chicken before grilling.
    • Replace the cheese with a dairy-free option for a vegan version.
    • Adjust the dressing according to your taste preference.
    • Prep Time: 15 minutes
    • Cook Time: 15 minutes
    • Category: Salad
    • Method: Grilling
    • Cuisine: American

    Nutrition

    • Serving Size: 1 bowl
    • Calories: 450
    • Sugar: 15g
    • Sodium: 400mg
    • Fat: 20g
    • Saturated Fat: 4g
    • Unsaturated Fat: 12g
    • Trans Fat: 0g
    • Carbohydrates: 35g
    • Fiber: 5g
    • Protein: 30g
    • Cholesterol: 70mg

    Sharing is caring!

  • Sesame Beef Stir-Fry Noodles

    Sesame Beef Stir-Fry Noodles


    Introduction to Sesame Beef Stir-Fry Noodles

    As a busy mom, I know how precious our time can be, especially when it comes to meal prep. That’s why I’m excited to share my go-to recipe for Sesame Beef Stir-Fry Noodles. This dish is quick, flavorful, and perfect for those hectic weeknights when you need a satisfying meal in under 30 minutes. The combination of tender beef, vibrant veggies, and chewy noodles, all drizzled with rich sauces, makes this a family favorite. Trust me, your loved ones will be asking for seconds!

    Why You’ll Love This Sesame Beef Stir-Fry Noodles

    This Sesame Beef Stir-Fry Noodles recipe is the answer to your meal-time prayers. It’s super quick, taking just 30 minutes from start to finish. I love how you can customize it with whatever veggies you have on hand, making it perfect for busy families. Plus, the flavors are a knockout! The moment you taste that savory sauce paired with tender beef, you’ll understand why it’s so adored.

    Ingredients for Sesame Beef Stir-Fry Noodles

    Gathering the right ingredients is half the fun of cooking, isn’t it? For this Sesame Beef Stir-Fry Noodles recipe, you’ll need a delightful mix of protein, veggies, and flavor boosters. Here’s what to grab:

    • Flank steak or sirloin: Choose thinly sliced beef for buttery tenderness; it’s the star of the dish.
    • Cornstarch: This magical powder helps the beef crisp up beautifully.
    • Soy sauce: A must-have for that savory umami kick; consider low-sodium for a healthier twist.
    • Toasted sesame oil: Adds a rich, nutty flavor—just a little goes a long way.
    • Egg noodles or wheat noodles: Use your favorite noodles for a satisfying base; they’re the canvas for all those delicious flavors.
    • Red bell pepper: Adds a pop of color and sweetness; feel free to replace it with yellow or green if you prefer.
    • Snap peas: Crunchy and fresh, they pair beautifully with the beef—zucchini can stand in if you’re out.
    • Carrots: Julienned for easy mixing, they introduce a lovely sweetness; don’t skip these!
    • Spring onions: The white parts provide a mild onion flavor while the green tops add a fresh finish.
    • Garlic and ginger: Freshly minced for big flavor; together, they create a fragrant foundation!
    • Oyster sauce: Adds depth to your dish; tamari is a great substitute for a gluten-free option.
    • Hoisin sauce: Sweet and savory, it rounds out the sauce perfectly; brown sugar can work in a pinch.
    • Rice vinegar: Brings acidity for balance; if you have it, apple cider vinegar will do.
    • Honey or brown sugar: Sweetness to offset the saltiness of soy sauce—the choice is yours.
    • Chili flakes (optional): Add if you prefer a kick—make sure to adjust according to your taste!
    • Toasted sesame seeds: For garnishing, they add crunch and nutty flavor.
    • Green spring onion tops: Sliced for a fresh garnish to elevate your dish.

    You can find the exact quantities for each ingredient at the bottom of this article, where they’re available for printing. Get ready to create a dazzling dish that your family will love!

    How to Make Sesame Beef Stir-Fry Noodles

    Marinate the Beef

    To start, grab a bowl and toss your thinly sliced beef with cornstarch, one tablespoon of soy sauce, and one teaspoon of toasted sesame oil. This marinade works wonders for both flavor and texture! Set it aside for about 10-15 minutes while you prepare the other ingredients. This will help the beef absorb those delicious flavors, ensuring every bite is juicy and tender.

    Cook the Noodles

    Next, it’s time to cook the noodles. Boil a pot of water and add your egg or wheat noodles. Follow the package instructions, which usually take around 4-7 minutes. When they’re done, drain and rinse under cold water to stop the cooking process. This step is key, as it prevents the noodles from becoming mushy when you stir-fry them later. Now, set those noodles aside and get ready to cook your beef!

    Prepare the Sauce

    In a small bowl, whisk together the oyster sauce, hoisin sauce, and remaining soy sauce with rice vinegar and honey or brown sugar. Ensure it’s a smooth mixture. This sauce is the heart of your Sesame Beef Stir-Fry Noodles, giving it that bold flavor we all crave!

    Stir-Fry the Beef

    Heat a tablespoon of vegetable oil in a large wok or skillet over high heat. Once the oil is hot, add your marinated beef. Sear it for about 2-3 minutes until it’s beautifully browned and no longer pink. This quick searing locks in the juices and creates that delightful crust we all love. Remove the beef and set it aside while you cook the veggies.

    Sauté the Veggies

    In the same pan, add another drizzle of oil if needed. Toss in the minced garlic and ginger, along with the white parts of the spring onions. Sauté for around 30 seconds until fragrant. Next, add the sliced bell pepper, snap peas, and julienned carrots. Stir-fry these vibrant veggies for 2-3 minutes; you want them tender yet still crisp for that perfect texture contrast in each bite!

    Combine Everything

    Now, return the browned beef to your pan along with the cooked noodles. Pour in the whisked sauce, ensuring everything gets coated evenly. Toss everything together for 2-3 minutes, allowing the flavors to meld beautifully. Give a quick taste; if it needs a little extra kick, feel free to add more chili flakes!

    Serve and Garnish

    Dish up your Sesame Beef Stir-Fry Noodles hot, and don’t forget that last touch: sprinkle toasted sesame seeds and the green parts of the spring onions on top. These garnishes not only enhance the look but add extra flavor and crunch! Enjoy this delightful dish your family will adore!

    Tips for Success

    • For perfectly tender beef, always slice against the grain.
    • Keep all your ingredients prepped and ready before cooking to streamline the process.
    • Don’t overcrowd the pan; cook in batches if necessary for even cooking.
    • Feel free to switch up vegetables based on seasonality or what’s in your fridge.
    • Taste your sauce before adding; adjust sweetness or spice to suit your preference.

    Equipment Needed

    • Large wok or skillet: For those big stir-fry sessions; if you don’t have one, a regular heavy-bottomed pan works too.
    • Cutting board and knife: Essential for prepping your ingredients.
    • Mixing bowls: Necessary for marinating and mixing sauces.
    • Tongs or spatula: Perfect for tossing everything together during cooking.

    Variations

    • Protein Swap: Substitute the beef with chicken, shrimp, or tofu for a different twist.
    • Add More Veggies: Enhance nutrition by adding broccoli, bok choy, or mushrooms.
    • Gluten-Free Option: Use gluten-free noodles and tamari instead of regular soy sauce.
    • Spice It Up: Throw in some sliced jalapeños or use a spicier sauce for extra heat.
    • Herb Infusion: Incorporate fresh cilantro or basil towards the end for an aromatic finish.

    Serving Suggestions

    • Pair your Sesame Beef Stir-Fry Noodles with a crisp green salad for a refreshing contrast.
    • Serve with steamed jasmine rice for a heartier meal option.
    • A chilled glass of lemonade or iced green tea complements the flavors beautifully.
    • For presentation, use deep bowls and garnish with extra sesame seeds and fresh herbs.

    FAQs about Sesame Beef Stir-Fry Noodles

    Can I use regular spaghetti instead of egg noodles?

    Absolutely! While I prefer egg noodles for their texture, regular spaghetti works just fine in this Sesame Beef Stir-Fry Noodles recipe. Just cook it according to package instructions, and you’ll be good to go!

    How can I make this dish vegetarian?

    For a vegetarian version, swap the beef for tofu, tempeh, or even mushrooms. You can also add extra veggies to make it heartier. Enjoy the same delicious flavors with your choice of plant-based protein!

    Can I prepare the ingredients ahead of time?

    Yes! Prepping ingredients like slicing the beef and veggies in advance can save you time during the week. Just store everything in airtight containers in the fridge, and they’ll be ready to go when you are!

    Can I freeze leftovers?

    Yes, you can freeze leftovers! Just portion them into freezer-safe containers and store for up to 2 months. When you’re ready to enjoy, thaw in the fridge overnight and reheat in a pan.

    What can I serve with Sesame Beef Stir-Fry Noodles?

    This stir-fry is delicious on its own, but it pairs beautifully with a light salad, steamed vegetables, or even some spring rolls. Feel free to get creative!

    Final Thoughts

    Making Sesame Beef Stir-Fry Noodles is more than just preparing a meal; it’s an experience filled with flavor and warmth. I love how this dish transforms a busy weeknight into something special, bringing the family together around the table. As the beef sizzles and the vibrant colors of the vegetables come alive, it fills my kitchen with not just aromas but stories and laughter. Whether it’s a casual dinner or a cozy gathering, this recipe will surely create lasting memories. So roll up your sleeves, and dive into this culinary adventure—your taste buds will thank you!


    Print

    clock clock iconcutlery cutlery iconflag flag iconfolder folder iconinstagram instagram iconpinterest pinterest iconfacebook facebook iconprint print iconsquares squares iconheart heart iconheart solid heart solid icon

    Description

    A quick and flavorful stir-fry recipe featuring beef, vegetables, and noodles, topped with sesame seeds.


    • 400 g flank steak or sirloin, thinly sliced across the grain
    • 1 tbsp cornstarch
    • 1 tbsp soy sauce
    • 1 tsp toasted sesame oil
    • 250 g egg noodles or wheat noodles
    • 1 red bell pepper, thinly sliced
    • 1 cup snap peas, trimmed
    • 2 medium carrots, julienned
    • 3 spring onions, sliced (separate white and green parts)
    • 2 cloves garlic, minced
    • 1 tbsp fresh ginger, minced
    • 3 tbsp soy sauce
    • 2 tbsp oyster sauce
    • 1 tbsp hoisin sauce
    • 2 tsp toasted sesame oil
    • 1 tbsp rice vinegar
    • 1 tbsp honey or brown sugar
    • 2 tbsp water
    • 1 tsp chili flakes (optional)
    • 2 tbsp toasted sesame seeds
    • Green parts of spring onions, sliced

    1. In a bowl, toss the sliced beef with cornstarch, 1 tbsp soy sauce, and 1 tsp sesame oil. Set aside to marinate while prepping other ingredients.
    2. Cook the noodles according to package instructions. Drain, rinse with cold water, and set aside.
    3. In a small bowl, whisk together all sauce ingredients until smooth.
    4. Heat 1 tbsp vegetable oil in a large wok or skillet over high heat. Add the marinated beef and sear for 2–3 minutes until browned. Remove beef from the pan and set aside.
    5. In the same pan, add another tablespoon of oil if needed. Sauté garlic, ginger, and the white parts of the spring onions for 30 seconds until fragrant.
    6. Add bell pepper, snap peas, and carrots. Stir-fry for 2–3 minutes until just tender but still crisp.
    7. Return the beef to the pan. Add cooked noodles and pour in the sauce. Toss everything together for 2–3 minutes until heated through and evenly coated.
    8. Serve immediately, topped with toasted sesame seeds and green spring onions.

    Notes

    • Adjust chili flakes based on your spice preference.
    • Feel free to add other vegetables like broccoli or bok choy.
    • For a gluten-free option, use gluten-free noodles and tamari instead of soy sauce.
    • Prep Time: 15 minutes
    • Cook Time: 15 minutes
    • Category: Main Course
    • Method: Stir-fry
    • Cuisine: Asian

    Nutrition

    • Serving Size: 1 serving
    • Calories: 480
    • Sugar: 10 g
    • Sodium: 950 mg
    • Fat: 15 g
    • Saturated Fat: 3 g
    • Unsaturated Fat: 8 g
    • Trans Fat: 0 g
    • Carbohydrates: 68 g
    • Fiber: 5 g
    • Protein: 27 g
    • Cholesterol: 70 mg

    Sharing is caring!

  • Almond Cherry Bread

    Almond Cherry Bread


    Introduction to Almond Cherry Bread

    As a busy mom, I know how precious time can be, especially when it comes to whipping up something delightful in the kitchen. That’s why I’m excited to share with you my Almond Cherry Bread recipe! It’s a beautifully moist bread that blends the sweet tartness of cherries with the nutty richness of almonds.

    This delectable creation isn’t just a treat for your taste buds; it’s the perfect solution for a busy day or a delightful addition to any gathering. Your loved ones will be charmed by both its flavor and the lovely aroma wafting through the house.

    Why You’ll Love This Almond Cherry Bread

    This Almond Cherry Bread is a delightful combination of flavors that will make your taste buds dance with joy.

    It’s quick and easy to prepare, perfect for those hectic mornings or cozy family gatherings.

    The moist texture and sweet almond glaze elevate it from just a simple quick bread to a pastry that feels like a treat.

    Plus, who can resist the beautiful presentation of cherries and almonds on top?

    Ingredients for Almond Cherry Bread

    When it comes to creating this Almond Cherry Bread, the ingredients you choose make all the difference. Each one plays a vital role in crafting this delectable treat. Here’s what you’ll need:

    • Greek yogurt: This adds moisture and a subtle tang. You can substitute regular plain yogurt if needed.
    • Buttermilk: It enhances the flavor and tenderness of the bread. If you don’t have buttermilk, you can make a quick substitute by adding a squeeze of lemon juice to regular milk.
    • Unsalted butter: It adds richness to the bread. Make sure it’s melted for a smoother batter.
    • Eggs: These provide structure and moisture. Room temperature eggs work best for baking.
    • Vanilla extract: For a warm, sweet flavor. A splash of almond extract can also amplify the nutty notes.
    • Almond extract: The star of this bread! It gives that distinct almond flavor which pairs perfectly with the cherries.
    • White granulated sugar: Sweetness that balances the tartness of the cherries. You can use coconut sugar for a healthier option.
    • All-purpose flour: The main body of the bread. For gluten-free dieters, a 1:1 gluten-free flour blend can be a great alternative.
    • Baking powder: This helps the bread rise to a delightful fluffiness. Check the expiration date for best results!
    • Salt: Just a pinch brings out all the flavors.
    • Cherries: Fresh or canned, pitted and chopped. Their tartness is a beautiful contrast to the sweetness of the glaze. If using canned, make sure to drain them well.
    • Corn starch: Coating the cherries with cornstarch prevents them from sinking to the bottom. It’s a simple trick that really helps!
    • Sliced almonds: These not only add flavor but also create a lovely crunch on top. Feel free to toast them for an extra depth.
    • For Almond Glaze: Confectioner’s sugar, cream, and almond extract come together to create a sweet finishing touch. The glaze can be adjusted for thickness by varying the amount of cream used.

    For the exact measurements of each ingredient, please scroll to the bottom of the article where you will find a printable version of the recipe.

    How to Make Almond Cherry Bread

    Making Almond Cherry Bread is simpler than you might think!

    With a few easy steps, you’ll have a delightful loaf that will fill your kitchen with a delicious aroma.

    Let’s get started!

    Step 1: Prepare Your Oven and Pan

    First things first, let’s get that oven ready!

    Preheat your oven to 350°F (that’s about 177°C for my metric friends).

    While the oven warms up, grab an 8 ½-inch loaf pan.

    Line it with parchment paper, allowing some paper to hang over the edges for easy removal later.

    Then, spray the sides with nonstick baking spray. This simple step ensures your bread releases easily after baking.

    Step 2: Mix Wet Ingredients

    In a large mixing bowl, let’s bring the wet ingredients together!

    Start by cracking two large eggs into the bowl—go ahead, it’s an egg-cellent time!

    Add in your Greek yogurt, buttermilk, melted butter, vanilla extract, almond extract, and sugar.

    Beat this mixture on medium speed for about two minutes.

    You want the eggs well beaten and everything nicely combined.

    The creamy texture at this stage sets you up for a moist bread!

    Step 3: Combine Dry Ingredients

    In a separate bowl, mix together the dry ingredients.

    You’ll need all-purpose flour, baking powder, and salt.

    Take a moment to sift these into a bowl to avoid any lumps.

    Then, gently incorporate the dry mix into the wet mixture.

    Beat on medium speed for about a minute until everything is well blended.

    This is where the magic of the bread starts to come together!

    Step 4: Prepare Cherries and Almonds

    Now, let’s take care of our cherries!

    If using fresh cherries, pit and chop them into quarters.

    For canned cherries, make sure to drain and chop them as well.

    Toss the chopped cherries with a tablespoon of cornstarch.

    This helps keep them suspended in the batter instead of sinking to the bottom.

    Next, gently fold the cherries and sliced almonds into the batter.

    Reserve a handful of both for topping the bread later!

    Step 5: Assemble the Batter

    With the cherries and almonds mixed in, it’s time to transfer the batter.

    Pour it into your prepared loaf pan and use a spatula to smooth the top.

    Sprinkle the reserved cherries and almonds over the top for an eye-catching presentation.

    I promise, it looks as gorgeous as it tastes!

    Step 6: Bake!

    Place your loaf pan in the preheated oven and set the timer for 50 to 60 minutes.

    The smell will be incredible as it bakes!

    To check for doneness, insert a toothpick into the center of the bread.

    If it comes out clean, your beautiful almond cherry bread is ready!

    Then, carefully remove the bread from the oven and let it cool in the pan for about 10 minutes.

    Step 7: Prepare the Almond Glaze

    For the finishing touch, we need the almond glaze!

    In a large mixing bowl, combine confectioner’s sugar, a tablespoon of almond extract, and about 1 to 2 tablespoons of cream.

    Whisk until smooth and creamy.

    You can adjust the thickness by adding more cream or sugar to your liking.

    Once your bread has cooled completely, drizzle the glaze over the top.

    This sweet addition ties everything together, making each bite simply irresistible!

    Tips for Success

    • Make sure your ingredients are at room temperature for optimal mixing.
    • Don’t skip the cornstarch on the cherries; it really helps keep them suspended in the batter.
    • Using a toothpick to test for doneness is key—wait for a clean pick to ensure your bread is perfectly baked!
    • Let the bread cool completely before glazing for a beautiful finish.
    • Store leftovers in an airtight container to keep the moisture locked in!

    Equipment Needed

    • Loaf pan: An 8 ½-inch pan works best, but you can use any loaf pan you have.
    • Mixing bowls: A large bowl for wet ingredients and another for dry will make mixing easier.
    • Electric mixer: A hand mixer speeds up the mixing process, but a whisk will do fine too.
    • Measuring cups and spoons: Accurate measurements ensure the best results.
    • Parchment paper: This helps with easy removal of your baked bread from the pan.

    Variations of Almond Cherry Bread

    • Chocolate Chip Twist: Add 1/2 cup of semi-sweet chocolate chips for a delightful contrast to the cherries!
    • Nutty Overload: Mix in additional nuts like walnuts or pecans for extra crunch and flavor.
    • Gluten-Free Option: Substitute all-purpose flour with a 1:1 gluten-free flour blend for a gluten-free version.
    • Fruit Medley: Swap out cherries for other fruits like raspberries or blueberries. The flavor combinations are endless!
    • Spiced Delight: Incorporate a teaspoon of cinnamon or nutmeg for a warm, spiced flavor that’s especially delightful in cooler months.

    Serving Suggestions for Almond Cherry Bread

    • Enjoy with Coffee: A warm slice pairs perfectly with a steaming cup of coffee or tea for a delightful breakfast treat.
    • Top with Whipped Cream: A dollop of whipped cream adds a touch of elegance and extra sweetness.
    • Add Fresh Fruit: Serve alongside seasonal fruits like strawberries or peaches for a refreshing complement.
    • Presentation Tip: Dust with powdered sugar before serving for a lovely, finishing touch that enhances visual appeal.

    FAQs about Almond Cherry Bread

    I’ve gathered some common questions about Almond Cherry Bread to help you bake this delicious treat confidently. Let’s dive into the juicy details!

    Can I make this Almond Cherry Bread ahead of time?
    Absolutely! You can prepare the batter a day in advance and store it in the refrigerator. Just remember to let it sit at room temperature for about 30 minutes before baking. Alternatively, you can bake the bread ahead of time and store it wrapped at room temperature. It actually tastes even better the next day!

    How do I know when the bread is fully baked?
    A toothpick is your best friend here! Insert it into the center of the bread. If it comes out clean or with just a few crumbs, your Almond Cherry Bread is ready to shine. If there’s wet batter, give it a few more minutes.

    Can I use frozen cherries in this recipe?
    Yes! Frozen cherries work wonderfully in this recipe. Just make sure to thaw and drain them well before adding them to the batter. This way, they won’t add extra moisture to the loaf.

    What can I serve with Almond Cherry Bread?
    This bread is delightful on its own, but you could pair it with a dollop of whipped cream, a side of yogurt, or even a cup of tea or coffee. For an extra special treat, serve it warm with butter.

    How should I store my Almond Cherry Bread?
    Once cooled, wrap it in plastic wrap and keep it at room temperature. It should stay fresh for about 3-4 days. You can also freeze slices for later enjoyment—just pop them in the microwave for a quick treat!

    Final Thoughts

    Baking this Almond Cherry Bread has filled my kitchen with warmth and joy.

    It’s not just a recipe; it’s a way to create cherished moments with loved ones.

    With every slice, you’ll enjoy the delightful interplay of sweet cherries and nutty almonds.

    Whether shared over coffee with friends or savored alone during a quiet afternoon, this bread brings a sprinkle of happiness to any day.

    I hope it brings as much delight to your home as it has to mine.

    Embrace the joy of baking and create your own sweet memories!


    Print

    clock clock iconcutlery cutlery iconflag flag iconfolder folder iconinstagram instagram iconpinterest pinterest iconfacebook facebook iconprint print iconsquares squares iconheart heart iconheart solid heart solid icon

    Description

    A deliciously moist almond cherry bread topped with a sweet almond glaze, combining the flavors of fresh cherries and almonds in every bite.


    • 1/2 cup Greek yogurt, or plain, strained yogurt
    • 1/2 cup buttermilk
    • 1/2 cup unsalted butter, melted
    • 2 large eggs
    • 1 tsp vanilla extract
    • 1 1/2 tsp almond extract
    • 3/4 cup white granulated sugar
    • 1 1/2 cups all-purpose flour
    • 1 1/2 tsp baking powder
    • 1/4 tsp salt
    • 1 1/2 cups cherries, fresh or canned
    • 1 tbsp corn starch
    • 1/2 cup sliced almonds
    • For Almond Glaze:
    • 1/2 cup confectioner’s sugar
    • 1 to 2 tbsp cream
    • 1/4 tsp almond extract

    1. Preheat the oven to 350F/177C. Line the inside of an 8 ½-inch loaf pan and spray the sides with a nonstick baking spray.
    2. In a large mixing bowl, combine the eggs, Greek yogurt, buttermilk, melted butter, almond and vanilla extracts, and sugar. Beat on medium speed for a few minutes until the eggs are well beaten.
    3. In a separate bowl, combine the dry ingredients: flour, baking powder, and salt. Sift the dry ingredients into the batter, then beat on medium speed for about 1 minute, until the flour is incorporated.
    4. Pit the cherries, then cut into quarters. Toss the cherries in cornstarch, then add to the batter along with the sliced almonds. Reserve a handful of cherries and almonds for adding to the top. Fold in the cherries and almonds by hand.
    5. Transfer the batter into the prepared loaf pan and add the remaining cherries and almonds on top.
    6. Bake the cherry bread in the preheated oven for 50 to 60 minutes, until a toothpick inserted into the center comes out clean. Take the bread out of the loaf pan and set onto a wire rack to cool completely.
    7. For the almond glaze: combine the confectioner’s sugar, almond extract, and cream in a large mixing bowl and whisk until smooth. Add more confectioner’s sugar for a thicker glaze. Drizzle the glaze over the top.
    8. For storing the bread, allow it to cool completely, then wrap in plastic wrap and keep at room temperature.

    Notes

    • Ensure cherries are pitted before adding to the batter.
    • For best results, use room temperature ingredients.
    • Store the bread at room temperature wrapped in plastic.
    • Prep Time: 20 minutes
    • Cook Time: 60 minutes
    • Category: Dessert
    • Method: Baking
    • Cuisine: American

    Nutrition

    • Serving Size: 1 slice
    • Calories: 230
    • Sugar: 15g
    • Sodium: 150mg
    • Fat: 10g
    • Saturated Fat: 5g
    • Unsaturated Fat: 3g
    • Trans Fat: 0g
    • Carbohydrates: 32g
    • Fiber: 1g
    • Protein: 4g
    • Cholesterol: 50mg

    Sharing is caring!