Blog

  • Spinach, Mushroom, and Ricotta Stuffed Zucchini

    Spinach, Mushroom, and Ricotta Stuffed Zucchini


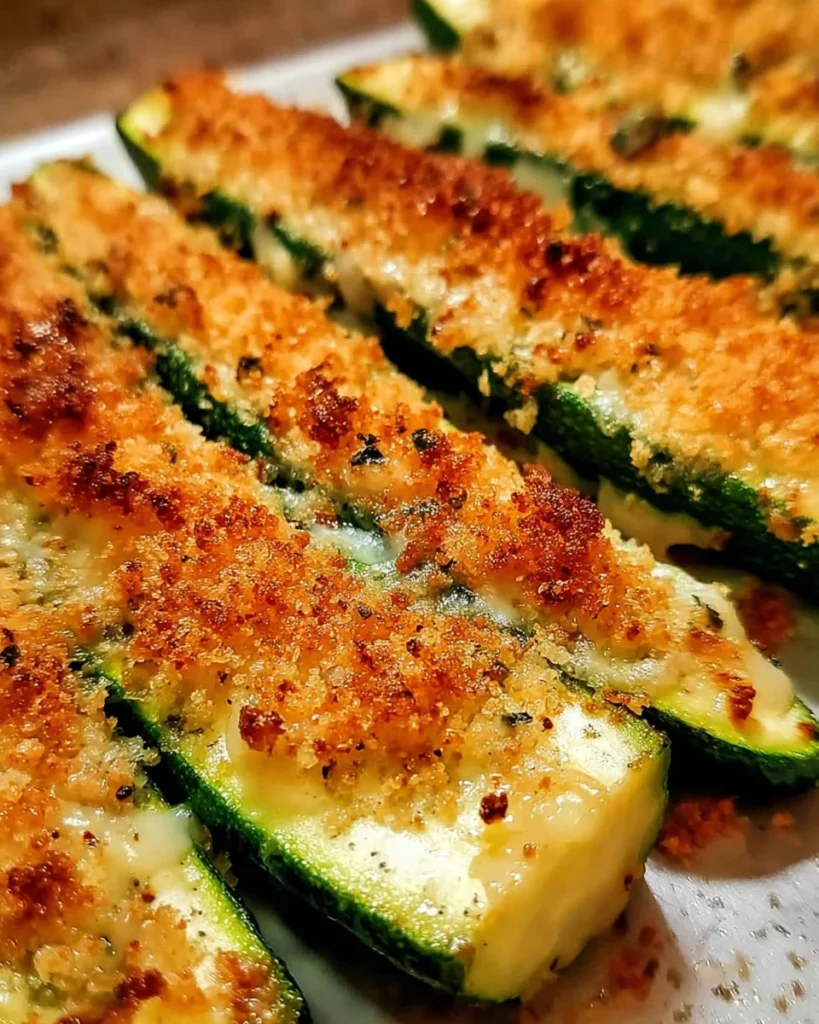
    Introduction to Spinach, Mushroom, and Ricotta Stuffed Zucchini

    Let’s be real—finding time to whip up a delicious meal after a long day can feel like climbing a mountain. That’s where my Spinach, Mushroom, and Ricotta Stuffed Zucchini comes to the rescue! This dish is a warm hug for your taste buds, combining creamy ricotta with earthy mushrooms and vibrant spinach. It’s the perfect quick solution for busy moms or professionals craving something wholesome yet delectable. Trust me, your family will rave about it, and you’ll enjoy the satisfaction of serving up a nourishing meal in just 45 minutes!

    Why You’ll Love This Spinach, Mushroom, and Ricotta Stuffed Zucchini

    This Spinach, Mushroom, and Ricotta Stuffed Zucchini is not just easy to make; it’s also a delightful way to sneak in some veggies. You can have it on the table in under an hour, making it a perfect choice for busy weeknights. The flavors meld together beautifully, creating a dish that’s comforting and satisfying. Plus, watching your family dig into something nutritious feels pretty rewarding, doesn’t it?

    Ingredients for Spinach, Mushroom, and Ricotta Stuffed Zucchini

    When it comes to creating my Spinach, Mushroom, and Ricotta Stuffed Zucchini, having the right ingredients makes all the difference. Here’s what you’ll need:

    • Medium Zucchinis: These serve as the perfect boats for our flavorful filling. Look for firm, straight zucchinis for better presentation.
    • Ricotta Cheese: Creamy and rich, this cheese adds a luscious texture to the filling. You can use part-skim ricotta for a lighter option.
    • Fresh Spinach: Bright and tender, chopped spinach not only imparts a lovely green color but also boosts the nutrition.
    • Mushrooms: I prefer to use button or cremini mushrooms. Their umami flavor complements the cheesy richness beautifully.
    • Grated Parmesan Cheese: A sprinkle of this savory cheese on top enhances the overall flavor. Feel free to substitute with Pecorino Romano for a sharper taste.
    • Garlic: Just one clove, minced, brings an aromatic punch to the filling. You can swap in garlic powder if needed.
    • Olive Oil: Used for sautéing, this oil carries rich, fruity flavors. Extra virgin olive oil adds an impressive depth.
    • Salt and Pepper: These simple seasonings elevate all the ingredients. Adjust to your taste preference.
    • Italian Seasoning: A delightful blend of herbs that adds a hint of the Mediterranean. Feel free to use your favorite dried herbs instead.
    • Marinara Sauce (optional): A spoonful on top adds a delicious layer of flavor. Swap for pesto or a homemade tomato sauce if you prefer.

    The ingredient amounts for this tasty dish can be found at the end of the article for easy printing. Happy cooking!

    How to Make Spinach, Mushroom, and Ricotta Stuffed Zucchini

    Now that we have our ingredients ready, let’s dive into the fun part—making these delightful Spinach, Mushroom, and Ricotta Stuffed Zucchini! Follow along with these simple steps, and soon you’ll have a dish that not only looks good but tastes incredible.

    Step 1: Preheat the Oven

    The first step is to preheat your oven to 375°F (190°C). This is a crucial stage. Preheating ensures that your stuffed zucchinis bake evenly and develop that lovely golden color. While the oven warms up, you can prepare the zucchinis. Multi-tasking in the kitchen? Yes, please!

    Step 2: Prepare the Zucchinis

    Next, grab those medium zucchinis and cut them in half lengthwise. Now, the fun part—scoop out the center with a spoon to create little boats! Make sure you leave enough flesh for structure. You want these zucchini boats to be sturdy, not sinking. This is where the flavor will go, so dig out just enough!

    Step 3: Sauté Garlic and Mushrooms

    Time to add some flavor! In a skillet, heat a couple of tablespoons of olive oil over medium heat. Add minced garlic and diced mushrooms. Sauté until the mushrooms soften and release their juices, about 5 minutes. This step wakes up all those flavors, turning your kitchen into a tempting fragrant paradise.

    Step 4: Cook Spinach

    Now, it’s time to toss in your chopped spinach. Stir it into the skillet and watch as it wilts down. This only takes a couple of minutes. Don’t forget to season with salt, pepper, and a sprinkle of Italian seasoning. Those herbs will enhance the taste, creating a delightful aroma that gets your family curious about dinner!

    Step 5: Create the Filling

    In a mixing bowl, combine your sautéed veggie mixture with ricotta cheese and half of the Parmesan. Stir it all together until well mixed. The rich, creamy ricotta pairs beautifully with the vegetables, making for a filling that’s simply divine. Plus, you can sneak in a taste or two—chef’s privilege!

    Step 6: Fill the Zucchini Boats

    It’s time to pack the zucchini boats! Take your ricotta mixture and fill each one, pressing down gently to get a good amount in there. You want them filled to the brim, bursting with flavor. Really give them some love! When they bake, the filling will expand, creating a heavenly bite each time.

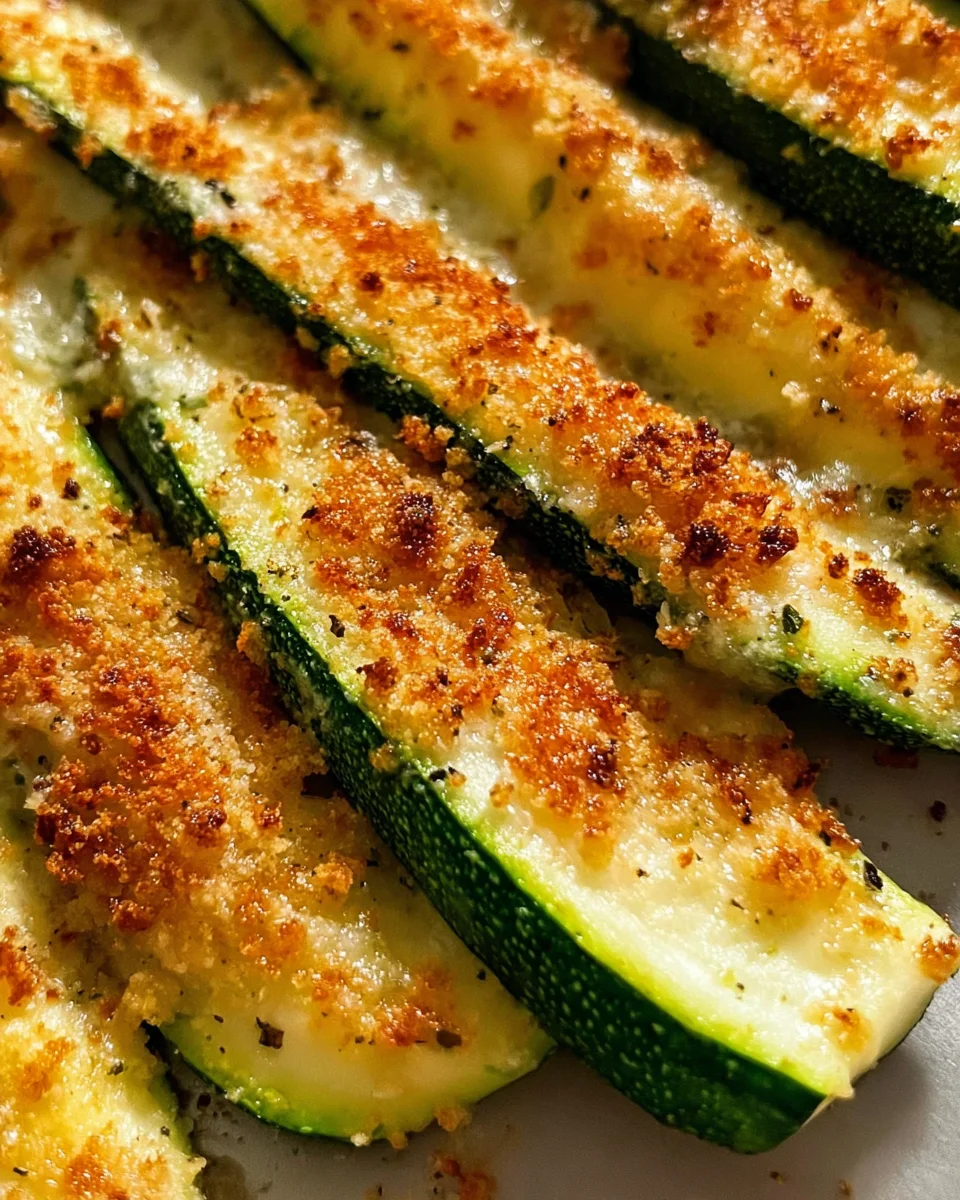
    Step 7: Bake and Finish

    Place your stuffed zucchinis in a baking dish, spaced apart. If you’re using marinara sauce, spoon some over the top now. Sprinkle the remaining Parmesan cheese like a finishing touch of magic. Bake in your preheated oven for 25-30 minutes. You’ll know they’re ready when the zucchini is tender and the cheese is beautifully golden. Let them cool for a few minutes before serving. Bon appétit!

    Tips for Success

    • Ensure your zucchinis are firm and straight for easy scooping and filling.
    • Don’t overcook the filling; sauté just until veggies are tender.
    • For added zip, try a splash of lemon juice in the filling.
    • If your family loves spice, add a pinch of red pepper flakes.
    • Let the stuffed zucchinis sit for a few minutes after baking to help them set.

    Equipment Needed

    • Baking Dish: A glass or ceramic dish works great. You can also use a cast iron skillet for a rustic look.
    • Skillet: A medium skillet is perfect for sautéing. Any non-stick skillet will do.
    • Spoon: Use a tablespoon to scoop out the zucchini. A melon baller can work if you have one!
    • Mixing Bowl: A medium-sized bowl is ideal for combining your filling ingredients.
    • Knife and Cutting Board: Essential for chopping and prepping your vegetables.

    Variations

    • Meaty Option: Add cooked ground turkey or sausage to the filling for a protein-packed twist.
    • Cheesy Delight: Incorporate different cheeses like feta or mozzarella for a unique flavor profile.
    • Herb-Bomb Version: Experiment with fresh herbs like basil, dill, or cilantro to infuse a vibrant taste.
    • Grain Booster: Add cooked quinoa or rice to the filling for extra texture and heartiness.
    • Gluten-Free: Skip the marinara sauce or use a gluten-free option to accommodate dietary needs.

    Serving Suggestions

    • Complement with a Salad: A fresh garden salad with a zesty vinaigrette pairs beautifully.
    • Drink Pairing: Enjoy your stuffed zucchini with a crisp Sauvignon Blanc or sparkling water with lemon.
    • Presentation Tip: Garnish with fresh basil or a sprinkle of extra parmesan for an inviting look.

    FAQs about Spinach, Mushroom, and Ricotta Stuffed Zucchini

    Can I make these stuffed zucchinis ahead of time?

    Absolutely! You can prepare the filling and stuff the zucchinis a day in advance. Just cover and refrigerate them. When you’re ready to bake, pop them in the oven and enjoy a hearty meal without the hassle of prep!

    What can I substitute for ricotta cheese?

    If ricotta isn’t your thing, you can use cottage cheese or cream cheese. Both add a creamy texture, though cream cheese will be richer. You can also blend either option for a smoother consistency, making it a versatile alternative!

    Can I freeze the stuffed zucchinis?

    Yes! These Spinach, Mushroom, and Ricotta Stuffed Zucchini freeze well. Prepare as directed, then freeze before baking. Just remember to thaw them in the fridge overnight before you bake for the best results!

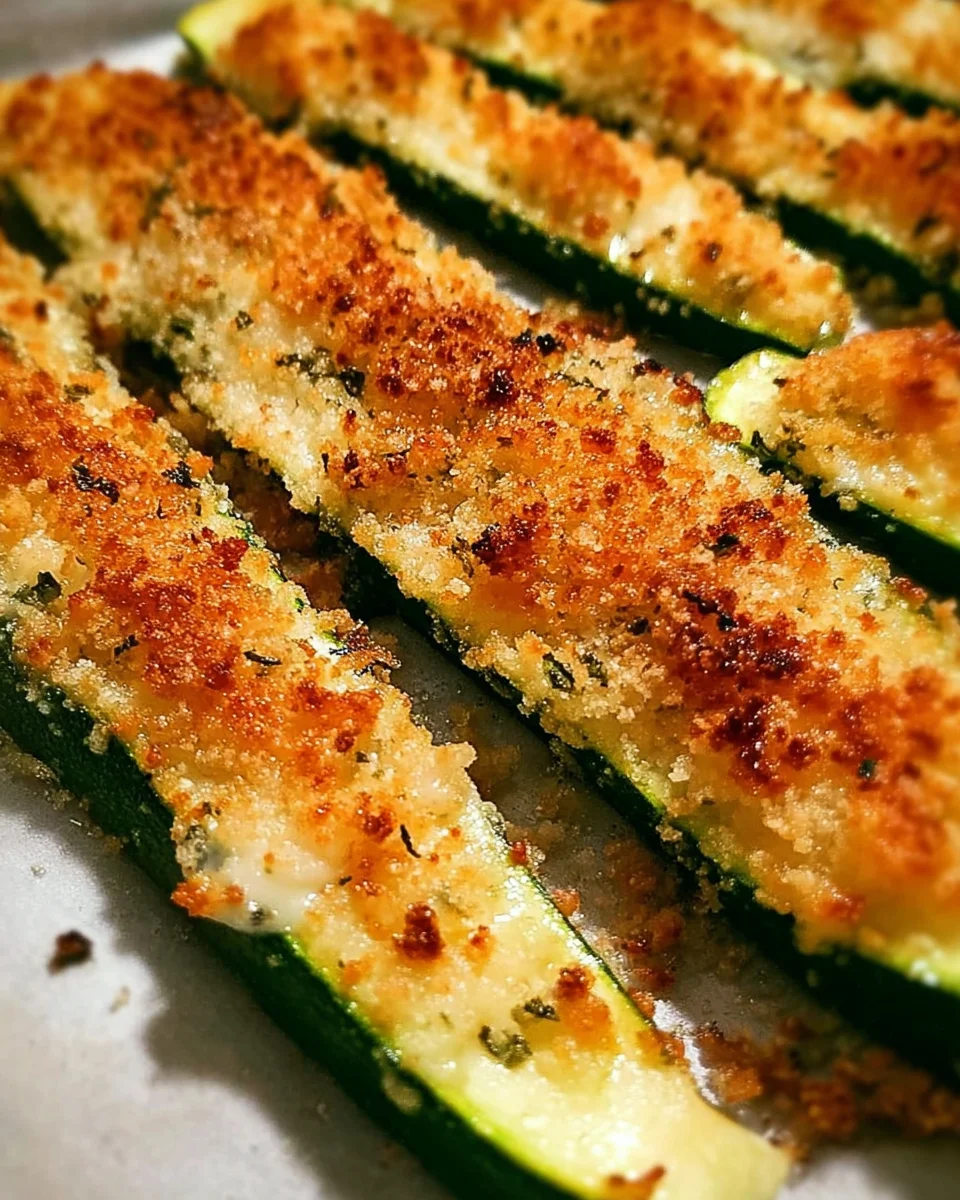
    How do I know when my stuffed zucchini is ready?

    You’ll want to look for tender zucchini and golden cheese on top. Using a fork, a gentle poke should confirm it’s soft but not mushy. Trust me, the smell will also be a clear indicator of deliciousness!

    Can I add more vegetables to the filling?

    Of course! Feel free to get creative with your vegetables. Bell peppers, diced carrots, or even some grated zucchini can add nutrients and flavor to the filling. The more, the merrier!

    Final Thoughts

    There’s something truly special about serving up a dish like Spinach, Mushroom, and Ricotta Stuffed Zucchini. It goes beyond just filling bellies—it nurtures connections and turns everyday meals into little celebrations. As you savor each bite, you’ll find not only the harmony of flavors but also the warmth of home-cooked love. Whether it’s a busy weeknight or a cozy weekend gathering, this dish creates delightful moments that linger long after the plates are cleared. Give it a try, and you’ll understand why it’s an instant family favorite!


    Print

    clock clock iconcutlery cutlery iconflag flag iconfolder folder iconinstagram instagram iconpinterest pinterest iconfacebook facebook iconprint print iconsquares squares iconheart heart iconheart solid heart solid icon

    Description

    Deliciously stuffed zucchinis filled with spinach, mushrooms, and ricotta cheese.


    • 4 medium zucchinis
    • 1 cup ricotta cheese
    • 2 cups fresh spinach, chopped
    • 1 cup mushrooms, diced
    • 1/2 cup grated Parmesan cheese
    • 1 clove garlic, minced
    • 2 tablespoons olive oil
    • Salt and pepper to taste
    • 1 teaspoon Italian seasoning
    • 1/2 cup marinara sauce (optional)

    1. Preheat the oven to 375°F (190°C).
    2. Cut the zucchinis in half lengthwise and scoop out the center using a spoon to create boats.
    3. In a skillet, heat olive oil over medium heat. Add garlic and mushrooms, sautéing until mushrooms are soft.
    4. Add chopped spinach to the skillet and cook until wilted. Season with salt, pepper, and Italian seasoning.
    5. In a mixing bowl, combine the sautéed vegetables with ricotta cheese and half of the Parmesan cheese. Mix well.
    6. Fill each zucchini boat with the ricotta mixture, pressing down gently to pack it in.
    7. Place the stuffed zucchinis in a baking dish. If desired, spoon marinara sauce over the top.
    8. Sprinkle the remaining Parmesan cheese on top of the stuffed zucchinis.
    9. Bake in the preheated oven for 25-30 minutes, or until the zucchinis are tender and the cheese is golden.
    10. Remove from the oven and let cool for a few minutes before serving.

    Notes

    • For added flavor, consider adding herbs like basil or oregano.
    • Make sure not to overcook the zucchini to maintain some crunch.
    • Feel free to substitute the marinara sauce with your favorite tomato sauce.
    • Prep Time: 15 minutes
    • Cook Time: 30 minutes
    • Category: Main Course
    • Method: Baking
    • Cuisine: Italian

    Nutrition

    • Serving Size: 1 stuffed zucchini
    • Calories: 250
    • Sugar: 3g
    • Sodium: 400mg
    • Fat: 15g
    • Saturated Fat: 6g
    • Unsaturated Fat: 8g
    • Trans Fat: 0g
    • Carbohydrates: 18g
    • Fiber: 3g
    • Protein: 12g
    • Cholesterol: 30mg

    Sharing is caring!

  • Baked Zucchini

    Baked Zucchini


    Introduction to Baked Zucchini

    As a busy mom, I know how challenging it can be to whip up something delicious and healthy for the family. That’s why I love baked zucchini! This simple recipe transforms ordinary zucchini into a crunchy, flavor-packed side dish that even picky eaters will enjoy.

    Imagine the oven working its magic, filling your kitchen with an irresistible aroma while you carry on with your day. Whether it’s a weeknight dinner or a gathering with friends, baked zucchini fits perfectly. Join me on this culinary adventure; I’ll share my passion for cooking and help you make a dish that’ll steal the show!

    Why You’ll Love This Baked Zucchini

    What’s not to love about baked zucchini? It’s a breeze to prepare, taking only minutes to get ready. With just a handful of ingredients, you can create a dish that’s not only crunchy but also packed with flavor. This recipe is perfect for those busy days when you need a quick side. Plus, it’s versatile enough to complement any meal, making weeknight dinners a delightful experience!

    Ingredients for Baked Zucchini

    Gathering the right ingredients is a crucial step in making your baked zucchini shine. Here’s what you need to get started:

    • Zucchini: Look for firm, medium-sized zucchini. They’re the star of the show and provide that lovely, tender crunch.
    • Olive Oil: This adds richness and helps the seasoning stick. Extra virgin is great for flavor!
    • Panko Breadcrumbs: These Japanese-style breadcrumbs give your zucchini that satisfying crunch. Regular breadcrumbs work too, but panko is crunchier!
    • Parmesan Cheese: Freshly grated parmesan brings a savory, salty kick. It’s a must-have for that ooey-gooey satisfaction.
    • Garlic Powder: Adds a wonderful depth of flavor. You can also use fresh garlic, but it requires a bit more work!
    • Salt and Pepper: Essential for elevating taste. Adjustable according to your preferences.

    Feel free to experiment! Adding herbs like Italian seasoning or oregano can elevate the dish further. Don’t worry, I’ve got all the exact quantities listed at the bottom of the article, ready for you to print out. Happy cooking!

    How to Make Baked Zucchini

    Creating the perfect baked zucchini is simpler than you might think. With just a few steps, you’ll have a dish that dazzles the taste buds! Let’s dive into the process.

    Step 1: Preheat the Oven

    The first step is to preheat your oven to 400°F (200°C). This is crucial! Preheating ensures that your zucchini starts cooking right away, resulting in that lovely golden crunch we all adore.

    Also, line a large baking sheet with parchment paper. This little trick makes cleanup a breeze and prevents sticking. Trust me; your future self will thank you!

    Step 2: Prepare the Zucchini

    Next, it’s time to wash and trim those zucchinis. Rinse them under cool water to remove any dirt. Then, trim the ends before cutting them in half lengthwise.

    Slice each half into wedges around ¾-inch thick. This thickness is key! It allows the zucchini to cook through without getting mushy while still remaining tender.

    Step 3: Season the Zucchini

    Now, let’s work some magic with seasoning! In a large bowl, toss the zucchini wedges with 1.5 tablespoons of olive oil, salt, and pepper. Make sure to coat them evenly—this is where the flavor begins!

    A good coating ensures that every bite has that delightful crunch. Don’t skimp on shaking things around to ensure consistency!

    Step 4: Create the Topping

    While your zucchini soaks in that seasoning goodness, grab a small bowl to prepare the topping. Combine the Panko breadcrumbs, freshly grated parmesan cheese, and garlic powder.

    If you’re feeling adventurous, toss in herbs like oregano or Italian seasoning for an extra flavor boost! Mix well until everything is evenly combined, creating that irresistible crispy topping.

    Step 5: Bake to Perfection

    Now it’s time for the big show! Place your baking sheet in the preheated oven and let those zucchini wedges roast away for 18 to 22 minutes.

    Keep a close eye on them! Once they’re tender and the topping becomes a deep golden brown, that’s your cue! The aroma wafting through your kitchen will make it hard to wait, but it’ll be so worth it!

    Tips for Success

    • Ensure your zucchini is fresh for the best flavor and texture.
    • Don’t overcrowd the baking sheet; give those beauties space to crisp up!
    • Adjust the seasoning to fit your taste. A pinch of cayenne pepper adds a kick!
    • Experiment with different cheeses, like cheddar, for a fun twist.
    • Serve the baked zucchini right away for maximum crunchiness.

    Equipment Needed

    • Baking Sheet: A standard sheet works well. If you don’t have one, a large casserole dish can do the trick.
    • Parchment Paper: Perfect for easy cleanup. Aluminum foil works as an alternative.
    • Mixing Bowls: A medium-sized bowl is ideal for tossing ingredients. Any bowl will work.
    • Knife and Cutting Board: Essential for prepping the zucchini. A sturdy set will make the task easier.

    Variations

    • Cheesy Spinach Baked Zucchini: Mix fresh spinach with the Panko topping for a nutritious boost!
    • Spicy Kick: Sprinkle some red pepper flakes into the Panko mixture for a fiery flavor.
    • Herb Lovers: Add fresh herbs like basil or thyme to the topping for a fresh, aromatic touch.
    • Gluten-Free Option: Use gluten-free breadcrumbs or almond flour for a crunchy topping.
    • Veggie Medley: Combine zucchini with other vegetables like bell peppers or eggplant for a colorful dish.

    Serving Suggestions for Baked Zucchini

    • Pair your baked zucchini with grilled chicken or fish for a light, balanced meal.
    • Serve alongside a fresh salad drizzled with lemon vinaigrette for a refreshing contrast.
    • Offer a chilled glass of white wine or sparkling water with lemon for an upbeat touch.
    • Consider garnishing with fresh herbs like parsley for a pop of color and flavor.
    • Present in a colorful dish to elevate your dining experience and impress your guests.

    FAQs about Baked Zucchini

    Can I use yellow squash instead of zucchini?
    Absolutely! Yellow squash works beautifully in this baked zucchini recipe. The flavor may be slightly different, but it’s equally delicious and can be a fun variation to try!

    How do I store leftovers?
    If you have any leftover baked zucchini, store it in an airtight container in the refrigerator. It’ll keep for about 3 to 4 days. Reheating in the oven will help retain its crunch!

    Can I freeze baked zucchini?
    While you can freeze baked zucchini, keep in mind that it may lose some of its crunch. If you plan to freeze, let it cool completely before placing it in a freezer-safe container. It’s best enjoyed fresh!

    What are some good dips for baked zucchini?
    Baked zucchini pairs wonderfully with dips! Consider serving it with marinara sauce, ranch dressing, or a tangy garlic aioli for an extra flavor boost. Yum!

    Can I make baked zucchini ahead of time?
    For easy meal prep, you can slice and season the zucchini a day in advance. Just store it in the fridge until you’re ready to pop it in the oven. Freshly baked is always best, but this method can save time!

    Final Thoughts on Baked Zucchini

    Baked zucchini is not just a recipe; it’s a celebration of simplicity and flavor. This dish brings together fresh ingredients and a crunch that’ll please even the fussiest eaters.

    I can’t tell you how many times baked zucchini has saved me on hectic weeknights or wowed guests at dinner parties. It adds a healthy twist to any meal while making me feel like a culinary rockstar.

    So, roll up your sleeves, embrace the joy of cooking, and dive into this crunchy delight. Trust me; your taste buds will thank you—even on the busiest days!


    Print

    clock clock iconcutlery cutlery iconflag flag iconfolder folder iconinstagram instagram iconpinterest pinterest iconfacebook facebook iconprint print iconsquares squares iconheart heart iconheart solid heart solid icon

    Description

    A delicious and crunchy baked zucchini recipe perfect as a side dish or snack.


    • 3 whole Zucchini
    • 2 tbsp Olive Oil
    • 3 tbsp Panko Breadcrumbs
    • 1/3 cup Parmesan Cheese
    • 1 tsp Garlic Powder
    • 1/2 tsp Salt
    • 1/2 tsp Pepper

    1. Preheat your oven to 400°F / 200°C. Line a large baking sheet with parchment paper for easy cleanup and to prevent sticking.
    2. Wash and trim the ends off the zucchini. Cut each one in half lengthwise, then slice each half into 2-3 long wedges, about ¾-inch thick.
    3. In a large bowl, toss the dry zucchini wedges with 1.5 tablespoons of olive oil, salt, and pepper. Arrange the zucchini in a single layer on your prepared baking sheet with the skin-side down.
    4. In a separate small bowl, combine the Panko breadcrumbs, freshly grated parmesan, and garlic powder. Mix well.
    5. Place the baking sheet in the preheated oven and roast for 18-22 minutes until the zucchini is tender and the topping is a deep golden brown.

    Notes

    • For extra flavor, you can add herbs like Italian seasoning or oregano to the breadcrumb mixture.
    • Serve immediately for the best texture.
    • Prep Time: 10 minutes
    • Cook Time: 22 minutes
    • Category: Side Dish
    • Method: Baking
    • Cuisine: Italian

    Nutrition

    • Serving Size: 1 serving
    • Calories: 150
    • Sugar: 2g
    • Sodium: 350mg
    • Fat: 10g
    • Saturated Fat: 3g
    • Unsaturated Fat: 4g
    • Trans Fat: 0g
    • Carbohydrates: 12g
    • Fiber: 3g
    • Protein: 5g
    • Cholesterol: 10mg

    Sharing is caring!

  • Ultimate Cheesy Ground Beef Melt

    Ultimate Cheesy Ground Beef Melt


    Introduction to Ultimate Cheesy Ground Beef Melt

    Is there anything better than a gooey, melty sandwich after a long day? The Ultimate Cheesy Ground Beef Melt is my go-to comfort food for those busy evenings when I crave something warm and satisfying. With just a few ingredients and a bit of time, you can transform everyday staples into a dish that feels special. It’s a quick solution for hectic nights or a charming meal to impress your loved ones. Trust me; once you take that first bite, you’ll be hooked on the rich flavors and heavenly texture!

    Why You’ll Love This Ultimate Cheesy Ground Beef Melt

    This Ultimate Cheesy Ground Beef Melt is a dream come true for busy moms and professionals like us! It’s incredibly easy to prepare, taking just 30 minutes from start to finish.

    The combination of savory ground beef and melted cheese creates a flavor explosion that will have your family asking for seconds. Whether you’re whipping it up for a late-night snack or a cozy dinner, this recipe delivers comfort and satisfaction in every bite.

    Ingredients for Ultimate Cheesy Ground Beef Melt

    For this mouthwatering Ultimate Cheesy Ground Beef Melt, you’ll need a few simple ingredients that you might already have on hand. Here’s what to gather:

    • Ground Beef: The star of the show! Choose lean ground beef for a balanced flavor.
    • Onion: A small onion, finely chopped, adds sweetness and depth to the filling.
    • Garlic: Minced garlic enhances the savory notes, making everything super aromatic.
    • Salt and Pepper: These staples bring out the flavors of the other ingredients; keep them handy!
    • Worcestershire Sauce: A dash of this sauce introduces a rich umami kick that elevates the beef.
    • Beef Broth: This broth helps keep the mixture moist and succulent while simmering.
    • Cheddar Cheese: Sharp shredded cheddar adds a bold flavor that pairs beautifully with the beef.
    • mozzarella Cheese: This cheese melts to perfection, creating that gooey, stretchy goodness we crave.
    • Bread: Use sourdough or white bread for that crispy, buttery crust that completes this sandwich.
    • Unsalted Butter: Softened butter is essential for achieving that golden, crispy outside.
    • Fresh Parsley: Chopped parsley is entirely optional, but it adds a touch of color and freshness!

    If you’re in need of substitutions or alternatives, here are a few ideas:

    • For a dairy-free option, swap the cheddar and mozzarella for your favorite dairy-free cheeses.
    • If gluten is a concern, simply choose a gluten-free bread that you love.
    • Looking to lighten things up? Try using ground turkey or chicken in place of beef.

    Exact measurements for these ingredients can be found toward the bottom of the article, making it easy to print and reference while you cook!

    How to Make Ultimate Cheesy Ground Beef Melt

    Step 1: Cook the Ground Beef

    To kick things off, grab a medium skillet and heat it over medium-high heat. Once it’s ready, toss in the ground beef. Be sure to break up the meat as it cooks, this helps it brown evenly. The sizzle of the beef is music to my ears! After a few minutes, add the finely chopped onion and minced garlic. Stir them in, letting their fragrant aroma fill your kitchen. You want the onion to soften and become translucent, which takes about 3–5 minutes. Just imagine how delicious this is going to taste! Keep an eye on the meat to ensure it doesn’t overcook; you want it perfectly browned to create that flavorful foundation for your Ultimate Cheesy Ground Beef Melt.

    Step 2: Season and Simmer

    Now that the beef is cooked, it’s time to season it to perfection. Sprinkle in some salt and pepper to taste; don’t be shy! Next, pour in the Worcestershire sauce, followed by the beef broth. This will bring depth to the dish and keep everything juicy. Give it a gentle stir, and let the mixture simmer for about 5–7 minutes. This is where all the magic happens! The broth will reduce, and the beef will soak up all those flavors, resulting in a rich, savory filling. If you want options, feel free to toss in a pinch of your favorite herbs for added flavor!

    Step 3: Prepare the Bread

    Once the filling is ready, it’s time to prep the bread. Start by spreading softened unsalted butter generously on one side of each slice of bread. That buttery goodness will help achieve that lovely, crispy crust we all adore. Meanwhile, preheat your skillet or griddle over medium heat. You want it hot enough to sizzle but not so hot that it burns the bread. These are the simple steps that make the difference in your Ultimate Cheesy Ground Beef Melt!

    Step 4: Assemble the Sandwich

    Now comes the fun part—assembling your sandwich! Place two slices of bread, butter side down, in the preheated skillet. Start by layering shredded cheddar cheese on each slice; go for that gooey goodness! Now, take a generous scoop of the savory ground beef mixture and spread it on top of the cheese. Don’t skimp on this part; the heart of the sandwich is in this mix! Finish with another layer of mozzarella cheese. Then, top it off with the remaining slices of bread, butter side up. This layering creates a mouthwatering experience with every bite, making your Ultimate Cheesy Ground Beef Melt unforgettable.

    Step 5: Grill the Sandwich

    It’s time to grill your masterpiece! Let the sandwiches cook for about 3–4 minutes on one side. Gently press down with a spatula to help the cheese melt beautifully. Keep an eye on the bread; we want it gloriously golden and crispy. Once it reaches that perfect shade, flip it carefully! Cook for another 3–4 minutes until both sides are golden brown, and your kitchen is filled with the delicious aroma of melting cheese. When it’s done, remove the sandwiches and let them cool for a minute. Slice them in half, sprinkle some fresh parsley if you like, and get ready for that amazing first bite of your Ultimate Cheesy Ground Beef Melt!

    Tips for Success

    • Use a good quality, lean ground beef for best flavor.
    • Don’t rush the cooking; letting the beef brown properly adds depth.
    • Experiment with different cheeses for unique flavors.
    • Preheat your skillet; it ensures crispy bread and melted cheese.
    • For extra crunch, try adding a sprinkle of breadcrumbs before grilling.

    Equipment Needed

    • Skillet or Griddle: A non-stick skillet works wonders, but a cast-iron skillet adds a delightful crust.
    • Spatula: For flipping those sandwiches with finesse; a silicone spatula is a great choice.
    • Butter Knife: Perfect for spreading that buttery goodness on the bread.
    • Measuring Cups: Handy for portioning out your cheese and broth.
    • Cutting Board: Essential for slicing your sandwiches post-grill.

    Variations of Ultimate Cheesy Ground Beef Melt

    • Spicy Kick: Add sliced jalapeños or a dash of hot sauce to the beef mixture for a fiery twist.
    • Mediterranean Flair: Mix in chopped olives, feta cheese, and sun-dried tomatoes for a taste of the Mediterranean.
    • Mushroom Lover: Sauté sliced mushrooms with the onions and garlic to add earthy flavors.
    • Veggie Delight: Swap half of the ground beef for black beans and add your favorite diced veggies for a hearty plant-based option.
    • Barbecue Bliss: Stir a bit of barbecue sauce into the beef mixture for a smoky, tangy flavor.

    Serving Suggestions for Ultimate Cheesy Ground Beef Melt

    • Pair with crispy fries or sweet potato fries for a classic combo.
    • Serve alongside a fresh garden salad for a balanced meal.
    • Try it with a side of pickle spears for a tangy crunch.
    • Wash it down with a cold soda or a chilled iced tea.
    • Garnish with extra parsley for a pop of color and flavor!

    FAQs about Ultimate Cheesy Ground Beef Melt

    Can I make the Ultimate Cheesy Ground Beef Melt ahead of time?

    Absolutely! You can prepare the ground beef mixture in advance, store it in the fridge, and assemble the sandwiches when you’re ready. This makes it a fantastic option for busy days!

    What cheese works best for this recipe?

    While cheddar and mozzarella are classic choices, feel free to get creative! Gouda, Swiss, or pepper jack also melt beautifully and add delightful flavors to your Ultimate Cheesy Ground Beef Melt.

    Can I freeze the sandwiches?

    Yes, you can! Wrap the prepared sandwiches tightly in plastic wrap and freeze. When you’re ready to enjoy them, let them thaw in the fridge overnight and grill as usual.

    What’s a good side dish to serve with this melt?

    Crispy fries or a fresh salad make excellent sides! The combination adds balance and rounds out your meal perfectly, elevating your Ultimate Cheesy Ground Beef Melt experience.

    How can I make this dish vegetarian?

    To make it vegetarian, swap the ground beef for a mix of black beans or lentils, and load up on roasted veggies for that savory flavor. Your Ultimate Cheesy Ground Beef Melt will still be delicious!

    Final Thoughts

    Making the Ultimate Cheesy Ground Beef Melt is more than just preparing a meal; it’s about enjoying the journey of cooking. The rich aroma wafting through your kitchen, the satisfaction of layering gooey cheese and savory beef, and the joy of seeing your loved ones gather around the table is what it’s all about. Every bite offers a comforting embrace, a reminder that food can heal and bring us together. So, let’s toast to easy recipes that create delicious memories, one cheesy sandwich at a time! You deserve a bit of indulgence in your busy life.


    Print

    clock clock iconcutlery cutlery iconflag flag iconfolder folder iconinstagram instagram iconpinterest pinterest iconfacebook facebook iconprint print iconsquares squares iconheart heart iconheart solid heart solid icon

    Description

    A delicious and indulgent sandwich featuring gooey melted cheese and savory ground beef, perfect for a comforting meal.


    • 1 lb ground beef
    • 1 small onion, finely chopped
    • 2 cloves garlic, minced
    • Salt and pepper, to taste
    • 1 tsp Worcestershire sauce
    • 1/2 cup beef broth
    • 1 cup shredded cheddar cheese
    • 1 cup shredded mozzarella cheese
    • 4 slices sourdough or white bread
    • 2 tbsp unsalted butter, softened
    • Fresh parsley, chopped (optional)

    1. In a medium skillet over medium-high heat, cook the ground beef. Break up the meat as it browns, ensuring even cooking. Add the chopped onion and garlic, stirring until the onion turns soft and translucent.
    2. Add salt and pepper to taste, then pour in the Worcestershire sauce and beef broth. Let the mixture simmer until the broth reduces, making sure the beef is flavorful and moist.
    3. Spread softened butter on one side of each bread slice. Preheat a skillet or griddle over medium heat.
    4. Place two slices of bread, butter side down, in the preheated skillet. Layer each slice with shredded cheddar cheese, followed by a generous portion of the ground beef mixture. Top with mozzarella cheese and cover with the remaining bread slices, butter side up.
    5. Cook the sandwiches for about 3–4 minutes on each side, pressing down gently to help the cheese melt. Flip carefully when the bread turns golden and crispy, cooking until the cheese is fully melted.
    6. Slice each sandwich in half, sprinkle with fresh parsley for garnish, and enjoy your warm, melty Ultimate Cheesy Ground Beef Melt!

    Notes

    • Dairy-Free Cheese: Swap out the cheddar and mozzarella for dairy-free options.
    • Gluten-Free Bread: Substitute with your favorite gluten-free bread if desired.
    • Ground Turkey or Chicken: Use ground turkey or chicken as a leaner alternative to beef.
    • Prep Time: 15 minutes
    • Cook Time: 15 minutes
    • Category: Main Dish
    • Method: Grilling
    • Cuisine: American

    Nutrition

    • Serving Size: 1 sandwich
    • Calories: 640
    • Sugar: 3g
    • Sodium: 800mg
    • Fat: 40g
    • Saturated Fat: 20g
    • Unsaturated Fat: 15g
    • Trans Fat: 1g
    • Carbohydrates: 44g
    • Fiber: 2g
    • Protein: 32g
    • Cholesterol: 100mg

    Sharing is caring!

  • Creamy Savory Mashed Sweet Potatoes

    Creamy Savory Mashed Sweet Potatoes


    Introduction to Creamy Savory Mashed Sweet Potatoes

    There’s something magical about the blend of creamy, savory mashed sweet potatoes that can elevate any meal. For busy moms like me, this dish is a quick solution for those hectic weeknights while still being a showstopper for Sunday dinners. As I peel and chop those vibrant sweet potatoes, I can’t help but feel a connection to family traditions and warm gatherings. This recipe isn’t just about filling bellies; it’s about creating moments that linger long after the plates are cleared. Let’s dive into these creamy savory mashed sweet potatoes that everyone will love!

    Why You’ll Love This Creamy Savory Mashed Sweet Potatoes

    These creamy savory mashed sweet potatoes are not just easy to make; they’re downright delightful! With just a few simple ingredients and minimal effort, you can whip up a side dish that tantalizes your taste buds and impresses your family. The velvety texture and buttery flavor effortlessly elevate any meal without taking hours in the kitchen. Plus, they’re a nutritious alternative to regular mashed potatoes that even picky eaters will adore!

    Ingredients for Creamy Savory Mashed Sweet Potatoes

    To create these creamy savory mashed sweet potatoes, you’ll need a handful of simple yet impactful ingredients. Each one adds its own unique flair to this delicious side dish.

    • Sweet Potatoes: The star of the dish, these vibrant tubers bring sweetness and nutrition. Look for firm, unblemished ones.
    • Salt: Essential for enhancing flavor, this ingredient will make each component shine. We’ll use it in two stages.
    • Garlic: Just a clove, minced to add a burst of savory goodness. It’s the secret handshake that elevates this dish!
    • Butter: Cubed for creaminess, this classic ingredient infuses rich flavor. For a vegan option, you can easily swap it out.
    • Black Pepper: A sprinkle for subtle heat. This gives depth while balancing the sweetness of the potatoes.
    • Sour Cream: This adds an indulgent creaminess, making the mash velvety. Greek yogurt could be a tangy alternative!
    • Fresh Parsley: Chopped to garnish, it brings a fresh burst of color and a hint of earthiness. It’s not just pretty—it’s flavorful!

    You can find the exact measurements for these ingredients at the bottom of this article, available for printing. Let’s not forget that cooking is all about flexibility, so feel free to switch things up based on what you have on hand! Your creativity is key to whipping up a batch that your family will adore.

    How to Make Creamy Savory Mashed Sweet Potatoes

    Creating the perfect creamy savory mashed sweet potatoes is a wonderful journey that transforms simple ingredients into a memorable side dish. Let’s walk through each step together, making it all feel familiar and manageable—because cooking should be fun!

    Step 1: Prepare the Sweet Potatoes

    Start by peeling and cutting your sweet potatoes into 1-inch cubes. This helps them cook more evenly. When I chop them, I remember my kids, excitedly waiting to taste the dish. Once chopped, set them aside in a bowl—let’s keep that sweet potato excitement alive!

    Step 2: Boil Until Tender

    In a large pot, fill it with water and bring to a rolling boil. Add the sweet potatoes and 1 teaspoon of salt. Cooking them should take around 15 minutes. You’ll know they’re ready when you can easily pierce them with a fork. Just keep an eye on them! Nobody likes overcooked potatoes that turn mushy.

    Step 3: Mash and Season

    Once you’ve drained the sweet potatoes, return them to the pot. Mix in the remaining teaspoon of salt, minced garlic, a few grinds of black pepper, and those delightful cubes of butter. Grab your potato masher or an electric hand mixer. I usually prefer a masher for that rustic texture, but do what feels right for you. Mash until they reach the texture you adore!

    Step 4: Add Creaminess

    Now’s the fun part! Stir in the sour cream. This is what turns your mashed sweet potatoes from good to great. The addition gives them that deliciously creamy richness we all crave. Don’t be afraid to taste as you go—adjust seasonings if necessary!

    Step 5: Garnish and Serve

    Transfer your beautiful mash to a serving bowl. This is where presentation comes into play! Sprinkle some fresh parsley on top for a pop of color. If you’re feeling indulgent, add a pat of butter right in the center. Serve warm, and watch as your family digs in, relishing each creamy bite!

    Tips for Success

    • Ensure sweet potatoes are cut into even cubes for consistent cooking.
    • Don’t skip the salt—it makes all the difference in flavor!
    • Taste as you mix; it’s your creation, so adjust seasonings as per your preference.
    • For extra creaminess, warm up the butter and sour cream before adding them in.
    • Make ahead! These mashed sweet potatoes reheat beautifully in the microwave.

    Equipment Needed

    • Large Pot: For boiling sweet potatoes; a stockpot works well if you’re doubling the recipe.
    • Colander: Essential for draining the potatoes after boiling; a slotted spoon can also do the trick if you’re in a pinch.
    • Potato Masher or Electric Hand Mixer: Choose based on your preferred texture; both get the job done.
    • Measuring Cups: Useful for ingredients but feel free to eyeball it! Cooking is often an art.

    Variations

    • Spicy Kick: Add a pinch of cayenne pepper or a dash of hot sauce to give your mashed sweet potatoes a flavorful heat that complements their sweetness.
    • Herb Infusion: Mix in chopped fresh herbs like rosemary or thyme for an aromatic twist that’s both uplifting and delicious.
    • Cheesy Goodness: Stir in some grated Parmesan or cheddar cheese for an extra layer of richness and flavor that cheese lovers will adore!
    • Maple Touch: A drizzle of maple syrup or honey can bring out the natural sweetness, making it a delightful option for holiday gatherings.
    • Nutty Flavor: Incorporate toasted pecans or walnuts for a delightful crunch and nutty flavor that contrasts beautifully with the creamy mash.

    Serving Suggestions

    • Pair these creamy savory mashed sweet potatoes with roasted chicken or turkey for a comforting meal.
    • Serve alongside steamed green beans or a fresh salad for a colorful plate.
    • Complement with a glass of crisp white wine like Sauvignon Blanc for an elevated dining experience.
    • For a festive touch, sprinkle with pomegranate seeds or serve in individual ramekins.

    FAQs about Creamy Savory Mashed Sweet Potatoes

    Curious about making creamy savory mashed sweet potatoes? You’re not alone! Here are some common questions and answers to guide you through this delicious recipe.

    Can I make these creamy savory mashed sweet potatoes ahead of time?
    Absolutely! You can prepare them ahead and reheat before serving. Just keep them in an airtight container in the fridge.

    Can I freeze leftover mashed sweet potatoes?
    Yes! To freeze, let them cool completely, then store in freezer-safe bags. They’ll keep well for up to three months.

    How do I reheat mashed sweet potatoes for the best texture?
    Reheat them in a microwave or on the stovetop, adding a splash of milk or cream. This helps restore their creamy consistency!

    What’s the best way to make these mashed sweet potatoes vegan?
    You can easily substitute the butter with plant-based butter and the sour cream with a vegan alternative, like coconut yogurt.

    What dishes pair well with creamy savory mashed sweet potatoes?
    They’re fantastic alongside roasted meats, like turkey or chicken, and also pair beautifully with vegetarian options, like hearty veggie burgers.

    Final Thoughts

    Making creamy savory mashed sweet potatoes goes beyond just preparing a side dish. It’s an opportunity to bring my family together around the dinner table. The delightful aroma wafting through the kitchen fills me with warmth and nostalgia. Each velvety bite evokes smiles and hearty praises, which adds to the joy of cooking. Plus, it’s a dish that invites creativity—allowing room for personal touches! So, don your apron and embrace this culinary adventure. I promise, these mashed sweet potatoes will quickly become a beloved staple in your home, just as they are in mine.


    Print

    clock clock iconcutlery cutlery iconflag flag iconfolder folder iconinstagram instagram iconpinterest pinterest iconfacebook facebook iconprint print iconsquares squares iconheart heart iconheart solid heart solid icon

    Description

    There’s something magical about the blend of creamy, savory mashed sweet potatoes that can elevate any meal. For busy moms like me, this dish is a quick solution for those hectic weeknights while still being a showstopper for Sunday dinners. As I peel and chop those vibrant sweet potatoes, I can’t help but feel a connection to family traditions and warm gatherings. This recipe isn’t just about filling bellies; it’s about creating moments that linger long after the plates are cleared. Let’s dive into these creamy savory mashed sweet potatoes that everyone will love!


    • 4 pounds sweet potatoes, peeled and cut into 1-inch cubes
    • 2 teaspoons salt, divided
    • 1 garlic clove, minced
    • 3 tablespoons butter, cubed
    • Freshly ground black pepper
    • ¼ cup sour cream
    • Fresh parsley for garnish, chopped

    1. In a large pot, bring water to a boil then add sweet potatoes and 1 teaspoon of salt.
    2. Cook until potatoes are tender.
    3. Drain then return the potatoes to the pot. Add in 1 teaspoon of salt, garlic, butter and black pepper.
    4. Mash with a potato masher to your desired consistency. You can also use an electric hand mixer and blend on low speed. Blend until smoother and creamy.
    5. Add sour cream and give a good stir. Transfer to a serving bowl and garnish with fresh parsley and more butter.

    Notes

    • Ensure sweet potatoes are evenly cut for consistent cooking.
    • For a vegan option, substitute butter with plant-based butter and sour cream with a vegan alternative.
    • This dish can be made ahead of time and reheated before serving.
    • Prep Time: 15 minutes
    • Cook Time: 20 minutes
    • Category: Side Dish
    • Method: Boiling and Mashing
    • Cuisine: American

    Nutrition

    • Serving Size: 1 cup
    • Calories: 250
    • Sugar: 8g
    • Sodium: 400mg
    • Fat: 10g
    • Saturated Fat: 5g
    • Unsaturated Fat: 2.5g
    • Trans Fat: 0g
    • Carbohydrates: 38g
    • Fiber: 4g
    • Protein: 3g
    • Cholesterol: 20mg

    Sharing is caring!

  • Loaded Baked Potato with Pulled Pork

    Loaded Baked Potato with Pulled Pork


    Introduction to Loaded Baked Potato with Pulled Pork

    Life can often feel like a whirlwind, right? That’s why I cherish recipes like this Loaded Baked Potato with Pulled Pork. It’s not just a meal; it’s the comfort of home wrapped in a delicious package. Whether you’re juggling work, kids’ activities, or just life in general, this dish is the perfect quick solution for a busy day. Imagine tender potatoes smothered in succulent pulled pork, rich cheddar, and delightful toppings. It’s a surefire way to impress your loved ones, filling bellies and warm hearts. Ready to dive into this culinary adventure?

    Why You’ll Love This Loaded Baked Potato with Pulled Pork

    What’s not to love about this Loaded Baked Potato with Pulled Pork? It’s a delightful blend of flavors that comes together without fuss. In just over an hour, you can serve a dish that feels gourmet but requires minimal effort. The smoky pull of BBQ and creamy cheese make every bite memorable. It’s the kind of comfort food that makes life a little sweeter, especially on hectic days when you crave something hearty and satisfying.

    Ingredients for Loaded Baked Potato with Pulled Pork

    Before we jump into cooking, let’s gather all our ingredients for this Loaded Baked Potato with Pulled Pork. Here’s what you’ll need:

    • Russet Potatoes: The star of the dish! Their fluffy interior is perfect for baking.
    • Pulled Pork: Succulent and savory, you can use leftover or store-bought pulled pork to save time.
    • Shredded Cheddar Cheese: This melty goodness adds a creamy layer that enhances the flavors.
    • BBQ Sauce: The secret ingredient! Choose your favorite for that tangy, smoky flavor.
    • Sour Cream: A dollop on top brings everything together with its cool, creamy taste.
    • Green Onions: A pop of color and freshness, adding a slight crunch.
    • Bacon Bits: Optional, but who can resist that crispy goodness?
    • Olive Oil: Helps crisp up the potato skin for that added texture.
    • Salt: A must-have for seasoning the potatoes, elevating their natural flavors.

    Feel free to get creative! You can swap regular cheese for a dairy-free alternative or try different sauces to change the flavor profile. All the exact quantities are at the bottom of the article, making it easy to print for your next cooking adventure.

    How to Make Loaded Baked Potato with Pulled Pork

    Step 1: Preheat the Oven

    Before you start, let’s get that oven warmed up! Preheat it to 400°F (200°C). This step is crucial because it ensures your potatoes bake evenly and become perfectly tender inside. An oven that’s at the right temperature will reward you with an irresistible, fluffy baked potato in no time. Trust me; this is the foundation of our delicious Loaded Baked Potato with Pulled Pork.

    Step 2: Prepare the Potatoes

    Now, it’s time to prep those russet potatoes! Scrub them clean under cold running water and gently pat them dry. Grab a fork and pierce each potato several times. These little fork marks help steam escape while baking, making the skin nice and crispy. Finally, rub them with olive oil and sprinkle a little salt for added flavor and texture.

    Step 3: Bake the Potatoes

    Place the prepared potatoes directly on the oven rack or on a baking sheet for about 50–60 minutes. The baking time may vary based on your oven. Check for doneness by piercing them with a knife; they should feel tender inside. They’ll have that perfectly crisp skin, ready to be loaded with goodness!

    Step 4: Prepare the Pulled Pork

    While the potatoes are baking, let’s focus on the pulled pork. If you have pre-cooked pulled pork, simply reheat it in a skillet with a splash of water or extra BBQ sauce to keep it moist. If you’re making it fresh, cook your pork shoulder as desired. I recommend using a slow cooker or Instant Pot for that smoky, tender flavor. Aim for a juicy result; it’s all about layering those flavors!

    Step 5: Assemble the Loaded Baked Potato

    Once the potatoes are baked to perfection, slice them open lengthwise to fluff up the insides with a fork. This is where the magic happens! Generously pile the pulled pork on top, followed by a generous sprinkle of melted cheddar cheese. Top it off with sour cream, green onions, bacon bits, and a drizzle of BBQ sauce. This layers the flavors, making each bite a delightful experience!

    Tips for Success

    • Choose starchy russet potatoes for the fluffiest texture.
    • Don’t skip piercing the potatoes; this prevents burst skins!
    • For extra flavor, let the pulled pork marinate in BBQ sauce before reheating.
    • Using a meat thermometer can ensure your pulled pork is heated perfectly.
    • Experiment with toppings like jalapeños or even guacamole for a twist!

    Equipment Needed

    • Oven: Essential for baking those perfect potatoes. A toaster oven works too!
    • Baking Sheet: Optional, but it catches any drips. You can use parchment paper as an alternative.
    • Skillet: Great for reheating pulled pork, but a microwave works just as well.
    • Fork: Perfect for fluffing the potato interior and piercing before baking.

    Variations

    • Spicy Loaded Baked Potato: Add jalapeños or hot sauce for a fiery kick that complements the BBQ beautifully.
    • Tex-Mex Twist: Swap out BBQ sauce for salsa or queso and top with cilantro for a zesty variation.
    • Vegetarian Option: Substitute pulled pork with seasoned black beans or lentils for a hearty, plant-based delight.
    • Cheesy Bacon Explosion: Use a mix of cheeses like Monterey Jack or pepper jack, and add extra crispy bacon bits on top.
    • Sweet & Savory: Drizzle a bit of maple syrup on top for a unique flavor contrast with the savory pork.

    Serving Suggestions

    • Coleslaw: A crunchy side that adds freshness and balances the richness of the loaded potato.
    • Green Salad: Lighten the meal with a simple green salad topped with vinaigrette.
    • Drinks: Pair with iced tea or a light beer to complement the BBQ flavors.
    • Presentation: Serve on a rustic wooden board for a fun, family-style meal.

    FAQs about Loaded Baked Potato with Pulled Pork

    Can I use any type of potato?

    While russet potatoes are ideal for their fluffy texture, you can experiment with others like Yukon gold or even sweet potatoes if you prefer. Each will offer a unique flavor profile and mouthfeel for your loaded baked potato with pulled pork.

    How do I store leftover loaded baked potatoes?

    If you happen to have any leftovers, let them cool fully, then wrap them tightly in foil or place them in an airtight container. Store in the fridge for up to three days. You can reheat them in the oven or microwave for a quick meal later!

    What toppings work well with pulled pork?

    Besides the classic choices like sour cream and cheddar cheese, feel free to get creative! Guacamole, pickled jalapeños, or even a drizzle of ranch dressing can elevate your loaded baked potato. The possibilities are endless!

    Can I make the pulled pork ahead of time?

    Absolutely! Pulled pork is excellent as a make-ahead dish. Cook it a day or two in advance and refrigerate. Just reheat before piling it onto your baked potatoes, making meal prep a breeze!

    Is this recipe gluten-free?

    Yes! This Loaded Baked Potato with Pulled Pork is naturally gluten-free. Just be sure to check your BBQ sauce for any hidden gluten ingredients. Enjoy this hearty comfort food fearlessly!

    Final Thoughts

    Creating this Loaded Baked Potato with Pulled Pork is more than just cooking; it’s an experience filled with warmth and joy. As the savory scents waft through my kitchen, a sense of satisfaction sweeps over me. Each bite is a symphony of flavors, wrapping me in a cozy embrace. It’s not just a meal; it’s a way to gather around the table and share stories with loved ones. So, whether it’s a busy weeknight or a weekend gathering, this dish offers a delightful escape into comfort. I hope it brings you the same happiness it brings to me!


    Print

    clock clock iconcutlery cutlery iconflag flag iconfolder folder iconinstagram instagram iconpinterest pinterest iconfacebook facebook iconprint print iconsquares squares iconheart heart iconheart solid heart solid icon

    Description

    A delicious Loaded Baked Potato topped with succulent pulled pork, cheddar cheese, and various toppings that make for a satisfying meal.


    • 4 large Russet potatoes
    • 2 cups pulled pork cooked
    • 1 cup shredded cheddar cheese
    • ½ cup BBQ sauce
    • ½ cup sour cream
    • ¼ cup green onions chopped
    • ¼ cup bacon bits
    • 1 tablespoon olive oil
    • 1 teaspoon salt

    1. Preheat your oven to 400°F (200°C).
    2. Scrub the potatoes clean, pat them dry, and pierce each one several times with a fork.
    3. Rub each potato with olive oil and sprinkle with salt.
    4. Place the potatoes directly on the oven rack or on a baking sheet. Bake for 50-60 minutes, or until tender when pierced with a knife.
    5. If using pre-cooked pulled pork, reheat it in a skillet with a splash of water or additional BBQ sauce to keep it moist.
    6. For fresh pulled pork, cook pork shoulder with seasonings (salt, pepper, garlic powder, paprika) in a slow cooker for 8 hours on low or in an Instant Pot on high pressure for 60 minutes.
    7. Once the potatoes are baked, slice them open lengthwise and fluff the interior with a fork.
    8. Add a generous portion of pulled pork on top of each potato.
    9. Sprinkle shredded cheddar cheese over the pulled pork while it’s still hot to let it melt.
    10. Top with sour cream, green onions, bacon bits, and a drizzle of BBQ sauce. Add optional toppings as desired.
    11. Serve immediately with your favorite sides, such as coleslaw or a green salad.

    Notes

    • Feel free to customize toppings based on personal preference.
    • For a spicier kick, consider adding jalapeños or hot sauce.
    • Prep Time: 15 minutes
    • Cook Time: 1 hour
    • Category: Main Dish
    • Method: Baking
    • Cuisine: American

    Nutrition

    • Serving Size: 1 potato
    • Calories: 650
    • Sugar: 4g
    • Sodium: 900mg
    • Fat: 30g
    • Saturated Fat: 15g
    • Unsaturated Fat: 10g
    • Trans Fat: 0g
    • Carbohydrates: 70g
    • Fiber: 5g
    • Protein: 30g
    • Cholesterol: 80mg

    Sharing is caring!

  • Bold Burger Bowls

    Bold Burger Bowls


    Introduction to Bold Burger Bowls

    Let’s be honest—some days, dinner can feel like a puzzle. That’s where my Bold Burger Bowls come in to save the day! These mouthwatering bowls are not only a quick solution for those busy evenings but also a delightful twist on traditional burgers. Imagine all your favorite burger flavors, but in a bowl topped with crispy homemade chips. It’s a dish that’s sure to impress your loved ones and keep everyone satisfied. So grab your apron and let’s bring a burst of flavor to the dinner table!

    Why You’ll Love This Bold Burger Bowls

    These Bold Burger Bowls are a game-changer for anyone wanting satisfying comfort food without the fuss. They come together quickly, which is a lifesaver for busy nights. The vibrant flavors appeal to everyone, including picky eaters. Plus, these bowls invite creativity; you can customize them with toppings your family loves. Trust me, you’ll find this dish becoming a regular on your meal rotation!

    Ingredients for Bold Burger Bowls

    Gathering all the essentials is part of the culinary thrill! Here’s what you’ll need for your Bold Burger Bowls.

    • Salt: Just a pinch brings out all the flavors.
    • Onion powder: This adds a sweet, earthy richness.
    • Black pepper: A dash for that spicy kick!
    • Dried oregano or mixed herbs: They create a lovely herbaceous aroma.
    • Smoked paprika: This brings warmth and depth to the dish.
    • Garlic powder: Because garlic makes everything better.
    • Cheese: Whether regular or dairy-free, this melty goodness is a must!
    • Pickle slices: They add that tangy crunch we all adore.
    • Lean beef mince: The star protein for that juicy flavor.
    • Lettuce: Shredded for freshness and color.
    • Potatoes: These will be transformed into crispy homemade chips.
    • Olive oil: Essential for roasting the chips to perfection.
    • Ketchup: Adds a hint of sweetness to balance flavors.
    • Dijon or yellow mustard: For a zesty twist!
    • Pickle juice: It brings a burst of flavor to the sauce.
    • Mayonnaise: This creamy base ties all the flavors together.

    Feel free to get creative! You can customize your toppings based on preferences. Looking to kick things up a notch? Add a sprinkle of cayenne pepper to the chips for a spicy surprise!

    For those following gluten-free diets, simply swap out the chips for gluten-free breadcrumbs. You’ll find the exact quantities of everything you need at the bottom of this article, available for printing!

    How to Make Bold Burger Bowls

    Creating these delicious Bold Burger Bowls is easier than you think! Follow these simple steps, and let’s get cooking!

    Step 1: Prepare the Spice Mix

    Start by gathering all your spices. In a small bowl, mix together salt, onion powder, black pepper, dried oregano, smoked paprika, and garlic powder. This fragrant blend is what makes the beef utterly irresistible. Set it aside so that the spices can mingle and get to know each other.

    Step 2: Make the Homemade Chips

    Now, let’s focus on those crispy homemade chips! Wash your potatoes thoroughly. Slice them into thin rounds or sticks—whatever you prefer. After slicing, dry them with paper towels. This step is crucial! Moisture can turn your chips soggy instead of crispy. Transfer your sliced potatoes into a large bowl, drizzle with olive oil, and sprinkle half of your prepared spice mix over them. Toss everything together until the potatoes are well coated.

    Step 3: Bake or Fry the Chips

    It’s time to cook those chips to perfection! If using an oven, spread them out evenly on a baking tray and bake at 200°C (390°F) for 30–40 minutes. Keep an eye on them to ensure they don’t burn. If you’re using an air fryer, cook for about 20 minutes, shaking the basket halfway through. You’ll know they’re done when they’re golden brown and crispy—just like you want them!

    Step 4: Cook the Beef

    While the chips are baking, heat the remaining olive oil in a frying pan over high heat. Toss in the lean beef mince. Use a spatula to break it apart as it cooks. Sprinkle the rest of your spice mix over the meat. Keep cooking until the beef is browned and all the juices have evaporated. This will lock in that intense flavor!

    Step 5: Whip Up the Burger Sauce

    Let’s create a burger sauce that will elevate your bowls to new heights! In a small dish, mix together mayonnaise, ketchup, Dijon mustard, and a splash of pickle juice. Stir it well and give it a taste. Adjust the flavors if needed—maybe add a touch more mayonnaise for creaminess or ketchup for sweetness. This sauce is what ties all the bold flavors together!

    Step 6: Assemble Your Bold Burger Bowls

    Now for the fun part—assembly! Start with a layer of crispy chips in each bowl. Next, add a generous handful of shredded lettuce. Pile on the cooked beef, and don’t be shy with the cheese and pickle slices. Finally, drizzle your delicious burger sauce over the top. Voilà! Your Bold Burger Bowls are ready to impress!

    Tips for Success

    • Cut the potatoes evenly for uniform cooking. It ensures all chips turn out crispy.
    • Preheating your oven or air fryer is essential for achieving that perfect crunch.
    • Taste your sauce before serving; don’t hesitate to tweak it to your liking.
    • If you’re short on time, consider using store-bought chips as a quick alternative.
    • Store leftover beef separately to maintain chip crispiness for next time!

    Equipment Needed for Bold Burger Bowls

    • Baking tray: A standard one works great—try a cast-iron skillet for extra crispiness.
    • Frying pan: A non-stick skillet is ideal for browning the beef.
    • Sharp knife: Essential for slicing those potatoes perfectly.
    • Mixing bowls: Any bowls will do, but glass is my favorite for easy cleaning.
    • Spoons: Use them for stirring, mixing, and assembling your delicious bowls!

    Variations on Bold Burger Bowls

    • Veggie Burger Bowls: Swap the beef mince for black beans or lentils for a hearty vegetarian option.
    • Grilled Chicken Bold Bowls: For a lighter twist, use grilled chicken breast seasoned with the same spice mix.
    • Spicy Kick: Add jalapeños or sriracha to the beef for those who love a little heat!
    • Keto-Friendly Bowls: Replace chips with cauliflower rice or even zoodles for a low-carb option.
    • International Flair: Try topping with guacamole and salsa for a Mexican-inspired version.

    Serving Suggestions with Bold Burger Bowls

    • Fresh Salad: Pair with a light, crisp side salad for a refreshing balance.
    • Cold Beverages: Serve with iced tea or lemonade to complement the flavors.
    • Presentation: Use colorful bowls to make your Bold Burger Bowls visually appealing.
    • Extra Toppings: Offer sides of guacamole or hot sauce for personal flair.

    FAQs about Bold Burger Bowls

    Can I make Bold Burger Bowls ahead of time?

    Absolutely! You can prep the chips and beef in advance. Store them separately in the fridge. When you’re ready to serve, just reheat and assemble. Quick and easy!

    What can I use instead of beef mince?

    If beef isn’t your thing, feel free to swap it out for ground turkey, chicken, or even vegetarian options like black beans or lentils. The spice mix will still work wonders with any protein!

    How do I make these bowls gluten-free?

    To keep your Bold Burger Bowls gluten-free, simply replace the homemade chips with gluten-free breadcrumbs. You can still create that delightful crunch!

    What are some good toppings for family favorites?

    Great question! You could add avocado slices, diced tomatoes, or even crispy bacon bits. Let your family pick and choose their favorites for a fun, customized experience.

    Can I use store-bought chips for this recipe?

    Sure! While homemade chips are perfect for freshness, store-bought chips can save time on busy nights. Just remember to sprinkle a bit of the spice mix on top for extra flavor!

    Final Thoughts on Bold Burger Bowls

    There’s something magical about Bold Burger Bowls. They transform a typical meal into a lively, flavorful experience that invites creativity and connection. Picture this: everyone gathered around the table, personalizing their bowls with favorite toppings. It’s not just dinner; it’s a fun culinary adventure that unites family. Plus, the crispy chips are an absolute hit, bringing that satisfying crunch! As a busy home cook, I cherish how easy they are to prepare. So, whether you’re feeding a crowd or just yourself, give these bowls a try, and bask in the joy they bring to the dinner table!


    Print

    clock clock iconcutlery cutlery iconflag flag iconfolder folder iconinstagram instagram iconpinterest pinterest iconfacebook facebook iconprint print iconsquares squares iconheart heart iconheart solid heart solid icon

    Description

    Bold Burger Bowls offer a delicious and fun twist on traditional burgers, combining all your favorite flavors in a bowl with crispy homemade chips.


    • ½ teaspoon salt
    • 1 teaspoon onion powder
    • ¼ teaspoon black pepper
    • 1 teaspoon dried oregano or mixed herbs
    • 1 ½ teaspoons smoked paprika
    • 1 teaspoon garlic powder
    • Cheese, regular or dairy-free
    • Pickle slices
    • 500 grams lean beef mince
    • Lettuce, shredded
    • 23 medium potatoes
    • 2 tablespoons olive oil, divided
    • ½ teaspoon garlic powder
    • 1 tablespoon ketchup
    • 1 teaspoon Dijon or yellow mustard
    • 1 teaspoon pickle juice from the pickle jar
    • 4 tablespoons mayonnaise
    • ½ teaspoon smoked paprika

    1. Stir all the spice mix ingredients together in a little bowl, then leave it to the side.
    2. After washing, slice the potatoes into thin chips and dry them off with paper towels. Put the chips into a big bowl, drizzle 1 tablespoon of olive oil, and toss in half the spice mix. Stir everything so the potatoes are coated nicely.
    3. Spread the chips out on a baking tray and bake them at 200°C (390°F) for 30–40 minutes, or toss them in an air fryer for about 20 minutes. Cook until they turn crisp and golden brown.
    4. While the chips are cooking, grab a frying pan and heat the rest of the olive oil over high heat. Add the beef mince and break it apart as you stir. Sprinkle on the rest of the spice mix, cook until the meat darkens, and let any liquid cook off completely.
    5. Mix all the burger sauce ingredients together in a small dish. Give it a taste and tweak the flavor if needed.
    6. When your chips are done, split them between your bowls. Add shredded lettuce to each bowl, followed by the cooked beef, cheese, and pickle slices. Top everything off with the burger sauce and serve.

    Notes

    • Feel free to customize toppings according to your preferences.
    • Make the chips spicy by adding cayenne pepper to the spice mix.
    • This dish can be made gluten-free by using gluten-free breadcrumbs instead of chips.
    • Prep Time: 15 minutes
    • Cook Time: 40 minutes
    • Category: Main Course
    • Method: Baking and Frying
    • Cuisine: American

    Nutrition

    • Serving Size: 1 bowl
    • Calories: 550
    • Sugar: 3g
    • Sodium: 800mg
    • Fat: 30g
    • Saturated Fat: 7g
    • Unsaturated Fat: 22g
    • Trans Fat: 0g
    • Carbohydrates: 40g
    • Fiber: 5g
    • Protein: 35g
    • Cholesterol: 80mg

    Sharing is caring!

  • Pulled Pork Sliders

    Pulled Pork Sliders


    Introduction to Pulled Pork Sliders

    As a busy mom, I often find myself juggling countless responsibilities, and cooking can sometimes feel like just another item on the to-do list. But let me tell you, Pulled Pork Sliders are a true lifesaver! These delightful bite-sized sandwiches are not only simple to whip up, but they also pack a flavorful punch that your family will absolutely adore. Whether it’s game day, a family gathering, or just a cozy night at home, these sliders transform mealtime into a fun, delicious experience. Trust me, your loved ones will be coming back for seconds!

    Why You’ll Love This Pulled Pork Sliders

    These Pulled Pork Sliders are a game changer for anyone pressed for time. With only a handful of ingredients and minimal prep, you can whip up these tasty gems in no time. The combination of tender, juicy pulled pork and gooey provolone cheese creates a symphony of flavors that’s hard to resist. Plus, they’re perfect for any gathering, leaving you more time to enjoy the moment with loved ones!

    Ingredients for Pulled Pork Sliders

    Gathering the right ingredients is the first step in crafting these irresistible Pulled Pork Sliders. Each component plays a role in building flavor and texture.

    • Slider Hawaiian Buns: These sweet, soft buns are the backbone of the sliders. They’re perfect for soaking up the saucy goodness!
    • Cooked Pulled Pork: Tender and flavorful, this is the star of the show. Use store-bought pork or leftovers from your barbecue; either way, it’s a time-saver!
    • Provolone Cheese: This gooey cheese melts beautifully, adding richness and creaminess to each bite. For a different twist, try mozzarella or cheddar!
    • BBQ Sauce: This adds a delightful tangy sweetness. Choose your favorite store-bought sauce, or whip up a quick homemade version if you’re feeling adventurous.
    • Butter: Melting butter helps to create a luscious glaze that elevates the flavor profile of the sliders.
    • Garlic Powder: A sprinkle of garlic powder infuses all the components with an aromatic warmth that’s hard to resist.
    • Dijon Mustard: Adds a subtle zing that compliments the richness of the pork wonderfully. You can swap it with yellow mustard if that’s what you have on hand.
    • Worcestershire Sauce: This gives depth and umami to the sliders, enhancing the overall taste.
    • Sesame Seeds: Sprinkled on top, they provide a hint of crunch and a nutty flavor, making each slider visually appealing.
    • Grated Parmesan Cheese: A touch of this salty cheese amplifies the savory profile of the sliders.
    • Crushed Red Pepper Flakes (Optional): For those who like a little kick, add these flakes for a spicy surprise!

    For those who want more details, exact ingredient quantities are listed at the bottom of the article, ready for you to print and get cooking!

    How to Make Pulled Pork Sliders

    Prepare the Oven and Ingredients

    Let’s get things moving! Preheat your oven to 350 degrees F while you gather all your ingredients. Having everything ready makes the cooking process smoother and more enjoyable. Trust me, it’s like having your ducks in a row—it just feels right! With your Hawaiian buns, pulled pork, provolone cheese, BBQ sauce, and butter ready to go, you’re all set to create some amazing sliders.

    Assemble the Slider Base

    Slice the Hawaiian buns in half, making sure to keep the tops and bottoms intact for easy assembling. It’s like opening a cozy little sandwich door! Next, place the bottom halves in a 9×13 baking dish, laying them side by side. This is where the magic begins, as you’ll soon pile on that delicious pulled pork. Ensure that each bun is secure and ready to hold all the flavors to come. Get that base ready—it’s about to get tasty!

    Mix Pulled Pork and Sauce

    In a separate mixing bowl, combine your cooked pulled pork with BBQ sauce. Stir it all together until the pork is completely coated in that saucy goodness. The sweet and smoky aroma will make your mouth water! Not only does this ensure every bite is packed with flavor, but it also adds a lovely glaze to the pork, keeping it juicy while baking. This is where the magic of pulled pork sliders happens!

    Layer on Cheese and Buns

    Now, let’s take your flavorful mixture and spread it evenly on top of the bottom halves of the Hawaiian buns. Imagine it as a warm, inviting blanket of deliciousness! Next, place the slices of provolone cheese right on top of the pulled pork. Watch how the cheese embraces the pork like a cozy hug. Finally, gently place the tops of the buns back on, sealing in that amazing combination of flavors.

    Create the Butter Glaze

    To add a little pizazz, melt the butter in a small bowl. Mix in garlic powder, Dijon mustard, and Worcestershire sauce until smooth. Brush half of this flavorful glaze generously on top of the buns. The buttery, savory goodness will make your sliders extra special. Plus, it’ll give them a beautiful golden crust, making your mouth water just at the sight of them!

    Bake the Sliders

    Cover the baking dish tightly with aluminum foil and pop it in the oven. Bake for about 20 minutes, but don’t forget to uncover it for the last minute! This will allow the tops to achieve that stunning golden color that makes sliders irresistible. Take a moment and let the tantalizing aroma fill your kitchen—trust me, your family will come running!

    Tips for Success

    • Prep your ingredients ahead of time to save on stress.
    • For extra flavor, try marinating the pulled pork overnight.
    • Experiment with different BBQ sauces for unique flavors.
    • Use a meat thermometer to ensure pulled pork is heated through to 165°F.
    • Consider adding pickles or coleslaw on the sliders for a refreshing crunch.

    Equipment Needed

    • Baking Dish: A 9×13 dish works wonders, or you can use a large oven-safe skillet if that’s what you have!
    • Mixing Bowls: Grab a couple of them for blending ingredients; any size will do!
    • Aluminum Foil: Essential for covering the dish while baking; it’s a must-have!
    • Butter Knife or Pastry Brush: Perfect for applying your buttery glaze.

    Variations

    • Spicy Pulled Pork: Add extra crushed red pepper flakes or a dash of hot sauce for a fiery kick.
    • Vegetarian Option: Substitute the pulled pork with jackfruit or seasoned mushrooms for a plant-based delight.
    • Gluten-Free: Use gluten-free buns to accommodate dietary needs without sacrificing flavor.
    • BBQ Chicken Sliders: Swap the pulled pork for shredded rotisserie chicken mixed with BBQ sauce for a quick alternative.

    Serving Suggestions

    • Coleslaw: A refreshing side option that adds crunch and balances the richness of the sliders.
    • Potato Chips: Crispy, salty chips are a classic pairing that adds texture and flavor.
    • Pickles: A few dill pickles on the side bring a tangy contrast that elevates each bite.
    • Beer or Iced Tea: Pair your sliders with a cold beer or refreshing iced tea for the perfect match!

    FAQs about Pulled Pork Sliders

    Have questions about making Pulled Pork Sliders? You’re not alone! Here are some common queries I often hear:

    Can I use leftover pulled pork? Absolutely! Leftovers are perfect for this recipe, and they save you time in the kitchen.

    Can I prepare these sliders ahead of time? Yes, you can assemble them in advance and bake just before serving. They’ll be just as delicious!

    What BBQ sauces work best? I love a tangy apple cider vinegar-based sauce, but any favorite sauce will elevate the flavor. Get creative!

    How do I store leftover sliders? Place leftovers in an airtight container in the fridge. They’ll stay good for up to three days.

    Can I freeze Pulled Pork Sliders? Definitely! Just wrap them tightly and freeze for a quick meal later. Just reheat and enjoy!

    Final Thoughts

    Nothing beats the joy of gathering around the table with family and friends, especially when Pulled Pork Sliders are involved. The combination of tender pulled pork and melty cheese wrapped in soft buns creates a warm, comforting experience that’s bound to make everyone smile. It’s a moment to savor, filled with laughter and love, and all the deliciousness that comes with a shared meal. So next time you’re looking to impress or simply indulge, remember this slider recipe. It’s more than just food; it’s a heartfelt connection to the beautiful moments we cherish.


    Print

    clock clock iconcutlery cutlery iconflag flag iconfolder folder iconinstagram instagram iconpinterest pinterest iconfacebook facebook iconprint print iconsquares squares iconheart heart iconheart solid heart solid icon

    Description

    Pulled Pork Sliders are bite-sized sandwiches filled with delicious pulled pork, gooey provolone cheese, and topped with a flavorful glaze. Perfect for gatherings or game day!


    • 12 slider Hawaiian buns
    • 4 cups cooked pulled pork
    • 9 slices provolone cheese
    • 1 cup BBQ sauce
    • ¼ cup butter
    • 1 teaspoon garlic powder
    • 1 teaspoon Dijon mustard
    • 1 teaspoon Worcestershire sauce
    • 1 teaspoon sesame seeds
    • 1 teaspoon grated parmesan cheese
    • ½ teaspoon crushed red pepper flakes (optional)

    1. Preheat oven to 350 degrees F.
    2. Slice Hawaiian buns in half, creating top and bottom layers.
    3. Place the bottom layer of buns in a 9×13 baking dish.
    4. In a mixing bowl, mix together 4 cups cooked pulled pork and 1 cup BBQ sauce until combined.
    5. Spread the pulled pork on top of the bottom layer of Hawaiian buns evenly.
    6. Top the pulled pork with slices of provolone cheese and then place the tops of Hawaiian buns on.
    7. In a small mixing bowl, melt the ¼ cup butter and mix with garlic powder, Dijon mustard, and Worcestershire sauce until combined. Brush half of the glaze on top of Hawaiian buns.
    8. Sprinkle sesame seeds, grated parmesan cheese, and crushed red pepper flakes on top of the buttered buns.
    9. Cover baking dish with aluminum foil and bake at 350 degrees for 20 minutes, uncovering for the last minute to achieve a golden finish on the buns.

    Notes

    • Microwaving the pulled pork can help it warm faster in the oven.
    • Feel free to adjust the heat level by adding more or less red pepper flakes.
    • These sliders can be made ahead of time and baked just before serving.
    • Prep Time: 15 minutes
    • Cook Time: 20 minutes
    • Category: Appetizer
    • Method: Baking
    • Cuisine: American

    Nutrition

    • Serving Size: 1 slider
    • Calories: 250
    • Sugar: 6g
    • Sodium: 750mg
    • Fat: 12g
    • Saturated Fat: 7g
    • Unsaturated Fat: 3g
    • Trans Fat: 0g
    • Carbohydrates: 22g
    • Fiber: 1g
    • Protein: 15g
    • Cholesterol: 40mg

    Sharing is caring!

  • Snickerdoodle Zucchini Bread

    Snickerdoodle Zucchini Bread


    Introduction to Snickerdoodle Zucchini Bread

    Hey there, fellow kitchen enthusiasts! I’m so thrilled to share my favorite Snickerdoodle Zucchini Bread recipe with you today. Imagine the sweet scent of cinnamon swirling through your kitchen on a busy weekday. This delightful bread isn’t just a tasty treat; it’s a sneakily healthy option packed with zucchini! It’s perfect for those hectic mornings when you need a quick breakfast or a cozy treat to impress your loved ones. Plus, making this bread is a simple joy that can brighten your day in the most delicious way.

    Why You’ll Love This Snickerdoodle Zucchini Bread

    This Snickerdoodle Zucchini Bread is a game-changer for busy moms and professionals alike. It’s incredibly easy to whip up, taking just over an hour from start to finish. The moist, tender texture combined with the warm cinnamon flavor creates a comforting experience with every slice. Plus, the added zucchini gives you a sneaky boost of nutrition, making it a sweet solution even for picky eaters in the family!

    Ingredients for Snickerdoodle Zucchini Bread

    Gathering your ingredients is half the fun! This Snickerdoodle Zucchini Bread uses simple staples you likely already have in your pantry. Here’s what you’ll need:

    • Grated zucchini: This is the star of the show! It adds moisture and a subtle nutrition boost.
    • Eggs: They provide structure and richness. You can use flax eggs for a vegan twist!
    • Vegetable oil: A key player for that tender crumb. You can swap it for applesauce if you want a lighter option.
    • Granulated sugar: This sweetens the bread perfectly. Reserve some for that yummy topping!
    • All-purpose flour: The foundation of your bread. Whole wheat flour can be a heartier alternative.
    • Vanilla extract: A splash of love! It enhances the overall flavor profile.
    • Baking powder and baking soda: The double act that helps your bread rise and become fluffy.
    • Allspice: This adds warmth and depth. If you don’t have allspice, a mix of cinnamon and nutmeg works too!
    • Cinnamon: The essence of snickerdoodles! Save some for that irresistible topping.
    • Salt: Just a pinch to balance the sweetness and enhance the flavors.

    All these ingredients work in harmony to create a delightful blend of flavors. For specific measurements, check the bottom of the article where you can find them listed for easy printing!

    How to Make Snickerdoodle Zucchini Bread

    Step 1: Preheat and Prep

    First things first, preheat your oven to 350°F (175°C). This ensures that the Snickerdoodle Zucchini Bread bakes evenly. While the oven warms up, grease and flour two 9×5-inch loaf pans. This prevents any sticky situations later! A little extra flour will make it easier to remove your golden loaves once they’re baked to perfection. It’s a simple step that saves you from the heartbreak of bread failure!

    Step 2: Mix Wet Ingredients

    In a large mixing bowl, beat the eggs, vegetable oil, and 2 cups of granulated sugar. Add a splash of vanilla extract for a fragrant twist! Make sure everything is well combined, as this forms the base of your Snickerdoodle Zucchini Bread. I love using a whisk for this part; it really gets the eggs fluffy. You want a smooth, velvety mixture to start with, so take your time here!

    Step 3: Add Zucchini

    Next, it’s time to fold in that grated zucchini! Gently stir it into your wet mixture. This step is crucial because the zucchini adds moisture and helps keep the bread fluffy. Plus, it sneaks in some extra nutrition, especially for those picky eaters. Just be sure you’ve squeezed out the excess moisture before grating; it makes a world of difference!

    Step 4: Prepare Dry Ingredients

    In another bowl, whisk together the flour, baking powder, baking soda, salt, allspice, and 2 teaspoons of cinnamon. Each ingredient has a role to play: the flour gives structure, while the baking soda and powder create that light, airy texture. The cinnamon and allspice add warm flavors that are absolutely divine! Make sure they’re well mixed, as uneven distribution can lead to some unexpected flavor surprises.

    Step 5: Combine Mixtures

    Now comes the fun part! Gradually add the dry ingredients to your wet mixture, stirring just until everything is moistened. It’s vital to avoid over-mixing at this stage; we want a tender crumb, not a tough loaf. You’ll know you’re done when no dry spots remain, but a few lumps are okay. Your dough should feel inviting and ready for the oven!

    Step 6: Prepare Loaf Pans

    Divide your batter evenly between the two prepared loaf pans. Next, mix the remaining 1/4 cup of granulated sugar with 1 teaspoon of cinnamon. Sprinkle this sweet blend evenly on top of both loaves for that signature snickerdoodle kick! This topping adds a fabulous crunch and sweet burst, taking your zucchini bread from ordinary to extraordinary.

    Step 7: Baking Time

    Pop those pans into your preheated oven and bake for 50–60 minutes. Keep an eye on your bread during the last few minutes of baking! To check for doneness, insert a toothpick in the center; it should come out clean or with a few moist crumbs. If the tops start to brown too quickly, tent them with aluminum foil for the last few minutes. Your kitchen will smell amazing!

    Step 8: Cooling

    Once baked, let the loaves cool in their pans for about 10 minutes. This helps the bread set and makes it easier to remove. After that, carefully transfer the loaves to a wire rack to cool completely. As tempting as it may be to slice right away, patience is key! For storage, place the cooled loaves in an airtight container at room temperature for up to three days. Enjoy every last crumb!

    Tips for Success

    • Always squeeze out excess moisture from zucchini to prevent sogginess.
    • Use room temperature eggs for smoother mixing and better texture.
    • Don’t over-mix the batter; a few lumps are fine!
    • Test for doneness using a toothpick; trust your nose for that delicious smell.
    • Experiment with mix-ins like nuts or chocolate chips for added flavor.

    Equipment Needed

    • 9×5-inch loaf pans (any baking dish of similar size will do).
    • Mixing bowls (glass or stainless steel work best).
    • Whisk (a fork can be a handy substitute).
    • Measuring cups and spoons (use a kitchen scale for accuracy if available).
    • Rubber spatula (a wooden spoon can be used in a pinch).

    Variations of Snickerdoodle Zucchini Bread

    • Nuts: Add chopped walnuts or pecans for a delightful crunch and extra flavor.
    • Chocolate Chips: Mix in some semi-sweet or dark chocolate chips for a decadent twist.
    • Maple Syrup: Substitute half the sugar with maple syrup for a natural sweetness and a hint of maple flavor.
    • Whole Wheat Flour: Use whole wheat flour instead of all-purpose flour for a heartier texture and added fiber.
    • Dairy-Free Option: Swap the vegetable oil for coconut oil and use flax eggs for a completely dairy-free version.
    • Spice Variations: Add a pinch of nutmeg or ginger for an added depth of flavor in your bread.
    • Mini Loaves: Bake in mini loaf pans for adorable single-serving sizes perfect for gifting!

    Serving Suggestions for Snickerdoodle Zucchini Bread

    • Pair your bread with a dollop of cream cheese frosting for a luxurious twist.
    • Enjoy it alongside a warm cup of chai tea or spiced cider for cozy afternoons.
    • Top with a scoop of vanilla ice cream for a delightful dessert option.
    • Serve slices with fresh fruit like berries or bananas for a refreshing contrast.
    • For a brunch spread, display the bread on a platter with muffins and coffee.

    FAQs about Snickerdoodle Zucchini Bread

    Can I freeze Snickerdoodle Zucchini Bread?

    Absolutely! This delightful bread freezes wonderfully. Just wrap the cooled loaves tightly in plastic wrap and then in aluminum foil. They can be frozen for up to three months!

    How do I know when my Snickerdoodle Zucchini Bread is done?

    The best way to check is by inserting a toothpick into the center. If it comes out clean or with a few moist crumbs, your bread is ready to come out of the oven. Trust me, your nose will know when it’s baking perfectly!

    Can I use yellow squash instead of zucchini?

    Certainly! Yellow squash works just as well as zucchini in this recipe. You’ll still achieve that moist, flavorful bread, and it’s a fantastic way to mix things up!

    What can I substitute for granulated sugar?

    If you’re looking to cut down on sugar, consider using coconut sugar or a sugar substitute like Stevia. Just keep in mind that this might slightly alter the flavor and texture.

    Is Snickerdoodle Zucchini Bread vegan?

    You can make this bread vegan by using flax eggs in place of regular eggs and opting for plant-based oil. It’s a delicious adaptation that everyone will enjoy!

    Final Thoughts

    Creating this Snickerdoodle Zucchini Bread is more than just baking; it’s crafting joyful moments in your kitchen. With its rich aroma and delightful texture, it brings a comforting hug to every meal. Whether I’m enjoying a slice with my morning coffee or sharing it with friends, this bread always sparks joy. It’s versatile enough to suit any occasion, making it a must-have recipe in every home. I hope you find as much happiness in baking and sharing this sweet surprise as I do. Let’s fill our kitchens with love, one loaf at a time!


    Print

    clock clock iconcutlery cutlery iconflag flag iconfolder folder iconinstagram instagram iconpinterest pinterest iconfacebook facebook iconprint print iconsquares squares iconheart heart iconheart solid heart solid icon

    Description

    Snickerdoodle Zucchini Bread is a deliciously moist and sweet bread infused with warm cinnamon flavors, making it a delightful surprise for any occasion.


    • 2 cups grated zucchini (excess moisture lightly squeezed out)
    • 3 eggs
    • 1 cup vegetable oil
    • 2 1/4 cups granulated sugar (reserve 1/4 cup for topping)
    • 3 cups all-purpose flour
    • 1 tsp vanilla extract
    • 1/2 tsp baking powder
    • 1 tsp baking soda
    • 1/2 tsp allspice
    • 3 tsp cinnamon (1 tsp reserved for topping)
    • 1 tsp salt

    1. Preheat oven to 350°F (175°C). Grease and flour two 9×5-inch loaf pans.
    2. In a large bowl, beat eggs, oil, 2 cups of the sugar, and vanilla until well combined.
    3. Stir in the grated zucchini.
    4. In a separate bowl, whisk together flour, baking soda, baking powder, salt, allspice, and 2 tsp of the cinnamon.
    5. Gradually add the dry ingredients to the wet mixture, stirring just until moistened.
    6. Divide the batter evenly between the prepared loaf pans.
    7. Mix the remaining 1/4 cup sugar with 1 tsp cinnamon and sprinkle evenly over both loaves.
    8. Bake for 50–60 minutes, or until a toothpick inserted in the center comes out clean.
    9. Cool in pans for 10 minutes, then remove and transfer to a wire rack to cool completely.

    Notes

    • Ensure to squeeze out excess moisture from the zucchini to prevent the bread from becoming too soggy.
    • This bread can be stored in an airtight container at room temperature for up to 3 days.
    • For a twist, you can add nuts or chocolate chips to the batter.
    • Prep Time: 20 minutes
    • Cook Time: 60 minutes
    • Category: Baking
    • Method: Baking
    • Cuisine: American

    Nutrition

    • Serving Size: 1 slice
    • Calories: 290
    • Sugar: 18g
    • Sodium: 240mg
    • Fat: 15g
    • Saturated Fat: 1.5g
    • Unsaturated Fat: 13.5g
    • Trans Fat: 0g
    • Carbohydrates: 36g
    • Fiber: 1g
    • Protein: 4g
    • Cholesterol: 50mg

    Sharing is caring!

  • Creamy Garlic Parmesan Chicken with Cheesy Twisted Pasta delights!

    Creamy Garlic Parmesan Chicken with Cheesy Twisted Pasta delights!


    Introduction to Creamy Garlic Parmesan Chicken with Cheesy Twisted Pasta

    As a busy mom, juggling family, work, and the never-ending to-do lists, finding time to whip up a delicious meal can feel daunting. That’s why I can’t wait to share my Creamy Garlic Parmesan Chicken with Cheesy Twisted Pasta with you! It’s a comforting dish that pleases even the pickiest of eaters, and it comes together in just 30 minutes. Packed with the rich flavors of garlic and Parmesan, it’s a quick solution for those hectic evenings when you still want to impress your loved ones with a home-cooked meal.

    Why You’ll Love This Creamy Garlic Parmesan Chicken with Cheesy Twisted Pasta

    This dish is a dream come true for busy nights! It combines ease, speed, and incredible taste in one creamy bowl. With just a handful of ingredients, you can craft a meal that’s sure to impress everyone around the table. The rich flavors of garlic and Parmesan will have your family asking for seconds, making it a delightful weeknight winner. Trust me; it’ll become a staple in your home!

    Ingredients for Creamy Garlic Parmesan Chicken with Cheesy Twisted Pasta

    Let’s talk ingredients! Gathering everything you need for this Creamy Garlic Parmesan Chicken with Cheesy Twisted Pasta is half the fun. Here’s what you’ll need:

    • Boneless skinless chicken breasts: Tender and juicy, they provide a protein-packed base for your meal.
    • Rotini pasta: Its twisty shape is perfect for holding onto that creamy sauce, ensuring every bite is a delight.
    • Garlic: Freshly minced garlic adds a bold flavor that elevates the dish. You can adjust this based on your love for garlic.
    • Parmesan cheese: Grated for a lovely salty kick and creaminess, it’s the ingredient that ties everything together.
    • Heavy cream: This adds the rich smoothness that makes the sauce luxurious. For a lighter option, you can substitute half-and-half.
    • Butter: A little butter helps sauté the garlic and create a sauce that’s full of flavor.
    • Olive oil: Essential for searing the chicken and adding depth to the dish. Use extra virgin for the best taste.
    • Italian seasoning: A blend of herbs like basil, oregano, and thyme that adds an Italian flair.
    • Salt and pepper: Simple seasonings that enhance the flavors of the dish—don’t skip them!
    • Fresh chopped parsley: Optional, but it adds a pop of color and freshness when garnishing your plate.

    All ingredient quantities and variations are available for printing at the bottom of the article. Happy cooking!

    How to Make Creamy Garlic Parmesan Chicken with Cheesy Twisted Pasta

    Prepare the Chicken

    Start by trimming the boneless skinless chicken breasts to remove any excess fat.

    Then, pat them dry with a paper towel—this helps the seasoning stick better.

    Generously sprinkle salt, pepper, and Italian seasoning on both sides.

    Trust me, giving that chicken a good rub will make all the difference in flavor!

    Let it rest while you prepare everything else.

    Every step counts when it comes to creating a darn good dinner!

    Sear the Chicken

    In a large skillet, heat a bit of olive oil over medium-high heat.

    Once the oil shimmers, carefully place the seasoned chicken breasts in the pan.

    Sear each side for about 5-6 minutes until they turn a beautiful golden brown.

    To check doneness, make sure the internal temperature hits 165°F.

    After cooking, take the chicken off the heat and let it rest for a few minutes.

    This will keep it juicy and flavorful!

    Cook the Pasta

    While the chicken is resting, bring a pot of salted water to a boil.

    Add the rotini pasta and cook according to package instructions until it’s al dente.

    Once ready, drain it well and toss it with a small pat of butter.

    This not only keeps the pasta from sticking but adds a hint of flavor.

    Feel free to give it a little shake or stir to coat evenly!

    It’s those little touches that make a meal truly shine.

    Create the Sauce

    Using the same skillet you cooked the chicken in, add two tablespoons of butter and minced garlic.

    Sauté the garlic for about 30 seconds until fragrant—don’t let it burn!

    Then, pour in the heavy cream and let it simmer for 3-4 minutes.

    Stir in the grated Parmesan cheese until it melts and forms a smooth sauce.

    If the sauce feels too thick, a splash of pasta water can help loosen it up.

    You want a velvety texture that hugs every twist of pasta!

    Combine and Plate

    Now, slice the rested chicken into strips.

    In the skillet, toss the drained pasta with the creamy sauce until every piece is coated.

    To serve, plate the saucy pasta and top it with those beautiful chicken slices.

    Drizzle any leftover sauce on top for extra richness, and don’t forget the parsley garnish!

    This final touch not only looks pretty but adds a fresh flavor that brightens the dish.

    Trust me; your family won’t want to miss out on this gem!

    Tips for Success

    • Always taste your sauce while cooking; adjust seasoning as needed.
    • For extra creaminess, add more Parmesan cheese, or a splash of pasta water.
    • Let the chicken rest before slicing to retain its juices.
    • Chop fresh herbs ahead of time for a quick garnish.
    • Keep an eye on the garlic to prevent burning—it’s quick to go from golden to burnt!

    Equipment Needed

    • Skillet: A large non-stick skillet works best, but any skillet will do.
    • Pasta pot: A standard pot for boiling water; a large saucepan is a great alternative.
    • Colander: For draining pasta; you can use a slotted spoon in a pinch.
    • Knife and cutting board: Essential for slicing chicken; keep them handy!

    Variations

    • Vegetarian Option: Substitute chicken with sautéed mushrooms or zucchini for a hearty plant-based dish.
    • Pasta Alternatives: Try using whole wheat or gluten-free pasta if you’re looking for healthier options.
    • Spice it Up: Add crushed red pepper flakes for a spicy kick to your creamy sauce.
    • Cheese Varieties: Experiment with different cheeses like feta or mozzarella for unique flavors.
    • Add Veggies: Toss in some spinach or cherry tomatoes during the pasta cooking stage for extra nutrition.

    Serving Suggestions

    • Side Salad: Pair the dish with a fresh garden salad drizzled with balsamic vinaigrette for a refreshing crunch.
    • Garlic Bread: Serve with warm garlic bread to soak up the creamy sauce—it’s a must!
    • Wine Pairing: A chilled Chardonnay complements the rich flavors beautifully.
    • Plate Presentation: Sprinkle extra parsley on top for color, and consider a slice of lemon on the side for a fresh twist.

    FAQs about Creamy Garlic Parmesan Chicken with Cheesy Twisted Pasta

    Curious about my Creamy Garlic Parmesan Chicken with Cheesy Twisted Pasta? Let’s answer some common questions you might have!

    Can I use different types of pasta for this recipe? Absolutely! While rotini is perfect for holding the creamy sauce, you can opt for penne, fusilli, or even spaghetti if that’s what you have on hand.

    How can I make this dish more nutritious? Easy! You can add in vegetables like spinach, broccoli, or bell peppers towards the end of cooking. They’ll boost the nutrients without sacrificing flavor.

    Can I make this dish ahead of time? Sure! You can prepare the chicken and sauce in advance. Just reheat before serving and cook the pasta fresh for the best texture.

    Is this recipe suitable for meal prepping? Yes! It stores well in the fridge for about three days. Just make sure to keep the chicken and pasta separate to avoid sogginess.

    What can I do with leftovers? Leftovers can be transformed into a delicious pasta bake! Just mix everything in a baking dish, top with more cheese, and bake until bubbly.

    Final Thoughts

    Making Creamy Garlic Parmesan Chicken with Cheesy Twisted Pasta isn’t just about dinner; it’s about creating moments.

    As you gather around the table, something magical happens—the laughter, the shared stories, and those familiar faces lighting up with joy from a comforting meal.

    This dish, with its velvety sauce and tender chicken, makes every effort in the kitchen worth it.

    Whether it’s a weeknight or a special occasion, this recipe brings satisfaction and smiles.

    So tie on that apron, turn up the heat, and enjoy a culinary adventure that’ll have your family asking for more!


    Print

    clock clock iconcutlery cutlery iconflag flag iconfolder folder iconinstagram instagram iconpinterest pinterest iconfacebook facebook iconprint print iconsquares squares iconheart heart iconheart solid heart solid icon

    Description

    A delicious and creamy dish featuring chicken and cheesy twisted pasta, topped with garlic and Parmesan.


    • 2 boneless skinless chicken breasts
    • 8 oz rotini pasta
    • 3 garlic cloves, minced
    • 1 cup grated Parmesan cheese
    • 1 cup heavy cream
    • 2 tablespoons butter
    • 1 tablespoon olive oil
    • 1 teaspoon Italian seasoning
    • Salt and pepper to taste
    • 1 tablespoon fresh chopped parsley (optional)

    1. Trim and pat dry the chicken breasts. Season both sides with salt, pepper, and Italian seasoning.
    2. Heat olive oil in a skillet over medium-high heat. Sear the chicken for 5-6 minutes per side until golden and cooked through. Remove and rest.
    3. Boil rotini pasta according to package directions. Drain and toss with a little butter.
    4. In the same skillet, add butter and minced garlic. Sauté for 30 seconds.
    5. Add heavy cream and simmer for 3-4 minutes. Stir in parmesan until melted and smooth.
    6. Slice the chicken into strips. Toss the pasta in the sauce until fully coated.
    7. Plate the pasta, top with sliced chicken, drizzle with extra sauce, and garnish with parsley.

    Notes

    • For added flavor, consider marinating chicken before cooking.
    • Adjust the amount of garlic according to your taste preference.
    • Prep Time: 10 minutes
    • Cook Time: 20 minutes
    • Category: Main Course
    • Method: Skillet Cooking
    • Cuisine: Italian

    Nutrition

    • Serving Size: 1 plate
    • Calories: 650
    • Sugar: 2g
    • Sodium: 800mg
    • Fat: 35g
    • Saturated Fat: 20g
    • Unsaturated Fat: 10g
    • Trans Fat: 0g
    • Carbohydrates: 60g
    • Fiber: 3g
    • Protein: 40g
    • Cholesterol: 150mg

    Sharing is caring!

  • Crispy Chickpea Artichoke Salad with Lemon Dressing delights your taste buds!

    Crispy Chickpea Artichoke Salad with Lemon Dressing delights your taste buds!


    Introduction to Crispy Chickpea Artichoke Salad with Lemon Dressing

    As a busy mom, finding time to whip up something delicious can feel like an uphill battle. That’s why I’m excited to share my Crispy Chickpea Artichoke Salad with Lemon Dressing! This vibrant salad is not just a treat for the taste buds; it’s also quick to prepare, making it perfect for hectic weeknights or those moments when you want to impress guests without breaking a sweat. The combination of crispy chickpeas and zesty dressing is simply delightful. Trust me, once you try it, you’ll want to make it again and again!

    Why You’ll Love This Crispy Chickpea Artichoke Salad with Lemon Dressing

    This Crispy Chickpea Artichoke Salad with Lemon Dressing is a game-changer! It’s not only packed with vibrant flavors, but it also comes together in about 35 minutes. The crispy chickpeas add that satisfying crunch, while the zesty lemon dressing brightens every bite. Plus, it’s hearty enough to serve as a meal on its own or as a delightful side. Your family will adore it, and you’ll appreciate how easy it is to prepare!

    Ingredients for Crispy Chickpea Artichoke Salad with Lemon Dressing

    Gathering fresh ingredients makes all the difference in this Crispy Chickpea Artichoke Salad with Lemon Dressing. Here’s what you’ll need:

    • Freshly-squeezed lemon juice: This is the star of your dressing, providing a refreshing zing. Don’t skip on the fresh juice!
    • Grated lemon zest: A sprinkle of zest will amplify that citrus flavor and make your salad extra fragrant.
    • Dijon mustard: Adds a slight tanginess that balances perfectly with the sweetness.
    • Honey: A touch of sweetness to round out the flavors. You can swap this with maple syrup for a vegan option.
    • Olive oil: This not only helps emulsify the dressing but also adds richness. Use a good quality oil for the best flavor!
    • Salt and pepper: Essential seasoning to enhance all the fresh flavors. Adjust to your taste!
    • Chickpeas: The foundation of this salad, these legumes are packed with protein and fiber, keeping you full longer. Canned makes prep fast and easy.
    • Garlic: Minced garlic adds depth and warmth to the crispy chickpeas. You’ll love the aroma!
    • Artichoke hearts: Tender and delicious, they add a unique flavor and a Mediterranean touch.
    • Sweet pepper: A pop of color and crunch! Feel free to use red, yellow, or orange peppers to brighten up your salad.
    • Feta: Crumbled for added creaminess and flavor. If you’re looking for a vegan alternative, try avocado or omit it altogether.
    • Fresh parsley: This adds a fresh, herbaceous note that brightens up the entire dish.

    If you’re interested in specific quantities, don’t worry! You can find them at the bottom of the article, all tidy and ready for printing.

    How to Make Crispy Chickpea Artichoke Salad with Lemon Dressing

    Preparing the Lemon Dressing

    Let’s start with the star of our show—the lemon dressing! In a small bowl, whisk together the freshly-squeezed lemon juice, lemon zest, Dijon mustard, and honey until smooth. The bright acidity of the lemon is invigorating, and the honey brings a lovely sweetness. While whisking, slowly drizzle in the olive oil. This helps to emulsify the dressing, creating a silky texture. You want it to be well combined, so don’t rush this part! Taste and season with salt and pepper. If you have leftovers, store the dressing in an airtight container in the fridge. It keeps well for about a week, ready for your next salad adventure!

    Baking the Chickpeas

    Now, onto those crispy chickpeas! Preheat your oven to 400°F and line a large sheet pan with parchment paper. In a medium bowl, toss the drained and rinsed chickpeas with minced garlic, olive oil, and a sprinkle of salt and pepper. Make sure each chickpea is coated evenly; this will help them crisp up beautifully. Spread them out in a single layer on the sheet pan, giving them enough space to breathe. Bake them for 15 to 20 minutes, or until they turn golden brown and crunchy. Keep an eye on them, as every oven is different! Once they’re done, allow them to cool slightly. You want that irresistible crunch when you mix them into the salad.

    Assembling the Salad

    It’s time to bring everything together! In a large serving bowl, combine the crispy chickpeas, chopped artichoke hearts, sweet pepper pieces, crumbled feta, and fresh parsley. Each ingredient adds layers of flavor and texture, making every bite a delight. Drizzle the lemon dressing over the top, then toss gently to ensure everything is evenly coated. Taste your creation and adjust the seasoning with salt and pepper if needed. This is your masterpiece, after all! Serve the salad immediately for the best crunch, or let it chill for a little while if you prefer. Enjoy a refreshing meal that’s bursting with flavors!

    Tips for Success

    • Always rinse and dry chickpeas well before tossing them with oil; this ensures maximum crispiness!
    • Feel free to customize the salad with your favorite seasonal veggies for variety.
    • Make the dressing a day in advance to let the flavors meld beautifully.
    • For even crispier chickpeas, try using a convection setting if your oven has one.
    • Mix and match feta with other cheeses like goat cheese for a different twist.

    Equipment Needed

    • Baking Sheet: A large rimmed baking sheet works best for roasting chickpeas. A shallow dish can be a good alternative.
    • Parchment Paper: This helps keep the chickpeas from sticking. If you don’t have it, use a non-stick spray.
    • Mixing Bowls: A medium bowl for chickpeas and a large one for the salad. Any size bowl will do!
    • Whisk: Perfect for blending your dressing. A fork is a handy substitute in a pinch.
    • Measuring Cups and Spoons: For accuracy in prepping your ingredients. You can eyeball measurements if you’re feeling adventurous!

    Variations

    • Vegan Option: Substitute honey with maple syrup in the dressing for a completely plant-based version.
    • Add More Vegetables: Incorporate ingredients like cherry tomatoes, cucumbers, or shredded carrots for a vibrant twist.
    • Protein Boost: Toss in cooked quinoa, grilled chicken, or shrimp for a heartier meal.
    • Spicy Kick: Add a pinch of red pepper flakes or diced jalapeños for a zesty burst of heat.
    • Different Greens: Mix in some baby spinach or arugula for extra nutrients and a peppery flavor.

    Serving Suggestions

    • Pair this Crispy Chickpea Artichoke Salad with Lemon Dressing alongside a slice of crusty bread or warm pita for a satisfying meal.
    • For a refreshing drink, serve with sparkling water infused with lemon or a light white wine.
    • Presentation tip: Serve in a large, colorful bowl, garnished with extra parsley for a pop of freshness.

    FAQs about Crispy Chickpea Artichoke Salad with Lemon Dressing

    Can I make Crispy Chickpea Artichoke Salad with Lemon Dressing ahead of time?

    Absolutely! You can roast the chickpeas and prepare the dressing a day in advance. Just keep the salad components separate until you’re ready to serve. This helps maintain that enjoyable crunch!

    How can I store leftovers?

    Store any leftovers in an airtight container in the refrigerator for up to 3 days. The chickpeas may lose some crispiness, but they’ll still be delicious in the salad! You can always re-crisp them in the oven if desired.

    Can I use different types of beans?

    Yes! While chickpeas make this salad unique, you can substitute them with other beans like black beans or kidney beans. Just adjust the baking time for different textures!

    Is this salad gluten-free?

    Yes! This Crispy Chickpea Artichoke Salad with Lemon Dressing is naturally gluten-free, making it a wonderful option for anyone with dietary restrictions.

    What can I serve with this salad?

    This salad pairs wonderfully with grilled chicken or shrimp for a protein boost. You can also enjoy it as a side with your favorite Mediterranean dishes like falafel or stuffed grape leaves.

    Final Thoughts

    There’s something truly joyful about whipping up a refreshing Crispy Chickpea Artichoke Salad with Lemon Dressing. It’s not just easy; it’s a celebration of flavors that can brighten any meal. I love how it effortlessly combines crunchiness and zest, making it a crowd-pleaser at the table. Moreover, this salad is perfect for any occasion, whether it’s a simple weeknight dinner or a gathering with friends. The bright flavors and textures always bring a smile to my face. I hope it does the same for you and becomes a cherished favorite in your home!


    Print

    clock clock iconcutlery cutlery iconflag flag iconfolder folder iconinstagram instagram iconpinterest pinterest iconfacebook facebook iconprint print iconsquares squares iconheart heart iconheart solid heart solid icon

    Description

    A delicious and refreshing Crispy Chickpea Artichoke Salad with Lemon Dressing that delights your taste buds!


    • 1/3 cup freshly-squeezed lemon juice
    • 1 tablespoon grated lemon zest
    • 1 tablespoon Dijon mustard
    • 1 tablespoon honey
    • 1/3 cup olive oil
    • Salt and pepper to taste
    • 2 cans (15 oz each) chickpeas, drained and rinsed
    • 2 medium cloves garlic, minced
    • 2 tablespoons olive oil
    • Salt and pepper to taste
    • 2 jars (12 oz each) artichoke hearts drained and roughly chopped
    • 1 medium sweet pepper, cut into 1/2-inch pieces
    • 1/2 cup crumbled feta
    • 2 tablespoons minced fresh parsley

    1. In a small bowl, whisk lemon juice, zest, mustard, and honey together. Slowly drizzle in olive oil, whisking constantly until vinaigrette is smooth. Season with salt and pepper to taste and refrigerate until ready to use.
    2. Preheat oven to 400F and line a large sheet pan with parchment paper.
    3. In a medium bowl, toss chickpeas, garlic, olive oil, and salt and pepper to taste until evenly coated.
    4. Arrange chickpeas in a single layer on the sheet pan and bake at 400F for 15-20 minutes until chickpeas are golden brown and crispy. Cool slightly.
    5. In a large serving bowl, combine chickpeas, artichoke hearts, sweet pepper, feta, and parsley.
    6. Drizzle dressing over the top and toss to evenly coat. Season salad with salt and pepper to taste.
    7. Serve salad immediately and enjoy!

    Notes

    • For a vegan version, substitute honey with maple syrup.
    • Feel free to add your favorite vegetables or nuts for extra crunch.
    • Prep Time: 15 minutes
    • Cook Time: 20 minutes
    • Category: Salad
    • Method: Baking
    • Cuisine: Mediterranean

    Nutrition

    • Serving Size: 1 serving
    • Calories: 320
    • Sugar: 3g
    • Sodium: 400mg
    • Fat: 20g
    • Saturated Fat: 3g
    • Unsaturated Fat: 15g
    • Trans Fat: 0g
    • Carbohydrates: 30g
    • Fiber: 8g
    • Protein: 10g
    • Cholesterol: 10mg

    Sharing is caring!