Blog

  • Mango Shrimp Coconut Rice Stack

    Mango Shrimp Coconut Rice Stack


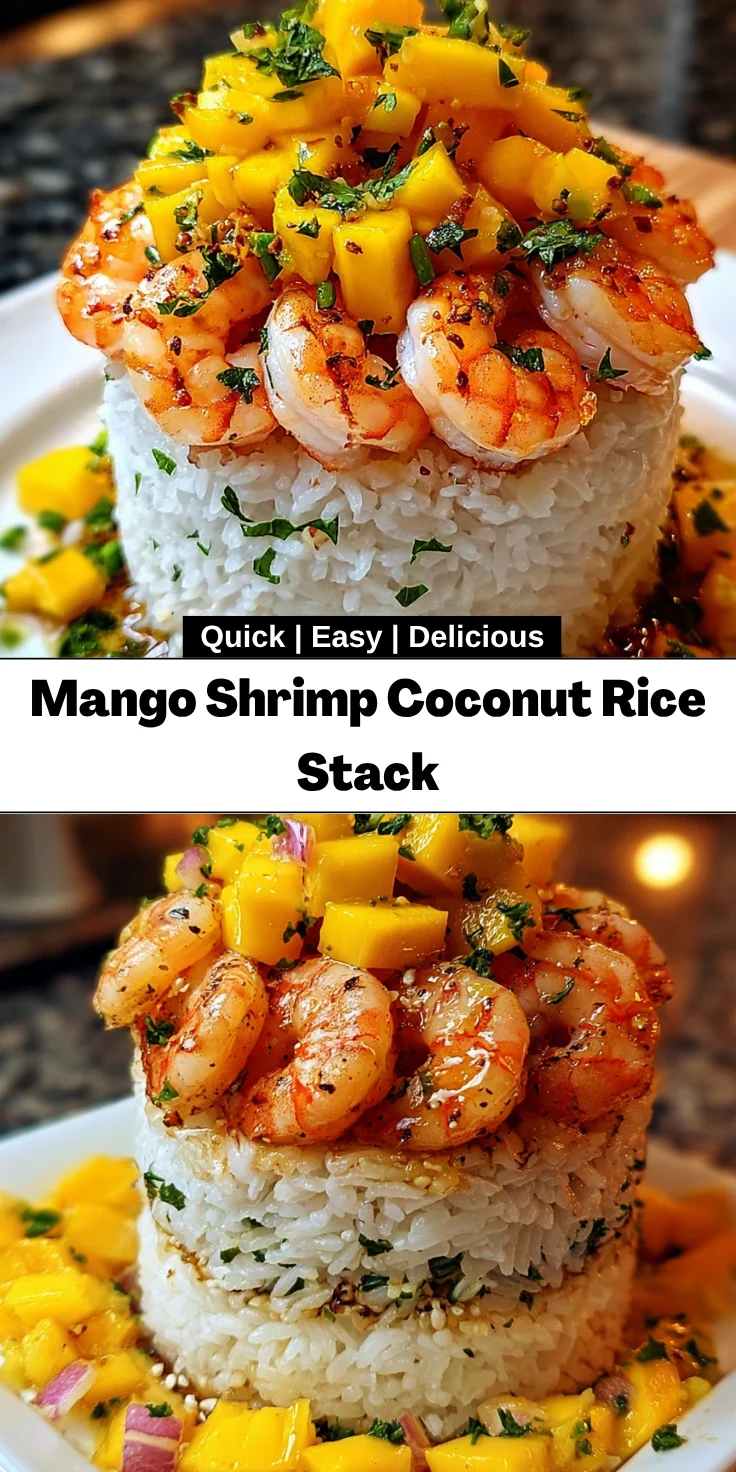
    Introduction to Mango Shrimp Coconut Rice Stack

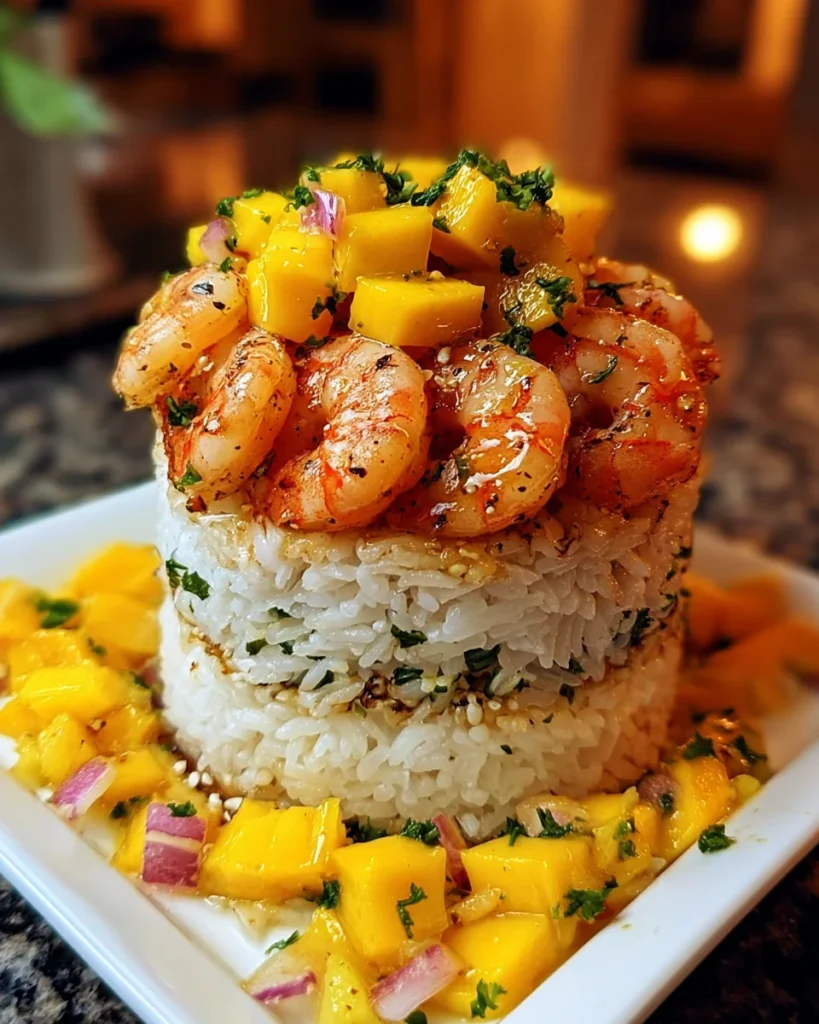
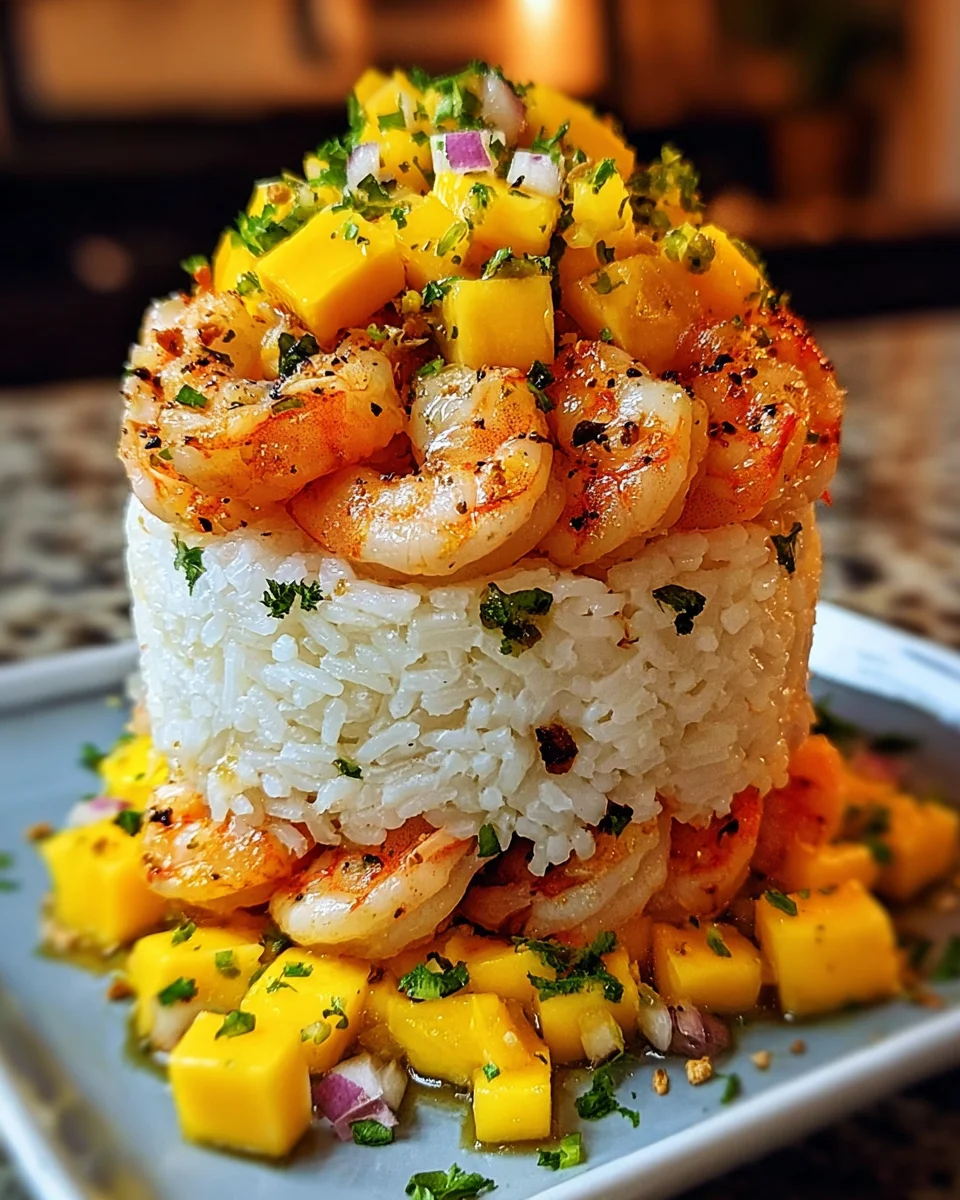
    Imagine a dish that’s as vibrant as a summer sunset and bursting with fresh flavors. That’s exactly what this Mango Shrimp Coconut Rice Stack offers! It’s perfect for those busy evenings when you want something special without spending hours in the kitchen. Packed with succulent shrimp, creamy coconut rice, and zesty mango salsa, it’s a delightful combination that will impress your family or serve as a centerpiece for your next gathering. Let’s dive into this delicious recipe that not only satisfies your taste buds but also brings a bit of sunshine to your dinner table!

    Why You’ll Love This Mango Shrimp Coconut Rice Stack

    This Mango Shrimp Coconut Rice Stack is not just a treat for the taste buds; it’s also a quick and easy meal option! With minimal prep and cook time, you can whip it up in just 30 minutes. The vibrant flavors paired with the luscious coconut rice make it a crowd-pleaser, perfect for both family dinners and impressive gatherings. Plus, it’s a healthy dish that feels indulgent without the guilt!

    Ingredients for Mango Shrimp Coconut Rice Stack

    Gathering the right ingredients is key to creating a vibrant Mango Shrimp Coconut Rice Stack that bursts with flavor! Here’s what you’ll need:

    • Jasmine rice: This fragrant rice is perfect for coconut dishes. It’s fluffy and slightly sticky, making it ideal for stacking.
    • Coconut milk: The star of the show! This creamy delight infuses the rice with flavor and pairs wonderfully with shrimp and mango.
    • Water: A simple addition that helps cook the rice to perfection.
    • Salt: Just a pinch balances the sweetness of the coconut and mango.
    • Shrimp: Look for fresh, peeled, and deveined shrimp for convenience. They cook quickly and add a lovely texture.
    • Olive oil: This versatile oil is perfect for sautéing the shrimp, adding a light richness.
    • Garlic: Minced garlic brings a fragrant, savory aroma to the shrimp that enhances every bite.
    • Ground ginger: A sprinkle of this spice adds a warm, zesty kick that complements the shrimp beautifully.
    • Lime juice: Freshly squeezed lime juice brightens the dish with acidity, marrying the flavors harmoniously.
    • Mango: Use a ripe mango for its sweetness and vibrant color—your taste buds will thank you!
    • Red onion: This adds a nice crunch and a bit of sweetness to the salsa.
    • Jalapeño (optional): If you like a bit of heat, this pepper can spice things up! Omit it for a milder dish.
    • More lime juice: Yes, another dash of lime juice enhances the mango salsa, making it super zesty.
    • Salt for salsa: Just a touch to bring the flavors together.

    For exact quantities, check out the bottom of the article where they’re listed for printing. Happy cooking!

    How to Make Mango Shrimp Coconut Rice Stack

    Creating this stunning Mango Shrimp Coconut Rice Stack is much easier than you might think! By following these straightforward steps, you’ll be well on your way to enjoying a colorful and flavorful dish. Let’s get cooking!

    Step 1: Cook the Coconut Rice

    Start by combining jasmine rice, coconut milk, water, and salt in a medium saucepan. Think of this as a mini tropical vacation for your rice!

    Bring the mixture to a boil over medium heat, then reduce the heat to low and cover it. Let it simmer for about 15 minutes. You’ll know it’s done when the rice is fluffy and has absorbed almost all the liquid.

    After that, remove it from heat and keep it covered for another 5 minutes. This step lets the rice steam to perfection. Fluff it with a fork before serving—so easy!

    Step 2: Prepare the Shrimp

    While the rice is doing its thing, it’s time to focus on the shrimp. Heat olive oil in a large skillet over medium-high heat. The best part is the sizzle of the garlic hitting the hot oil, which fills the kitchen with an incredible aroma!

    Add the minced garlic and sauté it for about 30 seconds until you can smell that heavenly fragrance. Now, toss in the shrimp, ground ginger, salt, and pepper. Cook them for about 3 to 4 minutes, or until they turn pink and opaque.

    Just before removing from the heat, drizzle some lime juice over the shrimp. This little tartness elevates the flavor and makes all the difference!

    Step 3: Make the Mango Salsa

    Now onto the refreshing mango salsa! In a medium bowl, combine the diced mango, red onion, jalapeño (if using), and lime juice. Can you smell the summer in the air yet?

    Sprinkle a touch of salt to enhance all the flavors, and mix everything together gently. Since mango is naturally sweet, you don’t need much salt—just enough to balance it! Set the salsa aside for a few moments.

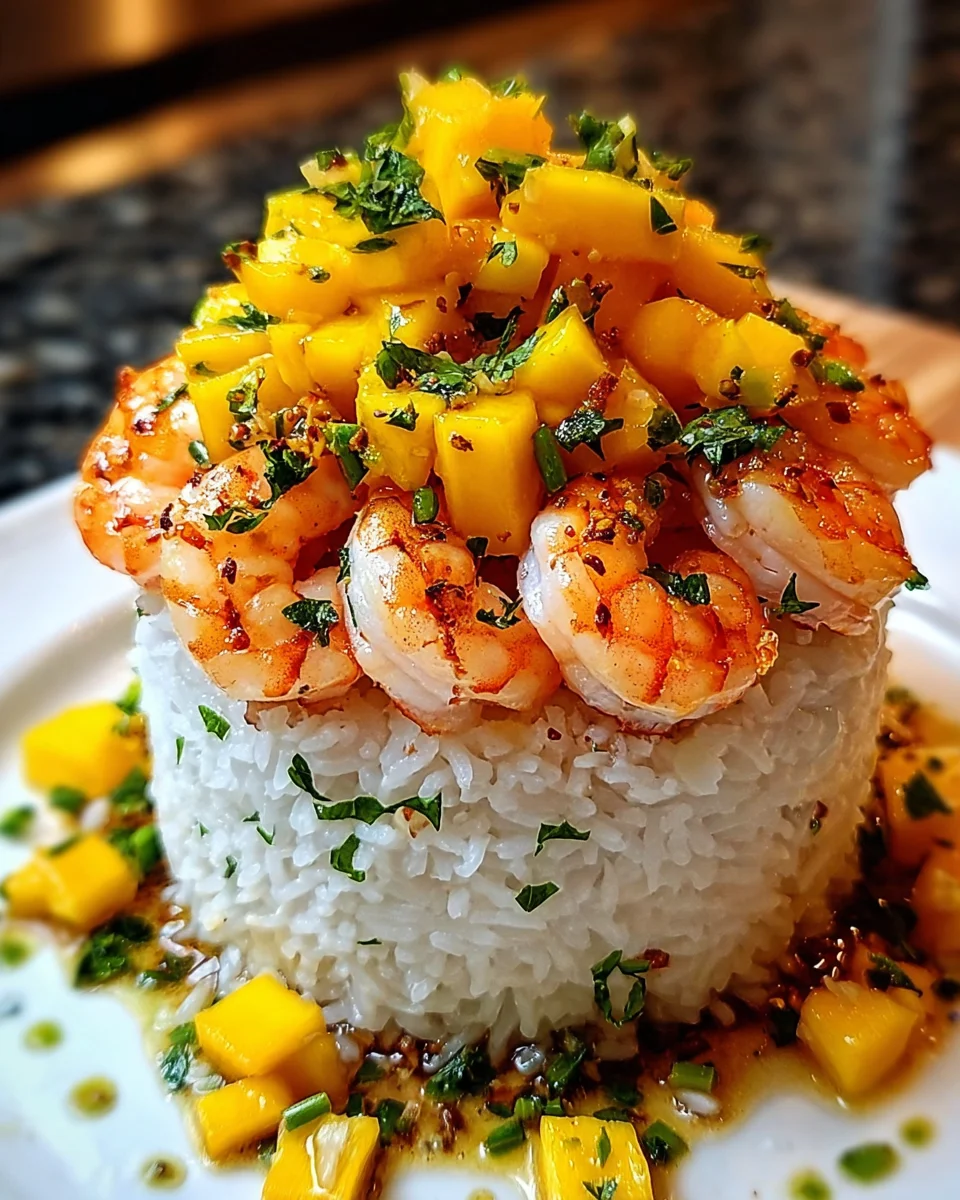
    Step 4: Assemble the Stack

    Ready for the fun part? Grab a round mold or a small bowl to start layering. Begin with a generous scoop of coconut rice. Pack it down slightly to create a solid base—it’ll hold your stack together nicely!

    Next, layer in the sautéed shrimp, and then finish it off with a stunning layer of mango salsa. Gently press down again to keep everything snug.

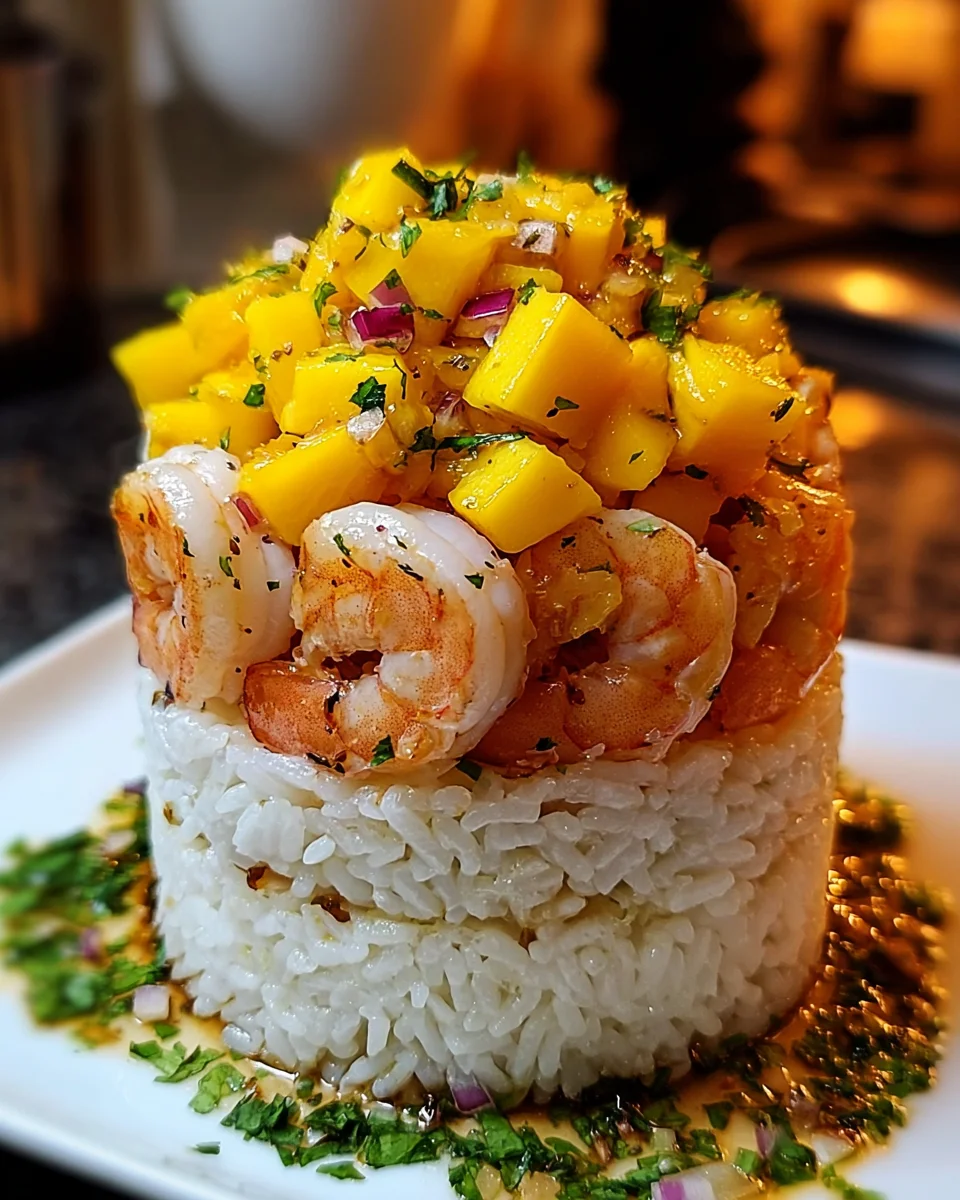
    When you’re ready, carefully remove the mold, revealing a beautifully stacked dish that says, “Look at me, I’m delicious!”

    Step 5: Serve and Enjoy

    Your Mango Shrimp Coconut Rice Stack is now ready to shine on your dinner table! For a final touch, consider garnishing it with fresh cilantro or a wedge of lime. It adds a pop of color and an extra twist of flavor.

    Gather your loved ones around and watch them delight in this culinary masterpiece. Bon appétit!

    Tips for Success

    • Rinse the jasmine rice before cooking to remove excess starch, ensuring fluffy rice.
    • Use fresh ingredients for the best flavor, especially in the mango salsa.
    • If you have extra time, marinate the shrimp in lime juice and ginger for 30 minutes before cooking to enhance flavor.
    • For a creamier coconut rice, replace some water with more coconut milk.
    • Make the mango salsa a few hours in advance for the flavors to meld.

    Equipment Needed

    • Medium saucepan: Use any pot with a lid for cooking the rice.
    • Large skillet: A frying pan works great for sautéing the shrimp.
    • Cutting board and knife: Essential for chopping mango and other ingredients.
    • Round mold or small bowl: A regular cup can also work for stacking.
    • Measuring cups: Handy for getting those portions just right!

    Variations of Mango Shrimp Coconut Rice Stack

    • Veggie Version: Swap shrimp for grilled vegetables like bell peppers, zucchini, or sweet corn for a delicious plant-based twist.
    • Shrimp Alternatives: Use scallops or firm fish like mahi-mahi if you’re looking for something different yet equally tasty.
    • Spice it Up: Add more heat to your mango salsa by including diced serrano peppers or a dash of cayenne pepper.
    • Herbal Infusion: Mix in fresh herbs such as mint or basil into the mango salsa for a refreshing zing.
    • Rice Options: Experiment with other rice types like brown rice or quinoa for a healthier spin that still brings plenty of flavor.

    Serving Suggestions

    • Pair with a light salad: A simple arugula salad with lemon vinaigrette complements the rich flavors beautifully.
    • Serve with refreshing beverages: Coconut water or iced green tea makes a great accompaniment.
    • Presentation tip: Serve on a colorful plate and add lime wedges and cilantro for a pop of color!

    FAQs about Mango Shrimp Coconut Rice Stack

    Can I use frozen shrimp for this recipe?
    Absolutely! Frozen shrimp work just fine. Just make sure to thaw them completely before cooking to ensure even cooking and the best flavor.

    What can I serve with the Mango Shrimp Coconut Rice Stack?
    This dish pairs beautifully with a light salad, grilled vegetables, or a refreshing beverage like coconut water or iced tea. It’s all about balancing the flavors!

    Can I make this recipe ahead of time?
    You can prepare the coconut rice and mango salsa in advance. Just assemble the stack right before serving to keep everything fresh and vibrant.

    What’s the best way to store leftovers?
    Store any leftovers in an airtight container in the fridge for up to two days. Reheat gently to avoid overcooking the shrimp.

    Is the Mango Shrimp Coconut Rice Stack gluten-free?
    Yes! This dish naturally fits into a gluten-free diet, making it a fantastic option for those with gluten sensitivities.

    Final Thoughts

    The Mango Shrimp Coconut Rice Stack brings a delightful touch of the tropics to your dinner table. It’s more than just a meal; it’s a culinary adventure that fosters joy and connection among loved ones. Each layer tells a story of flavors and textures, creating a feast that feels special without being overly complicated. I love watching my family savor every bite! Plus, the vibrant colors make it not just delicious but a feast for the eyes too. So, roll up your sleeves, get creative, and let this dish brighten your busy days!


    Print

    clock clock iconcutlery cutlery iconflag flag iconfolder folder iconinstagram instagram iconpinterest pinterest iconfacebook facebook iconprint print iconsquares squares iconheart heart iconheart solid heart solid icon

    Description

    This Mango Shrimp Coconut Rice Stack is a delicious and vibrant dish featuring layers of coconut rice, sautéed shrimp, and fresh mango salsa.


    • For the Coconut Rice:
    • 1 cup jasmine rice
    • 1 cup coconut milk
    • 1/2 cup water
    • 1/2 teaspoon salt
    • For the Shrimp:
    • 1 pound shrimp, peeled and deveined
    • 1 tablespoon olive oil
    • 2 cloves garlic, minced
    • 1 teaspoon ground ginger
    • Salt and pepper, to taste
    • 1 tablespoon lime juice
    • For the Mango Salsa:
    • 1 ripe mango, diced
    • 1/4 red onion, finely chopped
    • 1 jalapeño, seeded and minced (optional)
    • Juice of 1 lime
    • Salt, to taste

    1. Cook the Coconut Rice: In a medium saucepan, combine the jasmine rice, coconut milk, water, and salt. Bring to a boil, then reduce heat to low, cover, and simmer for about 15 minutes or until the rice is cooked and fluffy. Remove from heat and let it sit covered for another 5 minutes.
    2. Prepare the Shrimp: While the rice is cooking, heat the olive oil in a large skillet over medium-high heat. Add the minced garlic and sauté for about 30 seconds until fragrant. Add the shrimp, ginger, salt, and pepper, cooking until the shrimp turn pink and are cooked through (about 3-4 minutes). Drizzle with lime juice and remove from heat.
    3. Make the Mango Salsa: In a medium bowl, combine the diced mango, red onion, jalapeño (if using), lime juice, and salt. Toss gently to combine and set aside.
    4. Assemble the Stack: To assemble the stacks, use a round mold or a small bowl. Start by layering the coconut rice at the bottom, followed by a layer of shrimp, and top with the mango salsa. Gently press down to compact the layers, then carefully remove the mold.
    5. Serve and Enjoy: Your Mango Shrimp Coconut Rice Stack is ready to be served! Garnish with fresh cilantro or lime wedges if desired.

    Notes

    • Adjust the spice level of the mango salsa by adding or omitting the jalapeño.
    • Fresh cilantro can enhance the flavor when garnished on top.
    • Prep Time: 10 minutes
    • Cook Time: 20 minutes
    • Category: Main Course
    • Method: Stovetop
    • Cuisine: Asian Fusion

    Nutrition

    • Serving Size: 1 stack
    • Calories: 400
    • Sugar: 6g
    • Sodium: 500mg
    • Fat: 20g
    • Saturated Fat: 9g
    • Unsaturated Fat: 8g
    • Trans Fat: 0g
    • Carbohydrates: 36g
    • Fiber: 2g
    • Protein: 24g
    • Cholesterol: 180mg

    Sharing is caring!

  • 4th of July Rice Krispies Treats

    4th of July Rice Krispies Treats


    Introduction to 4th of July Rice Krispies Treats

    There’s something magical about fireworks, barbecues, and sweet treats that bring us together on the 4th of July. One of my favorite go-tos for this celebration is the delightful 4th of July Rice Krispies Treats. Not only are they fun to make, but they also bring a splash of color to any table. If you’re a busy mom or professional like me, you’ll appreciate how quick and easy this recipe is. Packed with nostalgia and flavor, these treats are sure to wow your guests and become a beloved holiday tradition!

    Why You’ll Love This 4th of July Rice Krispies Treats

    What’s not to love about these 4th of July Rice Krispies Treats? They’re super easy to whip up, with just a few ingredients that you probably have on hand. Plus, they come together in just 15 minutes! The taste is nostalgic, sweet, and chewy, making them a hit with kids and adults alike. Whether you’re hosting a gathering or just looking for a festive snack, these treats deliver cheer without the fuss!

    Ingredients in 4th of July Rice Krispies Treats

    Gathering the right ingredients is half the fun! Here’s what you’ll need to create your fabulous 4th of July Rice Krispies Treats:

    • Mini Marshmallows: These sweet, pillowy wonders are the heart of any Rice Krispies treat. Make sure they’re fresh for the best texture!
    • Rice Krispies: The classic crisp cereal provides that delightful crunch. You can use regular Rice Krispies or even flavored ones for a twist.
    • Unsalted Butter: This creamy goodness brings richness to your treats. Unsalted is best to control the saltiness, allowing the sweetness to shine.
    • Red Food Dye: A splash of color is essential for the festive look. Choose a gel or liquid dye; both work well! Just a little goes a long way.
    • Blue Food Dye: Just like the red dye, this one adds that patriotic pop! Start with a tiny amount and adjust to your desired brightness.
    • Patriotic Sprinkles: These charming extras are not just for looks. They add a bit of fun and texture to your treats. Feel free to use any themed sprinkles you have on hand!
    • Nonstick Cooking Spray: A little spray goes a long way in preventing sticking. Make sure to coat your pan well to ease the removal of those gorgeous layers!

    For exact quantities, check the bottom of the article where a handy printable recipe is waiting for you!

    How to Make 4th of July Rice Krispies Treats

    Now let’s dive into making these eye-catching 4th of July Rice Krispies Treats. The process is simple, and I promise you’ll love every minute of it. Get ready to bring a colorful twist to a classic treat!

    Prepare Your Pan

    First things first, grab your 9×13-inch pan. Spray it generously with nonstick cooking spray. This step is crucial to ensure your layers come out clean and gorgeous. Trust me; you’ll want to show off your work!

    Create the Red Layer

    Next, we’re going to make the vibrant red layer. In a large mixing bowl, combine 4 cups of mini marshmallows with 3 tablespoons of unsalted butter. Pop it into the microwave for about 1 minute and 30 seconds. Keep an eye on it, as microwave times can vary. You want the marshmallows to melt smoothly and blend effortlessly with the butter.

    Once your mixture is smooth, use a spoon or toothpick to add a bit of red food dye. Stir until you achieve a lovely, rich hue. Remember, it’s easier to add more dye than to take it away, so start small!

    Now, toss in 3 cups of Rice Krispies. Stir carefully to coat every last piece. It can be a bit sticky, but that’s okay! Once well mixed, pour this delight into your prepared pan. Press it down evenly to form a nice flat layer. Make sure it covers the entire bottom!

    Create the White Layer

    For the next layer, you’ll stick with tradition. Repeat the same steps as before but without adding any food coloring. Use 4 cups of marshmallows and 3 tablespoons of butter, melting them in the microwave until smooth. After that, fold in 3 cups of Rice Krispies. Once combined, spread it over the red layer just made. Gently press it down for evenness!

    Create the Blue Layer

    We’re almost there! For this layer, melt another 4 cups of mini marshmallows with 3 tablespoons of unsalted butter in the microwave. Again, ensure it’s silky smooth. This time, add just 2 drops of blue food dye and stir confidently. Remember, a little goes a long way! If you prefer a bolder color, you can always add more later.

    After it’s mixed, toss in 3 cups of Rice Krispies. Combine until every piece is well covered in that bright blue hue. Spread this mixture over the white layer, pressing it down to ensure it sticks nicely!

    Top and Set the Treats

    To make these 4th of July Rice Krispies Treats even more festive, sprinkle on those charming patriotic sprinkles. Lightly press them down so they adhere to the top, adding that extra pop of cheer!

    Now comes the hardest part – wait! Cover your pan and let the treats sit for at least 4 hours. This gives them time to firm up perfectly. When they’re ready, cut them into squares and get ready to impress everyone!

    Tips for Success

    • To prevent sticking, spray your hands with cooking spray when pressing the layers down.
    • Work quickly with the melted marshmallow mixture; it firms up fast!
    • For a fun twist, try adding different flavored extracts, like vanilla or almond, to your layers.
    • Mix the Rice Krispies gently to avoid crush them too much; you want that delightful crunch!
    • Store leftovers in an airtight container to keep them soft and chewy.

    Equipment Needed

    • 9×13-inch Baking Pan: Essential for setting your layers perfectly. You can also use a similar-sized dish.
    • Large Mixing Bowl: A sturdy bowl is crucial for mixing ingredients. Any large bowl will do!
    • Microwave: For melting the marshmallows. If you prefer, you can use a stovetop double boiler instead.
    • Spoon or Toothpick: To mix in the food dye and layer ingredients effectively. You can use any mixing tool you have on hand!

    Variations of 4th of July Rice Krispies Treats

    • Chocolate Drizzle: Melt some chocolate and drizzle it over the top for added richness and flavor. Dark, milk, or white chocolate all work well!
    • Nutty Surprise: Mix in some chopped nuts, like almonds or pecans, for a delightful crunch. Just make sure your guests don’t have nut allergies!
    • Fruity Twist: Add freeze-dried strawberries or blueberries into the layers for a fruity burst that complements the patriotic colors.
    • Colorful Marshmallows: Swap regular mini marshmallows with holiday-themed ones. You can find red, white, and blue options for extra flair!
    • Vegan Version: Use coconut oil instead of butter and dairy-free marshmallows for a plant-based treat that everyone can enjoy.
    • Gluten-Free Option: Ensure your Rice Krispies are certified gluten-free to create a treat that caters to those with dietary restrictions.

    Serving Suggestions for 4th of July Rice Krispies Treats

    • Ice Cream: Serve with a scoop of vanilla or strawberry ice cream for a delightful combination of flavors.
    • Fresh Fruit: Pair with a colorful fruit platter featuring strawberries, blueberries, and bananas for a refreshing touch.
    • Drinks: Offer festive drinks like lemonade or berry spritzers to complement the sweet treats.
    • Presentation: Arrange your treats on a patriotic-themed platter or dish for a fun visual impact during your celebration.

    FAQs about 4th of July Rice Krispies Treats

    Can I make these 4th of July Rice Krispies Treats ahead of time?

    Absolutely! You can prepare these treats a day or two in advance. Just store them in an airtight container once they’ve fully set. They stay soft and chewy, making them perfect for any gathering!

    What can I substitute for Rice Krispies?

    If you want to switch things up, try using puffed rice or even fruity cereals for a twist. Just be mindful that they might slightly alter the texture and taste.

    Can I use flavored marshmallows?

    Yes! Flavored marshmallows can add a delightful taste to your 4th of July Rice Krispies Treats. Try using strawberry or blueberry marshmallows for fun added flavors!

    How should I store leftovers?

    To keep your treats fresh, store them in an airtight container at room temperature. Keeping them in the fridge can make them overly firm, so room temperature is best!

    Can I add other mix-ins to my Rice Krispies Treats?

    Absolutely! You can incorporate mini chocolate chips, dried fruit, or even crushed cookies. The options are endless when it comes to customizing your 4th of July Rice Krispies Treats!

    Final Thoughts on 4th of July Rice Krispies Treats

    Making 4th of July Rice Krispies Treats is more than just whipping up a dessert; it’s about creating memorable moments with family and friends. The vibrant layers of red, white, and blue not only tickle the taste buds but also capture the festive spirit of this special day. Each bite offers a delightful crunch that lights up those July celebrations! Whether enjoyed at a picnic or served at a backyard barbecue, these treats will surely spark joy and smiles all around. So gather your loved ones, make these treats together, and celebrate the beauty of summer and freedom!


    Print

    clock clock iconcutlery cutlery iconflag flag iconfolder folder iconinstagram instagram iconpinterest pinterest iconfacebook facebook iconprint print iconsquares squares iconheart heart iconheart solid heart solid icon

    Description

    Deliciously festive Rice Krispies Treats, perfect for your 4th of July celebration!


    • 12 cups mini marshmallows
    • 9 cups Rice Krispies
    • 9 tablespoons unsalted butter
    • Red food dye
    • Blue food dye
    • Patriotic sprinkles
    • Nonstick cooking spray

    1. Spray a 9×13 pan with nonstick cooking spray and set aside.
    2. Place 4 cups of marshmallows and 3 tablespoons of butter in a large mixing bowl. Microwave for about 1 minute and 30 seconds or until the marshmallows are smooth when stirred and the butter has melted.
    3. Add a bit of the red food coloring using a spoon or toothpick. Quickly stir until no color streaks appear. If it’s not red enough, add a bit more until the correct shade is reached.
    4. Add 3 cups of the cereal to the bowl and mix until the cereal is fully coated.
    5. Add the mixture to the greased pan and spread even until it makes a nice even layer, covering the entire bottom of the pan.
    6. Repeat steps 2-5 for the white layer, but don’t add any food coloring.
    7. Repeat steps 2-5 for the blue layer, but only add about 2 drops of the food coloring to start. It gets bright quickly. If you need more, you can add it, but don’t start with more than 2 drops.
    8. Top with patriotic sprinkles and lightly press down so they stick to the top of the treats.
    9. Cover and let sit for about 4 hours or until dry. Cut into squares and enjoy!

    Notes

    • For best results, allow the treats to sit for at least 4 hours to ensure they firm up properly.
    • Feel free to adjust the amount of food coloring based on your preference for brightness.
    • Patriotic sprinkles can be replaced with other themed sprinkles for different occasions.
    • Prep Time: 15 minutes
    • Cook Time: 5 minutes
    • Category: Dessert
    • Method: Microwave
    • Cuisine: American

    Nutrition

    • Serving Size: 1 square
    • Calories: 150
    • Sugar: 14g
    • Sodium: 75mg
    • Fat: 4g
    • Saturated Fat: 2.5g
    • Unsaturated Fat: 1.5g
    • Trans Fat: 0g
    • Carbohydrates: 26g
    • Fiber: 0g
    • Protein: 1g
    • Cholesterol: 10mg

    Sharing is caring!

  • Baked Shrimp Toast

    Baked Shrimp Toast


    Introduction to Baked Shrimp Toast

    Let’s talk about a delightful little gem in the world of appetizers: Baked Shrimp Toast. If you’re anything like me, busy juggling work and home, you crave delicious recipes that don’t take forever to whip up. This Baked Shrimp Toast comes to the rescue! It’s the perfect way to indulge your taste buds while keeping it simple. Picture crispy baguette slices topped with a rich garlic shrimp mixture—absolute bliss! Moreover, they’re great for gatherings or a cozy family night. Trust me, these toasts are sure to impress everyone at your table, even the pickiest eaters!

    Why You’ll Love This Baked Shrimp Toast

    This Baked Shrimp Toast checks all the boxes for a busy mom like me. It’s not only easy and quick to prepare but also packed with flavor that bursts in every bite. The best part? You can whip it up in 30 minutes or less! Whether it’s a casual gathering or a busy weeknight family dinner, these toasts are versatile, satisfying, and sure to bring smiles to everyone’s faces. Trust me, they’re a hit!

    Ingredients for Baked Shrimp Toast

    Getting started with this Baked Shrimp Toast is a breeze! Here’s what you’ll need:

    • Baguette: The star of the show! Its crispy crust holds the shrimp mixture perfectly.
    • Shrimp: Use fresh or frozen shrimp. Just ensure they’re peeled and deveined, so your toast is smooth and tasty.
    • Garlic: Minced garlic amps up the flavor. Feel free to add more if you’re a garlic lover like me.
    • Mayonnaise: This creamy ingredient binds everything together and gives that delicious, indulgent taste.
    • Green Onions: Fresh and vibrant, they add a mild onion flavor—great for color and crunch!
    • Soy Sauce: A splash of soy sauce lends a savory depth to the shrimp mix. Always choose low-sodium for health!
    • Sesame Oil: Just a little drizzle of this nutty oil elevates the flavor profile and gives an Asian twist.
    • Ground Ginger: This warm spice complements the shrimp, adding a layer of complexity.
    • Egg: A beaten egg helps bind everything together, ensuring every bite is cohesive.
    • Sesame Seeds: Totally optional, but sprinkling these on top adds a delightful crunch and nutty flavor.
    • Salt and Pepper: Always essential for seasoning, adjust to your taste preferences!

    For exact quantities of these ingredients, be sure to check the bottom of the article where you can print the full recipe.

    How to Make Baked Shrimp Toast

    Preheat and Prepare

    First things first, let’s get your kitchen ready to create this scrumptious Baked Shrimp Toast! Start by preheating your oven to 375°F (190°C). While that’s heating up, grab a baking sheet and line it with parchment paper. This little trick keeps your toasts from sticking and ensures easy cleanup later. I promise, no one enjoys scrubbing a pan after a delightful meal. Trust me, you’ll be glad you took this small step!

    Create the Shrimp Mixture

    Now, let’s dive into making that mouthwatering shrimp mixture! In a mixing bowl, combine your finely chopped shrimp with the minced garlic, mayonnaise, and green onions. Add the soy sauce, sesame oil, grounding ginger, and your beaten egg to the bowl. Season with salt and pepper according to your taste. Don’t rush this part—mixing well is crucial! You want every shrimp piece coated evenly so that each toast is bursting with flavor. Feel free to taste and adjust if you need a bit more zing. When it’s all combined, it should smell heavenly!

    Assemble the Toasts

    It’s time to put your creation together! Take each slice of baguette and spread a generous amount of that savory shrimp mixture on top. Don’t be shy—make it thick! If you’re feeling fancy, here’s where you can sprinkle sesame seeds on top for added texture and flavor. Each toast should look like a little canvas of deliciousness and be ready for the oven. Trust me, you’ll want to make sure every inch of that bread is covered with shrimp goodness!

    Bake to Perfection

    Once your toasts are assembled and ready, arrange them on the lined baking sheet. Place them in your preheated oven and let them bake for about 15-20 minutes. Keep an eye on those edges—they should turn golden brown and crispy. The shrimp will be fully cooked when it turns opaque and firm. You can almost smell the deliciousness wafting through the kitchen, right? Your patience will be rewarded soon!

    Serving Suggestions

    After perfectly baking your toasts, let them cool slightly to avoid burning those eager taste buds. I like to garnish mine with a sprinkle of extra green onions or even a drizzle of sriracha for an added kick. These delightful toasts are best enjoyed warm, served alongside a dipping sauce or your favorite beverage. Whether you’re hosting, gathering, or just treating yourself, this Baked Shrimp Toast is a sure win!

    Tips for Success

    • Always use fresh shrimp for the best flavor and texture.
    • Make sure your shrimp is finely chopped; it spreads easier and cooks evenly.
    • Pre-toast the baguette slices for added crunch if desired.
    • Experiment with seasonings—don’t be afraid to play with flavors!
    • Serve immediately after baking for maximum freshness.
    • Feel free to double the recipe for larger gatherings!

    Equipment Needed

    • Baking Sheet: Essential for toasting your shrimp to perfection. A sturdy cookie sheet works well too.
    • Parchment Paper: Keeps the toasts from sticking; aluminum foil can be a substitute if needed.
    • Mixing Bowl: Vital for combining your shrimp mixture. Any bowl will do!
    • Knife: For chopping shrimp and green onions. A good chef’s knife makes it easier.
    • Spatula: Handy for spreading the shrimp mixture evenly on the baguette slices.

    Variations of Baked Shrimp Toast

    • Spicy Shrimp Toast: Add chopped jalapeños or a splash of hot sauce to the shrimp mixture for an extra kick.
    • Herb-Infused: Mix in fresh herbs like cilantro or basil for a vibrant twist.
    • Cheesy Delight: Sprinkle grated cheese on top before baking for a gooey, melty finish.
    • Whole Wheat Baguette: Use whole wheat baguette slices for a healthier option.
    • Vegetarian Version: Substitute shrimp with mashed avocado or a blend of veggies for a delightful twist.

    Serving Suggestions for Baked Shrimp Toast

    • Chilled White Wine: A crisp Sauvignon Blanc pairs beautifully with the flavors of the shrimp.
    • Fresh Salad: Serve with a light arugula salad dressed in lemon for a refreshing crunch.
    • Dipping Sauce: Offer soy sauce or sweet chili sauce for added flavor.
    • Plating: Garnish with fresh herbs and a sprinkle of chili flakes for a pop of color.
    • Appetizer Platter: Arrange on a beautiful platter with lemon wedges for an elegant touch.

    FAQs about Baked Shrimp Toast

    Can I make Baked Shrimp Toast ahead of time?

    Absolutely! You can prepare the shrimp mixture a day in advance and store it in the refrigerator. Just assemble and bake when you’re ready to serve. This saves time during busy gatherings!

    What can I serve with Baked Shrimp Toast?

    This delightful appetizer pairs wonderfully with a chilled drink, like white wine or a fruity mocktail. You might also consider a light salad or a piquant dipping sauce to complement the flavors.

    I don’t like shrimp. Can I substitute it?

    Of course! You could swap shrimp for finely chopped chicken or tofu. If you prefer a vegetarian option, mashed avocado mixed with spices can work its magic, too. Get creative!

    How do I store leftovers?

    Leftover Baked Shrimp Toast can be stored in an airtight container in the refrigerator for up to two days. Simply reheat in the oven to crisp them back up before serving again. Warm toast is always worth it!

    Can I freeze the shrimp mixture?

    Yes! You can freeze the shrimp mixture in a sealed container for up to three months. Thaw it overnight in the fridge before using, then follow the baking steps as usual for fresh, warm toasts!

    Final Thoughts on Baked Shrimp Toast

    Creating this Baked Shrimp Toast is more than just cooking; it’s about sharing joy and flavor with those you love. The crispy baguette combined with that garlicky shrimp mixture brings a smile to faces at any table. In just half an hour, you can present a delightful appetizer that’s not only impressive but also incredibly delicious. Whether it’s a cozy family gathering or a festive occasion, these toasts have a way of making ordinary moments extraordinary. Plus, who doesn’t love impressing their friends with such a simple, crowd-pleaser? Dive into the joy of cooking!


    Print

    clock clock iconcutlery cutlery iconflag flag iconfolder folder iconinstagram instagram iconpinterest pinterest iconfacebook facebook iconprint print iconsquares squares iconheart heart iconheart solid heart solid icon

    Description

    Baked Shrimp Toast is a delicious and easy appetizer featuring a garlic shrimp mixture spread on crispy baguette slices.


    • 1 baguette, sliced into ½-inch pieces
    • 1 pound shrimp, peeled, deveined, and finely chopped
    • 3 cloves garlic, minced
    • ¼ cup mayonnaise
    • 2 green onions, finely chopped
    • 1 tablespoon soy sauce
    • 1 teaspoon sesame oil
    • ½ teaspoon ground ginger
    • 1 egg, beaten
    • ¼ cup sesame seeds (optional, for topping)
    • Salt and pepper to taste

    1. Preheat your oven to 375°F (190°C). Line a baking sheet with parchment paper.
    2. Prepare the shrimp mixture: In a mixing bowl, combine the chopped shrimp, minced garlic, mayonnaise, green onions, soy sauce, sesame oil, ground ginger, and beaten egg. Season with salt and pepper to taste. Mix well until all ingredients are thoroughly combined.
    3. Assemble the toast: Spread each slice of baguette generously with the shrimp mixture. Sprinkle the top with sesame seeds if using.
    4. Bake: Arrange the prepared toasts on the lined baking sheet. Bake in the preheated oven for about 15-20 minutes, or until the shrimp is fully cooked and the edges of the bread are golden and crispy.
    5. Serve: Allow the shrimp toast to cool slightly before serving. They can be garnished with additional chopped green onions or a drizzle of sriracha for extra heat.

    Notes

    • For a spicier kick, add to the shrimp mixture or serve with extra sriracha.
    • Make sure the shrimp is finely chopped for even cooking and better spread on the toast.
    • Prep Time: 10 minutes
    • Cook Time: 15-20 minutes
    • Category: Appetizer
    • Method: Baking
    • Cuisine: Asian

    Nutrition

    • Serving Size: 1 toast
    • Calories: 150
    • Sugar: 1g
    • Sodium: 300mg
    • Fat: 8g
    • Saturated Fat: 1g
    • Unsaturated Fat: 2g
    • Trans Fat: 0g
    • Carbohydrates: 12g
    • Fiber: 1g
    • Protein: 10g
    • Cholesterol: 60mg

    Sharing is caring!

  • Red Hot Cinnamon Hard Candy

    Red Hot Cinnamon Hard Candy


    Introduction to Red Hot Cinnamon Hard Candy

    There’s something magical about the sweet, spicy kick of homemade Red Hot Cinnamon Hard Candy. It’s like a burst of warmth, perfect for chilly days or festive gatherings. As a busy mom, I know how valuable quick, delightful recipes can be. This one is not only easy but also a hit with friends and family! In just 25 minutes, you can whip up a batch that’s great for sharing—or for keeping all to yourself. Let’s dive into this delicious candy-making adventure, where simplicity meets sensational flavor!

    Why You’ll Love This Red Hot Cinnamon Hard Candy

    This Red Hot Cinnamon Hard Candy is the perfect blend of fun, flavor, and ease. In just 25 minutes, you can create this eye-catching treat that’ll impress everyone— from kids to guests. The spicy sweetness brings a unique twist, making it an ideal addition to any celebration. Plus, it’s a delightful way to show you care, whether you’re sharing with loved ones or sneaking a piece just for you!

    Ingredients Red Hot Cinnamon Hard Candy

    Creating your own Red Hot Cinnamon Hard Candy requires just a handful of simple ingredients. Let’s break them down:

    • Granulated Sugar: The backbone of this candy, sugar provides the sweet base that balances the spice.
    • Light Corn Syrup: This syrup helps prevent crystallization, ensuring a smooth texture that melts in your mouth.
    • Water: It’s essential for dissolving the sugar, allowing everything to combine and turn into that delectable candy mixture.
    • Cinnamon Extract: This is what imparts that unmistakable spicy flavor, making each bite a delightful experience.
    • Red Food Coloring (optional): A splash of red adds a beautiful pop to your candy, making it eye-catching and festive.
    • Cayenne Pepper (optional): If you love an extra kick, adding this spicy ingredient will heighten the warmth and flavor.
    • Powdered Sugar: To dust the finished pieces, preventing them from sticking together and adding a sweet finish.

    For an accurate ingredient list with exact measurements, check the bottom of the article where you can even print it out. Trust me, having these ingredients on hand will make your candy-making adventure even more delightful!

    How to Make Red Hot Cinnamon Hard Candy

    Prepare the Surface

    Start by lining a baking sheet with parchment paper or a silicone baking mat. This step is crucial! It prevents the candy from sticking and ensures easy removal later. Lightly dust the surface with powdered sugar, which acts like a protective cloud. Trust me, this little sprinkle works wonders in achieving a smooth finish for your beautiful candy pieces.

    Heat the Sugar Mixture

    In a heavy-bottomed saucepan, combine the granulated sugar, light corn syrup, and water over medium heat. Stir occasionally until the sugar dissolves, but be cautious! Once dissolved, it’s time to let the mixture boil without stirring. This is essential to prevent crystallization, which could ruin your candy’s silky texture. Remember, patience is key! It takes just a little time, and soon you’ll smell that sweet aroma wafting from your stove.

    Cook to Hard Crack Stage

    Here comes the important part: using a candy thermometer! Attach it to the saucepan and monitor closely as the mixture heats. You want it to reach 300°F, known as the hard crack stage. This temperature is vital for achieving that perfect crunch. If it’s too low, your candy will be chewy instead of hard. So, keep your eyes peeled and prepare yourself for the sweet reward!

    Add Flavor & Color

    Once you’ve reached the hard crack stage, it’s time to get creative! Remove the saucepan from heat and quickly stir in the cinnamon extract and, if you like, the red food coloring. The bright hue makes your Red Hot Cinnamon Hard Candy visually stunning. If you feel adventurous, sprinkle in some cayenne pepper for that extra zing! This spicy addition kicks the flavor up a notch, making it irresistibly delightful.

    Pour & Cool

    Carefully pour the hot candy mixture onto the prepared baking sheet. Be cautious—it’s molten hot! Allow it to cool completely for about 30 minutes. Once cooled, you’ll have a solid candy slab ready for breaking. The aroma will fill your kitchen, making the wait absolutely worth it!

    Break & Store

    Once the candy has hardened, it’s time for the fun part! Use your hands or a sturdy object to break the candy into small pieces. Dust the broken pieces with powdered sugar to prevent sticking and add a touch more sweetness. Store your delicious Red Hot Cinnamon Hard Candy in an airtight container. This candy stays fresh for up to two weeks, though I doubt it will last that long!

    Tips for Success

    • Always use a candy thermometer for precise temperature control; it’s essential for that perfect crunch.
    • When pouring the hot mixture, tilt the baking sheet slightly for even distribution.
    • Be patient while cooling—resist the urge to touch it until it’s fully hardened!
    • For extra flavor, experiment with spices like nutmeg or even vanilla extract.
    • Keep the work area clean to avoid sticky situations!

    Equipment Needed

    • Heavy-Bottomed Saucepans: A sturdy pot is essential. If you don’t have one, a regular saucepan will work, just keep an eye on it.
    • Candy Thermometer: This is key for accurate temperatures. If you don’t have one, a regular kitchen thermometer can suffice.
    • Baking Sheet: Use any sheet pan you have; it’ll be perfect for pouring the candy.
    • Parchment Paper or Silicone Baking Mat: Both are great for lining your baking sheet.
    • Spatula: A heat-resistant spatula helps in mixing and pouring.

    Variations

    • Different Extracts: Swap the cinnamon extract for other flavors like peppermint or vanilla for a unique twist!
    • Adjust Spice Levels: Modify the cayenne pepper to suit your heat preference. More spice for the bold, or skip it for a sweet delight.
    • Seasonal Flavors: Consider adding pumpkin spice or ginger extract during the fall for a festive flair!
    • Fruit Flavors: Incorporate citrus extracts like lemon or orange for a zesty, refreshing candy experience.
    • Chocolate Drizzle: After breaking the candy, drizzle some melted chocolate over the pieces for a decadent touch.

    Serving Suggestions

    • Pair your Red Hot Cinnamon Hard Candy with a steaming cup of chai for a cozy treat.
    • Make a festive candy dish, mixing it with other homemade treats to create a colorful display.
    • Offer as a sweet option at parties, alongside hot cocoa or spiced cider.
    • Wrap individual pieces in cute bags for thoughtful party favors.

    FAQs about Red Hot Cinnamon Hard Candy

    Can I use a different type of sugar?

    While granulated sugar is best for this recipe, you can experiment with alternatives like brown sugar for a deeper flavor. Just keep in mind that it may alter the candy’s texture and color slightly.

    How can I tell if my candy has reached the right temperature?

    The candy should reach 300°F for hard crack stage. If you don’t have a candy thermometer, a drop of the mixture in cold water should form a hard ball that breaks when you do. However, it’s best to use a thermometer for accuracy!

    What if my candy turns out too hard?

    If your Red Hot Cinnamon Hard Candy is rock solid, it might have been cooked too long. Next time, keep a close eye on the temperature to achieve that perfect crunchy bite without going overboard.

    How should I store the candy to keep it fresh?

    To keep your candy fresh, store it in an airtight container at room temperature. Avoid humidity, as it can make the candy sticky. If you’re generous, gifts can be stored beautifully in decorative boxes!

    Can I add nuts or other additions to my candy mixture?

    While nuts can be a delicious addition, they can alter the texture. If you decide to go for it, chop them finely and mix them in right after adding the flavor. Just be sure they’re added before pouring onto the baking sheet!

    Final Thoughts

    Making Red Hot Cinnamon Hard Candy is more than just a recipe; it’s a playful journey that brightens your kitchen and warms your heart. The joy of pulling together sweet and spicy elements creates a sensational treat that you’ll love sharing. Imagine your family’s excitement as they unwrap each piece, their faces lighting up at the bold flavors. Whether you’re enjoying it on a cozy evening or handing out little gifts, this candy embodies warmth and togetherness. So gather your ingredients, channel your inner candy maker, and experience the simple happiness that comes with creating something sweet!


    Print

    clock clock iconcutlery cutlery iconflag flag iconfolder folder iconinstagram instagram iconpinterest pinterest iconfacebook facebook iconprint print iconsquares squares iconheart heart iconheart solid heart solid icon

    Description

    Enjoy the spicy sweetness of homemade Red Hot Cinnamon Hard Candy, a delightful treat that’s perfect for sharing or savoring on your own.


    • 2 cups granulated sugar
    • ½ cup light corn syrup
    • ½ cup water
    • 1 tsp cinnamon extract
    • ½ tsp red food coloring (optional)
    • ½ tsp cayenne pepper (optional)
    • Powdered sugar (for dusting)

    1. Prepare the Surface: Line a baking sheet with parchment paper or a silicone baking mat. Lightly dust with powdered sugar to prevent sticking.
    2. Heat the Sugar Mixture: In a heavy-bottomed saucepan, combine sugar, corn syrup, and water over medium heat. Stir until sugar dissolves, then let it boil without stirring.
    3. Cook to Hard Crack Stage: Attach a candy thermometer and cook until it reaches 300°F (hard crack stage).
    4. Add Flavor & Color: Remove from heat and stir in cinnamon extract, red food coloring, and cayenne pepper.
    5. Pour & Cool: Carefully pour the hot candy mixture onto the prepared baking sheet. Let it cool completely for about 30 minutes.
    6. Break & Store: Once hardened, break into small pieces and dust with powdered sugar. Store in an airtight container for up to 2 weeks.

    Notes

    • Adjust the cayenne pepper to your spice preference.
    • Ensure to monitor the temperature closely to prevent burning.
    • Make sure to use a candy thermometer for accurate results.
    • Prep Time: 10 minutes
    • Cook Time: 15 minutes
    • Category: Candy
    • Method: Boiling
    • Cuisine: American

    Nutrition

    • Serving Size: 1 piece
    • Calories: 60
    • Sugar: 14g
    • Sodium: 2mg
    • Fat: 0g
    • Saturated Fat: 0g
    • Unsaturated Fat: 0g
    • Trans Fat: 0g
    • Carbohydrates: 15g
    • Fiber: 0g
    • Protein: 0g
    • Cholesterol: 0mg

    Sharing is caring!

  • No-Bake Oreo Cheesecake Sushi Rolls

    No-Bake Oreo Cheesecake Sushi Rolls


    Introduction to No-Bake Oreo Cheesecake Sushi Rolls

    Welcome to a dessert that truly marries fun with flavor! These No-Bake Oreo Cheesecake Sushi Rolls are not just a treat for the taste buds but a delightful visual feast as well. Whether you’re a busy mom seeking a quick solution for dessert or someone wanting to impress at gatherings, this recipe has you covered. With a mere 15 minutes of prep and no oven required, you’ll have an enticing sweet roll ready to thrill your family and friends. Dive in with me for a delicious adventure that’s as easy as it is tasty!

    Why You’ll Love This No-Bake Oreo Cheesecake Sushi Rolls

    These No-Bake Oreo Cheesecake Sushi Rolls are the answer to your dessert dilemmas. In just 15 minutes, you can whip up a delightful treat that looks as incredible as it tastes. Perfectly creamy and rich, every bite is a sweet celebration. Plus, the no-bake aspect means you can say goodbye to the oven—ideal for those hot summer days or when time is scarce. Trust me, these rolls will quickly become a family favorite!

    Ingredients for No-Bake Oreo Cheesecake Sushi Rolls

    Creating these delightful No-Bake Oreo Cheesecake Sushi Rolls requires just a handful of simple ingredients. Here’s what you’ll need:

    • Cream cheese: Softened for easy mixing, it’s the creamy base for your cheesecake. Make sure to take it out of the fridge ahead of time!
    • Powdered sugar: This will sweeten your cheesecake mixture, balancing the richness of the cream cheese. It dissolves easily, creating a smooth texture.
    • Oreo cookies: The star of our show! Crushed into fine crumbs, they add that irresistible chocolate flavor and crumbly texture.
    • Melted butter: This binds the Oreo crumbs into a delicious crust-like base. You can’t have cheesecake sushi rolls without a sturdy foundation!
    • Chocolate drizzle: Optional but oh-so-delicious! It adds a fun finishing touch that not only tastes great but also elevates the presentation.
    • Crushed Oreos: For garnish, adding a decorative and crunchy element that complements the softness of the cheesecake.
    • Whipped cream: Optional topping for adding extra creaminess. You could also use store-bought to save a little time!
    • Sliced strawberries or bananas: Optional fillings that provide a fresh contrast to the rich cheesecake. Feel free to get creative with seasonal fruits!

    For exact quantities of each ingredient, check the bottom of the article. You’ll find everything laid out clearly and ready for printing. Happy cooking!

    How to Make No-Bake Oreo Cheesecake Sushi Rolls

    Now comes the part where the magic happens! Making these No-Bake Oreo Cheesecake Sushi Rolls is as easy as pie, or should I say, easy as sushi? Follow each step closely for a delightful treat that’ll impress everyone.

    Step 1: Beat the Cream Cheese and Sugar

    Start by grabbing a medium-sized bowl. In it, combine the softened cream cheese and powdered sugar.

    Using an electric mixer, beat them together until the mixture is smooth and fluffy. No lumps allowed here! It should feel like a sweet cloud.

    Step 2: Crush the Oreos

    Now, let’s bring in those Oreos! Place them in a ziplock bag and seal it tightly.

    With a rolling pin or something heavy, crush them into fine crumbs. The sound can be quite therapeutic—trust me, it’s like a mini workout for your dessert!

    Step 3: Mix the Crust Ingredients

    In a separate bowl, mix the crushed Oreos with the melted butter. Stir until every crumb is coated. This mixture will serve as our crumbly base—think of it as the sushi rice!

    Step 4: Form the Base

    Lay out a sheet of parchment paper on your counter. Press the Oreo mixture into a thin rectangle, about ¼-inch thick.

    Ensure it’s evenly shaped so every slice has that pretty sushi roll look! Use your fingers or a spatula to smooth the top.

    Step 5: Spread the Cheesecake Mixture

    Grab your fluffy cheesecake mixture and spread it evenly over the Oreo crust. Leave about a ½-inch border on all sides.

    Now, this is the place to add any optional fruit filling if you’ve chosen to use it. Berries and bananas mix beautifully with the flavors!

    Step 6: Roll and Freeze

    Here’s where the fun part begins! Carefully lift the parchment paper on one side and start rolling the mixture towards the other side.

    Keep the roll tight but not too tight—like a warm hug! Once rolled up, tuck the ends like a burrito and place it in the freezer for about 30-45 minutes or until it’s firm.

    Step 7: Slice and Serve

    When it’s firm, take it out of the freezer. Using a sharp knife, slice the roll into 1-inch rounds.

    Garnish with chocolate drizzle, crushed Oreos, or whipped cream to elevate the presentation. You can also add fresh fruit on the side for a pop of color.

    Voila! Your No-Bake Oreo Cheesecake Sushi Rolls are ready to be devoured. Enjoy this delicious creation and watch smiles spread, just like the sweet cream inside each slice!

    Tips for Success

    • Ensure your cream cheese is softened to room temperature for easy mixing.
    • When crushing Oreos, use a ziplock bag to avoid any messy cleanup.
    • Don’t rush the freezing process; letting it chill properly ensures cleaner slices.
    • Add fillings sparingly to avoid a messy roll; you want that delightful surprise in every bite!
    • Feel free to experiment with different toppings—let your creativity shine!

    Equipment Needed

    • Mixing bowls: Any medium-sized bowl will do for mixing, but a glass bowl is ideal for watching that creamy texture come together.
    • Electric mixer: A hand mixer speeds things up, but a whisk works too—just get ready for a workout!
    • Parchment paper: Essential for easy rolling and cleanup; alternatively, a silicone mat can be used.
    • Sharp knife: Perfect for slicing through your roll cleanly—don’t forget to warm the knife under hot water for smoother cuts!
    • Ziplock bag or heavy rolling pin: Use either for crushing your Oreos to get those fine crumbs. A blender also works in a pinch!

    Variations of No-Bake Oreo Cheesecake Sushi Rolls

    • Nut Butter Swirls: Add a layer of almond or peanut butter between the cheesecake and Oreo layers for an extra flavor burst.
    • Fruit Twist: Substitute crushed Oreos for vanilla wafers and add fresh raspberries or diced peaches for a fruity delight.
    • Minty Fresh: Mix peppermint extract into your cream cheese mixture for a refreshing minty twist—like a dessert mojito!
    • Chocolate Lovers: Use double stuffed Oreos and drizzle chocolate sauce all over for that ultimate chocolate experience.
    • Dairy-Free Option: Swap cream cheese for dairy-free alternatives, and use coconut cream to keep it creamy and delicious!
    • Gluten-Free: Choose gluten-free Oreos or use crushed gluten-free cookies to accommodate dietary restrictions while still enjoying the fun.
    • Mini Sushi Rolls: Create bite-sized versions by rolling smaller sections of the cheesecake mixture—perfect for fun party snacks!

    Serving Suggestions for No-Bake Oreo Cheesecake Sushi Rolls

    • Pair with a scoop of vanilla ice cream for a delightful contrast of temperatures.
    • Serve alongside a fresh fruit salad for a refreshing side that balances the richness.
    • Drizzle with salted caramel for a sweet and slightly salty twist.
    • Garnish with mint leaves to add a pop of color and freshness.
    • Offer coffee or milk as a drink to complement the dessert beautifully.

    FAQs about No-Bake Oreo Cheesecake Sushi Rolls

    Can I make these No-Bake Oreo Cheesecake Sushi Rolls ahead of time?

    Absolutely! You can prepare the rolls a day in advance and store them in the fridge. Just slice them right before serving for the freshest experience.

    What can I substitute for cream cheese?

    If you’re looking for a dairy-free option, try using vegan cream cheese or coconut cream. They both work surprisingly well and keep the dessert creamy!

    How do I store leftovers?

    Place any leftover sushi rolls in an airtight container and refrigerate. They taste best when fresh but will stay good for a few days.

    Can I use other cookies instead of Oreos?

    Of course! Feel free to experiment with any chocolate or vanilla sandwich cookies. Just keep in mind that the flavor and texture may vary a bit.

    How can I make this recipe more festive for special occasions?

    For a celebration, add colorful sprinkles or seasonal fruits as toppings. You could also serve them on a decorative platter to impress your guests!

    Final Thoughts

    Indulging in these No-Bake Oreo Cheesecake Sushi Rolls is like wrapping your taste buds in a warm, delicious hug. The joy of creating something that looks as fun as it tastes cannot be overstated. Whether you’re bonding with family in the kitchen or surprising friends at a gathering, this recipe brings smiles all around. I’ve found that it’s not just about the dessert but the shared moments over a plate of homemade sweetness. So roll up your sleeves, gather your loved ones, and embark on this delightful adventure. Trust me, you won’t regret it!


    Print

    clock clock iconcutlery cutlery iconflag flag iconfolder folder iconinstagram instagram iconpinterest pinterest iconfacebook facebook iconprint print iconsquares squares iconheart heart iconheart solid heart solid icon

    Description

    A fun and delicious dessert that combines the flavors of Oreo cheesecake with the presentation of sushi rolls, ready in no time without baking.


    • 8 oz cream cheese softened
    • 0.25 cup powdered sugar
    • 20 Oreo cookies
    • 2 tbsp melted butter
    • Chocolate drizzle (optional)
    • Crushed Oreos (optional)
    • Whipped cream (optional)
    • Sliced strawberries or bananas (optional)

    1. Beat the softened cream cheese and powdered sugar together in a bowl until it’s smooth and fluffy.
    2. Crush the Oreos into fine crumbs.
    3. Mix the Oreo crumbs and melted butter until well combined.
    4. Press the Oreo mixture into a thin rectangle on a sheet of parchment paper.
    5. Spread the cheesecake mixture evenly over the Oreo crust, leaving about a ½-inch border.
    6. If using, add your optional fruit filling now.
    7. Carefully roll up the cheesecake mixture using the parchment paper as a guide.
    8. Freeze the roll for 30-45 minutes, or until firm.
    9. Once frozen, slice the roll into 1-inch rounds.
    10. Drizzle with chocolate, sprinkle with crushed Oreos, or top with whipped cream – get creative!

    Notes

    • Make sure the cream cheese is well softened for easier mixing.
    • Feel free to customize fillings according to your preferences.
    • This dessert is best enjoyed fresh but can be stored in the fridge for a few days.
    • Prep Time: 15 minutes
    • Cook Time: 0 minutes
    • Category: Dessert
    • Method: No-Bake
    • Cuisine: American

    Nutrition

    • Serving Size: 1 roll (1-inch slice)
    • Calories: 150
    • Sugar: 10g
    • Sodium: 90mg
    • Fat: 8g
    • Saturated Fat: 4g
    • Unsaturated Fat: 4g
    • Trans Fat: 0g
    • Carbohydrates: 20g
    • Fiber: 1g
    • Protein: 2g
    • Cholesterol: 30mg

    Sharing is caring!

  • Dump-and-Bake Chicken Tzatziki with Rice

    Dump-and-Bake Chicken Tzatziki with Rice


    Introduction to Dump-and-Bake Chicken Tzatziki with Rice

    As a busy mom, I know how chaotic life can get. Between work, errands, and family commitments, finding time to cook can feel like an uphill battle. That’s why I’m excited to share my Dump-and-Bake Chicken Tzatziki with Rice recipe. It’s not just easy; it’s bursting with flavor and perfect for a quick dinner solution. Picture tender chicken, fluffy rice, and a creamy tzatziki all baked together in one dish! You’ll not only save time but leave your loved ones raving about the taste. It’s a win-win!

    Why You’ll Love This Dump-and-Bake Chicken Tzatziki with Rice

    This recipe is a lifesaver, especially on those nights when you’re juggling a million things. It’s as simple as dumping ingredients together and letting your oven work its magic. The combination of succulent chicken and zesty tzatziki will dance on your taste buds, making every bite divine. Plus, who doesn’t love a one-pan wonder? Less cleanup means more family time, making it perfect for busy evenings!

    Ingredients for Dump-and-Bake Chicken Tzatziki with Rice

    Before we jump into the preparation, let’s talk about the ingredients that will bring this fantastic Dump-and-Bake Chicken Tzatziki to life. I promise each component plays a delicious role!

    • Boneless, skinless chicken breasts or thighs: Tender and juicy, chicken is the star of the dish. You can also use leftover chicken for a quick shortcut!
    • Long-grain white rice: This will absorb all the amazing flavors and become fluffy and soft. Feel free to swap with brown rice for added nutrients, though cooking time may vary.
    • Chicken broth or water: It keeps the rice moist and adds extra flavor. Homemade broth is lovely, but store-bought works fine too.
    • Plain Greek yogurt: This creamy ingredient creates a smooth tzatziki sauce. Look for whole milk for a richer taste or low-fat if you’re counting calories.
    • Grated cucumber: A fresh burst in the tzatziki, it should be squeezed to remove excess water. This keeps the sauce from getting watery and ensures a thick, creamy texture.
    • Olive oil: Adds richness to the dish. It’s also a heart-healthy fat! You could swap in avocado oil for a different flavor profile.
    • Garlic: Minced garlic brings an aromatic punch that elevates the overall taste. I recommend using fresh garlic for the best flavor!
    • Dried dill and oregano: These herbs infuse the dish with Mediterranean flair. Fresh herbs can be substituted if you have them on hand.
    • Ground cumin: This warm spice adds earthy notes to the tzatziki, complementing the chicken beautifully.
    • Salt and black pepper: Essential seasonings to enhance every flavor in this casserole!
    • Juice of lemon: Brightens up the dish, giving that zesty flavor boost. Adding lemon zest can intensify that citrus aroma!
    • Crumpled feta cheese (optional): This optional topping adds a salty tang that pairs wonderfully with the creamy tzatziki.
    • Fresh parsley or cilantro (for garnish): A sprinkle on top adds color and freshness, making every bite more enjoyable.

    For exact quantities, make sure to scroll down to the bottom of the article, where you’ll find everything you need to print out this delightful recipe!

    How to Make Dump-and-Bake Chicken Tzatziki with Rice

    Let’s dive into the simple steps that will transform everyday ingredients into a delightful Dump-and-Bake Chicken Tzatziki with Rice. Trust me, the magic is in the simplicity!

    Step 1: Preheat Your Oven

    Start by preheating your oven to 375°F (190°C). This ensures that your casserole is cooked evenly and beautifully. While it heats up, you can prep the rest of your ingredients!

    Step 2: Prepare the Tzatziki Sauce

    In a large bowl, combine the plain Greek yogurt, grated cucumber, olive oil, minced garlic, dried dill, oregano, ground cumin, lemon juice, salt, and pepper. Mix until everything is well blended. This creamy tzatziki sauce should have a nice balance of flavors. Squeeze that cucumber well to avoid a watery sauce!

    Step 3: Combine Chicken and Rice

    Next, take your 9×13-inch baking dish and add the uncooked rice and the chicken pieces. Pour that lovely tzatziki sauce over the top, and then add the chicken broth or water. Stir everything together to ensure all the chicken and rice are beautifully coated in that tangy sauce. Don’t be shy—let that tzatziki soak into the rice!

    Step 4: Bake the Casserole

    Cover the baking dish tightly with aluminum foil and place it in your preheated oven. Bake for about 40 to 45 minutes. This cooking time allows the rice to absorb all those tempting flavors and ensures the chicken is cooked through. You’ll know it’s ready when the rice is tender and the chicken is no longer pink.

    Step 5: Final Touches and Serve

    Once your casserole is done baking, carefully remove it from the oven and discard the foil. Stir everything to mix it up a bit. If you’d like, sprinkle with crumbled feta cheese for that salty kick, and garnish with chopped fresh parsley or cilantro. Serve it warm and watch your family dive right in!

    Tips for Success

    • Always squeeze out excess water from the grated cucumber to keep your tzatziki sauce thick.
    • Prepare the casserole ahead of time and store it in the fridge until you’re ready to bake.
    • Add your favorite veggies, like bell peppers or spinach, for extra nutrition.
    • Stir the casserole halfway through baking for even cooking.
    • For a spicy kick, add a pinch of red pepper flakes to the tzatziki sauce.

    Equipment Needed

    • 9×13-inch baking dish: A classic choice for casseroles; you can also use a larger or smaller dish if needed.
    • Large mixing bowl: For combining the tzatziki sauce; a big pot works too!
    • Aluminum foil: Essential for covering the dish while it bakes; parchment paper can be a substitute.
    • Measuring cups and spoons: Handy for accurately measuring ingredients, but you can eyeball them if you’re feeling adventurous!

    Variations on Dump-and-Bake Chicken Tzatziki with Rice

    • Add Vegetables: Incorporate bell peppers, zucchini, or spinach for added vitamins and flavors.
    • Swap Proteins: Use shrimp or turkey instead of chicken to mix up the protein source—delicious with the tzatziki!
    • Make it Vegetarian: Substitute the chicken with chickpeas or lentils for a hearty, plant-based option.
    • Change the Grains: Try quinoa or cauliflower rice for a low-carb alternative that still absorbs the tasty sauce.
    • Spice it Up: Toss in some chopped jalapeños or a dash of cayenne for those who enjoy a little heat in their meal.

    Serving Suggestions for Dump-and-Bake Chicken Tzatziki with Rice

    • Fresh Salad: Serve alongside a crisp Greek salad with tomatoes, olives, and feta for a refreshing contrast.
    • Pita Bread: Warm pita or naan can be a delightful addition for dipping into any leftover tzatziki sauce.
    • Wine Pairing: A chilled white wine, such as Sauvignon Blanc, complements the flavors beautifully.
    • Presentation: Garnish with extra herbs or a lemon wedge to make your dish visually appealing.

    FAQs about Dump-and-Bake Chicken Tzatziki with Rice

    As a busy mom and passionate cook, I often get asked about this delightful Dump-and-Bake Chicken Tzatziki with Rice recipe. Here are some of the most common questions and my answers to help you out!

    Can I use frozen chicken for this recipe?

    Yes, you definitely can! Just make sure to increase the baking time slightly. Frozen chicken may need an extra 10 to 15 minutes in the oven. Just check that the chicken is fully cooked through before serving!

    What if I don’t have Greek yogurt?

    No worries! You can substitute plain yogurt or even sour cream if that’s what you have on hand. The flavor may vary a bit, but it’ll still be creamy and delicious.

    Can I prepare this dish ahead of time?

    Absolutely! Prep the casserole a day ahead and keep it covered in the fridge. Just pop it in the oven when you’re ready, adding a few extra minutes to the cooking time, if necessary.

    What can I serve with Dump-and-Bake Chicken Tzatziki?

    This meal pairs wonderfully with a fresh salad, warm pita, or a glass of white wine. The options are endless, and it’s all about what you enjoy!

    Is this an easy dinner option for picky eaters?

    Yes, many kids love this dish because it’s creamy and packed with flavor. If your little ones are especially picky, consider cutting the veggies into smaller pieces or serving the tzatziki on the side for them to dip!

    Final Thoughts

    Cooking should be a joy, not a chore, and my Dump-and-Bake Chicken Tzatziki with Rice truly captures that spirit. It brings together the comfort of a hearty meal and the ease of simple preparation, making weeknight dinners remarkably less stressful. I love how each bite is a burst of Mediterranean flavors, wrapping your family in warmth and deliciousness. Plus, knowing that clean-up is a breeze is a huge win in my book! Whether you’re feeding a crowd or just your family, this recipe transforms mealtime into a cherished moment. Give it a try—you won’t regret it!


    Print

    clock clock iconcutlery cutlery iconflag flag iconfolder folder iconinstagram instagram iconpinterest pinterest iconfacebook facebook iconprint print iconsquares squares iconheart heart iconheart solid heart solid icon

    Description

    A simple and flavorful Dump-and-Bake Chicken Tzatziki casserole made with tender chicken, rice, and a creamy tzatziki sauce.


    • 1 pound boneless, skinless chicken breasts or thighs, cut into bite-sized pieces
    • 1 cup long-grain white rice (uncooked)
    • 1 ½ cups chicken broth or water
    • 1 cup plain Greek yogurt
    • ⅓ cup grated cucumber (squeeze out excess water)
    • 2 tablespoons olive oil
    • 2 garlic cloves, minced
    • 1 teaspoon dried dill (or 2 teaspoons fresh dill, chopped)
    • 1 teaspoon dried oregano
    • ½ teaspoon ground cumin
    • Salt and black pepper, to taste
    • Juice of 1 lemon
    • ½ cup crumbled feta cheese (optional)
    • ¼ cup chopped fresh parsley or cilantro (for garnish)

    1. Preheat your oven to 375°F (190°C).
    2. In a large bowl, combine the Greek yogurt, grated cucumber (squeeze out excess water), olive oil, minced garlic, dried dill, oregano, cumin, lemon juice, salt, and pepper. Mix well to create the tzatziki sauce.
    3. Add the uncooked rice and chicken pieces into a 9×13-inch baking dish. Pour the tzatziki sauce over the top, and add the chicken broth (or water). Stir everything together to ensure the rice and chicken are evenly coated.
    4. Cover the baking dish with aluminum foil and bake for 40-45 minutes, or until the rice is tender and the chicken is cooked through.
    5. Remove from the oven, discard the foil, and stir the casserole to mix everything together.
    6. Sprinkle with crumbled feta cheese (optional) and chopped fresh parsley or cilantro for garnish.
    7. Serve and enjoy!

    Notes

    • Make sure to squeeze out excess water from the grated cucumber to avoid a watery sauce.
    • This recipe can be easily adjusted by adding vegetables to the casserole for extra nutrients.
    • Leftovers can be stored in the refrigerator for up to 3 days.
    • Prep Time: 15 minutes
    • Cook Time: 45 minutes
    • Category: Casserole
    • Method: Baking
    • Cuisine: Mediterranean

    Nutrition

    • Serving Size: 1 serving
    • Calories: 450
    • Sugar: 3g
    • Sodium: 600mg
    • Fat: 17g
    • Saturated Fat: 4g
    • Unsaturated Fat: 11g
    • Trans Fat: 0g
    • Carbohydrates: 52g
    • Fiber: 2g
    • Protein: 30g
    • Cholesterol: 85mg

    Sharing is caring!

  • Kimchi Potatoes

    Kimchi Potatoes


    Introduction to Kimchi Potatoes

    Have you ever found yourself staring at your pantry, searching for inspiration? If so, you’re in for a delightful surprise with my Kimchi Potatoes! This dish brings together the crispy comfort of potatoes with the bold, tangy flavors of kimchi. Trust me, it’s a match made in culinary heaven. Whether you’re looking for a quick solution after a long day or a dish to impress your gathering, these Kimchi Potatoes offer both flavor and flair. Plus, they’re incredibly easy to whip up, making them the perfect addition to your busy weeknight lineup.

    Why You’ll Love This Kimchi Potatoes

    If you’re short on time but still crave something delicious, my Kimchi Potatoes have you covered. They come together in just 45 minutes, making them a fantastic option for busy nights. The explosion of flavors is nothing short of amazing, satisfying even picky eaters. Plus, they’re versatile enough to pair with any main dish, ensuring the whole family will devour them. Trust me, your taste buds will thank you!

    Ingredients for Kimchi Potatoes

    Gathering the right ingredients makes all the difference in preparing Kimchi Potatoes. Let’s look at what you’ll need for this mouthwatering side dish. Don’t worry; I’ve kept it straightforward!

    • Yukon Gold potatoes: These beauties are creamy and buttery, perfect for roasting and holding onto flavors.
    • Salt for boiling: A must to enhance the potatoes’ natural flavor as they cook in water.
    • Neutral cooking oil: This will help your potatoes crisp up beautifully. Choose oils like canola or vegetable oil.
    • Napa cabbage kimchi: This is the star of the show! It adds that spicy, tangy zing that elevates the dish. You can use store-bought or homemade—your choice!
    • Scallions: Both the white and pale green parts add a mild onion flavor. The vibrant green tops will be used as a fresh garnish.
    • Soy sauce (or tamari): This savory ingredient infuses depth into the dish. Tamari is a great gluten-free option.
    • Fish sauce: It might sound unconventional, but it brings an umami punch. You can skip this for a vegan option.
    • Toasted sesame seeds: These little gems add crunch and a nutty flavor, making your dish visually appealing too.
    • Greek yogurt: A dollop of this creamy goodness serves as a refreshing counterbalance to the spiciness of the kimchi. Feel free to use low-fat or full-fat.
    • Garlic: A grated clove adds warmth and an aromatic kick that ties everything together.
    • Optional garnishes: Consider topping your Kimchi Potatoes with sliced avocado or a crispy fried egg for extra flair!

    If you’re keen on precise measurements, don’t worry! You’ll find everything you need at the bottom of the article, available for easy printing!

    How to Make Kimchi Potatoes

    Ready to create this delightful dish? Follow these simple steps to make Kimchi Potatoes that will wow your family and friends!

    Step 1: Boil the Potatoes

    First, wash and scrub your Yukon Gold potatoes. Place them in a large pot, covering them with water by an inch. Add about a tablespoon of salt to enhance their flavor while boiling.

    Bring the water to a rolling boil over high heat. Once bubbling, reduce the heat and let the potatoes simmer for 12 to 15 minutes. You’ll know they’re done when a fork easily pierces them. Drain the pot and set the potatoes aside to cool off a bit.

    Step 2: Prepare the Sauce

    While the potatoes are cooling, it’s time to mix up the sauce! Grab a small jar or bowl, and combine the kimchi brine with soy sauce (or tamari) and fish sauce. Give it a good stir and set it aside for later. This sauce will be the secret to packing in flavor!

    Step 3: Cut and Crisp the Potatoes

    When the potatoes are cool enough to handle, chop them into 1-inch chunks. Don’t stress about perfection; just keep them similar in size so they cook evenly.

    Heat your neutral cooking oil in a large skillet over medium heat. Then, add the cut potatoes carefully. Let them cook for about 9 to 10 minutes until they turn golden brown and crispy on the outside. Give them a gentle toss now and then to ensure they’re evenly cooked.

    Step 4: Add the Kimchi

    Now, it’s time for the kimchi to shine! Toss in the roughly chopped napa cabbage kimchi along with the white and pale green parts of the scallions. Cook this mixture for another 5 to 6 minutes until the kimchi caramelizes a bit, creating a delicious sweet and savory smell.

    Step 5: Combine and Cook

    Pour your sauce mixture over the potato and kimchi medley. Stir to coat everything well! Let this simmer for another 2 minutes until the sauce reduces just a tad and clings to your crispy potatoes.

    Step 6: Serve with Yogurt

    To finish, sprinkle the toasted sesame seeds over your Kimchi Potatoes and garnish with the vibrant green parts of the scallions. In a small bowl, combine Greek yogurt with a grated garlic clove. Top each serving of Kimchi Potatoes with a dollop of this garlicky yogurt.

    If you’re feeling extra fancy, add some sliced avocado or a crispy fried egg on top. Enjoy your Kimchi Potatoes warm, and watch them disappear from the table!

    Tips for Success

    • Make sure to cook the potatoes until they’re fork-tender, but not mushy!
    • Don’t skip the kimchi brine; it adds a lot of flavor. Every drop matters!
    • Adjust the spiciness of your dish by varying the amount of kimchi you add.
    • For a crispier finish, allow the potatoes to sit undisturbed in the pan.
    • Feel free to customize the garnishes to your taste; they elevate the dish!

    Equipment Needed

    • Large pot: A sturdy pot for boiling your potatoes. A deep stockpot works great.
    • Skillet or sauté pan: A non-stick skillet is ideal for crispy potatoes, but any heavy skillet will do.
    • Cutting board and knife: A sharp knife and a clean cutting board for chopping potatoes and kimchi.
    • Small bowl or jar: For mixing and storing your sauce ingredients.
    • Slotted spoon: Useful for scooping out the potatoes once they’re boiled.

    Variations of Kimchi Potatoes

    • Vegan Kimchi Potatoes: Omit the fish sauce for a completely plant-based dish. The kimchi will still provide plenty of flavor!
    • Spicy Kick: If you love heat, add a teaspoon of gochujang (Korean chili paste) to the sauce for an extra punch.
    • Different Potatoes: Try using sweet potatoes for a sweeter flavor that pairs nicely with the tangy kimchi.
    • Herbed Variations: Add fresh herbs like cilantro or parsley as a vibrant garnish to brighten the dish.
    • Protein Boost: Toss in some cooked protein like shredded chicken or tofu for a more filling side dish!

    Serving Suggestions for Kimchi Potatoes

    • Pair with protein: Serve alongside grilled chicken, pork, or marinated tofu for a complete meal.
    • Refreshing salads: A crisp cucumber or mixed greens salad complements the spiciness perfectly.
    • Beverage ideas: Enjoy with a chilled light beer or iced green tea for a refreshing combo.
    • Presentation: Serve in vibrant bowls garnished with extra scallions for a colorful spread.
    • Perfect for gatherings: Share them as a unique appetizer that will intrigue your guests!

    FAQs about Kimchi Potatoes

    Curious about Kimchi Potatoes? Here are some frequently asked questions that might help you out!

    Can I make Kimchi Potatoes ahead of time?

    Absolutely! You can prepare them in advance and reheat them when it’s time to serve. Just keep the yogurt separate until serving to maintain freshness.

    What if my family doesn’t like spicy food?

    No problem! You can easily adjust the spice level by using less kimchi or opting for a milder version. The dish remains delicious with all those savory flavors!

    How long do leftovers last?

    Leftovers can be stored in an airtight container in the refrigerator for about 2 to 3 days. Just reheat on the stovetop or in the microwave before serving.

    Is this recipe gluten-free?

    To make Kimchi Potatoes gluten-free, simply use tamari instead of regular soy sauce. Always check your kimchi label for gluten ingredients, as some brands may vary.

    Can I use a different type of kimchi?

    Definitely! While napa cabbage is traditional, feel free to use any kimchi that suits your taste. The unique flavors of different types will create delightful variations!

    Final Thoughts

    Making Kimchi Potatoes has turned into one of my favorite culinary adventures. The joyful blend of crispy potatoes with that bold, tangy kimchi is enough to bring smiles around the dinner table. It’s an exciting dish that not only satisfies but also sparks laughter and conversation. Best of all, it’s simple enough for a weeknight yet impressive enough for special occasions. Every bite is a little explosion of flavor, reminding us that cooking can be both fun and delicious. So grab your ingredients, gather your loved ones, and dive into this unforgettable dish together!


    Print

    clock clock iconcutlery cutlery iconflag flag iconfolder folder iconinstagram instagram iconpinterest pinterest iconfacebook facebook iconprint print iconsquares squares iconheart heart iconheart solid heart solid icon

    Description

    Kimchi Potatoes is a deliciously unique side dish that combines the flavor of crispy potatoes with the tangy and spicy kick of kimchi.


    • 1 1/2 lbs. Yukon Gold potatoes
    • Salt for boiling
    • 2 Tbsp. neutral cooking oil
    • 2 cups napa cabbage kimchi, roughly chopped (plus 2 Tbsp. kimchi brine)
    • 4 to 5 chopped scallions, white and pale green parts separated from vibrant tops
    • 3 Tbsp. lower-sodium soy sauce or tamari
    • 1 tsp. fish sauce
    • 2 Tbsp. toasted sesame seeds
    • 3/4 cup plain full-fat or 2% Greek yogurt
    • 1 large garlic clove, grated
    • Sliced avocado and/or a crispy fried egg (optional for serving)

    1. Place the potatoes in a large pot and fill with enough water to cover by 1 inch; add ~1 tablespoon salt. Bring to a boil over high heat, then simmer, uncovered, for 12 to 15 minutes, until the potatoes are fork tender. Drain and set aside to slightly cool.
    2. Meanwhile, combine kimchi brine, soy sauce (or tamari), and fish sauce in a small jar or bowl; set aside.
    3. Once cool enough to handle, cut potatoes into chunks (about 1×1-inch in size).
    4. Heat oil in a large skillet or sauté pan over medium heat. Add potatoes and cook until golden and crisp, about 9 to 10 minutes.
    5. Stir in kimchi along with the white and pale green parts of scallions; cook 5 to 6 minutes, until the kimchi is nicely caramelized.
    6. Add soy sauce mixture and cook 2 more minutes, stirring often, until the sauce reduces and coats potatoes.
    7. Stir in sesame seeds and garnish with remaining bright green parts of scallions.
    8. In a small bowl, combine yogurt with grated garlic. Add a dollop of garlicky yogurt to each serving of kimchi potatoes.
    9. Enjoy with garnishes of choice (sliced avocado and/or fried or soft-boiled egg), if desired.

    Notes

    • For a vegan option, omit the fish sauce.
    • Adjust the amount of kimchi to taste for spiciness.
    • Leftovers can be stored in the fridge for a couple of days.
    • Prep Time: 15 minutes
    • Cook Time: 30 minutes
    • Category: Side Dish
    • Method: Stovetop
    • Cuisine: Korean

    Nutrition

    • Serving Size: 1 serving
    • Calories: 250
    • Sugar: 3g
    • Sodium: 600mg
    • Fat: 12g
    • Saturated Fat: 2g
    • Unsaturated Fat: 8g
    • Trans Fat: 0g
    • Carbohydrates: 30g
    • Fiber: 4g
    • Protein: 7g
    • Cholesterol: 5mg

    Sharing is caring!

  • Chocolate Salted Caramel Tarts

    Chocolate Salted Caramel Tarts


    Introduction to Chocolate Salted Caramel Tarts

    Hey there, fellow chocolate lovers! If you’re anything like me, you crave a sweet treat that feels indulgent without taking all day to whip up. Enter the delightful world of Chocolate Salted Caramel Tarts. These little beauties are perfect for a quick solution on a busy day or a show-stopping dessert for your next gathering. Trust me, the combination of rich, silky chocolate and smooth salted caramel tucked inside a buttery crust is pure bliss. Busy moms and professionals, this is your new go-to recipe for when you need a sweet escape!

    Why You’ll Love This Chocolate Salted Caramel Tarts

    These Chocolate Salted Caramel Tarts are a dream come true for busy cooks like me. They’re easy to prepare, and most of the ingredients are pantry staples. The dazzling flavors of creamy chocolate and rich caramel come together quickly, satisfying everyone’s sweet tooth. Plus, they look elegant, making you the star of any dinner party without breaking a sweat. Honestly, who wouldn’t love that combination?

    Ingredients for Chocolate Salted Caramel Tarts

    Let’s talk about the star players in our Cheese Chocolate Salted Caramel Tarts. Each ingredient plays a vital role in crafting this indulgent dessert. Here’s what you need:

    • All-purpose flour: The base for our buttery tart crust. It gives structure and texture.
    • Powdered sugar: Sweetens the crust while helping it stay tender and crumbly.
    • Unsalted butter: Cold and cubed is a must! It creates that flakiness we all desire in a tart shell.
    • Egg yolk: Adds richness and helps bind the crust together, making it more flavorful.
    • Ice water: Just a splash helps bring the dough together without warming the butter.
    • Granulated sugar: This is for our luscious salted caramel, providing the sweetness we love.
    • Heavy cream: Essential for both the caramel and ganache, it creates that silky, smooth texture.
    • Sea salt: Just the right amount amplifies the flavors of both the caramel and chocolate.
    • Vanilla extract: A splash infuses warmth and depth into the sweet caramel.
    • Chocolate chips: Use semi-sweet or dark, depending on your preference. They melt into a smooth ganache that’s pure heaven.
    • Flaky sea salt: For garnishing, it adds a delightful contrast to the sweetness.

    Each of these components works together to create a dessert that’s truly special. You’ll find exact quantities at the bottom of the article for easy printing. If you’re ever in a pinch, feel free to substitute dark chocolate for the semi-sweet or even add a pinch of espresso powder to the ganache for that coffee-chocolate lover’s twist!

    How to Make Chocolate Salted Caramel Tarts

    Now, let’s dive into the heavenly process of creating these Chocolate Salted Caramel Tarts. Follow these simple steps, and you’ll be on your way to homemade bliss. Trust me, the end results are worth every minute spent in the kitchen!

    Step 1: Make the Tart Shells

    To start, mix the all-purpose flour and powdered sugar in a bowl. Add the cold, cubed butter. Use a pastry cutter or your fingers to blend the mixture until it resembles coarse crumbs.

    Next, add the egg yolk and a tablespoon of ice water. Mix until a lovely dough forms. Don’t overwork it! This is essential for keeping your crust flaky.

    Now, press the dough into your tart pans. Make sure it’s evenly spread and reaches up the sides. Pop them in the fridge for 30 minutes. This chilling time is crucial for a perfect texture when baked.

    Preheat your oven to 350°F (175°C). Bake the tart shells for 15-20 minutes, keeping an eye on them until they’re golden brown. Let them cool while you prepare the filling.

    Step 2: Prepare the Salted Caramel

    For the salted caramel, heat granulated sugar in a saucepan over medium heat. Stir continuously until it melts into a beautiful amber color. Patience is key here, dear friends! You don’t want it to burn.

    Once it reaches that perfect shade, carefully whisk in the heavy cream. This will bubble up, so don’t rush it! Next, add the butter and stir until it’s all smooth.

    Finally, remove from heat and mix in the vanilla extract and sea salt. Set aside to cool—this caramel is about to bring your tarts to life!

    Step 3: Make the Chocolate Ganache

    It’s time for the ganache! In a saucepan, heat the heavy cream over medium heat until it’s simmering. Pour it over your chocolate chips in a bowl and let it sit for about 2 minutes. This step may feel like waiting for a pot to boil, but trust me, it’s worth it!

    After two minutes, stir the chocolate and cream together until it’s perfectly smooth and glossy. If you crave a deeper flavor, you might just want to take a moment to savor its beauty before moving on.

    Step 4: Assemble the Tarts

    Now, let’s bring it all together! Start by spooning a generous layer of cooled salted caramel into each tart shell, filling them halfway.

    Chill the tarts for about 20-30 minutes to let that caramel set. Once that’s done, pour your luscious chocolate ganache over the caramel layers.

    Don’t forget to sprinkle a touch of flaky sea salt on top! This adds a gourmet touch and elevates the entire dessert experience. Refrigerate the tarts for at least 2 hours before serving. When you’re ready, serve chilled for a flavor explosion!

    Tips for Success

    • Always use cold butter for a flaky tart crust.
    • Keep an eye on the sugar while melting; it can burn easily.
    • Whisk the cream into the caramel slowly to avoid splattering.
    • For an extra touch, use high-quality chocolate for the ganache.
    • Let the tarts chill completely for a nicer texture before serving.

    Equipment Needed

    • Tart pans: Use fluted or standard pans. If you don’t have any, muffin tins work in a pinch!
    • Mixing bowls: Essential for combining your ingredients. Any size will do.
    • Pastry cutter or fork: Great for cutting butter into flour. Fingers work too!
    • Measuring cups and spoons: Accurate measuring is key for deliciousness.
    • Whisk: Perfect for mixing the caramel and ganache smoothly.

    Variations of Chocolate Salted Caramel Tarts

    • Nut Butter Swirl: Add a swirl of your favorite nut butter (like peanut or almond) into the salted caramel for an extra layer of flavor.
    • Fruit Addition: Top the finished tarts with fresh berries or sliced bananas for a fruity twist that complements the richness of the chocolate and caramel.
    • Gluten-Free Option: Replace all-purpose flour with a gluten-free flour blend for a delicious gluten-free tart crust.
    • Dark Chocolate Lovers: Use 70% dark chocolate for the ganache for a more intense flavor; it pairs beautifully with the sweetness of the caramel.
    • Vegan Version: Substitute dairy with coconut cream and maple syrup in place of granulated sugar for vegan-friendly tarts.

    Serving Suggestions for Chocolate Salted Caramel Tarts

    • Whipped Cream: A dollop of freshly whipped cream perfectly complements the tarts’ richness.
    • Ice Cream: Serve with vanilla or sea salt caramel ice cream for a decadent pairing.
    • Fresh Berries: Add a side of mixed berries for a refreshing burst of flavor.
    • Presentation: Dust with cocoa powder or serve on a decorative platter for a stunning display.

    FAQs about Chocolate Salted Caramel Tarts

    As a passionate home cook, I know that you might have some questions about these delightful Chocolate Salted Caramel Tarts. Let’s tackle some common queries to ensure your baking experience is a smooth one!

    Can I make the tart shells ahead of time?
    Absolutely! You can prepare the tart shells a day in advance. Just keep them stored in an airtight container at room temperature. Assemble your tarts with the caramel and ganache when you’re ready to indulge.

    What type of chocolate is best for the ganache?
    I recommend using semi-sweet or dark chocolate for your ganache. The richer the chocolate, the more luxurious your tarts will taste. High-quality chocolate really makes a difference in flavor!

    How do I store leftover tarts?
    Store any leftover Chocolate Salted Caramel Tarts in the refrigerator for up to 3 days. Just cover them with plastic wrap or keep them in a sealed container to maintain their freshness.

    Can I freeze these tarts?
    Yes! You can freeze the assembled tarts before adding the ganache. Cover them tightly and store for up to 2 months. When you’re ready to serve, let them thaw overnight in the fridge and then add your ganache.

    What can I substitute for heavy cream?
    If you want a lighter option, try using half-and-half or coconut cream for a dairy-free alternative in both the caramel and ganache. Just keep in mind that the texture may be slightly different, but still delicious!

    Final Thoughts

    Creating Chocolate Salted Caramel Tarts is more than just making dessert; it’s an experience of joy wrapped in rich flavors. Each bite transports you to chocolatey heaven, melding smooth ganache with a delightful burst of salted caramel. I love how this recipe fits perfectly into busy lives, adding a touch of elegance without much fuss. Whether you share these tarts with family or keep them all to yourself, they bring happiness to the table. So go ahead, indulge in your taste of bliss, and savor the sweet moments that life has to offer!


    Print

    clock clock iconcutlery cutlery iconflag flag iconfolder folder iconinstagram instagram iconpinterest pinterest iconfacebook facebook iconprint print iconsquares squares iconheart heart iconheart solid heart solid icon

    Description

    Hey there, fellow chocolate lovers! If you’re anything like me, you crave a sweet treat that feels indulgent without taking all day to whip up. Enter the delightful world of Chocolate Salted Caramel Tarts. These little beauties are perfect for a quick solution on a busy day or a show-stopping dessert for your next gathering. Trust me, the combination of rich, silky chocolate and smooth salted caramel tucked inside a buttery crust is pure bliss. Busy moms and professionals, this is your new go-to recipe for when you need a sweet escape!


    • 1¼ cups all-purpose flour
    • ¼ cup powdered sugar
    • ½ cup unsalted butter, cold and cubed
    • 1 egg yolk
    • 1 tablespoon ice water
    • 1 cup granulated sugar
    • ½ cup heavy cream
    • 2 tablespoons unsalted butter
    • ½ teaspoon sea salt
    • 1 teaspoon vanilla extract
    • ½ cup heavy cream for ganache
    • 1 cup semi-sweet or dark chocolate chips
    • Flaky sea salt for garnish

    1. Make the tart shells: Mix flour and powdered sugar, add cold butter, and cut into the dry ingredients until crumbly. Add egg yolk and ice water to form a dough. Press into tart pans and refrigerate for 30 minutes. Bake at 350°F (175°C) for 15-20 minutes until golden brown. Let cool.
    2. Prepare the salted caramel: Melt sugar in a saucepan over medium heat, stirring until amber. Whisk in heavy cream cautiously, add butter, and stir until smooth. Remove from heat, stir in vanilla and sea salt, set aside to cool.
    3. Make the chocolate ganache: Heat cream in a saucepan until simmering. Pour over chocolate chips in a bowl, let sit for 2 minutes, then stir until smooth.
    4. Assemble the tarts: Spoon cooled caramel into tart shells, filling halfway and chill for 20-30 minutes. Pour chocolate ganache on top and sprinkle with flaky sea salt. Refrigerate for at least 2 hours before serving.

    Notes

    • Ensure the butter is cold for a flaky crust.
    • Watch the sugar closely while melting to avoid burning.
    • Use high-quality chocolate for the ganache for the best flavor.
    • Serve chilled for optimal texture and flavor.
    • Prep Time: 30 minutes
    • Cook Time: 20 minutes
    • Category: Dessert
    • Method: Baking
    • Cuisine: American

    Nutrition

    • Serving Size: 1 tart
    • Calories: 350
    • Sugar: 25g
    • Sodium: 150mg
    • Fat: 20g
    • Saturated Fat: 12g
    • Unsaturated Fat: 6g
    • Trans Fat: 0g
    • Carbohydrates: 36g
    • Fiber: 1g
    • Protein: 3g
    • Cholesterol: 50mg

    Sharing is caring!

  • Pineapple Cucumber Salad

    Pineapple Cucumber Salad


    Introduction to Pineapple Cucumber Salad

    As the summer sun warms our days, I can’t help but crave something refreshing and light. That’s where my Pineapple Cucumber Salad comes into play! This vibrant dish is not only a quick solution for a busy day, but it’s also perfect for impressing your loved ones at a gathering. With juicy pineapple and crunchy cucumber, it’s a delightful burst of flavor that never fails to brighten my mood. I promise, every bite is like a mini vacation for your taste buds, making it a must-try for anyone looking to elevate their summer meals!

    Why You’ll Love This Pineapple Cucumber Salad

    This Pineapple Cucumber Salad is the ultimate time-saver! With just 15 minutes of prep, you can whip up a tasty dish bursting with flavor. The sweet and tangy pineapple paired with cool cucumber is a match made in heaven. Plus, it’s vegan and can be customized with optional toppings, making it suitable for everyone at your table. Whether you’re feeding a crowd or just seeking a light lunch, this salad won’t disappoint!

    Ingredients for Pineapple Cucumber Salad

    Creating a delicious Pineapple Cucumber Salad starts with sourcing the freshest ingredients. Here’s what you’ll need:

    • Diced fresh pineapple: This juicy fruit adds a sweet and tropical hint, making your salad feel like a slice of paradise!
    • English cucumber (or Persian cucumbers): These are perfect for their crisp texture and refreshing taste. They provide hydration, essential for those hot summer days.
    • Red onion: Thinly sliced, this ingredient gives an added crunch and a slightly sharp flavor that beautifully contrasts the sweetness of the pineapple.
    • Fresh cilantro: A handful of this herb adds an aromatic boost, brightening up the overall flavor profile of your salad.
    • Jalapeño (optional): For those who enjoy a bit of a kick, a few thin slices can spice things up without overwhelming the dish.
    • Feta cheese (optional): This crumbly addition brings a creamy richness that complements the vibrant flavors of the salad.
    • Fresh lime juice: A vital component that brings a zesty brightness to the mix, tying everything together perfectly.
    • Honey or maple syrup: Just a touch adds a subtle sweetness, balancing the tangy lime and enhancing the pineapple’s natural sugars.
    • Olive oil: A drizzle contributes healthy fats and helps to marry the flavors in the dressing.
    • Salt and black pepper: Simple yet essential for bringing out all the flavors in the salad.
    • Red pepper flakes (optional): This adds a dash of heat for those who love a spicy bite.

    For exact measurements, check the end of the article where you can find everything available for printing!

    How to Make Pineapple Cucumber Salad

    Step 1: Prepare the Ingredients

    Start by dicing the fresh pineapple and cucumber into bite-sized pieces. Thinly slice the red onion and jalapeño for that extra flavor kick. Finally, chop the cilantro, which will add that lovely aroma. The secret to a great Pineapple Cucumber Salad is all in the prep, so take your time here!

    Step 2: Create the Dressing

    In a small bowl, whisk together the fresh lime juice, honey or maple syrup, olive oil, salt, and pepper. If you like a hint of heat, toss in some red pepper flakes! This vibrant dressing brings all the flavors together, enhancing every bite of your delightful salad.

    Step 3: Combine the Salad

    In a large mixing bowl, combine the diced pineapple, cucumber, red onion, chopped cilantro, and jalapeño. Mix it all together and feel free to get hands-on! This moment is where the magic begins, so enjoy the colors and aromas blending into a delicious medley.

    Step 4: Dress the Salad

    Now, drizzle the fresh dressing over your salad and gently toss to coat everything. Be careful not to overmix – we want that delightful texture intact! Each ingredient should shine through without getting mushy, making every bite of your Pineapple Cucumber Salad a joyful experience.

    Step 5: Serve and Enjoy

    You can dive into your salad right away, but I recommend chilling it for about 15–30 minutes for enhanced flavors. Garnish with a little extra cilantro or lime wedges to elevate the presentation. This salad not only tastes great but looks beautiful too!

    Tips for Success

    • Always use ripe pineapple for the sweetest flavor; it makes a world of difference!
    • For a cooler option, chill your ingredients before mixing; it’ll enhance the refreshing taste!
    • Don’t be afraid to adjust the dressing ingredients; personalizing it can elevate your Pineapple Cucumber Salad experience.
    • If you’re prepping ahead, store the salad components separately to keep everything fresh.
    • Experiment with different herbs, like mint or basil, for a unique twist!

    Equipment Needed

    • Cutting board: A stable surface for chopping; any clean surface will do!
    • Sharp knife: Essential for dicing and slicing; a good kitchen knife makes prep a breeze.
    • Mixing bowl: A medium-sized bowl works best; you can use any large container you have.
    • Whisk or fork: For mixing the dressing; a simple spoon can also get the job done!

    Variations of Pineapple Cucumber Salad

    • Mango Addition: Swap some pineapple for fresh mango for an extra tropical twist!
    • Avocado Delight: Dice in some ripe avocado for creamy richness and healthy fats.
    • Quinoa Boost: Add cooked quinoa to transform your salad into a delightful, filling meal.
    • Nuts for Crunch: Toss in some toasted almonds or walnuts for an added crunch and nutty flavor.
    • Herb Variations: Experiment with other herbs like mint or parsley for a different aromatic profile.
    • Vegan Caesar: Try a sprinkle of nutritional yeast instead of feta for a cheesy, vegan-friendly option.

    Serving Suggestions for Pineapple Cucumber Salad

    • Pair your Pineapple Cucumber Salad with grilled chicken or shrimp for a protein-packed meal.
    • Serve it alongside tacos or burritos for a refreshing contrast to spicy flavors.
    • For a delightful drink, enjoy with a chilled white wine or a sparkling lemonade.
    • Present in a colorful bowl for a beautiful centerpiece at your summer gathering.
    • Garnish with extra lime wedges or cilantro sprigs for an eye-catching finish.

    FAQs about Pineapple Cucumber Salad

    Can I make the Pineapple Cucumber Salad in advance?

    Absolutely! You can prep all the ingredients ahead of time, but I recommend keeping the dressing separate until you’re ready to serve. This keeps the salad fresh and crunchy, ensuring that your Pineapple Cucumber Salad maintains its delightful texture!

    How long does the salad last in the fridge?

    The salad is best enjoyed fresh, but it can last in the fridge for about 2 days. Just make sure to store it in an airtight container. The flavors will meld over time, giving you a slightly different but still tasty experience!

    What other dishes pair well with this salad?

    This salad is versatile! It pairs beautifully with grilled fish, shrimp tacos, or even a simple quinoa bowl. The possibilities are endless when it comes to complementing this refreshing delight!

    Final Thoughts

    Every time I make this Pineapple Cucumber Salad, I’m reminded of just how joyful cooking can be. It’s a delightful blend of flavors and textures that takes me straight to sunny picnics and warm gatherings with friends. With its vibrant colors and refreshing taste, it can instantly uplift any meal. Plus, the fact that it comes together in just 15 minutes makes it a win for busy days. Whether you’re hosting a barbecue or needing a light lunch, this salad is a delicious way to celebrate summer and create happy memories around the table!


    Print

    clock clock iconcutlery cutlery iconflag flag iconfolder folder iconinstagram instagram iconpinterest pinterest iconfacebook facebook iconprint print iconsquares squares iconheart heart iconheart solid heart solid icon

    Description

    As the summer sun warms our days, I can’t help but crave something refreshing and light. That’s where my Pineapple Cucumber Salad comes into play! This vibrant dish is not only a quick solution for a busy day, but it’s also perfect for impressing your loved ones at a gathering. With juicy pineapple and crunchy cucumber, it’s a delightful burst of flavor that never fails to brighten my mood. I promise, every bite is like a mini vacation for your taste buds, making it a must-try for anyone looking to elevate their summer meals!


    • 2 cups diced fresh pineapple
    • 1 large English cucumber (or 2 Persian cucumbers), diced
    • 1/4 small red onion, thinly sliced
    • 1/4 cup chopped fresh cilantro
    • 1 small jalapeño, thinly sliced (optional)
    • 1/4 cup crumbled feta cheese (optional)
    • 2 tablespoons fresh lime juice
    • 1 tablespoon honey or maple syrup
    • 1 tablespoon olive oil
    • 1/2 teaspoon salt
    • 1/4 teaspoon black pepper
    • 1/2 teaspoon red pepper flakes (optional)

    1. Dice the pineapple and cucumber into bite-sized pieces. Thinly slice the red onion and jalapeño. Chop the cilantro and crumble the feta cheese if using.
    2. In a small bowl, whisk together lime juice, honey or maple syrup, olive oil, salt, pepper, and red pepper flakes until combined.
    3. In a large mixing bowl, combine pineapple, cucumber, red onion, cilantro, and jalapeño.
    4. Drizzle the dressing over the salad and gently toss to coat.
    5. Sprinkle crumbled feta on top if desired.
    6. Serve immediately or chill for 15–30 minutes for enhanced flavor. Garnish with extra cilantro or lime wedges if desired.

    Notes

    • For a vegan option, omit the feta cheese.
    • Adjust the spiciness by adding or reducing the jalapeño and red pepper flakes.
    • Prep Time: 15 minutes
    • Cook Time: 0 minutes
    • Category: Salad
    • Method: No-cook
    • Cuisine: Fusion

    Nutrition

    • Serving Size: 1 cup
    • Calories: 150
    • Sugar: 10g
    • Sodium: 100mg
    • Fat: 7g
    • Saturated Fat: 1g
    • Unsaturated Fat: 5g
    • Trans Fat: 0g
    • Carbohydrates: 19g
    • Fiber: 2g
    • Protein: 2g
    • Cholesterol: 3mg

    Sharing is caring!

  • Ground Turkey and Peppers

    Ground Turkey and Peppers


    Introduction to Ground Turkey and Peppers

    As a passionate home cook, I know that busy days can leave us scrambling for dinner ideas. Enter my go-to recipe, Ground Turkey and Peppers. This dish is not only bursting with flavor but also quick and easy to prepare. Imagine a colorful medley of bell peppers mingling with lean ground turkey, all simmered to perfection. It’s just the thing to impress your loved ones or whip up after a hectic day. Trust me, this hearty meal will become a favorite in your household, making weeknight dinners feel special again.

    Why You’ll Love This Ground Turkey and Peppers

    This Ground Turkey and Peppers dish is all about simplicity and satisfaction. It comes together in just 30 minutes, making it perfect for your busy evenings. The lean turkey adds protein, while the vibrant bell peppers bring essential nutrients and a pop of color to your plate. With each bite, you’ll enjoy a wonderful blend of spices that elevates every flavor. It’s healthy, hearty, and an absolute crowd-pleaser!

    Ingredients for Ground Turkey and Peppers

    Let’s gather the colorful ingredients for our Ground Turkey and Peppers dish. Each one plays a vital role in transforming a simple meal into a flavorful experience. Here’s what you’ll need:

    • Extra-virgin olive oil: This is our cooking fat of choice. It adds richness and a touch of healthy fat.
    • Ground turkey: The star of the dish! I prefer using lean turkey (93/7) for a healthier boost of protein without extra fat.
    • Onion: A medium onion, either yellow or white, brings sweetness and depth to our skillet.
    • Bell peppers: A mix of red, yellow, and green peppers offers a bright splash of color and a crunchy texture in every bite.
    • Garlic: The fragrant garlic is a must! Minced, it adds a wonderful aroma and flavor that really ties the dish together.
    • Kosher salt: Essential for bringing out flavors. I recommend starting with one teaspoon, but taste and adjust as needed.
    • Black pepper: Freshly ground black pepper gives a warm spice that balances beautifully with the other ingredients.
    • Smoked paprika: This spice adds a touch of smokiness, creating a depth of flavor that enhances the turkey.
    • Dried oregano or Italian seasoning: These herbs introduce earthy notes that brighten the dish. They’re super versatile!
    • Optional jalapeño: If you like a little heat, a seeded and minced jalapeño will do the trick without overwhelming the flavors.
    • Fresh herbs: For garnishing, chopped parsley or cilantro adds a burst of freshness. A splash of lemon juice can brighten the dish even more!

    For exact measurements, be sure to scroll to the bottom of the article. Your printed shopping list awaits!

    How to Make Ground Turkey and Peppers

    Now that we have our ingredients prepped, let’s dive into making this delightful Ground Turkey and Peppers dish. I promise, it’s easier than it looks, and the result is a meal that’s full of flavor and nutrients. Let’s follow these simple steps together!

    Step 1: Prepare the Skillet

    Start by heating a large skillet over medium-high heat. Add a tablespoon of extra-virgin olive oil and let it warm until it shimmers. This step sets the stage for perfectly cooked turkey. Just be patient; a hot skillet helps to lock in those juicy flavors!

    Step 2: Cook the Turkey

    Next, add the 1 pound of ground turkey to the skillet. Use a spatula to break it up into smaller pieces. Season it with half the kosher salt, freshly ground black pepper, and all the smoked paprika. Stir occasionally, cooking for about 5-6 minutes until the meat is no longer pink. The smell at this point? Simply mouthwatering!

    Step 3: Add the Vegetables

    Once the turkey is cooked, push it to one side of the skillet. On the other side, toss in the diced onion and sliced bell peppers (and jalapeño if you’re feeling adventurous). Cook these vibrant veggies for 4-5 minutes, stirring occasionally until they soften a bit. You’ll love the crunch that the bell peppers add.

    Step 4: Incorporate Garlic and Seasonings

    Now, it’s time to bring in the flavors! Stir the cooked turkey into the onion and peppers. Add the minced garlic, dried oregano, and the remaining salt and pepper. Cook it all together for another 1-2 minutes until your kitchen fills with an irresistible aroma. Can you smell it? You’re on the right track!

    Step 5: Simmer to Meld Flavors

    If the skillet looks a bit dry, don’t worry! Just add a splash of water or low-sodium broth. This will help scrape any tasty browned bits from the bottom while creating a delightful sauce. Let it simmer for 2-3 minutes to meld all the flavors together. You’ll want to taste it at this point and adjust the seasoning if necessary.

    Step 6: Serve and Enjoy

    Finally, it’s time to dish it up! Serve your Ground Turkey and Peppers hot as is, or over rice for a hearty meal. You can even stuff it into tortillas for a delicious wrap or pair it with a fresh salad. Don’t forget to create a finishing touch with some fresh herbs or a squeeze of lemon juice. Enjoy every last bite!

    Tips for Success

    • Use fresh herbs for a brighter flavor; they can make the dish pop.
    • Prep your ingredients beforehand to save time during cooking.
    • Feel free to experiment with different vegetables like zucchini or corn.
    • Adjust the spice level by adding more or less jalapeño to suit your taste.
    • Leftovers? Store them in an airtight container for a tasty lunch the next day!

    Equipment Needed

    • Large skillet: A non-stick option works great to prevent sticking.
    • Spatula: A sturdy spatula for breaking up the turkey and stirring.
    • Knife and cutting board: Essential for chopping vegetables.
    • Measuring spoons: For accurate seasoning measurements, though eyeballing it works too!

    Variations of Ground Turkey and Peppers

    • Vegetable Medley: Add more veggies like zucchini, corn, or spinach for extra nutrition and flavor.
    • Spicy Twist: If you’re a heat enthusiast, experiment with different hot peppers like serrano or even a dash of cayenne pepper.
    • Italian Style: Substitute the smoked paprika and oregano with Italian herbs and diced tomatoes for a hearty pasta sauce vibe.
    • Mexican Flair: Add taco seasoning instead of the basic spices and serve with warm tortillas for a fun taco night.
    • Quinoa Base: Serve the turkey mixture over cooked quinoa instead of rice for a protein-packed alternative.
    • Dairy Option: Top with shredded cheese like mozzarella or cheddar for a cheesy finish, melting it right before serving.

    Serving Suggestions for Ground Turkey and Peppers

    • Pair it with fluffy rice or quinoa for a filling meal.
    • Serve it inside warm tortillas for delightful wraps.
    • Complement with a crisp green salad dressed in lemon vinaigrette.
    • Consider a refreshing cucumber or tomato salad on the side.
    • Enhance the meal with a chilled glass of white wine or sparkling water.

    FAQs about Ground Turkey and Peppers

    Can I use ground turkey breast instead of lean turkey?
    Absolutely! Ground turkey breast is a great option if you’re looking for a leaner choice. Just keep in mind that it might yield a slightly drier texture, so make sure to cook it carefully.

    What can I serve with Ground Turkey and Peppers for a complete meal?
    This dish pairs wonderfully with rice, quinoa, or even stuffed into tortillas. You can also serve it alongside a fresh salad or some roasted vegetables for a colorful and healthy plate.

    How can I store leftovers?
    Leftovers can be stored in an airtight container in the fridge for up to 3 days. You can reheat it in the microwave or on the stove for a quick lunch or dinner!

    Can I freeze this dish?
    Yes! Ground Turkey and Peppers freeze well. Just let it cool completely, place it in a freezer-safe container, and it can last up to 3 months. Thaw in the fridge overnight before reheating.

    Is this a kid-friendly recipe?
    Definitely! Kids often love the colorful bell peppers and the savory turkey. If your little ones are picky, you can adjust the spices and serve it over their favorite carbs like rice or pasta.

    Final Thoughts

    Cooking Ground Turkey and Peppers brings me joy, knowing it’s not just a meal but a beautiful way to gather the family. The vibrant colors and the delightful aroma light up my kitchen and my heart. Each bite is filled with love, nutrients, and a blend of spices that transports me to my happy place. It’s simple yet satisfying, the kind of dish that you’ll want to make again and again. If you’re looking for an easy weeknight recipe the whole family will enjoy, this one definitely hits the mark. So grab your skillet and create a memorable dinner tonight!


    Print

    clock clock iconcutlery cutlery iconflag flag iconfolder folder iconinstagram instagram iconpinterest pinterest iconfacebook facebook iconprint print iconsquares squares iconheart heart iconheart solid heart solid icon

    Description

    As a passionate home cook, I know that busy days can leave us scrambling for dinner ideas. Enter my go-to recipe, Ground Turkey and Peppers. This dish is not only bursting with flavor but also quick and easy to prepare. Imagine a colorful medley of bell peppers mingling with lean ground turkey, all simmered to perfection. It’s just the thing to impress your loved ones or whip up after a hectic day. Trust me, this hearty meal will become a favorite in your household, making weeknight dinners feel special again.


    • 1 tablespoon extra-virgin olive oil
    • 1 pound ground turkey (lean, 93/7)
    • 1 medium onion, diced (yellow or white)
    • 3 bell peppers (mix of red, yellow, green), cored and sliced into strips
    • 3 cloves garlic, minced
    • 1 teaspoon kosher salt, plus more to taste
    • ½ teaspoon freshly ground black pepper
    • 1 teaspoon smoked paprika
    • ½ teaspoon dried oregano or Italian seasoning
    • Optional: 1 jalapeño, seeded and minced (for heat)
    • Optional garnish: chopped fresh parsley, cilantro, or a squeeze of lemon juice

    1. In a large skillet over medium-high heat, warm the olive oil until shimmering.
    2. Add the ground turkey, break it up with a spatula, and season with half the salt, pepper, and all the smoked paprika. Cook until no longer pink, about 5–6 minutes.
    3. Push the turkey to one side of the skillet. Add the onion and bell peppers (and jalapeño, if using) to the empty side. Cook, stirring occasionally, until the vegetables begin to soften, about 4–5 minutes.
    4. Stir the turkey and vegetables together. Add the minced garlic, oregano, and remaining salt and pepper. Cook 1–2 minutes more until fragrant.
    5. If the skillet looks dry, add a splash of water or low-sodium broth and scrape up any browned bits from the bottom. Simmer 2–3 minutes so flavors meld.
    6. Taste and adjust seasoning as needed. Finish with chopped herbs or a squeeze of fresh lemon or lime juice. Serve hot on its own, over rice, stuffed into tortillas, or alongside a crisp salad.

    Notes

    • This dish can be customized with additional vegetables or spices as desired.
    • For a healthier option, serve over quinoa or lettuce wraps.
    • Prep Time: 10 minutes
    • Cook Time: 20 minutes
    • Category: Dinner
    • Method: Skillet
    • Cuisine: American

    Nutrition

    • Serving Size: 1/4 of the recipe
    • Calories: 250
    • Sugar: 4g
    • Sodium: 480mg
    • Fat: 10g
    • Saturated Fat: 2g
    • Unsaturated Fat: 8g
    • Trans Fat: 0g
    • Carbohydrates: 14g
    • Fiber: 3g
    • Protein: 27g
    • Cholesterol: 80mg

    Sharing is caring!