Blog

  • Steak and Shrimp Stir Fry

    Steak and Shrimp Stir Fry


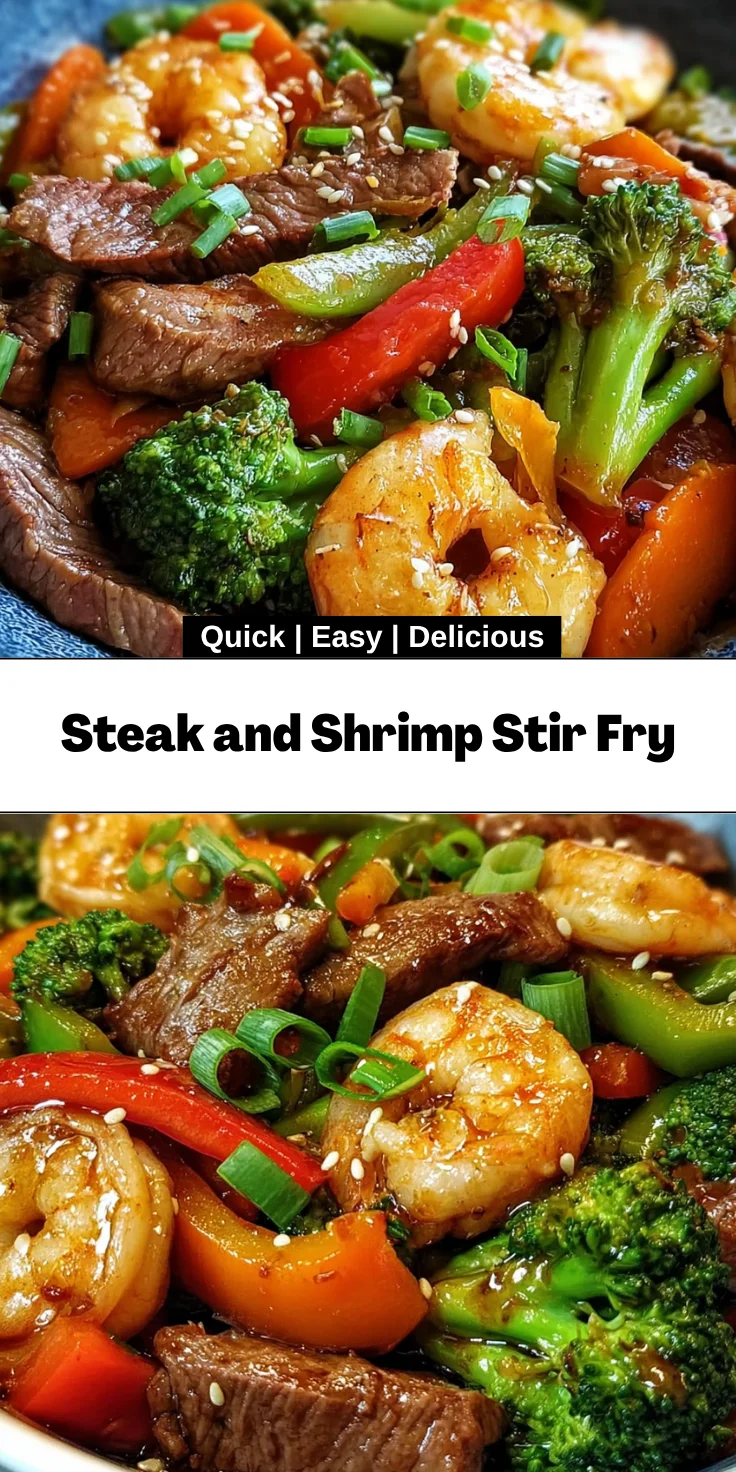
    Introduction to Steak and Shrimp Stir Fry

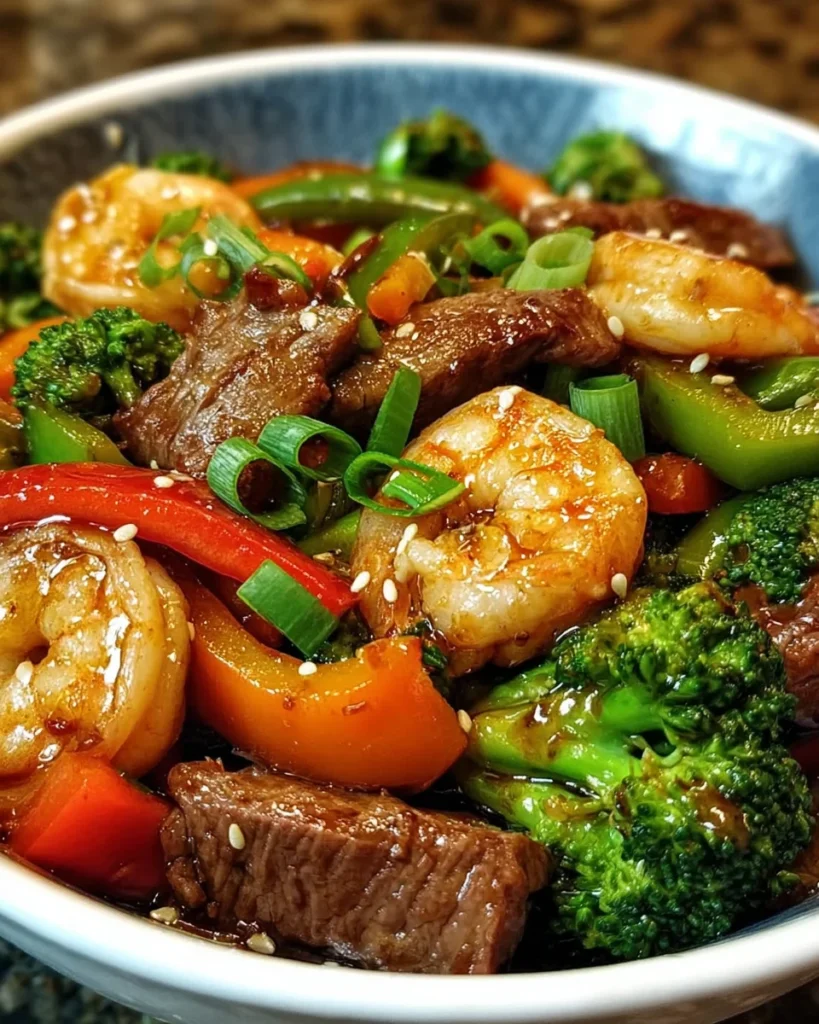
    As a busy mom, I totally understand the struggles of putting a wholesome meal on the table after a long day. That’s why I’ve fallen head over heels for this Steak and Shrimp Stir Fry. It’s a quick solution that doesn’t skimp on flavor or nutrition. Combining succulent steak and tender shrimp with vibrant, fresh veggies, this dish is sure to impress your family and friends. What’s more, it cooks up in just about 30 minutes, making it an ideal choice for those hectic weeknights when you still want to serve something special.

    Why You’ll Love This Steak and Shrimp Stir Fry

    This Steak and Shrimp Stir Fry is all about simplicity and taste. It’s a one-pan wonder that saves you time without sacrificing flavor. The quick cooking keeps everything fresh and vibrant, making it perfect for busy evenings. Plus, with minimal dishes, cleanup is a breeze! Whether you’re a culinary novice or a seasoned pro, this dish brings joy to the table and a smile to your family’s faces.

    Ingredients for Steak and Shrimp Stir Fry

    Gathering the right ingredients can set the stage for a delightful Steak and Shrimp Stir Fry. Here’s what you’ll need:

    • Flank Steak: Thinly sliced against the grain, it provides a tender bite and beefy flavor. Feel free to substitute with sirloin or ribeye for different flavors.
    • Shrimp: Peeled and deveined, shrimp adds a delightful sweetness. Opt for fresh, wild-caught shrimp if you can find it, as it enhances the dish.
    • Soy Sauce: This salty staple deepens the savory flavors. For a gluten-free option, tamari works just as well.
    • Cornstarch: A vital ingredient for marinating, it helps create a nice sear on the meat, ensuring it stays juicy.
    • Vegetable Oil: Perfect for high-heat cooking. Canola or avocado oil are great alternatives. They keep the dish healthy and light.
    • Bell Pepper: Adds sweetness and crunch. Choose red, yellow, or green; each brings a unique flavor. You can also swap it for snap peas or asparagus.
    • Broccoli Florets: Not only pretty on the plate, but they also provide vitamins and a tender-crisp texture.
    • Carrot: Julienned for a pop of color and natural sweetness. You can also use zucchini or snow peas if you prefer.
    • Garlic: Minced, it imparts a warm, aromatic essence that elevates the entire dish. Fresh is best!
    • Ginger: Freshly minced ginger adds a zesty, peppery kick that complements the shrimp and steak beautifully.
    • Green Onions: Chopped for freshness, they add a mild onion flavor that brightens the dish.
    • Salt and Pepper: Essential for enhancing flavors, be careful not to overdo it, especially with soy sauce already in play.
    • Sesame Seeds: A delightful garnish that adds a slight crunch and nutty flavor, but it’s purely optional.

    For exact quantities of each ingredient, make sure to scroll down to the bottom of the article where you can find the printable version. Happy cooking!

    How to Make Steak and Shrimp Stir Fry

    Now that you have your ingredients ready, let’s dive into making this delicious Steak and Shrimp Stir Fry. Follow these simple steps to create a stunning dish that’s sure to impress everyone at the table!

    Step 1: Marinate the Steak and Shrimp

    First things first, marinating is key!

    In a bowl, combine the soy sauce and cornstarch. This duo helps tenderize the meat, giving it a lovely sear later on.

    Add the sliced flank steak and shrimp into the bowl, making sure to coat them well with the marinade.

    Let it sit for about 15-20 minutes.

    This step is crucial. It infuses flavor while ensuring the meat stays juicy.

    So, resist the urge to skip it!

    Step 2: Cook the Steak

    Once marinated, it’s time to sear that steak!

    Heat one tablespoon of vegetable oil in a large skillet or wok over high heat.

    Once it’s nice and hot, add the marinated steak in a single layer.

    Let it cook for about 2-3 minutes.

    Don’t crowd the pan, or it will steam, and you won’t get that mouthwatering browning.

    When it’s well-browned, remove it from the skillet and set it aside.

    Trust me, those sizzle sounds are music to the ears!

    Step 3: Cook the Shrimp

    Next, let’s turn up the heat for the shrimp.

    In the same skillet, pair it with another tablespoon of vegetable oil, if needed.

    Add the marinated shrimp and cook for 2-3 minutes.

    You’ll know they are done when they turn pink and opaque.

    Be careful not to overcook them.

    Shrimp can go from tender to rubbery in a flash.

    So, keep a close eye!

    Step 4: Stir Fry the Vegetables

    Now, it’s time for the vibrant veggies to shine.

    In the same skillet, toss in the bell pepper, broccoli, and carrot.

    Stir-fry for about 3-4 minutes, ensuring they remain tender-crisp.

    This means cooking just enough for them to maintain their vibrant color and crunch!

    Once they look lively, add the minced garlic and ginger.

    Cook for another minute until your kitchen fills with that amazing aroma!

    Step 5: Combine and Serve

    Finally, let’s bring it all together!

    Add the cooked steak and shrimp back into the skillet with the vegetables.

    Toss everything gently for another minute to heat it through.

    Now, season with salt and pepper to taste.

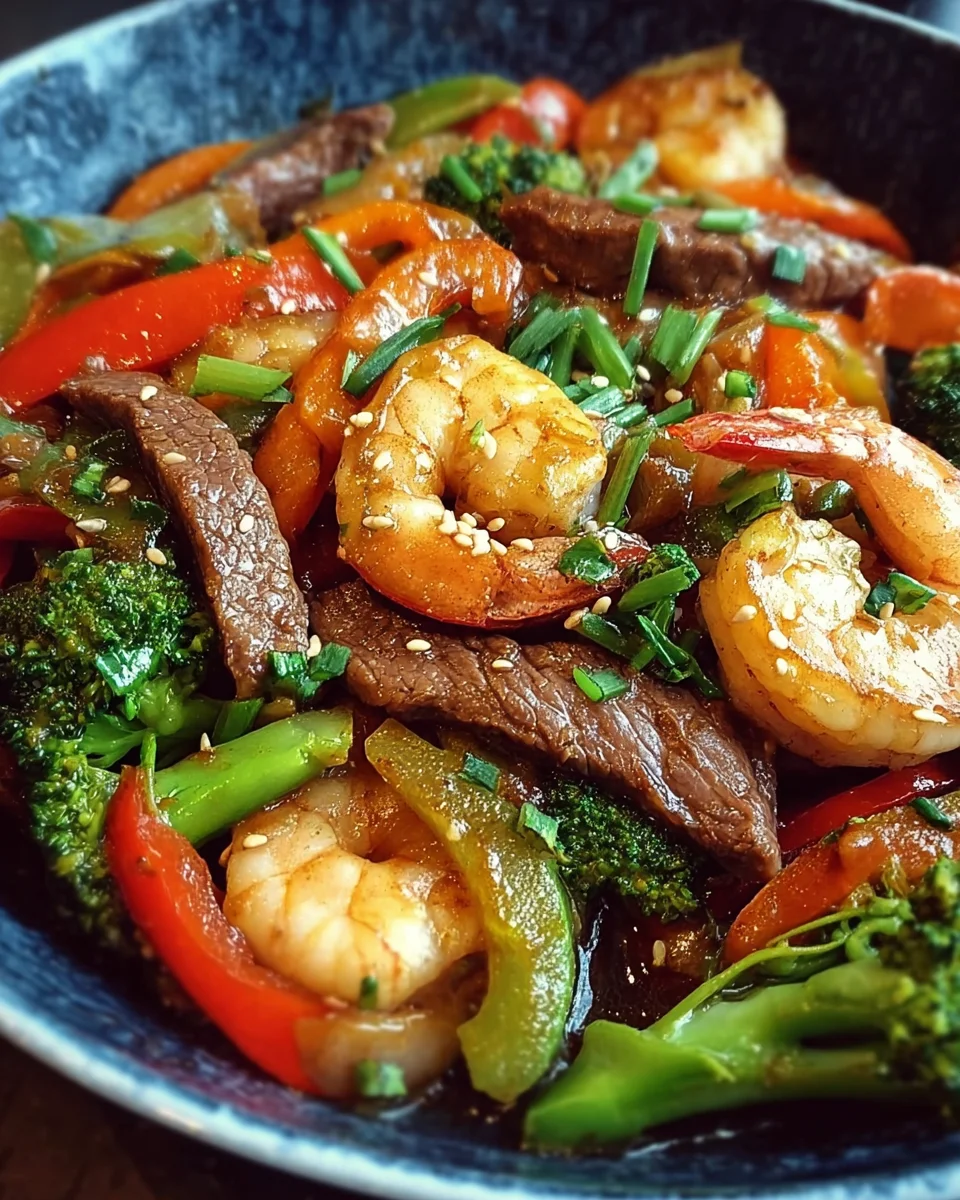
    Remember to sprinkle those chopped green onions and sesame seeds on top for a beautiful finish!

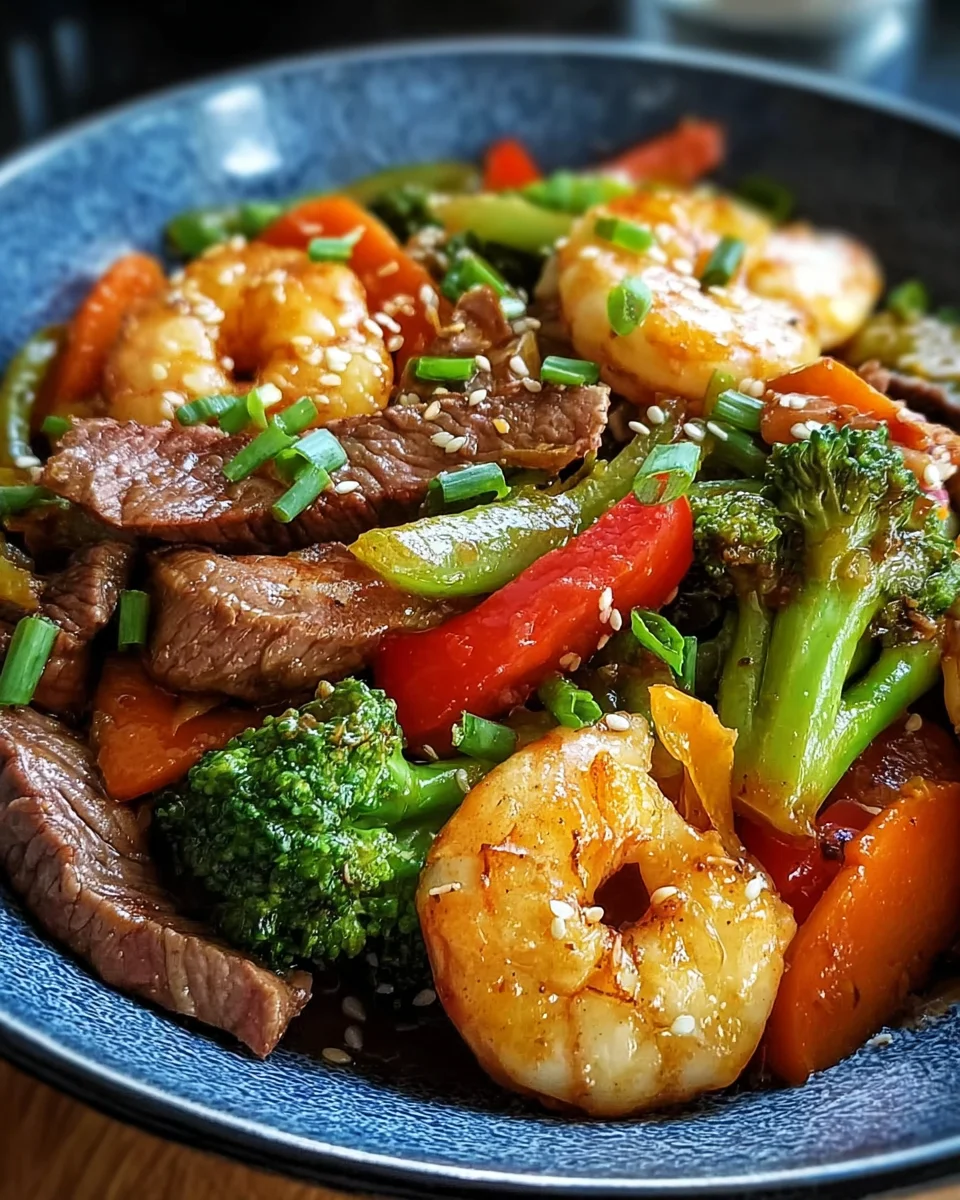
    Your delicious Steak and Shrimp Stir Fry is ready to serve.

    Dig in and enjoy the explosion of flavors!

    Tips for Success

    • Prep all ingredients before you start cooking to ensure a smooth flow.
    • Use high heat for quick cooking; this keeps your veggies vibrant and tender-crisp.
    • Don’t overcrowd the skillet; cook in batches if necessary for that perfect sear.
    • Experiment with different vegetables to suit your family’s tastes.
    • Adjust seasoning to your preference; taste as you go!

    Equipment Needed

    • Skillet or Wok: A large skillet works well, but a wok can give you that authentic stir-fry flavor.
    • Cutting Board: Essential for slicing your steak and veggies. A sturdy one makes a big difference!
    • Chef’s Knife: A sharp knife is crucial for easy and precise cuts. Safety first!
    • Spatula or Tongs: Great for tossing everything together without tearing your veggies.
    • Mixing Bowl: Used for marinating your shrimp and steak. Any bowl will do!

    Variations of Steak and Shrimp Stir Fry

    • Spicy Kick: Add sliced jalapeños or a dash of sriracha to bring some heat to your stir fry.
    • Citrus Twist: Incorporate orange or lime juice into the marinade for a zesty flavor boost.
    • Vegetarian Option: Substitute steak and shrimp with tofu or tempeh for a plant-based version that’s just as satisfying.
    • Asian-inspired: Toss in a splash of oyster sauce or sesame oil for an authentic Asian taste.
    • Low-carb Delight: Replace rice with cauliflower rice or serve it over a bed of leafy greens.

    Serving Suggestions for Steak and Shrimp Stir Fry

    • Serve over Rice: Fluffy jasmine or brown rice acts as a perfect base.
    • With Noodles: Toss it with soba or rice noodles for a filling twist.
    • Pair with Wine: A crisp white wine, like Sauvignon Blanc, complements the dish beautifully.
    • Presentation: Garnish with extra green onions and sesame seeds for a touch of elegance.
    • Fresh Side Salad: Serve with a light, zesty side salad for balance.

    FAQs about Steak and Shrimp Stir Fry

    Can I use frozen shrimp for this recipe?
    Absolutely! Just be sure to thaw them thoroughly before cooking. Frozen shrimp may take a minute longer to cook but will still taste great.

    What vegetables can I use in my stir fry?
    Feel free to get creative! Carrots, snap peas, bell peppers, and zucchini all work wonderfully. Just make sure to slice them for even cooking.

    Can I make this dish ahead of time?
    For the freshest flavor, I recommend enjoying it right after cooking. However, if needed, it can be prepared a few hours in advance and stored in the refrigerator. Just give it a quick stir-fry to reheat.

    Is this Steak and Shrimp Stir Fry gluten-free?
    Yes! When using gluten-free soy sauce or tamari, this recipe becomes a delightful gluten-free meal, perfect for anyone with dietary restrictions.

    How can I make this stir fry spicier?
    For a spicier kick, add some chopped red pepper flakes or a splash of your favorite hot sauce. You can also include fresh chili peppers for extra heat!

    Final Thoughts

    This Steak and Shrimp Stir Fry brings the joy of cooking back into the kitchen while satisfying even the pickiest of eaters. Each bite is a celebration of flavors, colors, and textures that can brighten any weeknight dinner. With its quick prep and simple steps, it’s a culinary adventure that doesn’t demand too much of your precious time. Whether it’s a family gathering or a solo meal, this dish is sure to create special moments around the table. So go ahead, savor the experience, and watch your loved ones light up with every delicious mouthful!


    Print

    clock clock iconcutlery cutlery iconflag flag iconfolder folder iconinstagram instagram iconpinterest pinterest iconfacebook facebook iconprint print iconsquares squares iconheart heart iconheart solid heart solid icon

    Description

    A quick and tasty stir fry featuring succulent steak and shrimp, combined with fresh vegetables and aromatic spices.


    • 1 pound flank steak thinly sliced against the grain
    • 1 pound shrimp peeled and deveined
    • 2 tablespoons soy sauce
    • 1 tablespoon cornstarch
    • 2 tablespoons vegetable oil
    • 1 bell pepper sliced
    • 1 cup broccoli florets
    • 1 carrot julienned
    • 3 garlic cloves minced
    • 1 tablespoon ginger minced
    • 2 green onions chopped
    • Salt and pepper to taste
    • Sesame seeds for garnish

    1. MARINATE THE STEAK AND SHRIMP: In a bowl, combine the soy sauce and cornstarch. Add the sliced flank steak and shrimp, mixing well to coat. Let it marinate for about 15-20 minutes.
    2. COOK THE STEAK: In a large skillet or wok, heat 1 tablespoon of vegetable oil over high heat. Add the marinated steak to the skillet in a single layer. Cook for about 2-3 minutes until browned, then remove from the skillet and set aside.
    3. COOK THE SHRIMP: In the same skillet, add another tablespoon of vegetable oil if needed. Add the marinated shrimp and cook for about 2-3 minutes until they turn pink and opaque. Remove from the skillet and set aside with the steak.
    4. STIR FRY THE VEGETABLES: In the same skillet, add the bell pepper, broccoli, and carrot. Stir-fry for about 3-4 minutes until the vegetables are tender-crisp. Stir in the minced garlic and ginger, cooking for an additional minute until fragrant.
    5. COMBINE AND SERVE: Add the cooked steak and shrimp back into the skillet with the vegetables. Toss everything together and cook for another minute to heat through. Season with salt and pepper to taste. Sprinkle with chopped green onions and sesame seeds before serving.

    Notes

    • For extra flavor, consider adding your favorite stir-fry sauce.
    • Feel free to substitute vegetables based on your preference.
    • Leftovers can be stored in the refrigerator for up to 2 days.
    • Prep Time: 20 minutes
    • Cook Time: 10 minutes
    • Category: Main Course
    • Method: Stir Fry
    • Cuisine: Asian

    Nutrition

    • Serving Size: 1 serving
    • Calories: 350
    • Sugar: 2g
    • Sodium: 600mg
    • Fat: 15g
    • Saturated Fat: 2g
    • Unsaturated Fat: 10g
    • Trans Fat: 0g
    • Carbohydrates: 22g
    • Fiber: 3g
    • Protein: 30g
    • Cholesterol: 180mg

    Sharing is caring!

  • Southwest Ground Beef Sweet Potato Skillet

    Southwest Ground Beef Sweet Potato Skillet


    Introduction to Southwest Ground Beef Sweet Potato Skillet

    As a busy mom, I understand that weeknights can often feel like a whirlwind. That’s why I adore this Southwest Ground Beef Sweet Potato Skillet! It’s a comforting, hearty dish that brings the warm flavors of the Southwest right into your kitchen, all in one pan. Imagine the aroma of spices wafting through your home while you whip up dinner in just 35 minutes. Perfect for impressing loved ones or simply satisfying your own cravings, this recipe ensures you can serve a wholesome meal without long hours in the kitchen!

    Why You’ll Love This Southwest Ground Beef Sweet Potato Skillet

    This Southwest Ground Beef Sweet Potato Skillet is a lifesaver for busy days! It combines ease and flavor, allowing you to create a delightful meal without fuss. The one-pan method means minimal dishes to wash, which is a huge plus in my house. Plus, the vibrant colors and bold spices make every bite feel like a cozy hug. Truly, this dish is the answer to balancing taste and convenience!

    Ingredients for Southwest Ground Beef Sweet Potato Skillet

    Gathering your ingredients is part of the fun in making the Southwest Ground Beef Sweet Potato Skillet. Let’s take a look at what you’ll need:

    • Ground beef: This is the heart of your dish, adding protein and richness. Use lean beef for a healthier option.
    • Sweet potatoes: Sweet potatoes bring a lovely sweetness and earthy flavor. They’re packed with nutrients, making your meal wholesome.
    • Black beans: These add a hearty texture and are a fantastic source of fiber and protein. Canned or dried, they work beautifully.
    • Corn: Sweet corn adds a pop of color and flavor. You can use frozen or canned, depending on what you have on hand.
    • Bell peppers: I love the crunch and sweetness they add. Try a mix of colors like red and yellow for visual appeal.
    • Onion: Diced onion complements the other flavors. It adds a savory base to the skillet.
    • Garlic: Minced garlic brings warmth and depth to your dish. It’s hard to resist that aroma as it cooks!
    • Chili powder: This is where the magic happens! It adds a kick and depth of flavor, essential for a Southwest vibe.
    • Cumin: With its earthy aroma, cumin enhances the overall flavor profile, making it taste truly authentic.
    • Olive oil: A splash of olive oil is perfect for sautéing and brings a rich taste to the skillet.
    • Salt and pepper: Basic seasonings that elevate all the flavors—don’t skip these!
    • Fresh cilantro: Optional, but this herb adds a bright finish and fresh flavor if you enjoy it.

    Feel free to adjust the veggies based on what your family loves or what you have in your pantry! For exact measurements, please refer to the bottom of the article, where you can find everything available for printing.

    How to Make Southwest Ground Beef Sweet Potato Skillet

    Let’s dive into the fun part: cooking! This Southwest Ground Beef Sweet Potato Skillet is a simple yet satisfying dish. Follow these straightforward steps, and you’ll have a delicious meal in no time!

    Step 1: Prepare the Sweet Potatoes

    First things first, let’s prepare those sweet potatoes. Peel them like you’re peeling a ripe banana—easy, right? Then, dice them into small cubes. The smaller the pieces, the faster they cook, which helps during busy weeknights.

    Step 2: Cook the Ground Beef

    Now, grab a large skillet and heat a tablespoon of olive oil over medium heat. Once it’s hot, add the ground beef. Don’t forget to season it generously with salt and pepper! Brown the beef while breaking it up with a spatula. This creates those lovely brown bits that add flavor to our dish.

    Step 3: Sauté Onions and Garlic

    After the beef is nicely cooked, remove it from the skillet. In the same pan, add another tablespoon of olive oil. Toss in the diced onion and sauté until it turns translucent. Then, add the minced garlic. That heavenly aroma will fill your kitchen, and I promise, you’ll find it hard to resist!

    Step 4: Add Sweet Potatoes

    Next, it’s time for those beautifully diced sweet potatoes. Add them to the skillet and stir well, coating them in the onion and garlic mixture. Allow them to cook for about 10 minutes. Make sure to stir every so often. This keeps them from sticking and ensures even cooking.

    Step 5: Mix in Remaining Ingredients

    Once the sweet potatoes are starting to soften, add your bell peppers, black beans, and corn. These vibrant ingredients bring color and nutrition to the skillet. Stir everything together and let it simmer for an additional 5-7 minutes until the sweet potatoes are tender. It’s looking good, isn’t it?

    Step 6: Combine and Garnish

    Finally, return the cooked ground beef to the skillet. Mix everything together until well-combined. Taste it and adjust the seasonings if necessary. For a fun finishing touch, sprinkle fresh cilantro on top before serving. Your Southwest Ground Beef Sweet Potato Skillet is ready to steal the show!

    Tips for Success

    • Cook sweet potatoes until fork-tender for the best texture.
    • Try adding other veggies like zucchini or spinach for more nutrients.
    • Season each layer as you cook to build flavor depth.
    • If you’re short on time, use pre-diced sweet potatoes from the store.
    • Store leftovers in airtight containers for easy reheating during the week.

    Equipment Needed

    • Large skillet: A non-stick skillet works best, but any large pan will do.
    • Spatula: Essential for breaking up the meat and stirring; a wooden spoon is a great substitute.
    • Knife and cutting board: For chopping those veggies—don’t skimp on the sharpness!
    • Measuring cups and spoons: Handy for precise ingredient measurements.

    Variations

    • For a meatless option, swap ground beef with lentils or crumbled tofu for a protein-packed vegetarian meal.
    • Try adding jalapeños or red pepper flakes for an extra kick if your family enjoys spicy food.
    • For a lower carb version, replace sweet potatoes with cauliflower or zucchini for a lighter dish.
    • Experiment with different beans like pinto or kidney beans to change up the flavor profile.
    • Adjust the spices! If you’re a cilantro lover, add more. If you prefer milder flavors, reduce the chili powder.

    Serving Suggestions for Southwest Ground Beef Sweet Potato Skillet

    • Serve with warm tortillas or over a bed of rice for a heartier meal.
    • A dollop of sour cream or Greek yogurt adds creaminess and balances the spice.
    • Pair it with a crisp side salad dressed with lime vinaigrette for freshness.
    • Enjoy with a refreshing glass of iced tea or sparkling water for a light beverage option.

    FAQs about Southwest Ground Beef Sweet Potato Skillet

    Can I make Southwest Ground Beef Sweet Potato Skillet ahead of time?
    Absolutely! This dish is great for meal prep. You can make it a day in advance and store it in the refrigerator. Just reheat when you’re ready to enjoy it!

    What if I don’t have sweet potatoes?
    Don’t fret! You can substitute sweet potatoes with regular potatoes or even cauliflower for a lighter option. Each choice brings its own unique flavor and texture.

    How can I make this dish spicier?
    If you’re looking for a kick, consider adding chopped jalapeños or a splash of hot sauce while cooking. It’s a simple way to awaken your taste buds!

    Can I freeze leftovers of the Southwest Ground Beef Sweet Potato Skillet?
    Yes, this dish freezes well! Just let it cool completely before transferring it to an airtight container. It’s perfect for busy days when you need a quick meal!

    What can I serve with this skillet?
    This dish shines on its own, but you can enhance the meal with warm tortillas, a dollop of sour cream, or a fresh salad on the side. It’s all about your preference!

    Final Thoughts

    The Southwest Ground Beef Sweet Potato Skillet has truly become a staple in my kitchen. It’s more than just a meal; it’s a celebration of flavors that brings everyone together. The joy of creating a dish that’s quick, nutritious, and bursting with taste is incomparable. Kids love it, and parents feel accomplished. Whether it’s a weekday dinner or a gathering with friends, this skillet never disappoints. I encourage you to give it a try; you might just find your new family favorite, perfectly balancing comfort and delight in each bite!


    Print

    clock clock iconcutlery cutlery iconflag flag iconfolder folder iconinstagram instagram iconpinterest pinterest iconfacebook facebook iconprint print iconsquares squares iconheart heart iconheart solid heart solid icon

    Description

    A delicious and hearty Southwest-inspired dish featuring ground beef and sweet potatoes cooked together for a flavorful one-pan meal.


    • Ground beef: 1 lb (450 g)
    • Sweet potatoes: 2 medium, peeled and diced (about 500 g)
    • Black beans: 1 can (15 oz or 425 g), drained and rinsed
    • Corn: 1 cup (frozen or canned)
    • Bell peppers: 1 red and 1 yellow, diced
    • Onion: 1 medium, diced
    • Garlic: 3 cloves, minced
    • Chili powder: 2 teaspoons
    • Cumin: 1 teaspoon
    • Olive oil: 2 tablespoons
    • Salt: to taste
    • Pepper: to taste
    • Fresh cilantro: for garnish (optional)

    1. Prepare the sweet potatoes by peeling and dicing them into small cubes.
    2. In a large skillet, heat 1 tablespoon of olive oil over medium heat and cook the ground beef until browned, seasoning with salt and pepper.
    3. In the same skillet, add the remaining olive oil and sauté the diced onion for 2-3 minutes, then add minced garlic and cook for another 30 seconds.
    4. Add the diced sweet potatoes to the skillet and cook for about 10 minutes, stirring occasionally, then sprinkle with chili powder and cumin.
    5. Stir in the diced bell peppers, black beans, and corn, cooking for another 5-7 minutes until sweet potatoes are tender.
    6. Return the cooked ground beef to the skillet, mix well, and cook for an additional 2-3 minutes. Adjust seasoning if needed and garnish with cilantro before serving.

    Notes

    • Feel free to add more vegetables based on your preference.
    • Can be served with avocado or sour cream if desired.
    • This dish is great for meal prep and can be stored in the refrigerator for a few days.
    • Prep Time: 10 minutes
    • Cook Time: 25 minutes
    • Category: Main Course
    • Method: Skillet
    • Cuisine: Southwestern

    Nutrition

    • Serving Size: 1 serving
    • Calories: 400
    • Sugar: 5g
    • Sodium: 600mg
    • Fat: 20g
    • Saturated Fat: 7g
    • Unsaturated Fat: 12g
    • Trans Fat: 0g
    • Carbohydrates: 30g
    • Fiber: 8g
    • Protein: 25g
    • Cholesterol: 70mg

    Sharing is caring!

  • Honeycrisp Apple Feta Salad

    Honeycrisp Apple Feta Salad


    Introduction to Honeycrisp Apple Feta Salad

    Sometimes, the day feels like a whirlwind, and finding time to prepare a satisfying meal can be tough. That’s where my Honeycrisp Apple Feta Salad comes in—a quick solution that doesn’t skimp on flavor or nutrition. With its vibrant colors and crunchy textures, it’s a dish that can steal the show at any table, impressing your loved ones without breaking a sweat in the kitchen. Plus, it’s packed with the freshness of Honeycrisp apples and creamy feta, making it perfect for busy moms and professionals seeking something light yet satisfying. Let’s dive in!

    Why You’ll Love This Honeycrisp Apple Feta Salad

    This Honeycrisp Apple Feta Salad is a delightful harmony of flavors that come together in mere minutes. It’s so easy that even on my busiest days, I can whip it up without breaking a sweat. The crispness of the apples, the creaminess of the feta, and the crunch from walnuts create a satisfying experience. Whether for a quick lunch or a family dinner, this salad never fails to impress. Trust me; your taste buds will thank you!

    Ingredients for Honeycrisp Apple Feta Salad

    Gathering the right ingredients is key to a delightful Honeycrisp Apple Feta Salad. Here’s a rundown of what you’ll need and a few suggestions to jazz it up:

    • Honeycrisp apples: These beauties are the star of the show! Their sweet-tart flavor and crisp texture add a refreshing crunch. Feel free to experiment with other apple varieties, like Granny Smith or Fuji, if necessary.
    • Feta cheese: Creamy and tangy, feta brings a delicious contrast to the sweetness of the apples. For a milder taste, try using goat cheese or ricotta, which can offer a unique twist.
    • Mixed greens: A blend of greens—like arugula, spinach, and romaine—provides a fresh base for the salad. You can easily substitute with kale or even a pre-packaged salad mix from the store.
    • Walnuts: Toasted walnuts add a nutty crunch and healthy fats. If you have allergies or prefer a different nut, pecans or almonds work wonderfully too!
    • Dried cranberries: These little bursts of sweetness are a perfect pairing with the salty feta. If you’re watching sugar intake, try using unsweetened dried cherries or even raisins.
    • Red onion: Thinly sliced, it gives a lovely bite to the salad. If raw onion is too strong, soak the slices in cold water for 10 minutes to soften the flavor.
    • Olive oil: A rich, fruity olive oil is essential for the dressing, but in a pinch, any neutral oil can work well.
    • Apple cider vinegar: This adds a tangy zing to the dressing. You can experiment with balsamic vinegar for a sweeter touch.
    • Honey: A drizzle of honey brings everything together with its natural sweetness. Agave syrup or maple syrup can substitute if you’re looking for alternatives.
    • Salt and pepper: A simple seasoning to enhance all the flavors. Always taste and adjust to your preference!

    For exact quantities, check out the recipe details at the bottom of the article. Now, let’s get ready to bring all these ingredients together for a refreshing culinary adventure!

    How to Make Honeycrisp Apple Feta Salad

    Prepare the Honeycrisp Apples

    First, you’ll want to core and slice those beautiful Honeycrisp apples. Start by cutting the apples in half to remove the core, then slice them thinly—about a quarter-inch thick works great. Keeping the skin on not only adds vibrant color but also a nutritional boost! To tackle the browning, toss your sliced apples in a splash of lemon juice. It’s a simple trick that keeps them looking fresh and appetizing. Plus, that zing from the lemon pairs nicely with the sweetness of the apples. Trust me, your salad will benefit from this simple step!

    Toast the Walnuts

    Now, let’s toast those walnuts! Place them in a dry skillet over medium heat. Stir them frequently, letting them dance around in the pan for about 5-7 minutes. You’ll know they’re ready when they become fragrant and slightly golden. This step intensifies their flavor, adding a delightful crunch to your salad. Just keep an eye on them; burnt nuts are a one-way ticket to a sad salad!

    Rinse and Dry the Mixed Greens

    Next up is the mixed greens. Rinse them gently under cold water—think of it as giving them a refreshing shower! After rinsing, it’s essential to dry them well. Use a salad spinner or a clean kitchen towel. Removing excess moisture keeps the greens crisp and prevents any sogginess in your salad. No one likes a wilted salad, right?

    Slice the Red Onion

    Time to tackle the red onion! Thinly slice it to enhance your salad with just the right amount of bite. If the raw onion taste is too potent, soak those slices in cold water for about 10 minutes. This helps mellow the flavor and makes them much easier to enjoy. Drain and pat them dry, and you’re ready to go!

    Whisk the Dressing

    Now, let’s whip up that dressing! In a small bowl or jar, combine olive oil, apple cider vinegar, honey, salt, and pepper. Whisk everything together until smooth, or if you choose a jar, just shake it up. The balance of tanginess from vinegar and sweetness from honey is divine! Don’t forget to taste and adjust the seasoning to fit your palate. A pinch more of salt or a drizzle of honey can make all the difference.

    Combine the Salad Ingredients

    In a large salad bowl, add those lovely mixed greens and sliced Honeycrisp apples. But here’s the trick—gently toss them first to combine without bruising the greens. This layering creates a beautiful foundation for your salad. Now, sprinkle in the crumbled feta, toasted walnuts, dried cranberries, and sliced red onion. Each ingredient adds its own charm to the mix!

    Dress and Serve

    Finally, it’s time to dress your salad! Drizzle half of that tasty dressing over the top, and toss gently to coat all the ingredients. If you like a bit more flavor, add more dressing later. For presentation, serve it in a large rustic bowl or individual plates, garnishing with extra cranberries, walnuts, or feta to impress your guests. Enjoy the delightful crunch and fresh flavors of your Honeycrisp Apple Feta Salad!

    Tips for Success

    To ensure your Honeycrisp Apple Feta Salad shines, keep these tips in mind:

    • Preparation is key: chop your ingredients ahead of time for a quick assembly.
    • Store any leftover dressing separately to keep greens crisp longer.
    • Feel free to adjust sweetness in the dressing by varying the honey.
    • If you plan to make this in advance, add the apples just before serving to prevent browning!

    Equipment Needed

    • Cutting board: A sturdy space for slicing your ingredients.
    • Sharp knife: Essential for cleanly cutting apples and vegetables.
    • Salad spinner: Helps rinse and dry mixed greens effectively.
    • Mixing bowl: A large bowl to bring everything together.
    • Small jar or whisk: For mixing up that delicious dressing.

    Variations of Honeycrisp Apple Feta Salad

    • Add grilled chicken or shrimp for a protein-packed meal.
    • Swap walnuts for pecans or almonds for a different nutty flavor.
    • Make it vegan by replacing feta with avocado or tofu.
    • Try adding quinoa for a hearty twist.
    • For a spicy kick, toss in sliced jalapeños or a sprinkle of chili flakes.

    Serving Suggestions

    • Pair the salad with grilled chicken for a satisfying dinner option.
    • Serve alongside a warm crusty baguette to soak up the flavors.
    • For drinks, a crisp Sauvignon Blanc complements the salad beautifully.
    • Garnish with fresh herbs like basil or mint for an extra pop of color.
    • Present in an elegant salad bowl for an eye-catching centerpiece.

    FAQs about Honeycrisp Apple Feta Salad

    Can I make Honeycrisp Apple Feta Salad ahead of time? Yes, but for the best taste and texture, prepare the dressing and toppings separately. Combine the ingredients right before serving to keep the greens crisp and prevent browning of the apples.

    How should I store leftover Honeycrisp Apple Feta Salad? Store any leftovers in an airtight container in the fridge. The salad is best eaten within a day to maintain its freshness, but you can keep it for up to two days if needed.

    Can I swap out the feta cheese for a dairy-free option? Absolutely! You can use crumbled tofu, avocado, or a dairy-free feta alternative for a similar creamy texture while keeping it vegan.

    What other nuts can I use in this salad? If walnuts aren’t your favorite, feel free to substitute with pecans, sliced almonds, or even pumpkin seeds. Each brings its unique flavor, enhancing the salad differently!

    What meals pair well with Honeycrisp Apple Feta Salad? This salad complements grilled chicken or fish perfectly. It also serves as a light side for pasta dishes or a hearty main paired with crusty bread. Enjoy experimenting!

    Final Thoughts

    The Honeycrisp Apple Feta Salad is more than just a dish; it’s a celebration of fresh flavors and vibrant colors. Every bite offers a delightful crunch, making it an instant favorite for my family and friends. It’s the perfect solution for busy moms and professionals who crave something healthy yet quick to prepare.

    This salad isn’t just visually appealing, it’s versatile too—ideal for potlucks or as a nourishing lunch. Each ingredient dances together, creating a medley of taste that elevates your meal. I hope you savor every forkful as much as I do!


    Print

    clock clock iconcutlery cutlery iconflag flag iconfolder folder iconinstagram instagram iconpinterest pinterest iconfacebook facebook iconprint print iconsquares squares iconheart heart iconheart solid heart solid icon

    Description

    A refreshing and flavorful salad featuring Honeycrisp apples, feta cheese, and mixed greens, perfect for any occasion.


    • 2 large Honeycrisp apples, cored and thinly sliced
    • 5 oz feta cheese, crumbled
    • 4 cups mixed greens (such as arugula, spinach, and romaine)
    • 1/2 cup walnuts, toasted and roughly chopped
    • 1/4 cup dried cranberries
    • 1/4 cup red onion, thinly sliced
    • 1/4 cup olive oil
    • 2 tablespoons apple cider vinegar
    • 1 tablespoon honey
    • Salt and pepper to taste

    1. Core the Honeycrisp apples and slice them thinly. Keep the skin on for added color and nutrients, or peel if preferred. Set aside in a bowl.
    2. In a dry skillet over medium heat, toast the walnuts for about 5-7 minutes, stirring frequently until fragrant and slightly golden. Remove from heat and let cool.
    3. Rinse the mixed greens under cold water and dry them using a salad spinner or a clean kitchen towel to avoid sogginess.
    4. Thinly slice the red onion. If the raw flavor is too strong, soak the slices in cold water for 10 minutes, then drain and pat dry.
    5. In a small bowl or jar, mix together the olive oil, apple cider vinegar, honey, salt, and pepper.
    6. Whisk the dressing ingredients together until emulsified, or shake in a jar until well combined. Adjust seasoning to taste.
    7. In a large salad bowl, add the mixed greens and sliced apples. Gently toss to combine.
    8. Sprinkle the crumbled feta, toasted walnuts, dried cranberries, and sliced red onion over the salad.
    9. Drizzle half of the dressing over the salad and toss gently to coat. Add more dressing if desired.
    10. Give the salad a final gentle toss and serve immediately, or let it sit for a few minutes to meld flavors.

    Notes

    • For added crunch, consider using roasted nuts instead of raw.
    • This salad is best served fresh, but can be stored in the refrigerator for up to a day.
    • Adjust the sweetness of the dressing by adding more or less honey to your taste.
    • Prep Time: 15 minutes
    • Cook Time: 7 minutes
    • Category: Salad
    • Method: Mixing and Tossing
    • Cuisine: American

    Nutrition

    • Serving Size: 1 serving
    • Calories: 350
    • Sugar: 12g
    • Sodium: 240mg
    • Fat: 25g
    • Saturated Fat: 5g
    • Unsaturated Fat: 20g
    • Trans Fat: 0g
    • Carbohydrates: 30g
    • Fiber: 5g
    • Protein: 8g
    • Cholesterol: 15mg

    Sharing is caring!

  • Homemade Saltwater Taffy Rolls

    Homemade Saltwater Taffy Rolls


    Introduction to Homemade Saltwater Taffy Rolls

    Picture this: a whirlwind day, kids are bouncing off the walls, and you want to create something special without spending hours in the kitchen. That’s where these Homemade Saltwater Taffy Rolls come in! They’re not just a delicious sweet treat; they’re also a fun project to take on with your kids or to impress guests at a gathering. Plus, once you get the hang of it, you’ll be whipping these up in no time. Trust me, nothing brings joy like the chewy, colorful candies made right in your own kitchen!

    Why You’ll Love This Homemade Saltwater Taffy Rolls

    There’s a special kind of magic in creating candy at home. These Homemade Saltwater Taffy Rolls are not only quick and simple but incredibly rewarding! With just a few pantry staples, you can craft a delightful treat that rivals anything from the store. They’ll please picky eaters and transport you back to childhood, making them perfect for any occasion. Trust me, the taste will have you dreaming of summer days at the beach!

    Ingredients for Homemade Saltwater Taffy Rolls

    Creating Homemade Saltwater Taffy Rolls requires just a handful of ingredients. Each one plays a crucial role in crafting that delightful texture and flavor we all love. Here’s what you’ll need:

    • Granulated sugar: This is the main sweetener, providing that perfect sugary goodness.
    • Light corn syrup: This helps to prevent crystallization, keeping your taffy silky and smooth.
    • Water: Just enough to help dissolve the sugar and corn syrup for a consistent mix.
    • Unsalted butter: A touch of richness that adds to the creaminess of your taffy.
    • Salt: Counterbalances the sweetness and enhances flavor for a delightful taste.
    • Vanilla extract: This adds a warm, comforting aroma and flavor that makes everything better!
    • Food coloring: Optional, but it’s your chance to get creative—think bright hues that are fun to eat.
    • Flavor extracts: Whether it’s peppermint, lemon, or strawberry, these can elevate your taffy to new heights.

    For detailed measurements, be sure to check the bottom of the article where everything is available for printing. Don’t be afraid to experiment with different flavor combinations; the world of taffy is your oyster!

    How to Make Homemade Saltwater Taffy Rolls

    Making Homemade Saltwater Taffy Rolls is not only rewarding; it’s a fun way to spend time in the kitchen. Let’s break it down into simple steps that will guide you through this sweet adventure!

    Prepare the Baking Surface

    First things first, prep your workspace. Generously grease a large baking sheet or a marble slab with unsalted butter. This step is crucial as it prevents the hot taffy from sticking, which is the last thing you want when you’re ready to pour!

    Combine Ingredients and Cook

    Next, grab a heavy-bottomed saucepan and combine granulated sugar, light corn syrup, water, and salt. Stir the mixture over medium heat until the sugar completely dissolves. This part is important; if you skip it, you might end up with gritty taffy. Once dissolved, let it come to a gentle boil. Resist the urge to stir again! Just let it bubble until a candy thermometer reads 250°F. This indicates that you’ve reached the hard-ball stage, perfect for that chewy texture!

    Add Flavor and Color

    Once you reach that magical temperature, take it off the heat immediately. Stir in your unsalted butter and vanilla extract. If you’re feeling adventurous, add your chosen food coloring and flavor extracts. This is your time to shine! Mix until everything is evenly combined, and the aroma sweeps you off your feet. Can you smell the nostalgia already?

    Pour and Cool the Mixture

    Carefully pour the hot taffy mixture onto your prepared surface. Now, let it cool until it’s just warm enough to handle, not too hot or you’ll burn yourself. Be patient—this is crucial for the next step!

    Pull the Taffy

    Once it’s cool enough, butter your hands thoroughly to avoid sticking. Now comes the fun part: start pulling, folding, and stretching the taffy. It should start to lighten in color and become firm. This process can be a bit of a workout, but it’s great! The more you pull, the chewier your taffy will be.

    Cut into Pieces

    Finally, form the pulled taffy into ropes of the desired thickness. Use buttered scissors or a sharp knife to cut them into bite-sized pieces. Once you’ve got your pieces, wrap each one in wax paper to keep them fresh and prevent sticking. And there you have it—your very own Homemade Saltwater Taffy Rolls!

    Tips for Success

    • Always use a candy thermometer; it’s key for achieving the right texture.
    • Grease everything well—tools and surfaces—to avoid sticky mishaps.
    • Work quickly when adding flavor and color, as the taffy sets fast!
    • Have butter on hand for your hands and tools during pulling.
    • Don’t hesitate to experiment with flavors; let your creativity shine!

    Equipment Needed for Homemade Saltwater Taffy Rolls

    • Heavy-bottomed saucepan: This helps distribute heat evenly; a regular saucepan works too.
    • Candy thermometer: Essential for the perfect texture; a regular cooking thermometer can suffice.
    • Large baking sheet or marble slab: Any flat, greased surface will do!
    • Butter or oil: For greasing surfaces and your hands, cooking spray can be a quick alternative.
    • Butter or sharp scissors: Use buttered scissors for cutting; you can also use a knife.

    Variations of Homemade Saltwater Taffy Rolls

    • Fruit Flavors: Try adding banana, raspberry, or coconut flavor extracts for a tropical twist.
    • Chocolate Coated: Dip cut taffy pieces in melted chocolate for a decadent treat that kids will love.
    • Spicy Sweet: Add a pinch of cayenne pepper to your taffy for a surprising kick mixed with sweetness.
    • Natural Colors: Use beet juice or matcha powder instead of artificial food coloring for a healthier option.
    • Vegan Option: Substitute the butter with coconut oil and ensure that the flavor extracts are vegan-friendly.

    Serving Suggestions for Homemade Saltwater Taffy Rolls

    • Great Pairings: Enjoy your taffy with a refreshing glass of lemonade or iced tea for a delightful contrast.
    • Festive Presentation: Arrange the taffy in a colorful bowl or jar for a fun centerpiece at parties.
    • Gift Idea: Wrap them in cellophane bags tied with a ribbon for a sweet homemade gift.
    • Snack Time: Pack them in lunchboxes for a fun treat that will brighten up the day.

    FAQs about Homemade Saltwater Taffy Rolls

    Can I use different flavors in my Homemade Saltwater Taffy Rolls?

    Absolutely! You can experiment with various flavor extracts like lemon, orange, or even root beer. The possibilities are endless, so let your taste buds guide you!

    Why does my taffy turn out sticky?

    If your Homemade Saltwater Taffy Rolls are sticky, it could be due to not cooking the mixture long enough or not adding enough corn syrup. Ensure you reach the correct temperature, and don’t skip the greasing step!

    How should I store my taffy?

    Store your wrapped taffy in an airtight container at room temperature. This helps maintain freshness and prevents the taffy from getting hard!

    Can I make this recipe vegan?

    Yes, you can substitute unsalted butter with coconut oil for your Homemade Saltwater Taffy Rolls. Just ensure any flavor extracts you choose are also vegan-friendly.

    How long do these taffy rolls last?

    When stored properly, your Homemade Saltwater Taffy Rolls can last up to two weeks, but they’ll likely be devoured long before that!

    Final Thoughts on Homemade Saltwater Taffy Rolls

    Making Homemade Saltwater Taffy Rolls isn’t just about creating a delicious treat; it’s about nurturing joy in the kitchen. Each pull and stretch of the taffy is a reminder of simpler times, where laughter filled the air and sweet treats brought everyone together. Whether you enjoy them yourself or share them with friends and family, you’ll find smiles all around. Plus, the endless flavor possibilities mean the fun never has to end. So, roll up your sleeves and dive into this sweet adventure—it’s a delightful way to make memories, one chewy piece at a time!


    Print

    clock clock iconcutlery cutlery iconflag flag iconfolder folder iconinstagram instagram iconpinterest pinterest iconfacebook facebook iconprint print iconsquares squares iconheart heart iconheart solid heart solid icon

    Description

    A sweet and chewy treat that you can easily make at home, perfect for any occasion.


    • 2 1/2 cups granulated sugar
    • 1 1/2 cups light corn syrup
    • 1 cup water
    • 2 tablespoons unsalted butter
    • 2 teaspoons salt
    • 1 teaspoon vanilla extract
    • Food coloring, as desired
    • Flavor extracts (such as peppermint, lemon, or strawberry), as desired

    1. Generously grease a large baking sheet or marble slab with unsalted butter to prevent sticking.
    2. In a heavy-bottomed saucepan, combine granulated sugar, light corn syrup, water, and salt. Stir over medium heat until the sugar fully dissolves.
    3. Allow the mixture to come to a boil without stirring. Attach a candy thermometer and cook until the temperature reaches 250°F (hard-ball stage).
    4. Remove from heat immediately. Stir in unsalted butter, vanilla extract, and any chosen food coloring or flavor extracts until evenly combined.
    5. Pour the hot taffy mixture onto the prepared baking sheet. Allow it to cool until just warm and safe to touch.
    6. Butter your hands thoroughly. Pull, fold, and stretch the taffy repeatedly until it becomes pale and firm.
    7. Form the taffy into ropes and cut into bite-sized pieces using buttered scissors or a sharp knife.
    8. Wrap each taffy piece in wax paper to preserve freshness and prevent sticking.

    Notes

    • Ensure all utensils and surfaces are well greased to make the process easier.
    • Experiment with different flavor extracts to create your favorite combinations.
    • Store the wrapped taffy in an airtight container for best freshness.
    • Prep Time: 15 minutes
    • Cook Time: 20 minutes
    • Category: Candy
    • Method: Stovetop
    • Cuisine: American

    Nutrition

    • Serving Size: 1 piece
    • Calories: 100
    • Sugar: 18g
    • Sodium: 30mg
    • Fat: 2g
    • Saturated Fat: 1g
    • Unsaturated Fat: 1g
    • Trans Fat: 0g
    • Carbohydrates: 22g
    • Fiber: 0g
    • Protein: 0g
    • Cholesterol: 5mg

    Sharing is caring!

  • Creamy Marry Me Chicken Pasta

    Creamy Marry Me Chicken Pasta


    Introduction to Creamy Marry Me Chicken Pasta

    When life gets hectic, and dinner plans seem daunting, I find solace in my favorite dish: Creamy Marry Me Chicken Pasta. This delightful recipe is not just a meal; it’s a warm hug on a plate, ready to impress your loved ones. It’s the kind of dish that invites smiles and sparks conversation around the dinner table. Perfect for busy evenings or a romantic date night, it combines the richness of chicken with sun-dried tomatoes and a luscious parmesan sauce. Trust me, this creamy masterpiece is a fast, flavorful solution that will have everyone asking for seconds!

    Why You’ll Love This Creamy Marry Me Chicken Pasta

    This Creamy Marry Me Chicken Pasta checks all the boxes for a perfect weeknight meal. First, it’s incredibly easy to make, taking just about 40 minutes from prep to plating. Second, the flavors are out of this world! The sun-dried tomatoes combined with rich creaminess create an unforgettable taste. Plus, it’s versatile enough to impress guests, making it your secret weapon for any occasion.

    Ingredients for Creamy Marry Me Chicken Pasta

    Gathering the right ingredients is the first step to culinary magic. For this Creamy Marry Me Chicken Pasta, you’ll need a delightful mix of flavors and textures. Here’s what you’ll need:

    • Boneless skinless chicken breasts: The star of the show! They provide lean protein and absorb flavors beautifully.
    • Penne pasta: This tubular pasta is perfect for holding onto the rich sauce. Grab some whole grain or gluten-free options if needed.
    • Butter: A bit of fat adds richness to our sauce, enhancing the creamy experience.
    • Chicken broth: This liquid gold adds depth to the flavor. Pot for low-sodium varieties to control salt levels.
    • Heavy cream: The secret to that luscious texture! If you’re looking for lighter options, half-and-half works too.
    • Grated parmesan cheese: A touch of sharpness complements the creaminess perfectly. Freshly grated is the best option!
    • Sun-dried tomatoes: These little gems pack a punch of flavor. You can find them in oil or dry; both work well.
    • Olive oil: A staple in many kitchens! Use it to sear the chicken and infuse a lovely aroma.
    • Minced garlic: Adds that irresistible aroma and flavor to the sauce. Fresh or jarred works great.
    • All-purpose flour: This is essential for creating a roux, thickening our sauce to perfection.
    • Paprika: Just a sprinkle adds warmth and color. Smoked paprika can also elevate the dish further.
    • Dried Italian seasoning: A blend of herbs that transports you straight to the Italian countryside.
    • Salt and pepper: The dynamic duo to taste. Always adjust to enhance the flavor of your dish!

    Each ingredient interacts beautifully, creating a delicious symphony of flavors. Exact quantities and more tips for substitutions can be found at the bottom of the article for easy printing!

    How to Make Creamy Marry Me Chicken Pasta

    Now that you have your ingredients lined up, it’s time to bring them together in a delightful dance of flavors. Follow these steps closely, and you’ll have a remarkable Creamy Marry Me Chicken Pasta ready in no time!

    Step 1: Cook the Penne Pasta

    Preparing the Pasta

    Start by bringing a large pot of salted water to a rolling boil. Add your penne pasta and cook according to package instructions until it’s al dente, which means it should still have a slight bite when you chew it. This is key for perfect texture! Trust me, soggy pasta isn’t an option here. Once done, drain it and set it aside, letting it hold its shape while we focus on the rest of our heavenly dish.

    Step 2: Sear the Chicken

    Seasoning and Cooking

    While your pasta cooks, it’s time for the star of the show: the chicken! Season the boneless skinless chicken breasts with salt and pepper liberally. In a large skillet over medium-high heat, drizzle some olive oil. Allow the oil to shimmer before adding the chicken. Cook for about 6-8 minutes per side until the chicken is golden brown and cooked through. Aim for an internal temperature of 165°F. Once cooked, set it aside on a plate and let it rest while we move on.

    Step 3: Create the Sauce

    Making the Roux

    In the same skillet, you just used for the chicken, melt 3 tablespoons of butter over medium heat. When the butter is bubbly, add 2 teaspoons of minced garlic and sauté for about 30 seconds until fragrant. Now, sprinkle in 3 tablespoons of all-purpose flour to create a roux. This step is crucial for our creamy sauce! Stir constantly for a couple of minutes until it turns golden and smells nutty.

    Step 4: Add Remaining Ingredients

    Incorporating Flavor

    Gradually whisk in the chicken broth and heavy cream. Keep whisking until the mixture becomes smooth and creamy. This is where the magic happens! Add in the grated parmesan cheese, sun-dried tomatoes, 1 teaspoon paprika, and 2 teaspoons dried Italian seasoning. Stir well and let it simmer for about 5-7 minutes until it thickens and coats the back of your spoon beautifully. Taste it, and don’t forget to adjust with salt and pepper as needed.

    Step 5: Combine Chicken and Pasta

    Final Mixing

    Finally, return your cooked chicken and penne pasta back into the skillet, tossing everything together. Make sure every piece of pasta is generously coated in that irresistible creamy sauce. If it looks a bit thick, feel free to add a splash of chicken broth. After all, we want this pasta to be luxurious! Once combined, let the dish sit for a couple of minutes before serving, allowing the flavors to meld together even more.

    Tips for Success

    • Don’t overcook the pasta; al dente gives the best texture!
    • Let the chicken rest after cooking to retain its juices.
    • Always taste and adjust the seasoning to your liking.
    • For a bit of zing, add red pepper flakes or a squeeze of lemon.
    • Keep some chicken broth handy to adjust the sauce’s thickness as needed.

    Equipment Needed

    • Large pot: Essential for boiling pasta. A stockpot works well too.
    • Skillet: A non-stick or cast iron skillet helps in even cooking.
    • Measuring spoons and cups: For accurate ingredient quantities.
    • Whisk: To combine the sauce smoothly; a fork can suffice if needed.
    • Cutting board and knife: Necessary for prepping chicken and tomatoes.

    Variations on Creamy Marry Me Chicken Pasta

    • Vegetarian Option: Substitute the chicken with grilled zucchini, mushrooms, or chickpeas. It’s just as delightful and adds a fresh twist!
    • Lightened-Up Version: Use half-and-half instead of heavy cream and reduce the butter for a healthier take, but still keep that creamy goodness.
    • Spicy Kick: Add diced jalapeños or crushed red pepper flakes for a heat that contrasts beautifully with the creaminess.
    • Herbaceous Twist: Mix in fresh basil or spinach just before serving for a pop of color and fresh flavor!
    • Gluten-Free Pasta: Pot for gluten-free penne to enjoy this dish without compromising on dietary needs.
    • Cheesy Delight: For an extra cheesy experience, sprinkle more grated parmesan or try adding mozzarella during the last few minutes of cooking.

    Serving Suggestions for Creamy Marry Me Chicken Pasta

    • Pair with a crisp garden salad topped with vinaigrette to balance the richness of the pasta.
    • Add garlic bread on the side for a satisfying crunch and to soak up that creamy sauce.
    • Serve with a chilled glass of white wine, such as Pinot Grigio, to elevate the meal.
    • Garnish with fresh basil or parsley for a touch of color and an aromatic finish.

    FAQs about Creamy Marry Me Chicken Pasta

    Many readers have questions about my delightful Creamy Marry Me Chicken Pasta. Let’s dive into some of the most common queries and clear up any culinary curiosities you might have!

    Can I make this dish ahead of time?

    Yes, you can! Prepare the pasta and sauce ahead of time. Keep everything in separate containers in the refrigerator. When you’re ready to eat, simply reheat in a skillet and combine.

    How long does left-over Creamy Marry Me Chicken Pasta last in the fridge?

    Leftovers can last up to three days in the refrigerator. Just be sure to store them in an airtight container to retain freshness!

    What can I serve with Creamy Marry Me Chicken Pasta?

    This dish pairs beautifully with a side salad or garlic bread for a satisfying meal. You could also serve it with steamed veggies for added balance!

    Can I freeze Creamy Marry Me Chicken Pasta?

    I recommend avoiding freezing due to the creamy texture. Creamy sauces can separate upon thawing, which won’t look appealing. Fresh is best for this one!

    How can I make this dish gluten-free?

    No worries! Simply swap the penne pasta for a gluten-free version. Check the sauce ingredients, and you’ll find this recipe is naturally gluten-free with proper substitutions!

    Final Thoughts

    The moment you serve Creamy Marry Me Chicken Pasta, you’ll witness the smiles and hear the oohs and aahs around the table. This delightful dish isn’t just about feeding hunger; it’s about creating memories and sharing love. Whether it’s a weeknight dinner or a special occasion, this pasta offers comfort with every creamy bite.

    I cherish the satisfaction of watching my family enjoy this meal together. And the best part? It’s a simple recipe that makes you feel like a culinary superstar. So, roll up your sleeves and get cooking; love is just a plate away!


    Print

    clock clock iconcutlery cutlery iconflag flag iconfolder folder iconinstagram instagram iconpinterest pinterest iconfacebook facebook iconprint print iconsquares squares iconheart heart iconheart solid heart solid icon

    Description

    A delicious creamy pasta dish featuring chicken, sun-dried tomatoes, and a rich parmesan sauce, perfect for a romantic dinner.


    • 1 ½ lbs boneless skinless chicken breasts
    • 10 oz penne pasta
    • 3 tbsp butter
    • 2 cups chicken broth
    • 1 cup heavy cream
    • 1 cup grated parmesan cheese
    • 1 cup sun-dried tomatoes
    • Olive oil
    • 2 tsp minced garlic
    • 3 tbsp all-purpose flour
    • 1 tsp paprika
    • 2 tsp dried Italian seasoning
    • Salt and pepper to taste

    1. Cook the penne pasta according to package instructions; drain and set aside.
    2. Season chicken with salt and pepper. In a large skillet over medium-high heat, heat olive oil and cook the chicken for 6-8 minutes until cooked through. Set aside.
    3. In the same skillet, melt butter over medium heat and sauté garlic for about 30 seconds. Stir in flour to create a roux.
    4. Gradually whisk in chicken broth, heavy cream, and parmesan until smooth.
    5. Add sun-dried tomatoes, paprika, Italian seasoning, salt, and pepper; simmer until thickened.
    6. Return chicken and pasta to the skillet; stir well to combine.
    7. Serve garnished with fresh basil and extra parmesan if desired.

    Notes

    • For added flavor, consider marinating the chicken in Italian dressing before cooking.
    • This dish pairs well with a side salad and garlic bread.
    • Leftovers can be stored in the refrigerator for up to 3 days.
    • Prep Time: 15 minutes
    • Cook Time: 25 minutes
    • Category: Main Course
    • Method: Stovetop
    • Cuisine: Italian

    Nutrition

    • Serving Size: 1 serving
    • Calories: 620
    • Sugar: 5g
    • Sodium: 850mg
    • Fat: 28g
    • Saturated Fat: 15g
    • Unsaturated Fat: 10g
    • Trans Fat: 0g
    • Carbohydrates: 64g
    • Fiber: 3g
    • Protein: 36g
    • Cholesterol: 120mg

    Sharing is caring!

  • Pickle Dip Pinwheels

    Pickle Dip Pinwheels


    Introduction to Pickle Dip Pinwheels

    Hey there, fellow food lovers! If you’re like me, juggling work, family, and life can sometimes feel like a circus act. That’s why I’m excited to share my delicious recipe for Pickle Dip Pinwheels. These scrumptious bites come together in a flash and are sure to impress your friends and family! Imagine a quick, hassle-free snack that you can whip up in under 15 minutes and still serve at parties—talk about a win-win! With creamy, tangy flavors and a hint of savory goodness, these pinwheels will quickly become your go-to appetizer for any occasion.

    Why You’ll Love This Pickle Dip Pinwheels

    If you’re looking for a simple yet crowd-pleasing appetizer, look no further! These Pickle Dip Pinwheels are not only quick to prepare but also bursting with flavor. They require minimal cooking, perfect for busy moms who need to keep their families satisfied without spending hours in the kitchen. Plus, the blend of creamy cream cheese, savory ham, and tangy pickles creates a delightful taste that everyone will adore!

    Ingredients for Pickle Dip Pinwheels

    Gathering the right ingredients is the first step toward making these Pickle Dip Pinwheels a smash hit! Here’s what you’ll need:

    • Cream Cheese: This is your creamy base, providing that smooth texture that holds everything together. Be sure to let it soften so it’s easy to spread.
    • Diced Deli Ham: A flavorful addition that adds protein and a savory kick. You can swap it for turkey or a vegetarian alternative if desired.
    • Diced Dill Pickle Spears: The star of the show! They deliver that sharp tanginess that perfectly complements the cream cheese and ham. Dill relish works as a substitute if you prefer.
    • Taco-Sized Tortillas: These wraps serve as your perfect vehicle for pinwheels. Whole wheat or spinach tortillas are great options for a healthier twist.

    For those who want to get creative, feel free to add in optional ingredients like diced green onions, shredded cheese, or even a dash of spicy mustard for some extra flair. Remember, the beauty of these pinwheels is their versatility! You can find specific quantities at the bottom of this article so you can make a batch that’s just right for you.

    How to Make Pickle Dip Pinwheels

    Ready to dive into creating these wonderful Pickle Dip Pinwheels? Let’s turn these simple ingredients into a delightful party favorite with some easy steps!

    Step 1: Prepare Your Ingredients

    First things first, dice your ham and pickles into smaller pieces. The smaller, the better! This helps each delicious bite meld those flavors seamlessly.

    Once diced, set them aside. Trust me, taking the time now will elevate your later mixing game!

    Step 2: Beat the Cream Cheese

    Now, grab a medium-sized bowl and let’s beat that cream cheese until it’s as smooth as silk. Aim for a texture that’s creamy yet spreadable. This soft base will be the foundation for all the delicious flavors to come.

    Step 3: Combine Ingredients

    Time to fold in your diced ham and pickles! Gently mix them into the cream cheese until everything is well combined. This blend of flavors is what makes the Pickle Dip Pinwheels truly memorable! Don’t rush; getting this perfect mix is vital.

    Step 4: Spread the Mixture

    Take your tortillas and spread the mixture evenly across each one, leaving about half an inch on the edges. This space is crucial for rolling—nobody likes a filling explosion!

    Use a spatula for a nice, even distribution. It can be a beautiful thing to see all that creamy goodness spread just right!

    Step 5: Roll and Refrigerate

    Once they’re spread, it’s time to roll those tortillas up tightly like a small sleeping burrito. Wrap each one firmly and then place them on a plate. Cover them with Saran Wrap and toss them in the fridge for about an hour. This step is key—it helps the flavors settle and makes slicing easier later!

    Step 6: Slice and Serve

    After an hour, it’s like Christmas morning as you unveil your pinwheels! Remove them from the fridge, and with a sharp knife, slice into about one-inch rounds.

    Feel free to present them on a beautiful platter. They look gorgeous and inviting, just waiting for someone to nibble!

    Tips for Success

    • Let your cream cheese soften for easier mixing and spreading.
    • Cut your pinwheels with a sharp, serrated knife to avoid squishing them.
    • Wrap each pinwheel tightly in plastic wrap for a cleaner slice.
    • Refrigerate longer for enhanced flavor; overnight is even better!
    • Experiment with different herbs or spices to add your personal touch.

    Equipment Needed

    • Mixing Bowl: A medium-sized bowl works best; if you don’t have one, a large plate can do in a pinch!
    • Sharp Knife: For slicing your pinwheels; a serrated knife is ideal for clean cuts.
    • Spatula: Use it to spread the mixture; any flat utensil will also work.
    • Plastic Wrap: Wrap your pinwheels tightly; alternative beeswax wrap can be a great eco-friendly substitute.

    Variations

    • Spicy Kick: Add diced jalapeños or a sprinkle of cayenne pepper for a spicy twist.
    • Herbed Delight: Incorporate fresh herbs like dill or chives to amplify the deliciousness.
    • Cheesy Goodness: Add shredded cheddar or pepper jack cheese to the cream cheese mixture for extra creaminess.
    • Lean and Green: Use turkey or chicken breast instead of ham for a lighter version.
    • Vegan Option: Substitute cream cheese with a plant-based version and use hummus instead of meat.

    Serving Suggestions for Pickle Dip Pinwheels

    • Pair with crisp vegetable sticks like celery or bell peppers for a colorful platter.
    • Serve alongside a refreshing dip, such as ranch or blue cheese dressing.
    • Complement with sparkling lemonade or a light white wine for a delightful pairing.
    • Present on a tiered serving tray for a touch of elegance.
    • Garnish with fresh dill or parsley for a pop of color and flavor.

    FAQs about Pickle Dip Pinwheels

    As a busy home cook, I know that questions might come up when making these delicious Pickle Dip Pinwheels. Here are some answers to the most common inquiries I receive:

    Can I make Pickle Dip Pinwheels ahead of time?

    Absolutely! You can make these pinwheels a day in advance. Just wrap them tightly and store them in the fridge. They taste even better when the flavors have had time to meld!

    What type of tortillas can be used for Pinwheels?

    Taco-sized tortillas are ideal, but you can use any type you prefer. Whole wheat, spinach, or even gluten-free tortillas work wonderfully if you or your guests need special accommodations.

    Can I customize the filling for my pinwheels?

    Yes! Feel free to get creative with the ingredients. Adding shredded cheese, olives, or different types of deli meats can give your Pickle Dip Pinwheels a unique twist that your guests will love!

    How do I store leftovers?

    Store any leftover pinwheels in an airtight container in the fridge. They’re perfect for snacking later in the day or for a quick lunch!

    What drinks pair well with Pickle Dip Pinwheels?

    These pinwheels pair nicely with sparkling water, a light white wine, or even a fruity lemonade. The refreshing taste complements the tanginess of the pickles beautifully!

    Final Thoughts

    Creating these Pickle Dip Pinwheels brings such joy to my kitchen! They are not just a treat for the taste buds, but also a way to bring friends and family together. I love how simple ingredients can be transformed into something stunning and delicious in no time. Whether it’s a family gathering or a weekend party, these pinwheels are bound to be a hit. Best of all, they allow us busy moms to impress without the stress. So roll up some fun, and let every bite of these pinwheels remind you of the joy in sharing food with loved ones!


    Print

    clock clock iconcutlery cutlery iconflag flag iconfolder folder iconinstagram instagram iconpinterest pinterest iconfacebook facebook iconprint print iconsquares squares iconheart heart iconheart solid heart solid icon

    Description

    Easy and delicious pickle dip pinwheels perfect for parties.


    • 16 oz cream cheese softened
    • 1 1/2 cup diced deli ham
    • 1 1/2 cup diced dill pickle spears
    • 67 taco sized tortillas

    1. Dice your ham and pickles in smaller pieces and set aside.
    2. In medium sized bowl, beat your cream cheese until smooth.
    3. Fold in your diced ham and pickles until combined.
    4. Spread your mixture evenly among tortillas leaving about 1/2″ on the side and roll up tightly.
    5. Place on plate and wrap in Saran Wrap and refrigerate for about one hour.
    6. Remove from refrigerator and slice into about 1″ rounds.

    Notes

    • These pinwheels can be made a day in advance.
    • Serve chilled for the best flavor.
    • Feel free to customize with additional ingredients such as cheese or spicy mustard.
    • Prep Time: 15 minutes
    • Cook Time: 0 minutes
    • Category: Appetizer
    • Method: No-Cook
    • Cuisine: American

    Nutrition

    • Serving Size: 1 pinwheel
    • Calories: 100
    • Sugar: 1g
    • Sodium: 250mg
    • Fat: 7g
    • Saturated Fat: 4g
    • Unsaturated Fat: 2g
    • Trans Fat: 0g
    • Carbohydrates: 6g
    • Fiber: 1g
    • Protein: 5g
    • Cholesterol: 20mg

    Sharing is caring!

  • Pickled Beet Salad

    Pickled Beet Salad


    Introduction to Pickled Beet Salad

    When life gets busy, we all crave something healthy yet vibrant, don’t we? That’s where my *Pickled Beet Salad* shines! This delightful dish is not just a feast for the eyes; it’s a quick solution for those hectic days. Imagine pulling together colorful ingredients that sing with flavor while nourishing your body.

    Whether you’re prepping for a family gathering or just seeking a cheerful side for dinner, this salad is your best friend. In a matter of moments, you can create a burst of joy on a plate that’ll impress your loved ones.

    Why You’ll Love This Pickled Beet Salad

    This *Pickled Beet Salad* is not just a recipe; it’s a culinary celebration! First, it comes together in a flash, making it perfect for my busy friends juggling work and family.

    Plus, its vibrant colors and bold flavors make it a crowd-pleaser at any table. The combination of crunch from the cucumbers, the creaminess of feta, and the delightful tang of pickled beets creates a taste sensation that’s simply unforgettable.

    Ingredients for Pickled Beet Salad

    Gathering the right ingredients is half the fun of cooking, and this *Pickled Beet Salad* has an array of beautiful elements just waiting to shine. Each one adds its unique flair!

    • Pickled Beets: These little ruby gems infuse the salad with tangy sweetness and vibrant color.
    • Cucumbers: Mini Persian cucumbers bring a crisp crunch, balancing the tender beets perfectly.
    • Red Onion: Thinly sliced or shaved, red onion adds a zesty kick that brightens each bite.
    • Feta Cheese: This creamy cheese crumbles add richness and a delightful contrast to the other ingredients.
    • Pistachios: Roughly chopped pistachios provide a nutty taste along with a satisfying crunch.
    • Dill: Freshly chopped dill offers an herbaceous flavor that beautifully complements the beets.
    • Extra Virgin Olive Oil: A drizzle of this golden oil enhances the overall taste and richness of the salad.
    • Pickled Beet Brine: Reserved brine from the pickled beets is used to create a harmonious dressing.
    • Dijon Mustard: A touch of this mustard adds a subtle tang that ties all the flavors together.
    • Salt and Black Pepper: The seasoning duo that elevates the other flavors, making for a well-rounded dish.

    For exact quantities, check the bottom of the article where you’ll find everything listed and available for printing!

    How to Make Pickled Beet Salad

    Making this *Pickled Beet Salad* is simpler than a Sunday stroll. Just follow my easy steps, and I promise you’ll be thrilled with the results!

    Prepare the Dressing

    Whisk Together the Ingredients

    Grab a small bowl and start by whisking together the extra virgin olive oil, pickled beet brine, Dijon mustard, salt, and black pepper. This dressing brings all the flavors together like a sweet melody. As you whisk, take a moment to appreciate the colors—the golden oil, the rosy brine, and the dark mustard swirl into a delicious harmony.

    Combine the Vegetables

    Mix Beets, Cucumbers, and Onion

    In a separate larger bowl, it’s time to bring the stars of the salad together! Toss in the chopped pickled beets, sliced cucumbers, and thinly shaved red onion. Each ingredient adds a unique texture and flavor, making the salad a vibrant mix. Trust me; your kitchen will start to smell divine!

    Marinate the Salad

    Refrigerate and Let Flavors Blend

    Once you’ve mixed the vegetables and dressing, cover the bowl and pop it in the refrigerator. Let it marinate for at least 2 hours, or even better, 12 hours if you’ve got the time. This soaking process allows the flavors to mingle and dance together, creating a burst of deliciousness with every bite. It’s the secret to a truly unforgettable *Pickled Beet Salad*!

    Add Final Touches

    Top with Feta, Pistachios, and Dill

    When you’re ready to serve, take out the salad and give it a gentle stir. Now sprinkle the crumbled feta cheese over the top, followed by the chopped pistachios and fresh dill. These final touches add extra color, crunch, and complexity. Each spoonful will be like a party of flavors in your mouth!

    Tips for Success

    • For the best flavor, let your *Pickled Beet Salad* marinate for the full 12 hours.
    • Consider using a mix of nuts for added flavor—walnuts or almonds work wonders!
    • To keep those cucumbers crisp, add them last, just before serving.
    • If you prefer a bolder taste, opt for aged feta cheese.
    • Experiment by adding a splash of citrus juice for a zesty twist.

    Equipment Needed

    • Bowl: A medium-sized mixing bowl works perfectly, but any large bowl will do.
    • Whisk: A standard whisk is best for mixing the dressing; a fork can also serve!
    • Measuring Cups: Useful for accurate ingredient portions; a simple cup can suffice.
    • Knife and Cutting Board: Essential for chopping veggies—any knife will do!

    Variations for Pickled Beet Salad

    • Cheese Swap: Try goat cheese for a creamier texture or vegan cheese for a dairy-free option.
    • Nut Alternatives: Substitute pistachios with walnuts, almonds, or even sunflower seeds for a different crunch.
    • Herb Mix: Experiment with fresh basil or parsley for a unique herbaceous flavor that complements the beets.
    • Savory Twist: Add cooked quinoa or farro for a heartier salad, turning it into a satisfying meal.
    • Flavor Blast: Infuse your salad with a splash of balsamic vinegar or citrus juice for an extra zing!

    Serving Suggestions for Pickled Beet Salad

    • Pair with grilled chicken or fish for a delightful main course.
    • Serve alongside crusty bread to soak up the flavorful dressing.
    • Enhance with a glass of crisp white wine or sparkling water.
    • Garnish with extra dill sprigs for a fresh presentation.
    • Consider a vibrant tablecloth to showcase the salad’s beautiful colors!

    FAQs about Pickled Beet Salad

    Can I make the *Pickled Beet Salad* ahead of time?
    Absolutely! In fact, prepping it ahead allows the flavors to develop beautifully. Make your salad the day before and let it sit in the fridge overnight for the best taste.

    How long will the salad last in the fridge?
    Stored in an airtight container, your *Pickled Beet Salad* will stay fresh for about 3 to 5 days. Just be sure to give it a quick stir before serving to redistribute all those tasty flavors!

    Can I use fresh beets instead of pickled?
    Of course! If you prefer fresh beets, roast or steam them until tender, then slice and toss them in the same dressing. While it won’t have that tangy kick, it’ll still taste delicious!

    What should I serve with *Pickled Beet Salad*?
    This salad shines as a side dish with grilled meats or can be the star of a light meal with added grains. It pairs beautifully with crusty bread or a crisp white wine for a well-rounded dining experience.

    Is *Pickled Beet Salad* suitable for gluten-free diets?
    Yes, it is! All of the ingredients are gluten-free. Just double-check any extras you might want to add, like bread or crackers. Enjoy this fresh and healthy salad worry-free!

    Final Thoughts

    Preparing this *Pickled Beet Salad* brings me so much joy, and I hope it does the same for you! The explosion of colors, textures, and flavors often turns a simple meal into a joyful occasion. Each crunchy bite carries a hint of sweetness and a zesty kick, making it more than just a salad; it’s a celebration on a plate.

    Whether shared with family or served at your next gathering, this salad is bound to become a favorite in your culinary repertoire. Here’s to adding a splash of yum to your busy days—one vibrant salad at a time!


    Print

    clock clock iconcutlery cutlery iconflag flag iconfolder folder iconinstagram instagram iconpinterest pinterest iconfacebook facebook iconprint print iconsquares squares iconheart heart iconheart solid heart solid icon

    Description

    A vibrant and easy-to-make Pickled Beet Salad that’s perfect for any occasion.


    • 2 cups pickled beets – drained with brine reserved, cut in 4s
    • 1 cup cucumbers – mini Persians, 1/2″ rounds cut in 4s
    • ¼ cup red onion – thinly sliced or shaved
    • ⅓ cup feta cheese – crumbled
    • ¼ cup pistachios – roughly chopped
    • 2 tablespoons dill – fresh, chopped
    • 3 tablespoons extra virgin olive oil
    • 2 tablespoons pickled beet brine
    • ½ teaspoon Dijon mustard
    • ¼ teaspoon salt
    • ⅛ teaspoon black pepper

    1. In a small bowl, whisk together the extra virgin olive oil, pickled beet brine, Dijon mustard, salt, and black pepper. Set aside.
    2. In another bowl, combine the chopped pickled beets, chopped cucumbers, thinly shaved red onion, and the dressing. Cover and refrigerate for at least 2 hours and up to 12 hours.
    3. Lightly stir the pickled mixture before sprinkling over the salad feta cheese crumbles, chopped pistachios, and fresh chopped dill. Serve immediately.

    Notes

    • For best flavor, allow the salad to marinate for the full 12 hours.
    • This salad can be served as a side dish or a light meal.
    • Feel free to substitute other nuts or cheeses based on your preference.
    • Prep Time: 15 minutes
    • Cook Time: 0 minutes
    • Category: Salad
    • Method: No-Cook
    • Cuisine: American

    Nutrition

    • Serving Size: 1 cup
    • Calories: 180
    • Sugar: 4g
    • Sodium: 250mg
    • Fat: 14g
    • Saturated Fat: 2g
    • Unsaturated Fat: 10g
    • Trans Fat: 0g
    • Carbohydrates: 12g
    • Fiber: 3g
    • Protein: 5g
    • Cholesterol: 10mg

    Sharing is caring!

  • Chocolate Rice Krispie Balls

    Chocolate Rice Krispie Balls


    Introduction to Chocolate Rice Krispie Balls

    Hey there, fellow home cooks! If you’re anything like me, you adore creating sweet delights that bring joy to your family. Chocolate Rice Krispie Balls are a perfect fit for busy moms and professionals who crave something quick, easy, and oh-so-delicious. Picture this: crunchy Rice Krispies coated in rich chocolate, all while being no-bake! These delightful treats come together in just a flash, making them the ideal snack for those moments when time feels like it’s slipping away. Trust me, once you bite into one of these beauties, you’ll feel like a culinary rockstar!

    Why You’ll Love This Chocolate Rice Krispie Balls

    From their simple preparation to that delightful crunch, Chocolate Rice Krispie Balls have it all. These no-bake treats are a whirlwind of flavor, taking just minutes to whip up. You won’t need fancy equipment or hours in the kitchen to impress your family. Plus, the balance of sweet chocolate and crunchy ingredients creates a satisfying bite that’s perfect for any occasion. They’re an enjoyable escape from your busy day!

    Ingredients for Chocolate Rice Krispie Balls

    When it comes to whipping up these delightful Chocolate Rice Krispie Balls, the ingredients are as simple as they are delicious. Here’s what you’ll need:

    • Peanut Butter: This creamy spread adds richness and binds everything together. You could also use almond or cashew butter for a different twist.
    • Soft Butter: Butter gives that luscious mouthfeel and keeps the mixture moist. If you’re vegan, coconut oil is a wonderful substitute.
    • Vanilla: A teaspoon of vanilla extract enhances the flavors beautifully. Don’t skip it; the warm notes make a big difference.
    • Rice Krispies: The star of the show! Their crunch is what makes these treats delightful. Any crispy rice cereal will work, but Rice Krispies are classic.
    • Chopped Pecans: These nuts add a lovely crunch and flavor. Feel free to swap them for walnuts or even sunflower seeds if nut allergies are a concern.
    • Shredded Coconut: It contributes a tropical twist and additional texture. Unsweetened coconut is a healthier option, but sweetened works too if you want extra sweetness.
    • Chocolate Chips: For that gorgeous chocolate coating! Semi-sweet is common, but dark chocolate or milk chocolate are equally delicious.
    • Sweet Chocolate: This ensures a smooth melting consistency for coating. Use good quality chocolate to elevate your treats.

    You’ll find all the exact quantities listed at the bottom of the article, along with a handy option to print the recipe. Now, let’s gather those tasty ingredients and get ready to create some magic in the kitchen!

    How to Make Chocolate Rice Krispie Balls

    Ready to mix, chill, and coat? Making these Chocolate Rice Krispie Balls is as fun as it is straightforward. Follow these simple steps for a delightful treat that will wow everyone!

    Step 1: Prepare the Mixture

    In a large mixing bowl, scoop out the peanut butter, soft butter, and vanilla extract. Using a spatula, mix them together until they form a smooth, luscious blend.

    Tip: If the peanut butter is hard, pop it in the microwave for just a few seconds to soften it up. This makes it easier to mix and ensures you won’t have to wrestle with it!

    Step 2: Add Crunchy Ingredients

    Now, it’s time to bring in the fun! Gradually stir in the Rice Krispies, chopped pecans, and shredded coconut. Make sure every crunchy bit gets a nice coating of that creamy mixture.

    Engaging your senses is key here. Feel the texture change as you mix. You’ll love watching everything come together into one cohesive mixture!

    Step 3: Chill the Mixture

    Cover the bowl with plastic wrap and pop it into the refrigerator for about 30 minutes. Chilling helps the mixture firm up, making rolling the balls much easier.

    Now’s a great time to clean up a bit or enjoy a quick break. Trust me, those 30 minutes will feel like the perfect moment to recharge your baking energy!

    Step 4: Melt the Chocolate

    It’s chocolate time! Set up a double boiler by placing a heatproof bowl over a saucepan of simmering water. Pour in the chocolate chips and sweet chocolate. Stir continuously until it’s perfectly smooth and creamy.

    Remember, patience is key! Keeping the heat low prevents your chocolate from seizing up. Stirring often also helps achieve that silky consistency we crave in our chocolate coating.

    Step 5: Dip the Balls

    Once your mixture has chilled and your chocolate is melted, it’s time for the fun part! Roll small portions of the chilled mixture into balls, then use a fork to dip each one into the melted chocolate.

    For a tidy finish, tap the fork gently on the bowl’s edge to shake off excess chocolate. No one likes a drippy ball!

    Step 6: Set the Chocolate

    Place your beautifully coated balls back onto the parchment-lined baking sheet. Now, transfer them to the refrigerator once more, letting the chocolate harden completely. This usually takes about an hour.

    Let’s be honest, waiting is the hardest part! But that moment when you bite into one of these chocolaty delights will be totally worth it. You’re nearly there!

    Tips for Success

    • Ensure your butter and peanut butter are soft for easier mixing.
    • Use fresh ingredients for the best taste, especially the chocolate.
    • Don’t rush the chilling process; it makes rolling the balls easier.
    • Keep chocolate warm while dipping for an even coat.
    • Experiment with flavors by adding spices or other nuts for variety.

    Equipment Needed

    • Mixing Bowl: A large bowl for combining ingredients. Any bowl will do, even a sturdy saucepan!
    • Spatula: A silicone spatula helps mix smoothly. Wooden spoons work too!
    • Double Boiler: For melting chocolate. You can create one using a bowl over a pot of simmering water.
    • Fork: Essential for dipping. Tongs can also do the trick!
    • Parchment Paper: To line your baking sheet. Wax paper can be a suitable alternative.

    Variations of Chocolate Rice Krispie Balls

    • Nut-Free: Replace pecans with pumpkin seeds or sunflower seeds to accommodate nut allergies.
    • Coconut-Free: Skip the shredded coconut and add more Rice Krispies for extra crunch.
    • Dried Fruit Addition: Toss in some chopped dried cherries or cranberries for a fruity twist.
    • Flavored Chocolate: Use flavored chocolate chips, like mint or caramel, for a unique taste experience.
    • Protein Boost: Stir in a scoop of protein powder to make these treats more filling and nutritious.

    Serving Suggestions

    • Pair these Chocolate Rice Krispie Balls with a tall glass of cold milk for a classic combo.
    • Serve them on a pretty platter for parties or family gatherings to impress your guests.
    • For a fun twist, sprinkle some sea salt on top before the chocolate sets!
    • Offer alongside fresh fruit like strawberries or bananas for a balanced treat.
    • Include them in a gift box with other homemade goodies for a heartfelt present!

    FAQs about Chocolate Rice Krispie Balls

    Can I make Chocolate Rice Krispie Balls ahead of time?

    Absolutely! These treats can be made in advance and stored in an airtight container for up to a week. Just keep them in the refrigerator to maintain freshness.

    What can I substitute for peanut butter?

    If you need a nut-free option, sunflower seed butter or almond butter are great alternatives! If you’re looking for a more fragrant option, consider using tahini.

    Can I use different types of chocolate for coating?

    Yes! Feel free to experiment with white chocolate, milk chocolate, or even dark chocolate chips. Each type brings its own unique flavor!

    How can I make these Chocolate Rice Krispie Balls healthier?

    To make these treats a bit healthier, you can use dark chocolate and reduce the amount of sugar. Adding chia seeds or hemp hearts can also elevate their nutritional value.

    What if I don’t have a double boiler?

    No problem! You can create a makeshift double boiler with a heatproof bowl placed over a pot of simmering water. Just ensure the bowl doesn’t touch the water!

    Final Thoughts

    Creating these Chocolate Rice Krispie Balls has been a joyful experience, one I’m eager to share with you. Each bite brings a delightful crunch and sweet satisfaction that transforms an ordinary day into something special. Whether you’re making them for a family gathering, a last-minute treat, or simply to satisfy that sweet tooth, these little balls of goodness are sure to bring smiles all around. Plus, there’s something wonderfully nostalgic about combining simple ingredients into a delightful treat. So roll up your sleeves and enjoy the delicious memories you’ll create with these easy-to-make snacks!


    Print

    clock clock iconcutlery cutlery iconflag flag iconfolder folder iconinstagram instagram iconpinterest pinterest iconfacebook facebook iconprint print iconsquares squares iconheart heart iconheart solid heart solid icon

    Description

    A delightful and easy-to-make treat, Chocolate Rice Krispie Balls combine the crunch of Rice Krispies with the richness of chocolate for a perfect sweet snack.


    • ½ cup peanut butter
    • 3 tbsp soft butter
    • 1 tsp vanilla
    • 1 cup Rice Krispies
    • ½ cup chopped pecans
    • 1 cup shredded coconut
    • 1 package chocolate chips
    • 1 square sweet chocolate

    1. In a large mixing bowl, combine the peanut butter, soft butter, and vanilla. Stir until smooth and well combined.
    2. Mix in the Rice Krispies, chopped pecans, and shredded coconut. Stir until all ingredients are evenly distributed and well coated.
    3. Cover the bowl with plastic wrap and refrigerate the mixture for at least 30 minutes to firm up. Once chilled, take small portions and roll them into balls using your hands. Place the balls on a parchment-lined baking sheet.
    4. In a double boiler over low heat, melt the chocolate chips and sweet chocolate together. Stir continuously until smooth and creamy. Keep the heat low to prevent the chocolate from hardening too quickly.
    5. Using a fork, dip each Rice Krispie ball into the melted chocolate mixture, ensuring it is evenly coated. Tap the fork gently on the side of the bowl to remove any excess chocolate.
    6. Place the chocolate-coated balls back onto the parchment paper-lined baking sheet. Transfer the sheet to the refrigerator to allow the chocolate to set completely, usually about 1 hour.

    Notes

    • For a different flavor, try adding other nuts or dried fruits.
    • These treats can be stored in an airtight container for up to a week.
    • Make sure the chocolate stays warm while dipping the balls to ensure an even coat.
    • Prep Time: 15 minutes
    • Cook Time: 15 minutes
    • Category: Dessert
    • Method: No-Bake
    • Cuisine: American

    Nutrition

    • Serving Size: 1 ball
    • Calories: 150
    • Sugar: 10g
    • Sodium: 50mg
    • Fat: 8g
    • Saturated Fat: 3g
    • Unsaturated Fat: 5g
    • Trans Fat: 0g
    • Carbohydrates: 15g
    • Fiber: 1g
    • Protein: 3g
    • Cholesterol: 5mg

    Sharing is caring!

  • Patriotic Cookie Ice Cream Sandwiches

    Patriotic Cookie Ice Cream Sandwiches


    Introduction to Patriotic Cookie Ice Cream Sandwiches

    Every summer, I find myself dreaming of desserts that scream celebration. That’s where my Patriotic Cookie Ice Cream Sandwiches come in. They’re perfect for everything from family barbecues to festive fireworks nights! With just a few simple steps, you can whip up these delightful treats that will charm both kids and adults alike. Trust me, if you’re a busy mom or professional, this is a quick and impressive solution to satisfy sweet tooth cravings without burning the midnight oil. Let’s dive into this delicious adventure!

    Why You’ll Love This Patriotic Cookie Ice Cream Sandwiches

    These Patriotic Cookie Ice Cream Sandwiches are not just delicious; they’re the epitome of quick and easy fun! They require minimal prep time, making them a lifesaver for busy moms like me. Plus, the combination of soft cookies, creamy ice cream, and vibrant sprinkles is irresistibly delightful. Whether it’s a family gathering or a solo treat, you’ll savor every sweet bite and share smiles all around!

    Ingredients for Patriotic Cookie Ice Cream Sandwiches

    Gathering the right ingredients for my Patriotic Cookie Ice Cream Sandwiches is almost as enjoyable as devouring the final product! Here’s what you’ll need:

    • Sugar Cookie Dough: You can grab a tube of ready-made dough for convenience or bake from scratch with your favorite soft sugar cookie recipe. Either way, these cookies set the stage for your delicious sandwiches.
    • Red, White, and Blue Mini Chocolate Chips: These fun little morsels add a festive touch and a delightful chocolatey flavor. They also embody the spirit of the celebrations!
    • Vanilla Ice Cream: The creamy, classic flavor you love! Feel free to switch it up with any ice cream flavor that your family adores for a personalized twist.
    • Red, White, and Blue Sprinkles: These vibrant sprinkles are not just for looks; they add crunch and a burst of color, making your sandwiches festive for any summer holiday!

    You’ll find the specific measurements at the bottom of the article if you’d like to print the recipe for easy access.

    How to Make Patriotic Cookie Ice Cream Sandwiches

    Preheat the Oven

    Let’s kick things off by preheating your oven to 350 degrees Fahrenheit. This step is crucial because a properly heated oven means beautifully baked cookies. No one wants doughy centers or burnt edges, right?

    Prepare Cookie Dough

    While the oven heats up, it’s time to prepare your cookie dough. Place the tube of sugar cookie dough in a medium mixing bowl. Allow it to sit on the counter for about 10 minutes. This makes it easier to mix in the chocolate chips. Soft dough is way happier dough!

    Mix in Chocolate Chips

    Now, let’s add some fun! Pour in your red, white, and blue mini chocolate chips. Use a spatula to fold them evenly into the dough. Remember, you want every bite to be bursting with chocolatey goodness!

    Scoop and Bake Cookies

    Scoop the dough onto a nonstick sheet pan. Aim for balls about 2 tablespoons in size. Space them out so they won’t spread too close during baking. Bake for 11 to 13 minutes, just until they’re golden at the edges. Watch them carefully; over-baking leads to crunchy cookies! Soft cookies are what you want here.

    Cool and Freeze Cookies

    Once baked, allow the cookies to cool completely on a wire rack. This is key to ensure they don’t crumble during assembly. For the best results, pop them in the freezer for about 30 minutes. This will help them maintain a perfect structure when we add the ice cream!

    Prepare Ice Cream

    Next up is the ice cream! Take your half-gallon of vanilla ice cream out of the freezer. Let it sit out for about 5 minutes. This slight softening makes scooping and spreading the ice cream much easier. Trust me, you’ll thank yourself later!

    Assemble the Sandwiches

    Let’s bring these beauties to life. Start by flipping half of the cookies over. Scoop about 1/4 cup of softened ice cream on each flipped cookie. Gently press a second cookie on top, creating a sandwich. Press down until the ice cream peeks out at the edges. Oh, the joy of assembling!

    Add Sprinkles

    Now for the festive touch! Pour the red, white, and blue sprinkles into a bowl or on a plate. Roll the edges of your ice cream sandwiches in the sprinkles until all sides are covered. This adds not just color but a delightful crunch too!

    Freeze the Sandwiches

    Finally, it’s time to set our creations. Place the assembled ice cream sandwiches back into the freezer. Leave them to harden fully. Once set, individually wrap each sandwich in plastic wrap. This makes for easy serving if they’re not all devoured in one go!

    Tips for Success

    • Keep an eye on your cookies while baking; remove them as soon as they turn golden. They’ll firm up as they cool!
    • Use a cookie scoop for even portions; this makes sure all sandwiches are perfectly sized and visually appealing.
    • For an extra twist, experiment with flavored whipped cream or frozen yogurt in place of ice cream.
    • Store leftovers in an airtight container for up to a week—if they last that long!

    Equipment Needed

    • Baking Sheet: A standard nonstick baking sheet works best. Alternatively, line with parchment paper.
    • Mixing Bowl: A medium-sized bowl is ideal for mixing the dough. Any mixing bowl will do, even a large plastic one.
    • Spatula: Use a rubber spatula for easy mixing and scooping cookie dough.
    • Wire Rack: Great for cooling cookies. If you don’t have one, simply use a plate!
    • Cookie Scoop: Helpful for even-sized cookies. If you don’t have one, two spoons will work for scooping dough.

    Variations

    • Chocolate Cookie Base: Swap sugar cookie dough for chocolate cookie dough for a rich twist!
    • Gelato Filling: Use gelato instead of ice cream for a creamy, Italian-inspired treat.
    • Allergen-Friendly: Try gluten-free cookie dough or dairy-free ice cream to accommodate dietary needs.
    • Fruit Flavors: Mix in fresh or frozen berries with the ice cream for a fruity explosion!
    • Nutty Crunch: Add chopped nuts to the cookie dough for extra texture and flavor.

    Serving Suggestions

    • Pair these Patriotic Cookie Ice Cream Sandwiches with a refreshing lemonade or iced tea for a perfect summer combo.
    • Serve alongside fresh fruit skewers—think strawberries, blueberries, and bananas—for extra color!
    • Present them on a festive platter, decorated with additional sprinkles or edible glitter.

    FAQs about Patriotic Cookie Ice Cream Sandwiches

    Can I use homemade cookie dough for these ice cream sandwiches?

    Absolutely! In fact, I often recommend my favorite soft sugar cookie recipe. Homemade dough allows for any personal touches you might like, such as adding nuts or additional extracts for flavor!

    How do I store leftover ice cream sandwiches?

    Keep your Patriotic Cookie Ice Cream Sandwiches in an airtight container wrapped individually in plastic wrap. They’ll stay fresh in the freezer for up to a week, but trust me, they may not last that long!

    What’s the best way to soften ice cream?

    Let your ice cream sit at room temperature for about 5 minutes before assembly. It should be soft enough to scoop but not runny. This makes the sandwich-building a breeze!

    Can I make these sandwiches ahead of time?

    Definitely! You can assemble your sandwiches a day in advance. Just keep them wrapped and stored in the freezer until you’re ready to serve. They’ll be ready for impromptu celebrations!

    Can I use different ice cream flavors?

    Of course! Feel free to mix and match flavors. Whether it’s chocolate, strawberry, or something uniquely wild like mint chocolate chip, the possibilities are endless with these Patriotic Cookie Ice Cream Sandwiches!

    Final Thoughts

    Creating Patriotic Cookie Ice Cream Sandwiches is a joyous and delightful experience that brings everyone together. As you mix, scoop, and assemble, the kitchen transforms into a hub of laughter and smiles. Whether they’re for a summer holiday or just a sweet treat on a Tuesday, these sandwiches are sure to ignite happy memories. They’re not just desserts; they’re a celebration of togetherness and fun. So, roll up your sleeves and make kitchen magic happen—these ice cream sandwiches are bound to be a hit, bringing smiles that linger long after the last bite!


    Print

    clock clock iconcutlery cutlery iconflag flag iconfolder folder iconinstagram instagram iconpinterest pinterest iconfacebook facebook iconprint print iconsquares squares iconheart heart iconheart solid heart solid icon

    Description

    Delicious patriotic cookie ice cream sandwiches that are perfect for any celebration.


    • 16 ounce tube sugar cookie dough (or your favorite soft sugar cookie dough recipe)
    • 1/2 cup red, white, and blue mini chocolate chips
    • 1/2 gallon vanilla ice cream
    • 1/2 cup red, white, and blue sprinkles

    1. Preheat oven to 350 degrees F.
    2. Place cookie dough in a medium mixing bowl. Allow the dough to sit out on the counter for 10 minutes to make stirring easier.
    3. Pour chocolate chips into the cookie dough and stir them in evenly.
    4. Scoop the cookie dough onto a nonstick sheet pan, staggering them so they will not spread into each other.
    5. Bake for 11-13 minutes until they are just golden around the edges. (Watch them carefully and do not over-bake.)
    6. Allow the cookies to cool completely, then transfer to the freezer for 30 minutes.
    7. Let the ice cream sit out for 5 or so minutes to soften just enough to make scooping and pressing easier.
    8. Flip half of the cookies over. Scoop about 1/4 cup of ice cream onto the flipped cookies. Top the ice cream with the additional cookies and gently press down until the ice cream reaches the edge.
    9. Pour the sprinkles into a bowl or on a plate. Roll the cookie edges into the sprinkles until all sides are covered.
    10. Place assembled ice cream sandwiches in the freezer to harden and set fully. Then, individually wrap them in plastic wrap and place back into the freezer until ready to serve.

    Notes

    • Ensure not to over-bake the cookies to keep them soft for the sandwiches.
    • Experiment with different flavors of ice cream for variety.
    • These are great for summer holidays like Independence Day.
    • Prep Time: 20 minutes
    • Cook Time: 13 minutes
    • Category: Dessert
    • Method: Baking and assembly
    • Cuisine: American

    Nutrition

    • Serving Size: 1 sandwich
    • Calories: 300
    • Sugar: 20g
    • Sodium: 150mg
    • Fat: 12g
    • Saturated Fat: 7g
    • Unsaturated Fat: 3g
    • Trans Fat: 0g
    • Carbohydrates: 42g
    • Fiber: 1g
    • Protein: 3g
    • Cholesterol: 30mg

    Sharing is caring!

  • Raspberry Cheesecake Cupcakes

    Raspberry Cheesecake Cupcakes


    Introduction to Raspberry Cheesecake Cupcakes

    There’s something magical about the combination of creamy cheesecake and fresh raspberries, don’t you think? That’s why I am so excited to share my recipe for Raspberry Cheesecake Cupcakes with you! These delightful little treats are perfect for the busy moms and professionals who deserve a sweet escape, even on the craziest days.

    With a burst of berry goodness in each bite, these cupcakes bring joy and a touch of elegance to any occasion. They’re simple to make, quick to bake, and oh-so-satisfying. Trust me, they will make you feel like a culinary superstar!

    Why You’ll Love This Raspberry Cheesecake Cupcakes

    These Raspberry Cheesecake Cupcakes are not just delicious; they’re a quick fix for your sweet cravings! With minimal prep time and simple ingredients, you can whip up a batch in no time. Plus, the creamy texture combined with the tart raspberry flavor makes them irresistible. Whether you’re treating yourself after a long day or impressing your friends, these cupcakes are a delightful way to bring joy without a lot of fuss.

    Ingredients for Raspberry Cheesecake Cupcakes

    Gathering the right ingredients is vital for creating your delicious Raspberry Cheesecake Cupcakes. Here’s what you’ll need:

    • Graham cracker crumbs: The base of your cupcake crust, adding that signature crunch and sweetness.
    • Unsalted butter: Helps bind the crumbs together for a rich flavor. Opt for unsalted for a balanced taste.
    • Cream cheese: The star of our show! It brings a creamy, velvety texture that defines cheesecake.
    • Granulated sugar: Sweetens the filling and balances the tartness of the raspberries.
    • Large eggs: They give structure to your cupcakes, helping them rise and hold together.
    • Vanilla extract: A splash of vanilla adds warmth and depth to the overall flavor profile.
    • Sour cream: This ingredient makes the filling extra creamy and enhances the flavor complexity.
    • Fresh raspberries: You can’t have raspberry cheesecake cupcakes without the star berry! They add a tangy twist.
    • Raspberry jam: A delightful addition for extra raspberry flavor, making each bite irresistible.
    • Fresh raspberries (for compote): Creating a luscious compote to top your cupcakes, adding a burst of berry goodness.
    • Lemon juice: Brightens the compote and balances the sweetness with a hint of acidity.
    • Cornstarch: A thickening agent for your compote, ensuring it’s just the right consistency.

    For exact quantities, check the bottom of this article, where you can also find a printable version of the recipe!

    How to Make Raspberry Cheesecake Cupcakes

    Step 1: Prepare the Cupcake Liners

    Let’s get that oven fired up! Preheat it to 325°F (165°C) while you prepare your cupcake pan. Line each cupcake well with a liner—this keeps your treats from sticking and makes for easy cleanup. I like to use colorful liners to brighten things up, but any will do. This step sets the stage for baking the Raspberry Cheesecake Cupcakes to perfection!

    Step 2: Make the Crust

    Now, it’s time to whip up the yummy crust! Grab a bowl and mix those graham cracker crumbs with the melted butter until it resembles wet sand. You want it to stick together when pressed. Once mixed, take a spoon or your fingers and press the crumb mixture firmly into the bottom of each lined cupcake well. Make sure it’s nice and even—it’s the foundation for our delicious cupcakes!

    Step 3: Prepare the Cheesecake Filling

    This is where the magic happens! In a large bowl, beat the softened cream cheese and granulated sugar together until they’re smooth and creamy. I often use a hand mixer for this step; it makes life easier. Next, add in the eggs one at a time, beating well after each addition. This is crucial for fluffy cupcakes! Stir in the vanilla extract and sour cream, folding in those fresh raspberries and raspberry jam gently. Remember, we want to preserve some of that berry goodness without overmixing. It’s going to be utterly delightful!

    Step 4: Bake and Cool

    Time to fill those cupcake liners! Scoop your cheesecake filling into each lined cup, filling them about three-quarters full. This allows space for them to rise without overflowing. Bake in your preheated oven for 20-22 minutes. The centers should be set but slightly jiggle when tapped. Once done, remove them from the oven and let the cupcakes cool completely at room temperature. The lovely aroma of Raspberry Cheesecake Cupcakes will surely invite family members to sneak a taste!

    Step 5: Make the Raspberry Compote

    While your cupcakes cool, let’s whip up a luscious raspberry compote! In a small saucepan, combine fresh raspberries, sugar, and lemon juice over medium heat. Stir occasionally as the raspberries begin to break down and release their juices. It’s like a beautiful berry symphony! Once fragrant and syrupy, stir in the dissolved cornstarch and cook for another minute or two. This will thicken the compote just right. Remove from heat and set aside to cool—it’s going to be the perfect topping!

    Step 6: Assemble the Cupcakes

    Finally, it’s time for the pièce de resistance! Take your cooled Raspberry Cheesecake Cupcakes and top each one with a generous spoonful of the raspberry compote. Don’t be shy—make it luscious! For an extra pop, garnish with a few fresh raspberries on top. This not only adds flavor but also makes them look so beautifully inviting. Now, you’ve created something truly special!

    Tips for Success

    • Ensure your cream cheese is softened before mixing for a smooth batter.
    • Don’t overmix the batter—this keeps your cupcakes light and fluffy.
    • Let the cupcakes cool completely before adding the compote to prevent it from sliding off.
    • Experiment with different jams for unique flavors and textures.
    • Use fresh berries for the best compote—frozen ones can work but may not be as vibrant.

    Equipment Needed

    • Cupcake pan: A standard 12-cup muffin tin works perfectly.
    • Cupcake liners: Use paper or silicone options for easy removal.
    • Mixing bowls: One large bowl for the filling and a smaller one for the crust.
    • Hand mixer or whisk: Use whichever you prefer for mixing.
    • Small saucepan: Necessary for making the raspberry compote.

    Variations on Raspberry Cheesecake Cupcakes

    • Chocolate Raspberry Cheesecake Cupcakes: Incorporate cocoa powder into your crust for a chocolatey base, or swirl melted chocolate into the filling for a delightful twist.
    • Gluten-Free Option: Substitute graham cracker crumbs with gluten-free cookie crumbs to accommodate dietary preferences without sacrificing flavor.
    • Vegan Raspberry Cheesecake Cupcakes: Use vegan cream cheese and substitute eggs with flax seeds or applesauce for a delightful plant-based treat.
    • Berry Medley: Mix in blueberries or strawberries with the raspberries for a fruity explosion and a beautiful color contrast.
    • Lemon Zest Addition: Add lemon zest to the filling for a refreshing citrus kick that pairs beautifully with the raspberry flavor.

    Serving Suggestions for Raspberry Cheesecake Cupcakes

    • Pair with a dollop of whipped cream for a touch of elegance.
    • Serve alongside a scoop of vanilla ice cream to enhance the creamy texture.
    • Complement with a refreshing glass of iced tea or lemonade.
    • Arrange on a decorative cake stand for a beautiful presentation.
    • Top with mint leaves for a pop of color and freshness.

    FAQs about Raspberry Cheesecake Cupcakes

    Can I use frozen raspberries instead of fresh? Absolutely! Frozen raspberries work, but they can be a bit mushier once thawed. For the best texture, try to use fresh berries whenever possible.

    How do I store leftover cupcakes? Store your Raspberry Cheesecake Cupcakes in an airtight container in the refrigerator. They can last 3-4 days, but trust me, they might not last that long!

    Can I make these cupcakes ahead of time? Yes! These cupcakes can be made a day in advance. Just keep them refrigerated until you’re ready to serve them, adding the compote right before serving to keep it fresh.

    What can I substitute for cream cheese? If you’re looking for an alternative, you can use mascarpone cheese or a vegan cream cheese option. They’ll provide a similar creamy texture.

    Can I add more raspberries to the filling? You can definitely add more raspberries if you love fruit! Just be cautious not to overmix the batter, to keep that creamy texture intact.

    Final Thoughts

    Making Raspberry Cheesecake Cupcakes is not just about whipping up a dessert; it’s about creating moments of joy and connection. Every bite is a celebration, a sweet escape from the daily hustle. Picture the looks on your loved ones’ faces as they savor these delightful treats, their eyes lighting up with every creamy, berry-filled bite. This recipe is a testament to the magic of homemade goodness, reminding us that sometimes, life’s best moments are found in simple pleasures. So grab your apron, and let these cupcakes add a little sweetness to your day—you deserve it!


    Print

    clock clock iconcutlery cutlery iconflag flag iconfolder folder iconinstagram instagram iconpinterest pinterest iconfacebook facebook iconprint print iconsquares squares iconheart heart iconheart solid heart solid icon

    Description

    Raspberry Cheesecake Cupcakes are a delightful treat that combines the creamy goodness of cheesecake with fresh raspberry flavor in a perfectly portioned cupcake.


    • 1 ½ cups graham cracker crumbs
    • ¼ cup unsalted butter (melted)
    • 2 cups cream cheese (softened)
    • ¾ cup granulated sugar
    • 2 large eggs
    • 1 tsp vanilla extract
    • ¼ cup sour cream
    • 1 cup fresh raspberries
    • 2 tbsp raspberry jam
    • 1 cup fresh raspberries (for compote)
    • ¼ cup granulated sugar (for compote)
    • 1 tbsp lemon juice
    • 1 tsp cornstarch (dissolved in 1 tbsp cold water)

    1. Preheat oven to 325°F (165°C) and line a cupcake pan with liners.
    2. Mix graham cracker crumbs with melted butter until well combined. Press the mixture into the bottom of each cupcake liner and set aside.
    3. In a large bowl, beat softened cream cheese and sugar until smooth and creamy. Add eggs one at a time, mixing well after each addition. Stir in vanilla extract and sour cream until fully combined. Gently fold in fresh raspberries and raspberry jam, being careful not to overmix.
    4. Fill the cupcake liners with cheesecake filling, about ¾ full. Bake for 20-22 minutes, or until the centers are set. Let the cupcakes cool completely at room temperature, then refrigerate.
    5. In a small saucepan, combine raspberries, sugar, and lemon juice. Cook over medium heat, stirring occasionally until the raspberries break down and the mixture becomes syrupy. Stir in the cornstarch mixture and cook for another 1-2 minutes, or until the compote thickens. Remove from heat and let cool.
    6. Once the cupcakes are cool, top each with a spoonful of raspberry compote. Garnish with additional fresh raspberries for an extra burst of flavor.

    Notes

    • For a smoother texture, ensure the cream cheese is softened properly before mixing.
    • Adjust the sweetness of the compote by adding more or less sugar according to taste.
    • These cupcakes can be made a day ahead and stored in the refrigerator.
    • Prep Time: 20 minutes
    • Cook Time: 22 minutes
    • Category: Dessert
    • Method: Baking
    • Cuisine: American

    Nutrition

    • Serving Size: 1 cupcake
    • Calories: 250
    • Sugar: 15g
    • Sodium: 150mg
    • Fat: 15g
    • Saturated Fat: 8g
    • Unsaturated Fat: 0g
    • Trans Fat: 0g
    • Carbohydrates: 28g
    • Fiber: 1g
    • Protein: 4g
    • Cholesterol: 70mg

    Sharing is caring!