Blog

  • Baked Snickerdoodle Donuts

    Baked Snickerdoodle Donuts


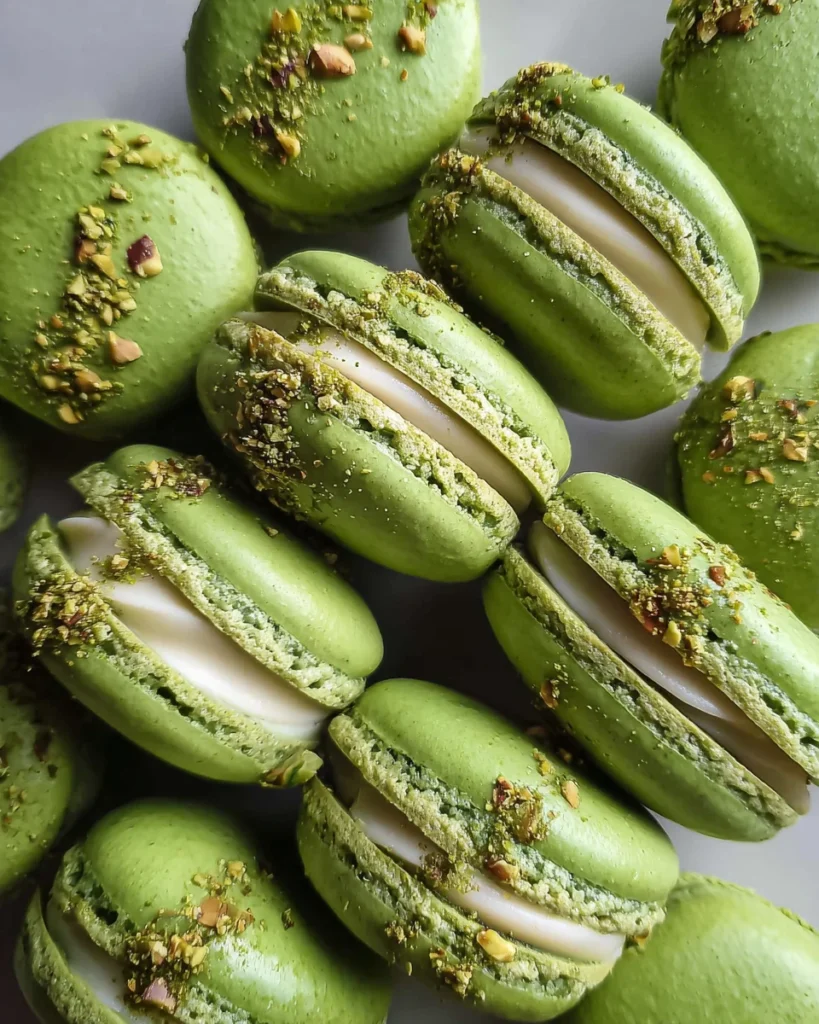
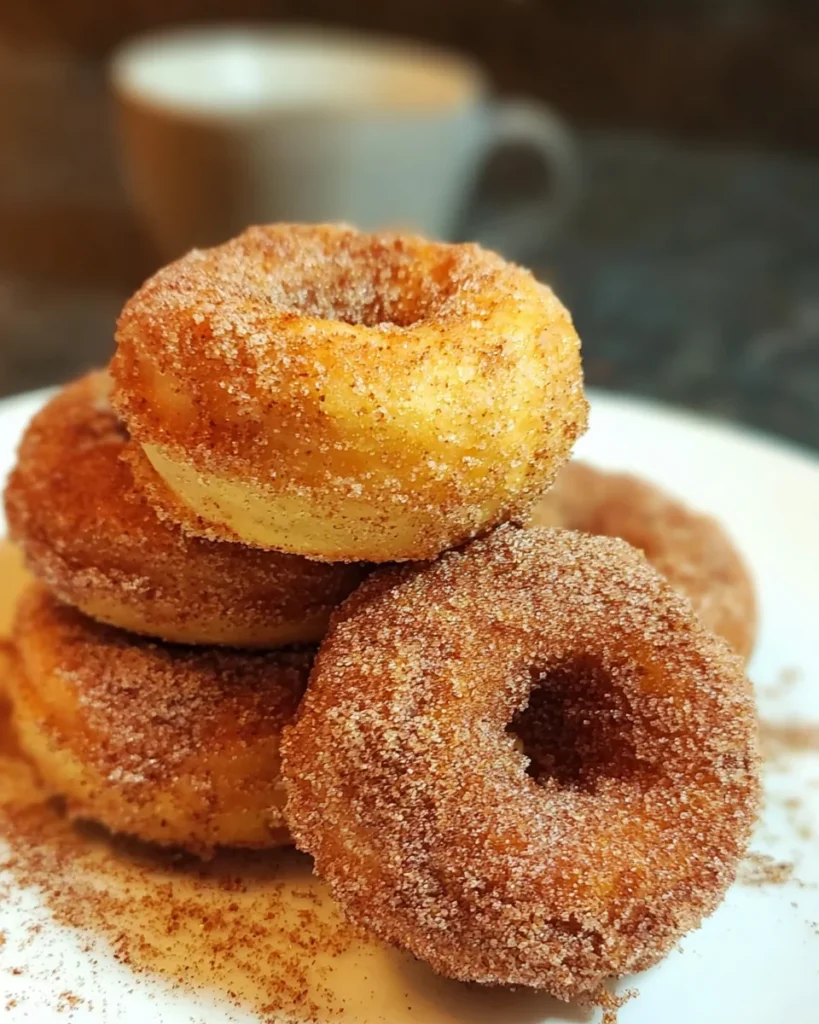
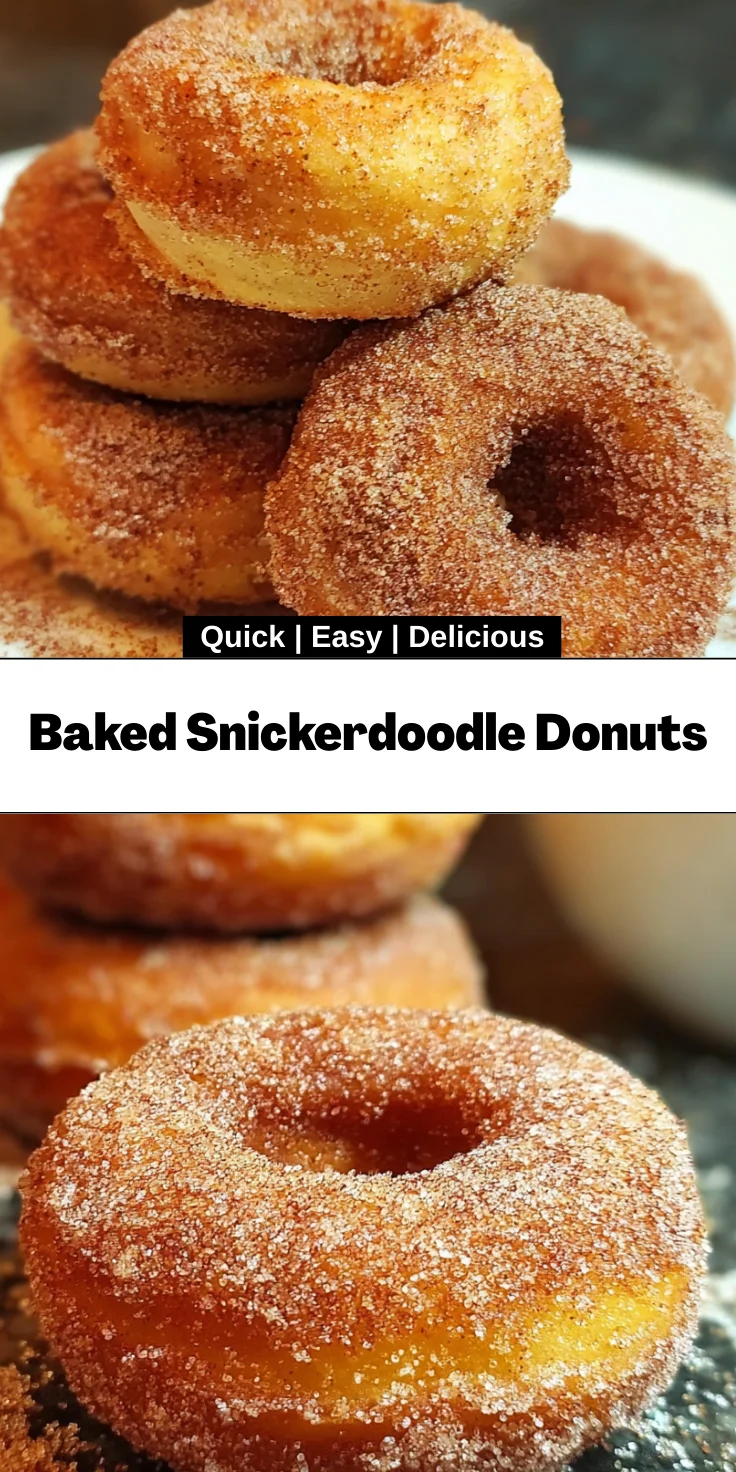
    Introduction to Baked Snickerdoodle Donuts

    Welcome to my kitchen, where sweet creations come to life! Today, we’re diving into the world of Baked Snickerdoodle Donuts. If you’re a busy mom like me, you know the joy of whipping up something delicious yet simple. These donuts are fluffy, coated in cinnamon sugar, and they won’t keep you in the kitchen for hours. Perfect for a cozy breakfast or a delightful afternoon treat, they cater to both the sweet tooth of your family and the little chef in you. Trust me, once you make these, they’ll disappear faster than you can say “yum!”

    Why You’ll Love This Baked Snickerdoodle Donuts

    These Baked Snickerdoodle Donuts are a game changer for any busy kitchen. They come together in a snap, allowing you to whip up a batch in less than 30 minutes. The delightful blend of cinnamon and sugar encapsulates comfort in every bite. Whether it’s a family breakfast or a surprise for your kids after school, these donuts are sure to please everyone. Who doesn’t love a treat that’s as quick as it is delicious?

    Ingredients for Baked Snickerdoodle Donuts

    Before you dive into your baking adventure, let’s gather everything you need for these tasty Baked Snickerdoodle Donuts. Each ingredient plays a crucial role in bringing those sweet, fluffy morsels to life!

    • Cake Flour: This is the hero of our donuts. It gives them that tender, fluffy texture we crave. You can substitute with all-purpose flour, but the results will slightly differ.
    • Granulated Sugar: We use granulated sugar for sweetness and a lovely caramelization while baking. For a twist, try using brown sugar for a richer taste.
    • Baking Powder: The secret leavening agent that helps our donuts rise. No substitutions here; it’s essential for that cloud-like texture.
    • Ground Cinnamon: Ah, the heart of the snickerdoodle! This spice infuses our donuts with warmth and sweetness. Feel free to play with other spices like nutmeg for added flavor.
    • Kosher Salt: A pinch of salt elevates all the flavors, balancing the sweetness beautifully. Regular table salt works too, just use a little less.
    • Buttermilk: This liquid gives the donuts their moistness and tang. If you don’t have buttermilk, mix regular milk with a splash of vinegar or lemon juice as a quick substitute.
    • Eggs: They bind our ingredients together while adding moisture. You can replace them with applesauce for a vegan variation!
    • Vanilla Extract: Nothing says homemade quite like a splash of pure vanilla. Look for real extract for the best flavor; imitation doesn’t hold a candle!
    • Unsalted Butter: Melted butter adds richness and flavor. If you’re looking for a dairy-free option, coconut oil does a great job here too!
    • Cinnamon Sugar Coating: This is where the magic happens. Combining granulated sugar with ground cinnamon creates that heavenly outer layer. Use more or less cinnamon to suit your taste!

    For exact quantities of each ingredient, check the bottom of this article. Ready to get cooking? Let’s make some magic happen in the kitchen!

    How to Make Baked Snickerdoodle Donuts

    Now, let’s dive into the heart of the matter: making those delightful Baked Snickerdoodle Donuts. With a bit of guidance, you’ll find it’s as easy as pie—or donut, rather! Follow these steps closely, and soon you’ll have a dozen fluffy treats to enjoy.

    Step 1: Preheat the Oven

    First things first, preheat your oven to 350°F (175°C). Preheating is essential because it helps the donuts rise perfectly and achieve that golden color. It’s a small step but makes a world of difference in texture!

    Step 2: Prepare the Baking Pan

    Next, grab your donut pan and give it a loving coat of cooking spray or a brush of melted butter. This prevents any sticky situations. Trust me, you don’t want to be wrestling your warm donuts out of the pan—they deserve a smooth exit!

    Step 3: Mix Dry Ingredients

    In a large mixing bowl, whisk together the cake flour, granulated sugar, baking powder, ground cinnamon, and kosher salt. Ensure everything is evenly combined so that each bite of your donuts will be delicious. Lumps and bumps aren’t welcome here!

    Step 4: Combine Wet Ingredients

    In a separate bowl, whisk the buttermilk, eggs, vanilla extract, and melted butter together. Mix thoroughly, but don’t overdo it. Remember, we want to create a lovely batter without overmixing; that’ll keep our donuts nice and fluffy.

    Step 5: Combine Wet and Dry Ingredients

    Now, pour the wet mixture into the dry bowl. Gently fold the two together until just combined. Avoid vigorous stirring; we want to maintain that light texture in our donuts. Think of it like a delicate embrace rather than a rough handshake!

    Step 6: Fill the Donut Pan

    Grab a piping bag or a spoon and fill each donut cavity about ¾ full with the batter. This ensures they’ll rise to a beautiful shape. Don’t overfill; we want the perfect donut, not donut muffins!

    Step 7: Bake

    Pop the filled pan into the oven and bake for 10-12 minutes. Watch for that golden hue, and test doneness with a toothpick. If it comes out clean, your donuts are ready to shine!

    Step 8: Cool and Prepare Cinnamon Sugar Coating

    Once baked, let the donuts cool in the pan for about 5 minutes. Meanwhile, combine granulated sugar and ground cinnamon in a shallow dish. This mixture is what transforms your donuts into the snickerdoodle treat we adore!

    Step 9: Coat the Donuts

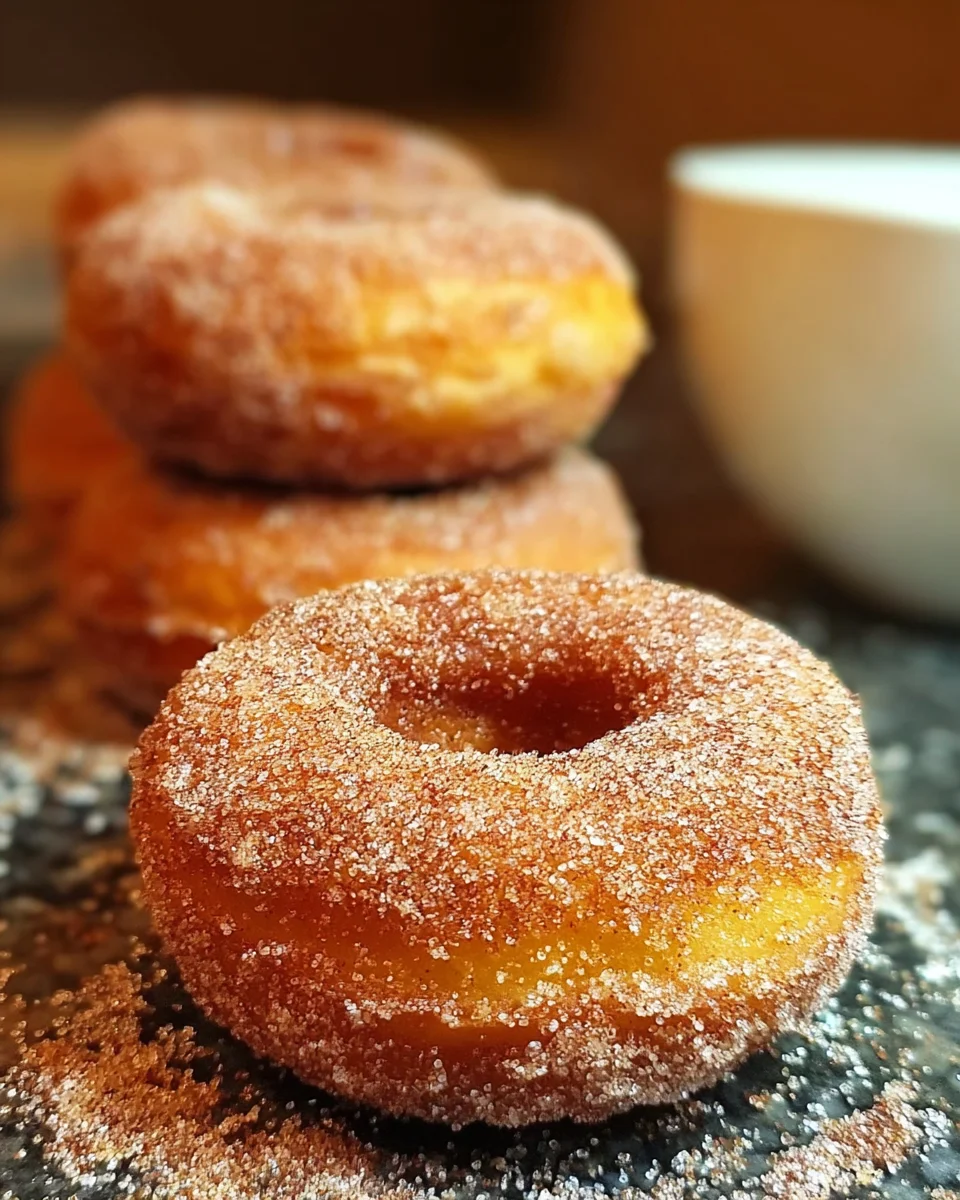
    Last but not least, roll each warm donut in the cinnamon sugar mixture until it’s fully coated. Make sure every inch is covered for that classic snickerdoodle flavor. Enjoy this step; it’s the frosting on the cake, or in this case, the sugar on the donut!

    Tips for Success

    • Measure ingredients accurately for best results. Too much flour can lead to dense donuts.
    • Don’t overmix the batter; this helps keep your donuts light and fluffy.
    • Use a piping bag for easy and mess-free filling of the donut pan.
    • Let the donuts cool slightly before coating to ensure the sugar sticks well.
    • Experiment with different spices in the sugar for a unique twist!

    Equipment Needed

    • Donut Pan: A must-have for shaping your donuts. If you don’t have one, a muffin tin can work in a pinch—just adjust baking time!
    • Mixing Bowls: Use two medium bowls for wet and dry ingredients. You can repurpose containers or large measuring cups too.
    • Whisk: Perfect for blending ingredients smoothly. A fork can do the job if you’re in a pinch!
    • Measuring Cups and Spoons: Essential for accurate ingredient quantities. Use a kitchen scale for precision if needed!

    Variations on Baked Snickerdoodle Donuts

    • Chocolate Chip Snickerdoodle Donuts: Fold in mini chocolate chips to the batter for a delightful twist on classic flavors.
    • Gluten-Free Option: Swap out the cake flour for a 1:1 gluten-free baking blend to cater to gluten sensitivities.
    • Vegan Snickerdoodle Donuts: Replace eggs with applesauce and buttermilk with plant-based milk mixed with vinegar for a dairy-free treat.
    • Maple Glazed Donuts: Drizzle a simple maple glaze over cooled donuts for a sweet, nutty flavor that pairs well with cinnamon.
    • Spice It Up: Add a dash of nutmeg or ginger to the batter for an extra layer of flavor that adds warmth and depth.

    Serving Suggestions

    • Pair with Coffee: Serve these donuts alongside a warm cup of coffee or tea for a cozy treat.
    • Add Fresh Fruit: A side of fresh berries or sliced bananas adds a refreshing touch to your sweet treat.
    • Presentation: Arrange the donuts on a pretty cake stand for a beautiful display at gatherings or brunch.
    • Drizzle with Maple Syrup: For an indulgent twist, drizzle warm donuts with maple syrup for extra sweetness.
    • Serve with Whipped Cream: A dollop of whipped cream makes for a delightful accompaniment at dessert time.

    FAQs about Baked Snickerdoodle Donuts

    Can I make Baked Snickerdoodle Donuts ahead of time?
    Absolutely! These donuts are best enjoyed fresh, but they can be made ahead and stored in an airtight container for a couple of days. Just pop them in the microwave for a few seconds to soften them up before serving!

    What can I use instead of buttermilk?
    If you’re out of buttermilk, no worries! You can mix regular milk with a tablespoon of vinegar or lemon juice and let it sit for about 5 minutes. This creates a quick homemade buttermilk substitute.

    How should I store any leftover donuts?
    To keep your Baked Snickerdoodle Donuts fresh, store them in an airtight container at room temperature. They can also be refrigerated for up to a week, but they might lose some of their fluffiness.

    Can I freeze these donuts?
    Yes! These donuts freeze well. Place them in a single layer on a baking sheet until frozen, then transfer them to an airtight container. When you want one, just reheat in the microwave!

    Can I customize the flavor of the coating?
    Definitely! While the classic cinnamon sugar coating is fabulous, feel free to experiment with other spices like pumpkin pie spice or even cocoa powder for a chocolatey twist. Get creative and make them your own!

    Final Thoughts

    Creating these Baked Snickerdoodle Donuts has been such a joy in my kitchen! From the warm aroma of cinnamon filling the air to the blissful smiles on my family’s faces, these donuts truly encapsulate happiness. They’re more than a treat; they’re a sweet moment shared with loved ones. Whether enjoyed at breakfast or as an afternoon pick-me-up, each bite is a gentle reminder of how simple joys can be so satisfying. So roll up your sleeves, embrace the mess, and indulge in this delightful recipe. Happiness is just a donut away!


    Print

    clock clock iconcutlery cutlery iconflag flag iconfolder folder iconinstagram instagram iconpinterest pinterest iconfacebook facebook iconprint print iconsquares squares iconheart heart iconheart solid heart solid icon

    Description

    Delicious and fluffy Baked Snickerdoodle Donuts coated in cinnamon sugar, perfect for a sweet indulgence!


    • 2 cups Cake Flour
    • ¾ cup Granulated Sugar
    • 2 teaspoons Baking Powder
    • ¾ teaspoon Ground Cinnamon
    • ½ teaspoon Kosher Salt
    • ¾ cup Buttermilk
    • 2 large Eggs, lightly beaten
    • 1 teaspoon Vanilla Extract
    • 2 tablespoons Unsalted Butter, melted
    • ¾ cup Granulated Sugar (for coating)
    • 1 tablespoon Ground Cinnamon (for coating)

    1. Preheat the Oven – Start by preheating your oven to 350°F (175°C).
    2. Prepare the Baking Pan – Grease a donut pan well with cooking spray or melted butter.
    3. Mix Dry Ingredients – In a large mixing bowl, whisk together the cake flour, granulated sugar, baking powder, ground cinnamon, and kosher salt.
    4. Combine Wet Ingredients – In another bowl, whisk together the buttermilk, eggs, vanilla extract, and melted butter.
    5. Combine Wet and Dry Ingredients – Pour the wet mixture into the dry ingredients and gently mix until just combined.
    6. Fill the Donut Pan – Fill each donut cavity about ¾ full with the batter.
    7. Bake – Bake for 10-12 minutes, or until golden and a toothpick comes out clean.
    8. Cool and Prepare Cinnamon Sugar Coating – Allow donuts to cool for 5 minutes, then mix sugar and cinnamon in a shallow dish.
    9. Coat the Donuts – Roll each warm donut in the cinnamon sugar mixture until fully coated.

    Notes

    • Make sure not to overmix the batter to keep the donuts fluffy.
    • Donuts are best enjoyed fresh but can be stored in an airtight container for a couple of days.
    • Prep Time: 15 minutes
    • Cook Time: 12 minutes
    • Category: Dessert
    • Method: Baked
    • Cuisine: American

    Nutrition

    • Serving Size: 1 donut
    • Calories: 180
    • Sugar: 12g
    • Sodium: 200mg
    • Fat: 6g
    • Saturated Fat: 3g
    • Unsaturated Fat: 2g
    • Trans Fat: 0g
    • Carbohydrates: 28g
    • Fiber: 1g
    • Protein: 2g
    • Cholesterol: 40mg

    Sharing is caring!

  • Salsa Verde Chicken & Rice Skillet

    Salsa Verde Chicken & Rice Skillet


    Introduction to Salsa Verde Chicken & Rice Skillet

    Hey there, fellow busy cooks! If you’re anything like me, you know the struggle of coming home after a long day and needing a quick, delicious dinner solution. That’s where my Salsa Verde Chicken & Rice Skillet comes into play. It’s a delightful, one-pan meal that’s not only bursting with flavor but also super simple to whip up. Picture this: tender chicken, zesty salsa verde, and fluffy rice all cooked together in harmony. This dish is perfect for impressing your loved ones or just enjoying a cozy night in with the family!

    Why You’ll Love This Salsa Verde Chicken & Rice Skillet

    This Salsa Verde Chicken & Rice Skillet is truly a lifesaver for busy moms and professionals. It whips up in just 35 minutes, allowing you to spend less time in the kitchen and more time with your loved ones. The flavors are vibrant and satisfying, making even the pickiest eaters come back for seconds. Plus, you only need one pan, which means fewer dishes to wash. Who doesn’t love that?

    Ingredients for Salsa Verde Chicken & Rice Skillet

    Gathering the right ingredients for your Salsa Verde Chicken & Rice Skillet not only sets the stage for a great meal but also brings joy to the cooking experience. Here’s what you’ll need:

    • Shredded rotisserie chicken: This time-saver is tender, flavorful, and adds heartiness to the dish. Feel free to use leftover cooked chicken if you have it on hand.
    • Diced yellow onion: Adds a sweet and savory base to the skillet, enhancing the overall flavor. You could substitute with white onion for a sharper taste.
    • Minced garlic: Brings a wonderful aroma and taste, elevating every bite. Fresh garlic is best, but jarred minced garlic can work in a pinch.
    • Extra virgin olive oil: Perfect for sautéing and adds a nice fruity flavor. Canola or avocado oil are good alternatives.
    • Salsa verde: The star of the dish! This vibrant green sauce delivers tangy and spicy notes. You can find it pre-made in most grocery stores or make your own if you’re feeling adventurous.
    • Diced green chiles: These bring a gentle heat and a flavorful kick. Canned green chiles are convenient, but fresh peppers can be roasted and diced for more depth.
    • White long grain rice: Offers a fluffy base for the dish. You can substitute with brown rice or quinoa, but adjust cook times accordingly.
    • Chicken broth: Adds moisture and extra flavor to the rice. Homemade broth is fabulous if you have it, or you can use low-sodium canned broth to keep things healthier.
    • Shredded Monterey Jack cheese: Melts beautifully and adds a creamy richness. Feel free to swap with cheddar or pepper jack for a twist!
    • Black beans: These are nutrient-packed and add protein. Canned beans are super convenient, just make sure to rinse them well.
    • Roasted corn: Gives a sweet crunch to the dish. Frozen corn works well, just toss it in without thawing!
    • Chili powder: This spice blend adds depth and warmth. You can use your favorite chili blend or even a pinch of cayenne for an extra kick.
    • Sea salt: Essential for bringing all the flavors together. Adjust to taste based on your dietary needs.
    • Cumin: Adds an earthy flavor that compliments the chicken and vegetables perfectly. A pinch of smoked paprika could work if you’re a fan of that smoky flavor.
    • Garlic powder: A great addition to deepen the garlic flavor. If you don’t have garlic powder, simply add more fresh garlic.
    • Dash of black pepper: Just a sprinkle adds a touch of warmth.
    • Cilantro: Fresh cilantro as a topping brightens the dish and gives it a fresh finish. If you’re not a fan, parsley can work, too!
    • Optional toppings: Consider garnishing your skillet with avocado or a sprinkle of red pepper flakes for extra flavor and texture.

    All ingredients with specific measurements are listed at the bottom of the article for your convenience, perfect for printing! Enjoy the creative joy of cooking!

    How to Make Salsa Verde Chicken & Rice Skillet

    Step 1 – Sauté Aromatics

    To begin your Salsa Verde Chicken & Rice Skillet, heat 1 tablespoon of extra virgin olive oil in a large pan over medium heat. Once the oil is shimmering, add 3 minced garlic cloves and 1 cup of diced yellow onion. Sauté these aromatics for about 3-5 minutes, stirring frequently. You want the onion to become soft and translucent while the garlic releases its fragrant aroma. This step is key to layering flavor in your dish!

    Step 2 – Seasoning Blend

    While your onion and garlic are softening, grab a small bowl to mix your spices. Combine 1 teaspoon of chili powder, 1 teaspoon of sea salt, ½ teaspoon of cumin, ½ teaspoon of garlic powder, and a dash of black pepper. Sprinkle this seasoning blend into the pan with the sautéed aromatics. Stir to combine, allowing the flavors to meld together for about a minute. This step adds depth to your salsa verde chicken and rice skillet.

    Step 3 – Combine Main Ingredients

    Now comes the fun part! Take the sautéed mixture off the heat and add in your star ingredients. Pour in 1 can of rinsed and drained black beans, ½ cup of roasted corn, and 2 cups of shredded rotisserie chicken. Follow that with 1 can (4 oz) of diced green chiles and 2 cups of chicken broth. Now, pour in 15.5 oz of salsa verde and add 1 cup of long grain rice. Give everything a good stir to combine thoroughly. It should look colorful and appetizing at this stage, and the aroma will be irresistible!

    Step 4 – Simmer

    Bring the mixture to a boil over high heat. You’ll want to let it bubble for about 2-3 minutes to ensure everything is combined well. Once it’s boiling, reduce the heat to a low simmer and cover the pan with a lid. Set your timer for 15 minutes, allowing the rice to cook perfectly and absorb all the delightful flavors. Keep an eye on it, but resist the urge to lift the lid too much!

    Step 5 – Cheese Melting

    Once the timer goes off, check if the rice is tender and has absorbed the liquid. If it needs a few more minutes, simply add a splash of broth and cover again. When the rice is all done, turn off the heat and sprinkle 1 cup of shredded Monterey Jack cheese on top. Cover the pan for another 2-3 minutes, giving the cheese time to melt beautifully. The gooey melted cheese is going to make your dish shine!

    Step 6 – Garnish and Serve

    Finally, let’s finish this Salsa Verde Chicken & Rice Skillet. Remove the lid and gently fluff the dish with a fork. Top it off with a handful of chopped cilantro, slices of creamy avocado, and a sprinkle of red pepper flakes for a bit of heat. Serve it hot and watch your family dig in with joy. Enjoy every delicious bite!

    Tips for Success

    • Prep your ingredients in advance to speed up cooking time.
    • If using brown rice, increase cooking time by 10-15 minutes. It requires more liquid.
    • Always taste and adjust seasoning before serving.
    • Try adding other veggies like bell peppers or zucchini for extra nutrition.
    • This dish stores well, so make a double batch for easy leftovers!

    Equipment Needed

    • Large skillet: A non-stick or cast-iron skillet works great for even cooking.
    • Wooden spoon or spatula: Perfect for stirring your ingredients without damaging the pan.
    • Measuring cups and spoons: Essential for accuracy, but you can eyeball ingredients if you’re comfortable.
    • Cutting board and knife: For chopping those aromatics!

    Variations on Salsa Verde Chicken & Rice Skillet

    • Vegetarian Option: Substitute the shredded chicken with cooked lentils or chickpeas for a hearty, plant-based meal.
    • Spicy Kick: Add more diced jalapeños or a splash of hot sauce for those who love heat.
    • Cauliflower Rice: For a low-carb version, swap in cauliflower rice instead of long-grain rice. Adjust the liquid accordingly.
    • Different Cheeses: Try using pepper jack cheese for a spicy twist, or go with feta for a unique flavor profile.
    • Mexican Street Corn Style: Mix in crumbled cotija cheese and a squeeze of lime for that beloved street corn flavor.
    • Cheesy Broccoli: Toss in some steamed broccoli florets right before serving for added nutrition and color.

    Serving Suggestions

    • Fresh Salad: Pair with a light cucumber and tomato salad for a refreshing contrast.
    • Drinks: Serve with a chilled margarita or a sparkling limeade for a festive touch.
    • Presentation: Garnish with extra cilantro and lime wedges for a pop of color and zest.
    • Tortilla Chips: Offer tortilla chips on the side for a crunchy, fun element.

    FAQs about Salsa Verde Chicken & Rice Skillet

    Can I make the Salsa Verde Chicken & Rice Skillet ahead of time?
    Absolutely! This dish is perfect for meal prep. You can prepare it in advance, store it in the refrigerator, and reheat it easily during the week. Just make sure to reheat it on a low flame, adding a splash of broth if needed to keep it moist.

    What can I substitute for salsa verde?
    If you can’t find salsa verde, you can use regular salsa or even a homemade blend of green tomatillos, jalapeños, and lime juice. This will still deliver that delightful flavor you’re after.

    Are there any dietary adjustments I can make?
    Yes, for a gluten-free version, ensure that all your ingredients are gluten-free, particularly the chicken broth. You can also make it vegetarian by swapping chicken with lentils or chickpeas and using vegetable broth.

    How do I store leftovers of this dish?
    Store leftovers in an airtight container in the refrigerator for up to 3-4 days. It also freezes well, so feel free to portion it out for future meals!

    Can I use uncooked chicken in this recipe?
    While I recommend using shredded rotisserie chicken for convenience, you can cook raw chicken in the skillet first, then follow the remaining steps. Just make sure it’s fully cooked before adding other ingredients.

    Final Thoughts

    Cooking my Salsa Verde Chicken & Rice Skillet brings a sense of peace to my busy evenings. With every colorful layer, I’m reminded of the joy that simple, home-cooked meals can bring to our tables. Whether you’re gathering around for a family dinner or meal prepping for the week ahead, this dish is a flavorful companion to your culinary adventures. The best part? It’s a stress-free way to serve up love and care on a plate. Your family will savor every bite, and you’ll relish the happiness these moments create together!


    Print

    clock clock iconcutlery cutlery iconflag flag iconfolder folder iconinstagram instagram iconpinterest pinterest iconfacebook facebook iconprint print iconsquares squares iconheart heart iconheart solid heart solid icon

    Description

    Salsa Verde Chicken & Rice Skillet is a flavorful one-pan meal featuring shredded chicken, rice, and a mix of vibrant ingredients cooked together for a delicious and easy dinner.


    • 2 cups shredded rotisserie chicken
    • 1 cup yellow onion, diced
    • 3 garlic cloves, minced
    • 1 tbsp extra virgin olive oil
    • 15.5oz salsa verde
    • 1 can (4oz) diced green chiles
    • 1 cup white long grain rice
    • 2 cups chicken broth
    • 1 cup shredded monterey jack cheese
    • 1 can black beans, rinsed and drained
    • 1/2 cup roasted corn
    • 1 tsp chili powder
    • 1 tsp sea salt
    • 1/2 tsp cumin
    • 1/2 tsp garlic powder
    • dash of black pepper
    • 3 tbsp cilantro
    • optional toppings: avocado, red pepper flakes

    1. Add olive oil to a pan to heat on medium.
    2. Add minced garlic and diced yellow onion to the pan.
    3. Mix together spices in a small bowl and add them to season with garlic and onion until fragrant.
    4. Pour in drained and rinsed black beans, roasted corn, shredded chicken, green chiles, chicken broth, salsa verde and rice. Mix together to combine.
    5. Bring to a boil for 2-3 minutes before turning heat to a simmer and set timer for 15 minutes. Place lid on pan.
    6. Once timer is up, check to make sure rice is cooked through. Set timer for additional time if needed.
    7. Once rice has completely soaked up the liquid and is cooked through, turn off the heat. Top with shredded cheese and place lid on pan to allow cheese to melt for 2-3 minutes.
    8. When cheese has melted, top with cilantro, avocado and red pepper flakes.
    9. Enjoy!

    Notes

    • Customize with your favorite toppings for added flavor.
    • This dish can be made ahead and reheated for convenient meals.
    • Adjust spices according to your taste preferences.
    • Prep Time: 10 minutes
    • Cook Time: 25 minutes
    • Category: Main Course
    • Method: Skillet
    • Cuisine: Mexican

    Nutrition

    • Serving Size: 1 serving
    • Calories: 500
    • Sugar: 3g
    • Sodium: 900mg
    • Fat: 20g
    • Saturated Fat: 6g
    • Unsaturated Fat: 14g
    • Trans Fat: 0g
    • Carbohydrates: 50g
    • Fiber: 10g
    • Protein: 30g
    • Cholesterol: 70mg

    Sharing is caring!

  • Spicy Jalapeño Pepper Jack Burger

    Spicy Jalapeño Pepper Jack Burger


    Introduction to Spicy Jalapeño Pepper Jack Burger

    As a busy mom, I know how hard it can be to whip up something delicious after a long day. Enter the Spicy Jalapeño Pepper Jack Burger—a mouthwatering treat that’s not only quick to make, but also packs a flavorful punch! This burger is perfect for the nights when you crave something satisfying but want to keep it simple. The combination of spicy jalapeños and creamy pepper jack cheese is just what I need to ignite my taste buds and turn an ordinary dinner into a culinary adventure.

    Why You’ll Love This Spicy Jalapeño Pepper Jack Burger

    This Spicy Jalapeño Pepper Jack Burger is one of my go-to recipes because it checks all the boxes for a busy lifestyle. It’s quick to prepare, taking just about 35 minutes from start to finish. The tantalizing blend of spices, creamy cheese, and fresh toppings creates an explosion of flavors that will make everyone at the dinner table smile. Plus, it’s a fun way to spice up a classic meal and satisfy those cravings!

    Ingredients for Spicy Jalapeño Pepper Jack Burger

    Gathering the right ingredients is the key to crafting a delicious Spicy Jalapeño Pepper Jack Burger. Here’s what you’ll need:

    • Ground Beef: I prefer an 80/20 blend for juicy, flavorful patties. You could switch it up with ground turkey or plant-based options if you like.
    • Salt and Pepper: Simple seasonings, but they make a world of difference in enhancing the flavor of your burger.
    • Fresh Jalapeños: These add a kick! Adjust the number based on your spice tolerance.
    • Butter: A little melted butter infuses both the jalapeños and buns with rich flavor.
    • Pepper Jack Cheese: The creamy and spicy cheese melts beautifully over the patties, giving that gooey goodness.
    • Arugula or Shredded Lettuce: I enjoy arugula for its peppery notes, but any green will provide a fresh crunch.
    • Tomato: Slices of juicy tomato add moisture and balance to the spice.
    • Red Onion: A bit of sharpness that complements the other flavors perfectly.
    • Mayonnaise: A creamy base for the sauce that brings everything together.
    • Adobo Sauce: This smoky sauce from chipotle peppers brings depth to your mayo.
    • Chipotle Pepper: Finely minced, it gives a bold, smoky flavor that enhances the burger’s profile.
    • Lime Juice: A splash of acidity to brighten all the rich flavors.
    • Burger Buns: I love brioche for its sweetness, but sesame buns work great too. Toasting them adds that delightful crunch!

    Want exact amounts for your grocery list? Check out the bottom of this article for the quantities, which you can easily print!

    How to Make Spicy Jalapeño Pepper Jack Burger

    Step 1: Prepare the Chipotle Mayo

    Start by mixing mayonnaise, adobo sauce, minced chipotle pepper, lime juice, and a pinch of salt in a bowl. This chipotle mayo isn’t just a condiment; it’s packed with a smoky, spicy flavor that enhances your burger’s taste. Set it aside in the fridge while you prepare the rest. Trust me, the cool creaminess with a kick will elevate every bite of your Spicy Jalapeño Pepper Jack Burger.

    Step 2: Sauté the Jalapeños

    Next, heat a skillet over medium heat and add a tablespoon of butter. Toss in the thinly sliced jalapeños and sauté them for about 2–3 minutes. This step is key; sautéing softens the peppers and brings out their natural sweetness. Keep an eye on them so they don’t burn. Once slightly softened, set them aside. This will add a flavorsome crunch to your burger!

    Step 3: Form the Patties

    In a bowl, divide the ground beef into four equal portions. Gently form each portion into a patty, being careful not to overwork the meat. Season both sides with salt and pepper for balanced flavor. For the perfect texture, make a slight indentation in the center of each patty—this helps them cook evenly. You’ll be rewarded with juicy burgers that everyone will love.

    Step 4: Cook the Patties

    Heat a grill or skillet over medium-high heat and place the patties on it. Cook for about 3–4 minutes per side, or until they reach your desired doneness. In the last minute, add a slice of pepper jack cheese on each patty and cover to melt. The melted cheese oozing over the juicy patty is simply divine and crucial in making your Spicy Jalapeño Pepper Jack Burger unforgettable!

    Step 5: Toast the Buns

    While the patties are cooking, spread butter on the insides of your burger buns. Toast them on the grill or in a pan until golden brown. This step is essential! Toasted buns add a delightful crunch and prevent them from getting soggy. If you’re in a pinch, a toaster works too, but grilling makes them extra special.

    Step 6: Assemble the Burger

    Finally, it’s time to bring your burger to life. Start with the bottom bun, slather it with chipotle mayo, then add a layer of arugula or lettuce. Place the juicy patty on top, followed by the sautéed jalapeños and red onion slices. Finish with the top bun for a perfect presentation. Arrange them on a plate, and your Spicy Jalapeño Pepper Jack Burger is ready to impress!

    Tips for Success

    • Let your patties rest for a few minutes after cooking for better juiciness.
    • Don’t skip toasting the buns; it’s a game-changer for texture!
    • Feel free to customize toppings to suit your family’s taste—mushrooms or avocado are great additions!
    • If you like more heat, add sliced jalapeños directly onto the burger!
    • Always ensure your grill or skillet is properly preheated for even cooking.

    Equipment Needed

    • Grill or Skillet: Either will work, but a grill adds that smoky flavor.
    • Spatula: A sturdy one helps flip those burger patties easily.
    • Mixing Bowl: Needed for the chipotle mayo and seasoning the meat.
    • Knife and Cutting Board: For slicing jalapeños, tomatoes, and onions.
    • Meat Thermometer: Optional, but useful for perfectly cooked patties.

    Variations of Spicy Jalapeño Pepper Jack Burger

    • Turkey or Chicken Patties: Swap ground beef for ground turkey or chicken for a lighter option that still bursts with flavor.
    • Vegetarian Option: Use black bean or chickpea patties for a hearty and plant-based alternative that doesn’t skimp on taste.
    • Different Cheeses: Try gouda or sharp cheddar if you’re not a fan of pepper jack. They both melt beautifully and add unique flavors!
    • Grilled Pineapple: Add a slice of grilled pineapple on top to balance the spicy kick with a touch of sweetness.
    • Avocado Slices: Layer in some creamy avocado for added richness and a boost of healthy fats.
    • Spicy Salsa: Top your burger with a spoonful of fresh salsa for a zestier flavor profile and a delightful crunch.

    Serving Suggestions

    • Fries or Sweet Potato Fries: Serve alongside crispy fries for a classic combo that everyone loves.
    • Coleslaw: A cool, tangy coleslaw adds a refreshing crunch that balances the heat.
    • Beer or Craft Soda: Pair your burger with a cold craft beer or soda for a refreshing drink.
    • Garnish with Fresh Herbs: Sprinkle fresh cilantro or parsley on top for a pop of color and flavor.

    FAQs about Spicy Jalapeño Pepper Jack Burger

    Can I make this Spicy Jalapeño Pepper Jack Burger ahead of time?

    Absolutely! You can prepare the patties and the chipotle mayo in advance. Just keep them refrigerated until you’re ready to cook. This makes weeknight dinners a breeze!

    What if my family doesn’t like spicy food?

    No problem! Simply reduce the number of jalapeños or remove them altogether. You can still enjoy the creamy pepper jack cheese and flavorful chipotle mayo without the heat!

    Can I use a different type of cheese?

    For sure! If pepper jack isn’t your favorite, swap it for gouda, cheddar, or even mozzarella. Just make sure it melts well to get that delightful gooey texture.

    Is this burger gluten-free?

    Yes, as long as you choose gluten-free buns, your Spicy Jalapeño Pepper Jack Burger can be made gluten-free. Look for buns at your local store or you can make your own!

    What sides pair well with this burger?

    I love serving crispy fries or a vibrant coleslaw on the side. Both add texture and balance out the spicy kick of the burger!

    Final Thoughts

    When I think about the Spicy Jalapeño Pepper Jack Burger, it brings a smile to my face. It’s more than just a meal; it’s a flavorful experience that sparks joy during busy dinners. Each bite transports me to summer barbecues, surrounded by laughter and good company. This recipe not only satisfies cravings but also makes weeknight cooking feel special. Whether you’re feeding the family or hosting friends, this burger is sure to impress. So fire up that grill or skillet and experience the loving warmth that this delicious burger will bring to your table!


    Print

    clock clock iconcutlery cutlery iconflag flag iconfolder folder iconinstagram instagram iconpinterest pinterest iconfacebook facebook iconprint print iconsquares squares iconheart heart iconheart solid heart solid icon

    Description

    A deliciously spicy burger featuring jalapeños and pepper jack cheese that will ignite your taste buds.


    • 680 g ground beef (80/20 blend)
    • Salt and freshly ground black pepper, to taste
    • 2 fresh jalapeños, thinly sliced
    • 1 tbsp butter
    • 4 slices pepper jack cheese
    • 1 cup arugula or shredded lettuce
    • 1 tomato, sliced
    • ½ red onion, thinly sliced
    • ½ cup mayonnaise
    • 1 tbsp adobo sauce (from chipotle peppers in adobo)
    • 1 chipotle pepper, finely minced
    • 1 tsp lime juice
    • Pinch of salt
    • 4 brioche or sesame burger buns, toasted
    • 1 tbsp butter (for toasting)

    1. In a bowl, combine mayonnaise, adobo sauce, chipotle pepper, lime juice, and salt. Mix well and refrigerate until use.
    2. In a skillet over medium heat, melt butter. Add sliced jalapeños and sauté for 2–3 minutes until slightly softened. Remove from heat.
    3. Divide ground beef into 4 equal portions and form into patties. Season both sides with salt and pepper.
    4. Heat a grill or skillet over medium-high heat. Cook patties 3–4 minutes per side or until desired doneness. In the last minute, top each patty with pepper jack cheese and cover to melt.
    5. Spread butter on buns and toast in a pan or on the grill until golden brown.
    6. Spread chipotle mayo on both bun halves. Layer bottom bun with arugula, tomato, and burger patty. Top with sautéed jalapeños, red onion slices, and the top bun. Serve hot.

    Notes

    • You can adjust the number of jalapeños based on your spice preference.
    • Use turkey or plant-based patties for a different twist.
    • For extra creaminess, add more chipotle mayo to your burger.
    • Prep Time: 15 minutes
    • Cook Time: 20 minutes
    • Category: Main Course
    • Method: Grilling or Skillet Cooking
    • Cuisine: American

    Nutrition

    • Serving Size: 1 burger
    • Calories: 650
    • Sugar: 3g
    • Sodium: 950mg
    • Fat: 40g
    • Saturated Fat: 16g
    • Unsaturated Fat: 24g
    • Trans Fat: 0g
    • Carbohydrates: 40g
    • Fiber: 2g
    • Protein: 35g
    • Cholesterol: 100mg

    Sharing is caring!

  • White Chocolate Strawberry Cheesecake

    White Chocolate Strawberry Cheesecake


    Introduction to White Chocolate Strawberry Cheesecake

    There’s something undeniably special about a dessert that turns an ordinary day into a celebration. My White Chocolate Strawberry Cheesecake does just that! Imagine creamy, velvety cheesecake paired with the sweet tanginess of fresh strawberries, all sitting on a buttery graham cracker crust. Best of all, it’s a quick solution for busy moms and professionals alike, offering a slice of joy even on the craziest days. Whether you’re celebrating a birthday or just treating yourself after a long week, this cheesecake is the perfect dish to impress your loved ones while keeping your time in the kitchen simple.

    Why You’ll Love This White Chocolate Strawberry Cheesecake

    You’ll adore this White Chocolate Strawberry Cheesecake for so many reasons! It’s an uncomplicated recipe that deftly balances your busy schedule and your desire for indulgence. The rich, creamy filling melts in your mouth, while the strawberry sauce adds a bright pop of flavor. Plus, it’s visually stunning, making it an eye-catching centerpiece at any gathering. Trust me; your family will be asking for seconds—and maybe even thirds!

    Ingredients for White Chocolate Strawberry Cheesecake

    Gathering the right ingredients for this White Chocolate Strawberry Cheesecake is the first step towards creating a memorable treat. Here’s what you’ll need:

    • Graham cracker crumbs: These create the buttery, crunchy base. You can use store-bought or crush your own!
    • Unsalted butter: Adds richness to the crust. Make sure it’s melted for easy mixing.
    • Cream cheese: The star of the show! Cream cheese brings the creamy texture and tangy flavor that we all know and love.
    • Granulated sugar: Sweetens the cheesecake and balances the tanginess of the cream cheese.
    • Large eggs: These help in binding the ingredients, giving the cheesecake that perfect, silky structure.
    • Vanilla extract: A touch of vanilla elevates the flavor, making it exceptionally delightful.
    • Heavy cream: This adds a luscious texture to your cheesecake, making it rich and indulgent.
    • White chocolate: Melted and mixed in, this ingredient introduces a sweet, luxurious flavor that pairs wonderfully with strawberries.
    • Fresh strawberries: They’re not just folded in; they enhance the flavor and bring a fresh fruitiness to every bite!
    • Strawberry sauce: This is for that delightful swirl on top. You can either make it from scratch or grab a bottle from the store for convenience.
    • Fresh strawberries for garnish: They make your cheesecake visually appealing and add an extra pop of color.

    For exact quantities and easy access, check the bottom of the article for printable measurements. Happy baking!

    How to Make White Chocolate Strawberry Cheesecake

    Ready to create your own White Chocolate Strawberry Cheesecake? Let’s dive into these straightforward steps that will guide you through the process. The joy of baking lies in the journey, so let’s get those ingredients and get started!

    Step 1: Prepare the Crust

    First, preheat your oven to 325°F (163°C). In a bowl, combine the graham cracker crumbs with the melted butter until they look like wet sand. Press this mixture firmly into the bottom of a greased 9-inch springform pan. Your crust needs to be sturdy, so don’t be shy! Pop it in the oven for 10 minutes, then let it cool completely. Trust me, this crust will be the foundation of your cheesecake magic.

    Step 2: Melt the White Chocolate

    While your crust cools, let’s get the white chocolate ready. Using a double boiler or your microwave, melt the white chocolate. If you’re microwaving, do it in short bursts – about 20 seconds each time. Stir between intervals until it’s smooth. Allow it to cool slightly. This will be the secret ingredient that gives the cheesecake its dreamy creaminess.

    Step 3: Combine the Cheesecake Filling

    In a large mixing bowl, beat the softened cream cheese and granulated sugar together until fluffy. I always use an electric mixer for this – it makes life so much easier! Crack in the eggs, one at a time, mixing gently after each addition. Then, add the vanilla extract and heavy cream. Finally, fold in that lovely melted white chocolate until everything is blended and creamy, like a cloud waiting to be shaped.

    Step 4: Fold in the Strawberries

    Now, it’s time to add the strawberries! Gently fold in the chopped fresh strawberries into your cheesecake batter. This adds a burst of freshness to each slice. You want them distributed evenly without breaking them up too much. The blush of pink from the strawberries is just irresistible!

    Step 5: Layer the Cheesecake Mixture

    Pour half of your cheesecake batter over the cooled crust. Drizzle some strawberry sauce over that layer, letting it create a beautiful swirl. Gently pour the remaining batter on top. For the finishing touch, take a toothpick or a knife and swirl it through the layers for that gorgeous marbled effect. It’s like painting, but much tastier!

    Step 6: Bake the Cheesecake

    Place your springform pan into a water bath for even baking. This prevents cracks and ensures a velvety texture. Bake it in the oven for 55 to 60 minutes. The edges should be set, but the center should still have a little jiggle. Once done, turn off the oven and let it cool inside with the door slightly ajar. Patience is key here!

    Step 7: Chill and Garnish

    After it cools completely, pop your cheesecake in the fridge. Ideally, let it chill for at least 4 hours, but overnight is perfection. When you’re ready to serve, garnish with fresh strawberries and drizzle more strawberry sauce on top. This is where you make it look fancy, and you’ll be amazed at your masterpiece!

    Tips for Success

    • Always use room temperature cream cheese for a smoother filling.
    • Don’t rush melting the white chocolate; this is key for a perfect texture.
    • Line your springform pan with parchment paper for easy removal.
    • Make your strawberry sauce ahead of time to save on prep.
    • For added flavor, consider using flavored extracts in place of vanilla.

    Equipment Needed

    • 9-inch springform pan: Perfect for cheesecakes. A regular pie dish can work in a pinch.
    • Mixing bowls: You’ll need a large one for the filling; glass or stainless steel works best.
    • Electric mixer: It makes beating cream cheese easy. A whisk can do in a squeeze!
    • Double boiler or microwave-safe bowl: For melting the white chocolate safely.

    Variations of White Chocolate Strawberry Cheesecake

    • For a tropical twist, swap strawberries for fresh mango or pineapple. You’ll get a beautiful flavor explosion!
    • If you prefer a lighter cheesecake, try using Greek yogurt in place of some cream cheese.
    • Going gluten-free? Use almond flour or gluten-free graham cracker crumbs for the crust.
    • Add a hint of mint to the cheesecake filling by mixing in some finely chopped mint leaves.
    • For extra elegance, incorporate a layer of raspberry sauce between the cheesecake layers.

    Serving Suggestions

    • Serve slices with a dollop of whipped cream on top for added richness.
    • Pair your cheesecake with a tall glass of iced tea or a fruity sparkling drink.
    • For an elegant touch, garnish with fresh mint leaves.
    • Present on a delightful cake stand to showcase its beauty.

    FAQs about White Chocolate Strawberry Cheesecake

    Got questions about making this White Chocolate Strawberry Cheesecake? Don’t worry, I’ve got you covered! Here are some common queries that might pop into your mind:

    Can I use different types of chocolate? Absolutely! While white chocolate delivers a creamy sweetness, you could experiment with milk or dark chocolate for a richer flavor profile.

    How do I prevent cracks in my cheesecake? Using a water bath is key to maintaining moisture and ensuring even baking. Also, never overbake your cheesecake; a slight jiggle in the center is a good sign!

    Can I make this cheesecake in advance? Yes, in fact, cheesecakes often taste better after chilling overnight. Make it a day ahead for the best flavor and texture.

    What’s the best way to store leftovers? Store any leftover cheesecake in an airtight container in the refrigerator. It will stay fresh for up to five days—if it lasts that long!

    Can I freeze White Chocolate Strawberry Cheesecake? Definitely! Wrap individual slices tightly in plastic wrap, then store in a freezer-safe bag. Thaw in the fridge before enjoying.

    Final Thoughts

    Baking this White Chocolate Strawberry Cheesecake is more than just a meal; it’s a heartfelt experience that combines love, flavor, and a touch of creativity. Every slice tells a story, showcasing the wonderful balance between creamy cheesecake and the playful sweetness of strawberries. Whether it’s a family gathering or a quiet moment of indulgence, this cheesecake evokes joy and satisfaction. I can’t tell you enough how rewarding it feels to share this treat with those you love. So, grab your apron, let’s make some memories, and enjoy a slice of bliss together!


    Print

    clock clock iconcutlery cutlery iconflag flag iconfolder folder iconinstagram instagram iconpinterest pinterest iconfacebook facebook iconprint print iconsquares squares iconheart heart iconheart solid heart solid icon

    Description

    A delectable white chocolate strawberry cheesecake that combines creamy cheesecake with fresh strawberries and a buttery graham cracker crust. Perfect for any dessert lover!


    • Crust: 250 g graham cracker crumbs
    • 85 g unsalted butter, melted
    • Cheesecake Filling: 450 g cream cheese, softened
    • 100 g granulated sugar
    • 2 large eggs
    • 1 teaspoon vanilla extract
    • 120 ml heavy cream
    • 170 g white chocolate, melted
    • 75 g fresh strawberries, chopped
    • Strawberry Swirl and Topping: 60 ml strawberry sauce
    • Fresh strawberries, for garnish

    1. Preheat oven to 163°C. Combine graham cracker crumbs and melted butter. Press firmly into the base of a greased 23 cm springform pan. Bake for 10 minutes, then allow to cool.
    2. Gently melt white chocolate using a double boiler or in the microwave with brief intervals, stirring until smooth. Let cool slightly before use.
    3. In a large bowl, beat cream cheese and sugar until creamy. Add eggs individually, mixing gently after each addition. Blend in vanilla extract, heavy cream, and the cooled melted white chocolate until uniform.
    4. Fold chopped strawberries gently into the cheesecake batter, ensuring even distribution.
    5. Pour half the cheesecake mixture over the cooled crust. Drizzle strawberry sauce over this layer. Add the remaining cheesecake mixture on top and use a toothpick or knife to create a marbled swirl.
    6. Place the pan into a water bath and bake for 55 to 60 minutes, until the edges are set and the center has a slight wobble. Switch off oven and cool inside with the door ajar.
    7. Refrigerate for a minimum of 4 hours, preferably overnight. Before serving, top with fresh strawberries and drizzle with additional strawberry sauce.

    Notes

    • Ensure to let the cheesecake cool completely before refrigerating.
    • This cheesecake is best served cold after chilling overnight.
    • You can use store-bought strawberry sauce for convenience.
    • Prep Time: 30 minutes
    • Cook Time: 1 hour
    • Category: Dessert
    • Method: Baking
    • Cuisine: American

    Nutrition

    • Serving Size: 1 slice
    • Calories: 350
    • Sugar: 18 g
    • Sodium: 150 mg
    • Fat: 24 g
    • Saturated Fat: 14 g
    • Unsaturated Fat: 8 g
    • Trans Fat: 0 g
    • Carbohydrates: 30 g
    • Fiber: 1 g
    • Protein: 5 g
    • Cholesterol: 80 mg

    Sharing is caring!

  • Zucchini Carrot Muffins

    Zucchini Carrot Muffins


    Introduction to Zucchini Carrot Muffins

    There’s something magical about Zucchini Carrot Muffins that brings a cozy warmth to my kitchen. Whenever I need a quick solution for a busy day, these muffins come to my rescue. They combine everyday ingredients into a delightful treat, perfect for breakfast or an afternoon pick-me-up. Imagine the sweet aroma wafting through your home as they bake! It’s like a hug in muffin form. For moms juggling schedules or busy professionals needing a quick snack, these muffins are just the thing to brighten your day and impress your loved ones.

    Why You’ll Love This Zucchini Carrot Muffins

    Zucchini Carrot Muffins are not only delicious, but they also shine in the kitchen for being quick and easy to whip up. With just one mixing bowl and a handful of ingredients, you can create a batch that will disappear faster than you can say “muffin magic!” Plus, they’re a sneaky way to get those veggies into your family’s diet, ensuring everyone gets a tasty dose of nutrition.

    Ingredients for Zucchini Carrot Muffins

    Before we dive into making these delightful Zucchini Carrot Muffins, let’s gather our ingredients. Each one plays a special role, bringing flavor and moisture to our perfect little treats. Don’t worry; I’ve got some handy tips for optional ingredients and substitutions along the way. For specific measurements, check out the bottom of the article—I’ll have them ready for you to print out!

    Essential Ingredients

    Zucchini

    Zucchini is the star of the show, adding moisture and a subtle sweetness. It’s also rich in vitamins and keeps our muffins nice and tender. Shred it finely for better incorporation into the batter, and feel free to use leftover zucchini from your garden or the farmer’s market!

    Carrots

    Grated carrots contribute a natural sweetness and a pop of color. They’re also packed with beta-carotene, which our bodies convert to vitamin A. Plus, they blend seamlessly into the muffins, making them a hit with picky eaters. Squeeze out extra moisture if your carrots are juicy!

    Apples

    Shredded apple brings an unexpected twist to the flavor profile. It adds a hint of tartness and extra sweetness. If you want a different take, consider using a sweeter variety like Fuji or Honeycrisp, or even substituting mashed banana for a different fruit experience!

    Sugar

    Granulated sugar sweetens the deal, balancing the flavors of the vegetables. You can swap half of it with brown sugar for a deeper flavor and a moist texture, or use a sugar substitute if you prefer a lower-calorie option.

    Eggs

    Eggs bind everything together, providing structure and moisture to the muffins. If you’re looking for an egg-free option, try using flaxseed meal mixed with water or a store-bought egg replacer to achieve similar results.

    Oil

    Oil adds moistness to our muffins, helping them stay soft and fluffy. You can go with traditional vegetable oil, but feel free to experiment with melted coconut oil or applesauce for a lighter touch.

    Flour

    All-purpose flour forms the base of our muffins. For a healthier spin, whole wheat flour or gluten-free blends can be used as alternatives that won’t skimp on taste!

    Baking Ingredients

    A pinch of salt, baking soda, and cinnamon might seem simple, but they work magic in our recipe. Baking soda helps our muffins rise, while cinnamon adds a warm, cozy flavor, making each bite feel like a hug. Don’t forget to check those spices lurking in the back of your pantry!

    How to Make Zucchini Carrot Muffins

    Now that we’ve rounded up our ingredients, it’s time to transform them into something truly magical. Follow these simple steps, and soon you’ll have a scrumptious batch of Zucchini Carrot Muffins to share—or hide away for yourself! Each step is straightforward, making this a perfect recipe even for those rushed, busy days.

    Step 1: Preheat the Oven

    First things first! Preheat your oven to 350°F (175°C). This is a crucial step that ensures your muffins bake evenly. While the oven warms up, you can multitask, mixing your ingredients and preparing the muffin tins.

    Step 2: Mix Wet Ingredients

    In a large mixing bowl, combine the sugar, eggs, and oil. Use a whisk or a spoon to blend these ingredients until they’re well combined. You want to make sure the sugar dissolves a bit, which helps create that delightful sweetness in every muffin!

    Step 3: Combine Dry Ingredients

    In a separate bowl, whisk together the flour, salt, baking soda, and cinnamon. This step is vital because it helps distribute the leavening agent evenly throughout the flour. Trust me, no one wants a surprise salty bite or a muffin that didn’t rise!

    Step 4: Mix Everything Together

    Slowly add the dry ingredients to the wet mixture. It may look a bit thick, and that’s perfectly okay! Don’t be shy here. Once combined, gently fold in the shredded zucchini, carrot, and apple. The mixture should be well-blended but remember, no over-mixing!

    Step 5: Fill Muffin Tins

    Grab your muffin tin and line it with cupcake liners, or simply grease it. Fill each cup about two-thirds full with the batter. This trick prevents messy overflow and gives your muffins room to rise beautifully. Plus, it helps them bake more evenly!

    Step 6: Bake to Perfection

    Transfer the muffin tin to your preheated oven and bake for 20 to 25 minutes. Keep an eye on them, and consider setting a timer. When you see that gorgeous golden-brown hue, they’re almost done. To check for doneness, insert a toothpick into the center of a muffin; it should come out with just a few crumbs, not wet batter.

    Tips for Success

    • Grate the zucchini and carrot finely for better texture in the muffins.
    • Don’t skip preheating the oven; it’s essential for even baking.
    • Try adding chopped nuts or raisins for extra flavor and texture.
    • Store muffins in an airtight container to keep them fresh for up to 3 days.
    • For a fun twist, serve them warm with a pat of butter or cream cheese.

    Equipment Needed

    • Muffin tin – You can also use a silicone muffin mold for easy removal.
    • Mixing bowls – A large bowl for wet ingredients and a medium bowl for dry.
    • Whisk or spoon – Any mixing tool will work; just avoid a fork for rough mixing.
    • Grater – A box grater or food processor makes quick work of shredding veggies.
    • Measuring cups and spoons – Essential for accurate baking, but feel free to eyeball it if you’re confident!

    Variations on Zucchini Carrot Muffins

    • For a tropical twist, add shredded coconut or crushed pineapple for added flavor and moisture.
    • If you’re looking to boost the nutrition, consider mixing in some ground flaxseed or chia seeds.
    • To make these muffins gluten-free, substitute all-purpose flour with almond flour or a gluten-free blend.
    • For a vegan version, replace the eggs with flax eggs and use a plant-based oil.
    • Add chocolate chips or dried fruit, like cranberries or apricots, for a delightful surprise in every bite.

    Serving Suggestions for Zucchini Carrot Muffins

    • Enjoy them warm with a spread of cream cheese or butter for an indulgent breakfast.
    • Pair with a steaming cup of coffee or herbal tea for a cozy afternoon snack.
    • For a festive touch, dust with powdered sugar before serving.
    • Serve alongside fresh fruit for a colorful, nutritious plate.

    FAQs about Zucchini Carrot Muffins

    As we dive deeper into the world of Zucchini Carrot Muffins, I can only imagine some questions might be bubbling up in your mind. Let’s tackle a few of the most common queries that pop up whenever I bake these delightful muffins.

    Can I freeze Zucchini Carrot Muffins?

    Absolutely! These muffins freeze beautifully. Just let them cool completely, wrap them tightly in plastic wrap or aluminum foil, and place them in an airtight container. When you’re ready to enjoy, simply thaw them at room temperature or pop them in the microwave for a warm treat.

    How can I make Zucchini Carrot Muffins healthier?

    There are plenty of ways to boost the health factor! You can substitute half of the granulated sugar with applesauce, use whole wheat flour instead of all-purpose, or add in some oats for extra fiber. Sneaking in some nuts or seeds will also provide a nutty crunch and additional nutrients!

    Can I replace the eggs in this recipe?

    Yes, you can easily make these muffins egg-free! I’ve had great success using a flax egg—mix one tablespoon of ground flaxseed with three tablespoons of water, let it sit for a few minutes to thicken, and use it in place of one egg. It works like a charm!

    What can I add for extra flavor?

    For an extra kick of flavor, consider adding a teaspoon of vanilla extract or a sprinkle of nutmeg. Chopped nuts, such as walnuts or pecans, and dried fruits like raisins or cranberries can also elevate the taste and texture.

    What should I do if I don’t have zucchini?

    If zucchini is a no-show, don’t fret! You can substitute it with grated summer squash or even replace it with more carrots or apples. The muffins will still turn out delicious and moist, keeping that delightful essence intact!

    Final Thoughts

    Making Zucchini Carrot Muffins is like creating little bites of happiness for yourself and your family. From the moment you mix the ingredients to the final whiff of that delicious aroma filling your kitchen, it’s an adventure worth taking. Each muffin is not just a treat; it’s a warm hug after a long day, a vibrant snack for busy mornings, and a sneaky way to include veggies in the family diet. Embrace the joy of baking with these muffins, and watch how they transform your day. Trust me, they’ll become a beloved staple in your home!


    Print

    clock clock iconcutlery cutlery iconflag flag iconfolder folder iconinstagram instagram iconpinterest pinterest iconfacebook facebook iconprint print iconsquares squares iconheart heart iconheart solid heart solid icon

    Description

    Zucchini Carrot Muffins are a delicious and moist treat that combines the flavors of zucchini, carrot, and apple in a delightful muffin form.


    • 1 1/2 cup granulated sugar (301 grams)
    • 2 eggs
    • 1 cup oil (250 ml)
    • 3 cups flour (384 grams)
    • 1 teaspoon salt (5.69 grams)
    • 1 teaspoon baking soda (4.8 grams)
    • 1 teaspoon cinnamon (2.6 grams)
    • 1 cup shredded zucchini (about half a medium zucchini, 150 grams)
    • 1 cup shredded carrot (about two carrots, 180 grams)
    • 1 cup shredded apple (about one apple, 150 grams)

    1. Preheat the oven to 350 degrees and line a muffin tin with cupcake liners.
    2. In a large bowl, mix together the sugar, eggs, and oil.
    3. In another large bowl whisk together the flour, salt, baking soda, and cinnamon. Slowly add the flour mixture to the sugar and egg mixture. The batter will be very thick.
    4. Mix in the zucchini, apple, and carrot.
    5. Fill the muffin tins 2/3 full.
    6. Bake for 20 to 25 minutes or until the muffins are golden brown and a toothpick stuck in one of the middle ones comes out with a crumb or two.

    Notes

    • For extra flavor, consider adding nuts or raisins to the batter.
    • These muffins can be stored in an airtight container for up to 3 days.
    • Prep Time: 15 minutes
    • Cook Time: 25 minutes
    • Category: Baked Goods
    • Method: Baking
    • Cuisine: American

    Nutrition

    • Serving Size: 1 muffin
    • Calories: 200
    • Sugar: 16g
    • Sodium: 120mg
    • Fat: 10g
    • Saturated Fat: 1g
    • Unsaturated Fat: 8g
    • Trans Fat: 0g
    • Carbohydrates: 26g
    • Fiber: 1g
    • Protein: 3g
    • Cholesterol: 30mg

    Sharing is caring!

  • Christmas Tree Cake Macarons

    Christmas Tree Cake Macarons


    Introduction to Christmas Tree Cake Macarons

    Ah, the holiday season! It’s that magical time of year when we gather with loved ones, share stories, and indulge in sweet treats. I can’t help but get excited when thinking about Christmas Tree Cake Macarons. These delightful little confections capture the festive spirit like no other! The joy of biting into a colorful macaron, filled with cake-inspired goodness, is truly a slice of holiday magic.

    Whether you’re a busy mom juggling holiday chaos or a professional striving to impress guests, this recipe is your secret weapon. In just a few steps, you’ll create beautiful, Instagram-worthy sweets that everyone will adore. So, roll up your sleeves, and let’s dive into the festive fun!

    Why You’ll Love This Christmas Tree Cake Macarons

    These Christmas Tree Cake Macarons are the perfect festive dessert for busy lives! They’re not just easy to make; they’re also quick, bringing holiday cheer in under two hours. Imagine the oohs and aahs as you present these tree-shaped delights! Each bite offers a balance of flavor and texture, making them not just a treat but a delightful experience to savor with family and friends.

    Ingredients for Christmas Tree Cake Macarons

    To create these delightful Christmas Tree Cake Macarons, you’ll need several key ingredients. Let’s take a closer look at each one:

    • Powdered Sugar: This fine sugar allows the macarons to achieve that signature smooth texture. It also sweetens the batter without any graininess.
    • Almond Flour: Finely ground blanched almond flour gives the macarons their delicate bite and unique flavor, making them extra special.
    • Egg Whites: Room temperature egg whites are crucial. They whip up beautifully and provide the structure needed for that perfect macaron shell.
    • Granulated Sugar: Added to the egg whites, it helps achieve stiff peaks, resulting in a sturdy yet tender shell.
    • Cream of Tartar: This stabilizer helps the egg whites maintain their volume while whipping, ensuring a fluffier texture.
    • Green Gel Food Coloring: This magical touch adds the festive color we all love, making each macaron look like a little holiday tree!
    • Unsalted Butter: Softened butter is the star of the filling. It adds creaminess and richness, elevating the overall flavor.
    • More Powdered Sugar (for filling): Another round of powdered sugar sweetens the decadent butter filling to perfection.
    • Vanilla Extract: A hint of vanilla enhances the flavor, giving your macarons a warm, comforting note.
    • Heavy Cream: This luscious addition helps create the perfect filling consistency, making it just right for piping.
    • Finely Crumbled Snack Cakes: Look for Christmas Tree Cakes or similar. They add a fun twist to the filling with a nostalgic flavor.
    • Pinch of Salt: A touch of salt in the filling brings out the sweetness and balances the flavors.
    • White Chocolate Drizzle: The drizzle adds a festive flair and a touch of elegance, transforming each macaron into a holiday masterpiece.
    • Red and Green Sprinkles: These cheerful toppings bring the Christmas spirit right onto your dessert!
    • Edible Gold Stars (optional): Want to add a touch of glamour? These are perfect for finishing off your delightful creations.

    You’ll find the exact quantities for these ingredients at the bottom of the article, ready for printing. Happy baking!

    How to Make Christmas Tree Cake Macarons

    Making Christmas Tree Cake Macarons is an adventure filled with smiles and sweet aromas! Follow these easy steps, and you’ll have delightful treats to share in no time.

    Prepare the Macaron Batter

    First, sift the powdered sugar and almond flour together twice. This process is essential as it removes lumps and ensures a smooth batter. In a separate bowl, beat your room-temperature egg whites until they’re foamy. Add the cream of tartar, then gradually mix in the granulated sugar until you reach stiff peaks. The mixture should stand tall like fluffy clouds!

    Now comes the fun part—add your green gel food coloring! You want that festive hue to burst forth. Once you’ve achieved the perfect color, gently fold in the almond flour mixture. Be careful here! You want the batter to flow like lava, not be too runny, which is what makes these macarons so special.

    Pipe the Macarons

    Next, transfer your beautiful batter into a piping bag. With a steady hand, pipe out tree shapes or circles onto lined baking sheets. Don’t worry if they aren’t perfect; they’ll still taste amazing! Once you’ve piped them out, tap the trays gently on the counter to release any air bubbles. It’s like giving them a little love tap!

    Let them rest for about 30 to 60 minutes until they form a skin. This waiting game is crucial for that perfect macaron texture.

    Bake the Shells

    Time to bring the heat! Preheat your oven to 300°F (150°C). Bake one tray at a time for 14 to 16 minutes. Halfway through, rotate the tray for even baking. When they’re ready, let them cool completely before gently lifting them off the mats. Patience is key here, folks!

    Make the Filling

    While the shells cool, let’s whip up the filling! Beat the softened butter in a bowl until it’s fluffy and light. Then, mix in the powdered sugar, vanilla extract, heavy cream, and a pinch of salt. This filling should be rich and creamy, just like a warm hug on a cold winter day!

    Finally, fold in those tasty crumbled snack cakes, adding that nostalgic holiday flavor. Transfer this delightful mixture into a piping bag, ready for assembly.

    Assemble the Macarons

    Now comes the best part! Pick two similar-sized shells and pipe a generous dollop of that luscious filling onto one. Gently sandwich it with the other shell, and voilà! Your macaron is coming to life!

    Decorate the Macarons

    Feeling festive? Drizzle with white chocolate for a touch of elegance. Sprinkle on some red and green sprinkles—these little gems bring the holiday spirit to life! You can even place an edible gold star on top for an extra sparkle. Your creations will look as enchanting as a twinkling Christmas tree!

    Mature for Best Flavor

    For the best flavor, it’s essential to let your macarons mature. Place them in an airtight container and refrigerate for at least 24 hours. This magic step allows the flavors to meld, enhancing your Christmas Tree Cake Macarons even more. Trust me; the wait will be worth it!

    Tips for Success

    • Always use room temperature egg whites for better volume.
    • Sift your dry ingredients thoroughly for a smooth macaron texture.
    • Allow macarons to rest before baking; it helps create that signature skin.
    • Don’t rush the cooling process; letting them cool completely prevents breakage.
    • Experiment with colors and decorations to make each batch uniquely yours.

    Equipment Needed

    • Parchment paper or silicone baking mats—both work well for lining your baking sheets.
    • A stand mixer or hand mixer for whipping egg whites to perfection.
    • Piping bags and tips for shaping your macarons—plastic bags can work in a pinch!
    • Kitchen scale for measuring ingredients accurately, though measuring cups will suffice.

    Variations

    • Flavored Fillings: Swap out the vanilla extract for peppermint or almond extract for a different twist.
    • Gluten-Free Option: Use gluten-free cake mix for the filling to cater to those with gluten sensitivities.
    • Colorful Holiday Theme: Change the food coloring to red or a mix of colors to match your holiday decor.
    • Nut-Free Version: Try using sunflower seed flour instead of almond flour for those with nut allergies.
    • Reduced Sugar: Use a sugar substitute in both the shells and filling for a lower-sugar alternative.

    Serving Suggestions

    • Pair your Christmas Tree Cake Macarons with a steaming cup of hot cocoa for a cozy treat.
    • Serve alongside festive holiday cookies to create a beautiful dessert platter.
    • Present them on a decorative cake stand, garnished with winter greenery for an elegant touch.
    • Offer with a scoop of vanilla ice cream for an extra indulgence.

    FAQs about Christmas Tree Cake Macarons

    As you embark on the delightful journey of making Christmas Tree Cake Macarons, you might have a few questions. Don’t worry; I’ve got you covered! Here are some common FAQs to guide you along the way.

    Can I make the macaron batter ahead of time?

    While it’s best to pipe and bake your macarons fresh, you can store the piped batter in the refrigerator for a few hours. Just be sure to let it come back to room temperature before baking for the best results.

    How can I tell when my macarons are done baking?

    Your macarons should have a smooth shell and lift easily off the baking mat when done. They’ll begin to develop a slight shine, and you should see no wobble when you gently touch them.

    What can I use instead of almond flour?

    If you have nut allergies or need a nut-free option, sunflower seed flour works wonderfully. You can also try finely ground oats, but the texture may differ slightly.

    Can I freeze my Christmas Tree Cake Macarons?

    Absolutely! Place the assembled macarons in an airtight container, separated with parchment paper. They can be frozen for up to three months, so you can enjoy holiday magic all year round!

    What’s the secret to perfect macarons?

    Mastering macarons takes practice! The key is to pay attention to the mixing technique. Make sure the batter flows like lava without being too runny, and don’t skip the resting period before baking. This is crucial for achieving that perfect texture and rise!

    Final Thoughts

    Making Christmas Tree Cake Macarons is more than just baking; it’s crafting joy during the holiday season! As the aroma fills your kitchen, you can’t help but feel the warmth of togetherness. These delightful treats not only taste heavenly, but they also create cherished memories around the table.

    Whether you’re enjoying them as a family or gifting them to friends, each macaron is a little bundle of happiness. So, put on your apron, let the magic unfold, and spread the joy of these festive sweets. Trust me, they’ll make your holiday celebrations sparkle with flavor and cheer!


    Print

    clock clock iconcutlery cutlery iconflag flag iconfolder folder iconinstagram instagram iconpinterest pinterest iconfacebook facebook iconprint print iconsquares squares iconheart heart iconheart solid heart solid icon

    Description

    Delightful Christmas Tree Cake Macarons that capture the magic of the holiday season!


    • 1 3/4 cups (175g) powdered sugar
    • 1 cup (100g) almond flour (finely ground, blanched)
    • 3 large egg whites (about 90g), room temperature
    • 1/4 cup (50g) granulated sugar
    • 1/2 teaspoon cream of tartar
    • Green gel food coloring
    • 1/2 cup (113g) unsalted butter, softened
    • 1 1/2 cups (150g) powdered sugar (for filling)
    • 1/2 teaspoon vanilla extract
    • 2 tablespoons heavy cream
    • 1/2 cup (85g) finely crumbled snack cakes (Christmas Tree Cakes or similar)
    • Pinch of salt (for filling)
    • White chocolate drizzle (for decoration)
    • Red and green sprinkles (for decoration)
    • Edible gold stars (optional, for decoration)

    1. Prepare the Macaron Batter: Sift powdered sugar and almond flour together twice. Beat egg whites until foamy, add cream of tartar, then gradually add granulated sugar and beat to stiff peaks. Mix in green food coloring. Gently fold in almond flour mixture until batter flows like lava.
    2. Pipe the Macarons: Transfer batter to a piping bag and pipe tree shapes or circles onto lined baking sheets. Tap trays to remove air bubbles, rest 30–60 minutes until a skin forms.
    3. Bake the Shells: Preheat oven to 300°F (150°C). Bake one tray at a time for 14–16 minutes, rotating halfway. Cool completely before removing from mats.
    4. Make the Filling: Beat butter until fluffy, then add powdered sugar, vanilla, cream, and salt. Fold in crumbled snack cakes. Transfer to piping bag.
    5. Assemble the Macarons: Pair similar-sized shells, pipe filling on one, and sandwich with another.
    6. Decorate: Drizzle with white chocolate, add sprinkles, and place gold star on top if desired.
    7. Mature for Best Flavor: Refrigerate in an airtight container for 24 hours before serving.

    Notes

    • Ensure egg whites are at room temperature for better volume.
    • Let the macarons rest before baking for the ideal texture.
    • Feel free to customize decorations to suit your holiday theme.
    • Prep Time: 30 minutes
    • Cook Time: 16 minutes
    • Category: Dessert
    • Method: Baking
    • Cuisine: French

    Nutrition

    • Serving Size: 1 macaron
    • Calories: 150
    • Sugar: 12g
    • Sodium: 50mg
    • Fat: 8g
    • Saturated Fat: 5g
    • Unsaturated Fat: 3g
    • Trans Fat: 0g
    • Carbohydrates: 18g
    • Fiber: 1g
    • Protein: 2g
    • Cholesterol: 30mg

    Sharing is caring!

  • Sausage Dipped Pancakes Delight

    Sausage Dipped Pancakes Delight


    Introduction to Sausage Dipped Pancakes Delight

    Let’s face it—mornings can be a whirlwind! Between rushing to get the kids ready and tackling that endless to-do list, it’s hard to find time for a nourishing breakfast. That’s where my Sausage Dipped Pancakes Delight come to the rescue. Imagine fluffy pancakes lovingly enveloping savory sausage, creating a symphony of flavors that can kickstart your day. This delicious breakfast not only delights the taste buds but also gives you that much-needed fuel to conquer anything that comes your way. It’s quick, easy, and impressive enough to treat your loved ones. Now, isn’t that a breakfast dream come true?

    Why You’ll Love This Sausage Dipped Pancakes Delight

    This recipe is all about simplicity and satisfaction. In just 30 minutes, you can whip up a breakfast that pleases even the pickiest eaters. The combination of savory sausage and sweet pancakes delivers a delightful contrast in every bite. Plus, the leftovers are easy to reheat, making this dish a convenient option for those busy weekday mornings. Trust me; your family will be asking for these again and again!

    Ingredients for Sausage Dipped Pancakes Delight

    Gather these simple yet flavorful ingredients for your Sausage Dipped Pancakes Delight. Each component plays a vital role in creating a mouthwatering breakfast that’s sure to become a family favorite.

    • Beef breakfast sausage patties: These add a savory punch to your pancakes. Feel free to swap for turkey or plant-based sausage if you prefer!
    • All-purpose flour: The base for your pancakes, giving them structure and fluffiness. You can also use gluten-free flour if needed.
    • Baking powder: This leavening agent helps your pancakes rise to fluffy perfection.
    • Salt: A pinch enhances the flavors while balancing the sweetness of the pancakes.
    • Granulated sugar: Adds a touch of sweetness, complementing the savory sausage beautifully.
    • Whole milk: It lends creaminess to the batter, making your pancakes rich and moist. You can substitute almond or oat milk for a dairy-free version.
    • Large egg: Binds everything together and enriches the flavor of the batter.
    • Vanilla extract: A hint of vanilla elevates the taste, making your pancakes irresistibly delicious.
    • Unsalted butter: Melted butter enriches the batter and adds flavor. Use coconut oil for a dairy-free alternative.
    • Maple syrup: A drizzle of this sweet elixir takes your pancakes to the next level. You could also try honey or agave syrup for variety.

    Exact measurements for these ingredients can be found at the bottom of the article, along with a handy printable version.

    How to Make Sausage Dipped Pancakes Delight

    Now, let’s dive into the magic of making your delicious Sausage Dipped Pancakes Delight. With every step, I bet you’ll feel like a culinary wizard in your kitchen!

    Step 1: Brown the Sausages

    First things first, grab your beef breakfast sausage patties. Heat a non-stick skillet over medium heat. Once it’s warm, brown your sausages until they turn golden on both sides. This typically takes about 7-10 minutes. When they’re perfectly cooked, transfer the patties to a paper towel-lined plate. This will help soak up any extra fat and keep your kitchen cleaner!

    Step 2: Prepare the Pancake Batter

    Next up, we mix up the batter. In a large mixing bowl, sift together the all-purpose flour, baking powder, salt, and granulated sugar. In another bowl, whisk your room temperature whole milk, large egg, vanilla extract, melted unsalted butter, and maple syrup until it’s all combined. Now, gently pour the wet ingredients into the dry ones. Stir just enough to incorporate everything—overmixing is a pancake’s worst enemy!

    Step 3: Cook the Sausage Dipped Pancakes

    It’s time for the fun part! Preheat your non-stick skillet or griddle again over medium heat. Lightly grease the surface with butter or a non-stick spray. Now, here comes the exciting bit: dip each cooked sausage patty into your pancake batter, coating it completely. Carefully place each patty onto the hot griddle. Let them cook until bubbles appear on the surface, which usually takes about 2-3 minutes. Once they look bubbly, it’s time to flip them! Cook until golden and cooked through—this should take another 2-3 minutes. Ah, the delightful smell will fill the kitchen!

    Serve your Sausage Dipped Pancakes Delight straight off the griddle. Don’t forget to garnish with a pat of butter and a generous drizzle of warm maple syrup! If you’re feeling extra fancy, toss on some fresh berries or scrambled eggs on the side. Enjoy every bite!

    Tips for Success

    • Stick to room temperature ingredients for a smoother batter.
    • Whisk gently—overmixing can lead to tough pancakes!
    • Keep the heat medium; too hot, and you’ll burn the pancakes.
    • Use a ladle or measuring cup for even pouring of batter.
    • Try adding spices like cinnamon for extra flavor!

    Equipment Needed

    • Non-stick skillet or griddle: A must for even cooking; you can use a cast-iron skillet too!
    • Mixing bowls: Essential for combining your ingredients; any size will work.
    • Whisk: For a smooth batter; a fork works in a pinch!
    • Measuring cups and spoons: Precision in baking is key.
    • Spatula: Perfect for flipping your pancakes with ease.

    Variations

    • Gluten-Free Option: Use a gluten-free all-purpose flour blend for a delicious gluten-free Sausage Dipped Pancakes Delight.
    • Spicy Twist: Add a pinch of cayenne pepper or some diced jalapeños to the batter for an extra kick.
    • Berry-Infused: Fold in fresh blueberries or sliced strawberries into the pancake batter for a fruity surprise.
    • Herbed Pancakes: Mix in chopped chives or parsley for a fresh herbal note that complements the sausage.
    • Cheesy Delight: Sprinkle shredded cheese into the batter for a cheesy, savory flavor that pairs perfectly with the sausage.

    Serving Suggestions

    • Pair with fresh fruit like strawberries, blueberries, or bananas for a vibrant touch.
    • Serve with a side of scrambled eggs for a hearty breakfast plate.
    • Enjoy with a steaming cup of coffee or herbal tea to complement the flavors.
    • Drizzle additional maple syrup over the top for that perfect sweet balance.
    • Add a dollop of whipped cream for a fun, indulgent twist.

    FAQs about Sausage Dipped Pancakes Delight

    Got questions about my Sausage Dipped Pancakes Delight? You’re not alone! Here are some common queries that can help you whip up this delicious breakfast with confidence.

    Can I use turkey sausage instead of beef?

    Absolutely! Turkey sausage is a great alternative and keeps the dish light while still delivering lots of flavor. Feel free to choose whatever sausage you love!

    How do I store leftovers?

    To keep your pancakes fresh, place them in an airtight container in the fridge for up to three days. You can easily reheat them in the microwave or on a skillet. Perfect for busy mornings!

    Can I freeze Sausage Dipped Pancakes Delight?

    Yes! You can freeze the pancakes and sausage patties separately. Just ensure they’re completely cooled before freezing. When you’re ready, pop them in the microwave or toaster for a quick breakfast!

    What can I serve with these pancakes?

    These pancakes pair wonderfully with fresh fruit, scrambled eggs, or a drizzle of maple syrup. You can even add a dollop of whipped cream for a decadent touch!

    How can I make this recipe healthier?

    To give your Sausage Dipped Pancakes Delight a health boost, consider using whole wheat flour or adding some mashed bananas to the batter. You can also opt for low-sodium sausage and use less sugar.

    Final Thoughts

    When it comes to breakfast, my Sausage Dipped Pancakes Delight truly captures the essence of comfort and convenience. It’s not just a meal but a delightful experience that brings joy to your table and smiles to your loved ones’ faces. Every bite is a fusion of savory and sweet, making it a hit at any morning gathering. Plus, the ease of preparation means you won’t feel overwhelmed in the kitchen. So, gather your family and embrace this scrumptious dish that celebrates both simplicity and flavor. Trust me, mornings will never be the same!


    Print

    clock clock iconcutlery cutlery iconflag flag iconfolder folder iconinstagram instagram iconpinterest pinterest iconfacebook facebook iconprint print iconsquares squares iconheart heart iconheart solid heart solid icon

    Description

    Sausage Dipped Pancakes Delight is a mouthwatering breakfast that combines savory sausage with fluffy pancakes for a perfect morning treat!


    • 16 beef breakfast sausage patties
    • 225 grams all-purpose flour, sifted
    • 15 grams baking powder
    • 5 grams salt
    • 12 grams granulated sugar
    • 310 millilitres whole milk, room temperature
    • 1 large egg
    • 5 millilitres vanilla extract
    • 42 grams unsalted butter, melted
    • 15 millilitres maple syrup

    1. Brown the beef breakfast sausage patties in a non-stick skillet over medium heat until fully cooked and golden on both sides. Transfer to a paper towel-lined plate to drain excess fat.
    2. In a large mixing bowl, sift together the flour, baking powder, salt, and sugar. In a separate bowl, whisk the milk, egg, vanilla extract, melted butter, and maple syrup until combined. Gently mix the wet ingredients into the dry ingredients just until incorporated, avoiding overmixing.
    3. Preheat a non-stick skillet or griddle over medium heat and lightly grease with butter or non-stick spray. Dip each cooked sausage patty into the pancake batter to coat completely. Place gently onto the hot surface. Cook for 2 to 3 minutes, or until bubbles appear on the surface, then flip and continue cooking until golden brown and thoroughly cooked.
    4. Serve the sausage dipped pancakes immediately, garnished with butter and drizzled with warm maple syrup. Complement with fresh berries or scrambled eggs, if desired.

    Notes

    • Ensure not to overmix the pancake batter for fluffier pancakes.
    • Customize by adding chocolate chips or nuts into the pancake batter if desired.
    • Prep Time: 15 minutes
    • Cook Time: 15 minutes
    • Category: Breakfast
    • Method: Pan-frying
    • Cuisine: American

    Nutrition

    • Serving Size: 2 pancakes with sausage
    • Calories: 450
    • Sugar: 5 grams
    • Sodium: 800 milligrams
    • Fat: 25 grams
    • Saturated Fat: 10 grams
    • Unsaturated Fat: 15 grams
    • Trans Fat: 0 grams
    • Carbohydrates: 40 grams
    • Fiber: 2 grams
    • Protein: 20 grams
    • Cholesterol: 70 milligrams

    Sharing is caring!

  • Cauldron Cookie Cups Fun

    Cauldron Cookie Cups Fun


    Introduction to Cauldron Cookie Cups Fun

    As the leaves change colors and pumpkins dot the streets, it’s time to embrace the magic of autumn with delicious treats. That’s where my Cauldron Cookie Cups Fun comes in—a whimsical and easy recipe that brings a sprinkle of joy to any Halloween gathering. Whether you’re juggling work, kids, or simply life, these cookie cups are quick to whip up and full of flavor. Plus, they double as festive decor! Trust me, your loved ones will be spellbound by their deliciousness and adorable presentation!

    Why You’ll Love This Cauldron Cookie Cups Fun

    These Cauldron Cookie Cups Fun are a real lifesaver for busy moms like me! They come together quickly, allowing you to create delightful treats in no time. The rich chocolate flavor pairs perfectly with the creamy green buttercream, making each bite a little taste of heaven. Plus, who doesn’t love a treat that doubles as a decoration? They’re sure to bring festive cheer and smiles at your Halloween festivities!

    Ingredients for Cauldron Cookie Cups Fun

    Gather your ingredients, and let’s get this cauldron bubbling! Here’s what you’ll need to create these spooky treats:

    • Devil’s Food Cake Mix – The rich base for our cookie cups. You can use other chocolate cake mixes if you prefer.
    • Eggs – These will add moisture and act as a binder in the cookie dough.
    • Canola or Vegetable Oil – This keeps your cookie cups soft and chewy. You can opt for melted butter for a richer flavor.
    • Black Food Coloring – Totally optional, but it adds a deep, dark hue to our cookies, elevating their spooky look.
    • Unsalted Butter – Softened, for the creamy buttercream filling that tastes like a sweet dream.
    • Powdered Sugar – Essential for that sweet, fluffy buttercream texture. Don’t skimp on this!
    • Vanilla Extract – A splash of vanilla enhances the overall flavor profile of our buttercream.
    • Salt – Just a pinch brings out the sweetness and balances flavors nicely.
    • Milk – This will help adjust the consistency of your buttercream, making it easy to pipe.
    • Green Food Coloring – To achieve that perfect bubbling potion look in your buttercream, don’t be afraid to add more for vibrancy!
    • Round Green Sprinkles – These add an extra layer of texture and fun to your finished cookie cups.
    • Halloween Sprinkles – Perfect for adding that festive flair and creativity to your decorations.
    • Candy Eyeballs – These little gems are sure to turn your cookie cups into a creepy but cute treat!
    • Pretzel Sticks – Break these in half to provide a stirring stick for your “potion.” Plus, they add a nice salty crunch!

    For exact quantities, head to the bottom of the article where you can find the full recipe available for printing!

    How to Make Cauldron Cookie Cups Fun

    Step 1: Preheat and Prepare

    Let the Halloween baking begin! Start by preheating your oven to 350°F. While it warms up, lightly grease three 12-count mini muffin pans. This ensures our cookie cups will pop right out after baking. The mini muffin pans are the perfect size for creating these delightful cauldron treats, so don’t skip this step. A good prep goes a long way in baking!

    Step 2: Mix the Cookie Batter

    In a large mixing bowl, combine the Devil’s Food cake mix, eggs, and canola oil. If you like a darker cookie cup, add that black food coloring now! Mix until everything is smooth and blended well; lumps aren’t welcome at this party. The rich chocolate aroma alone should have your family begging for a taste already—it’s going to be a blast!

    Step 3: Bake the Cookie Cups

    Scoop about half a tablespoon of the cookie batter into each mini muffin cup. Flatten the dough with your fingers before baking. Pop these in the oven and bake for 8 to 10 minutes, or until the edges are set. Remember to press an indentation in each warm cookie using the back of a tablespoon as soon as they come out. This creates the perfect pocket for our buttercream potion!

    Step 4: Make the Green Buttercream

    In a medium bowl, start beating the softened unsalted butter until creamy and fluffy. Slowly add the powdered sugar, vanilla extract, and salt; keep mixing until it’s nice and smooth. Gradually add in milk, a tablespoon at a time, until you get that perfect pipeable consistency. Don’t forget to mix in green food coloring until you achieve that vibrant bubbling potion hue. Enjoy watching it turn into the magical filling!

    Step 5: Assemble & Decorate the Cookie Cups

    Once your cookie cups have cooled completely, it’s time to fill them with that delectable green buttercream! Use a piping bag to carefully pipe the buttercream into each indentation, making it look all bubbly and fun. Now sprinkle green, Halloween sprinkles, and add the candy eyeballs for a quirky touch. Finish it off by breaking pretzel sticks in half to serve as adorable stirring sticks. Voila, your spooky cauldron cookie cups are ready!

    Tips for Success

    • Make sure your butter is softened, not melted, for the buttercream.
    • Keep an eye on cookie baking time. Ovens can vary, so check a minute or two early!
    • If you want a richer flavor, add a pinch of cinnamon to the cookie dough.
    • For vibrant green buttercream, feel free to adjust the food coloring to your preference.
    • Use a piping bag for clean and easy decorating.

    Equipment Needed

    • 12-count mini muffin pans – Regular muffin pans will work if you adjust baking time.
    • Mixing bowls – Any size will do, just ensure they’re sturdy enough for mixing.
    • Piping bag or plastic zip-top bag – A simple spoon will suffice if you don’t have one!
    • Measuring spoons – These help ensure perfect portions for dough and buttercream.

    Variations of Cauldron Cookie Cups Fun

    • Chocolate Chip Twist: Add half a cup of mini chocolate chips to the cookie batter for extra chocolatey goodness!
    • Gluten-Free Option: Swap out the Devil’s Food cake mix for a gluten-free chocolate cake mix to cater to dietary restrictions.
    • Vegan-Friendly: Replace the eggs with flax eggs and use vegan butter for the buttercream to make a delightful vegan treat.
    • Flavor Infusion: Mix in a teaspoon of peppermint extract to the buttercream for a refreshing minty twist.
    • Nutty Delight: Incorporate finely chopped nuts into the cookie batter for added texture and flavor—walnuts or pecans work well!

    Serving Suggestions for Cauldron Cookie Cups Fun

    • Pair these cookie cups with a warm cup of apple cider for a delightful fall treat.
    • Set them on a spooky Halloween-themed platter to impress your guests!
    • Serve alongside vanilla ice cream for an indulgent dessert combo.
    • Accompany with festive cocktails or mocktails for an adult twist!

    FAQs about Cauldron Cookie Cups Fun

    Can I make the cookie cups ahead of time?
    Absolutely! You can bake the cookie cups a day in advance. Just store them in an airtight container at room temperature. When you’re ready to serve, whip up the buttercream and decorate them for an added touch of freshness!

    What if I don’t have mini muffin pans?
    No worries! You can use regular muffin pans, but keep an eye on the baking time, as the cookie cups will take longer to cook. Just adjust as needed until they’re perfectly set.

    How do I store leftover cookie cups?
    If you have any cookie cups left (though I doubt it!), simply store them in an airtight container at room temperature for up to three days. They’re best eaten fresh but will still taste great for a little while!

    Can I customize the decorations?
    Definitely! Feel free to get creative with your decorations. You can change the sprinkles, use different candy eyeballs, or even swap in seasonal themes to match your Halloween vibe.

    Is it possible to make these gluten-free?
    Yes! Just use a gluten-free chocolate cake mix in place of the Devil’s Food cake mix. Your friends and family won’t miss out on the fun with this tasty alternative!

    Final Thoughts on Cauldron Cookie Cups Fun

    Embracing the spirit of Halloween with my Cauldron Cookie Cups Fun has truly been a delightful experience. They’re more than just treats; they’re little moments of joy that spark creativity and laughter in the kitchen. Every bite is a taste of nostalgia, reminding me of festive gathering and cherished memories. Plus, the smiles on my loved ones’ faces make every bit of effort worthwhile. Whether you’re hosting a spooky get-together or simply treating your family, these cookie cups are sure to cast a spell of happiness that lingers long after the season ends!


    Print

    clock clock iconcutlery cutlery iconflag flag iconfolder folder iconinstagram instagram iconpinterest pinterest iconfacebook facebook iconprint print iconsquares squares iconheart heart iconheart solid heart solid icon

    Description

    A fun and spooky treat perfect for Halloween, these Cauldron Cookie Cups are filled with delicious green buttercream and decorated to look like bubbling potions.


    • 1 (15.25 oz) box Devil’s Food cake mix
    • 2 large eggs
    • 1/2 cup canola oil or vegetable oil
    • Black food coloring, optional
    • 1 cup unsalted butter, softened
    • 3 cups powdered sugar
    • 1 teaspoon vanilla extract
    • 1/2 teaspoon salt
    • 1 to 3 tablespoons milk
    • Green food coloring
    • Round green sprinkles
    • Halloween sprinkles
    • Candy eyeballs
    • Pretzel sticks

    1. Preheat oven to 350°F. Lightly grease three 12-count mini muffin pans.
    2. In a large bowl, combine cake mix, eggs, oil, and black food coloring if using; mix until smooth.
    3. Scoop about 1/2 tablespoon of dough into each mini muffin cup; flatten with fingers. Bake 8-10 minutes until edges are set.
    4. Remove from oven and immediately press an indentation in each warm cookie using the back of a 1 tablespoon measuring spoon. Cool completely.
    5. Beat butter in a medium bowl until creamy. Gradually add powdered sugar, vanilla, and salt; beat until smooth. Add milk gradually until smooth and pipeable. Stir in green food coloring to desired shade.
    6. Pipe green buttercream into cooled cookie cups to resemble bubbling potions. Decorate with green sprinkles, candy eyeballs, and Halloween sprinkles. Break pretzel sticks in half and insert as stir sticks.

    Notes

    • For extra flavor, you can add a pinch of cinnamon to the cookie batter.
    • Store any leftover cookie cups in an airtight container at room temperature.
    • Feel free to customize the decorations based on your Halloween theme.
    • Prep Time: 20 minutes
    • Cook Time: 10 minutes
    • Category: Dessert
    • Method: Baking
    • Cuisine: American

    Nutrition

    • Serving Size: 1 cookie cup
    • Calories: 150
    • Sugar: 12g
    • Sodium: 100mg
    • Fat: 8g
    • Saturated Fat: 3g
    • Unsaturated Fat: 4g
    • Trans Fat: 0g
    • Carbohydrates: 18g
    • Fiber: 0g
    • Protein: 1g
    • Cholesterol: 20mg

    Sharing is caring!

  • Blueberry Lemon Poppy Seed Muffins

    Blueberry Lemon Poppy Seed Muffins


    Introduction to Blueberry Lemon Poppy Seed Muffins

    There’s something magical about waking up to the aroma of freshly baked muffins. It’s like a warm hug for your senses! Today, I’m sharing my recipe for Blueberry Lemon Poppy Seed Muffins that I promise will put a smile on your face, no matter how hectic your day is. These muffins are fluffy, bursting with sweet blueberries, and have just the right zing from the lemon. Perfect for a quick breakfast or a delightful afternoon snack, this recipe is a little slice of joy that fits into our busy lives as moms and professionals.

    Why You’ll Love This Blueberry Lemon Poppy Seed Muffins

    These Blueberry Lemon Poppy Seed Muffins are not just incredibly delicious but also incredibly easy to make. With just a handful of ingredients and quick steps, you can whip them up even on your busiest mornings. The bright lemon zest and plump blueberries harmonize beautifully, creating a delightful treat your family will adore. Plus, they make for a perfect snack to keep your energy up throughout the day!

    Ingredients for Blueberry Lemon Poppy Seed Muffins

    Gathering the right ingredients is half the battle, and I always find it exciting to shop for these vibrant components. Here’s what you’ll need for making these delicious Blueberry Lemon Poppy Seed Muffins:

    • All-purpose flour: The base of our muffins, giving them the perfect texture. You may swap in whole wheat for added fiber.
    • Baking powder: This little powerhouse makes the muffins rise and become fluffy.
    • Salt: Just a pinch, but it enhances all the flavors beautifully.
    • Unsalted butter: Rich and creamy, it adds moisture and flavor. Don’t skip this; it’s essential!
    • Sugar: Granulated sugar not only sweetens but also helps create that lovely golden crust.
    • Lemon zest: A burst of citrus fragrance that brightens the whole muffin. Use the freshest lemons you can find!
    • Eggs: These bind everything together, so make sure they’re at room temperature for optimal mixing.
    • Vanilla extract: Adds warmth; every baked good deserves a splash of vanilla!
    • Sour cream: This gives our muffins a tender crumb. You can substitute with plain yogurt if needed.
    • Freshly squeezed lemon juice: More lemon flavor! Choose fresh juice for the best taste.
    • Poppy seeds: These tiny gems add a nice crunch and a subtle nuttiness.
    • Blueberries: Sweet and juicy, they are the stars of the show! Fresh is ideal, but frozen works well too.
    • Confectioners’ sugar: This is for the glaze that adds a sweet finish to the muffins.
    • Milk: Just a splash for the glaze; it smooths out the consistency.

    For precise measurements, check the bottom of the article where I’ve detailed everything for easy printing. Now, let’s get cooking!

    How to Make Blueberry Lemon Poppy Seed Muffins

    Step 1 – Preheat Your Oven

    First things first—preheat your oven to 400°F (204°C). This step is crucial! Starting with a hot oven ensures that our muffins rise beautifully. While the oven warms up, take a moment to line your muffin tin with paper liners. Your future self will thank you for the easy cleanup!

    Step 2 – Combine Dry Ingredients

    Next, grab a large bowl and sift together 3 cups of flour, baking powder, and salt. Sifting is like giving your flour a spa day—it aerates it, ensuring light and fluffy muffins. Each dry ingredient has a role, enhancing texture and taste. Trust me; this step sets the foundation!

    Step 3 – Cream Butter and Sugar

    Now, let’s get into the fun part! In another bowl, beat the butter, granulated sugar, lemon zest, and vanilla extract using a mixer. Aim for that light and fluffy texture—about three minutes should do the trick. This blend adds richness and flavor, making each muffin a little indulgence!

    Step 4 – Add Eggs and Mix

    Once your butter and sugar are fluffy, it’s time to add in those eggs, one at a time. This gradual addition is key! Mixing them in slowly incorporates air, helping the muffins puff up beautifully. Don’t forget to scrape down the bowl to mix everything evenly!

    Step 5 – Mix Wet Ingredients Separately

    In a separate measuring cup, whisk together the sour cream and lemon juice until smooth. Mixing your wet ingredients beforehand helps create a luscious batter. This step also balances flavors, enhancing that delightful lemony profile in your muffins!

    Step 6 – Coat Blueberries with Flour

    Now, let’s tackle the blueberries! In a small bowl, toss them with the remaining flour. This little trick prevents them from sinking to the bottom of the batter. You want those juicy bursts in each delightful bite, not just sitting at the bottom!

    Step 7 – Combine All Mixtures

    With everything prepped, it’s time to combine! With your mixer on low, alternate adding your flour mixture and sour cream mixture. Start and end with the flour, and remember—mix gently! Overmixing will lead to dense muffins, and we’re aiming for fluffy perfection!

    Step 8 – Bake to Perfection

    Divide the batter evenly among your muffin cups and pop them into the oven. Bake for 25 to 27 minutes, or until the tops are golden brown. A toothpick inserted should come out clean or with just a couple of moist crumbs. Let them cool in the pan for ten minutes, and then transfer them to a wire rack!

    Step 9 – Prepare the Glaze

    While the muffins cool, it’s glaze time! In a medium bowl, whisk together the confectioners’ sugar, lemon juice, zest, and milk. Aim for a smooth consistency—add more milk if needed. This sweet glaze adds a delightful finish, turning your muffins into a gorgeous treat worthy of any brunch table!

    Tips for Success

    • Always use room temperature ingredients for better mixing and texture.
    • Don’t skip the sifting—it’s crucial for fluffy muffins!
    • Mix gently when combining wet and dry ingredients to maintain fluffiness.
    • For an extra zesty kick, add more lemon zest to the batter.
    • Store your muffins in an airtight container to keep them fresh.

    Equipment Needed

    • Muffin tin: Use a 12-cup muffin tin; silicone tins are a great non-stick alternative.
    • Mixing bowls: A set of nested bowls will help keep everything organized.
    • Handheld or stand mixer: Either works, but a stand mixer saves time and effort!
    • Sifter: A fine-mesh sieve works if you don’t have a sifter on hand.
    • Measuring cups and spoons: Essential for precision in baking.

    Variations

    • Whole Wheat Flour: Swap half the all-purpose flour for whole wheat flour for a nutty flavor and added fiber.
    • Vegan Option: Use plant-based butter, flax eggs, and dairy-free yogurt or milk to make these muffins vegan-friendly.
    • Banana Blueberry Muffins: Replace half the sour cream with mashed bananas for a moist twist on flavor.
    • Gluten-Free: Substitute the all-purpose flour with a gluten-free all-purpose blend to make a gluten-free version.
    • Mixed Berries: Incorporate raspberries or strawberries along with blueberries for a delicious berry medley.

    Serving Suggestions

    • Pair muffins with a dollop of whipped cream or a smear of cream cheese for a delightful touch.
    • Serve alongside a refreshing iced tea or a warm cup of coffee to enhance the flavors.
    • Garnish with additional lemon zest or fresh blueberries to make your presentation pop!

    FAQs about Blueberry Lemon Poppy Seed Muffins

    Can I use frozen blueberries for this recipe?

    Absolutely! Frozen blueberries work wonderfully in these muffins. Just toss them in flour before folding them into the batter. This helps prevent them from clumping together and sinking during baking.

    How should I store these muffins?

    Keep your Blueberry Lemon Poppy Seed Muffins in an airtight container at room temperature for up to three days. For longer storage, consider freezing them in a freezer-safe bag. Just thaw and warm them up when you’re ready to enjoy!

    Can I substitute the sour cream with yogurt?

    Yes, you can easily swap sour cream for plain yogurt! It will provide a similar moisture level and tanginess to your muffins, keeping them soft and delicious.

    What can I add for extra flavor?

    If you want to amp up the flavor, consider adding a teaspoon of almond extract or a pinch of nutmeg. Both complement the lemon zest beautifully and add an extra layer of flavor to your muffins!

    Are there any dietary adaptations for these muffins?

    Certainly! You can make these Blueberry Lemon Poppy Seed Muffins gluten-free by using a gluten-free flour blend. Additionally, for a vegan version, replace the eggs with flax eggs and use plant-based milk and butter. Enjoy the versatility!

    Final Thoughts

    Every time I bake these Blueberry Lemon Poppy Seed Muffins, it’s like bringing a little sunshine into my kitchen. The sweet aroma fills the air, and it feels like a hug from the inside out. These muffins are more than just a treat; they are a sweet escape from a hectic day and a delightful way to reconnect with family over breakfast or snack time. Whether enjoyed with a cup of coffee or shared with friends, these muffins are sure to create smiles all around. Trust me, you’ll want to make a batch again and again!


    Print

    clock clock iconcutlery cutlery iconflag flag iconfolder folder iconinstagram instagram iconpinterest pinterest iconfacebook facebook iconprint print iconsquares squares iconheart heart iconheart solid heart solid icon

    Description

    Delicious blueberry muffins infused with lemon flavor and topped with a sweet lemon glaze.


    • 3 cups plus 2 tablespoons all-purpose flour, divided
    • 1 tablespoon baking powder
    • 1/2 teaspoon salt
    • 8 tablespoons (4 ounces) unsalted butter, at room temperature
    • 1 and 1/3 cups granulated sugar
    • 3 teaspoons lemon zest, finely grated
    • 2 large eggs, at room temperature
    • 2 teaspoons pure vanilla extract
    • 1 cup full-fat sour cream
    • 1/3 cup freshly squeezed lemon juice
    • 3 tablespoons poppy seeds
    • 1 and 1/2 cups blueberries
    • 1 and 1/2 cups confectioners’ sugar, sifted (for glaze)
    • 2 tablespoons freshly squeezed lemon juice (for glaze)
    • 1 teaspoon lemon zest, finely grated (for glaze)
    • 2 teaspoons whole milk, more if needed (for glaze)

    1. Preheat oven to 400 degrees (F). Line a 12 cup muffin tin with paper liners; set aside.
    2. In a large bowl, sift together 3 cups of the flour, baking powder, and salt; set aside.
    3. In a large bowl using a handheld electric mixer, or in the bowl of a stand mixer fitted with the paddle attachment, combine the butter, sugar, lemon zest, and vanilla extract; beat on medium speed until light and fluffy, about 3 minutes.
    4. Add in the eggs, one at a time, beating well after each addition and scraping down the sides of the bowl as needed.
    5. Turn mixer off and set batter aside. In a spouted bowl or measuring cup add the sour cream and lemon juice; whisk well to combine and set aside.
    6. In a separate bowl combine the blueberries and remaining flour; toss well to coat the berries in the flour.
    7. With the mixer speed on low, alternate adding the flour mixture and the sour cream mixture, beginning and ending with flour. Be sure not to over mix here.
    8. Fold the blueberries and poppy seeds into the batter, mixing just until evenly combined.
    9. Divide the batter evenly among prepared muffin tins.
    10. Bake for 25 to 27 minutes, or until the tops are lightly golden brown and a toothpick inserted in the middle comes out clean, or with a just a few moist crumbs attached. Cool muffins 10 minutes in the pan before transferring to a cooling rack.
    11. For the Lemon Glaze: In a medium mixing bowl combine the confectioners’ sugar, lemon juice, zest, and milk; whisk until smooth, adding more milk as needed to reach desired consistency. Drizzle over the muffins right before serving.

    Notes

    • Ensure all ingredients are at room temperature for the best results.
    • Do not overmix the batter to keep the muffins light and fluffy.
    • Store muffins in an airtight container at room temperature for up to 3 days.
    • Prep Time: 20 minutes
    • Cook Time: 25-27 minutes
    • Category: Dessert
    • Method: Baking
    • Cuisine: American

    Nutrition

    • Serving Size: 1 muffin
    • Calories: 250
    • Sugar: 10g
    • Sodium: 200mg
    • Fat: 10g
    • Saturated Fat: 5g
    • Unsaturated Fat: 3g
    • Trans Fat: 0g
    • Carbohydrates: 35g
    • Fiber: 1g
    • Protein: 3g
    • Cholesterol: 40mg

    Sharing is caring!

  • Pistachio Macarons

    Pistachio Macarons


    Introduction to Pistachio Macarons

    Hey there, fellow food lovers! If you’re like me, the joy of baking can sometimes feel buried under a mountain of responsibilities. But fear not! These Pistachio Macarons are here to save the day. They’re not just a delight for your taste buds; they’re also a showstopper that can impress anyone who takes a bite. Imagine the sweet, nutty flavor dancing on your tongue, all while knowing you whipped them up in no time. Perfect for busy days or when you simply want to treat yourself or your loved ones, these macarons bring a sprinkle of elegance to any occasion.

    Why You’ll Love This Pistachio Macarons

    What’s not to love about these delightful Pistachio Macarons? They’re easy to make, yet feel oh-so-delicate and fancy. With minimal prep time, you can achieve impressive results that will have your friends asking for seconds! Plus, the sweet and nutty flavors create a magical experience, making every bite a little moment of bliss in our busy lives. Trust me, once you try them, you’ll be hooked!

    Ingredients for Pistachio Macarons

    Cooking is all about the ingredients, and these Pistachio Macarons are no exception! Here’s what you’ll need to whip up this delightful treat:

    • Super fine almond flour: This is the magic dust that gives macarons their signature texture. Make sure it’s super fine for the best results!
    • Confectioners’ sugar: This powdered sugar adds sweetness while also helping achieve that silky smooth batter. It’s essential for a soft bite!
    • Egg whites: Using room temperature egg whites is crucial; they whip up better for that fluffy meringue we love. Don’t skimp on this step!
    • Super fine white sugar: This sugar helps stabilize the egg whites while adding just the right amount of sweetness.
    • Green gel food coloring: To give our macarons that lovely pastel hue! Feel free to adjust the amount to your liking.
    • Pistachio extract: A little splash of this adds that rich nutty flavor that perfectly complements the almond in the macarons.
    • Heavy cream: This is for the luscious ganache filling. It creates a smooth texture and enriches every bite.
    • White chocolate: Finely chopped white chocolate melts into a creamy ganache, a luxurious filling that enhances the flavors.
    • Pistachio paste or cream: This can be used in the ganache for a more intense pistachio flavor. If you can’t find it, a spread works too!
    • Chopped unsalted pistachios: These add a delightful crunch and help elevate the overall presentation of your macarons.

    The ingredient measurements are in the recipe section below, ready for you to print out. Let’s gather these goodies and get ready to bake! Trust me, each element combines to create a treat that’s as beautiful as it is tasty.

    How to Make Pistachio Macarons

    Are you ready to dive into the world of Pistachio Macarons? Let me guide you through this fun, step-by-step journey. It might feel challenging at first, but trust me, the results are so worth it! Here we go.

    Step 1: Prepare Your Baking Sheet

    First things first, get your baking sheet ready!

    Line it with a silicone baking mat. This nifty tool helps prevent sticking and keeps your macarons from spreading. If you don’t have one, parchment paper does the trick too. Just make sure it’s flat!

    Step 2: Mix the Dry Ingredients

    Now, let’s get those dry ingredients mixed!

    Sift the super fine almond flour and confectioners’ sugar into a large mixing bowl. This step ensures there are no lumps and helps achieve that smooth macaron texture we all crave.

    Whisk them together gently; get that rhythm going!

    Step 3: Make the Meringue

    Next comes the magic of meringue!

    In your stand mixer, beat the egg whites until soft peaks form. Once you see those lovely soft peaks, gradually add the super fine white sugar. Increase the mixer speed to get that fluffiness.

    Keep beating until you reach stiff peaks. This means you should be able to turn the bowl upside down without your meringue moving a muscle! Add the green gel food coloring and pistachio extract, and gently mix until combined.

    Step 4: Combine Dry Ingredients with Meringue

    Here’s where the magic happens!

    Sift the dry mixture into the meringue; this is like introducing two best friends!

    Gently fold them together using a spatula.

    You want the mixture to ribbon off the spatula smoothly. It should flow like lava but not be too runny. This can take a bit of practice, so don’t rush!

    Step 5: Pipe the Macarons

    Time to pipe those beauties!

    Fill a piping bag fitted with a round tip, or use a zip-top bag with the corner snipped off. Pipe 1 to 1 ½-inch circles onto your prepared baking sheet. Be sure to leave some space in between—these little guys will puff up a bit!

    Once you’ve piped all the batter, tap the baking sheet lightly on the counter. This helps release any trapped air bubbles!

    Step 6: Bake the Macarons

    It’s baking time!

    Let your macarons sit at room temperature for about 30 minutes until they form a “skin.”

    This makes a huge difference in texture!

    Preheat your oven to 300°F, then bake for 15 to 20 minutes, keeping an eye on them. They should have risen and formed a nice little foot!

    Step 7: Prepare the Ganache

    While the macarons cool, let’s work on that scrumptious ganache!

    Heat the heavy cream in a small saucepan, just until it starts to simmer. Pour it over the finely chopped white chocolate in a mixing bowl. Let it sit for a few minutes so the chocolate can melt.

    Then, whisk until you achieve a silky smooth consistency.

    Let the ganache cool down before filling your macarons—this prevents the shells from getting soggy!

    And there you have it! You’re now one step closer to enjoying your Pistachio Macarons. Just a little patience while they cool, and then you can indulge in these lovely treats!

    Tips for Success

    • Always use super fine almond flour for a smooth texture.
    • Let your egg whites sit at room temperature for at least 30 minutes before whipping.
    • Don’t skip the resting period; it’s crucial for forming that perfect skin.
    • Keep an eye on your macarons while baking to prevent overbaking.
    • Practice folding gently—it’s all about the right consistency!

    Equipment Needed

    • Stand mixer: While a hand mixer works fine too, a stand mixer allows you to multitask.
    • Sifting tool: A fine-mesh sieve or a simple flour sifter will do the job.
    • Piping bag and tips: If you don’t have a piping bag, a zip-top bag with the corner cut off works just as well.
    • Silicone baking mat: Parchment paper can be a great substitute for easy removal of macarons.

    Variations of Pistachio Macarons

    • Chocolate Pistachio Macarons: Replace some almond flour with cocoa powder for a delightful twist. Chocolate and pistachio make a divine combination!
    • Lavender Infused Macarons: Add a touch of culinary lavender to the dry ingredients for a floral note that pairs beautifully with pistachio.
    • Vegan Pistachio Macarons: Substitute egg whites with aquafaba (the liquid from canned chickpeas) for a plant-based version that still holds airy peaks.
    • Sugar-Free Macarons: Use a sugar substitute like erythritol or stevia to reduce sugar content without sacrificing flavor.
    • Citrus Zest: Incorporate a hint of lemon or orange zest in your ganache for a refreshing citrus kick that complements the nuts.

    Serving Suggestions for Pistachio Macarons

    • Coffee or Tea: Pair these macarons with a rich cup of espresso or a delicate herbal tea for an elegant treat.
    • Fresh Berries: Serve alongside raspberries or strawberries for a pop of color and refreshing taste.
    • Chocolate Sauce: Drizzle some dark chocolate sauce over the macarons for an indulgent presentation.
    • Platter Display: Arrange them on a beautiful serving platter, garnished with mint leaves for an impressive look.
    • Whipped Cream: A dollop of lightly sweetened whipped cream makes for a delightful accompaniment.

    FAQs about Pistachio Macarons

    Can I make Pistachio Macarons ahead of time?
    Absolutely! You can prepare the macaron shells a day in advance and store them in an airtight container. They can even be frozen for a month. Just be sure to let them thaw in the fridge before filling.

    What is the best way to store Pistachio Macarons?
    To keep your macarons fresh, store them in an airtight container in the fridge. They’re best enjoyed within three days, but you can also freeze them for longer-lasting bliss.

    Why are my macarons not forming feet?
    This could be due to under-mixing the batter or not letting them rest long enough before baking. Ensure your meringue is stiff and that you wait until the shells are dry to touch.

    Can I change the filling for my macarons?
    Definitely! Get creative with your fillings. You can use buttercream, fruit jams, or ganaches flavored with other ingredients like coffee or lavender for a twist!

    What should I do if my macarons crack while baking?
    Cracking can happen for several reasons, including an overly hot oven or too much moisture in the batter. A lower baking temperature can help, so keep an eye on those little beauties!

    Final Thoughts

    Making Pistachio Macarons is more than just a baking project; it’s an adventure that can fill your kitchen with warmth and joy. As you blend and fold, there’s a certain magic in the air, transforming simple ingredients into beautiful treats. Every bite offers a sweet escape from the chaos of daily life, a moment where you can savor the deliciousness of your hard work. Plus, sharing these macarons with loved ones creates unforgettable memories. So gather your ingredients, embrace the process, and let the deliciousness unfold. You’ll find that these little delights become a favorite for sure!


    Print

    clock clock iconcutlery cutlery iconflag flag iconfolder folder iconinstagram instagram iconpinterest pinterest iconfacebook facebook iconprint print iconsquares squares iconheart heart iconheart solid heart solid icon

    Description

    Delicious Pistachio Macarons filled with a creamy pistachio white chocolate ganache.


    • 140 grams super fine almond flour (about 1 ½ cups)
    • 120 grams confectioners’ sugar (about 1 cup)
    • 100 grams egg whites (about 3 large egg whites), at room temperature
    • 110 grams super fine white sugar (about 1 cup + 2 teaspoons)
    • 12 teaspoons green gel food coloring
    • ½ teaspoon pistachio extract
    • 6 tablespoons (90 grams) heavy cream
    • 9 ounces (250 grams) white chocolate, finely chopped
    • ¼ cup (60 grams) pistachio paste, cream, or spread
    • 2 ounces (57 grams) white chocolate, melted
    • ¼ cup (60 grams) unsalted pistachios, chopped finely

    1. Prepare a baking sheet with a silicone baking mat (or if you have enough, prepare 2 baking sheets).
    2. Sift almond flour and confectioners’ sugar into a large mixing bowl, discarding large pieces.
    3. Whisk together the almond flour and confectioners’ sugar until well-combined.
    4. Beat egg whites in a stand mixer on low until soft peaks form, then add white sugar and increase speed to medium.
    5. Once medium peaks form, increase to high and beat until stiff peaks are achieved.
    6. Add green food coloring and pistachio extract, mixing until just combined.
    7. Sift the dry mixture into the meringue, folding carefully until the mixture ribbons off the spatula.
    8. Add batter to a piping bag and pipe 1 to 1 ½-inch circles onto the baking sheet.
    9. Tap the baking sheet to remove air bubbles and poke any remaining bubbles with a toothpick.
    10. Preheat oven to 300°F and allow macarons to sit until a skin forms (8 minutes to 1 hour).
    11. Bake for 15-20 minutes, checking at 15 minutes for readiness.
    12. Let macarons cool completely before removing from the mat.
    13. For the ganache, heat heavy cream in a saucepan, bring to a simmer, then pour over chopped white chocolate and pistachio paste.
    14. Stir lightly and let sit for 2 minutes, then whisk until smooth.
    15. Cover and let cool to just warmer than room temperature before using.

    Notes

    • Ensure that egg whites are at room temperature for better aeration.
    • Use a silicone mat or parchment paper for baking macarons.
    • Be careful not to overmix the batter to maintain airiness.
    • Store macarons in an airtight container to retain freshness.
    • Prep Time: 90 minutes
    • Cook Time: 20 minutes
    • Category: Dessert
    • Method: Baking
    • Cuisine: French

    Nutrition

    • Serving Size: 1 macaron
    • Calories: 100
    • Sugar: 10g
    • Sodium: 25mg
    • Fat: 5g
    • Saturated Fat: 3g
    • Unsaturated Fat: 2g
    • Trans Fat: 0g
    • Carbohydrates: 11g
    • Fiber: 1g
    • Protein: 2g
    • Cholesterol: 15mg

    Sharing is caring!