Blog

  • Low-Carb Mongolian Ground Beef and Cabbage

    Low-Carb Mongolian Ground Beef and Cabbage


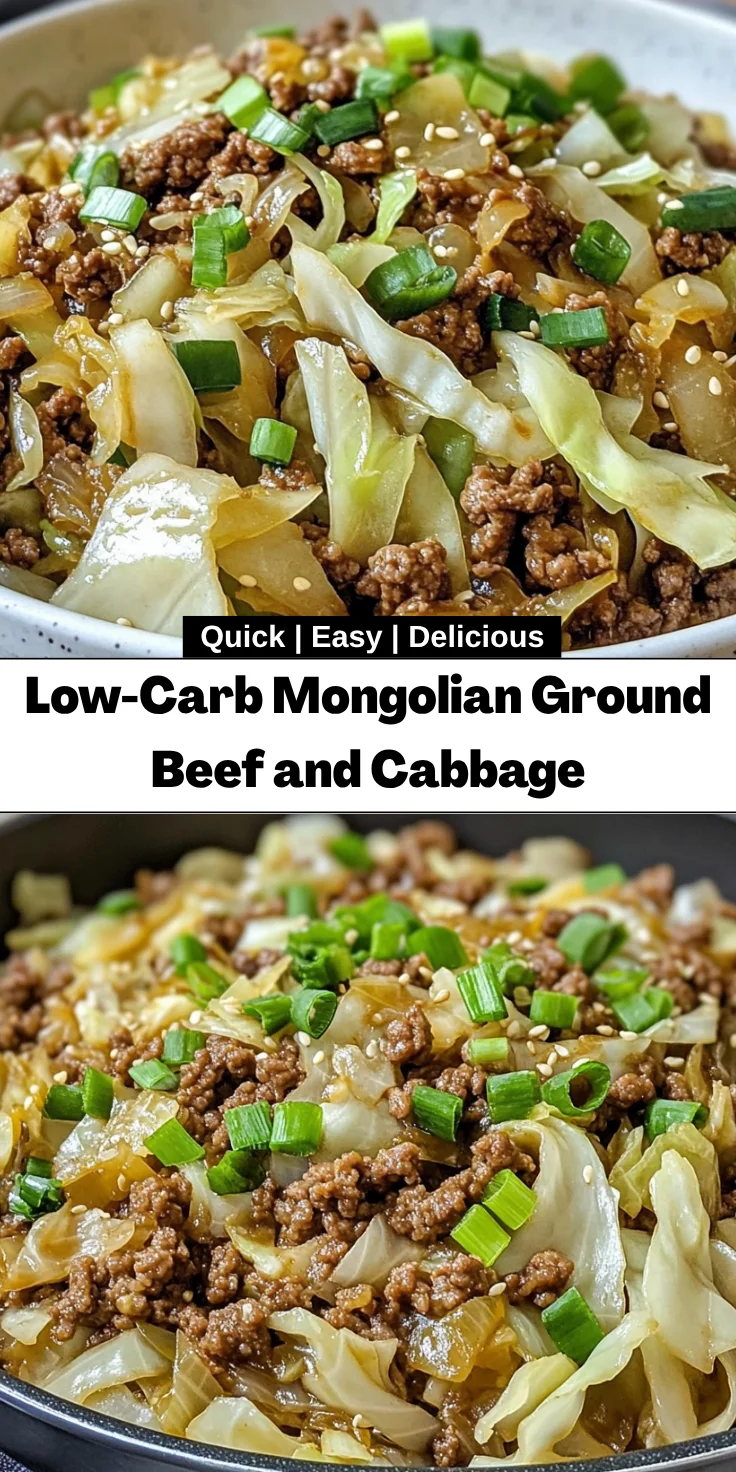
    Introduction to Low-Carb Mongolian Ground Beef and Cabbage

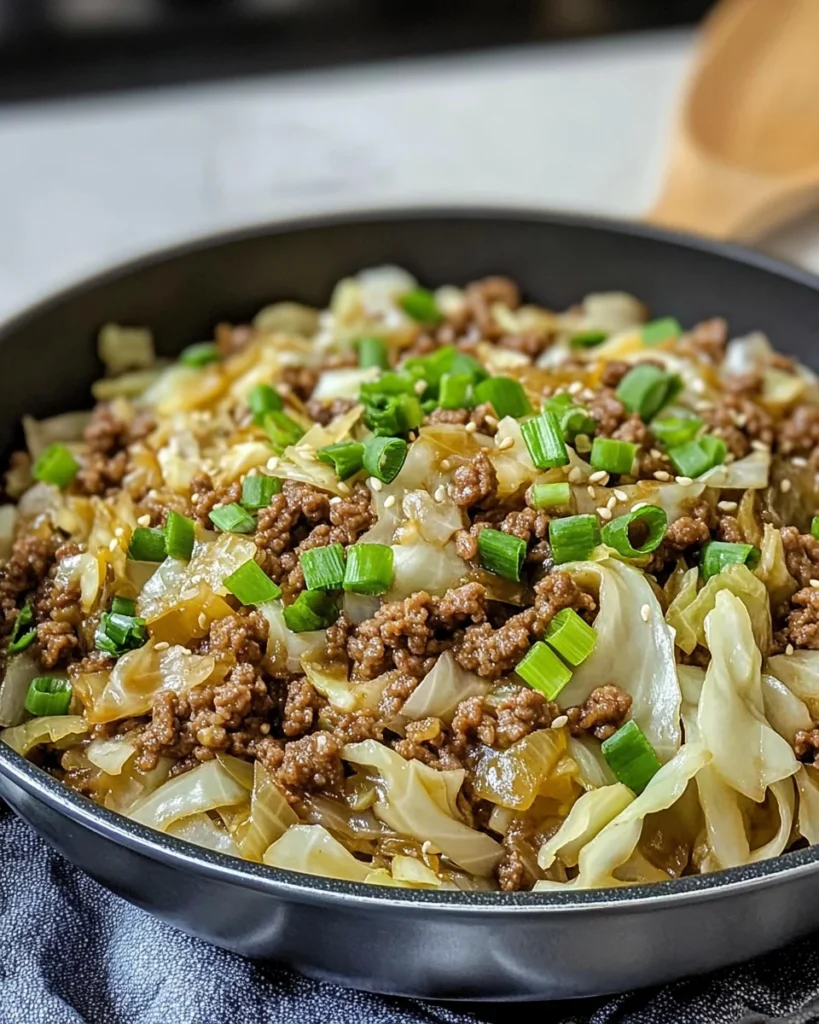
    Hey there, fellow food lovers! Let me introduce you to a dish that has quickly become a favorite in my home—Low-Carb Mongolian Ground Beef and Cabbage. If you’re like me, juggling a busy life while aiming to provide nourishing meals, this recipe is a true lifesaver. It’s not only simple to whip up on a weeknight, but it’s also packed with flavor that will impress your loved ones. Plus, who doesn’t love a one-skillet meal that keeps things tidy in the kitchen? Let’s dive into this delightful culinary adventure!

    Why You’ll Love This Low-Carb Mongolian Ground Beef and Cabbage

    This Low-Carb Mongolian Ground Beef and Cabbage is a joy to make! It’s quick, taking just 25 minutes from start to finish, perfect for busy nights. You get a savory mix of tender beef and crisp cabbage that my family can’t resist. Plus, it’s low in carbs but high in flavor, making it a healthy choice you won’t feel guilty about. Trust me, your taste buds will thank you!

    Ingredients for Low-Carb Mongolian Ground Beef and Cabbage

    Let’s gather all the ingredients to create this scrumptious Low-Carb Mongolian Ground Beef and Cabbage. Here’s what you’ll need:

    • Onion: A half-small onion, finely diced, adds a sweetness and depth to our dish.
    • Green Cabbage: About three cups, shredded—the star here! It becomes tender while retaining that satisfying crunch.
    • Garlic: Three cloves, minced, for a glorious aroma and rich flavor.
    • Soy Sauce: Two tablespoons provide a salty umami boost. For a lower sodium option, opt for coconut aminos.
    • Sesame Oil: Just a tablespoon adds a nutty richness. It’s perfect for that Asian flair!
    • Rice Vinegar: One tablespoon gives a tangy kick, balancing the savory notes beautifully.
    • Ground Ginger: A teaspoon of this spice enhances the warmth and adds a lovely aromatic quality.
    • Red Pepper Flakes: A ¼ teaspoon, optional, for those who enjoy a little heat. Adjust according to your preference!
    • Salt and Black Pepper: A pinch of each to taste, elevating the dish without overpowering it.
    • Green Onions: Sliced for garnish, these provide a fresh crunch and a pop of color.
    • Toasted Sesame Seeds: One tablespoon, also optional, to sprinkle on top, adding a nutty crunch and visual appeal.

    For exact quantities, check the bottom of the article where you can find a printable version of this delicious recipe!

    How to Make Low-Carb Mongolian Ground Beef and Cabbage

    Now that we have our ingredients ready, let’s get cooking! This Low-Carb Mongolian Ground Beef and Cabbage comes together in a flash, making it perfect for those busy nights. Follow these simple steps for a dish that’s not only tasty but sure to impress!

    Step 1: Brown the Ground Beef

    Start by heating a large skillet over medium heat. Add the ground beef and cook until it’s fully browned. This isn’t just about cooking the meat. It’s about letting all those delicious juices come out.

    Drain Excess Fat

    Once the beef is browned, it’s essential to drain any excess fat. I usually tilt the skillet and pour off the fat, leaving the beef behind. This step is golden for keeping the dish lighter and healthier. No one likes a greasy meal!

    Step 2: Add Onion and Garlic

    Next up, toss in the finely diced onion and minced garlic. They want to mingle with that savory beef!

    Sauté Until Fragrant

    Cook these for about 2-3 minutes until they become fragrant and soft. This sautéing process is where the magic happens, enhancing the overall flavor of the Low-Carb Mongolian Ground Beef and Cabbage. Your kitchen will smell heavenly!

    Step 3: Incorporate the Cabbage

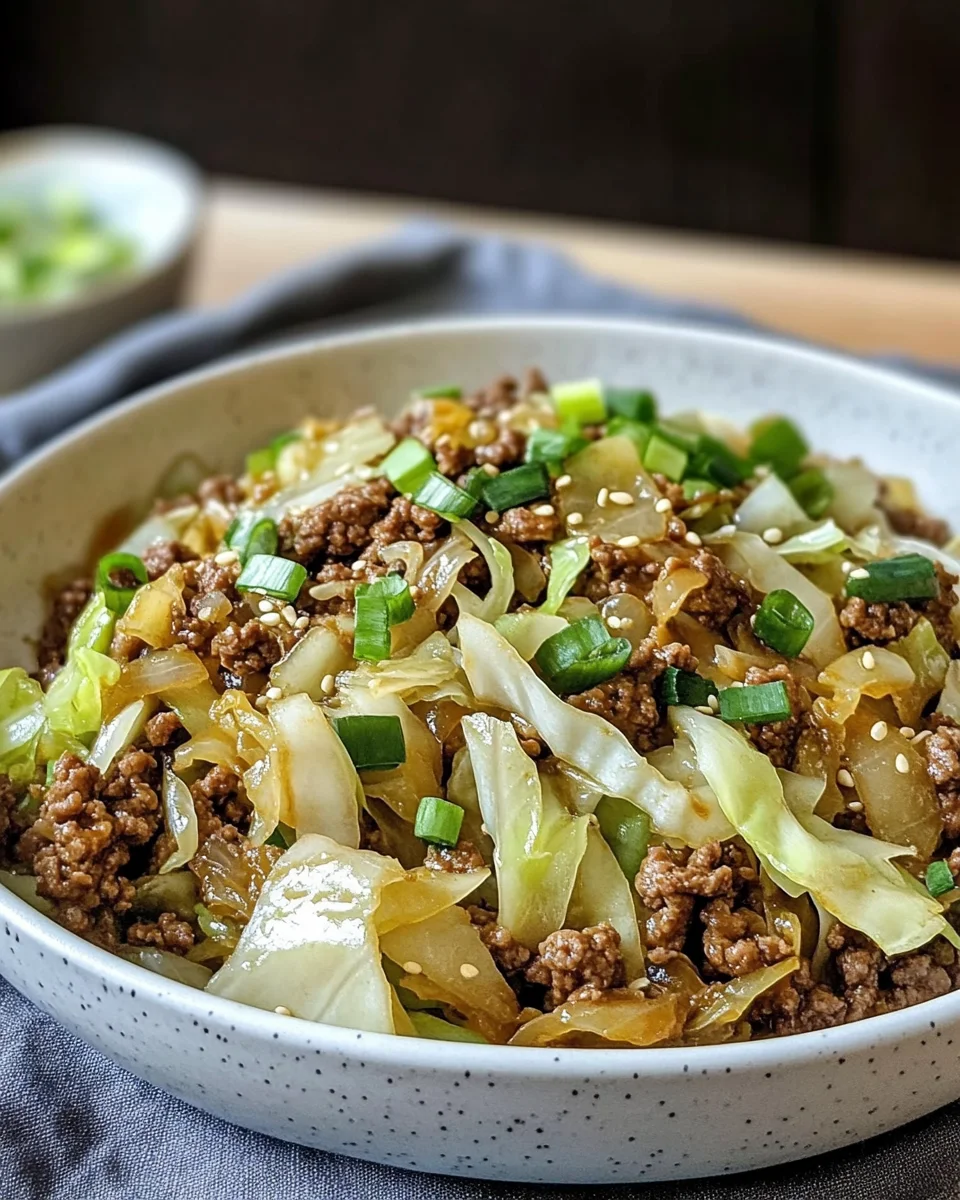
    Now, it’s time to add in the shredded cabbage. I love how vibrant the green looks against the beef. Stir it in and let it sauté.

    Sauté Until Slightly Wilted

    Keep stirring until the cabbage is slightly wilted—about 5 minutes should do the trick. Avoid overcooking it; we want it to retain a bit of crunch. This texture contrast makes each bite enjoyable and satisfying!

    Step 4: Add Seasoning

    It’s flavor time! Pour in your soy sauce or coconut aminos, sesame oil, rice vinegar, and ground ginger. If you’re feeling a little adventurous, add those red pepper flakes now.

    Mix Well and Cook

    Mix everything together thoroughly. Make sure all the sauce coats the beef and cabbage. Let it cook for another 2-3 minutes, allowing the flavors to marry beautifully. This step ties everything together, and trust me, your taste buds will thank you!

    Step 5: Garnish Before Serving

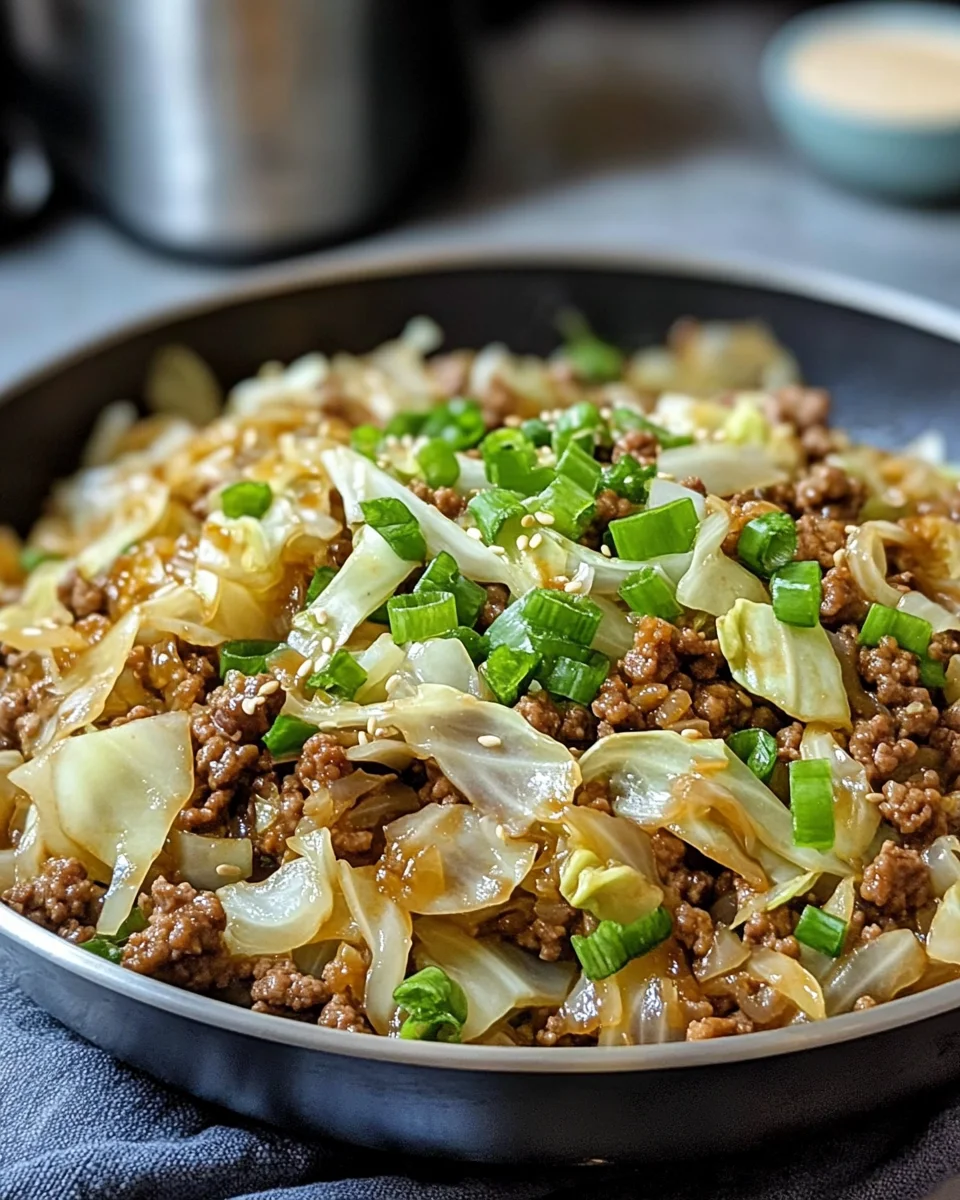
    When finished, it’s time for the final touches! Serve up the Low-Carb Mongolian Ground Beef and Cabbage on plates.

    Add Final Touches

    Sprinkle sliced green onions and toasted sesame seeds on top. Not only does it make the dish look gorgeous, but it also adds freshness and a delightful crunch. Those garnishes will make this dish pop, both visually and in flavor!

    Tips for Success

    • Always taste as you go! A pinch more salt or spice can elevate your dish.
    • Prep your ingredients ahead of time to save stress when cooking.
    • Feel free to customize with your favorite low-carb veggies like bell peppers or zucchini.
    • Don’t forget to let the beef brown properly for that rich flavor.
    • Keep leftovers in an airtight container for easy lunches!

    Equipment Needed

    • Large Skillet: A non-stick skillet works wonders, but any large frying pan will do.
    • Spatula: Use a wooden or silicone spatula for easy stirring without scratching your pan.
    • Knife and Cutting Board: Essential for dicing onion and garlic with ease.
    • Measuring Spoons: Handy for accurate ingredient measuring, especially for seasonings.

    Variations of Low-Carb Mongolian Ground Beef and Cabbage

    • Protein Swap: Substitute ground beef with ground turkey or chicken for a leaner version.
    • Vegetarian Option: Replace the meat with crumbled tempeh or tofu for a hearty plant-based dish.
    • Add More Veggies: Toss in bell peppers, mushrooms, or broccoli to boost nutritional content and flavor.
    • Spicy Kick: For spice lovers, increase the red pepper flakes or add a splash of sriracha when mixing in the sauce.
    • Extra Crunch: Mix in some chopped nuts like cashews or almonds for added texture and flavor.

    Serving Suggestions for Low-Carb Mongolian Ground Beef and Cabbage

    • Pair this dish with a refreshing cucumber salad for a cool contrast.
    • Serve it alongside cauliflower rice for a hearty, low-carb side.
    • A light Asian-inspired dressing can amplify the flavors.
    • Enjoy with iced green tea to cleanse the palate.
    • For presentation, use a vibrant plate and arrange the dish with garnishes for a beautiful display.

    FAQs about Low-Carb Mongolian Ground Beef and Cabbage

    Can I make this dish ahead of time? Absolutely! You can prepare Low-Carb Mongolian Ground Beef and Cabbage a day in advance. Just store it in an airtight container in the refrigerator. When you’re ready to eat, reheat it in the skillet or microwave.

    Is this recipe suitable for meal prep? Yes! This dish is perfect for meal prep. It’s easy to portion out and keeps well in the fridge. Just reheat during the week for a quick, nutritious lunch or dinner.

    Can I freeze leftovers? You can! Place cooled leftovers in a freezer-safe container. They’ll stay good for about three months. Just thaw overnight in the fridge before reheating.

    What can I serve with Low-Carb Mongolian Ground Beef and Cabbage? This dish pairs beautifully with cauliflower rice or a fresh salad. You can also enjoy it as is for a simple low-carb meal that still satisfies your cravings!

    How can I adjust the spice level? If you want a milder version, leave out the red pepper flakes altogether. For more heat, feel free to double the amount or add your favorite hot sauce during cooking.

    Final Thoughts

    This Low-Carb Mongolian Ground Beef and Cabbage recipe truly embodies what home cooking is all about—convenience, taste, and a whole lot of love. It’s wonderful to watch my family enjoy a nutritious meal that comes together in a flash, reminding me that delicious food doesn’t have to be complicated. Whether you’re serving it on a busy weeknight or impressing guests, this dish hits the mark every time. I hope this recipe will find a special place in your kitchen, creating joyful moments around the table for you and your loved ones!


    Print

    clock clock iconcutlery cutlery iconflag flag iconfolder folder iconinstagram instagram iconpinterest pinterest iconfacebook facebook iconprint print iconsquares squares iconheart heart iconheart solid heart solid icon

    Description

    A delicious and easy low-carb dish featuring ground beef and cabbage, perfect for a quick weeknight meal.


    • 1/2 small onion, finely diced
    • 3 cups green cabbage, shredded
    • 3 cloves garlic, minced
    • 2 tablespoons soy sauce (or coconut aminos for low sodium)
    • 1 tablespoon sesame oil
    • 1 tablespoon rice vinegar
    • 1 teaspoon ground ginger
    • 1/4 teaspoon red pepper flakes (optional)
    • Salt and black pepper to taste
    • 2 green onions, sliced (for garnish)
    • 1 tablespoon toasted sesame seeds (optional, for garnish)

    1. In a large skillet over medium heat, brown the ground beef until fully cooked. Drain any excess fat.
    2. Add the diced onion and garlic to the beef. Cook for 2-3 minutes until fragrant and soft.
    3. Stir in the shredded cabbage and sauté until slightly wilted, about 5 minutes.
    4. Add soy sauce, sesame oil, rice vinegar, ground ginger, red pepper flakes, salt, and pepper. Mix well and cook another 2-3 minutes until cabbage is tender.
    5. Garnish with sliced green onions and sesame seeds before serving.

    Notes

    • For a lower sodium option, use coconut aminos instead of soy sauce.
    • The red pepper flakes can be adjusted based on heat preference.
    • This dish is versatile; feel free to add other low-carb vegetables.
    • Prep Time: 10 minutes
    • Cook Time: 15 minutes
    • Category: Main Dish
    • Method: Skillet
    • Cuisine: Asian

    Nutrition

    • Serving Size: 1 serving
    • Calories: 300
    • Sugar: 3g
    • Sodium: 600mg
    • Fat: 20g
    • Saturated Fat: 6g
    • Unsaturated Fat: 14g
    • Trans Fat: 0g
    • Carbohydrates: 10g
    • Fiber: 4g
    • Protein: 22g
    • Cholesterol: 70mg

    Sharing is caring!

  • Banana Pudding Cheesecake Cones

    Banana Pudding Cheesecake Cones


    Introduction to Banana Pudding Cheesecake Cones

    As a busy mom, I crave simple yet delightful desserts that bring smiles to my family’s faces. That’s why I absolutely adore these Banana Pudding Cheesecake Cones. They’re quick to whip up, incredibly satisfying, and perfect for any occasion—be it a weeknight treat or a family gathering.

    The creamy cheesecake blends beautifully with the nostalgic taste of banana pudding, all nestled in a crunchy graham cracker cone. It’s not just a dessert; it’s a sweet escape from the hustle and bustle of daily life. Trust me—everyone will be reaching for seconds!

    Why You’ll Love This Banana Pudding Cheesecake Cones

    What’s not to love about a dessert that comes together in just 15 minutes? These Banana Pudding Cheesecake Cones are not only fast but also effortless to make. The creamy filling embraces the sweet bananas, all tucked inside a crispy cone. It’s the perfect harmony of flavors and textures that satisfies even the pickiest eaters. Plus, kids can help decorate, turning dessert time into family fun!

    Ingredients for Banana Pudding Cheesecake Cones

    Gathering the right ingredients for your Banana Pudding Cheesecake Cones is half the fun! Here’s what you’ll need:

    • Graham cracker cones: These provide a crunchy, sweet base for your dessert. You can find them at most grocery stores. If you can’t find cones, consider using small cups instead.
    • Cream cheese: This is the star of your cheesecake filling. Use softened cream cheese to make blending easier. Philadelphia is my go-to brand!
    • Powdered sugar: This adds sweetness and helps create a smooth texture in your cheesecake filling. Sift it first to avoid lumps!
    • Vanilla extract: A splash of vanilla enhances the flavor of your cheesecake. Opt for pure vanilla extract for the best taste; imitation can work, but it lacks depth.
    • Bananas: Choose ripe bananas for that sweet, delightful flavor. They’re a key component, adding freshness to the creamy filling.
    • Whipped cream: This adds volume and lightness to your filling. You can use store-bought for convenience or whip your own from heavy cream for a touch of homemade charm.

    For delicious variations, consider drizzling chocolate sauce or caramel on top for extra flavor! You can find the exact ingredient quantities at the bottom of the article, all ready for printing.

    How to Make Banana Pudding Cheesecake Cones

    Now, let’s dive into the fun part—making these Banana Pudding Cheesecake Cones! Follow these simple steps, and you’ll have a dessert that’s sure to impress.

    Step 1: Prepare Your Ingredients

    First things first, let’s get organized! Gather all your ingredients and tools on the countertop. This simple step ensures we won’t be hunting for things while trying to whip up our sweet treat. It makes the process smoother and more enjoyable.

    Step 2: Make the Cheesecake Filling

    In a mixing bowl, combine the softened cream cheese and sifted powdered sugar. Use an electric mixer or a sturdy whisk. Beat until the mixture is creamy and smooth. Then, add that splash of vanilla extract. Mix again until everything is well combined. You want a fluffy filling that melts in your mouth!

    Step 3: Fold in the Whipped Cream

    Next, grab that fluffy whipped cream. This step is crucial for achieving the light, airy texture of your filling. Gently fold the whipped cream into the cream cheese mixture using a rubber spatula. Be gentle! You want to maintain that fluffiness you just created. It’s like mixing clouds into your dessert!

    Step 4: Fill the Cones

    Now comes the fun part—filling the cones! You can use a spoon or a piping bag to fill each graham cracker cone with your delightful cheesecake mixture. Don’t be shy; fill them generously! The idea is to create a beautiful, towering delight that’s hard to resist.

    Step 5: Add Toppings

    It’s time for the final touches! Top each filled cone with sliced bananas and an extra dollop of whipped cream. If you’re feeling adventurous, drizzle some caramel or chocolate sauce on top for added sweetness. The visual appeal will make everyone’s mouths water!

    Step 6: Serve or Store

    For the best crunch, serve your cones immediately. If you need to prepare them ahead of time, store them upright in a glass in the fridge. They keep well for a couple of hours, but trust me, they won’t last long once the family sees them!

    Tips for Success

    • Make sure your cream cheese is fully softened for a smooth blend.
    • Use ripe bananas for the sweetest flavor in your cones.
    • Don’t overmix the filling after adding whipped cream; keep it light and fluffy!
    • Store filled cones upright to maintain their crunch until serving.
    • Try adding nutmeg or cinnamon for an extra flavor twist!

    Equipment Needed

    • Mixing bowl: A large mixing bowl for combining ingredients. A sturdy dish will do the trick.
    • Electric mixer or whisk: An electric mixer speeds up the process, but a good whisk works just as well.
    • Rubber spatula: Perfect for folding in the whipped cream without deflating it.
    • Piping bag or spoon: For filling your cones; a piping bag adds a professional touch!
    • Glass for storage: A tall glass keeps cones upright in the fridge, ensuring they maintain their crunch.

    Variations of Banana Pudding Cheesecake Cones

    • Peanut Butter Swirl: Stir in some creamy peanut butter into the cheesecake filling for a delicious twist on flavors.
    • Add Nuts: Sprinkle chopped pecans or almonds on top of the bananas for a crunchy texture that complements the dessert beautifully.
    • Use Different Fruits: Swap bananas for strawberries, blueberries, or even mango slices for a fruity explosion of flavors.
    • Dairy-Free Option: Replace cream cheese with a dairy-free alternative and use coconut whipped cream for a lighter option.
    • Chocolate Lovers: Mix in cocoa powder with the cream cheese for a chocolatey cheesecake filling, and top with shaved chocolate.

    Serving Suggestions for Banana Pudding Cheesecake Cones

    • Pair with a tall glass of cold milk or a creamy vanilla shake for a timeless combo.
    • Serve alongside a fresh fruit salad for a refreshing contrast to the sweet cones.
    • Present on a colorful platter, garnished with mint leaves for a pop of color.
    • Add a sprinkle of graham cracker crumbs on top for extra texture and flair!

    FAQs about Banana Pudding Cheesecake Cones

    Can I make Banana Pudding Cheesecake Cones ahead of time?

    You can prepare the filling in advance and store it in the fridge. However, I recommend filling the cones just before serving. This keeps the cones crispy and prevents them from getting soggy.

    What can I use instead of graham cracker cones?

    If you can’t find graham cracker cones, small plastic cups or waffle cones work beautifully. The creamy filling will just crave a delicious home, no matter the vessel!

    Can I use other fruits in this recipe?

    Absolutely! While bananas are the star here, try strawberries, raspberries, or peaches. Just slice them up and let your creativity shine through with flavor combinations!

    How long do Banana Pudding Cheesecake Cones last in the fridge?

    Filled cones are best enjoyed fresh, but you can keep them in the fridge for about 2-3 hours. Make sure to store them upright to maintain their delightful crunch.

    Is this dessert suitable for special diets?

    This recipe can easily accommodate dietary needs. For a gluten-free version, use gluten-free cones and swap the cream cheese with a dairy-free alternative. Your Banana Pudding Cheesecake Cones will still be a hit!

    Final Thoughts

    Creating Banana Pudding Cheesecake Cones is more than just making dessert; it’s crafting a joyful experience for my family. Each cone combines creamy goodness, sweet bananas, and a crunchy texture that dances on your palate.

    The smiles on my loved ones’ faces when they take their first bite are priceless.

    Whether it’s a sunny afternoon or a bustling weeknight, these cones brighten the day. With minimal effort and maximum flavor, they prove that sweet moments can fit into our busy lives. So pull out those cones and let the good times roll!


    Print

    clock clock iconcutlery cutlery iconflag flag iconfolder folder iconinstagram instagram iconpinterest pinterest iconfacebook facebook iconprint print iconsquares squares iconheart heart iconheart solid heart solid icon

    Description

    As a busy mom, I crave simple yet delightful desserts that bring smiles to my family’s faces. That’s why I absolutely adore these Banana Pudding Cheesecake Cones. They’re quick to whip up, incredibly satisfying, and perfect for any occasion—be it a weeknight treat or a family gathering.


    • 6 graham cracker cones
    • 8 oz cream cheese (softened)
    • 1 cup powdered sugar (sifted)
    • 1 tsp vanilla extract
    • 2 ripe bananas (sliced)
    • 1 cup whipped cream (homemade or store-bought)

    1. Prepare all ingredients by gathering them on your countertop for easy access.
    2. In a mixing bowl, beat together softened cream cheese and sifted powdered sugar until smooth. Add vanilla extract and mix until combined.
    3. Gently fold in the whipped cream until the mixture is light and fluffy.
    4. Spoon or pipe the cheesecake filling into each graham cracker cone generously.
    5. Top with sliced bananas and add an extra dollop of whipped cream.
    6. Serve immediately for the best crunch or store upright in a glass in the fridge until ready to enjoy.

    Notes

    • For added flavor, consider drizzling some caramel or chocolate sauce on top.
    • Make sure the cream cheese is softened for easier mixing.
    • Bananas should be ripe for the best flavor.
    • Prep Time: 15 minutes
    • Cook Time: 0 minutes
    • Category: Dessert
    • Method: No-bake
    • Cuisine: American

    Nutrition

    • Serving Size: 1 cone
    • Calories: 230
    • Sugar: 14g
    • Sodium: 150mg
    • Fat: 10g
    • Saturated Fat: 5g
    • Unsaturated Fat: 5g
    • Trans Fat: 0g
    • Carbohydrates: 30g
    • Fiber: 1g
    • Protein: 3g
    • Cholesterol: 30mg

    Sharing is caring!

  • Mexican Street Corn Pasta Salad

    Mexican Street Corn Pasta Salad


    Introduction to Mexican Street Corn Pasta Salad

    As a passionate home cook, I know how challenging it can be to whip up a satisfying meal after a long day. That’s where my Mexican Street Corn Pasta Salad comes in! This delightful dish is a burst of summer flavors, perfect for casual barbecues or family gatherings. It brings the familiar joy of street corn with a refreshing twist. In just about 35 minutes, you can impress your loved ones with this vibrant, easy-to-make salad. Trust me, this recipe is a quick solution that turns your mealtime into a joyful event!

    Why You’ll Love This Mexican Street Corn Pasta Salad

    This Mexican Street Corn Pasta Salad is easy to make and packs a punch of flavor! It’s the perfect dish for busy moms like us who want something quick yet satisfying. With simple ingredients that dance together, it’s a crowd-pleaser that appeals to both kids and adults. Plus, it’s so versatile—you can serve it as a side or a light main dish. It truly brightens up any table!

    Ingredients for Mexican Street Corn Pasta Salad

    Gathering the right ingredients can make all the difference in your cooking experience! Here’s what you’ll need for this vibrant Mexican Street Corn Pasta Salad:

    • Fusilli pasta: This curly pasta holds onto the dressing beautifully, adding great texture.
    • Fresh corn: Use sweet, tender corn for the best flavor; grilled corn brings a smoky essence that’s irresistible.
    • Mayonnaise: It provides creaminess. If you prefer a lighter option, swap it for Greek yogurt.
    • Lime juice: Freshly squeezed is best to brighten the dish and offer a zesty kick.
    • Chili powder: This adds warmth and depth—adjust the amount for your spice level!
    • Smoked paprika: It imparts a subtle smokiness. Feel free to use regular paprika if you prefer.
    • Salt and black pepper: Essential seasonings that enhance all the flavors.
    • Cotija cheese: This crumbly cheese gives that authentic street corn taste—substitutes like feta work too!
    • Fresh cilantro: Adds a pop of color and freshness. If you’re not a fan, you can skip it.

    For exact quantities, check the bottom of this article where you can find the full recipe available for printing!

    How to Make Mexican Street Corn Pasta Salad

    Now, let’s get our hands into making this delightful Mexican Street Corn Pasta Salad! Each step is simple and quick, allowing you to enjoy the cooking process, even on a busy day. Here’s how you can whip it up in no time.

    Cook the Pasta

    Start by bringing a pot of salted water to a boil. Toss in 8 ounces of fusilli pasta and cook according to the package instructions. Usually, it’s around 8-10 minutes. You want it al dente, so keep an eye on it! Once cooked, drain the pasta and set it aside to cool.

    Grill the Corn

    Time to fire up the grill! Preheat it to medium-high heat and throw on 4 husked ears of fresh corn. Grill them for about 10 minutes, turning occasionally, until they have those lovely char marks. Let them cool a bit, then carefully slice the kernels off the cob, adding them to a large mixing bowl. The smoky flavor really elevates your pasta salad!

    Prepare the Dressing

    In a separate bowl, whisk together 1/4 cup of mayonnaise, 2 tablespoons of freshly squeezed lime juice, 1/2 teaspoon of chili powder, and a 1/4 teaspoon each of smoked paprika, salt, and black pepper. This creamy dressing ties all the flavors together, bringing a delightful zesty touch to your dish!

    Combine Ingredients

    Now, let’s bring everything together! Pour the dressing over the corn kernels and mix well. Next, add the cooled fusilli pasta, tossing everything to ensure it’s evenly coated. Sprinkle in 1/4 cup of crumbled cotija cheese and 2 tablespoons of chopped fresh cilantro. Gently fold these in, preserving that lovely texture!

    Chill Before Serving

    For the flavors to meld perfectly, let your salad chill in the refrigerator for at least 30 minutes. This step is key to elevating your Mexican Street Corn Pasta Salad, allowing that refreshing taste to shine through. Before serving, give it a good stir and sprinkle some extra cotija and cilantro on top if you like!

    Tips for Success

    • Use a timer when cooking pasta to avoid overcooking; al dente is best!
    • Make your salad a day ahead for richer flavors—just give it a good stir before serving.
    • For an added crunch, toss in some diced bell peppers or red onions.
    • Adjust spices according to your family’s taste; you can always add more!
    • Don’t skip the chilling step—it’s vital for flavor integration.

    Equipment Needed

    • Large pot: For boiling pasta; you can use a Dutch oven if available.
    • Grill or grill pan: Essential for charring the corn; a broiler can work in a pinch.
    • Mixing bowls: One large to combine ingredients, and a smaller one for the dressing.
    • Knife and cutting board: For slicing corn and chopping cilantro.
    • Whisk: Great for mixing the dressing smoothly; a fork works in a pinch!

    Variations

    • For a touch of heat, add diced jalapeños or a splash of hot sauce to the dressing.
    • Try adding black beans or chickpeas for a protein boost, making it a heartier meal.
    • If you’re gluten-free, substitute fusilli pasta with gluten-free pasta made from brown rice or lentils.
    • For a dairy-free version, skip the cotija cheese or use a dairy-free alternative like cashew cheese.
    • Experiment with different herbs, such as parsley or green onions, to switch up the flavor profile!

    Serving Suggestions

    • Pair this Mexican Street Corn Pasta Salad with grilled chicken or shrimp for a complete meal.
    • Serve it alongside fresh guacamole and tortilla chips for a delightful appetizer spread.
    • A chilled margarita or iced tea complements the flavors perfectly.
    • Consider a colorful platter presentation to enhance visual appeal at gatherings!

    FAQs about Mexican Street Corn Pasta Salad

    Can I make this salad ahead of time?

    Absolutely! This Mexican Street Corn Pasta Salad is perfect for making a day in advance. Just ensure to give it a good stir before serving, as the flavors deepen wonderfully overnight!

    What can I use if I can’t find cotija cheese?

    If cotija cheese isn’t available, feta cheese can be a great substitute. It offers a similar crumbly texture and a tangy flavor that works beautifully in this salad!

    Can I add more veggies to this pasta salad?

    Of course! Feel free to toss in diced bell peppers, red onions, or even cherry tomatoes for added color and crunch. This salad is all about customization!

    How long will the pasta salad last in the fridge?

    Stored in an airtight container, your Mexican Street Corn Pasta Salad will stay fresh for about 3-4 days. Just make sure to keep it chilled!

    Is this pasta salad suitable for a gluten-free diet?

    For a gluten-free version, simply substitute the fusilli pasta with gluten-free pasta made from rice or lentils. It keeps the dish delicious while catering to your dietary needs!

    Final Thoughts

    Creating this Mexican Street Corn Pasta Salad is more than just cooking; it’s an act of love, a moment to gather friends and family around the table. The vibrant colors and rich flavors not only please the palate but also lift your spirits. I hope this recipe becomes a staple in your home, bringing joy to busy days and laughter-filled gatherings. Whether you’re serving it warm in the sun or chilling in the fridge, it’s a dish that celebrates the joy of cooking and the heartwarming connections we cherish. Enjoy every flavorful bite!


    Print

    clock clock iconcutlery cutlery iconflag flag iconfolder folder iconinstagram instagram iconpinterest pinterest iconfacebook facebook iconprint print iconsquares squares iconheart heart iconheart solid heart solid icon

    Description

    As a passionate home cook, I know how challenging it can be to whip up a satisfying meal after a long day. That’s where my Mexican Street Corn Pasta Salad comes in! This delightful dish is a burst of summer flavors, perfect for casual barbecues or family gatherings.


    • 8 ounces fusilli pasta
    • 4 ears fresh corn, husked
    • 1/4 cup mayonnaise
    • 2 tablespoons freshly squeezed lime juice
    • 1/2 teaspoon chili powder
    • 1/4 teaspoon smoked paprika
    • 1/4 teaspoon salt
    • 1/4 teaspoon black pepper
    • 1/4 cup crumbled cotija cheese
    • 2 tablespoons chopped fresh cilantro

    1. Cook the fusilli pasta according to package instructions, drain, and set aside.
    2. Preheat grill to medium-high heat.
    3. Grill the corn for about 10 minutes, turning occasionally until nicely charred. Remove and let it cool.
    4. Cut the kernels off the cob and place them in a large mixing bowl.
    5. Whisk together mayonnaise, lime juice, chili powder, smoked paprika, salt, and black pepper in a small bowl.
    6. Pour the dressing over the corn kernels and mix well.
    7. Add the cooked pasta to the corn mixture and toss until evenly coated.
    8. Gently fold in cotija cheese and chopped cilantro.
    9. Refrigerate the pasta salad for at least 30 minutes to allow flavors to meld.
    10. Before serving, stir the pasta salad and garnish with additional cotija cheese and cilantro if desired.

    Notes

    • For a spicier version, add diced jalapeños to the salad.
    • This salad can be made a day ahead, just be sure to give it a good stir before serving.
    • Feel free to use other types of cheese like feta if cotija is not available.
    • Prep Time: 15 minutes
    • Cook Time: 20 minutes
    • Category: Salad
    • Method: Grilling and mixing
    • Cuisine: Mexican

    Nutrition

    • Serving Size: 1 cup
    • Calories: 320
    • Sugar: 3g
    • Sodium: 500mg
    • Fat: 15g
    • Saturated Fat: 3g
    • Unsaturated Fat: 10g
    • Trans Fat: 0g
    • Carbohydrates: 40g
    • Fiber: 4g
    • Protein: 8g
    • Cholesterol: 15mg

    Sharing is caring!

  • Chocolate Peanut Butter Cake Roulade

    Chocolate Peanut Butter Cake Roulade


    Introduction to Chocolate Peanut Butter Cake Roulade

    As a passionate home cook, I find joy in creating desserts that make any day feel special. If you’re a busy mom or professional looking for a sweet escape, the Chocolate Peanut Butter Cake Roulade is your answer! This delightful dessert marries rich chocolate cake with creamy peanut butter filling, topped with a luscious ganache. It’s a real crowd-pleaser that impresses loved ones without consuming your entire day. Plus, it’s an adaptable treat that can fit any occasion, from casual family dinners to festive gatherings. Ready to create a masterpiece?

    Why You’ll Love This Chocolate Peanut Butter Cake Roulade

    This Chocolate Peanut Butter Cake Roulade combines simplicity with indulgence. In just a little over an hour, you can whip up an impressive dessert that looks as good as it tastes. The rich chocolate pairs beautifully with the creamy peanut butter, creating a flavor harmony that’s hard to resist. Plus, it’s perfect for any gathering, making it a stress-free choice for busy days when you still want to wow your guests!

    Ingredients for Chocolate Peanut Butter Cake Roulade

    To create this delicious Chocolate Peanut Butter Cake Roulade, you’ll need a handful of staple ingredients, many of which you likely already have in your pantry. Below is a breakdown of each ingredient’s role in this delightful treat:

    • Eggs: They provide structure and moisture, making the cake fluffier.
    • Granulated sugar: Sweetens the cake and helps it caramelize during baking.
    • All-purpose flour: The base of the cake, providing stability and texture.
    • Unsweetened cocoa powder: Adds rich chocolate flavor without extra sweetness.
    • Baking powder: Helps the cake rise, creating that light and airy texture.
    • Salt: Balances the sweetness and enhances flavor.
    • Vanilla extract: Adds a warm, aromatic quality that complements the chocolate.
    • Whole milk: Contributes moisture, making the cake tender and delicious.
    • Powdered sugar: Used for dusting and creating a smooth filling, giving it a sweet finish.
    • Creamy peanut butter: The star of the filling, lending its signature nutty goodness.
    • Unsalted butter: Adds creaminess and richness to the peanut butter filling.
    • Heavy cream: Helps to create a smooth texture in both the filling and ganache.
    • Semi-sweet chocolate: The heavenly topping that glazes our roulade and wraps it in chocolate goodness.

    While each ingredient plays a vital role, feel free to switch things up! For instance, you can use almond milk instead of whole milk for a dairy-free option or substitute the creamy peanut butter with crunchy for added texture. The exact quantities for each ingredient can be found at the bottom of this article, ready for printing!

    How to Make Chocolate Peanut Butter Cake Roulade

    Making this Chocolate Peanut Butter Cake Roulade is a fun adventure that you can conquer in a few easy steps. I promise you’ll be amazed at how simple and satisfying it is to whip up this stunning dessert. Here’s how to create it:

    Preheat and Prepare the Pan

    First things first, preheat your oven to 350°F (175°C). This step ensures that your cake rises perfectly.

    Next, take a jelly roll pan and line it with parchment paper. Grease the paper lightly to prevent sticking. It’s like creating a cozy bed for your cake, ensuring a smooth release once it’s baked. Trust me, this preparation will pay off later!

    Make the Cake Batter

    In a mixing bowl, beat your eggs and granulated sugar together until fluffy and pale. You’ll notice this mixture getting a little like a soft cloud, perfect for a light cake.

    Now, sift in the all-purpose flour, unsweetened cocoa powder, baking powder, and salt. Gently fold these dry ingredients into the egg mixture. Be gentle here, as overmixing can lead to a dense cake!

    Add in the vanilla extract and whole milk, mixing until just combined. The batter should be smooth and glossy, almost like a rich chocolate potion. You’ll want to sneak a taste at this stage, but remember—plenty more deliciousness awaits!

    Bake the Cake

    Pour your luscious batter into the prepared pan, spreading it out evenly.

    Bake for 10 to 12 minutes. Keep an eye on it! The cake should be set but still soft, like a gentle hug.

    Roll the Cake

    As soon as it’s out of the oven, dust a kitchen towel generously with powdered sugar. This little trick helps absorb any stickiness later.

    Turn the warm cake onto the towel and gently roll it up with the towel still inside. The warmth and softness of the cake make it easier to roll without cracking. It’s like tucking your cake into a cozy blanket!

    Let it cool completely in its rolled position while you prepare the filling.

    Prepare the Peanut Butter Filling

    In a separate bowl, combine the creamy peanut butter, unsalted butter, powdered sugar, and heavy cream. Beat these ingredients until smooth and fluffy—think of it as making a dream-like filling that’s just bursting with peanut butter flavor.

    The consistency should be creamy and spreadable, perfect for filling your roulade!

    Assemble the Roulade

    Once the cake has cooled, gently unroll it. Spread the peanut butter filling evenly over the cake, leaving a little border around the edges. This is where the magic happens!

    Roll the cake back up into a log shape, but this time without the towel. Wrapping it up in plastic wrap helps keep it snug and tight. Pop it into the fridge for at least 30 minutes to set.

    Create the Chocolate Ganache

    While your roulade is chilling, it’s time to make that decadent chocolate ganache.

    Melt the semi-sweet chocolate in a heatproof bowl with a splash of heavy cream. Stir until smooth—just like the chocolate dreams you’ve had on tough days!

    Let the ganache cool slightly before pouring it over the chilled roulade. This layer of chocolate will elevate your dessert to legendary status!

    Finish and Chill

    Once the ganache is ready, pour it over the rolled cake. Make sure it’s evenly coated—all that chocolate goodness should hug every inch of your roulade.

    Place the roulade back in the refrigerator to allow the ganache to set, ensuring that each slice you serve looks stunning. After about 30 minutes, you’ll be all set to slice and serve your masterpiece!

    Tips for Success

    • Always preheat your oven to ensure even baking.
    • Dust your kitchen towel generously with powdered sugar to prevent sticking.
    • Roll the cake gently to avoid cracking; practice makes perfect!
    • Use room-temperature ingredients for a smoother batter.
    • Allow the ganache to cool slightly before pouring for a smoother finish.
    • Feel free to experiment with flavors; add espresso powder for an extra kick.

    Equipment Needed

    • Jelly roll pan: Alternatively, you can use a rimmed baking sheet if you don’t have one.
    • Parchment paper: Wax paper can work, but parchment is best for non-stick properties.
    • Mixing bowls: A large bowl for batter; smaller ones for filling.
    • Electric mixer: A whisk can do in a pinch, but it’ll take longer.
    • Kitchen towel: A clean dishcloth will also suffice for rolling.

    Variations on Chocolate Peanut Butter Cake Roulade

    • Nutty Delight: Substitute half of the creamy peanut butter with almond or cashew butter for a different nutty flavor.
    • Healthier Option: Use whole wheat flour instead of all-purpose for a nutritious twist while maintaining texture.
    • Dairy-Free Choice: Swap the heavy cream and butter with coconut cream and vegan butter for a dairy-free version.
    • Fruit Fusion: Add a layer of raspberry or strawberry jam under the peanut butter filling for a fruity zing.
    • Decadent Chocolate: Use dark chocolate instead of semi-sweet for a richer ganache that chocolate lovers will adore.
    • Spicy Kick: Mix in a pinch of cayenne pepper or a splash of espresso to give the chocolate batter a warm kick.
    • Gluten-Free: Substitute the all-purpose flour with a 1:1 gluten-free baking blend to cater to gluten sensitivities.

    Serving Suggestions

    • Pair your Chocolate Peanut Butter Cake Roulade with a dollop of whipped cream for a light touch.
    • Serve with a scoop of vanilla ice cream for an indulgent dessert experience.
    • A fresh fruit salad on the side adds a refreshing contrast to the rich cake.
    • For drinks, a steaming cup of coffee or a glass of cold milk elevates the treat.
    • Garnish with chocolate shavings or chopped nuts for a beautiful presentation.

    FAQs about Chocolate Peanut Butter Cake Roulade

    Can I make this Chocolate Peanut Butter Cake Roulade in advance?

    Absolutely! This roulade can be made a day ahead. Once assembled, just wrap it tightly in plastic wrap and store it in the refrigerator. This resting time allows the flavors to meld beautifully.

    What can I substitute for peanut butter?

    If you’re looking for an alternative, consider using almond butter or sunflower seed butter for a nut-free version. They offer a similar creamy texture with a different flavor twist.

    How do I prevent the roulade from cracking?

    To avoid cracks, be gentle when rolling the cake. Using a kitchen towel dusted with powdered sugar can help; it allows the cake to slide without sticking. Also, ensure the cake is warm but not too hot when rolling!

    Can I freeze the Chocolate Peanut Butter Cake Roulade?

    Yes, you can! Just slice it into pieces, wrap them in plastic wrap, and then place in an airtight container. It can be stored in the freezer for up to three months. Thaw in the fridge before serving.

    What should I serve with the roulade?

    This delightful dessert pairs well with a scoop of vanilla ice cream, fresh fruit, or a dollop of whipped cream. A hot cup of coffee or cold glass of milk makes it even more enjoyable!

    Final Thoughts

    The Chocolate Peanut Butter Cake Roulade is more than just a dessert; it’s an experience that brings joy to every gathering. Each slice offers a delightful blend of rich chocolate and creamy peanut butter, creating a harmonious flavor that satisfies sweet cravings.

    Preparing this roulade is like a culinary adventure, allowing you to connect with your loved ones over something truly special. Whether it’s a casual family dinner or a festive occasion, this dessert is sure to leave a lasting impression. So go ahead, indulge in the joy of baking and savor every bite of this delectable treat!


    Print

    clock clock iconcutlery cutlery iconflag flag iconfolder folder iconinstagram instagram iconpinterest pinterest iconfacebook facebook iconprint print iconsquares squares iconheart heart iconheart solid heart solid icon

    Description

    As a passionate home cook, I find joy in creating desserts that make any day feel special. If you’re a busy mom or professional looking for a sweet escape, the Chocolate Peanut Butter Cake Roulade is your answer! This delightful dessert marries rich chocolate cake with creamy peanut butter filling, topped with a luscious ganache.


    • 4 Eggs
    • 1 cup Granulated sugar
    • 1 cup All-purpose flour
    • 1/3 cup Unsweetened cocoa powder
    • 1 tsp Baking powder
    • 1/4 tsp Salt
    • 1 tsp Vanilla extract
    • 1/2 cup Whole milk
    • Powdered sugar for dusting
    • 1 cup Creamy peanut butter
    • 1/2 cup Unsalted butter
    • 2 cups Powdered sugar for filling
    • 1 cup Heavy cream
    • 6 oz Semi-sweet chocolate for ganache

    1. Preheat your oven to 350°F (175°C) and line a jelly roll pan with parchment paper, lightly greasing it.
    2. In a mixing bowl, beat eggs and sugar until light and fluffy. Sift in flour, cocoa powder, baking powder, and salt, then fold gently. Add vanilla and milk, mixing until combined.
    3. Pour the batter into the prepared pan, spreading it evenly. Bake for 10-12 minutes until set but still soft.
    4. Dust a kitchen towel with powdered sugar, turn the warm cake onto it, and roll gently with the towel. Let it cool completely.
    5. In a bowl, beat peanut butter, butter, powdered sugar, and heavy cream until smooth.
    6. Unroll the cooled cake and spread the peanut butter filling evenly, leaving a border.
    7. Roll the cake back into a log shape without the towel and wrap in plastic wrap. Refrigerate for at least 30 minutes.
    8. Melt semi-sweet chocolate with a splash of heavy cream until smooth, then let cool slightly before pouring over the roulade.
    9. Drizzle the ganache over the roulade and refrigerate until set. Slice with a sharp knife, cleaning it between cuts.
    10. Plate and enjoy your Chocolate Peanut Butter Cake Roulade with coffee or milk!

    Notes

    • Be cautious while rolling the cake to prevent cracking.
    • For a richer flavor, you can add a bit of espresso powder to the batter.
    • The roulade can be made a day ahead and stored in the refrigerator.
    • Prep Time: 20 minutes
    • Cook Time: 12 minutes
    • Category: Dessert
    • Method: Baking
    • Cuisine: American

    Nutrition

    • Serving Size: 1 slice
    • Calories: 350
    • Sugar: 25g
    • Sodium: 200mg
    • Fat: 20g
    • Saturated Fat: 8g
    • Unsaturated Fat: 10g
    • Trans Fat: 0g
    • Carbohydrates: 40g
    • Fiber: 2g
    • Protein: 6g
    • Cholesterol: 60mg

    Sharing is caring!

  • Cranberry Apple Coleslaw

    Cranberry Apple Coleslaw


    Introduction to Cranberry Apple Coleslaw

    When life feels like a whirlwind, and dinner time creeps up unexpectedly, having a go-to recipe can be a lifesaver. That’s where my Cranberry Apple Coleslaw comes in! This refreshing twist on a classic salad brings together crunchy cabbage, sweet apples, and tangy cranberries, creating a beautiful dish that’s perfect for both family dinners and festive gatherings.

    It’s not just quick and easy, but it also impresses your loved ones with its vibrant colors and delightful flavor. Let’s dive into this delightful recipe that will make your table shine!

    Why You’ll Love This Cranberry Apple Coleslaw

    If you’re a busy mom or professional, this Cranberry Apple Coleslaw is your new best friend! It’s quick to whip up, taking just 15 minutes. The blend of crunchy textures and sweet-tart flavors elevates any meal. Plus, it’s the perfect side dish for barbecues, potlucks, or simple dinners. With its vibrant colors, this salad adds a cheerful touch to your table, making even hectic nights feel special.

    Ingredients for Cranberry Apple Coleslaw

    Let’s gather our vibrant ingredients for this delightful Cranberry Apple Coleslaw!

    Start with shredded green cabbage, which is the main base, adding crunch and freshness. You can also use a pre-packaged coleslaw mix, if you’re pressed for time.

    Next, we’ll introduce a large apple—Honeycrisp or Granny Smith work beautifully. Their sweetness complements the tanginess of dried cranberries, which add a burst of flavor and chewiness.

    If you want extra color and texture, toss in some shredded carrots. They brighten the mix! You can also add sliced almonds or pecans for some delightful crunch.

    For the dressing, you’ll need creamy mayonnaise, but feel free to swap it with Greek yogurt for a lighter option. Apple cider vinegar adds a tangy kick, while honey (or maple syrup, if you’re in the mood) brings a hint of sweetness.

    Don’t forget Dijon mustard for a touch of zest and flavor balance!

    Finally, season with a sprinkle of salt and pepper to round it all out.

    Remember, you can find the exact measurements at the bottom of the article, ready for printing!

    How to Make Cranberry Apple Coleslaw

    Now, let’s get into the fun part—making this fabulous Cranberry Apple Coleslaw! Follow these easy steps, and you’ll have a colorful salad ready to impress in no time.

    Step 1: Combine the Vegetables and Fruits

    Start by grabbing a large bowl and tossing in the shredded cabbage. This is the crunchy foundation of our coleslaw.

    Next, add in those delightful apple slices. The sweetness is just heavenly!

    Throw in the dried cranberries as well. They add a chewiness that pairs perfectly with the crisp veggies.

    If you’ve opted for shredded carrots and sliced almonds, now’s the time to include them. They’ll bring extra color and crunch to the mix.

    Gently fold everything together for a colorful medley—this step is where the magic begins!

    Step 2: Make the Dressing

    In a smaller bowl, let’s whip up the dressing. Begin with the creamy mayonnaise.

    Add the apple cider vinegar for that zing we all love. Then, drizzle in the honey or maple syrup, whichever tickles your taste buds.

    Don’t forget the Dijon mustard! It adds a delightful layer of flavor.

    Finish it off with some salt and pepper. Use a whisk and blend it all until it’s smooth and creamy.

    Trust me, this dressing is the heartbeat of our Cranberry Apple Coleslaw!

    Step 3: Mix Everything Together

    Now comes the fun part! Pour that luscious dressing over your coleslaw mixture.

    Gently toss everything together until every ingredient is beautifully coated.

    You’ll want to see the colors pop!

    This homely dance of flavors will create a vibrant dish everyone will love!

    Step 4: Chill and Serve

    After mixing, it’s time to give your coleslaw a little beauty rest in the fridge.

    Cover the bowl with plastic wrap or a lid, and pop it in the refrigerator for at least 30 minutes.

    This chilling time allows those flavors to meld together perfectly, creating a cohesive taste sensation!

    When you’re ready to serve, just grab a serving spoon and watch everyone rave about your amazing Cranberry Apple Coleslaw.

    Tips for Success

    • Chill this coleslaw for longer than 30 minutes if you have time; it only gets better!
    • Adjust sweetness by adding more honey or a splash of maple syrup to taste.
    • For a crunchier texture, add the nuts just before serving to prevent sogginess.
    • Feel free to use leftover coleslaw as a topping for sandwiches or wraps.
    • Experiment with different apples to find your favorite combination!

    Equipment Needed

    • Large mixing bowl: A standard bowl works fine, but a pasta bowl is fantastic for tossing.
    • Small mixing bowl: Any small bowl will do for the dressing.
    • Whisk: If you don’t have one, a fork can work in a pinch!
    • Cutting board and knife: Essential for slicing apples and shredding cabbage.
    • Serving spoon: For presenting your lovely coleslaw!

    Variations of Cranberry Apple Coleslaw

    • For a zesty kick, add a sprinkle of lemon juice or lime juice to the dressing!
    • Switch up the fruits by adding diced pears or mandarin oranges for added sweetness.
    • For a spicy twist, include a pinch of cayenne pepper in the dressing.
    • Go vegan by replacing mayonnaise with tahini or a plant-based yogurt.
    • Add chopped fresh herbs like cilantro or parsley for an extra layer of flavor!

    Serving Suggestions for Cranberry Apple Coleslaw

    • Pair this vibrant coleslaw with grilled chicken or fish for a delicious meal!
    • Serve it alongside crispy tacos for a refreshing contrast.
    • Drizzle a little balsamic glaze over the top for an elegant touch.
    • Enjoy with a chilled glass of white wine or sparkling water.
    • Garnish with extra cranberries or nuts for a beautiful presentation!

    FAQs about Cranberry Apple Coleslaw

    I’ve gathered some common questions about my delightful Cranberry Apple Coleslaw for you! Let’s dive in.

    Can I make Cranberry Apple Coleslaw ahead of time?

    Absolutely! In fact, making it ahead is a great idea. It allows all the flavors to meld together beautifully. Just remember to store it in the fridge covered. The longer it sits, the tastier it gets!

    What type of apples work best for this coleslaw?

    I recommend using Honeycrisp or Granny Smith apples. Both varieties offer a perfect balance of sweetness and tartness, making your coleslaw delightful.

    Can I use fresh cranberries instead of dried?

    While dried cranberries provide that lovely chewiness, you can certainly try using fresh cranberries. Just keep in mind that fresh cranberries are quite tart, so you may need to adjust the sweetness of the dressing!

    How long does Cranberry Apple Coleslaw last in the fridge?

    Your coleslaw will stay fresh in the fridge for about 3 to 5 days. Just give it a good stir before serving, as the ingredients may settle.

    Can I customize the nuts in the coleslaw?

    Yes! Feel free to experiment with different nuts like walnuts or sunflower seeds. Just remember to add them right before serving for that satisfying crunch!

    Final Thoughts on Cranberry Apple Coleslaw

    There’s something truly special about serving up a vibrant bowl of Cranberry Apple Coleslaw. The crispness of fresh cabbage, the sweetness of apples, and the tart smile of cranberries create a symphony of flavors.

    Whether it’s a regular weeknight dinner or a lively gathering with friends, I can always count on this salad to elevate the meal.

    It’s not just about the ingredients; it’s about those moments around the table. So, grab a bowl, mix it up, and watch as this delightful dish brings everyone together, sharing smiles and happy memories!


    Print

    clock clock iconcutlery cutlery iconflag flag iconfolder folder iconinstagram instagram iconpinterest pinterest iconfacebook facebook iconprint print iconsquares squares iconheart heart iconheart solid heart solid icon

    Description

    When life feels like a whirlwind, and dinner time creeps up unexpectedly, having a go-to recipe can be a lifesaver. That’s where my Cranberry Apple Coleslaw comes in! This refreshing twist on a classic salad brings together crunchy cabbage, sweet apples, and tangy cranberries, creating a beautiful dish that’s perfect for both family dinners and festive gatherings.


    • 4 cups shredded green cabbage (or coleslaw mix)
    • 1 large apple (such as Honeycrisp or Granny Smith), thinly sliced
    • 1/2 cup dried cranberries
    • 1/4 cup shredded carrots (optional)
    • 1/4 cup sliced almonds or pecans (optional, for crunch)
    • 1/2 cup mayonnaise
    • 2 tbsp apple cider vinegar
    • 1 tbsp honey (or maple syrup)
    • 1 tsp Dijon mustard
    • Salt and pepper, to taste

    1. In a large bowl, combine the shredded cabbage, apple slices, dried cranberries, carrots, and almonds (if using).
    2. In a small bowl, whisk together the mayonnaise, apple cider vinegar, honey, Dijon mustard, salt, and pepper until smooth.
    3. Pour the dressing over the coleslaw mixture and toss until everything is evenly coated.
    4. Cover and refrigerate for at least 30 minutes to allow the flavors to meld. Serve cold.

    Notes

    • This coleslaw can be made ahead of time for convenience.
    • Feel free to adjust the amount of honey or maple syrup based on your sweetness preference.
    • Adding other ingredients like raisins or herbs can enhance the flavor.
    • Prep Time: 15 minutes
    • Cook Time: 0 minutes
    • Category: Salad
    • Method: Mixing
    • Cuisine: American

    Nutrition

    • Serving Size: 1 cup
    • Calories: 180
    • Sugar: 10g
    • Sodium: 200mg
    • Fat: 12g
    • Saturated Fat: 2g
    • Unsaturated Fat: 8g
    • Trans Fat: 0g
    • Carbohydrates: 18g
    • Fiber: 3g
    • Protein: 2g
    • Cholesterol: 5mg

    Sharing is caring!

  • Mississippi Pot Roast

    Mississippi Pot Roast


    Introduction to Mississippi Pot Roast

    When life gets hectic, finding comfort in a home-cooked meal can feel like a warm hug for the soul. That’s where Mississippi Pot Roast comes in—a dish that brings joy and satisfaction to busy days. Imagine the rich aroma of a tender chuck roast slowly cooking away while you tackle your to-do list. This incredible recipe is a savior for tired moms and professionals alike, offering a delightful blend of flavors with minimal fuss. Whether you’re feeding a family or enjoying a quiet meal, Mississippi Pot Roast is your go-to dish for hearty comfort food.

    Why You’ll Love This Mississippi Pot Roast

    This Mississippi Pot Roast is not just easy to make; it’s also a total game-changer for busy days. With a hands-off cooking method, it practically prepares itself while you manage your schedule. The robust flavors from the pepperoncini and ranch dressing meld beautifully in the slow cooker, resulting in fall-apart tender meat. It’s comfort food that brings everyone together—perfect for family dinners or lazy weekends.

    Ingredients for Mississippi Pot Roast

    To create this mouthwatering Mississippi Pot Roast, you’ll need a handful of straightforward ingredients. Each one packs a punch of flavor that transforms the dish into a family favorite.

    • Chuck roast: This cut of meat is the star of the show. It has the perfect fat-to-meat ratio, making it tender and juicy after slow cooking.
    • Pepperoncini peppers: These tangy little gems add a delightful kick. They introduce a mild heat and a unique flavor profile that sets this dish apart.
    • Pepperoncini juice: Don’t forget the juice! It enhances the overall taste and keeps the roast moist as it cooks.
    • Unsalted butter: A few cubes of butter not only add richness but also help the flavors to meld wonderfully during cooking.
    • Au jus gravy mix: This seasoning gives the roast a deep, savory flavor that’s truly irresistible. It’s a shortcut that makes life easier!
    • Buttermilk ranch dressing mix: With its herby and creamy profile, this mix enhances the overall taste, making every bite mouthwatering.

    If you’re looking to experiment, consider adding more pepperoncini for extra heat or using a different cut of beef like brisket for a twist.

    For exact measurements and a printable version of the ingredients, scroll down to the bottom of this article. Let’s get cooking!

    How to Make Mississippi Pot Roast

    Now that we’ve gathered our ingredients, let’s dive into the steps to create this delicious Mississippi Pot Roast. Each step is straightforward, making it easy for even the busiest of us to whip up a fantastic meal.

    Step 1: Optional Searing

    To kick things off, I often recommend searing the chuck roast in a skillet. Heat 2–3 tablespoons of oil over medium-high heat. Once hot, gently place the roast in the pan. Sear each side for about 3–4 minutes until it turns a lovely brown. This step isn’t necessary, but it adds amazing depth and flavor to your pot roast!

    Step 2: Prepare the Slow Cooker

    With the roast beautifully seared, it’s time to transfer it to the slow cooker. Carefully place the chuck roast inside, ensuring it sits snugly at the bottom. The slow cooker will be the magic pot that turns this chunk of meat into tender bliss.

    Step 3: Add Ingredients

    Now, let’s give our roast some love! Top it with ½ jar of pepperoncini peppers and the juice. Scatter the cubed butter around, and sprinkle the au jus gravy mix and buttermilk ranch dressing mix over everything. Don’t be shy—it all combines into a flavorful sauce that infuses the meat with irresistible taste!

    Step 4: Cooking Time

    Cover the slow cooker and set it to LOW for 8–10 hours. This is the crucial part! Cooking low and slow allows the roast to become super tender and infused with flavors. Your kitchen will smell incredible, making the wait absolutely worth it.

    Step 5: Shred and Serve

    When the time’s up, carefully remove the roast from the cooker. Let it rest for about 10 minutes under some foil. This step helps the juices redistribute, making the meat even juicier! Use two forks to shred the roast gently and then return it to the pot. Stir to soak up those tasty juices and let it sit for an extra 15–20 minutes. Now it’s ready to serve, either as a hearty meal or in sandwiches!

    Tips for Success

    • Don’t rush it! Quality takes time, so allow the roast to cook fully for maximum tenderness.
    • If you like extra spice, throw in a few more pepperoncini or hot peppers for a flavorful kick.
    • For a meal prep win, make this a day ahead. The flavors meld beautifully overnight.
    • Make sure to occasionally baste the roast, enhancing the flavor and moisture.

    Equipment Needed

    • Slow cooker: The star of this recipe. An essential tool for that tender, slow-cooked magic.
    • Skillet: Perfect for searing the roast. If you don’t have one, a stovetop pot works too.
    • Meat forks: For shredding the roast. You can use regular forks in a pinch!
    • Cutting board: To rest and shred the meat safely.

    Variations of Mississippi Pot Roast

    • Spicy Kick: Add additional hot peppers alongside the pepperoncini for a fiery flavor boost!
    • Herb Infusion: Toss in fresh herbs like rosemary or thyme for an aromatic twist on the traditional recipe.
    • Vegetable Medley: Consider adding carrots, potatoes, or onions to the slow cooker, creating a complete one-pot meal.
    • Gluten-Free Option: Ensure you choose gluten-free au jus mix and ranch seasoning for dietary needs.
    • Slow Cooker Alternatives: If you don’t have a slow cooker, you can cook the roast in a Dutch oven at low heat for a similar outcome.

    Serving Suggestions for Mississippi Pot Roast

    • Mashed Potatoes: Creamy mashed potatoes are the perfect companion for soaking up that delicious sauce.
    • Fresh Salad: A light side salad adds a refreshing contrast to the rich flavors of the roast.
    • Crusty Bread: Serve with crusty bread or rolls for dipping into the savory juices.
    • Favorite Beverage: Pair with a robust red wine or sparkling water for the ultimate dining experience.

    FAQs about Mississippi Pot Roast

    As I’ve shared my recipe, I know you might have some questions about this delightful dish. Here are a few frequently asked questions that can help clarify any uncertainties!

    Can I use a different cut of meat for Mississippi Pot Roast?

    Absolutely! While chuck roast is ideal, you can experiment with cuts like brisket or round, but keep in mind the cooking time may vary.

    Can I make this Mississippi Pot Roast ahead of time?

    Yes! In fact, making it a day in advance can intensify the flavors. Just reheat it gently before serving.

    Is this recipe suitable for a gluten-free diet?

    Yes! Just make sure to select gluten-free au jus gravy mix and ranch dressing mix. It’s an easy swap that keeps everyone happy.

    What sides pair well with Mississippi Pot Roast?

    Popular choices include creamy mashed potatoes, rice, or even a crispy salad for a refreshing contrast. Perfect for balancing the rich flavors!

    How do I store leftover Mississippi Pot Roast?

    Store leftovers in an airtight container in the fridge for up to 3-4 days. You can also freeze it in portions for easy meals later!

    Final Thoughts

    As you savor each bite of Mississippi Pot Roast, you’ll discover not just a meal but an experience that warms the heart. It’s the kind of recipe that turns busy evenings into cozy family gatherings, filled with laughter and love. Each forkful of tender, flavorful meat brings back memories of home and togetherness. I hope this dish becomes a staple in your kitchen, bringing comfort and joy during hectic times. With minimal effort and maximum flavor, Mississippi Pot Roast is truly a celebration of home cooking that you and your loved ones will cherish!


    Print

    clock clock iconcutlery cutlery iconflag flag iconfolder folder iconinstagram instagram iconpinterest pinterest iconfacebook facebook iconprint print iconsquares squares iconheart heart iconheart solid heart solid icon

    Description

    When life gets hectic, finding comfort in a home-cooked meal can feel like a warm hug for the soul. That’s where Mississippi Pot Roast comes in—a dish that brings joy and satisfaction to busy days. Imagine the rich aroma of a tender chuck roast slowly cooking away while you tackle your to-do list. This incredible recipe is a savior for tired moms and professionals alike, offering a delightful blend of flavors with minimal fuss. Whether you’re feeding a family or enjoying a quiet meal, Mississippi Pot Roast is your go-to dish for hearty comfort food.


    • 34 lb chuck roast
    • ½ (12 oz) jar pepperoncini peppers
    • ½ (12 oz) jar pepperoncini juice
    • ¼ cup unsalted butter, cubed
    • 1 (1 oz) packet au jus gravy mix
    • 1 (0.4 oz) packet buttermilk ranch dressing mix

    1. Optional Step: Sear the roast in a skillet with 2–3 tablespoons of oil over medium-high heat for 3–4 minutes per side, until browned.
    2. Place the chuck roast in a slow cooker.
    3. Top with pepperoncini peppers, their juice, cubed butter, au jus gravy mix, and ranch seasoning.
    4. Cover and cook on LOW for 8–10 hours, or until the roast is fall-apart tender.
    5. Carefully remove the roast and let rest, loosely covered with foil, for 10 minutes.
    6. Shred the meat with two forks, return it to the slow cooker, and stir to soak up the juices. Let it sit for 15–20 more minutes for extra flavor.
    7. Serve hot with mashed potatoes, rice, or as a sandwich filling.

    Notes

    • For extra heat, consider adding additional pepperoncini or hot peppers.
    • Can be prepared a day in advance for better flavor, just reheat before serving.
    • Prep Time: 15 minutes
    • Cook Time: 8–10 hours
    • Category: Main Dish
    • Method: Slow Cooker
    • Cuisine: American

    Nutrition

    • Serving Size: 1 serving
    • Calories: 400
    • Sugar: 1g
    • Sodium: 960mg
    • Fat: 29g
    • Saturated Fat: 12g
    • Unsaturated Fat: 10g
    • Trans Fat: 0g
    • Carbohydrates: 5g
    • Fiber: 0g
    • Protein: 30g
    • Cholesterol: 100mg

    Sharing is caring!

  • Pulled Pork Grilled Cheese Sandwich

    Pulled Pork Grilled Cheese Sandwich


    Introduction to Pulled Pork Grilled Cheese Sandwich

    Hey there, fellow food lovers! If you’ve ever craved a warm, comforting meal that practically hugs you from the inside, then the Pulled Pork Grilled Cheese Sandwich is just the ticket. I know how busy life can get, especially when juggling kids, work, and everything in between. This recipe is not only delicious, but it’s also a quick solution for a hectic day. Plus, it’s an easy dish to impress your loved ones with, all while keeping it simple in the kitchen. Trust me, they’ll be raving about this flavor explosion!

    Why You’ll Love This Pulled Pork Grilled Cheese Sandwich

    This Pulled Pork Grilled Cheese Sandwich is a delightful blend of flavors that brings joy to your taste buds. It’s quick to prepare, especially if you use a slow cooker. The combination of tender pulled pork and gooey cheese creates an unforgettable experience with each bite. Whether you’re a busy mom or a professional, this recipe fits perfectly into your schedule, satisfying even the pickiest eaters in your household!

    Ingredients for Pulled Pork Grilled Cheese Sandwich

    Gathering the right ingredients is the first step to a mouthwatering Pulled Pork Grilled Cheese Sandwich. Here’s what you’ll need:

    • Pork shoulder or pork butt: The star of the show, this cut is ideal for slow cooking. Juicy and flavorful, it falls apart beautifully.
    • Salt and pepper: Essential for seasoning. Feel free to sprinkle liberally for a more robust flavor.
    • Olive oil: A touch of this liquid gold is perfect for searing your pork and adds richness.
    • Onion: Chopped, this adds sweetness and depth to the dish. You can use yellow or white onions based on your preference.
    • Garlic: Minced for that aromatic punch! Use fresh garlic to enhance the overall flavor of your pulled pork.
    • Barbecue sauce: This is where the magic happens! Choose your favorite variety for a unique flavor twist.
    • Chicken or beef broth: This helps create a delicious sauce while keeping the pork juicy as it cooks.
    • Bread: Eight slices of your choice. Whether it’s sourdough, whole grain, or a classic white, the bread will hold everything together. Choose what you love!
    • Shredded cheese: Two cups, using cheddar, mozzarella, or a blend. The gooier, the better! You can even experiment with gourmet cheeses.
    • Butter: For spreading on the bread, it creates that beautiful, crispy crust when grilling.

    Feeling adventurous? Add toppings like pickles or coleslaw to elevate your sandwich further! For exact measurements, you can check the bottom of the article where they are available for printing.

    How to Make Pulled Pork Grilled Cheese Sandwich

    Ready to dive into the deliciousness of a Pulled Pork Grilled Cheese Sandwich? Let’s get cooking! I’ll walk you through each step. Just follow along, and soon, you’ll be savoring every gooey, flavorful bite.

    Step 1: Prepare the Pork

    Start by seasoning your pork shoulder or butt with salt and pepper. Make sure every side gets a good sprinkle. This is where the flavor journey begins!

    Once seasoned, it’s time to give it a quick cook. Grab your trusty skillet or Dutch oven and heat it over medium-high heat. You want your pork to have a layer of flavor right from the get-go.

    Step 2: Sear the Pork

    Now, add a tablespoon of olive oil to the hot skillet. Watch it shimmer like liquid gold! Carefully place the pork into the skillet.

    Sear each side until you spot a beautiful brown crust forming, about 3-4 minutes per side. This step packs in flavor while ensuring your pulled pork is juicy when it’s done.

    Step 3: Sauté the Aromatics

    Once the pork is seared, remove it from the pan and set it aside. In that same skillet, toss in your finely chopped onion and minced garlic.

    Cook these ingredients for about 2-3 minutes until they soften and release their delicious aroma. It’s the scent of home cooking, and trust me, your family will come running!

    Step 4: Slow Cook the Pork

    Now, return the pork to the skillet. Pour in your favorite barbecue sauce and the chicken or beef broth. This is where we bring everything together.

    Bring it to a gentle simmer, then cover and reduce the heat to low. Allow it to cook for 6-8 hours. During this time, the pork will become tender and easily shred. Your patience will be rewarded!

    Step 5: Shred the Pork

    Once your pork is tender, take two forks and shred it right there in the skillet. It’s mesmerizing to watch the meat pull apart! Mix it with the sauce until it’s all well combined.

    At this point, your pulled pork is ready to shine in your grilled cheese sandwiches!

    Step 6: Assemble and Grill the Sandwich

    Grab your favorite slices of bread and spread butter on one side of each slice. Now for the fun part!

    Place one slice, butter side down, on a hot skillet. Layer it with a generous amount of shredded cheese, followed by a heap of your pulled pork. Top it off with another slice of cheese and finish with another slice of bread, butter side up.

    Cook until golden and crispy, then flip! Repeat until your sandwich is ooey-gooey and ready to serve. Slice it in half and get ready for a flavor explosion!

    Tips for Success

    • Always season your pork well to maximize flavor.
    • For ultra-tender pork, don’t rush the slow cooking process.
    • Use fresh ingredients, especially garlic and onions, for better taste.
    • Experiment with cheese blends for a unique twist on flavor.
    • Let your grilled cheese sit for a minute before cutting; it helps hold the ingredients.

    Equipment Needed

    • Skillet or Dutch oven: A heavy-bottomed pan works well if you don’t have a Dutch oven.
    • Cooking utensils: A set of sturdy forks for shredding the pork and a spatula for flipping sandwiches.
    • Cutting board: Essential for assembling your sandwiches.
    • Sharp knife: Perfect for slicing your bread and sandwich once it’s grilled.

    Variations on Pulled Pork Grilled Cheese Sandwich

    • Spicy Kick: Add jalapeños or hot sauce to your pulled pork for an extra zing that elevates the flavor profile.
    • Veggie Delight: Toss in some sautéed bell peppers and spinach along with your pulled pork for added nutrition and color.
    • Cheesy Heaven: Mix different types of cheese like gouda or pepper jack to create a gourmet experience.
    • Gluten-Free Option: Use gluten-free bread to keep this comfort food accessible for everyone.
    • Breakfast Style: Add a fried egg on top before serving for a hearty breakfast twist on this classic sandwich!

    Serving Suggestions for Pulled Pork Grilled Cheese Sandwich

    • Pair with a crisp side salad for a refreshing contrast to the richness of the sandwich.
    • Serve with sweet potato fries or potato chips for that classic comfort food vibe.
    • A cold glass of iced tea or lemonade complements the flavors beautifully.
    • Garnish with fresh herbs like parsley for a pop of color and flavor.
    • Wrap in parchment paper for a rustic presentation that’s sure to impress!

    FAQs about Pulled Pork Grilled Cheese Sandwich

    Can I use leftover pulled pork for this sandwich?

    Absolutely! If you’ve got leftover pulled pork from a previous meal, it makes for a quick and tasty option. Just heat it up, and you’re ready to assemble your sandwich.

    What kind of cheese works best in a Pulled Pork Grilled Cheese Sandwich?

    For the ultimate experience, I recommend using a blend of cheddar and mozzarella. This combination gives you that gooey texture and sharp flavor. But feel free to experiment with your favorites!

    Can I make this sandwich gluten-free?

    Yes! Simply opt for gluten-free bread. The pulled pork and toppings will remain delicious, and everyone can enjoy this comforting meal!

    How can I store leftover pulled pork?

    Store any leftover pulled pork in an airtight container in the fridge for up to four days. Just reheat it before using it to whip up another delicious sandwich!

    Is this recipe kid-friendly?

    Definitely! Kids love cheesy sandwiches, and the pulled pork adds a fun twist. You can even let them customize toppings, making dinner a delightful experience!

    Final Thoughts

    In a world that often feels chaotic, creating a Pulled Pork Grilled Cheese Sandwich offers a moment of joy and comfort. The tantalizing aroma that fills your kitchen brings everyone together, sparking smiles as you share this delightful meal. It’s not just about eating; it’s about connecting over good food and cherished memories. With each gooey bite, you’ll find satisfaction and warmth that nourishes the soul. So, grab your ingredients and enjoy this culinary adventure! Your family will thank you, and you might just find yourself making this flavor-packed sandwich a regular staple in your busy kitchen.


    Print

    clock clock iconcutlery cutlery iconflag flag iconfolder folder iconinstagram instagram iconpinterest pinterest iconfacebook facebook iconprint print iconsquares squares iconheart heart iconheart solid heart solid icon

    Description

    Hey there, fellow food lovers! If you’ve ever craved a warm, comforting meal that practically hugs you from the inside, then the Pulled Pork Grilled Cheese Sandwich is just the ticket. I know how busy life can get, especially when juggling kids, work, and everything in between. This recipe is not only delicious, but it’s also a quick solution for a hectic day. Plus, it’s an easy dish to impress your loved ones with, all while keeping it simple in the kitchen. Trust me, they’ll be raving about this flavor explosion!


    • 2 lbs pork shoulder or pork butt
    • Salt and pepper to taste
    • 1 tablespoon olive oil
    • 1 onion, finely chopped
    • 2 cloves garlic, minced
    • 1 cup barbecue sauce
    • 1/2 cup chicken or beef broth
    • 8 slices bread of your choice
    • 2 cups shredded cheese (cheddar, mozzarella, or a blend)
    • Butter for spreading

    1. Season the pork shoulder or butt with salt and pepper on all sides.
    2. Heat olive oil in a large skillet or Dutch oven over medium-high heat. Sear the pork on all sides until browned, about 3-4 minutes per side.
    3. Remove the pork from the skillet and set aside. In the same skillet, add the chopped onion and garlic. Cook until softened and fragrant, about 2-3 minutes.
    4. Return the pork to the skillet and add barbecue sauce and broth. Bring to a simmer, then cover and reduce the heat to low. Cook for 6-8 hours, or until the pork is tender and easily shreds with a fork.
    5. Once the pork is cooked, shred it using two forks. Mix the shredded pork with the sauce in the skillet until well combined.

    Notes

    • Serve the pulled pork on grilled cheese sandwiches.
    • Use your favorite type of cheese for a more personalized flavor.
    • Feel free to add extra toppings like pickles or coleslaw.
    • Prep Time: 15 minutes
    • Cook Time: 6-8 hours
    • Category: Sandwich
    • Method: Slow Cooking
    • Cuisine: American

    Nutrition

    • Serving Size: 1 sandwich
    • Calories: 650
    • Sugar: 10g
    • Sodium: 1200mg
    • Fat: 30g
    • Saturated Fat: 15g
    • Unsaturated Fat: 10g
    • Trans Fat: 0g
    • Carbohydrates: 50g
    • Fiber: 2g
    • Protein: 35g
    • Cholesterol: 90mg

    Sharing is caring!

  • Baked Mediterranean Pasta

    Baked Mediterranean Pasta


    Introduction to Baked Mediterranean Pasta

    Life can get hectic, can’t it? Between juggling family, work, and everything in between, finding time to whip up a delicious meal can feel overwhelming. That’s where this Baked Mediterranean Pasta comes into play! It’s not just a quick solution for busy days; it’s a dish that bursts with flavor and love. Packed with vibrant Mediterranean ingredients, this meal will impress your loved ones and leave everyone satisfied. Trust me, once you pull this cheesy goodness from the oven, the smiles will be worth every minute you spent in the kitchen!

    Why You’ll Love This Baked Mediterranean Pasta

    This Baked Mediterranean Pasta is a delightful blend of convenience and flavor. It comes together quickly, making it a perfect option for those busy weeknights. Not only is it satisfying to eat, but it also features wholesome ingredients that make my heart happy. Plus, it can easily adapt to fit even the pickiest eater in your family. Trust me, it’s the kind of meal that will bring everyone to the table with joy!

    Ingredients for Baked Mediterranean Pasta

    This Baked Mediterranean Pasta is as colorful as it is delicious. Let’s dive into the ingredients that make this dish so special, shall we?

    • Pasta: I love using rigatoni or penne for this recipe. They hold sauce beautifully and have the perfect bite.
    • Cherry Tomatoes: Their sweetness shines through when baked. Halving them helps them burst with flavor.
    • Kalamata Olives: These rich, briny bites bring depth to the dish. They’re a must for that authentic Mediterranean taste.
    • Garlic: Yes, please! It’s the aromatic superstar that adds a warm, inviting essence to your pasta.
    • Fresh Basil: Nothing beats the flavor of fresh basil! Tossing it in just before serving not only elevates the taste but also adds a beautiful touch.
    • Sun-Dried Tomatoes: Their concentrated flavor is a great way to enrich the dish. They add a nice chewy texture as well.
    • Pesto: You can go with store-bought or make your own. This creamy blend of herbs takes the dish to a whole new level.
    • Mozzarella Cheese: Oh, the melty goodness! It creates a cheesy crust that’s hard to resist.
    • Parmesan Cheese: A sprinkle of this sharp cheese adds an extra flavor punch. It’s the finishing touch to our pasta masterpiece.
    • Olive Oil: A good quality olive oil will not only flavor the sauté but also help everything combine beautifully.
    • Dried Oregano: This classic herb adds a hint of earthiness. It’s essential for that authentic Italian vibe.
    • Salt and Pepper: Basic but crucial! They enhance all the flavors in this delightful mix, ensuring nothing gets lost.

    Curious about exact quantities? Don’t worry! You can find those listed at the bottom of the article for easy printing.

    How to Make Baked Mediterranean Pasta

    Cooking this Baked Mediterranean Pasta is a delightful adventure! Let’s break it down step-by-step so you can enjoy each flavorful bite.

    Step 1: Preheat and Prepare

    First things first, preheat your oven to 375°F (190°C). This will ensure that it’s nice and hot when your pasta is ready for baking.

    While the oven warms up, fill a large pot with salted water and bring it to a boil. Add your rigatoni or penne and cook until just shy of al dente, about a minute less than the package directions suggest. This way, the pasta will finish cooking in the oven without turning mushy.

    Once cooked, drain the pasta and set it aside. A little pasta water can cling to it, which helps create a delightful sauce later.

    Step 2: Sauté the Aromatics

    Now, let’s add some magic! In a skillet, heat a couple of tablespoons of olive oil over medium heat. Toss in the minced garlic and sauté for 1–2 minutes, just until fragrant. Don’t rush; burnt garlic is a no-no!

    Next, add those gorgeous cherry tomatoes. Stir them around until they start to soften and burst open, releasing their juices. You’ll want to keep an eye on them and stir occasionally, about 5 minutes should do the trick. This step heightens the flavors, making your dish sing!

    Step 3: Combine Ingredients

    In a large mixing bowl, it’s time to blend flavors! Combine the drained pasta with the sautéed garlic and tomatoes. Then add the Kalamata olives, sun-dried tomatoes, chopped basil, and pesto.

    Don’t forget to sprinkle in the dried oregano along with salt and pepper. Mix everything together well, ensuring that every piece of pasta is coated in that yummy goodness. This even mixing is crucial for a balanced flavor in every bite!

    Step 4: Transfer and Top

    Now, pour this vibrant mixture into a greased 9×13-inch baking dish. Spread it evenly. The next step is where the cheese magic happens! Top the pasta with shredded mozzarella and a generous sprinkle of grated Parmesan.

    Feel free to get a little creative here! Add extra toppings like sliced olives, a handful of spinach, or even a dash of red pepper flakes for a kick. It’s your canvas—paint it however you like!

    Step 5: Bake to Perfection

    Slide that baking dish into your preheated oven and bake for about 20–25 minutes. The cheese should melt into a bubbly, golden crust. If you like it a little extra crispy, turn on the broiler for the last 2–3 minutes. Just keep a close watch; you don’t want it to burn!

    Once it’s done, pull it out and let it rest for about 5 minutes. This allows the flavors to meld perfectly, making each serving even more delicious.

    Tips for Success

    • Use a high-quality olive oil for richer flavor.
    • Don’t overcook the pasta; it should be firm to the bite.
    • Mix in some extra veggies like bell peppers or spinach for added nutrition.
    • Customize cheese according to your taste—feta or goat cheese can be delightful!
    • Let the pasta cool for a few minutes before serving to enhance flavors.

    Equipment Needed

    • Large Pot: Essential for boiling pasta. A versatile Dutch oven works too.
    • Skillet: Use any non-stick or stainless-steel skillet for sautéing.
    • Baking Dish: A 9×13-inch dish is ideal. A larger casserole dish can work well.
    • Mixing Bowl: A large bowl makes combining easy, but any bowl will do!
    • Measuring Cups and Spoons: Handy for accurate ingredient measuring.

    Variations of Baked Mediterranean Pasta

    • Add Protein: For a heartier dish, toss in cooked chicken, shrimp, or chickpeas to boost the protein content.
    • Whole Grain Pasta: Swap regular pasta for whole grain or gluten-free options for a healthier choice.
    • Extra Veggies: Incorporate zucchini, spinach, or bell peppers for added nutrition and freshness.
    • Spicy Twist: Mix in red pepper flakes or sliced jalapeños for a delightful kick that liven up the flavors.
    • Cheesy Variations: Experiment with different cheeses like feta, goat cheese, or even a vegan cheese option to suit your preferences.
    • Herb-Infused: Play with herbs like parsley, thyme, or even a splash of lemon juice for zesty and aromatic notes.

    Serving Suggestions for Baked Mediterranean Pasta

    • Garlic Bread: Serve with warm, crusty garlic bread for a comforting touch.
    • Green Salad: Add a fresh green salad with balsamic vinaigrette to complement the flavors.
    • Wine Pairing: Enjoy with a crisp white wine, like Sauvignon Blanc, or a light red, like Pinot Noir.
    • Garnish: Finish with a sprinkle of extra basil or a drizzle of olive oil for a beautiful presentation.

    FAQs about Baked Mediterranean Pasta

    Can I make this Baked Mediterranean Pasta ahead of time?

    Absolutely! You can assemble it a day in advance and keep it in the fridge. Just cover it with foil to prevent drying out. When you’re ready to bake, remove the foil and bake as instructed, adding a few extra minutes if it’s cold from the fridge.

    Is this dish suitable for a vegetarian diet?

    Yes! This Baked Mediterranean Pasta is fully vegetarian, but always double-check your pesto to ensure it’s meat-free. You could even add extra vegetables for a nutritional boost!

    How can I store leftovers?

    Leftovers can be stored in an airtight container in the fridge for up to 3 days. Reheat in the oven or microwave until warmed through. The flavors might just deepen overnight!

    Can I freeze Baked Mediterranean Pasta?

    Yes, freezing is an option! Just bake it first, let it cool completely, then wrap tightly and freeze. When ready to serve, thaw overnight in the fridge and reheat in the oven.

    What can I serve with Baked Mediterranean Pasta?

    This dish pairs wonderfully with a fresh green salad or some garlic bread. Both complement the flavors perfectly and make for a well-rounded meal. Enjoy!

    Final Thoughts on Baked Mediterranean Pasta

    As I reminisce over countless family dinners, this Baked Mediterranean Pasta stands out as a true crowd-pleaser. There’s something magical about the way the flavors meld together, creating a comforting dish that feels like a warm hug. Each bite whispers of sun-drenched Mediterranean days, inviting everyone to savor the moment. Whether you’re enjoying it solo or sharing it with loved ones, this recipe always brings smiles to the table. Embrace the joy of cooking, and let this dish be your ticket to delicious simplicity. Trust me, you’ll want to make it again and again!


    Print

    clock clock iconcutlery cutlery iconflag flag iconfolder folder iconinstagram instagram iconpinterest pinterest iconfacebook facebook iconprint print iconsquares squares iconheart heart iconheart solid heart solid icon

    Description

    Life can get hectic, can’t it? Between juggling family, work, and everything in between, finding time to whip up a delicious meal can feel overwhelming. That’s where this Baked Mediterranean Pasta comes into play! It’s not just a quick solution for busy days; it’s a dish that bursts with flavor and love. Packed with vibrant Mediterranean ingredients, this meal will impress your loved ones and leave everyone satisfied. Trust me, once you pull this cheesy goodness from the oven, the smiles will be worth every minute you spent in the kitchen!


    • 12 oz (340g) rigatoni or penne pasta
    • 2 cups cherry tomatoes, halved
    • 1/2 cup Kalamata olives, pitted
    • 3 cloves garlic, minced
    • 1/2 cup fresh basil leaves, chopped
    • 1/4 cup sun-dried tomatoes, chopped
    • 1/3 cup pesto (store-bought or homemade)
    • 1 1/2 cups shredded mozzarella cheese
    • 1/2 cup grated Parmesan cheese
    • 2 tablespoons olive oil
    • 1 teaspoon dried oregano
    • Salt and pepper to taste

    1. Preheat oven to 375°F (190°C).
    2. Cook pasta in salted water until just shy of al dente. Drain and set aside.
    3. In a skillet, heat olive oil and sauté garlic for 1–2 minutes. Add cherry tomatoes and cook until they begin to soften and burst.
    4. In a large bowl, mix pasta with sautéed tomatoes, garlic, olives, sun-dried tomatoes, chopped basil, pesto, oregano, salt, and pepper.
    5. Transfer to a greased 9×13-inch baking dish. Top with mozzarella and Parmesan cheese.
    6. Bake for 20–25 minutes, until cheese is melted and golden. Broil for 2–3 minutes if desired for extra browning.
    7. Let rest for 5 minutes. Garnish with fresh herbs before serving.

    Notes

    • For a vegetarian option, ensure the pesto is meat-free.
    • Can substitute other types of pasta based on preference.
    • Add extra vegetables like spinach or bell peppers for more nutrition.
    • Prep Time: 15 minutes
    • Cook Time: 30 minutes
    • Category: Main Dish
    • Method: Baking
    • Cuisine: Mediterranean

    Nutrition

    • Serving Size: 1 serving
    • Calories: 450
    • Sugar: 3g
    • Sodium: 500mg
    • Fat: 21g
    • Saturated Fat: 10g
    • Unsaturated Fat: 9g
    • Trans Fat: 0g
    • Carbohydrates: 48g
    • Fiber: 3g
    • Protein: 19g
    • Cholesterol: 40mg

    Sharing is caring!

  • Raspberry Pistachio Mousse Cake

    Raspberry Pistachio Mousse Cake


    Introduction to Raspberry Pistachio Mousse Cake

    As someone who loves to share the joy of cooking, I can tell you there’s something magical about a Raspberry Pistachio Mousse Cake. It’s like a little slice of heaven that manages to impress without demanding hours of effort. This dessert offers the perfect blend of tart raspberries and rich pistachios, making it a showstopper for any gathering. Whether you’re racing through a busy weekday or prepping for a special occasion, this mousse cake is here to save the day. Trust me; your family and friends will be begging for seconds!

    Why You’ll Love This Raspberry Pistachio Mousse Cake

    This Raspberry Pistachio Mousse Cake is not just a treat; it’s a revelation. First, it’s easy to whip up, making it perfect for busy weeknights or unexpected guests. The layers are a feast for the eyes, and the flavors? Simply divine! With a velvety mousse and a tangy raspberry compote, every bite is a harmonious dance of taste. Impressing loved ones has never felt so effortless!

    Ingredients for Raspberry Pistachio Mousse Cake

    Now that your taste buds are tingling, let’s gather the magic ingredients for this delightful Raspberry Pistachio Mousse Cake! Here’s what you’ll need:

    • Pistachios (roasted and unsalted, finely ground) – These provide a rich, nutty flavor that pairs perfectly with our tart friend, the raspberry.
    • Almond flour – This adds a subtle sweetness and a lovely texture to the crust, making it a fantastic gluten-free option.
    • Sugar – A little sweetness goes a long way in balancing out the flavors of this dessert.
    • Melted butter – This helps bind our crust together while adding a buttery richness that everyone loves.
    • Egg – Essential for structure! It helps the crust set while keeping it light.
    • Vanilla extract – A splash of this fragrant beauty enhances the overall flavor, giving it that warm, familiar taste.
    • Heavy cream – The star of our mousses! This creates a luscious mouthfeel that elevates the dessert.
    • Gelatin powder – A crucial ingredient for achieving that perfect mousse texture without being too dense.
    • Cold water – We need this to bloom the gelatin before it magically transforms our creamy mixture.
    • Fresh or frozen raspberries – Feel free to use what’s available! Raspberries bring a tartness that contrasts beautifully with the sweetness of the pistachios.
    • Lemon juice – Just a touch brightens up the raspberry flavor, making it pop!
    • Cornstarch – This thickens our raspberry compote and helps achieve a nice, spreadable consistency.
    • More heavy cream for the raspberry mousse – Because who can resist extra creaminess?

    Exact quantities are found at the bottom of the article, ready for you to print and use. Happy cooking!

    How to Make Raspberry Pistachio Mousse Cake

    Now that we have our ingredients gathered, it’s time to roll up our sleeves and create this stunning Raspberry Pistachio Mousse Cake! I promise, every step brings you closer to a dessert that will have everyone talking. Let’s dive right in!

    Step 1: Prepare the Crust

    First, preheat your oven to 350°F (175°C). While it warms, mix the finely ground pistachios, almond flour, sugar, melted butter, egg, and vanilla extract in a bowl.

    Once combined, your mixture should feel slightly moist and crumbly. Next, press this mixture into the bottom of your chosen molds, forming an even layer. Bake for 12 to 15 minutes until it’s lightly golden. Cool completely before moving on!

    Step 2: Make the Pistachio Mousse

    While the crust cools, let’s create our rich pistachio mousse! Start by blooming the gelatin in cold water for about 5 minutes. This step is critical; it ensures a smooth texture later.

    In another bowl, blend some finely ground pistachios with heavy cream, sugar, and vanilla extract until the mixture is smooth. Once your gelatin is ready, gently heat it until fully dissolved and mix it into your pistachio blend.

    Next, whip the remaining heavy cream until soft peaks form. Then carefully fold this whipped cream into the pistachio mixture, making sure not to deflate it. We want light, airy mousse!

    Step 3: Create the Raspberry Compote

    Now, let’s whip up the raspberry compote! In a small saucepan, combine fresh or frozen raspberries, sugar, and lemon juice. Cook this over medium heat until the raspberries break down and soften, about 5 minutes.

    After that, stir in a cornstarch slurry to thicken it up. This step helps create a rich layer of compote that contrasts beautifully with our mousse. Once thickened, let it cool completely.

    Step 4: Assemble the Cake

    Time to layer it all together! Start with your cooled crust at the bottom. Spread a lovely layer of the pistachio mousse over the crust. Next, spoon a thin layer of the raspberry compote on top. This will add a vibrant tang to every bite!

    Follow this with the raspberry mousse, made in a similar way to your pistachio mousse but mixing whipped cream into raspberry puree. Pipe it carefully over the compote, ensuring an even spread. Each layer adds depth to the cake, both visually and in flavor!

    Step 5: Chill and Serve

    Finally, cover your masterpiece and let it chill in the fridge for at least 4 hours, or even overnight if you can wait that long! This chilling time helps the flavors meld beautifully.

    When you’re ready to serve, garnish with fresh raspberries and a sprinkle of crushed pistachios. Not only will it look divine, but it’ll taste like pure bliss. Enjoy every bite of your Raspberry Pistachio Mousse Cake!

    Tips for Success

    • Always bloom your gelatin in cold water first for the best texture.
    • If using frozen raspberries, let them thaw to enhance their flavor before cooking.
    • Chilling the mousse overnight enhances the flavor and texture—patience pays off!
    • Whip the heavy cream until soft peaks form to keep your mousse airy.
    • Don’t skip the garnish—fresh raspberries and crushed pistachios make it irresistible!

    Equipment Needed

    • Mixing bowls – Any size will do! Just make sure they’re large enough to accommodate your delicious creations.
    • Whisk – A hand whisk works great, but an electric mixer speeds up the whipping process.
    • Measuring cups and spoons – Essential to ensure accurate ingredient ratios for perfect results.
    • Spatula – A flexible one is best for folding in the whipped cream.
    • Molds or a springform pan – Choose your favorite, but make sure it’s suitable for the chilling process.

    Variations

    • Nut-Free Version: Swap pistachios for sunflower seeds or pumpkin seeds for a similar nutty flavor without the allergens.
    • Vegan Delight: Replace heavy cream with coconut cream and use aquafaba (chickpea water) instead of eggs to create a delightful vegan version.
    • Flavor Infusions: Add a splash of almond extract to the pistachio mousse for an extra layer of flavor.
    • Fruit Alternatives: Experiment with other berries like strawberries or blueberries for the compote to switch up the flavor profile.
    • Chocolate Twist: Incorporate a layer of chocolate ganache beneath the pistachio mousse for a decadent chocolate raspberry experience.

    Serving Suggestions

    • Pair with a dollop of whipped cream for added richness and texture.
    • Serve alongside a refreshing mint tea or a light-bodied white wine for a delightful contrast.
    • Garnish each slice with fresh mint leaves to enhance presentation and flavor.
    • Consider a side of chocolate-covered almonds for a complementary crunch.

    FAQs about Raspberry Pistachio Mousse Cake

    As you explore the delightful world of Raspberry Pistachio Mousse Cake, questions may come to mind. Here are some answers to common queries that can help you along the journey!

    Can I use frozen raspberries for the compote?

    Absolutely! Frozen raspberries work perfectly for the compote. Just thaw them beforehand to enhance their flavor. They’ll blend nicely into your luscious mousse!

    How long does the Raspberry Pistachio Mousse Cake last?

    This beautiful cake can last up to 3 days in the fridge when stored in an airtight container. But trust me, it won’t last that long—it’s too delicious!

    Can I make this dessert ahead of time?

    Yes! In fact, chilling it overnight intensifies those wonderful flavors. It’s a great option to prepare in advance for gatherings.

    Is there a vegetarian option for this dessert?

    Definitely! The Raspberry Pistachio Mousse Cake is already vegetarian-friendly. Just ensure your gelatin is sourced from a vegetarian-friendly brand if you prefer.

    What can I serve with my Raspberry Pistachio Mousse Cake?

    Pair it with a dollop of whipped cream or some fresh mint tea. Both elevate the experience, creating a delightful treat for the senses!

    Final Thoughts

    Creating a Raspberry Pistachio Mousse Cake is not just about making a dessert; it’s about crafting memories. Each layer tells a story, from the nutty, crisp crust to the silky mousse that dances with raspberry compote. It’s the perfect indulgence for family gatherings or a thoughtful gift for a friend. I love seeing the joy on my loved ones’ faces as they savor each bite. This cake embodies comfort and elegance, reminding us that, even amid our busy lives, there’s always room for a touch of sweetness. Trust me, your heart—and your taste buds—will thank you!


    Print

    clock clock iconcutlery cutlery iconflag flag iconfolder folder iconinstagram instagram iconpinterest pinterest iconfacebook facebook iconprint print iconsquares squares iconheart heart iconheart solid heart solid icon

    Description

    As someone who loves to share the joy of cooking, I can tell you there’s something magical about a Raspberry Pistachio Mousse Cake. It’s like a little slice of heaven that manages to impress without demanding hours of effort. This dessert offers the perfect blend of tart raspberries and rich pistachios, making it a showstopper for any gathering. Whether you’re racing through a busy weekday or prepping for a special occasion, this mousse cake is here to save the day. Trust me; your family and friends will be begging for seconds!


    • ½ cup pistachios (roasted, unsalted, finely ground)
    • ¼ cup almond flour
    • 2 tablespoons sugar
    • 2 tablespoons melted butter
    • 1 egg
    • ½ teaspoon vanilla extract
    • ½ cup pistachios (finely blended)
    • 1 cup heavy cream
    • 2 tablespoons sugar
    • 1 teaspoon gelatin powder
    • 2 tablespoons cold water
    • ½ teaspoon vanilla extract
    • 1 cup fresh or frozen raspberries
    • 2 tablespoons sugar
    • 1 teaspoon lemon juice
    • 1 teaspoon cornstarch + 1 tablespoon water (slurry)
    • 1 cup raspberries (blended and strained)
    • 2 tablespoons sugar
    • 1 cup heavy cream
    • 1 teaspoon gelatin powder
    • 2 tablespoons cold water
    • ½ teaspoon vanilla extract

    1. Preheat oven to 350°F (175°C).
    2. Mix ground pistachios, almond flour, sugar, melted butter, egg, and vanilla.
    3. Press into molds and bake for 12–15 minutes. Cool completely.
    4. Bloom gelatin in cold water for 5 minutes.
    5. Blend pistachios, cream, sugar, and vanilla until smooth.
    6. Heat gelatin until dissolved and mix in.
    7. Whip heavy cream separately and fold into the pistachio mixture.
    8. Layer over crust and chill for 30 minutes.
    9. Cook raspberries, sugar, and lemon juice until soft, about 5 minutes.
    10. Stir in cornstarch slurry and cook until thickened. Let cool.
    11. Spread a thin layer over pistachio mousse.
    12. Bloom gelatin in cold water for 5 minutes.
    13. Warm raspberry puree and mix in gelatin. Let cool slightly.
    14. Whip cream, sugar, and vanilla until soft peaks form.
    15. Fold in raspberry mixture and pipe over compote.
    16. Chill for at least 4 hours or overnight.
    17. Garnish with fresh raspberries and crushed pistachios before serving.

    Notes

    • Ensure the gelatin is fully dissolved before adding it to the mixture for the mousses.
    • For a more intense raspberry flavor, use fresh raspberries when available.
    • Chilling the cake overnight will enhance the flavors and texture.
    • Prep Time: 30 minutes
    • Cook Time: 15 minutes
    • Category: Dessert
    • Method: Baking and Chilling
    • Cuisine: Pâtisserie

    Nutrition

    • Serving Size: 1 slice
    • Calories: 400
    • Sugar: 20g
    • Sodium: 100mg
    • Fat: 30g
    • Saturated Fat: 15g
    • Unsaturated Fat: 8g
    • Trans Fat: 0g
    • Carbohydrates: 35g
    • Fiber: 4g
    • Protein: 5g
    • Cholesterol: 80mg

    Sharing is caring!

  • Watermelon Strawberry Salad

    Watermelon Strawberry Salad


    Introduction to Watermelon Strawberry Salad

    As the sun shines brighter and the days grow warmer, I find myself craving something light and refreshing. That’s where my Watermelon Strawberry Salad comes in! This vibrant dish is not just a feast for the eyes; it’s a quick solution for busy days when you want to impress your loved ones without spending hours in the kitchen. With its sweet, juicy watermelon and luscious strawberries, this salad is a delightful way to celebrate summer. Plus, it’s so easy to whip up, making it perfect for those hectic weeknights or casual gatherings with friends.

    Why You’ll Love This Watermelon Strawberry Salad

    This Watermelon Strawberry Salad is a game-changer for busy moms and professionals alike. It’s incredibly easy to make, taking just 15 minutes from start to finish. The combination of sweet watermelon and strawberries creates a burst of flavor that dances on your palate. Plus, it’s a healthy option that feels indulgent, making it perfect for summer picnics or a light lunch. You’ll love how it brightens up any meal!

    Ingredients for Watermelon Strawberry Salad

    Gathering the right ingredients is key to making this Watermelon Strawberry Salad a hit. Here’s what you’ll need:

    • Strawberries: Fresh, juicy strawberries are the star of this salad. They add sweetness and a pop of color. Make sure to choose ripe ones for the best flavor.
    • Fresh Mint: This herb brings a refreshing twist. Chiffonade or chop it finely to release its aromatic oils. Mint pairs beautifully with the fruit.
    • Watermelon: Opt for seedless watermelon if possible. Its crisp texture and natural sweetness balance the tartness of the strawberries.
    • Chia Seeds: These tiny seeds add a nutritional boost. They’re rich in fiber and omega-3 fatty acids, making your salad even healthier.
    • Feta Cheese: Crumbled feta adds a creamy, salty contrast to the sweet fruits. For a vegan option, consider using a plant-based feta alternative.
    • Olive Oil: A drizzle of good-quality olive oil enhances the flavors. It adds richness without overpowering the salad.
    • Lime Juice: Freshly squeezed lime juice brightens the dish. It adds a zesty kick that complements the sweetness of the fruits.
    • Honey: This natural sweetener ties the dressing together. You can substitute it with maple syrup for a vegan-friendly option.
    • Sea Salt Flakes: A sprinkle of sea salt enhances the flavors. It’s a simple touch that makes a big difference.
    • Black Pepper: A dash of black pepper adds a subtle warmth. It’s optional, but I love the extra layer of flavor it brings.

    For exact measurements, check the bottom of the article where you can find everything listed for easy printing. Enjoy the process of gathering these fresh ingredients, as they’ll come together to create a salad that’s as delightful to make as it is to eat!

    How to Make Watermelon Strawberry Salad

    Making this Watermelon Strawberry Salad is a breeze! Follow these simple steps, and you’ll have a refreshing dish ready in no time. Let’s dive in!

    Step 1: Prepare the Dressing

    Start by mixing the dressing. In a mason jar or a small bowl, combine the olive oil, lime juice, honey, sea salt, and black pepper. Shake or whisk until everything is well blended. This dressing is the magic that ties the salad together!

    Step 2: Slice the Strawberries

    Next, grab those beautiful strawberries. Trim the tops off and slice them into 3 or 4 pieces. The goal is to create bite-sized pieces that will mix well with the watermelon. The vibrant red will add a lovely contrast to the salad.

    Step 3: Cube the Watermelon

    Now, it’s time for the watermelon! Cut it into 1 to 1 ½ inch cubes. If you can find seedless watermelon, that’s even better. Arrange the cubes on a serving platter, creating a colorful base for your salad. The juicy texture will complement the strawberries perfectly.

    Step 4: Combine Ingredients

    Gently stir in the sliced strawberries, chopped mint, crumbled feta cheese, and chia seeds. Be careful not to mash the fruits; we want them to keep their shape. This combination of flavors and textures is what makes this salad so delightful!

    Step 5: Drizzle and Serve

    Finally, drizzle your homemade dressing over the salad. Add more fresh lime juice if you like a zesty kick. Sprinkle with sea salt flakes and black pepper to taste. Serve immediately for the best flavor and texture. Enjoy this refreshing salad as a side dish or a light meal!

    Tips for Success

    • Use chilled fruits for a refreshing taste. It makes a world of difference!
    • Choose ripe strawberries and watermelon for maximum sweetness.
    • Prep the dressing ahead of time and store it in the fridge for quick assembly.
    • Feel free to adjust the sweetness of the dressing to your liking.
    • Serve immediately to enjoy the best texture and flavor.

    Equipment Needed

    • Mason Jar or Small Bowl: For mixing the dressing. A whisk works too!
    • Cutting Board: Essential for slicing fruits safely. Any sturdy surface will do.
    • Sharp Knife: A good knife makes cutting fruits a breeze.
    • Serving Platter: To showcase your beautiful salad. A large plate works just as well.

    Variations

    • Berry Medley: Add blueberries or raspberries for an extra burst of flavor and color.
    • Nutty Crunch: Toss in some chopped walnuts or almonds for added texture and healthy fats.
    • Spicy Kick: Add a pinch of cayenne pepper or sliced jalapeños for a surprising heat that complements the sweetness.
    • Herb Swap: Experiment with basil or cilantro instead of mint for a different herbal note.
    • Vegan Delight: Use a plant-based feta and substitute honey with agave syrup for a completely vegan version.

    Serving Suggestions

    • Pair this Watermelon Strawberry Salad with grilled chicken or fish for a balanced meal.
    • Serve it alongside crusty bread or pita chips for a delightful crunch.
    • For drinks, consider a refreshing iced tea or sparkling water with lime.
    • Present the salad in a large, colorful bowl to showcase its vibrant hues.
    • Garnish with extra mint leaves for an elegant touch.

    FAQs about Watermelon Strawberry Salad

    As I’ve shared my love for this Watermelon Strawberry Salad, I often get questions from fellow home cooks. Here are some of the most common inquiries, along with my answers to help you enjoy this refreshing dish even more!

    Can I make this salad ahead of time?

    While it’s best enjoyed fresh, you can prepare the dressing and chop the fruits ahead of time. Just keep them separate until you’re ready to serve. This way, the salad stays crisp and vibrant!

    What can I substitute for feta cheese?

    If you’re looking for a dairy-free option, try using a plant-based feta. It offers a similar creamy texture without the dairy. You can also skip the cheese altogether for a lighter version.

    How can I make this salad more filling?

    To turn this salad into a more substantial meal, consider adding grilled chicken or chickpeas. Both options provide protein and will keep you satisfied longer.

    Is this salad suitable for meal prep?

    Absolutely! Just remember to store the dressing separately. When you’re ready to eat, combine everything for a fresh taste. It’s a great option for busy weekdays!

    Can I use other fruits in this salad?

    Definitely! Feel free to mix in other seasonal fruits like peaches, blueberries, or even kiwi. The more colorful, the better! Each fruit adds its unique flavor and texture.

    Final Thoughts

    Creating this Watermelon Strawberry Salad is more than just preparing a dish; it’s about bringing joy to your table. The vibrant colors and refreshing flavors remind me of sunny days spent with family and friends. Each bite is a celebration of summer, a moment to pause and savor the sweetness of life. Whether you’re serving it at a picnic or enjoying it as a light lunch, this salad is sure to bring smiles all around. I hope you find as much joy in making and sharing this recipe as I do. Happy cooking!


    Print

    clock clock iconcutlery cutlery iconflag flag iconfolder folder iconinstagram instagram iconpinterest pinterest iconfacebook facebook iconprint print iconsquares squares iconheart heart iconheart solid heart solid icon

    Description

    As the sun shines brighter and the days grow warmer, I find myself craving something light and refreshing. That’s where my Watermelon Strawberry Salad comes in! This vibrant dish is not just a feast for the eyes; it’s a quick solution for busy days when you want to impress your loved ones without spending hours in the kitchen. With its sweet, juicy watermelon and luscious strawberries, this salad is a delightful way to celebrate summer. Plus, it’s so easy to whip up, making it perfect for those hectic weeknights or casual gatherings with friends.


    • 3 cups strawberries, chilled, tops cut off
    • 2 tablespoons fresh mint, chiffonade or chopped fine
    • 3 cups watermelon, chilled, seedless if possible, cubed
    • ½ teaspoon chia seeds
    • ½ cup feta cheese, crumbled
    • 2 tablespoons olive oil
    • 1 whole fresh lime, juiced
    • 1 ½ teaspoons honey, or sub with maple liquid type
    • Crushed sea salt flakes to taste
    • Black pepper to taste

    1. In a mason jar (or a small bowl) mix the salad dressing ingredients, shake well and set aside.
    2. Trim the strawberries and cut them into 3 or 4 slices.
    3. Cut the watermelon into 1 to 1 ½ inch cubes and arrange it on a serving platter together with strawberries.
    4. Gently stir in the chopped mint, crumbled feta cheese, and chia seeds.
    5. To finish, drizzle with the salad dressing, more fresh limes, and add sea salt flakes and pepper as needed. Enjoy right away!

    Notes

    • For a vegan option, substitute feta cheese with a plant-based alternative.
    • Adjust the sweetness of the dressing by adding more or less honey/maple syrup.
    • Serve immediately for the best flavor and texture.
    • Prep Time: 15 minutes
    • Cook Time: 0 minutes
    • Category: Salad
    • Method: No-cook
    • Cuisine: American

    Nutrition

    • Serving Size: 1 serving
    • Calories: 150
    • Sugar: 10g
    • Sodium: 200mg
    • Fat: 8g
    • Saturated Fat: 2g
    • Unsaturated Fat: 6g
    • Trans Fat: 0g
    • Carbohydrates: 18g
    • Fiber: 2g
    • Protein: 4g
    • Cholesterol: 10mg

    Sharing is caring!