Blog

  • Crunchy Spicy Chicken Salad

    Crunchy Spicy Chicken Salad


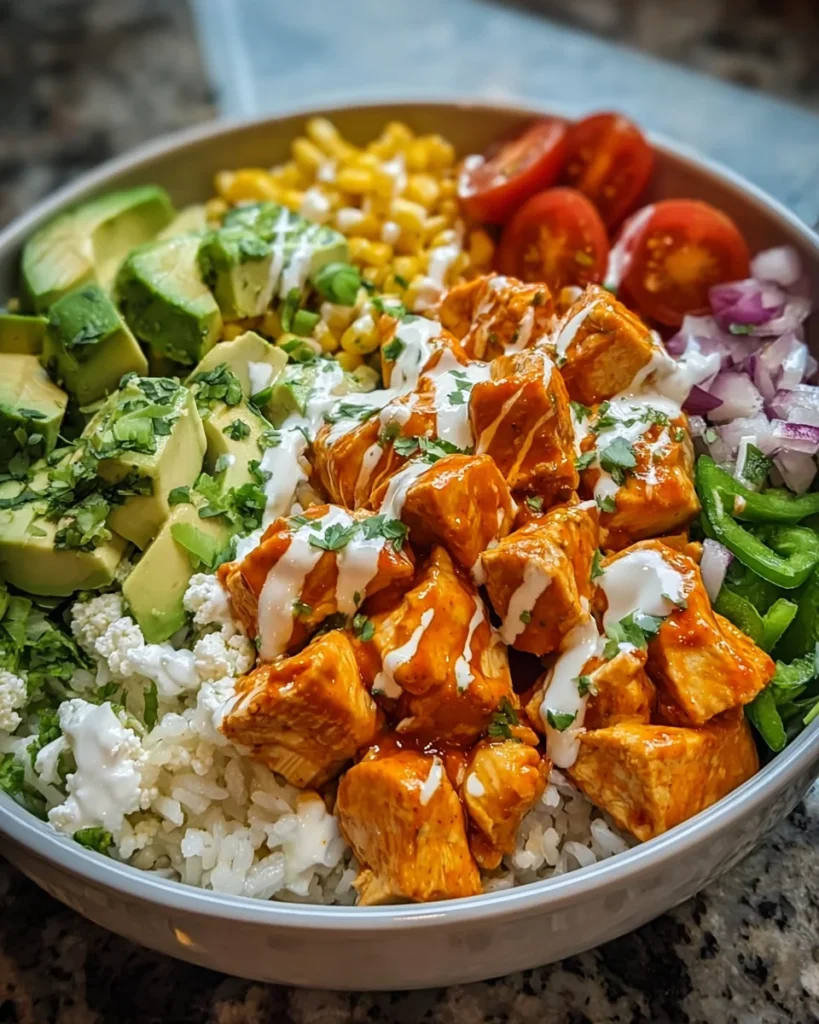
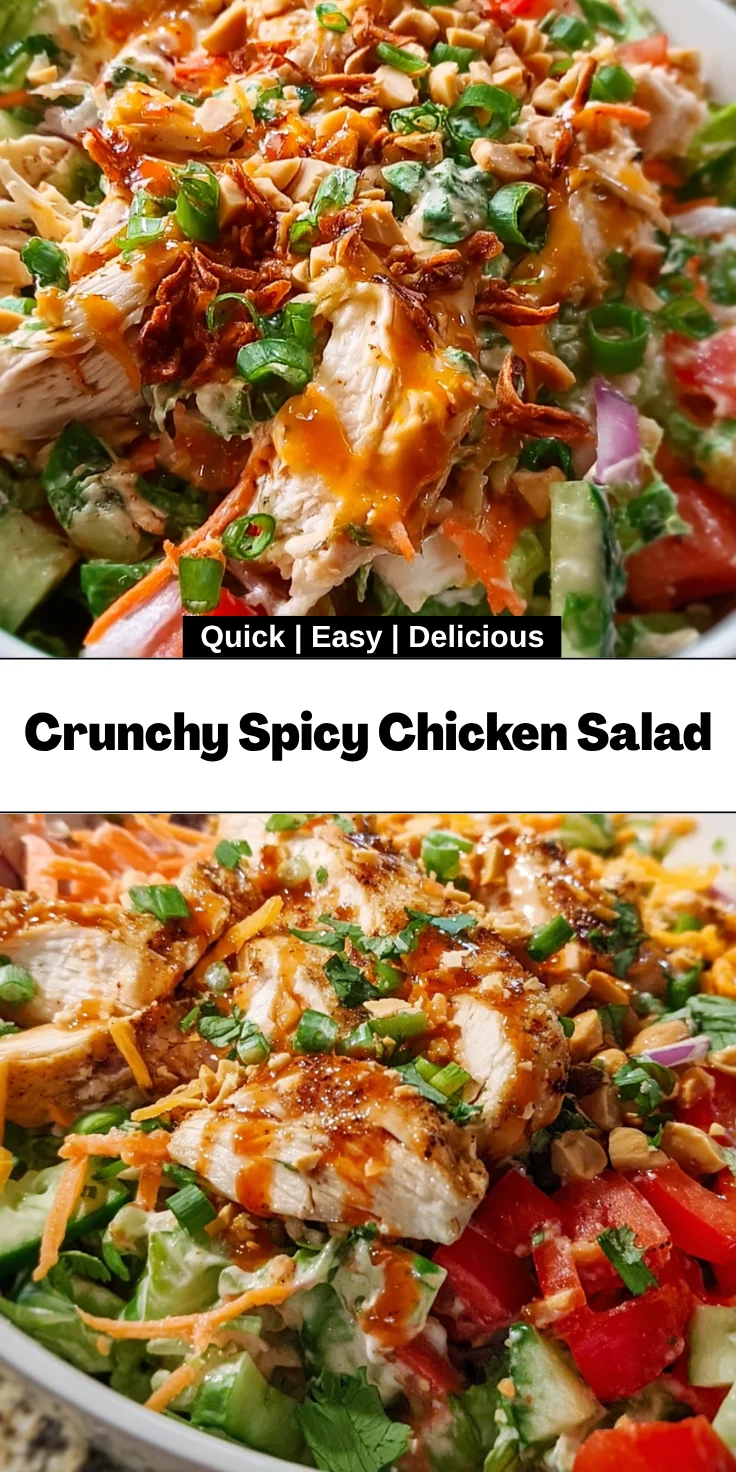
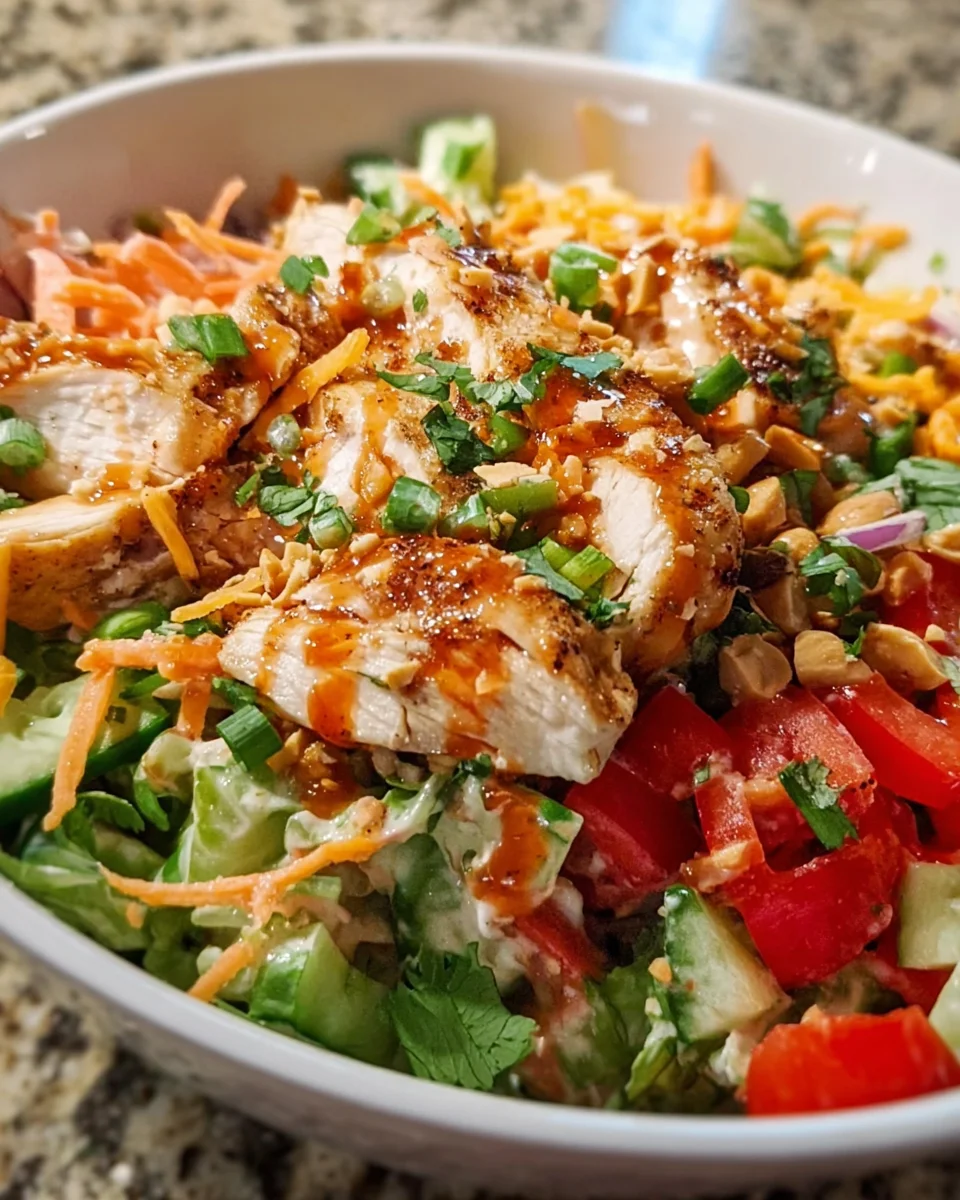
    Introduction to Crunchy Spicy Chicken Salad

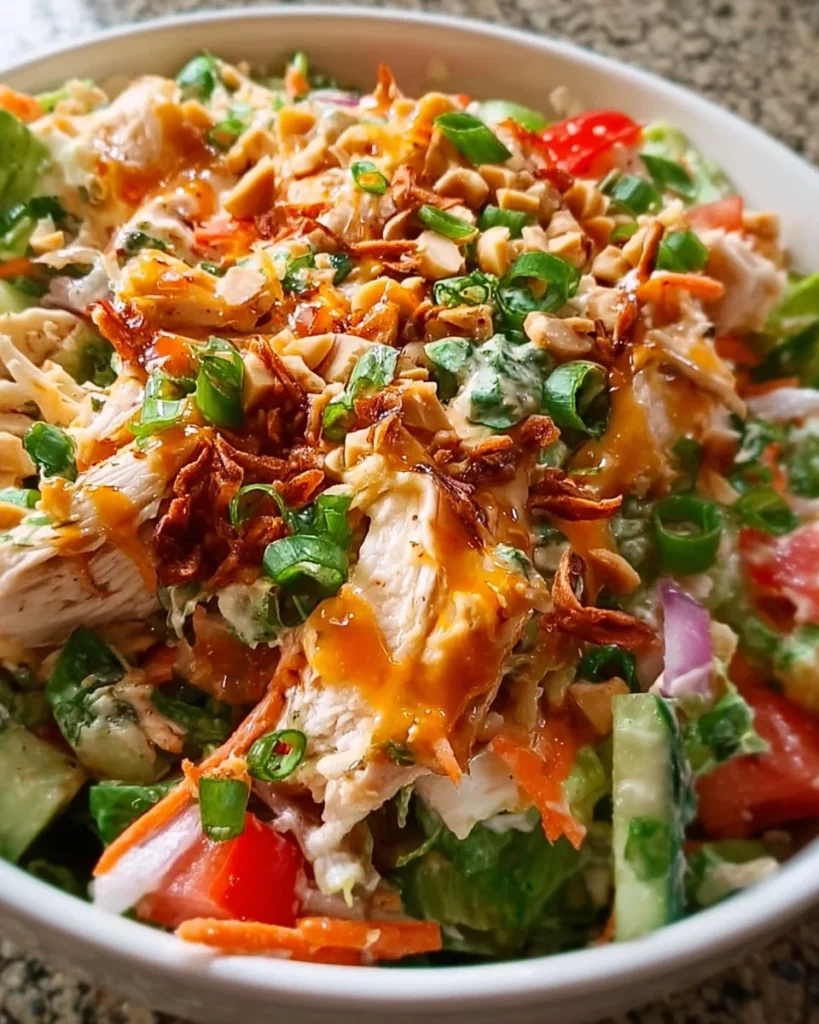
    As a passionate home cook, I know how hectic life can get, especially for busy moms and professionals. That’s why I’m excited to share my Crunchy Spicy Chicken Salad with you! This vibrant salad is not just a meal; it’s a flavor explosion ready in just 15 minutes. Imagine the satisfying crunch of fresh veggies paired with spicy, shredded chicken. It’s a quick solution for when you need something nutritious that still delights the palate. Whether it’s for a packed lunch or a light dinner, this recipe is here to impress your taste buds!

    Why You’ll Love This Crunchy Spicy Chicken Salad

    This Crunchy Spicy Chicken Salad is a lifesaver for busy days. It’s incredibly easy to whip up, letting you spend less time in the kitchen and more time enjoying dinner with your family. The harmonious blend of spicy chicken and crisp vegetables delivers a taste that will leave everyone asking for seconds. Plus, it’s healthy and gluten-free—a win-win for your meal planning!

    Ingredients for Crunchy Spicy Chicken Salad

    Gathering the freshest ingredients is key to making my Crunchy Spicy Chicken Salad truly shine. Here’s a rundown of what you’ll need:

    • Cooked chicken breasts: Shredded for a tender texture and packed with protein. Grabbing a rotisserie chicken can save time!
    • Mixed salad greens: A vibrant base full of nutrients. Choose whatever looks freshest at your local store.
    • Shredded carrots: For a pop of color and a sweet crunch. They also add a nice crunch to every bite!
    • Red bell pepper: Thinly sliced for sweetness and a crunchy bite. Feel free to swap it for yellow or orange peppers!
    • Sliced cucumber: Refreshing and hydrating, cucumber balances the spices perfectly.
    • Fresh cilantro: Chopped for a burst of freshness. If you’re not a fan, parsley works great too!
    • Roasted peanuts: Chopped for an irresistible crunch. If you have nut allergies, sunflower seeds can be a tasty alternative.
    • Olive oil: The base of your dressing—it adds richness. Extra virgin is my go-to for its flavor.
    • Lime juice: Gives the salad a zesty brightness, perfect for that refreshing touch.
    • Honey: Balances spice with a hint of sweetness. Agave syrup can be a vegan alternative.
    • Sriracha or hot sauce: The secret to the spicy kick! Adjust it based on your heat preference.
    • Minced garlic: Adds depth and flavor to your dressing. Feel free to use garlic powder if you’re in a pinch.
    • Salt and pepper: Essential for seasoning your dressing to perfection. Don’t hold back on the flavors!

    All ingredient measurements can be found at the bottom of the article for easy reference or printing. Happy cooking!

    How to Make Crunchy Spicy Chicken Salad

    Making my Crunchy Spicy Chicken Salad is as easy as pie—well, maybe easier! Just follow these simple steps, and you’ll have a delicious meal ready in no time.

    Step 1: Prepare the Dressing

    First things first: let’s whip up that flavorful dressing!

    In a small bowl, add the olive oil, lime juice, honey, sriracha, and minced garlic. Whisk everything together until it’s nicely blended.

    Make sure to taste it! Adjust the sriracha or honey if you want more heat or sweetness. This dressing can make or break your spicy salad, so get it just the way you love it.

    Step 2: Combine the Salad Ingredients

    Now that your dressing is ready, it’s time to build your salad bliss!

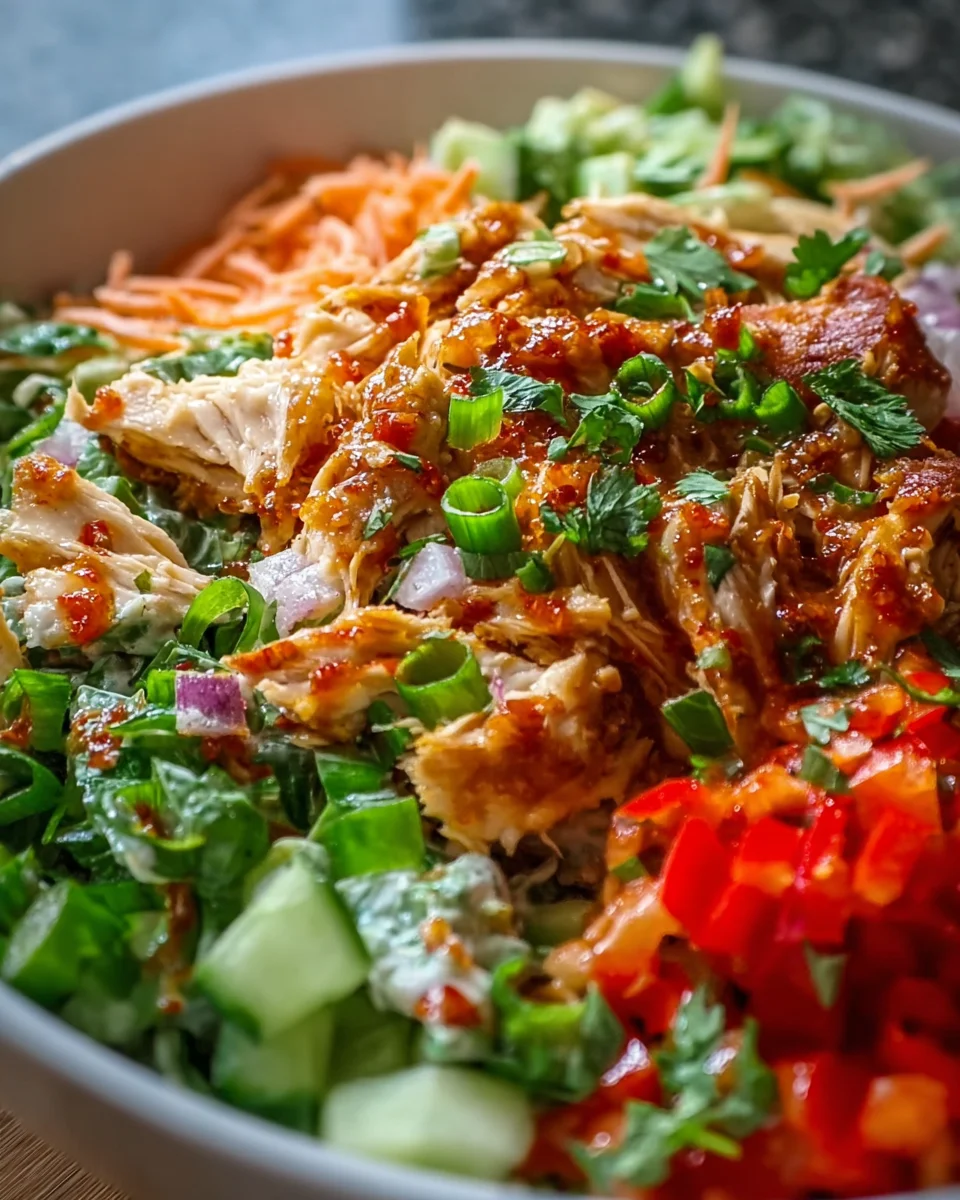
    In a large salad bowl, toss together the mixed salad greens, shredded chicken, shredded carrots, red bell pepper, cucumber, and chopped cilantro.

    Feel free to add any extra veggies you have on hand! This salad is flexible and a great way to use up produce.

    Step 3: Toss and Serve

    With all the ingredients in the bowl, it’s time for the fun part! Pour that zesty dressing over the salad.

    Gently toss everything together until it’s well coated, but don’t be too rough. You want to keep the crunch of those veggies!

    Finally, sprinkle the chopped roasted peanuts on top for a delightful crunch.

    Serve immediately for maximum freshness. You’ll be amazed at how quickly this healthy salad turns into a family favorite!

    Tips for Success

    • Use pre-cooked shredded chicken to save time. A rotisserie chicken works wonders!
    • Make the dressing a day ahead for deeper flavors. Just give it a good shake before using.
    • Customize veggies based on what’s in your fridge. Carrots, cabbage, or even avocado can add great texture!
    • Toss the salad just before serving to maintain that refreshing crunch.
    • Double the recipe for meal prep. It’s perfect for busy weeknights!

    Equipment Needed

    • Mixing bowl: A large bowl is essential. Any bowl will do—just make sure it’s big enough for tossing.
    • Whisk: Perfect for mixing the dressing. A fork can also work in a pinch!
    • Measuring spoons: Useful for precise ingredients like honey or lime juice.
    • Chopping board and knife: Necessary for prepping your veggies. Keep them sharp for easy slicing!

    Variations of Crunchy Spicy Chicken Salad

    • Spicy Thai Twist: Add mandarin oranges and a splash of soy sauce for a flavorful Asian-inspired variation.
    • Southwestern Style: Include black beans, corn, and avocado, swapping sriracha for chipotle sauce for a smoky kick.
    • Protein-Packed: Substitute the chicken with grilled shrimp or tofu for a delightful vegetarian option.
    • Herbed Delight: Mix in fresh basil and mint along with cilantro to elevate the freshness of your salad.
    • Nut-Free Alternative: Replace peanuts with crispy chickpeas for crunch without the nuts, perfect for allergies.

    Serving Suggestions for Crunchy Spicy Chicken Salad

    • Pair with Whole Grain Bread: Serve alongside slices of hearty whole grain bread for a wholesome meal.
    • Refreshing Beverage: Enjoy with a chilled lemonade or sparkling water to complement the spice.
    • Presentation Matters: Serve in colorful bowls with an extra sprinkle of chopped peanuts for an enticing look.
    • Perfect for Picnics: Pack it in a portable container for an on-the-go lunch!

    FAQs about Crunchy Spicy Chicken Salad

    Here are some common questions about my Crunchy Spicy Chicken Salad that might help you enjoy it even more!

    Can I make the salad ahead of time?

    Absolutely! You can prep the ingredients and store them separately. Just wait to add the dressing until you’re ready to serve to keep things fresh and crunchy.

    How can I make this salad suitable for meal prep?

    For meal prep, divide the salad into individual containers. Keep the dressing in a small jar to add before eating. That way, you can enjoy it fresh all week!

    What other proteins can I use besides chicken?

    If you’re looking for a change, try grilled shrimp, toasted chickpeas, or marinated tofu. Each offers a different flavor while keeping your salad delicious and filling!

    Is this salad gluten-free?

    Yes! My Crunchy Spicy Chicken Salad is naturally gluten-free, making it a fantastic option for those on gluten-free diets. Just double-check your dressing ingredients!

    How spicy can I make it?

    That’s entirely up to you! Start with a teaspoon of sriracha for a mild kick and increase it as needed, adjusting to your family’s taste preferences!

    Final Thoughts on Crunchy Spicy Chicken Salad

    Creating my Crunchy Spicy Chicken Salad has been a delightful journey, and I hope it becomes a staple in your kitchen too. It’s not just about the flavors; it’s the joy of bringing together fresh ingredients and spices that reflect your unique taste. This salad brings everyone to the table, turning a simple meal into a joyous experience. Whether you’re busy with family commitments or just craving something exciting, this vibrant dish is sure to please. So, roll up your sleeves, toss in the magic, and watch it disappear from the bowl!


    Print

    clock clock iconcutlery cutlery iconflag flag iconfolder folder iconinstagram instagram iconpinterest pinterest iconfacebook facebook iconprint print iconsquares squares iconheart heart iconheart solid heart solid icon

    Description

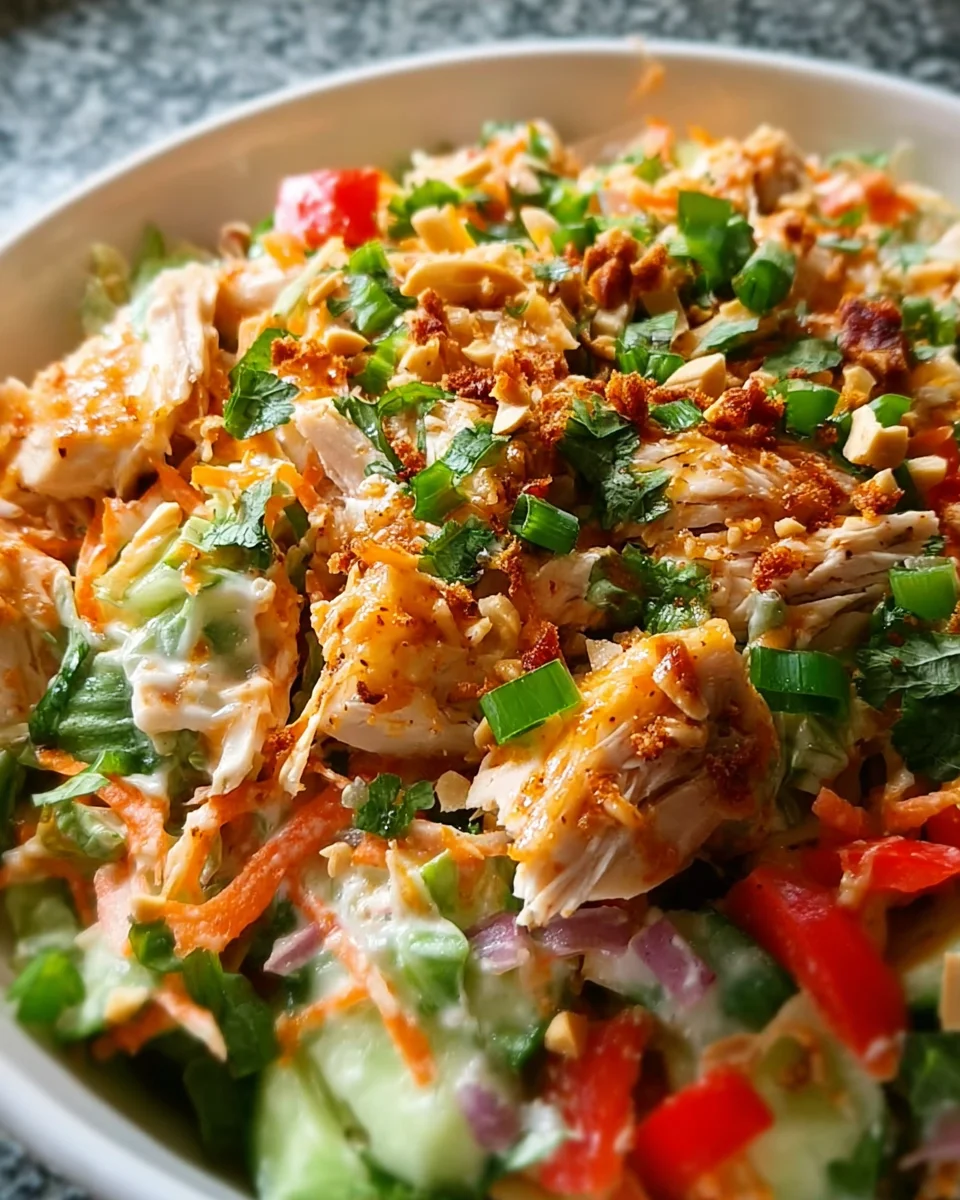
    A delicious and crunchy salad featuring spicy chicken and fresh vegetables, perfect for a quick meal.


    • 2 cooked chicken breasts, shredded
    • 4 cups mixed salad greens
    • 1 cup shredded carrots
    • 1 red bell pepper, thinly sliced
    • 1/2 cup sliced cucumber
    • 1/4 cup chopped fresh cilantro
    • 1/4 cup roasted peanuts, chopped
    • 3 tbsp olive oil (for dressing)
    • 1 tbsp lime juice (for dressing)
    • 1 tsp honey (for dressing)
    • 1 tsp sriracha or hot sauce (adjust to taste, for dressing)
    • 1 clove garlic, minced (for dressing)
    • Salt and pepper to taste (for dressing)

    1. In a small bowl, whisk together olive oil, lime juice, honey, sriracha, garlic, salt, and pepper to make the spicy dressing.
    2. In a large salad bowl, combine mixed greens, shredded chicken, carrots, bell pepper, cucumber, and cilantro.
    3. Pour the dressing over the salad and toss gently to combine.
    4. Sprinkle chopped roasted peanuts on top for crunch.
    5. Serve immediately.

    Notes

    • Adjust the level of spice in the dressing according to your preference.
    • This salad is best served fresh to maintain its crunch.
    • Prep Time: 15 minutes
    • Cook Time: 0 minutes
    • Category: Salad
    • Method: Mixing
    • Cuisine: American

    Nutrition

    • Serving Size: 1 serving
    • Calories: 350
    • Sugar: 3g
    • Sodium: 200mg
    • Fat: 20g
    • Saturated Fat: 3g
    • Unsaturated Fat: 15g
    • Trans Fat: 0g
    • Carbohydrates: 15g
    • Fiber: 4g
    • Protein: 25g
    • Cholesterol: 70mg

    Sharing is caring!

  • Buffalo Chicken Bowls

    Buffalo Chicken Bowls


    Introduction to Buffalo Chicken Bowls

    As a busy mom, I know how challenging it can be to whip up a tasty dinner that pleases everyone. That’s why I absolutely adore these Buffalo Chicken Bowls! They pack a punch with flavor while being super simple to make. Imagine tender chicken, fresh veggies, and zesty Buffalo sauce all together in one bowl—delicious, right? These bowls are not just a quick solution for hectic nights, but they’re also a fun dish to impress your family and friends. So, let’s dive into this spicy meal idea that’s sure to become a family favorite!

    Why You’ll Love This Buffalo Chicken Bowls

    These Buffalo Chicken Bowls are an absolute game-changer for busy nights. They come together in just 35 minutes, offering a savory explosion of flavors everyone will crave. Plus, they’re packed with protein and fresh ingredients, making them a nutritious option you can feel good about serving. The beauty of this dish lies in its versatility—customize it to please even the pickiest eaters! You’ll wonder how you ever lived without them.

    Ingredients for Buffalo Chicken Bowls

    Let’s gather all the delicious ingredients that make up these Buffalo Chicken Bowls. Each one plays a vital role to ensure a mouthwatering experience. Here’s what you’ll need:

    • Boneless, skinless chicken breasts: The star of the show, juicy and easy to cook. If you’re short on time, rotisserie chicken is a great substitute!
    • Olive oil: Adds richness and helps seasonings stick to your chicken.
    • Garlic powder: A dash of flavor that elevates the dish without overpowering it.
    • Onion powder: It brings a subtle sweetness to balance the spice.
    • Smoked paprika: This optional touch gives your chicken a smoky depth, making flavors pop!
    • Salt and pepper: Essential for enhancing all the other lovely flavors.
    • Buffalo sauce: The secret sauce! It’s what makes these bowls genuinely spicy and addictive. Want more heat? Add extra!
    • Unsalted butter: For those wanting an extra creamy buffalo sauce—worth considering!
    • Cooked brown rice, white rice, or quinoa: These grains serve as a hearty base. Quinoa adds a nutty flavor and more protein, while rice is classic and comforting.
    • Corn kernels: Fresh or frozen, corn adds a sweet crunch. Family members who aren’t into spice will enjoy this texture.
    • Cherry tomatoes: They’re juicy and add a burst of color, making it visually appealing.
    • Shredded lettuce or mixed greens: Provides a fresh, crisp layer that balances the richness of the dish.
    • Avocado: Creamy slices enrich the bowl and bring healthy fats. Who can say no to avocado?
    • Sliced red onions (optional): They add a sharp zing that’s delightful with the savory chicken.
    • Fresh cilantro (optional): A sprinkle adds freshness—perfect if you’re a cilantro fan!
    • Crumbled feta cheese (optional): Creamy yet tangy, this is a flavorful finishing touch that many love.
    • Ranch or blue cheese dressing (optional): Perfect for drizzling over the top if you’re craving extra creaminess!
    • Extra buffalo sauce: To drizzle on top, for those who adore heat.
    • Lime: A squeeze adds a refreshing zing that balances out the spiciness beautifully.

    The ingredient list may seem long, but many items are standard in most kitchens. Don’t worry; exact quantities for these Buffalo Chicken Bowls can be found at the bottom of the article and are available for printing!

    How to Make Buffalo Chicken Bowls

    Now that we have all our ingredients lined up, it’s time to get cooking! Follow these simple steps to create mouthwatering Buffalo Chicken Bowls that are as fun to make as they are to eat.

    Prepare the Chicken

    First, let’s give our chicken some love! Start by slicing the chicken breasts horizontally to create thinner pieces. This helps them cook faster and more evenly.

    Coat the chicken with olive oil, then sprinkle on garlic powder, onion powder, smoked paprika, salt, and pepper. Mix it up so the seasonings cover every inch. Trust me, this is where the magic begins!

    Next, heat a skillet over medium-high heat, adding a bit of olive oil. Once it’s hot, lay your seasoned chicken in the pan. Cook for about 6-8 minutes on each side, ensuring it’s golden brown. You want that internal temperature to hit 165°F (74°C).

    Once done, remove the chicken from the skillet. Let it rest for a few minutes. Resting is essential; it keeps the juices inside the chicken, making it juicy and tender!

    Make the Buffalo Sauce

    Using the same skillet is a great way to capture all those flavors! Lower the heat to medium-low and add butter if you’re using it. Let it melt gently.

    Then, pour in the Buffalo sauce. Stir it well to combine into a creamy masterpiece. Want that extra kick? Feel free to customize it with more sauce! You can adjust the heat and find the sweet spot for your taste buds.

    Prepare the Base

    While the chicken rests, let’s get started on the base. If you’re using rice or quinoa, follow package instructions to cook it. For quick meal prep, you can use leftover grains!

    While that cooks, rinse your corn if it’s canned and chop your cherry tomatoes in half. Don’t forget to shred lettuce and slice that heavenly avocado. These fresh ingredients bring color and crunch into your bowls!

    Assemble the Buffalo Chicken Bowls

    Now comes the fun part—assembling our delicious bowls! Start with a hearty layer of brown rice, white rice, or quinoa at the bottom. This acts as the delicious base.

    Next, pile on the shredded lettuce, corn, halved cherry tomatoes, and sliced avocado. You should see vibrant colors dancing in your bowl!

    Finally, add the sliced buffalo chicken on top and drizzle it generously with extra sauce from the skillet. If you like, sprinkle feta cheese, drizzle some ranch or blue cheese dressing, and a squeeze of lime to finish.

    And just like that, your Buffalo Chicken Bowls are ready to impress! These hearty bowls do not only look pretty; they taste spectacular, offering a perfect balance of spice and freshness. Enjoy every flavorful bite!

    Tips for Success

    • Prep all ingredients before starting to cook; it makes the process smoother.
    • Use a meat thermometer to ensure chicken is cooked perfectly.
    • Customize the spice level by adjusting the amount of buffalo sauce.
    • Meal prep these bowls for easy leftovers during the week; they keep well!
    • Mix in your favorite veggies to suit your family’s tastes.

    Equipment Needed

    • Skillet: A non-stick skillet works wonders, but any skillet will do.
    • Meat thermometer: Ensures perfectly cooked chicken; a kitchen staple!
    • Cutting board: You’ll need this for chopping and slicing ingredients.
    • Sharp knife: A good knife makes preparation a breeze.
    • Measuring cups: For accurately portioning your grains and toppings.

    Variations for Buffalo Chicken Bowls

    • Cauliflower Rice: Swap out grains for cauliflower rice for a low-carb alternative.
    • Veggie-Loaded: Add roasted or sautéed veggies like bell peppers, zucchini, or spinach for extra nutrition.
    • Grilled Chicken: For a smoky flavor, grill the chicken instead of skillet cooking for that charred goodness.
    • Dairy-Free Option: Omit the butter and cheese, using avocado or tahini for creaminess instead.
    • Buffalo Tofu: Replace chicken with marinated and baked tofu for a vegetarian version bursting with flavor.
    • Different Sauces: Experiment with different sauces like teriyaki or BBQ if buffalo isn’t your thing.

    Serving Suggestions

    • Pair your Buffalo Chicken Bowls with a refreshing side salad for added crunch.
    • Serve with crispy tortilla chips for a fun twist; they’re perfect for scooping!
    • Enjoy a cold beverage like iced tea or a light beer to balance the heat.
    • For a pop of color, garnish bowls with extra cilantro or lime wedges.

    FAQs about Buffalo Chicken Bowls

    As you prepare to dive into the world of Buffalo Chicken Bowls, some questions might pop up. Don’t worry; I’ve got you covered with answers!

    Can I make Buffalo Chicken Bowls ahead of time for meal prep?

    Absolutely! These bowls are perfect for meal prep. You can cook the chicken, grains, and veggies ahead of time, then assemble them when you’re ready to eat. Just store each component in separate containers to keep everything fresh.

    How can I make these bowls less spicy?

    If you’re sensitive to heat, simply reduce the amount of buffalo sauce you use. You can also mix in some ranch or blue cheese dressing to mellow out the spice. Trying a milder buffalo sauce is a great option too!

    What if I have leftovers?

    Leftovers can be stored in an airtight container in the fridge for up to three days. When reheating, you can warm everything up in the microwave. Just keep in mind that the lettuce and avocado are best added fresh!

    Are Buffalo Chicken Bowls healthy?

    Yes! They’re packed with protein from the chicken, fiber from the veggies, and healthy fats from avocado. Swapping grains for quinoa or using brown rice boosts the nutrient value further. They’re a wholesome meal you can feel good about!

    Can I use other proteins instead of chicken?

    Absolutely! You can swap chicken for turkey, shrimp, or even plant-based proteins like tofu or tempeh. The flavors of Buffalo sauce are versatile enough to complement various proteins beautifully!

    Final Thoughts

    These Buffalo Chicken Bowls are more than just a meal; they’re a culinary adventure brimming with flavor and joy. Every bowl reflects the warmth of home-cooked goodness, wrapping you in comfort after a long day. Plus, the versatility allows you to cater to your family’s diverse tastes while keeping things exciting in the kitchen. As you relish those spicy, creamy bites, know that you’re making memories alongside delicious food. So gather your loved ones around the table, and savor the happiness this dish brings to your home. You won’t regret adding this recipe to your busy weeknight arsenal!


    Print

    clock clock iconcutlery cutlery iconflag flag iconfolder folder iconinstagram instagram iconpinterest pinterest iconfacebook facebook iconprint print iconsquares squares iconheart heart iconheart solid heart solid icon

    Description

    A delicious and spicy Buffalo Chicken Bowl that combines tender chicken with fresh vegetables and grains, perfect for a satisfying meal.


    • 2 large boneless, skinless chicken breasts
    • 1 tablespoon olive oil
    • ½ teaspoon garlic powder
    • ½ teaspoon onion powder
    • 1 teaspoon smoked paprika (optional)
    • Salt and pepper to taste
    • ½ cup Buffalo sauce
    • 2 tablespoons unsalted butter (optional, for extra creaminess)
    • 2 cups cooked brown rice, white rice, or quinoa
    • 1 cup corn kernels (frozen or fresh)
    • 1 cup cherry tomatoes, halved
    • 1 cup shredded lettuce or mixed greens
    • 1 avocado, sliced
    • ¼ cup sliced red onions (optional)
    • 1 tablespoon fresh cilantro, chopped (optional)
    • ¼ cup crumbled feta cheese (optional)
    • ¼ cup ranch or blue cheese dressing (optional)
    • Extra buffalo sauce for drizzling
    • A squeeze of lime juice

    1. Season the chicken breasts with olive oil, garlic powder, onion powder, smoked paprika, salt, and pepper.
    2. Heat a skillet over medium-high heat, add a little olive oil, and cook the chicken for 6-8 minutes per side, until fully cooked (internal temperature of 165°F/74°C).
    3. Remove from heat and let it rest for a few minutes before slicing.
    4. Melt the butter (if using) in the same skillet over low heat.
    5. Add the buffalo sauce and stir to combine.
    6. Slice the chicken into strips or bite-sized pieces and toss in the buffalo sauce mixture until well coated.
    7. Cook rice or quinoa according to package instructions.
    8. Slice the avocado, halve the cherry tomatoes, and chop the cilantro.
    9. Start with a layer of rice or quinoa in each bowl.
    10. Add shredded lettuce, corn, cherry tomatoes, avocado, and red onions.
    11. Top with the buffalo chicken and drizzle any extra sauce from the skillet.
    12. Finish with crumbled feta, dressing, and a squeeze of lime if desired.

    Notes

    • Feel free to adjust toppings based on personal preferences.
    • This dish can be made ahead of time for meal prep.
    • For more heat, add additional buffalo sauce to taste.
    • Prep Time: 15 minutes
    • Cook Time: 20 minutes
    • Category: Main Course
    • Method: Skillet Cooking
    • Cuisine: American

    Nutrition

    • Serving Size: 1 bowl
    • Calories: 550
    • Sugar: 4g
    • Sodium: 800mg
    • Fat: 25g
    • Saturated Fat: 8g
    • Unsaturated Fat: 15g
    • Trans Fat: 0g
    • Carbohydrates: 50g
    • Fiber: 8g
    • Protein: 40g
    • Cholesterol: 90mg

    Sharing is caring!

  • Chilled summer pasta salad

    Chilled summer pasta salad


    Introduction to Chilled Summer Pasta Salad

    As the summer sun shines, finding refreshing meals can be a challenge, right? Enter the chilled summer pasta salad, a delightful dish that’s both easy and vibrant! This recipe is perfect for those hectic days when you need a cool, nourishing meal at your fingertips. Imagine sitting outside, enjoying fresh ingredients while feeling the gentle breeze. With just a handful of ingredients, you can whip up this flavorful delight that will impress your loved ones. So let’s embark on this culinary adventure that not only satisfies the palate but also brings a sense of joy and ease to your summertime dining.

    Why You’ll Love This Chilled Summer Pasta Salad

    This chilled summer pasta salad is a lifesaver for busy days. It’s quick to make, taking just about 25 minutes from start to finish. The vibrant colors and fresh flavors awaken your senses, turning any meal into a celebration. Plus, it’s easily customizable! You can toss in your favorite vegetables or proteins. No cooking fuss, just simple steps toward a delicious dish that’s sure to please everyone.

    Ingredients for Chilled Summer Pasta Salad

    Gathering the right ingredients is the first step toward your refreshing chilled summer pasta salad. Here’s what you’ll need:

    • Rotini pasta: Its spiral shape holds dressing beautifully, making each bite delightful.
    • Cherry tomatoes: Sweet bursts of flavor; choose vibrant ones for added color and taste.
    • Cucumber: Adds a crisp, refreshing crunch. Opt for English cucumbers for less peeling!
    • Bell pepper: Colorful and sweet; they bring a slight crunch and a rainbow effect to your salad. Any color works!
    • Red onion: For a zesty kick. Finely chop it to soften its sharpness.
    • Black olives: Rich and briny, they add depth of flavor. You can use green olives if you prefer.
    • Feta cheese: Creamy and tangy, it complements the salad perfectly. Swap with goat cheese for a twist!
    • Fresh basil: Fragrant and fresh, it elevates the salad’s overall flavor. You can use parsley if basil isn’t on hand.
    • Olive oil: The key to a smooth dressing! Use extra virgin for the best taste.
    • Red wine vinegar: Adds brightness; feel free to substitute with white wine vinegar for a milder flavor.
    • Garlic powder: Provides depth without the sharpness of fresh garlic. Use fresh minced garlic for extra zing, if you like!
    • Salt and pepper: These enhance all the flavors; adjust to your taste!

    You’ll find exact quantities at the bottom of the article, along with a printable version for easy access. Now, let’s get cooking!

    How to Make Chilled Summer Pasta Salad

    Creating your chilled summer pasta salad is a breeze! Follow these simple steps to make a refreshing dish that will keep you cool all summer long.

    Step 1: Cook the Pasta

    Start by cooking the rotini pasta in a pot of boiling water. Follow the package instructions until it’s al dente. This means it should have a slight bite to it, not mushy! Once it’s done, drain it in a colander. Here’s a little tip: rinse the pasta under cold water for about a minute. This process halts the cooking and cools it down, which is exactly what we want for our chilled salad.

    Step 2: Prepare the Vegetables

    While the pasta is cooking, wash and chop your vegetables. Slice the cherry tomatoes in half and dice the cucumber and bell pepper into small, bite-sized pieces. Aim for uniform cuts to make your salad aesthetically pleasing. Don’t forget to finely chop the red onion; it adds just the right kick! Fresh ingredients not only taste better but add beautiful colors to your salad.

    Step 3: Mix Ingredients

    In a large mixing bowl, combine your cooled rotini pasta with the prepared vegetables. It’s like bringing together a vibrant community of flavors! Toss in the black olives and crumbled feta cheese, and sprinkle the chopped basil on top. Every bite will burst with freshness!

    Step 4: Whisk the Dressing

    Let’s bring it all together with a tangy dressing. In a small bowl, whisk together the olive oil, red wine vinegar, garlic powder, salt, and pepper. Embrace the aroma! This dressing is simple yet delicious, enhancing the flavors of your chilled summer pasta salad.

    Step 5: Combine and Chill

    Now, pour that beautiful dressing over your salad. Gently toss everything together until the pasta and veggies are evenly coated. Cover the bowl with plastic wrap and pop it in the refrigerator for at least 30 minutes. This chilling time allows the flavors to meld beautifully, creating a dish that sings of summer!

    Tips for Success

    • Don’t overcook the pasta; aim for al dente for perfect texture.
    • Allow the salad to chill for a bit; it enhances the flavors.
    • Customize with seasonal veggies—zucchini or spinach work great!
    • Make it vegan by omitting feta or using plant-based cheese.
    • Store leftovers in an airtight container for up to 3 days.

    Equipment Needed

    • Large pot: For boiling the pasta. A stockpot works great!
    • Colander: To drain the pasta. You can use a slotted spoon in a pinch!
    • Mixing bowl: A large one for combining ingredients. Any big bowl will do!
    • Whisk: For the dressing. A fork works just as well!
    • Knife and cutting board: Essential for chopping veggies.

    Variations

    • Protein Boost: Add grilled chicken, shrimp, or chickpeas for extra protein.
    • Different Noodles: Try bowtie or penne pasta instead of rotini for a fun shape.
    • Herb Options: Swap fresh basil for parsley, dill, or even mint for a unique twist.
    • Spicy Kick: Toss in diced jalapeños or a pinch of red pepper flakes for heat.
    • Seasonal Veggies: Incorporate snap peas, radishes, or roasted corn for a seasonal flare.

    Serving Suggestions

    • Pair your chilled summer pasta salad with grilled shrimp or chicken for a hearty meal.
    • Serve it alongside crusty garlic bread for a delightful crunch.
    • Complement with a crisp white wine or sparkling water infused with lemon.
    • Presentation tip: Use a beautiful serving bowl and garnish with extra basil for that wow factor!

    FAQs about Chilled Summer Pasta Salad

    Can I make this chilled summer pasta salad ahead of time?

    Absolutely! This chilled summer pasta salad tastes even better the next day. Make it a day ahead and store it in the fridge, allowing the flavors to marry beautifully.

    What kind of pasta can I use?

    While rotini is my go-to, you can easily swap it for other shapes like penne, fusilli, or farfalle. Just ensure it holds the dressing well!

    How long will leftovers stay fresh?

    Your salad should last in the fridge for about three days in an airtight container. Just give it a stir before serving!

    Can I customize the vegetables?

    Of course! Feel free to add or substitute with your favorite veggies. Spinach, zucchini, or even roasted bell peppers can really elevate the taste!

    Is this pasta salad suitable for a vegan diet?

    Yes! Simply omit the feta cheese or use a plant-based alternative to make it a delightful vegan dish, perfect for all summer occasions.

    Final Thoughts

    This chilled summer pasta salad is truly a celebration of summer flavors and ease. Each bite bursts with freshness, turning hot days into delightful culinary experiences. Preparing it brings a sense of joy and accomplishment, knowing you’ve created something both nourishing and beautiful. Whether you’re sharing it at a family gathering or enjoying it solo for lunch, the flavors meld together to create a dish that comforts and refreshes. So, embrace the summer sunshine with this vibrant pasta salad, and let it bring a smile to your day as much as it does to your palate!


    Print

    clock clock iconcutlery cutlery iconflag flag iconfolder folder iconinstagram instagram iconpinterest pinterest iconfacebook facebook iconprint print iconsquares squares iconheart heart iconheart solid heart solid icon

    Description

    A refreshing chilled summer pasta salad perfect for hot days.


    • 8 ounces rotini pasta
    • 1 cup cherry tomatoes, halved
    • 1 cup cucumber, diced
    • 1 cup bell pepper, diced (any color)
    • 1/2 cup red onion, finely chopped
    • 1/2 cup black olives, sliced
    • 1/2 cup feta cheese, crumbled
    • 1/4 cup fresh basil, chopped
    • 1/4 cup olive oil
    • 2 tablespoons red wine vinegar
    • 1 teaspoon garlic powder
    • Salt and pepper to taste

    1. Cook the rotini pasta according to package instructions until al dente. Drain and rinse under cold water to cool.
    2. In a large bowl, combine the cooled pasta, cherry tomatoes, cucumber, bell pepper, red onion, black olives, feta cheese, and basil.
    3. In a small bowl, whisk together the olive oil, red wine vinegar, garlic powder, salt, and pepper.
    4. Pour the dressing over the pasta salad and toss gently to combine.
    5. Cover the bowl with plastic wrap and refrigerate for at least 30 minutes to allow the flavors to meld.
    6. Before serving, give the salad a good stir and adjust seasoning if necessary.

    Notes

    • Use whole wheat rotini for a healthier option.
    • Feel free to add other vegetables like spinach or zucchini.
    • This salad can be made a day ahead and stored in the refrigerator.
    • Prep Time: 15 minutes
    • Cook Time: 10 minutes
    • Category: Salad
    • Method: No-Cook
    • Cuisine: Mediterranean

    Nutrition

    • Serving Size: 1 cup
    • Calories: 250
    • Sugar: 3g
    • Sodium: 400mg
    • Fat: 15g
    • Saturated Fat: 5g
    • Unsaturated Fat: 8g
    • Trans Fat: 0g
    • Carbohydrates: 28g
    • Fiber: 3g
    • Protein: 6g
    • Cholesterol: 20mg

    Sharing is caring!

  • Marinated Cheese Appetizer with Salami & Pickles

    Marinated Cheese Appetizer with Salami & Pickles


    Introduction to Marinated Cheese Appetizer with Salami & Pickles

    Ah, the joy of hosting! Whether it’s for a spontaneous gathering or a planned get-together, having the perfect appetizer can make all the difference. That’s where my Marinated Cheese Appetizer with Salami & Pickles comes in. It’s a delightful mixture that not only tantalizes the taste buds but also makes your life easier. With just a bit of prep and a little marination time, you’ll create something that impresses without overwhelming you. Plus, who doesn’t love the combination of creamy cheese, savory salami, and zesty pickles? This dish is sure to be a crowd-pleaser!

    Why You’ll Love This Marinated Cheese Appetizer with Salami & Pickles

    This Marinated Cheese Appetizer with Salami & Pickles is a true lifesaver in the kitchen. It takes just minutes to prepare, making it perfect for those busy days when you need a quick and delicious solution. The flavors meld together beautifully, offering a burst of taste in every bite. Plus, it’s the kind of dish that everyone raves about, ensuring your gatherings are memorable without the stress!

    Ingredients for Marinated Cheese Appetizer with Salami & Pickles

    Your journey to a delightful Marinated Cheese Appetizer with Salami & Pickles begins with gathering the right ingredients. Here’s what you’ll need:

    • Sharp Cheddar Cheese: This cheese adds a bold flavor that contrasts beautifully with the other ingredients.
    • Monterey Jack or Mozzarella: Both options bring a creamy texture, balancing the sharpness of the cheddar.
    • Dry Salami: The rich, savory notes of salami enhance the dish, making each bite irresistible.
    • Mini Dill Pickles or Gherkins: Their tangy crunch adds a delightful zing, elevating the entire flavor profile.
    • Red Onion (optional): A thin slice of red onion can add a touch of sweetness and a pop of color but can be omitted for a milder taste.
    • Olive Oil: Used in the marinade, it brings richness and helps to meld all those lovely flavors together.
    • Red Wine Vinegar or White Balsamic: Either option adds vibrant acidity, balancing the richness of the cheese and salami.
    • Dijon Mustard: This ingredient gives a hint of spice and depth to the marinade—make sure it’s a good quality for the best flavor.
    • Garlic: A little minced garlic adds a delightful aroma and punch that complements the other ingredients.
    • Italian Seasoning: A blend of herbs that brings an Italian flair, enhancing the overall taste.
    • Crushed Red Pepper Flakes (optional): For those who enjoy a kick, these flakes add heat without overpowering the dish.
    • Salt & Pepper: Essential seasonings that help bring all the flavors to life—taste as you go to ensure balance.
    • Fresh Parsley (or Dried): Adding a touch of freshness to the dish, whether you use fresh or dried parsley, it’s a great garnish too!

    For exact quantities, check the bottom of the article, where you can find everything laid out for easy printing. Happy prepping!

    How to Make Marinated Cheese Appetizer with Salami & Pickles

    Prepare the Ingredients

    Let’s start by prepping our ingredients for this delightful Marinated Cheese Appetizer with Salami & Pickles. First, cube the sharp cheddar cheese and Monterey Jack or mozzarella into bite-sized pieces. This way, they’ll soak up the marinade better. Next, slice the dry salami into small, easy-to-manage pieces that are perfect for grabbing later. If you’re using the optional red onion, thinly slice it now for that extra flavor boost. Don’t forget to drain your mini dill pickles or gherkins well; their tang will elevate this dish! Having all these ingredients ready makes the whole process smoother, trust me!

    Make the Marinade

    Now, let’s whip up the marinade that ties everything together. In a small bowl or jar, combine the olive oil, red wine vinegar or white balsamic, and Dijon mustard. This brings a depth of flavor and a touch of zing. Next, add in the minced garlic and Italian seasoning, giving it a quick stir. For those who like a bit of heat, sprinkle in some crushed red pepper flakes. Finally, season with salt and pepper, adjusting to your preference. A fresh pathway of flavors is crucial for this Marinated Cheese Appetizer with Salami & Pickles, so make sure everything is mixed well and ready to shine!

    Combine and Marinate

    Let’s put it all together! In a large bowl or resealable container, place the cubed cheeses, sliced salami, drained pickles, and, if you chose to use it, red onion. Pour the freshly made marinade over these delicious ingredients, making sure they’re all coated evenly. Gently toss everything together; you want to combine flavors, not ruin those lovely cheese cubes! Once combined, cover the bowl or seal the container and refrigerate. Allow it to marinate for at least an hour, but for best results, let it sit overnight. The longer this magical mixture marinates, the tastier it gets. Every bite will pack a punch of flavor!

    Serving Suggestions

    When it comes to serving this Marinated Cheese Appetizer with Salami & Pickles, presentation is key! Consider using wooden skewers for individual serving sizes; it makes it fun and easy for guests to grab a bite. Place the marinated treasures in a charming bowl, garnishing with a sprinkle of fresh parsley for a pop of color. You can also serve it alongside crackers or fresh bread for added texture. This appetizer looks vibrant and inviting, making it not just a dish, but a centerpiece. Trust me, your guests will be coming back for seconds!

    Tips for Success

    • Make sure to cut the cheese and salami into even-sized pieces for consistent marination.
    • Let the appetizer marinate longer for a richer flavor—up to 24 hours is ideal!
    • Taste the marinade before mixing in the ingredients; you can adjust seasonings as needed.
    • Use a glass or ceramic container for marinating; metal can alter the taste.
    • Always serve chilled for the best flavor experience!

    Equipment Needed

    • Cutting Board: A good cutting board keeps your counters safe; plastic or wood works well.
    • Knife: A sharp chef’s knife makes quick work of cubing cheese and slicing salami.
    • Mixing Bowl: Any large bowl will do for combining ingredients; glass is great for visibility.
    • Whisk or Fork: Use these to mix the marinade thoroughly.
    • Resealable Container: Perfect for marinating; a glass container is ideal to avoid staining.

    Variations of Marinated Cheese Appetizer with Salami & Pickles

    • Smoked Cheese: Swap sharp cheddar for smoked Gouda for an earthy twist.
    • Vegetarian Version: Replace salami with marinated artichokes or olives for a savory punch.
    • Herbed Marinade: Add fresh herbs like basil or dill for a fragrant upgrade.
    • Spicy Kick: Incorporate jalapeños or pepper jack cheese for an extra heat boost.
    • Nuts and Seeds: Toss in some toasted nuts or sunflower seeds for crunch!

    Serving Suggestions for Marinated Cheese Appetizer with Salami & Pickles

    • Pair with crusty baguette slices or gourmet crackers for added texture.
    • Serve alongside a light salad for a refreshing contrast.
    • Complement with a crisp white wine or sparkling water with lemon.
    • Display on a beautiful cheese board for a stunning presentation.

    FAQs about Marinated Cheese Appetizer with Salami & Pickles

    How long can I marinate the cheese and salami?
    You can marinate your Marinated Cheese Appetizer with Salami & Pickles for at least one hour. However, letting it sit overnight truly enhances the flavors, allowing the ingredients to meld beautifully. Flavorful goodness in every bite awaits!

    Can I use different types of cheese or salami?
    Absolutely! Feel free to experiment with different types of cheese, like smoked Gouda or pepper jack for a spicy twist. For salami, you could use turkey or beef varieties as substitutes. Just remember, the taste profile could shift a bit, but it’ll still be delicious!

    Is this appetizer gluten-free?
    Yes! This Marinated Cheese Appetizer with Salami & Pickles is gluten-free. It’s great for parties since everyone can enjoy it. Just double-check your serving accompaniments like crackers for gluten-free options.

    What can I serve alongside this appetizer?
    Pair your Marinated Cheese Appetizer with crunchy fresh veggies, seasoned crackers, or a refreshing salad. A crisp white wine or sparkling water with citrus can also perfectly complement the dish!

    Can I make this appetizer ahead of time?
    Definitely! You can prepare this appetizer a day in advance. In fact, the flavors become even richer with a little time. Just store it in the fridge and serve when you’re ready to impress your guests!

    Final Thoughts on Marinated Cheese Appetizer with Salami & Pickles

    Creating this Marinated Cheese Appetizer with Salami & Pickles is like painting a flavor masterpiece. Each ingredient harmonizes, offering a burst of joy and satisfaction with every bite. Whether hosting friends or enjoying a quiet evening, this dish brings a little zest to the table. It’s not just about food; it’s about creating delightful moments with loved ones. Plus, knowing that you’ve made something delicious with ease can be a source of pride! So get ready to enjoy smiles and compliments—trust me, this appetizer is bound to be the star of your next gathering!


    Print

    clock clock iconcutlery cutlery iconflag flag iconfolder folder iconinstagram instagram iconpinterest pinterest iconfacebook facebook iconprint print iconsquares squares iconheart heart iconheart solid heart solid icon

    Description

    A delicious marinated cheese appetizer combined with salami and pickles, perfect for gatherings.


    • 8 oz sharp cheddar cheese, cubed
    • 8 oz Monterey Jack or mozzarella, cubed
    • 4 oz dry salami, sliced into bite-size pieces
    • 1 cup mini dill pickles or gherkins, drained
    • ½ small red onion, thinly sliced (optional)
    • ⅓ cup olive oil
    • 2 tablespoons red wine vinegar or white balsamic
    • 1 teaspoon Dijon mustard
    • 1 clove garlic, minced
    • 1 teaspoon Italian seasoning
    • ½ teaspoon crushed red pepper flakes (optional)
    • Salt & pepper to taste
    • 1 tablespoon chopped fresh parsley (or 1 teaspoon dried)

    1. Cube the cheeses, slice the salami, and drain the pickles. Thinly slice the red onion, if using.
    2. In a small bowl or jar, whisk together the olive oil, vinegar, Dijon mustard, garlic, Italian seasoning, red pepper flakes, salt, pepper, and parsley.
    3. Place the cheese, salami, pickles, and onion in a large bowl or resealable container.
    4. Pour the marinade over the ingredients and gently toss to coat evenly.
    5. Cover and refrigerate for at least 1 hour, or up to 24 hours, stirring occasionally if marinating overnight.
    6. Serve chilled or at room temperature in a bowl or on skewers for individual servings.

    Notes

    • Marinating for longer enhances the flavors.
    • Can be served as a party appetizer or a snack.
    • Adjust the level of heat with crushed red pepper flakes according to taste.
    • Prep Time: 15 minutes
    • Cook Time: 0 minutes
    • Category: Appetizer
    • Method: No-cook
    • Cuisine: American

    Nutrition

    • Serving Size: 1/2 cup
    • Calories: 250
    • Sugar: 1g
    • Sodium: 600mg
    • Fat: 20g
    • Saturated Fat: 7g
    • Unsaturated Fat: 10g
    • Trans Fat: 0g
    • Carbohydrates: 5g
    • Fiber: 1g
    • Protein: 12g
    • Cholesterol: 30mg

    Sharing is caring!

  • Lemon Poppy Seed Energy Bites

    Lemon Poppy Seed Energy Bites


    Introduction to Lemon Poppy Seed Energy Bites

    Life gets hectic, doesn’t it? We juggle work, family, and countless responsibilities. That’s why I’m excited to share my Lemon Poppy Seed Energy Bites with you. These little gems are a quick solution for those busy days when you need a burst of energy without the guilt. With a refreshing lemon flavor and a delightful crunch from poppy seeds, they’re not just nutritious; they’re irresistible! Ideal as a snack for the kids or a wholesome treat for yourself, this recipe is about bringing a little joy back to your snack time!

    Why You’ll Love This Lemon Poppy Seed Energy Bites

    These Lemon Poppy Seed Energy Bites are a game changer! They’re incredibly easy to whip up, taking just ten minutes of your time. The zesty lemon flavor dances on your palate, while the protein-packed ingredients keep you feeling full and satisfied. Perfect for busy moms, these bites are also a wonderful way to treat your kiddos to something nutritious without any fuss. Who says healthy can’t be delicious?

    Ingredients for Lemon Poppy Seed Energy Bites

    Gathering the right ingredients is key to making these refreshing Lemon Poppy Seed Energy Bites. Here’s what you’ll need:

    • PlantFusion vanilla bean protein powder – A vegan protein option that adds creaminess and helps keep you fueled throughout the day.
    • Old-fashioned rolled oats – Adding fiber and texture, oats make these bites hearty. Go gluten-free if needed!
    • Poppy seeds – These little seeds add a lovely crunch and a subtle nutty flavor that brings joy to every bite.
    • Truvia or preferred sweetener – A touch of sweetness goes a long way. Feel free to swap with honey or agave for a natural alternative.
    • Freshly grated lemon zest – This brightens the flavor of your bites, giving them that zesty lemon kick we all love.
    • Freshly squeezed lemon juice – Using fresh lemons over bottled juice enhances the freshness and tang in these energy bites.
    • Water – Helps to combine everything, ensuring a nice consistency for shaping your energy bites.

    If you’d like to mix things up, consider adding in ingredients like chia seeds, chopped nuts, or some dried fruit for a creative twist! The best part? Exact quantities are at the bottom of the article and available for printing, making your cooking experience even smoother.

    How to Make Lemon Poppy Seed Energy Bites

    Making Lemon Poppy Seed Energy Bites is a breeze! This no-bake recipe is as simple as it gets. Let’s roll up our sleeves and dive into the delicious steps to create these energizing snacks.

    Step 1: Combine Dry Ingredients

    In a large bowl, start by combining the protein powder, rolled oats, poppy seeds, Truvia, and lemon zest. Mix them well, ensuring everything is evenly distributed. This step is crucial because it sets the base for the wonderful flavor and texture of your energy bites. Remember, the more thoroughly you mix, the better the final result!

    Step 2: Mix in Wet Ingredients

    Next, gradually pour the freshly squeezed lemon juice and water into your dry mixture. Stir gently but firmly until everything is well incorporated. You want a uniform consistency, so make sure there are no dry clumps left. The zesty lemon aroma should already start to fill your kitchen, making the process feel even more rewarding!

    Step 3: Form into Bites

    Now comes the fun part! With clean hands, scoop out small portions of the mixture and shape them into bite-sized spheres. I usually aim for about a tablespoon of mixture for each bite, but feel free to adjust according to your preference. Gently press them together so they hold their shape well. It’s like crafting little energy balls of joy!

    Step 4: Store Properly

    Once you’ve shaped all your energy bites, place them in an airtight container. Store them in the refrigerator to keep them fresh. They’re best enjoyed chilled, and you can easily grab one on the go. These Lemon Poppy Seed Energy Bites can stay good for up to a week, so you’ll always have a nutritious snack ready when the hunger pangs hit!

    Tips for Success

    • Use fresh lemons for zest and juice; it makes a world of difference in flavor!
    • Keep your hands slightly damp when forming the bites to prevent sticking.
    • Experiment with different protein powders for varied flavors and nutrition.
    • If the mixture feels too dry, add a splash more water or lemon juice.
    • For extra fun, invite the kids to help roll the bites; it’s a great way to spend time together!

    Equipment Needed

    • Mixing bowl – A large bowl to combine ingredients. A sturdy pot can work too!
    • Spoon or spatula – For stirring the mixture. A fork can do the job as well!
    • Airtight container – To store your bites. A plastic bag will work if you’re short on space.
    • Measuring spoons – Helpful for accuracy, but eyeballing can be fine for this recipe!

    Variations of Lemon Poppy Seed Energy Bites

    • Chia Seed Boost: Add a tablespoon of chia seeds for extra fiber and omega-3s.
    • Coconut Twist: Incorporate shredded unsweetened coconut into the mixture for a tropical flair.
    • Nutty Delight: Mix in some chopped almonds or walnuts for added crunch and healthy fats.
    • Dried Fruit Medley: Include some dried cranberries or apricots to enhance sweetness and chewiness.
    • Cocoa Infusion: For a chocolatey twist, add a tablespoon of cocoa powder and adjust the sweetener accordingly.
    • Spice It Up: Sprinkle in a pinch of cinnamon or ginger for a warm spice note that complements lemon perfectly.

    Serving Suggestions for Lemon Poppy Seed Energy Bites

    • Pair these energy bites with a refreshing glass of iced herbal tea for a delightful afternoon pick-me-up.
    • Enjoy them alongside a bowl of fresh fruit for a balanced snack, bringing color and nutrients to your plate.
    • Present them on a pretty platter at your next gathering—guests will love the cheerful lemon flavor!
    • For an extra protein boost, serve with a dollop of Greek yogurt on the side.

    FAQs about Lemon Poppy Seed Energy Bites

    Can I make these Lemon Poppy Seed Energy Bites gluten-free?
    Absolutely! Just use gluten-free rolled oats as a substitute. These energizing snacks will still be delicious and safe for anyone with gluten sensitivities.

    How long do Lemon Poppy Seed Energy Bites last?
    Once refrigerated in an airtight container, these bites can last up to a week. Just grab one when those afternoon snack cravings hit!

    Can I substitute the protein powder?
    Certainly! If you prefer plant-based proteins, you can use pea protein, or feature a different flavor to shake things up. Just keep in mind that this may slightly alter the taste.

    What’s the best way to enjoy these energy bites?
    These Lemon Poppy Seed Energy Bites are perfect on their own, but I love pairing them with a cup of green tea for a refreshing boost. They also make a great pre-workout snack!

    Can I freeze these energy bites?
    Yes, you can! Just make sure they’re stored in a freezer-safe container. They can last a month in the freezer, making them a convenient option for meal prep!

    Final Thoughts

    Making these Lemon Poppy Seed Energy Bites can transform your snacking routine into a joyful experience. Each bite is a little burst of sunshine, bringing zest and satisfaction to your busy day. I love having a stash of these in the fridge, ready to fuel my mornings or as a pick-me-up during the afternoon slump. They not only nourish my body but also remind me that healthy eating doesn’t have to be complicated or boring. So, roll up your sleeves and get ready to savor the delightful taste of these bites—you won’t regret it!


    Print

    clock clock iconcutlery cutlery iconflag flag iconfolder folder iconinstagram instagram iconpinterest pinterest iconfacebook facebook iconprint print iconsquares squares iconheart heart iconheart solid heart solid icon

    Description

    A refreshing and nutritious snack packed with protein and zesty lemon flavor.


    • 3 scoops (90g) PlantFusion vanilla bean protein powder
    • ½ cup (50g) old-fashioned rolled oats (gluten-free, if necessary)
    • 1 tbsp (9g) poppy seeds
    • ½ tbsp (7g) Truvia (or preferred sweetener)
    • 1 tsp freshly grated lemon zest (about one medium lemon)
    • 6 tbsp (90mL) freshly squeezed lemon juice (about two medium lemons)
    • 6 tbsp (90mL) water

    1. In a large bowl, combine the protein powder, oats, poppy seeds, Truvia, and lemon zest.
    2. Add in the lemon juice and water, stirring until fully incorporated.
    3. Shape the mixture into 28 small spheres, gently pressing them together.
    4. Place them in an airtight container and refrigerate until ready to eat.

    Notes

    • Store in the refrigerator for up to one week.
    • These bites can be enjoyed as a quick snack or pre-workout energy boost.
    • Prep Time: 10 minutes
    • Cook Time: 0 minutes
    • Category: Snack
    • Method: No-bake
    • Cuisine: American

    Nutrition

    • Serving Size: 1 energy bite
    • Calories: 70
    • Sugar: 2g
    • Sodium: 15mg
    • Fat: 1.5g
    • Saturated Fat: 0.5g
    • Unsaturated Fat: 1g
    • Trans Fat: 0g
    • Carbohydrates: 10g
    • Fiber: 1g
    • Protein: 5g
    • Cholesterol: 0mg

    Sharing is caring!

  • Cholesterol Lowering Black Bean & Mango Salad

    Cholesterol Lowering Black Bean & Mango Salad


    Introduction to Cholesterol Lowering Black Bean & Mango Salad

    Welcome, fellow home cooks! If you’re searching for a vibrant and delicious dish, look no further than this Cholesterol Lowering Black Bean & Mango Salad. Life can be a whirlwind, especially for busy moms and professionals, making it challenging to eat healthily. This salad is not only quick and easy to whip up but is also bursting with flavor and nutrients. It’s the perfect blend of beans and tropical mango that will have your family asking for seconds. Let’s dive into making this delightful dish together!

    Why You’ll Love This Cholesterol Lowering Black Bean & Mango Salad

    This salad checks all the boxes—it’s quick, wholesome, and oh-so-delicious! In just 15 minutes, you can have a bright, cholesterol-lowering meal on the table. The blend of black beans and mango adds a delightful sweetness that even picky eaters will love. Plus, it’s a fantastic way to sneak in those essential nutrients. Trust me, this vibrant salad will become a staple in your busy kitchen!

    Ingredients for Cholesterol Lowering Black Bean & Mango Salad

    Gathering the right ingredients is the first step to creating a delicious Cholesterol Lowering Black Bean & Mango Salad. Here’s what you’ll need:

    • Black beans: A can of these nutritious legumes forms the protein-packed base, known for their cholesterol-lowering benefits.
    • Mango: Choose a ripe mango for a sweet, juicy burst that adds a tropical twist to the salad. You can use fresh or frozen, though fresh is best!
    • Red bell pepper: This crunchy veggie not only adds a lovely color but also a hint of sweetness and a bunch of vitamins.
    • Red onion: Adding a touch of sharpness, red onion balances perfectly with the sweetness of the mango.
    • Cilantro: Fresh cilantro brings a bright flavor that elevates the dish, but if you’re not a fan, parsley works too!
    • Avocado: Creamy and rich, avocados provide healthy fats and make the salad super satisfying.
    • Lime juice: A squeeze of lime juice brightens everything up—don’t skip it! Fresh lime juice is the star here.
    • Olive oil: Good quality olive oil brings everything together with its smooth texture and heart-healthy properties.
    • Salt and pepper: These staples help enhance the flavors; remember, a little goes a long way!

    For a fun twist, you can also add some diced cucumber for crunch, or swap in your favorite herbs. All the exact quantities are detailed at the bottom of the article, where you can also find a printable recipe!

    How to Make Cholesterol Lowering Black Bean & Mango Salad

    Creating this Cholesterol Lowering Black Bean & Mango Salad is as easy as pie, or should I say, as simple as a salad? Follow these practical steps, and you’ll have a colorful dish ready in no time!

    Step 1: Prepare the Veggies

    Start by dicing the red bell pepper and red onion. Aim for small, even pieces to ensure a well-blended experience.

    Chop some fresh cilantro, too. I love chopping it fine, so it spreads its vibrant flavor throughout the salad.

    Step 2: Dice the Mango and Avocado

    For the mango, slice it in half, remove the pit, and carefully peel it. Then, cut it into small cubes. Remember, using a ripe mango is key! It’ll be sweeter and juicier, enhancing the flavor of your salad.

    Now, do the same with the avocado. Slice it in half, remove the pit (careful now!), and scoop out the creamy flesh before dicing.

    Step 3: Mix the Salad Base

    In a large mixing bowl, combine your black beans, diced mango, chopped red bell pepper, red onion, and cilantro. Use a spatula to gently fold them together. You want to keep everything intact; no mushy salads here!

    Step 4: Add Avocado

    Now comes the avocado! Gently fold it into the salad. Don’t be too rough, or those lovely avocado pieces will turn to mush. We want them to stay chunky for that creamy texture!

    Step 5: Prepare the Dressing

    In a small bowl, whisk together the juice of one lime, your olive oil, salt, and pepper. This dressing is a game changer, boosting the flavors of your Cholesterol Lowering Black Bean & Mango Salad. Adjust the seasoning to your liking—it’s all about what makes your taste buds sing!

    Step 6: Toss the Salad

    Pour the dressing over the salad mixture. Now, gently toss everything together until evenly coated. This step is crucial for ensuring every bite is a burst of flavor!

    Step 7: Serve and Enjoy

    Your salad is ready! Serve it immediately for the freshest taste. If you can wait, letting it chill in the refrigerator for about 30 minutes helps the flavors meld even better. It’s a win-win, really!

    Tips for Success

    • Always choose a ripe mango; it makes all the difference in flavor.
    • Be gentle when mixing to keep the avocado intact for that creamy bite.
    • Letting the salad chill enhances the flavors; plan for a little waiting time!
    • Feel free to customize the veggies based on what you have on hand.
    • Store leftovers in an airtight container to maintain freshness for up to two days.

    Equipment Needed

    • Cutting board: Essential for chopping your fresh ingredients. A sturdy one will do!
    • Sharp knife: You’ll need this for easy dicing of veggies and fruits.
    • Mixing bowl: A large bowl is perfect for combining all those vibrant ingredients.
    • Whisk: Ideal for mixing the dressing—if you don’t have one, a fork works too!
    • Spatula: Use this for gently folding ingredients without crushing them.

    Variations for Cholesterol Lowering Black Bean & Mango Salad

    • Spice it Up: Add diced jalapeños for a kick. This adds a zesty boldness that pairs beautifully with the sweetness of the mango.
    • Go Tropical: Include diced pineapple or papaya for an even sweeter, tropical flavor profile.
    • Quinoa Base: For a heartier version, toss in some cooked quinoa. It brings added protein and can help keep you fuller longer.
    • Different Beans: Swap black beans for kidney beans or chickpeas. This can introduce new flavors while still being healthy.
    • Creaminess Plus: Mix in Greek yogurt or a splash of coconut milk for a creamy dressing option that’s still healthy.
    • Vegan Cheese: Crumble some vegan feta on top for an extra layer of flavor and creaminess—without the cholesterol!

    Serving Suggestions

    • Pair your Cholesterol Lowering Black Bean & Mango Salad with grilled chicken or fish for a complete meal.
    • Serve alongside whole grain tortilla chips for a crunchy complement.
    • A glass of chilled lemonade or herbal iced tea balances the flavors perfectly.
    • For presentation, use a colorful platter to highlight the salad’s vibrant ingredients.

    FAQs about Cholesterol Lowering Black Bean & Mango Salad

    As you prepare to whip up this delicious Cholesterol Lowering Black Bean & Mango Salad, you might have some questions. Here are the answers to help you along the way!

    Can I make this salad ahead of time?

    Absolutely! You can prepare the salad a few hours in advance. Just wait to add the avocado until you’re ready to serve to keep it fresh and green.

    Is this salad suitable for meal prep?

    Yes! It’s perfect for meal prep. The salad can be stored in an airtight container in the refrigerator for up to two days. Just remember to keep the avocado aside if you want it to stay fresh.

    Can I adjust the ingredients based on my dietary needs?

    Definitely! This Cholesterol Lowering Black Bean & Mango Salad is versatile. You can substitute ingredients or add others based on what you love or need. Need it gluten-free? It’s already gluten-free!

    How can I enhance the flavor of the salad?

    For more oomph, add spices like cumin or chili powder for a kick, or consider fresh herbs like basil or mint for a unique twist!

    Is there a way to make this salad more filling?

    Sure! Mix in some cooked quinoa or even grilled chicken for added protein. It transforms the salad into a more substantial dish!

    Final Thoughts

    Creating this Cholesterol Lowering Black Bean & Mango Salad is more than just a cooking endeavor; it’s a delightful culinary adventure that can bring joy to your table. The vibrant colors and fresh ingredients remind me of sunny days and happy gatherings. This salad is not only quick and easy to prepare, but it also fosters healthy eating habits for you and your family. Every bite is packed with flavors that dance on your palate, making meal time enjoyable. I hope it brings you as much happiness as it brings to my kitchen!


    Print

    clock clock iconcutlery cutlery iconflag flag iconfolder folder iconinstagram instagram iconpinterest pinterest iconfacebook facebook iconprint print iconsquares squares iconheart heart iconheart solid heart solid icon

    Description

    A fresh and vibrant salad that combines the nutritional benefits of black beans and mango to help lower cholesterol levels.


    • 1 can (15 oz) black beans, drained and rinsed
    • 1 ripe mango, peeled and diced
    • 1 red bell pepper, diced
    • 1/4 cup red onion, finely chopped
    • 1/4 cup fresh cilantro, chopped
    • 1 avocado, diced
    • Juice of 1 lime
    • 2 tablespoons olive oil
    • Salt and pepper to taste

    1. Prepare the Veggies: Begin by chopping the red bell pepper, red onion, and fresh cilantro. Make sure everything is finely chopped for a well-blended salad.
    2. Dice the Mango and Avocado: Peel the mango and avocado, then dice them into small, bite-sized pieces. Ensure the mango is ripe for optimal sweetness.
    3. Mix the Salad Base: In a large mixing bowl, combine the drained black beans, diced mango, red bell pepper, red onion, and chopped cilantro.
    4. Add Avocado: Gently fold the diced avocado into the salad. Be careful not to mash it, as you want the pieces to remain intact.
    5. Prepare the Dressing: In a small bowl, whisk together the lime juice, olive oil, salt, and pepper. Adjust the seasoning according to your taste.
    6. Toss the Salad: Pour the dressing over the salad and toss everything together gently, ensuring the dressing is evenly distributed.
    7. Serve and Enjoy: The salad is now ready to be served. You can enjoy it immediately or let it chill in the refrigerator for about 30 minutes to allow the flavors to meld.

    Notes

    • For added crunch, consider including some diced cucumber.
    • This salad is best enjoyed fresh but can be stored in an airtight container in the refrigerator for up to 2 days.
    • Adjust lime juice and seasoning according to your taste preference.
    • Prep Time: 15 minutes
    • Cook Time: 0 minutes
    • Category: Salad
    • Method: No-Cook
    • Cuisine: Mexican

    Nutrition

    • Serving Size: 1 cup
    • Calories: 200
    • Sugar: 4g
    • Sodium: 220mg
    • Fat: 9g
    • Saturated Fat: 1g
    • Unsaturated Fat: 8g
    • Trans Fat: 0g
    • Carbohydrates: 30g
    • Fiber: 10g
    • Protein: 7g
    • Cholesterol: 0mg

    Sharing is caring!

  • Strawberry Shortcake Cheesecake Sushi Rolls

    Strawberry Shortcake Cheesecake Sushi Rolls


    Introduction to Strawberry Shortcake Cheesecake Sushi Rolls

    As a busy mom, dessert can sometimes feel like an afterthought, right? But let me introduce you to my delightful creation: Strawberry Shortcake Cheesecake Sushi Rolls. This exciting recipe takes the flavors of strawberries and cream cheese, packing them into a fun sushi roll format! Perfect for a quick solution to impress your loved ones, these sushi rolls are not only beautiful but also incredibly easy to whip up. Whether it’s a family gathering or a sweet craving, these tasty treats will charm everyone at your table!

    Why You’ll Love This Strawberry Shortcake Cheesecake Sushi Rolls

    Imagine a dessert that’s as simple as it is stunning! These Strawberry Shortcake Cheesecake Sushi Rolls are a breeze to make, perfect for busy days when cravings hit. Each bite bursts with strawberry flavor and creamy goodness, offering a delightful twist on traditional cheesecake. Plus, you can assemble them in no time, making them an ideal choice for entertaining or treating yourself. Who doesn’t want a dessert that looks fancy but is effortlessly easy?

    Ingredients for Strawberry Shortcake Cheesecake Sushi Rolls

    Let’s get started on the fun part—gathering the ingredients for my Strawberry Shortcake Cheesecake Sushi Rolls! This recipe highlights simple, yet delicious components that come together beautifully. Below are the main players, and don’t worry, I’ll include exact measurements at the bottom for those who want to print it out.

    • Crushed Golden Oreos: These delicious cookies form the crust that ties everything together with a sweet crunch.
    • Melted Butter: This is key for binding the crust while lending a rich flavor. You could use coconut oil for a different twist!
    • Cream Cheese: The creamy base of our cheesecake filling! Make sure it’s softened to avoid lumps. Neufchâtel cheese is a lighter option if you’re watching your calories.
    • Powdered Sugar: This adds just the right amount of sweetness to balance the cream cheese. It’s fine if you want to use a sugar alternative, too.
    • Vanilla Extract: A splash of this magic ingredient enhances all the flavors, inviting warmth with every bite.
    • Heavy Whipping Cream: Essential for creating a light and fluffy cheesecake texture. If you prefer dairy-free options, coconut cream can work wonders!
    • Diced Fresh Strawberries: These juicy gems not only bring freshness but also vibrant color. You could swap them with other fruits like raspberries if desired.
    • Strawberry Preserves or Jam: A spoonful layers on extra strawberry flavor; feel free to use homemade or store-bought depending on your time!
    • Extra Crushed Golden Oreos: This is for coating those sushi rolls and adding an irresistible crunch. You can substitute with graham cracker crumbs for a different profile.
    • Whipped Cream and Additional Strawberries (optional): These make a lovely garnish for serving, adding a touch of elegance that’s impossible to resist!

    Now that we have everything we need, you’re one step closer to crafting these beautiful rolls! Just follow along, and this dessert will be the highlight of your next sweet occasion!

    How to Make Strawberry Shortcake Cheesecake Sushi Rolls

    Now, the exciting part! Let’s dive into creating these stunning Strawberry Shortcake Cheesecake Sushi Rolls. Follow these simple steps, and you’ll be a sushi roll pro in the dessert world!

    Step 1: Prepare the Crust

    Start by mixing the crushed Golden Oreos with melted butter in a bowl. This forms a delicious crust mixture that’s sweet and inviting. It should be crumbly yet slightly sticky; perfect for that scrumptious base!

    Step 2: Freeze the Crust

    Next, spread that delightful crust mixture evenly onto a parchment-lined baking sheet. Press it flat with your fingers or a spatula to create a smooth surface. It’ll look a bit like a cookie sheet of happiness! Now, pop it in the freezer for about 10–15 minutes to set.

    Step 3: Make the Cheesecake Filling

    While the crust firms up, grab a mixing bowl and beat the softened cream cheese until smooth. Add in the powdered sugar and a splash of vanilla extract, then mix until well combined. This mixture should be creamy and oh-so-delicious!

    Step 4: Whip the Cream

    In another bowl, whip the heavy cream until you see stiff peaks forming. This step transforms your cheesecake into a fluffy delight! Gently fold the whipped cream into the cream cheese mixture, careful not to deflate it. The aim? A light and airy filling that will melt in your mouth!

    Step 5: Layer the Cheesecake

    Now, it’s time to spread that dreamy cheesecake mixture over the chilled crust. Use a spatula to ensure even coverage. This layer is where the magic starts to happen; it should look like a cloud of creamy sweetness over the cookie base.

    Step 6: Add Strawberry Layers

    Evenly distribute the diced strawberries and spoonfuls of strawberry preserves over the cheesecake layer. This combination brings color and flavor, making your rolls burst with fruity goodness. Your inner photographer will want to capture this vibrant scene!

    Step 7: Roll It Up

    Carefully use the parchment paper to guide you as you roll the layered sheet into a log. This part requires a gentle touch. Once it’s rolled, freeze it for at least 1 hour to let those flavors meld together beautifully!

    Step 8: Slice into Rolls

    After an hour and a little patience, remove the log from the freezer. With a sharp knife, slice it into sushi-sized rolls. Each bite should reveal those mesmerizing layers of color and texture. It’s like a rainbow of deliciousness!

    Step 9: Coat with Crushed Oreos

    To finish, roll the sides of each sushi slice in extra crushed Oreos. This crunchy coating adds a fun twist and makes these rolls even more irresistible. You’ll love that contrast between the creamy filling and the hint of crunch!

    Step 10: Garnish and Serve

    Finally, garnish your delightful rolls with whipped cream and a few sliced strawberries if you wish. Serve them chilled, and watch everyone’s face light up with joy! You’ve mastered a stunning dessert that impresses without the stress!

    Tips for Success

    • Always soften your cream cheese! It mixes smoother, ensuring a creamy texture.
    • Don’t skip freezing the crust! It helps everything hold together beautifully.
    • Use fresh strawberries for pop and flavor; they make a world of difference!
    • Keep a damp cloth nearby for sticky fingers while you roll.
    • Feel free to experiment with flavors; layers of lemon curd add a zesty kick!

    Equipment Needed

    • Mixing Bowls: You’ll need at least two bowls. Glass or metal works great for mixing.
    • Spatula: A rubber spatula is ideal for spreading and folding ingredients.
    • Sharp Knife: A sharp knife is essential for slicing those beautiful rolls.
    • Parchment Paper: This helps prevent sticking and makes for easy cleanup.
    • Baking Sheet: Any standard baking sheet will do for freezing the crust.

    Variations

    • Fruit Swaps: Replace strawberries with other fruits like blueberries, peaches, or raspberries for a different flavor profile.
    • Chocolate Lovers: Add a swirl of chocolate sauce or melted chocolate into the cheesecake filling for a decadent twist.
    • Gluten-Free Option: Substitute crushed gluten-free cookies for the crust to make this dessert accessible for gluten-sensitive eaters.
    • Vegan Version: Use vegan cream cheese and coconut whipped cream for a plant-based alternative that keeps the flavors intact.
    • Nutty Touch: Incorporate crushed nuts, like almonds or pecans, into the filling or as a coating for added texture and flavor.

    Serving Suggestions

    • Pair these Strawberry Shortcake Cheesecake Sushi Rolls with a refreshing mint tea or a sparkling lemonade for a delightful contrast.
    • For a more decadent touch, serve alongside a scoop of vanilla ice cream.
    • Presentation matters! Serve on a colorful platter with fresh mint leaves for a pop of color.
    • Consider offering a drizzle of chocolate sauce for those who enjoy a sweet twist.
    • Add edible flowers for a beautiful, elegant touch for special occasions!

    FAQs about Strawberry Shortcake Cheesecake Sushi Rolls

    Can I make these Strawberry Shortcake Cheesecake Sushi Rolls ahead of time?

    Absolutely! You can prepare these rolls a day in advance and keep them in the refrigerator. Just make sure they are well-wrapped in plastic to maintain freshness. They’ll be a delightful treat waiting for you!

    What can I use as a substitute for Golden Oreos?

    If Golden Oreos aren’t your favorite or if you want a different flavor, graham crackers or any other buttery cookie will work beautifully. They’ll still give you that delicious crust everyone loves!

    How should I store leftover sushi rolls?

    Store any leftover Strawberry Shortcake Cheesecake Sushi Rolls in an airtight container in the fridge for up to three days. Just remember to enjoy them chilled for the best flavor!

    Can I freeze the sushi rolls for later?

    Yes, you can freeze these rolls! Once sliced, place them in a single layer on a baking sheet to freeze. After they’re firm, transfer them to a zip-top bag for up to a month. Just thaw in the fridge before serving.

    Do I have to use fresh strawberries?

    While fresh strawberries add a pop of flavor and beautiful visuals, you can use frozen or dried strawberries in a pinch. Just remember that frozen berries may introduce some extra moisture in the layers!

    Final Thoughts

    Making Strawberry Shortcake Cheesecake Sushi Rolls is more than just whipping up a dessert; it’s about creating joyful moments in the kitchen. Each layer of strawberries and cream meets a sweet crunch, bringing a delightful harmony that’s hard to resist. I love watching family and friends savor these beautiful rolls, their faces lighting up with every bite! This recipe not only impresses but also adds a sprinkle of creativity to everyday routines. Whether it’s a special occasion or just a simple dessert craving, these rolls promise happiness served on a platter!


    Print

    clock clock iconcutlery cutlery iconflag flag iconfolder folder iconinstagram instagram iconpinterest pinterest iconfacebook facebook iconprint print iconsquares squares iconheart heart iconheart solid heart solid icon

    Description

    A delightful twist on a classic dessert, these Strawberry Shortcake Cheesecake Sushi Rolls combine the flavors of strawberries and cream cheese in a fun and unique presentation.


    • 2 cups crushed Golden Oreos
    • 4 tbsp melted butter
    • 8 oz cream cheese, softened
    • 1/2 cup powdered sugar
    • 1 tsp vanilla extract
    • 1 cup heavy whipping cream
    • 1/2 cup diced fresh strawberries
    • 1/2 cup strawberry preserves or jam
    • Extra crushed Golden Oreos for coating
    • Whipped cream and additional strawberries for garnish (optional)

    1. Mix crushed Golden Oreos with melted butter to form a crust mixture.
    2. Spread the crust mixture evenly onto a parchment-lined baking sheet, pressing it flat. Freeze for 10–15 minutes to set.
    3. In a bowl, beat cream cheese until smooth. Add powdered sugar and vanilla extract; mix until combined.
    4. In another bowl, whip heavy cream until stiff peaks form. Gently fold it into the cream cheese mixture.
    5. Spread the cheesecake mixture over the chilled crust evenly.
    6. Evenly distribute diced strawberries and strawberry preserves over the cheesecake layer.
    7. Carefully roll the layered sheet into a log using the parchment paper to guide it. Freeze for at least 1 hour to set.
    8. Remove from freezer, slice into sushi-sized rolls.
    9. Roll the sides of each slice in crushed Oreos for a crunchy coating.
    10. Garnish with whipped cream and sliced strawberries if desired. Serve chilled.

    Notes

    • Make sure the cream cheese is softened for easier mixing.
    • For a more intense strawberry flavor, use fresh strawberries or a higher quality strawberry jam.
    • This dessert is best served chilled, so keep it in the refrigerator until ready to serve.
    • Prep Time: 30 minutes
    • Cook Time: 0 minutes
    • Category: Dessert
    • Method: No-bake
    • Cuisine: American

    Nutrition

    • Serving Size: 1 roll
    • Calories: 200
    • Sugar: 12g
    • Sodium: 150mg
    • Fat: 10g
    • Saturated Fat: 5g
    • Unsaturated Fat: 2g
    • Trans Fat: 0g
    • Carbohydrates: 25g
    • Fiber: 1g
    • Protein: 2g
    • Cholesterol: 30mg

    Sharing is caring!

  • Nutella Drizzle Macarons

    Nutella Drizzle Macarons


    Introduction to Nutella Drizzle Macarons

    Welcome to the world of Nutella Drizzle Macarons! If you’re like me, you appreciate the little sweet moments in life that bring joy amidst the chaos of busy days. These delightful French cookies offer a perfect excuse to indulge while impressing loved ones or friends. Imagine treating your family to these little gems after a long day—we all need that hug in edible form, don’t we? They’re simple to whip up, making them a fantastic choice for anyone looking for a quick but truly special dessert idea. Let’s dive into the deliciousness!

    Why You’ll Love This Nutella Drizzle Macarons

    What’s not to adore about these Nutella Drizzle Macarons? They’re a delightful balance of crisp shells and creamy filling. Plus, they come together relatively quickly, making them an ideal treat for busy days. The rich chocolate hazelnut flavor is pure magic. Each bite feels like a mini celebration, ensuring smiles all around. Whether it’s a family gathering or a casual afternoon snack, these macarons are sure to dazzle!

    Ingredients for Nutella Drizzle Macarons

    When it comes to baking these Nutella Drizzle Macarons, having the right ingredients is key. Each element plays a crucial role, so let’s dive into what you’ll need:

    • Almond Flour: This is essential for the macaron shell, giving it that delicate, nutty framework. It’s much finer than regular flour, ensuring a smooth texture.
    • Powdered Sugar: This sweetener helps create a melt-in-your-mouth experience. It also contributes to the creaminess of the filling.
    • Egg Whites: They’re the stars of the show! Room temperature egg whites help achieve that perfect meringue consistency, leading to the soft and chewy interior of the macaron.
    • Granulated Sugar: This is added during the whipping of the egg whites to create those glorious stiff peaks, ensuring stability in your macarons.
    • Nutella: The star filling! This rich chocolate hazelnut spread offers an indulgent layer, and it’s also drizzled on top for extra flair.
    • Food Coloring (optional): Want a splash of color? Use this to make your macarons extra exciting. Just a drop or two will do!

    For exact measurements and a handy printing option, you can find everything neatly laid out at the bottom of the article. Now that you know your ingredients, you’re one step closer to creating these delightful treats!

    How to Make Nutella Drizzle Macarons

    Preheat and Prep

    Get started by preheating your oven to 300°F (150°C). This step is crucial in achieving the perfect macaron texture. While the oven warms up, line your baking sheets with parchment paper. Using parchment helps prevent sticking and ensures easy removal later on. It’s like giving your macarons a comfy bed to rest on while they bake!

    Combine Dry Ingredients

    Now it’s time to combine the almond flour and powdered sugar. Sift them together in a bowl until it’s lump-free. This step is vital because it helps create a smooth macaron shell. Sifting aerates the mixture, ensuring your macarons rise beautifully. Plus, it keeps the final product light and delicate—just like a little cloud of goodness.

    Whip Egg Whites

    Next, it’s time to whip the egg whites. In a clean bowl, beat the egg whites on medium speed until they become frothy. Gradually add in the granulated sugar, continuing to whip until you hit those stiff peaks. This is the magic moment! Stiff peaks mean your meringue will hold up well, ensuring a wonderful structure for your Nutella Drizzle Macarons—no collapsing allowed!

    Fold Ingredients Together

    With your meringue ready, gently fold the dry mixture into the egg whites. Use a spatula and be soft but thorough. The key is to maintain as much air as possible. We want our macarons to stay light and airy! Remember, patience is a virtue. Over-mixing can lead to flat cookies, and nobody wants that.

    Pipe the Macarons

    Now for some fun! Transfer your mixture into a piping bag, and snip the tip to about 1/2-inch wide. Pipe small circles on the lined baking sheets. Aim for uniform sizes to ensure even baking. If you’re feeling creative, you can use stencils to get perfect shapes. Give each circle a little wiggle to help them settle into place. It’s all part of the process!

    Bake Perfect Macarons

    Slide your baking sheets into the preheated oven. Bake for 15-20 minutes, but keep an eye on them. You’ll know they’re done when they’re firm to the touch. Once they’re out, let the macarons cool completely before removing them from the parchment. Patience pays off—this is crucial for avoiding cracks!

    Drizzle with Nutella

    Finally, let’s top these beauties with even more Nutella. Gently melt Nutella in the microwave for about 10-15 seconds to make it drizzle-friendly. Using a spoon, drizzle it over the cooled macarons in an artistic fashion. Feeling fancy? Use a piping bag for a more polished look. The Nutella adds that extra touch of decadence—a sweet finish to your glorious macaron creation!

    Tips for Success

    • Always use room temperature egg whites for best meringue texture.
    • Sift your almond flour and powdered sugar more than once for ultra-smooth macarons.
    • Keep your mixing bowl and utensils free from grease; it helps in whipping egg whites.
    • Let your macarons rest for 15-30 minutes before baking to help form a skin.
    • Experiment with different food colors to make your macarons pop!

    Equipment Needed

    • Baking Sheets: Use regular or insulated sheets; both work well.
    • Parchment Paper: A silicone baking mat is a great alternative.
    • Mixer: A hand mixer or stand mixer will do the trick for whipping egg whites.
    • Piping Bag: A plastic zip-top bag with the corner snipped works perfectly.
    • Fine Sifter: A mesh strainer can also be used to sift dry ingredients.

    Variations

    • Chocolate Macarons: Swap half the almond flour with cocoa powder for a rich chocolate flavor.
    • Nut-Free Option: Use sunflower seed flour instead of almond flour for a nut-free version.
    • Fruit Flavored: Add fruit purees like raspberry or strawberry to the filling for a refreshing twist.
    • Spice It Up: Mix a pinch of espresso powder into the dry ingredients for a mocha-inspired macaron.
    • Vegan Version: Replace egg whites with aquafaba, the liquid from canned chickpeas, for a plant-based option.

    Serving Suggestions

    • Pair your Nutella Drizzle Macarons with a warm cup of coffee or mocha for a comforting treat.
    • Serve alongside fresh berries to add a refreshing contrast to the rich flavors.
    • For a beautiful presentation, dust macarons with powdered sugar or arrange them on a colorful platter.
    • Consider gifting them in a decorated box for special occasions; they make lovely edible gifts!

    FAQs about Nutella Drizzle Macarons

    How do I store Nutella Drizzle Macarons?
    Store your macarons in an airtight container at room temperature for up to three days. If you need to keep them longer, refrigerate them for up to a week. Just let them come back to room temperature before indulging in that delightful bite!

    Can I make these macarons ahead of time?
    Absolutely! You can prepare the macaron shells a day in advance and fill them just before serving. This way, they stay fresh and delicious. Just make sure to store the shells separately from the Nutella filling to maintain the perfect texture.

    What if my macarons crack while baking?
    Cracks often happen due to too much moisture in the batter or an improper oven temperature. Ensure your macaron batter isn’t over-mixed, and consider checking your oven’s calibration. A small oven thermometer can go a long way!

    Can I use other fillings apart from Nutella?
    Of course! While Nutella is a fabulous choice, let your imagination roam. You can use fruit jams, buttercream, or lemon curd for a refreshing alternative. The sky’s the limit when it comes to flavors!

    How can I achieve colorful macarons without losing flavor?
    Using gel food coloring is your best bet! It’s potent, so just a tiny drop will do without changing the batter’s consistency. The result is beautifully colored Nutella Drizzle Macarons that taste as good as they look!

    Final Thoughts

    Baking Nutella Drizzle Macarons is so much more than just a culinary experience; it’s a journey filled with laughter, creativity, and sweet indulgence. The joy of creating these delicate cookies—watching them puff up in the oven and then adding that finishing touch of drizzled Nutella—makes every effort worthwhile. I promise, the smiles you’ll receive when sharing them are priceless! So, whether you’re treating yourself after a long day or impressing guests at a gathering, these macarons deliver happiness in every bite. Why not whisk together your ingredients and dive into this delightful adventure? Sweet success awaits!


    Print

    clock clock iconcutlery cutlery iconflag flag iconfolder folder iconinstagram instagram iconpinterest pinterest iconfacebook facebook iconprint print iconsquares squares iconheart heart iconheart solid heart solid icon

    Description

    Nutella Drizzle Macarons are delicate French cookies filled with rich chocolate hazelnut spread and topped with a luscious Nutella drizzle.


    • 1 cup almond flour
    • 1 ¾ cups powdered sugar
    • 3 large egg whites (room temperature)
    • ½ cup granulated sugar
    • ½ cup Nutella (for drizzling)
    • Food coloring (optional)

    1. Preheat oven to 300°F (150°C) and line baking sheets with parchment paper.
    2. Sift together almond flour and powdered sugar until lump-free.
    3. In a clean bowl, whip egg whites on medium speed until frothy. Gradually add granulated sugar until stiff peaks form.
    4. If using food coloring, fold it into the meringue gently.
    5. Fold dry ingredients into the egg whites until just combined, then pipe small circles onto prepared sheets.
    6. Bake for 15-20 minutes or until firm to the touch; let cool before removing from parchment.
    7. Melt Nutella slightly and drizzle over cooled macarons.

    Notes

    • Ensure egg whites are at room temperature for best results.
    • Use a clean bowl to whip egg whites free from any grease.
    • Let the macarons cool completely before drizzling Nutella to avoid melting.
    • Prep Time: 30 minutes
    • Cook Time: 20 minutes
    • Category: Dessert
    • Method: Baking
    • Cuisine: French

    Nutrition

    • Serving Size: 1 macaron
    • Calories: 120
    • Sugar: 10g
    • Sodium: 20mg
    • Fat: 7g
    • Saturated Fat: 1g
    • Unsaturated Fat: 6g
    • Trans Fat: 0g
    • Carbohydrates: 15g
    • Fiber: 1g
    • Protein: 2g
    • Cholesterol: 0mg

    Sharing is caring!

  • Pinto Beans, Green Chile and Beef Soup

    Pinto Beans, Green Chile and Beef Soup


    Introduction to Pinto Beans, Green Chile and Beef Soup

    As a busy mom, I understand the struggle of juggling work, kids, and dinner on a weeknight. That’s where my Pinto Beans, Green Chile, and Beef Soup comes in—a hearty, comforting dish that warms both the body and soul. The best part? It’s quick to whip up yet packed with flavors that’ll impress your loved ones. Imagine the delightful aroma filling your kitchen while you prepare this nourishing meal. You can enjoy it any day of the week, making it the perfect solution for those hectic evenings when you still want something special.

    Why You’ll Love This Pinto Beans, Green Chile and Beef Soup

    This Pinto Beans, Green Chile, and Beef Soup is like a warm hug in a bowl. It’s super easy to make, taking just about 50 minutes from start to finish. With rich, bold flavors, it satisfies even the heartiest of appetites. Plus, you can prep it ahead of time and enjoy the leftovers! Not to mention, it’s gluten-free, making it a great option for everyone at the table.

    Ingredients for Pinto Beans, Green Chile and Beef Soup

    Gathering the right ingredients sets the foundation for this delicious Pinto Beans, Green Chile, and Beef Soup. Here’s what you’ll need:

    • Ground beef or stew beef: This is the heart of your soup, providing rich flavor and protein. Choose lean ground beef for a healthier option or stew beef for hearty texture.
    • Onion: Chopped onion adds sweetness and depth. You can use yellow, white, or even red onion, depending on your preference.
    • Garlic: Minced garlic enhances the flavor profile with its aromatic goodness. Fresh is always best, but granulated garlic can work in a pinch.
    • Pinto beans: The star ingredient! These creamy beans are packed with protein and fiber. You can use canned beans for convenience or soak and cook dry beans for a more homemade flavor.
    • Green chilies: Diced green chilies add a mild kick to the soup. Choose mild varieties for a subtle flavor boost, or go for hot ones if you prefer some heat.
    • Diced tomatoes: Canned diced tomatoes bring acidity and moisture to the soup, balancing the richness of the beef. Use fire-roasted for an extra depth of flavor.
    • Beef broth: Rich beef broth creates a savory base. You can substitute with water or vegetable broth, although the flavor will change.
    • Spices: Cumin, chili powder, and smoked paprika (if you like it) create a warm spice blend that echoes Mexican cuisine. Adjust these spices based on your taste preferences.
    • Fresh cilantro: Chopped cilantro adds brightness and freshness as a garnish. If you’re not a fan, scallions or parsley can also work.
    • Lime wedges: These provide a zesty finish. A squeeze of lime right before serving elevates every bite!

    For exact quantities of these ingredients, check the bottom of the article where you’ll find everything laid out, perfect for printing!

    How to Make Pinto Beans, Green Chile and Beef Soup

    Now that you’ve got your ingredients ready, it’s time to dive into making this delicious Pinto Beans, Green Chile, and Beef Soup! Follow these easy steps to create a warm bowl of comfort that your family will adore.

    Step 1: Brown the Beef

    Start by heating a large pot or Dutch oven over medium heat. Add a tablespoon of olive oil, then toss in your ground beef. Cook it, breaking it apart with a spoon, until it turns brown and is fully cooked—this should take about 5-7 minutes. If you’re using stew beef, brown it for about 8-10 minutes. This step builds the rich foundation of flavor for your soup!

    Step 2: Sauté Onions and Garlic

    Next, add the chopped onion and minced garlic to the pot. Cook them together for 2-3 minutes until the onion is soft and translucent. This will fill your kitchen with an irresistible aroma that makes everyone curious about dinner!

    Step 3: Add Spices

    Time to spice things up! Stir in the cumin, chili powder, smoked paprika (if you’re using it), salt, and black pepper. Cook this mixture for another 1-2 minutes until the spices become fragrant. They’ll awaken all the flavors and add some lovely warmth to your soup!

    Step 4: Combine Ingredients

    Now, it’s time to bring everything together. Add in the pinto beans, diced green chilies, diced tomatoes (with their juices), and the beef broth. Stir all the ingredients together until combined, letting them mingle for a moment. You’ll see your soup come together in one big flavorful pot!

    Step 5: Simmer the Soup

    Bring the soup to a gentle boil, then reduce the heat to low. Let it simmer uncovered for about 25-30 minutes. This simmering time allows all the ingredients to blend beautifully, creating a rich and hearty flavor. If you chose stew beef, make sure it becomes tender during this time.

    Step 6: Taste and Adjust Seasoning

    Once it’s simmered to perfection, taste your soup. Adjust the seasoning with more salt, pepper, or chili powder as needed. This final touch makes all the difference in enhancing the soup’s flavor profile.

    Step 7: Serve with Garnish

    Finally, ladle the warm soup into bowls. Garnish each bowl with fresh cilantro and some lime wedges. A squeeze of lime adds a zesty burst, brightening every delightful bite! Serve it hot alongside warm tortillas or crusty bread for an extra treat.

    Tips for Success

    • Use lean ground beef for a healthier soup without sacrificing flavor.
    • Always sauté your spices; this enhances their flavors and aroma.
    • For a thicker soup, mash some of the pinto beans against the pot.
    • Don’t rush the simmering process—this melds the flavors beautifully.
    • Feel free to adapt the recipe with your favorite veggies for variety.

    Equipment Needed

    • Large pot or Dutch oven: Essential for simmering your soup. A heavy-bottomed pot works well too.
    • Wooden spoon: Perfect for stirring and breaking up the meat.
    • Cutting board and knife: For chopping veggies and garlic. A simple chopping mat can work in a pinch.
    • Measuring cups and spoons: To ensure you get the right amount of spices and broth.

    Variations of Pinto Beans, Green Chile and Beef Soup

    • Vegetarian Option: Swap out the beef for textured vegetable protein (TVP) or mushrooms for a hearty, plant-based twist.
    • Extra Veggies: Add bell peppers, carrots, or corn to increase nutritional value and flavor. They also bring a lovely splash of color!
    • Spice It Up: If you love heat, try adding jalapeños or cayenne pepper to amp up the spice level.
    • Different Beans: While pinto beans are fantastic, you can use black beans or kidney beans for a unique taste and texture.
    • Coconut Milk: For a creamy and slightly sweet note, stir in some coconut milk while simmering the soup.
    • Herbs and Greens: Toss in fresh spinach, kale, or parsley right at the end for added nutrients and freshness.

    Serving Suggestions

    • Pair the soup with warm tortillas for a deliciously comforting experience.
    • Serve alongside a crisp green salad to balance the hearty flavors.
    • For drinks, consider a light beer or refreshing citrus-infused water.
    • Garnish each bowl with extra lime wedges for vibrant presentation.

    FAQs about Pinto Beans, Green Chile and Beef Soup

    Can I make this soup in a slow cooker?
    Absolutely! Brown the beef and sauté the onions and garlic first, then add everything to the slow cooker. Cook on low for 6-8 hours or high for 3-4 hours. You’ll love coming home to this warm, comforting meal.

    Can I freeze Pinto Beans, Green Chile, and Beef Soup?
    Yes, you can! Simply let the soup cool completely, then transfer it to airtight containers. It can be frozen for up to three months. When you’re ready to enjoy it, just reheat on the stove.

    What can I serve with this soup?
    This hearty soup pairs wonderfully with warm tortillas, crusty bread, or a fresh green salad. You could even add some avocado slices for a creamy contrast!

    How spicy is this soup?
    The spice level depends on the type of green chilies you choose. Opt for mild for a gentle warmth or hot for a spicy kick. Remember, you can always adjust the seasoning to your preference!

    Can I use dried pinto beans instead of canned?
    Of course! Just soak the dried beans overnight and cook them until tender before adding them to the soup. This will give you that authentic homemade flavor!

    Final Thoughts

    This Pinto Beans, Green Chile, and Beef Soup is more than just a meal; it’s a celebration of home-cooked goodness. Each spoonful envelops you in warmth, reminding you of cozy family dinners and shared laughter. I love how it brings people together, providing comfort and nutrition on even the busiest nights. Plus, the versatility of the recipe means you can make it your own each time. Whether it’s a chilly evening or a food-filled feast, this hearty soup will always be a cherished favorite on your table. So, let’s get cooking and create more joyful memories around the dinner table!


    Print

    clock clock iconcutlery cutlery iconflag flag iconfolder folder iconinstagram instagram iconpinterest pinterest iconfacebook facebook iconprint print iconsquares squares iconheart heart iconheart solid heart solid icon

    Description

    A hearty soup made with pinto beans, green chile, and beef, perfect for a warm meal.


    • 1 lb ground beef (or stew beef, diced)
    • 1 onion, chopped
    • 3 cloves garlic, minced
    • 1 can (15 oz) pinto beans, drained and rinsed
    • 1 can (4 oz) diced green chilies (mild or hot)
    • 1 can (14.5 oz) diced tomatoes, undrained
    • 4 cups beef broth (or water)
    • 1 tsp cumin
    • 1 tsp chili powder
    • 1/2 tsp salt (or to taste)
    • 1/2 tsp black pepper
    • 1/2 tsp smoked paprika (optional)
    • 1 tbsp olive oil (for sautéing)
    • Fresh cilantro, chopped (for garnish)
    • Lime wedges (for serving)

    1. In a large pot or Dutch oven, heat the olive oil over medium heat. Add the ground beef and cook, breaking it apart with a spoon, until browned and cooked through (about 5-7 minutes). If using stew beef, brown it in the same way for about 8-10 minutes.
    2. Add the chopped onion and minced garlic to the pot and cook for another 2-3 minutes, until softened.
    3. Stir in the cumin, chili powder, smoked paprika (if using), salt, and black pepper. Cook for 1-2 minutes to let the spices become fragrant.
    4. Add the pinto beans, green chilies, diced tomatoes (with juices), and beef broth to the pot. Stir to combine.
    5. Bring the soup to a boil, then reduce the heat and simmer, uncovered, for 25-30 minutes to allow the flavors to meld together. If you used stew beef, make sure the beef becomes tender during this time.
    6. Taste and adjust the seasoning with more salt, pepper, or chili powder as needed.
    7. Ladle the soup into bowls and garnish with fresh cilantro and lime wedges for a burst of freshness.
    8. Serve hot with warm tortillas or crusty bread on the side, if desired.

    Notes

    • Adjust the heat by choosing mild or hot green chilies.
    • This soup can be stored in the refrigerator for up to 3 days.
    • Feel free to add other vegetables, such as bell peppers or corn, for additional flavor and nutrition.
    • Prep Time: 10 minutes
    • Cook Time: 40 minutes
    • Category: Soup
    • Method: Stovetop
    • Cuisine: Mexican

    Nutrition

    • Serving Size: 1 cup
    • Calories: 320
    • Sugar: 2g
    • Sodium: 680mg
    • Fat: 16g
    • Saturated Fat: 5g
    • Unsaturated Fat: 10g
    • Trans Fat: 0g
    • Carbohydrates: 30g
    • Fiber: 8g
    • Protein: 22g
    • Cholesterol: 70mg

    Sharing is caring!

  • Mediterranean Chicken Patties

    Mediterranean Chicken Patties


    Introduction to Mediterranean Chicken Patties

    Welcome, fellow kitchen adventurers! If you’re anything like me, you’re always on the lookout for delicious solutions to mealtime chaos. Enter the star of today’s show: Mediterranean Chicken Patties! These delightful patties are not only bursting with flavor but are also super quick to whip up. They can turn a hectic weeknight into a gourmet experience without breaking a sweat. Trust me, they’re bound to impress your loved ones, whether it’s a casual dinner or a cozy family gathering. Let’s dive in and make something magical together!

    Why You’ll Love This Mediterranean Chicken Patties

    You’re going to adore these Mediterranean Chicken Patties for many reasons! First, they’re incredibly easy to make, which means you can spend less time in the kitchen and more time with your loved ones. They cook up in a flash, making them perfect for busy evenings. Plus, each bite is an explosion of flavor, showcasing bright herbs and spices that will make your taste buds dance. What’s not to love?

    Ingredients for Mediterranean Chicken Patties

    Gathering the ingredients for Mediterranean Chicken Patties is not only vital but also part of the fun! Here’s what you’ll need:

    • Olive Oil: This liquid gold adds richness and moisture while helping to achieve that perfect golden crust.
    • Onion: Diced onion forms the flavor base, caramelizing beautifully when sautéed, adding a sweet and savory note.
    • Garlic: A touch of minced garlic amplifies the overall taste, delivering that aromatic zing we all crave.
    • Baby Spinach: This leafy green not only adds color but packs in nutrients, making these patties both tasty and healthy.
    • Ground Chicken: The hero of our dish, ground chicken provides a lean protein that’s easy to work with and absorbs flavors well.
    • Breadcrumbs: They bind the mixture together and help create a lovely crunchy exterior when cooked.
    • Greek Yogurt: A creamy element that adds moisture and a slight tanginess, making these patties tender and delightful.
    • Fresh Dill: This herb brings a bright, light flavor reminiscent of the Mediterranean, enhancing each bite.
    • Fresh Lemon Juice: A splash of lemon juice offers a refreshing zing that elevates the savory notes of the dish.
    • Dried Oregano: A staple in Mediterranean cuisine, oregano delivers an earthy, aromatic character that’s simply irresistible.
    • Paprika: This spice adds warmth and a mild smokiness, elevating the overall flavor profile.
    • Ground Cumin: With its nutty aroma, cumin offers depth, making it a fitting companion for chicken.
    • Salt: Essential in any recipe, salt enhances all the beautiful flavors in your patties.
    • Ground Black Pepper: A pinch rounds out the taste, adding a subtle heat that doesn’t overpower.

    Feel free to get creative with your patties! For a twist, swap chicken for turkey or use gluten-free breadcrumbs. Optional ingredients like feta cheese or sun-dried tomatoes can also add extra pizzazz!

    Exact measurements for these ingredients can be found at the bottom of the article and are ready for printing.

    How to Make Mediterranean Chicken Patties

    Now that we’ve got our ingredients lined up, it’s time to bring those Mediterranean Chicken Patties to life! Each step is simple, but trust me, they lead to something mouthwatering. Let’s dive in, shall we?

    Step 1: Sautéing the Onions and Garlic

    The first step is key for layering in flavor. Start by heating 1 tablespoon of olive oil in a skillet over medium heat. Once hot, toss in the diced onion and sauté until it turns translucent, about 5 minutes. Then, add the minced garlic and cook for another 30 seconds. This aromatic base is bursting with flavor and will bring your patties to the next level!

    Step 2: Mixing the Ingredients

    Once your onion and garlic are perfectly sautéed, it’s time to mix! In a large bowl, combine the cooled onion-garlic mixture with spinach, ground chicken, breadcrumbs, Greek yogurt, fresh dill, lemon juice, oregano, paprika, cumin, salt, and pepper. Use your hands or a spatula to mix until everything is well incorporated. You’re looking for a texture that holds together but isn’t too dry. It’s a mix where flavors cozy up and mingle!

    Step 3: Shaping the Patties

    Shaping the patties is where the fun begins! With slightly damp hands, scoop out about ¼ cup of the mixture and gently form it into a round patty, about ½ inch thick. Try to keep them even in size for uniform cooking. For that extra touch, make a little indentation in the center of each patty. It helps them cook evenly and allows for some delicious crust development later on.

    Step 4: Cooking the Patties

    Let’s get cooking! Heat the remaining 2 tablespoons of olive oil in your skillet over medium heat. Gently place the patties in the hot skillet, being careful not to overcrowd. Cook each patty for about 5-6 minutes on one side, then flip and cook the other side until golden brown and cooked through. You’ll want them lovely and brown with just the right crunch. If you’ve made larger patties, just ensure they’re cooked through to an internal temperature of 165°F (75°C).

    Once cooked, drain the patties on paper towels to absorb any excess oil. They’re now ready for your plate! Serve warm and enjoy every delicious bite!

    Tips for Success

    • Use fresh herbs for the best flavor; they can make a world of difference!
    • Keep your hands damp while shaping patties to prevent sticking.
    • Ensure the skillet is preheated before adding patties for that perfect golden crust.
    • If using frozen ground chicken, thaw it overnight in the fridge for even mixing.
    • Experiment with spices! A dash of cayenne can add a kick!

    Equipment Needed

    • Skillet: A non-stick or cast-iron skillet works wonders for even cooking.
    • Mixing Bowl: A large bowl for combining all your delicious ingredients.
    • Spatula: Essential for flipping those patties with ease.
    • Measuring Cups: Useful for measuring ingredients accurately.
    • Paper Towels: Handy for draining excess oil after cooking.

    Variations

    • Herb Swap: Switch out dill for fresh parsley or cilantro for a different flavor profile.
    • Cheesy Delight: Incorporate crumbled feta or shredded mozzarella into the mix for a cheesy twist.
    • Spice it Up: Add spices like crushed red pepper flakes or cumin for a spicier kick.
    • Veggie Surprise: Toss in additional veggies like finely chopped bell peppers or zucchini for extra nutrition.
    • Gluten-Free Option: Use gluten-free breadcrumbs or substitutes like crushed oats or almond flour if needed.

    Serving Suggestions

    • Fresh Salad: Pair your patties with a crisp Greek salad featuring cucumbers, tomatoes, and olives.
    • Tzatziki Sauce: Serve with this cool, tangy sauce for a delightful flavor boost.
    • Warm Pita Bread: Wrap the patties in warm pita for a handheld treat.
    • Lemon Wedges: A squeeze of lemon brightens up the dish immensely.

    FAQs about Mediterranean Chicken Patties

    Can I use other meats instead of ground chicken?
    Absolutely! You can replace ground chicken with ground turkey or even ground beef. Each variation will bring its unique flavor, but make sure to adjust your cooking times accordingly.

    How do I store leftover patties?
    Leftovers can be kept in an airtight container in the refrigerator for up to three days. Just reheat in the skillet or microwave when you’re ready to enjoy them again!

    Can I freeze Mediterranean Chicken Patties?
    Yes! You can freeze uncooked patties by placing them on a baking sheet until solid. Once frozen, transfer them to a freezer bag. Thaw overnight in the fridge before cooking them.

    What should I serve with Mediterranean Chicken Patties?
    These patties pair wonderfully with a fresh Greek salad or can be enjoyed in a pita with tzatziki sauce. You can also serve them alongside roasted veggies for a complete meal.

    Are these patties suitable for a low-carb diet?
    While they do contain breadcrumbs, you can easily make them low-carb by using alternatives like crushed pork rinds or almond flour for binding. Adjust your ingredients, and you’re all set!

    Final Thoughts

    Making Mediterranean Chicken Patties has become one of my culinary joys. Each bite is a celebration of flavors that dances on your palate, transporting you to sun-soaked Mediterranean shores. Whether you’re hurriedly preparing dinner after a long day or hosting friends, these patties seamlessly fit any occasion. They’re not just a meal; they’re a way to share love and warmth with those around you. Trust me, when you serve these golden delights, you’ll see smiles all around the table. So, let’s keep cooking, sharing, and savoring every delicious moment together!


    Print

    clock clock iconcutlery cutlery iconflag flag iconfolder folder iconinstagram instagram iconpinterest pinterest iconfacebook facebook iconprint print iconsquares squares iconheart heart iconheart solid heart solid icon

    Description

    Delicious Mediterranean Chicken Patties that are perfect for any meal.


    • 3 tablespoons olive oil
    • 1 medium onion, diced
    • 1 tablespoon garlic, minced
    • 1 cup baby spinach, chopped
    • 1 lb. ground chicken
    • 1/2 cup breadcrumbs
    • 1/4 cup Greek yogurt
    • 2 tablespoons fresh dill, finely chopped
    • 1 tablespoon fresh lemon juice
    • 1 teaspoon dried oregano
    • 1/2 teaspoon paprika
    • 1/2 teaspoon ground cumin
    • 1/2 teaspoon salt
    • 1/4 teaspoon ground black pepper

    1. Sauté onion in 1 tablespoon of olive oil over medium heat until translucent (about 5 minutes). Add garlic and cook for another 30 seconds. Remove from heat.
    2. In a large bowl, mix the sautéed onion and garlic with spinach, ground chicken, breadcrumbs, Greek yogurt, dill, lemon juice, oregano, paprika, cumin, salt, and pepper until well combined.
    3. Shape the mixture into approximately eight patties (½ inch thick).
    4. Heat the remaining olive oil in a skillet over medium heat. Cook patties for about 5-6 minutes on each side until golden brown and cooked through.
    5. Drain on paper towels and serve warm with garnishes as desired.

    Notes

    • Can be served with tzatziki sauce for added flavor.
    • Store leftovers in an airtight container in the refrigerator for up to 3 days.
    • Prep Time: 15 minutes
    • Cook Time: 12 minutes
    • Category: Main Course
    • Method: Pan-fry
    • Cuisine: Mediterranean

    Nutrition

    • Serving Size: 1 patty
    • Calories: 180
    • Sugar: 1g
    • Sodium: 350mg
    • Fat: 8g
    • Saturated Fat: 1.5g
    • Unsaturated Fat: 6g
    • Trans Fat: 0g
    • Carbohydrates: 10g
    • Fiber: 1g
    • Protein: 18g
    • Cholesterol: 65mg

    Sharing is caring!