Blog

  • Chicken & Chickpea Salad

    Chicken & Chickpea Salad


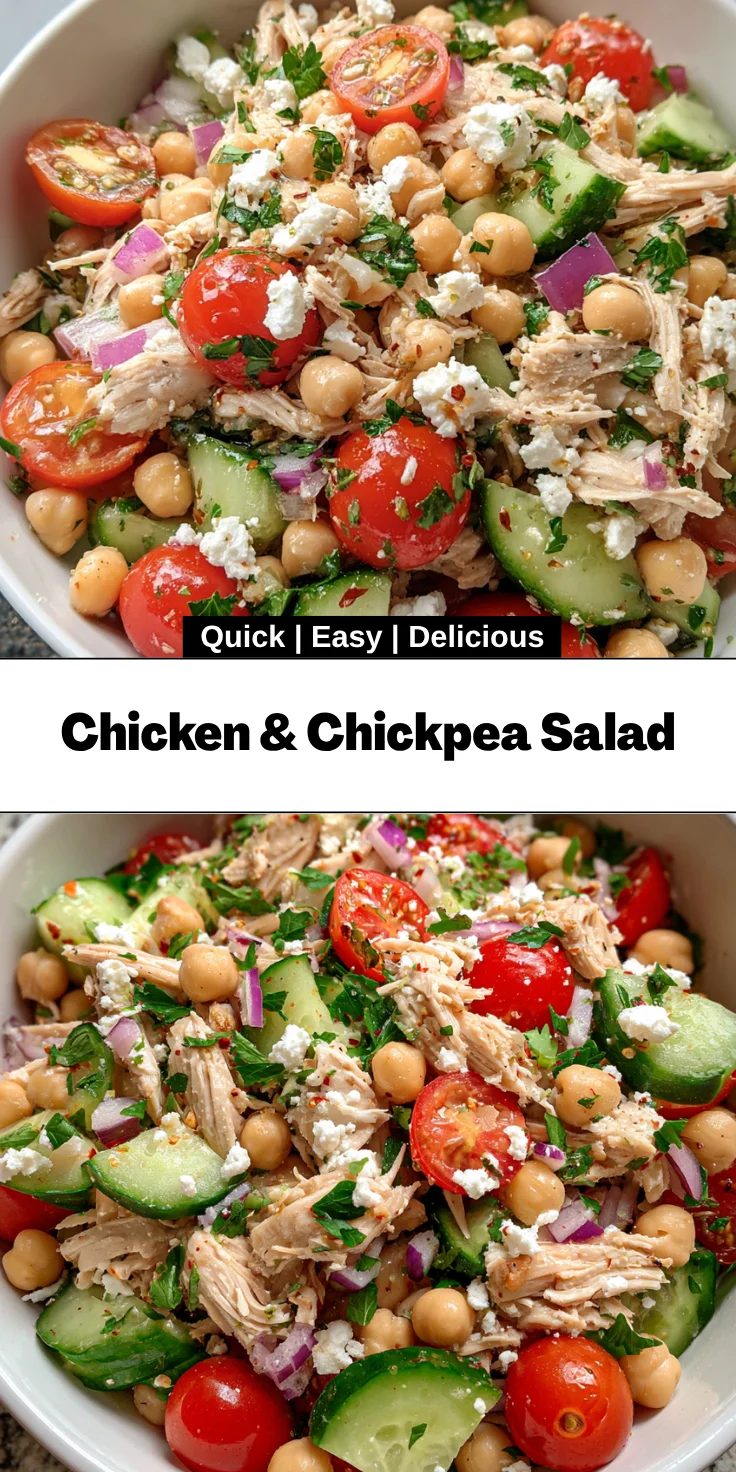
    Introduction to Chicken & Chickpea Salad

    Hey there, fellow busy food lovers! If you’re anything like me, you know the struggle of juggling work, family, and a healthy lifestyle. That’s where this delightful Chicken & Chickpea Salad comes into play. It’s not only a quick solution for a busy day, but it’s also packed with flavors that will impress your family and friends. Imagine tossing together wholesome ingredients in just ten minutes! This salad is a delightful blend of textures and nutrients that’ll keep you feeling satisfied without taking up your precious time. Trust me, you’ll want to make this your go-to recipe!

    Why You’ll Love This Chicken & Chickpea Salad

    This Chicken & Chickpea Salad is a real game changer in the kitchen. It’s ridiculously easy to whip up, taking a mere ten minutes from start to finish. Not only does it burst with vibrant flavors, but it’s also a healthy option that keeps you fueled throughout your long day. Whether you’re feeding a family or just treating yourself, this salad is the perfect quick meal that everyone will adore!

    Ingredients for Chicken & Chickpea Salad

    This Chicken & Chickpea Salad comes together with a handful of simple, wholesome ingredients. You’ll find everything you need right in your pantry or local grocery store.

    • Cooked, shredded chicken: I often use rotisserie chicken for its delicious flavor, but any cooked chicken works well.
    • Chickpeas: These little powerhouses add protein and fiber. Canned chickpeas are a quick and convenient choice; just rinse and drain them!
    • Cherry tomatoes: Their sweetness adds a lovely pop to the salad. Feel free to swap them out for diced tomatoes if that’s what you have on hand.
    • Red bell pepper: This adds a crunchy texture and a touch of sweetness. You can easily replace it with yellow or orange bell peppers, too.
    • Cucumber: Crisp and refreshing, cucumbers complement the other ingredients beautifully. If you’d like, pickling them can enhance their flavor.
    • Red onion: Use finely chopped red onion for a mild bite. If your family prefers a softer taste, consider using green onions instead.
    • Fresh parsley: This herb adds brightness and freshness. You can also try dill or cilantro if you want to switch things up.
    • Feta cheese (optional): Crumbled feta adds a tangy flavor that takes this salad to the next level. If you’re avoiding dairy, feel free to skip it.

    Now, for the dressing—you’ll need a few more ingredients to tie everything together:

    • Olive oil: A good-quality extra virgin olive oil provides richness and healthy fats.
    • Lemon juice: Freshly squeezed lemon juice gives a zesty kick that brightens the entire salad.
    • Dijon mustard: This adds a hint of tanginess that balances the flavors perfectly.
    • Garlic: Minced garlic infuses the dressing with aromatic goodness.
    • Dried oregano: This herb brings a delightful Mediterranean touch. You can also try Italian seasoning for variety.
    • Salt and black pepper: Essential for rounding out the flavors in this dish—just a pinch to taste!

    You can find the exact quantities for each ingredient at the bottom of the article, making it easy to get whipping in the kitchen!

    How to Make Chicken & Chickpea Salad

    Getting this Chicken & Chickpea Salad ready is a breeze! You’ll see, it comes together in no time and requires no cooking. Let’s dive into the steps that will have you enjoying this salad before you know it!

    Step 1: Prepare the Dressing

    Grab a small bowl and whisk together the olive oil, lemon juice, Dijon mustard, minced garlic, oregano, salt, and black pepper. You want all those flavors to blend beautifully. The dressing acts as the glue that holds this salad together.

    Step 2: Assemble the Salad

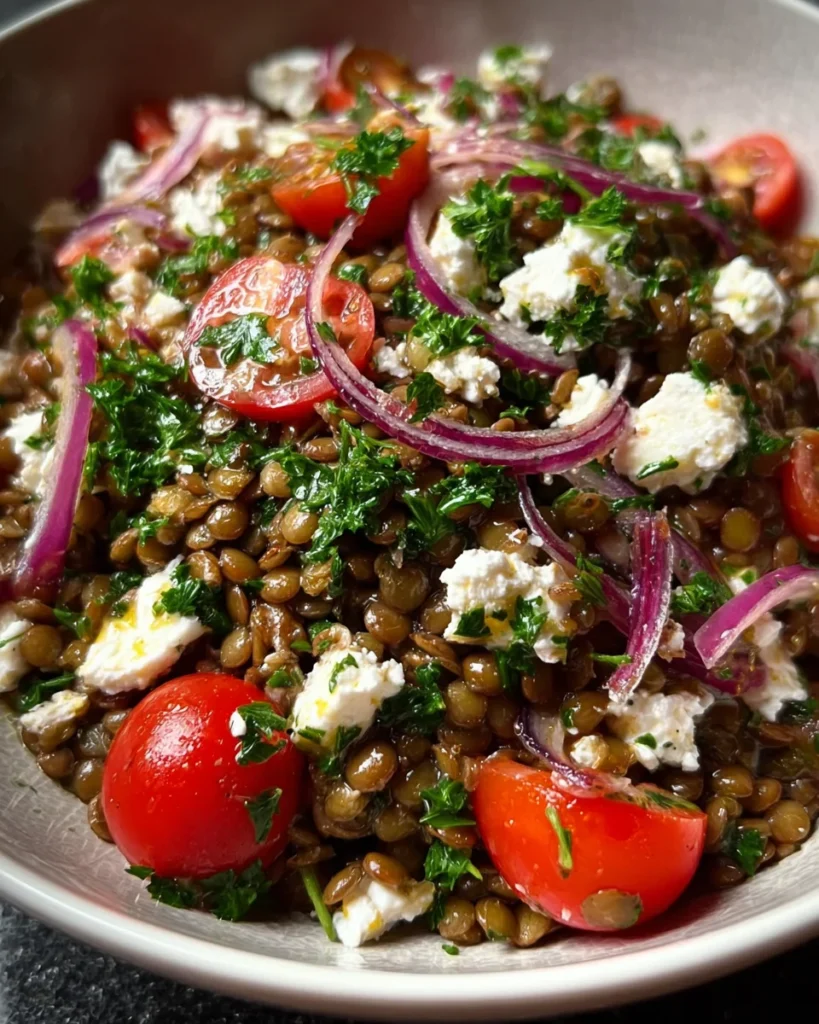
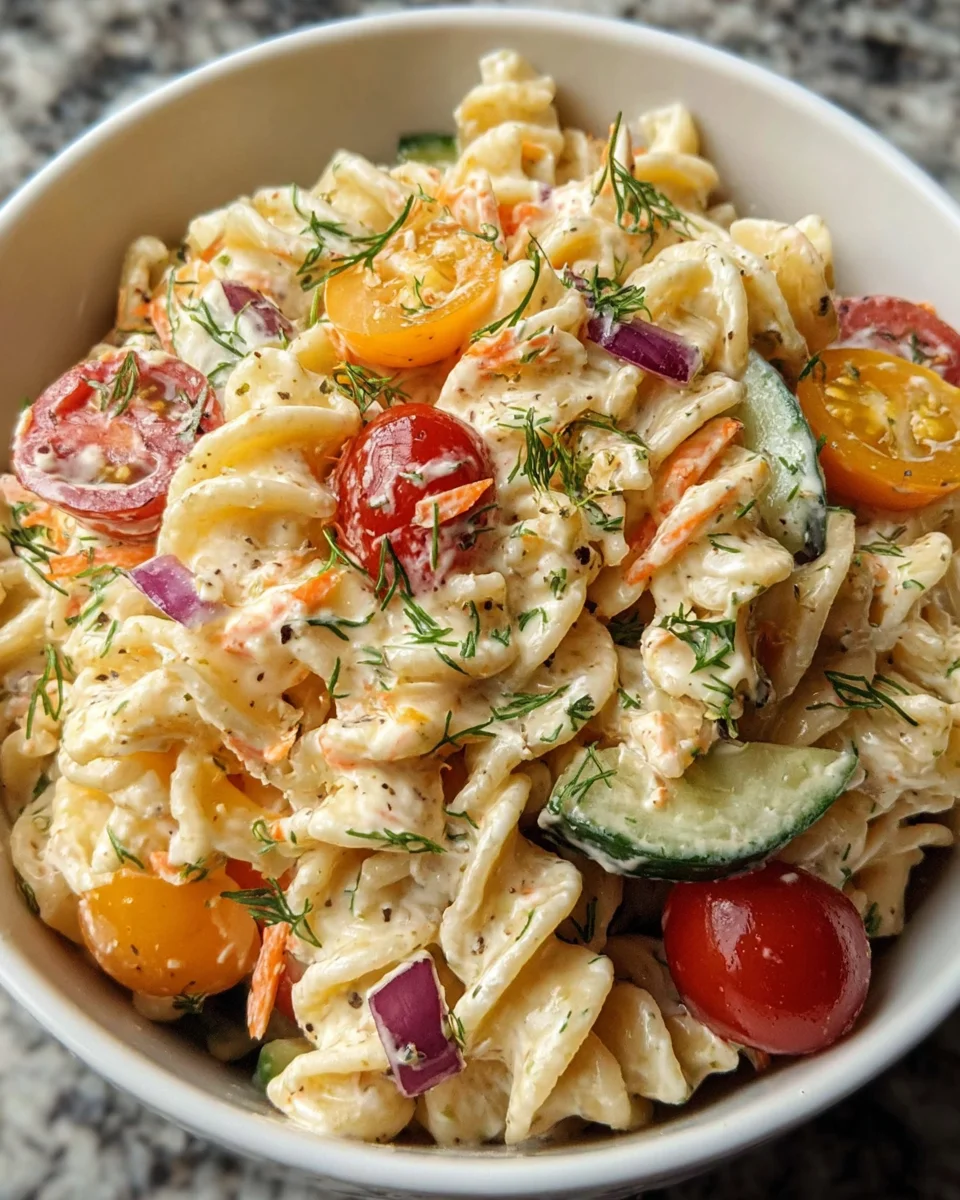
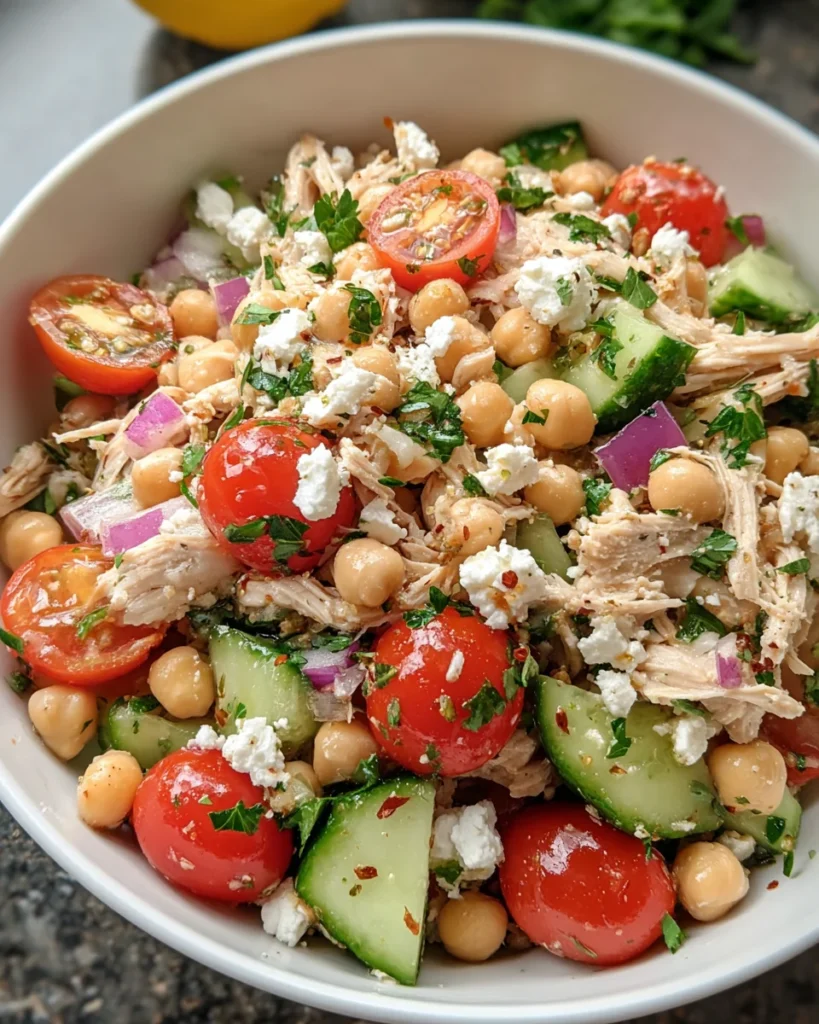
    In a large bowl, combine the shredded chicken, drained chickpeas, cherry tomatoes, red bell pepper, cucumber, red onion, and parsley. If you’re a fan of vibrant colors, you’ll love the visual delight this mix provides!

    Step 3: Toss & Serve

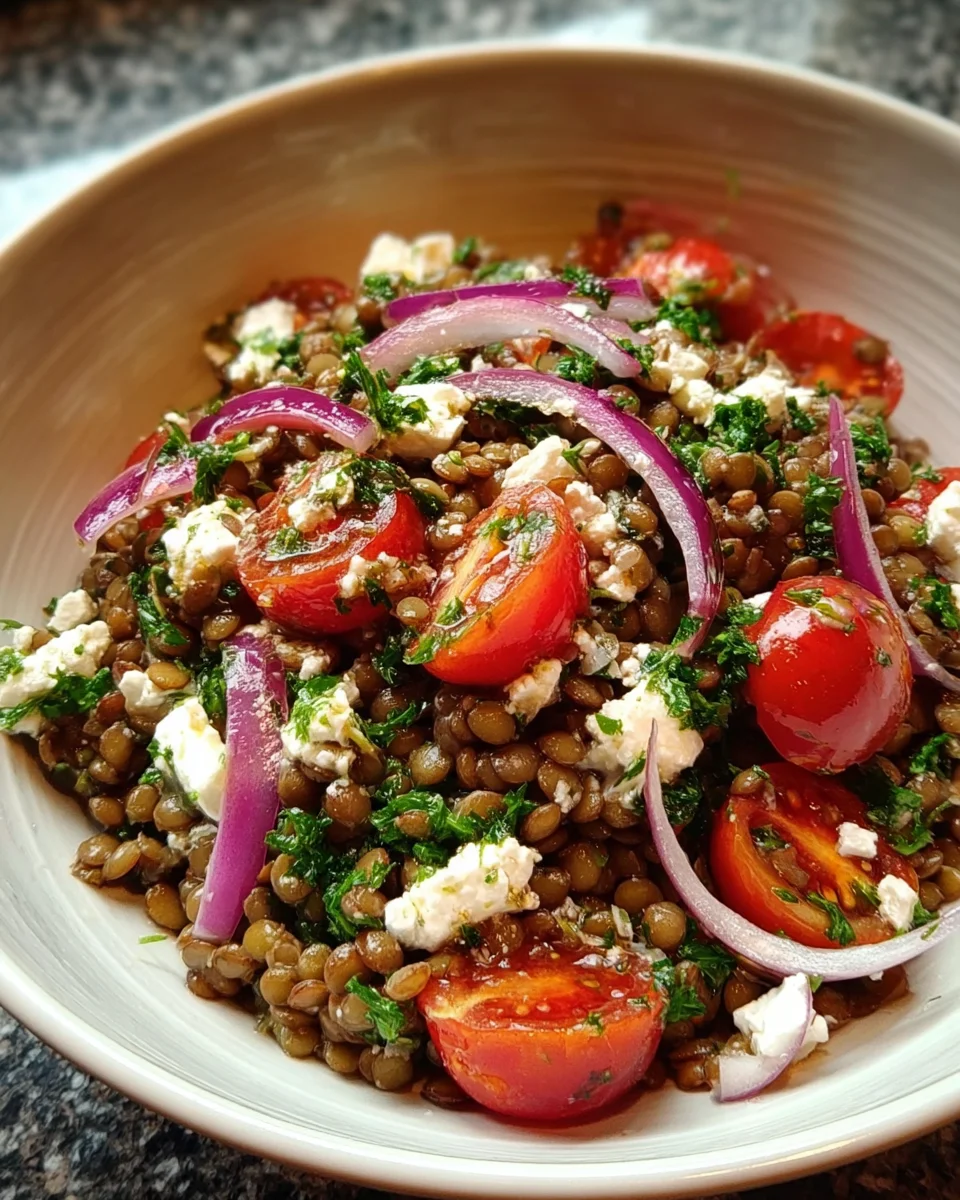
    Pour the dressing over your salad and gently toss everything to coat. This is where the magic happens! If you’re crumbling feta on top, now’s the time to sprinkle it over and give it one more gentle toss. It’s all about making sure every bite is packed with flavor.

    Step 4: Chill or Serve Immediately

    Enjoy this Chicken & Chickpea Salad right away, or let it chill in the fridge for about 15-30 minutes. Chilling lets the flavors meld together, making every bite even more delicious. Trust me, patience pays off here!

    Tips for Success

    • Prep your ingredients ahead of time for a quicker assembly.
    • Experiment with different veggies based on what’s in season.
    • Taste and adjust the dressing before adding to the salad. A dash more lemon can do wonders!
    • Add the feta just before serving to keep it fresh and crumbly.
    • Store any leftovers in an airtight container for up to three days.

    Equipment Needed

    • Medium mixing bowl: Any large bowl works, but a glass or ceramic one adds a nice touch.
    • Whisk: A fork can do the trick if you don’t have a whisk on hand.
    • Cutting board: Pot for any sturdy surface to chop your veggies.
    • Knife: A sharp kitchen knife makes prep easier and safer.
    • Measuring spoons: Keep them handy for precise dressing measurements!

    Variations for Chicken & Chickpea Salad

    • Add Fruits: Toss in some diced apples or pomegranate seeds for a sweet contrast.
    • Change the Protein: Swap shredded chicken for grilled shrimp or tuna for a different twist.
    • Go Vegan: Replace chicken with marinated tofu or tempeh, and use a vegan feta alternative.
    • Spice it Up: Sprinkle in some red pepper flakes or cayenne pepper for a spicy kick!
    • Leafy Greens: Add a bed of spinach or arugula for extra nutrition and color.
    • Nutty Crunch: Toss in some roasted almonds or sunflower seeds for added texture and flavor.

    Serving Suggestions for Chicken & Chickpea Salad

    • Serve chilled: Enjoy this salad on a hot day for a refreshing meal.
    • Pair with whole grain pita: Soft pita bread complements the salad beautifully.
    • Accompany with a crisp white wine: A light Sauvignon Blanc enhances the flavors.
    • Garnish with extra parsley: A sprinkle of bright green parsley adds a lovely presentation touch.
    • Enjoy as a standalone meal: Great as a light lunch or dinner on its own!

    FAQs about Chicken & Chickpea Salad

    Can I make this Chicken & Chickpea Salad ahead of time?
    Absolutely! You can prepare the salad a day in advance. Just keep the dressing separate until you’re ready to serve. It helps keep everything fresh and crunchy.

    Is this Chicken & Chickpea Salad gluten-free?
    Yes, it is! All the ingredients in the salad are naturally gluten-free, making it a great option for those with gluten sensitivities.

    Can I substitute fresh chicken for canned chickpeas?
    Oh, you definitely can! While canned chickpeas are quick, you can use cooked lentils or even fresh grilled chicken if that’s what you have on hand. It’s super flexible.

    What can I use instead of feta cheese?
    If you’re not a feta fan or want to keep it dairy-free, try crumbled goat cheese or omit it altogether! Nutritional yeast can add a cheesy flavor as a vegan alternative.

    How long can I store the Chicken & Chickpea Salad?
    You can store leftovers in an airtight container in the fridge for up to three days. Just know that the veggies might soften a bit, but it’ll still taste great!

    Final Thoughts

    Whether you’re whipping up this Chicken & Chickpea Salad for a busy weeknight dinner or a leisurely weekend lunch, the joy it brings is unmistakable. The vibrant colors and delightful textures will surely brighten your day. Plus, knowing you’re providing a nutritious meal that your family will love adds to the satisfaction. This salad is more than just a recipe; it’s a reliable companion for all those moments when life gets hectic. I hope you find as much joy in making and sharing this dish as I do. Here’s to delicious, quick meals that nourish our bodies and souls!
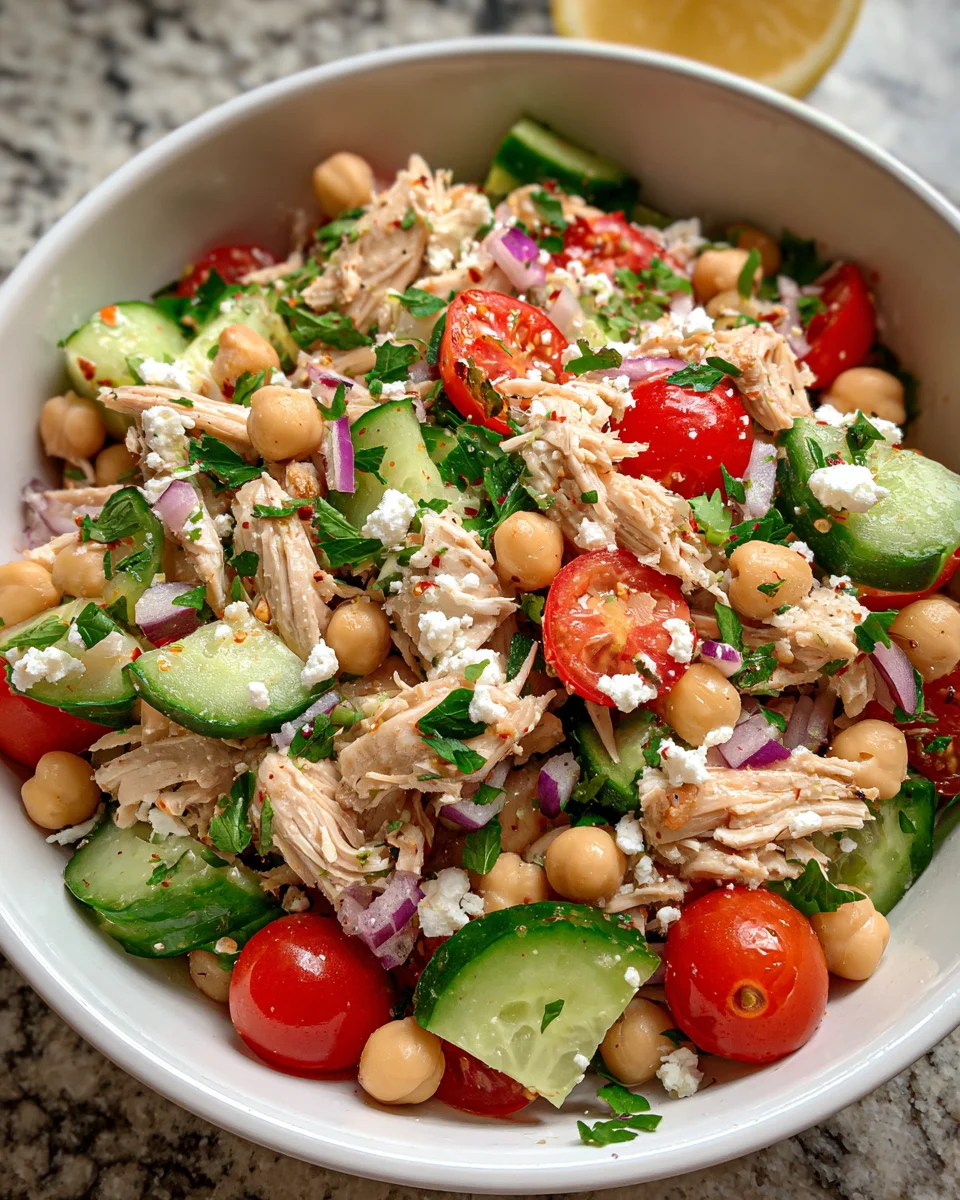

    Print

    clock clock iconcutlery cutlery iconflag flag iconfolder folder iconinstagram instagram iconpinterest pinterest iconfacebook facebook iconprint print iconsquares squares iconheart heart iconheart solid heart solid icon

    Description

    A quick and delicious Chicken & Chickpea Salad that combines shredded chicken and fresh vegetables, topped with a zesty dressing.


    • 2 cups cooked, shredded chicken (rotisserie works great)
    • 1 can (15 oz) chickpeas, drained and rinsed
    • 1 cup cherry tomatoes, halved
    • ½ red bell pepper, diced
    • ½ cucumber, diced
    • ¼ red onion, finely chopped
    • ¼ cup fresh parsley, chopped
    • ¼ cup feta cheese, crumbled (optional)
    • 3 tbsp olive oil
    • 2 tbsp lemon juice
    • 1 tsp Dijon mustard
    • 1 clove garlic, minced
    • ½ tsp dried oregano
    • ½ tsp salt
    • ¼ tsp black pepper

    1. Prepare the dressing: In a small bowl, whisk together olive oil, lemon juice, Dijon mustard, garlic, oregano, salt, and black pepper until well combined.
    2. Assemble the salad: In a large bowl, combine shredded chicken, chickpeas, cherry tomatoes, bell pepper, cucumber, red onion, and parsley.
    3. Toss & serve: Pour the dressing over the salad and toss to coat everything evenly. If using, sprinkle with crumbled feta.
    4. Chill or serve immediately: Enjoy right away, or let it chill in the fridge for 15-30 minutes for even better flavor!

    Notes

    • Can use any cooked chicken; rotisserie is quick and flavorful.
    • Feel free to add other vegetables like avocado or spinach.
    • This salad can be stored in the fridge for up to 3 days.
    • Prep Time: 10 minutes
    • Cook Time: 0 minutes
    • Category: Salad
    • Method: No-cook
    • Cuisine: Mediterranean

    Nutrition

    • Serving Size: 1 serving
    • Calories: 350
    • Sugar: 3g
    • Sodium: 500mg
    • Fat: 20g
    • Saturated Fat: 3g
    • Unsaturated Fat: 15g
    • Trans Fat: 0g
    • Carbohydrates: 25g
    • Fiber: 8g
    • Protein: 25g
    • Cholesterol: 60mg

    Sharing is caring!

  • Lentil & Feta Salad with Parsley

    Lentil & Feta Salad with Parsley


    Introduction to Lentil & Feta Salad with Parsley

    As a busy mom, I know how challenging it can be to whip up something nutritious and delicious. That’s where my Lentil & Feta Salad with Parsley comes into play! This vibrant salad is not just a quick solution for hectic days; it’s also an impressive dish that can wow your family or guests. Imagine a blend of hearty lentils, creamy feta, and fresh parsley that dances on your taste buds. It’s light, refreshing, and pairs beautifully with any meal, or stands out as a star all on its own.

    Why You’ll Love This Lentil & Feta Salad with Parsley

    This Lentil & Feta Salad with Parsley is a game changer for anyone juggling a busy life. In just 35 minutes, you’ll have a nutritious dish that bursts with flavor. It’s so easy to make, even the kids could help! Plus, the combination of lentils and feta gives you a satisfying meal that feels indulgent while being incredibly healthy. Trust me, your taste buds will thank you!

    Ingredients for Lentil & Feta Salad with Parsley

    Gathering the right ingredients is key to making this Lentil & Feta Salad with Parsley shine. Here’s what you need:

    • Lentils: Green or brown lentils work best. Rich in fiber and protein, they give the salad a hearty base.
    • Water or Vegetable Broth: Use either to cook the lentils. Broth adds extra flavor, making the dish even more delicious.
    • Feta Cheese: Crumbled feta introduces a creamy, tangy taste. It’s a star ingredient in this salad!
    • Cherry Tomatoes: Sweet and juicy, they bring a burst of freshness. Plus, their bright color makes your dish pop.
    • Red Onion: Finely chopped, red onion adds a delightful crunch and mild bite that balances the salad.
    • Fresh Parsley: Chopped parsley offers a vibrant green touch and enhances the flavor profile. It’s a must-have!
    • Olive Oil: Just a drizzle adds richness and helps meld the flavors together, creating a delectable dressing.
    • Lemon Juice: For a zesty kick, lemon juice brightens up the salad. It’s the finishing touch that elevates everything!
    • Salt and Black Pepper: Essential for seasoning, these kitchen staples bring all the flavors to life. Adjust to your preference.

    Feel free to explore your creativity! You can toss in vegetables like cucumbers or bell peppers for extra crunch. And the best part? All the ingredients with exact quantities are listed at the bottom, ready for you to print and take to the kitchen!

    How to Make Lentil & Feta Salad with Parsley

    Now that you have your ingredients ready, let’s dive into making this delightful Lentil & Feta Salad with Parsley. It’s a simple process, perfect for those hectic weeknights!

    Step 1: Boil the Lentils

    Start by bringing a saucepan filled with 3 cups of water or vegetable broth to a boil. Once boiling, add in 1 cup of rinsed lentils. Reduce the heat to a simmer, cover, and let them cook for about 20 to 25 minutes. You’ll want those lentils tender but not mushy. A quick taste test is a great way to check!

    Step 2: Drain and Cool

    Once the lentils are cooked to perfection, drain them in a colander. Allow them to cool for a bit. This is key! If you skip this step, the heat can wilt the fresh ingredients we’ll be adding later.

    Step 3: Combine the Ingredients

    In a large mixing bowl, combine the cooled lentils with 1/2 cup of crumbled feta cheese, 1/2 cup of halved cherry tomatoes, 1/4 finely chopped red onion, and 1/4 cup of chopped fresh parsley. As you mix, you’ll notice the colors blend beautifully, making your dish both pop and feel fresh!

    Step 4: Dress the Salad

    Now for the magic touch! Drizzle 1 tablespoon of olive oil and 1 tablespoon of lemon juice over the salad. This dressing not only enhances flavor but also brings all the ingredients together. A pinch of salt and black pepper will elevate the taste even more. Adjust according to your preference!

    Step 5: Toss and Serve

    Gently toss all the ingredients together with a wide spatula or spoon. You want everything to be well-coated with the dressing without mashing the lentils or feta. Serve this colorful salad cooled or at room temperature. It’s perfect for lunch, a light dinner, or as a side dish with your favorite protein!

    Tips for Success

    • Always rinse lentils before cooking to remove any debris and enhance their flavor.
    • Cook lentils until they’re just tender to prevent mushiness—trust me, it makes a difference!
    • Chill your salad in the refrigerator for an hour for a refreshing taste.
    • Experiment with herbs like mint or basil for a unique twist.
    • Make it a meal by adding grilled chicken or chickpeas for protein.

    Equipment Needed

    • Saucepan: A medium-sized pot works well for boiling lentils. If you’re low on space, a large skillet can do the trick, too.
    • Colander: Essential for draining lentils. A fine-mesh strainer is a good alternative if you have one.
    • Mixing Bowl: Any large bowl will suffice; a salad bowl is perfect for tossing everything together.
    • Spatula or Spoon: Use a wide spatula for easy mixing, or a wooden spoon if that’s what you have!

    Variations on Lentil & Feta Salad with Parsley

    • Greek Twist: Add some sliced olives and diced cucumber for a refreshing Greek-inspired version.
    • Spicy Kick: Mix in diced jalapeños or a sprinkle of red pepper flakes for a touch of heat.
    • Protein Boost: Incorporate grilled chicken or shrimp for a heartier meal that satisfies.
    • Nutty Flavor: Toss in some toasted walnuts or sunflower seeds for crunch and healthy fats.
    • Vegan Option: Substitute feta with cubed avocado or a vegan feta cheese for a dairy-free delight.

    Serving Suggestions for Lentil & Feta Salad with Parsley

    • Pair it with grilled chicken or fish for a delightful, balanced meal.
    • Serve as a side dish with roasted vegetables or a warm pita bread.
    • Enhance the presentation by adding lemon wedges on the side.
    • Enjoy it with a chilled glass of white wine or sparkling water.
    • Garnish with extra parsley for a fresh, vibrant touch.

    FAQs about Lentil & Feta Salad with Parsley

    Many of you may have questions as you whip up this delightful Lentil & Feta Salad with Parsley. Here are some common queries and my best answers to help you along the way!

    Can I make this salad ahead of time?

    Absolutely! This salad can be made ahead and stored in the refrigerator for up to three days. It actually tastes better as the flavors meld together!

    Is the lentil salad gluten-free?

    Yes, lentils are naturally gluten-free, making this lentil salad a fantastic option for those with gluten sensitivities.

    How can I store leftovers?

    Store any leftovers in an airtight container in the refrigerator. Be sure to consume them within three days for the best taste and quality.

    Can I use different types of cheese?

    Of course! While feta is a star ingredient, you can experiment with goat cheese for a tangy twist or even a sharp cheddar for a completely different flavor profile.

    What can I serve with this salad?

    This salad pairs beautifully with grilled meats or can be served alongside roasted vegetables for a complete, hearty meal. Enjoy!

    Final Thoughts

    Creating this Lentil & Feta Salad with Parsley has been a rewarding culinary adventure. It’s more than just a recipe; it’s a delicious way to nourish your family and make memories in the kitchen. The medley of flavors and colors will make your dining table feel vibrant and inviting. I love that it’s versatile enough for any occasion, from a casual lunch to an elegant dinner. So, take a moment to savor each bite—and the satisfaction that comes from preparing something wholesome. Trust me, your taste buds and your loved ones will sing your praises!


    Print

    clock clock iconcutlery cutlery iconflag flag iconfolder folder iconinstagram instagram iconpinterest pinterest iconfacebook facebook iconprint print iconsquares squares iconheart heart iconheart solid heart solid icon

    Description

    A delicious and healthy salad combining lentils, feta cheese, and fresh parsley, perfect for a light meal or side dish.


    • 1 cup green or brown lentils, rinsed
    • 3 cups water or vegetable broth
    • 1/2 cup crumbled feta cheese
    • 1/2 cup cherry tomatoes, halved
    • 1/4 red onion, finely chopped
    • 1/4 cup chopped fresh parsley
    • 1 tablespoon olive oil
    • 1 tablespoon lemon juice
    • Salt and black pepper, to taste

    1. In a saucepan, bring the lentils and water or broth to a boil.
    2. Reduce the heat and simmer for 20–25 minutes until the lentils are tender but not mushy.
    3. Drain the lentils and let them cool.
    4. In a large bowl, combine the cooked lentils, feta, cherry tomatoes, red onion, and parsley.
    5. Drizzle with olive oil and lemon juice.
    6. Season with salt and black pepper to taste.
    7. Toss gently to combine and serve chilled or at room temperature.

    Notes

    • Feel free to add other vegetables such as cucumbers or bell peppers for added crunch.
    • This salad can be made ahead of time and stored in the refrigerator for up to 3 days.
    • Adjust the seasoning as per your taste preferences.
    • Prep Time: 10 minutes
    • Cook Time: 25 minutes
    • Category: Salad
    • Method: Boiling and Mixing
    • Cuisine: Mediterranean

    Nutrition

    • Serving Size: 1 serving
    • Calories: 250
    • Sugar: 2g
    • Sodium: 300mg
    • Fat: 10g
    • Saturated Fat: 3g
    • Unsaturated Fat: 7g
    • Trans Fat: 0g
    • Carbohydrates: 30g
    • Fiber: 10g
    • Protein: 12g
    • Cholesterol: 15mg

    Sharing is caring!

  • Tropical Hawaiian Chicken Burger

    Tropical Hawaiian Chicken Burger


    Introduction to Tropical Hawaiian Chicken Burger

    As a passionate home cook, I know just how hectic life can get. That’s why I absolutely love sharing my recipe for the Tropical Hawaiian Chicken Burger. It’s a delightful dish that brings a burst of island flavors right to your kitchen. Imagine enjoying a juicy chicken patty, topped with grilled pineapple and melted Swiss cheese, all drizzled with a tangy teriyaki glaze! This recipe isn’t just delicious; it’s also a quick solution for busy weeknights or an impressive meal for family and friends. Trust me, your taste buds will thank you!

    Why You’ll Love This Tropical Hawaiian Chicken Burger

    This Tropical Hawaiian Chicken Burger is a game changer! It’s incredibly easy to whip up, making it perfect for those busy evenings when time is not on your side. The sweet and savory flavors create a taste explosion that will leave everyone at your table smiling. Plus, it’s a delightful escape to the islands with every bite—who doesn’t need a mini-vacation on a plate? It’s a win-win!

    Ingredients for Tropical Hawaiian Chicken Burger

    Gathering your ingredients is the fun part! Here’s what you’ll need for this irresistible Tropical Hawaiian Chicken Burger:

    • Ground Chicken: The star of our show! Ground chicken is lean and flavorful, making it perfect for juicy patties.
    • Green Onion: Adds a fresh crunch and a mild onion flavor that lifts the dish.
    • Garlic: A garlic clove, minced, brings depth to the patties. It’s a flavor booster!
    • Fresh Ginger: Just a teaspoon of grated ginger imparts a warm, zesty note that ties everything together.
    • Soy Sauce: This adds saltiness and a savory umami taste to the chicken. Opt for low-sodium if watching sodium intake.
    • Sesame Oil: A drizzle of this fragrant oil enhances the patty’s flavor with a nutty aroma.
    • Salt and Pepper: Simple but essential for seasoning the chicken to perfection.
    • Pineapple Rings: Fresh or canned, grilled pineapple gives that tropical sweetness that makes this burger memorable.
    • Swiss or Monterey Jack Cheese: Melty cheese is a must! It brings creaminess and additional flavor.
    • Avocado: Sliced avocado adds healthy fats and creaminess, making each bite even more delightful.
    • Shredded Lettuce: For crunch and freshness, lettuce balances the flavors beautifully.
    • Brioche Buns: Toasted brioche buns are soft and slightly sweet, providing the perfect vessel for your burger.
    • Teriyaki Glaze: Made from more soy sauce, brown sugar, rice vinegar, and garlic powder, this glaze adds a tangy kick to your burger.

    Remember, you can find precise quantities of everything at the end of the article for easy printing. Feel free to get creative with substitutions! You can swap the chicken for turkey for a leaner option, or use other vegetables instead of avocado. Happy cooking!

    How to Make Tropical Hawaiian Chicken Burger

    Step 1: Prepare the Teriyaki Glaze

    Let’s start with the teriyaki glaze—this sauce is the heart of our Tropical Hawaiian Chicken Burger. In a small saucepan, combine soy sauce, brown sugar, rice vinegar, garlic powder, and sesame oil. Stir continuously while bringing the mix to a gentle simmer over medium heat. You’ll smell those delicious aromas wafting through the kitchen in no time!

    Once it’s simmering, prepare your cornstarch slurry by mixing the cornstarch with 2 teaspoons of water until smooth. This step is crucial for thickening our glaze. Slowly pour the slurry into the bubbling sauce, whisking it constantly to combine. You’ll notice the glaze start to thicken beautifully. Keep stirring for about 2 more minutes, then remove it from heat. Let it cool as it thickens up even more. This glaze will give your burger that sweet, tangy kick everyone craves!

    Step 2: Make the Chicken Patties

    Now, let’s move on to the chicken patties! In a large mixing bowl, combine your ground chicken, finely chopped green onion, minced garlic, grated ginger, soy sauce, sesame oil, salt, and pepper. Use your hands or a spatula to mix everything together, but don’t overwork it. We want the flavors combined without making the meat tough.

    Once mixed, divide your chicken mixture into four equal portions. Wet your hands lightly to prevent sticking, and shape each portion into a patty about three-quarters of an inch thick. The thickness helps ensure they cook evenly and retain juiciness. Set the patties aside on a plate or cutting board and let them rest for a few minutes. This little break allows the flavors to marry, ensuring that every bite is bursting with flavor!

    Step 3: Cook the Patties

    It’s time to cook those delicious patties! Preheat your grill or a non-stick skillet over medium-high heat. If you’re using a skillet, a touch of non-stick spray will do wonders. Once heated, add the chicken patties, making sure not to crowd the pan. You want them to have room to cook properly!

    Cook the patties for around 5 to 6 minutes on one side. When they’re beautifully browned, flip them over. This is also when you’ll want to add a slice of Swiss or Monterey Jack cheese on top of each patty. Give it another 5 minutes for the other side. The internal temperature should reach 165°F (74°C) to ensure they’re fully cooked through. A quick kitchen thermometer will make this step easy. Once they’re done, transfer them to a plate and let them rest for a minute. This helps keep them juicy!

    Step 4: Grill the Pineapple

    While your patties rest, it’s time to grill the pineapple! Grab those pineapple rings and get your grill ready. If you’re using fresh pineapple, you’ll want to grill these for about 1 to 2 minutes per side. You’re looking for those lovely grill marks and a hint of caramelization. This brings out the natural sugars in the fruit, intensifying its sweetness.

    This brief grilling transforms the pineapple, making it soft and succulent. It pairs perfectly with the savory chicken and adds that classic tropical flair we’re after! Set the pineapple aside once grilled; you’ll want to layer this on your burger shortly.

    Step 5: Toast the Brioche Buns

    Now, let’s toast our brioche buns! Lightly butter the insides of your buns and place them on the grill or skillet. You want to achieve that golden-brown color we all love and a slight crunch. Keep an eye on them as they toast quickly—just 1 to 2 minutes will do the trick. Toasted buns aren’t just about texture; they help keep the filling from getting soggy, too!

    Step 6: Assemble the Burger

    Finally, it’s showtime—assembly! Start by spreading a generous spoonful of that glorious teriyaki glaze on the bottom half of your toasted brioche bun. Layer on a handful of shredded lettuce for that crunchy foundation, followed by the cooked chicken patty with melted cheese. Next, stack on the grilled pineapple ring—this is where the magic happens! Top it off with creamy avocado slices for an extra touch, and drizzle a little more teriyaki glaze on top.

    Finish with the top bun, and give it a gentle press to hold everything in place. Your Tropical Hawaiian Chicken Burger is now ready to devour! Serve it hot and enjoy that beautiful fusion of flavors that makes each bite a mini-vacation. Trust me; your family and friends will be asking for seconds!

    Tips for Success

    • Marinate the chicken patties for about 30 minutes for extra flavor.
    • Use a meat thermometer to ensure the patties are cooked perfectly.
    • Grill the pineapple until it’s golden to enhance its sweetness.
    • Experiment with different cheeses like pepper jack for a spicy kick.
    • Customize your toppings—try adding jalapeños or a slice of tomato!

    Equipment Needed

    • Grill or non-stick skillet: A grill brings out those smoky flavors, but any skillet will work.
    • Large mixing bowl: For combining the chicken mixture.
    • Spatula: A sturdy spatula will help flip the patties easily.
    • Meat thermometer: This is essential to ensure the patties are cooked through.

    Variations of Tropical Hawaiian Chicken Burger

    • Turkey Patties: For a leaner option, substitute ground chicken with ground turkey. It’s equally delicious and just as easy to prepare!
    • Vegetarian Delight: Swap the chicken with a black bean or chickpea patty for a hearty vegetarian version that’s packed with protein.
    • Spicy Kick: Add diced jalapeños or a splash of sriracha to the chicken mixture for a spicy twist that’ll ignite your taste buds.
    • Grilled Peppers: Mix in some grilled bell peppers or onions for an added depth of flavor and an extra serving of veggies.
    • Soy-Free Option: Use coconut aminos instead of soy sauce for a soy-free alternative that still delivers great taste.
    • Gluten-Free Buns: Pot for gluten-free brioche buns to accommodate gluten sensitivities, making this burger accessible to everyone.

    Serving Suggestions

    • Pair your Tropical Hawaiian Chicken Burger with sweet potato fries for a perfect balance of flavors.
    • Serve alongside a refreshing pineapple or mango salsa to brighten your meal.
    • For drinks, consider coconut water or a light lager to complement the tropical vibe.
    • Present your burgers on a colorful platter topped with fresh herbs for a festive touch.

    FAQs about Tropical Hawaiian Chicken Burger

    Can I use ground turkey instead of chicken in this recipe?

    Absolutely! Ground turkey is a fantastic substitute for a leaner Tropical Hawaiian Chicken Burger. Just follow the same steps as you would with chicken.

    How can I make this recipe gluten-free?

    To make your Tropical Hawaiian Chicken Burger gluten-free, simply swap out regular soy sauce for gluten-free soy sauce or coconut aminos. Also, be sure to use gluten-free brioche buns.

    What can I serve with these burgers?

    These flavorful burgers pair beautifully with sweet potato fries, a fresh salad, or a tropical fruit salsa. Drink options like coconut water or a light lager also complement the meal nicely.

    Is it possible to make the patties ahead of time?

    Yes! You can prepare the chicken patties in advance and store them in the fridge. I recommend cooking them just before serving to keep them juicy and fresh. This makes for a quick dinner option on busy nights!

    Can I freeze the cooked burgers?

    Definitely! Just cool the cooked patties completely, then wrap them securely in plastic wrap or foil, and place them in an airtight container. They’ll last up to three months in the freezer. Reheat in the oven for best results!

    Final Thoughts

    Every bite of the Tropical Hawaiian Chicken Burger is like a mini-vacation in your mouth. It’s more than just a meal; it’s a joyful escape, perfect for busy nights or gatherings with loved ones. The playful combination of savory and sweet flavors is bound to bring smiles to your dining table. Plus, the ease of preparation means you can focus less on cooking and more on making memories. So, gather around, serve up these delicious burgers, and enjoy the happiness they bring. Trust me, your taste buds are in for a delightful treat!


    Print

    clock clock iconcutlery cutlery iconflag flag iconfolder folder iconinstagram instagram iconpinterest pinterest iconfacebook facebook iconprint print iconsquares squares iconheart heart iconheart solid heart solid icon

    Description

    A delicious burger featuring ground chicken patties topped with grilled pineapple, Swiss cheese, and a tangy teriyaki glaze.


    • lbs (680 g) ground chicken
    • 1 green onion, finely chopped
    • 1 garlic clove, minced
    • 1 tsp grated fresh ginger
    • 1 tbsp soy sauce
    • ½ tsp sesame oil
    • Salt and pepper, to taste
    • 4 pineapple rings (fresh or canned, drained)
    • 4 slices Swiss or Monterey Jack cheese
    • 1 avocado, sliced
    • 1 cup shredded lettuce
    • 4 brioche buns, toasted
    • ¼ cup soy sauce
    • 2 tbsp brown sugar
    • 1 tbsp rice vinegar
    • 1 tsp cornstarch + 2 tsp water (slurry)
    • ½ tsp sesame oil
    • Pinch of garlic powder

    1. In a small saucepan, combine soy sauce, brown sugar, rice vinegar, garlic powder, and sesame oil. Bring to a simmer. Stir in cornstarch slurry and cook until thickened. Remove from heat.
    2. In a bowl, mix ground chicken with green onion, garlic, ginger, soy sauce, sesame oil, salt, and pepper. Form into 4 equal patties.
    3. Heat a grill or non-stick skillet over medium-high heat. Cook patties for about 5–6 minutes per side, or until internal temperature reaches 165°F (74°C). Add cheese slices in the last minute of cooking.
    4. While patties cook, grill pineapple rings 1–2 minutes per side until lightly caramelized.
    5. Lightly butter and toast the brioche buns until golden.
    6. Spread a spoonful of teriyaki glaze on the bottom bun. Layer with lettuce, chicken patty with cheese, grilled pineapple, avocado slices, and more glaze. Top with bun and serve.

    Notes

    • For added flavor, marinate the chicken patties for 30 minutes before cooking.
    • Substitute any vegetable of your choice for the avocado if desired.
    • Feel free to use turkey instead of chicken for a leaner option.
    • Prep Time: 15 minutes
    • Cook Time: 20 minutes
    • Category: Main Course
    • Method: Grilling
    • Cuisine: Hawaiian

    Nutrition

    • Serving Size: 1 burger
    • Calories: 550
    • Sugar: 10g
    • Sodium: 800mg
    • Fat: 24g
    • Saturated Fat: 10g
    • Unsaturated Fat: 12g
    • Trans Fat: 0g
    • Carbohydrates: 45g
    • Fiber: 4g
    • Protein: 35g
    • Cholesterol: 90mg

    Sharing is caring!

  • Zesty Cajun White Chicken Chili

    Zesty Cajun White Chicken Chili


    Introduction to Zesty Cajun White Chicken Chili

    Life gets hectic, doesn’t it? Between school runs, work deadlines, and a never-ending to-do list, finding time to prepare a homemade meal might feel like a dream. That’s where my Zesty Cajun White Chicken Chili comes in—a vibrant and hearty dish that’s not only quick to whip up but also bursting with flavor. Imagine cozying up to a bowl of chili that brings warmth and comfort, perfect for impressing loved ones or treating yourself on a busy day. This recipe is all about flavorful ingredients and rich textures, easily cooked in just 45 minutes!

    Why You’ll Love This Zesty Cajun White Chicken Chili

    This delightful chili is like a warm hug on a chilly day! It’s simple and quick to prepare, making it perfect for busy moms like us. The blend of Cajun spices packs a flavor punch without being overwhelming. With just one pot, cleanup is a breeze. Plus, this cozy dish is a crowd-pleaser, ensuring happy faces at your dinner table. Trust me, it will become a family favorite in no time!

    Ingredients for Zesty Cajun White Chicken Chili

    When crafting my Zesty Cajun White Chicken Chili, fresh, flavorful ingredients are the stars of the show. Let’s take a peek at what you’ll need:

    • Chicken thighs: I love using boneless, skinless chicken thighs for their tenderness and juicy flavor. They hold up beautifully in chili.
    • Andouille sausage: This spicy, smoky sausage adds depth and richness. Feel free to swap it for a milder sausage if you prefer less heat.
    • Garlic: The aromatic magic ingredient! Freshly chopped garlic enhances the overall flavor and gives a warm, inviting aroma.
    • Jalapeño: Diced and deseeded, it provides just the right amount of kick! Adjust the quantity to suit your spice tolerance.
    • Bell pepper: A colorful addition that contributes sweetness and crunch. Any color will do—mix it up for a beautiful dish!
    • Celery and onion: These herbs form the aromatic base, bringing incredible flavors. Together, they meld beautifully with the spices.
    • White beans: Creamy and hearty, they fill the chili and provide additional protein. Canned ones work wonderfully here, just rinse and drain.
    • Chicken broth: This adds a rich backdrop for the chili. Homemade broth can elevate the flavor, but store-bought works too!
    • Salsa verde: Bringing bright flavors and a little tang, it’s a secret ingredient that kicks the chili up a notch.
    • Cajun spice mix: A must for that signature flavor! You’ll use it in two stages for a robust taste.
    • Salt and pepper: Freshly ground enhances all the flavors, bringing balance to the dish.
    • Ground cumin: This warm spice adds an earthy depth to the chili and complements the Cajun flavors beautifully.
    • Sour cream: For an indulgently creamy finish, stirring this in at the end makes the chili rich and satisfying.
    • Unsalted butter: A bit of butter helps soften the veggies while adding a touch of richness.
    • Parmesan: A sprinkle at the end offers a savory touch. If you’re feeling adventurous, try mixing in different cheeses!
    • Lime: A squeeze just before serving brightens everything up, adding a zesty freshness.
    • Green onions and fresh herbs: Thinly sliced as a bright garnish, they add color and freshness. Cilantro or parsley works beautifully!

    Most of these ingredients can be found in your local grocery store, and if something’s missing, feel free to experiment with what you have on hand. Remember, exact quantities are at the bottom for easy printing!

    How to Make Zesty Cajun White Chicken Chili

    Now that we’ve gathered our ingredients, let’s dive into the steps for making this delicious Zesty Cajun White Chicken Chili. It’s a straightforward process that fills your kitchen with mouth-watering aromas and brings the family together. Let’s get started!

    Step 1: Brown the Sausage

    Begin by heating a tablespoon of oil in a big Dutch oven over medium heat. Toss in those sausage rounds, letting them sizzle for about five minutes. You want them to develop a nice golden-brown color! This step brings out their smoky flavors, enhancing the rich base of the chili. Once they’re browned, lift them out with a slotted spoon. Set them aside, but don’t clean the pot just yet—the leftover bits add incredible flavor!

    Step 2: Sear the Chicken

    Next, add the chopped chicken thighs to the pot along with half of your Cajun spice blend. This blend is the heart and soul of the dish! Sear the chicken for about 5-7 minutes, stirring occasionally, until it’s beautifully browned and cooked through. The key here is to allow the chicken to soak up the spices. After that, remove it from the pot and set aside with the sausage. Your chili is off to a great start!

    Step 3: Cook the Vegetables

    In that same pot, melt a spoonful of butter. Add the diced onion, celery, bell pepper, and jalapeño. These vibrant veggies are the backbone of flavor here! Sauté them for about 5 minutes until they soften. Stir occasionally—this step lets their natural sweetness shine through and amalgamate beautifully with the spices. Soon, your kitchen will feel like a southern culinary haven!

    Step 4: Add Spices and Broth

    Once the veggies are perfectly tender, it’s time to amp up the flavor. Add in the chopped garlic, the remaining Cajun spice mix, and ground cumin. Cook for another minute until fragrant—oh, that smell! Then pour in the chicken broth and mix in the white beans and salsa verde. Stir everything together, and witness how those flavors come alive! This base is what your chili dreams are made of!

    Step 5: Combine and Simmer

    Return the browned sausage and seared chicken back to the pot. Now it’s time to let it simmer! Bring the pot to a gentle bubble and let everything cook together for about 15-20 minutes. This simmering process allows the flavors to meld, creating a robust and comforting chili. Don’t rush this part—this is where the magic truly happens!

    Step 6: Stir in Creaminess

    After simmering, turn off the heat and fold in the sour cream and grated Parmesan. This addition gives the chili its rich, creamy texture. Stir until everything is blended together—it’s like wrapping your bowl of chili in a cozy blanket! If you feel adventurous, taste and adjust seasoning as needed. It should feel indulgent and satisfying.

    Step 7: Serve It Up

    Your Zesty Cajun White Chicken Chili is ready to shine! Ladle it into bowls and finish with a sprinkle of green onions and a handful of fresh herbs. A squeeze of lime over the top adds a burst of freshness every time you dig in. For an inviting presentation, consider serving it alongside crusty bread or over fluffy rice. Gather your family around, and share the warmth of your creation!

    Tips for Success

    • Prep your ingredients ahead of time to save precious minutes during cooking.
    • Don’t skimp on browning the sausage and chicken; it builds incredible depth of flavor.
    • Taste as you go! Adjust spices to find your perfect chili balance.
    • Make it a day in advance; flavors develop beautifully overnight.
    • Top with a dollop of sour cream for extra creaminess and flair!

    Equipment Needed

    • Large Dutch oven: Essential for even cooking and flavor development. A heavy-bottomed pot works too!
    • Cutting board and sharp knife: Handy for chopping your ingredients efficiently.
    • Measuring cups and spoons: To keep your ingredients and portions precise.
    • Slotted spoon: Perfect for retrieving sausage and chicken without the excess fat.
    • Wooden spoon: For stirring everything together and scraping the flavorful bits at the bottom.

    Variations of Zesty Cajun White Chicken Chili

    • Vegetarian Option: Swap out chicken and sausage for plant-based alternatives like tofu or tempeh. Use vegetable broth and add more beans for protein.
    • Spicy Twist: Amp up the heat by adding diced habaneros or a dash of hot sauce. This will give your chili a fiery kick!
    • Bean Medley: Use a variety of beans like black beans or kidney beans along with the white beans for different textures and flavors.
    • Low-Carb Variation: Replace beans with diced zucchini or cauliflower for a veggie-packed, low-carb option that’s still filling.
    • Creamy Alternative: For extra creaminess without sour cream, blend a small amount of the chili and stir it back in before serving.

    Serving Suggestions for Zesty Cajun White Chicken Chili

    • Pair it with crusty, warm bread for dipping—perfect for soaking up those flavorful juices!
    • Serve over fluffy rice or quinoa for a hearty meal that will satisfy everyone.
    • Complement with a fresh green salad dressed in vinaigrette for a lovely balance.
    • Offer a side of cornbread; the sweetness goes wonderfully with the spiciness.
    • Wash it down with a refreshing iced tea or a light lager for an enjoyable meal!

    FAQs about Zesty Cajun White Chicken Chili

    I’m sure you might have a few questions buzzing around in your mind as you think about whipping up this delightful dish! Here are some common queries that come up, complete with helpful answers to guide you:

    Can I make Zesty Cajun White Chicken Chili in advance? Absolutely! This chili tastes even better the next day as the flavors continue to develop. Simply store it in the fridge, and reheat when you’re ready to enjoy.

    What can I serve with this chili? Pairing it with crusty bread, cornbread, or over rice makes for a hearty meal. A fresh green salad dressed in vinaigrette can also complement the flavors beautifully!

    Is this chili spicy? It has a mild to medium spice level thanks to the Cajun seasonings and jalapeño. If you prefer it milder, feel free to adjust the amount of jalapeño or omit it altogether!

    Can I freeze leftovers? Yes! This chili freezes wonderfully. Just store it in airtight containers. When you’re ready for a quick meal, let it thaw and reheat on the stovetop.

    How do I make this chili vegetarian-friendly? Simple! Substitute chicken and sausage with plant-based alternatives like tofu or tempeh. Use vegetable broth and add even more beans for protein!

    Final Thoughts

    Preparing my Zesty Cajun White Chicken Chili is more than just cooking; it’s a way to nourish both body and soul. This dish has a unique way of bringing people together, creating those warm, heartwarming moments shared around the table. The blend of spices, creamy texture, and vibrant flavors will leave everyone savoring each bite. Plus, knowing it’s easy to make means you can focus on what truly matters—spending quality time with your loved ones. So grab your ingredients, embrace the delightful aromas, and enjoy the happiness this chili brings to your kitchen!


    Print

    clock clock iconcutlery cutlery iconflag flag iconfolder folder iconinstagram instagram iconpinterest pinterest iconfacebook facebook iconprint print iconsquares squares iconheart heart iconheart solid heart solid icon

    Description

    A flavorful and hearty Zesty Cajun White Chicken Chili that brings a delightful combination of spices and creamy textures.


    • 1 pound chicken thighs (boneless, skinless), chopped up small
    • 1 pound andouille sausage, cut into rounds
    • 4 garlic cloves, chopped
    • 1 jalapeño, diced with seeds removed
    • 1 cup chopped bell pepper
    • 1 cup celery, diced
    • 1 cup yellow onion, diced
    • 2 cans white beans (15 oz. each), rinsed and drained
    • 4 cups broth made from chicken
    • 1/2 cup of salsa verde
    • 2 teaspoons Cajun spice mix, use half now and half later
    • Salt and pepper, fresh ground
    • 1 teaspoon ground cumin
    • 1/2 cup sour cream
    • 1 tablespoon unsalted butter
    • 1/4 cup Parmesan, grated
    • Lime squeezed over top
    • Green onions, thinly sliced
    • Chopped cilantro or parsley for color

    1. Heat a tablespoon of oil in a big Dutch oven on medium. Toss in sausage rounds, browning them for about 5 minutes, then remove from the pot.
    2. Add chicken chunks and half the Cajun spice blend. Sear the chicken until cooked through, then remove from the pot with the sausage.
    3. Melt a spoonful of butter in the hot pot. Stir in onion, celery, bell pepper, and jalapeño, allowing them to soften for about 5 minutes, stirring occasionally.
    4. Add garlic, remaining Cajun spice, and cumin; cook for another minute until fragrant.
    5. Pour in chicken broth, add white beans, and mix in salsa verde. Return the browned sausage and chicken to the pot. Let it bubble gently for about 15-20 minutes.
    6. Turn off the heat and stir in sour cream and Parmesan until creamy.
    7. Spoon the chili into bowls and top with green onions, chopped herbs, and a squeeze of lime before serving.

    Notes

    • This chili can be made ahead of time and tastes even better the next day.
    • Adjust the spiciness by either adding or omitting jalapeños.
    • For a thicker chili, let it simmer longer.
    • Prep Time: 15 minutes
    • Cook Time: 30 minutes
    • Category: Main Dish
    • Method: Stovetop
    • Cuisine: Cajun

    Nutrition

    • Serving Size: 1 bowl
    • Calories: 420
    • Sugar: 3g
    • Sodium: 900mg
    • Fat: 25g
    • Saturated Fat: 10g
    • Unsaturated Fat: 15g
    • Trans Fat: 0g
    • Carbohydrates: 30g
    • Fiber: 8g
    • Protein: 28g
    • Cholesterol: 85mg

    Sharing is caring!

  • Creamy Cottage Cheese Ranch Pasta Salad

    Creamy Cottage Cheese Ranch Pasta Salad


    Introduction to Creamy Cottage Cheese Ranch Pasta Salad

    Hey there! If you’re like me, juggling family, work, and everything in between, you probably cherish quick yet delicious meals. Enter my Creamy Cottage Cheese Ranch Pasta Salad – a real game changer! It’s refreshing, creamy, and gives a cozy nod to those busy days when you need something simple yet impressive. With just a handful of ingredients, you can whip up a delightful dish that’ll not only satisfy your taste buds but also win over your loved ones. So, let’s dive into this culinary adventure together and make mealtime a little brighter!

    Why You’ll Love This Creamy Cottage Cheese Ranch Pasta Salad

    This Creamy Cottage Cheese Ranch Pasta Salad is everything a busy mom or professional needs. It’s super easy to whip up—perfect for those hectic days when you’re racing against the clock. Plus, the creamy ranch flavor is a hit with everyone, even the pickiest eaters. With its delightful blend of fresh veggies and savory goodness, it’s a dish you’ll want on repeat. Seriously, this recipe makes meals feel special without draining your energy!

    Ingredients for Creamy Cottage Cheese Ranch Pasta Salad

    Gathering the right ingredients is half the fun! Here’s what you’ll need for this delicious Creamy Cottage Cheese Ranch Pasta Salad:

    • Cooked Pasta: Any type you love works! Think rotini, penne, or even gluten-free options. Just make sure it’s cooked and cooled before mixing it in.
    • Cottage Cheese: This creamy delight is the star of the show. Choose a low-fat version if you’re watching calories, but full-fat will give it a rich flavor.
    • Ranch Seasoning Mix: You can buy this in stores or whip up a homemade version. It’s versatile and adds that signature tangy zest!
    • Cherry Tomatoes: Their burst of sweetness gives a lovely pop of color. Feel free to swap for grape or even diced regular tomatoes.
    • Cucumber: The crunchiness elevates the salad. English or Persian cucumbers are refreshing choices, while pickles can add a fun tang!
    • Red Onion: This adds a sharp bite. If you prefer a milder flavor, soak the chopped onion in cold water for a few minutes before adding.
    • Shredded Carrots: It’s a fantastic way to sneak in some veggies! Baby carrots can also work if you shred them yourself.
    • Fresh Dill: The herb brings a delightful freshness. Don’t have fresh? Dried dill can work, but use less as it’s more concentrated.
    • Salt and Black Pepper: Simple seasonings that enhance the flavors. Adjust them to your personal taste!

    Feel free to customize this vibrant salad with your favorite veggies—like bell peppers or avocados. The exact quantities of each ingredient are at the bottom of the article for your convenience and easy printing!

    How to Make Creamy Cottage Cheese Ranch Pasta Salad

    Step 1: Make the Creamy Ranch Base

    Let’s kick things off by whipping up the creamy ranch base! Take your cottage cheese and ranch seasoning mix. Toss them in a small blender or a mixing bowl. Blend until smooth and creamy. If you’re using a bowl, a hand mixer can do the trick, too! Feel free to add a pinch of salt and a dash of black pepper for extra flavor during this step. This sauce is the heart of our salad, so make it tasty!

    Step 2: Mix the Salad

    In a large mixing bowl, gather your cooled cooked pasta, halved cherry tomatoes, chopped cucumber, diced red onion, and shredded carrots. Add in the fresh dill to bring a vibrant flavor. It’s a colorful mix, and trust me, your loved ones will enjoy it! Gently stir everything together until the pasta and veggies are nicely combined.

    Step 3: Toss to Combine

    Now it’s time to make our salad shine! Pour the creamy ranch base over the pasta and veggies. Using a spatula, carefully fold the ingredients together until they’re evenly coated. Avoid stirring too aggressively, as we want to keep everything intact. This is where the flavors start to blend, making your Creamy Cottage Cheese Ranch Pasta Salad truly delightful!

    Step 4: Chill and Serve

    Chill your pasta salad in the refrigerator for at least 30 minutes. This step allows all those delicious flavors to meld together beautifully. When you’re ready to serve, give it a gentle stir. For a lovely touch, garnish with some extra dill on top. Present it in a beautiful bowl or individual servings for a fun touch. Enjoy your lovely creation!

    Tips for Success

    • Always cool your pasta thoroughly to prevent a soggy salad.
    • Feel free to mix in ingredients like bell peppers or olives for extra flavor.
    • Don’t skip the chilling step! It enhances the taste.
    • Toss gently to keep the pasta and veggies intact.
    • Double the recipe for larger gatherings—it disappears fast!

    Equipment Needed

    • Large Mixing Bowl: Essential for combining all your ingredients. Any bowl will do, but a bigger one makes it easier!
    • Blender or Mixing Bowl: Use a small blender to create the creamy ranch base. If you don’t have one, a hand mixer works wonderfully!
    • Spatula: Perfect for gently folding your salad ingredients together without mashing them.

    Variations

    • Protein Boost: Add grilled chicken, shrimp, or chickpeas to make it a heartier main dish!
    • Vegan Option: Swap cottage cheese for cashew cream or silken tofu blended with a bit of lemon juice for that creamy texture.
    • Gluten-Free: Use gluten-free pasta options, such as chickpea or quinoa pasta, to keep it friendly for gluten sensitivities.
    • Cheesy Delight: Mix in some shredded cheese like cheddar or feta for an extra layer of flavor!
    • Spicy Kick: Stir in some diced jalapeños or a splash of hot sauce if you like a little heat!

    Serving Suggestions

    • Sides: Pair your pasta salad with grilled chicken or veggie skewers for a balanced meal.
    • Drinks: A crisp glass of white wine or homemade lemonade complements the creamy flavors beautifully.
    • Presentation: Serve in a colorful bowl, garnished with extra dill or cherry tomatoes for a vibrant look!

    FAQs about Creamy Cottage Cheese Ranch Pasta Salad

    Can I make this Creamy Cottage Cheese Ranch Pasta Salad a day in advance?
    Absolutely! In fact, making it ahead of time allows the flavors to meld beautifully. Just be sure to store it in an airtight container in the refrigerator until you’re ready to serve.

    What pasta works best for this salad?
    You can use any cooked pasta you love! Rotini, penne, or even farfalle works well. Just make sure it’s cooled before adding to the salad to avoid a soggy mess.

    Is this recipe suitable for picky eaters?
    Yes! The creamy ranch flavor is a big hit, and you can easily customize the vegetables to appeal to your family’s tastes. If someone doesn’t like a specific veggie, simply swap it for one they prefer!

    Can I make this salad without ranch seasoning?
    Sure thing! You can create your own ranch flavor by mixing herbs like dill, parsley, and garlic powder with a bit of mayonnaise and yogurt for creaminess. Feel free to get creative!

    How do I store leftovers?
    Store any leftovers in an airtight container in the fridge. It should stay fresh for about 2 to 3 days. Just give it a good stir before serving again.

    Final Thoughts

    This Creamy Cottage Cheese Ranch Pasta Salad is more than just a meal; it’s a delightful experience! Each bite brings a wave of creamy comfort, colorful veggies, and that tasty ranch zing. Whether you’re prepping for a picnic or just looking to brighten up a busy weeknight, this salad delivers on flavor and simplicity. Plus, it sparks joy in the kitchen, connecting us with our loved ones over delicious, homemade food. I hope you enjoy making it as much as I do! Trust me, it’ll become a repeat favorite in your household, bringing smiles to every table.


    Print

    clock clock iconcutlery cutlery iconflag flag iconfolder folder iconinstagram instagram iconpinterest pinterest iconfacebook facebook iconprint print iconsquares squares iconheart heart iconheart solid heart solid icon

    Description

    A refreshing and creamy pasta salad featuring cottage cheese and ranch seasoning, perfect for any gathering.


    • 2 cups cooked pasta (your choice!), cooled
    • 1 cup cottage cheese
    • 1 tablespoon ranch seasoning mix (store-bought or homemade)
    • 1 cup cherry tomatoes, halved
    • ½ cup cucumber, chopped
    • ¼ cup red onion, finely chopped
    • ½ cup shredded carrots
    • 2 tablespoons fresh dill, chopped
    • Salt and black pepper, to taste

    1. Make the Creamy Ranch Base: In a small blender or mixing bowl, blend or stir together the cottage cheese and ranch seasoning until smooth and well combined. Season with salt and pepper to taste.
    2. Mix the Salad: In a large bowl, combine the cooked pasta, cherry tomatoes, cucumber, red onion, shredded carrots, and fresh dill.
    3. Toss to Combine: Pour the cottage cheese ranch dressing over the pasta and vegetables. Toss gently until everything is evenly coated.
    4. Chill and Serve: Refrigerate for at least 30 minutes before serving to let the flavors meld. Serve cold, garnished with extra dill if desired.

    Notes

    • Feel free to customize with your favorite vegetables.
    • This salad can be made a day in advance for convenience.
    • Prep Time: 15 minutes
    • Cook Time: 10 minutes
    • Category: Salad
    • Method: Mixing
    • Cuisine: American

    Nutrition

    • Serving Size: 1 cup
    • Calories: 250
    • Sugar: 3g
    • Sodium: 400mg
    • Fat: 6g
    • Saturated Fat: 3g
    • Unsaturated Fat: 2g
    • Trans Fat: 0g
    • Carbohydrates: 40g
    • Fiber: 2g
    • Protein: 12g
    • Cholesterol: 15mg

    Sharing is caring!

  • Baked Feta Shrimp and Tomatoes: A Flavorful Delight!

    Baked Feta Shrimp and Tomatoes: A Flavorful Delight!


    Introduction to Baked Feta Shrimp and Tomatoes

    Have you ever craved a dish that’s both delicious and easy to whip up? Let me introduce you to my favorite gem: Baked Feta Shrimp and Tomatoes. This savory delight is perfect for busy evenings when you need something quick yet impressive on the dinner table. Just picture it—juicy shrimp nestled among creamy feta and burst-y tomatoes, all bathed in olive oil and herbs. The wonderful aromas that fill your kitchen make it hard to resist! Trust me; your family will think you’re a culinary superstar, and you’ll barely break a sweat.

    Why You’ll Love This Baked Feta Shrimp and Tomatoes

    This dish is a game-changer, I promise! It’s not only incredibly easy to prepare but also bursts with flavor that will leave your taste buds dancing. In just 40 minutes, you can have a complete meal for your family that looks and tastes gourmet. Plus, the combination of creamy feta and juicy tomatoes creates a sauce that’s perfect for dipping, making every bite a delightful experience!

    Ingredients for Baked Feta Shrimp and Tomatoes

    Let’s dive into the deliciousness that brings this meal to life! Here’s what you’ll need for your Baked Feta Shrimp and Tomatoes. You’ll find each ingredient plays a vital role in enhancing the flavors and textures of the dish. Remember, exact quantities are at the bottom of the article, ready for printing!

    • Shrimp: Large and juicy, they’re the stars of this dish. You can use fresh or frozen, just remember to thaw the latter before cooking.
    • Feta Cheese: This creamy block adds a tangy richness. Pot for full-fat feta for the best melt and flavor.
    • Cherry Tomatoes: Sweet and fresh, these little gems burst with flavor as they roast, balancing the savory feta beautifully.
    • Olive Oil: A luxurious drizzle to tie everything together. Not only does it provide a rich flavor, but it also helps the ingredients meld wonderfully.
    • Garlic: Minced for that aromatic kick. It fills your kitchen with delightful scents as it bakes.
    • Dried Oregano: This herb brings a Mediterranean essence, giving the dish a warm and comforting touch.
    • Dried Basil: Similar to oregano, it enhances the overall flavor profile with its slightly sweet notes.
    • Red Pepper Flakes: Add them if you like a little heat; they offer a delightful contrast to the creaminess of the feta.
    • Salt and Pepper: Always essential for bringing out the flavors. Feel free to adjust to your taste!
    • Fresh Parsley: A sprinkle on top adds freshness and a pop of color, elevating your presentation.
    • Lemon Juice and Zest: These add a zesty brightness that cuts through the richness, making every bite refreshing.
    • Honey: An optional touch of sweetness balances the dish if you desire. It’s not necessary, but it’s delicious!
    • Baguette or Crusty Bread: Perfect for scooping up all that flavorful goodness. You could even make crostini if you like a little crunch!

    How to Make Baked Feta Shrimp and Tomatoes

    Ready to dive into the deliciousness of Baked Feta Shrimp and Tomatoes? Let’s simplify the cooking process with clear, step-by-step instructions. I’m all about making things easy while keeping flavors vibrant. Let’s get started!

    Step 1: Preheat the Oven

    First things first—preheating your oven to 400°F (200°C) is crucial. This step ensures that your dish cooks evenly and quickly. A hot oven helps the feta cheese melt just right, while roasting the tomatoes to perfection.

    Step 2: Prepare the Feta and Tomatoes

    In a lovely baking dish, place the block of feta cheese right in the center. Surround it generously with those halved cherry tomatoes. Their sweet bursts will mingle beautifully with the creamy feta as they cook. Trust me, this arrangement looks gorgeous and inviting!

    Step 3: Season the Dish

    Now, it’s time to bring flavor to life! Drizzle olive oil over the feta and tomatoes. Next, sprinkle the minced garlic, dried oregano, and basil over the top. If you’re feeling a bit adventurous, toss in some red pepper flakes for that hint of spice. Don’t forget to season with salt and pepper—these little adjustments make a world of difference!

    Step 4: Bake the Feta and Tomatoes

    Pop the baking dish in your preheated oven. Let it bake for about 20 minutes. Keep an eye on it; you want the feta to soften up beautifully and the tomatoes to blister. That’s when all those lovely flavors really start to develop!

    Step 5: Prepare the Shrimp

    While your feta and tomatoes are baking, take a moment to season the shrimp. Toss them in a bowl with a pinch of salt, pepper, and a drizzle of olive oil. This step ensures that your shrimp are flavorful and ready to shine when added to the dish!

    Step 6: Combine and Bake

    After 20 minutes, take the dish out of the oven. Gently stir the tomatoes and garlic mixture, creating a cozy nest for the shrimp atop the feta. Return the dish to the oven and let it bake for another 10 to 12 minutes. When the shrimp turn pink and opaque, they’re ready to join the creamy, tomato goodness!

    Step 7: Final Touches for Serving

    Once baked to perfection, finish your dish with a drizzle of fresh lemon juice and a touch of honey, if you choose. Sprinkle freshly chopped parsley and lemon zest over the top for that burst of freshness. Serve it all hot with slices of crusty bread at the side for dipping into the delicious saucy goodness.

    Tips for Success

    • Use fresh shrimp for the best texture and taste; frozen shrimp is a handy alternative.
    • Don’t skip preheating the oven; it ensures even cooking for your dish.
    • Feel free to theme your spices based on what’s in your pantry; customize it to your taste!
    • Adjust baking time, if needed, based on your oven’s quirks. Every oven is different!
    • Serve immediately for the best flavor and freshness experience!

    Equipment Needed

    • Baking Dish: A 9×13 inch dish works great; a cast-iron skillet can add a rustic touch.
    • Measuring Cups and Spoons: Essential for accurate ingredient amounts; a kitchen scale can be handy too.
    • Cutting Board: For chopping garlic and parsley; a plate can do in a pinch.
    • Knife: A sharp chef’s knife makes prep quick and easy.

    Variations on Baked Feta Shrimp and Tomatoes

    • Vegetable Additions: Feel free to toss in some sliced bell peppers, zucchini, or spinach for added nutrition and variety.
    • Cheese Alternatives: If feta isn’t your favorite, try goat cheese or ricotta for a different creamy experience.
    • Herb Swaps: Replace oregano and basil with fresh thyme or rosemary for an earthy, aromatic twist.
    • Make it Spicy: Add in diced jalapeños or fresh chili peppers for an extra kick to tantalize your taste buds!
    • Grain Boost: Serve the dish over quinoa or brown rice for a heartier meal that’s filling and nutritious.
    • Dairy-Free Option: Use cashew cream or nutritional yeast as a cheesy alternative for a dairy-free version that still packs flavor.

    Serving Suggestions

    • Side Salad: A light arugula salad with lemon vinaigrette perfectly complements this dish.
    • Wine Pairing: Crisp white wine, like Sauvignon Blanc, pairs beautifully with the flavors.
    • Presentation: Serve in the baking dish for a rustic look, garnished with extra parsley.
    • Bread Choice: Offer different types of crusty bread, such as sourdough or ciabatta, for variety.

    FAQs about Baked Feta Shrimp and Tomatoes

    Can I use frozen shrimp for this recipe?
    Absolutely! Just make sure to thaw them before adding to the dish. Frozen shrimp can work beautifully and save you some prep time.

    What if I can’t find feta cheese?
    If feta isn’t available, go for goat cheese or ricotta as tasty alternatives. Each will bring a different but delightful creaminess to your Baked Feta Shrimp and Tomatoes.

    Can I make this dish in advance?
    You can prep everything a day ahead, but I recommend baking right before serving for that fresh, hot-off-the-oven flavor. It really makes a difference!

    What should I serve with Baked Feta Shrimp and Tomatoes?
    Pair it with a light salad or some crusty bread for a complete meal. It’s also delicious over rice or quinoa for added heartiness!

    How do I store leftovers?
    Store any leftovers in an airtight container in the fridge for up to 2 days. Just reheat gently in the oven or microwave to enjoy again!

    Final Thoughts

    Baked Feta Shrimp and Tomatoes is more than just a recipe; it’s a delightful experience! It infuses your kitchen with warmth and wonderful aromas, turning a simple evening into something special. Each bite of creamy feta mingled with juicy shrimp and bursting tomatoes brings a burst of joy. You’ll feel accomplished, knowing you created a dish that captivates the whole family. Plus, it’s versatile, easily adapting to your tastes and pantry. Whether for a cozy weeknight dinner or a gathering with friends, this savory delight is bound to impress and create cherished memories around the dinner table!


    Print

    clock clock iconcutlery cutlery iconflag flag iconfolder folder iconinstagram instagram iconpinterest pinterest iconfacebook facebook iconprint print iconsquares squares iconheart heart iconheart solid heart solid icon

    Description

    A Flavorful Delight of Baked Feta Shrimp and Tomatoes, perfect for a savory meal.


    • 1 lb large shrimp, peeled and deveined
    • 1 block (8 oz) feta cheese
    • 2 cups cherry tomatoes, halved
    • 1⁄4 cup olive oil
    • 4 cloves, minced
    • 1 teaspoon dried oregano
    • 1 teaspoon dried basil
    • 1⁄2 teaspoon red pepper flakes (optional)
    • Salt and pepper to taste
    • 2 tablespoons fresh parsley, chopped
    • 1 tablespoon fresh lemon juice
    • 1 tablespoon lemon zest
    • 1⁄2 teaspoon honey (optional)
    • 1 baguette or crusty bread, sliced (for serving)

    1. Preheat your oven to 400°F (200°C).
    2. In a baking dish, arrange the block of feta cheese in the center. Surround the feta with the halved cherry tomatoes.
    3. Drizzle the olive oil over the feta and tomatoes.
    4. Sprinkle the minced garlic, oregano, basil, and red pepper flakes (if using) evenly over the dish. Season with salt and pepper to taste.
    5. Bake in the preheated oven for 20 minutes, or until the feta is soft and the tomatoes are blistered.
    6. While the feta and tomatoes are baking, season the shrimp with salt, pepper, and a bit of olive oil.
    7. After 20 minutes, remove the dish from the oven and stir the tomatoes and garlic mixture around the feta. Then, place the seasoned shrimp on top of the feta and tomatoes.
    8. Return the dish to the oven and bake for an additional 10-12 minutes, or until the shrimp are pink and cooked through.
    9. Once done, remove the dish from the oven and drizzle the fresh lemon juice and honey (if using) over the shrimp. Sprinkle with lemon zest and fresh parsley for a burst of freshness.
    10. Serve with slices of crusty baguette or bread for dipping into the flavorful sauce.

    Notes

    • Feel free to adjust the spices according to your taste preferences.
    • For a complete meal, serve this dish with a side salad.
    • Prep Time: 10 minutes
    • Cook Time: 30 minutes
    • Category: Seafood
    • Method: Baking
    • Cuisine: Mediterranean

    Nutrition

    • Serving Size: 1 serving
    • Calories: 450
    • Sugar: 3g
    • Sodium: 900mg
    • Fat: 25g
    • Saturated Fat: 7g
    • Unsaturated Fat: 17g
    • Trans Fat: 0g
    • Carbohydrates: 12g
    • Fiber: 2g
    • Protein: 35g
    • Cholesterol: 270mg

    Sharing is caring!

  • Grilled Octopus Recipe: Elevate Your Seafood Dinner Tonight!

    Grilled Octopus Recipe: Elevate Your Seafood Dinner Tonight!


    Introduction to Grilled Octopus Recipe

    Welcome, fellow food lovers! If you’re like me, the thought of delighting your family with a fabulous seafood dish can be both exciting and daunting. That’s where this delicious Grilled Octopus Recipe comes in! Perfect for busy weeknights or special gatherings, it’s a quick solution that’s sure to impress your loved ones. Imagine the smoky aroma wafting through your kitchen as you serve up tender, perfectly charred octopus. Whether you’re a seafood aficionado or a novice cook, this recipe is easy enough to whip up any day of the week. Let’s dive in!

    Why You’ll Love This Grilled Octopus Recipe

    This Grilled Octopus Recipe is a game changer for your dinner routine! It’s incredibly easy to prepare, taking just 30 minutes from start to finish. The blend of smoky char and zesty lemon brightens the flavor, elevating this dish beyond the ordinary. Plus, grilling brings out a delightful tenderness that’s hard to resist. It’s a perfect way to impress friends and family, all while keeping your kitchen stress-free!

    Ingredients for Grilled Octopus Recipe

    This Grilled Octopus Recipe features a handful of straightforward ingredients that work together beautifully to create a dish bursting with flavor. Let’s take a quick look at what you’ll need:

    • Octopus: The star of the show! Look for a large, fresh octopus at your local fish market or grocery store. If you’re feeling adventurous, frozen octopus can work too—just ensure it’s well thawed and cleaned.
    • Olive Oil: This luscious oil adds richness and helps with grilling. Extra virgin olive oil is my go-to, as it enhances flavor beautifully.
    • Garlic: Fresh minced garlic gives the octopus a warm and fragrant touch. If you’re a garlic lover like me, feel free to add extra!
    • Salt and Black Pepper: Simple seasoning that brings out the natural flavors. Adjust to your taste—sea salt can enhance the briny essence of the octopus.
    • Lemon: Essential for brightening the dish! Serve wedges on the side for a zesty squeeze over your grilled octopus.
    • Parsley: Freshly chopped parsley not only adds color but also a fresh herby aroma that complements the dish perfectly.

    Don’t fret about exact measurements just yet! You can find the specific quantities at the bottom of the article, which are also available for printing. Get ready to savor this incredible seafood delight!

    How to Make Grilled Octopus Recipe

    Preheat the Grill

    Start by preheating your grill to medium-high heat. This step is crucial for that perfect char. When the grill is hot, it sears the outside of the octopus while keeping the inside tender and juicy. Trust me, this is where the magic happens!

    Prepare the Octopus

    Next, pat the octopus dry with paper towels. This helps achieve a nice sear without steaming. Now, rub the octopus with olive oil, minced garlic, salt, and pepper. Proper seasoning is key, as it enhances the flavor. If you have time, let it marinate for a few hours. Your taste buds will thank you!

    Grill the Octopus

    Time to hit the grill! Place the octopus on the hot grill and cook for about 4-5 minutes per side. You’re looking for a beautiful char and that delectable smoky flavor. Keep an eye on the texture; it should be tender and slightly springy. Once it’s done, you’ll know—just look for those perfect grill marks!

    Let it Rest

    After removing the octopus from the grill, let it rest for about 2 minutes. This resting period allows the juices to redistribute, enhancing its tenderness and flavor. And trust me, it’s worth every second!

    Slice and Serve

    Now comes the fun part! Slice the grilled octopus into bite-sized pieces. Arrange them beautifully on a platter, garnishing with fresh parsley and lemon wedges. A sprinkle of extra olive oil makes everything pop. Now it’s ready for your guests!

    Tips for Success

    • Choose a high-quality octopus for the best flavors; fresh is always better than frozen.
    • Keep your grill well-oiled to prevent sticking.
    • Don’t rush the grilling process—patience ensures that delicious char.
    • Experiment with different herbs, like oregano or dill, for unique flavor combinations.
    • Serve immediately after slicing for optimal taste and presentation.

    Equipment Needed

    • Grill: A traditional charcoal or gas grill works best. An indoor grill pan can also do the trick.
    • Tongs: Essential for flipping the octopus safely and easily.
    • Paper towels: For patting the octopus dry before seasoning.
    • Serving platter: Showcase your beautifully grilled octopus for a stunning presentation.

    Variations

    • Spicy Kick: Add red pepper flakes to your olive oil and garlic mixture for a zesty, fiery twist that packs a punch!
    • Herb-Infused: Experiment with adding fresh herbs like rosemary or thyme to the marinade for a fragrant spin on the traditional flavor.
    • Smoky Paprika: Incorporate a teaspoon of smoked paprika into your seasoning mix for an extra layer of smoky depth.
    • Vegan Alternative: Try grilled eggplant or zucchini slices brushed with olive oil and garlic for a plant-based option that’s just as delightful.
    • Citrus Variation: Swap out lemon for lime or orange for a different citrus punch that brightens up the dish in a unique way.

    Serving Suggestions

    • Pair the grilled octopus with a refreshing Greek salad for a Mediterranean feast.
    • A chilled glass of white wine, like Sauvignon Blanc, complements the flavors beautifully.
    • Serve with warm pita bread to soak up the delicious juices.
    • For a fun presentation, arrange on a wooden board with lemon wedges and sprigs of fresh herbs.

    FAQs about Grilled Octopus Recipe

    Do you have questions about this Grilled Octopus Recipe? I’ve gathered some of the most common inquiries that come up when grilling this delightful seafood. Let’s clear up any confusion!

    How do I know if my octopus is properly cooked?
    The best way to check is by ensuring it’s tender. When you pierce it with a fork, it should yield easily. The outside should have a nice char, while the inside remains juicy and slightly springy.

    Can I use frozen octopus?
    Absolutely! Frozen octopus is a convenient option. Just make sure to fully thaw and clean it before cooking. Thaw it in the fridge overnight or submerge it in cold water for a quicker defrost.

    What should I serve with my grilled octopus?
    This grilled octopus pairs beautifully with sides like a crisp Greek salad, roasted vegetables, or even a fragrant rice pilaf. Don’t forget the lemon wedges for an extra burst of flavor!

    Can I marinate the octopus overnight?
    Yes, marinating overnight can enhance the flavors significantly. Just ensure you don’t add too much acid, like lemon juice, as it can toughen the octopus if left too long.

    Is this dish suitable for a gluten-free diet?
    Yes! This Grilled Octopus Recipe is naturally gluten-free, making it a delicious option for anyone needing to avoid gluten. Enjoy it with confidence!

    Final Thoughts on the Grilled Octopus Recipe

    There’s something truly special about sharing a delicious meal with loved ones. This Grilled Octopus Recipe brings the taste of the Mediterranean right to your backyard. With its smoky aroma and zesty lemon accents, it’s sure to be a family favorite. Plus, the fact that it’s ready in just 30 minutes makes it a lifesaver for busy evenings. Whether you’re celebrating a special occasion or simply treating your family to something extraordinary, this dish adds a touch of culinary magic to any table. I can’t wait for you to experience the joy of making it!


    Print

    clock clock iconcutlery cutlery iconflag flag iconfolder folder iconinstagram instagram iconpinterest pinterest iconfacebook facebook iconprint print iconsquares squares iconheart heart iconheart solid heart solid icon

    Description

    A delicious and easy recipe for grilled octopus, perfect for seafood lovers looking to elevate their dinner.


    • 1 large octopus (about 23 lbs), cleaned
    • 3 tbsp olive oil
    • 2 cloves garlic, minced
    • 1 tsp salt
    • 1 tsp black pepper
    • 1 lemon, cut into wedges
    • Fresh parsley, chopped (for garnish)

    1. Preheat your grill to medium-high heat.
    2. Pat the octopus dry with paper towels.
    3. Rub the octopus with olive oil, minced garlic, salt, and black pepper.
    4. Place the octopus on the grill and cook for 4-5 minutes per side until charred and tender.
    5. Remove from the grill and let it rest for 2 minutes.
    6. Slice into pieces and serve with lemon wedges and fresh parsley.

    Notes

    • Ensure the octopus is well-cleaned before cooking.
    • For added flavor, marinate the octopus for a few hours before grilling.
    • Prep Time: 20 minutes
    • Cook Time: 10 minutes
    • Category: Main Course
    • Method: Grilling
    • Cuisine: Mediterranean

    Nutrition

    • Serving Size: 1 serving
    • Calories: 300
    • Sugar: 0g
    • Sodium: 600mg
    • Fat: 18g
    • Saturated Fat: 2g
    • Unsaturated Fat: 16g
    • Trans Fat: 0g
    • Carbohydrates: 2g
    • Fiber: 0g
    • Protein: 30g
    • Cholesterol: 70mg

    Sharing is caring!

  • Oreo Truffles

    Oreo Truffles


    Introduction to Oreo Truffles

    What could be more delightful than a sweet treat that’s simple to whip up? Oreo Truffles are the answer! These little wonders seamlessly blend the rich crunch of Oreo cookies with the creamy goodness of cream cheese, all wrapped in a chocolate coat. As a busy mom, I know firsthand how much of a thrill it is to create something fancy without spending hours in the kitchen. Just imagine whipping up a batch of these in under an hour! Perfect for snacks, parties, or even a little self-indulgence, Oreo Truffles are a total game-changer!

    Why You’ll Love This Oreo Truffles

    Let’s face it, life gets hectic and dessert shouldn’t add to the chaos! With Oreo Truffles, you get a no-bake dessert that’s super quick to make. In just 50 minutes, you’ll have a delectable treat that’s perfect for every occasion. Plus, who can resist those rich cookie flavors mingled with creamy goodness? These truffles are a sweet escape that’ll bring smiles without the fuss!

    Ingredients for Oreo Truffles

    To craft these divine Oreo Truffles, start with Oreo cookies for that classic crunch and flavor. Next, grab some softened cream cheese to bind everything together and add richness. You’ll need semisweet or milk chocolate for the coating—either will give a lovely finish. If you want to add a dash of elegance, consider using white chocolate for drizzling. Finally, you can top them with more crushed Oreos for an extra festive touch. For exact measurements, scroll to the bottom of the article, where you’ll find everything neatly laid out and ready for printing!

    How to Make Oreo Truffles

    Let’s dive into the magical world of Oreo Truffles! This little adventure will transport you from a busy day to a sweet escape in just a few simple steps. Follow along, and you’ll have these divine treats ready in no time!

    Step 1: Prepare the Oreo Crumbs

    The first step is to crush those Oreo cookies into fine crumbs. Using a food processor makes this easy! Pulse the cookies until they become a sandy texture, like beach sand. If you don’t have a food processor, you can place the cookies in a zip-top bag and crush them with a rolling pin. Just make sure there are no big chunks left!

    Step 2: Mix Oreo Crumbs with Cream Cheese

    Now, let’s get mixing! Take your room temperature cream cheese and blend it with the Oreo crumbs. Room temperature is key here; it helps everything combine smoothly without lumps. Mix until it’s fully combined and resembles a thick, chocolatey paste. You can use a spatula or a stand mixer for this. Trust me, the creaminess is pure bliss!

    Step 3: Form the Truffle Balls

    Time to roll! Scoop about a tablespoon of the mixture and roll it into a ball. Aim for about 1 inch in diameter, so they’re bite-sized and cute! Keeping them uniform helps with even coating later. Feel free to have fun with this part; get the kids involved or make it a party with friends!

    Step 4: Chill the Truffles

    Once you have all your truffle balls ready, it’s chilling time! Place them on a parchment-lined tray and pop them into the freezer for 20–30 minutes. This step is crucial as it helps solidify the truffles, making them easier to coat in chocolate. You won’t want a melty mess after all your hard work!

    Step 5: Dip in Chocolate

    Next, let’s coat these beauties! Melt your chocolate in a microwave safe bowl or using a double boiler method. Dip each chilled truffle into the melted chocolate, letting the excess drip off. This will give your truffles that professional, polished look. It’s like giving them a spa day!

    Step 6: Add White Chocolate Drizzle

    To finish off, melt a bit of white chocolate for the drizzle, and pipe it over your dipped truffles. It not only adds flavor but creates a beautiful contrast against the dark chocolate. If you’d like, sprinkle some extra crushed Oreos on top for a charming touch. Your truffles are now ready to impress!

    Tips for Success

    • Make sure cream cheese is softened for easier mixing.
    • For a smooth coating, melt chocolate slowly to avoid burning.
    • Don’t skip the chilling step; it ensures the truffles hold their shape.
    • Use a toothpick for dipping to keep your hands clean!
    • Experiment with different chocolate varieties for unique flavors.

    Equipment Needed

    • Food processor (a zip-top bag and rolling pin work too!)
    • Parchment paper (wax paper can be a substitute)
    • Microwave-safe bowl or double boiler for melting chocolate
    • Spatula or stand mixer (a sturdy mixing spoon will do)
    • Cookie scoop for uniform balls (or use your hands!)

    Variations

    • For a minty twist, add a few drops of peppermint extract to the mixture.
    • Try using golden Oreos instead of regular for a different flavor profile.
    • Substitute cream cheese with vegan cream cheese for a dairy-free option.
    • Roll the truffles in crushed nuts or sprinkles for added texture.

    Serving Suggestions

    • Pair Oreo Truffles with a rich cup of coffee or a tall glass of milk for a delightful treat.
    • Serve them on a beautiful platter, garnished with fresh mint leaves for a pop of color.
    • Consider using small dessert cups for a fun, stackable presentation.
    • For a festive touch, arrange them on a cake stand for parties.

    FAQs about Oreo Truffles

    Got questions about Oreo Truffles? Don’t worry, I’ve got the answers to make your truffle-making adventure smooth!

    Can I use dairy-free chocolate? Absolutely! Substituting with dairy-free chocolate makes these treats suitable for a vegan diet.

    How long do Oreo Truffles last? When stored in the refrigerator, they can stay fresh for up to a week. Just try to resist eating them all at once!

    Can I freeze them? Yes, you can freeze Oreo Truffles! They’ll keep well for a month, just thaw them in the fridge before enjoying.

    What can I use instead of cream cheese? If you need a dairy-free option, try using vegan cream cheese. It works wonderfully!

    Can I personalize my toppings? Definitely! Get creative with toppings like sprinkles, crushed nuts, or even mini chocolate chips. Your truffles, your rules!

    Final Thoughts

    Indulging in these Oreo Truffles is more than just a dessert; it’s a celebration of life’s sweet moments! It brings me joy to create and share these little bites of happiness with loved ones. Each truffle is a small masterpiece, one that requires minimal effort yet delivers maximum pleasure. Whether you make them for a festive occasion or a quick treat after a long day, they’ll surely bring smiles all around. So, roll up your sleeves and embrace the delightful chaos of truffle-making. Trust me, the joy on everyone’s faces will be worth it!


    Print

    clock clock iconcutlery cutlery iconflag flag iconfolder folder iconinstagram instagram iconpinterest pinterest iconfacebook facebook iconprint print iconsquares squares iconheart heart iconheart solid heart solid icon

    Description

    Oreo Truffles are rich, creamy, and easy-to-make dessert treats that combine the delicious flavors of Oreo cookies and cream cheese, all beautifully coated in chocolate.


    • 36 Oreo cookies
    • 8 oz cream cheese, softened
    • 12 oz semisweet or milk chocolate, for coating
    • 4 oz white chocolate, for drizzle
    • Extra crushed Oreos, for garnish (optional)

    1. Add Oreos to a food processor and pulse into fine crumbs.
    2. Mix Oreo crumbs with softened cream cheese until fully combined.
    3. Scoop and roll the mixture into 1-inch balls.
    4. Place the truffle balls on a parchment-lined tray and freeze for 20–30 minutes.
    5. Melt chocolate and dip each chilled truffle, letting excess drip off.
    6. Place dipped truffles back on the tray.
    7. Drizzle with melted white chocolate and sprinkle crushed Oreos on top.
    8. Let them set fully before serving or storing.

    Notes

    • Ensure cream cheese is at room temperature for easier mixing.
    • Use any chocolate of your preference for coating.
    • These truffles can be stored in the refrigerator for up to a week.
    • Prep Time: 15 minutes
    • Cook Time: 5 minutes
    • Category: Dessert
    • Method: No-Bake
    • Cuisine: American

    Nutrition

    • Serving Size: 1 truffle
    • Calories: 120
    • Sugar: 10g
    • Sodium: 50mg
    • Fat: 7g
    • Saturated Fat: 4g
    • Unsaturated Fat: 2g
    • Trans Fat: 0g
    • Carbohydrates: 15g
    • Fiber: 1g
    • Protein: 2g
    • Cholesterol: 10mg

    Sharing is caring!

  • Biscoff Cookie Butter Cinnamon Rolls

    Biscoff Cookie Butter Cinnamon Rolls


    Introduction to Biscoff Cookie Butter Cinnamon Rolls

    There’s something magical about waking up to the smell of warm, freshly baked Biscoff Cookie Butter Cinnamon Rolls. As a busy mom, I find joy in those cozy mornings where the world slows down, if only for a little while. This delightful recipe creates the perfect blend of sweet and spiced, transforming your breakfast table into a fragrant refuge. With just a few simple ingredients, you can brighten anyone’s day. Trust me, once you try these rolls, you’ll understand why they quickly become a beloved family favorite that you’ll want to make again and again!

    Why You’ll Love This Biscoff Cookie Butter Cinnamon Rolls

    These Biscoff Cookie Butter Cinnamon Rolls are a delightful treat that brings smiles to breakfast tables effortlessly. They are quick to whip up, taking just 30 minutes from start to finish. Plus, the rich, buttery flavor of Biscoff complements the warm cinnamon perfectly. As a busy mom, you’ll appreciate how simple it is to impress your family with these tasty rolls, making them an easy go-to for beautiful mornings!

    Ingredients for Biscoff Cookie Butter Cinnamon Rolls

    To whip up these scrumptious Biscoff Cookie Butter Cinnamon Rolls, you’ll need a handful of simple ingredients. Each one plays a vital role in creating that irresistible flavor and texture that we all crave on leisurely mornings. Here’s what to gather:

    • Refrigerated Cinnamon Rolls: The base of our delicious creation. Opt for your favorite brand; these make the process quick and easy. Feel free to choose classic, flaky kinds that come in a can!
    • Biscoff Cookie Butter: This velvety spread adds a unique sweetness, making your rolls truly special. You’ll use half for the filling and a bit for the glaze, so grab a jar that makes you feel excited!
    • Ground Cinnamon: This essential spice offers warmth and flavor, perfectly complementing the sweetness of Biscoff. Use a light hand at first and adjust based on your family’s taste preferences.
    • Milk: A splash helps create a smooth glaze that beautifully coats the cinnamon rolls. Any milk will do—dairy, almond, or oat; choose what works best for you!

    For those who want to get creative, consider adding a sprinkle of chopped nuts or chocolate chips to the filling for an extra flavor kick. If you like a thicker glaze, simply reduce the amount of milk. Feel free to get adventurous, as the possibilities are endless!

    You can find the exact quantities for each ingredient at the bottom of the article, available for printing. Happy baking!

    How to Make Biscoff Cookie Butter Cinnamon Rolls

    Making your own Biscoff Cookie Butter Cinnamon Rolls is as easy as pie—well, easier than pie, really! Follow these simple steps, and you’ll be enjoying warm, gooey goodness in no time. Let’s get rolling!

    Prepare the Cinnamon Rolls

    Start by unrolling the refrigerated cinnamon rolls. Place the dough on a clean surface. Let the rolls relax for a minute. This way, they’ll be easier to work with. You might even want to take a moment to admire their fluffy potential!

    Spread the Biscoff Cookie Butter

    Now for the fun part: grab your Biscoff cookie butter! Use a butter knife or a spatula to spread a generous layer over the dough. Make sure to reach the edges, as that’s where the magic happens! Just imagine that sweet, spiced flavor when they bake—heavenly!

    Sprinkle the Cinnamon

    Time to bring in the spice! Grab your ground cinnamon and sprinkle it evenly over the cookie butter. Feel free to adjust the amount based on your family’s preferences. If they love cinnamon, don’t be shy! This step is where flavor layers begin to unfold!

    Roll and Place in Baking Dish

    Next, carefully re-roll the dough to create your spiral shape. Take your time; we don’t want any spills! Once rolled, slice them into individual pieces about the size of your palm. Place each roll into a baking dish, ensuring they have some space in between. They’ll rise beautifully in the oven!

    Bake the Rolls

    Preheat your oven according to the package instructions. Usually, it’s around 350°F. Pop the rolls in and bake for 15 to 20 minutes or until golden brown. While they bake, the smell will fill your kitchen, bringing everyone rushing in! When they’re done, let the rolls cool for just a bit, but not too long; they are best enjoyed warm!

    Prepare the Glaze

    While your Biscoff Cookie Butter Cinnamon Rolls are baking, whip up the glaze. In a mixing bowl, combine the remaining Biscoff cookie butter with milk. Stir until it’s smooth and pourable. If you want a thicker glaze, add less milk. Simplicity is key here, just like the recipe itself!

    Drizzle and Serve

    Finally, once your rolls have cooled slightly, drizzle that divine glaze generously over the top. The warm rolls will soak up the sweetness, and oh boy, it’s a sight to behold! Serve them immediately, and watch as happy faces light up the room. You’ve just made a delicious breakfast that will have everyone begging for more!

    Tips for Success

    • Don’t rush the baking time; each oven is different, so check for that golden color.
    • Use room temperature Biscoff cookie butter for easier spreading.
    • Feel free to experiment with the filling; nuts or chocolate chips add great texture!
    • Let the rolls cool slightly before drizzling the glaze for that ooey-gooey effect.
    • Store leftovers in an airtight container, and reheat for a quick breakfast treat!

    Equipment Needed

    • Baking Dish: A 9×13 inch dish works perfectly; any oven-safe dish can substitute.
    • Mixing Bowl: Use a medium-sized bowl for the glaze; a large one does the trick too.
    • Butter Knife or Spatula: Essential for spreading the cookie butter; any flat utensil will do.
    • Sharp Knife: For slicing the rolls; a kitchen knife or even a pizza cutter works well.

    Variations

    • Nutty Delight: Add a handful of chopped walnuts or pecans to the filling for an extra crunch and flavor.
    • Chocolate Lovers: Mix in chocolate chips with the Biscoff cookie butter for a rich and indulgent twist.
    • Gluten-Free Option: Use gluten-free cinnamon rolls available at your local store for a gluten-free variation.
    • Spiced Rum Glaze: For a fun adult twist, add a splash of spiced rum to your glaze!
    • Fruit Infusion: Incorporate fresh raspberries or sliced strawberries in the filling for a fruity twist.

    Serving Suggestions

    • Pair with Fresh Fruit: Serve your Biscoff Cookie Butter Cinnamon Rolls with a side of fresh berries for a sweet and tart balance.
    • Beverage Match: Enjoy with a steaming cup of coffee or tea to enhance those cozy flavors.
    • Presentation Tip: Arrange rolls on a pretty platter and dust with powdered sugar for a charming look.
    • Add a Dollop: A scoop of whipped cream or a scoop of vanilla ice cream elevates this treat to dessert status!

    FAQs about Biscoff Cookie Butter Cinnamon Rolls

    Can I use homemade cinnamon rolls instead of refrigerated ones?

    Absolutely! If you have a favorite homemade cinnamon roll recipe, feel free to use that. Just ensure it’s rolled out thin enough to spread the Biscoff cookie butter nicely.

    What if I don’t like Biscoff cookie butter?

    No problem! You can easily swap it for another nut or cookie butter. Almond butter, peanut butter, or even Nutella can bring a new twist while keeping things delicious!

    How do I store leftover cinnamon rolls?

    Place any leftovers in an airtight container at room temperature for up to two days, or refrigerate for up to a week. Just reheat before serving to bring back the warm goodness!

    Can I freeze Biscoff Cookie Butter Cinnamon Rolls?

    Definitely! Freeze them before baking for up to three months. When you’re ready to bake, let them thaw in the refrigerator overnight and then bake as usual!

    How can I make these rolls more festive for holidays?

    Consider adding seasonal toppings! Sprinkling with festive sprinkles, or nuts, or even drizzling with some colored glaze can help transform these rolls for special occasions. They’ll be a hit at any festive breakfast or brunch!

    Final Thoughts

    There’s nothing quite like the joy of sharing warm Biscoff Cookie Butter Cinnamon Rolls with loved ones. The combination of rich flavors and comforting textures creates a delightful experience that quickly transforms an ordinary morning into something magical. As you gather around the table, laughter and smiles replace the morning rush, turning your kitchen into a place of connection and warmth. Whether it’s a special occasion or just another Tuesday, I encourage you to embrace the sweet moments. So, roll up your sleeves, and let these cinnamon rolls create delightful memories that will linger long after the last bite!


    Print

    clock clock iconcutlery cutlery iconflag flag iconfolder folder iconinstagram instagram iconpinterest pinterest iconfacebook facebook iconprint print iconsquares squares iconheart heart iconheart solid heart solid icon

    Description

    Delicious and easy Biscoff Cookie Butter Cinnamon Rolls, perfect for brightening up your mornings!


    • Refrigerated Cinnamon Rolls: 1 package
    • Biscoff Cookie Butter: 1/2 cup (for filling) + 1/4 cup (for glaze)
    • Ground Cinnamon: 1-2 teaspoons
    • Milk: 2 tablespoons

    1. Unroll the refrigerated cinnamon rolls and spread a generous amount of Biscoff cookie butter over the surface, reaching the edges.
    2. Sprinkle ground cinnamon evenly over the cookie butter.
    3. Carefully re-roll the dough to create a spiral shape and place in a baking dish with space between each roll.
    4. Preheat the oven according to package instructions and bake the rolls for 15-20 minutes until golden brown and cooked through.
    5. While the rolls are baking, prepare the glaze by combining remaining Biscoff cookie butter with milk until smooth and pourable.
    6. Drizzle the glaze over the warm rolls and serve immediately.

    Notes

    • For an extra flavor boost, you can add chopped nuts or chocolate chips to the filling.
    • If you prefer a thicker glaze, reduce the amount of milk used.
    • Prep Time: 10 minutes
    • Cook Time: 20 minutes
    • Category: Breakfast
    • Method: Baking
    • Cuisine: American

    Nutrition

    • Serving Size: 1 roll
    • Calories: 320
    • Sugar: 18g
    • Sodium: 380mg
    • Fat: 15g
    • Saturated Fat: 5g
    • Unsaturated Fat: 8g
    • Trans Fat: 0g
    • Carbohydrates: 42g
    • Fiber: 1g
    • Protein: 4g
    • Cholesterol: 5mg

    Sharing is caring!

  • Cucumber Feta Salad

    Cucumber Feta Salad


    Introduction to Cucumber Feta Salad

    As summer rolls in, I find myself reaching for light, fresh dishes that bring joy to the table. One of my absolute favorites has to be Cucumber Feta Salad. It’s the kind of dish that not only ignites your taste buds but also feels effortless to whip up on a warm day. Whether you’re juggling a busy day or hosting a picnic, this salad is a quick solution to bring a burst of flavor and color to any meal. Trust me, it’s a delightful way to impress your loved ones without spending hours in the kitchen!

    Why You’ll Love This Cucumber Feta Salad

    This Cucumber Feta Salad is a summer revelation that marries ease with deliciousness. In just ten minutes, you can serve a dish that bursts with freshness, making it perfect for busy weeknights or gatherings. The crunch of cucumbers paired with the creaminess of feta creates a symphony of flavors in every bite. Plus, it’s a great way to sneak in some veggies, satisfying even the pickiest eaters at your table!

    Ingredients for Cucumber Feta Salad

    Gathering fresh ingredients is a joy that enhances any dish. For Cucumber Feta Salad, simplicity reigns supreme. You’ll need:

    • Cucumbers: The star of the show! Look for firm, crisp ones for that refreshing crunch.
    • Red Onion: Adds a zesty bite and vibrant color. Go for a small onion to keep it mild and sweet.
    • Fresh Dill: This herb infuses the salad with a lovely aromatic hint. It’s like a whisper of summer!
    • Fresh Parsley: Adds a burst of color and freshness. If you’re feeling adventurous, you can mix in other herbs too.
    • Feta Cheese: The creamy, crumbly cheese that brings a salty richness. Don’t skimp on the quality; it makes all the difference.
    • Extra Virgin Olive Oil: A drizzle of this liquid gold helps tie all the flavors together for a smooth taste.
    • Lemon Juice: Brightens the dish with a zesty kick. Freshly squeezed is best, but bottled works in a pinch!
    • Salt and Pepper: Essential for seasoning. Don’t be shy; they elevate all the flavors.

    Feel free to customize! Add cherry tomatoes for extra sweetness or some olives for a briny kick. And remember, you can find the exact quantities for each ingredient listed at the bottom of the article, ready for you to print! Enjoy the vibrant possibilities of this Cucumber Feta Salad, letting your creativity flow!

    How to Make Cucumber Feta Salad

    Making Cucumber Feta Salad is as delightful as eating it! Let’s break it down step by step.

    Step 1 – Prepare the Vegetables

    Start by washing your cucumbers. I like to slice them thinly; it makes each bite crisp and refreshing. Aim for uniform slices, as this helps in flavor distribution. You can use a sharp knife or a mandolin for precision. Next, thinly slice the red onion. The goal is to have bites that mix well together.

    Step 2 – Add Fresh Herbs

    Now, it’s time for the herbs! Chop your fresh dill and parsley finely. Adding these herbs enhances both flavor and nutrition. The dill brings a fresh, anise-like taste, while parsley adds color and brightness. Mixing in these herbs is like adding a sunshine feeling to the dish!

    Step 3 – Sprinkle Feta Cheese

    The best part is crumbling the feta cheese over your beautiful vegetables. This cheese adds a creamy texture and a burst of salty goodness. Make sure you use high-quality feta; it makes a world of difference in flavor. It’s the cherry on top of this delicious Mediterranean salad!

    Step 4 – Make the Dressing

    Let’s whip up the dressing! In a small bowl, combine extra virgin olive oil, fresh lemon juice, salt, and pepper. Whisk it together until it’s well mixed. This simple dressing brings everything together. The freshness of lemon juice brightens the salad, making each bite a refreshing experience!

    Step 5 – Combine Ingredients

    Gently combine the cucumber, onion, herbs, and feta in a large bowl. Pour the dressing over everything. Toss the salad gently, ensuring all ingredients are evenly coated. The key is not to bruise the veggies! This step is where all those flavors intermingle and start to shine.

    Step 6 – Serve or Chill

    You can serve the salad right away, but letting it chill in the refrigerator for about 30 minutes allows the flavors to meld beautifully. If you wait, you’ll be rewarded with a more robust taste. It’s perfect for a summer gathering, or just to enjoy on a quiet evening at home!

    Tips for Success

    • Use chilled ingredients for an extra-refreshing salad.
    • Adjust the salt and pepper to taste; some feta can be saltier than others.
    • For added crunch, try adding bell peppers or radishes.
    • Experiment with fresh herbs! Basil or mint can add a delightful twist.
    • Always serve Cucumber Feta Salad cold for the best flavor experience.

    Equipment Needed

    • Large Bowl: Essential for mixing the salad. A mixing bowl works perfectly if you don’t have a serving bowl.
    • Small Bowl: Ideal for whisking together the dressing. Any bowl will do!
    • Knife: A sharp knife helps slice the vegetables evenly. A mandolin can be a fun alternative.
    • Cutting Board: A good cutting board keeps your workspace tidy while prepping.

    Variations on Cucumber Feta Salad

    • Add Cherry Tomatoes: Their sweetness complements the cucumber and feta beautifully. Just halve them and toss them in!
    • Include Avocado: Creamy avocado slices provide a rich texture and healthy fats. Mmm, what a heavenly addition!
    • Mix in Olives: Kalamata or green olives can bring a briny flavor, enhancing the salad’s Mediterranean essence.
    • Spice it Up: For a kick, sprinkle in some red pepper flakes or a dash of hot sauce. It’s a fun twist!
    • Go Greek: Add diced bell peppers and capers for an authentic Greek salad vibe. You won’t regret it!
    • Quinoa Twist: Mix in cooked quinoa for added protein, turning this salad into a heartier meal option.
    • Substitute Cheese: Try goat cheese for a tangy alternative, or even a dairy-free feta for a plant-based version.

    Serving Suggestions for Cucumber Feta Salad

    • Pair the salad with grilled chicken or fish for a satisfying meal.
    • Serve with warm pita bread and hummus for a delightful Mediterranean-inspired spread.
    • A glass of chilled white wine or sparkling water enhances the refreshing flavors.
    • For presentations, plate it in a colorful serving dish to impress your guests!

    FAQs about Cucumber Feta Salad

    Can I prep Cucumber Feta Salad in advance?
    Absolutely! This salad tastes even better after sitting for a while. If you prep it a few hours ahead, the flavors meld beautifully. Just keep it covered in the fridge until you’re ready to serve.

    What can I substitute for feta cheese?
    If you’re not a fan of feta, try goat cheese for a tangy bite. You can also use crumbled tofu or a dairy-free feta for a plant-based option.

    How long will leftovers last?
    Leftover Cucumber Feta Salad can be stored in an airtight container in the fridge for up to 2-3 days. However, for the best texture and flavor, I recommend enjoying it fresh.

    Can I add protein to make it a meal?
    Definitely! Adding grilled chicken, shrimp, or chickpeas can turn this salad into a satisfying main dish. It’s a great way to make it more filling without losing that refreshing taste!

    Is Cucumber Feta Salad gluten-free?
    Yes! This salad is naturally gluten-free. It’s a great option for those who need to avoid gluten while still enjoying a tasty and nutritious dish.

    Final Thoughts

    Cucumber Feta Salad isn’t just a dish; it’s a celebration of summer simplicity and freshness! Each bite is like a little burst of sunshine on your palate, making me smile every time I enjoy it. This recipe offers a perfect blend of flavors, textures, and colors that can brighten any meal. Whether you’re sharing it with family or savoring it solo, the joy it brings is unmistakable. So, grab those cucumbers and feta cheese, let your kitchen be your canvas, and whip up this refreshing salad that embodies the essence of summer. Happy cooking!


    Print

    clock clock iconcutlery cutlery iconflag flag iconfolder folder iconinstagram instagram iconpinterest pinterest iconfacebook facebook iconprint print iconsquares squares iconheart heart iconheart solid heart solid icon

    Description

    A refreshing Cucumber Feta Salad perfect for summer.


    • 2 large cucumbers, thinly sliced
    • 1 small red onion, thinly sliced
    • 1/4 cup fresh dill, chopped
    • 1/4 cup fresh parsley, chopped
    • 1 cup feta cheese, crumbled
    • 1/4 cup extra virgin olive oil
    • 2 tablespoons lemon juice
    • Salt and pepper to taste

    1. In a large bowl, combine the sliced cucumbers and red onion.
    2. Add the chopped dill and parsley to the bowl.
    3. Sprinkle the crumbled feta cheese over the vegetables.
    4. In a small bowl, whisk together the olive oil, lemon juice, salt, and pepper.
    5. Pour the dressing over the salad and toss gently to combine.
    6. Serve immediately or refrigerate for 30 minutes to allow flavors to meld.

    Notes

    • For added flavor, consider using a mix of herbs.
    • This salad can be made a few hours in advance for best flavor.
    • Prep Time: 10 minutes
    • Cook Time: 0 minutes
    • Category: Salad
    • Method: Mixing
    • Cuisine: Mediterranean

    Nutrition

    • Serving Size: 1 serving
    • Calories: 200
    • Sugar: 3g
    • Sodium: 400mg
    • Fat: 16g
    • Saturated Fat: 4g
    • Unsaturated Fat: 10g
    • Trans Fat: 0g
    • Carbohydrates: 8g
    • Fiber: 2g
    • Protein: 6g
    • Cholesterol: 20mg

    Sharing is caring!