Blog

  • Smothered Chicken with Creamed Spinach Bacon And Mushrooms

    Smothered Chicken with Creamed Spinach Bacon And Mushrooms


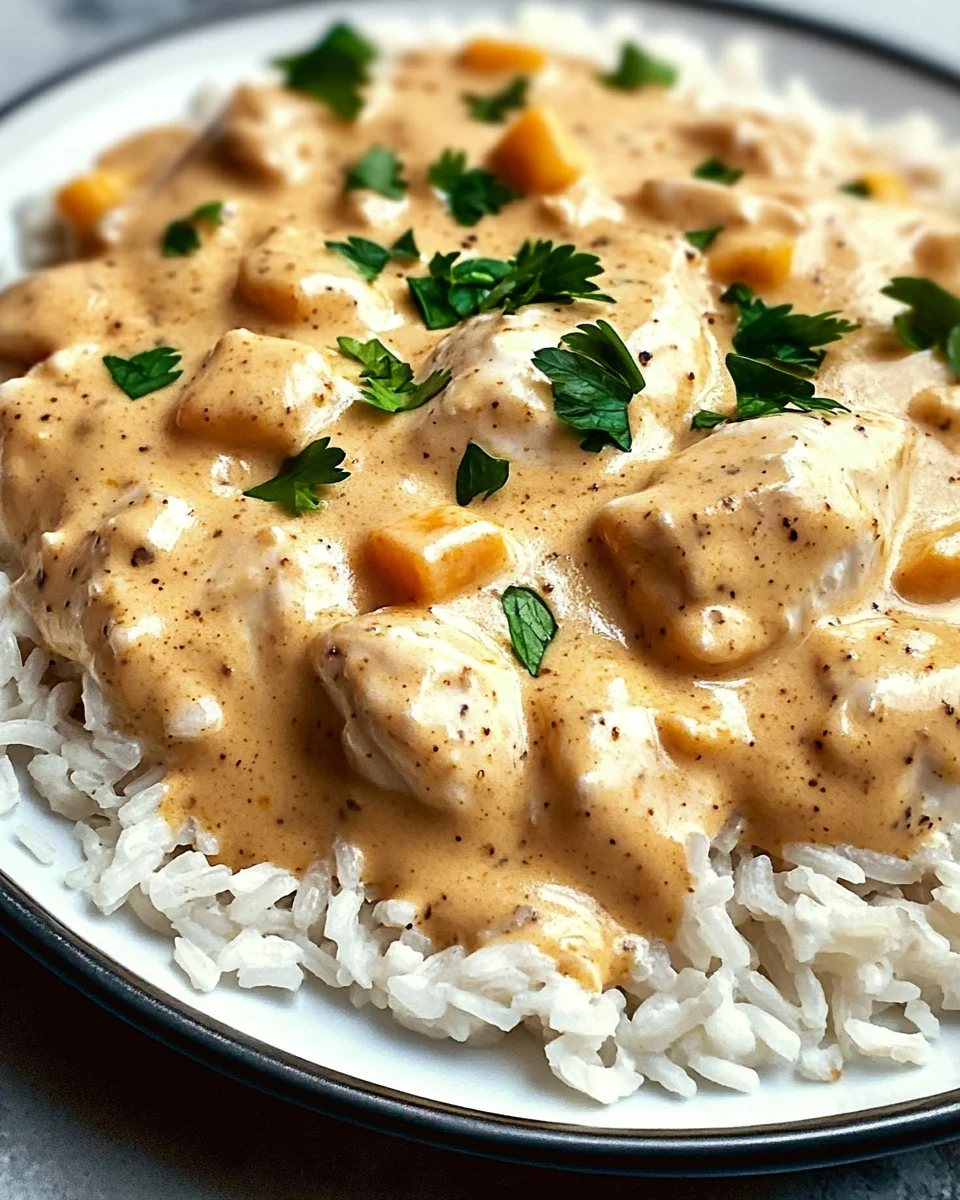
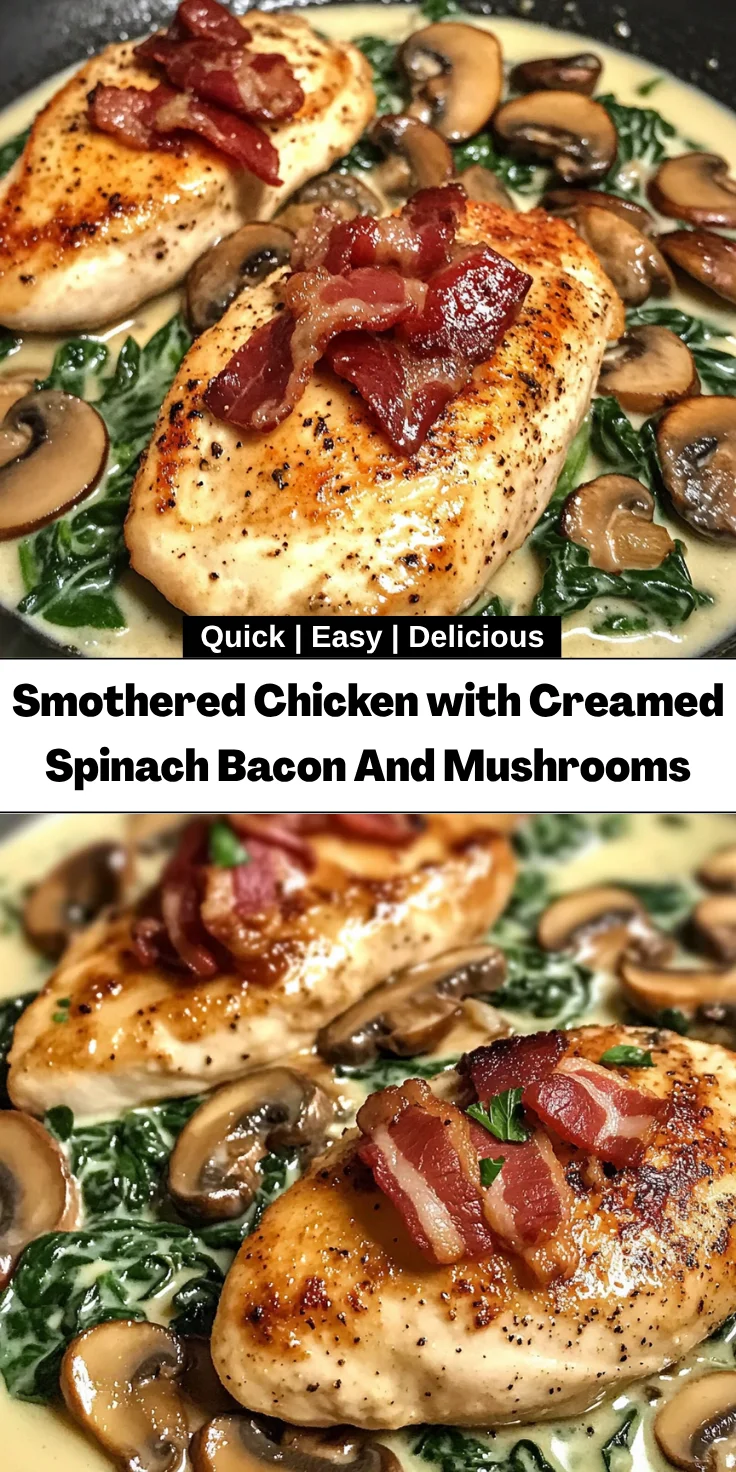
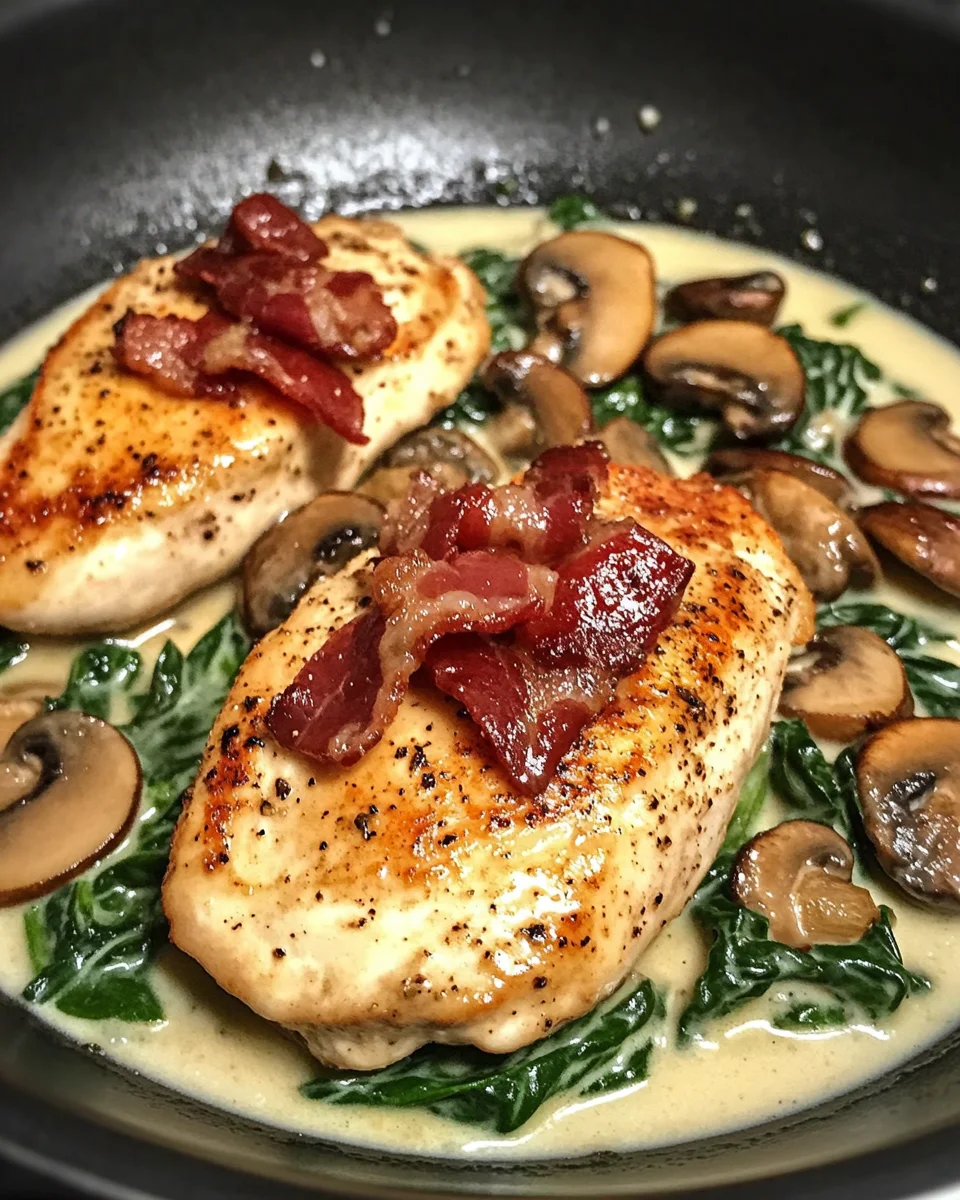
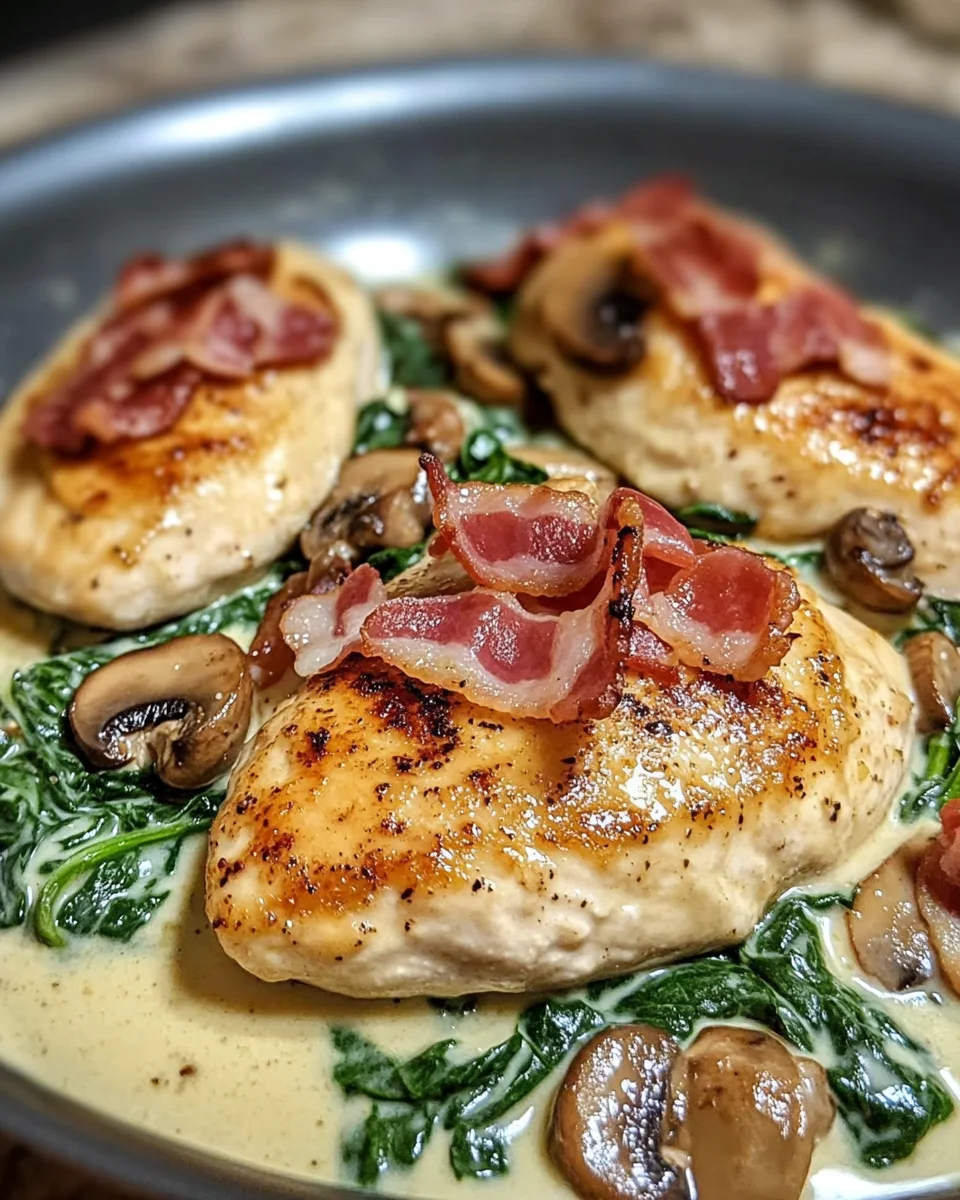
    Introduction to Smothered Chicken with Creamed Spinach Bacon And Mushrooms

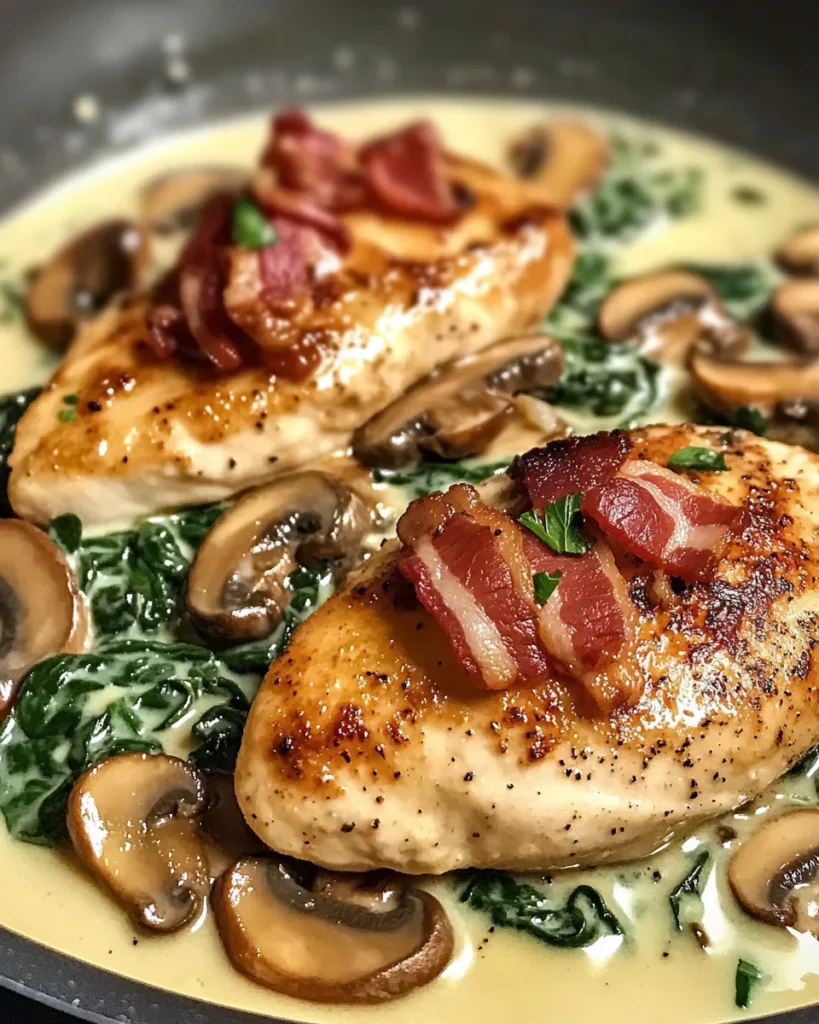
    Welcome, fellow home cooks! If you’re anything like me, you’re often searching for a delightful recipe that fits into a busy schedule. That’s where my Smothered Chicken with Creamed Spinach Bacon And Mushrooms comes in. This creamy dish is not only heartwarming but also quick to put together. Imagine a cozy evening at home where you can treat your loved ones to a meal bursting with flavor! It’s the kind of dinner that brightens up your week and won’t leave you feeling exhausted. Ready to dive in? Let’s make some magic together in the kitchen!

    Why You’ll Love This Smothered Chicken with Creamed Spinach Bacon And Mushrooms

    This Smothered Chicken with Creamed Spinach Bacon And Mushrooms is your ticket to a meal that feels like a warm hug. With minimal cooking time, you’ll have dinner ready in about 45 minutes. The savory blend of chicken, creamy sauce, and crisp bacon creates a delightful dish. Plus, it’s easy to make, meaning more time for you to relax or catch up with family. What’s not to love?

    Ingredients for Smothered Chicken with Creamed Spinach Bacon And Mushrooms

    Gathering the right ingredients can truly elevate your cooking experience. Here’s what you’ll need to whip up this delicious Smothered Chicken with Creamed Spinach Bacon And Mushrooms.

    • Chicken breasts: The star of the dish! Juicy and tender, they form the hearty base of your meal.
    • Olive oil: A healthy fat that helps cook the chicken and adds flavor to the dish.
    • Salt and pepper: Simple seasonings that enhance the natural flavors of your ingredients.
    • Garlic powder: Adds that aromatic depth without the fuss of fresh garlic.
    • Onion powder: A quick way to infuse a savory essence, perfect for busy cooks!
    • Bacon: Crispy, salty goodness that makes every bite delightful. Swap for turkey bacon if you prefer.
    • Onion: Freshly chopped onions bring a sweet and savory flavor to your sauté.
    • Spinach: Fresh spinach provides a pop of color and a nutritious boost. Feel free to substitute frozen if that’s what you have!
    • Mushrooms: Sliced mushrooms add an earthy richness, making the sauce even more luxurious.
    • Heavy cream: This is what makes the dish oh-so-creamy. You can use half and half as a lighter option.
    • Parmesan cheese: Grated for a hint of nutty flavor, it adds to the creaminess of the sauce.
    • Fresh parsley (optional): A lovely garnish that adds a fresh touch and brightens the dish.

    If you’re curious about the exact measurements of each ingredient, check out the end of the article where I’ve included them for easy printing!

    How to Make Smothered Chicken with Creamed Spinach Bacon And Mushrooms

    Now that you’ve gathered your ingredients, let’s roll up our sleeves and create this delicious Smothered Chicken with Creamed Spinach Bacon And Mushrooms. Each step is straightforward, making it a breeze for even the busiest cooks!

    Step 1: Prepare the Chicken

    Start by rinsing the chicken breasts under cold water. Pat them dry with paper towels. This simple step helps season the chicken better. Next, season both sides with salt, pepper, garlic powder, and onion powder. Rub the seasonings gently into the meat. This infuses flavor right from the start!

    Step 2: Cook the Chicken

    Heat a tablespoon of olive oil in a large skillet over medium heat. Once the oil shimmers, it’s time to add the seasoned chicken breasts. Cook them for 5-7 minutes on each side. You want them golden brown and cooked through. If your chicken is thick, it might need a little extra time. This chicken is the heart of our dish!

    Step 3: Cook the Bacon

    After the chicken is cooked, remove it from the skillet and set aside. In the same skillet, add the chopped bacon. Cook for about 3-4 minutes until crispy. The bacon drippings left behind will add incredible flavor. Trust me, it’s worth saving that goodness!

    Step 4: Sauté the Vegetables

    Once the bacon is crispy, remove it and set aside as well. In the skillet, toss in the finely chopped onion and sliced mushrooms. Cook for around 5 minutes. Stir them often until they soften and turn a lovely golden brown. Those earthy mushrooms add so much depth to our creamy sauce!

    Step 5: Make the Cream Sauce

    Next, it’s time for the star of our show! Add the chopped spinach to the skillet and cook for about 2-3 minutes. This will help it wilt down. Now, stir in the heavy cream and grated Parmesan cheese. Allow it to simmer for 2-3 minutes so the sauce can thicken up. You’ll know it’s ready when it coats the back of a spoon beautifully!

    Step 6: Combine Everything

    Return the chicken breasts to the skillet, and spoon that luscious cream sauce over the top. Let everything heat through for another 2 minutes. The chicken will soak up all that delicious flavor. It’s like wrapping them in a warm, creamy blanket!

    Step 7: Garnish and Serve

    Finally, if you like a touch of freshness, sprinkle the chopped parsley on top just before serving. This little addition gives a lovely color contrast. Serve your Smothered Chicken with Creamed Spinach Bacon And Mushrooms hot, and watch your family smile with delight!

    Tips for Success

    • Make sure your skillet is hot before adding the chicken; it helps achieve a nice sear.
    • Don’t rush the sautéing process. Take your time to allow the veggies to get nicely caramelized.
    • Feel free to adjust the creaminess; use less heavy cream if you prefer.
    • Consider marinating the chicken for a few hours for deeper flavor.
    • Always taste your sauce before serving and adjust seasoning as needed!

    Equipment Needed

    • Large skillet: Essential for cooking the chicken and sauce. A cast-iron skillet works wonderfully.
    • Wooden spoon or spatula: Perfect for stirring and combining ingredients.
    • Meat thermometer: Optional, but helps ensure your chicken is cooked through.
    • Measuring cups and spoons: Use these for accurate ingredient measurements.

    Variations of Smothered Chicken with Creamed Spinach Bacon And Mushrooms

    • Herbed Chicken: Add fresh herbs like thyme or rosemary to elevate the flavor profile of the chicken.
    • Vegetable Medley: Include other vegetables such as bell peppers or zucchini for extra color and nutrients.
    • Gluten-Free Option: Ensure the heavy cream and all other ingredients are certified gluten-free for a diet-friendly adaptation.
    • Spicy Twist: Add a pinch of red pepper flakes to the cream sauce for a delightful kick.
    • Vegan Alternative: Substitute chicken with grilled tofu or portobello mushrooms, using coconut cream for the sauce.

    Serving Suggestions

    • Pair with fluffy rice or creamy mashed potatoes to soak up that delicious sauce.
    • Serve alongside a fresh garden salad for a refreshing crunch.
    • A glass of chilled white wine complements this dish beautifully.
    • Present on a large platter, garnished with extra parsley for that restaurant-style touch.

    FAQs about Smothered Chicken with Creamed Spinach Bacon And Mushrooms

    Can I use frozen spinach for this recipe?

    Absolutely! If you’re pressed for time, frozen spinach works just as well. Just make sure to thaw and drain it before adding it to your dish. This little shortcut can save you time without sacrificing flavor!

    How can I make this dish healthier?

    For a lighter version of Smothered Chicken with Creamed Spinach Bacon And Mushrooms, you can swap the heavy cream for Greek yogurt or a lower-fat cream. You could also reduce the amount of bacon or use turkey bacon for less fat.

    Can I prepare this dish ahead of time?

    Yes! You can cook the chicken and the cream sauce separately, then combine them before serving. Store them in airtight containers in the fridge for up to two days. Just reheat gently over medium heat!

    What can I serve with Smothered Chicken?

    This dish pairs beautifully with rice, pasta, or even a simple side of roasted vegetables. For a light touch, a fresh salad is also a great choice!

    Can I freeze leftovers?

    Yes! Just ensure you store the leftovers in an airtight freezer container. They can keep for up to three months. Simply thaw in the fridge overnight before reheating.

    Final Thoughts

    Making Smothered Chicken with Creamed Spinach Bacon And Mushrooms isn’t just about satisfying your hunger; it’s about creating memorable moments around the dinner table. This dish brings together flavors that are comforting and rich, just like a warm embrace from an old friend. Whether you’re enjoying it on a hectic weeknight or impressing guests over the weekend, it’s sure to become a family favorite. I can’t wait for you to try this recipe and share the joy it brings. Happy cooking, and don’t forget to savor every delightful bite!


    Print

    clock clock iconcutlery cutlery iconflag flag iconfolder folder iconinstagram instagram iconpinterest pinterest iconfacebook facebook iconprint print iconsquares squares iconheart heart iconheart solid heart solid icon

    Description

    A delicious and creamy dish of smothered chicken topped with sautéed spinach, bacon, and mushrooms.


    • 4 chicken breasts
    • 1 tablespoon olive oil
    • Salt and pepper, to taste
    • 1/2 teaspoon garlic powder
    • 1/2 teaspoon onion powder
    • 4 slices bacon, chopped
    • 1/2 cup onion, finely chopped
    • 2 cups fresh spinach, chopped
    • 8 oz mushrooms, sliced
    • 1 cup heavy cream
    • 1/4 cup grated Parmesan cheese
    • 1 tablespoon fresh parsley, chopped (optional)

    1. Heat olive oil in a large skillet over medium heat. Season chicken breasts with salt, pepper, garlic powder, and onion powder.
    2. Add chicken to the skillet and cook for 5-7 minutes per side, or until golden brown and cooked through. Remove from skillet and set aside.
    3. In the same skillet, add chopped bacon and cook until crispy, about 3-4 minutes.
    4. Remove bacon and set aside, leaving the bacon drippings in the skillet.
    5. Add onion and mushrooms to the skillet, cooking for 5 minutes until soft and browned.
    6. Add spinach to the skillet and cook for an additional 2-3 minutes, until wilted.
    7. Stir in heavy cream and Parmesan cheese, simmering for 2-3 minutes until the sauce thickens.
    8. Return chicken breasts to the skillet, spooning the creamy spinach, bacon, and mushroom mixture over the top. Cook for 2 more minutes to heat everything through.
    9. Garnish with fresh parsley, if desired. Serve immediately.

    Notes

    • This dish can be served with rice or pasta for a complete meal.
    • Feel free to add other vegetables if desired.
    • Store leftovers in an airtight container in the refrigerator for up to 3 days.
    • Prep Time: 15 minutes
    • Cook Time: 30 minutes
    • Category: Dinner
    • Method: Skillet
    • Cuisine: American

    Nutrition

    • Serving Size: 1 serving
    • Calories: 550
    • Sugar: 2g
    • Sodium: 800mg
    • Fat: 40g
    • Saturated Fat: 15g
    • Unsaturated Fat: 20g
    • Trans Fat: 0g
    • Carbohydrates: 6g
    • Fiber: 1g
    • Protein: 45g
    • Cholesterol: 140mg

    Sharing is caring!

  • Creamy Smothered Chicken and Rice

    Creamy Smothered Chicken and Rice


    Introduction to Creamy Smothered Chicken and Rice

    As a busy mom and passionate home cook, I understand the chaotic daily rush that often leaves us longing for a delicious meal without hours of prep. That’s where my Creamy Smothered Chicken and Rice comes in—a comforting dish that’s quick to whip up, yet impressive enough to make any family gathering shine. Imagine tender chicken breasts soaking in a dreamy, creamy sauce, served over fluffy rice. It’s the kind of meal that wraps around you like a warm hug, soothing both the palate and the soul. Ready to dive in?

    Why You’ll Love This Creamy Smothered Chicken and Rice

    This Creamy Smothered Chicken and Rice is a lifesaver for anyone with a busy schedule. It combines ease and comfort in one delightful dish. You’ll love how quickly it comes together—perfect for those hectic weeknights when you need a satisfying meal fast. Rich flavors and creamy textures will make your taste buds sing, while the kids will beg for seconds. It’s the ultimate comfort food any day of the week!

    Ingredients for Creamy Smothered Chicken and Rice

    To create this delicious Creamy Smothered Chicken and Rice, you’ll need a few simple, accessible ingredients that can usually be found in your kitchen. Below is a rundown of what you’ll require:

    • Boneless skinless chicken breasts: They’re lean, juicy, and cook up tender, making them perfect for this dish.
    • Garlic powder: Adds a warm and aromatic flavor. You could use fresh garlic if you prefer, but powdered makes it super quick.
    • Onion powder: A handy ingredient that gives depth without needing to chop onions. A win for time-saving!
    • Smoked paprika: This brings a subtle smokiness to the dish. It’s what gives it an irresistible depth of flavor.
    • Salt and black pepper: Simple seasonings that elevate the taste. Adjust to your family’s preference.
    • Olive oil: Perfect for searing your chicken; it adds healthy fats and flavor.
    • Long-grain white rice: The backbone of this meal; fluffy and perfect for soaking up the creamy sauce. Substitute with brown rice for a healthier twist.
    • Chicken broth: Enhances the dish with rich flavor, but vegetable broth is a delightful alternative if you prefer.
    • Unsalted butter: It creates the luscious sauce and ensures you control the saltiness.
    • All-purpose flour: This thickens the sauce beautifully—feel free to use gluten-free flour if needed.
    • Whole milk: Gives the sauce that creamy texture. You can replace it with a dairy-free option like almond or oat milk.
    • Thyme: A subtle herb that pairs perfectly with chicken. Fresh or dried will work fine.
    • Shredded cheddar cheese and grated Parmesan cheese: A combo that makes the sauce ooze with cheesy goodness. Use your favorite cheese if you’re feeling adventurous!
    • Fresh parsley: For garnish, it adds a pop of color and freshness.

    For exact measurements, feel free to scroll down to the bottom of the article where you can find the printable version of this recipe. Let’s get cooking!

    How to Make Creamy Smothered Chicken and Rice

    Now that we’ve gathered our ingredients, it’s time to dive into making this Creamy Smothered Chicken and Rice. I promise you, it’s easier than it seems! Let’s break it down step by step.

    Season the Chicken

    First things first, let’s get that chicken ready for its moment in the pan. Season your boneless, skinless chicken breasts generously with garlic powder, onion powder, smoked paprika, salt, and black pepper. This seasoning blend is like a flavor hug. Don’t skimp; it’s what makes the chicken sing!

    Sear the Chicken

    Next, heat the olive oil in a large skillet over medium-high heat. When the oil starts to shimmer, carefully add your seasoned chicken breasts. Allow them to sear for about 4-5 minutes on each side. You want that beautiful golden-brown crust to form. This step locks in flavor and keeps the chicken juicy. Once done, remove them from the skillet and set aside. This will be their cozy timeout while the sauce comes together!

    Prepare the Rice

    In a medium saucepan, bring the chicken broth and a pinch of salt to a gentle boil. Add the long-grain white rice, then reduce the heat to low. Cover the pot and let it simmer quietly for 15-18 minutes. The rice should become fluffy while absorbing all that chicken goodness. After it’s done, fluff it gently with a fork and set it aside. Trust me, the rice will soak up every bit of the creamy sauce later!

    Make the Creamy Sauce

    In the same skillet you used for the chicken, lower the heat and melt the butter. Once melted, whisk in the all-purpose flour for about 1-2 minutes until it’s lightly golden. This is how we create that luscious base for our sauce. Gradually pour in the milk and extra chicken broth, whisking constantly to avoid lumps. In no time, you’ll have a smooth sauce. Stir in garlic powder, thyme, shredded cheddar, and grated Parmesan. Cook it for 3-4 minutes, until thick and bubbly. It will smell heavenly!

    Combine Chicken and Sauce

    Now it’s time to bring everything together. Return those seared chicken breasts to the skillet, and spoon that creamy sauce over the top. Cover the skillet and let it simmer on low for about 10 minutes. This allows the chicken to finish cooking and soak up all the delicious flavors. Your kitchen is going to smell like a five-star restaurant, I promise!

    Serve with Rice

    Finally, plate the fluffy rice onto your serving dishes and crown it with the smothered chicken and its glorious sauce. Don’t forget a sprinkle of fresh parsley on top for that lovely pop of color. Serve it warm, and watch your loved ones dive in with big smiles. This dish is comfort at its finest!

    Tips for Success

    • Always season the chicken well for the best flavor.
    • Don’t rush the searing process. Let the chicken get golden; it adds depth!
    • When making the sauce, whisk continuously to avoid lumps.
    • Feel free to adjust the cheese types for personal taste.
    • For added color, mix in some sautéed vegetables before serving.

    Equipment Needed

    • Large skillet: A non-stick skillet works great for easy cooking and cleanup.
    • Medium saucepan: Essential for cooking the rice. Any pot with a lid will do.
    • Whisk: A must for the creamy sauce; a fork can also work in a pinch.
    • Measuring cups: Handy for accurate ingredients; a simple eye for proportions can suffice.

    Variations of Creamy Smothered Chicken and Rice

    • Spicy Kick: Add a dash of cayenne pepper or diced jalapeños to the sauce for a fiery twist.
    • Mushroom Love: Sauté some sliced mushrooms with the chicken for an earthy flavor boost.
    • Vegetarian Options: Swap the chicken for hearty vegetables like zucchini, bell peppers, or cauliflower. Use vegetable broth instead.
    • Healthier Twist: Opt for brown rice instead of white for extra fiber and nutrients.
    • Herb Variations: Experiment with fresh herbs like basil or rosemary for a burst of freshness in the sauce.

    Serving Suggestions for Creamy Smothered Chicken and Rice

    • Fresh Green Salad: A light salad with mixed greens can offer a refreshing contrast.
    • Steamed Vegetables: Brightly colored steamed veggies like broccoli and carrots add nutrition and color.
    • Garlic Bread: Serve with warm garlic bread for a cozy, filling meal.
    • Iced Tea: A refreshing glass of iced tea complements the creamy richness perfectly.
    • Presentation Tip: Garnish each plate with a sprig of parsley for a beautiful finish.

    FAQs about Creamy Smothered Chicken and Rice

    Let’s address a few common questions you might have about Creamy Smothered Chicken and Rice. I want to ensure you have all the info you need to whip up this delicious dish without a hitch!

    Can I use chicken thighs instead of chicken breasts?

    Absolutely! Chicken thighs are great alternatives. They’re even juicier than breasts and will add a bit more flavor to your dish. Just add an extra couple of minutes to the cooking time.

    Can I prepare this dish ahead of time?

    You sure can! You can season the chicken and make the creamy sauce ahead. Just reheat everything when you’re ready to serve for a smooth, quick dinner.

    Is the recipe gluten-free?

    Yes, Creamy Smothered Chicken and Rice can easily be made gluten-free! Simply substitute the all-purpose flour with a gluten-free flour blend. It’ll work like a charm in the sauce.

    What type of rice can I use instead of white rice?

    For a healthier option, try brown rice or quinoa. They’ll hold up well and add more texture and nutrition to your meal.

    How do I store leftovers?

    Leftovers can be stored in an airtight container in the refrigerator for up to three days. Just reheat gently on the stove or microwave, and enjoy your savory dish again!

    Final Thoughts

    Cooking can be a hectic juggling act, but my Creamy Smothered Chicken and Rice is here to make your life a little easier. This dish isn’t just about filling bellies; it creates moments around the table where laughter and love thrive. Its rich flavors invite everyone to relax and enjoy a hearty meal together. Whether it’s a busy weeknight or a small family gathering, this recipe brings comfort and warmth to your home. So, roll up your sleeves, embrace the joy of cooking, and watch as this delightful dish steals the show!


    Print

    clock clock iconcutlery cutlery iconflag flag iconfolder folder iconinstagram instagram iconpinterest pinterest iconfacebook facebook iconprint print iconsquares squares iconheart heart iconheart solid heart solid icon

    Description

    A tasty dish featuring chicken breasts smothered in a creamy sauce served over fluffy rice.


    • 4 boneless skinless chicken breasts
    • 1 teaspoon garlic powder
    • 1 teaspoon onion powder
    • 1 teaspoon smoked paprika
    • Salt and black pepper to taste
    • 2 tablespoons olive oil
    • 1 cup long-grain white rice
    • 2 cups chicken broth
    • ½ teaspoon salt
    • 2 tablespoons unsalted butter
    • 2 tablespoons all-purpose flour
    • 1 ½ cups whole milk
    • ½ cup chicken broth
    • ½ teaspoon garlic powder
    • ¼ teaspoon thyme
    • ½ cup shredded cheddar cheese
    • ½ cup grated Parmesan cheese
    • Fresh parsley chopped (for garnish)

    1. Season the chicken breasts with garlic powder, onion powder, smoked paprika, salt, and black pepper.
    2. Heat olive oil in a large skillet over medium-high heat. Sear the chicken for 4-5 minutes on each side until golden brown. Remove from the skillet and set aside.
    3. In a medium saucepan, bring chicken broth and salt to a boil. Add the rice, reduce heat to low, cover, and simmer for 15-18 minutes until tender and the liquid is absorbed. Fluff with a fork and set aside.
    4. In the same skillet used for the chicken, melt the butter over medium heat. Whisk in the flour and cook for 1-2 minutes until lightly golden.
    5. Gradually add the milk and chicken broth, whisking constantly to create a smooth sauce. Stir in garlic powder, thyme, cheddar cheese, and Parmesan cheese. Cook for 3-4 minutes until the sauce thickens and the cheese is melted.
    6. Return the chicken breasts to the skillet, spooning the creamy sauce over the top. Cover and simmer on low heat for 10 minutes until the chicken is fully cooked and tender.
    7. Plate the cooked rice and top with the smothered chicken and sauce. Garnish with fresh parsley and serve immediately.

    Notes

    • Make sure the chicken is cooked through before serving.
    • Leftovers can be stored in an airtight container in the refrigerator.
    • This dish can be served with a side of vegetables for a complete meal.
    • Prep Time: 15 minutes
    • Cook Time: 30 minutes
    • Category: Main Course
    • Method: Skillet
    • Cuisine: American

    Nutrition

    • Serving Size: 1 serving
    • Calories: 500
    • Sugar: 5g
    • Sodium: 800mg
    • Fat: 20g
    • Saturated Fat: 10g
    • Unsaturated Fat: 8g
    • Trans Fat: 0g
    • Carbohydrates: 45g
    • Fiber: 1g
    • Protein: 30g
    • Cholesterol: 90mg

    Sharing is caring!

  • Grilled Shrimp Bowl with Avocado, Corn Salsa & Creamy Sauce

    Grilled Shrimp Bowl with Avocado, Corn Salsa & Creamy Sauce


    Introduction to Grilled Shrimp Bowl with Avocado, Corn Salsa & Creamy Sauce

    As a busy mom, I know how challenging it can be to whip up a meal that’s both quick and delicious. That’s why I’m excited to share my Grilled Shrimp Bowl with Avocado, Corn Salsa & Creamy Sauce! This dish is not only a feast for the eyes but also a burst of flavors that will impress your loved ones. With marinated shrimp, creamy avocado, and vibrant corn salsa, it’s a perfect solution for those hectic weeknights or a delightful weekend treat. Trust me, this bowl will become a family favorite in no time!

    Why You’ll Love This Grilled Shrimp Bowl with Avocado, Corn Salsa & Creamy Sauce

    This Grilled Shrimp Bowl is a game-changer for busy days. It’s quick to prepare, taking just 30 minutes from start to finish. The combination of fresh ingredients creates a symphony of flavors that dance on your palate. Plus, it’s versatile! You can easily customize it to suit your family’s tastes. Whether you’re feeding picky eaters or looking for a healthy meal, this bowl has you covered!

    Ingredients for Grilled Shrimp Bowl with Avocado, Corn Salsa & Creamy Sauce

    Gathering the right ingredients is key to making this Grilled Shrimp Bowl with Avocado, Corn Salsa & Creamy Sauce a success. Here’s what you’ll need:

    • Shrimp: Large, peeled, and deveined shrimp are perfect for grilling. They soak up the marinade beautifully.
    • Olive Oil: This adds richness and helps the spices stick to the shrimp. You can substitute with avocado oil if you prefer.
    • Spices: Smoked paprika, cumin, chili powder, and garlic powder create a flavorful marinade. Feel free to adjust the spices to your taste.
    • Lime Juice: Fresh lime juice brightens the dish and balances the flavors. Bottled lime juice works in a pinch, but fresh is best!
    • Salt and Pepper: Essential for seasoning. Don’t skip these; they enhance all the flavors.
    • Cilantro: Fresh chopped cilantro adds a burst of freshness. If you’re not a fan, parsley is a great substitute.
    • Corn: You can use fresh, frozen, or canned corn for the salsa. Each option brings a different texture and sweetness.
    • Red Bell Pepper: This adds crunch and sweetness to the corn salsa. You can swap it for any color bell pepper you have on hand.
    • Green Onions: They provide a mild onion flavor. Chives can be used as an alternative.
    • Avocados: Ripe avocados are creamy and delicious. If they’re not ripe, you can use guacamole as a shortcut.
    • Mayo or Greek Yogurt: This forms the base of the creamy sauce. Greek yogurt is a healthier option, while mayo adds richness.
    • Hot Sauce: Optional, but it adds a nice kick! Adjust the amount based on your spice preference.

    For exact measurements, check the bottom of the article where you can find everything listed for easy printing. Happy cooking!

    How to Make Grilled Shrimp Bowl with Avocado, Corn Salsa & Creamy Sauce

    Step 1: Marinate the Shrimp

    Start by preparing the marinade for the shrimp. In a bowl, mix together olive oil, smoked paprika, cumin, chili powder, garlic powder, lime juice, salt, and pepper. This blend creates a flavorful base that will infuse the shrimp with deliciousness. Toss the peeled and deveined shrimp in the marinade, ensuring they are well-coated. Let them sit for 15 to 20 minutes. This step is crucial as it allows the shrimp to absorb all those vibrant flavors, making each bite a taste sensation!

    Step 2: Prepare the Corn Salsa

    While the shrimp marinates, it’s time to whip up the corn salsa. In a separate bowl, combine the corn, diced red bell pepper, chopped green onions, and cilantro. Drizzle with lime juice and sprinkle with salt. Mix everything together until well combined. This salsa is a burst of color and flavor! Once mixed, cover the bowl and chill it in the refrigerator. Chilling allows the flavors to meld beautifully, making it even more refreshing when served.

    Step 3: Make the Avocado Mash

    Next, let’s create that creamy avocado mash. Scoop the ripe avocados into a bowl and add lime juice, salt, and pepper. Using a fork, mash the avocados until they’re creamy but still slightly chunky. This texture adds a delightful contrast to the other ingredients. The lime juice not only enhances the flavor but also keeps the avocados from browning. Set this aside; it will be a luscious topping for your bowl!

    Step 4: Whisk the Creamy Sauce

    Now, let’s make the creamy sauce that ties everything together. In a bowl, whisk together mayo or Greek yogurt, lime juice, hot sauce (if using), garlic powder, smoked paprika, cilantro, and a pinch of salt. Adjust the thickness by adding a splash of water if needed. This sauce is rich and tangy, adding a delightful creaminess to the dish. It’s the perfect finishing touch that elevates the entire Grilled Shrimp Bowl!

    Step 5: Grill the Shrimp

    It’s time to fire up the grill! Preheat your grill or grill pan over medium-high heat. Once hot, add the marinated shrimp. Grill them for about 2 to 3 minutes on each side until they turn pink and are lightly charred. Keep an eye on them; shrimp cook quickly! You’ll know they’re done when they curl up and are opaque. Remove them from the grill and let them rest for a moment while you prepare to assemble your bowl.

    Step 6: Assemble the Bowl

    Now comes the fun part—assembling your Grilled Shrimp Bowl! Start with a base of rice or quinoa in a bowl. Next, layer on the vibrant corn salsa, followed by the creamy avocado mash. Top it all off with the grilled shrimp, and don’t forget to drizzle the creamy sauce over everything. Garnish with fresh cilantro for that extra pop of flavor. Each layer brings its own unique taste, creating a delightful meal that’s as beautiful as it is delicious!

    Tips for Success

    • Always use fresh shrimp for the best flavor and texture.
    • Let the shrimp marinate for at least 15 minutes to absorb the spices.
    • Chill the corn salsa for at least 30 minutes to enhance its freshness.
    • Use a grill basket for smaller shrimp to prevent them from falling through the grates.
    • Adjust the creamy sauce thickness by adding more or less water as needed.

    Equipment Needed

    • Grill or Grill Pan: Essential for cooking the shrimp. A stovetop grill pan works well if you don’t have an outdoor grill.
    • Mixing Bowls: Use various sizes for marinating, mixing salsa, and preparing the creamy sauce.
    • Fork: Perfect for mashing the avocado to your desired consistency.
    • Whisk: Handy for blending the creamy sauce ingredients smoothly.
    • Measuring Cups and Spoons: Useful for precise ingredient measurements, especially for the sauce.

    Variations

    • Spicy Shrimp: Add more hot sauce to the marinade for a fiery kick that will wake up your taste buds!
    • Vegetarian Option: Substitute shrimp with grilled zucchini or portobello mushrooms for a hearty, plant-based bowl.
    • Quinoa Base: Swap rice for quinoa to boost the protein content and add a nutty flavor to your bowl.
    • Different Salsas: Experiment with mango or pineapple salsa for a sweet twist that complements the shrimp beautifully.
    • Low-Fat Sauce: Use Greek yogurt instead of mayo for a lighter, healthier creamy sauce without sacrificing flavor.

    Serving Suggestions

    • Pair your Grilled Shrimp Bowl with a side of tortilla chips for a crunchy contrast.
    • Serve with a refreshing cucumber salad to balance the flavors.
    • For drinks, consider a chilled white wine or a zesty limeade.
    • Garnish with extra cilantro and lime wedges for a vibrant presentation.

    FAQs about Grilled Shrimp Bowl with Avocado, Corn Salsa & Creamy Sauce

    Can I use frozen shrimp for this recipe?

    Absolutely! Just make sure to thaw the shrimp completely before marinating. Frozen shrimp can be just as delicious when cooked properly.

    What can I substitute for avocado if I’m allergic?

    If avocados are off the table, try using a creamy hummus or a dollop of Greek yogurt. Both options will add a nice creaminess to your bowl.

    How can I make this dish spicier?

    For a spicy kick, add more hot sauce to the creamy sauce or sprinkle some red pepper flakes over the grilled shrimp. You can also use a spicier chili powder in the marinade.

    Can I prepare the corn salsa ahead of time?

    Yes! The corn salsa can be made a day in advance. Just store it in the fridge to let the flavors meld together beautifully.

    Is this Grilled Shrimp Bowl gluten-free?

    Yes, this dish is naturally gluten-free! Just ensure that any sauces or additional ingredients you use are also gluten-free.

    Final Thoughts

    Creating this Grilled Shrimp Bowl with Avocado, Corn Salsa & Creamy Sauce is more than just cooking; it’s about bringing joy to your table. Each bite is a celebration of fresh flavors and vibrant colors that can brighten even the busiest of days. I love how this dish not only satisfies my family’s cravings but also allows me to experiment with ingredients. Whether it’s a quick weeknight dinner or a special gathering, this bowl is sure to impress. So, roll up your sleeves, gather your loved ones, and enjoy the deliciousness together!


    Print

    clock clock iconcutlery cutlery iconflag flag iconfolder folder iconinstagram instagram iconpinterest pinterest iconfacebook facebook iconprint print iconsquares squares iconheart heart iconheart solid heart solid icon

    Description

    As a busy mom, I know how challenging it can be to whip up a meal that’s both quick and delicious. That’s why I’m excited to share my Grilled Shrimp Bowl with Avocado, Corn Salsa & Creamy Sauce! This dish is not only a feast for the eyes but also a burst of flavors that will impress your loved ones. With marinated shrimp, creamy avocado, and vibrant corn salsa, it’s a perfect solution for those hectic weeknights or a delightful weekend treat. Trust me, this bowl will become a family favorite in no time!


    • 1 lb large shrimp, peeled and deveined
    • 2 tbsp olive oil
    • 1 tsp smoked paprika
    • 1/2 tsp cumin
    • 1/2 tsp chili powder
    • 1/4 tsp garlic powder
    • Juice of 1 lime
    • Salt and pepper to taste
    • Fresh chopped cilantro (for garnish)
    • 1 1/2 cups corn (fresh, frozen, or canned)
    • 1/4 cup diced red bell pepper
    • 1/4 cup chopped green onions
    • 2 tbsp chopped cilantro
    • 1 tbsp lime juice
    • 2 ripe avocados
    • Juice of 1/2 lime
    • 1/2 cup mayo or Greek yogurt
    • 1 tbsp lime juice
    • 1 tsp hot sauce (optional, to taste)
    • 1/2 tsp garlic powder
    • 1/2 tsp smoked paprika
    • 1 tbsp chopped cilantro

    1. In a bowl, mix olive oil, paprika, cumin, chili powder, garlic powder, lime juice, salt, and pepper. Toss shrimp in the marinade and let sit for 15–20 minutes.
    2. In another bowl, combine corn, bell pepper, green onions, cilantro, lime juice, and salt. Mix and chill.
    3. Scoop avocado into a bowl, mash with lime juice, salt, and pepper until creamy but slightly chunky.
    4. Whisk together mayo (or yogurt), lime juice, hot sauce, garlic powder, smoked paprika, cilantro, and salt. Adjust thickness with a splash of water if needed.
    5. Heat a grill or grill pan over medium-high. Cook shrimp 2–3 minutes per side until pink and lightly charred.
    6. Add rice or quinoa to the base of a bowl. Top with corn salsa, avocado mash, grilled shrimp, and drizzle with the creamy sauce. Garnish with fresh cilantro.

    Notes

    • For a spicier kick, add more hot sauce to the creamy sauce.
    • This dish can be served with rice or quinoa for a complete meal.
    • Leftover shrimp can be stored in the refrigerator for up to 2 days.
    • Prep Time: 20 minutes
    • Cook Time: 10 minutes
    • Category: Main Course
    • Method: Grilling
    • Cuisine: Mexican

    Nutrition

    • Serving Size: 1 bowl
    • Calories: 450
    • Sugar: 2g
    • Sodium: 600mg
    • Fat: 25g
    • Saturated Fat: 4g
    • Unsaturated Fat: 20g
    • Trans Fat: 0g
    • Carbohydrates: 30g
    • Fiber: 8g
    • Protein: 25g
    • Cholesterol: 200mg

    Sharing is caring!

  • Cucumber Mozzarella Salad

    Cucumber Mozzarella Salad


    Introduction to Cucumber Mozzarella Salad

    I am a mom on the go and I know time is so precious when it comes to getting meals ready. That’s why I totally love this Cucumber Mozzarella Salad. It’s a quick dish to throw together taking only 15 minutes, so that makes it the perfect solution for really busy days. With mozzarella and vibrant cucumbers and such a refreshing and tangy dressing, this salad isn’t just easy to make; it’s a great way to win over your loved ones too. You will be making this recipe over and over again. I promise you’ll thank me for it.

    Why You’ll Love This Cucumber Mozzarella Salad

    I treasure the recipe of Cucumber Mozzarella Salad so much – it’s not only tasty but it is also very easy to prepare. It is basically a very quick process to prepare such a refreshing set of items. In no more than 15 min, you can assemble this energetic ensemble perfect for whichever event. A healthy option that’s actually palatable to the pickiest of eaters – this is not just about the fresh flavors. Surely, with vibrant components and delightful taste, this salad will become everyone’s household favorite!

    Ingredients for Cucumber Mozzarella Salad

    Gathering the right ingredients is key to making this Cucumber Mozzarella Salad shine. Here’s what you’ll need:

    • English cucumber: Crisp and refreshing, it adds a satisfying crunch. You can substitute with regular cucumbers if needed.
    • Cherry tomatoes: Their sweetness bursts in your mouth, making them a delightful addition. Feel free to use grape tomatoes for a similar taste.
    • Fresh mozzarella: Creamy and mild, it complements the salad beautifully. If you can’t find mozzarella balls, diced fresh mozzarella works just as well.
    • Avocado: Adds a rich, buttery texture. If you’re not a fan, you can skip it or replace it with diced bell peppers for extra crunch.
    • Basil leaves: Fresh basil brings a fragrant aroma and a pop of color. Dried basil can be used in a pinch, but fresh is best!
    • Extra virgin olive oil: This high-quality oil enhances the flavors and adds healthy fats. You can substitute with avocado oil if desired.
    • Balsamic vinegar: It adds a tangy sweetness that ties everything together. Red wine vinegar is a good alternative if you’re out of balsamic.
    • Garlic: A little minced garlic elevates the dressing. If you prefer a milder flavor, you can reduce the amount or omit it.
    • Fine sea salt: Essential for enhancing flavors. Adjust to your taste, especially if you’re watching your sodium intake.
    • Freshly ground black pepper: A dash of pepper adds a subtle kick. You can use white pepper for a milder flavor.

    For exact measurements, check the bottom of the article where you can find everything listed for easy printing. Enjoy the process of gathering these fresh ingredients, as they’ll come together to create a salad that’s not only delicious but also visually stunning!

    How to Make Cucumber Mozzarella Salad

    Assemble the Salad Ingredients

    To start, grab a large serving bowl and begin layering your fresh ingredients. First, add the sliced English cucumber, arranging it evenly for a beautiful presentation. Next, toss in the halved cherry tomatoes, letting their vibrant colors shine through. Then, gently add the mozzarella balls or diced mozzarella, followed by the creamy avocado. Finally, sprinkle the chopped basil leaves on top, adding a fragrant touch. This colorful arrangement not only looks appealing but also sets the stage for a delightful salad experience. Trust me, your family will be impressed!

    Prepare the Dressing

    Now, let’s whip up the dressing that will elevate our Cucumber Mozzarella Salad. In a small bowl, combine the extra virgin olive oil, balsamic vinegar, and minced garlic. Whisk these ingredients together until they’re well blended and emulsified. The dressing should have a smooth consistency, with the oil and vinegar beautifully mingling. Don’t forget to add a pinch of fine sea salt and freshly ground black pepper to taste. This simple yet flavorful dressing is the secret to bringing all the salad ingredients together in perfect harmony!

    Dress and Serve the Salad

    Just before serving, it’s time to bring everything together. Drizzle the prepared dressing over the salad, ensuring every ingredient gets a taste of that zesty goodness. Gently toss the salad with your hands or a large spoon, making sure all the ingredients are evenly coated. This step is crucial for maximizing flavor in every bite. Serve the salad immediately for the freshest experience, and watch as your loved ones dig in with delight. Enjoy the burst of flavors that this Cucumber Mozzarella Salad brings to your table!

    Tips for Success

    • Use ripe avocados for the creamiest texture; they should yield slightly when pressed.
    • Chill your salad ingredients before assembling for an extra refreshing bite.
    • Experiment with different herbs like parsley or mint for a unique twist.
    • Make the dressing ahead of time and store it in the fridge for up to a week.
    • For added crunch, toss in some toasted nuts or seeds just before serving.

    Equipment Needed

    • Large serving bowl: A beautiful bowl enhances presentation; any large bowl will do.
    • Small mixing bowl: For whisking the dressing; a mason jar works great too!
    • Whisk or fork: To blend the dressing; a spoon can also do the trick.
    • Cutting board and knife: Essential for chopping ingredients; a good peeler is handy for cucumbers.

    Variations

    • Protein Boost: Add grilled chicken or shrimp for a heartier salad that’s perfect for lunch or dinner.
    • Vegan Option: Replace mozzarella with marinated tofu or chickpeas for a plant-based twist.
    • Spicy Kick: Toss in some sliced jalapeños or a sprinkle of red pepper flakes for a spicy flavor boost.
    • Fruit Fusion: Incorporate diced mango or strawberries for a sweet contrast to the savory ingredients.
    • Grain Addition: Mix in cooked quinoa or farro for added texture and nutrition, making it a complete meal.

    Serving Suggestions

    • Pair this Cucumber Mozzarella Salad with grilled chicken or fish for a balanced meal.
    • Serve it alongside crusty bread or garlic knots for a delightful Italian touch.
    • For drinks, a chilled white wine or sparkling water with lemon complements the salad beautifully.
    • Present the salad in a clear glass bowl to showcase its vibrant colors.

    FAQs about Cucumber Mozzarella Salad

    Can I make Cucumber Mozzarella Salad ahead of time?

    Absolutely! You can prepare the salad a few hours in advance. Just keep the dressing separate until you’re ready to serve. This way, the ingredients stay fresh and crisp, ensuring a delightful crunch when you dig in.

    What can I substitute for mozzarella in this salad?

    If mozzarella isn’t your thing, you can easily swap it out for feta cheese or even goat cheese. Both options add a tangy flavor that pairs wonderfully with the fresh ingredients.

    How can I make this salad more filling?

    To turn this Cucumber Mozzarella Salad into a heartier meal, consider adding grilled chicken, chickpeas, or quinoa. These additions not only boost the protein content but also make it a satisfying dish for lunch or dinner.

    Is this salad suitable for meal prep?

    Yes! This salad is perfect for meal prep. Just store the ingredients separately and combine them when you’re ready to eat. It keeps well in the fridge for a couple of days, making it a great option for busy weeks.

    Can I use other vegetables in this salad?

    Definitely! Feel free to get creative. Bell peppers, red onions, or even radishes can add extra flavor and crunch. Just remember to keep the balance of flavors in mind for the best results!

    Final Thoughts

    Putting together the Cucumber Mozzarella Salad is not about cooking but the whole enjoyable experience of cooking fresh flavors at your home. Every bite is a celebration of vibrant ingredients for me, and I am reminded of bright sunny days and family get-togethers. And, the most appropriate word for this salad is ‘versatile’. It’s a kind of dish that not just feeds you but fills you as well. Thus dip into the glee of life with this refreshing salad, serve company to your great foods, and invite love and laughter in every meal. Cheer up with your cooking!


    Print

    clock clock iconcutlery cutlery iconflag flag iconfolder folder iconinstagram instagram iconpinterest pinterest iconfacebook facebook iconprint print iconsquares squares iconheart heart iconheart solid heart solid icon

    Description

    As a busy mom, I know how precious time can be, especially when it comes to meal prep. That’s why I absolutely adore this Cucumber Mozzarella Salad. It’s a refreshing dish that comes together in just 15 minutes, making it a perfect solution for those hectic days. With vibrant cucumbers, creamy mozzarella, and a zesty dressing, this salad is not only quick to whip up but also a delightful way to impress your loved ones. Trust me, once you try it, you’ll find yourself reaching for this recipe again and again!


    • 1/2 english cucumber (cut into quarters lengthwise and sliced)
    • 3 cups halved cherry tomatoes
    • 8 oz fresh mozzarella balls (or 1 cup diced fresh mozzarella)
    • 1 large diced avocado
    • 1/3 cup chopped basil leaves
    • 3 tablespoons extra virgin olive oil
    • 1 tablespoon balsamic vinegar
    • 1 clove garlic (peeled and either pressed or grated)
    • 1/2 teaspoon fine sea salt (adjust to taste)
    • 1/4 teaspoon freshly ground black pepper

    1. Assemble the Salad Ingredients: Begin by placing the fresh ingredients into a serving bowl. Add sliced cucumber, halved cherry tomatoes, mozzarella balls, diced avocado, and fresh basil leaves. Make sure everything is well arranged to create an appealing presentation.
    2. Prepare the Dressing: In a separate small bowl, whisk together the dressing ingredients. Combine olive oil, balsamic vinegar, minced garlic, a pinch of salt, and freshly ground pepper. Whisk until the mixture is emulsified and all the components are thoroughly combined.
    3. Dress and Serve the Salad: Just before serving, drizzle the prepared dressing over the salad. Gently toss all the ingredients in the bowl to ensure even coating with the dressing. Serve immediately and enjoy the fresh flavors of this delightful salad.

    Notes

    • Feel free to add other vegetables like bell peppers or red onion for extra flavor.
    • This salad is best served fresh but can be stored in the refrigerator for a few hours before serving.
    • Adjust the seasoning according to your taste preferences.
    • Prep Time: 15 minutes
    • Cook Time: 0 minutes
    • Category: Salad
    • Method: No-cook
    • Cuisine: Italian

    Nutrition

    • Serving Size: 1 serving
    • Calories: 250
    • Sugar: 3g
    • Sodium: 300mg
    • Fat: 18g
    • Saturated Fat: 5g
    • Unsaturated Fat: 13g
    • Trans Fat: 0g
    • Carbohydrates: 12g
    • Fiber: 4g
    • Protein: 8g
    • Cholesterol: 20mg

    Sharing is caring!

  • Chocolate Cherry Cheesecake Bars

    Chocolate Cherry Cheesecake Bars


    Introduction to Chocolate Cherry Cheesecake Bars

    Welcome to a delightful world where chocolate and cherries dance together in perfect harmony! If you’re like me—juggling work, kids, and a million responsibilities—you’ll appreciate this recipe for Chocolate Cherry Cheesecake Bars. They’re not just eye-catching; they’re a creamy, dreamy dessert that feels luxurious without the fuss. Perfect for a quick weeknight treat or a special occasion, these bars will impress your loved ones at every gathering. Let’s dive into this delicious recipe that will become a staple in your busy kitchen!

    Why You’ll Love This Chocolate Cherry Cheesecake Bars

    These Chocolate Cherry Cheesecake Bars are a dream come true for anyone pressed for time. They require minimal effort yet deliver maximum flavor! The creamy texture pairs beautifully with the tartness of the cherries, creating an irresistible treat everyone will love. Plus, they can be prepared ahead of time, making them perfect for busy days. Treat yourself and your family to something delightful without breaking a sweat!

    Ingredients for Chocolate Cherry Cheesecake Bars

    Gathering the right ingredients is the first step toward making these delightful Chocolate Cherry Cheesecake Bars! Here’s what you’ll need:

    • Graham cracker crumbs or chocolate sandwich cookie crumbs: These serve as the base. Choose graham crackers for a classic taste or chocolate sandwich cookies for a richer flavor.
    • Unsalted butter: Melted, it binds the crust together and adds that delicious richness. Unsalted is preferred, as it lets the other flavors shine.
    • Cream cheese: The star of the show! You’ll want it softened for a smooth, creamy texture that blends beautifully with the other ingredients.
    • Granulated sugar: This sweetens the cheesecake filling, balancing the tartness of the cherries and making every bite irresistible.
    • Eggs: They provide structure and help the cheesecake set, ensuring each bar holds its shape after slicing.
    • Vanilla extract: Its warm flavor enhances the overall taste of the cheesecake, adding depth and a touch of sweetness.
    • Cherry pie filling: Packed with fruity goodness, it brings a burst of tart cherry flavor. Use fresh cherries for a lighter alternative.
    • Semi-sweet chocolate chips: These add a delightful touch of chocolate that pairs perfectly with the cheesecake and cherries. Feel free to experiment with dark or milk chocolate, depending on your mood.

    Exact quantities for these ingredients can be found at the bottom of this article for easy printing! Happy baking!

    How to Make Chocolate Cherry Cheesecake Bars

    Now, let’s embark on the delicious journey of making these Chocolate Cherry Cheesecake Bars! With just a few simple steps, you’ll create a delightful dessert that will have everyone clamoring for more.

    Step 1: Prepare the Baking Pan

    Start by preheating your oven to 350°F (175°C). While it warms up, grab an 8-inch square baking pan. Line it with parchment paper, letting it hang over the edges. This bit of prep makes it super easy to lift the bars out later. Trust me, it’s a game changer!

    Step 2: Make the Crust

    In a mixing bowl, combine your graham cracker crumbs or chocolate sandwich cookie crumbs with the melted unsalted butter. Stir until the mixture resembles wet sand—it should hold together when pressed. Next, firmly press this crumb mixture into the bottom of your lined baking pan. Use the bottom of a flat measuring cup to get a nice, even layer. This crust is the solid foundation for your luscious bars!

    Step 3: Prepare the Cheesecake Filling

    In another large bowl, beat the softened cream cheese and granulated sugar together until the mixture is velvety smooth. This step is crucial; you want a creamy texture that will melt in your mouth! Add the eggs one at a time, mixing gently after each addition. Then, blend in the vanilla extract. Just until it’s combined—no need to overdo it!

    Step 4: Assemble the Cheesecake Bars

    Pour the luscious cheesecake filling over the crumb crust, smoothing the surface with a spatula. Now comes the fun part! Drop spoonfuls of cherry pie filling across the top of the cheesecake layer. Grab a knife and gently swirl the cherry filling into the cheesecake. Aim for a marbled effect, but don’t overmix—some cherry bursts are perfect!

    Step 5: Bake to Perfection

    Time to pop these beauties into the oven! Bake for about 30 to 45 minutes. Look for the edges to be set while the center remains just slightly jiggly. This means you’ve achieved that perfectly creamy cheesecake texture everyone craves. Avoid overbaking, as you want that heavenly creaminess!

    Step 6: Cool and Chill

    Once baked, remove your pan from the oven and let it cool completely in the pan. After it’s cooled down, refrigerate for several hours or until fully chilled. Chilling is key here—trust me, this step makes slicing easier and enhances the flavors beautifully! Once chilled, lift the bars out using the parchment overhang and cut them into generous squares.

    Tips for Success

    • Use room temperature cream cheese for a smooth filling—no lumps allowed!
    • Chill the bars overnight for the best flavor and texture.
    • For cleaner cuts, use a sharp knife dipped in hot water to slice the bars.
    • Feel free to customize with your favorite toppings like nuts or whipped cream.
    • Store leftovers in an airtight container in the fridge for up to a week!

    Equipment Needed

    • 8-inch square baking pan: If you don’t have one, a similarly sized round pan works too.
    • Parchment paper: Use aluminum foil if you’re in a pinch, but parchment gives a cleaner release.
    • Mixing bowls: A large bowl for the filling and a medium bowl for the crust.
    • Spatula: Perfect for smoothing out the filling; a wooden spoon can work as well.
    • Whisk or electric mixer: A whisk is great for hand mixing, but an electric mixer makes it faster!

    Variations on Chocolate Cherry Cheesecake Bars

    • Nutty Delight: Add a handful of chopped walnuts or pecans to the crust for a delightful crunch that pairs well with the creamy filling.
    • Healthier Swap: Use Greek yogurt instead of cream cheese for a lighter version. It will still be creamy but with less fat and a tangy flavor!
    • Berry Burst: Substitute cherry pie filling with fresh raspberries or blueberries for a fruity twist that’s just as vibrant and delicious.

    • Gluten-Free Option: Swap regular graham crackers for gluten-free ones or almond flour to create a crust suitable for gluten-sensitive diets.
    • Decadent Chocolate: Overload on chocolate by mixing chocolate chips into the cheesecake filling for an extra chocolaty experience!

    Serving Suggestions for Chocolate Cherry Cheesecake Bars

    • Pair with a dollop of whipped cream for added richness and a touch of elegance.
    • Serve with a scoop of vanilla ice cream for a delightful contrast in temperatures.
    • Drizzle with chocolate sauce or warm cherry syrup for a decadent finishing touch.
    • Garnish with fresh cherries or mint leaves for a pop of color.
    • Enjoy with a cup of coffee or a glass of dessert wine for a perfect end to any meal.

    FAQs about Chocolate Cherry Cheesecake Bars

    Can I make Chocolate Cherry Cheesecake Bars ahead of time?

    Absolutely! These bars actually taste even better when made a day in advance. Just be sure to store them in the fridge until you’re ready to serve. This allows the flavors to meld beautifully!

    How do I store leftover bars?

    Store your Chocolate Cherry Cheesecake Bars in an airtight container in the fridge. They’ll stay fresh for about a week—if they last that long!

    Can I use fresh cherries instead of cherry pie filling?

    You can! Fresh cherries bring a bright flavor and a wonderful texture. Just pit and chop them before swirling into the cheesecake filling. It’s a lovely twist if you want something lighter!

    What can I substitute for cream cheese?

    If you’re looking for a lighter option, try using Greek yogurt or a dairy-free cream cheese alternative. Just be aware that the texture may vary slightly, but you’ll still enjoy a delicious flavor.

    Why are my bars cracking on top?

    Cracks can occur if the cheesecake is baked at too high a temperature or overbaked. To help prevent this, bake at the recommended temperature and keep an eye on them towards the end. Remember, a slightly jiggly center is ideal!

    Final Thoughts

    These Chocolate Cherry Cheesecake Bars are not just a treat but also a celebration of life’s little moments. With each creamy, chocolatey bite, you’ll feel a wave of joy wash over you. Whether you’re sharing them with family or enjoying a well-deserved solo snack, these bars make every occasion feel special. As a busy mom or professional, embracing the joy of baking can be a sweet escape from our hectic lives. I hope this recipe invites a little sweetness into your daily routine. So go ahead, indulge, and let the flavors bring happiness to your day!


    Print

    clock clock iconcutlery cutlery iconflag flag iconfolder folder iconinstagram instagram iconpinterest pinterest iconfacebook facebook iconprint print iconsquares squares iconheart heart iconheart solid heart solid icon

    Description

    Delicious chocolate cherry cheesecake bars that offer a creamy texture and a delightful burst of cherry flavor.


    • 1 1/2 cups graham cracker crumbs or chocolate sandwich cookie crumbs
    • 5 tablespoons unsalted butter, melted
    • 16 ounces cream cheese, softened
    • 1/2 cup granulated sugar
    • 2 large eggs
    • 1 teaspoon vanilla extract
    • 1/2 cup cherry pie filling
    • 1/2 cup semi-sweet chocolate chips

    1. Preheat the oven to 350°F (175°C). Line an 8-inch square baking pan with parchment paper, leaving an overhang on two sides.
    2. Combine graham cracker crumbs or chocolate sandwich cookie crumbs with melted butter in a bowl. Press the mixture firmly into the bottom of the prepared baking pan to form an even base.
    3. Beat softened cream cheese with granulated sugar in a large bowl until the mixture is smooth and creamy.
    4. Add eggs one at a time, mixing gently after each addition, then blend in the vanilla extract just until combined.
    5. Pour the cheesecake filling over the prepared crust and smooth the surface with a spatula.
    6. Drop spoonfuls of cherry pie filling over the cheesecake layer. Gently swirl with a knife for a marbled effect, being careful not to overmix.
    7. Sprinkle semi-sweet chocolate chips across the top, pressing them slightly into the filling if desired.
    8. Bake in the preheated oven for 30–45 minutes or until the edges are set and the center is just slightly jiggly.
    9. Remove from the oven and cool completely in the pan. Refrigerate for several hours or until fully chilled before slicing into bars.

    Notes

    • Ensure the cream cheese is fully softened for a smooth filling.
    • Chilling the bars before cutting will result in cleaner slices.
    • Feel free to use fresh cherries instead of cherry pie filling for a fresher taste.
    • Prep Time: 15 minutes
    • Cook Time: 30-45 minutes
    • Category: Dessert
    • Method: Baking
    • Cuisine: American

    Nutrition

    • Serving Size: 1 bar
    • Calories: 250
    • Sugar: 18g
    • Sodium: 200mg
    • Fat: 15g
    • Saturated Fat: 8g
    • Unsaturated Fat: 2g
    • Trans Fat: 0g
    • Carbohydrates: 28g
    • Fiber: 1g
    • Protein: 3g
    • Cholesterol: 60mg

    Sharing is caring!

  • No Bake Berry Cheesecake Bars

    No Bake Berry Cheesecake Bars


    Introduction to No Bake Berry Cheesecake Bars

    Are you searching for a delightful dessert that beats the heat and requires no baking? Look no further than these No Bake Berry Cheesecake Bars! As a busy mom myself, I know how essential it is to whip up something quick yet impressive. Nothing says “I love you” quite like a creamy cheesecake topped with vibrant berries. These bars are not only easy to make, but they’ll also bring a refreshing taste that everyone will love. So, grab your ingredients and let’s dive into this delicious adventure!

    Why You’ll Love This No Bake Berry Cheesecake Bars

    These No Bake Berry Cheesecake Bars are the ultimate treat that combines ease and flavor. Perfect for busy weeks, you can whip them up in just half an hour, letting you enjoy more time with your family. The creamy cheesecake and fresh, vibrant berries create a delicious contrast that will impress everyone who takes a bite. Stress-free and stunning, this dessert fits beautifully into every busy mom’s recipe arsenal!

    Ingredients for No Bake Berry Cheesecake Bars

    To create these heavenly No Bake Berry Cheesecake Bars, you’ll need a few essential ingredients, each playing a vital role in the flavor and texture.

    • Graham crackers form the crust, offering a buttery crunch. You can swap them for ginger snaps for a zingy twist.
    • Granulated and powdered sugar sweeten the filling and crust, balancing the tartness of the berries.
    • Unsalted butter binds the crust together, adding richness.
    • Full-fat cream cheese provides that creamy texture we all love.
    • Cold heavy cream is whipped to create lightness in the cheesecake filling.
    • Sour cream adds a slight tang, enriching the flavor.
    • Fresh lemon juice brightens the flavor and complements the berries.
    • Fresh mixed berries, like strawberries and blueberries, elevate the dessert with vibrant colors and flavors. Choose organic for the best taste!

    For exact quantities, don’t forget to check the bottom of the article. Enjoy the creative process!

    How to Make No Bake Berry Cheesecake Bars

    Now that we’ve gathered all our ingredients, it’s time to get hands-on! Making No Bake Berry Cheesecake Bars is like a fun dance in the kitchen. With each step, the anticipation builds. Let’s get to it!

    Step 1: Prepare the Berry Sauce

    Start by creating that luscious berry sauce. In a medium saucepan over medium heat, combine the fresh berries, lemon juice, sugar, vanilla, and a pinch of salt.

    As those berries heat up, you’ll hear them start to pop and sizzle, releasing their sweet juices. Stir gently and break them down with a spoon. After about ten minutes, the mixture thickens beautifully.

    Remove it from heat and let it cool for a few minutes. Then, transfer the berry mix to a blender or grab an immersion blender. Blend until silky smooth, but don’t forget to strain it through a fine sieve to get rid of those pesky seeds. This little step makes all the difference!

    Step 2: Make the Graham Cracker Crust

    Next up, let’s create that dreamy crust! In a food processor, pulse the graham crackers, sugar, and salt until fine crumbs form. It’s like making a sandy beach—sounds fun, right?

    Now, slowly drizzle in the melted unsalted butter and pulse until everything is well-combined.

    Grab a 9×9-inch baking pan and line it with parchment paper. Press the crumb mixture firmly into the bottom of the pan to create an even layer. This crust is the foundation of your dessert!

    Pop it in the freezer while we move to the next step. Just fifteen minutes will do!

    Step 3: Whip the Cream

    While the crust firms up, let’s work on that fluffy whipped cream. In a chilled mixing bowl, pour in the cold heavy cream. Using a hand mixer, beat the cream on medium speed. Start slow to prevent a whipped cream explosion!

    In just 2-3 minutes, you’ll see beautiful stiff peaks forming, resembling fluffy clouds. At this point, set it aside, but don’t forget to keep it chilled so it stays light and airy.

    Step 4: Mix the Cheesecake Filling

    In another mixing bowl, beat the softened cream cheese and powdered sugar together. You want a smooth, creamy consistency—think of velvet!

    Next, add the sour cream, vanilla extract, fresh lemon juice, and a pinch of salt. Mix until everything’s well blended. You’ll smell that delicious tang from the lemon!

    Now, gently fold in the whipped cream using a rubber spatula. Be careful here, as we don’t want to deflate that lovely fluffiness we just achieved!

    Step 5: Assemble the Dessert

    Grab that prepared crust from the freezer. Spread the cheesecake filling evenly over it using an offset spatula. It should look smooth and inviting.

    Now it’s time for the grand highlight! Drop spoonful of your berry sauce on top of the filling. Then, take a knife and gently swirl it through the cheesecake. This creates a pretty marbled effect and promises that berry flavor in every bite!

    Cover the pan with plastic wrap and let it chill in the fridge overnight or at least 8-12 hours. The wait will be worth it!

    Step 6: Chill and Serve

    Once chilled, remove the cheesecake from the fridge. Lift it out of the pan using the parchment paper. Slice it into bars, and voilà—your No Bake Berry Cheesecake Bars are ready to shine!

    Serve them chilled and watch everyone’s faces light up. Trust me; the burst of berry flavors and creamy texture will be a hit!

    Tips for Success

    • Always use room temperature cream cheese for easier blending.
    • Chill your mixing bowl and beaters before whipping the cream to enhance texture.
    • Let the berry sauce cool fully before adding it to the cheesecake to maintain creaminess.
    • Feel free to use a mix of frozen and fresh berries if fresh ones aren’t available.
    • For better cutting, run a knife under hot water before slicing.

    Equipment Needed

    • Food processor: For crushing graham crackers; a zip-lock bag and rolling pin work too.
    • Mixing bowls: A couple of medium bowls to mix fillings; a single large one can suffice as well.
    • Hand mixer: For whipping cream; a whisk can work but requires more effort.
    • Baking pan: A 9×9-inch pan is ideal; an 8×8-inch pan will also work.
    • Parchment paper: To line the pan for easy removal; non-stick spray is a good alternative.

    Variations

    • Try swapping out berries for your favorites; peaches and blackberries create a new twist!
    • For a chocolatey surprise, mix in some cocoa powder to the cheesecake filling.
    • Use honey or maple syrup instead of granulated sugar for a natural sweetener.
    • Make it gluten-free by using gluten-free graham crackers or almond flour.
    • Add a dash of cinnamon or nutmeg for a warm, cozy flavor profile.

    Serving Suggestions

    • Pair these bars with a dollop of whipped cream for an extra touch of creaminess.
    • Serve alongside fresh mint leaves for a refreshing garnish.
    • Complement with a scoop of vanilla ice cream for a decadent twist.
    • Enjoy them with a glass of iced tea or lemonade to enhance the experience.
    • For a stunning presentation, dust the top with powdered sugar before serving.

    FAQs about No Bake Berry Cheesecake Bars

    Got questions about these delightful No Bake Berry Cheesecake Bars? You’re not alone! Here are some common queries:

    How long do these bars last in the refrigerator? They can last up to five days in the fridge, making them perfect for meal prep!

    Can I freeze the bars? Absolutely! These bars freeze well for up to three months. Just wrap them tightly in plastic wrap and foil.

    What if I have dietary restrictions? For a dairy-free version, swap cream cheese and heavy cream with plant-based alternatives!

    Can I use frozen berries? Yes! Just thaw them first, and they will work beautifully in your berry sauce.

    How can I make this dessert kid-friendly? You could involve kids in making the berry sauce or even let them choose their favorite berries.

    Final Thoughts

    Making No Bake Berry Cheesecake Bars is truly a joyful experience that brings everyone together. The simple process allows for creativity and fun, making it a fantastic choice for busy lives. These bars are perfect for family gatherings, picnics, or any special occasion where you want to impress without the fuss of baking.
    With their vibrant colors and creamy texture, they’re sure to be a crowd-pleaser. So, as you gather around the table with loved ones, know that these delightful treats will not just satisfy your sweet tooth, but also create cherished memories.


    Print

    clock clock iconcutlery cutlery iconflag flag iconfolder folder iconinstagram instagram iconpinterest pinterest iconfacebook facebook iconprint print iconsquares squares iconheart heart iconheart solid heart solid icon

    Description

    No Bake Berry Cheesecake Bars are a delicious and easy dessert made with a graham cracker crust, creamy cheesecake filling, and a vibrant berry sauce.


    • 15 sheets graham crackers
    • 2 tablespoons granulated sugar
    • Pinch of salt
    • 1/2 cup melted unsalted butter
    • 1 cup cold heavy cream
    • 24 ounces full-fat cream cheese, room temperature
    • 1 1/3 cups powdered sugar
    • 1/3 cup sour cream, room temperature
    • 2 teaspoons vanilla extract
    • 1 teaspoon fresh lemon juice
    • Pinch of salt
    • 2 cups mixed fresh berries (strawberries, blueberries, raspberries)
    • 2 tablespoons fresh lemon juice
    • 1/4 cup granulated sugar
    • 1 teaspoon vanilla extract
    • Pinch of salt

    1. Combine fresh berries, lemon juice, sugar, vanilla, and salt in a saucepan over medium heat. Cook while stirring, breaking up the berries, until the mixture thickens after approximately 10 minutes.
    2. Transfer the berry mixture to a blender and blend until smooth or use an immersion blender. Pass the mixture through a sieve and discard the seeds. Cool and refrigerate.
    3. Pulse graham crackers, sugar, and salt in a food processor until finely ground. Stream in melted butter until combined. Press the crumb mixture into a 9×9-inch pan lined with parchment paper, ensuring an even layer. Freeze until firm.
    4. Beat cold heavy cream in a chilled mixing bowl with a hand mixer until stiff peaks form, about 2-3 minutes. Start slow to prevent splattering. Refrigerate.
    5. Beat cream cheese and powdered sugar together until smooth. Add sour cream, vanilla, lemon juice, and salt, mixing until combined. Fold in whipped cream gently with a rubber spatula.
    6. Spread cheesecake filling evenly over the prepared crust using an offset spatula. Drop spoonfuls of berry sauce on top and swirl gently with a knife. Cover with plastic wrap.
    7. Refrigerate overnight or for at least 8-12 hours until fully set. Slice and serve.

    Notes

    • Make sure to use room temperature ingredients for easier mixing.
    • This dessert should be prepared a day ahead for best results.
    • Feel free to use any combination of berries you prefer.
    • Prep Time: 30 minutes
    • Cook Time: 10 minutes
    • Category: Dessert
    • Method: No-Bake
    • Cuisine: American

    Nutrition

    • Serving Size: 1 bar
    • Calories: 250
    • Sugar: 15g
    • Sodium: 150mg
    • Fat: 15g
    • Saturated Fat: 9g
    • Unsaturated Fat: 3g
    • Trans Fat: 0g
    • Carbohydrates: 25g
    • Fiber: 1g
    • Protein: 3g
    • Cholesterol: 40mg

    Sharing is caring!

  • Blueberry Pie Overnight Oats

    Blueberry Pie Overnight Oats


    Introduction to Blueberry Pie Overnight Oats

    Hey there, fellow kitchen adventurers! If you’re like me, juggling a million things every day, breakfast can sometimes fall by the wayside. That’s where these delightful Blueberry Pie Overnight Oats come in to save the morning! Imagine waking up to the sweet, comforting taste of blueberry pie, all packed into a nutritious breakfast that takes just minutes to prepare. Perfect for busy moms and professionals, this recipe not only fills your belly but also warms your heart. Let’s dive into this fantastic morning treat that’s sure to impress your loved ones!

    Why You’ll Love This Blueberry Pie Overnight Oats

    Let’s be honest—life can be chaotic, and who has time for elaborate breakfasts? These Blueberry Pie Overnight Oats are a game-changer, offering a quick, no-cook solution that fits seamlessly into your busy mornings. The aromatic blend of blueberries and creamy yogurt not only pleases your palate but also packs a nutritious punch. Plus, they’re incredibly customizable, so everyone can enjoy them just the way they like!

    Ingredients for Blueberry Pie Overnight Oats

    Gathering delicious ingredients is the foundation of this Blueberry Pie Overnight Oats recipe! Here’s what you’ll need to whip up this tasty breakfast:

    • Old-fashioned rolled oats: These chewy oats are the backbone of your overnight oats. They soak up all the yummy flavors!
    • Almond milk: A creamy, dairy-free option that keeps things light and refreshing. Feel free to swap it with any plant-based milk you adore.
    • Coconut yogurt: This adds a lovely creaminess and a hint of tropical flavor. If you prefer, any non-dairy yogurt works beautifully, too.
    • Chia seeds: These tiny powerhouses soak up liquid, expand, and provide a boost of fiber and omega-3s. They’re a nutritious addition!
    • Blueberries: Fresh or frozen, these little gems bring sweetness, vibrant color, and antioxidants. They truly make the dish sing!
    • Maple syrup or raw honey: Just a touch of sweetness to enhance the flavors. Adjust the amount based on your preference for sweetness.
    • Lemon zest (optional): A pinch of lemon zest brightens up the flavor profile with a delightful citrus note. It’s a small touch that makes a big difference!
    • Granola: Your favorite blend adds the perfect crunchy finish. It’s like the finishing touch that elevates the dish to new heights!

    For exact measurements, check the bottom of the article where you can find everything listed and ready for printing.

    How to Make Blueberry Pie Overnight Oats

    Ready to create your very own Blueberry Pie Overnight Oats? Let’s roll up our sleeves and get started! This recipe is straightforward and will have your kitchen smelling like a bakery in no time. Follow these simple steps for a breakfast that not only tastes amazing but is loaded with good-for-you ingredients.

    Step 1: Prepare the Oat Mixture

    First up, grab a medium mixing bowl, and let’s combine all the soul-satisfying ingredients! Mix together one cup of old-fashioned rolled oats, one cup of almond milk, and half a cup of coconut yogurt. Add in two tablespoons of chia seeds and, for that extra zing, a pinch of lemon zest if you like. Mixing thoroughly is crucial here; it ensures every oat is coated and ready to soak up those delightful flavors!

    Step 2: Let it Rest

    Now that everything is beautifully combined, let it rest! Cover the bowl and let it sit for a few minutes. This little pause allows the oats and chia seeds to absorb the almond milk, creating that perfect creamy texture. Trust me, those few minutes make a world of difference!

    Step 3: Enhance with Banana

    Want to take your oats to the next level? Let’s add a mashed ripe banana! In a separate bowl, mash a banana until it’s nice and smooth, then stir it into your oat mixture. This adds natural sweetness and a creamy consistency that will make every spoonful a joy. Your taste buds will be thankful!

    Step 4: Fold in Blueberries

    Next, it’s blueberry time! Gently fold in one cup of fresh or frozen blueberries into the oat mix. Take your time with this step; gently coax those berries into the oats without squishing them. The burst of flavor and color they bring to the dish is not only mouthwatering but also adds valuable antioxidants!

    Step 5: Make the Blueberry Chia Compote

    Now, let’s add that charming compote! In a small saucepan over medium-low heat, combine another cup of blueberries with two tablespoons of chia seeds and two tablespoons of maple syrup or honey. A splash of lemon juice and a dash of vanilla extract are great additions too. Stir frequently, allowing it to simmer gently for about 5–7 minutes until it thickens slightly. This will create a delightful syrup that you’ll want to scoop on top!

    Step 6: Chill Overnight

    After all that hard work, it’s time for the waiting game! Cover your oat mixture and put it in the refrigerator for at least 4 to 6 hours—ideally overnight. This chilling time lets the flavors meld and ensures everything is perfectly creamy and delicious for your breakfast.

    Step 7: Final Assembly

    Are you ready for the big reveal? Take your beautifully chilled oats out of the refrigerator, give them a good stir, and then it’s time to serve! Layer a generous spoonful of your blueberry chia compote on top of each serving and finish with a sprinkle of your favorite granola. This combination not only looks stunning but adds that perfect crunch to every bite!

    Tips for Success

    • Use old-fashioned oats for the best texture; quick oats can turn mushy.
    • For creamier oats, let them soak for a full night instead of a few hours.
    • Experiment with different fruits like strawberries or raspberries for variety.
    • Store leftovers in individual jars for easy grab-and-go breakfasts.
    • Adjust sweetness by tasting—everyone’s preference is different!

    Equipment Needed

    • Medium mixing bowl: Any large bowl will do for combining ingredients.
    • Saucepan: A small one for making the blueberry chia compote; a non-stick option works great.
    • Spoon or spatula: For stirring everything together with ease.
    • Measuring cups: To ensure you get the right quantities.
    • Refrigerator: A must for chilling your delicious overnight oats!

    Variations on Blueberry Pie Overnight Oats

    • Nutty Delight: Add a tablespoon of almond or peanut butter for a creamy nutty flavor that elevates your oats.
    • Berry Blast: Swap in different berries like strawberries or raspberries for a delightful twist on this flavorful breakfast.
    • Spiced Up: Add a sprinkle of cinnamon or nutmeg to warm up the flavors and give your oats that cozy feeling.
    • Protein Power: Stir in a scoop of your favorite protein powder to boost the protein content, perfect for active mornings.
    • Granola Swap: Use flavored granola, like cinnamon raisin or coconut, to change up the taste and crunch factor.

    Serving Suggestions for Blueberry Pie Overnight Oats

    • Pair with a side of fresh fruit for a colorful and nutritious breakfast plate.
    • Complement with a glass of almond milk or your favorite plant-based drink.
    • Top with a dollop of whipped coconut cream for indulgence.
    • Serve in mason jars for a charming, on-the-go presentation.
    • Sprinkle with extra blueberries for a pop of color and flavor!

    FAQs about Blueberry Pie Overnight Oats

    Can I use gluten-free oats for this recipe?

    Absolutely! Just make sure to choose gluten-free certified oats. They provide the same awesome texture and flavor while being a safe choice for those with gluten sensitivities.

    How long can I store leftover overnight oats?

    You can keep your Blueberry Pie Overnight Oats in the refrigerator for 3–5 days. Just give them a quick stir before serving to refresh the texture!

    Can I freeze Blueberry Pie Overnight Oats?

    Yes! You can freeze them for up to 2 months. Just portion them into freezer-safe containers. When you’re ready to enjoy, thaw in the refrigerator overnight.

    What can I use instead of coconut yogurt?

    If coconut yogurt isn’t your thing, don’t worry! Any plant-based yogurt—like almond or cashew yogurt—will work wonderfully as a substitute, keeping everything creamy and delicious.

    Is it possible to make this recipe without added sweeteners?

    Of course! You can skip the maple syrup or honey entirely. The mashed banana and blueberries already lend a natural sweetness. Taste as you go and adjust if needed!

    Final Thoughts

    Creating these Blueberry Pie Overnight Oats has been a delightful journey, blending wholesome ingredients with nostalgic flavors. Every bite transports me to sun-kissed picnics, and the ease of preparing this recipe is like having a secret weapon for breakfast. This dish isn’t just about nourishment; it’s about those little moments of joy—waking to a ready-made treat that delights the senses. Whether you’re impressing friends or simply treating yourself, this recipe will make your mornings a little brighter and a lot more delicious. Embrace the day with a spoonful of happiness!


    Print

    clock clock iconcutlery cutlery iconflag flag iconfolder folder iconinstagram instagram iconpinterest pinterest iconfacebook facebook iconprint print iconsquares squares iconheart heart iconheart solid heart solid icon

    Description

    A delicious and nutritious overnight oats recipe that combines the flavors of blueberry pie with healthy ingredients, perfect for a quick breakfast.


    • 1 cup old-fashioned rolled oats or large flake oats
    • 1 cup almond milk or other plant-based milk
    • ½ cup coconut yogurt or any non-dairy yogurt
    • 2 tablespoons chia seeds
    • 1 cup blueberries (fresh or frozen)
    • 2 tablespoons maple syrup or raw honey
    • 1 lemon zest (optional)
    • ½ cup granola (your favorite blend)

    1. In a medium mixing bowl, combine 1 cup of old-fashioned rolled oats, 1 cup of almond milk, ½ cup of coconut yogurt, and 2 tablespoons of chia seeds. Add a pinch of lemon zest for a bright note. Stir well until all the ingredients are fully incorporated.
    2. Cover the bowl and let it rest for a few minutes while you prepare the next step.
    3. If you prefer a touch of natural sweetness, mash a ripe banana in a separate bowl, then stir it into the oat mixture from Step 1. Once mixed, make sure everything is combined well before moving on to the fruit.
    4. Gently fold in 1 cup of fresh blueberries into the oat mixture, ensuring they are evenly distributed throughout. Cover the bowl again and place it in the refrigerator.
    5. In a small saucepan over medium-low heat, combine 1 cup of fresh blueberries, 2 tablespoons of chia seeds, and 2 tablespoons of maple syrup (or raw honey), along with a splash of lemon juice and a dash of vanilla extract. Stir frequently.
    6. Allow the mixture to simmer gently for about 5-7 minutes, or until it thickens slightly. Remove from heat and let it cool.
    7. After the oat mixture has chilled overnight (about 4-6 hours), take it out of the refrigerator and give it a good stir.
    8. Top each serving with a generous spoonful of the blueberry chia compote and a sprinkle of your favorite granola for that perfect crunchy finish.

    Notes

    • This recipe can be made vegan by using maple syrup instead of honey.
    • You can adjust the sweetness by adding more or less maple syrup or honey.
    • Feel free to substitute different fruits for variety.
    • Prep Time: 15 minutes
    • Cook Time: 10 minutes
    • Category: Breakfast
    • Method: No-Cook
    • Cuisine: American

    Nutrition

    • Serving Size: 1 serving
    • Calories: 320
    • Sugar: 15g
    • Sodium: 150mg
    • Fat: 10g
    • Saturated Fat: 5g
    • Unsaturated Fat: 5g
    • Trans Fat: 0g
    • Carbohydrates: 50g
    • Fiber: 8g
    • Protein: 6g
    • Cholesterol: 0mg

    Sharing is caring!

  • Pumpkin Energy Balls

    Pumpkin Energy Balls


    Introduction to Pumpkin Energy Balls

    As a busy mom who constantly juggles work, kids, and everything in between, I understand the struggle of finding quick snacks that are both nutritious and delightful. That’s why I absolutely adore these Pumpkin Energy Balls! They’re a no-bake snack that come together in just 10 minutes, making them perfect for those hectic mornings or afternoon slumps. Packed with the goodness of oats and pumpkin, these little bites of joy offer a tasty pick-me-up without any guilt. Trust me, once you’ve tasted them, you’ll be eager to whip up a batch for yourself and your loved ones!

    Why You’ll Love This Pumpkin Energy Balls

    These Pumpkin Energy Balls are a total game changer for busy lives! They take only minutes to prepare and require no baking, which means less hassle in the kitchen. Plus, they’re deliciously sweet and packed with nutrients, making them a guilt-free indulgence. With just a handful of simple ingredients, you can create a snack that not only satisfies but also fuels your day. Trust me, it’s love at first bite!

    Ingredients for Pumpkin Energy Balls

    Before you dive into making these delectable Pumpkin Energy Balls, let’s gather all the essential ingredients. Each plays a crucial role in delivering flavor and nutrition. Here’s what you’ll need:

    • Rolled oats: These are the base of our energy balls, providing texture and a dose of fiber to keep you full.
    • Medjool dates: These sweet, chewy fruits bring natural sweetness and bind the ingredients together seamlessly.
    • Peanut butter or almond butter: This adds creaminess and healthy fats. Feel free to swap with sunflower seed butter for a nut-free option!
    • Pumpkin puree: The star of the show! It gives these bites a festive flavor and is packed with vitamins.
    • Vanilla extract: A splash of this aromatic essence enhances the overall flavor profile, giving a warm, inviting touch.
    • Ground cinnamon: This spice adds warmth and a deliciously cozy flavor, making each bite feel like a hug!
    • Ground ginger: It complements the cinnamon with a little kick, adding depth and dimension to the mix.
    • Ground nutmeg: Just a pinch of this fragrant spice boosts the autumn vibe of these energy balls.
    • Salt: A tiny pinch amplifies all the other flavors, balancing the sweetness perfectly.
    • Mini chocolate chips: These little indulgences provide a fun twist and a touch of extra sweetness that makes these snacks irresistible.

    For a complete list of ingredients with exact measurements, check out the bottom of the article where you can even print them out. Happy cooking!

    How to Make Pumpkin Energy Balls

    Getting into the kitchen to whip up these Pumpkin Energy Balls is a delight! Just follow these simple steps, and you’ll have a healthy, tasty snack ready in no time.

    Step 1: Gather Ingredients

    First things first, let’s gather everything you’ll need. You’ll want to have your rolled oats, medjool dates, nut butter, pumpkin puree, vanilla extract, spices, salt, and chocolate chips at the ready. Having everything prepped makes the process smoother and quicker, especially on those busy days!

    Step 2: Process the Base Ingredients

    Next, toss the rolled oats, medjool dates, nut butter, pumpkin puree, vanilla extract, cinnamon, ginger, nutmeg, and salt into the base of your food processor. Ensure everything is packed in there nice and snug. This step is crucial, my friends! Blending the ingredients allows them to bond beautifully, creating that scrumptious dough you’ve been dreaming of. Pulse until the mixture is combined well.

    Step 3: Achieve the Right Consistency

    Once you’ve blitzed the ingredients, check the consistency. You want it to be sticky and cohesive, almost like a dough that you can pinch together. If it feels too crumbly, don’t worry! Just add a touch more pumpkin puree or nut butter to get that perfect blend. The goal is to make it rollable!

    Step 4: Add Chocolate Chips

    Now, it’s time for the fun part! Transfer that delicious dough to a large bowl and fold in the mini chocolate chips. This addition brings delightful pockets of sweetness that your taste buds will cherish. Just imagine! Biting into one of those energy balls and being greeted by a burst of chocolatey goodness!

    Step 5: Roll into Balls

    Finally, scoop out small portions of the dough and roll them into 1-inch balls. I find it helpful to wet my hands a little to prevent sticking. Once you’ve rolled them out, place the energy balls on a plate or in an airtight container. These snacks are perfect for on-the-go munching and can be stored in the fridge to keep them fresh. Enjoy them straight from the fridge or at room temperature, whichever way you prefer!

    Tips for Success

    • Make sure your dates are soft and fresh for easy blending.
    • Use a high-powered food processor to achieve a silky smooth texture.
    • Monitor the dough consistency – a tacky dough ensures easy rolling.
    • Chill the energy balls in the fridge before serving for a firmer bite.
    • Tweak the spices according to your taste – don’t be shy to experiment!

    Equipment Needed

    • Food processor: Essential for blending the ingredients smoothly. A high-powered blender works too if you don’t have one.
    • Mixing bowl: A standard bowl is perfect for combining the dough and chocolate chips.
    • Measuring cups: Necessary for accuracy. Use any standard measuring cups you have on hand.
    • Baking sheet or plate: Great for placing your rolled energy balls as they chill.

    Variations of Pumpkin Energy Balls

    • Nut-Free Option: Substitute peanut or almond butter with sunflower seed butter for a nut-free snack.
    • Protein Boost: Add a scoop of your favorite protein powder to enhance the nutritional value.
    • Spiced Delight: Experiment with different spices like allspice or cardamom for a unique flavor twist.
    • Fruit Add-Ins: Toss in some dried cranberries or chopped apricots for an extra chewy texture.
    • Chocolate Lovers: Use dark chocolate chips or even drizzle melted chocolate over the energy balls for a decadent treat.

    Serving Suggestions

    • Pair these Pumpkin Energy Balls with a warm cup of tea or coffee for a cozy afternoon snack.
    • Serve them alongside a fresh fruit salad for a refreshing burst of flavor.
    • Pack them in lunchboxes as a delightful treat that your kids will love.
    • Garnish with a sprinkle of cinnamon for an extra touch of autumn flair.

    FAQs about Pumpkin Energy Balls

    As with any delightful recipe, questions are bound to pop up! Here are some frequently asked questions about these delectable Pumpkin Energy Balls.

    Can I make these Pumpkin Energy Balls nut-free?

    Absolutely! Just swap out the peanut or almond butter for sunflower seed butter. This way, you can enjoy a delicious snack without any nuts.

    How should I store my Pumpkin Energy Balls?

    To keep them fresh, store the energy balls in an airtight container in the fridge. They’ll last about a week, but trust me, they’ll vanish much faster!

    Can I freeze Pumpkin Energy Balls?

    You sure can! Just place them in a single layer on a baking sheet to freeze them individually, then transfer to a freezer bag or container. They can last up to three months in the freezer.

    What can I add for extra flavor?

    Feel free to get creative! Adding dried fruits like cranberries or coconut flakes can give your energy balls a delightful twist. You could even sprinkle in some chia seeds for added crunch.

    Are these healthy for kids?

    Yes, indeed! With wholesome ingredients, these Pumpkin Energy Balls are a perfect, nourishing snack that’s both delicious and nutritious for kids. They’ll love the taste, and you’ll love the peace of mind!

    Final Thoughts

    Whipping up these Pumpkin Energy Balls brings such joy to my busy days! They capture the essence of cozy autumn flavors while providing a nutritious boost. Every bite feels like a warm hug, making them perfect for sharing with family or enjoying during those crazy afternoons. Best of all, they require minimal effort but deliver maximum satisfaction. Whether you’re fueling up for a workout or need a quick pick-me-up, these delightful snacks have you covered. I hope they bring as much happiness to your kitchen as they do to mine. Happy snacking!


    Print

    clock clock iconcutlery cutlery iconflag flag iconfolder folder iconinstagram instagram iconpinterest pinterest iconfacebook facebook iconprint print iconsquares squares iconheart heart iconheart solid heart solid icon

    Description

    A quick and healthy no-bake snack made with oats, pumpkin, and nut butter, perfect for a boost of energy.


    • 1 + 1/2 cups rolled oats
    • 1 cup medjool dates, tightly packed (~14 dates)
    • 1/2 cup peanut butter or almond butter
    • 1/4 cup pumpkin puree, not pie filling
    • 1 tsp vanilla extract
    • 1 tsp ground cinnamon
    • 1/4 tsp ground ginger
    • 1/4 tsp ground nutmeg
    • 1/4 tsp salt
    • 3 tbsp mini chocolate chips

    1. Add oats, dates, peanut butter, pumpkin, vanilla, cinnamon, ginger, nutmeg, and salt to the base of a food processor.
    2. Process ingredients until a sticky, nearly-smooth dough forms. The dough should be pinch-able and stick together when you press it with your hands.
    3. Transfer the dough to a large bowl. Add mini chocolate chips and mix to combine.
    4. Roll dough into 1-inch balls. Enjoy!

    Notes

    • Use a food processor to ensure the ingredients blend well.
    • Store in the fridge for a longer shelf life.
    • Adjust spices according to personal preference.
    • Prep Time: 10 minutes
    • Cook Time: 0 minutes
    • Category: Snack
    • Method: No-Bake
    • Cuisine: American

    Nutrition

    • Serving Size: 1 ball
    • Calories: 150
    • Sugar: 10g
    • Sodium: 50mg
    • Fat: 7g
    • Saturated Fat: 1g
    • Unsaturated Fat: 6g
    • Trans Fat: 0g
    • Carbohydrates: 21g
    • Fiber: 3g
    • Protein: 4g
    • Cholesterol: 0mg

    Sharing is caring!

  • Crockpot Lamb Stew

    Crockpot Lamb Stew


    Introduction to Crockpot Lamb Stew

    As a busy mom, I know how challenging it is to find time to prepare hearty meals for my family. That’s where my love for Crockpot Lamb Stew comes in! This delightful dish is not just simple; it’s a warm hug in a bowl. After a long day, coming home to the inviting aroma of tender lamb simmering away is a true blessing. Whether you want to impress loved ones or just need a quick solution for a hectic weeknight, this stew is the answer. Get ready to dive into a flavorful adventure that will satisfy everyone around your dinner table!

    Why You’ll Love This Crockpot Lamb Stew

    This Crockpot Lamb Stew makes life so much easier. With minimal prep, it cooks itself while you go about your day. Plus, the flavors meld beautifully over time, creating a meal that’s rich and satisfying. Best of all, it’s comforting and wholesome, making it the perfect dish for family dinners. Trust me, your loved ones will be begging for seconds!

    Ingredients for Crockpot Lamb Stew

    Gathering the right ingredients is half the fun! For this flavorful Crockpot Lamb Stew, you’ll need a cozy mix that brings warmth to your kitchen. Here’s what you’ll need:

    • Lamb stew meat: Look for tender cuts like shoulder or leg, cubed for even cooking. It’s rich in flavor!
    • Potatoes: I love using hearty varieties like Yukon Gold or Russets. They become creamy as they cook.
    • Carrots: Sweet, sliced carrots add a lovely color and balance out the savory elements.
    • Onion: A chopped onion lends depth to the stew, making every spoonful delightful.
    • Beef broth: This serves as the stew’s flavorful base. Homemade is great, but store-bought works wonders, too!
    • Rosemary: Fresh or dried, rosemary adds a lovely earthy aroma. It complements lamb beautifully.
    • Salt and pepper: Simple seasonings, but essential for enhancing all the wonderful flavors.

    Feeling adventurous? You can toss in optional ingredients like peas or mushrooms for extra flavor! If you’re in a pinch, feel free to swap out lamb for beef for a different, yet equally delicious stew. Don’t worry if you can’t find something; this recipe is versatile! For exact quantities, check the end of the article—perfect for printing when you’re ready to cook!

    How to Make Crockpot Lamb Stew

    Now, let’s get down to the nitty-gritty of crafting this delicious Crockpot Lamb Stew. Follow these simple, step-by-step instructions, and before you know it, you’ll have a mouthwatering meal ready to serve!

    Prepare the Ingredients

    First things first, we need to prepare our ingredients! Start by cutting the lamb stew meat into bite-sized cubes. This will ensure even cooking and tenderness. Don’t worry about making them perfect; just aim for uniformity.

    Next, grab your trusty knife and chop the potatoes into small, even pieces. This will help them cook through and be beautifully creamy. Yukon Golds work like a charm for this stew!

    Finally, take those vibrant carrots and slice them into rounds. Carrots infuse sweetness into the stew and give a burst of color, lifting everyone’s spirits at the dinner table.

    Combine Ingredients in the Crockpot

    Now that everything is prepped, it’s time to combine our ingredients in the crockpot. Start by placing the cubed lamb stew meat at the bottom. It’s the star of the show, after all!

    Then add in the diced potatoes, sliced carrots, and chopped onion. Layering these ingredients helps in developing the flavors as they cook together. It’s like creating a little flavor party in your slow cooker!

    Add Seasoning and Broth

    Next, let’s amp up the flavor! Pour in the beef broth gently over the ingredients. The broth is crucial; it infuses everything with its savory goodness.

    Now sprinkle the rosemary—trust me, it brings a cozy aroma into your kitchen. Season with salt and pepper to taste. Don’t skimp! These little seasonings will elevate the entire dish.

    Set Cooking Time

    Finally, it’s time to set the magic in motion! Cover your crockpot with the lid and set it to low. Let it work its wonders for 7-8 hours. During this time, the lamb will become incredibly tender, and all the flavors will meld into a heavenly stew.

    While it’s cooking, you’ve got the perfect excuse to relax. Maybe catch a quick break or sneak in some time for yourself. You deserve it!

    Tips for Success

    • Always brown the lamb first for enhanced flavor—this step adds a rich depth to your stew.
    • Don’t rush the cooking time; low and slow makes all the difference in tenderness.
    • For a thicker stew, remove some broth, then mash a few potato pieces before serving.
    • Adding a splash of red wine can elevate the flavors wonderfully.
    • Feel free to customize with your favorite veggies!

    Equipment Needed

    • Crockpot: A slow cooker is essential for this dish, but you can also use a Dutch oven if you prefer.
    • Cutting board: A sturdy board will help you chop ingredients safely.
    • Knife: A sharp knife makes prep work a breeze and ensures even cuts.
    • Measuring cups: Needed for broths and seasonings for precise flavor.
    • Serving spoon: For ladling out that warm, delicious stew at the dinner table.

    Variations on Crockpot Lamb Stew

    • Herb Medley: Add thyme, parsley, or even oregano for a well-rounded flavor profile that brightens the dish.
    • Vegetarian Twist: Swap the lamb with hearty vegetables like lentils or chickpeas for a plant-based version.
    • Spicy Kick: Toss in a diced jalapeño or sprinkle in some red pepper flakes for a warm, spicy twist.
    • Whole Grains: Incorporate barley or quinoa about an hour before cooking ends for added texture and nutrition.
    • Sweet Potatoes: Substitute traditional potatoes with sweet potatoes for a richer flavor and a touch of sweetness.

    Serving Suggestions for Crockpot Lamb Stew

    • Crusty Bread: Serve with a slice of warm, crusty bread for dipping into that rich stew.
    • Side Salad: A fresh salad with a tangy vinaigrette adds a delightful crunch and balances the meal.
    • Wine Pairing: A robust red wine complements the flavors beautifully; try a Cabernet Sauvignon.
    • Garnish: Top with fresh herbs like parsley for a pop of color and flavor.
    • Family Style: Serve the stew right from the pot for a cozy, communal dining experience.

    FAQs about Crockpot Lamb Stew

    Curious about this amazing Crockpot Lamb Stew? Here are some common questions that might pop into your mind as you prepare this fabulous dish!

    • Can I use lamb chops instead of stew meat? Absolutely! Just ensure to cut them into bite-sized pieces. However, stew meat generally has more fat, making the stew richer.
    • What can I use instead of beef broth? If you prefer, you can substitute with chicken broth or vegetable broth for a lighter flavor.
    • Can I prepare the stew the night before? Yes! You can chop your ingredients and add them to the crockpot liner in the fridge. Just add the broth and seasonings in the morning before cooking.
    • How long will leftovers last? Your delicious leftovers can be stored in the refrigerator for up to three days. Just reheat and enjoy!
    • Can I freeze leftovers? Yes, you can! Portion the stew into airtight containers and freeze for up to three months. Thaw in the fridge before reheating.

    Final Thoughts

    Cooking this Crockpot Lamb Stew is not just about making dinner; it’s about creating moments and memories. The warm, comforting aroma fills my home, reminding me of cherished family gatherings. As we gather around the table, laughter and stories mix with the rich flavors of the stew. This recipe is a delightful way to show love through food, as it transforms a few simple ingredients into a wholesome meal. I hope you find joy in every spoonful, and your loved ones taste the warmth in your heart. Happy cooking, and enjoy the delicious adventure this stew brings!


    Print

    clock clock iconcutlery cutlery iconflag flag iconfolder folder iconinstagram instagram iconpinterest pinterest iconfacebook facebook iconprint print iconsquares squares iconheart heart iconheart solid heart solid icon

    Description

    A hearty and flavorful Crockpot Lamb Stew, perfect for family dinners.


    • 2 lbs lamb stew meat, cubed
    • 4 potatoes, diced
    • 3 carrots, sliced
    • 1 onion, chopped
    • 3 cups beef broth
    • 2 tsp rosemary
    • Salt and pepper to taste

    1. Add lamb, potatoes, carrots, and onion to the crockpot.
    2. Pour in beef broth, rosemary, salt, and pepper.
    3. Cook on low for 7-8 hours until the lamb is tender.

    Notes

    • Serve with crusty bread for a complete meal.
    • Leftovers can be refrigerated for up to 3 days.
    • Prep Time: 15 minutes
    • Cook Time: 7-8 hours
    • Category: Main Course
    • Method: Slow Cooking
    • Cuisine: American

    Nutrition

    • Serving Size: 1 cup
    • Calories: 350
    • Sugar: 2g
    • Sodium: 800mg
    • Fat: 15g
    • Saturated Fat: 6g
    • Unsaturated Fat: 7g
    • Trans Fat: 0g
    • Carbohydrates: 30g
    • Fiber: 5g
    • Protein: 25g
    • Cholesterol: 90mg

    Sharing is caring!

  • Easy Pumpkin Maple Crescent Bites

    Easy Pumpkin Maple Crescent Bites


    Introduction to Easy Pumpkin Maple Crescent Bites

    Hey there, fellow food lovers! When life gets busy and the chaos of everyday routines creeps in, I’m always on the lookout for that perfect recipe. Enter my Easy Pumpkin Maple Crescent Bites. These little delights are the epitome of cozy comfort food, wrapped up in a flaky crescent roll.

    They’re a quick solution for those days when you need something sweet but don’t have hours to spare. Trust me, they’ll impress your loved ones and give your home that warm, autumn aroma that simply beckons everyone to the kitchen!

    Why You’ll Love This Easy Pumpkin Maple Crescent Bites

    These Easy Pumpkin Maple Crescent Bites are a winner in every way! They come together in just 30 minutes, making them perfect for busy days. The delightful spice blend combined with creamy pumpkin gives an irresistible flavor that everyone will love. Plus, they’re equally suitable for family gatherings or a cozy night in. Trust me, these bites will be the highlight of your dessert table!

    Ingredients for Easy Pumpkin Maple Crescent Bites

    Gathering the right ingredients is the first step to culinary success! Here’s what you’ll need for these delightful Easy Pumpkin Maple Crescent Bites:

    • Crescent Rolls: The foundation of this recipe; they create a flaky, buttery exterior that cradles all the deliciousness inside.
    • Canned Pumpkin Puree: This is the star ingredient! It gives an earthy, sweet flavor and creamy texture. Make sure to get pure pumpkin, not pumpkin pie filling!
    • Brown Sugar: Adding a touch of natural sweetness with hints of caramel flavor that beautifully complements the spices.
    • Ground Cinnamon: This warm spice infuses everything with autumn vibes—think cozy evenings by the fire.
    • Ground Ginger: A dash of this spice brings a zing to the mixture, enhancing that cheerful fall flavor profile.
    • Ground Nutmeg: A pinch of nutmeg adds depth; its rich, warm qualities work wonders with pumpkin dishes.
    • Ground Cloves: Another warm spice that’s potent in flavor—just a little goes a long way in elevating the overall taste.
    • Vanilla Extract: This little dash of magic amplifies the sweetness and adds an extra layer of flavor complexity.
    • Powdered Sugar: Used for the maple glaze that transforms these bites from delicious to utterly irresistible!
    • Pure Maple Syrup: Oh, the sweet, rich goodness! This syrup provides a classic flavor that screams autumn.
    • Milk: Just a splash helps achieve the perfect consistency for the glaze. You can adjust this according to your desired thickness.

    All the ingredient measurements you need for the exact quantities in your recipe are neatly tucked away at the bottom of the article, ready for your printing adventure!

    How to Make Easy Pumpkin Maple Crescent Bites

    Let’s dive into the exciting world of making these Easy Pumpkin Maple Crescent Bites! Follow along with these simple steps to create mouthwatering treats that are sure to impress. Ready? Let’s get started!

    Step 1: Preheat and Prepare

    First things first, preheat your oven to 375°F. This step ensures your bites bake evenly. While that’s happening, line a baking sheet with parchment paper or a silicone baking mat. This will prevent sticking and make clean-up a breeze.

    Step 2: Make the Pumpkin Filling

    Next, in a small bowl, grab your canned pumpkin puree and add the brown sugar, cinnamon, ginger, nutmeg, cloves, and vanilla extract. Mix it all together until it becomes a smooth and creamy filling. The aroma wafting from this mixture will make your kitchen feel like a cozy cafe! You want a perfectly blended texture, so take your time. This filling will add delightful spice and sweetness to each bite.

    Step 3: Prepare the Crescent Rolls

    Unroll the crescent dough while keeping it on its original parchment. Gently separate the triangles—there will be eight in total. At the wide end of each triangle, place a generous teaspoon of that delicious pumpkin filling. Roll each triangle from the wide end towards the point, embracing the filling inside. The rolling creates a pastry pocket that encases all the gooey goodness!

    Step 4: Bake to Perfection

    Now it’s time to bake! Place the filled crescent rolls on your prepared baking sheet, giving them a little space to expand. Bake them in your preheated oven for about 12 to 15 minutes until they turn golden brown and puff up ever so slightly. Keep an eye on them, as the smell will make you want to dive right in! Once out of the oven, allow them to cool slightly on the baking sheet before glazing.

    Step 5: Whip Up the Maple Glaze

    In a small bowl, whisk together the powdered sugar, pure maple syrup, and just enough milk to create a smooth, pourable consistency. Start with a teaspoon of milk and gradually mix in more if needed. This glaze should be thick yet drizzly—perfect for coating those warm crescent bites. Trust me, this is the icing on the cake, or in this case, on the crescent bites!

    Step 6: Drizzle and Serve

    Finally, drizzle that luscious maple glaze generously over the warm crescent bites. This adds the perfect finishing touch! Serve them warm for the ultimate experience and watch as everyone lights up with joy. Enjoy the rewards of your hard work!

    Tips for Success

    • Make sure to really mix the pumpkin filling for even flavor distribution.
    • If you want a thicker glaze, simply add less milk. Adjust until it’s to your liking!
    • For a touch of creativity, sprinkle some chopped pecans or walnuts into the filling for added crunch.
    • Do not overcrowd the baking sheet; it helps with even baking.
    • Serve immediately for the best flavor and soft texture!

    Equipment Needed

    • Baking Sheet: A standard sheet pan will work, but a coated or non-stick one is ideal for easy release.
    • Parchment Paper or Silicone Baking Mat: Either will prevent sticking and make cleanup simple.
    • Mixing Bowls: A medium bowl for the filling and a small one for the glaze.
    • Whisk or Fork: Perfect for blending the glaze until smooth.
    • Measuring Spoons: To ensure accurate measurements, particularly for the spices and glaze ingredients.

    Variations on Easy Pumpkin Maple Crescent Bites

    • Add Chocolate Chips: For a decadent twist, fold in a handful of semi-sweet or dark chocolate chips into the pumpkin filling for a delightful surprise!
    • Swap the Maple Glaze: Instead of a maple glaze, try a cream cheese frosting for a richer flavor that will have your guests raving!
    • Make It Gluten-Free: Use gluten-free crescent roll dough available at many grocery stores to make this a gluten-free treat!
    • Seasonal Spice Mix: Experiment with pumpkin spice mix instead of individual spices for a more pronounced seasonal flavor.
    • Add Nuts: Toss in some finely chopped pecans or walnuts into the filling for added crunch and texture.
    • Vegan Option: Use vegan crescent rolls and substitute maple syrup with a vegan-friendly sweetener for a delightful plant-based version.

    Serving Suggestions

    • Pair with Coffee: Enjoy these bites alongside a warm cup of coffee or chai tea for a delightful afternoon treat.
    • Festive Platter: Arrange them on a colorful platter with fall-themed decorations for a beautiful presentation at gatherings!
    • Ice Cream: Serve with a scoop of vanilla or cinnamon ice cream for a cozy dessert experience.
    • Fresh Fruit: A side of sliced apples or pears adds a refreshing contrast to the sweet bites.

    FAQs about Easy Pumpkin Maple Crescent Bites

    Curious minds often have questions! Here are some common inquiries about these delightful Easy Pumpkin Maple Crescent Bites that I hope will help you in your baking adventure!

    Can I make these Easy Pumpkin Maple Crescent Bites ahead of time?

    Absolutely! You can prepare the pumpkin filling in advance and store it in the refrigerator for up to two days. Assemble the bites just before baking for the freshest taste!

    What can I use instead of crescent rolls?

    If you don’t have crescent rolls, puff pastry sheets are a great alternative! Just cut them into triangles and follow the same filling instructions for a delicious similar treat.

    Can I freeze these bites after baking?

    Yes! Once they’ve cooled, place them in an airtight container or freezer bag. They can be frozen for up to a month. Just reheat in the oven for a few minutes when you’re ready to enjoy them.

    Are these crescent bites suitable for dietary restrictions?

    They can be easily adapted! For a gluten-free version, look for gluten-free crescent roll dough. Vegan-friendly adaptations can be made using plant-based ingredients!

    How should I store leftovers?

    Store any leftovers in an airtight container at room temperature for up to two days. If they last longer, transfer them to the fridge to maintain freshness!

    Final Thoughts

    Making Easy Pumpkin Maple Crescent Bites is not just about baking; it’s about bringing warmth and joy into your home. These delightful pieces of heaven provide a cozy excuse to gather around the table, sharing stories and laughter with loved ones. Each bite filled with spiced pumpkin and topped with sweet maple glaze is a testament to the comfort of autumn flavors. Whether it’s a busy weekday or a festive gathering, these treats add a touch of magic that will leave everyone asking for seconds. So, roll up your sleeves, and let’s create some unforgettable memories together!


    Print

    clock clock iconcutlery cutlery iconflag flag iconfolder folder iconinstagram instagram iconpinterest pinterest iconfacebook facebook iconprint print iconsquares squares iconheart heart iconheart solid heart solid icon

    Description

    Easy Pumpkin Maple Crescent Bites are delicious bites made with crescent rolls filled with a spiced pumpkin mixture and topped with a sweet maple glaze.


    • 1 can (8 ounces) refrigerated crescent rolls
    • 1/2 cup canned pumpkin puree
    • 2 tablespoons packed brown sugar
    • 1 teaspoon ground cinnamon
    • 1/2 teaspoon ground ginger
    • 1/4 teaspoon ground nutmeg
    • 1/4 teaspoon ground cloves
    • 1 teaspoon vanilla extract
    • 1/2 cup powdered sugar
    • 2 tablespoons pure maple syrup
    • 1 to 2 teaspoons milk, for consistency

    1. Preheat oven to 375°F. Line a baking sheet with parchment paper or a silicone baking mat.
    2. In a small bowl, thoroughly combine pumpkin puree, brown sugar, cinnamon, ginger, nutmeg, cloves, and vanilla extract until fully blended.
    3. Unroll the crescent dough and separate into 8 triangles. Place a generous teaspoon of pumpkin filling on the wide end of each triangle. Gently roll each triangle from the wide end toward the point.
    4. Arrange filled crescents on the prepared baking sheet. Bake in the preheated oven for 12 to 15 minutes, until golden brown. Allow to cool slightly on the baking sheet.
    5. In a small bowl, whisk together powdered sugar, maple syrup, and just enough milk to achieve a smooth, pourable consistency.
    6. Drizzle maple glaze generously over the warm crescents before serving. Enjoy while fresh and warm.

    Notes

    • Ensure the pumpkin puree is well mixed for even flavor.
    • You can adjust the amount of milk in the glaze to achieve your desired consistency.
    • Prep Time: 15 minutes
    • Cook Time: 15 minutes
    • Category: Dessert
    • Method: Baking
    • Cuisine: American

    Nutrition

    • Serving Size: 1 bite
    • Calories: 150
    • Sugar: 10g
    • Sodium: 150mg
    • Fat: 5g
    • Saturated Fat: 1g
    • Unsaturated Fat: 4g
    • Trans Fat: 0g
    • Carbohydrates: 22g
    • Fiber: 1g
    • Protein: 2g
    • Cholesterol: 0mg

    Sharing is caring!