Category: Uncategorized

  • Teriyaki Chicken Foil Packet

    Teriyaki Chicken Foil Packet


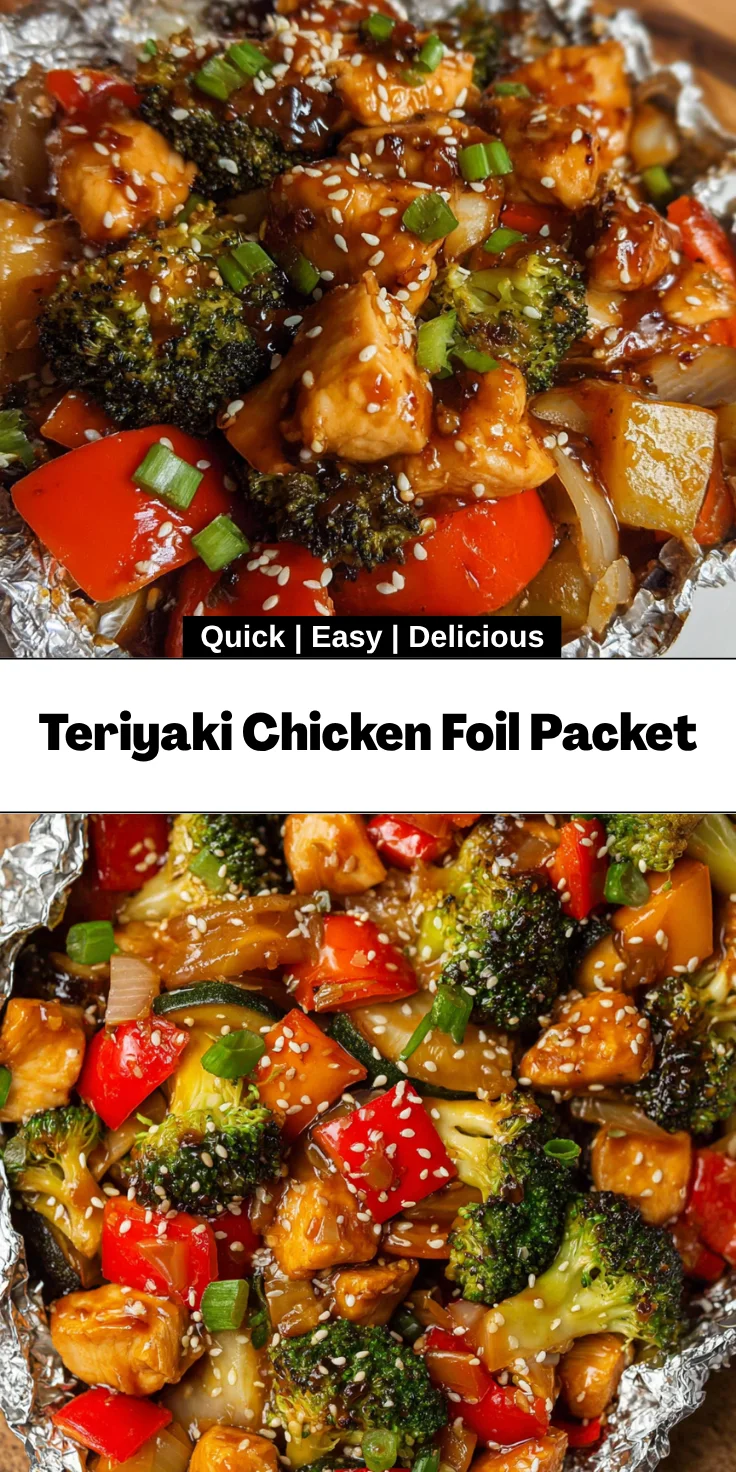
    Introduction to Teriyaki Chicken Foil Packet

    Are you looking for a meal that’s as easy as it is delicious? Welcome to my world of the Teriyaki Chicken Foil Packet! As a busy mom, I totally understand how hectic our lives can get. Between work, school, and everything in between, finding time to cook can feel like a major hurdle.

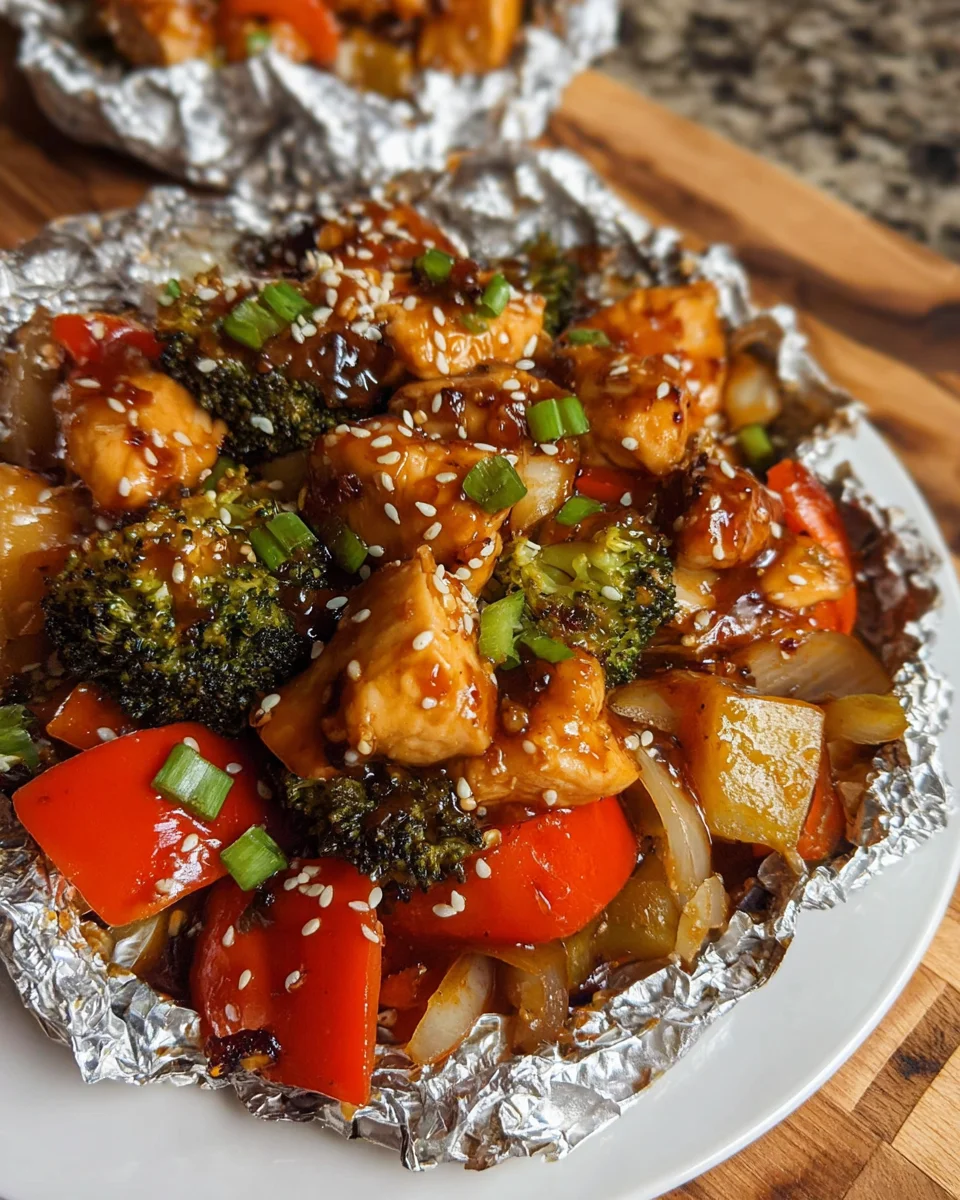
    This delightful foil packet recipe is here to save the day! It’s bursting with flavor, requires minimal cleanup, and can be on the table in just 22 minutes. Trust me, you’ll relish every bite—making family dinners a breeze!

    Why You’ll Love This Teriyaki Chicken Foil Packet

    This Teriyaki Chicken Foil Packet is the superhero of weeknight dinners. It’s not just about how quickly it comes together; it’s also super flavorful and satisfying.

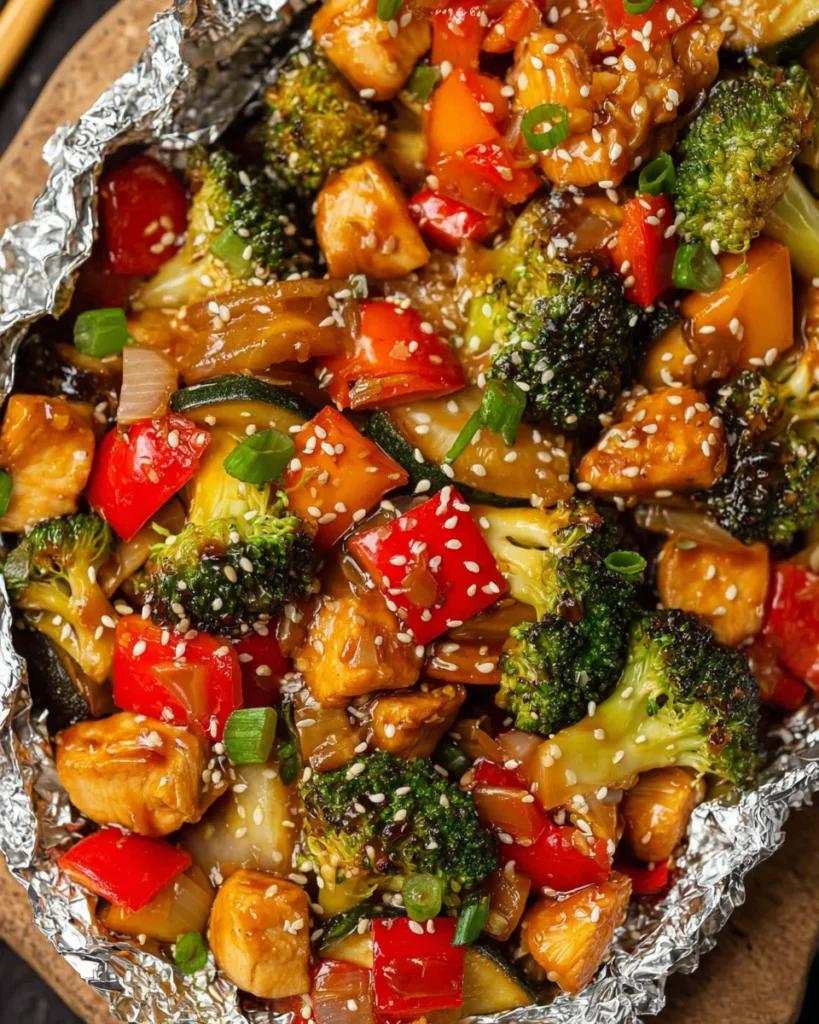
    Picture this: delicious chicken, crisp veggies, and a sweet-savory teriyaki sauce—all wrapped up in a neat little packet! Plus, there’s minimal cleanup involved, which means more time for you to unwind after a busy day. Trust me, your taste buds will thank you!

    Ingredients for Teriyaki Chicken Foil Packet

    Gathering the right ingredients is half the fun! Here’s what you’ll need for this mouth-watering Teriyaki Chicken Foil Packet.

    • Boneless Skinless Chicken Breasts: Dice them into bite-sized pieces for quick cooking. They’re lean and protein-packed!
    • Bell Peppers: Use any color you like—red, yellow, or green. They add a delightful crunch and vibrant color.
    • Onion: A small onion adds depth and sweetness to the dish. You can use yellow or red for different flavors.
    • Broccoli Florets: These little green trees not only look cute but are loaded with nutrients. Plus, they cook quickly!
    • Sugar Snap Peas: Sweet and crispy, they’re perfect for this meal. If you can’t find them, snow peas work just as well.
    • Brown Sugar: This gives the sauce that delightful caramel flavor. A touch of sweetness balances out the saltiness of the soy sauce.
    • Low Sodium Soy Sauce: It’s key for that savory umami taste. Opt for low sodium to keep it healthier.
    • Rice Vinegar: This adds a hint of tanginess to the sauce. If you don’t have rice vinegar, regular vinegar can work, but it might change the flavor a bit.
    • Honey: A natural sweetener, it enhances the sauce and adds richness.
    • Minced Garlic: Fresh garlic brings an aromatic punch to the dish. Garlic powder can be a quick substitute if you’re in a pinch.
    • Ground Ginger: A little kick of ginger adds warmth and depth. Fresh ginger is an awesome swap if you have it on hand!
    • Pepper: This simple seasoning rounds out the flavors. You can use fresh cracked pepper for more intensity.
    • Cornstarch: It acts as a thickener for the sauce, giving it that glossy finish we love in teriyaki. If you’re avoiding cornstarch, a little flour can also do the trick.
    • Sesame Seeds: These are for garnish—nutty and pretty! You can toast them lightly for added flavor.
    • Green Onions: Chopped for topping, they add a fresh crunch and a pop of color.

    You’ll find specific measurements at the end of the article, ready for printing. With these ingredients, you’ll create a delightful meal that everyone will love!

    How to Make Teriyaki Chicken Foil Packet

    Step 1: Preheat the Grill and Prepare Foil

    Kick things off by preheating your grill to medium-high heat, around 400 degrees F. This is the sweet spot for cooking. While the grill warms up, cut four squares of aluminum foil, each about 12×12 inches. Think of these as little cooking vessels for all those flavors! It’s like wrapping up a cozy present, only this time, it’s dinner that’s waiting to be unwrapped.

    Step 2: Mix the Sauce

    In a large mixing bowl, toss together all the sauce ingredients—brown sugar, soy sauce, rice vinegar, honey, minced garlic, ground ginger, and pepper. Whisk them until well combined. This sweet-savory blend is the backbone of your teriyaki chicken foil packet. Now, remember to reserve half of this sauce in a saucepan for later. This will give your dish a second boost of flavor!

    Step 3: Combine Chicken and Vegetables

    Now it’s time to add those diced chicken breasts and your vibrant veggies: bell peppers, onion, broccoli, and sugar snap peas to the mixing bowl. Stir gently but thoroughly, letting the sauce hug every piece of chicken and veggie. I love watching the colors meld together; it’s like a mini rainbow in a bowl! This step is where the magic begins to happen.

    Step 4: Prepare the Foil Packets

    Divide the chicken-vegetable mixture evenly among the four squares of foil. Here’s a tip: make sure not to overfill—less is more when folding them up! Just gather the edges, fold them together tightly, and create neat packets. Think of these packets as little gifts of flavor waiting to be opened on the grill.

    Step 5: Grill the Packets

    Place those beautifully wrapped foil packets directly on the grill. Let them sizzle away for about 5-6 minutes. Then, flip them over and continue cooking for another 5-6 minutes. Keep an eye on them, and make sure the chicken reaches an internal temperature of 165 degrees F. That’s key for safe eating, plus it ensures the chicken is juicy and tender!

    Step 6: Prepare the Sauce for Serving

    While the packets are sizzling away, take that reserved sauce you set aside earlier. Heat it gently in the saucepan over medium heat. In a separate small bowl, whisk the cornstarch with a little water until it’s dissolved, then mix this into the saucepan. This step thickens your sauce, creating that lovely glossy finish. Drizzle it over your finished packets for that extra kick of flavor!

    Tips for Success

    • Experiment with your veggies! Feel free to swap in favorites like zucchini or asparagus.
    • Don’t rush the grilling. Ensuring the chicken is cooked through guarantees tenderness.
    • Use heavy-duty foil for easy handling and to prevent any leaks during cooking.
    • Double the sauce if you love extra flavor—it’s perfect for drizzling!
    • Try making these packets ahead of time for a quick weeknight dinner!

    Equipment Needed

    • Grill: A traditional outdoor grill works beautifully, but a stovetop grill pan is a great alternative!
    • Aluminum Foil: Regular or heavy-duty foil is essential for creating those neat packets.
    • Mixing Bowl: Any large bowl will do for mixing the sauce and ingredients together.
    • Whisk: Perfect for combining your sauce ingredients.
    • Meat Thermometer: Ensures your chicken is cooked to the safe internal temperature of 165°F.

    Variations of Teriyaki Chicken Foil Packet

    • Vegetarian Option: Substitute chicken with firm tofu or tempeh. They soak up the teriyaki sauce brilliantly!
    • Seafood Delight: Use shrimp or fish fillets for a lighter twist. Just adjust cooking time as seafood cooks faster!
    • Spicy Kick: Add sliced jalapeños or a dash of sriracha to the sauce for some heat!
    • Low-Carb Version: Swap out sugar snap peas and starchy vegetables for zucchini or mushrooms for a keto-friendly meal.
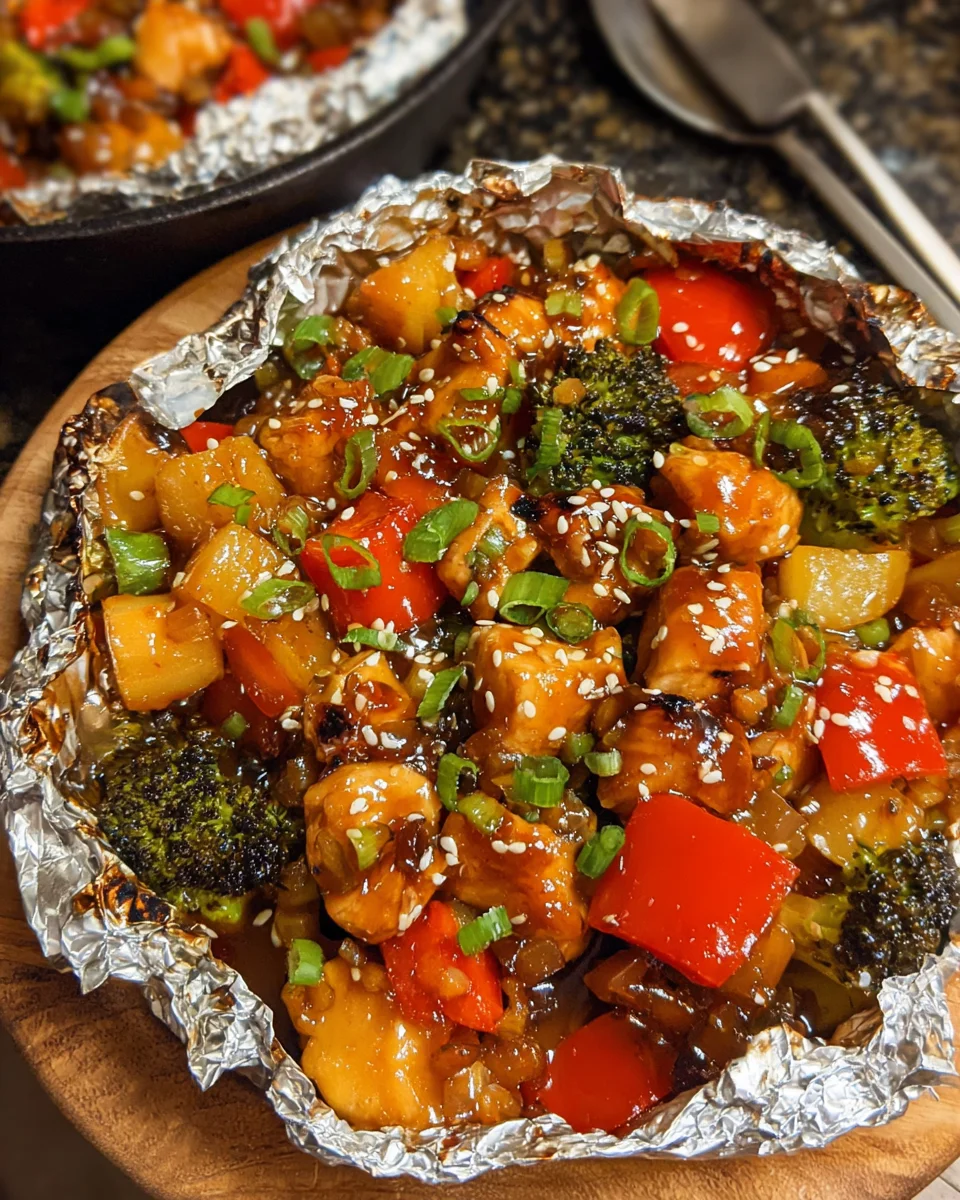
    • Sweet Pineapple Addition: Toss in fresh pineapple chunks for a tropical, fruity flavor that pairs beautifully with the teriyaki.

    Serving Suggestions for Teriyaki Chicken Foil Packet

    • Rice or Quinoa: Serve over fluffy rice or nutty quinoa to soak up that delicious sauce.
    • Chilled Sides: Pair with a refreshing cucumber salad or sesame coleslaw for a crunchy contrast.
    • Drink Pairing: Enjoy alongside a light iced tea or a crisp white wine to complement the flavors.
    • Presentation: Serve the packets directly on plates for a fun reveal, garnished with extra sesame seeds and green onions.

    FAQs about Teriyaki Chicken Foil Packet

    Can I use frozen chicken for this recipe?

    Absolutely! Just make sure to adjust the cooking time. Frozen chicken might need an extra few minutes on the grill. Ensure the internal temperature still hits 165 degrees F for safety.

    What if I don’t have a grill?

    No worries! You can bake these teriyaki chicken foil packets in your oven at 400 degrees F. Just place them on a baking sheet and cook according to the same timeframe. It’s just as delicious!

    How can I ensure my chicken stays juicy?

    Marinating the chicken in the sauce longer before cooking can help. Also, make sure not to overcook it on the grill. Using a meat thermometer is your best friend here!

    What are some good side dishes to serve with this meal?

    Serve this tasty dish with jasmine rice, a simple salad, or steamed dumplings. Each side pairs wonderfully with the flavors of your teriyaki chicken foil packet.

    Can I prepare these packets in advance?

    Yes, you can prep them a few hours ahead of time! Just store them in the fridge until you’re ready to grill. It’s a fantastic time-saver for busy nights!

    Final Thoughts

    The Teriyaki Chicken Foil Packet is more than just a meal; it’s a delightful culinary adventure wrapped in convenient simplicity. I cherish those moments when my family gathers around, excited to open their little packets of joy. Each bite bursts with flavors that create smiles and spark joy at the dinner table.

    This recipe turns a hectic evening into a special occasion filled with laughter and warmth. I hope you find as much joy in preparing and sharing this easy dish as I do. After all, nothing beats a quick, delicious meal that brings everyone together!


    Print

    clock clock iconcutlery cutlery iconflag flag iconfolder folder iconinstagram instagram iconpinterest pinterest iconfacebook facebook iconprint print iconsquares squares iconheart heart iconheart solid heart solid icon

    Description

    A quick and delicious teriyaki chicken foil packet recipe that’s perfect for grilling.


    • 4 Boneless Skinless Chicken Breasts diced into 1 inch pieces
    • 2 Bell Peppers diced
    • 1 small Onion diced
    • 2 cups Broccoli Florets
    • 1 cup Sugar Snap Peas
    • For the Sauce:
    • ¼ cup Brown Sugar
    • ½ cup Low Sodium Soy Sauce
    • ¼ cup Rice Vinegar
    • ¼ cup Honey
    • 2 teaspoons Minced Garlic
    • ½ teaspoon Ground Ginger
    • 1 teaspoon Pepper
    • 1 Tablespoon Cornstarch
    • For the Topping:
    • 2 Tablespoons Sesame Seeds
    • 2 Stalks Green Onions diced

    1. Preheat a grill over medium high heat (approximately 400 degrees F) and set aside 4 12X12 inch squares of foil.
    2. In a large mixing bowl, add in all the sauce ingredients except for the cornstarch. Whisk to thoroughly combine all the ingredients and then transfer half of the sauce to a small saucepan and leave the rest in the mixing bowl.
    3. Add in the chicken and vegetables to the large mixing bowl. Stir to coat it all with the sauce.
    4. Then distribute the mixture evenly between the pieces of foil and fold up the ends to create a foil pack.
    5. Place the foil packets on the grill. Cook for 5-6 minutes. Then flip the packets and cook for 5-6 more minutes until the chicken is cooked through (internal temperature of 165 degrees F).
    6. While the foil packets are cooking, heat the remaining sauce in the saucepan over medium heat. Whisk the cornstarch with a small amount of water in a small bowl until the cornstarch is dissolved and whisk this mixture into the saucepan.
    7. Brush the extract sauce on the chicken and veggies when serving and top them with the sesame seeds and diced green onions.

    Notes

    • Ensure the chicken reaches an internal temperature of 165 degrees F for safe consumption.
    • Feel free to substitute any of the vegetables based on your preference.
    • This recipe can also be baked in the oven instead of grilling.
    • Prep Time: 10 minutes
    • Cook Time: 12 minutes
    • Category: Main Dish
    • Method: Grilling
    • Cuisine: Asian

    Nutrition

    • Serving Size: 1 packet
    • Calories: 300
    • Sugar: 15g
    • Sodium: 600mg
    • Fat: 6g
    • Saturated Fat: 1g
    • Unsaturated Fat: 5g
    • Trans Fat: 0g
    • Carbohydrates: 35g
    • Fiber: 4g
    • Protein: 30g
    • Cholesterol: 70mg

    Sharing is caring!

  • Patriotic Funfetti Cake

    Patriotic Funfetti Cake


    Introduction to Patriotic Funfetti Cake

    There’s a certain magic in bringing people together over a beautiful dessert. The Patriotic Funfetti Cake is my go-to when I want to spread joy and celebrate holidays with family and friends. With its vibrant colors and sweet flavor, it’s an absolute showstopper. I remember the first time I baked it for a Fourth of July gathering, and faces lit up with delight. This cake isn’t just food; it’s a festive tradition that creates lasting memories. If you’re looking for a quick, delicious treat to reflect your patriotic spirit, you’ve hit the jackpot!

    Why You’ll Love This Patriotic Funfetti Cake

    This Patriotic Funfetti Cake is not just a treat; it’s a celebration on a plate. It’s incredibly easy to whip up, requiring just a few simple steps. The vibrant sprinkles give it that festive flair, making it suitable for any holiday gathering. Plus, the flavor is pure bliss—light, fluffy, and bursting with sweetness! Your family and friends will adore this delicious addition to their celebrations!

    Ingredients for Patriotic Funfetti Cake

    When it comes to baking, using quality ingredients makes all the difference. Here’s what you’ll need for your Patriotic Funfetti Cake.

    • All-purpose flour: The foundation of our cake. It provides structure and a tender crumb.
    • Baking powder: This leavening agent helps our cake rise to fluffy perfection. Freshness matters, so check the date!
    • Fine sea salt: Just a pinch brings out the flavors and balances sweetness.
    • Baking soda: Another leavening agent, it works with acidity for a light texture.
    • Unsalted butter: Adds richness. Room temperature butter is perfect for creaming with sugar.
    • Sugar: Granulated sugar sweetens our cake and contributes to its fluffy texture.
    • Egg whites: They provide structure and help the cake rise. Ensure they’re at room temperature for easy incorporation.
    • Whole milk: Brings moisture and richness. Room temperature helps blend better with other ingredients.
    • Vanilla extract: Infuses the cake with a warm, sweet flavor. Pure extract is best for that authentic taste.
    • Sour cream: It adds moisture and a subtle tang that balances the sweetness.
    • Patriotic sprinkles: The star of the show! They not only add color but also a bit of fun texture.
    • Powdered sugar: Essential for a light, creamy frosting. It sweetens without adding graininess.
    • Sea salt: A tiny pinch enhances the sweetness of the frosting.
    • More sprinkles: For garnish, if you wish, to make your cake even more festive.

    Don’t worry if you can’t find all the ingredients right away. Each element can be swapped! For example, Greek yogurt can stand in for sour cream, or you could even try almond extract in place of vanilla for a unique twist.

    You can find the exact quantities of all ingredients at the bottom of the article for easy printing. Happy baking!

    How to Make Patriotic Funfetti Cake

    Baking this Patriotic Funfetti Cake is a fun adventure! Here’s how to create this colorful and festive dessert step by step. Let’s get started!

    Step 1: Preheat and Prepare the Baking Dish

    First things first. Preheat your oven to 350°F. While that heats up, grab a 9×13-inch baking dish and spray it with baking spray to keep your cake from sticking. It’s like giving your cake a cozy non-stick blanket!

    Step 2: Mix the Dry Ingredients

    In a medium-sized bowl, whisk together the all-purpose flour, baking powder, sea salt, and baking soda. This step ensures the leavening agents are evenly distributed. It’s crucial for a cake that rises evenly. No one wants a lopsided cake!

    Step 3: Cream Butter and Sugar

    In your stand mixer bowl, cream the room temperature butter and granulated sugar together for about three minutes. This mixture should become light and fluffy—you want a cloud for your cake’s base! Scraping down the sides of the bowl helps combine all that buttery goodness.

    Step 4: Add Egg Whites Gradually

    Now, let’s add the egg whites. Toss them in three batches, mixing well after each addition. This gradual incorporation gives the cake its light texture. The egg whites are like little air pumps, helping your cake rise beautifully!

    Step 5: Blend in Milk and Vanilla

    Next, slowly stir in the whole milk and vanilla extract. Mix until everything is smooth. This liquid goodness adds moisture and flavor. You want your batter to have a beautiful silky texture, almost like a warm hug!

    Step 6: Combine Wet and Dry Ingredients

    Now it’s time to bring the mixtures together. Add half of the dry flour mix to the wet batter and combine until you can’t see any flour. Repeat with half of the sour cream. This layering technique keeps your batter light and fluffy. Repeat until you’ve added all the dry ingredients and the rest of the sour cream.

    Step 7: Stir in the Patriotic Sprinkles

    Here comes the fun part! Gently fold in those vibrant patriotic sprinkles. Imagine the smiles as you see those joyful colors mix into the batter. It’s a party in the bowl!

    Step 8: Bake the Cake

    Pour your wonderfully colorful batter into the prepared baking dish. Smooth the top with a spatula for even baking. Pop it in the oven and bake for 35-42 minutes. To check for doneness, insert a toothpick into the center; it should come out clean. Don’t peek too often, or your cake might pout!

    Step 9: Make the Frosting

    As the cake is cooling, let’s whip up the frosting. In a large bowl, beat the softened butter until it’s smooth. Gradually add the powdered sugar, one cup at a time, mixing well after each addition. Then, add in the salt, milk, and vanilla extract, mixing until well combined. Whip this frosting on medium-high speed for about three minutes for a fluffy texture!

    Step 10: Frost and Garnish the Cake

    Once the cake is completely cool, it’s time to frost! Generously spread the fluffy frosting on top. If you’re feeling adventurous, pile on more sprinkles for that festive touch. A well-garnished cake is always a crowd-pleaser!

    Tips for Success

    • Always use room temperature ingredients for better mixing and texture.
    • Don’t rush the creaming process; it’s crucial for a light cake.
    • Check your baking powder’s freshness to ensure a good rise.
    • Let the cake cool completely before frosting to avoid melting.
    • Use an offset spatula for smooth frosting application.

    Equipment Needed

    • Stand mixer: For effortless mixing. A hand mixer will work if you don’t have one.
    • 9×13-inch baking dish: Essential for our cake. Any similar-sized dish can work in a pinch.
    • Mixing bowls: You’ll need a couple for combining dry and wet ingredients.
    • Spatula: Great for scraping down the sides and spreading frosting.
    • Whisk: Ideal for mixing dry ingredients evenly.

    Variations of Patriotic Funfetti Cake

    • Gluten-Free Option: Substitute all-purpose flour with a gluten-free blend to cater to gluten sensitivities.
    • Swap the Sprinkles: Use seasonal or themed sprinkles to match different holidays or celebrations throughout the year.
    • Fruit Addition: Incorporate fresh berries, like blueberries or strawberries, for a burst of natural sweetness and flavor.
    • Chocolate Twist: Mix in some mini chocolate chips for a decadent chocolate version of the funfetti cake.
    • Dairy-Free Alternative: Opt for dairy-free butter and yogurt to make a delightful dairy-free treat!

    Serving Suggestions for Patriotic Funfetti Cake

    • Ice Cream: Serve slices with a scoop of vanilla or strawberry ice cream for a delightful combination.
    • Fresh Berries: A side of fresh strawberries or blueberries adds a refreshing contrast to the sweetness.
    • Festive Plates: Use themed plates for a fun presentation that complements the cake’s festive colors.
    • Lemonade: Pair it with a glass of refreshing lemonade for a perfect summer treat.
    • Whipped Cream: A dollop of whipped cream on top can enhance flavor and presentation!

    FAQs about Patriotic Funfetti Cake

    Can I make the Patriotic Funfetti Cake ahead of time?
    Yes! You can bake the cake a day in advance. Just make sure to store it in an airtight container once it’s completely cool. Frost it on the day you plan to serve it for the freshest taste.

    Can I use egg substitutes for this cake?
    Absolutely! If you’re avoiding eggs, you can substitute the egg whites with 1/4 cup of unsweetened applesauce for each egg white. This will maintain moisture and keep your cake fluffy!

    How can I store leftovers?
    Store any leftovers in an airtight container at room temperature for up to three days. If you live in a humid climate, consider refrigerating them to maintain freshness.

    What occasions are best to serve this cake?
    This Patriotic Funfetti Cake is perfect for any festive occasion! From July 4th celebrations to Memorial Day and Labor Day picnics, it’s a delightful way to add some color to your gatherings!

    Can I freeze the cake?
    Yes! You can freeze the cake for up to three months. Wrap it tightly in plastic wrap, and then in aluminum foil. Thaw it in the fridge overnight before frosting and serving.

    Final Thoughts

    Baking this Patriotic Funfetti Cake isn’t just about satisfying a sweet tooth; it’s about creating joyful moments with loved ones. Each slice bursts with vibrant colors and flavors that spark excitement and celebration. I can’t help but smile recalling the laughter and cheers at gatherings, all thanks to this festive creation. Whether it’s a holiday or just a sunny weekend, this cake brings people together. So roll up your sleeves, gather your family, and make some delicious memories. Trust me, you’ll find joy in every bite as you celebrate life’s special moments!


    Print

    clock clock iconcutlery cutlery iconflag flag iconfolder folder iconinstagram instagram iconpinterest pinterest iconfacebook facebook iconprint print iconsquares squares iconheart heart iconheart solid heart solid icon

    Description

    A festive and colorful cake perfect for celebrating patriotic holidays with family and friends.


    • 2 cups + 2 tablespoons all-purpose flour
    • ¾ teaspoon baking powder
    • ½ teaspoon fine sea salt
    • ¼ teaspoon baking soda
    • ¾ cup unsalted butter (room temp)
    • 1 ½ cups granulated sugar
    • 6 large egg whites (room temp)
    • ¾ cup whole milk (room temp)
    • 1 tablespoon vanilla extract
    • ½ cup sour cream (room temp)
    • ¾ cup patriotic sprinkles
    • ¾ cup unsalted butter (softened)
    • 3 cups powdered sugar
    • pinch of sea salt
    • 2 tablespoons whole milk
    • 1 teaspoon vanilla extract
    • More sprinkles for garnish (optional)

    1. Preheat the oven to 350°F. Spray a 9×13-inch baking dish with baking spray and set it aside.
    2. In a medium-sized bowl, mix together the flour, baking powder, salt, and baking soda; set aside.
    3. In the bowl of a stand mixer with the paddle attachment, cream the butter with the sugar for 3 minutes until light and fluffy, scrape down the sides as needed.
    4. Add the egg whites into the mixer in three batches; ensuring they are fully incorporated before adding the next batch, scrape down the sides.
    5. Slowly stir in the milk and vanilla until smooth.
    6. Add half of the flour mixture to the wet mixture and mix in until combined. Then mix in half of the sour cream until combined. Repeat with the remaining flour and sour cream.
    7. Scrape down the sides of the bowl and stir in the sprinkles. Pour the batter into the baking dish and smooth out the top.
    8. Bake for 35-42 minutes until a toothpick inserted into the center comes out clean. Place on a wire rack to cool completely.
    9. While the cake is cooling, make the frosting by placing the butter into a large bowl with an electric hand mixer and whip until smooth.
    10. Slowly add the powdered sugar 1 cup at a time until incorporated. Add the salt, milk, and vanilla, stir until combined, then whip on medium-high speed until light and fluffy for 3 minutes.
    11. Frost the cake and garnish with additional sprinkles if desired.
    12. Cut and serve.

    Notes

    • Ensure all ingredients are at room temperature for best results.
    • Store leftovers in an airtight container at room temperature for up to three days.
    • This cake is perfect for July 4th celebrations or any patriotic occasion.
    • Prep Time: 20 minutes
    • Cook Time: 35-42 minutes
    • Category: Dessert
    • Method: Baking
    • Cuisine: American

    Nutrition

    • Serving Size: 1 piece
    • Calories: 350
    • Sugar: 30g
    • Sodium: 190mg
    • Fat: 15g
    • Saturated Fat: 9g
    • Unsaturated Fat: 4g
    • Trans Fat: 0g
    • Carbohydrates: 50g
    • Fiber: 1g
    • Protein: 3g
    • Cholesterol: 60mg

    Sharing is caring!

  • Crockpot Moroccan Chicken

    Crockpot Moroccan Chicken


    Introduction to Crockpot Moroccan Chicken

    Do you ever find yourself scrambling for dinner ideas after a long day? I know I do! That’s why I love my Crockpot Moroccan Chicken. It’s not just a meal; it’s a flavorful escape that transports my taste buds straight to North Africa. With tender chicken thighs braised in a magical blend of spices and sweet fruits, this dish is a quick solution for busy moms and professionals. Whether you’re hosting friends or simply feeding your family, this easy dinner option is sure to impress!

    Why You’ll Love This Crockpot Moroccan Chicken

    Let me tell you, this Crockpot Moroccan Chicken is a game-changer! First, it’s a hands-free meal that practically cooks itself. Just toss everything into the slow cooker, and let it work its magic. The aroma fills your home, making dinner feel special even on the busiest nights. Plus, the warm blend of spices and sweet fruits creates a taste sensation that will satisfy even the pickiest eaters.

    Ingredients for Crockpot Moroccan Chicken

    Here’s what you’ll need for this delightful dish:

    • Boneless, skinless chicken thighs: The star of the show! They’re juicy and flavorful, perfect for slow cooking.
    • Diced tomatoes: Brings a juicy brightness to the mix. I always prefer using canned tomatoes, as they save time!
    • Dried apricots: These little gems add a touch of sweetness. If you’re feeling adventurous, dried figs work well too.
    • Golden raisins: They contribute a lovely, sweet chew that pairs beautifully with the spices. You can also substitute with regular raisins if needed.
    • Onion: A fragrant base that makes everything better. Just chop it up, and let it work its magic!
    • Garlic: A must-have for flavor! Fresh garlic will infuse the dish with a rich aroma. You could use garlic powder in a pinch.
    • Spices: Ground cumin, ground coriander, cinnamon, paprika, and cayenne pepper create that warm, savory Moroccan profile. Adjust them according to your taste.
    • Salt and pepper: Essential for seasoning. Don’t skip these, as they elevate all the flavors!
    • Chicken broth: Adds moisture and enhances the savory notes. You can use vegetable broth for a lighter version.
    • Cilantro or parsley: Fresh herbs for garnish, adding a pop of color and flavor at the end!

    Exact quantities are listed at the bottom of the article for your convenience. Happy cooking!

    How to Make Crockpot Moroccan Chicken

    Step 1: Prepare the Chicken

    First things first, let’s get that chicken ready! I like to use boneless, skinless chicken thighs because they stay juicy as they slow cook.

    Simply place the chicken thighs at the bottom of your crockpot. No need to fuss about them—just lay them in like you’re tucking them in for a cozy nap!

    Step 2: Add the Fruits and Vegetables

    Next up, it’s time for the fruits and veggies. Grab your can of diced tomatoes and drain them before sprinkling them over the chicken.

    Then, toss in those dried apricots and golden raisins. Their sweetness will balance beautifully with the savory spices. I always get excited seeing those vibrant colors!

    Now, add the chopped onion and minced garlic. This trio really wakes up the dish, creating a mouthwatering base.

    Step 3: Spice It Up

    It’s time for the magic to happen—spices galore! Sprinkle ground cumin, coriander, cinnamon, paprika, cayenne, salt, and pepper over the top.

    Don’t be shy—this is where you get to infuse incredible flavor! You can adjust the spice levels based on your family’s preferences.

    Step 4: Add the Broth

    Ready for the final touch? Pour in the chicken broth. This will keep the chicken tender and add depth to the flavors.

    Make sure it’s spread evenly; a good mix really checks off all the flavor boxes!

    Step 5: Cook to Perfection

    Now, we wait! Cover your crockpot with the lid and set it to LOW for 5–6 hours or HIGH for 2.5–3 hours. The smell will have you counting down the minutes!

    Take a moment to kick back, relax, or tackle those other endless to-dos. When the time is up, your kitchen will smell absolutely incredible. Trust me, everyone will be at the table, and you’ll be the star of the night!

    Tips for Success

    • Prep your ingredients the night before to save time!
    • If you’re short on time in the morning, simply assemble everything in the crockpot, refrigerate overnight, and start cooking in the morning!
    • Feel free to swap in your favorite veggies like bell peppers or carrots for extra nutrition.
    • Always taste and adjust seasoning toward the end of cooking for the best flavor.
    • Serve with warm couscous or rice to soak up all that delicious sauce!

    Equipment Needed for Crockpot Moroccan Chicken

    • Crockpot: The star of the show! A standard 6-quart model works well.
    • Chopping board and knife: Essential for prepping your veggies and herbs.
    • Measuring cups and spoons: Handy for precise ingredient measurements, but eyeballing works too.
    • Wooden spoon: Perfect for mixing everything together.

    Variations of Crockpot Moroccan Chicken

    • Add spinach or kale: Toss in some fresh greens during the last hour of cooking for a healthy boost.
    • Switch up the protein: Try using pork or chickpeas for a vegetarian option. Both are delicious alternatives.
    • Use different dried fruits: Trade apricots and raisins for dates or prunes for a unique flavor twist!
    • Experiment with spices: For a zestier profile, add some ginger or turmeric. These can elevate the dish further.
    • Make it a stew: Add sweet potatoes or butternut squash for a heartier, comfort food vibe.

    Serving Suggestions for Crockpot Moroccan Chicken

    • Couscous or rice: Serve this scrumptious chicken over fluffy couscous or rice to absorb the flavorful sauce.
    • Fresh salad: Pair it with a light salad of mixed greens and a citrus vinaigrette for a refreshing contrast.
    • Warm pita bread: Offer warm pita on the side for scooping up the chicken and sauce.
    • Mint tea: A glass of sweet Moroccan mint tea complements the spices beautifully.
    • Garnish wisely: A sprinkle of toasted almonds or additional herbs elevates the presentation!

    FAQs about Crockpot Moroccan Chicken

    Can I use chicken breasts instead of thighs? Absolutely! While I love the juiciness of chicken thighs, you can certainly use boneless, skinless chicken breasts. Just keep an eye on the cooking time, as they may cook a little faster.

    Can I prepare this recipe ahead of time? Yes! You can chop your ingredients and even layer them in the crockpot the night before. Just pop it in the fridge and turn it on in the morning before you rush out for the day.

    Is it possible to freeze leftovers? Yes! This Crockpot Moroccan Chicken freezes beautifully. Store leftovers in airtight containers for up to three months. Thaw in the fridge overnight and reheat for a quick meal.

    What can I use as a substitute for dried fruits? If you’re not a fan of dried apricots or raisins, feel free to swap them for other dried fruits like figs or cranberries. They’ll still add a lovely sweetness to the dish!

    How spicy is this dish? It’s all about your taste! The cayenne pepper is optional, so if you prefer a milder flavor, simply leave it out. The combination of spices brings warmth, not necessarily heat.

    Final Thoughts on Crockpot Moroccan Chicken

    This Crockpot Moroccan Chicken is more than just a meal; it’s an experience that brings joy to both the cook and the table. As I savor each bite, I can’t help but appreciate the warming spices and sweet fruits dancing together. The best part? I can prep it in minutes and let my crockpot do the work while I tackle my busy day. With its vibrant colors and delightful flavors, this recipe is perfect for family gatherings or a cozy weeknight dinner. Trust me, once you try it, it will surely become a staple in your home kitchen!


    Print

    clock clock iconcutlery cutlery iconflag flag iconfolder folder iconinstagram instagram iconpinterest pinterest iconfacebook facebook iconprint print iconsquares squares iconheart heart iconheart solid heart solid icon

    Description

    A flavorful and easy dinner option featuring chicken thighs cooked in a blend of Moroccan spices and fruits.


    • 2 lbs boneless, skinless chicken thighs
    • 1 (14.5 oz) can diced tomatoes, drained
    • 1/2 cup dried apricots, chopped
    • 1/4 cup golden raisins
    • 1 small onion, chopped
    • 2 cloves garlic, minced
    • 1 1/2 tsp ground cumin
    • 1 tsp ground coriander
    • 1/2 tsp cinnamon
    • 1/2 tsp paprika
    • 1/4 tsp cayenne (optional)
    • 1/2 tsp salt
    • 1/2 tsp black pepper
    • 1/2 cup chicken broth
    • 1/4 cup chopped fresh cilantro or parsley (for garnish)

    1. Place chicken in the crockpot.
    2. Top with tomatoes, apricots, raisins, onion, and garlic.
    3. Sprinkle with cumin, coriander, cinnamon, paprika, cayenne, salt, and pepper. Add broth.
    4. Cover and cook on LOW for 5–6 hours or HIGH for 2.5–3 hours.
    5. Garnish with cilantro or parsley and serve with couscous.

    Notes

    • Adjust spice levels to your preference.
    • Can be served over couscous or rice for a complete meal.
    • Prep Time: 15 minutes
    • Cook Time: 5-6 hours (LOW) or 2.5-3 hours (HIGH)
    • Category: Dinner
    • Method: Crockpot
    • Cuisine: Moroccan

    Nutrition

    • Serving Size: 1 serving
    • Calories: 350
    • Sugar: 9g
    • Sodium: 550mg
    • Fat: 10g
    • Saturated Fat: 2g
    • Unsaturated Fat: 8g
    • Trans Fat: 0g
    • Carbohydrates: 40g
    • Fiber: 3g
    • Protein: 27g
    • Cholesterol: 100mg

    Sharing is caring!

  • One Pan Chicken Sausage and Orzo

    One Pan Chicken Sausage and Orzo


    Introduction to One Pan Chicken Sausage and Orzo

    As a busy mom, I completely understand the struggle of juggling hectic schedules while trying to whip up something delicious for dinner. That’s where my go-to recipe for One Pan Chicken Sausage and Orzo comes in. It’s like a warm hug in a bowl—simple to make yet bursting with flavor. With juicy chicken sausage, tender orzo, and vibrant spinach all cooked in one pan, it’s perfect for impressing my family or enjoying a cozy night in. In just 30 minutes, you’ll have a hearty meal that makes every busy day feel like a culinary celebration.

    Why You’ll Love This One Pan Chicken Sausage and Orzo

    This dish is a beacon of hope for any time-crunched mom or professional. The best part? It’s all made in one pan, saving you the hassle of endless cleanup. In just 30 minutes, you’ll savor a meal that’s hearty, creamy, and incredibly satisfying. Plus, it’s flexible! Add your favorite veggies or adjust the spices to suit picky eaters. Dinner doesn’t get easier or tastier than this!

    Ingredients for One Pan Chicken Sausage and Orzo

    Gathering the right ingredients is half the fun of cooking! For One Pan Chicken Sausage and Orzo, you’ll need a delightful combination of fresh and pantry staples. Here’s what you’ll require:

    • Olive oil: This golden liquid is perfect for sautéing and adds a fruity flavor to your dish.
    • Chopped yellow onion: The base of our flavor profile, onions bring sweetness when cooked down.
    • Garlic: Who can resist the aroma of garlic? Mince it for a bold punch of flavor.
    • Mild Italian chicken sausage: Juicy and flavorful, these chunks are the protein star of our show. You can swap it with turkey sausage for a lighter option.
    • Dry orzo: This tiny pasta cooks quickly and absorbs all the lovely flavors around it.
    • Chicken broth: The soul of our creamy broth. Use low-sodium for a healthier choice.
    • Italian seasoning: A blend of herbs that brings that classic Italian taste to our dish.
    • Sea salt and pepper: Essential for seasoning and enhancing all the other flavors!
    • Coconut milk: Adds creaminess without dairy for a lovely texture. You can also use heavy cream if you prefer.
    • Freshly grated parmesan: This cheese gives a rich flavor. Grate it fresh for the best results!
    • Baby spinach: Packed with nutrition and color. Plus, it wilts beautifully into the dish.
    • Crushed red pepper: Add this for a dash of heat if you like a little spice!
    • Fresh basil: This fragrant herb is perfect for garnishing, adding a fresh finish.

    You’ll find the exact measurements for these ingredients at the bottom of the article, ready for printing whenever you need them.

    How to Make One Pan Chicken Sausage and Orzo

    Now that we have our ingredients prepped, it’s time to dive into the magic of cooking! With just a few simple steps, you’ll create a meal that’s bursting with flavor and sure to impress. Here’s how to make One Pan Chicken Sausage and Orzo:

    Step 1: Sauté the Aromatics

    Start by heating olive oil in your trusty large skillet over medium heat. Once it shimmers, toss in the chopped yellow onion and minced garlic. Sauté them for about five minutes, stirring often. This step is crucial! Cooking the onions until they’re soft and fragrant builds the flavor foundation for your dish, creating a heavenly base that’ll have everyone wondering what smells so good!

    Step 2: Brown the Chicken Sausage

    Next up, it’s time to add those juicy chunks of chicken sausage. Stir them into the skillet and cook for another five to six minutes until they turn a gorgeous golden brown. This browning releases all those delicious flavors and ensures your sausage pieces are a delight with each bite. Trust me; your family won’t be able to resist!

    Step 3: Add Orzo and Broth

    Now, let’s incorporate our dry orzo into the mix. Toss it around for about a minute. This toasting not only adds flavor but also gives that orzo a nice bite. Then, slowly pour in the chicken broth and coconut milk, followed by the Italian seasoning, salt, and pepper. Stir it all together and bring it to a boil—it’s already starting to look and smell amazing!

    Step 4: Simmer for Perfection

    Once boiling, cover the skillet and reduce the heat to a gentle simmer. Let it cook for about 10 to 12 minutes. This is when the orzo will soak up all those delicious flavors and transform into a creamy, flavorful companion to our sausage. Give it a stir halfway through to ensure even cooking. It’s all about patience and letting those ingredients mingle!

    Step 5: Stir in Spinach and Parmesan

    Finally, it’s time to finish our One Pan wonder! Stir in the baby spinach and freshly grated parmesan cheese. As you mix, watch the spinach wilt and the cheese melt, creating a creamy, dreamy dish. It’s so simple, yet so impressive! Serve hot, garnished with fresh basil and a sprinkle of crushed red pepper for that perfect touch of color and flavor.

    Tips for Success

    • Have all your ingredients prepped before starting to save time.
    • Don’t skip the toasting step for the orzo; it elevates the flavor!
    • Use low-sodium chicken broth for a healthier dish that doesn’t compromise on taste.
    • Feel free to substitute spinach with kale or other greens if you prefer.
    • Taste and adjust seasonings at the end to your liking for the perfect finish.

    Equipment Needed

    • Large Skillet: A non-stick skillet works wonders but any large pan will do.
    • Wooden Spoon: Perfect for stirring and preventing scratches on your skillet.
    • Measuring Cups: Handy for accurate ingredient measurement.
    • Cheese Grater: For freshly grated parmesan, but a food processor can work too.

    Variations of One Pan Chicken Sausage and Orzo

    • Veggie-Packed Delight: Toss in bell peppers, zucchini, or cherry tomatoes for an extra burst of flavor and nutrition.
    • Spicy Kick: Add more crushed red pepper or diced jalapeños to the sausage for a fiery touch.
    • Herb Swap: Experiment with fresh herbs like thyme or oregano instead of Italian seasoning for a unique twist.
    • Gluten-Free Option: Use gluten-free pasta instead of orzo while keeping the same cooking method.
    • Vegan Makeover: Substitute chicken sausage with plant-based sausage and replace coconut milk with cashew cream.


    Serving Suggestions for One Pan Chicken Sausage and Orzo

    • Side Salad: Pair your dish with a light, vibrant green salad drizzled with balsamic vinaigrette.
    • Crispy Bread: Serve with crusty garlic bread for dipping into the creamy broth.
    • Wine Pairing: Enjoy a chilled glass of white wine, like Pinot Grigio, to complement the flavors.
    • Colorful Garnish: Add fresh basil and a sprinkle of parmesan on top for a beautiful presentation.
    • Kid-Friendly Add-ons: Serve with a side of carrot sticks or cucumber slices for a balanced meal.

    FAQs about One Pan Chicken Sausage and Orzo

    Curious about something specific? You’re not alone! Here are some frequently asked questions about my favorite One Pan Chicken Sausage and Orzo recipe:

    Can I prepare this dish ahead of time? Absolutely! You can prep the ingredients a day in advance. Just store them separately in sealed containers in the fridge. When you’re ready to cook, it’ll come together in no time!

    How can I make this a lighter meal? If you want to lighten things up, consider using turkey sausage instead of chicken sausage, and swap coconut milk for lower-fat options like evaporated milk. You’ll still get a rich flavor!

    What if I can’t find orzo? No problem! You can replace orzo with other small pasta shapes like ditalini or even quinoa for a gluten-free option. Just adjust the cooking time as needed.

    How do I store leftovers? Store any leftovers in an airtight container in the fridge for up to three days. When reheating, add a splash of chicken broth or water to maintain creaminess.

    Can I freeze One Pan Chicken Sausage and Orzo? Yes! It freezes beautifully. Just make sure to cool it completely before transferring it to a freezer-safe container. Reheat on the stovetop with a bit of broth when you’re ready to enjoy it again.

    Final Thoughts

    There’s something truly magical about One Pan Chicken Sausage and Orzo. It’s more than just a meal; it’s a comforting experience that brings my family together after a long day. The aroma fills the kitchen, making everyone’s mouth water in anticipation. With every creamy bite, I know I’ve created not only a delicious dish but also memories around the table. This quick recipe transforms busy evenings into moments of joy, showing that cooking doesn’t have to be complicated to be rewarding. Trust me, you’ll cherish this dish as a staple in your home just like I have!


    Print

    clock clock iconcutlery cutlery iconflag flag iconfolder folder iconinstagram instagram iconpinterest pinterest iconfacebook facebook iconprint print iconsquares squares iconheart heart iconheart solid heart solid icon

    Description

    One Pan Chicken Sausage and Orzo is a quick and flavorful meal that combines juicy chicken sausage, tender orzo, and vibrant spinach in a creamy broth.


    • 1 Tablespoon olive oil
    • 1 cup chopped yellow onion
    • 4 cloves garlic, minced
    • 1 12 oz package mild Italian Chicken sausage, cut into 1” chunks
    • 2 cups dry orzo
    • 4 cups chicken broth
    • 1 teaspoon Italian seasoning
    • ¼ teaspoon sea salt
    • ¼ teaspoon pepper
    • ½ cup canned full fat coconut milk, or heavy cream
    • ½ cup freshly grated parmesan
    • 5 oz baby spinach
    • Crushed red pepper, for serving (optional)
    • Fresh basil, for garnish

    1. Add oil to a large skillet over medium heat. Once hot, add onion and garlic and cook for about 5 minutes, stirring often.
    2. Add chicken sausage into the pan and sauté for another 5-6 minutes or until golden.
    3. Add orzo to the pan and toss for 1 minute to toast, then add the chicken broth, coconut milk, salt, pepper, and Italian seasoning. Bring the orzo to a boil, then cover and reduce to a simmer. Cook for 10-12 minutes or until orzo is cooked.
    4. Add spinach and parmesan. Mix well until spinach is wilted and parmesan has melted. Serve with extra parmesan cheese, fresh basil, and crushed red pepper, if desired.

    Notes

    • This dish can be customized with other vegetables like bell peppers or zucchini.
    • For a spicier kick, add more crushed red pepper.
    • Prep Time: 10 minutes
    • Cook Time: 20 minutes
    • Category: Main Course
    • Method: Stovetop
    • Cuisine: Italian

    Nutrition

    • Serving Size: 1 serving
    • Calories: 450
    • Sugar: 2g
    • Sodium: 800mg
    • Fat: 22g
    • Saturated Fat: 10g
    • Unsaturated Fat: 12g
    • Trans Fat: 0g
    • Carbohydrates: 43g
    • Fiber: 2g
    • Protein: 22g
    • Cholesterol: 60mg

    Sharing is caring!

  • Peanut Butter Chocolate Greek Yogurt Bark

    Peanut Butter Chocolate Greek Yogurt Bark


    Introduction to Peanut Butter Chocolate Greek Yogurt Bark

    As a busy mom who juggles countless tasks, I know the struggle of feeding my family something delicious yet healthy. That’s where my Peanut Butter Chocolate Greek Yogurt Bark comes in—it’s the ultimate treat that checks all the boxes! This delightful recipe not only satisfies your sweet tooth, but it also packs a nutritious punch. Whether you need a quick pick-me-up during your hectic day or a fun dessert to impress your loved ones, this bark is your go-to solution. Trust me, once you try it, your taste buds will thank you!

    Why You’ll Love This Peanut Butter Chocolate Greek Yogurt Bark

    This Peanut Butter Chocolate Greek Yogurt Bark isn’t just a tasty treat; it’s a lifesaver for busy days! With minimal prep time, you can whip it up in just 15 minutes. Plus, the combination of creamy Greek yogurt and rich peanut butter gives it a flavor that’s simply divine. It’s a guilt-free indulgence packed with protein, making it perfect for kids and adults alike. Trust me, it’s a crowd-pleaser!

    Ingredients for Peanut Butter Chocolate Greek Yogurt Bark

    Let’s dive into the star-studded cast of ingredients that make up this Peanut Butter Chocolate Greek Yogurt Bark. Each one contributes to the delectable flavor and creamy texture of this treat!

    • Plain Greek yogurt: This is the base of our bark, providing creaminess and a good dose of protein. I prefer using whole milk or full-fat yogurt for extra richness!
    • Peanut butter: It adds a delightful nuttiness and acts as a fantastic binding agent. You can use creamy or crunchy—whatever tickles your taste buds!
    • Vanilla protein powder: This not only boosts the protein content but also infuses a sweet vanilla flavor. Opt for your favorite brand, or try an unsweetened version for less sugar.
    • Maple syrup or honey: A touch of natural sweetness is key! You can choose either, depending on your preference for flavor and dietary needs.
    • Vanilla extract: Just a splash elevates the flavor, making everything taste even better. Make sure to use the real stuff; it makes a world of difference!
    • Dark chocolate chips: These are the crowning glory of our bark! Choose a high-quality dark chocolate for a rich, indulgent taste that pairs perfectly with peanut butter.
    • Flaked sea salt (optional): A sprinkle of this adds contrast and enhances the sweetness, creating a truly gourmet experience. Trust me, it’s worth it!

    If you’re curious about the exact quantities for these ingredients, don’t worry! You can find them at the bottom of the article, ready for printing. Happy cooking!

    How to Make Peanut Butter Chocolate Greek Yogurt Bark

    Now that we’ve gathered our ingredients, let’s get to the fun part—making this Peanut Butter Chocolate Greek Yogurt Bark. I’ll guide you through each step, ensuring you get a delicious result that’s oh-so-satisfying!

    Step 1: Mix the Base

    Start by combining the plain Greek yogurt, creamy peanut butter, vanilla protein powder, your choice of sweetener, and a splash of vanilla extract in a large mixing bowl.

    Use a whisk or a spatula to blend everything until it’s smooth and creamy. This mixture is where the magic begins—every bite of the bark will hold this deliciously thick base!

    Step 2: Prepare the Pan

    Line a quarter sheet pan with parchment paper for easy removal. The parchment acts like a magic carpet, allowing you to lift the bark out when it’s all set!

    If you don’t have this pan, no worries! A 9×13 inch baking dish works perfectly too! Just make sure it’s lined well to prevent sticking.

    Step 3: Spread the Mixture

    Now, pour the creamy yogurt mixture into the prepared pan. Use an offset spatula to spread it evenly. Aim for a thickness between 1/4 and 1/2 inch. This thickness is key for the perfect balance of flavors and textures!

    Step 4: Melt the Chocolate

    While you’re waiting for your mixture to settle, melt the dark chocolate chips. Place them in a microwave-safe bowl.

    Heat them in 30-second increments, stirring in between. This ensures your chocolate melts evenly and avoids burning, which can quickly ruin your bark’s vibe!

    Step 5: Combine Layers

    Once your chocolate is melted and silky, pour it over the top of the peanut butter yogurt mixture. Use a spatula to spread it evenly, ensuring every inch is covered. This creates a beautiful chocolate layer that makes each bite irresistible!

    Step 6: Freeze to Set

    Now comes the hardest part—waiting! Transfer the pan to the freezer and let it chill for at least 2 to 3 hours.

    When you can’t resist any longer, check its firmness by gently pressing on it. If it holds its shape, you’re ready for the final step!

    Step 7: Serve and Enjoy

    Once frozen, it’s time to get creative! Remove the bark from the pan using the parchment paper. Cut it into pieces or simply break it into chunks. Feel free to sprinkle flaked sea salt on top for that gourmet touch.

    Now, take a moment to enjoy your culinary creation! You’ve just made a delicious and healthy treat that your family will love and thank you for!

    Tips for Success

    • For an even creamier texture, let your Greek yogurt sit at room temperature for a few minutes before mixing.
    • If you’re short on time, use store-bought chocolate sauce instead of melting chocolate chips.
    • Experiment with nut butters—almond or sunflower seed butter work beautifully in this recipe!
    • Before serving, let the bark sit out for a few minutes to soften slightly for easier cutting.
    • Double the recipe and stash some for later—it’s a great solution for weekday snacks!

    Equipment Needed

    • Mixing bowl: Any large bowl works, or grab a blender for a smoother mixture.
    • Spatula: An offset spatula is perfect, but a regular spatula will do the trick!
    • Parchment paper: If you don’t have it, aluminum foil can be a good substitute.
    • Microwave-safe bowl: Use any heat-resistant dish for melting chocolate.
    • Knife or pizza cutter: For cutting or breaking the bark into pieces.

    Variations for Peanut Butter Chocolate Greek Yogurt Bark

    • Nut-free version: Swap peanut butter for sunflower seed butter or tahini for a nut-free delight.
    • Vegan option: Use dairy-free yogurt and plant-based chocolate chips to make this bark vegan-friendly.
    • Fruit add-ins: Toss in some dried fruits like cranberries or apricots for added sweetness and texture.
    • Spiced up: Add a pinch of cinnamon or a dash of cayenne pepper for a spicy kick to your bark.
    • Coconut crunch: Mix in shredded coconut for a tropical twist and extra crunch.
    • Chunky style: Fold in chopped nuts or seeds into the yogurt mixture for added crunch and healthy fats.

    Serving Suggestions for Peanut Butter Chocolate Greek Yogurt Bark

    • Pair your bark with fresh fruit like strawberries or bananas for a refreshing contrast.
    • Serve with a dollop of whipped cream or a scoop of vanilla ice cream for indulgence.
    • Consider a side of nutty granola for added crunch and texture.
    • For drinks, a chilled glass of almond milk or herbal tea complements the flavors beautifully.
    • Present the bark on a platter, garnished with extra flaked sea salt for an elegant touch!

    FAQs about Peanut Butter Chocolate Greek Yogurt Bark

    Can I use low-fat Greek yogurt? Absolutely! While I prefer whole milk for richness, low-fat Greek yogurt works just fine. You’ll still get that creamy texture!

    How long does the bark last in the freezer? Your Peanut Butter Chocolate Greek Yogurt Bark can last up to two months in the freezer if properly stored. Just wrap it tightly to avoid freezer burn.

    Can I make this without protein powder? Yes, you can leave it out! Just replace it with more yogurt to maintain the right consistency and creaminess.

    What if I don’t like dark chocolate? No problem! Feel free to use milk chocolate or even white chocolate. Just adjust the sweetness if necessary, as they can be sweeter than dark chocolate.

    Is this bark suitable for kids? Absolutely! It’s packed with protein and healthy fats, making it a great snack for kids. Just keep an eye out for any nut allergies.

    Final Thoughts

    Creating this Peanut Butter Chocolate Greek Yogurt Bark has brought not just joy, but a sense of accomplishment to my kitchen. Each bite is a reminder that healthy treats can be indulgent too. I love knowing I can whip it up in no time, even on my busiest days. The smiles on my family’s faces when they enjoy it make every effort worthwhile. If you’re looking for a fun and nutritious snack that everyone will adore, this bark is your answer! So, gather your ingredients and experience the joy of homemade magic in your own kitchen!


    Print

    clock clock iconcutlery cutlery iconflag flag iconfolder folder iconinstagram instagram iconpinterest pinterest iconfacebook facebook iconprint print iconsquares squares iconheart heart iconheart solid heart solid icon

    Description

    Peanut Butter Chocolate Greek Yogurt Bark is a delicious and healthy treat made with Greek yogurt, peanut butter, and dark chocolate.


    • 1 c plain Greek yogurt, whole milk/full fat
    • 3/4 c peanut butter
    • 1/4 c vanilla protein powder
    • 12 T maple syrup or honey
    • 1/4 tsp vanilla extract
    • 1 c dark chocolate chips
    • flaked sea salt, optional

    1. Stir together the yogurt, peanut butter, protein powder, sweetener, and vanilla until smooth and creamy.
    2. Spread the mixture evenly on a parchment lined quarter sheet pan.
    3. Spread the mixture to a thickness of between 1/4 inch and 1/2 inch.
    4. Melt the dark chocolate chips in the microwave in 30 second increments, stirring in between.
    5. Once melted, spread the chocolate evenly over the peanut butter yogurt mixture.
    6. Transfer to the freezer for at least 2-3 hours.
    7. Once frozen, sprinkle with flaked sea salt, cut into pieces or break it up and enjoy!

    Notes

    • Using an offset spatula helps to spread the mixture evenly.
    • If a quarter sheet pan is not available, a 9×13 inch baking pan can be used.
    • Store any leftovers in the freezer for a refreshing treat later.
    • Prep Time: 15 minutes
    • Cook Time: 0 minutes
    • Category: Dessert
    • Method: Freezing
    • Cuisine: American

    Nutrition

    • Serving Size: 1 piece
    • Calories: 150
    • Sugar: 5g
    • Sodium: 50mg
    • Fat: 10g
    • Saturated Fat: 3g
    • Unsaturated Fat: 7g
    • Trans Fat: 0g
    • Carbohydrates: 10g
    • Fiber: 2g
    • Protein: 7g
    • Cholesterol: 5mg

    Sharing is caring!

  • Marry Me Chicken

    Marry Me Chicken


    Introduction to Marry Me Chicken

    Hey there, fellow food lovers! If you’re anything like me, busy schedules often cloud our dinner plans. That’s where my Marry Me Chicken comes into play—a creamy, dreamy dish that’s perfect for a quick weeknight dinner or a romantic date night at home. Picture tender chicken breasts swimming in a luscious sauce, oozing with flavor. Trust me, this dish is known to sweep loved ones off their feet! Whether you’re looking to impress or simply want a satisfying meal, Marry Me Chicken is your go-to solution. Let’s dive into this heartwarming recipe!

    Why You’ll Love This Marry Me Chicken

    Marry Me Chicken is more than just a meal; it’s a comforting hug after a long day. This creamy chicken recipe comes together in just 40 minutes, making it perfect for busy moms or professionals. Plus, the blend of sun-dried tomatoes and Parmesan brings incredible flavor to your table. You won’t just be feeding your family; you’ll be creating moments worth savoring, one bite at a time.

    Ingredients Marry Me Chicken

    Before we dive into the blissful creation of Marry Me Chicken, let’s gather our ingredients. Each one plays a crucial role in crafting this heart-winning dish!

    • Boneless skinless chicken breasts or thighs: Chicken is the star of this show, tender and juicy.
    • Salt: Essential for enhancing the flavor of the chicken.
    • Black pepper: Adds a subtle kick and depth to the dish.
    • Paprika: This spice brings warmth and a lovely color to the chicken.
    • Olive oil: A must for that perfect sear and to prevent sticking in the skillet.
    • Garlic: Minced garlic offers a savory aroma that fills your kitchen with love.
    • Sun-dried tomatoes: These gems pack a punch of sweet and tangy flavor.
    • Heavy cream: The heart of the creamy sauce that envelops your chicken.
    • Chicken broth: This adds depth and richness to our sauce.
    • Red pepper flakes: Optional, but they bring a delightful heat that balances the creaminess.
    • Grated Parmesan cheese: This is the secret to a richly flavored sauce.
    • Italian seasoning: A blend of herbs that elevates the dish with herby undertones.
    • Unsalted butter: Adds a luxurious finish to your creamy sauce.
    • Fresh basil or parsley: For that final touch of color and freshness to garnish.

    Also, note that ingredient measurements are conveniently listed at the bottom of the article for easy printing. Ready to get cooking?

    How to Make Marry Me Chicken

    Now comes the fun part—bringing this Marry Me Chicken to life! Each step is easy and rewarding, so let’s get started!

    Step 1: Prepare the Chicken

    Begin by taking your chicken breasts or thighs. Pat them dry with a paper towel. This helps achieve a nice golden crust when you sear them. Then, sprinkle salt, pepper, and paprika all over the chicken. Don’t skimp on this step; it’s where the flavor begins!

    Step 2: Sear the Chicken

    Heat olive oil in a large skillet over medium-high heat. Once hot, add the seasoned chicken pieces. Sear each side for about 4-5 minutes. You want them golden and beautiful! Once seared, remove the chicken from the skillet. Set it aside on a plate while we work on the sauce.

    Step 3: Sauté Garlic

    In the same skillet, toss in the minced garlic. Cook it for about 30 seconds, just until it becomes fragrant. Be careful not to burn it! This little addition will fill your kitchen with a mouthwatering aroma.

    Step 4: Add Sun-Dried Tomatoes

    Now, stir in those delightful sun-dried tomatoes. Let them cook for about a minute. This step allows their flavors to meld with the garlic, creating a wonderful base for our sauce. Trust me, it’s a game-changer!

    Step 5: Create the Creamy Sauce

    Pour in the chicken broth, scraping up any delicious, browned bits left in the pan. Then, add heavy cream, grated Parmesan cheese, red pepper flakes, and Italian seasoning. Stir well and let it simmer for 2-3 minutes. You’ll see the sauce thicken and become luxurious!

    Step 6: Simmer the Chicken in Sauce

    Return the chicken to the skillet, placing it right into that dreamy sauce. Spoon some of the sauce over the top. Let everything simmer together for 5-7 minutes until the chicken is cooked through and fully coated in that creamy goodness.

    Step 7: Garnish and Serve

    Finally, garnish your dish with fresh basil or parsley. This will not only add a burst of color but also freshness. Serve your Marry Me Chicken immediately. You can pair it with pasta, mashed potatoes, or a side of crusty bread to soak up every last bit of that dreamy sauce!

    Tips for Success

    • Always pat your chicken dry before seasoning to ensure a nice sear.
    • Feel free to let the sauce simmer longer for extra thickness; just don’t forget to stir!
    • Taste as you go, adjusting spices to match your preferences.
    • Pair the dish with a splash of white wine for added flair.
    • Don’t be shy with the garnishes; they really elevate the dish!

    Equipment Needed

    • Large skillet: A non-stick one makes for easy cooking and cleanup.
    • Meat thermometer: To ensure your chicken is cooked perfectly.
    • Wooden spoon or spatula: For stirring and scraping up those delicious bits.
    • Cutting board: Always handy for prepping your ingredients.
    • Sharp knife: Essential for chopping garlic and sun-dried tomatoes.

    Variations

    • Low-Carb Option: Substitute heavy cream with cauliflower cream for a lighter, low-carb version.
    • Vegetarian Delight: Replace chicken with thick slices of zucchini or portobello mushrooms for a savory twist.
    • Sundried Tomato Substitution: If you’re not a fan, use roasted red peppers for a sweet, smoky flavor.
    • Spicy Kick: For those who love heat, add jalapeños or use spicy Italian sausage instead of chicken.
    • Cheese Lovers: Mix in different cheeses like Gouda or Fontina for a rich, creamy experience.

    Serving Suggestions

    • Pair your Marry Me Chicken with al dente spaghetti or fettuccine to soak up that creamy sauce.
    • Serve alongside garlic bread for a delightful way to enjoy every drop of sauce.
    • A crisp green salad with lemon vinaigrette balances the richness of the chicken.
    • For drinks, a chilled Chardonnay complements the flavors beautifully.
    • Garnish with extra basil or parsley for a vibrant presentation!

    FAQs about Marry Me Chicken

    What makes Marry Me Chicken special?

    Marry Me Chicken is special because of its creamy sauce combined with savory sun-dried tomatoes and rich Parmesan cheese. Each bite is bursting with flavor, making it a memorable dish. It’s known to impress anyone who tries it—hence the name!

    Can I prepare Marry Me Chicken ahead of time?

    Absolutely! You can prep the chicken and even the sauce in advance, storing them separately in the fridge. When you’re ready to eat, simply reheat the sauce and add the chicken to warm through.

    Is Marry Me Chicken suitable for meal prep?

    Yes, it’s perfect for meal prep! Divide the chicken and sauce into individual containers for quick lunches or dinners throughout the week. Just reheat and enjoy!

    What can I serve with Marry Me Chicken?

    This dish pairs beautifully with pasta, mashed potatoes, or a simple green salad. You can also serve it with crusty bread to soak up that delicious sauce. The options are endless!

    How can I adjust the spice level in Marry Me Chicken?

    If you prefer a milder dish, skip the red pepper flakes. For a spicy kick, consider adding some chopped fresh chilies or extra red pepper flakes, tailoring it to your taste!

    Final Thoughts

    Cooking Marry Me Chicken is more than just preparing a meal; it’s about creating an experience filled with love and joy. Each bite takes you on a delightful journey, where creamy goodness meets delectable flavors, making it impossible not to smile. This dish is perfect for family dinners or special occasions, bringing everyone together at the table. Imagine the laughter and conversation as you savor every morsel. Trust me, with Marry Me Chicken, you’re not just cooking—you’re crafting moments that linger in the hearts of those you love. So, roll up those sleeves and enjoy this magical recipe!


    Print

    clock clock iconcutlery cutlery iconflag flag iconfolder folder iconinstagram instagram iconpinterest pinterest iconfacebook facebook iconprint print iconsquares squares iconheart heart iconheart solid heart solid icon

    Description

    Marry Me Chicken is a creamy and flavorful dish made with tender chicken breasts, sun-dried tomatoes, and Parmesan cheese in a rich sauce that is sure to win hearts.


    • 4 boneless skinless chicken breasts (or thighs)
    • 1 teaspoon salt
    • ½ teaspoon black pepper
    • ½ teaspoon paprika
    • 2 tablespoons olive oil
    • 3 cloves garlic, minced
    • ½ cup sun-dried tomatoes, drained and chopped
    • 1 cup heavy cream
    • ½ cup chicken broth
    • ½ teaspoon red pepper flakes (optional, for spice)
    • ½ cup grated Parmesan cheese
    • 1 teaspoon Italian seasoning
    • 2 tablespoons unsalted butter
    • Fresh basil or parsley for garnish

    1. Season the chicken with salt, pepper, and paprika.
    2. Heat olive oil in a large skillet over medium-high heat. Add the chicken and sear for 4-5 minutes per side until golden brown. Remove from skillet and set aside.
    3. In the same skillet, add minced garlic and cook for about 30 seconds until fragrant.
    4. Stir in the sun-dried tomatoes, cooking for another minute to release their flavor.
    5. Pour in the chicken broth, scraping up any browned bits from the bottom of the skillet.
    6. Add the heavy cream, Parmesan cheese, red pepper flakes, Italian seasoning, and butter. Stir well and let the sauce simmer for 2-3 minutes until slightly thickened.
    7. Return the chicken to the skillet, spooning sauce over the top. Let simmer for 5-7 minutes, or until the chicken is fully cooked and the sauce is rich and creamy.
    8. Garnish with fresh basil or parsley and serve immediately. Enjoy over pasta, mashed potatoes, or with a side of crusty bread to soak up the sauce!

    Notes

    • Feel free to adjust the level of spices according to your taste.
    • This dish pairs well with a variety of sides, including pasta and vegetables.
    • Prep Time: 10 minutes
    • Cook Time: 30 minutes
    • Category: Main Course
    • Method: Skillet
    • Cuisine: American

    Nutrition

    • Serving Size: 1 serving
    • Calories: 540
    • Sugar: 2g
    • Sodium: 800mg
    • Fat: 38g
    • Saturated Fat: 18g
    • Unsaturated Fat: 10g
    • Trans Fat: 0g
    • Carbohydrates: 8g
    • Fiber: 1g
    • Protein: 43g
    • Cholesterol: 145mg

    Sharing is caring!

  • Sloppy Joe Casserole

    Sloppy Joe Casserole


    Introduction to Sloppy Joe Casserole

    Hey there! If you’re looking for a meal that turns chaos into comfort, let me introduce you to my Sloppy Joe Casserole. It’s an absolute lifesaver for those crazy busy evenings when cooking feels like climbing a mountain. This dish is not just quick; it’s packed with flavors that’ll make everyone at the table smile. Plus, it’s a wonderful way to turn familiar favorites into a delicious variation! Trust me, a dish like this is perfect for impressing your loved ones while keeping your sanity intact. Let’s dive into this heartwarming recipe together!

    Why You’ll Love This Sloppy Joe Casserole

    This Sloppy Joe Casserole is like a warm hug on a plate! It’s easy to whip up, making it perfect for busy families. Within just 45 minutes, you can present a hearty meal that everyone will devour. The combination of seasoned beef, sweet peppers, and gooey cheese creates a flavor explosion. Plus, it’s a one-dish wonder, meaning fewer dishes to wash afterward. Who doesn’t love that?

    Ingredients for Sloppy Joe Casserole

    Let’s break down all the tasty ingredients that make up our Sloppy Joe Casserole. Each component plays a special role in bringing this dish to life. You can find exact quantities at the bottom of the article for easy printing!

    • Ground Beef: This is the heart of the dish, providing that delicious savory flavor.
    • Onion: Adds a sweet and slightly sharp taste, enhancing the overall flavor profile.
    • Green Bell Pepper: Brings crunch and color, plus a mild sweetness.
    • Red Bell Pepper: Offers extra sweetness and vibrant color to our casserole.
    • Garlic: Just a clove adds a fragrant warmth that elevates the entire dish.
    • Petite Diced Tomatoes: These juicy gems add tanginess and moisture to keep things from being dry.
    • Ketchup: The secret to that classic Sloppy Joe taste, combining sweetness and acidity.
    • Brown Sugar: Balances the acidity and enhances the sweetness of the ketchup.
    • Yellow Mustard: Adds a zesty kick that punctuates the richness of the beef.
    • Salt and Black Pepper: Essential seasonings that boost every flavor in the dish.
    • Frozen Whole-Kernel Corn: This sweet addition lends texture and heartiness while being convenient.
    • Penne Pasta: Offers a perfect base to absorb all those delicious flavors—plus, it’s fun to eat!
    • Colby-Jack Cheese: This melty cheese provides creaminess and a delightful stretch with every bite.

    Feel free to customize the vegetables based on what you have on hand. If you’re running low on bell peppers, throw in some zucchini or mushrooms instead! This flexibility makes our Sloppy Joe Casserole truly adaptable to your family’s tastes. The more personal it gets, the better it is, don’t you think?

    How to Make Sloppy Joe Casserole

    Let’s dive into the process of creating this amazing Sloppy Joe Casserole! Follow these simple step-by-step instructions, and you’ll have a meal that brings everyone together in no time.

    Step 1 – Preheat the Oven

    First things first, you need to preheat your oven to 350°F (175°C). Preheating is crucial because it ensures that your casserole bakes evenly. You want that cheese to melt just right, transforming your dish into a gooey delight. So, while you prepare the next steps, let that oven do its thing!

    Step 2 – Brown the Ground Beef

    In a large skillet over medium-high heat, brown one pound of ground beef. Stir it occasionally until it’s fully cooked and has no pink spots left. About 5-7 minutes should do it. The browned beef is packed with flavor and serves as the savory foundation for our casserole. Plus, it fills your kitchen with a delicious aroma!

    Step 3 – Sauté the Vegetables

    Next, add in your chopped onion, green bell pepper, red bell pepper, and minced garlic to the skillet. Stir everything together and let it cook for 5-7 minutes. You’re looking for the vegetables to soften up and become aromatic. This is where the magic starts; the combination of colors and scents is sure to make your taste buds tingle!

    Step 4 – Combine the Ingredients

    Now it’s time to bring the bigger flavors into play! Mix in the petite diced tomatoes, ketchup, yellow mustard, brown sugar, salt, and black pepper. Stir everything together and reduce the heat to low. Cover the skillet and let it simmer for about 10 minutes. This step lets all those flavors meld into one hearty mixture.

    Step 5 – Cook the Pasta and Corn

    While your meat mix simmers, bring a pot of water to a boil. Cook the penne pasta and frozen whole-kernel corn until tender. It usually takes about 8-10 minutes. After cooking, drain them both well. This way, your casserole will have that perfect texture and hearty goodness!

    Step 6 – Mix Everything Together

    Once you’ve drained the pasta and corn, it’s time for the fun part! Add them to the skillet along with 1 ½ cups of shredded Colby-Jack cheese. Give everything a good stir so that the cheese melts and coats the mixture evenly. You’ll see how they all come together into a colorful and inviting blend!

    Step 7 – Transfer to Baking Dish

    Now it’s time to move your delicious mixture into a 9×13-inch baking dish. Spread it out evenly using a spatula. This is where your casserole gets its final shape. Make sure it’s level to ensure even baking. Trust me, your patience will pay off when you slice into that cheesy goodness!

    Step 8 – Bake It All Together

    Finally, pop your casserole into the preheated oven and let it bake for about 20 minutes. You’ll know it’s ready when the cheese is melted and bubbly, creating a beautiful golden-crusted top. Take a moment to savor the aroma wafting through your kitchen. It’s a peek into the deliciousness awaiting you!

    Tips for Success

    • Always taste as you go! Adjust seasoning according to your family’s preferences.
    • Use lean ground beef to cut down on grease without sacrificing flavor.
    • Customize your veggies! Don’t hesitate to toss in what you have on hand.
    • Let the casserole rest for a few minutes before serving. This helps it set.
    • For extra crunch, sprinkle breadcrumbs on top before baking.

    Equipment Needed

    • Large Skillet: Use this for browning the beef and sautéing the veggies. A Dutch oven works too!
    • Pasta Pot: Essential for boiling your pasta and corn. Any large pot will do!
    • Baking Dish: A 9×13-inch dish is perfect, but any similar-sized dish works just fine.
    • Spatula: Handy for mixing and spreading the casserole.

    Variations of Sloppy Joe Casserole

    • Turkey or Chicken: Swap out the ground beef for ground turkey or chicken for a lighter twist on this classic.
    • Vegetarian: Use plant-based ground meat or finely chopped mushrooms, lentils, and beans instead for a hearty veggie version.
    • Spicy Kick: Add some diced jalapeños or a splash of hot sauce to the mix for those who love a little heat!
    • Cheesy Delight: Mix in different types of cheese like pepper jack or mozzarella for a unique cheese experience.
    • Low-Carb Option: Substitute the pasta with spaghetti squash or zucchini noodles for a low-carb adaptation.
    • Southern Flair: Stir in some cooked bacon or sausage bits for that extra Southern comfort vibe.

    Serving Suggestions for Sloppy Joe Casserole

    • Side Salad: Pair your casserole with a crisp green salad drizzled with vinaigrette for a refreshing contrast.
    • Garlic Bread: Serve with warm garlic bread for the perfect way to soak up those delicious flavors.
    • Drinks: A cold iced tea or lemonade complements the meal brilliantly.
    • Presentation: Garnish with fresh parsley for a pop of color and added freshness.

    FAQs about Sloppy Joe Casserole

    Can I make Sloppy Joe Casserole ahead of time?
    Absolutely! You can prepare the casserole in advance and store it in the refrigerator. Just assemble everything in the baking dish, cover it, and pop it in the fridge. When you’re ready to eat, bake it straight from the fridge, adding a few extra minutes to the cooking time.

    What can I serve with Sloppy Joe Casserole?
    This dish pairs perfectly with a simple side salad, garlic bread, or even some roasted vegetables. The sweet and savory flavors of the casserole balance beautifully with fresh, crispy sides.

    Can I freeze Sloppy Joe Casserole?
    Yes, you can freeze it! Simply let the casserole cool completely before transferring it to an airtight container. It can last in the freezer for up to 3 months. Just thaw it in the fridge overnight before baking.

    How spicy is this casserole?
    The base recipe isn’t spicy, but you can easily add heat to it! Consider stirring in diced jalapeños or a splash of your favorite hot sauce for a kick that’ll warm you right up.

    What’s the best way to reheat leftover Sloppy Joe Casserole?
    To reheat, simply place individual servings in the microwave or warm the whole dish in the oven at 350°F (175°C) for about 15-20 minutes, until heated through. Cover with foil to keep it moist!

    Final Thoughts

    Preparing this Sloppy Joe Casserole is more than just making dinner; it’s a chance to gather your loved ones around the table and share some laughter and warmth. With its comforting flavors and inviting aroma, it creates a sense of home that everyone craves after a long day. It’s gratifying to see happy faces enjoying a meal that you whipped up with love. So, the next time life gets hectic, remember this recipe is here to save the day. Dive in, savor every bite, and cherish those moments that bring your family close!


    Print

    clock clock iconcutlery cutlery iconflag flag iconfolder folder iconinstagram instagram iconpinterest pinterest iconfacebook facebook iconprint print iconsquares squares iconheart heart iconheart solid heart solid icon

    Description

    A hearty and delicious Sloppy Joe Casserole that the whole family will enjoy.


    • 1 lb ground beef
    • 1 small onion, chopped
    • 1 green bell pepper, chopped
    • 1 red bell pepper, chopped
    • 1 clove garlic, minced
    • 1 14.5 oz can petite diced tomatoes
    • 1 cup ketchup
    • 1 tbsp brown sugar
    • 1 tsp yellow mustard
    • Salt and black pepper to taste
    • 2 cups frozen whole-kernel corn
    • 1 16 oz package penne pasta
    • 1 ½ cups shredded Colby-Jack cheese

    1. Preheat your oven to 350°F (175°C).
    2. In a large skillet, brown the ground beef over medium-high heat until fully cooked and no pink remains.
    3. Add the chopped onion, red and green bell peppers, and minced garlic to the skillet. Stir and cook for 5–7 minutes until the vegetables are softened.
    4. Mix in the diced tomatoes, ketchup, mustard, brown sugar, salt, and pepper. Stir to combine, then reduce the heat to low. Cover and let the mixture simmer for 10 minutes.
    5. Meanwhile, cook the penne pasta and frozen corn in boiling water (in separate pots or together). Drain well.
    6. Add the cooked pasta, corn, and shredded Colby-Jack cheese to the skillet. Stir until everything is evenly combined.
    7. Transfer the mixture to a 9×13-inch baking dish, spreading it out evenly.
    8. Bake in the preheated oven for 20 minutes, or until the cheese is melted and the dish is heated through.
    9. Serve hot and enjoy!

    Notes

    • Feel free to customize the vegetables based on your preference.
    • This casserole can be made ahead of time and stored in the refrigerator before baking.
    • Prep Time: 15 minutes
    • Cook Time: 30 minutes
    • Category: Main Course
    • Method: Baking
    • Cuisine: American

    Nutrition

    • Serving Size: 1 serving
    • Calories: 500
    • Sugar: 10g
    • Sodium: 800mg
    • Fat: 25g
    • Saturated Fat: 10g
    • Unsaturated Fat: 15g
    • Trans Fat: 0g
    • Carbohydrates: 50g
    • Fiber: 5g
    • Protein: 25g
    • Cholesterol: 70mg

    Sharing is caring!

  • Korean Ground Beef Bowl

    Korean Ground Beef Bowl


    Introduction to Korean Ground Beef Bowl

    Life gets hectic, doesn’t it? Between juggling work, kids, and endless to-do lists, it’s hard to find time to cook a delicious meal. That’s where my Korean Ground Beef Bowl comes in—a comforting dish that’s as satisfying as it is easy to whip up. Trust me; this recipe will become your go-to solution for busy days. Imagine vivid flavors and delightful aromas coming together in one bowl, making dinner feel like a special occasion. Plus, it’s customizable, meaning even the pickiest eater in your family will be impressed!

    Why You’ll Love This Korean Ground Beef Bowl

    This Korean Ground Beef Bowl is not just a recipe; it’s a lifesaver for busy evenings! With about 35 minutes from start to finish, you’ll be enjoying a delicious meal without the stress. The combination of flavors—savory, nutty, and just a hint of sweetness—is simply irresistible. Plus, it’s a one-bowl wonder, making cleanup a breeze! It’s definitely a dish that lets you spend more time with your loved ones and less time in the kitchen.

    Ingredients for Korean Ground Beef Bowl

    Gathering the right ingredients is the first step towards creating your own Korean Ground Beef Bowl. Here’s what you’ll need:

    • Ground Beef: I prefer 80/20 for its balance of flavor and fat, perfect for browning.
    • Soy Sauce or Tamari: This adds that lovely umami taste. Tamari is a great gluten-free alternative if that’s your need.
    • Sesame Oil: A key player for a rich, nutty undertone—don’t skip it!
    • Garlic: Freshly minced garlic infuses the dish with an aromatic kick.
    • Ginger: Minced ginger provides a zesty freshness that brightens up the flavors.
    • Green Onions: Chopped for a mild onion flavor, plus they’re fantastic for garnish.
    • Salt and Pepper: Essential for balancing flavors—just the right pinch can elevate your bowl.
    • Cooked Rice: Use jasmine, basmati, or brown rice as a hearty base for your bowl.
    • Optional Toppings: Think sesame seeds, sliced cucumber, kimchi, or pickled veggies for added flavor and texture.
    • Optional Vegetables: Bell peppers, carrots, broccoli, or spinach can add color and nutrition to the dish.
    • Optional Egg: A fried egg on top adds creaminess and looks downright lovely!

    For precise quantities of each ingredient, check the end of the article where everything is neatly organized for you. Happy cooking!

    How to Make Korean Ground Beef Bowl

    Prepare the Rice

    Starting with the rice is essential for a perfect Korean Ground Beef Bowl. First, rinse 1 cup of rice under cold water until the water runs clear to remove excess starch. This step helps the rice remain fluffy rather than sticky. Then, combine the rinsed rice with 2 cups of water in a pot. Bring it to a boil, then reduce the heat to low, cover, and simmer for around 15 minutes. Once the water has absorbed, take it off the heat and let it sit for 5 minutes. Fluff it with a fork for a light texture.

    Cook the Ground Beef

    Now, let’s move on to the star of the show: the ground beef! In a large skillet over medium-high heat, add 1 pound of ground beef. Break it apart with a spatula, giving it some love as it cooks. You’re aiming for a beautiful brown color; this usually takes about 5-7 minutes. Make sure it’s cooked all the way through—no one wants a pink beef bowl! If needed, drain any excess fat for a leaner dish.

    Add Flavors

    Once your ground beef is cooked, it’s time to amp up the flavors. Add minced garlic and ginger to the skillet. Cook for an additional 1-2 minutes until those amazing aromas waft through your kitchen. This step is crucial for enhancing the overall taste, making your Korean Ground Beef Bowl unforgettable!

    Season It Up

    Now let’s make it sing! Stir in the soy sauce, sesame oil, and chopped green onions. These ingredients create a lovely balance of savory and nutty flavors. Season with salt and pepper to your liking—just a pinch can work wonders. Let it simmer for a couple of minutes, allowing all those flavors to meld beautifully.

    Assemble the Bowl

    Your Korean Ground Beef Bowl is almost ready! Spoon a generous amount of your fluffy rice into the bottom of a bowl. Next, layer the seasoned ground beef mixture on top, letting it rest like a warm blanket. If you opted for additional vegetables like broccoli or bell peppers, scatter them on or around the beef. This not only adds nutrition but also makes the dish visually appealing!

    Garnish

    A beautiful meal deserves a pretty finish! Sprinkle sesame seeds and leftover chopped green onions generously over the top. You can also add extras like a fried egg for creaminess or kimchi for a delightful kick. This final touch is what elevates your Korean Ground Beef Bowl from good to gourmet!

    Tips for Success

    • Rinse the rice thoroughly to avoid stickiness and achieve a fluffier texture.
    • Don’t rush the browning of the beef; it adds delicious detail and flavor.
    • Feel free to mix in your favorite vegetables to boost nutrition and color.
    • Adjust seasoning to your taste; a dash of red pepper flakes can add heat.
    • Leftovers make great lunch; store in airtight containers for easy reheating!

    Equipment Needed

    • Large Skillet: Essential for browning beef; a non-stick option works great too.
    • Pot with Lid: Required for cooking rice; any medium-sized pot will do.
    • Spatula: Perfect for breaking apart and stirring the beef.
    • Measuring Cups: Handy for precise ingredients, though not strictly necessary.
    • Fork: Used for fluffing rice after it’s cooked.

    Variations

    • Ground Turkey or Chicken: Swap out the beef for ground turkey or chicken for a leaner option without sacrificing flavor.
    • Cauliflower Rice: For a low-carb alternative, serve the beef over cauliflower rice or zoodles instead of regular rice.
    • Spicy Twist: If you love heat, add sriracha or gochujang (Korean chili paste) to the mix for an extra kick.
    • Vegan Version: Substitute the ground beef with crumbled tofu or tempeh, and use soy sauce to keep it tasty.
    • Mix of Vegetables: Incorporate your favorite veggies; snap peas and bok choy pair wonderfully for added crunch.

    Serving Suggestions for Korean Ground Beef Bowl

    • Pair your Korean Ground Beef Bowl with a side of crispy Asian slaw for added crunch.
    • A chilled cucumber salad with a vinegar dressing complements the dish beautifully.
    • Serve it with a light Korean beer or iced green tea for a refreshing beverage.
    • To elevate presentation, use vibrant bowls that highlight the colorful ingredients.
    • A sprinkle of fresh herbs like cilantro can also brighten up the dish!

    FAQs about Korean Ground Beef Bowl

    Wondering about some specifics regarding the Korean Ground Beef Bowl? Here are a few FAQs that might help you along your culinary journey:

    Can I make this dish ahead of time?

    Absolutely! You can prepare the ground beef mixture and store it in the fridge for up to three days. Just reheat it before serving over fresh rice!

    What’s the best way to store leftovers?

    Store any leftovers in an airtight container in the refrigerator. This way, you can enjoy your Korean Ground Beef Bowl as quick lunch the next day!

    Can I freeze the beef mixture?

    Yes, you can freeze the beef mixture! Just let it cool down first, then place it in a freezer-safe container. It’s perfect for quick meals on busy nights!

    What other proteins can I use?

    Feel free to swap in ground turkey, chicken, or even crumbled tofu for a vegan option. Each will offer a unique twist on the classic Korean Ground Beef Bowl.

    How can I make it more nutritious?

    Add a mix of colorful vegetables such as carrots, bell peppers, or spinach. This not only enhances flavors but also boosts the nutritional benefits.

    Final Thoughts

    Creating a Korean Ground Beef Bowl has brought me pure joy in the kitchen. It’s more than just a meal; it’s a delightful experience that invites family gatherings and cozy dinners. The vibrant flavors and inviting aromas transform ordinary nights into memorable moments. Every bowl feels like a warm hug, reminding me of shared laughter and love around the table. Plus, the flexibility of this dish makes it a reliable option for any busy week. I hope you find as much happiness in making it as I do in sharing this recipe with you!


    Print

    clock clock iconcutlery cutlery iconflag flag iconfolder folder iconinstagram instagram iconpinterest pinterest iconfacebook facebook iconprint print iconsquares squares iconheart heart iconheart solid heart solid icon

    Description

    Life gets hectic, doesn’t it? Between juggling work, kids, and endless to-do lists, it’s hard to find time to cook a delicious meal. That’s where my Korean Ground Beef Bowl comes in—a comforting dish that’s as satisfying as it is easy to whip up. Trust me; this recipe will become your go-to solution for busy days.


    • 1 pound ground beef 80/20
    • 2 tablespoons soy sauce or tamari
    • 1 tablespoon sesame oil
    • 3 cloves garlic, minced
    • 1 teaspoon ginger, minced
    • 2 green onions, chopped (plus extra for garnish)
    • Salt and pepper to taste
    • 2 cups cooked rice (jasmine, basmati, or brown rice)
    • Optional toppings: sesame seeds, sliced cucumber, kimchi, or pickled vegetables
    • Optional vegetables: bell peppers, carrots, broccoli, or spinach
    • Optional egg: a fried egg on top

    1. Prepare the Rice: Rinse 1 cup of rice under cold water until the water runs clear. Combine with 2 cups of water in a pot. Bring to a boil, then reduce heat to low, cover, and simmer for about 15 minutes until water is absorbed. Remove from heat and let it sit for 5 minutes before fluffing with a fork.
    2. Cook the Ground Beef: In a large skillet over medium-high heat, add the ground beef. Use a spatula to break it apart as it cooks. Brown until it’s no longer pink, about 5-7 minutes.
    3. Add Flavors: Drain excess fat if necessary. Add the minced garlic and ginger, cooking for an additional 1-2 minutes until fragrant.
    4. Season It Up: Stir in the soy sauce, sesame oil, and chopped green onions. Season with salt and pepper to taste. Allow it to simmer for a couple of minutes so the flavors meld together.
    5. Assemble the Bowl: Spoon a generous amount of cooked rice into the bottom of your bowl. Top the rice with the seasoned ground beef mixture. If using additional vegetables, such as steamed broccoli or sliced bell peppers, add them on top or around the beef.
    6. Garnish: Finish with a sprinkle of sesame seeds, chopped green onions, and any other toppings you prefer, like kimchi or a fried egg.

    Notes

    • This dish is highly customizable with different vegetables and toppings.
    • Adjust the spice level by adding red pepper flakes or sriracha if desired.
    • Prep Time: 10 minutes
    • Cook Time: 25 minutes
    • Category: Main Course
    • Method: Stovetop
    • Cuisine: Korean

    Nutrition

    • Serving Size: 1 bowl
    • Calories: 480
    • Sugar: 2g
    • Sodium: 700mg
    • Fat: 28g
    • Saturated Fat: 10g
    • Unsaturated Fat: 15g
    • Trans Fat: 1g
    • Carbohydrates: 30g
    • Fiber: 2g
    • Protein: 24g
    • Cholesterol: 80mg

    Sharing is caring!

  • Whipped Feta with Roasted Beets & Pistachios

    Whipped Feta with Roasted Beets & Pistachios


    Introduction to Whipped Feta with Roasted Beets & Pistachios

    As a passionate home cook, I always seek out recipes that spark joy and delight. Enter my Whipped Feta with Roasted Beets & Pistachios! This dish marries creamy, flavorful feta with the earthy sweetness of roasted beets, creating a vibrant appetizer. Perfect for busy days or when entertaining loved ones, it’s a quick solution that feels gourmet without the fuss. Not to mention, the crunchy pistachios add a delightful texture. Imagine scooping it up with warm pita—pure bliss! You’re bound to fall in love, just as I did.

    Why You’ll Love This Whipped Feta with Roasted Beets & Pistachios

    This Whipped Feta with Roasted Beets & Pistachios is a delightful combination of flavor and simplicity. It’s a breeze to prepare, taking just under an hour from start to finish. The creamy feta, sweet beets, and crunchy pistachios create a stunning centerpiece that impresses anyone who sees it. Plus, it’s vegan-friendly, perfect for diverse dietary needs, making it an ideal choice for gatherings or quiet family evenings.

    Ingredients for Whipped Feta with Roasted Beets & Pistachios

    Gathering the right ingredients is half the fun! Here’s what you’ll need for this Whipped Feta with Roasted Beets & Pistachios. Don’t worry; exact measurements can be found at the bottom of the article for easy printing.

    • Beets: One large beet is perfect, giving that sweet earthiness. You can use golden or red for a splash of color.
    • Avocado Oil: A light drizzle helps achieve that perfect roast. It adds flavor without overpowering the beets.
    • Salt and White Pepper: These basic seasonings bring out the natural sweetness of the beets and enhance the feta.
    • Non-Dairy Yogurt: A creamy base for the whipped feta. I love using brands like Culina or Siggi’s for thickness.
    • Vegan Feta Cheese: This gives the heavenly whipped texture. Try Violife or Trader Joe’s for a great taste.
    • Pistachios: Lightly chopped, these nutty morsels add a delightful crunch that contrasts beautifully with the creamy feta and sweet beets.
    • Crushed Pink Peppercorns: For a touch of heat and color, sprinkle them on. They add a lovely visual appeal too.
    • Good Olive Oil: A generous drizzle heightens the flavors and makes your dish shine.
    • Optional Sweetener: A drizzle of vegan honey or maple syrup can enhance the sweetness if you like.
    • Sumac or Za’atar: These Middle Eastern spices give an extra layer of flavor. They’re not mandatory, but they can elevate the dish!
    • Pita or Flatbread: For serving, warm pita or flatbread helps scoop up all that dreamy whipped feta.

    How to Make Whipped Feta with Roasted Beets & Pistachios

    Step 1: Preheat the Oven

    First things first, preheating the oven to 350°F (175°C) is essential for even roasting. It gets the cooking process moving along nicely, ensuring those beautiful beets become tender and sweet. This simple step sets the stage for your culinary creation!

    Step 2: Prepare the Beets

    Next up, place your beet wedges in a bowl. Drizzle with avocado oil, then sprinkle with salt and white pepper. Toss them until fully coated. Spread those brightly colored beauties on a baking sheet, and roast for 20-25 minutes. Look for fork-tender beets; they should glide easily when they’re done!

    Step 3: Whip the Feta Mixture

    While those beets are roasting, let’s whip up the feta! In a large bowl, combine the vegan feta cheese and non-dairy yogurt. Using a hand mixer or whisk, blend them until the mixture is smooth and fluffy. Taste it and feel free to adjust salt or pepper to complement the sweetness of the beets perfectly.

    Step 4: Assemble the Dish

    Once your beets have cooled slightly, it’s time to assemble! Spread the whipped feta mixture onto a large serving plate, creating a luscious base. Then, elegantly arrange the roasted beets on one side, making it visually inviting. The contrast of colors will be stunning, catching everyone’s eye!

    Step 5: Garnish and Serve

    Finish it off with a sprinkle of chopped pistachios and crushed pink peppercorns for a pop of color. Drizzle a touch of good olive oil over the top to add richness. Presentation is key—serve it up immediately with warm pita or flatbread for the ultimate dipping experience!

    Tips for Success

    • Roast the beets in a single layer to ensure even cooking and caramelization.
    • Allow the whipped feta to sit for a few minutes before serving. This helps the flavors meld beautifully.
    • For an extra kick, consider adding a splash of citrus juice to the feta mixture!
    • Taste as you go! Adjust seasonings to suit your palate.
    • Make it ahead! The dish holds well in the fridge—just assemble before serving.

    Equipment Needed

    • Baking Sheet: A standard sheet works well. If you don’t have one, a shallow dish will do.
    • Mixing Bowl: Any size bowl will suffice, but a larger one gives you space to whip.
    • Hand Mixer or Whisk: A hand mixer is quicker, but a whisk gives you a good workout!
    • Knife and Cutting Board: Essential for chopping your beets and pistachios.

    Variations of Whipped Feta with Roasted Beets & Pistachios

    • Herbed Feta: Add fresh herbs like dill or basil to the feta mixture for an aromatic twist.
    • Citrus Zest: A bit of grated lemon or orange zest can brighten the flavors and add a refreshing zing.
    • Spicy Kick: Mix in some diced jalapeños or a pinch of cayenne in the feta for a spicy surprise.
    • Nut Variations: Swap pistachios for toasted walnuts or pecans for a different crunch.
    • Seasonal Veggies: Experiment with roasted carrots or sweet potatoes alongside your beets for added variety and color.
    • Cheese Adjustments: For a creamier texture, try adding a little tahini or vegan cream cheese to the feta mix.

    Serving Suggestions for Whipped Feta with Roasted Beets & Pistachios

    • Pair with a crisp, green salad for a refreshing contrast.
    • Accompany with a light white wine like Sauvignon Blanc to complement the dish’s flavors.
    • Serve as part of a charcuterie board for an elegant touch.
    • Garnish with microgreens or edible flowers for a stunning presentation.
    • Warm pita bread or toasted baguette makes for the perfect dipping companion!

    FAQs about Whipped Feta with Roasted Beets & Pistachios

    Can I use regular feta instead of vegan feta? Absolutely! If you’re not following a vegan diet, feel free to substitute traditional feta for a creamier texture. Just adjust the yogurt for consistency.

    How long can I store leftovers? Leftovers can be stored in an airtight container in the fridge for up to three days. Just give it a good stir before serving again!

    What if I don’t have pistachios? No worries! You can swap in other nuts like walnuts or pecans to maintain that satisfying crunch. They’ll still taste delicious!

    Can I make this recipe ahead of time? Definitely! You can roast the beets and prepare the whipped feta a day in advance. Assemble right before serving for the best presentation.

    Is this dish suitable for a gluten-free diet? Yes! Serve it with gluten-free pita or vegetable sticks for a satisfying, gluten-free snack that everyone will enjoy.

    Final Thoughts on Whipped Feta with Roasted Beets & Pistachios

    This Whipped Feta with Roasted Beets & Pistachios is truly a feast for the senses! Each bite brings a delightful mix of creamy, sweet, and crunchy textures that transport you straight to the Mediterranean. I love how it’s both an impressive dish for gatherings and a comforting snack after a long day. It reminds us how simple ingredients can create joy in the kitchen. So gather around the table, dip that warm pita, and enjoy this tasty adventure together. Your loved ones won’t just eat this dish; they’ll savor every delicious moment!


    Print

    clock clock iconcutlery cutlery iconflag flag iconfolder folder iconinstagram instagram iconpinterest pinterest iconfacebook facebook iconprint print iconsquares squares iconheart heart iconheart solid heart solid icon

    Description

    As a passionate home cook, I always seek out recipes that spark joy and delight. Enter my Whipped Feta with Roasted Beets & Pistachios! This dish marries creamy, flavorful feta with the earthy sweetness of roasted beets, creating a vibrant appetizer. Perfect for busy days or when entertaining loved ones, it’s a quick solution that feels gourmet without the fuss. Not to mention, the crunchy pistachios add a delightful texture. Imagine scooping it up with warm pita—pure bliss! You’re bound to fall in love, just as I did.


    • 1 large beet (about 450 g), peeled and cut into 1–1.5 inch wedges
    • 12 tbsp avocado oil, for roasting
    • Salt and white pepper, to taste
    • 7 oz (200 g) non-dairy plain unsweetened yogurt (recommended: Culina or Siggi’s for thickness)
    • 7 oz (200 g) vegan feta cheese, at room temperature (recommended: Violife or Trader Joe’s)
    • 1/3 cup pistachios, lightly chopped
    • Crushed pink peppercorns, to taste
    • A drizzle of good olive oil
    • Optional: vegan honey or maple syrup for a hint of sweetness
    • Optional: sumac or za’atar for added flavor
    • Fluffy flatbread or pita, for dipping

    1. Preheat the oven to 350°F (175°C).
    2. Toss the beet wedges with avocado oil, salt, and white pepper. Arrange them on a baking sheet and roast for 20-25 minutes, or until fork-tender. Set aside to cool slightly.
    3. In a large bowl, add the vegan feta cheese, non-dairy yogurt, salt, and white pepper. Use a hand mixer or whisk to beat the mixture until smooth and fluffy.
    4. Spread the whipped feta mixture onto a large serving plate. Arrange the roasted beets over half of the plate.
    5. Top with crushed pistachios, pink peppercorns, and a generous drizzle of olive oil. For extra flavor, consider adding a light drizzle of vegan honey or maple syrup and a sprinkle of sumac or za’atar if desired.
    6. Serve with warm pita or flatbread for dipping, and enjoy immediately.

    Notes

    • Adjust seasoning based on personal taste.
    • Can be made ahead of time and assembled just before serving.
    • Use other types of nuts if pistachios are not available.
    • Prep Time: 15 minutes
    • Cook Time: 25 minutes
    • Category: Appetizer
    • Method: Roasting and Mixing
    • Cuisine: Mediterranean

    Nutrition

    • Serving Size: 1 serving
    • Calories: 280
    • Sugar: 5g
    • Sodium: 300mg
    • Fat: 22g
    • Saturated Fat: 3g
    • Unsaturated Fat: 15g
    • Trans Fat: 0g
    • Carbohydrates: 20g
    • Fiber: 5g
    • Protein: 8g
    • Cholesterol: 0mg

    Sharing is caring!

  • Garlic Herb Roasted Potatoes Carrots and Zucchini

    Garlic Herb Roasted Potatoes Carrots and Zucchini


    Introduction to Garlic Herb Roasted Potatoes Carrots and Zucchini

    Let’s face it—between work, family, and everything in between, getting dinner on the table can feel like a juggling act. That’s where my Garlic Herb Roasted Potatoes Carrots and Zucchini come to the rescue! This dish is a delightful blend of flavors that not only pleases the palate but also offers a quick solution for busy nights. It’s hearty, healthy, and oh-so-simple to whip up. You’ll want to keep this recipe close at hand; it’s perfect for impressing your loved ones or simply treating yourself after a long day.

    Why You’ll Love This Garlic Herb Roasted Potatoes Carrots and Zucchini

    This dish combines vibrant colors, irresistible aromas, and a medley of textures that make every bite a delight. It’s not only quick to prepare—ready in under an hour—but also packs a nutritional punch. Plus, the garlic and herbs create a flavor explosion that even picky eaters will love. You’ll appreciate how effortlessly these roast to perfection, turning simple veggies into a satisfying side dish.

    Ingredients for Garlic Herb Roasted Potatoes Carrots and Zucchini

    Gathering the right ingredients sets the stage for your Garlic Herb Roasted Potatoes Carrots and Zucchini. Here’s what you’ll need:

    • Potatoes: I prefer using medium-sized potatoes. They add heartiness and texture, perfect for soaking in that garlicky goodness.
    • Carrots: These vibrant orange beauties bring a natural sweetness to the dish. Choose large carrots for the best flavor. You can use baby carrots for ease!
    • Zucchini: With its mild flavor and tender texture, zucchini complements the other veggies beautifully. Try to pick firm zucchinis with a shiny skin.
    • Olive Oil: This is the magic elixir that helps everything roast to golden perfection. Use extra-virgin olive oil for a richer taste.
    • Garlic: Fresh minced garlic brings a robust, aromatic kiss of flavor. You can always adjust according to your taste—garlic lovers, rejoice!
    • Salt & Pepper: These staples enhance the natural flavors of your ingredients. I recommend using sea salt for a touch of sophistication.
    • Dried Oregano & Thyme: These herbs provide a fragrant backdrop that elevates the entire dish. Fresh herbs could also work if you have them on hand!
    • Paprika: This is optional but can add a smoky kick. It’s a wonderful way to play with flavors and add a hint of warmth.
    • Fresh Parsley: Not just for garnish, fresh parsley brightens the dish. It adds a pop of color and freshness.

    Exact quantities for these tasty additions are listed at the bottom of the article, ready for you to print out. Happy cooking!

    How to Make Garlic Herb Roasted Potatoes Carrots and Zucchini

    Step 1: Preheat the Oven

    First things first, let’s get that oven preheated to 425°F (220°C). Preheating is key—it ensures your veggies roast evenly and become beautifully golden. While the oven warms up, prepare a large baking sheet. You can line it with parchment paper or lightly grease it with olive oil to prevent sticking. Trust me, this small step saves a lot of hassle later!

    Step 2: Prepare the Vegetables

    Now it’s time to wash those beautiful vegetables. Rinse the potatoes, carrots, and zucchini under cool water. Once they’re clean, let’s get dicing and slicing. Cut the potatoes into 1-inch cubes for hearty bites. The carrots should be sliced into thin rounds to ensure even cooking. Lastly, slice the zucchini into half-moons about ½-inch thick. Uniformity is essential! It helps everything roast together perfectly, resulting in the best Garlic Herb Roasted Potatoes Carrots and Zucchini you’ve ever made.

    Step 3: Make the Garlic Herb Mixture

    In a small bowl, combine the olive oil, minced garlic, salt, black pepper, oregano, thyme, and paprika! This is where the magic begins. Stir everything together until it’s well mixed. The smell is heavenly as the garlic mingles with the herbs. Feel free to adjust the seasoning based on your preferences. More garlic? Go for it! A little less salt? You’ve got it! This Garlic Herb mixture is really the heart of the dish.

    Step 4: Toss the Vegetables

    In a large mixing bowl, add all your prepared vegetables. Pour that aromatic garlic herb mixture over them. Now, it’s time to get your hands in there—yes, hands-on cooking! Toss everything together with your fingers or a spatula, ensuring every piece is evenly coated. This delightful mixture will enhance flavors and make your Garlic Herb Roasted Potatoes Carrots and Zucchini truly shine.

    Step 5: Roast the Vegetables

    Spread the seasoned vegetables out on your prepared baking sheet. Be sure not to overcrowd them; this allows hot air to circulate and promotes even roasting. If they’re too close together, you might end up with steamed veggies instead of that wonderful roasted texture we all crave. Slide that sheet into your preheated oven and roast for 30-35 minutes. Flip the vegetables halfway through for an even golden-brown finish!

    Step 6: Serve and Garnish

    Once your veggies are golden and tender, it’s time to take them out of the oven. Give them a quick taste—adjust sea salt and black pepper if needed. Sprinkle the fresh parsley on top before serving. This bright garnish adds color and freshness to the dish. Serve your Garlic Herb Roasted Potatoes Carrots and Zucchini warm. Enjoy the delightful flavors you’ve crafted, and don’t be surprised when everyone comes back for seconds!

    Tips for Success

    • Always cut vegetables into similar sizes for even roasting.
    • Pat potatoes dry before seasoning to help them crisp up nicely.
    • Feel free to mix and match your favorite veggies based on what you have.
    • Adjust the roasting time if you prefer softer or crisper veggies.
    • For added flavor, squeeze a bit of lemon juice before serving.

    Equipment Needed

    • Baking Sheet: A large sheet is ideal; a roasting pan works too.
    • Parchment Paper: Optional for lining, but it makes cleanup easier.
    • Mixing Bowl: A large bowl to toss veggies and seasonings.
    • Spatula: Use one to flip the veggies; tongs are a great alternative!
    • Knife and Cutting Board: Essential for prepping your colorful ingredients.

    Variations

    • Add Protein: Toss in some cooked chicken, sausage, or chickpeas for a heartier dish!
    • Switch Up the Veggies: Try bell peppers, asparagus, or Brussels sprouts based on your taste preferences or what’s in season.
    • Herb Swaps: Use fresh herbs like rosemary or basil for a unique flavor twist; fresh herbs add a vibrant touch.
    • Spice It Up: Add a pinch of red pepper flakes for a zesty kick or a dash of curry powder for an exotic flair!
    • Roast with Cheese: Sprinkle some Parmesan or feta cheese over the veggies in the last few minutes of roasting for a deliciously cheesy finish.

    Serving Suggestions

    • Pair your Garlic Herb Roasted Potatoes Carrots and Zucchini with grilled chicken or fish for a wholesome meal.
    • Serve alongside a fresh, green salad drizzled with vinaigrette to brighten your plate.
    • A glass of chilled white wine complements the flavors beautifully.
    • Presentation tip: Serve in a colorful bowl, garnished with extra parsley for an eye-catching finish!

    FAQs about Garlic Herb Roasted Potatoes Carrots and Zucchini

    Can I use other vegetables in this recipe?

    Absolutely! This recipe is versatile. You can easily swap in other vegetables like bell peppers, broccoli, or even Brussels sprouts. Just make sure they’re cut to similar sizes for even cooking.

    How do I store leftovers?

    Once cooled, store any leftovers in an airtight container in the fridge. They’ll stay fresh for about 3-4 days. Reheat them in the oven or microwave. Trust me, they taste just as good the next day!

    Can I make this dish ahead of time?

    I love that you can prep the veggies and the garlic herb mixture ahead of time. Just keep them in separate containers in the fridge. When you’re ready to enjoy, simply toss and roast!

    How can I make this dish vegan?

    This recipe is already vegan! Just ensure all seasonings and oils are plant-based, and you’re good. You might want to add some nutritional yeast for a cheesier flavor if you like!

    What can I serve with Garlic Herb Roasted Potatoes Carrots and Zucchini?

    This vibrant side dish pairs wonderfully with grilled meats, fish, or even a hearty vegetarian dish. It complements salads beautifully too, adding a nutritious punch to your meals.

    Final Thoughts

    Cooking should be a joyful experience, and my Garlic Herb Roasted Potatoes Carrots and Zucchini embodies that joy! It’s a dish that not only nourishes the body but also warms the heart. The aroma wafting through your kitchen while these veggies roast is simply delightful. Whether you’re whipping it up for a family dinner or hosting friends, this recipe always impresses. Plus, it’s a beautiful reminder that simplicity in cooking can lead to the most delicious outcomes. So roll up your sleeves, savor the process, and enjoy every delightful bite. Happy cooking!


    Print

    clock clock iconcutlery cutlery iconflag flag iconfolder folder iconinstagram instagram iconpinterest pinterest iconfacebook facebook iconprint print iconsquares squares iconheart heart iconheart solid heart solid icon

    Description

    Let’s face it—between work, family, and everything in between, getting dinner on the table can feel like a juggling act. That’s where my Garlic Herb Roasted Potatoes Carrots and Zucchini come to the rescue! This dish is a delightful blend of flavors that not only pleases the palate but also offers a quick solution for busy nights. It’s hearty, healthy, and oh-so-simple to whip up. You’ll want to keep this recipe close at hand; it’s perfect for impressing your loved ones or simply treating yourself after a long day.


    • 4 medium potatoes, diced into 1-inch cubes
    • 3 large carrots, peeled and sliced into thin rounds
    • 2 medium zucchinis, sliced into half-moons
    • 3 tablespoons olive oil
    • 4 cloves garlic, minced
    • 1 teaspoon salt (or to taste)
    • ½ teaspoon black pepper
    • 1 teaspoon dried oregano
    • 1 teaspoon dried thyme
    • 1 teaspoon paprika (optional, for a smoky kick)
    • 2 tablespoons fresh parsley, chopped (plus extra for garnish)

    1. Preheat your oven to 425°F (220°C). Line a large baking sheet with parchment paper or lightly grease it with olive oil to prevent sticking.
    2. Wash and dice the potatoes into 1-inch cubes. Pat them dry with a paper towel to remove excess moisture.
    3. Peel the carrots and slice them into thin rounds. Make sure the slices are uniform for even cooking.
    4. Cut the zucchinis into half-moon slices about ½-inch thick.
    5. In a small bowl, combine olive oil, minced garlic, salt, black pepper, oregano, thyme, and paprika. Stir until well mixed.
    6. Place the potatoes, carrots, and zucchini in a large mixing bowl. Pour the olive oil mixture over the vegetables and toss until everything is evenly coated.
    7. Spread the seasoned vegetables onto the prepared baking sheet in a single layer, avoiding overcrowding.
    8. Place the baking sheet in the preheated oven and roast for 30-35 minutes, flipping the vegetables halfway through.
    9. Once golden and tender, remove from the oven. Sprinkle with fresh parsley and serve immediately.

    Notes

    • Ensure vegetables are cut to similar sizes for even cooking.
    • If zucchini browns too quickly, remove it early or push it to the edges of the pan.
    • Prep Time: 15 minutes
    • Cook Time: 35 minutes
    • Category: Side Dish
    • Method: Roasting
    • Cuisine: American

    Nutrition

    • Serving Size: 1 cup
    • Calories: 200
    • Sugar: 2g
    • Sodium: 300mg
    • Fat: 10g
    • Saturated Fat: 1g
    • Unsaturated Fat: 9g
    • Trans Fat: 0g
    • Carbohydrates: 30g
    • Fiber: 4g
    • Protein: 4g
    • Cholesterol: 0mg

    Sharing is caring!