Category: Uncategorized

  • Sweet Chili Chicken Coconut Lime

    Sweet Chili Chicken Coconut Lime


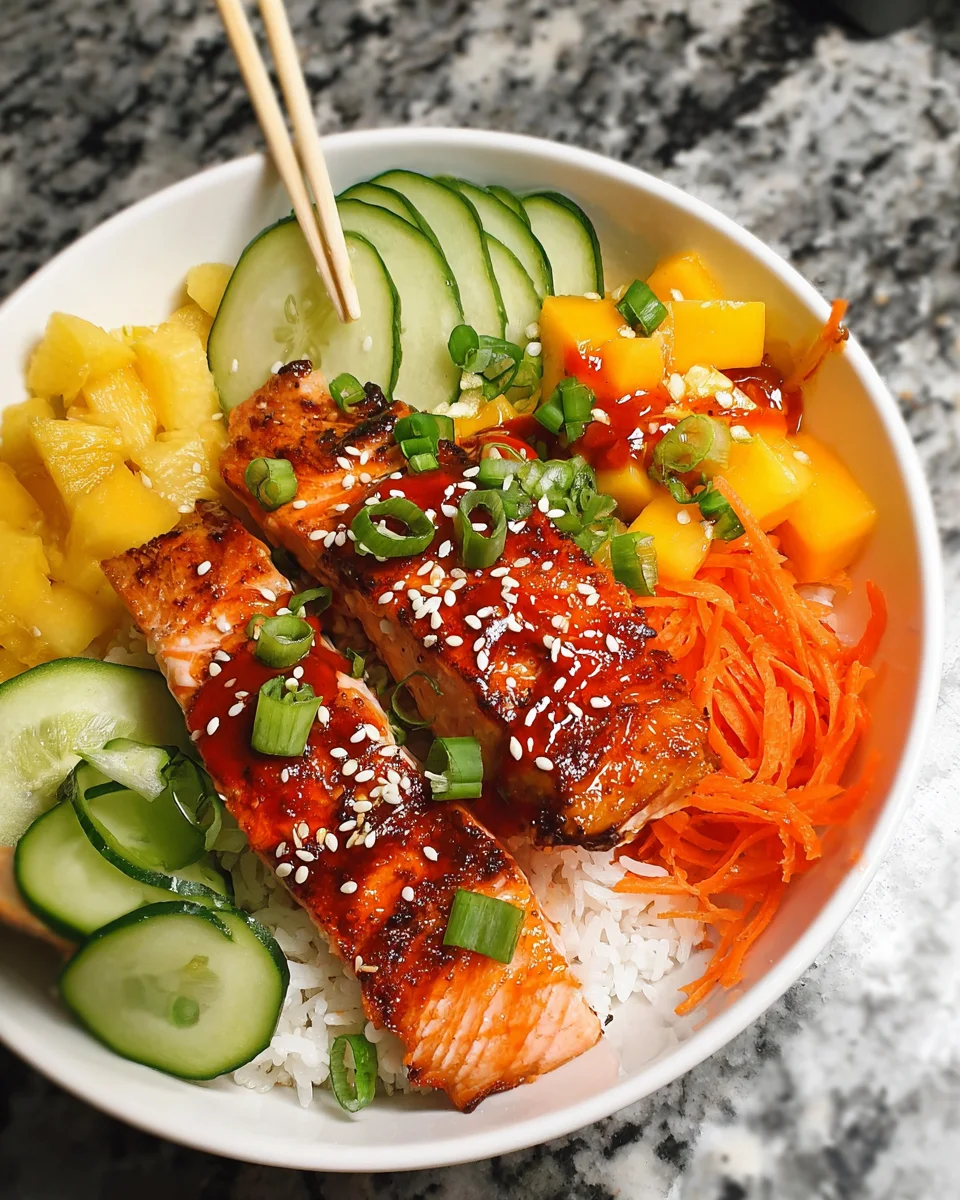
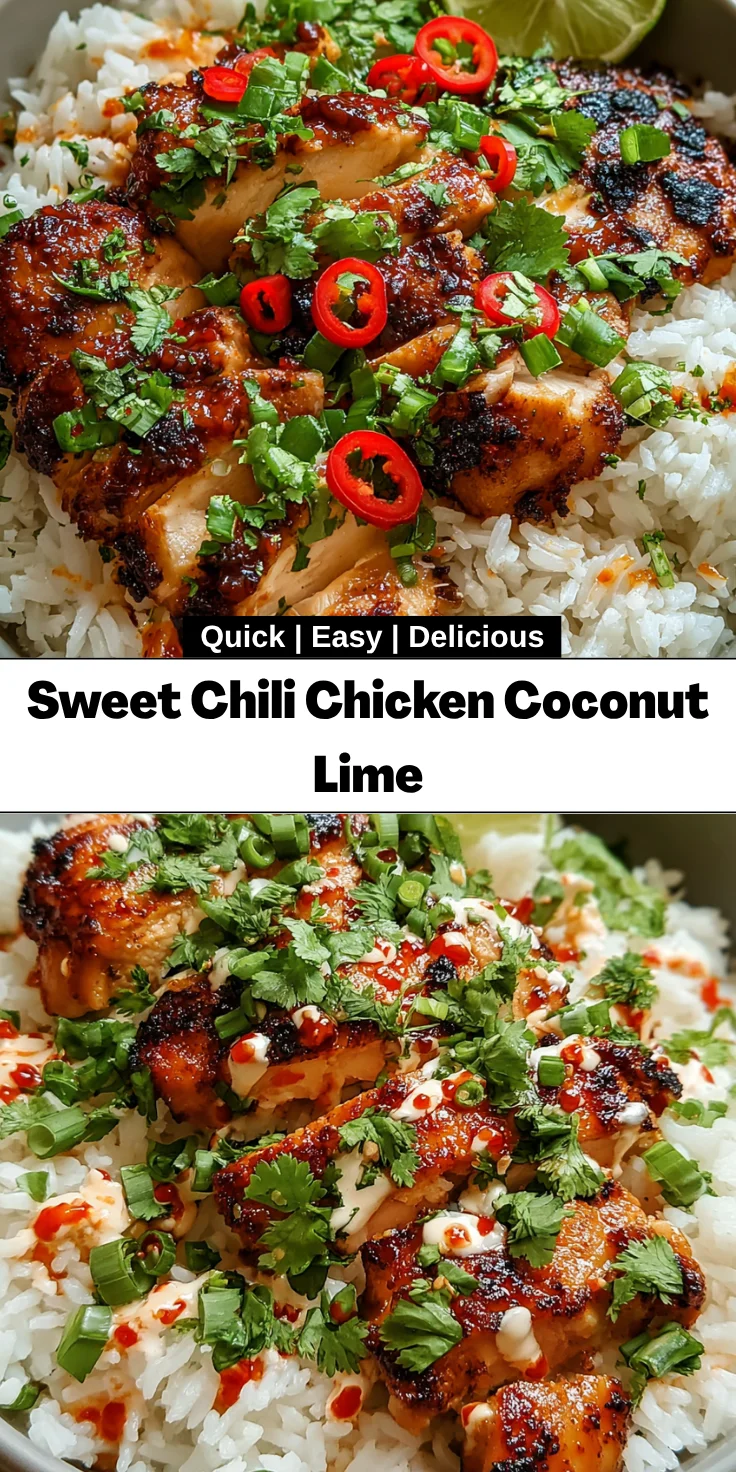
    Introduction to Sweet Chili Chicken Coconut Lime

    Welcome to my kitchen, where deliciousness takes center stage! If you’re looking for a flavorful dish that captures the essence of vibrant Asian fusion, you’ve come to the right place. My Sweet Chili Chicken Coconut Lime recipe is a delightful treat that’s perfect for a busy weeknight or an intimate dinner with friends. It combines tender chicken with a sweet and tangy coconut lime drizzle, ensuring it’s not only quick to prepare but also impresses your loved ones. Let’s dive into this culinary adventure that promises to tickle your taste buds!

    Why You’ll Love This Sweet Chili Chicken Coconut Lime

    This Sweet Chili Chicken Coconut Lime dish is a lifesaver for busy moms and professionals like us! It’s not only quick to whip up, but each bite bursts with vibrant flavors. Imagine rich coconut, zesty lime, and sweet chili dancing on your palate. Plus, it’s a one-pan wonder, making cleanup a breeze. You’ll have more time to enjoy dinner with your family while savoring this delightful meal together!

    Ingredients for Sweet Chili Chicken Coconut Lime

    When it comes to creating the perfect Sweet Chili Chicken Coconut Lime, having the right ingredients is key! Each has its own role in crafting the delicious symphony of flavors. Here’s what you’ll need:

    • Boneless skinless chicken thighs: Juicy and flavorful, thighs stay tender when cooked, making them perfect for this dish.
    • Sweet chili sauce: This sweet and spicy sauce serves as the base for the marinade, adding depth and richness.
    • Soy sauce: A touch of umami that enhances the overall flavor without overpowering your taste buds.
    • Garlic: Freshly minced garlic brings a lovely aroma, elevating every bite with its rich flavor.
    • Fresh ginger: Grated ginger adds warmth and a subtle kick, balancing the sweetness of the chili sauce.
    • Lime juice: Fresh lime juice introduces a zesty brightness, brightening up the dish beautifully.
    • Full-fat coconut milk: Creamy and luscious, coconut milk provides a rich, smooth drape over the chicken.
    • Chili sauce or sriracha (optional): For those who enjoy a bit of heat, adding chili sauce can fire up your dish!
    • Jasmine rice: Fluffy and aromatic, jasmine rice makes the perfect bed for the chicken and sauce.
    • Fresh cilantro: Adds a refreshing herbaceous note that brightens up the plate.
    • Green onions: Chopped green onions lend a pleasant crunch and mild onion flavor.
    • Crushed red pepper (optional): If you’re feeling adventurous, a sprinkle of crushed red pepper adds extra spice.
    • Salt: Essential for bringing all the flavors together; adjust to your palate.
    • Olive oil: Used for cooking, it prevents the chicken from sticking and contributes a subtle flavor.

    For exact measurements, check the bottom of the article where you can find the ingredients listed in more detail, perfect for printing!

    How to Make Sweet Chili Chicken Coconut Lime

    Now, let’s make this amazing Sweet Chili Chicken Coconut Lime come to life in your kitchen! Follow along with these simple steps to create a dish that’ll have your family asking for seconds.

    Step 1: Marinate the Chicken

    The marination is key in this recipe. It allows the chicken to soak up all those sweet and savory flavors. In a large bowl, whisk together the sweet chili sauce, soy sauce, minced garlic, grated ginger, and lime juice. These vibrant ingredients create a perfect melange of tastes.

    Now, add your chicken thighs to the marinade, making sure each piece is completely coated. Cover and let it sit for at least 30 minutes. If time allows, marinate it longer—trust me, the flavor will be next-level divine!

    Step 2: Prepare the Coconut Lime Sauce

    While the chicken is marinating, let’s whip up the coconut lime sauce. In a separate bowl, combine the full-fat coconut milk, a squeeze of lime juice, a spoonful of sweet chili sauce, and if you like it spicy, a dash of chili sauce or sriracha.

    This sauce is not just a dressing; it’s a flavorful hug for your chicken. Mixing in the lime juice adds a bright note that pairs beautifully with the richness of the coconut milk. Pop it in the fridge and let those flavors marry while you cook the chicken!

    Step 3: Cook the Chicken

    Once the marinating is done, it’s cooking time! Heat a grill pan or skillet over medium-high heat. Drizzle in a little olive oil to coat the pan. This helps to achieve that lovely caramelization we all crave.

    Carefully add the marinated chicken thighs to the hot pan. Cook each side for about 5–6 minutes or until the chicken is fully cooked, achieving a golden-brown crust.

    Check for doneness by cutting into a thigh; it should be juicy and white throughout. After cooking, let the chicken rest for a few minutes—this locks in the juices, making every bite flavorful!

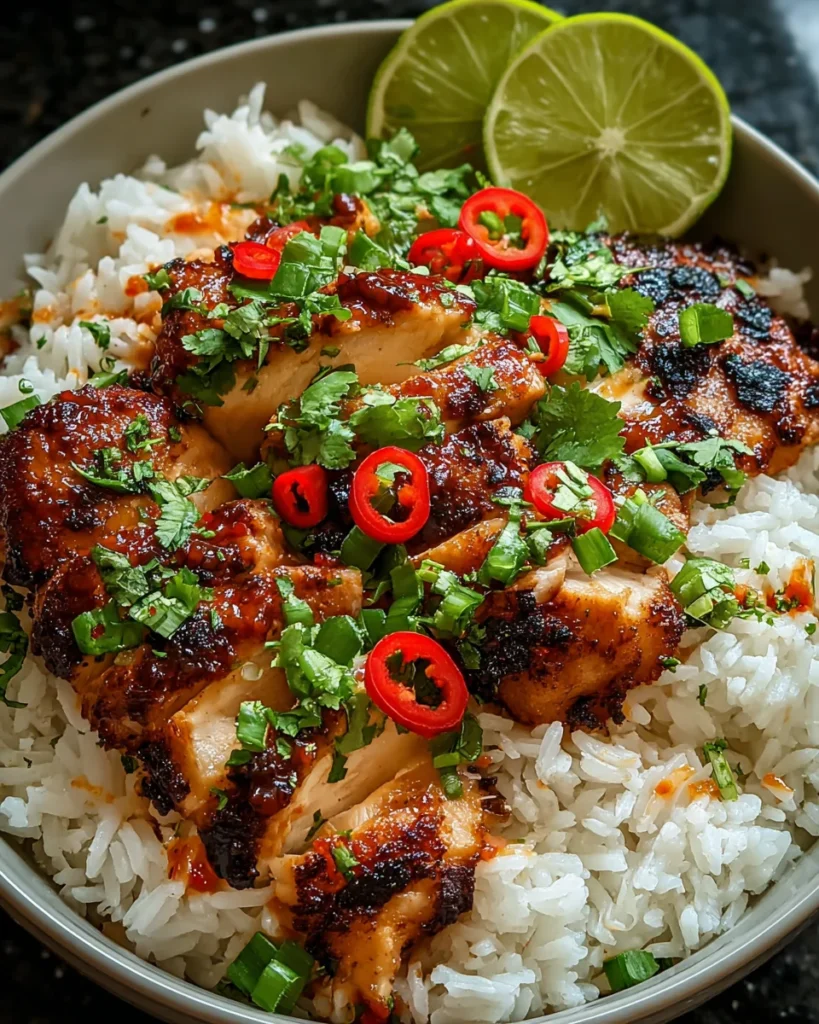
    Step 4: Assemble the Dish

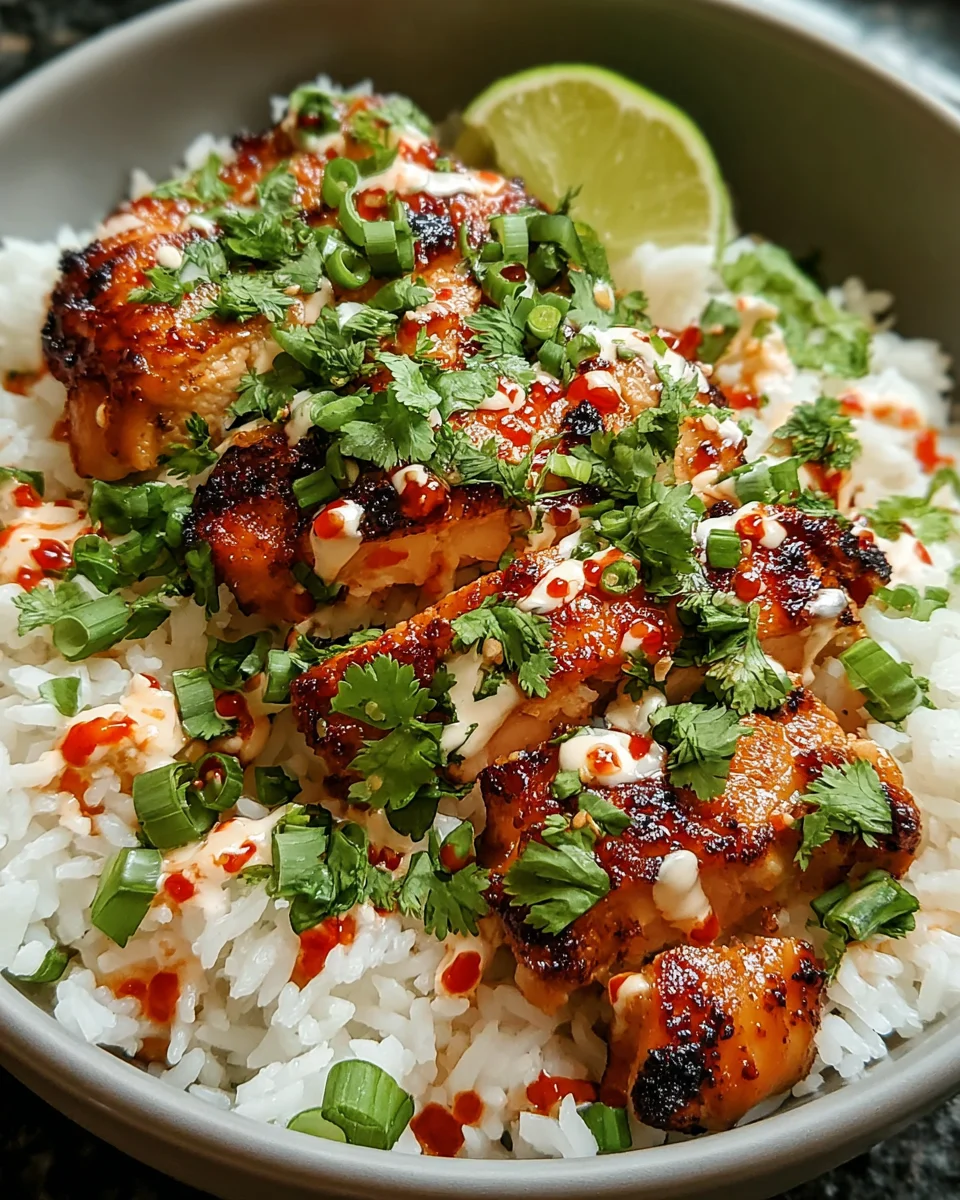
    Now comes the fun part! Grab some bowls and serve your fluffy jasmine rice as the base.

    Slice the rested chicken and lay it over the rice, allowing it to soak in those delicious flavors.

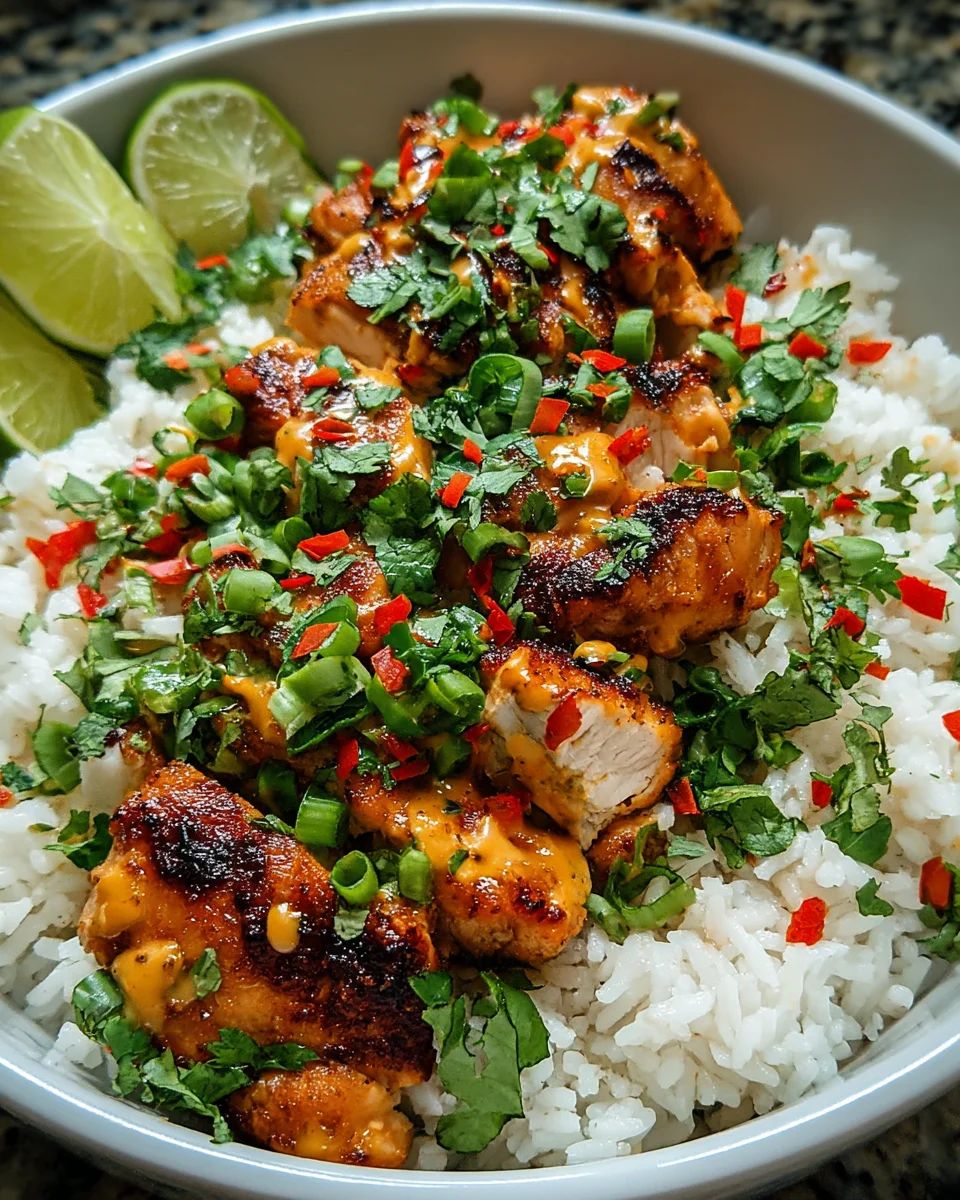
    Next, generously drizzle the coconut lime sauce over the chicken.

    For the final touch, sprinkle fresh cilantro, chopped green onions, and if you’re feeling wild, a pinch of crushed red pepper. Don’t forget to squeeze some extra lime wedges on top for that zesty kick! Enjoy your flavorful creation immediately!

    Tips for Success

    • Let the chicken marinate longer for a deeper flavor punch.
    • Always use fresh ingredients for the best taste.
    • Use a meat thermometer to ensure your chicken is perfectly cooked at 165°F.
    • Experiment with the coconut lime sauce—add more lime for extra zing!
    • Prepare jasmine rice in advance to save time during busy nights.

    Equipment Needed

    • Grill pan or skillet: A nonstick skillet works well if you don’t have a grill pan.
    • Mixing bowls: Use medium-sized bowls for marinating and sauce preparation.
    • Whisk: A fork can also do the job for mixing your marinade and sauce.
    • Meat thermometer: Optional, but it ensures perfect chicken doneness.
    • Serving bowls: Any dish will do, but fun ones can brighten your table!

    Variations of Sweet Chili Chicken Coconut Lime

    • Vegetarian Version: Swap the chicken for tofu or tempeh. Marinate and cook it the same way for a delightful plant-based option.
    • Seafood Twist: Use shrimp instead of chicken! Marinate briefly (about 15 minutes) and sauté for 3-4 minutes until they turn pink and opaque.
    • Spicy Kick: For those who crave heat, add extra sriracha to the marinade or double up on the crushed red pepper.
    • Quinoa Substitute: Replace jasmine rice with quinoa for a protein-packed, gluten-free alternative that’s just as tasty.
    • Extra Veggies: Add bell peppers, snap peas, or broccoli to the pan while cooking the chicken for more color and nutrition.

    Serving Suggestions

    • Sides: Serve with a side of steamed broccoli or a fresh garden salad for a colorful plate.
    • Drinks: Pair with a light Chardonnay or a refreshing iced tea to complement the flavors.
    • Presentation: Use vibrant bowls and garnish generously with lime wedges and herbs for a beautiful display.

    FAQs about Sweet Chili Chicken Coconut Lime

    As we dive into making this Sweet Chili Chicken Coconut Lime, you might have some burning questions. Let’s get those answered to make your cooking experience seamless and delightful!

    Can I use chicken breasts instead of thighs?

    Absolutely! Chicken breasts can work, but they might need a bit more attention to prevent drying out. Thighs are inherently juicier, but if you prefer breasts, just ensure to marinate well and monitor cooking closely.

    Is this dish gluten-free?

    Yes, by choosing gluten-free soy sauce or tamari, this Asian Fusion Recipe becomes entirely gluten-free. Just double-check your sauces for labels to keep it safe!

    How do I store leftovers?

    Store any leftovers in an airtight container in the fridge. It should last for up to three days. Reheat gently on the stove or in the microwave for best results!

    Can I prepare the sauce in advance?

    Definitely! The coconut lime sauce can be made a day ahead. Just keep it stored in the fridge, and it will be ready to drizzle on when you’re ready to enjoy this fantastic dish!

    What can I serve with Sweet Chili Chicken Coconut Lime?

    This dish pairs beautifully with jasmine rice, but steamed vegetables or a light salad are great options too! It balances the meal and adds freshness to the plate.

    Final Thoughts

    Creating this Sweet Chili Chicken Coconut Lime dish is not just about feeding your family; it’s about sharing moments filled with laughter and joy. Each bite transports you to a world of vibrant flavors that spark happiness around the dinner table. I love how easy it is to whip up, yet it feels like a special occasion! Whether you’re a busy mom or a professional looking to impress, this recipe is your ticket to a joyful meal. So gather your loved ones, and let the delightful aromas wafting from your kitchen weave unforgettable memories with every delicious forkful!
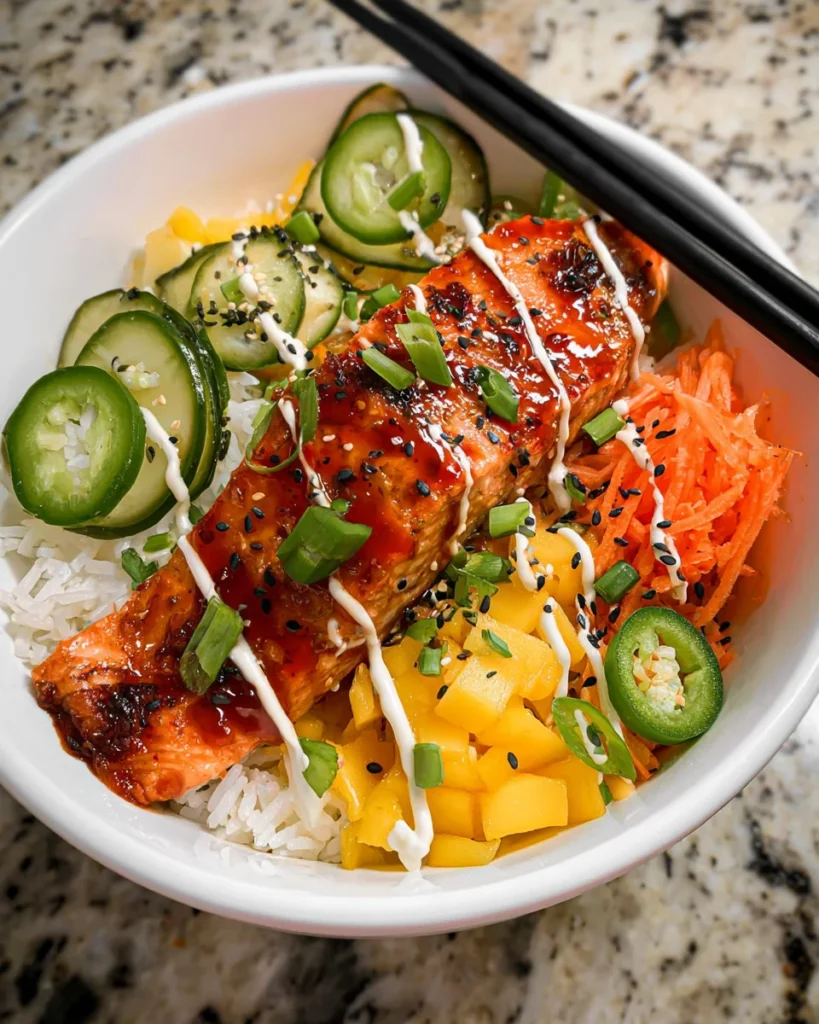

    Print

    clock clock iconcutlery cutlery iconflag flag iconfolder folder iconinstagram instagram iconpinterest pinterest iconfacebook facebook iconprint print iconsquares squares iconheart heart iconheart solid heart solid icon

    Description

    A delicious recipe combining sweet chili chicken with a coconut lime drizzle, served over jasmine rice.


    • 1.5 lbs boneless skinless chicken thighs
    • 1/2 cup sweet chili sauce
    • 1 tbsp soy sauce
    • 2 cloves garlic, minced
    • 1 tsp fresh ginger, grated
    • Juice of 1 lime
    • 1/2 cup full-fat coconut milk
    • Juice of 1 lime
    • 1/2 tbsp sweet chili sauce
    • 1 tsp chili sauce or sriracha, optional
    • 3 cups cooked jasmine rice
    • 1/4 cup chopped fresh cilantro
    • 2 green onions, chopped
    • Crushed red pepper, optional
    • Salt to taste
    • Olive oil for cooking

    1. In a bowl, whisk together sweet chili sauce, soy sauce, garlic, ginger, and lime juice. Add chicken and marinate for at least 30 minutes.
    2. In a separate bowl, combine coconut milk, lime juice, a spoonful of sweet chili sauce, and optional chili sauce. Chill until ready to use.
    3. Heat a grill pan or skillet over medium-high heat with a drizzle of olive oil. Cook chicken thighs for 5–6 minutes per side, or until fully cooked and caramelized. Let rest, then slice.
    4. Add jasmine rice to bowls, top with sliced chicken, and drizzle with the prepared coconut lime sauce.
    5. Garnish with cilantro, green onions, crushed red pepper, and lime wedges. Serve immediately.

    Notes

    • Marinate the chicken for longer for enhanced flavor.
    • Adjust the level of spiciness by modifying the amount of chili sauce or sriracha.
    • This dish is best served immediately to enjoy the fresh ingredients.
    • Prep Time: 30 minutes
    • Cook Time: 12 minutes
    • Category: Dinner
    • Method: Grilling or sautéing
    • Cuisine: Asian Fusion

    Nutrition

    • Serving Size: 1 serving
    • Calories: 500
    • Sugar: 10g
    • Sodium: 750mg
    • Fat: 20g
    • Saturated Fat: 10g
    • Unsaturated Fat: 5g
    • Trans Fat: 0g
    • Carbohydrates: 55g
    • Fiber: 3g
    • Protein: 30g
    • Cholesterol: 120mg

    Sharing is caring!

  • Reese’s Pieces Chocolate Chip Cookie Bars

    Reese’s Pieces Chocolate Chip Cookie Bars


    Introduction to Reece’s Pieces Chocolate Chip Cookie Bars

    Hey there, fellow dessert enthusiasts! If you’re like me, juggling a busy life while dreaming about delicious treats can be quite a challenge. That’s why I’m thrilled to share my recipe for Reece’s Pieces Chocolate Chip Cookie Bars. This delightful treat combines the classic comfort of chocolate chip cookies with the whimsical crunch of Reece’s Pieces. It’s a quick solution for those chaotic days when you need a sweet surprise for your loved ones. Trust me, these cookie bars will brighten anyone’s day and make your baking adventures incredibly fun!

    Why You’ll Love This Reece’s Pieces Chocolate Chip Cookie Bars

    First off, let’s talk about how easy this recipe is. With just a few simple steps, you can whip up these delicious cookie bars in no time. The best part? They’re a crowd-pleaser, ideal for family gatherings or an afternoon treat. The combination of classic chocolate chip flavors and the crunchy, colorful Reece’s Pieces makes each bite utterly irresistible. Trust me, these bars will leave everyone wanting more!

    Ingredients for Reece’s Pieces Chocolate Chip Cookie Bars

    When it comes to making these Reece’s Pieces Chocolate Chip Cookie Bars, gathering the right ingredients is key to their delightful flavor and texture. Here’s a breakdown of what you’ll need:

    • Unsalted butter: Softened to room temperature, this creates a creamy base for your bars. Butter adds richness and helps achieve that perfect chewy texture.
    • Brown sugar: Packed for a deep, caramel-like flavor, brown sugar also adds moisture and chewiness to the cookie bars.
    • Granulated sugar: Just a bit of granulated sugar sweetens the mix and contributes to the cookies’ golden edges.
    • Large eggs: These help bind the ingredients together, ensuring a tender crumb that melts in your mouth.
    • Vanilla extract: A splash of pure vanilla extract enhances the sweetness and adds warmth to the bars.
    • All-purpose flour: The backbone of these bars, flour gives them structure while keeping them soft and tender.
    • Baking soda: This leavening agent helps the bars rise and attain that soft, chewy texture we all love.
    • Salt: Just a pinch helps to balance the sweetness and brings out the flavors of all the ingredients.
    • Chocolate chips: Small, melty chocolate pieces add indulgence and sweetness, blending perfectly with the other ingredients.
    • Reece’s Pieces: These crunchy candies provide not just unique flavor, but also a fun pop of color and texture that makes each bite exciting!

    Keep in mind, you can find exact quantities at the bottom of the article for easy printing. Feel free to get creative with your ingredients! For example, you could substitute dark chocolate chips for a bolder taste or even introduce some nuts for added crunch. Baking should be enjoyable, so let your creativity shine through!

    How to Make Reece’s Pieces Chocolate Chip Cookie Bars

    Step 1: Preheat and Prepare

    Let’s kick off this baking adventure by preheating your oven to a cozy 350°F (175°C). This temperature helps the bars become perfectly golden while ensuring that every bite is warm and chewy. Next, grab your trusty 9×13 inch baking pan and grease it well. You can use butter or cooking spray—just make sure it’s evenly coated to keep those delicious cookie bars from sticking. Prepping your pan properly is key for easy removal later. Trust me, no one wants to wrestle with a stubborn dessert!

    Step 2: Cream the Butter and Sugars

    Now, let’s get to the fun part! In a large mixing bowl, toss in your softened unsalted butter along with the brown and granulated sugars. Using a hand mixer or a sturdy spatula, cream these ingredients together until the mixture is smooth and fluffy. This step is crucial because it traps air in the butter, giving your cookie bars a lovely texture. You want a little cloud of sweetness in there! Take your time, and don’t rush. A well-creamed base means a better result!

    Step 3: Add Eggs and Vanilla

    Next up is the star ingredient—eggs! Add them in one at a time, mixing well after each addition. This method ensures that the eggs incorporate fully into the batter, helping to create that ideal chewy texture. Follow up by pouring in the vanilla extract. The sweet aroma will fill your kitchen, setting the stage for these delightful bars. You might find yourself sneaking a taste along the way—don’t worry, I won’t tell anyone!

    Step 4: Combine Dry Ingredients

    Now, let’s turn our attention to the dry ingredients. In a separate bowl, whisk together the all-purpose flour, baking soda, and salt. Mixing these three together ensures an even distribution of the baking soda, which helps the bars rise perfectly. If you’re feeling adventurous, you can even sift them for a lighter texture! Once mixed, set this bowl aside and get ready to bring your wet and dry ingredients together for cookie magic.

    Step 5: Integrate Dry and Wet Ingredients

    Time to combine our mixtures! Gradually add the dry flour mixture to the creamy butter mixture you’ve created. Stir gently until just combined. Be careful not to overmix, as this can lead to tough bars. We want them soft and chewy, so stop when you see no dry flour. If you have a spatula, this is a perfect time to use it. Gently fold the mixture, feeling the excitement of what’s to come!

    Step 6: Fold in Chocolate Chips and Reece’s Pieces

    Here comes the best part—adding the chocolate chips and Reece’s Pieces! Using a spatula, gently fold them into the batter. This step is all about the love; you want to ensure every bite has a generous mix of gooey chocolate and crunchy candy. I recommend using a light touch, so you don’t break the Reece’s Pieces. When you see those colorful morsels shining through, you’ll know it’s almost time to bake!

    Step 7: Bake to Perfection

    With the batter ready, it’s time to transfer it to your prepared baking pan. Spread it evenly using a spatula, pressing it down slightly to eliminate any air pockets. Now, pop it into the preheated oven! Bake for 20-25 minutes. Keep an eye on those edges; they’re your telltale sign that your bars are ready. You’ll know they are done when they’re lightly golden and a toothpick inserted into the center comes out clean. Can you smell the sweet aroma already?

    Step 8: Cool and Cut

    Once tentatively baked to perfection, remove your cookie bars from the oven and allow them to cool in the pan. Let them sit for about 15-20 minutes, so they firm up slightly. This makes cutting them a breeze! When they’re cool enough to handle, lift them out (if you greased well, this should be easy!). Cut them into bars, and try not to eat the entire batch in one sitting! I know it’s tempting, but you might want to share a few with family or friends—if you can bear to part with them!

    Tips for Success

    • Use room temperature ingredients for better mixing and texture.
    • Don’t skip the creaming step—it’s essential for light, chewy bars.
    • For even baking, spread the batter evenly in the pan.
    • Watch the timer closely to avoid overbaking; golden edges are your cue.
    • Let them cool completely for cleaner cuts without crumbling.

    Equipment Needed

    • 9×13 inch baking pan: Essential for even baking; a similar-sized dish can work too.
    • Mixing bowls: Use medium and large bowls for mixing wet and dry ingredients.
    • Hand mixer or spatula: A hand mixer speeds up the creaming process, but a sturdy spatula does the job well.
    • Whisk: Perfect for mixing dry ingredients evenly.
    • Spatula: Great for folding in Reece’s Pieces and chocolate chips.

    Variations for Reece’s Pieces Chocolate Chip Cookie Bars

    • Nutty Goodness: Add a cup of chopped walnuts or pecans for a delightful crunch and extra flavor.
    • Dark Chocolate Delight: Swap half of the chocolate chips for dark chocolate chips for a richer taste that pairs perfectly with Reece’s Pieces.
    • Peanut Butter Swirl: Swirl in some creamy peanut butter into the batter before baking for a nutty twist.
    • Gluten-Free Option: Substitute all-purpose flour with a gluten-free blend to cater to dietary needs while still enjoying the flavor.
    • Oatmeal Addition: Mix in a cup of rolled oats for added texture and a chewy bite.
    • Sweet and Salty: Sprinkle some sea salt on top before baking for a delightful contrast in flavors.

    Serving Suggestions for Reece’s Pieces Chocolate Chip Cookie Bars

    • Serve warm with a scoop of vanilla ice cream for the ultimate dessert experience.
    • Pair with a tall glass of cold milk to complement the sweetness.
    • For a fun presentation, place bars on a colorful platter and sprinkle with extra Reece’s Pieces.
    • Consider adding a drizzle of chocolate syrup on top for extra indulgence!

    FAQs about Reece’s Pieces Chocolate Chip Cookie Bars

    Can I use any other types of candy in this recipe?
    Absolutely! While Reece’s Pieces are a delightful choice, feel free to experiment. M&Ms or peanut butter cups work wonderfully. Just think about what flavors your family loves!

    How do I store the cookie bars to keep them fresh?
    To keep your Reece’s Pieces Chocolate Chip Cookie Bars fresh, store them in an airtight container. They’ll stay delicious for up to a week at room temperature. If they last that long, of course!

    Can I freeze these cookie bars for later?
    Yes! These bars freeze beautifully. Just cut them into bars, wrap them in plastic wrap, and place them in a freezer-safe container. They’ll be good for up to three months. Perfect for those surprise sweet cravings!

    What should I do if I overbake them?
    If your bars turn out a bit too firm from overbaking, don’t panic! Serve them warm with ice cream or a drizzle of cream. It’ll mask any dryness and create a delicious dessert.

    Can I double the recipe?
    Definitely! Doubling the recipe is a great way to ensure you have enough cookie bars for gatherings. Just use a larger baking pan, and keep an eye on the baking time. Happy baking!

    Final Thoughts on Reece’s Pieces Chocolate Chip Cookie Bars

    Every bite of these Reece’s Pieces Chocolate Chip Cookie Bars tells a story of comfort and joy. They’re perfect for busy days or lazy weekends, bringing smiles to faces young and old. I love how this recipe effortlessly bridges the gap between classic favorites and whimsical treats. The colorful crunch of Reece’s Pieces adds a delightful twist that makes baking fun. Whether it’s for a special occasion or simply to brighten a regular day, these bars bring people together. So, why not whip up a batch and share the love? Happy baking, my fellow food adventurers!


    Print

    clock clock iconcutlery cutlery iconflag flag iconfolder folder iconinstagram instagram iconpinterest pinterest iconfacebook facebook iconprint print iconsquares squares iconheart heart iconheart solid heart solid icon

    Description

    Delightfully easy Reece’s Pieces Chocolate Chip Cookie Bars that combine classic chocolate chip flavors with the fun crunch of Reece’s Pieces.


    • 1 cup unsalted butter, softened
    • 1 cup brown sugar, packed
    • 1/2 cup granulated sugar
    • 2 large eggs
    • 2 teaspoons vanilla extract
    • 3 cups all-purpose flour
    • 1 teaspoon baking soda
    • 1/2 teaspoon salt
    • 1 cup chocolate chips
    • 1 cup Reece’s Pieces

    1. Preheat the oven to 350°F (175°C) and grease a 9×13 inch baking pan.
    2. In a large mixing bowl, cream together the softened butter, brown sugar, and granulated sugar until smooth.
    3. Beat in the eggs one at a time, then stir in the vanilla extract.
    4. In a separate bowl, whisk together the flour, baking soda, and salt.
    5. Gradually add the dry ingredients to the wet ingredients, mixing until just combined.
    6. Fold in the chocolate chips and Reece’s Pieces.
    7. Spread the batter evenly into the prepared baking pan.
    8. Bake for 20-25 minutes, or until the edges are lightly golden and a toothpick inserted into the center comes out clean.
    9. Allow to cool in the pan before cutting into bars.

    Notes

    • Store leftovers in an airtight container for up to one week.
    • For added flavor, try using different types of chocolate chips.
    • This recipe can be doubled for a larger batch.
    • Prep Time: 15 minutes
    • Cook Time: 25 minutes
    • Category: Dessert
    • Method: Baking
    • Cuisine: American

    Nutrition

    • Serving Size: 1 bar
    • Calories: 200
    • Sugar: 14g
    • Sodium: 150mg
    • Fat: 10g
    • Saturated Fat: 6g
    • Unsaturated Fat: 2g
    • Trans Fat: 0g
    • Carbohydrates: 28g
    • Fiber: 1g
    • Protein: 2g
    • Cholesterol: 30mg

    Sharing is caring!

  • Popcorn Chocolate Chip Cookies

    Popcorn Chocolate Chip Cookies


    Introduction to Popcorn Chocolate Chip Cookies

    Welcome to a delightful adventure in baking! If you’re like me, balancing a busy schedule while craving something sweet can feel like a jigsaw puzzle missing a piece. That’s where my Popcorn Chocolate Chip Cookies come into play. These unique treats blend the luscious sweetness of chocolate chips with the satisfying crunch of popcorn. They’re not just cookies; they’re a charming way to bring joy to your family gatherings or a cozy evening at home. Trust me, once you try them, you’ll understand why they quickly become a family favorite!

    Why You’ll Love This Popcorn Chocolate Chip Cookies

    These Popcorn Chocolate Chip Cookies are the perfect blend of comfort and fun! They’re quick to whip up, making them an ideal choice for busy evenings or unexpected guests. The irresistible combination of chewy chocolate and light, crispy popcorn leaves everyone craving more. Plus, with just a handful of ingredients, you can bake them in no time, bringing warm smiles to your family’s faces. Simple delights like this can make any day feel special!

    Ingredients for Popcorn Chocolate Chip Cookies

    Gathering the right ingredients is the first step in our cookie adventure. Here’s what you’ll need for these delightful Popcorn Chocolate Chip Cookies:

    • Unsalted butter: This adds richness and moisture, making your cookies soft and luscious. Soften it up for easy mixing!
    • Brown sugar: This gives your cookies a deep sweetness and a hint of caramel flavor. The moisture in brown sugar keeps them chewy.
    • Granulated sugar: Balances out the sweetness and adds a bit of crispness to the cookie edges.
    • Large eggs: Essential for binding and providing structure. Plus, they help to give that delightful texture we all love.
    • Vanilla extract: This magical ingredient enhances all the flavors. It brings warmth and a sweet aroma to every bite.
    • All-purpose flour: The foundation of your cookies. It provides the structure needed for that perfect cookie base.
    • Baking soda: This leavener helps your cookies rise and gives them a lovely crumb. It’s a must for the right texture.
    • Baking powder: Works alongside baking soda for that extra lift, making your cookies light and fluffy.
    • Salt: Just a pinch enhances flavors and balances the sweetness.
    • Semi-sweet chocolate chips: They melt beautifully, creating gooey pockets of chocolate throughout your cookies. A chocolate lover’s dream!
    • Buttered popcorn: The star ingredient! It adds a unique crunch and a touch of salty goodness to balance the sweetness. Fresh popcorn works best.
    • Sea salt flakes: Optional, but a light sprinkle on top brings out the flavors and adds a gourmet touch.

    For exact measurements of these ingredients, you can find them at the end of the article. Happy baking!

    How to Make Popcorn Chocolate Chip Cookies

    Now that we have everything ready, it’s time to dive into the magical process of making these Popcorn Chocolate Chip Cookies! Follow these steps, and you’ll see how simple it is to create a delicious treat that will wow your loved ones.

    Step 1: Preheat the Oven

    First, preheat your oven to 350°F (175°C). This ensures even baking. While the oven heats up, line a baking sheet with parchment paper. This makes for easy cleanup and prevents your cookies from sticking. Trust me, parchment paper is a lifesaver!

    Step 2: Creaming the Butter and Sugars

    In a large mixing bowl, cream together the softened unsalted butter, brown sugar, and granulated sugar. Beat this mixture until it’s light and fluffy, about 2-3 minutes. This step is crucial; it helps create a tender, airy texture in your cookies. You’ll notice as it gets creamy and smooth!

    Step 3: Combine Wet and Dry Ingredients

    In a separate bowl, whisk together your dry ingredients. This includes flour, baking soda, baking powder, and salt. Gradually add this dry mixture to the creamed butter and sugars. Mix gently until just combined to avoid overworking the dough, which can lead to tough cookies!

    Step 4: Incorporating Chocolate Chips and Popcorn

    Next, fold in the semi-sweet chocolate chips and the coarsely chopped popcorn. Be gentle here; you want to maintain that popcorn crunch! Remember, the popcorn might seem like an unusual addition, but it adds a fantastic texture and flavor that you won’t forget!

    Step 5: Scooping Cookies onto Baking Sheet

    Using a cookie scoop or tablespoon, drop about two tablespoons of dough onto your prepared baking sheet. Make sure to leave about 2 inches of space between each scoop. This allows the cookies to spread evenly without merging together. You want each cookie to have its moment in the spotlight!

    Step 6: Baking the Cookies

    Bake your cookies for 10-12 minutes, or until the edges turn golden brown while the centers remain soft. This is key for that perfect chewy texture! Once they’re out, let them cool slightly on the baking sheet before transferring them to a wire rack. Enjoy that fragrant, sweet aroma filling your kitchen!

    Tips for Success

    • Always use softened butter for easy creaming—no one likes a tough cookie!
    • Do not overmix the dough; stop as soon as the flour disappears for maximum tenderness.
    • Experiment with different chocolate chip varieties, like milk or white chocolate, for varied flavor.
    • For an extra crunch, add a few whole popcorn pieces on top before baking.
    • Let the cookies cool slightly before digging in for the best texture!

    Equipment Needed

    • Mixing bowls: A large one for creaming and a smaller one for dry ingredients. If you don’t have them, any sturdy bowl will do!
    • Electric mixer: For creaming, but a good old-fashioned whisk works too (just get ready for a workout!).
    • Baking sheet: A standard cookie sheet will work wonders; alternatively, use a cast iron skillet for a fun twist!
    • Parchment paper: If you’re out, silicone baking mats or a greased sheet can save the day.

    Variations of Popcorn Chocolate Chip Cookies

    • Nutty Delight: Add coarsely chopped walnuts or pecans for a crunchy, nutty flavor that complements the chocolate.
    • Healthier Twist: Substitute half the all-purpose flour with whole wheat flour for a heartier cookie. It adds a slight nuttiness!
    • Espresso Boost: Mix in a tablespoon of instant espresso powder to enhance the chocolate flavor without overwhelming sweetness.
    • Dried Fruit Addition: Incorporate a handful of dried cranberries or cherries for a sweet-tart surprise in each bite.
    • Gluten-Free Option: Use a gluten-free all-purpose flour blend to accommodate those who are gluten-sensitive.
    • Dark Chocolate Chunk: Swap semi-sweet chips for dark chocolate chunks for a richer chocolate experience.

    Serving Suggestions for Popcorn Chocolate Chip Cookies

    • Milk: There’s nothing quite like a glass of cold milk to complement your cookies.
    • Ice Cream: Serve warm cookies with a scoop of vanilla ice cream on top for an indulgent dessert.
    • Presentation: Arrange cookies on a colorful platter and sprinkle a few popcorn pieces around for a fun touch.
    • Coffee: Brew a cup of your favorite coffee for a delightful afternoon treat combination.

    FAQs about Popcorn Chocolate Chip Cookies

    Can I use ready-made popcorn for the cookies?

    Absolutely! Store-bought buttered popcorn works just fine. Just ensure it’s fresh for the best texture and flavor. A little crunch goes a long way in these cookies!

    How do I store the cookies after baking?

    Keep your Popcorn Chocolate Chip Cookies in an airtight container at room temperature. They’ll stay fresh for up to a week. Try to resist eating them all at once!

    Can I freeze the cookie dough?

    You bet! Scoop the dough into balls and freeze them on a baking sheet. Once solid, transfer them to a freezer bag. Bake them directly from frozen; just add a couple of extra minutes to the baking time for fresh-baked goodness!

    What can I substitute if I don’t have semi-sweet chocolate chips?

    If semi-sweet chips aren’t on hand, feel free to use milk or dark chocolate chips. Even white chocolate can work, giving your cookies a sweet, decadent twist!

    Are these cookies suitable for a party?

    Definitely! These cookies are not only delicious but also visually fun with that popcorn texture. They’re sure to be a hit at any gathering!

    Final Thoughts

    There’s something magical about baking that brings joy into our homes, isn’t there? These Popcorn Chocolate Chip Cookies are not just a treat; they’re an experience worth sharing. Each bite delivers a delightful crunch paired with sweet chocolate bliss, making them perfect for every occasion. The smiles on my family’s faces when they take a bite remind me why I love baking. So, grab your favorite apron and create these cookies together. After all, it’s the little moments spent together in the kitchen that create lasting memories. Happy baking, and enjoy every delicious bite!


    Print

    clock clock iconcutlery cutlery iconflag flag iconfolder folder iconinstagram instagram iconpinterest pinterest iconfacebook facebook iconprint print iconsquares squares iconheart heart iconheart solid heart solid icon

    Description

    Delicious cookies combining the sweetness of chocolate chips and the crunch of popcorn for a unique treat.


    • 1 cup unsalted butter, softened
    • 1 cup brown sugar, packed
    • ½ cup granulated sugar
    • 2 large eggs
    • 1 teaspoon vanilla extract
    • 2 ¼ cups all-purpose flour
    • 1 teaspoon baking soda
    • ½ teaspoon baking powder
    • ½ teaspoon salt
    • 1 ½ cups semi-sweet chocolate chips
    • 2 cups buttered popcorn (homemade or store-bought), coarsely chopped
    • Sea salt flakes, for sprinkling (optional)

    1. Preheat the oven to 350°F (175°C). Line a baking sheet with parchment paper.
    2. Cream the butter and sugars in a large mixing bowl until light and fluffy, about 2-3 minutes. Add the eggs, one at a time, beating well after each addition. Stir in the vanilla extract.
    3. Whisk together the dry ingredients—flour, baking soda, baking powder, and salt—in a separate bowl. Gradually add the dry mixture to the wet ingredients, mixing until just combined.
    4. Fold in the chocolate chips and chopped popcorn. The popcorn may seem odd at first, but it gives the cookies an incredible texture and flavor.
    5. Scoop the dough onto the prepared baking sheet, about 2 tablespoons per cookie. Leave about 2 inches of space between each cookie, as they will spread.
    6. Bake for 10-12 minutes, or until the edges are golden brown, but the centers are still soft. This will give you that perfect chewy texture with a slightly crispy edge.

    Notes

    • For best results, use fresh popcorn for the best texture.
    • These cookies can be stored in an airtight container for up to a week.
    • Prep Time: 15 minutes
    • Cook Time: 12 minutes
    • Category: Dessert
    • Method: Baking
    • Cuisine: American

    Nutrition

    • Serving Size: 1 cookie
    • Calories: 200
    • Sugar: 12g
    • Sodium: 120mg
    • Fat: 10g
    • Saturated Fat: 5g
    • Unsaturated Fat: 3g
    • Trans Fat: 0g
    • Carbohydrates: 25g
    • Fiber: 1g
    • Protein: 2g
    • Cholesterol: 30mg

    Sharing is caring!

  • Mexican Street Corn Avocado Toast: A Delicious Twist!

    Mexican Street Corn Avocado Toast: A Delicious Twist!


    Introduction to Mexican Street Corn Avocado Toast

    Ah, the simple joy of avocado toast! It’s that comforting meal that can bring a little sunshine to even the cloudiest of mornings. Let me introduce you to my delightful twist on this favorite—Mexican Street Corn Avocado Toast. Perfect for busy days when time slips away, this recipe combines the creaminess of avocado with the bold flavors of Mexican street corn. Whether you’re prepping for a hectic workweek or wanting to impress loved ones at brunch, this dish delivers both deliciousness and satisfaction. Trust me, it’s a flavorful experience that’ll leave you smiling with every bite!

    Why You’ll Love This Mexican Street Corn Avocado Toast

    This Mexican Street Corn Avocado Toast is a dream come true for busy moms and professionals alike. It’s quick to whip up in just 20 minutes, making it a life-saver during hectic weekdays. The vibrant flavors burst with every bite, giving your taste buds an exciting adventure. Plus, it’s healthy and vegetarian-friendly, so you can feel great about serving it to your family. What’s not to love?

    Ingredients for Mexican Street Corn Avocado Toast

    Let’s gather the ingredients to bring this vibrant dish to life! Here’s what you’ll need:

    • Ripe avocado: The creamy star of the show! Look for one that gives a little when you gently squeeze it.
    • Bread: Choose your favorite—sourdough adds a tangy crunch, while whole grain brings hearty goodness.
    • Corn: Fresh corn on the cob is fantastic for charring, but canned or frozen varieties work just as well. Perfect for versatility!
    • Butter: A tablespoon for charring the corn will add richness and flavor that will make your mouth water.
    • Cotija cheese: This crumbly, salty cheese brings that authentic Mexican street food vibe. Can’t find it? Feta is a fabulous substitute!
    • Lime juice: A splash of brightness to enhance the avocado; fresh lime is ideal, but bottled works in a pinch.
    • Chili powder: This adds a warm spice, taking the flavor profile to the next level. Adjust it based on your spice tolerance!
    • Smoked paprika: Adds a nice smoky depth that pairs beautifully with the charred corn.
    • Salt: Just a sprinkle to elevate all the bold flavors. Taste as you go!
    • Cilantro: Fresh and fragrant, this herb offers a lovely finishing touch.
    • Mexican crema or mayo: Optional, but this creamy addition can make your toast extra indulgent.
    • Hot sauce: If you like a kick, drizzle on your favorite hot sauce for an exciting punch.

    You can find exact measurements at the bottom of this article, available for printing. Get ready for a flavor fiesta in your kitchen!

    How to Make Mexican Street Corn Avocado Toast

    Now that we have all our vibrant ingredients lined up, let’s get our hands dirty and dive into this fun cooking adventure! Follow these simple steps to whip up a plate of Mexican Street Corn Avocado Toast that’ll have your family coming back for seconds.

    Prepare the Corn

    First things first, let’s get that corn ready! If you’re using fresh corn, slice the kernels off the cob. Then, grab a skillet and melt a tablespoon of butter over medium heat. Toss in the corn and let it sizzle until it turns golden brown. This should take about 5-7 minutes. You’ll know it’s ready when you can smell that irresistible, toasty goodness wafting through your kitchen.

    If you’re using canned or frozen corn, don’t fret! Just drain the canned corn or thaw the frozen one, then sauté it in butter for 3-5 minutes until it caramelizes beautifully. Either way, charred corn brings an exciting flavor to your Mexican Street Corn Avocado Toast!

    Mash the Avocado

    Now, let’s work on the creamy avocado. Cut the ripe avocado in half and remove the pit. Scoop the green flesh into a bowl. Here comes the fun part: use a fork to mash it up to your desired creaminess. I like mine a bit chunky for texture, but you do you!

    Once mashed, add a splash of lime juice, a pinch of salt, and a sprinkle of chili powder. The lime juice will keep your avocado looking vibrant and fresh, while the chili powder kicks up the flavor. Mix it all together, and set it aside. Can you smell that? Yum!

    Assemble the Toast

    Next, it’s time to toast the bread. I highly recommend using a toaster or skillet to achieve that perfect golden brown delight. Personally, I love a good sourdough, as it adds a tangy touch, but feel free to choose whatever bread you prefer!

    Once your bread is perfectly toasted, take that glorious mashed avocado and spread it generously over each slice. Be as generous as you want! Now, here comes the star of the show: sprinkle that charred corn on top and finish with crumbled cotija cheese for that irresistible texture.

    Add Toppings and Serve

    Now for the final touches! Garnish your Mexican Street Corn Avocado Toast with freshly chopped cilantro. An extra squeeze of lime over the top is a must—it brightens everything up!

    If you’re feeling a little indulgent, add a drizzle of Mexican crema or a swirl of mayo. And for my spice-loving friends, do not hold back on the hot sauce! Serve immediately, and don’t be surprised if it disappears quickly. Happy munching!

    Tips for Success

    • Use ripe avocados for the creamiest texture—look for those that gently yield to pressure!
    • Toast your bread just until golden; you want a perfect balance between crunchy and soft.
    • Feel free to add more spices, adjusting to your taste for that perfect personal touch.
    • Cook the corn until it’s nicely charred for maximum flavor—it’s worth the extra minute!
    • Enjoy your Mexican Street Corn Avocado Toast immediately for the best experience!

    Equipment Needed

    • Skillet: A non-stick or cast iron skillet works great for charring the corn.
    • Toaster or Pan: Use either for toasting your bread to golden perfection.
    • Bowl: A mixing bowl for mashing the avocado and blending flavors.
    • Fork: Essential for mashing the avocado to the right consistency.
    • Cutting Board and Knife: Perfect for slicing the avocado and corn.

    Variations

    • Spicy Twist: Add diced jalapeños or roasted red peppers for an extra kick of heat.
    • Herb Flavors: Try incorporating other fresh herbs like mint or parsley for a unique taste.
    • Protein Boost: Top your toast with a poached egg or black beans for added protein and heartiness.
    • Nutty Flavor: Sprinkle some toasted pumpkin seeds or chia seeds for a delightful crunch.
    • Gluten-Free: Use gluten-free bread alternatives to accommodate dietary preferences.

    Serving Suggestions for Mexican Street Corn Avocado Toast

    • Pair with a fresh fruit salad for a refreshing, vibrant contrast.
    • A side of zesty lime wedges enhances the dish’s flavor and adds a pop of color.
    • Enjoy with a chilled glass of lime-infused water or a light Mexican beer.
    • For a hearty brunch, serve alongside scrambled eggs or breakfast tacos.

    FAQs about Mexican Street Corn Avocado Toast

    Can I use frozen corn for this recipe? Absolutely! Frozen corn works perfectly in this Mexican Street Corn Avocado Toast. Just sauté it like you would fresh corn, and you’re good to go!

    How can I make my avocado toast spicier? If you’re a fan of heat, simply add more chili powder or drizzle some hot sauce. You can even toss in diced jalapeños for an extra spicy kick!

    Is this avocado toast suitable for meal prep? It’s best enjoyed fresh, but you can prepare the corn and mash the avocado in advance. Just assemble the toast right before serving for that fresh bite.

    What if I can’t find cotija cheese? No worries! Feta cheese makes a great substitute. It offers a similar salty and tangy flavor that complements the dish beautifully.

    Can I make this recipe vegan? Yes! Simply skip the cotija cheese or use a dairy-free cheese alternative. The rest of the ingredients are naturally vegan and still oh-so-delicious!

    Final Thoughts

    Making Mexican Street Corn Avocado Toast is not just about satisfying hunger; it’s about creating a delightful experience for you and your loved ones. Each bite encapsulates the warmth of home cooking and the joy of sharing vibrant flavors. Whether it’s a quick breakfast or a fancy brunch, this dish is sure to leave a lasting impression on your taste buds. So embrace the adventure of cooking, indulge in the rich textures, and let the deliciousness of this toast bring a bright spark to your day. Trust me, you’ll find yourself coming back for more!


    Print

    clock clock iconcutlery cutlery iconflag flag iconfolder folder iconinstagram instagram iconpinterest pinterest iconfacebook facebook iconprint print iconsquares squares iconheart heart iconheart solid heart solid icon

    Description

    A delicious twist on traditional avocado toast, featuring Mexican street corn flavors.


    • 1 ripe avocado
    • 2 slices of bread (sourdough, whole grain, or your favorite toast base)
    • ½ cup corn (fresh, canned, or frozen)
    • 1 tablespoon butter (for charring corn)
    • 2 tablespoons cotija cheese (or feta as a substitute)
    • 1 tablespoon lime juice
    • ½ teaspoon chili powder
    • ¼ teaspoon smoked paprika
    • Salt to taste
    • 1 tablespoon chopped cilantro
    • 1 tablespoon Mexican crema or mayo (optional for extra richness)
    • Hot sauce (optional for spice lovers)

    1. Prepare the Corn: If using fresh corn, char it in a skillet with butter over medium heat until golden brown. If using canned or frozen corn, drain and sauté it in a pan with butter for 3-5 minutes until caramelized.
    2. Mash the Avocado: Scoop the avocado into a bowl. Add lime juice, salt, and a pinch of chili powder for flavor. Mash to your desired consistency using a fork.
    3. Assemble the Toast: Toast the bread until golden and crispy. Spread a generous layer of mashed avocado on each slice. Top with charred corn and crumbled cotija cheese.
    4. Add Toppings and Serve: Garnish with fresh cilantro and an extra squeeze of lime. Drizzle with Mexican crema or hot sauce for an extra kick. Enjoy immediately!

    Notes

    • For a spicier version, add more chili powder or your favorite hot sauce.
    • Adjust the amount of lime juice and salt to taste based on personal preference.
    • Prep Time: 10 minutes
    • Cook Time: 10 minutes
    • Category: Breakfast
    • Method: Sautéing, Toasting
    • Cuisine: Mexican

    Nutrition

    • Serving Size: 1 slice
    • Calories: 320
    • Sugar: 2g
    • Sodium: 400mg
    • Fat: 22g
    • Saturated Fat: 8g
    • Unsaturated Fat: 14g
    • Trans Fat: 0g
    • Carbohydrates: 28g
    • Fiber: 8g
    • Protein: 6g
    • Cholesterol: 30mg

    Sharing is caring!

  • Kale Cranberry Salad: A Delicious Wholesome Delight!

    Kale Cranberry Salad: A Delicious Wholesome Delight!


    Introduction to Kale Cranberry Salad

    As a busy mom, I know the importance of quick, nutritious meals that don’t compromise on flavor. That’s where my Kale Cranberry Salad shines! This refreshing salad is perfect for those hectic weekdays when you need a healthy dish in a snap. Packed with vibrant kale, tart cranberries, and crunchy nuts, it brings that delightful balance of taste and nutrition to your table. Plus, it’s so easy to whip up, you might find yourself serving it at family gatherings or impressing friends at your next brunch. So, let’s dive into this wholesome delight!

    Why You’ll Love This Kale Cranberry Salad

    This Kale Cranberry Salad is not only a burst of flavors, but it’s also a lifesaver for busy days. With just 15 minutes of prep time, you can serve a fresh and vibrant dish the whole family will love. The combination of textures—from crunchy almonds to chewy cranberries—creates a delightful experience in every bite. It’s versatile enough to pair beautifully with any meal, making it a go-to on my dinner rotation!

    Ingredients for Kale Cranberry Salad

    The vibrant flavors and textures in this Kale Cranberry Salad come from simple yet impactful ingredients. Here’s what you’ll need to create this delightful dish:

    • Fresh kale: Look for crisp, dark green leaves. Kale is the star of the show, providing essential nutrients and a hearty base.
    • Dried cranberries: They add a sweet and tangy kick, perfectly balancing the hearty kale.
    • Sliced almonds: Whether toasted or raw, these bring a nice crunch and a dose of healthy fats.
    • Crumble feta cheese: It introduces creamy goodness and salty notes—great for those cheese lovers.
    • A large apple: I recommend Granny Smith or Honeycrisp for their crisp texture and sweet-tart flavor, adding a refreshing element.
    • Red onion: Just a touch of thinly sliced red onion elevates the flavor with a mild sharpness.
    • Olive oil: A high-quality olive oil is essential for dressing and provides beneficial fats.
    • Apple cider vinegar: This tangy vinegar adds zest and helps balance the sweetness of the cranberries and apple.
    • Honey or maple syrup: A drizzle of either will sweeten the dressing naturally, harmonizing the flavors.
    • Salt and pepper: These staples elevate all the ingredients, enhancing their individual flavors.
    • Optional pumpkin seeds: If you crave extra crunch, sprinkle them on top for an added texture and a dose of nutrients.

    For precise measurements, check the end of the article, where you can find everything listed for easy printing!

    How to Make Kale Cranberry Salad

    Prepare the Kale

    To kick things off, wash your fresh kale under cool water. Once it’s clean, remove the tough stems and tear the leaves into bite-sized pieces. This not only makes it easier to eat but also helps with the overall presentation. Here’s the secret: massage the kale! Drizzle a little olive oil over the leaves and gently rub them between your fingers for 2-3 minutes. This little act of love softens the kale, enhances its flavor, and makes it more enjoyable. Trust me; it’s worth the effort!

    Mix the Dressing

    Next, let’s whip up a dressing that brings everything together. In a small bowl, combine olive oil, apple cider vinegar, honey (or maple syrup), salt, and pepper. Whisk them together until you have a smooth mixture. Each ingredient plays a significant role: the olive oil provides healthy fats, the vinegar adds tanginess, and the honey sweetens the deal. Taste as you go, adjusting it until it feels just right. This dressing elevates the entire Kale Cranberry Salad and makes every bite shine!

    Combine Salad Ingredients

    Now comes the fun part! In the bowl with the prepared kale, add your diced apple, dried cranberries, sliced almonds, crumbled feta cheese, and thinly sliced red onion. Each of these ingredients brings unique flavors and textures that harmonize beautifully. The juicy apple and chewy cranberries contrast nicely with crunchy almonds, while the feta adds creaminess. Gently toss everything together with tongs, ensuring the kale is surrounded by the other ingredients. This mix ensures a delightful experience in every bite!

    Dress the Salad

    Time to dress the salad! Pour the delicious dressing over the kale mixture. Then, using salad tongs or forks, delicately toss everything again. The goal here is to coat every piece evenly without bruising the tender kale. Take your time to mix it well, allowing those fantastic flavors to mingle and release their magic. This step is crucial for creating a cohesive dish that sings summer with each bite!

    Garnish (Optional)

    If you want to add a little extra flair, consider garnishing with pumpkin seeds. Just sprinkle them over the top for an added crunch and a pop of color. Not only do they look great, but they also contribute a boost of nutrients. It’s an easy way to make your Kale Cranberry Salad look like it came from a fancy restaurant!

    Serve

    Lastly, let the salad sit for about 10 minutes before serving. This resting time allows the flavors to meld beautifully. Serve this refreshing salad chilled or at room temperature in a beautiful bowl. You can add a slice of lemon on the side for an extra zing. Enjoy it as a main dish, or as a side at your next gathering—it’s sure to impress!

    Tips for Success

    • Use fresh, vibrant kale for the best flavor and nutrition.
    • Massage the kale well to ensure a tender texture.
    • Adjust the sweetness of the dressing to your taste with honey or maple syrup.
    • Try adding other nuts or seeds for different flavors and crunch.
    • Prepare the salad ingredients in advance, but dress just before serving for optimal freshness.

    Equipment Needed

    • Large mixing bowl: A big bowl will help toss all ingredients easily.
    • Small bowl: Perfect for mixing the dressing smoothly.
    • Whisk or fork: To combine the dressing ingredients thoroughly.
    • Tongs or salad forks: Ideal for tossing the salad without bruising the kale.
    • Chef’s knife: A sharp knife makes chopping apples and onions a breeze.

    Variations

    • Add grilled chicken or chickpeas for a protein boost to make it a hearty meal.
    • Swap out feta for avocado to create a creamy, dairy-free option.
    • Incorporate roasted sweet potato for a cozy and filling twist.
    • Experiment with different nuts, like walnuts or pistachios, for varied flavor and crunch.
    • Try using different vinegars, such as balsamic or red wine vinegar, for a unique dressing flavor.
    • For a spicy kick, toss in some sliced jalapeños or a sprinkle of chili flakes.

    Serving Suggestions

    • Pair this Kale Cranberry Salad with a side of grilled salmon for a nutritious meal.
    • Serve alongside crusty whole-grain bread for a heartier dining experience.
    • Complement the salad with a light vinaigrette or a refreshing lemon beverage.
    • Present in a large, colorful bowl to showcase the vibrant ingredients.
    • Add a sprinkle of fresh herbs on top for an elegant touch!

    FAQs about Kale Cranberry Salad

    Can I prepare this Kale Cranberry Salad in advance?
    Absolutely! You can wash and chop all your ingredients ahead of time. Just remember to dress the salad just before serving to keep the kale fresh and crisp.

    Is this salad suitable for a vegetarian diet?
    Yes! This Kale Cranberry Salad is entirely vegetarian. It’s a fantastic option for anyone looking to enjoy healthy, plant-based meals without sacrificing flavor.

    What can I substitute for the feta cheese?
    If you’re not a fan of feta, you can easily swap it for goat cheese, or leave it out entirely. For a vegan option, try using cubed avocado or a dairy-free cheese alternative.

    Can I add protein to this salad?
    Definitely! Grilled chicken, chickpeas, or even quinoa can provide a lovely protein boost, making it a filling main dish. It’s a delicious way to make this salad even more satisfying!

    How long will leftovers last?
    If you have any leftovers, they can typically last in the fridge for up to 2 days. Just be aware that the kale may become a bit softer, but the flavors will still be lovely!

    Final Thoughts

    Creating this Kale Cranberry Salad has become a joyful ritual in my kitchen. It’s more than just a recipe; it’s a celebration of fresh, vibrant ingredients coming together in harmony. I love how easy it is to prepare, yet it impresses everyone at the table. Each bite tells a story of nourishment, crunch, and delightful sweetness. Sharing this salad with my family always reminds me that healthy eating doesn’t have to be boring. So, whether it’s a busy weeknight or a festive gathering, this Kale Cranberry Salad will surely elevate the moment and create lasting memories!


    Print

    clock clock iconcutlery cutlery iconflag flag iconfolder folder iconinstagram instagram iconpinterest pinterest iconfacebook facebook iconprint print iconsquares squares iconheart heart iconheart solid heart solid icon

    Description

    A refreshing and delicious kale salad packed with cranberries, apples, and nuts for a wholesome delight.


    • 6 cups fresh kale, stems removed and leaves torn into bite-sized pieces
    • 1 cup dried cranberries
    • 1/2 cup sliced almonds (toasted if desired)
    • 1/2 cup crumbled feta cheese (or goat cheese)
    • 1 large apple, diced (Granny Smith or Honeycrisp)
    • 1/4 red onion, thinly sliced
    • 1/4 cup olive oil
    • 2 tablespoons apple cider vinegar
    • 1 tablespoon honey or maple syrup
    • Salt and pepper to taste
    • Optional: 1/4 cup pumpkin seeds for added crunch

    1. Prepare the Kale: In a large mixing bowl, add the torn kale leaves. Drizzle with a bit of olive oil and massage the leaves for 2-3 minutes until they are softened and darkened in color.
    2. Mix the Dressing: In a small bowl, whisk together the olive oil, apple cider vinegar, honey (or maple syrup), salt, and pepper until well combined.
    3. Combine Salad Ingredients: Add the diced apple, dried cranberries, sliced almonds, crumbled feta cheese, and red onion to the bowl with the kale.
    4. Dress the Salad: Pour the dressing over the salad mixture. Using tongs or salad forks, toss everything together until well coated.
    5. Garnish (Optional): If using, sprinkle pumpkin seeds over the top for an extra crunch.
    6. Serve: Let the salad sit for about 10 minutes to allow the flavors to meld, then serve chilled or at room temperature.

    Notes

    • This salad can be prepared in advance but is best served fresh.
    • Feel free to customize with other ingredients, such as nuts or seeds.
    • Prep Time: 15 minutes
    • Cook Time: 0 minutes
    • Category: Salad
    • Method: Mixing
    • Cuisine: American

    Nutrition

    • Serving Size: 1 serving
    • Calories: 250
    • Sugar: 18g
    • Sodium: 200mg
    • Fat: 14g
    • Saturated Fat: 2g
    • Unsaturated Fat: 10g
    • Trans Fat: 0g
    • Carbohydrates: 30g
    • Fiber: 5g
    • Protein: 6g
    • Cholesterol: 10mg

    Sharing is caring!

  • Spinach Strawberry Salad with Pecans: A Fresh Delight!

    Spinach Strawberry Salad with Pecans: A Fresh Delight!


    Introduction to Spinach Strawberry Salad with Pecans

    As a busy mom, I know how tough it can be to whip up fresh, flavorful meals without feeling overwhelmed. That’s where my Spinach Strawberry Salad with Pecans shines! It’s the vibrant ray of sunshine I crave on those hectic days. This delightful salad is not only easy to prepare, but it also bursts with freshness, leaving you and your family satisfied and energized. Imagine the crunch of the pecans balanced with sweet strawberries, all nestled in tender spinach. It’s the perfect solution for nights when you want something healthy but don’t have much time to spare!

    Why You’ll Love This Spinach Strawberry Salad with Pecans

    This Spinach Strawberry Salad with Pecans is a lifesaver for busy days! In just 15 minutes, you can serve a dish that brings fresh flavors and satisfying textures to your table. The sweet strawberries combined with the crunchy pecans and creamy cheese create a heavenly harmony. Plus, it’s a healthy salad that not only boosts your mood but also nourishes your body—perfect for us busy moms seeking joy in quick meals!

    Ingredients for Spinach Strawberry Salad with Pecans

    Gathering your ingredients for the Spinach Strawberry Salad with Pecans is part of the fun! Here’s what you’ll need:

    • Spinach or Baby Kale: Choose fresh, vibrant leaves—look for rich green color and no wilting. This will be the base of your salad.
    • Strawberries: Pot for ripe strawberries that are juicy and fragrant. They should be bright red with no signs of bruising to ensure maximum sweetness!
    • Feta or Goat Cheese: These cheeses add a creamy texture. If you prefer something lighter, go for crumbled feta. Or, feta gives a tangy kick for a delightful contrast.
    • Candied Pecans: These add a sweet crunch, but if you’re in a pinch, regular pecans or walnuts can work just as well. You could even toast them for extra flavor!
    • Balsamic Glaze or Vinegar: A splash of balsamic brings richness and acidity. If you love a sweeter flavor, go for the glaze. Otherwise, stick with vinegar for a classic touch!
    • Extra Virgin Olive Oil: This is essential for a smooth dressing. Go for high-quality olive oil for a lovely depth of flavor.
    • Raw Honey: Adds a natural sweetness to balance the acidity. Replace honey with pure maple syrup for a vegan twist.
    • Dijon Mustard: This adds a subtle zing that ties all the flavors together beautifully.
    • Salt and Pepper: A sprinkle of salt and fresh cracked pepper enhances everything. Don’t skip this step!

    For detailed quantities, you’ll find them at the end of the article, ready for easy printing. Get excited about bringing this gorgeous salad to life!

    How to Make Spinach Strawberry Salad with Pecans

    Creating the perfect Spinach Strawberry Salad with Pecans is a breeze! Let’s break it down into simple steps so you can enjoy this healthy salad in no time. Follow along, and let your kitchen come alive with fresh flavors!

    Step 1: Prepare the Greens

    First things first, let’s get our spinach or baby kale ready. Start by rinsing your greens thoroughly under cold running water. I like to give them a little bath to wash away any dirt or grit.

    After washing, gently pat them dry with a clean kitchen towel or use a salad spinner. This step keeps your salad crisp and fresh. Once dried, tear the leaves into bite-sized pieces. Keep those vibrant greens looking beautiful!

    Step 2: Slice the Strawberries

    Moving on to the star of our salad: the strawberries! Select ripe, sweet strawberries—this is key for maximum flavor. They should be deep red and fragrant.

    Slice them up by cutting off the green tops, then halving or quartering them, depending on their size. This way, each bite will burst with juicy goodness. If you have kids, they might even want to help with slicing—great way to get them involved in healthy eating!

    Step 3: Mix the Dressing

    Now it’s time to whip up the dressing. In a small bowl, combine the balsamic glaze (or vinegar), extra virgin olive oil, raw honey, and Dijon mustard.

    Whisk everything together until well blended. You want the dressing to be smooth and silky. This dressing will elevate your fresh salad, so don’t rush—take a moment to enjoy the aroma of the ingredients mingling together!

    Step 4: Combine Ingredients

    In a large bowl, toss together your prepared greens, sliced strawberries, and crumbled cheese (if using). This is where the magic happens! Make sure everything is evenly distributed for a perfect balance of flavors in each bite.

    Then, drizzle the dressing over your salad. Use tongs to gently toss everything, ensuring each piece is coated in the delicious dressing.

    Step 5: Garnish and Serve

    Finally, it’s time to garnish your salad with those lovely candied pecans. Sprinkle them on top for that unique sweet crunch that contrasts the juicy strawberries.

    Serve immediately for the best experience, and watch as your family devours this vibrant dish! Present it in a beautiful bowl to make it even more enticing. Enjoy every refreshing bite!

    Tips for Success

    Want to make the most of your Spinach Strawberry Salad with Pecans? Here are some helpful tips:

    • For leftovers, store the salad in an airtight container—without dressing—to keep it fresh longer.
    • Prepare ingredients ahead of time and mix them just before serving for maximum crunch.
    • If making ahead, keep the dressing separate until it’s time to toss the salad.
    • Feel free to customize—add grilled chicken for protein or swap in your favorite nuts!

    Equipment Needed

    Gathering the right tools will streamline your salad-making adventure! Here’s what you’ll need:

    • Large Bowl: Perfect for mixing all your ingredients. A big mixing bowl works wonders!
    • Whisk: Essential for blending your dressing. A fork can substitute in a pinch!
    • Knife: For slicing strawberries and crumbling cheese. A sharp chef’s knife is ideal.
    • Cutting Board: A sturdy surface for all your chopping. Any clean cutting surface will do!

    Variations for Spinach Strawberry Salad with Pecans

    One of the best things about the Spinach Strawberry Salad with Pecans is how versatile it is! Here are some tasty variations to suit your mood or dietary needs:

    • Nut Alternatives: Swap pecans for walnuts, almonds, or hazelnuts. Each nut brings a unique flavor and texture!
    • Protein-Packed Option: Add grilled chicken, shrimp, or chickpeas for a satisfying boost. It turns this salad into a full meal!
    • Vegan Delight: Omit the cheese and use maple syrup instead of honey for a delightful vegan experience.
    • Fruit Swap: Experiment with other fresh fruits like blueberries, raspberries, or even diced apples for a twist on flavors.
    • Herb Infusion: Toss in fresh herbs like mint or basil for a refreshing kick that elevates the overall taste.
    • Cheese Variety: Try goat cheese, blue cheese, or even a dairy-free alternative for a different creamy texture.
    • Texture Contrast: Add some crispy bacon or fried onions for an unexpected crunch that complements the sweetness of the strawberries.

    Serving Suggestions

    • Grilled Chicken: Pair the salad with grilled chicken for a satisfying meal.
    • Crispy Bread: Serve with crusty baguette or garlic bread for a delightful crunch.
    • Refreshing Drinks: Enjoy with iced tea or sparkling water infused with citrus.
    • Plating Tip: Present in a large bowl, garnished with extra strawberries for a stunning visual flair!

    FAQs about Spinach Strawberry Salad with Pecans

    Have questions about your Spinach Strawberry Salad with Pecans? You’re not alone! Here are some common queries I’ve encountered:

    Can I make this salad ahead of time?

    Absolutely! Just prepare the greens, strawberries, and dressing separately. When you’re ready to eat, combine everything in a large bowl and toss with the dressing for a fresh taste.

    What’s the best way to store leftovers?

    If you have any salad left, store it in an airtight container in the fridge. However, keep the dressing on the side to prevent the greens from wilting.

    Can I substitute the feta cheese?

    Yes! If you’re not a fan of feta, try goat cheese, or even leave the cheese out entirely for a vegan option. It’s still delicious!

    How can I add more protein to the salad?

    For a protein boost, consider adding grilled chicken, chickpeas, or even tofu. They all add heartiness without compromising the salad’s vibrant flavors!

    Is this salad good for meal prep?

    Definitely! The ingredients last a few days when stored properly. Just keep the dressing separate until you’re ready to enjoy this healthy salad!

    Final Thoughts

    The Spinach Strawberry Salad with Pecans is more than just a dish; it’s a celebration of fresh flavors and satisfying textures. With every bite, you’ll feel a burst of joy knowing you made a healthy, vibrant meal in just 15 minutes! I encourage you to try it out and revel in the delightful combinations it offers.

    Whether it’s for a family dinner or a gathering with friends, this salad is sure to impress. So go ahead, dish it up and share your experience. I can’t wait to hear how this fresh favorite brightens your day!


    Print

    clock clock iconcutlery cutlery iconflag flag iconfolder folder iconinstagram instagram iconpinterest pinterest iconfacebook facebook iconprint print iconsquares squares iconheart heart iconheart solid heart solid icon

    Description

    A fresh and delightful salad combining spinach, strawberries, and pecans for a perfect flavor balance.


    • 5 oz spinach or baby kale (about 5 cups), washed
    • 1 lb strawberries, hulled and sliced
    • ½ cup crumbled feta or goat cheese
    • ¼ cup candied pecans
    • ¼ cup balsamic glaze or balsamic vinegar
    • ¼ cup extra virgin olive oil
    • 1 tablespoon raw honey
    • 1 teaspoon Dijon mustard
    • Salt and pepper, to taste

    1. In a large bowl, combine spinach (or baby kale), sliced strawberries, and crumbled cheese.
    2. In a small bowl, whisk together balsamic glaze (or vinegar), olive oil, honey, Dijon mustard, salt, and pepper until blended.
    3. Pour dressing over salad and toss gently to coat evenly.
    4. Garnish with candied pecans.
    5. Serve immediately and enjoy.

    Notes

    • For a vegan option, omit cheese and use maple syrup instead of honey.
    • Make ahead by preparing the ingredients separately and combining them just before serving.
    • Prep Time: 15 minutes
    • Cook Time: 0 minutes
    • Category: Salad
    • Method: No Cook
    • Cuisine: American

    Nutrition

    • Serving Size: 1 serving
    • Calories: 250
    • Sugar: 10g
    • Sodium: 200mg
    • Fat: 18g
    • Saturated Fat: 3g
    • Unsaturated Fat: 12g
    • Trans Fat: 0g
    • Carbohydrates: 20g
    • Fiber: 3g
    • Protein: 6g
    • Cholesterol: 10mg

    Sharing is caring!

  • Blackstone garlic parmesan chicken

    Blackstone garlic parmesan chicken


    Introduction to Blackstone Garlic Parmesan Chicken

    Hey there, fellow food lovers! If you’re like me, weekends can quickly turn into a culinary frenzy. That’s where my Blackstone garlic parmesan chicken comes in—your secret weapon for a delightful meal that won’t eat away at your precious time! This dish is a comforting hug for your taste buds, combining juicy chicken with the savory flavors of garlic and parmesan. You’ll find it’s perfect for impressing your family or whipping up on a busy weeknight. Trust me, it’s one you’ll want in your back pocket when time is tight but flavor is a must!

    Why You’ll Love This Blackstone Garlic Parmesan Chicken

    This Blackstone garlic parmesan chicken is a game-changer for your dinner routine! It’s quick, taking just 25 minutes from start to finish, making it perfect for busy weekdays. The flavors are simply irresistible, with the garlic and parmesan melding beautifully to create a satisfying dish. Plus, it’s versatile—pair it with your favorite sides, and you’ve got a meal that everyone will love.

    Ingredients for Blackstone Garlic Parmesan Chicken

    Gathering the right ingredients is the first step to creating a culinary masterpiece! For this Blackstone garlic parmesan chicken, here’s what you’ll need:

    • Boneless, skinless chicken breasts: This lean protein is the star of the dish, ensuring a juicy and hearty experience.
    • Fresh garlic: Minced garlic provides a fragrant, savory depth. Feel free to adjust if you want a stronger garlic kick!
    • Grated Parmesan cheese: This adds a rich, umami flavor that melts beautifully. You could also use Pecorino Romano for a sharper taste.
    • Extra virgin olive oil: It’s great for searing the chicken and adds healthy fats. If you’re out, avocado oil works just as well.
    • Dried Italian herbs (oregano and basil): These fragrant herbs elevate the dish’s flavor. You can use fresh herbs if you have some on hand!
    • Salt and pepper: Essential for seasoning. Don’t skip this, as it enhances the overall flavor profile.

    You can find all these ingredients at your local grocery store. The exact measurements are waiting for you at the bottom of the article, along with a handy printable version!

    How to Make Blackstone Garlic Parmesan Chicken

    Now that we have our ingredients ready, let’s dive into making this scrumptious Blackstone garlic parmesan chicken. These steps will guide you through the process, ensuring you end up with tender, flavorful chicken that’ll impress even the pickiest eaters.

    Step 1: Preheat the Blackstone Griddle

    The first step is to preheat your Blackstone griddle. This is crucial for achieving that perfect sear. You want your griddle to be hot, around medium-high heat. A well-preheated griddle helps lock in juices and create that delicious, golden crust on the chicken. Plus, it’ll give you those mouthwatering grill marks we all love!

    Step 2: Prepare the Chicken

    While the griddle heats up, it’s time to prepare your chicken. Pat the boneless, skinless chicken breasts dry with a paper towel. This simple tip helps achieve a crispy sear. Next, season both sides generously with salt, pepper, and the dried Italian herbs. A well-seasoned chicken is key to a flavor-packed dish!

    Step 3: Sear the Chicken

    Once your griddle is ready, it’s showtime! Place the chicken breasts on the hot griddle and sear them for about 5-7 minutes on each side. You’re aiming for a golden-brown color, which adds flavor and texture. Always check that the internal temperature reaches 165°F to ensure they’re cooked safely.

    Step 4: Sauté Garlic

    Once your chicken is cooked through, it’s garlic time! Lower the heat slightly and add in the minced garlic. Let it sauté for about 1-2 minutes until fragrant. Keep an eye on it, though; burnt garlic is a big no-no! You want just enough time for the garlic to infuse its amazing flavor without getting bitter.

    Step 5: Add Parmesan

    Now comes the fun part: adding the parmesan cheese! Sprinkle a generous amount over the chicken breasts. Cover them with a lid or aluminum foil for 2-3 minutes. This step is crucial because it allows the cheese to melt gloriously, creating that ooey-gooey texture we dream about. It’s like a cozy blanket of flavor!

    Step 6: Let It Rest

    After the delicious madness, it’s time to let your chicken rest for a couple of minutes. Resting allows the juices to redistribute, making every bite tender and juicy. Trust me; this step can make all the difference in flavor! Once rested, you can garnish with parsley if you’d like a pop of color and then serve it up!

    Tips for Success

    • Always preheat your Blackstone for an even sear.
    • Don’t rush the garlic sautéing; you want it fragrant, not burnt!
    • Use fresh Parmesan if possible; it melts better and tastes divine.
    • Let the chicken rest after cooking—this ensures juiciness.
    • Experiment with herbs to personalize your flavor; thyme or rosemary work well!

    Equipment Needed

    • Blackstone griddle: This is your main tool for cooking. A cast-iron skillet could work in a pinch!
    • Spatula: A sturdy spatula helps flip the chicken without losing that perfect sear.
    • Meat thermometer: Essential for checking that chicken is cooked through; any kitchen thermometer will do!
    • Cutting board: For prepping your chicken and herbs, a large cutting board is ideal.

    Variations

    • Lemon Zest: Add a sprinkle of lemon zest before serving for a bright, zingy flavor.
    • Spicy Kick: Mix in crushed red pepper flakes with the garlic for a delightful heat.
    • Herb Swaps: Try fresh herbs like rosemary or thyme for a different flavor profile; fresh lambs or parsley are wonderful too!
    • Parmesan Alternatives: Use Gruyère or Asiago cheese for a unique twist on the classic recipe.
    • Vegetarian Option: Substitute the chicken with thick slices of zucchini or eggplant for a delicious plant-based meal.

    Serving Suggestions for Blackstone Garlic Parmesan Chicken

    • Serve with a fresh salad: A crisp Caesar or garden salad pairs perfectly, adding a refreshing crunch.
    • Complement with roasted veggies: Try asparagus or Brussels sprouts seasoned with olive oil and lemon.
    • Pair with a light white wine: Sauvignon Blanc enhances the garlic and parmesan flavors beautifully.
    • Garnish: Top with freshly chopped parsley or basil for a vibrant finish.

    FAQs about Blackstone Garlic Parmesan Chicken

    Let’s dive into some common questions about this fabulous Blackstone garlic parmesan chicken. I know you may have queries about flavors, cooking times, or even variations. Here are some answers to help you create the best dish possible!

    Can I use chicken thighs instead of breasts?

    Absolutely! Chicken thighs are fantastic for this recipe. They’re juicier and tender. Just make sure to adjust the cooking time, as thighs may need a bit longer than breasts to reach the safe internal temperature of 165°F.

    What should I serve with Blackstone garlic parmesan chicken?

    This dish pairs wonderfully with sides like roasted vegetables, a fresh salad, or creamy mashed potatoes. Each will complement the savory flavors beautifully. Feel free to get creative!

    Can I make this garlic parmesan chicken ahead of time?

    While it’s best enjoyed fresh, you can prep the chicken and season it in advance. Store it in the refrigerator until you’re ready to cook. This can save you time on a busy weeknight.

    What if I don’t have a Blackstone griddle?

    Don’t worry! A stovetop skillet or grill pan works just as well. The key is to create that high heat for a good sear on your chicken. You’ll still achieve delicious results!

    Can I customize the flavor?

    Definitely! Feel free to mix it up with different herbs, spices, or even add a splash of lemon juice for brightness. Make it yours and enjoy every bite!

    Final Thoughts

    There’s something truly special about sharing a meal that bursts with flavor and warmth. This Blackstone garlic parmesan chicken doesn’t just satisfy hunger; it brings loved ones together at the table, igniting smiles with each delicious bite. I love how this recipe effortlessly blends simplicity with mouthwatering taste, making it perfect for busy nights or special gatherings. Whether it’s a family dinner or a cozy evening treat, you can’t go wrong. So, fire up that griddle and let the tantalizing aroma fill your kitchen. Joyful moments await, one savory chicken breast at a time!


    Print

    clock clock iconcutlery cutlery iconflag flag iconfolder folder iconinstagram instagram iconpinterest pinterest iconfacebook facebook iconprint print iconsquares squares iconheart heart iconheart solid heart solid icon

    Description

    A delicious and savory garlic parmesan chicken recipe made on the Blackstone griddle, perfect for a quick weeknight meal.


    • 4 boneless, skinless chicken breasts (about 1.5 lbs)
    • 4 cloves fresh garlic, minced
    • 1 cup grated Parmesan cheese
    • 2 tbsp extra virgin olive oil
    • 2 tsp dried Italian herbs (oregano and basil)
    • Salt and pepper to taste

    1. Preheat your Blackstone griddle to medium-high heat and drizzle with olive oil.
    2. Pat chicken breasts dry and season both sides with salt, pepper, and dried herbs.
    3. Sear the chicken for 5-7 minutes on each side until golden brown and cooked through (internal temp should reach 165°F).
    4. Lower the heat slightly, add minced garlic, and sauté for 1-2 minutes until fragrant.
    5. Generously sprinkle grated Parmesan over the chicken, cover with a lid or aluminum foil for 2-3 minutes until melted.
    6. Remove from heat, let rest for a couple of minutes, garnish with parsley if desired, then serve.

    Notes

    • Make sure to check the internal temperature of the chicken to ensure it is cooked properly.
    • Feel free to adjust the amount of garlic and Parmesan to suit your taste.
    • Serve with a side salad or vegetables for a complete meal.
    • Prep Time: 10 minutes
    • Cook Time: 15 minutes
    • Category: Main Dish
    • Method: Grilling
    • Cuisine: American

    Nutrition

    • Serving Size: 1 chicken breast
    • Calories: 320
    • Sugar: 0g
    • Sodium: 550mg
    • Fat: 20g
    • Saturated Fat: 5g
    • Unsaturated Fat: 14g
    • Trans Fat: 0g
    • Carbohydrates: 2g
    • Fiber: 0g
    • Protein: 36g
    • Cholesterol: 105mg

    Sharing is caring!

  • Spicy Sriracha Salmon Bowls

    Spicy Sriracha Salmon Bowls


    Introduction to Spicy Sriracha Salmon Bowls

    Hey there, fellow food lovers! If you’re anything like me, you know that some nights just scream for a delicious meal that doesn’t take up your entire evening. That’s where my Spicy Sriracha Salmon Bowls come in! This vibrant dish is perfect for busy moms and professionals looking for a quick solution without sacrificing flavor. With a kick of sriracha and fresh vegetables, these bowls are not only easy to whip up but also a hit with everyone at the table. Let’s get ready to dive into flavor!

    Why You’ll Love This Spicy Sriracha Salmon Bowls

    If you’re racing against the clock, these Spicy Sriracha Salmon Bowls are your new best friend! They come together in just 25 minutes and are packed with flavor, so no one will feel shortchanged at dinner. Plus, imagine the delight on your family’s faces when they taste the spicy, tangy goodness. This dish not only satisfies hunger but also sparks joy with every colorful bite!

    Ingredients for Spicy Sriracha Salmon Bowls

    Gathering your ingredients is half the fun! For these Spicy Sriracha Salmon Bowls, you’ll need a delightful mix of fresh and flavorful items.

    • Salmon fillets: The star of the show! Rich in omega-3 fatty acids, salmon brings health benefits and incredible taste to your bowl.
    • Olive oil or cooking spray: A little lubrication for your air fryer basket or baking sheet to prevent sticking.
    • Sriracha: This spicy condiment delivers the sweet and fiery punch that elevates your salmon. Adjust the amount based on your heat preference.
    • Brown sugar: This adds a touch of sweetness, balancing the heat from the sriracha beautifully.
    • Salt: Essential for enhancing the flavors in this vibrant dish.
    • Cooked rice: Your hearty base layer, offering a comforting texture to absorb all the lovely flavors.
    • Jalapeño: Freshly sliced for an extra kick! Don’t be shy about its spice; remove the seeds for milder bites.
    • Cucumber: Cool and crunchy, it brings a refreshing contrast to the spicy elements.
    • Shredded carrots: For both color and a slight sweetness, carrots add a delightful crunch.
    • Mango: A sweet surprise that balances the entire dish, making every bite sing with flavor.
    • Light mayonnaise: Creamy and rich, this contributes to the spicy mayo that adds a luscious touch.
    • Minced garlic: A hint of garlicky goodness that amplifies the depth of flavor in your spicy mayo.
    • Sesame seeds: These not only add a bit of crunch but also enhance the visual appeal with a nutty flavor.
    • Green onion: Freshly chopped, they give a burst of color and a sharp bite that’s the perfect garnish.

    As you gather these ingredients, don’t hesitate to customize this dish to suit your tastes. Want to toss in some bell peppers or avocado? Go for it! The exact measurements for these ingredients are available at the bottom of the article and ready for printing.

    How to Make Spicy Sriracha Salmon Bowls

    Ready to whip up your Spicy Sriracha Salmon Bowls? Let’s dive into the steps that will take you from a collection of ingredients to a vibrant, delicious meal. Follow my guide, and we’ll make this a delightful cooking adventure together!

    Prepare the Salmon

    Start by preparing your salmon fillets. In a small bowl, combine 2 tablespoons of sriracha, salt, and brown sugar. This blend is essential, as it creates a sweet-and-spicy rub that will infuse your salmon with flavor.

    Rub this mixture generously over each salmon fillet. Let them rest at room temperature for about 15 minutes. This marination process is crucial; it allows the flavors to meld, ensuring that every bite bursts with deliciousness!

    Cook the Salmon

    Now it’s time to cook the salmon! Preheat your air fryer to 400°F (200°C). Don’t skip this step; a hot air fryer makes for perfectly cooked, flaky fish. Lightly coat the basket with olive oil or cooking spray to avoid sticking.

    Place the salmon fillets in the basket, skin-side down. Air fry for about 7 to 10 minutes. If you don’t have an air fryer, don’t worry! You can bake your salmon in the oven at the same temperature for 12 to 15 minutes. Keep an eye on it, and check if it flakes easily with a fork. That’s the perfect sign it’s ready!

    Make the Spicy Mayo

    While the salmon is cooking, let’s create that amazing spicy mayo. In a small bowl, mix the remaining 1½ tablespoons of sriracha with the light mayonnaise and minced garlic. Stir until well combined.

    This zesty addition balances the meal, cutting through the rich flavor of the salmon while still giving it a kick. Set this aside until your bowl is ready to be assembled. It’s a delightful touch that will have everyone coming back for more!

    Assemble Your Bowl

    Final step—assemble your beautiful bowl! Start with a generous scoop of cooked rice as your base. Next, place that gorgeous, cooked salmon right on top.

    Drizzle the spicy mayo over the salmon like a finishing touch on a masterpiece. Now, layer on your colorful toppings: sliced jalapeños, refreshing cucumber, crunchy shredded carrots, and sweet mango chunks. Don’t forget to sprinkle sesame seeds and freshly chopped green onions for a pop of color and crunch!

    Presentation is key; arrange your ingredients in a way that makes your mouth water just looking at it. Serve those bowls right away and enjoy the burst of flavors with every bite!

    Tips for Success

    • Don’t skip the marinade time! Letting the salmon sit brings out the best flavors.
    • Keep an eye on your salmon while cooking to avoid drying it out.
    • Feel free to adjust the amount of sriracha based on your spice tolerance.
    • Experiment with different veggies for a personalized touch!
    • Use leftover salmon as a delightful meal prep option for busy days.

    Equipment Needed

    • Air fryer: Perfect for quick, crispy cooking. No air fryer? You can use an oven instead.
    • Baking sheet: If baking, line it with parchment paper for easy cleanup.
    • Mixing bowls: A couple of these will help with marinating and making the spicy mayo.
    • Measuring spoons: Essential for keeping your ingredients on point!

    Variations

    • Vegetarian Option: Swap the salmon for marinated tofu or grilled tempeh for a plant-based delight!
    • Quinoa Base: Use cooked quinoa instead of rice for a protein-packed alternative.
    • Spicy Tuna: Try using sushi-grade tuna with the same sriracha marinade for a fresh twist.
    • Asian Slaw: Mix in a crunchy Asian slaw with cabbage and sesame dressing for added texture.
    • Low-Carb Version: Replace rice with cauliflower rice to keep it light and low-carb.

    Serving Suggestions

    • Crisp Salad: Pair your bowls with a light green salad dressed in a tangy vinaigrette.
    • Refreshing Drink: Serve with iced green tea or sparkling water with lime for a refreshing touch.
    • Presentation: Use colorful bowls to showcase vibrant ingredients and make the meal pop!

    FAQs about Spicy Sriracha Salmon Bowls

    Can I use frozen salmon for this recipe? Absolutely! Just be sure to thaw your salmon completely before marinating. It may take a little longer to cook, so keep an eye on it as you air fry or bake.

    How can I make this dish milder? If you prefer a less spicy flavor profile, reduce the amount of sriracha in the marinade and the spicy mayo. You can also add more mayonnaise to tone down the heat.

    Can I prepare the components ahead of time? Yes, you can! Prepare the salmon and spicy mayo in advance and store them separately. Assemble your bowls just before serving for the best experience!

    What can I substitute for rice? If rice isn’t your thing, try quinoa, cauliflower rice, or even a bed of leafy greens for a lighter meal.

    Is this recipe suitable for meal prep? Definitely! Each component stores well in the fridge, making this a fantastic option for busy days when you need a healthy yet satisfying meal ready to go.

    Final Thoughts

    As I look back on creating my Spicy Sriracha Salmon Bowls, I can’t help but smile. This dish truly captures the joy of cooking—a delightful blend of flavors, vibrant colors, and an ease that fits perfectly into my busy life. It’s more than just a meal; it’s a way to gather my family around the table, enjoy good conversation, and savor each bite. Whether you’re in a rush or want to impress your loved ones with a delicious dinner, these bowls bring happiness to your kitchen. Dive in and create your own flavorful experience!


    Print

    clock clock iconcutlery cutlery iconflag flag iconfolder folder iconinstagram instagram iconpinterest pinterest iconfacebook facebook iconprint print iconsquares squares iconheart heart iconheart solid heart solid icon

    Description

    Delicious and spicy salmon bowls featuring Sriracha, fresh vegetables, and creamy mayo.


    • 2 salmon fillets
    • Olive oil or cooking spray for air fryer basket
    • 3½ tbsp sriracha divided
    • 2 tbsp brown sugar
    • ½ tsp salt
    • 2 cups cooked rice
    • 1 jalapeño sliced
    • 1 cucumber sliced
    • 1 cup shredded carrots
    • 1 mango chopped
    • ½ cup light mayonnaise
    • 1 tsp minced garlic
    • ½ tbsp sesame seeds for garnish
    • Green onion for garnish

    1. In a small bowl, stir together 2 tablespoons of sriracha, the salt, and brown sugar. Rub the mixture all over the salmon fillets and let them sit at room temperature for about 15 minutes to soak up the flavor.
    2. Preheat your air fryer to 400°F/200°C. Lightly coat the basket with olive oil or a bit of cooking spray to keep things from sticking.
    3. Air fry the salmon for 7 to 10 minutes, depending on the thickness and how done you like it. No air fryer? No problem. You can bake the salmon in the oven at 400°F/200°C for about 12–15 minutes, or until it flakes easily with a fork.
    4. While the salmon cooks, make the spicy mayo: mix the remaining 1½ tablespoons of sriracha with the minced garlic and mayo in a small bowl. Set aside.
    5. Time to build your bowl: start with a scoop of cooked rice, then layer on the salmon.
    6. Drizzle with the spicy mayo, then load it up with your toppings—sliced jalapeños, cucumber, shredded carrots, and chopped mango.
    7. Finish with a sprinkle of sesame seeds and some fresh chopped green onion. Serve right away and enjoy every bite!

    Notes

    • Adjust the level of spiciness by varying the amount of Sriracha to your taste.
    • Feel free to substitute or add more vegetables based on your preference.
    • For meal prep, you can store each component separately in the refrigerator.
    • Prep Time: 15 minutes
    • Cook Time: 10 minutes
    • Category: Dinner
    • Method: Air Fryer or Oven
    • Cuisine: Asian

    Nutrition

    • Serving Size: 1 bowl
    • Calories: 600
    • Sugar: 5g
    • Sodium: 800mg
    • Fat: 25g
    • Saturated Fat: 4g
    • Unsaturated Fat: 20g
    • Trans Fat: 0g
    • Carbohydrates: 65g
    • Fiber: 4g
    • Protein: 35g
    • Cholesterol: 70mg

    Sharing is caring!

  • One-Pot Honey Garlic BBQ Chicken Pasta

    One-Pot Honey Garlic BBQ Chicken Pasta


    Introduction to One-Pot Honey Garlic BBQ Chicken Pasta

    As a passionate home cook, I know the struggle of finding time to whip up a delicious meal after a long day. That’s why I can’t wait to share my one-pot honey garlic BBQ chicken pasta with you! Not only is this dish bursting with flavor, but it’s also a quick solution for busy moms and professionals alike. Imagine tender chicken dancing with rotini pasta in a sweet and tangy sauce—all made in just one pot! Perfect for weekday dinners or impressing your loved ones, this recipe is simply a dinner lifesaver!

    Why You’ll Love This One-Pot Honey Garlic BBQ Chicken Pasta

    This dish is a reaffirmation that busy kitchens don’t have to compromise on flavor or nutrition. In just 30 minutes, you can serve up an enticing meal that’ll have everyone gathering around the table. The best part? It’s all made in one pot, which means fewer dishes to wash! With its sweet and tangy flavors, your family will be asking for seconds before they even finish their first helping.

    Ingredients for One-Pot Honey Garlic BBQ Chicken Pasta

    Gathering your ingredients is half the fun! Here’s what you need for this delightful one-pot honey garlic BBQ chicken pasta:

    • Chicken breast: Diced into bite-sized pieces, it’s the heart of this dish, providing protein and tenderness.
    • Olive oil: This helps to brown the chicken beautifully while adding healthy fat.
    • Garlic: Minced and aromatic, it adds depth to the flavor profile. I can’t resist that mouthwatering scent!
    • BBQ sauce: Sweet and tangy, it serves as the star of the show, creating that perfect blend of flavors we’ll crave.
    • Honey: A splash of sweetness that balances the flavors and complements the BBQ sauce exceptionally well.
    • Soy sauce: It rounds out the taste with its savory notes, bringing a hint of umami goodness.
    • Chicken broth: This is what brings everything together, giving our pasta a rich and flavorful base.
    • Dry rotini pasta: The spirals are perfect for trapping bits of sauce, and you can swap it with any pasta you love!
    • Salt and black pepper: Essential for seasoning, giving the dish a delightful taste.
    • Optional spices: If you’re feeling adventurous, red pepper flakes or smoked paprika add a delightful kick!

    All these ingredients work together to create a symphony of flavors. For exact measurements, check the end of the article, where they’re detailed and ready for printing!

    How to Make One-Pot Honey Garlic BBQ Chicken Pasta

    Now, let’s dive into how to create this delightful one-pot honey garlic BBQ chicken pasta. Each step is simple and straightforward, ensuring that you’ll feel like a pro in your kitchen. I promise, you’ll have a delectable meal ready in no time!

    Step 1: Sauté the Chicken

    Begin by heating 2 tablespoons of olive oil in a large deep skillet or pot over medium-high heat. When the oil shimmers, add 1 pound of diced chicken breast. Sauté for about 4–5 minutes until the chicken turns a light golden brown. The aroma will make your kitchen feel inviting! Remember, you want the chicken cooked but not dry.

    Step 2: Add Garlic

    Once the chicken is browned to perfection, stir in 3 cloves of minced garlic. The fragrance will immediately fill the air! Cook for about 1 minute, just enough for the garlic to become fragrant without burning. Trust me, this is where the magic starts!

    Step 3: Combine Sauce Ingredients

    Reduce the heat to medium and add 3/4 cup of BBQ sauce, 2 tablespoons of honey, and 2 tablespoons of soy sauce to the skillet. Stir everything together, coating the chicken with the sweet and tangy sauce. It smells so good already, doesn’t it? Let those flavors meld together!

    Step 4: Add Broth and Pasta

    Next, pour in 3 cups of chicken broth (or water, if you’re in a pinch) and sprinkle in 2 1/2 cups of dry rotini pasta. Give it a good stir, ensuring the pasta is completely submerged in the liquid. This step is essential for even cooking, so keep those spirals cozy!

    Step 5: Boil and Simmer

    Bring the mixture to a roaring boil. As soon as it starts bubbling, reduce the heat to a simmer. Cover the pot and let it cook for 12–15 minutes, stirring occasionally. Keep an eye on it, as you want the pasta to soak up that delicious sauce and cook to al dente perfection!

    Step 6: Thicken and Season

    After the initial cooking time, uncover the pot and let it simmer for an additional 3–5 minutes. This will allow the sauce to thicken and coat the pasta beautifully. Taste the dish and adjust the seasoning with salt, black pepper, and any optional spices you like, such as red pepper flakes or smoked paprika.

    Step 7: Serve it Hot

    Once everything is thick and flavorful, it’s time to serve! Dish up the pasta hot, and enjoy it while it’s at its freshest. For a burst of color, consider garnishing it with chopped fresh herbs like parsley or cilantro. Your family will be amazed, and you’ll feel like a culinary rockstar!

    Tips for Success

    • Prep all your ingredients in advance to make cooking smoother.
    • Give the chicken space in the pan to brown nicely; overcrowding can lead to steaming.
    • Stir occasionally to prevent pasta from sticking to the bottom of the pot.
    • Feel free to tweak the sauce ingredients to match your family’s taste.
    • For a creamy twist, stir in a dollop of cream or cheese right before serving.

    Equipment Needed

    • Large deep skillet or pot: A Dutch oven can be a fantastic alternative.
    • Spatula: Any sturdy spatula works for stirring, but a wooden one adds a nice touch.
    • Measuring cups: Essential for precise ingredient measurements, or use a standard cup if you’re in a pinch.
    • Knife and cutting board: A classic duo for chopping chicken and garlic.

    Variations

    • Swap the Protein: Try using shrimp, turkey, or even plant-based chicken alternatives to cater to different diets.
    • Pasta Variety: While rotini is great, you can opt for penne, fusilli, or even gluten-free pasta for a dietary adaptation.
    • Add Veggies: Boost nutrition by tossing in some spinach, bell peppers, or broccoli during the last few minutes of cooking.
    • Spicy Kick: If you love heat, add diced jalapeños or a splash of your favorite hot sauce for an extra zing.
    • BBQ Sauce DIY: Make your own BBQ sauce to control the sweetness and tangness, using ingredients like apple cider vinegar and mustard.

    Serving Suggestions for One-Pot Honey Garlic BBQ Chicken Pasta

    • Pair this dish with a crisp green salad for a fresh contrast.
    • Serve with garlic bread or warm dinner rolls to soak up the sauce.
    • A chilled glass of iced tea or lemonade can complement the sweetness perfectly.
    • For a pop of color, garnish with freshly chopped herbs right before serving.

    FAQs about One-Pot Honey Garlic BBQ Chicken Pasta

    Can I make this One-Pot Honey Garlic BBQ Chicken Pasta in advance?

    Absolutely! You can prepare it ahead of time and simply reheat when you’re ready to eat. Just be sure to store it in an airtight container in the fridge for up to three days.

    What can I use instead of chicken?

    If chicken isn’t your style, feel free to try shrimp, turkey, or even tofu for a vegetarian option. The sauce will complement different proteins beautifully!

    Can I freeze the leftovers?

    Yes, this dish freezes well! Just make sure to store it in a freezer-safe container. When you’re ready to enjoy it, let it thaw overnight in the fridge before reheating on the stove or microwave.

    How do I store leftover One-Pot Honey Garlic BBQ Chicken Pasta?

    Leftovers should be kept in an airtight container in the fridge. They are best consumed within three days for optimal freshness and flavor.

    What sides pair nicely with this one-pot meal?

    I recommend a light salad or some crusty garlic bread to complement the dish. You’ll love how it balances out the meal!

    Final Thoughts

    As a home cook, nothing brings me more joy than creating meals that bring smiles around the dinner table. This one-pot honey garlic BBQ chicken pasta does just that! It’s not only delicious and satisfying, but it also makes the cooking process a breeze—perfect for our busy lives. The warmth of sweet and tangy flavors combined with tender chicken and pasta creates a comforting hug in a bowl. With minimal cleanup, you can focus on what truly matters: sharing laughter and stories with the ones you love. Isn’t that what cooking is all about? Enjoy every delightful bite!


    Print

    clock clock iconcutlery cutlery iconflag flag iconfolder folder iconinstagram instagram iconpinterest pinterest iconfacebook facebook iconprint print iconsquares squares iconheart heart iconheart solid heart solid icon

    Description

    A delicious and easy one-pot meal featuring tender chicken, rotini pasta, and a sweet and tangy honey garlic BBQ sauce.


    • 1 lb chicken breast, diced
    • 2 tbsp olive oil
    • 3 cloves garlic, minced
    • 3/4 cup BBQ sauce
    • 2 tbsp honey
    • 2 tbsp soy sauce
    • 3 cups chicken broth (or water)
    • 2 1/2 cups dry rotini pasta
    • Salt and black pepper, to taste
    • Optional: red pepper flakes or smoked paprika for extra kick

    1. Heat olive oil in a large deep skillet or pot over medium-high heat.
    2. Add diced chicken and cook for 4–5 minutes until lightly browned.
    3. Stir in minced garlic and cook for 1 more minute.
    4. Reduce heat to medium. Add BBQ sauce, honey, and soy sauce. Stir to coat the chicken.
    5. Pour in chicken broth and add dry rotini. Mix well to ensure pasta is submerged.
    6. Bring to a boil, then lower heat to a simmer. Cover and cook for 12–15 minutes, stirring occasionally.
    7. Uncover and simmer for another 3–5 minutes until sauce thickens and pasta is al dente.
    8. Taste and season with salt, pepper, and optional spices. Serve hot.

    Notes

    • Feel free to adjust the spice level with optional red pepper flakes or smoked paprika.
    • This dish can be garnished with fresh herbs like parsley or cilantro for added flavor.
    • You can substitute rotini pasta with any pasta of your choice.
    • Prep Time: 10 minutes
    • Cook Time: 20 minutes
    • Category: Main Dish
    • Method: One-pot cooking
    • Cuisine: American

    Nutrition

    • Serving Size: 1/4 recipe
    • Calories: 450
    • Sugar: 8g
    • Sodium: 600mg
    • Fat: 10g
    • Saturated Fat: 1.5g
    • Unsaturated Fat: 8.5g
    • Trans Fat: 0g
    • Carbohydrates: 66g
    • Fiber: 3g
    • Protein: 30g
    • Cholesterol: 70mg

    Sharing is caring!

  • Cheesy Keto Pepperoni Bites

    Cheesy Keto Pepperoni Bites


    Introduction to Cheesy Keto Pepperoni Bites

    As a passionate home cook, I know how hectic life can get, especially when you’re juggling kids, work, and a million other responsibilities. That’s why these Cheesy Keto Pepperoni Bites have become my go-to snack. They’re quick, easy, and perfect for satisfying those pesky cravings without sacrificing your health goals. Packed with gooey cheese and savory pepperoni, they’re little bites of joy that the whole family will love. Plus, they fit perfectly into a low-carb diet, making them a delightful treat for anyone looking to indulge guilt-free!

    Why You’ll Love This Cheesy Keto Pepperoni Bites

    These Cheesy Keto Pepperoni Bites are not only super easy to whip up, but they also bake up in a flash. With gooey, melted cheese and a flavorful pepperoni surprise inside, they hit all the right notes. Whether you’re hosting friends or just needing a quick snack after a long day, these bites will have everyone asking for more. They’re delicious, satisfying, and oh-so-simple to make!

    Ingredients for Cheesy Keto Pepperoni Bites

    When it comes to making Cheesy Keto Pepperoni Bites, gathering the right ingredients is key to delivering that unbeatable flavor. Here’s what you’ll need:

    • Shredded mozzarella cheese: This melty favorite gives the bites that gooey texture we all love.
    • Cream cheese: Softened cream cheese adds richness and helps bind everything together nicely.
    • Almond flour: A low-carb alternative to regular flour, it offers a nutty flavor without the carbs.
    • Large egg: This is the secret to binding the ingredients and giving your bites a fluffy texture.
    • Italian seasoning: A blend of herbs that infuses the bites with classic Italian flavor.
    • Garlic powder: A must for that aromatic, mouthwatering taste that complements the pepperoni.
    • Salt and black pepper: Just the right touch to enhance all the flavors in each bite.
    • Sliced pepperoni: The star of the show! This spicy, savory meat adds a burst of flavor inside each bite.
    • Optional: Grated Parmesan cheese: Sprinkle on top for a salty finish that elevates the snacks to heavenly.
    • Marinara sauce: Perfect for dipping these delicious bites into; it’s like a match made in culinary heaven!

    For those looking to mix things up, feel free to swap in different types of cheese or experiment with your favorite spices. You can find all the ingredients listed with exact measurements at the bottom of the article for easy printing!

    How to Make Cheesy Keto Pepperoni Bites

    Creating these Cheesy Keto Pepperoni Bites is a breeze! Just follow these simple steps, and you’ll have a delightful snack ready in no time. Let’s get cooking!

    Step 1: Preheat and Prepare

    First things first, preheat your oven to 400°F (200°C). This step is crucial for achieving that perfectly golden and bubbly finish on your bites. Next, line a baking sheet with parchment paper. This will prevent the bites from sticking and make clean-up a snap. Trust me; future-you will be grateful!

    Step 2: Combine Cheeses

    In a mixing bowl, combine the shredded mozzarella cheese and the softened cream cheese. Pop it in the microwave for about 30-45 seconds until it’s melted and easy to stir. This step makes it much simpler to blend both cheeses into a creamy mixture. Give it a good stir until smooth—the cheesiness should be irresistible!

    Step 3: Add Dry Ingredients

    Now, it’s time to add the dry ingredients. Toss in the almond flour, large egg, Italian seasoning, garlic powder, salt, and black pepper. Mix everything together until a dough forms. Don’t be afraid to get your hands in there—sometimes, it’s the best way to create that perfect dough consistency. Plus, it’s all about getting those flavors combined!

    Step 4: Form the Bites

    Take a generous spoonful of the dough and roll it into a ball, about the size of a golf ball. Flatten it slightly, then place a slice of pepperoni in the center. Now, here’s the magic—wrap the dough around the pepperoni, ensuring it’s fully enclosed. This ensures that every bite will have that tasty burst of pepperoni! Aim for a nice, round shape for even baking.

    Step 5: Place on Baking Sheet

    Arrange the cheese-wrapped pepperoni bites on the prepared baking sheet, spacing them about an inch apart. This allows for even cooking and prevents them from sticking together. If you want to kick up the flavor, sprinkle some grated Parmesan cheese on top before baking!

    Step 6: Bake

    Slide the baking sheet into your preheated oven and let them bake for 10-12 minutes. Keep a close eye on them; you’ll know they’re ready when they turn golden and bubbly. The aroma wafting through your kitchen will be hard to resist!

    Step 7: Cool and Serve

    Once your bites are baked to perfection, allow them to cool for a few minutes. This will help them firm up a bit for easier handling. Serve them warm with a side of marinara sauce for dipping. It’s like the cherry on top of your cheesy, pepperoni treat! Enjoy each bite and savor the deliciousness.

    Tips for Success

    • Make sure your cream cheese is softened for a smooth mix.
    • Use parchment paper; it’s a game changer for easy clean-up!
    • Don’t rush the baking; golden bites mean crispy happiness.
    • Consider letting the bites cool briefly before serving; it enhances their flavor.
    • Experiment with herbs or spice blends to personalize your bites.

    Equipment Needed

    • Mixing bowl: A medium-sized bowl works perfectly; a stand mixer can be handy but is not necessary.
    • Spoon: For combining the ingredients and shaping the bites; a cookie scoop can make it easier.
    • Baking sheet: A standard baking sheet or any oven-safe dish will do the job.
    • Parchment paper: If you don’t have it, greasing the pan works as well.

    Variations

    • Cheesy Veggie Bites: Add some finely chopped bell peppers, spinach, or mushrooms to the dough for a veggie twist.
    • Spicy Kick: Use spicy pepperoni or add red pepper flakes and jalapeños for a fiery flavor.
    • Different Cheese: Substitute mozzarella with cheddar, gouda, or even pepper jack for unique flavor profiles.
    • Herb-Infused: Incorporate fresh herbs like basil or oregano into the dough for a fragrant touch.
    • Mini Bites: Scale down the size of the bites for bite-sized snacks perfect for parties.

    Serving Suggestions

    • Serve with a side of marinara sauce for that classic dipping experience.
    • Pair with a crisp garden salad for a refreshing contrast to the warm bites.
    • For drinks, try a light sparkling water or a bubbly iced tea.
    • Present on a wooden platter for a rustic feel at your gathering.
    • Sprinkle with fresh parsley for a pop of color before serving!

    FAQs about Cheesy Keto Pepperoni Bites

    As a dedicated home cook, I often get asked a few common questions about these Cheesy Keto Pepperoni Bites. Here are answers that can help you tackle any concerns or curiosities you might have!

    Can I make Cheesy Keto Pepperoni Bites ahead of time?

    Absolutely! You can prepare the dough ahead of time and store it in the fridge. Just form the bites when you’re ready to bake them and enjoy a fresh batch!

    What’s the best way to store leftovers?

    These bites are best enjoyed fresh, but you can store leftovers in an airtight container in the fridge for up to three days. Just reheat them in the oven for that delicious, crispy texture!

    Can I freeze Cheesy Keto Pepperoni Bites?

    Yes, you can! After baking, let them cool completely, then freeze in a single layer. Once frozen, transfer to a freezer-safe bag, and they’ll be ready for quick snacks later!

    What can I substitute for almond flour?

    If you need a different option, you can try coconut flour—but keep in mind it absorbs more moisture, so adjust your liquid ingredients accordingly.

    How do I make these bites spicier?

    If you’re like me and enjoy a little heat, consider using spicy pepperoni, or even adding a pinch of red pepper flakes to the mixture. It’s a simple way to elevate the flavor!

    Final Thoughts

    There’s something truly special about whipping up a batch of Cheesy Keto Pepperoni Bites. They’re not just a quick snack; they’re a little slice of happiness that brings everyone together. Whether it’s game night, a casual gathering, or that much-needed snack after a long day, these bites will delight your taste buds and warm your heart. Plus, knowing that you’re serving up something healthy without sacrificing flavor is the ultimate win for busy families. So go ahead, enjoy every cheesy moment and share these little treasures with those you love!


    Print

    clock clock iconcutlery cutlery iconflag flag iconfolder folder iconinstagram instagram iconpinterest pinterest iconfacebook facebook iconprint print iconsquares squares iconheart heart iconheart solid heart solid icon

    Description

    Cheesy Keto Pepperoni Bites are a delicious and easy snack made with cheese, pepperoni, and other keto-friendly ingredients, perfect for satisfying cravings.


    • 1 cup shredded mozzarella cheese
    • 1/2 cup cream cheese, softened
    • 1/4 cup almond flour
    • 1 large egg
    • 1 teaspoon Italian seasoning
    • 1/2 teaspoon garlic powder
    • 1/4 teaspoon salt
    • 1/4 teaspoon black pepper
    • 1 cup sliced pepperoni
    • Optional: 1/4 cup grated Parmesan cheese for topping
    • Marinara sauce for dipping

    1. Preheat your oven to 400°F (200°C) and line a baking sheet with parchment paper.
    2. In a mixing bowl, combine shredded mozzarella cheese and softened cream cheese. Microwave for 30-45 seconds until it’s melty and easy to combine. Stir until smooth.
    3. Add the almond flour, egg, Italian seasoning, garlic powder, salt, and black pepper to the cheese mixture. Mix until a dough forms.
    4. Roll the dough into small balls about the size of a golf ball. Flatten each ball slightly and place a slice of pepperoni in the center. Wrap the dough around the pepperoni to fully enclose it and reshape into a ball.
    5. Place the cheese-wrapped pepperoni bites on the prepared baking sheet, spacing them about an inch apart. If desired, sprinkle Parmesan cheese on top for extra flavor.
    6. Bake in the preheated oven for 10-12 minutes or until golden and bubbly.
    7. Allow the bites to cool for a few minutes before serving. Pair with marinara sauce for dipping. Enjoy your cheesy goodness!

    Notes

    • These bites are best served fresh but can be stored in the refrigerator for a few days.
    • You can experiment with different types of cheese or add your favorite spices.
    • For a spicier kick, consider adding hot pepperoni or red pepper flakes.
    • Prep Time: 15 minutes
    • Cook Time: 12 minutes
    • Category: Snack
    • Method: Baking
    • Cuisine: American

    Nutrition

    • Serving Size: 1 bite
    • Calories: 120
    • Sugar: 1g
    • Sodium: 260mg
    • Fat: 10g
    • Saturated Fat: 4g
    • Unsaturated Fat: 5g
    • Trans Fat: 0g
    • Carbohydrates: 2g
    • Fiber: 1g
    • Protein: 7g
    • Cholesterol: 30mg

    Sharing is caring!