Category: Uncategorized

  • Blueberry Swirl Yogurt Bites

    Blueberry Swirl Yogurt Bites


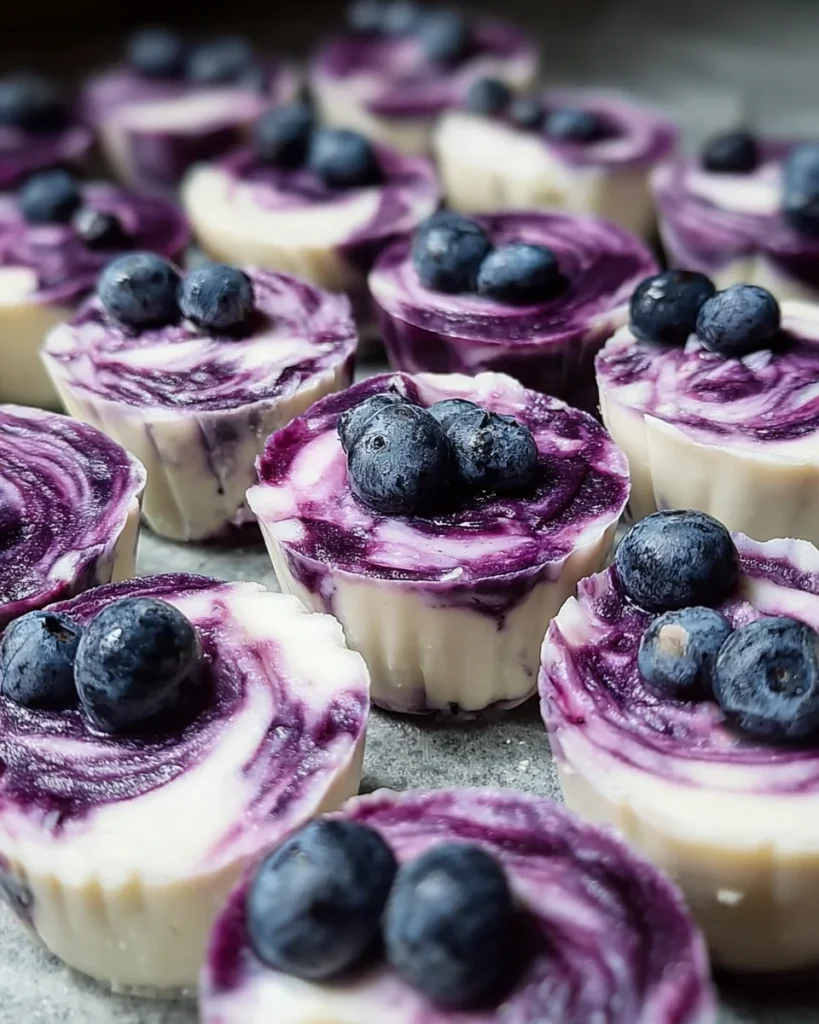
    Introduction to Blueberry Swirl Yogurt Bites

    As a busy mom, I often find myself juggling the demands of family, work, and a few personal projects. That’s why I’m excited to introduce you to my Blueberry Swirl Yogurt Bites. These delightful snacks are not only a refreshing treat but also incredibly easy to whip up. Imagine reaching into your freezer to grab a tasty, healthy bite that’s perfect for those hectic afternoons or a quick dessert. They’re an effortless way to please the whole family, all while sneaking in some nutritious goodness. Trust me; once you try these, you’ll want to make them again and again!

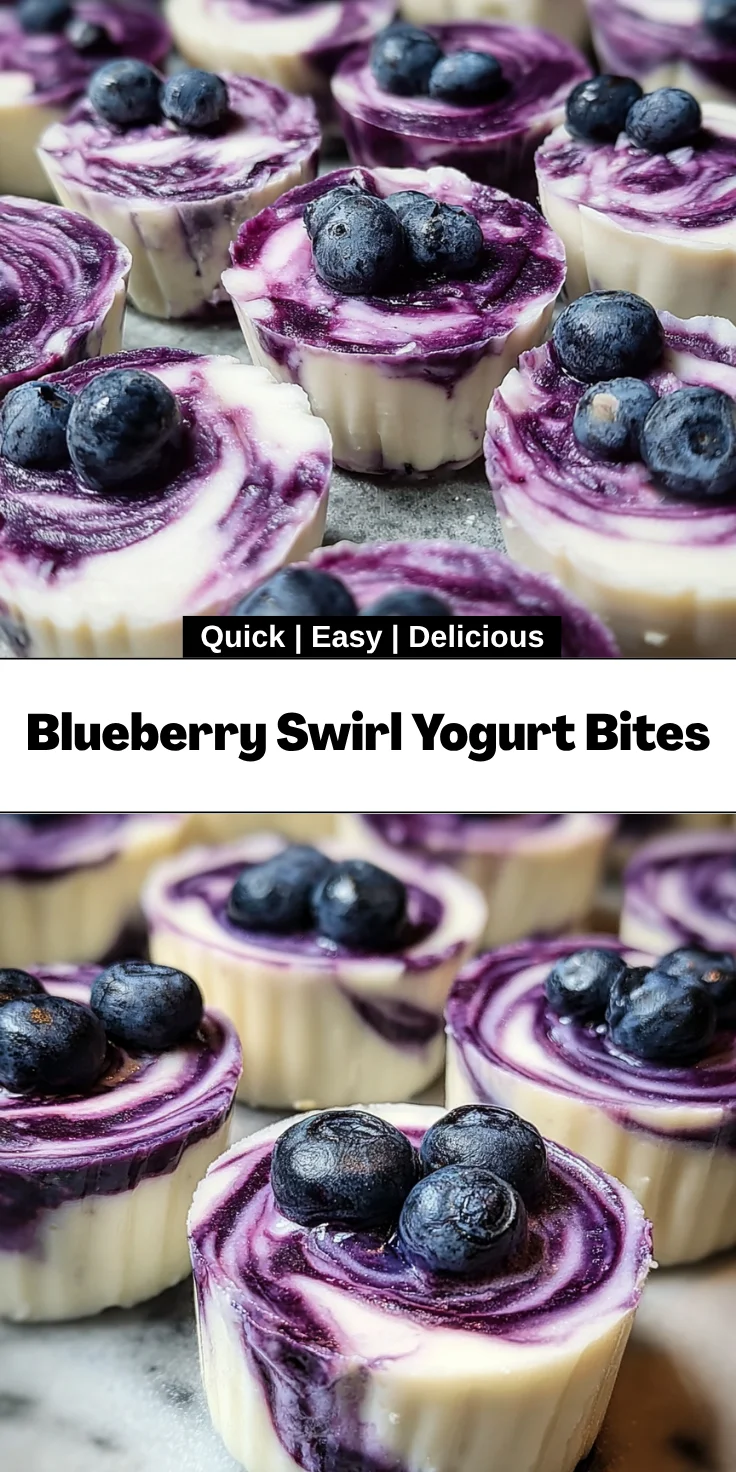
    Why You’ll Love This Blueberry Swirl Yogurt Bites

    These Blueberry Swirl Yogurt Bites are a game-changer for your snack routine! They’re not only super easy to make, but they also come together quickly. You’ll love how fresh and flavorful they are, with ripe blueberries swirling through creamy Greek yogurt. Plus, they’re perfect for those busy days when you need a healthy treat that satisfies your sweet tooth. Say goodbye to store-bought snacks and hello to this homemade delight!

    Ingredients for Blueberry Swirl Yogurt Bites

    Creating these mouthwatering Blueberry Swirl Yogurt Bites is a breeze with just a handful of tasty ingredients. Here’s what you’ll need:

    • Plain Greek yogurt: This creamy base is packed with protein and adds a lovely texture to your bites.
    • Fresh blueberries: The star of the show! These juicy gems provide the vibrant color and natural sweetness.
    • Honey or maple syrup: Use honey for a rich sweetness or maple syrup if you prefer a vegan option. Both blend perfectly!
    • Vanilla extract: A splash of this fragrant extract enhances the overall flavor, making it even more delightful.
    • Lemon juice: A dash of lemon juice adds brightness and a subtle zing that balances the sweetness.
    • Salt: Just a pinch brings all the flavors together, enhancing the sweetness of the blueberries.
    • Granola (optional): For a crunchy topping, granola adds an irresistible texture and extra flavor. Customize it with your favorite kind!

    Feel free to mix and match fruits. You can use strawberries or raspberries if blueberries aren’t your style. Don’t worry about measurements; you’ll find all the exact quantities at the bottom of this article, ready for printing!

    How to Make Blueberry Swirl Yogurt Bites

    Let’s dive into making these delightful Blueberry Swirl Yogurt Bites. The process is as enjoyable as the result! Follow these simple steps, and you’ll have a delicious, refreshing snack at your fingertips in no time.

    Step 1: Prepare the Blueberry Mixture

    Start by combining fresh blueberries, honey, vanilla extract, lemon juice, and a pinch of salt in a blender or food processor. Blend until smooth, or pulse a few times if you prefer some texture. I love leaving a few chunks for a burst of blueberry goodness!

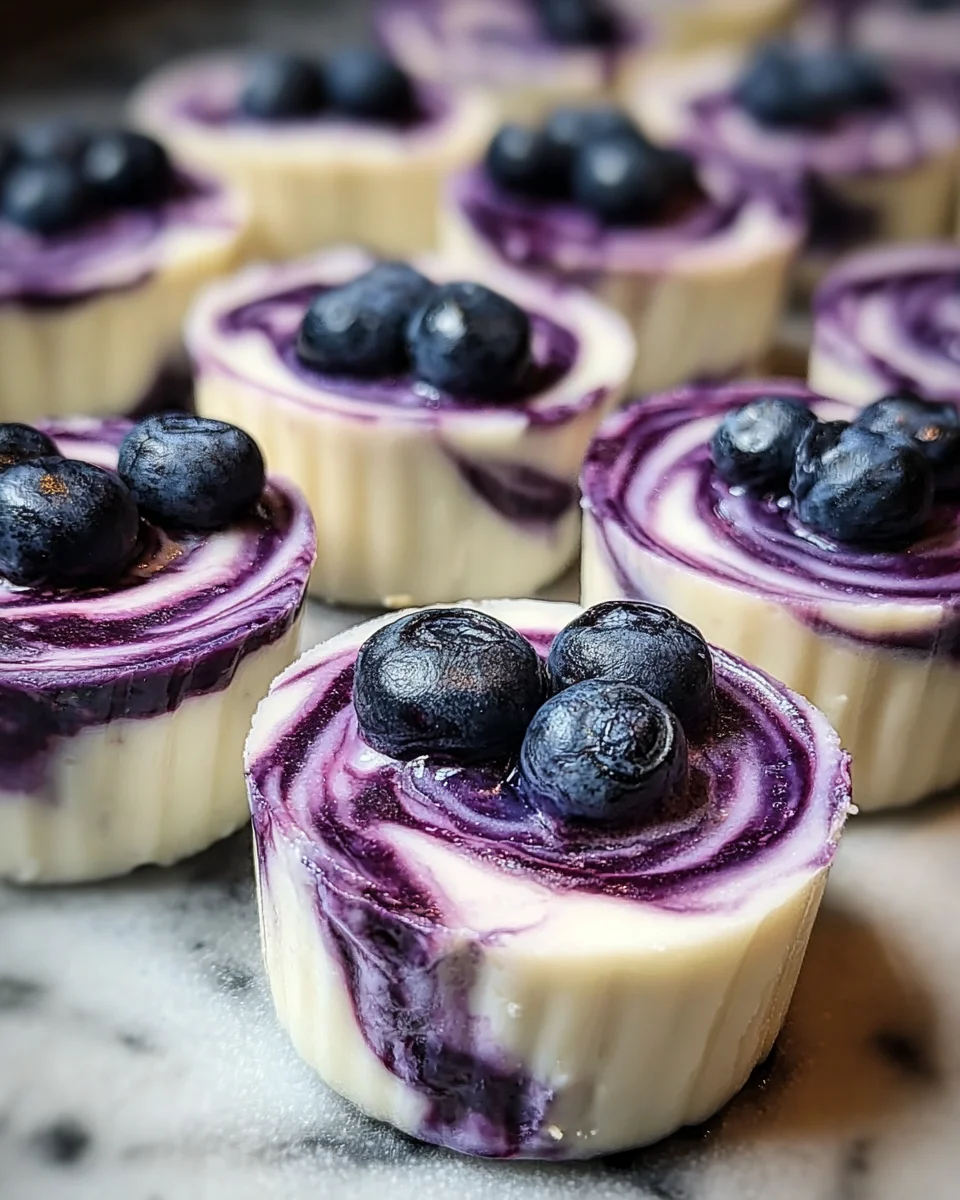
    Step 2: Swirl into Yogurt

    In a mixing bowl, add your creamy Greek yogurt. Gently fold in half of the blueberry mixture. This step is key—don’t overmix! You want to create a beautiful swirl effect that you can see. The contrast between the yogurt and blueberry is what makes this treat so tempting!

    Step 3: Fill the Molds

    Now, grab your muffin tin lined with silicone molds or paper liners. Spoon the yogurt mixture into each mold, filling them about three-quarters full. This generous portion size ensures you have a good bite without overflowing.
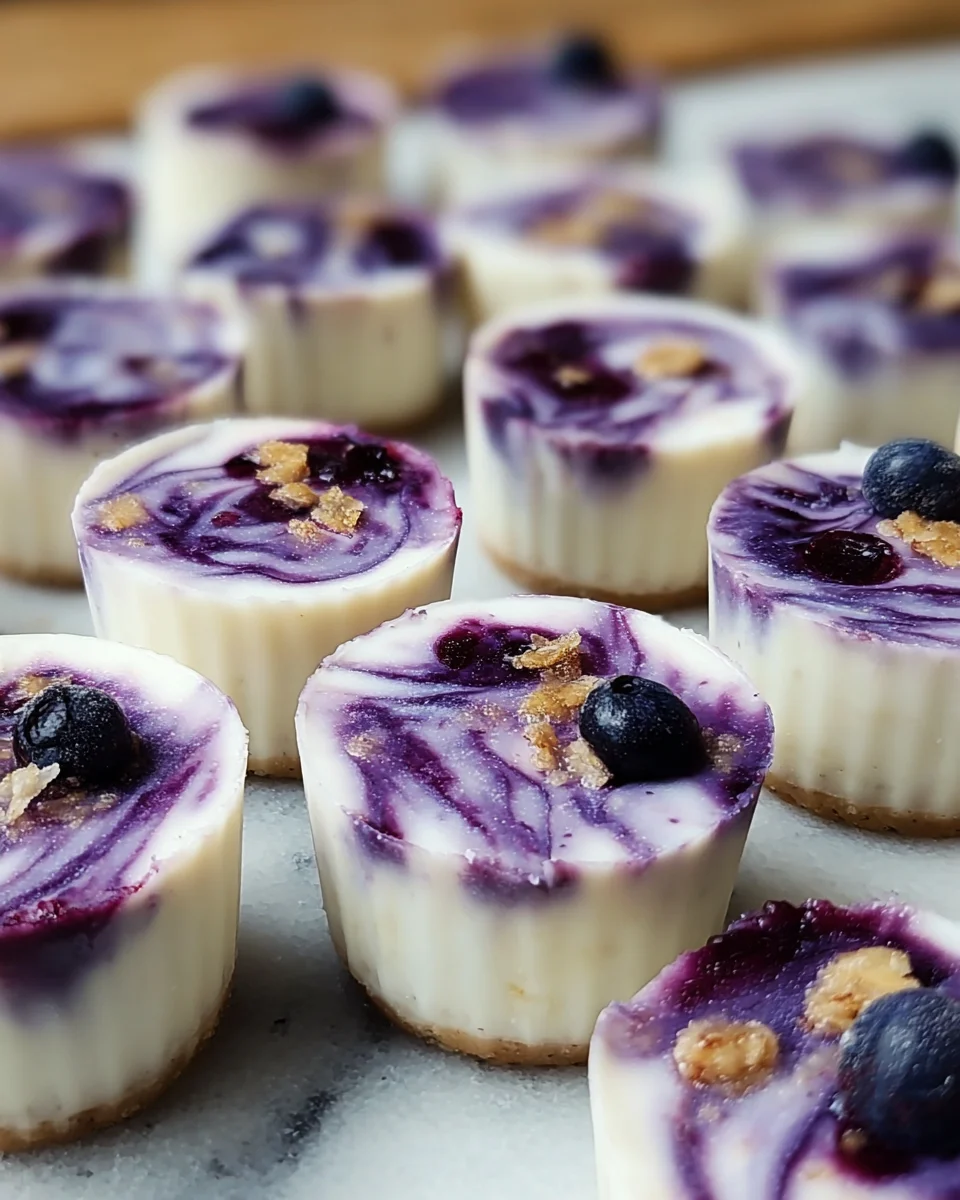
    Step 4: Add Topping

    Top each yogurt bite with a dollop of the remaining blueberry mixture. If you’re feeling fancy, sprinkle some granola on top. It adds a delightful crunch that pairs perfectly with the creamy yogurt.

    Step 5: Freeze

    It’s time to freeze your delicious concoction! Place the muffin tin in the freezer and allow it to freeze for at least four hours or until solid. The waiting might be tough, but trust me, it’s worth it!

    Step 6: Store the Yogurt Bites

    Once frozen solid, carefully remove the yogurt bites from the molds. Store them in an airtight container, and they’ll keep in the freezer for up to two months. You’ll thank yourself on those busy days when a quick snack is exactly what you need!

    Tips for Success

    • Always use ripe blueberries for the best flavor and natural sweetness.
    • Adjust the sweetness of your yogurt bites by adding more or less honey/maple syrup.
    • If you’re short on time, prepare the blueberry mixture in advance and store it in the fridge.
    • Try experimenting with other fruits like strawberries or raspberries for different flavors!
    • Use silicone molds for easy removal—no fuss, no mess!

    Equipment Needed

    • Blender or food processor: Essential for creating that smooth blueberry mixture. A hand mixer works too!
    • Mixing bowl: Use a medium-sized bowl to combine your ingredients.
    • Muffin tin: A standard muffin tin works perfectly, but silicone molds make removal a breeze.
    • Spoon or spatula: Handy for scooping and swirling your yogurt mixture.

    Variations of Blueberry Swirl Yogurt Bites

    • Mixed Berry Delight: Swap blueberries for a mix of berries, like strawberries and raspberries, for a colorful twist.
    • Peanut Butter Swirl: Add a swirl of creamy peanut butter into the yogurt for a nutty flavor that will satisfy your cravings.
    • Chocolate Chip Heaven: Fold in mini chocolate chips along with the blueberry mixture for a decadent treat.
    • Coconut Bliss: Top your yogurt bites with shredded coconut instead of granola for a tropical flair.
    • Dairy-Free Option: Use dairy-free yogurt like almond or coconut yogurt to make these bites suitable for a vegan diet.

    Serving Suggestions

    • Serve with a cup of herbal tea or a refreshing iced coffee for a delightful afternoon snack.
    • Pair with fresh fruit to create a colorful fruit platter that adds a pop to your table.
    • Present yogurt bites in a cute dessert cup, garnished with mint leaves for an appealing touch.

    FAQs about Blueberry Swirl Yogurt Bites

    Are you curious about these delightful Blueberry Swirl Yogurt Bites? I’ve gathered a few frequently asked questions to help you out!

    Can I use frozen blueberries instead of fresh?
    Absolutely! Frozen blueberries will work just fine. Just remember to thaw them a bit before blending to achieve the desired texture.

    How long do these yogurt bites last in the freezer?
    These tasty bites can be stored in an airtight container in the freezer for up to two months. Perfect for grab-and-go snacks!

    Can I make these yogurt bites without gluten?
    Yes! All the ingredients are naturally gluten-free. If you decide to add granola, just make sure you choose a gluten-free option.

    What other fruits can I use in this recipe?
    Feel free to get creative! Strawberries, raspberries, or even mangoes can be great substitutes to mix things up.

    How can I adjust the sweetness of the yogurt bites?
    Simply add more or less honey or maple syrup to taste. Start with a bit and adjust until you achieve your preferred sweetness!

    Final Thoughts

    Every time I reach for a Blueberry Swirl Yogurt Bite, it reminds me of why I love cooking for my family. These little bites not only burst with refreshing flavor but also bring joy to our busy days. They’re perfect for satisfying cravings and an easy way to sneak in some nutrition. Plus, I adore that I can customize them to fit our taste buds! I hope you’ll enjoy these delightful snacks just as much as my family does. Trust me; they’ll become your go-to treat that makes you feel good, inside and out!


    Print

    clock clock iconcutlery cutlery iconflag flag iconfolder folder iconinstagram instagram iconpinterest pinterest iconfacebook facebook iconprint print iconsquares squares iconheart heart iconheart solid heart solid icon

    Description

    A refreshing and healthy snack made with Greek yogurt and fresh blueberries, perfect for a quick treat.


    • 1 cup plain Greek yogurt
    • 1 cup fresh blueberries
    • 2 tablespoons honey (or maple syrup for a vegan option)
    • 1 teaspoon vanilla extract
    • 1 tablespoon lemon juice
    • 1/4 teaspoon salt
    • 1/4 cup granola (optional, for topping)

    1. In a blender or food processor, combine the fresh blueberries, honey, vanilla extract, lemon juice, and salt. Blend until smooth. If you prefer some texture, pulse a few times to leave some blueberry chunks.
    2. In a mixing bowl, add the Greek yogurt and gently fold in half of the blueberry mixture, creating a swirl effect. Do not fully mix; you want to see both the yogurt and the blueberry mixture.
    3. Line a muffin tin with silicone molds or paper liners. Spoon the yogurt mixture into each mold, filling them about three-quarters full.
    4. Top each yogurt bite with a small amount of the remaining blueberry mixture and a sprinkle of granola if desired.
    5. Place the muffin tin in the freezer and freeze for at least 4 hours or until solid.
    6. Once frozen, remove the yogurt bites from the molds and store them in an airtight container in the freezer for up to 2 months.

    Notes

    • Adjust sweetness by adding more or less honey or maple syrup.
    • Granola is optional but adds a nice crunch.
    • These yogurt bites can be customized with other fruits as well, such as strawberries or raspberries.
    • Prep Time: 15 minutes
    • Cook Time: 0 minutes
    • Category: Snack
    • Method: Freezing
    • Cuisine: American

    Nutrition

    • Serving Size: 1 yogurt bite
    • Calories: 50
    • Sugar: 5g
    • Sodium: 30mg
    • Fat: 1g
    • Saturated Fat: 0g
    • Unsaturated Fat: 1g
    • Trans Fat: 0g
    • Carbohydrates: 9g
    • Fiber: 1g
    • Protein: 3g
    • Cholesterol: 5mg

    Sharing is caring!

  • One-Pan Bold Honey BBQ Chicken Rice

    One-Pan Bold Honey BBQ Chicken Rice


    Introduction to One-Pan Bold Honey BBQ Chicken Rice

    Hey there, fellow home cooks! If you’re like me, juggling family, work, and everything in between can be a whirlwind. That’s why I’m excited to share my One-Pan Bold Honey BBQ Chicken Rice recipe with you. This dish is not just a meal; it’s a quick solution for those busy evenings when you want something delicious without the mess. Picture tender chicken, fluffy rice, and a bold honey BBQ sauce all cooked in one pan! Trust me, your loved ones will be impressed, and you’ll feel like a culinary superstar!

    Why You’ll Love This One-Pan Bold Honey BBQ Chicken Rice

    This One-Pan Bold Honey BBQ Chicken Rice is a dream come true for busy families. It’s simple and quick, with a cooking time of just 40 minutes! Plus, the bold flavors make this dish a hit at the dinner table, even with picky eaters. With minimal cleanup, you can savor every last bite and enjoy quality time with your loved ones, knowing dinner was a breeze.

    Ingredients for One-Pan Bold Honey BBQ Chicken Rice

    For this delightful One-Pan Bold Honey BBQ Chicken Rice, you’ll need some everyday ingredients that pack a punch. Let’s dive into each one!

    • Boneless, skinless chicken breast or thighs: Choose whichever you prefer for tenderness and flavor. Thighs tend to be juicier, while breasts are leaner and cook quickly.
    • Long-grain white rice: This rice cooks up fluffy and absorbs the savory sauce beautifully. If you’re feeling adventurous, you can try brown rice, but remember it’ll take longer to cook!
    • BBQ sauce: A sweet or smoky variety works wonders in this dish. Feel free to use homemade or your favorite store-bought brand. For a real treat, try out specialty flavors!
    • Onion: Chopped onion adds sweetness and depth. You can also swap it out for shallots or green onions if you prefer a milder flavor.
    • Garlic: Minced garlic brings a wonderful aroma and richness to the dish. It’s the secret ingredient that elevates the flavor!
    • Olive oil: This is used for sautéing the chicken and veggies, offering a lovely taste and healthy fats. You can substitute with avocado oil if you have it on hand.
    • Chicken broth (or water): Chicken broth boosts the rice’s flavor, but if you’re in a pinch, water will do just fine!
    • Salt and pepper: These essential seasonings dial up the flavor. Adjust them to your personal taste, but don’t skip them!
    • Optional: If you like it sweet, drizzle in a touch of honey. For a kick, add some hot sauce or chili flakes.

    Not only are all these ingredients easily accessible, but they’re also versatile. You can adjust flavors or add extras to match your family’s favorites! Exact quantities for each ingredient are at the bottom of the article for your convenience.

    How to Make One-Pan Bold Honey BBQ Chicken Rice

    Now that we have our ingredients ready, let’s dive into creating this One-Pan Bold Honey BBQ Chicken Rice! Follow these simple steps, and you’ll be enjoying a flavorful meal before you know it!

    Step 1: Prepare the Chicken

    Start by dicing your chicken into bite-sized cubes. This helps it cook evenly and quickly. Once diced, season the pieces generously with salt and pepper. This small step goes a long way in enhancing the flavor of your dish.

    Step 2: Sear the Chicken

    Next, grab a large skillet and heat up a couple of tablespoons of olive oil over medium-high heat. When the oil is shimmering, add the seasoned chicken to the pan. Sear the chicken until it’s golden brown, which should take about 5–7 minutes. Once it’s cooked, use a slotted spoon to remove it from the pan and set it aside. This step adds a nice depth of flavor!

    Step 3: Sauté Onions and Garlic

    In the same skillet, toss in the chopped onion. Sauté it for about 2–3 minutes until it softens and becomes fragrant. Then, add in the minced garlic, stirring for just a minute more. Your kitchen will start smelling amazing—a hint of what’s to come!

    Step 4: Toast the Rice

    Now, it’s time to add the uncooked rice to the mix. Stir it in, allowing it to toast for about a minute. This brief toasting enhances the flavor and gives the rice a beautiful texture. It’s a simple trick that turns ordinary rice into something special!

    Step 5: Create the Base

    Pour in the chicken broth (or water) and give everything a good stir. Make sure to scrape any flavorful bits stuck to the bottom of the pan; that’s your secret flavor booster! This mixture is the base for your dish and it’s where all those delicious flavors will meld together.

    Step 6: Combine Everything

    Return the browned chicken to the skillet and stir in your BBQ sauce. Don’t hold back—this is what will give your rice that bold flavor. Ensure everything is well combined, and let the sauce envelop the chicken and rice. Your taste buds are already dancing!

    Step 7: Simmer

    Reduce the heat to low and cover your skillet. Let it simmer for about 18–20 minutes. This is where the magic happens! The rice will absorb the liquid and flavors will deepen. Just keep an eye on it to make sure nothing sticks to the bottom.

    Step 8: Fluff and Serve

    Once the rice is tender, remove the skillet from heat but let it sit covered for about 5 more minutes. Then, take a fork and gently fluff the rice, mixing everything together beautifully. You can add an extra drizzle of BBQ sauce on top if you’re feeling indulgent. Now, scoop it onto plates and dig in!

    Tips for Success

    • Always prep your ingredients before you start cooking to streamline your process.
    • Use a non-stick skillet for easier clean-up and to prevent sticking.
    • Feel free to experiment with different BBQ sauces for unique flavors.
    • Let the dish rest after cooking; this allows flavors to develop.
    • For the best results, ensure your chicken pieces are uniform in size.

    Equipment Needed

    • Large skillet: A non-stick skillet is best, but any large pan will work.
    • Cutting board: Essential for prepping your chicken and vegetables.
    • Sharp knife: A good knife makes dicing much easier.
    • Measuring cups: For accurate ingredient portions.
    • Wooden spoon: Perfect for stirring and combining ingredients.

    Variations for One-Pan Bold Honey BBQ Chicken Rice

    • Vegetarian Option: Substitute chicken with chickpeas or tofu for a hearty vegetarian meal. Just ensure you sauté them well for added flavor!
    • Mixed Vegetables: Stir in bell peppers, corn, or frozen peas along with the onions for a pop of color and nutrition. They cook quickly and add great texture.
    • Spicy Kick: For those who love heat, incorporate diced jalapeños or a pinch of cayenne pepper into the sautéed onions and garlic.
    • Brown Rice: Swap out white rice for brown rice. Just remember to adjust the cooking time as it takes longer to cook and requires more liquid.
    • Different Sauces: Experiment with other sauces like teriyaki or a spicy Korean BBQ sauce for a fun twist on flavor profiles!

    Serving Suggestions for One-Pan Bold Honey BBQ Chicken Rice

    • Serve with a side of crisp green salad to add freshness and crunch.
    • Pair with a cooling yogurt sauce or creamy coleslaw for a delightful contrast.
    • Enjoy with chilled iced tea or a light white wine for a refreshing touch.
    • Garnish with chopped parsley or green onions for a colorful presentation.

    FAQs about One-Pan Bold Honey BBQ Chicken Rice

    Can I use brown rice instead of white rice?

    Yes, you can! Just remember that brown rice takes longer to cook, so adjust the cooking time and liquid accordingly. It adds a nutty flavor and extra fiber!

    Can I make this dish ahead of time?

    Absolutely! You can prepare it a day in advance and reheat it when you’re ready to serve. Just make sure to store it in an airtight container to keep it fresh.

    What type of BBQ sauce is best for this recipe?

    A honey BBQ sauce works wonders, adding a sweet touch. However, feel free to experiment with smoky or spicy varieties to personalize the flavor to your liking!

    How do I store leftovers?

    Store any leftovers in an airtight container in the fridge for up to three days. When reheating, add a splash of water or broth to keep the rice moist.

    Can I add vegetables to the One-Pan Bold Honey BBQ Chicken Rice?

    Absolutely! Adding vegetables like bell peppers, corn, or peas not only enhances the dish’s flavor but also packs in more nutrition. Just sauté them along with the onions!

    Final Thoughts

    There’s something truly magical about sharing a hearty meal like One-Pan Bold Honey BBQ Chicken Rice with family. This dish not only satisfies those hunger pangs but also creates a cozy atmosphere where stories and laughter flow freely. The simplicity of one-pan cooking means you’ll spend less time cleaning and more time with the ones you love. Whether you’re a busy mom or a professional, this recipe brings a burst of flavor to your table without the fuss. So roll up your sleeves, and let this delicious recipe inspire your next culinary adventure!


    Print

    clock clock iconcutlery cutlery iconflag flag iconfolder folder iconinstagram instagram iconpinterest pinterest iconfacebook facebook iconprint print iconsquares squares iconheart heart iconheart solid heart solid icon

    Description

    A delicious one-pan dish featuring tender chicken, rice, and a bold honey BBQ sauce, perfect for a quick meal.


    • 1 lb boneless, skinless chicken breast or thighs, diced
    • 1 cup long-grain white rice
    • 1 cup BBQ sauce (honey or smoky style)
    • 1/2 onion, chopped
    • 2 garlic cloves, minced
    • 2 tablespoons olive oil
    • 2 cups chicken broth (or water)
    • Salt and pepper, to taste
    • Optional: 1 tablespoon honey or hot sauce for extra sweetness or heat

    1. Dice chicken into bite-sized cubes. Season with salt and pepper.
    2. Heat olive oil in a large skillet over medium-high heat. Sear chicken until golden brown, 5–7 minutes. Remove and set aside.
    3. In the same pan, sauté chopped onion for 2–3 minutes, then add minced garlic and cook for 1 more minute.
    4. Stir in uncooked rice, letting it toast for about a minute.
    5. Pour in chicken broth and stir to combine, scraping the bottom of the pan.
    6. Return chicken to the pan. Stir in BBQ sauce.
    7. Reduce heat to low, cover, and simmer for 18–20 minutes, or until rice is tender and liquid is absorbed.
    8. Fluff the rice gently, let it sit for 5 minutes off heat, then serve. Add extra BBQ sauce on top if desired.

    Notes

    • Adjust BBQ sauce to taste for desired sweetness or smokiness.
    • Adding vegetables such as bell peppers or corn can enhance the dish.
    • For a spicier version, add chili flakes or hot sauce.
    • Prep Time: 10 minutes
    • Cook Time: 30 minutes
    • Category: Main Course
    • Method: Stovetop
    • Cuisine: American

    Nutrition

    • Serving Size: 1 serving
    • Calories: 450
    • Sugar: 10g
    • Sodium: 800mg
    • Fat: 12g
    • Saturated Fat: 2g
    • Unsaturated Fat: 8g
    • Trans Fat: 0g
    • Carbohydrates: 50g
    • Fiber: 2g
    • Protein: 30g
    • Cholesterol: 80mg

    Sharing is caring!

  • Creamy Mushroom Soup

    Creamy Mushroom Soup


    Introduction to Creamy Mushroom Soup

    There’s something undeniably comforting about a steaming bowl of creamy mushroom soup. It feels like a warm hug on a chilly day, doesn’t it? For busy moms and professionals, this creamy mushroom soup is not only a quick solution for a hectic day, but it also impresses loved ones with its rich flavors. With just a handful of simple ingredients, you can whip up a meal that feels gourmet without taking hours in the kitchen. Plus, it’s an excellent way to sneak in some veggies—those mushrooms pack a flavorful punch! Let’s dive into making this delightful dish!

    Why You’ll Love This Creamy Mushroom Soup

    This creamy mushroom soup is the definition of easy cooking—perfect for your busy life! It comes together in just 40 minutes, allowing you to enjoy a warm, satisfying meal without spending all night in the kitchen. The rich, earthy flavors will dance on your taste buds, making it an irresistible favorite for the whole family. Plus, it’s versatile enough to dress up or enjoy simply as it is!

    Ingredients for Creamy Mushroom Soup

    Gathering the right ingredients is the first step in crafting your creamy mushroom soup. Here’s what you’ll need:

    • Mushrooms: Use fresh, sliced mushrooms for the best flavor. Cremini or button mushrooms are excellent choices. If you’re feeling adventurous, try a mix of wild mushrooms!
    • Butter: This adds richness and depth, giving the soup that luscious, creamy texture. You can substitute with olive oil for a lighter option.
    • Onion: Finely chopped onions are essential for the aromatic base. They add a subtle sweetness that balances the earthy mushrooms.
    • Garlic: Minced garlic boosts the umami and adds a comforting aroma. Don’t overdo it; just a couple of cloves do the trick!
    • Broth: Vegetable or chicken broth whisks the flavors together. Homemade broth is fantastic, but store-bought is perfectly fine for busy days.
    • Heavy Cream: This is the star ingredient, giving the soup its creaminess. You can opt for half-and-half if you want a lighter version.
    • Thyme: Fresh or dried thyme lends a fragrant herbal note. Feel free to replace it with rosemary or parsley for a different twist.
    • Salt and Pepper: Don’t forget these staples! They elevate the flavors. Season to taste, but remember the broth may have added sodium.
    • Fresh Parsley: A sprinkle on top before serving adds a pop of color and freshness—an optional but delightful touch!

    For exact quantities and print-friendly instructions, head down to the bottom of the article.

    How to Make Creamy Mushroom Soup

    Step 1: Sauté the Aromatics

    Let’s kick things off by melting some butter in a large pot over medium heat. As the butter starts to foam, toss in your finely chopped onions and minced garlic. Sauté them gently until they become translucent. This takes about 4-5 minutes. Make sure to stir frequently so they don’t brown too much—nobody wants burnt garlic in their creamy mushroom soup! The goal here is to build a lovely aromatic base that sets the stage for the mushrooms. Trust me, it’s worth the wait as that rich aroma fills your kitchen!

    Step 2: Cook the Mushrooms

    Now, it’s time to add those sliced mushrooms! Pour them in and give them a good stir, letting them cook for about 5 minutes. Watch them closely as they release their moisture and start to turn golden brown. Here’s a tip: avoid overcrowding the pot. If the mushrooms are crammed together, they’ll steam instead of brown. You want them to caramelize beautifully! This step is crucial because those browned bits are where the flavor magic happens, enriching the creaminess of your soup.

    Step 3: Combine and Simmer

    Once your mushrooms are beautifully browned, it’s time to introduce the broth. Pour in your vegetable or chicken broth, and bring it to a simmer. After boiling for a minute, reduce the heat and let it simmer gently for 15-20 minutes. This simmering stage is where the flavors meld together. You’ll notice the soup transforming as it cooks, filling your home with a delightful scent that guests will surely appreciate. Give it a stir now and then to keep everything combined and to check on the flavors developing!

    Step 4: Blend the Soup

    Are you ready for the creamy part? If you have an immersion blender, bring it out and blend the soup right in the pot until it’s smooth and creamy. Be cautious, though, as the soup is hot! If using a regular blender, let the soup cool for a few minutes before carefully blending in batches. Alternatively, you can also use a potato masher for a chunkier texture if that’s more your style. Just remember to keep it covered to avoid explosive splashes that might leave a mess all over your kitchen!

    Step 5: Add Final Ingredients

    Now comes the pièce de résistance—adding heavy cream! Pour it in and stir gently to combine with the soup. This is when things get indulgently creamy. Toss in the thyme leaves, followed by a pinch of salt and pepper to enhance the flavor even more. If the soup looks a bit thick for your liking, you can easily adjust the consistency by adding a splash more broth. Keep simmering for an additional 5 minutes to let all those wonderful flavors meld together perfectly!

    Step 6: Serve the Soup

    Your comforting creamy mushroom soup is almost ready to be devoured! Ladle it into warm bowls and garnish with a sprinkle of fresh parsley. A drizzle of olive oil on top can add a touch of elegance if you’re feeling fancy. Serve with a crusty piece of bread on the side for that ultimate cozy experience. Enjoy this delicious soup on its own or pair it with a simple salad. Either way, you’re in for a treat!

    Tips for Success

    • Always taste as you go! Adjust seasoning to match your preferred flavor.
    • Use fresh mushrooms for the best flavor and texture.
    • If you prefer a lighter soup, try substituting half-and-half for some heavy cream.
    • Prepare extra soup; it stores well in the fridge for up to a week.
    • Add a splash of white wine for a gourmet twist.

    Equipment Needed

    • Large pot: Essential for cooking the soup. A Dutch oven works beautifully here.
    • Immersion blender: Perfect for blending the soup smoothly. A regular blender is a great alternative.
    • Chopping board and knife: For slicing mushrooms and chopping onions and garlic.
    • Measuring cups and spoons: To keep your ingredients in check.

    Variations

    • Vegan Option: Replace heavy cream with coconut cream or cashew cream for a dairy-free version.
    • Add Protein: Stir in cooked chicken, tofu, or lentils for extra protein and heartiness.
    • Mushroom Medley: Experiment with a variety of mushrooms like shiitake, portobello, or oyster for different flavors.
    • Spicy Kick: Add a pinch of red pepper flakes or a drizzle of sriracha for a spicy twist.
    • Herb Infusion: Try using fresh herbs like rosemary or sage for a different herbal note.

    Serving Suggestions

    • Pair your creamy mushroom soup with a warm, crusty baguette for a delightful dip.
    • Serve alongside a simple green salad drizzled with vinaigrette for a balanced meal.
    • A glass of Chardonnay complements the earthy flavors beautifully.
    • Garnish with additional thyme or chives for a touch of elegance.
    • Present in rustic bowls for that cozy, homey feel!

    FAQs about Creamy Mushroom Soup

    Can I make this creamy mushroom soup ahead of time?

    Absolutely! This creamy mushroom soup actually tastes even better the next day as the flavors deepen. You can prepare it in advance and store it in the refrigerator for up to a week. Just reheat gently on the stovetop, adding a splash of broth if it thickens too much.

    Can I freeze creamy mushroom soup?

    Yes! Freezing is a wonderful option for preserving this soup. Cool it completely, then transfer to airtight containers or freezer bags, leaving some space for expansion. It can be frozen for up to three months. Thaw overnight in the fridge and reheat before serving!

    What can I use instead of heavy cream?

    If you’re looking for a lighter option, half-and-half works well. For a dairy-free twist, try coconut cream or cashew cream. This way, you can enjoy a creamy texture while accommodating dietary preferences!

    Can I add vegetables to the soup?

    Sure! Feel free to toss in some spinach, kale, or carrots towards the end of cooking. This enhances nutrition and adds color to your creamy mushroom soup. Get creative by using whatever vegetables you have on hand!

    What’s the best way to serve creamy mushroom soup?

    I recommend ladling the soup into warm bowls, garnishing with fresh parsley, and serving it alongside a slice of crusty bread. A drizzle of olive oil adds a gourmet touch, making it a crowd-pleaser!

    Final Thoughts

    Making creamy mushroom soup is more than just cooking; it’s an experience where simple ingredients transform into something extraordinary. Each step from sautéing aromatics to blending the rich mixture evokes warmth and comfort, perfect for chilly evenings or busy weekdays. I find joy in gathering around the table, sharing this delectable soup with family and friends, knowing it brings everyone together. With its creamy texture and earthy flavors, this soup is sure to become a cherished staple in your home. So grab your ingredients and create your own comforting bowl of joy!


    Print

    clock clock iconcutlery cutlery iconflag flag iconfolder folder iconinstagram instagram iconpinterest pinterest iconfacebook facebook iconprint print iconsquares squares iconheart heart iconheart solid heart solid icon

    Description

    There’s something undeniably comforting about a steaming bowl of creamy mushroom soup. It feels like a warm hug on a chilly day, doesn’t it? For busy moms and professionals, this creamy mushroom soup is not only a quick solution for a hectic day, but it also impresses loved ones with its rich flavors. With just a handful of simple ingredients, you can whip up a meal that feels gourmet without taking hours in the kitchen. Plus, it’s an excellent way to sneak in some veggies—those mushrooms pack a flavorful punch! Let’s dive into making this delightful dish!


    • 1 pound mushrooms, sliced
    • 4 tablespoons butter
    • 1 onion, finely chopped
    • 2 cloves garlic, minced
    • 4 cups vegetable or chicken broth
    • 1 cup heavy cream
    • 1 teaspoon thyme leaves
    • Salt and pepper to taste
    • Fresh parsley for garnish

    1. In a large pot, melt the butter over medium heat. Add the chopped onion and minced garlic, and sauté until translucent and fragrant.
    2. Add the sliced mushrooms to the pot and cook for about 5 minutes until they release their moisture and start to brown.
    3. Pour in the vegetable or chicken broth and bring to a boil. Reduce heat and simmer for 15-20 minutes to meld flavors.
    4. Using an immersion blender or regular blender, puree the soup until smooth and creamy.
    5. Return the soup to the pot, stir in the heavy cream and thyme leaves. Season with salt and pepper.
    6. Simmer for an additional 5 minutes for flavors to blend. Adjust consistency with more broth if needed.
    7. Ladle the soup into bowls, garnish with fresh parsley, and serve hot.

    Notes

    • Adjust seasoning as per your taste.
    • This soup can be made ahead of time and stored in the refrigerator.
    • Consider adding additional herbs for extra flavor.
    • Prep Time: 10 minutes
    • Cook Time: 30 minutes
    • Category: Soup
    • Method: Stovetop
    • Cuisine: American

    Nutrition

    • Serving Size: 1 bowl
    • Calories: 350
    • Sugar: 3g
    • Sodium: 800mg
    • Fat: 28g
    • Saturated Fat: 17g
    • Unsaturated Fat: 8g
    • Trans Fat: 0g
    • Carbohydrates: 15g
    • Fiber: 2g
    • Protein: 7g
    • Cholesterol: 80mg

    Sharing is caring!

  • Greek Chicken Orzo Salad

    Greek Chicken Orzo Salad


    Introduction to Greek Chicken Orzo Salad

    As a busy mom, I know how challenging it can be to whip up a meal that’s both delicious and nutritious. That’s why I’m excited to share my Greek Chicken Orzo Salad with you! This vibrant dish is not only a feast for the eyes but also a quick solution for those hectic weeknights. Imagine tender chicken, perfectly cooked orzo, and fresh veggies all tossed together in a zesty dressing. It’s a delightful way to impress your loved ones while keeping your kitchen time to a minimum. Trust me, this salad will become a staple in your home!

    Why You’ll Love This Greek Chicken Orzo Salad

    This Greek Chicken Orzo Salad is a game-changer for busy days. It’s quick to prepare, taking just 30 minutes from start to finish. The combination of flavors is simply irresistible, with the tangy feta and zesty dressing dancing on your taste buds. Plus, it’s a one-bowl wonder, making cleanup a breeze. Whether you’re feeding a family or hosting friends, this salad is sure to impress without the stress!

    Ingredients for Greek Chicken Orzo Salad

    Gathering the right ingredients is key to making a delicious Greek Chicken Orzo Salad. Here’s what you’ll need:

    • Orzo pasta: This tiny pasta shape is perfect for salads, soaking up flavors beautifully.
    • Boneless, skinless chicken breasts: A lean protein that keeps the dish light and satisfying.
    • Salt and black pepper: Essential for seasoning, enhancing the natural flavors of the ingredients.
    • Dried oregano and thyme: These herbs add a classic Mediterranean touch, bringing warmth and depth.
    • Olive oil: A staple in Greek cuisine, it adds richness and helps to sauté the chicken.
    • Cherry tomatoes: Their sweetness and juiciness brighten up the salad, making it refreshing.
    • English cucumber: Crisp and cool, it adds a nice crunch and balances the flavors.
    • Red onion: Thinly sliced for a mild bite, it adds color and a bit of zing.
    • Kalamata olives: These briny gems bring a bold flavor that’s quintessentially Greek.
    • Feta cheese: Crumbled feta adds creaminess and a tangy kick that ties everything together.
    • Fresh lemon juice: A splash of acidity brightens the salad and enhances the flavors.
    • Fresh parsley and dill: These herbs add freshness and a pop of color, making the dish visually appealing.
    • Garlic: Minced garlic infuses the dressing with a savory depth that’s hard to resist.
    • Extra-virgin olive oil: This high-quality oil is perfect for the dressing, adding a fruity flavor.

    For those who want to get creative, feel free to add other vegetables like bell peppers or even swap the chicken for grilled shrimp. You can find the exact quantities for each ingredient at the bottom of the article, ready for printing!

    How to Make Greek Chicken Orzo Salad

    Now that you have all your ingredients ready, let’s dive into making this delightful Greek Chicken Orzo Salad. Follow these simple steps, and you’ll have a delicious meal in no time!

    Step 1: Cook the Orzo Pasta

    Start by bringing a pot of salted water to a boil. Add the orzo pasta and cook according to the package instructions, usually around 8-10 minutes. You want it al dente, so it holds up well in the salad. Once cooked, drain the orzo and set it aside to cool. This step is crucial, as it prevents the pasta from becoming mushy when mixed with the other ingredients.

    Step 2: Prepare the Chicken

    While the orzo is cooking, season the boneless, skinless chicken breasts with salt, black pepper, dried oregano, and thyme. These herbs will infuse the chicken with a lovely Mediterranean flavor. In a large skillet, heat 1 tablespoon of olive oil over medium-high heat. Add the chicken breasts and cook for about 6-7 minutes on each side, until golden brown and cooked through. Once done, remove the chicken from the skillet and let it rest for a few minutes before slicing it into strips.

    Step 3: Combine the Ingredients

    In a large mixing bowl, combine the cooled orzo, sliced chicken, halved cherry tomatoes, diced cucumber, thinly sliced red onion, Kalamata olives, and crumbled feta cheese. This colorful mix not only looks appealing but also offers a variety of textures and flavors that make each bite exciting!

    Step 4: Make the Dressing

    In a small bowl, whisk together the fresh lemon juice, chopped parsley, dill, minced garlic, and extra-virgin olive oil. This dressing is the heart of the salad, bringing everything together with its zesty and fresh flavors. Taste it and adjust the seasoning if needed; a little extra salt or pepper can make a big difference!

    Step 5: Toss the Salad

    Pour the dressing over the salad mixture and gently toss everything together until well coated. Make sure every ingredient gets a taste of that delicious dressing. This is where the magic happens, as the flavors meld together beautifully.

    Step 6: Serve or Chill

    You can serve the Greek Chicken Orzo Salad immediately for a fresh, warm meal. Alternatively, if you prefer a chilled salad, cover it and place it in the refrigerator for a few hours. This allows the flavors to deepen, making it even more delightful. Either way, you’re in for a treat!

    Tips for Success

    • Marinate the chicken in the dressing for a few hours for extra flavor.
    • Use fresh herbs whenever possible; they elevate the dish significantly.
    • Let the orzo cool completely before mixing to avoid sogginess.
    • Feel free to customize with your favorite veggies or proteins.
    • Make it ahead of time; it tastes even better after chilling!

    Equipment Needed

    • Large pot: For boiling the orzo. A deep skillet works too.
    • Skillet: A non-stick skillet is ideal for cooking chicken.
    • Mixing bowl: A large bowl for combining all ingredients.
    • Whisk: For mixing the dressing. A fork can work in a pinch.
    • Measuring cups and spoons: Essential for accurate ingredient portions.

    Variations of Greek Chicken Orzo Salad

    • Vegetarian Option: Swap the chicken for grilled zucchini or chickpeas for a hearty, meat-free meal.
    • Grain-Free Version: Use quinoa or cauliflower rice instead of orzo for a gluten-free alternative.
    • Spicy Kick: Add sliced jalapeños or a sprinkle of red pepper flakes for a bit of heat.
    • Extra Protein: Toss in some grilled shrimp or feta-stuffed peppers for added flavor and nutrition.
    • Herb Variations: Experiment with fresh basil or mint instead of parsley and dill for a different flavor profile.

    Serving Suggestions for Greek Chicken Orzo Salad

    • Pair with warm pita bread for a delightful Mediterranean experience.
    • Serve alongside a light tzatziki sauce for a refreshing dip.
    • Complement with a crisp white wine, like Sauvignon Blanc.
    • Garnish with extra parsley or lemon wedges for a pop of color.
    • Present in a large bowl for a family-style meal or in individual servings for a more elegant touch.

    FAQs about Greek Chicken Orzo Salad

    Can I make Greek Chicken Orzo Salad ahead of time?

    Absolutely! This salad is perfect for meal prep. You can make it a day in advance and store it in the refrigerator. The flavors will meld beautifully, making it even tastier!

    Is Greek Chicken Orzo Salad gluten-free?

    Traditional orzo is made from wheat, so it’s not gluten-free. However, you can easily substitute it with gluten-free pasta or quinoa for a delicious alternative.

    What can I add to the salad for extra crunch?

    If you’re looking for a bit of crunch, consider adding bell peppers, radishes, or even toasted pine nuts. They’ll add texture and flavor to your Greek Chicken Orzo Salad!

    How long will leftovers last in the fridge?

    Leftovers can be stored in an airtight container for up to 3 days. Just give it a good toss before serving again to refresh the flavors!

    Can I use other proteins besides chicken?

    Definitely! Feel free to swap the chicken for grilled shrimp, chickpeas, or even diced turkey. The salad is versatile and can accommodate your favorite proteins!

    Final Thoughts

    Creating this Greek Chicken Orzo Salad is more than just preparing a meal; it’s about bringing joy to your table. The vibrant colors and fresh flavors make it a feast for the senses, while the ease of preparation means you can enjoy quality time with your loved ones. Whether it’s a busy weeknight or a special gathering, this salad shines in any setting. I hope it becomes a cherished recipe in your home, just as it has in mine. So grab your ingredients, and let’s make mealtime a delightful experience together!


    Print

    clock clock iconcutlery cutlery iconflag flag iconfolder folder iconinstagram instagram iconpinterest pinterest iconfacebook facebook iconprint print iconsquares squares iconheart heart iconheart solid heart solid icon

    Description

    As a busy mom, I know how challenging it can be to whip up a meal that’s both delicious and nutritious. That’s why I’m excited to share my Greek Chicken Orzo Salad with you! This vibrant dish is not only a feast for the eyes but also a quick solution for those hectic weeknights. Imagine tender chicken, perfectly cooked orzo, and fresh veggies all tossed together in a zesty dressing. It’s a delightful way to impress your loved ones while keeping your kitchen time to a minimum. Trust me, this salad will become a staple in your home!


    • 1 cup orzo pasta
    • 2 boneless, skinless chicken breasts
    • Salt and black pepper, to taste
    • 1 teaspoon dried oregano
    • 1 teaspoon dried thyme
    • 2 tablespoons olive oil, divided
    • 1 cup cherry tomatoes, halved
    • 1/2 English cucumber, diced
    • 1/4 red onion, thinly sliced
    • 1/2 cup Kalamata olives, pitted and halved
    • 1/4 cup crumbled feta cheese
    • 2 tablespoons fresh lemon juice
    • 2 tablespoons chopped fresh parsley
    • 1 tablespoon chopped fresh dill
    • 1 garlic clove, minced
    • 1/4 cup extra-virgin olive oil

    1. Cook the orzo pasta according to package instructions. Drain and set aside to cool.
    2. Season the chicken breasts with salt, black pepper, oregano, and thyme.
    3. In a large skillet, heat 1 tablespoon of olive oil over medium-high heat. Add the chicken breasts and cook until golden brown and thoroughly cooked, around 6-7 minutes per side. Remove chicken from the skillet and let it rest for a few minutes before slicing into strips.
    4. In a large mixing bowl, combine the cooked orzo, sliced chicken, cherry tomatoes, cucumber, red onion, Kalamata olives, and feta cheese.
    5. In a small bowl, whisk together lemon juice, parsley, dill, garlic, and extra-virgin olive oil.
    6. Pour the dressing over the salad and toss to coat everything evenly. Season with additional salt and black pepper if needed.
    7. Serve the salad immediately or chill it in the refrigerator for a few hours before serving.

    Notes

    • For added flavor, marinate the chicken in the dressing for a few hours before cooking.
    • This salad can be made ahead of time and stored in the refrigerator.
    • Feel free to add other vegetables or proteins as desired.
    • Prep Time: 15 minutes
    • Cook Time: 15 minutes
    • Category: Salad
    • Method: Stovetop
    • Cuisine: Greek

    Nutrition

    • Serving Size: 1 serving
    • Calories: 350
    • Sugar: 3g
    • Sodium: 600mg
    • Fat: 20g
    • Saturated Fat: 3g
    • Unsaturated Fat: 15g
    • Trans Fat: 0g
    • Carbohydrates: 30g
    • Fiber: 3g
    • Protein: 20g
    • Cholesterol: 70mg

    Sharing is caring!

  • Snickerdoodle Cobbler

    Snickerdoodle Cobbler


    Introduction to Snickerdoodle Cobbler

    As a busy mom juggling countless responsibilities, I often find myself yearning for something sweet yet simple. That’s where my delightful Snickerdoodle Cobbler comes in! Warm, buttery, and speckled with just the right amount of cinnamon, it feels like a warm hug on a chilly evening. You see, this recipe is not just about satisfying your sweet tooth; it’s about creating joyful moments with family. Picture cozy evenings spent around the table, laughter spilling out with every bite. Let me share this irresistible Snickerdoodle Cobbler with you—it’s a tasty treat that fits perfectly into your hectic life!

    Why You’ll Love This Snickerdoodle Cobbler

    This Snickerdoodle Cobbler is practically a miracle in a baking dish! It’s incredibly easy to whip up, even on your busiest days. With just a handful of ingredients and a short prep time, you’ll be rewarded with a warm dessert that tastes like a cinnamon dream. The best part? It’s perfect for gatherings, or those cozy nights when you want something sweet without all the fuss. Trust me, everyone will love it!

    Ingredients for Snickerdoodle Cobbler

    Now let’s dive into the star players of this Snickerdoodle Cobbler. Each ingredient plays a vital role in creating that heavenly flavor and delightful texture. Here’s what you’ll need:

    • Butter: The melted butter gives the cobbler its rich flavor and moist texture. Don’t skimp here; it’s essential!
    • Sugar: A blend of granulated and brown sugar adds sweetness and a lovely depth of flavor. Use brown sugar for extra caramel notes.
    • Vanilla Extract: This little dash of magic brightens the entire dessert, enhancing the sweet flavors.
    • All-Purpose Flour: It’s the foundation of the batter, providing structure and tenderness to the cobbler. You can substitute with whole wheat flour for a healthier option.
    • Baking Powder: This leavening agent helps the cobbler rise beautifully, giving it that light and fluffy texture.
    • Salt: A small pinch boosts the flavors dramatically and balances sweetness.
    • Milk: Whole milk works best here. It adds moisture to the batter, making it rich and creamy.
    • Ground Cinnamon: Essential for that warm, comforting flavor. You might want to sprinkle a little extra on top if you’re a cinnamon lover!
    • Brown Sugar: Sprinkled on top before baking, it caramelizes and creates a wonderfully sweet crust.
    • Hot Water: This is unique! Pouring it over the unbaked mixture creates layers, resulting in a gooey bottom and a delicious cobbler top. Just be sure not to stir!

    You can find the measurements for all these ingredients at the bottom of the article, which are available for easy printing. Happy baking!

    How to Make Snickerdoodle Cobbler

    Ready to indulge in a sweet, gooey delight? Let’s dive into the steps for creating this Snickerdoodle Cobbler! Each step is straightforward, perfect for even the busiest of moms. Trust me, the aroma that will fill your kitchen will lead everyone to the table!

    Step 1: Preheat the Oven

    First things first—let’s get that oven preheating! Set it to 350°F (175°C). While your oven warms up, grab a 9×13 inch baking dish and pour in your melted butter. This butter not only adds flavor but also serves as a gooey base for the cobbler, so don’t skip this step!

    Step 2: Prepare the Batter

    Now for the fun part! In a medium bowl, mix together your sugar, vanilla extract, flour, baking powder, salt, and milk. Use a whisk to combine everything until it’s nice and smooth. This batter will be the heart of your Snickerdoodle Cobbler, rich and oh-so-delicious. Once mixed, gently pour the batter over the melted butter in the baking dish, making sure to cover it evenly.

    Step 3: Add Cinnamon Sugar

    Who doesn’t love a sprinkle of cinnamon? In a small bowl, combine your remaining sugar and ground cinnamon. Sprinkle this mixture evenly over the batter—this adds a flavorful, sweet crust. It’s like a warm hug of spice that takes your cobbler to another level!

    Step 4: Add Brown Sugar

    In this step, you’ll send the flavor soaring! Distribute the brown sugar over the top of the cinnamon layer. This will caramelize beautifully as it bakes, adding a rich sweetness that contrasts perfectly with the fluffy cobbler. Seriously, this layer is where the magic happens!

    Step 5: Pour Hot Water

    Here’s where it gets a bit unconventional. Carefully pour hot water over the entire mixture—but please, don’t stir! This step might feel a bit odd, but it’s essential for creating that amazing gooey bottom while the top becomes golden and fluffy. Just trust the process here!

    Step 6: Bake the Cobbler

    Pop your baking dish into the preheated oven and let it work its magic! Bake for 40-45 minutes. Keep an eye on it during the last few minutes. You want the top to be golden brown and the cobbler to be set. When it’s done, let it cool slightly before diving in. Pair it with a scoop of vanilla ice cream, and you’ll be in dessert heaven!

    Tips for Success

    • Don’t rush the butter melting process; it should be completely melted for the best results.
    • Pour the batter over the melted butter slowly to avoid mixing the layers.
    • Use fresh spices for maximum flavor—cinnamon should have a warm, inviting scent.
    • Check the doneness by inserting a toothpick; it should come out clean.
    • Let the cobbler cool slightly for the perfect texture before serving.

    Equipment Needed

    • 9×13 inch baking dish: A standard dish is perfect, but any large oven-safe dish works.
    • Mixing bowls: Use a medium bowl for the batter and a small bowl for mixing sugar and cinnamon.
    • Whisk or spoon: A whisk makes mixing easy, but a sturdy spoon will do just fine.
    • Measuring cups and spoons: Precision is key, so make sure to have these on hand!

    Variations of Snickerdoodle Cobbler

    • Nutty Twist: Add 1/2 cup of chopped walnuts or pecans to the batter for a delightful crunch and added flavor.
    • Fruit-Filled Delight: Layer fresh apples or peaches underneath the batter for a fruity twist that pairs beautifully with cinnamon.
    • Gluten-Free Option: Substitute all-purpose flour with a gluten-free flour blend to make this dessert accessible for those with dietary restrictions.
    • Dairy-Free Adaptation: Use a plant-based butter and almond or oat milk for a dairy-free version of this beloved recipe.
    • Chocolate Heaven: Stir in 1 cup of chocolate chips into the batter for a richer, sweeter cobbler that chocolate lovers will adore.

    Serving Suggestions

    • Serve warm with a generous scoop of vanilla ice cream for a classic twist.
    • Add a drizzle of caramel sauce on top for an extra indulgent treat.
    • A dollop of freshly whipped cream complements the cinnamon perfectly.
    • Pair with a hot cup of coffee or chai tea for a cozy gathering.
    • Dust with powdered sugar for a beautiful presentation that impresses!

    FAQs about Snickerdoodle Cobbler

    As with any beloved dessert, there are often a host of questions swirling around. Let me answer a few common ones about this delightful Snickerdoodle Cobbler!

    Can I make Snickerdoodle Cobbler ahead of time?

    Absolutely! You can prepare the cobbler ahead and store it in the fridge. Just cover it well to keep it fresh. When you’re ready to serve, simply pop it in the oven to reheat. Fresh out of the oven is the best!

    Is it okay to substitute ingredients in the Snickerdoodle Cobbler recipe?

    Yes! Feel free to adjust the recipes to suit your needs. Substitute whole wheat flour for all-purpose flour or use almond milk in place of regular milk. Just remember, substitutions might alter the texture a bit.

    Can I freeze leftover Snickerdoodle Cobbler?

    You can! Once cooled, slice the cobbler and wrap it tightly in plastic wrap or store it in an airtight container. It’ll keep in the freezer for about 2-3 months. Just thaw and reheat when you crave another bite!

    What’s the best way to serve Snickerdoodle Cobbler?

    A scoop of vanilla ice cream or a dollop of whipped cream makes a fantastic addition. Some like to drizzle a bit of caramel sauce for extra indulgence. It’s the perfect treat any time of day!

    How can I make my Snickerdoodle Cobbler even more flavorful?

    Add a pinch of nutmeg or a splash of almond extract to the batter for a unique twist. You can also sprinkle some extra cinnamon on top before serving for even more warmth and comfort.

    Final Thoughts

    Every bite of this Snickerdoodle Cobbler is a warm embrace, transforming even the busiest evenings into something special. I love watching smiles light up faces as they take that first spoonful. The simple act of baking together can create cherished memories that last a lifetime. Plus, with just a handful of ingredients, you get a sweet reprieve from the chaos of daily life. Whether it’s a family gathering or a cozy night in, this recipe is sure to bring joy and comfort to your home. So, roll up those sleeves and indulge—your taste buds will thank you!


    Print

    clock clock iconcutlery cutlery iconflag flag iconfolder folder iconinstagram instagram iconpinterest pinterest iconfacebook facebook iconprint print iconsquares squares iconheart heart iconheart solid heart solid icon

    Description

    A delicious Snickerdoodle Cobbler that’s easy to make and irresistibly sweet with a hint of cinnamon.


    • 1 cup butter, melted
    • 1 1/2 cups sugar, divided
    • 1 teaspoon vanilla extract
    • 2 cups all-purpose flour
    • 1 tablespoon baking powder
    • 1/2 teaspoon salt
    • 1 1/2 cups milk
    • 2 teaspoons ground cinnamon
    • 1 cup brown sugar
    • 2 cups hot water

    1. Preheat your oven to 350°F (175°C). Pour melted butter into a 9×13 inch baking dish.
    2. In a medium bowl, mix together 1 cup of sugar, vanilla extract, flour, baking powder, salt, and milk until well combined. Pour the batter over the melted butter in the baking dish.
    3. In a small bowl, combine the remaining 1/2 cup of sugar and ground cinnamon. Sprinkle evenly over the batter.
    4. Evenly distribute the brown sugar over the top.
    5. Carefully pour the hot water over the entire mixture. Do not stir.
    6. Bake for 40-45 minutes, or until the top is golden brown and the cobbler is set.
    7. Let cool slightly before serving. Enjoy with a scoop of vanilla ice cream or a dollop of whipped cream if desired.

    Notes

    • Make sure to pour the hot water carefully to avoid mixing the layers.
    • Can be served warm or at room temperature.
    • Prep Time: 15 minutes
    • Cook Time: 40-45 minutes
    • Category: Dessert
    • Method: Baking
    • Cuisine: American

    Nutrition

    • Serving Size: 1 slice
    • Calories: 350
    • Sugar: 35g
    • Sodium: 180mg
    • Fat: 16g
    • Saturated Fat: 10g
    • Unsaturated Fat: 2g
    • Trans Fat: 0g
    • Carbohydrates: 50g
    • Fiber: 1g
    • Protein: 4g
    • Cholesterol: 60mg

    Sharing is caring!

  • Loaded Bacon Cheeseburger Pasta

    Loaded Bacon Cheeseburger Pasta


    Introduction to Loaded Bacon Cheeseburger Pasta

    Picture this: a busy evening after a long day, and you’re left wondering what’s for dinner. That’s where my Loaded Bacon Cheeseburger Pasta comes to the rescue! This creamy, savory dish packs the irresistible flavors of bacon and cheeseburgers into a delightful pasta that your family will adore. It’s the perfect quick solution for those hectic nights, ensuring you spend more time enjoying dinner rather than slaving away over the stove. Let’s bring comfort food to your table and create a meal that’s sure to impress your loved ones.

    Why You’ll Love This Loaded Bacon Cheeseburger Pasta

    This Loaded Bacon Cheeseburger Pasta is not just about flavor; it’s about ease and speed. With just one skillet, you’ll whip up a mouthwatering meal in about 40 minutes! It’s a dish that satisfies even the pickiest eaters while bringing joy to the whole family. Trust me, the bold flavors and creamy texture will make it a go-to recipe in your home. Let’s say goodbye to dinner stress!

    Ingredients for Loaded Bacon Cheeseburger Pasta

    Gathering the right ingredients is half the fun, and this Loaded Bacon Cheeseburger Pasta is no exception! Here’s what you’ll need:

    • Pasta: Choose penne, rotini, or elbow macaroni. These shapes hold the creamy sauce beautifully.
    • Bacon: Chopped bacon adds a crispy, smoky flavor that makes this dish irresistible. Who doesn’t love bacon?
    • Ground Beef: The star protein! It’s hearty and satisfying, perfect for a filling meal.
    • Onion: Diced onion adds a sweetness that complements the savory elements in the dish.
    • Garlic: Minced garlic brings depth and warmth, elevating the entire flavor profile.
    • Worcestershire Sauce: A splash of this sauce introduces a rich umami flavor that’s simply delicious.
    • Mustard: Regular yellow or Dijon mustard works beautifully, giving a tangy kick to the sauce.
    • Smoked Paprika: This ingredient adds a subtle smokiness that enhances the overall cheeseburger vibe.
    • Salt and Pepper: Essential for seasoning! Adjust to your taste preference as you cook.
    • Ketchup: A classic burger condiment, it offers sweetness and pairs well with all the savory notes.
    • Heavy Cream or Whole Milk: This provides the creaminess that brings everything together, making each bite luscious.
    • Cheddar Cheese: Shredded cheddar introduces that cheesy goodness we all crave in a pasta dish!
    • Cream Cheese: This adds an extra layer of creaminess, making the sauce smooth and indulgent.
    • Diced Tomatoes: A can of diced tomatoes, drained, brings freshness into the rich mix.
    • Beef Broth: This is used to create a brothier sauce. Vegetable broth can be a substitute if needed.
    • Pickles: Optional for garnish, they add crunch and a zesty flavor. It’s a nod to that classic cheeseburger!
    • Fresh Parsley: Finely chopped parsley can brighten the dish and add a pop of color.

    For the exact quantities of each ingredient, check the bottom of the article. You can easily print the recipe for your convenience! Now, let’s dive into making this delicious pasta dish!

    How to Make Loaded Bacon Cheeseburger Pasta

    Now that we have our ingredients ready, let’s get cooking! Follow these simple steps, and I promise you’ll enjoy every moment of making your Loaded Bacon Cheeseburger Pasta. Each step is designed to make this delicious dish a breeze to prepare, perfect for those busy nights.

    Step 1: Cook the Pasta

    Start by boiling a large pot of water. Once it’s bubbling like a small volcano, add your choice of penne, rotini, or elbow macaroni.

    Cook according to the package directions until it’s al dente, that sweet spot where pasta is tender yet has a little bite. Drain it and set it aside. Save yourself from potential messy pasta by giving it a quick rinse under cold water!

    Step 2: Prepare the Bacon

    In a large skillet over medium heat, toss in the chopped bacon. Let it sizzle until it becomes crispy and golden. The aroma alone is pure heaven!

    Once it’s done, use a slotted spoon to transfer the bacon onto paper towels, soaking up those delicious drippings. Keep the grease in the skillet—it’s treasure for the next steps, so don’t even think about tossing it!

    Step 3: Brown the Beef and Onion

    Now, it’s time to brown the beef. Add your pound of ground beef and diced onion to the skillet with that tasty bacon grease.

    Cook for about 5 to 7 minutes, stirring occasionally until the beef is no longer pink and the onion is softened. Drain any excess fat, but leave some for flavor. Your family will thank you for this aromatic base!

    Step 4: Add Spices and Garlic

    Next, stir in the minced garlic, Worcestershire sauce, mustard, smoked paprika, salt, and black pepper. You’ll want to cook this mixture for about a minute to let those flavors bloom.

    Feel free to add a pinch more paprika if you like a smokier taste. This step transforms your dish from ordinary to extraordinary!

    Step 5: Make the Creamy Sauce

    It’s sauce time! Pour in the drained diced tomatoes, beef broth, ketchup, and the heavy cream.

    Stir everything together and bring this beauty to a gentle simmer over medium-low heat. The aroma will be intoxicating! Then, lower the heat and mix in the shredded cheddar cheese and cream cheese.

    Stir until both cheeses are beautifully melted and the sauce is creamy. This is comfort food magic in action!

    Step 6: Combine Pasta and Sauce

    Time to bring everything together! Add the cooked pasta to your glorious sauce in the skillet.

    Toss it all out like you’re at a pasta party. Make sure every noodle is coated in that cheesy goodness. You’re almost there!

    Step 7: Garnish and Serve

    To finish, gently sprinkle the crispy bacon on top of your loaded pasta. If you’re feeling fancy, toss on some chopped pickles and fresh parsley for that extra oomph.

    Serve immediately and watch the smiles light up your dinner table. This Loaded Bacon Cheeseburger Pasta is about to become a family favorite!

    Tips for Success

    • Always cook pasta just until al dente for the perfect texture.
    • If you want your sauce creamier, add a splash more heavy cream.
    • Taste as you go! Adjust seasonings to suit your family’s palate.
    • Feel free to use turkey or chicken instead of ground beef for a lighter option.
    • Make it ahead! This dish holds up well in the fridge for quick dinners.

    Equipment Needed

    • Large Pot: For boiling pasta. A stockpot works great too!
    • Large Skillet: Essential for cooking the sauce. A non-stick skillet is ideal.
    • Slotted Spoon: Perfect for removing bacon from the skillet.
    • Measuring Cups and Spoons: For accurate ingredient portions.
    • Colander: To drain the pasta efficiently. Use a large sieve as an alternative!

    Variations of Loaded Bacon Cheeseburger Pasta

    • Vegetarian Version: Swap the ground beef for lentils or your favorite plant-based crumbles. It’s a great way to enjoy the same flavor profile without the meat!
    • Spicy Kick: Add jalapeños or crushed red pepper flakes to turn up the heat. This will give your Loaded Bacon Cheeseburger Pasta an exciting twist!
    • Cheesy Delight: For extra cheesiness, mix in a bit of mozzarella or pepper jack cheese along with the cheddar. More cheese is always a good idea!
    • Low-Carb Option: Use spiralized zucchini or cauliflower for a healthier, low-carb alternative. Simply sauté until tender and mix with the sauce!
    • BBQ Twist: Incorporate barbecue sauce instead of ketchup for a smoky, tangy flavor that echoes summer vibes on your plate.

    Serving Suggestions for Loaded Bacon Cheeseburger Pasta

    • Garlic Bread: A crispy slice of garlic bread pairs perfectly for sopping up that creamy sauce.
    • Side Salad: A fresh garden salad adds a crisp contrast to this hearty dish.
    • Drink Pairing: A chilled soda or iced tea complements the flavors beautifully.
    • Presentation: Serve in shallow bowls and sprinkle with extra parsley for a pop of color.

    FAQs about Loaded Bacon Cheeseburger Pasta

    Feeling curious about this Loaded Bacon Cheeseburger Pasta? Here are some questions I’ve frequently encountered, along with answers to help you in your cooking journey!

    Can I make this pasta dish ahead of time?

    Absolutely! You can prepare the sauce and cook the pasta in advance. Just store them separately in the fridge and combine them before serving. It’s a perfect meal prep option for busy weeknights!

    What type of pasta is best for this recipe?

    I recommend using penne, rotini, or elbow macaroni. These shapes catch the creamy sauce beautifully, ensuring you get a delicious bite every time you dig in!

    Can I use ground turkey instead of beef?

    Yes! Ground turkey or chicken can be a fantastic substitute. It lightens the dish slightly without sacrificing flavor, making it a healthier option.

    Is there a gluten-free option available?

    Definitely! Just swap out the regular pasta for gluten-free pasta. The dish will still have all the comforting flavors we love!

    How should I store leftovers?

    Leftovers can be stored in an airtight container for up to three days in the fridge. Just reheat it gently on the stove or in the microwave when you’re ready for round two!

    Final Thoughts

    Creating this Loaded Bacon Cheeseburger Pasta is more than just making a meal; it’s about bringing family together around the dinner table. With its creamy texture and savory flavors, it turns an ordinary weeknight into a delightful culinary adventure. Every bite is a reminder of comfort food that wraps you in a warm hug.

    So, whether you’re cooking for picky eaters or just need a quick and satisfying dish, this recipe has you covered. Embrace the joy of cooking, and make memories with every delicious serving. Trust me, your loved ones will be asking for seconds!


    Print

    clock clock iconcutlery cutlery iconflag flag iconfolder folder iconinstagram instagram iconpinterest pinterest iconfacebook facebook iconprint print iconsquares squares iconheart heart iconheart solid heart solid icon

    Description

    A creamy and savory pasta dish loaded with the flavors of bacon cheeseburgers.


    • 8 ounces penne, rotini, or elbow macaroni
    • 6 slices bacon, chopped
    • 1 pound ground beef
    • 1 small onion, diced
    • 2 cloves garlic, minced
    • 1 teaspoon Worcestershire sauce
    • 1 teaspoon mustard (yellow or Dijon)
    • 1 teaspoon smoked paprika
    • 1/2 teaspoon salt
    • 1/2 teaspoon black pepper
    • 1/4 cup ketchup
    • 1 cup heavy cream or whole milk
    • 2 cups shredded cheddar cheese
    • 1/4 cup cream cheese
    • 1 (14.5-ounce) can diced tomatoes, drained
    • 1/2 cup beef broth
    • 1/4 cup chopped pickles (optional, for garnish)
    • Fresh parsley, chopped (optional, for garnish)

    1. Cook pasta in boiling water according to package directions until al dente. Drain and set aside.
    2. In a large skillet over medium heat, cook chopped bacon until crispy. Remove with a slotted spoon and keep bacon grease in the pan.
    3. Add ground beef and diced onion to the skillet. Cook until beef is browned and onion is softened, about 5 to 7 minutes. Drain excess fat.
    4. Stir in minced garlic, Worcestershire sauce, mustard, smoked paprika, salt, and black pepper. Cook for 1 minute until fragrant.
    5. Add diced tomatoes, beef broth, ketchup, and heavy cream. Stir thoroughly and bring to a simmer over medium-low heat.
    6. Lower heat and stir in shredded cheddar cheese and cream cheese until fully melted and smooth.
    7. Add cooked pasta to the skillet and toss until evenly coated with the cheese sauce.
    8. Sprinkle crispy bacon over the pasta and stir gently to combine. Garnish with chopped pickles and fresh parsley if desired. Serve immediately.

    Notes

    • For a spicier dish, consider adding crushed red pepper flakes.
    • This recipe can be made gluten-free by using gluten-free pasta.
    • Leftovers can be stored in an airtight container in the refrigerator for up to 3 days.
    • Prep Time: 15 minutes
    • Cook Time: 25 minutes
    • Category: Main Dish
    • Method: Skillet
    • Cuisine: American

    Nutrition

    • Serving Size: 1 bowl
    • Calories: 780
    • Sugar: 6g
    • Sodium: 900mg
    • Fat: 48g
    • Saturated Fat: 24g
    • Unsaturated Fat: 20g
    • Trans Fat: 0g
    • Carbohydrates: 56g
    • Fiber: 3g
    • Protein: 32g
    • Cholesterol: 120mg

    Sharing is caring!

  • Chicken Alfredo Gnocchi

    Chicken Alfredo Gnocchi


    Introduction to Chicken Alfredo Gnocchi

    When life gets busy, it’s natural to crave something comforting yet quick to prepare. That’s where my Chicken Alfredo Gnocchi comes in! Imagine tender chicken, soft gnocchi, and a creamy, dreamy Alfredo sauce all baked to perfection. This dish is not just a meal; it’s a warm hug in a bowl! Perfect for impressing loved ones or simply treating yourself, it brings joy to the table without demanding hours in the kitchen. So, grab your apron, and let’s dive into this deliciously creamy adventure that will brighten even the busiest of days!

    Why You’ll Love This Chicken Alfredo Gnocchi

    This Chicken Alfredo Gnocchi is a game-changer for busy moms and professionals alike. It combines ease with incredible taste, making mealtime stress-free. In just 40 minutes, you’ll have a delightful, creamy dish that satisfies even the pickiest eaters. Plus, who can resist that bubbling cheese topping? It’s comforting, it’s quick, and it transforms a simple dinner into an occasion, making it perfect for weeknight family dinners or when entertaining guests.

    Ingredients for Chicken Alfredo Gnocchi

    Before we dive into cooking, let’s gather all the love that goes into this Chicken Alfredo Gnocchi. Here’s a list of essential ingredients that will elevate your dish to creamy perfection:

    • Chicken breast: Tender and juicy, this serves as the star protein, filling you up and adding richness.
    • Olive oil: A healthy fat that adds depth and helps with cooking the chicken to a golden hue.
    • Unsalted butter: For a decadent sauce, this enhances the flavors without over-salting.
    • Garlic: Fresh cloves bring aromatic goodness and essential flavor that elevates the whole dish.
    • Flour: This is crucial for making a roux, which serves as the base for our creamy Alfredo sauce.
    • Chicken broth: Adding moisture and flavor, it gives your dish that rich comfort you crave.
    • Milk: While any cow’s milk works, whole milk will render a creamier sauce.
    • Heavy cream: For that luxurious texture, this is what dreams are made of in an Alfredo sauce.
    • Potato gnocchi: These lovely little pillows of potato goodness soak up the sauce, making each bite divine.
    • Shredded mozzarella cheese: Melty and stretchy, this is what creates that irresistible cheese pull.
    • Parmesan cheese: A sprinkle of this sharp cheese adds a nutty finish and enhances the overall flavor.

    Keep in mind, if you’re looking to switch things up based on dietary preferences, you can certainly substitute the chicken with tofu or a plant-based chicken option.
    For precise measurements and more details on each ingredient, take a peek at the bottom of the article, where I’ve included everything you need for printing!

    How to Make Chicken Alfredo Gnocchi

    Creating this creamy Chicken Alfredo Gnocchi is as easy as pie, but with a lot more flavor! Follow these simple steps to make a dish that your family will love—while saving you time and effort. Let’s get cooking!

    Step 1: Preheat and Prepare the Chicken

    First things first, preheat your oven to 425°F. This step is crucial because it ensures that your dish will bake evenly. Meanwhile, grab your chicken breast and pat it dry with paper towels. Ensuring it’s dry helps it get that beautiful golden brown color when cooking.

    Step 2: Cook the Chicken

    Now, let’s add some flavor! Season the chicken with olive oil, Italian seasoning, garlic powder, salt, and pepper. This combination boosts flavor while the olive oil helps with browning. In your trusty cast-iron skillet, cook the chicken over medium-high heat for about 8–10 minutes, or until it’s golden brown and cooked through. This step locks in the juiciness and adds great texture.

    Step 3: Create the Alfredo Sauce

    Next, let’s make the star of the show—the Alfredo sauce! In the same skillet, melt about four tablespoons of butter and add diced shallots and garlic until they’re soft and aromatic. Sprinkle in the flour, whisking it into a roux, which helps thicken your sauce. Gradually add the chicken broth, milk, and heavy cream, stirring constantly until the mixture thickens. This creamy goodness is what elevates your Chicken Alfredo Gnocchi into a heavenly dish!

    Step 4: Combine Chicken and Gnocchi

    Once your sauce is creamy and velvety, it’s time to bring everything together! Stir in your cooked chicken and uncooked potato gnocchi. This is vital for ensuring even cooking and flavor distribution. Each gnocchi will soak up that delicious sauce. Mix well, but be gentle! You don’t want to damage those lovely little pillows!

    Step 5: Bake Your Dish

    Finally, transfer your mixture into a baking dish and top it with shredded mozzarella and Parmesan cheese. The cheese creates that irresistible golden topping as it bakes! Slide it into the preheated oven and bake for 12–15 minutes, or until it’s bubbly and golden brown. The aroma will have everyone making their way to the kitchen—trust me!

    Tips for Success

    • Always pat your chicken dry for a better sear.
    • Don’t skip the roux; it’s the key to a thick, creamy sauce.
    • For extra flavor, consider adding fresh herbs like basil or parsley.
    • If time is tight, use store-bought gnocchi to save a few minutes.
    • Let the dish cool slightly before serving; it helps set the flavors.

    Equipment Needed

    • Cast-iron skillet – a frying pan works just fine if you’re without one.
    • Baking dish – any oven-safe dish will do, no need for an elaborate setup.
    • Whisk – use a fork in a pinch to combine your ingredients.
    • Measuring cups and spoons – essential for accuracy.
    • Spatula – a wooden spoon can also work for stirring!

    Variations of Chicken Alfredo Gnocchi

    • Vegetarian Option: Substitute the chicken with sautéed mushrooms or spinach for a hearty, meat-free version that still delivers on flavor.
    • Gluten-Free Twist: Use gluten-free gnocchi to maintain that comforting texture while catering to gluten-sensitive diets.
    • Herb-Infused Alfredo: Incorporate fresh herbs like thyme or rosemary into the sauce for a fragrant and flavorful punch.
    • Spicy Kick: Add red pepper flakes or a dash of hot sauce to the Alfredo sauce for a spicy twist that elevates the dish.
    • Cheesy Delight: Mix in additional cheeses like Gouda or Havarti for a richer and creamier texture.

    Serving Suggestions for Chicken Alfredo Gnocchi

    • Pair with a fresh garden salad dressed in lemon vinaigrette for a light contrast.
    • Serve with crusty garlic bread to soak up that delicious Alfredo sauce.
    • Complement with a chilled glass of white wine, like Pinot Grigio.
    • Garnish with fresh parsley for a pop of color and flavor.

    FAQs about Chicken Alfredo Gnocchi

    Can I prepare Chicken Alfredo Gnocchi in advance?

    Yes! You can prepare the dish up to the baking stage, then cover and refrigerate it for a day. Just remember to bake it longer if it’s cold from the fridge, allowing the cheese to melt beautifully.

    What can I use if I don’t have gnocchi?

    If gnocchi isn’t handy, you can substitute it with pasta, like fettuccine or penne. While the texture differs, it still works well with the creamy Alfredo sauce!

    How can I make this dish less rich?

    To lighten the dish, you can use low-fat milk instead of whole milk and half the amount of heavy cream. You’ll still enjoy a creamy Chicken Alfredo Gnocchi, just with fewer calories!

    Can I freeze Chicken Alfredo Gnocchi?

    Although freezing isn’t ideal due to the nature of gnocchi, you can freeze the baked dish. Just ensure to cool it completely, wrap it tightly, and it should last for up to 3 months. Thaw before reheating!

    What’s the best way to reheat leftovers?

    The microwave is quick, but it can make the gnocchi chewy. I recommend reheating in an oven at 350°F, adding a splash of milk to keep everything creamy while warming through!

    Final Thoughts

    Every bite of this Chicken Alfredo Gnocchi feels like a celebration of comfort and love. This recipe transforms an ordinary night into something special, uniting family around the table with its rich flavors and inviting aroma. The joy of preparing a dish that brings smiles—especially from picky eaters—makes all the effort worthwhile. Plus, knowing it takes just about 40 minutes is like icing on the cake! So, I encourage you to embrace this delicious journey, savor the moments shared, and make lasting memories with each creamy, cheesy spoonful. Trust me, you’ll be back for seconds!


    Print

    clock clock iconcutlery cutlery iconflag flag iconfolder folder iconinstagram instagram iconpinterest pinterest iconfacebook facebook iconprint print iconsquares squares iconheart heart iconheart solid heart solid icon

    Description

    A deliciously creamy Chicken Alfredo Gnocchi dish that combines tender chicken, pillowy gnocchi, and a rich cheese sauce, topped to perfection.


    • 1 lb chicken breast
    • 2 Tablespoons olive oil
    • 4 Tablespoons unsalted butter
    • 3 cloves garlic
    • 3 Tablespoons flour
    • 1/2 cup chicken broth
    • 2 cups milk
    • 1/2 cup heavy cream
    • 1 lb potato gnocchi
    • 1 1/2 cups shredded mozzarella cheese
    • 1/2 cup parmesan cheese

    1. Preheat the oven to 425°F.
    2. Season the chicken with olive oil, garlic powder, Italian seasoning, salt, and pepper. Cook in a cast-iron skillet over medium-high heat for about 8–10 minutes until golden brown.
    3. In the same skillet, sauté shallots and garlic in butter until soft. Add flour to make a roux, then whisk in chicken broth, milk, and cream until thickened.
    4. Stir in diced chicken and uncooked gnocchi. Top with mozzarella and parmesan cheese.
    5. Bake for 12–15 minutes until bubbly and golden.

    Notes

    • Make sure the chicken is cooked through before adding the other ingredients.
    • For added flavor, consider using fresh herbs like parsley for garnish.
    • Prep Time: 15 minutes
    • Cook Time: 25 minutes
    • Category: Main Dish
    • Method: Baking
    • Cuisine: Italian

    Nutrition

    • Serving Size: 1 cup
    • Calories: 600
    • Sugar: 3g
    • Sodium: 850mg
    • Fat: 34g
    • Saturated Fat: 17g
    • Unsaturated Fat: 9g
    • Trans Fat: 0g
    • Carbohydrates: 50g
    • Fiber: 2g
    • Protein: 30g
    • Cholesterol: 120mg

    Sharing is caring!

  • Salami Mozzarella Tortellini Pasta Salad

    Salami Mozzarella Tortellini Pasta Salad


    Introduction to Salami Mozzarella Tortellini Pasta Salad

    Hey there, fellow food lovers! As a busy mom myself, I know how chaotic life can get. Between juggling work, family, and a million little tasks, making dinner can sometimes feel like a daunting challenge. That’s where my delicious Salami Mozzarella Tortellini Pasta Salad comes in! It’s a go-to recipe that’s not only quick to whip up, but also a real crowd-pleaser. With its vibrant colors and fresh flavors, this dish is sure to impress your loved ones while saving you precious time in the kitchen. Let’s dive in!

    Why You’ll Love This Salami Mozzarella Tortellini Pasta Salad

    This Salami Mozzarella Tortellini Pasta Salad is a lifesaver for busy days! It’s super easy to make, taking just about 15 minutes of hands-on time. Plus, the combination of creamy mozzarella, zesty salami, and fresh veggies creates a taste sensation that will have everyone asking for seconds. Whether it’s for a picnic, family gathering, or just a quick weeknight meal, this salad is deliciously versatile and satisfying!

    Ingredients for Salami Mozzarella Tortellini Pasta Salad

    Gathering your ingredients beforehand makes this process much simpler and more enjoyable. Here’s what you’ll need for this delightful Salami Mozzarella Tortellini Pasta Salad:

    • Cheese tortellini: The star of this dish! Look for fresh or frozen options at your local grocery store.
    • Cherry tomatoes: Sweet and juicy, they add a pop of color and freshness.
    • mozzarella pearls: These little bites of cheesy goodness are easy to toss in and melt in your mouth.
    • Sliced salami: A savory addition that provides a delightful contrast of flavor. You can choose your favorite variety!
    • Red onion: A bit of sharpness that brings a nice crunch. You can substitute with green onions for a milder taste.
    • Fresh basil: Adds a fragrant herbal note. If fresh isn’t available, a small amount of dried basil works too.
    • Black olives: For that briny bite, which rounds out the flavors beautifully. Feel free to omit if olives aren’t your thing!
    • Italian dressing: This brings everything together with its tangy flavor. You can also make your own to control the ingredients.
    • Olive oil: A drizzle of this helps enhance the overall taste and texture.
    • Salt and black pepper: Essential for seasoning. Adjust to your preference!

    For exact measurements, you can refer to the bottom of the article where everything is laid out for you. Happy cooking!

    How to Make Salami Mozzarella Tortellini Pasta Salad

    Creating your Salami Mozzarella Tortellini Pasta Salad is as easy as pie—yum, pie! Follow these straightforward steps to whip up a delightful dish that’ll have everyone talking.

    Step 1: Prepare the Ingredients

    Before you dive in, it’s vital to have all your ingredients prepped and ready to go.

    Start by cooking your tortellini according to package instructions.

    Once they are al dente, drain and let them cool.

    Chop your veggies like cherry tomatoes, red onions, and fresh basil.

    Having everything on hand makes assembling the salad a breeze. It saves time and keeps the mess to a minimum!

    Step 2: Combine the Base

    In a large bowl, combine the cooled tortellini with the star players: cherry tomatoes, mozzarella pearls, sliced salami, and red onion.

    Gently fold them together, making sure each ingredient is evenly distributed.

    This mix is the base of our hearty salad, and it looks absolutely gorgeous as you toss those vibrant colors together.

    Step 3: Add Dressing

    Here comes the magical part!

    Drizzle your Italian dressing and a splash of olive oil over the delightful mix.

    Use a spatula or wooden spoon to gently toss everything.

    You want that dressing to coat every morsel of tortellini and veggie.

    This ensures that every bite bursts with flavor—trust me, it makes a world of difference!

    Step 4: Season to Taste

    Now, don’t skip this important step!

    Lightly sprinkle salt and fresh black pepper into the mix.

    Tasting as you go is the key here.

    Remember, you can always add more, but you can’t take it away.

    Use your judgment to find that perfect balance!

    Step 5: Chill and Serve

    Patience is a virtue with this salad!

    Cover your bowl with plastic wrap and place it in the fridge for at least 30 minutes.

    Chilling allows the flavors to meld beautifully, creating a symphony of tastes!

    When you’re ready to serve, just give it a quick toss and enjoy the compliments!

    Tips for Success

    • Make it a meal: Add grilled chicken or chickpeas for extra protein.
    • Customize it: Feel free to swap out veggies based on what you have handy.
    • Prep ahead: This salad can be made a few hours in advance or even the night before.
    • Adjust the dressing: Start with a little and add more if needed for your taste.
    • Fresh herbs make a difference: Always use fresh basil for the best flavor!

    Equipment Needed

    • Large mixing bowl: A good-sized bowl is essential for combining everything. A salad bowl or even a colander works if needed.
    • Cutting board and knife: Sharp knives are crucial for chopping veggies quickly.
    • Spatula or wooden spoon: Perfect for gently mixing your salad without breaking any ingredients.
    • Plastic wrap or lid: Use to cover the salad while it chills in the fridge.

    Variations of Salami Mozzarella Tortellini Pasta Salad

    • Veggie Delight: Toss in some spinach, bell peppers, or cucumbers for extra crunch and nutrients.
    • Herbed Up: Experiment with different fresh herbs like parsley or oregano to change the flavor profile.
    • Protein Power: Add grilled chicken, shrimp, or chickpeas to transform this side dish into a satisfying main course.
    • Gluten-Free Option: Substitute regular tortellini with gluten-free pasta shells for a delightful twist.
    • Cheese Swap: Use provolone or feta cheese if mozzarella isn’t your favorite.

    Serving Suggestions for Salami Mozzarella Tortellini Pasta Salad

    • Pair with Garlic Bread: Warm, buttery garlic bread complements the salad beautifully.
    • Fresh Fruit Salad: A light fruit salad brings a refreshing balance to your meal.
    • Wine Pairing: A crisp white wine or light red wine enhances the flavors of the salad.
    • Garnish: Serve in a decorative bowl and sprinkle extra basil on top for a pop of color.

    FAQs about Salami Mozzarella Tortellini Pasta Salad

    Can I make this salad ahead of time?

    Absolutely! This Salami Mozzarella Tortellini Pasta Salad actually tastes better after it sits for a while. Prepare it a few hours in advance or even the night before to let those flavors meld wonderfully.

    What other vegetables can I add?

    The beauty of this salad is its versatility! You can add in bell peppers, spinach, or even zucchini. Use whatever fresh veggies you have on hand to make it your own.

    Is this salad suitable for meal prep?

    Yes! This salad holds up well in the fridge, making it a great choice for meal prep. Just keep the dressing separate until you’re ready to enjoy it for optimal freshness.

    How do I store leftovers?

    Store any leftovers in an airtight container, and they’ll stay fresh for about 2-3 days. Just give it a good toss before serving again!

    Can I use a different type of pasta?

    Of course! While cheese tortellini shines in this recipe, you can swap it out for other pasta types like penne or rotini. Just adjust cooking times as needed!

    Final Thoughts

    This Salami Mozzarella Tortellini Pasta Salad is more than just a delicious dish; it’s a celebration of flavor, color, and ease.

    When I serve it at family gatherings or casual get-togethers, I see smiles all around the table, and that warms my heart.

    It’s a dish that brings us together, filling our bellies and lifting our spirits.

    Whether it’s a busy weeknight or a laid-back weekend picnic, this salad is a trusty companion.

    So dive in, enjoy the bursts of flavor, and remember, cooking should always be fun and shared with the ones you love!


    Print

    clock clock iconcutlery cutlery iconflag flag iconfolder folder iconinstagram instagram iconpinterest pinterest iconfacebook facebook iconprint print iconsquares squares iconheart heart iconheart solid heart solid icon

    Description

    A delicious and refreshing pasta salad featuring cheese tortellini, salami, mozzarella, and fresh vegetables, perfect for any gathering.


    • 1 (20 oz) package cheese tortellini, cooked and cooled
    • 1 cup cherry tomatoes, halved
    • 1 cup mozzarella pearls
    • 1 cup sliced salami, cut into bite-size pieces
    • 1/2 red onion, thinly sliced
    • 1/4 cup fresh basil, chopped
    • 1/4 cup black olives, sliced
    • 1/2 cup Italian dressing
    • 1 tablespoon olive oil
    • Salt and black pepper to taste

    1. In a large bowl, combine the cooled tortellini, cherry tomatoes, mozzarella pearls, sliced salami, red onion, basil, and black olives.
    2. Drizzle with Italian dressing and olive oil.
    3. Gently toss everything together until well coated.
    4. Season with salt and pepper to taste.
    5. Chill in the refrigerator for at least 30 minutes before serving to let flavors meld.

    Notes

    • Feel free to add other vegetables or proteins to customize the salad.
    • This salad can be made a few hours in advance for better flavor.
    • Prep Time: 15 minutes
    • Cook Time: 0 minutes
    • Category: Salad
    • Method: No-Cook
    • Cuisine: Italian

    Nutrition

    • Serving Size: 1 cup
    • Calories: 320
    • Sugar: 2g
    • Sodium: 540mg
    • Fat: 20g
    • Saturated Fat: 6g
    • Unsaturated Fat: 14g
    • Trans Fat: 0g
    • Carbohydrates: 25g
    • Fiber: 2g
    • Protein: 10g
    • Cholesterol: 30mg

    Sharing is caring!

  • Louisiana Voodoo Fries Cheese

    Louisiana Voodoo Fries Cheese


    Introduction to Louisiana Voodoo Fries Cheese

    Hey there! If you’re like me, you’re often in search of recipes that blend quick, delicious flavors with a dash of fun. Let me introduce you to Louisiana Voodoo Fries Cheese—a dish that’s as delightful as it sounds! Imagine crispy French fries smothered in a creamy cheddar cheese sauce, seasoned just right. This recipe is perfect for a busy day or a weekend gathering with loved ones. With just a handful of ingredients, you can whip up a crowd-pleaser that’ll have everyone coming back for seconds. Trust me, your taste buds will thank you!

    Why You’ll Love This Louisiana Voodoo Fries Cheese

    This Louisiana Voodoo Fries Cheese recipe is all about simplicity and flavor. In just under an hour, you can create an indulgent dish that’ll impress family and friends. Its cheesy goodness and zesty seasonings make it a standout comfort food. Plus, it’s perfect for those hectic weeknights when you need something quick, yet satisfying. You’ll love how easily it comes together without skimping on taste!

    Ingredients for Louisiana Voodoo Fries Cheese

    Gathering the right ingredients is key to making delicious Louisiana Voodoo Fries Cheese. Here’s what you’ll need:

    • Frozen French fries: The base of this dish; opt for crinkle-cut or steak fries for extra texture.
    • Brown sugar: Adds a hint of sweetness that balances the savory flavors.
    • Garlic powder: Provides a kick of flavor without the fuss of fresh garlic.
    • Onion powder: Enhances the savory notes, lending depth to your seasoning blend.
    • Chili powder: Gives the fries their zesty magic, adding just a touch of heat.
    • Paprika: Introduces a mild smokiness and beautiful color to the dish.
    • Salt: Essential for bringing out all the flavors in the cheese sauce.
    • Black pepper: A dash adds warmth and a slight bite that complements the other spices.
    • Ranch dressing: Drizzled on top, this creamy dressing adds extra flavor and creaminess, perfect for dipping!
    • Unsalted butter: For making the roux, it allows you to control the saltiness of the dish.
    • All-purpose flour: This is crucial for thickening the cheese sauce into a velvety delight.
    • Whole milk: Gives the cheese sauce a rich, creamy texture; you can substitute with plant-based milk if desired.
    • Medium cheddar cheese: Freshly shredded for the best flavor and texture; don’t skimp on this cheesy goodness!

    Feel free to customize this recipe by adding jalapenos or green onions for extra toppings! You’ll find exact quantities listed at the bottom of the article, making it easy to print and follow.

    How to Make Louisiana Voodoo Fries Cheese

    Preheat and Prepare

    First things first, let’s get that oven preheated! Follow the package instructions for the frozen fries. While the oven warms, line two baking sheets with aluminum foil for easy cleanup. Then, spray them with nonstick cooking spray to ensure our fries don’t stick. Trust me, this step is like making a cozy bed for your fries. With the prep underway, you’re already on your way to a deliciously cheesy adventure!

    Create the Seasoning Blend

    Now, let’s whip up the seasoning blend that’ll bring these fries to life. In a small bowl, mix together brown sugar, garlic powder, onion powder, chili powder, paprika, salt, and black pepper. It’s like crafting your own spice magic! This blend adds a zing that your taste buds will adore. Make sure it’s well combined; no clumps, please!

    Bake the Fries

    Spread the frozen fries out in a single layer across your baking sheets. The even layer is crucial for that perfect crunch. Next, sprinkle the seasoning blend over them evenly—take your time! Toss the fries gently to coat them all. Bake according to the package instructions until they’re golden brown and crispy. If your oven has a mind of its own, try rotating the trays halfway through for even cooking. Just like that, your fries are becoming stars of the dish!

    Make the Cheese Sauce

    Now for the pièce de resistance: the cheese sauce! In a medium skillet, melt the butter over medium-low heat. Whisk in the flour to create a roux, cooking it for 1-2 minutes until it bubbles gently. This step is crucial, as it helps thicken our sauce. Gradually pour in the milk while whisking to combine smoothly. Keep stirring until it starts to thicken a bit. Then, it’s time to stir in that glorious shredded cheddar cheese! Be patient, allowing it to melt fully into a velvety sauce. If the sauce gets too thick, you can add a splash more milk. Now your cheese sauce is ready to bring all the joy!

    Serve the Louisiana Voodoo Fries Cheese

    Grab a serving plate and layer a quarter of your crispy fries on the bottom. Gently spoon a quarter of that luscious cheese sauce over them. Drizzle with a tablespoon of ranch dressing for an extra kick, then, if you like, sprinkle a pinch of the reserved seasoning blend on top. Repeat these layers for the remaining servings. Serve right away with extra ranch, cheese sauce, or ketchup on the side for dipping. Just imagine the smiles on the faces when you present this cheesy delight!

    Tips for Success

    • Use freshly shredded cheese for the smoothest and most flavorful sauce.
    • Don’t hesitate to experiment with different kinds of fries like sweet potato or curly fries!
    • Double the seasoning blend for an even bolder flavor on your fries.
    • If you’re short on time, cook the fries in an air fryer for extra crispness.
    • Adjust the spice level by adding more chili powder or some cayenne if you’re feeling adventurous!

    Equipment Needed

    • Baking sheets: A sturdy option for even cooking; parchment paper works too!
    • Small bowl: For mixing spices; any bowl will do, just make sure it’s big enough.
    • Skillet: A medium-sized skillet is best for the cheese sauce; a saucepan works too.
    • Whisk: Essential for stirring your roux and cheese sauce; a fork can work in a pinch.

    Variations of Louisiana Voodoo Fries Cheese

    • Spicy Voodoo Fries: Add diced jalapenos or a sprinkle of cayenne pepper to amp up the heat in your seasoning blend!
    • Loaded Voodoo Fries: Top with crispy bacon bits, green onions, and a dollop of sour cream for a heartier version.
    • Vegetarian Twist: Switch out the ranch dressing for a dairy-free option, keeping it friendly for all diets.
    • Cheesy Veggie Fries: Mix in diced bell peppers or roasted corn before baking for a touch of extra color and nutrition.
    • Herb-Infused Fries: Toss in some fresh herbs like cilantro or parsley for a burst of freshness alongside the cheesy goodness!

    Serving Suggestions

    • Pair your Louisiana Voodoo Fries Cheese with a crisp garden salad for a refreshing contrast.
    • Serve alongside spicy chicken wings or finger sandwiches for a fun gathering.
    • For drinks, iced tea or a cold beer complements the savory flavors beautifully.
    • Present in a fun basket or on a rustic wooden board for a cozy touch!

    FAQs about Louisiana Voodoo Fries Cheese

    Can I use fresh fries instead of frozen for Louisiana Voodoo Fries Cheese? Absolutely! Fresh-cut fries can add a delightful crunch. Just make sure to adjust the cooking time accordingly to achieve that crispy texture.

    What can I substitute for whole milk in the cheese sauce? If you need a dairy-free option, unsweetened almond or oat milk works great. They’ll still give the sauce a creamy consistency without compromising on flavor!

    How can I make Louisiana Voodoo Fries Cheese spicier? If you’re after a kick, add extra chili powder or a dash of cayenne pepper to the seasoning mix. You can also top your fries with sliced jalapenos for an extra spicy touch!

    Can I prepare the cheese sauce in advance? Yes, you can! Just make sure to store it in an airtight container in the fridge. When you’re ready to serve, gently reheat it over low heat, adding a splash of milk if it thickens too much.

    What are some good sides to serve with Louisiana Voodoo Fries Cheese? I love pairing it with a light salad or crispy chicken wings. The freshness of a salad balances the richness of the cheese beautifully!

    Final Thoughts

    Making Louisiana Voodoo Fries Cheese is more than just whipping up a quick snack; it’s an invitation to gather around the table. It’s about sharing laughter, connecting with loved ones, and savoring the delightful cheesiness that warms the heart. I love how this dish transforms an ordinary meal into an extraordinary experience, one cheesy fry at a time. Whether served for movie night or as a surprise treat, these fries bring joy and comfort. So, roll up your sleeves, gather your loved ones, and let the cheesy goodness bring smiles that last long after the last bite!


    Print

    clock clock iconcutlery cutlery iconflag flag iconfolder folder iconinstagram instagram iconpinterest pinterest iconfacebook facebook iconprint print iconsquares squares iconheart heart iconheart solid heart solid icon

    Description

    Louisiana Voodoo Fries Cheese is a delicious and indulgent dish featuring crispy French fries topped with a creamy cheddar cheese sauce and zesty seasonings.


    • 2832 oz (800–900 g) frozen French fries
    • 1 ½ teaspoons brown sugar
    • ¼ teaspoon garlic powder
    • ¼ teaspoon onion powder
    • ¼ teaspoon chili powder
    • ¼ teaspoon paprika
    • ¼ teaspoon salt
    • ¼ teaspoon black pepper
    • 4 tablespoons ranch dressing, plus more for dipping
    • 2 tablespoons unsalted butter
    • 2 tablespoons all-purpose flour
    • ⅔ cup (160 ml) whole milk
    • 2 cups (200 g) medium cheddar cheese, freshly shredded

    1. Preheat the oven according to the instructions on your frozen fries’ package. Line two baking sheets with foil and coat with nonstick cooking spray.
    2. In a small bowl, mix together the brown sugar, garlic powder, onion powder, chili powder, paprika, salt, and black pepper.
    3. Spread the frozen fries in a single layer on the prepared baking sheets. Sprinkle evenly with the seasoning blend, reserving about ½ teaspoon for topping later.
    4. Toss the fries to coat evenly. Bake according to the package instructions, rotating trays halfway through if needed, until fries are golden and crispy.
    5. In a medium skillet over medium-low heat, melt the butter.
    6. Whisk in the flour and cook for 1–2 minutes, whisking constantly, to form a roux.
    7. Slowly pour in the milk, whisking until smooth and fully combined.
    8. Simmer until slightly thickened, then gradually stir in the shredded cheddar cheese until fully melted and smooth. If the sauce becomes too thick, add a splash more milk. Reduce heat to low to keep warm.
    9. Layer a quarter of the fries onto a serving plate. Spoon over ¼ of the cheese sauce. Drizzle with 1 tablespoon ranch dressing and sprinkle a pinch of the reserved seasoning on top, if desired.
    10. Repeat with the remaining fries, cheese sauce, and ranch for the other servings.
    11. Serve immediately with extra ranch, cheese sauce, or ketchup on the side for dipping.

    Notes

    • Adjust the seasoning to your taste if desired.
    • Freshly shredded cheese gives the best texture and flavor in the cheese sauce.
    • Feel free to add other toppings like jalapenos or green onions for extra flavor.
    • Prep Time: 15 minutes
    • Cook Time: 30 minutes
    • Category: Appetizer
    • Method: Baking
    • Cuisine: American

    Nutrition

    • Serving Size: 1 serving
    • Calories: 450
    • Sugar: 2g
    • Sodium: 700mg
    • Fat: 25g
    • Saturated Fat: 15g
    • Unsaturated Fat: 5g
    • Trans Fat: 0g
    • Carbohydrates: 45g
    • Fiber: 4g
    • Protein: 12g
    • Cholesterol: 60mg

    Sharing is caring!

  • Mediterranean Greek Salad with Feta and Olives

    Mediterranean Greek Salad with Feta and Olives


    Introduction to Mediterranean Greek Salad with Feta and Olives

    Picture this: it’s a hot summer day, and you’re craving something light, fresh, and bursting with flavor. Enter the Mediterranean Greek Salad with Feta and Olives! This vibrant salad is not just a feast for the eyes but also a quick solution for busy moms like us. It comes together in a flash, allowing you to focus on what truly matters—enjoying time with your loved ones. Juicy tomatoes, crisp cucumbers, and creamy feta come together harmoniously, creating a dish that impresses at any gathering or simply at your family dinner table.

    Why You’ll Love This Mediterranean Greek Salad with Feta and Olives

    This Mediterranean Greek Salad with Feta and Olives is a true lifesaver for busy days. It’s super easy to whip up, needing just 15 minutes of your time. The crunchy vegetables and creamy feta create a delightful symphony of flavors and textures that your family will love. Plus, it’s healthy and refreshing—ideal for summer meals. The best part? It’s so versatile that you can customize it to suit everyone’s tastes!

    Ingredients for Mediterranean Greek Salad with Feta and Olives

    This Mediterranean Greek Salad with Feta and Olives is all about freshness and flavor. Here’s what you’ll need to whip up this delightful salad:

    • Ripe Tomatoes: Choose juicy, vine-ripened tomatoes for that rich taste. They add a burst of color and sweetness!
    • Cucumber: The crunch from cucumbers balances the salad’s creaminess. Peeling them is optional but makes for a smoother bite.
    • Red Onion: Use thin slices for a sharp bite that adds depth. You can soak them in water for a milder flavor.
    • Green Bell Pepper: This adds a refreshing crunch and a slight bitterness. You can swap it with a sweeter pepper if preferred.
    • Kalamata Olives: These pitted olives provide a briny flavor. If you’re not a fan, you could opt for green olives instead!
    • Feta Cheese: Crumbled feta gives the salad its creamy goodness. For a twist, try goat cheese or even a dairy-free option if needed.
    • Extra Virgin Olive Oil: A must for drizzling! It enhances flavors and gives richness.
    • Red Wine Vinegar: Adds acidity to balance the richness of the feta. You can use lemon juice if you want a brighter flavor.
    • Dried Oregano: This herb ties everything together, giving a classic Mediterranean flair. Fresh oregano works wonders too!
    • Sea Salt and Black Pepper: Essential for seasoning. Adjust to your taste—don’t be shy!

    Remember, all ingredient quantities and further details are available at the bottom of this article for easy printing. Feel free to get creative with your veggies to make it your own!

    How to Make Mediterranean Greek Salad with Feta and Olives

    Making this Mediterranean Greek Salad with Feta and Olives is a delightful journey that you’ll savor! Let’s dive into the steps to create your refreshing masterpiece.

    Step 1: Prep the Vegetables

    Start with the tomatoes, cucumbers, red onion, and green bell pepper. Cut the tomatoes into wedges—this ensures every bite bursts with flavor. For cucumbers, peeling is up to you! I find that peeling them adds a tender touch, while leaving the skin brings a nice crunch.

    Next, thinly slice the red onion. The key is to keep it delicate in taste, so I recommend soaking it in a little cold water if you prefer a milder flavor. Lastly, chop the green bell pepper, maintaining its vibrant color. This combination of veggies will make your salad lively and full of texture!

    Step 2: Combine Ingredients

    Once your veggies are prepped, grab a large mixing bowl. Toss in the chopped tomatoes, cucumbers, sliced red onion, and green bell pepper. Then, add the Kalamata olives. Their dark, salty charm creates an enticing contrast against the bright vegetables.

    As you combine them, take a moment to appreciate the colorful medley! This is the fun part, where the colors and textures start to blend, hinting at the deliciousness to come.

    Step 3: Make the Dressing

    In a small bowl, whisk together the extra virgin olive oil, red wine vinegar, dried oregano, sea salt, and freshly ground black pepper. Each ingredient plays a vital role! The olive oil brings richness, while the vinegar adds that zing everyone craves. Oregano kicks in with its aromatic warmth, binding all flavors beautifully.

    This dressing transforms your salad into something extraordinary. Don’t skimp on this step—it’s where the magic happens!

    Step 4: Toss the Salad

    Now for the tossing! Drizzle your vibrant dressing over the vegetable mix. Gently toss everything together. The goal here is to coat every piece without mashing the veggies. Each crunch should remain intact, giving your salad that essential texture!

    This step makes the Mediterranean Greek Salad with Feta and Olives truly sing. Each veggie will be perfectly dressed, ready to shine.

    Step 5: Add Feta Cheese and Serve

    Finally, sprinkle the crumbled feta cheese on top, letting it snow beautifully over the colorful salad. This creamy addition is the star of the show!

    You can serve the salad immediately, or let it chill in the fridge for a bit. Chilling marries the flavors, enhancing the overall taste. This salad is best served slightly cool, so dig in, and enjoy every refreshing bite!

    Tips for Success

    • Use farm-fresh ingredients for the best flavor—it’s the heart of this Mediterranean Greek Salad with Feta and Olives.
    • Rest the salad for at least 10 minutes before serving to allow the flavors to meld beautifully.
    • Chill the salad for a refreshing taste, especially on hot summer days.
    • Consider adding a pinch of red pepper flakes for a surprising kick!
    • Switch up the veggies for variety; roasted peppers or artichokes work deliciously!

    Equipment Needed

    • Large mixing bowl: A sturdy bowl for tossing your salad. A salad spinner works too!
    • Cutting board: Essential for chopping your fresh veggies. A plate can suffice if you’re in a pinch.
    • Chef’s knife: For precise and safe cutting. A small knife can work, just be cautious!
    • Whisk: Perfect for mixing your dressing. A fork does the trick too!

    Variations of Mediterranean Greek Salad with Feta and Olives

    • Protein Boost: Add grilled chicken or shrimp for a hearty main dish. The added protein complements the salad beautifully.
    • Quinoa Twist: Stir in some cooked quinoa for extra fiber and a nutty flavor. This can transform the salad into a satisfying meal!
    • Herb Infusion: Experiment with fresh herbs like basil or parsley. They elevate the freshness and complexity of the salad.
    • Vegan Option: Swap feta for a plant-based cheese or avocado for creaminess while keeping it dairy-free.
    • Seasonal Additions: Incorporate seasonal ingredients like roasted beets in the fall or radishes in the spring for a delightful crunch.

    Serving Suggestions with Mediterranean Greek Salad with Feta and Olives

    • Pair with grilled chicken or fish for a balanced meal rich in flavor.
    • Serve alongside warm pita bread or crusty baguette for scooping.
    • Drizzle extra olive oil over the top for an elegant touch.
    • Complement with a chilled glass of white wine or iced tea.
    • Present in a large, colorful bowl to highlight the vibrant ingredients.

    FAQs about Mediterranean Greek Salad with Feta and Olives

    What is the best way to store leftovers of Mediterranean Greek Salad with Feta and Olives?

    Store any leftovers in an airtight container in the fridge. They can last for up to 2 days, but the salad is best enjoyed within 24 hours. Just remember to keep the feta separate if possible, to maintain its creamy texture!

    Can I make this salad ahead of time?

    Absolutely! This Mediterranean Greek Salad with Feta and Olives is great for meal prep. Prepare all the veggies and dressing a day in advance. Just add the feta right before serving to keep everything fresh and tasty.

    Can I use different types of olives?

    For sure! While Kalamata olives are traditional, feel free to use green olives or even stuffed olives for a twist. Each variety brings its unique flavor to the mix!

    Is this salad suitable for a low-carb diet?

    Yes! This salad is naturally low in carbs, making it a perfect choice for those watching their carbs. It’s rich in vegetables and healthy fats from the feta and olive oil, making it both nutritious and filling.

    How can I make this Mediterranean Greek Salad with Feta and Olives more filling?

    Add in some protein like grilled chicken, chickpeas, or even quinoa. These ingredients not only bulk up the salad but also keep you satisfied longer. It’s a wonderful way to enjoy this tasty dish for lunch or dinner!

    Final Thoughts

    Creating this Mediterranean Greek Salad with Feta and Olives is like taking a mini-vacation to the sun-soaked shores of Greece. Imagine the delightful crunch of fresh vegetables combined with the tangy feta and briny olives. Each bite offers a burst of flavor that transports you away from the hustle and bustle of daily life. Whether you’re hosting a summer gathering or simply looking for a refreshing dish for the family, this salad is a joy to make and to eat. I hope it brings you as much happiness and satisfaction as it has brought me in my own kitchen adventures!


    Print

    clock clock iconcutlery cutlery iconflag flag iconfolder folder iconinstagram instagram iconpinterest pinterest iconfacebook facebook iconprint print iconsquares squares iconheart heart iconheart solid heart solid icon

    Description

    A refreshing Mediterranean Greek Salad featuring ripe tomatoes, crisp cucumbers, and creamy feta cheese, perfect for summer.


    • 3 medium ripe tomatoes, cut into wedges
    • 1 cucumber, peeled and sliced into half moons
    • 1/2 red onion, thinly sliced
    • 1 green bell pepper, sliced
    • 1/2 cup Kalamata olives, pitted
    • 3/4 cup crumbled feta cheese
    • 1/4 cup extra virgin olive oil
    • 1 tablespoon red wine vinegar
    • 1 teaspoon dried oregano
    • Sea salt, to taste
    • Freshly ground black pepper, to taste

    1. Chop the tomatoes, cucumber, red onion, and bell pepper and place them in a large mixing bowl.
    2. Add the Kalamata olives to the bowl with the chopped vegetables.
    3. In a small bowl, whisk together the olive oil, red wine vinegar, oregano, salt, and black pepper.
    4. Pour the dressing over the vegetables and gently toss until everything is evenly coated.
    5. Top the salad with crumbled feta cheese and serve immediately or chill slightly before serving.
    • Prep Time: 15 minutes
    • Cook Time: 0 minutes
    • Category: Salad
    • Method: No Cook
    • Cuisine: Mediterranean

    Nutrition

    • Serving Size: 1 serving
    • Calories: 250
    • Sugar: 3g
    • Sodium: 600mg
    • Fat: 20g
    • Saturated Fat: 5g
    • Unsaturated Fat: 15g
    • Trans Fat: 0g
    • Carbohydrates: 10g
    • Fiber: 3g
    • Protein: 6g
    • Cholesterol: 20mg

    Sharing is caring!