Category: Uncategorized

  • One-Pan Chicken Feta Pomegranate

    One-Pan Chicken Feta Pomegranate


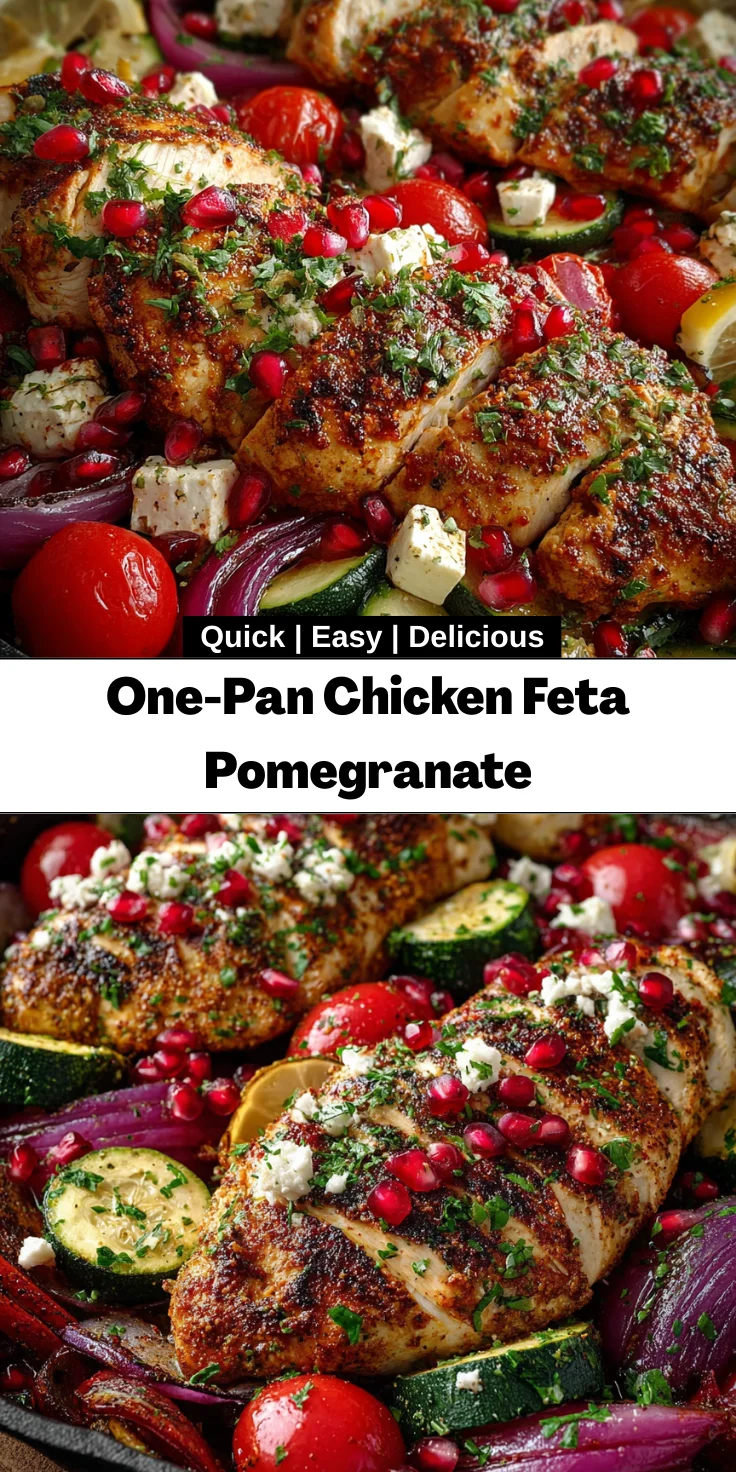
    Introduction to One-Pan Chicken Feta Pomegranate

    As a busy mom, I know how precious time can be, especially when it comes to dinner. That’s why I’m thrilled to share this delightful One-Pan Chicken Feta Pomegranate recipe. It’s a colorful, mouthwatering dish that’s perfect for weeknight meals or special gatherings. With vibrant veggies and the tangy sweetness of pomegranate, this dish is sure to impress your loved ones without the fuss. Plus, who doesn’t love a meal that requires minimal cleanup? Let’s dive into this flavorful adventure that’ll have everyone asking for seconds!

    Why You’ll Love This One-Pan Chicken Feta Pomegranate

    This One-Pan Chicken Feta Pomegranate is a lifesaver for busy evenings. With just one sheet pan to clean up, you get all the deliciousness without the mess. Plus, it’s packed with flavor and color! The combination of tender chicken and roasted veggies topped with creamy feta and crunchy pomegranate seeds makes every bite pop. And let’s be honest, who doesn’t love a hassle-free dish that looks gourmet? It’s a win-win!

    Ingredients for One-Pan Chicken Feta Pomegranate

    Gathering the right ingredients is the first step in creating this mouthwatering One-Pan Chicken Feta Pomegranate. Below, you’ll find a list of all the key components that make this dish shine, along with some ideas on substitutions and extras that can elevate your meal even further.

    • Boneless, skinless chicken breasts: The star of the show, juicy and protein-packed.
    • Olive oil: This adds richness and helps achieve that perfect golden-brown crust.
    • Smoked paprika: A little bit brings a delightful depth of flavor and a hint of smokiness.
    • Dried oregano: This herb lends a Mediterranean touch that harmonizes beautifully with the chicken.
    • Ground cumin: Adds warmth and complexity; it’s an unexpected, yet welcome addition!
    • Sea salt and freshly ground black pepper: Essential for seasoning and bringing out all the flavors.
    • Red onion: Sweet and caramelized, it adds a lovely contrast to the dish.
    • Red bell peppers: These vibrant veggies not only add color but also a sweet crunch.
    • Zucchini: A perfect sidekick, its mild flavor absorbs all the magical spices.
    • Cherry tomatoes: Juicy bursts of sweetness that balance the savory elements perfectly.
    • Feta cheese: The creamy texture and tanginess elevate the dish to gourmet levels.
    • Pomegranate seeds (arils): They offer a lovely crunch and a pop of sweetness that’s simply irresistible!
    • Fresh parsley: A sprinkle of this bright herb adds freshness and color.
    • Lemon wedges: For squeezing on top just before serving; it brightens up the flavors.

    If you’re looking for variations, feel free to experiment! Substituting feta with a dairy-free alternative works well for a vegan-friendly version. All ingredient quantities for the recipe are available at the bottom of the article for printing, ensuring a smooth meal prep.

    How to Make One-Pan Chicken Feta Pomegranate

    Cooking should be a joy, not a burden. Let me guide you through making this easy One-Pan Chicken Feta Pomegranate, step by step. You’ll see how simple it is to create a dish that is both delicious and beautiful!

    Step 1: Preheat the Oven

    Start by preheating your oven to 220°C (425°F). This temperature helps ensure that your chicken and veggies get that perfectly roasted taste. While the oven heats, line a large sheet pan with parchment paper or foil. This makes cleanup easy, because let’s be real, who enjoys scrubbing pans after a long day?

    Step 2: Marinate the Chicken

    In a large bowl, combine the olive oil, smoked paprika, oregano, cumin, sea salt, and black pepper. Mix well to create a vibrant marinade. Then, grab those chicken breasts and toss them in the bowl, making sure they’re coated evenly. This marination step is crucial! It infuses the chicken with all those lovely spices and flavors. If you have extra time, let them marinate for a few hours to boost the flavor even more.

    Step 3: Arrange on the Sheet Pan

    Once your chicken is marinated, arrange the chicken breasts on the prepared sheet pan. It’s best to give them a little space so they roast evenly. Now, scatter the red onion, bell peppers, zucchini, and halved cherry tomatoes around the chicken. Don’t be shy! The more colorful, the better. Drizzle a little olive oil over the veggies and sprinkle some salt and pepper for added flavor. This will create a symphony of tastes as everything roasts together!

    Step 4: Roast in the Oven

    Pop the sheet pan in the oven and roast everything for about 30–35 minutes. You know it’s done when the chicken is cooked through and reaches an internal temperature of 74°C (165°F). The veggies should be tender and slightly caramelized. I love to sneak a peek halfway through to give the pan a little toss. This ensures that the veggies brown nicely on all sides, enhancing their flavor.

    Step 5: Add Feta and Pomegranate

    Once cooked, remove the pan from the oven and immediately sprinkle the crumbled feta cheese and pomegranate seeds over the hot chicken and vegetables. The heat from the dish will soften the feta slightly, bringing out its creamy goodness. For a finishing touch, garnish with chopped parsley—this not only adds freshness but also makes your plate look gorgeous. Serve with lemon wedges on the side, ready to squeeze over each bite. Enjoy your culinary creation!

    Tips for Success

    • Don’t rush the marination; even 30 minutes makes a difference!
    • Use fresh ingredients for the best flavors; fresh herbs elevate the dish.
    • Feel free to mix in your favorite veggies for added variety.
    • Check your chicken with a meat thermometer to ensure it’s perfectly cooked.
    • Pair with a simple green salad for a refreshing side.

    Equipment Needed

    • Large sheet pan: A great alternative is a cast-iron skillet if you prefer.
    • Mixing bowl: Any large bowl will do—make sure it’s big enough for tossing.
    • Measuring spoons: A simple tablespoon or teaspoon can work just as well.
    • Oven thermometer: Helpful for ensuring your oven is at the correct temperature.
    • Sharp knife: Any good kitchen knife will make prep easier.

    Variations

    • For a spicy kick, add crushed red pepper flakes to the marinade.
    • Swap out chicken for turkey or firm tofu for a vegetarian option.
    • Include sweet potatoes or carrots for a heartier vegetable mix.
    • Try different cheeses like goat cheese or a vegan alternative for dairy-free diets.
    • Add a splash of balsamic vinegar to enhance the flavors even more.

    Serving Suggestions

    • Pair your One-Pan Chicken Feta Pomegranate with a light green salad for freshness.
    • Serve with warm crusty bread to soak up all the delicious juices.
    • A chilled glass of white wine complements the flavors beautifully.
    • For a pop of color, sprinkle extra pomegranate seeds on top.
    • Present it on a large platter for an impressive table display.

    FAQs about One-Pan Chicken Feta Pomegranate

    Can I use frozen chicken breasts for this recipe?

    While fresh chicken works best, you can use frozen chicken breasts. Just make sure to fully thaw them before marinating. Cooking from frozen may affect the roasting time, so adjust accordingly.

    What can I substitute for pomegranate seeds?

    If pomegranate seeds aren’t available, try using dried cranberries or raisins for a sweet and chewy contrast. Alternatively, you can skip them and still enjoy the dish!

    Is this dish gluten-free?

    Absolutely! This One-Pan Chicken Feta Pomegranate is naturally gluten-free. It’s perfect for anyone avoiding gluten while still offering tons of flavor and nutrition.

    How can I store leftovers?

    Store leftovers in an airtight container in the refrigerator for up to three days. Reheat in the oven or microwave until warmed through for a quick meal.

    Can I make this recipe ahead of time?

    Yes! You can marinate the chicken in advance and store it in the fridge. Just remember to assemble and roast it the day you plan to serve it for the best taste!

    Final Thoughts

    This One-Pan Chicken Feta Pomegranate truly embodies the joy of cooking without the stress. It’s a meal that not only nourishes the body but also ignites the soul with flavor and vibrant colors. Just imagine the smiles around the dinner table as you serve up this delightful dish. It’s perfect for those busy weekdays or when you want to impress guests with minimal effort. Embrace the simplicity and let the fragrant aroma fill your home. Trust me, this recipe will become a cherished favorite, bringing warmth and joy to your family meals for years to come!
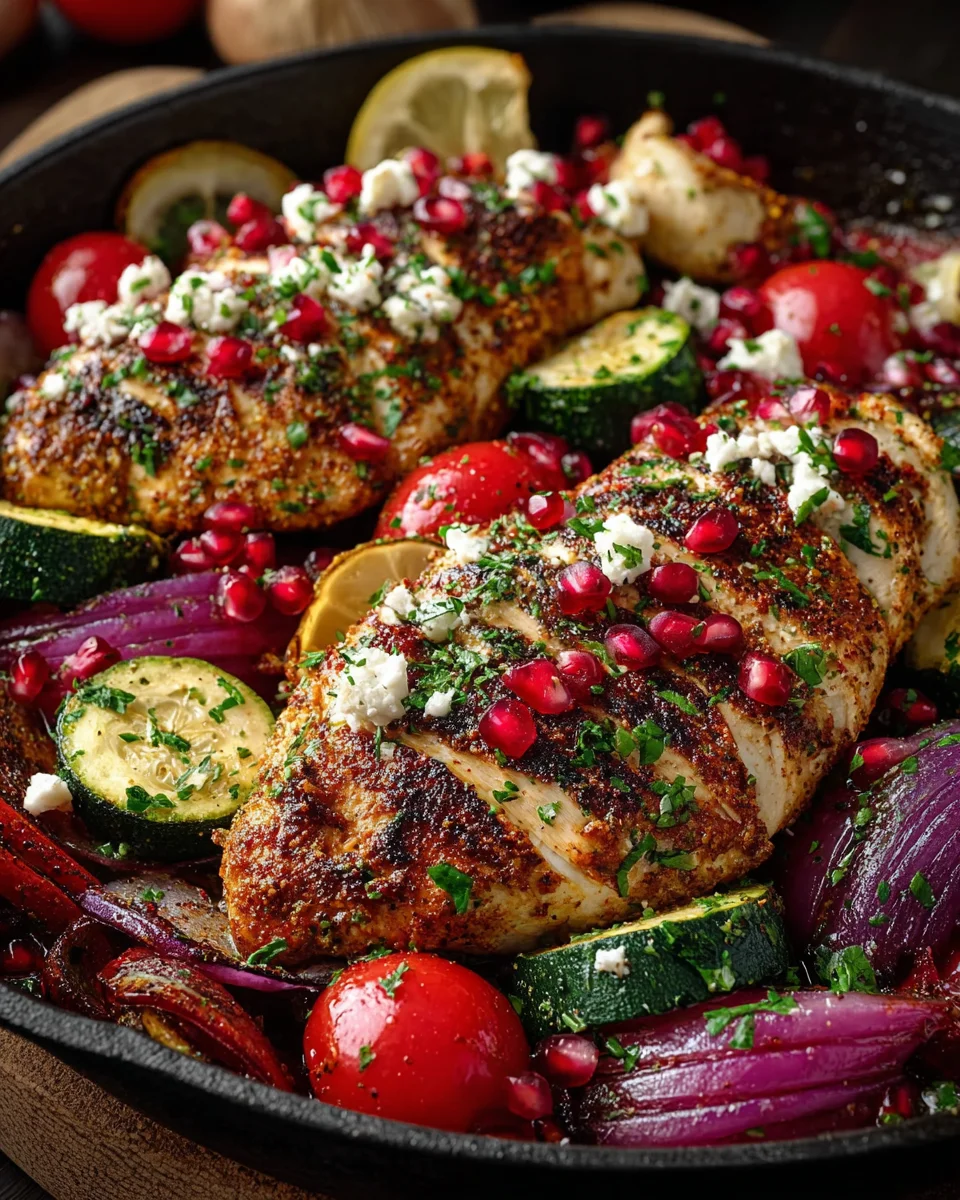

    Print

    clock clock iconcutlery cutlery iconflag flag iconfolder folder iconinstagram instagram iconpinterest pinterest iconfacebook facebook iconprint print iconsquares squares iconheart heart iconheart solid heart solid icon

    Description

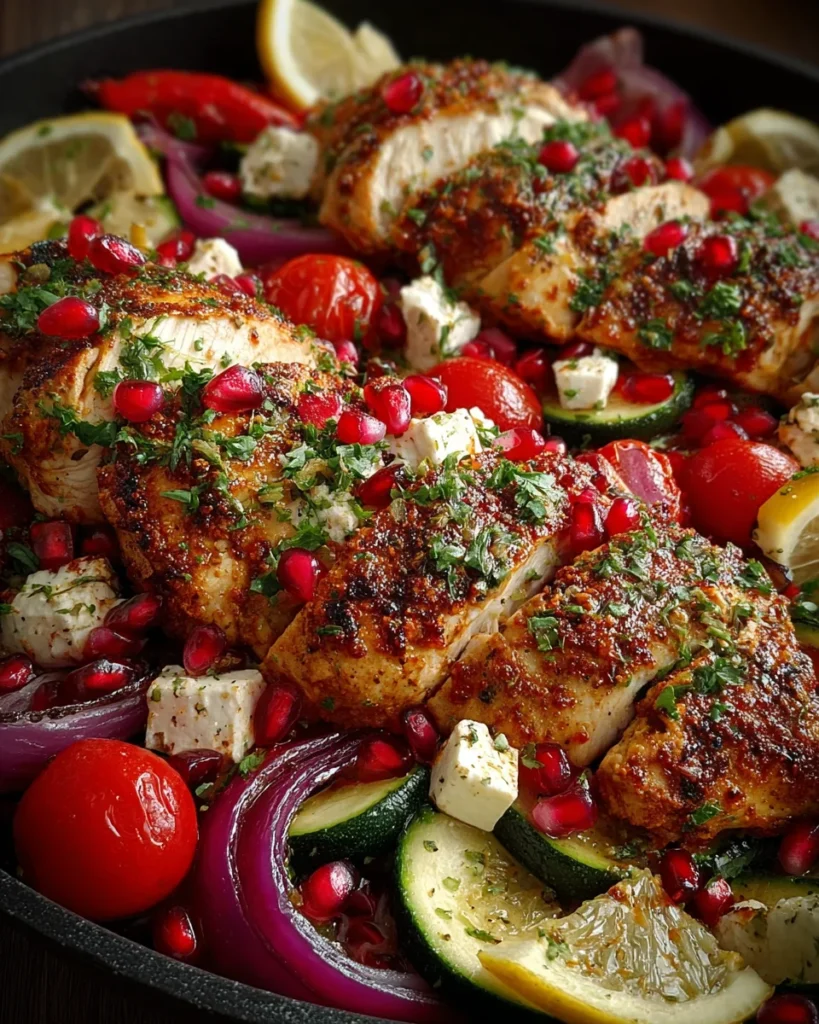
    A flavorful one-pan meal featuring chicken breasts roasted with colorful vegetables, topped with crumbled feta cheese and pomegranate seeds.


    • 4 boneless, skinless chicken breasts (150 g each)
    • 2 tbsp olive oil
    • 1 tsp smoked paprika
    • 1 tsp dried oregano
    • ½ tsp ground cumin
    • 1 tsp sea salt
    • ½ tsp freshly ground black pepper
    • 1 large red onion, cut into wedges
    • 2 red bell peppers, sliced
    • 1 small zucchini, sliced into half-moons
    • 200 g cherry tomatoes, halved
    • 120 g feta cheese, crumbled
    • 100 g pomegranate seeds (arils)
    • 2 tbsp fresh parsley, chopped
    • 1 lemon, cut into wedges

    1. Preheat the oven to 220°C (425°F). Line a large sheet pan with parchment paper or foil for easy cleanup.
    2. In a large bowl, combine olive oil, smoked paprika, oregano, cumin, salt, and pepper. Add the chicken breasts and toss to coat evenly.
    3. Arrange the chicken breasts on the prepared sheet pan.
    4. Scatter the red onion wedges, bell pepper slices, zucchini, and cherry tomatoes evenly around the chicken. Drizzle vegetables lightly with a bit more olive oil and season with a pinch of salt and pepper.
    5. Roast in the preheated oven for 30–35 minutes, or until the chicken is cooked through (internal temperature 74°C/165°F) and the vegetables are tender and caramelized.
    6. Remove from the oven. Immediately sprinkle the crumbled feta and pomegranate seeds over the hot chicken and vegetables.
    7. Garnish with chopped parsley and serve with lemon wedges on the side.

    Notes

    • For added flavor, marinate the chicken for a few hours before roasting.
    • You can substitute the feta with a dairy-free alternative for a vegan version.
    • Prep Time: 15 minutes
    • Cook Time: 35 minutes
    • Category: Main Dish
    • Method: Roasting
    • Cuisine: Mediterranean

    Nutrition

    • Serving Size: 1 serving
    • Calories: 390
    • Sugar: 5g
    • Sodium: 850mg
    • Fat: 18g
    • Saturated Fat: 6g
    • Unsaturated Fat: 8g
    • Trans Fat: 0g
    • Carbohydrates: 20g
    • Fiber: 4g
    • Protein: 40g
    • Cholesterol: 100mg

    Sharing is caring!

  • Maximalist Orzo Roasted Root

    Maximalist Orzo Roasted Root


    Introduction to Maximalist Orzo Roasted Root

    Welcome, fellow home cooks! If you’re like me, juggling family, work, and a busy lifestyle can sometimes feel overwhelming. That’s where my Maximalist Orzo Roasted Root comes in—a delightful dish that merges comfort and sophistication seamlessly. Picture creamy orzo enveloping tender roasted root vegetables, all infused with rich flavors. This meal isn’t just quick to prepare; it impresses everyone at the dinner table, whether it’s a weeknight dinner or a special gathering. So, let’s dive into creating this colorful feast that truly celebrates the beauty of hearty, wholesome ingredients!

    Why You’ll Love This Maximalist Orzo Roasted Root

    This Maximalist Orzo Roasted Root dish is not just a feast for the eyes but a real winner for busy lives. It’s quick, yet it feels like an indulgent treat. The comforting creaminess of orzo pairs beautifully with the earthy sweetness of roasted vegetables. Plus, it’s versatile! You can tweak ingredients based on what you have, making it a convenient go-to meal for any night of the week.

    Ingredients for Maximalist Orzo Roasted Root

    Gathering the right ingredients is crucial for making my Maximalist Orzo Roasted Root shine. Each component adds its magic, from sweet vegetables to creamy textures. Here’s what you’ll need:

    • Carrots: Sweet and bright, they provide a lovely crunch.
    • Parsnips: Earthy and slightly nutty, they bring depth to the dish.
    • Sweet Potato: A hint of sweetness and creaminess when roasted.
    • Golden Beet: Adds an earthy flavor while contributing stunning color.
    • Olive Oil: For roasting and sautéing, it enhances flavor and promotes browning.
    • Smoked Paprika: This gives a touch of warmth and depth to the veggies.
    • Sea Salt & Black Pepper: Essential seasonings to brighten every flavor!
    • Unsalted Butter: Helps in sautéing and adds richness to the orzo.
    • Yellow Onion: A flavor base that’s sweet when cooked, enhancing overall taste.
    • Garlic: A must for adding aromatic punch to the dish.
    • Orzo Pasta: The star of the show with its creamy risotto-like texture.
    • Dry White Wine: It adds acidity and balances the richness beautifully.
    • Vegetable Broth: Use warm broth for a silky, flavorful consistency.
    • Parmesan Cheese: Grated for a salty, nutty flavor that blends seamlessly.
    • Goat Cheese: The creamy tanginess elevates the dish to another level.
    • Lemon Zest: A dash of brightness to cut through the richness.
    • Fresh Parsley & Thyme: These herbs brighten the dish and add freshness.
    • Extra Parmesan and Microgreens: Perfect finishes for garnish and added texture.
    • Drizzle of Olive Oil: An extra touch of flavor before serving!

    For exact measurements, check the bottom of the article where they are provided for printing. Feel free to swap out root vegetables based on what you have at home, making this dish as flexible as it is delicious!

    How to Make Maximalist Orzo Roasted Root

    Step 1: Preheat and Prepare the Vegetables

    Let’s kick things off! Preheat your oven to 425°F (220°C). This heat is key to achieving that beautiful caramelization. While the oven warms up, grab your carrots, parsnips, sweet potato, and golden beet. Peel and dice them into bite-sized pieces, making must-have uniform chunks for even roasting. Next, in a mixing bowl, toss the diced veggies with olive oil, smoked paprika, sea salt, and black pepper. Feel free to let your creativity shine here; add more spices if you like a kick!

    Step 2: Roast the Root Vegetables

    Once your oven is hot, spread the seasoned vegetables onto a baking sheet. Make sure they’re in a single layer; overcrowding leads to steaming rather than roasting. Slide that sheet into the oven and let those veggies roast for 25-30 minutes. Remember to stir halfway through! You want them golden, tender, and begging to be included in the creamy orzo. That aroma wafting through your kitchen? Pure bliss!

    Step 3: Sauté Aromatics

    While the vegetables are roasting, let’s build some flavor! In a large skillet, heat olive oil and unsalted butter over medium heat. Add the finely diced yellow onion and sauté for about 3-4 minutes until it’s translucent. This is the foundation for your dish, and trust me, it’s worth the wait! Stir in the minced garlic for the final minute, allowing it to release its fragrant oils. The combination of onion and garlic will make your kitchen feel like a five-star restaurant!

    Step 4: Toast the Orzo

    Now it’s time to add your star ingredient—orzo! Toss it into the skillet with the sautéed onion and garlic. Toast the orzo for about 2 minutes, stirring it continuously. This tiny pasta will soak up all those delicious flavors while developing a lovely nutty aroma. You’ll be surprised how such a simple step can elevate your dish so much!

    Step 5: Add Liquid Gradually

    Next, it’s time to bring it all together! Pour in the dry white wine and stir until it’s mostly absorbed. Then, begin adding the warm vegetable broth—one cup at a time. This gradual addition is crucial! Stir often and watch as the orzo absorbs the broth, transforming into a creamy risotto-like texture. Allow it to cook for about 15 minutes, every so often giving it a loving stir. You want to achieve that perfect combination of tender pasta and creamy goodness!

    Step 6: Combine and Serve

    Finally, fold in those roasted root vegetables, along with grated Parmesan, crumbled goat cheese, lemon zest, fresh parsley, and thyme. These ingredients are like a finishing touch on a beautiful painting. Give it a taste and season with salt and pepper to your liking. Once you serve it hot, don’t forget a sprinkle of extra shaved Parmesan and a drizzle of olive oil for that gourmet finish. Your Maximalist Orzo Roasted Root is ready to impress!

    Tips for Success

    • Always use warm broth for the best absorption and creaminess.
    • Don’t skip the toasting step for the orzo; it amplifies its flavor.
    • Feel free to mix and match root vegetables based on what’s in season.
    • For extra depth, consider adding a pinch of red pepper flakes for heat.
    • Make it ahead! This dish stores well for leftovers.

    Equipment Needed

    • Oven: Essential for roasting the veggies; a toaster oven will also work.
    • Baking Sheet: A rimmed baking sheet is ideal; a casserole dish can substitute.
    • Large Skillet: A non-stick skillet is best for sautéing; a regular pan will do fine.
    • Mixing Bowl: Perfect for tossing veggies; any large bowl works.
    • Wooden Spoon: Great for stirring; a silicone spatula is a good alternative.

    Variations for Maximalist Orzo Roasted Root

    • Add Protein: For a heartier meal, toss in grilled chicken, sautéed shrimp, or even chickpeas for extra protein.
    • Herb Swaps: Experiment with different fresh herbs like basil or dill to add unique flavors.
    • Cheese Alternatives: Try feta or blue cheese instead of goat cheese for a different tangy twist.
    • Vegetable Variety: Use seasonal vegetables like butternut squash or beets instead of the original root veggies.
    • Spice it Up: For more heat, add diced jalapeños or a pinch of cayenne pepper to the vegetable mix.

    Serving Suggestions for Maximalist Orzo Roasted Root

    • Fresh Salad: Pair with a light arugula or spinach salad drizzled with lemon vinaigrette.
    • Crusty Bread: Serve with warm, crusty bread or a baguette to soak up all that creaminess.
    • Light Wine: Enjoy with a chilled white wine like Sauvignon Blanc for a refreshing balance.
    • Beautiful Plate: Present on a clean white dish, topped with microgreens for a pop of color.

    FAQs about Maximalist Orzo Roasted Root

    Can I use gluten-free orzo for this recipe?

    Absolutely! Gluten-free orzo is a great substitute that still gives you that creamy texture. Just be sure to check the cooking time as it may vary.

    What other vegetables work well in this dish?

    Feel free to experiment! Root vegetables like turnips or rutabagas can add a delightful twist. You can even use seasonal veggies like zucchini or bell peppers for variety.

    Can I make this dish ahead of time?

    Yes, you can prep the root vegetables and orzo separately in advance. Just mix them together when you’re ready to serve, and it’ll be just as delicious!

    How can I add protein to my Maximalist Orzo Roasted Root?

    A great way to add protein would be to mix in grilled chicken, sautéed shrimp, or even chickpeas. They complement the dish beautifully while making it heartier!

    Is this dish suitable for meal prep?

    Definitely! It stores well in the fridge for up to three days. Just reheat gently before serving for a comforting meal anytime!

    Final Thoughts

    As you savor each bite of my Maximalist Orzo Roasted Root, I hope you find a moment of joy during your bustling days. This dish embodies warmth, comfort, and creativity, transforming humble ingredients into a gourmet experience right in your kitchen. I love how it brings family and friends together, turning an ordinary meal into an occasion to cherish. So, whether it’s a hectic weeknight or a special dinner, let this recipe remind you of the happiness that good food and shared moments can bring. Happy cooking, and enjoy every delicious spoonful!


    Print

    clock clock iconcutlery cutlery iconflag flag iconfolder folder iconinstagram instagram iconpinterest pinterest iconfacebook facebook iconprint print iconsquares squares iconheart heart iconheart solid heart solid icon

    Description

    Maximalist Orzo Roasted Root is a flavorful dish combining roasted root vegetables with creamy orzo risotto, enriched with cheeses and fresh herbs.


    • 2 medium carrots, peeled and diced
    • 2 parsnips, peeled and diced
    • 1 small sweet potato, peeled and diced
    • 1 small golden beet, peeled and diced
    • 2 tablespoons olive oil
    • 1 teaspoon smoked paprika
    • 1/2 teaspoon sea salt
    • 1/4 teaspoon black pepper
    • 1 tablespoon olive oil
    • 2 tablespoons unsalted butter
    • 1 medium yellow onion, finely diced
    • 2 garlic cloves, minced
    • 1 1/2 cups orzo pasta
    • 1/2 cup dry white wine
    • 4 cups vegetable broth, kept warm
    • 1/2 cup grated Parmesan cheese
    • 1/3 cup crumbled goat cheese
    • 1/2 teaspoon lemon zest
    • 2 tablespoons fresh parsley, chopped
    • 1 tablespoon fresh thyme leaves
    • Salt and pepper to taste
    • Extra Parmesan, shaved for garnish
    • Microgreens or fresh herbs for garnish
    • Drizzle of olive oil for garnish

    1. Preheat oven to 425°F (220°C).
    2. Combine diced carrots, parsnips, sweet potato, and golden beet with olive oil, smoked paprika, sea salt, and black pepper on a baking sheet. Spread in a single layer and roast for 25-30 minutes, stirring halfway through, until golden and tender.
    3. While the vegetables are roasting, heat olive oil and butter in a large skillet over medium heat. Add finely diced onion and sauté for 3-4 minutes until translucent. Stir in minced garlic and cook for an additional minute.
    4. Add orzo to the pan and toast for 2 minutes, stirring continuously. Pour in the dry white wine and stir until mostly absorbed.
    5. Add warm vegetable broth one cup at a time, stirring frequently and allowing each addition to be absorbed before adding more. Continue this process until the orzo is creamy and al dente, about 15 minutes.
    6. Fold in the roasted root vegetables, Parmesan, goat cheese, lemon zest, parsley, and thyme. Adjust seasoning with salt and pepper to taste.
    7. Serve hot, topped with extra shaved Parmesan, microgreens, and a drizzle of olive oil.

    Notes

    • Ensure the vegetable broth is warm before adding it to the orzo for better absorption.
    • Feel free to substitute any root vegetables based on availability or preference.
    • Prep Time: 15 minutes
    • Cook Time: 45 minutes
    • Category: Main Dish
    • Method: Roasting and stovetop cooking
    • Cuisine: Italian

    Nutrition

    • Serving Size: 1 cup
    • Calories: 450
    • Sugar: 4g
    • Sodium: 600mg
    • Fat: 18g
    • Saturated Fat: 7g
    • Unsaturated Fat: 6g
    • Trans Fat: 0g
    • Carbohydrates: 59g
    • Fiber: 5g
    • Protein: 14g
    • Cholesterol: 30mg

    Sharing is caring!

  • Keto Low Carb Steak Gorgonzola Alfredo Spaghetti Squash

    Keto Low Carb Steak Gorgonzola Alfredo Spaghetti Squash


    Introduction to Keto Low Carb Steak Gorgonzola Alfredo Spaghetti Squash

    Hey there, fellow kitchen adventurers! I know life can get hectic, juggling family, work, and everything in between. That’s why I’m so excited to share my Keto Low Carb Steak Gorgonzola Alfredo Spaghetti Squash with you. It’s a delightful, hearty dish that not only satisfies your cravings but is also easy to prepare on those busy nights.

    Imagine impressing your loved ones with this scrumptious meal, loaded with flavor and nutrition. Trust me; this dish will quickly become one of your go-to family favorites!

    Why You’ll Love This Keto Low Carb Steak Gorgonzola Alfredo Spaghetti Squash

    This Keto Low Carb Steak Gorgonzola Alfredo Spaghetti Squash is a true gem for busy weeks. Not only does it come together in about an hour, but it’s also a one-dish wonder, making cleanup a breeze!

    The rich flavors meld beautifully, offering comfort without the carb load. Plus, it’s a fantastic way to sneak in veggies for the family while keeping everyone satisfied. You’ll love every bite!

    Ingredients in Keto Low Carb Steak Gorgonzola Alfredo Spaghetti Squash

    Let’s gather our ingredients for this delicious dish! Each item plays a crucial role in creating that unforgettable taste experience. Feel free to adjust ingredients based on your taste or what you’ve got on hand. Here’s what you’ll need:

    • Spaghetti Squash: This is our star ingredient, a perfect low-carb pasta substitute. Roasting it gives a lovely texture and holds all the creamy goodness.
    • Steak: I like using a good cut, like sirloin or ribeye, for flavor and tenderness. It’s the protein powerhouse of our dish!
    • Salt and Black Pepper: These staples enhance the flavors of all ingredients. Just remember to season as you go.
    • Vegetable Oil: A drizzle of oil helps to roast the squash evenly and adds that nice golden color.
    • Frozen or Fresh Spinach: A great way to sneak in greens! Frozen spinach is convenient; fresh gives a vibrant touch. Either works wonders.
    • Sundried Tomatoes: Their sweet, tangy flavor elevates the dish, adding depth. You can swap with fresh tomatoes if you prefer.
    • Gorgonzola Crumbles: This cheese brings a rich, sharp flavor that transforms our alfredo sauce into something special. Blue cheese can be a delightful alternative if you can’t find gorgonzola.
    • Mozzarella Cheese: Grated and sprinkled on top, it adds that melty goodness. You can use part-skim for a lighter option.
    • Unsalted Butter: Rich and creamy—it’s essential for making our alfredo sauce smooth and luxurious. It’s best to stick with unsalted to control the seasoning.
    • Heavy Cream: This creates the base of our alfredo sauce, giving it that indulgent richness we crave.
    • Ground Nutmeg: A pinch adds warmth and depth to the sauce. Make sure to use it sparingly; a little goes a long way!
    • Freshly Grated Parmesan Cheese: Essential for that cheesy flavor in the alfredo. Using fresh cheese helps it melt beautifully!

    For exact measurements and printing, scroll down to the end of this article. Prepare to embark on a flavorful culinary journey!

    How to Make Keto Low Carb Steak Gorgonzola Alfredo Spaghetti Squash

    Step 1: Preheat and Prep the Squash

    First, let’s set the stage for our delicious dish! Preheat your oven to 400°F. While it warms up, grab that spaghetti squash. Cut it in half lengthwise, and scoop out the seeds. Drizzle vegetable oil inside and sprinkle with salt and pepper. This simple prep makes a world of difference in flavor!

    Step 2: Season and Roast

    Place the seasoned squash cut-side down on a baking sheet. Roast it in the oven for about 30-40 minutes. You’ll know it’s ready when you can easily pierce the flesh with a fork. The aroma will tempt your taste buds, I promise!

    Step 3: Cook the Steak

    While the squash roasts, heat a skillet over medium-high heat. Season your steak generously with salt and black pepper. Sear the steak for about 4-5 minutes on each side, depending on thickness and your preferred doneness. You want it juicy, yet tender. Once done, let it rest before slicing.

    Step 4: Prepare the Alfredo Sauce

    In the same skillet, lower the heat to medium and add unsalted butter. Let it melt gently. Pour in the heavy cream, stirring as you go. Add the ground nutmeg, then gradually mix in the freshly grated Parmesan cheese. Keep stirring until you have a thick, creamy sauce. It’s the heart of our Keto Low Carb Steak Gorgonzola Alfredo dish!

    Step 5: Combine and Bake

    Now, it’s time for the magic to happen! Use a fork to fluff the inside of the roasted spaghetti squash. Combine the sliced steak, thawed spinach, sundried tomatoes, gorgonzola, and half the Alfredo sauce into each squash half. Oh, the colors are stunning! Top with mozzarella cheese, and bake for an extra 15 minutes to melt it all together.

    Step 6: Serve and Enjoy

    Finally, take your culinary masterpiece out of the oven. If you want that golden top, broil for an extra couple of minutes. Serve hot, drizzling on any leftover Alfredo sauce if desired. Watch your family devour this Keto Low Carb Steak Gorgonzola Alfredo Spaghetti Squash with delight!

    Tips for Success

    • Choose the Right Steak: Select cuts like ribeye or sirloin for their great flavor and tenderness.
    • Don’t Rush the Roasting: Ensure the squash is perfectly tender. Patience pays off, trust me!
    • Season Generously: Don’t skip on seasoning your steak and sauce for maximum flavor.
    • Adjust Creaminess: If you prefer a lighter sauce, add more cream or use less cheese.
    • Try Fresh Ingredients: Whenever possible, use fresh spinach and quality cheeses for the best taste.

    Equipment Needed

    • Sharp Knife: Ideal for cutting the spaghetti squash. A sturdy chef’s knife will work wonders.
    • Baking Sheet: A standard sheet will do. Line it with parchment paper for easy cleanup.
    • Skillet: A non-stick skillet makes steak cooking a breeze. Any heavy skillet works too.
    • Oven Mitts: Essential for handling hot dishes—safety first!
    • Mixing Bowl: Use a bowl for combining ingredients before filling the squash. A large bowl is perfect.

    Variations

    • Swap the Steak: Try using chicken, shrimp, or even grilled vegetables for a lighter option.
    • Cheese Options: If gorgonzola isn’t your favorite, substitute with feta or goat cheese for a tangy twist.
    • Vegetarian Version: Eliminate the steak altogether and load up on additional vegetables, like bell peppers or mushrooms.
    • Herbs and Spices: Add fresh herbs like basil or parsley to elevate flavors. A sprinkle of red pepper flakes can also add a bit of heat.
    • Nut-Free Option: If you’re avoiding nuts, ensure your cheese is nut-free and consider using almond milk instead of heavy cream for a lighter sauce.

    Serving Suggestions

    • Fresh Salad: Pair your dish with a crisp Caesar or arugula salad for a refreshing crunch.
    • Wine Pairing: A glass of light red, like Pinot Noir, complements the rich flavors beautifully.
    • Garnish: Sprinkle fresh herbs, like parsley or basil, on top for a pop of color and flavor.
    • Crusty Bread: Serve with a side of low-carb garlic bread for dipping into the creamy sauce.

    FAQs about Keto Low Carb Steak Gorgonzola Alfredo Spaghetti Squash

    Can I use a different type of squash? Absolutely! While spaghetti squash offers a lovely texture, you can substitute it with zucchini or butternut squash for a different culinary adventure.

    Is this dish suitable for meal prep? Yes! This Keto Low Carb Steak Gorgonzola Alfredo Spaghetti Squash can be made ahead of time and stored in the fridge. Just reheat the portions in the oven or microwave.

    How do I store leftovers? Store any leftovers in an airtight container in the fridge. They should be good for 3–4 days. Reheat thoroughly before serving!

    Can I make this with another protein source? For sure! Chicken, shrimp, or even tofu are excellent substitutes. Feel free to explore and find your favorite combination!

    What’s a keto-friendly side dish to serve with this? A light salad or grilled vegetables would pair nicely, maintaining the low-carb theme while adding freshness to your meal.

    Final Thoughts

    Cooking is more than just following a recipe—it’s connecting with family and creating memories. My Keto Low Carb Steak Gorgonzola Alfredo Spaghetti Squash brings joy to our dinner table. The balance of flavors, the warmth of the melted cheese, and the satisfaction of a healthy meal unite us. Whether it’s a weeknight dinner or a special gathering, this dish delights both the senses and the spirit. Trust me, once you’ve tried it, you’ll cherish every glorious bite and the love that went into making it. Happy cooking, my friends!


    Print

    clock clock iconcutlery cutlery iconflag flag iconfolder folder iconinstagram instagram iconpinterest pinterest iconfacebook facebook iconprint print iconsquares squares iconheart heart iconheart solid heart solid icon

    Description

    A delicious Keto Low Carb Steak Gorgonzola Alfredo Spaghetti Squash dish that is both savory and satisfying.


    • 1 spaghetti squash (23 pounds)
    • 1 pound steak
    • Salt
    • Black pepper
    • Vegetable oil
    • 3/4 cup frozen spinach chopped, thawed, drained (or 1.5 cups fresh chopped spinach)
    • 1/4 cup sundried tomatoes chopped or sliced
    • 4 ounces gorgonzola crumbles (or blue cheese) (approximately 3/4 cup)
    • 1 cup mozzarella cheese grated
    • 8 Tablespoons unsalted butter (1 stick, 1/4 pound)
    • 2 cups heavy cream
    • 1/4 teaspoon ground nutmeg
    • 1 1/2 cups freshly grated Parmesan cheese

    1. Preheat oven to 400F.
    2. Cut the spaghetti squash in half lengthwise, removing the seeds.
    3. Drizzle the inside with vegetable oil and season with salt and pepper.
    4. Place cut side down on a baking sheet and roast for 30-40 minutes until tender.
    5. Cook the steak seasoned with salt and pepper in a skillet to just shy of your preferred doneness.
    6. Prepare the alfredo sauce by heating butter and heavy cream, adding nutmeg, and stirring in Parmesan until melted.
    7. Fluff the interior of the roasted squash with a fork.
    8. Combine steak, spinach, sundried tomatoes, gorgonzola, and half of the alfredo sauce in the squash halves.
    9. Sprinkle mozzarella cheese on top and bake for an additional 15 minutes.
    10. Optionally, broil for a few minutes to brown the cheese.
    11. Serve with additional sauce or mix-ins if desired.

    Notes

    • Adjust seasoning based on the salinity of the cheese used.
    • Ensure steak is cooked properly for safety.
    • Prep Time: 15 minutes
    • Cook Time: 55 minutes
    • Category: Main Course
    • Method: Baking, Sautéing
    • Cuisine: American

    Nutrition

    • Serving Size: 1/4 of the recipe
    • Calories: 600
    • Sugar: 3g
    • Sodium: 800mg
    • Fat: 48g
    • Saturated Fat: 26g
    • Unsaturated Fat: 20g
    • Trans Fat: 0g
    • Carbohydrates: 10g
    • Fiber: 3g
    • Protein: 36g
    • Cholesterol: 150mg

    Sharing is caring!

  • Bacon Wrapped Green Bean Bundles

    Bacon Wrapped Green Bean Bundles


    Introduction to Bacon Wrapped Green Bean Bundles

    Life gets hectic, doesn’t it? Between juggling work, family, and everything in between, time often slips through our fingers. That’s where these stunning Bacon Wrapped Green Bean Bundles come to the rescue! They embody the perfect blend of savory goodness and effortless preparation. Honestly, they’re a dish that stands out at any gathering, ready to impress your loved ones. In just an hour, you can whip up this crowd-pleaser that’s sure to become a family favorite. Trust me; this recipe is a quick solution for all those busy days when you crave something delicious yet easy!

    Why You’ll Love This Bacon Wrapped Green Bean Bundles

    These Bacon Wrapped Green Bean Bundles are the superheroes of the appetizer world! They come together in a flash, making them perfect for our busy lives. The combination of crispy bacon and tender green beans creates a delicious harmony that tantalizes the taste buds. Plus, with minimal prep and cleanup, you can enjoy more time with loved ones. They’re a surefire way to elevate any meal without breaking a sweat!

    Ingredients for Bacon Wrapped Green Bean Bundles

    Preparing these delightful Bacon Wrapped Green Bean Bundles is a breeze! Let’s gather some truly wonderful ingredients. You know, the kind that make your heart sing and your taste buds dance!

    • Fresh green beans: These vibrant veggies add a crisp bite, making them the star of the show.
    • Thin-sliced bacon: Pot for thin slices to ensure they cook evenly, wrapping snugly around the green beans.
    • Honey French salad dressing: This sweet and tangy dressing infuses the bundles with flavor, bringing everything together beautifully.
    • Freshly ground black pepper: A dash of pepper adds a hint of spice, enhancing the overall delight of each bundle.

    If you’re feeling adventurous, you might try different dressings like balsamic or even a zesty lemon vinaigrette!

    For those looking for substitutions, turkey bacon can be a lighter alternative, though the texture will differ. You could also experiment with different herbs or spices if you want to jazz them up.

    Want to know exact quantities? Don’t worry! They’re all listed at the bottom of the article for easy printing.

    How to Make Bacon Wrapped Green Bean Bundles

    Now that we’ve gathered our delicious ingredients, let’s dive into the step-by-step process of creating these scrumptious Bacon Wrapped Green Bean Bundles. Trust me, it’s easier than you think!

    Preheat the Oven and Prepare the Bacon

    First things first, let’s get that oven preheated to 375 degrees. This ensures our bundles cook evenly, making them crispy and golden.

    While the oven warms up, lay the slices of bacon on a rimmed baking sheet. Space them out so they can cook evenly. We want to partially cook the bacon for about 8-10 minutes. This makes it easier to wrap around the green beans.

    After baking, be sure to let the bacon drain on paper towels. This little trick helps absorb excess grease, keeping your bundles from becoming soggy. Remember, we want that crispiness!

    Prepare the Green Beans

    Next up, it’s all about the green beans! Rinse them under cool water, snipping off the ends. This quick step makes them clean and ready for bundling.

    Fill a large pot with water and bring it to a boil. Once bubbling, toss the beans in for a quick blanch, about 3-5 minutes. You’re aiming for a bright green color, which means they’ll be perfectly tender without turning mushy.

    Once they’re blanched, drain the beans and immediately rinse them with cold water. This stops the cooking process and locks in that vibrant color!

    Assemble the Bacon Wrapped Green Bean Bundles

    Now it’s time to play chef! Grab your green beans and divide them into bundles of 5-7 beans each. This size is perfect for wrapping.

    Take your halved bacon slices and wrap one piece around each green bean bundle. Secure it with a toothpick, making sure everything stays snug and tight. When you bite into these bundles later, you’ll appreciate that all the goodness stays inside!

    Drizzle with Dressing and Bake

    Once all your bundles are wrapped, place them in a glass baking dish. Now, it’s time to drizzle the lovely honey French dressing over the bundles.

    Make sure each bundle is coated well. This sweet dressing adds layers of flavor, bringing out the best in every bite. Sprinkle some freshly ground black pepper on top to add that perfect touch of spice.

    Pop the dish into the oven and bake for about 45 minutes. Halfway through, give the bundles a little turn. This ensures every side gets that delightful crispiness we crave in bacon!

    Serve and Enjoy

    Once the bacon is crispy and the bundles look tempting, take them out of the oven. Carefully remove the toothpicks and transfer the bundles to a beautiful serving platter.

    As you serve them up, imagine the smiles on your loved ones’ faces. They won’t just taste the flavors; they’ll feel the love you put into making this special dish. Just like that, you’ve transformed simple ingredients into a savory delight everyone will adore!

    Tips for Success

    • Always choose fresh, crisp green beans for the best texture.
    • Partially cooking the bacon is key for that perfect crispiness when baked.
    • Feel free to prep the bundles ahead of time; store them in the fridge until you’re ready to bake.
    • Experiment with different dressings to suit your taste; don’t be afraid to get creative!
    • Using a meat thermometer ensures the bacon reaches the desired doneness of 165°F.

    Equipment Needed

    • Rimmed baking sheet: Essential for cooking bacon; a standard sheet will do!
    • Glass baking dish: Perfect for assembling bundles; ceramic works too!
    • Toothpicks: Necessary for securing the bacon; kitchen skewers can serve as an alternative.
    • Large pot: Needed for blanching green beans; any sizable pot will work just fine.
    • Colander: Useful for draining beans after blanching; or a simple sieve will suffice!

    Variations for Bacon Wrapped Green Bean Bundles

    • Barbecue twist: Swap the honey French dressing for a smoky barbecue sauce for a different flavor profile that’s sure to be a hit!
    • Spicy kick: Add a pinch of cayenne pepper or a drizzle of Sriracha over the bundles before baking to spice things up.
    • Herb-infused: Incorporate fresh herbs like rosemary or thyme when wrapping the bacon around the green beans for a fragrant twist.
    • Cheesy delight: Sprinkle grated Parmesan or cheddar cheese over the bundles before baking for an extra layer of deliciousness.
    • Vegetarian version: Use tempeh or vegan bacon as a substitute for traditional bacon, preserving the savory taste while keeping it plant-based.

    Serving Suggestions

    • Pair with a fresh garden salad for a light, wholesome meal.
    • Serve alongside roasted potatoes or sweet potatoes for a heartier option.
    • Complement with a crisp white wine, like Sauvignon Blanc, to enhance the savory flavors.
    • For a vibrant touch, garnish with fresh parsley or chives before serving.

    FAQs about Bacon Wrapped Green Bean Bundles

    As you prepare to create these delightful Bacon Wrapped Green Bean Bundles, you might have a few questions swirling around in your mind. Let’s address some common queries to help ease your cooking journey!

    Can I make these Bacon Wrapped Green Bean Bundles ahead of time?
    Absolutely! You can prepare the bundles and store them in the refrigerator. Just ensure you wrap and secure them well. Bake them fresh when you’re ready to serve!

    What other dressings can I use besides honey French?
    Experimenting is part of the fun! Try balsamic vinaigrette or a zesty lemon dressing for a unique twist. Each will bring its own delightful flavor to the bundles.

    Can these bundles be made gluten-free?
    Yes! The ingredients are naturally gluten-free, so long as you choose a dressing that doesn’t contain gluten. Always check labels to be sure.

    Can I use frozen green beans instead of fresh?
    While fresh green beans yield the best texture, frozen can work in a pinch. Just be sure to thaw and drain them well before wrapping.

    How do I store leftovers of Bacon Wrapped Green Bean Bundles?
    Store any leftovers in an airtight container in the fridge. They can be reheated in the oven for a few minutes, achieving that lovely crispiness once again!

    Final Thoughts

    Creating these Bacon Wrapped Green Bean Bundles has been a heartwarming experience, filled with joyful moments and deliciousness. This recipe brings together the best of both worlds: satisfying flavors and effortless preparation. Whether you’re hosting a dinner party or enjoying a cozy family meal, these bundles are sure to elevate the occasion. I love watching the smiles on my loved ones’ faces as they take that first crispy bite. With each bundle, you’re not just serving a dish; you’re sharing love and warmth, creating beautiful memories that linger long after the last bite. Trust me; they’ll become a treasured favorite!


    Print

    clock clock iconcutlery cutlery iconflag flag iconfolder folder iconinstagram instagram iconpinterest pinterest iconfacebook facebook iconprint print iconsquares squares iconheart heart iconheart solid heart solid icon

    Description

    Bacon Wrapped Green Bean Bundles are a savory delight!


    • ½ pound fresh green beans
    • 6 slices thin-sliced bacon
    • ½ cup honey French salad dressing
    • Freshly ground black pepper

    1. Preheat oven to 375 degrees. Partially cook bacon by placing slices on a rimmed baking sheet and baking for 8-10 minutes. Remove from oven and drain on paper towels.
    2. Rinse green beans and snip off the ends. Bring a large pot of water to a boil, then add the beans. Blanch the beans for 3-5 minutes until bright green. Drain and rinse with cold water to stop cooking.
    3. Divide the beans into bundles of 5-7 beans each. Cut bacon slices in half and wrap one half around a bean bundle, securing it with a toothpick. Place the bundles in a glass baking dish.
    4. Drizzle the bundles with honey French dressing, ensuring the bacon is coated. Season with freshly ground black pepper.
    5. Bake at 375 degrees for about 45 minutes, turning midway through, until the bacon is crispy.
    6. Remove the bundles from the baking dish and transfer them to a serving platter. Serve immediately.

    Notes

    • Ensure the bacon is cooked to the desired crispiness before serving.
    • These bundles can be prepared ahead of time and baked just before serving.
    • Prep Time: 15 minutes
    • Cook Time: 45 minutes
    • Category: Appetizer
    • Method: Oven Baking
    • Cuisine: American

    Nutrition

    • Serving Size: 1 bundle
    • Calories: 150
    • Sugar: 4g
    • Sodium: 600mg
    • Fat: 10g
    • Saturated Fat: 3g
    • Unsaturated Fat: 5g
    • Trans Fat: 0g
    • Carbohydrates: 7g
    • Fiber: 2g
    • Protein: 6g
    • Cholesterol: 15mg

    Sharing is caring!

  • Butter Pecan Cinnamon Buns

    Butter Pecan Cinnamon Buns


    Introduction to Butter Pecan Cinnamon Buns

    Life can be a whirlwind, can’t it? Between bustling mornings and chaotic afternoons, there often isn’t a moment to spare. That’s where my Butter Pecan Cinnamon Buns come into play. They’re the perfect balance of sweet and comforting—ideal for breakfast or a delightful treat to share with loved ones. Imagine the aroma of cinnamon and pecans wafting through your kitchen, welcoming everyone home. These buns are easy to whip up, making them a quick solution for a busy day, or a splendid indulgence to impress your friends. Trust me, these will quickly become a favorite!

    Why You’ll Love This Butter Pecan Cinnamon Buns

    Getting a delicious breakfast or dessert on the table doesn’t have to be a chore. These Butter Pecan Cinnamon Buns come together with minimal fuss, giving you more time to enjoy with your family. The warm, gooey filling is a treat for the senses, satisfying both sweet cravings and comfort needs. Plus, the heavenly butter pecan sauce takes it over the top, turning an ordinary day into something special!

    Ingredients for Butter Pecan Cinnamon Buns

    Before we dive into this charming culinary adventure, let’s gather our ingredients for these heavenly Butter Pecan Cinnamon Buns. Each element plays a role in creating that warm, delicious embrace with every bite. Don’t worry; I’ll keep it simple yet informative!

    • Whole Milk: This creamy base helps activate the yeast and gives our buns a tender texture. Choose full-fat for that rich flavor.
    • Unsalted Butter: Using soft butter means easy mixing! It enhances flavor while keeping our buns buttery and moist.
    • All-Purpose Flour: The backbone of our dough, it provides structure. You can substitute with a gluten-free blend if needed.
    • Rapid Rise Yeast: This is the magic that helps our dough rise quickly. Just watch it transform into fluffy goodness!
    • Granulated Sugar: A touch of sweetness that also activates the yeast. It’s the little things!
    • Salt: Balances flavors and enhances the overall taste. Don’t skip this; it’s a flavor booster!
    • Large Egg: Eggs add richness and moisture to the dough, helping bind everything together.
    • Light Brown Sugar: We’ll use this for the filling—its molasses undertones add that signature caramel flavor.
    • Ground Cinnamon: The star of the show! It brings that warm spice we all adore in cinnamon rolls.
    • Ground Ginger, Nutmeg, and Cloves: These spices complement the cinnamon beautifully, giving a warm and cozy blend of flavors.
    • Pecan Halves and Chopped Pecans: They provide a delightful crunch and nutty sweetness in our buns and the butter pecan sauce.
    • Heavy Cream: For our butter pecan sauce, it adds richness. Replace with coconut milk for a dairy-free option.
    • Vanilla Extract: Just a splash gives our buns a warm undertone that elevates their flavor.

    Specific measurements can be found at the bottom of the article for your convenience, so let’s roll up our sleeves and get ready for some fun in the kitchen!

    How to Make Butter Pecan Cinnamon Buns

    Now comes the fun part! Making these Butter Pecan Cinnamon Buns is a delightful experience that fills your kitchen with warm, sweet aromas. Let’s get started step by step!

    Preparing the Dough

    To kick things off, we’ll need to mix our ingredients. Start by warming the milk gently until it’s barely boiling. Remove it from heat and add the very soft butter, stirring until it melts in. This mixture should cool to about 115 to 120 degrees Fahrenheit. Now, in a stand mixer, combine 2 and 1/2 cups of flour, rapid rise yeast, granulated sugar, and salt. Give it a good whisk to dissolve everything. Next, add in that lovely egg and slowly pour in your yeast mixture. Watch how it all comes together!

    Switch to the dough hook and slowly add the remaining flour, a little at a time. You want a dough that’s smooth but slightly sticky. If it starts sticking too much, sprinkle in a bit of flour as you knead. Simply delightful!

    Letting the Dough Rise

    Now it’s time for a little magic! Cover your dough with saran wrap and let it rise in a warm spot. This should take about 60 minutes, or until it’s doubled in size. Trust me, this step is crucial for those fluffy buns you crave!

    While you wait, you can enjoy a nice cup of coffee or catch up on a few moments of peace. You deserve it!

    Creating the Filling

    While the dough is rising, let’s prepare a heavenly filling! Grab a medium bowl and mix together the light brown sugar, ground cinnamon, and other spices along with softened butter. You want this to resemble a thick paste that spreads easily. If it’s just a bit too thick, add a splash of milk to loosen it up. This filling is the heartbeat of our Butter Pecan Cinnamon Buns!

    Shaping the Buns

    Once your dough has risen beautifully, it’s time to roll it out! On a lightly floured surface, stretch the dough into a large rectangle that’s about 16×9 inches. Take that luscious filling and spread it over the center, leaving a three-inch border all around.

    Now, tightly roll up the dough and pinch the seams to seal it. Grab some dental floss for cutting—seriously, it’s the best tool for a clean cut! Slice the dough into 12 equal pieces. Place them cut side up in your prepared pan and cover again with saran wrap. Let them rise for another 30 minutes as you preheat your oven.

    Baking the Buns

    Preheat your oven to 350 degrees Fahrenheit. Once the buns have puffed up nicely, it’s time to bake them! Slide them in and let them bake for 18-20 minutes or until they’re lightly browned on top and edges. Your kitchen will smell heavenly, and you’ll know they’re ready when they look like golden little pillows of joy. Don’t forget to let them cool for a few minutes.

    Making the Butter Pecan Sauce

    Meanwhile, let’s whip up that irresistible butter pecan sauce. In a saucepan over medium heat, melt the unsalted butter. Stir in the packed dark brown sugar and cook until it bubbles—it should take about 2 minutes. Now, add in the heavy cream, ground cinnamon, and salt. Whisk everything together until smooth, then fold in the pecans. This is where the magic happens! Once combined, remove from heat, stir in the vanilla extract, and get ready for the final touch to your buns!

    Tips for Success

    • Ensure your milk isn’t too hot; this preserves yeast activity, so check the temperature!
    • Use dental floss to slice the buns for clean cuts and a beautiful presentation.
    • For an extra touch, add chopped chocolate to the filling for a sweet surprise!
    • Feel free to experiment with your spice blend for a unique twist!

    Equipment Needed for Butter Pecan Cinnamon Buns

    • Stand Mixer: While a hand mixer works, a stand mixer with a dough hook makes life easier.
    • Baking Dish: A 9×13-inch pan is ideal, but any similar-sized dish will suffice.
    • Rolling Pin: A must for flattening dough; a wine bottle can work in a pinch!
    • Saran Wrap: Essential for covering rising dough; you can also use a kitchen towel.

    Variations of Butter Pecan Cinnamon Buns

    • Chocolate Chip Variation: Add a generous handful of chocolate chips to the filling for a deliciously sweet twist that chocolate lovers will adore.
    • Maple Pecan Buns: Replace the brown sugar in the filling and sauce with maple syrup for a delightful maple flavor that pairs perfectly with pecans.
    • Vegan Options: Substitute the milk with almond or coconut milk, use dairy-free butter, and replace the egg with a flaxseed egg for a vegan-friendly treat.
    • Spicy Twist: Add a pinch of cayenne pepper or a dash of cardamom to the spice mix for a unique kick that elevates the flavor profile.
    • Fruit Add-Ins: Fold in some dried fruit, like cranberries or cherries, into the filling for a burst of tart sweetness.

    Serving Suggestions for Butter Pecan Cinnamon Buns

    • Fresh Brewed Coffee: A rich cup of coffee pairs perfectly with your warm, gooey buns.
    • Maple Syrup Drizzle: For an extra indulgence, serve with a drizzle of maple syrup on top.
    • Fresh Fruit: Brighten your plate with some fresh berries or slices of banana.
    • Presentation: Stack your buns on a beautiful platter and dust with powdered sugar for a stunning look.

    FAQs about Butter Pecan Cinnamon Buns

    Let’s tackle some frequently asked questions about these irresistible Butter Pecan Cinnamon Buns! I know some queries might pop up while you’re baking these delightful treats, so here are some answers to guide you along the way.

    Can I prepare the dough in advance? Absolutely! Make the dough, let it rise, and shape the buns. Then, cover them and refrigerate overnight. Just remember to bring them back to room temperature before baking!

    How should I store leftover buns? Keep them in an airtight container at room temperature for up to three days. If you want to keep them longer, pop them in the refrigerator. Reheat them in the oven or microwave before serving.

    Can I freeze these buns? Yes, you can freeze them! After baking, let them cool completely. Then, wrap them tightly in plastic wrap and store them in an airtight container. They can last up to three months in the freezer.

    What can I use instead of pecans? If you’re not a fan of pecans, try walnuts, almonds, or even hazelnuts for a lovely twist. Each nut brings its own flavor to the party!

    How do I make these gluten-free? Simply swap out regular flour for a gluten-free all-purpose blend. Make sure it contains xanthan gum, which helps mimic the gluten structure found in traditional flour.

    Final Thoughts

    There’s something truly magical about making Butter Pecan Cinnamon Buns. From the moment you warm the milk to the last sweet bite, you create joy in every layer. These tender buns bring the warmth of home cooking right to your kitchen, making busy mornings feel special. I love how they spark conversations and create memories with family and friends over coffee. Whether for breakfast or a cozy dessert, they never fail to impress. So roll up your sleeves and embrace the delightful experience of baking. I promise, a warm bun with that buttery pecan drizzle is pure happiness on a plate!


    Print

    clock clock iconcutlery cutlery iconflag flag iconfolder folder iconinstagram instagram iconpinterest pinterest iconfacebook facebook iconprint print iconsquares squares iconheart heart iconheart solid heart solid icon

    Description

    Delicious Butter Pecan Cinnamon Buns topped with a rich butter pecan sauce, perfect for breakfast or dessert.


    • 1 cup whole milk
    • 4 tablespoons unsalted butter, very soft
    • 3 and 1/2 cups all-purpose flour, divided
    • (1) 0.25 oz package rapid rise yeast
    • 3 tablespoons granulated sugar
    • 3/4 teaspoon salt
    • 1 large egg, at room temperature
    • 1 cup light brown sugar
    • 1 tablespoon ground cinnamon
    • 3/4 teaspoon ground ginger
    • 1/4 teaspoon nutmeg
    • 1/4 teaspoon cloves
    • 1/2 cup butter, VERY soft
    • 1/2 cup unsalted butter (for the butter pecans)
    • 3/4 cup dark brown sugar, packed
    • 1/4 teaspoon ground cinnamon (for the butter pecans)
    • 1/3 cup heavy cream
    • 1/4 teaspoon salt (for the butter pecans)
    • 1 and 1/2 cups pecan halves
    • 1/2 cup pecans, roughly chopped
    • 2 teaspoons vanilla extract

    1. Lightly grease a 9×13-inch baking dish with nonstick baking spray. Set aside.
    2. In a small saucepan, heat the milk over medium-high just until it comes to a boil. Remove from heat and add in the butter. Stir until melted, then cool until between 115 and 120 degrees (F).
    3. In the bowl of a stand mixer, combine 2 and 1/2 cups of the flour, yeast, sugar, and salt; whisk to combine. Whisk in the egg and slowly pour in the milk/butter mixture, mixing well.
    4. Using the dough hook, mix on low speed and gradually add remaining flour, a 1/4 cup at a time, mixing well and scraping down the sides as needed.
    5. Once all flour has been added, increase mixer speed to medium and beat for 5 minutes.
    6. Remove dough and knead on a lightly floured surface until smooth, about 5 or 6 times.
    7. Place the dough back in the bowl, cover with saran wrap, and let rise for 60 minutes, or until doubled in size.
    8. In a medium bowl, mix together brown sugar, spices, and softened butter until combined, resembling a thick paste.
    9. Once dough has risen, roll it out into a large rectangle (about 16 x 9-inches).
    10. Spread the butter/sugar mixture in the middle of the dough, leaving a three-inch barrier around the edges.
    11. Tightly roll up the dough, sealing the seams, and cut into 12 equal pieces.
    12. Place the pieces cut side up in the prepared pan, cover tightly with saran wrap, and let rise for another 30 minutes while preheating the oven to 350 degrees (F).
    13. Bake for 18-20 minutes until lightly browned on tops and edges. Let cool for a few minutes.
    14. In a saucepan over medium heat, melt butter for pecans, then stir in brown sugar and cook until bubbling, about 2 minutes.
    15. Add cinnamon, heavy cream, and salt, whisk to combine, then fold in pecans until coated. Remove from heat and stir in vanilla.
    16. Pour the butter pecans on top of the cinnamon rolls and serve!

    Notes

    • Make sure the milk is not too hot when adding the butter as it will hinder the yeast activation.
    • Use dental floss to slice the buns for a clean cut and nice appearance.
    • Can be served warm or at room temperature.
    • Prep Time: 90 minutes
    • Cook Time: 20 minutes
    • Category: Dessert
    • Method: Baking
    • Cuisine: American

    Nutrition

    • Serving Size: 1 bun
    • Calories: 350
    • Sugar: 20g
    • Sodium: 350mg
    • Fat: 15g
    • Saturated Fat: 8g
    • Unsaturated Fat: 5g
    • Trans Fat: 0g
    • Carbohydrates: 50g
    • Fiber: 2g
    • Protein: 5g
    • Cholesterol: 40mg

    Sharing is caring!

  • Crockpot Chicken Pot Pie Casserole

    Crockpot Chicken Pot Pie Casserole


    Introduction to Crockpot Chicken Pot Pie Casserole

    There’s something utterly comforting about a warm casserole, especially when life gets hectic. That’s where my Crockpot Chicken Pot Pie Casserole comes in. It’s like a warm hug on a chilly evening, perfect after a long day of juggling work and family. I know how precious those evenings can be, filled with chaos and cravings. This recipe is a lifesaver—easy to prep, hearty, and oh so delicious. Just toss the ingredients in your crockpot, and let it work its magic while you unwind. Trust me; your family will be begging for seconds!

    Why You’ll Love This Crockpot Chicken Pot Pie Casserole

    Imagine coming home to the delightful aroma of Crockpot Chicken Pot Pie Casserole wafting through your kitchen. It’s not just about taste—it’s about ease, too! This dish is a one-pot wonder that requires minimal effort. In just a few hours, you’ll have a comforting meal that warms not only your stomach but your soul. Plus, it’s a fantastic way to sneak in those veggies your kids might resist!

    Ingredients for Crockpot Chicken Pot Pie Casserole

    Let’s gather what we need for this delicious dish. The beauty of Crockpot Chicken Pot Pie Casserole is in its simplicity. Here’s a rundown of the ingredients:

    • Boneless, skinless chicken breasts: These lean cuts make the perfect base for the casserole. They’re easy to shred after cooking and absorb all the lovely flavors.
    • Cream of chicken soup: This is where the creaminess comes from! It acts as a rich sauce, adding a savory depth. If you’re feeling adventurous, you can try a homemade version too!
    • Frozen mixed vegetables: A convenient choice that saves prep time. You can use peas, carrots, or corn. Fresh veggies? Go for it! They add a vibrant crunch.
    • Chicken broth: This liquid adds moisture and richness to the dish. Opt for low-sodium if you’re watching your salt intake.
    • Refrigerated biscuit dough: This is the crowning glory! Placed on top, the biscuits bake into a golden, fluffy crust that everyone loves. You can swap for crescent rolls if you want a twist.

    For the exact quantities, don’t worry—you’ll find them at the bottom of the article, along with a handy printable version for your kitchen!

    How to Make Crockpot Chicken Pot Pie Casserole

    Step 1: Prepare the Base

    Start your culinary adventure by placing the boneless, skinless chicken breasts in your crockpot.

    Add the can of cream of chicken soup to create that luscious, creamy texture. Next, toss in the frozen mixed vegetables, filling the pot with colorful goodness.

    Pour in the chicken broth, which will keep everything moist as it cooks. Trust me; this base is the backbone of your Crockpot Chicken Pot Pie Casserole. Stir gently to combine, and you’re all set for the next step!

    Step 2: Cook the Mixture

    Now, it’s time to let the magic happen! Cover the crockpot and set it on low for about 4-5 hours.

    This is when the chicken becomes tender and the flavors intermingle beautifully.

    Once the time’s up, grab a couple of forks and shred that chicken right in the pot.

    You can practically hear it singing as it absorbs all those savory notes. It’s a simple step that elevates your chicken casserole to new heights!

    Step 3: Add Biscuit Topping

    Time to crown your masterpiece! Open up the refrigerated biscuit dough and place the pieces evenly on top of the chicken mixture.

    This will create a heavenly, fluffy topping as they bake.

    You’ll want to cover the crockpot again—set it to cook for an additional 30 minutes.

    Keep an eye on it; you’re looking for golden-brown, delicious biscuits.

    When they’re perfect, dig in and prepare for smiles all around as you serve up your Crockpot Chicken Pot Pie Casserole!

    Tips for Success

    • Ensure your crockpot is set to low for the best texture; high heat can dry out the chicken.
    • Don’t skip the shredding step; it allows the chicken to soak up the sauce, enriching the flavor.
    • Experiment with herbs like thyme or rosemary for added depth—fresh or dried works!
    • If you’re short on time, use rotisserie chicken; just shred and mix it in.
    • For a crispy topping, pop the casserole under the broiler for a few minutes after cooking!

    Equipment Needed for Crockpot Chicken Pot Pie Casserole

    • Crockpot: Essential for cooking this dish. A slow cooker works if you don’t have a crockpot.
    • Cutting board and knife: For chopping any fresh veggies you decide to add.
    • Measuring cups: Handy for accurate ingredient portions, though you could eyeball it if you’re feeling adventurous!
    • Forks: Perfect for shredding the chicken right in the pot.
    • Serving spoon: To dish out those hearty portions of deliciousness!

    Variations of Crockpot Chicken Pot Pie Casserole

    • Turkey Swap: Got leftover turkey? Use it instead of chicken for a post-holiday twist!
    • Vegetarian Delight: Replace the chicken with a medley of mushrooms and faux chicken strips for a meatless option.
    • Spicy Kick: Add diced jalapeños or a splash of hot sauce for a touch of heat that spices things up!
    • Cheesy Goodness: Stir in some shredded cheddar cheese after shredding the chicken for a rich and creamy addition.
    • Healthier Version: Use low-fat cream of chicken soup or Greek yogurt instead for a lighter dish.

    Serving Suggestions for Crockpot Chicken Pot Pie Casserole

    • Pair with a crisp green salad for a fresh contrast to the warmth of the casserole.
    • Serve with homemade garlic bread to soak up every delightful bite.
    • For a drink, try a light white wine or infused lemonade.
    • Garnish with fresh herbs like parsley for a pop of color and flavor.
    • Use fun plates to boost your family’s excitement about dinner!

    FAQs about Crockpot Chicken Pot Pie Casserole

    Can I use frozen chicken breasts in this recipe?

    Absolutely! You can throw frozen chicken breasts directly into the crockpot. Just remember that it may require an extra hour of cooking time for them to reach the proper temperature. The flavors will meld beautifully, making it just as delicious!

    What if I don’t have cream of chicken soup?

    No worries! You can use any cream soup variant, like cream of mushroom or even homemade versions. It’s all about getting that creamy texture in your Crockpot Chicken Pot Pie Casserole.

    Can I make this a dairy-free dish?

    Yes, you can! Look for dairy-free cream soup options or use a mixture of blended silken tofu and vegetable broth for a similar creamy consistency. You’ll still enjoy all the comforting flavors!

    How long will leftovers last in the fridge?

    Your leftover chicken casserole will stay good in an airtight container for up to three days in the fridge. Just reheat in the microwave or oven, and enjoy the cozy taste all over again!

    Can I freeze this casserole?

    Definitely! Freeze it before adding the biscuit topping. Thaw in the fridge overnight and then cook as directed. It’s a great make-ahead meal that’s ready when you are!

    Final Thoughts on Crockpot Chicken Pot Pie Casserole

    There’s a special kind of joy that comes from sharing a meal that warms both the belly and the heart. My Crockpot Chicken Pot Pie Casserole is more than just a dish; it’s a beautiful reminder of cozy family nights. The aroma that fills your kitchen, the laughter around the table, and that first warm bite—it all adds up to a truly delightful experience. So, whether you’re cooking for your family or hosting friends, this recipe offers comfort and love. Dive in, savor each bite, and let the happiness flow through every delicious spoonful!


    Print

    clock clock iconcutlery cutlery iconflag flag iconfolder folder iconinstagram instagram iconpinterest pinterest iconfacebook facebook iconprint print iconsquares squares iconheart heart iconheart solid heart solid icon

    Description

    A comforting and hearty casserole made with chicken, vegetables, and biscuit topping cooked in a crockpot.


    • 1 lb boneless, skinless chicken breasts
    • 1 can (10.5 oz) cream of chicken soup
    • 2 cups frozen mixed vegetables
    • 1/2 cup chicken broth
    • 1 can refrigerated biscuit dough

    1. Place chicken, cream of chicken soup, mixed vegetables, and chicken broth in the crockpot.
    2. Cook on low for 4-5 hours, then shred the chicken.
    3. Place the biscuit dough on top and cook for another 30 minutes until the biscuits are golden brown.

    Notes

    • Feel free to use fresh vegetables if you prefer.
    • Leftovers can be stored in an airtight container in the refrigerator for up to 3 days.
    • Prep Time: 10 minutes
    • Cook Time: 5 hours 30 minutes
    • Category: Dinner
    • Method: Crockpot
    • Cuisine: American

    Nutrition

    • Serving Size: 1/6 of the casserole
    • Calories: 350
    • Sugar: 2g
    • Sodium: 800mg
    • Fat: 14g
    • Saturated Fat: 5g
    • Unsaturated Fat: 8g
    • Trans Fat: 0g
    • Carbohydrates: 36g
    • Fiber: 2g
    • Protein: 20g
    • Cholesterol: 60mg

    Sharing is caring!

  • Fudgy Pumpkin Chocolate Chip Bars

    Fudgy Pumpkin Chocolate Chip Bars


    Introduction to Fudgy Pumpkin Chocolate Chip Bars

    As the leaves turn and the air becomes crisp, the joy of baking fills my heart with warmth. Fall is the perfect season to gather my family and whip up something special. That’s where these Fudgy Pumpkin Chocolate Chip Bars come into play! They’re a fantastic treat that captures the essence of autumn in every bite. I love how quick and easy they are to prepare, making them ideal for busy moms like us. Bake a batch and watch your loved ones light up with delight—it’s a delicious way to embrace the season!

    Why You’ll Love This Fudgy Pumpkin Chocolate Chip Bars

    These Fudgy Pumpkin Chocolate Chip Bars are a glorious fusion of chocolate and pumpkin—an irresistible pairing that brings warmth to your soul. Their fudgy texture is simply delightful, making each bite a heavenly experience. Not only are they quick and easy to whip up, but they’re also perfect for busy moms. You can satisfy your sweet cravings without the fuss, leaving you more time to enjoy precious moments with your family.

    Ingredients for Fudgy Pumpkin Chocolate Chip Bars

    Gathering the right ingredients is the first step to creating these mouthwatering Fudgy Pumpkin Chocolate Chip Bars. Here’s what you’ll need:

    • 1 cup butter (2 sticks): Adds richness and a smooth texture that makes the bars delightfully fudgy.
    • 1 tablespoon pumpkin pie spice: This spice mix brings that cozy, warm flavor synonymous with fall.
    • 1 cup granulated sugar and 1 cup brown sugar (packed): A perfect balance of sweetness that enhances the pumpkin’s natural flavor.
    • 1 (8-oz) cup pumpkin puree (not pumpkin pie filling): Using pure pumpkin puree is essential for achieving the right consistency and flavor.
    • 2 teaspoons vanilla: A dash of vanilla elevates the overall taste, making your dessert even more irresistible.
    • 1/2 teaspoon kosher salt: Enhances the sweetness and adds depth to the flavor.
    • 1 large egg: Acts as a binder, bringing all the ingredients together.
    • 2 cups all-purpose flour (spooned and leveled): Necessary for structure without compromising the fudginess.
    • 1 teaspoon baking powder: Helps the bars rise just enough for that perfect texture.
    • 1 cup semisweet and 1 cup dark chocolate chips: Provide bursts of chocolatey goodness throughout the bars.

    If you’re interested in precise measurements, check out the bottom of the article. Happy baking!

    How to Make Fudgy Pumpkin Chocolate Chip Bars

    Creating these Fudgy Pumpkin Chocolate Chip Bars is a delightful experience that you can enjoy, even on the busiest of days. Let’s dive into the steps!

    Step 1: Prepare Your Pan

    First things first, you need to get your baking pan ready. Grab a 9×13 inch pan, then either spray it with nonstick spray or line it with parchment paper. This will help the bars come out easily and prevent sticking. A little prep goes a long way!

    Step 2: Melt the Butter

    Next, place 1 cup of butter in a medium saucepan. Heat it over medium heat until it melts, allowing it to become golden and fragrant. Butter is the base for our fudgy texture—don’t rush this step!

    Step 3: Mix in Pumpkin Pie Spice

    Once the butter is melted, add 1 tablespoon of pumpkin pie spice. Letting it toast in the warm butter for a few seconds releases its fabulous aroma. This little extra step ensures that your bars will have that irresistible fall flavor!

    Step 4: Combine Sugars

    Now, stir in 1 cup of granulated sugar and 1 cup of packed brown sugar. Mix until everything is blended together. The combination of sugars creates the perfect balance of sweetness that enhances the pumpkin flavor. You’ll love the way it smells!

    Step 5: Add Pumpkin Puree and Vanilla

    Here comes the star of the show! Add 1 cup of pumpkin puree and mix in 2 teaspoons of vanilla extract. Remember to use pure pumpkin puree for the best results. This mixture will give your bars their signature fudgy texture and rich taste.

    Step 6: Incorporate Egg

    Next, crack in 1 large egg and mix vigorously until everything is well combined. The egg acts as a binding agent, helping to bring all your ingredients together smoothly. Don’t skip this step; it makes a difference!

    Step 7: Fold in Flour and Baking Powder

    Now it’s time to add some structure! Gently fold in 2 cups of all-purpose flour and 1 teaspoon of baking powder, stirring just until most lumps are gone. Be careful not to overmix, as this can lead to tough bars. It’s about balance here!

    Step 8: Mix in Chocolate Chips

    Chocoholics, rejoice! Gently fold in 1 cup of semisweet chocolate chips and 1 cup of dark chocolate chips. They’ll melt slightly during baking, creating delicious pockets of chocolate in every bite. Yum!

    Step 9: Bake to Perfection

    Pour the batter into your prepared pan and spread it evenly. Bake in your preheated oven at 350 degrees F for 25-30 minutes. To check for doneness, insert a toothpick into the center—if it comes out clean, you’re golden! Let the bars cool before cutting. They’ll be worth the wait!

    Tips for Success

    To ensure your Fudgy Pumpkin Chocolate Chip Bars turn out perfectly, here are a few quick tips!

    First, don’t overmix the batter; a few lumps are perfectly fine to maintain that fudgy texture.

    Make sure your pan is well-prepared—this helps avoid any sticky situations when you’re trying to slice the bars.

    Lastly, always check for doneness with a toothpick. The toothpick should come out clean but still moist for the perfect fudgy center!

    Equipment Needed

    For making these Fudgy Pumpkin Chocolate Chip Bars, you’ll need a few trusty tools:

    • 9×13 inch baking pan: Essential for baking your bars to perfection. Use any similar-sized pan if you don’t have one.
    • Medium saucepan: For melting the butter and mixing ingredients.
    • Mixing bowl: A large bowl will do, or you can grab a hand mixer for easier blending.
    • Spatula: Perfect for folding in your ingredients smoothly.
    • Toothpick: To check doneness!

    Variations

    These Fudgy Pumpkin Chocolate Chip Bars are versatile and can easily be tailored to suit different tastes.

    For a gluten-free option, substitute all-purpose flour with a 1:1 gluten-free flour blend.

    Want a crunch? Add 1 cup of chopped walnuts or pecans for extra texture.

    Feeling adventurous? Try swirling in some cream cheese for a delightful tangy flavor!

    Serving Suggestions

    These delightful Fudgy Pumpkin Chocolate Chip Bars are perfect on their own, but you can elevate the experience even more!

    Pair them with a cup of hot coffee or a scoop of vanilla ice cream for a warm treat.

    For a lovely presentation, dust with powdered sugar or drizzle with melted chocolate for an extra touch of indulgence!

    FAQs about Fudgy Pumpkin Chocolate Chip Bars

    Curious about these Fudgy Pumpkin Chocolate Chip Bars? Here are some frequently asked questions to help you out!

    How should I store the bars?

    Keep your delicious bars tightly sealed in an airtight container at room temperature for 2-3 days. This keeps them fresh and fudgy. If you can’t eat them that quickly, freezing is an option!

    Can I freeze these bars?

    Absolutely! To freeze, let them cool completely, then cut them into squares and place them in a single layer in a freezer bag. They’ll stay good for up to 3 months. Just thaw at room temperature when you’re ready to enjoy!

    Can I make these bars gluten-free?

    Yes! For a gluten-free version of these Fudgy Pumpkin Chocolate Chip Bars, simply substitute the all-purpose flour with a gluten-free 1:1 baking mix. They’ll be just as fudgy and delicious!

    Can I use fresh pumpkin instead of canned?

    While I recommend using pure pumpkin puree for consistency, you can use fresh pumpkin! Just make sure to cook and puree it until smooth before incorporating it into the recipe.

    I hope these answers assist you in your baking adventure!

    Final Thoughts

    Making Fudgy Pumpkin Chocolate Chip Bars is not just about baking; it’s about creating beautiful memories with your loved ones. The aroma wafting through the house brings back warm memories of fall gatherings, laughter, and joy. As you slice these delightful bars, remember to share them with family and friends—there’s nothing like enjoying the sweetness of life together.

    So go ahead, embrace the heartwarming spirit of fall! Dive into this delicious treat, knowing you’re not just satisfying your sweet tooth but also spreading love and joy one fudgy bite at a time!


    Print

    clock clock iconcutlery cutlery iconflag flag iconfolder folder iconinstagram instagram iconpinterest pinterest iconfacebook facebook iconprint print iconsquares squares iconheart heart iconheart solid heart solid icon

    Description

    Delicious fudgy pumpkin bars packed with chocolate chips, perfect for fall treats.


    • 1 cup butter (2 sticks)
    • 1 tablespoon pumpkin pie spice*
    • 1 cup granulated sugar
    • 1 cup brown sugar, packed
    • 1 (8-oz) cup pumpkin, canned (not pumpkin pie filling)
    • 2 teaspoons vanilla
    • 1/2 teaspoon kosher salt
    • 1 large egg
    • 2 cups all purpose flour, spooned and leveled
    • 1 teaspoon baking powder
    • 1 cup semisweet chocolate chips
    • 1 cup dark chocolate chips

    1. Preheat the oven to 350 degrees F. Spray a 9×13 inch pan with nonstick spray, or line with parchment paper.
    2. In a medium saucepan, melt 1 cup of butter over medium heat.
    3. Add 1 tablespoon pumpkin pie spice to the hot butter and let it toast for a few seconds.
    4. Stir in 1 cup granulated sugar and 1 cup packed brown sugar.
    5. Add 1 cup pumpkin puree (not pumpkin pie filling) and mix in 2 teaspoons of vanilla and 1/2 teaspoon kosher salt.
    6. Add 1 large egg and mix vigorously.
    7. Add 2 cups flour and 1 teaspoon baking powder, stir them together.
    8. Mix until most lumps are gone, being careful not to overbeat.
    9. Pour the batter into the prepared pan.
    10. Sprinkle 1 cup semisweet and 1 cup dark chocolate chips over the top and gently fold them into the batter.
    11. Bake for 25-30 minutes until a toothpick comes out clean.
    12. Let cool before slicing.

    Notes

    • Storage: Keep leftovers tightly sealed for 2-3 days or freeze for up to 3 months.
    • Do not use pumpkin pie filling; use pure pumpkin puree.
    • Optional: Substitute pumpkin pie spice with a mix of cinnamon, nutmeg, and ginger.
    • Prep Time: 15 minutes
    • Cook Time: 30 minutes
    • Category: Dessert
    • Method: Baking
    • Cuisine: American

    Nutrition

    • Serving Size: 1 bar
    • Calories: 300
    • Sugar: 25g
    • Sodium: 180mg
    • Fat: 15g
    • Saturated Fat: 9g
    • Unsaturated Fat: 6g
    • Trans Fat: 0g
    • Carbohydrates: 40g
    • Fiber: 2g
    • Protein: 3g
    • Cholesterol: 40mg

    Sharing is caring!

  • Carrots and Lentils Bowl

    Carrots and Lentils Bowl


    Introduction to Carrots and Lentils Bowl

    As a busy mom, I understand the struggle of wanting to serve something healthy yet delicious without spending hours in the kitchen. That’s why I absolutely love my Carrots and Lentils Bowl! It’s a vibrant dish that packs layers of flavor while being friendly on time and effort. With roasted carrots mingling beautifully with hearty lentils, every bite provides comfort and joy. Plus, it’s packed with nutrients that we all need, making it a perfect dinner choice for our families. Let’s make cooking simple and enjoyable together!

    Why You’ll Love This Carrots and Lentils Bowl

    This Carrots and Lentils Bowl is a game changer for busy nights. It comes together quickly, taking less than an hour from start to finish. The flavors are downright irresistible, with the warmth of roasted carrots complementing the earthy lentils beautifully. You won’t just love how easy it is to prepare; your family will rave about the taste! It’s a meal that brings joy without added stress.

    Ingredients for Carrots and Lentils Bowl

    Let’s gather everything we need for this delightful Carrots and Lentils Bowl! Having the right ingredients on hand makes the cooking process smooth and enjoyable. Here’s what you’ll need:

    • Ground cumin: This adds a warm, earthy flavor that pairs perfectly with the sweetness of roasted carrots.
    • Smoked paprika: A pinch of this brings a subtle smokiness, elevating the dish to new heights.
    • Carrots: The stars of this bowl, they bring sweetness and vibrant color to the mix.
    • Ground cinnamon: Just a hint of this spice adds depth, hinting at warmth and comfort.
    • Honey or maple syrup: A drizzle for a touch of sweetness, balancing the flavors beautifully.
    • Kosher salt: Essential for seasoning, enhancing all the flavors in this delightful dish.
    • Olive oil: This multi-tasker not only aids in roasting but deepens the dish’s richness.
    • Shallot: Adds a delicate onion flavor without overpowering the other ingredients.
    • Dijon mustard: This gives a tangy layer that brightens the lentil mixture.
    • French lentils: These lentils retain their shape and provide protein to keep you satisfied.
    • Red wine vinegar: A splash for acidity, balancing the sweetness and enhancing the overall flavor.
    • Flat-leaf parsley: Finely chopped, it adds freshness and a pop of green.
    • Castelvetrano olives: Their unique flavor and buttery texture bring a burst of brininess.
    • Almonds (optional): Tossing in chopped almonds adds a crunchy texture, but feel free to skip if nuts aren’t your thing.
    • Fresh mint: Bright and aromatic, mint lifts the dish and adds a refreshing twist.
    • Medjool dates: Minced for a natural sweetness that complements the carrots and lentils.
    • Hummus: The creamy base that binds everything together, creating a delightful combination.

    Each ingredient plays a unique role, creating a balanced and delicious Carrots and Lentils Bowl. For exact quantities, check the end of the article where you can find them available for printing!

    How to Make Carrots and Lentils Bowl

    Now that we have our ingredients ready, let’s dive into creating this vibrant Carrots and Lentils Bowl. Follow these simple steps, and you’ll have a delicious, nutritious meal in no time!

    Step 1: Preheat Your Oven

    First things first, let’s get the oven cranked up to 200°C. This temperature is perfect for roasting those lovely vegetables. You want it hot and ready to bring out the natural sweetness in our carrots!

    Step 2: Prepare Carrots and Shallots

    Next up, grab your carrots and shallots. In a large bowl, toss them with olive oil, smoked paprika, cumin, cinnamon, honey, and a pinch of kosher salt. Make sure they are well-coated; this way, they will roast evenly and soak up all those delicious flavors.

    Step 3: Roast Your Vegetables

    Spread the carrots and shallot mixture in a single layer on a baking sheet. Place it in the oven and let them roast for about 25-30 minutes. Remember to stir the veggies halfway through! This ensures they cook evenly and become beautifully caramelized.

    Step 4: Cook the Lentils

    While everything is roasting away, bring about 1 liter of salted water to a boil in a medium pot. Add your French lentils and lower the heat. Let them simmer for 20-25 minutes until they are tender but not mushy. Drain any excess water afterward to avoid sogginess.

    Step 5: Combine Lentils and Flavorings

    Once the lentils are warm, combine them in a bowl with olive oil, red wine vinegar, Dijon mustard, parsley, olives, minced dates, and chopped almonds. This mix adds an explosion of flavors! Adjust the seasoning with a little kosher salt if necessary.

    Step 6: Assemble the Bowl

    Finally, serve hummus on the bottom of a plate or shallow bowl. Pile the roasted carrots and lentil mixture on top. Drizzle a bit of olive oil for that finishing touch. What a feast for the eyes, let alone your taste buds!

    Tips for Success

    • Don’t skip the stirring while roasting—it’s essential for even cooking.
    • Soak lentils for an hour before cooking to reduce cooking time.
    • Taste as you go! Adjust sweetness or seasoning according to your preference.
    • Feel free to add your favorite veggies—zucchini or bell peppers work wonders.
    • Store leftover bowls in airtight containers for quick lunches.

    Equipment Needed

    • Baking sheet: A sturdy one is key for roasting. If you don’t have one, a flat oven-safe dish works.
    • Mixing bowls: You’ll need a couple for combining ingredients. Any size will do!
    • Wooden spoon: Perfect for stirring! A spatula or tongs will work just as well.

    Variations of Carrots and Lentils Bowl

    • Spicy Kick: Add a pinch of cayenne pepper or a dash of hot sauce to the lentils for a spicy twist that packs a punch!
    • Seasonal Veggies: Swap or add seasonal vegetables like roasted sweet potatoes, zucchini, or cherry tomatoes for extra color and flavor.
    • Protein Boost: Toss in some cooked quinoa or chickpeas along with the lentils for an even more protein-rich meal.
    • Vegan Delight: Use maple syrup instead of honey for a fully vegan option that’s just as sweet!
    • Herb Variety: Experiment with different fresh herbs, like cilantro or basil, to give your bowl a new and exciting flavor profile!

    Serving Suggestions for Carrots and Lentils Bowl

    • Pair with a Side Salad: A light arugula or spinach salad with a simple vinaigrette complements the meal beautifully.
    • Enjoy with a Refreshing Drink: A chilled glass of sparkling water or lemon-infused iced tea can elevate your dining experience.
    • Presentation Matters: Serve in colorful bowls to make the vibrant Carrots and Lentils Bowl visually appealing!

    FAQs about Carrots and Lentils Bowl

    Let’s answer some common questions about this delightful Carrots and Lentils Bowl! I hope these insights help you in your kitchen adventures!

    Can I make this Carrots and Lentils Bowl ahead of time?
    Absolutely! You can prepare the vegetables and lentils in advance. Just store them separately in the fridge, and they’ll be perfect for quick meal assembly later!

    What type of lentils should I use?
    I recommend using French lentils for this recipe. They hold their shape well and add a lovely texture to the bowl. However, green or brown lentils can work too!

    Can I add protein to the bowl?
    Definitely! Chickpeas, quinoa, or even grilled chicken can be great additions to amp up protein in your Carrots and Lentils Bowl. Feel free to customize it!

    How long does this dish last in the fridge?
    Stored in an airtight container, this bowl can last up to three days in the fridge. Just give it a stir before serving to mix all those wonderful flavors!

    Is this recipe kid-friendly?
    Yes! The sweet roasted carrots and creamy hummus make it appealing to kids. You can adjust the spices for a milder flavor if needed. Enjoy cooking together!

    Final Thoughts

    Creating this Carrots and Lentils Bowl has been such a joy, and I hope you feel the same way when you make it! The vibrant colors and tantalizing flavors remind me that healthy eating doesn’t have to be mundane. Instead, it’s a delightful adventure waiting to unfold in your kitchen. Plus, it’s an excellent way to bring the family together for a nourishing meal that everyone will enjoy. So grab those carrots, embrace the warmth of spices, and dive into a bowl filled with love and nourishment. Happy cooking, my friends!


    Print

    clock clock iconcutlery cutlery iconflag flag iconfolder folder iconinstagram instagram iconpinterest pinterest iconfacebook facebook iconprint print iconsquares squares iconheart heart iconheart solid heart solid icon

    Description

    A vibrant and delicious Carrots and Lentils Bowl that combines roasted carrots and flavorful lentils with fresh herbs and spices.


    • 1 teaspoon ground cumin
    • 1 teaspoon smoked paprika
    • 3 large carrots, sliced into thick rounds
    • 1/4 teaspoon ground cinnamon
    • 1 teaspoon honey or maple syrup
    • 1/2 teaspoon kosher salt
    • 2 tablespoons olive oil
    • 1 large shallot, thinly sliced
    • 1 teaspoon Dijon mustard
    • 2 tablespoons olive oil
    • 1 cup dry French lentils
    • 2 tablespoons red wine vinegar
    • 1/4 cup fresh flat-leaf parsley, finely chopped
    • 1/4 cup Castelvetrano olives, chopped and pitted
    • Kosher salt
    • 1/4 cup roasted and salted almonds, chopped (optional)
    • 2 tablespoons freshly chopped mint
    • 34 Medjool dates, pitted and finely minced
    • Hummus (to serve)

    1. Heat your oven up to 200°C and use the middle rack position.
    2. Combine the carrots and shallots with oil, smoked paprika, cumin, cinnamon, honey, and salt. Spread these in one flat layer on a baking sheet.
    3. Put them in the oven until the carrots soften and get slightly browned, around 25-30 minutes. Stir them halfway for even cooking.
    4. Boil about 1 liter of water with some salt. Once bubbling, add lentils. Lower the heat and simmer for 20-25 minutes, just until they’re tender but not mushy. Drain out the extra water.
    5. When the lentils are warm but not hot, toss them with oil, vinegar, mustard, parsley, olives, dates, almonds, and mint. Balance the flavors with a bit of kosher salt.
    6. Spread hummus on plates or shallow bowls. Pile the lentil blend and roasted carrots on top, then drizzle a small amount of olive oil to finish.

    Notes

    • The almonds are optional but add a nice crunch to the dish.
    • You can adjust the sweetness by adding more or less honey/maple syrup based on your preference.
    • Serve immediately for the best flavor and texture.
    • Prep Time: 15 minutes
    • Cook Time: 40 minutes
    • Category: Salad
    • Method: Roasting and boiling
    • Cuisine: Mediterranean

    Nutrition

    • Serving Size: 1 bowl
    • Calories: 350
    • Sugar: 10g
    • Sodium: 200mg
    • Fat: 15g
    • Saturated Fat: 2g
    • Unsaturated Fat: 12g
    • Trans Fat: 0g
    • Carbohydrates: 42g
    • Fiber: 12g
    • Protein: 15g
    • Cholesterol: 0mg

    Sharing is caring!

  • Maple Bacon Carrots Glazed

    Maple Bacon Carrots Glazed


    Introduction to Maple Bacon Carrots Glazed

    As a busy mom juggling numerous tasks, I know how challenging it can be to find meals that please everyone. That’s why I’m thrilled to share my Maple Bacon Carrots Glazed recipe! This dish combines the sweet embrace of maple syrup with the savory crunch of crispy bacon, creating a delightful treat that even the pickiest eaters can’t resist. Whether it’s a weeknight dinner or a special gathering, these tender, caramelized carrots add joy to any table. I promise, once you try them, you’ll be hooked!

    Why You’ll Love This Maple Bacon Carrots Glazed

    If you’re looking for a side dish that blends convenience with deliciousness, you’re in for a treat! This Maple Bacon Carrots Glazed recipe is quick to prepare, taking just about 50 minutes from start to finish. Plus, the irresistible combination of sweet and savory flavors will have your family asking for seconds. It’s a simple yet stunning dish that makes even ordinary weeknight meals feel extraordinary!

    Ingredients for Maple Bacon Carrots Glazed

    Gathering the right ingredients is the first step to creating your delicious Maple Bacon Carrots Glazed. Here are the essentials you’ll need:

    • Carrots: Fresh, tender carrots are key. Look for organic options if possible, as they tend to be sweeter.
    • Bacon: Thin-sliced bacon brings that crunchy, savory flavor. Turkey bacon can be a healthier substitute.
    • Maple Syrup: The star of the show! Pure maple syrup enhances the natural sweetness of carrots. Avoid pancake syrup for true flavor.

    For a twist, consider adding a sprinkle of black pepper or even chili flakes for a hint of spice. If your family has any dietary preferences, feel free to swap the bacon for a plant-based alternative!

    Wanna know the exact quantities? Check the bottom of the article for all the details available for printing.

    How to Make Maple Bacon Carrots Glazed

    Now let’s get cooking! Making Maple Bacon Carrots Glazed is easier than it sounds. Just follow these steps, and you’ll have a dish that steals the show!

    Preparing for Baking

    First things first, preheat your oven to 400°F. This ensures your bacon will get that perfect crispy texture. While the oven heats, peel your carrots and cut them to about ½ inch thick. If you have unevenly sized carrots, try to cut them to similar sizes so they cook evenly.

    Wrapping the Carrots

    Next, take a slice of thin-sliced bacon and wrap it around a carrot, starting at the thick end. Be sure to wrap it tightly but avoid overlapping the bacon too much. If you overlap, some parts might not crisp up properly. If you find bacon too tight, a simple, loose wrap works just fine. Each carrot should look like a little bacon-wrapped gift!

    Baking the Carrots

    Once all your carrots are lovingly wrapped, place them on a wire rack set over a baking sheet. This rack helps circulate heat, allowing the bacon to crisp and the carrots to tenderize perfectly. Arrange your carrots so they have a little breathing room; they don’t need to be cramped together like sardines!

    Glazing the Carrots

    After baking for 25 minutes, take those beauties out! Now comes the fun part—glazing! Use a brush to apply the pure maple syrup all over the bacon-wrapped carrots. Make sure you cover all sides for that wonderful sweetness. This is what transforms the dish into a true Maple Bacon Carrots Glazed masterpiece.

    Final Baking

    Return the carrots to the oven for another 8 to 10 minutes. This last bake allows that syrup to caramelize and create a beautiful glaze. It’s like giving the dish a golden crown! Keep an eye on them, as the glaze can go from caramelized to burnt if left unattended.

    Tips for Success

    • Don’t rush the wrapping; make sure each carrot is snugly wrapped to achieve that crispy perfection.
    • Use a non-stick baking sheet for easier cleanup, or line it with parchment paper.
    • For more color and flavor, try mixing in baby carrots with your regular ones.
    • Keep an eye on the glaze during the final bake to avoid burning.
    • Serve immediately for the best taste and texture!

    Equipment Needed

    • Baking Sheet: A standard baking sheet works great, but a roasting pan is a solid alternative.
    • Wire Rack: Essential for even cooking. If you don’t have one, place the carrots directly on the baking sheet.
    • Brush: A pastry brush makes glazing easy, but a spoon can also do the job!

    Variations of Maple Bacon Carrots Glazed

    • Spicy Maple Bacon Carrots: Add a pinch of cayenne pepper or red chili flakes to the maple syrup before glazing for a tantalizing kick.
    • Balsamic Glaze: Swap out maple syrup for a balsamic reduction for a sweeter, tangy twist that pairs well with bacon.
    • Herbed Carrots: Before wrapping, toss the carrots with fresh herbs like thyme or rosemary for added depth of flavor.
    • Maple Mustard Glaze: Mix equal parts maple syrup and Dijon mustard for a sweet and tangy glaze that complements bacon beautifully.
    • Vegetarian Option: Use veggie bacon or a plant-based alternative to keep it smoky while making it suitable for a vegetarian diet.

    Serving Suggestions

    • Pair with a crisp green salad dressed in lemon vinaigrette for a refreshing contrast.
    • Serve alongside roasted chicken or pork for a hearty dinner that satisfies everyone.
    • Present on a warm platter, garnished with fresh parsley for a pop of color.
    • Complement with a glass of chilled white wine or sparkling cider for a festive touch.

    FAQs about Maple Bacon Carrots Glazed

    Can I use frozen carrots for this recipe?

    While fresh carrots yield the best results, frozen carrots can work in a pinch. Just make sure they’re thawed and drained well to avoid excess moisture. This way, your bacon can still crisp up nicely!

    How do I store leftovers?

    Store any leftover Maple Bacon Carrots Glazed in an airtight container in the fridge. They’ll keep well for 2 to 3 days, though the bacon may lose some crispiness. Reheat in the oven for a few minutes to warm them up!

    Can I make these ahead of time?

    You can prepare the bacon-wrapped carrots and place them in the fridge up to a day in advance. When ready to serve, simply bake for the same time. Just brush on the maple syrup before the final bake to ensure the glaze shines!

    What can I serve with Maple Bacon Carrots Glazed?

    These delightful carrots are a fantastic side to roasted meats or fish. They also pair beautifully with grains like quinoa or couscous for a satisfying vegetarian option!

    Are Maple Bacon Carrots Glazed suitable for a gluten-free diet?

    Absolutely! This dish is naturally gluten-free, as long as you use gluten-free bacon and ensure your maple syrup is pure. Enjoy this sweet and savory delight without worry!

    Final Thoughts

    Bringing Maple Bacon Carrots Glazed to your dinner table is like wrapping love in every bite. The moment that sweet and savory aroma fills your kitchen, you know you’re in for a treat. As you gather around with family or friends, these delightful carrots become more than just a side—they spark conversation, laughter, and joy. I adore how a simple dish can create lasting memories. So, roll up your sleeves, embrace the mess, and allow this recipe to transform your meals into cherished moments that you’ll look forward to time and again!


    Print

    clock clock iconcutlery cutlery iconflag flag iconfolder folder iconinstagram instagram iconpinterest pinterest iconfacebook facebook iconprint print iconsquares squares iconheart heart iconheart solid heart solid icon

    Description

    Maple Bacon Carrots Glazed is a delicious dish featuring tender carrots wrapped in crispy bacon and coated with sweet maple syrup.


    • 2 pounds carrots, peeled, each less than 1/2 inch thick
    • 1 pound thin-sliced bacon
    • 1/4 cup maple syrup

    1. Preheat oven to 400°F.
    2. Tightly wrap one slice of thin-sliced bacon around each carrot, starting at the thick end. Avoid overlapping layers while wrapping.
    3. Place the bacon-wrapped carrots on a wire rack set over a baking sheet to allow for even cooking.
    4. Bake in the center of the oven for 25 minutes, or until the bacon turns crispy and the carrots are tender.
    5. Remove from the oven and brush all sides of the carrots with maple syrup to coat evenly.
    6. Return to the oven and bake for an additional 8 to 10 minutes until the glaze caramelizes.
    7. Transfer the glazed bacon-wrapped carrots to a serving platter and serve immediately.

    Notes

    • For extra flavor, consider adding a sprinkle of black pepper or chili flakes before baking.
    • This dish can be served as a side or appetizer.
    • Prep Time: 15 minutes
    • Cook Time: 35 minutes
    • Category: Side Dish
    • Method: Baking
    • Cuisine: American

    Nutrition

    • Serving Size: 1 serving
    • Calories: 350
    • Sugar: 9g
    • Sodium: 800mg
    • Fat: 25g
    • Saturated Fat: 10g
    • Unsaturated Fat: 15g
    • Trans Fat: 0g
    • Carbohydrates: 25g
    • Fiber: 4g
    • Protein: 10g
    • Cholesterol: 30mg

    Sharing is caring!

  • Pumpkin Roll Cream Cheese Filling

    Pumpkin Roll Cream Cheese Filling


    Introduction to Pumpkin Roll Cream Cheese Filling

    As the cool breeze announces the arrival of fall, my kitchen naturally shifts to cozy treats, and the Pumpkin Roll Cream Cheese Filling is one of my all-time favorites. This delightful dessert combines a light sponge cake with rich, creamy filling, making it a perfect treat for your family or gatherings. On busy days, this recipe is a quick solution that allows you to whip up something impressive without spending hours in the kitchen. Trust me, everyone will ask for seconds, and you’ll love how easy it is to make!

    Why You’ll Love This Pumpkin Roll Cream Cheese Filling

    This Pumpkin Roll Cream Cheese Filling is the ultimate dessert for busy moms and professionals alike. It’s simple and quick, taking just a little over an hour from start to finish. The sweet and spiced flavors of fall come together beautifully, making it a crowd-pleaser. Plus, the creamy filling adds that delightful touch everyone craves, ensuring every bite feels like a warm hug!

    Ingredients for Pumpkin Roll Cream Cheese Filling

    Gathering the right ingredients for your Pumpkin Roll Cream Cheese Filling is essential for achieving that delightful taste. Here’s what you’ll need:

    • All-purpose flour: This forms the base of our sponge cake, giving it structure and tenderness.
    • Baking powder: A key leavening agent that helps the cake rise, creating a light and airy texture.
    • Pumpkin pie spice: This delightful blend of spices adds warmth and that quintessential fall flavor. Feel free to make your own with cinnamon, nutmeg, and ginger!
    • Kosher salt: Just a pinch enhances the sweetness and balances the flavors beautifully.
    • Eggs: They provide moisture and help bind the ingredients together, leading to a rich texture.
    • Vanilla extract: A splash of this fragrant extract rounds out the flavors, making every bite a dream.
    • Canned pumpkin: A must for that rich pumpkin flavor! Ensure you use pure pumpkin puree, not pumpkin pie filling.
    • Cream cheese: The star of our filling, it adds a luscious creaminess that pairs perfectly with pumpkin.
    • Powdered sugar: For a touch of sweetness in the filling, it blends effortlessly with cream cheese.
    • Salted butter: Adds richness to the filling and a smooth texture when mixed well with the cream cheese.
    • Additional flavoring options: Consider adding chopped nuts for a delightful crunch.

    All the ingredients with specific quantities are listed at the bottom of the article, making it easy for you to print out the recipe and get started!

    How to Make Pumpkin Roll Cream Cheese Filling

    Step 1: Preheat and Prepare

    Start by preheating your oven to 375°F. This is crucial for achieving a fluffy cake roll. While that’s heating, line a jelly roll pan with parchment paper. Make sure to leave some overhang, which will help you lift the cake out later. This little prep step will save you from a sticky situation!

    Step 2: Mix Dry Ingredients

    In a medium mixing bowl, whisk together the sifted flour, baking powder, pumpkin pie spice, and kosher salt. This step is vital because it ensures the ingredients are evenly combined, helping your cake to rise beautifully. You’ll want a light and flavorful sponge!

    Step 3: Combine Wet Ingredients

    In a large bowl, combine the lightly beaten eggs, granulated sugar, vanilla extract, and canned pumpkin. Give it a good whisk until the mixture is smooth and fully blended. This silky texture is essential as it creates a rich base for your Pumpkin Roll Cream Cheese Filling. Trust me, the consistency matters!

    Step 4: Integrate Ingredients

    Now, gently fold the dry ingredients into the wet mixture. Be careful not to overmix, as we want to keep that light sponge texture. Just stir until the flour disappears into the batter. A little lumps are perfectly okay. The key here is to treat your batter like it’s the most delicate treasure.

    Step 5: Bake the Cake

    Spread the batter evenly in the prepared pan, ensuring it’s smooth on top. Bake for about 15 minutes, or until the surface springs back when lightly touched. Keep an eye on it! You’re aiming for a golden cake that’s fluffy but not dry. The aroma will be heavenly!

    Step 6: Roll and Cool the Cake

    Once baked, quickly turn the cake out onto a clean kitchen towel sprinkled with powdered sugar. Carefully roll the warm cake lengthwise into a log shape, using the towel to help. This allows the cake to cool in its rolled form. Let it rest for about 30 minutes to cool completely. Patience, my friend!

    Step 7: Prepare the Cream Cheese Filling

    In the bowl of a stand mixer, combine the softened cream cheese, powdered sugar, softened butter, and vanilla extract. Beat until the mixture is light and fluffy, about 2-3 minutes. This creamy goodness will make your Pumpkin Roll irresistible! Don’t rush this step; it’s where the magic happens!

    Step 8: Assemble the Pumpkin Roll

    Carefully unroll the cooled cake. Spread the cream cheese filling evenly over the surface, making sure to reach all the corners. Roll the cake back up, this time without the towel. Wrap it tightly in plastic wrap. Your Pumpkin Roll Cream Cheese Filling is coming to life!

    Step 9: Chill and Serve

    Refrigerate the wrapped cake for about an hour to set the filling. When you’re ready to serve, remove it from the wrap and dust the exterior with powdered sugar for that perfect finishing touch. Slice it into pieces, and enjoy every sweet bite!

    Tips for Success

    • Use room temperature ingredients for a smoother batter.
    • Don’t skip sifting the flour; it ensures a lighter cake.
    • Allow the cake to cool entirely before spreading the filling.
    • Dust the towel with powdered sugar to prevent sticking.
    • For a nutty twist, add chopped walnuts or pecans to the filling.
    • Refrigerate the roll overnight for enhanced flavor, if possible.

    Equipment Needed

    • Jelly roll pan: A shallow pan; if you don’t have one, use a baking sheet with sides.
    • Parchment paper: Essential for easy removal; aluminum foil can work as a substitute.
    • Mixing bowls: Have a couple of different sizes for convenience.
    • Stand mixer or hand mixer: Either will do for creaming the filling!
    • Wire cooling rack: If you lack one, a large plate will work too.

    Variations on Pumpkin Roll Cream Cheese Filling

    • Gluten-Free Option: Substitute all-purpose flour with a gluten-free flour blend. Ensure other ingredients are also gluten-free for a delightful version that everyone can enjoy.
    • Spiced Cream Cheese Filling: Mix in additional spices like cinnamon and a pinch of nutmeg or clove to elevate the filling’s flavor perfectly for fall gatherings!
    • Maple Cream Cheese Filling: Replace some powdered sugar with maple syrup for a rich, sweet twist. This adds a delightful depth and an autumnal taste.
    • Nutty Delight: Fold in chopped pecans or walnuts into the cream cheese filling for added texture and a nutty flavor that complements the pumpkin beautifully.
    • Vegan Option: Use a plant-based cream cheese and replace eggs with flaxseeds or a commercial egg substitute to create a vegan-friendly pumpkin roll.

    Serving Suggestions for Pumpkin Roll Cream Cheese Filling

    • Pair with Coffee: Enjoy slices with a steaming cup of coffee or chai for a cozy treat.
    • Whipped Cream: Add a dollop of whipped cream on top for extra creaminess.
    • Garnish: Decorate the platter with autumn leaves or small gourds for a festive touch.
    • Ice Cream: Serve alongside vanilla ice cream for a delightful contrast in temperatures.
    • Fruit Sides: Complement with fresh fruit like cranberries or apple slices for a refreshing balance.

    FAQs about Pumpkin Roll Cream Cheese Filling

    Can I make Pumpkin Roll Cream Cheese Filling ahead of time?

    Absolutely! You can prepare the cake roll a day in advance. Just store it wrapped in plastic wrap in the fridge. This allows the flavors to meld beautifully, making it even more delicious when served!

    How do I store leftover Pumpkin Roll?

    To keep your Pumpkin Roll fresh, wrap it tightly in plastic wrap or store it in an airtight container in the refrigerator. Enjoy it within 3-4 days for the best flavor and texture!

    Can I freeze Pumpkin Roll Cream Cheese Filling?

    Yes, you can! Wrap the rolled cake in plastic wrap and aluminum foil to prevent freezer burn. It can be frozen for up to three months. When ready to enjoy, thaw overnight in the fridge!

    What can I use as a substitute for cream cheese?

    If you’re looking for an alternative, use mascarpone or a thick Greek yogurt. While they won’t have the same flavor, they can lend a creamy texture to the filling.

    Is this recipe suitable for a gluten-free diet?

    It can be made gluten-free! Simply replace the all-purpose flour with a gluten-free flour blend. Don’t forget to check the labels on other ingredients to ensure they’re gluten-free as well!

    Final Thoughts on Pumpkin Roll Cream Cheese Filling

    Every time I make this Pumpkin Roll Cream Cheese Filling, it feels like a warm embrace of autumn in my kitchen. The joy of seeing my loved ones savor each slice is priceless. This recipe is not just about the delicious flavors; it’s about sharing moments of happiness and togetherness. Whether it’s a cozy family gathering or a festive celebration, this pumpkin roll adds a special touch. It’s an easy yet impressive dessert that will surely make you the star of the occasion. I can’t wait for you to experience this delightful treat!


    Print

    clock clock iconcutlery cutlery iconflag flag iconfolder folder iconinstagram instagram iconpinterest pinterest iconfacebook facebook iconprint print iconsquares squares iconheart heart iconheart solid heart solid icon

    Description

    A delightful treat, the Pumpkin Roll Cream Cheese Filling combines a light sponge cake with a rich and creamy filling, perfect for fall desserts.


    • 3/4 cup all-purpose flour, sifted
    • 1 teaspoon baking powder
    • 1 tablespoon pumpkin pie spice
    • 1/4 teaspoon kosher salt
    • 3 large eggs, lightly beaten
    • 1 1/2 teaspoons vanilla extract
    • 1 cup granulated sugar
    • 2/3 cup canned pumpkin
    • 8 ounces full-fat cream cheese, softened
    • 1 cup powdered sugar, plus extra for dusting
    • 6 tablespoons salted butter, softened
    • 1 teaspoon vanilla extract

    1. Preheat oven to 375°F. Line a jelly roll pan with parchment paper and set aside.
    2. In a medium bowl, whisk together sifted flour, baking powder, pumpkin pie spice, and kosher salt.
    3. In a large bowl, combine eggs, granulated sugar, vanilla extract, and canned pumpkin. Whisk until fully blended and smooth.
    4. Add the dry mixture to the wet ingredients and stir gently until just combined. Avoid overmixing to maintain a light sponge.
    5. Spread the batter evenly into the prepared pan. Bake for 15 minutes or until the surface springs back when touched.
    6. Once baked, carefully turn the cake out onto a clean work surface. Gently roll the cake lengthwise into a log shape while still warm.
    7. Transfer the rolled cake to a wire cooling rack and allow to cool completely while maintaining the rolled shape.
    8. In the bowl of a stand mixer, beat the cream cheese, powdered sugar, softened butter, and vanilla extract together until light and fluffy.
    9. Gently unroll the cooled cake. Spread the cream cheese filling evenly over the surface, then carefully roll the cake up again.
    10. Wrap the filled cake roll tightly in plastic wrap and refrigerate for 1 hour to set.
    11. Remove the chilled cake from plastic wrap. Dust the exterior with powdered sugar, slice, and serve.

    Notes

    • Ensure the cream cheese is softened for easier mixing.
    • You can add chopped nuts to the filling for extra texture if desired.
    • Dust with powdered sugar right before serving for the best presentation.
    • Prep Time: 30 minutes
    • Cook Time: 15 minutes
    • Category: Dessert
    • Method: Baking
    • Cuisine: American

    Nutrition

    • Serving Size: 1 slice
    • Calories: 250
    • Sugar: 20g
    • Sodium: 180mg
    • Fat: 12g
    • Saturated Fat: 7g
    • Unsaturated Fat: 5g
    • Trans Fat: 0g
    • Carbohydrates: 33g
    • Fiber: 1g
    • Protein: 3g
    • Cholesterol: 70mg

    Sharing is caring!