Category: Uncategorized

  • Crockpot Pizza Chicken

    Crockpot Pizza Chicken


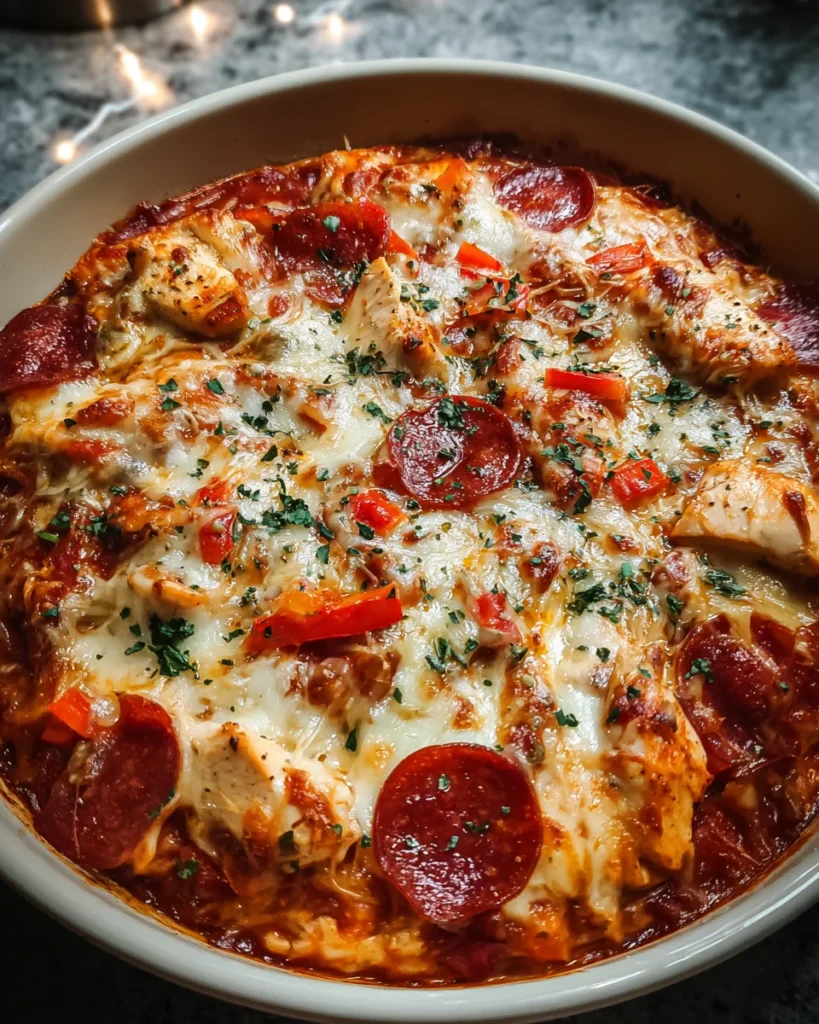
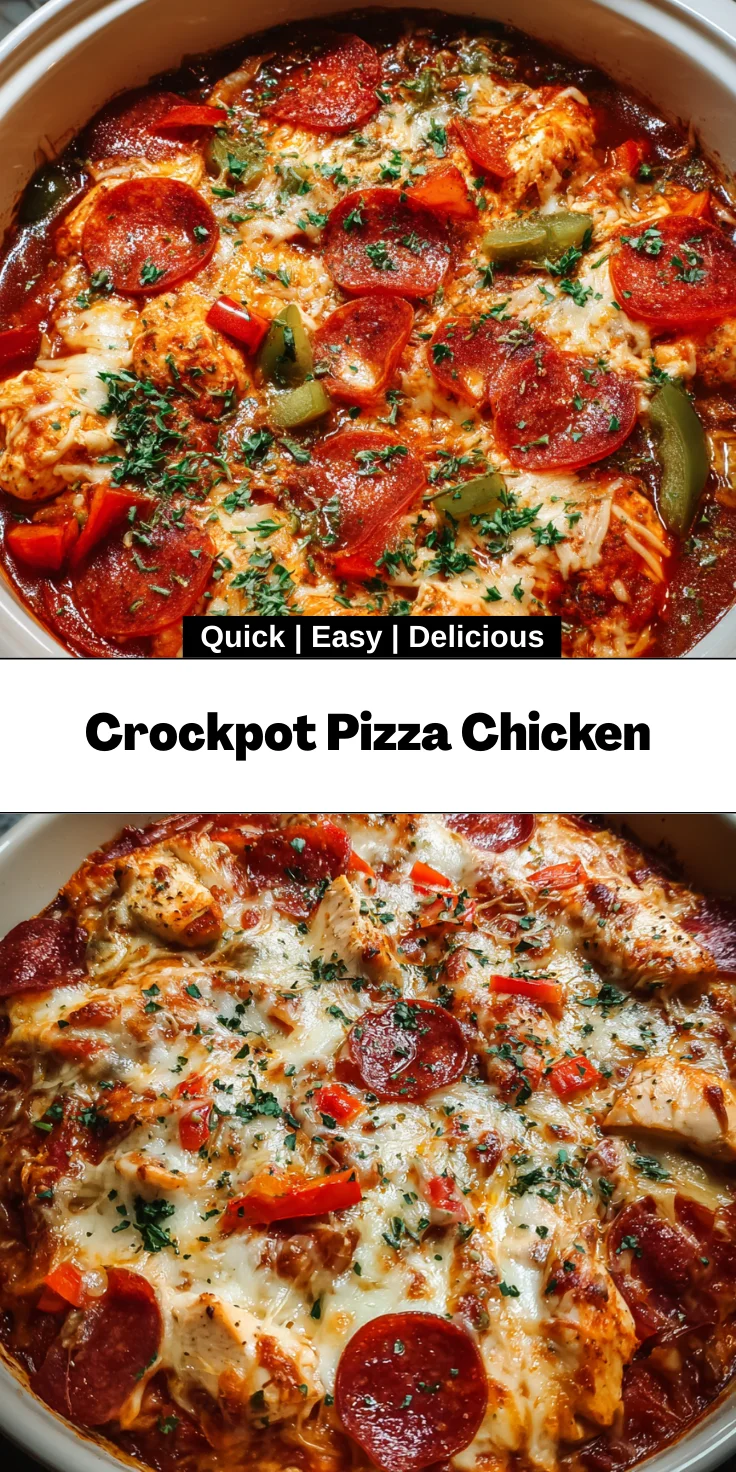
    Introduction to Crockpot Pizza Chicken

    As a busy mom, I know how precious time can be, especially when it comes to dinner prep. That’s why I absolutely adore this Crockpot Pizza Chicken! It brings the joy of pizza into a simple, hearty meal, all while freeing up my evening. Perfect for those days when I’m juggling kids, work, and chores, this dish is a quick solution and a crowd-pleaser. Imagine a cozy family night, with everyone digging into this savory chicken that tastes like your favorite pizza. It’s comfort food made effortless, and it never fails to warm my family’s hearts!

    Why You’ll Love This Crockpot Pizza Chicken

    This Crockpot Pizza Chicken is truly a lifesaver for any hectic evening. It combines minimal prep time with maximum flavor, making it an ideal weeknight favorite. The aroma wafts through your home, drawing everyone to the table. Plus, it’s endlessly adaptable, so you can personalize it to suit even the pickiest eaters. Who doesn’t love a dish that simplifies dinner and brings smiles all around?

    Ingredients for Crockpot Pizza Chicken

    Let’s gather the magical components for this delightful dish! Each ingredient plays a role in making your Crockpot Pizza Chicken a hit. Here’s what you’ll need:

    • Chicken breast: The star of the show! Juicy and protein-packed, it serves as the perfect canvas for all those delicious pizza flavors.
    • Pizza sauce: This creamy sauce adds the signature kick of pizza. You can use store-bought or make your own for added zest. Either way, it’s a must!
    • mozzarella cheese: Oozing and melty, mozzarella is the classic pizza cheese. It brings creaminess and a stretchy texture that makes each bite heavenly.
    • Pepperoni slices: For the meat lovers in the family! The crispy edges add a burst of flavor, bringing that pizza feel to your chicken dish.
    • Bell peppers: Colorful and crunchy, bell peppers introduce a fresh crunch and a hint of sweetness that balances the savory elements beautifully.
    • Onions: Chopped onions add a savory depth and a touch of sweetness as they cook down, enhancing the overall flavor of the dish.

    Feel free to get creative with your ingredients! Want to swap the pepperoni for sausage? Go for it! Or maybe your kids love olives? Toss them in without hesitation. The sky’s the limit!

    If you’re curious about the exact measurements, don’t worry! You can find those details at the bottom of the article, along with a handy printable version.

    How to Make Crockpot Pizza Chicken

    Ready to transform your evening meal into something delicious? Let’s dive right into the steps for making this easy Crockpot Pizza Chicken. It’s as simple as following a few key steps, and pretty soon, you’ll have a fantastic dish simmering away!

    Step 1: Prepare the Chicken

    Start by chopping your chicken breast into bite-sized pieces. I often like to use kitchen scissors for this — it’s quick and easy!

    Once chopped, place the chicken in your crockpot. Make sure it’s evenly distributed across the bottom. This ensures that each piece gets the love it deserves during cooking.

    Step 2: Add Toppings

    Now it’s time for the fun part—layering! Pour the pizza sauce over the chicken. Use a spatula to spread it around, coating the chicken evenly.

    Next, sprinkle the mozzarella cheese generously on top. Don’t be shy; we want that cheesy goodness!

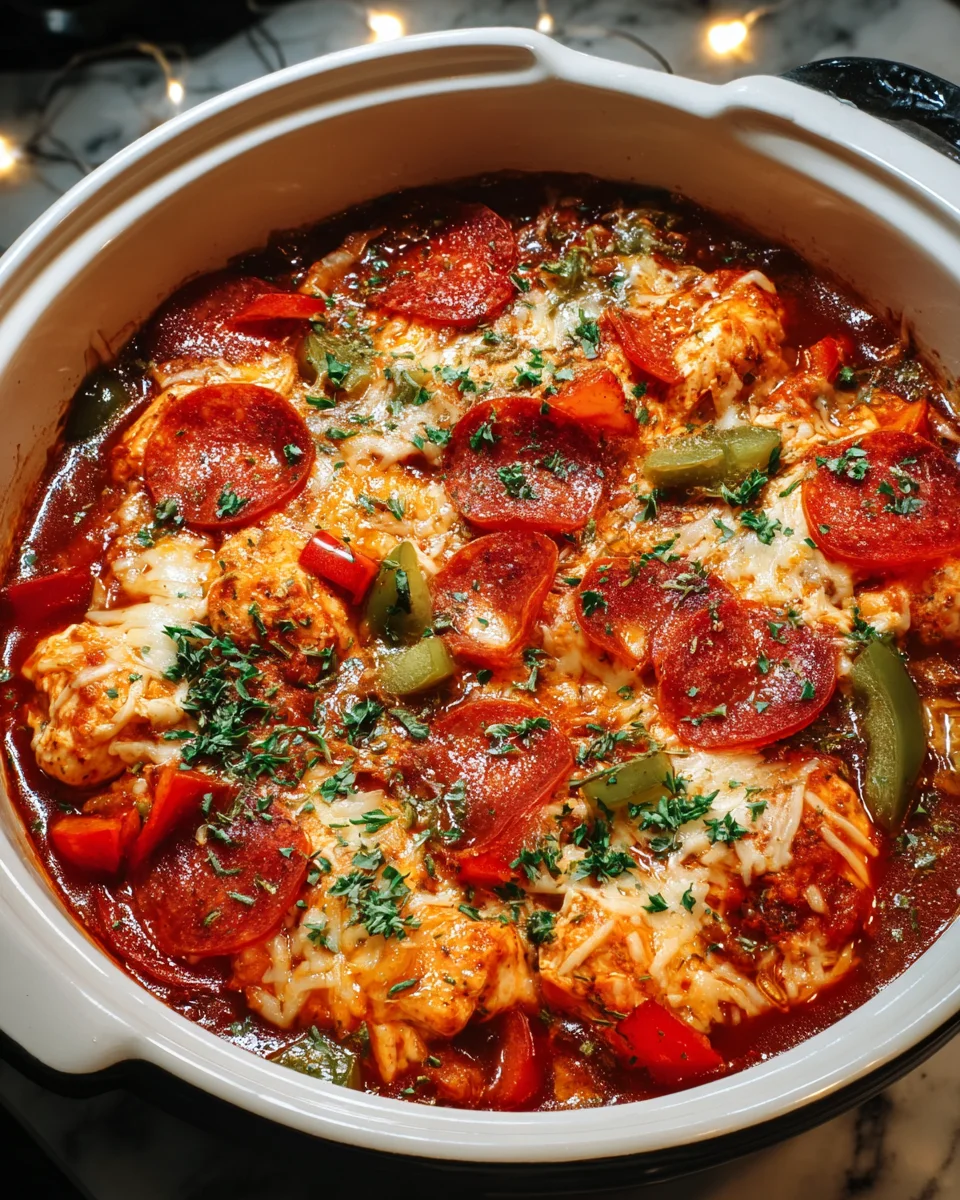
    Then, add your pepperoni slices, bell peppers, and onions. Feel free to mix and match your toppings. Got leftover veggies? Toss them in! The best part of this dish is how adaptable it is.

    Step 3: Cooking the Dish

    Cover the crockpot with its lid and set it to cook on low for four hours. During this time, the ingredients will meld together, creating a rich and tasty dish.

    As it cooks, the aroma will fill your kitchen. This is the moment where you’ll realize: Dinner is going to be amazing!

    Step 4: Serving Suggestions

    Once the cooking time is up, it’s time to dig in! You can serve your Crockpot Pizza Chicken with crusty bread or over a bed of pasta for a hearty meal.

    If you want to keep it lighter, consider pairing it with a fresh salad. You can also sprinkle a bit more cheese on top fresh from the crockpot for that extra touch.

    Tips for Success

    • Prep Ahead: Chop your veggies the night before to save time.
    • Mix it Up: Experiment with different toppings; add mushrooms or spinach!
    • Check Doneness: Ensure chicken reaches an internal temperature of 165°F.
    • Rest Before Serving: Let the dish sit for a few minutes before digging in.
    • Storage: Refrigerate leftovers in an airtight container for up to three days.

    Equipment Needed

    • Crockpot: The heart of this recipe! Any slow cooker will do, but a 4-6 quart size is perfect.
    • Cutting Board: A reliable surface for chopping your chicken and veggies.
    • Knife: A sharp knife for quick and easy chopping.
    • Spatula: Great for spreading sauce and mixing ingredients.
    • Measuring Cups: Handy for precise ingredient quantities, though not necessary!

    Variations on Crockpot Pizza Chicken

    • Veggie Delight: Load up with extra vegetables like zucchini, mushrooms, or spinach for a health boost.
    • Spicy Kick: Add sliced jalapeños or crushed red pepper flakes for a spicy version that’ll set your taste buds dancing.
    • Cheese Lover’s Dream: Swap in different cheeses like cheddar or parmesan for a flavor twist, or toss in a variety for extra gooeyness.
    • Low-Carb Option: Serve it over cauliflower rice or zucchini noodles for a lighter, low-carb meal.
    • Barbecue Chicken: Replace pizza sauce with barbecue sauce for a smoky, sweet variation that’s equally delicious!

    Serving Suggestions for Crockpot Pizza Chicken

    • Crusty Bread: Serve with warm garlic bread or Italian rolls for a delightful dipping experience.
    • Pasta: Over spaghetti or penne for a comforting meal.
    • Fresh Salad: A crisp Caesar or garden salad pairs perfectly with the richness of the dish.
    • Herb Garnish: Sprinkle fresh basil or parsley on top before serving for a pop of color.
    • Drink Pairing: Consider a light red wine or sparkling water with lemon for balance.

    FAQs about Crockpot Pizza Chicken

    Are you curious about a few details on making the perfect Crockpot Pizza Chicken? Here are some common questions I’ve encountered:

    Can I use frozen chicken? Yes! You can add frozen chicken breast directly to the crockpot. Just ensure it cooks for at least an additional hour if starting from frozen.

    How can I make this dish gluten-free? Luckily, this Crockpot Pizza Chicken is naturally gluten-free! Just double-check your pizza sauce and any toppings for hidden gluten.

    Can I double the recipe? Absolutely! Just make sure your crockpot is large enough. Doubling the ingredients will provide delicious leftovers, too!

    What do I do with leftovers? Store any leftovers in an airtight container in the fridge. They’re great over rice or in a wrap the next day!

    Is this recipe healthy? With chicken as the protein base and plenty of veggies, it’s a wholesome choice! Adjust the toppings for even more nutrition.

    Final Thoughts

    Every time I make this Crockpot Pizza Chicken, I rediscover the joy of home-cooked meals. It’s not just about the convenience; it’s about creating delicious moments with my family. The act of gathering around the table, sharing stories, and enjoying a flavorful dish really nourishes the soul. Plus, seeing smiles as they savor every bite reminds me of the magic of cooking. Whether you’re faced with a busy week or simply craving some comfort food, this recipe is a perfect way to bring the flavors of pizza into your home. Dive in and enjoy every cheesy, savory moment!


    Print

    clock clock iconcutlery cutlery iconflag flag iconfolder folder iconinstagram instagram iconpinterest pinterest iconfacebook facebook iconprint print iconsquares squares iconheart heart iconheart solid heart solid icon

    Description

    A simple and delicious recipe for Crockpot Pizza Chicken, ideal for busy weeknights.


    • 1 lb chicken breast, chopped
    • 1 cup pizza sauce
    • 1 cup mozzarella cheese
    • 1/2 cup pepperoni slices
    • 1/2 cup chopped bell peppers
    • 1/2 cup chopped onions

    1. Place chicken in the crockpot and top with pizza sauce, cheese, pepperoni, bell peppers, and onions.
    2. Cook on low for 4 hours.
    3. Serve with crusty bread or over pasta.

    Notes

    • Feel free to add your favorite pizza toppings.
    • This dish can be served over rice for a different twist.
    • Leftovers can be stored in the refrigerator for up to 3 days.
    • Prep Time: 10 minutes
    • Cook Time: 4 hours
    • Category: Dinner
    • Method: Crockpot
    • Cuisine: Italian

    Nutrition

    • Serving Size: 1 cup
    • Calories: 350
    • Sugar: 6g
    • Sodium: 820mg
    • Fat: 20g
    • Saturated Fat: 10g
    • Unsaturated Fat: 6g
    • Trans Fat: 0g
    • Carbohydrates: 12g
    • Fiber: 1g
    • Protein: 30g
    • Cholesterol: 70mg

    Sharing is caring!

  • Sweet Coconut Cream Pancakes

    Sweet Coconut Cream Pancakes


    Introduction to Sweet Coconut Cream Pancakes

    Good morning, sunshine! If you’re looking for a delightful way to brighten your busy mornings, then these Sweet Coconut Cream Pancakes are just what you need. They’re not only fluffy and delicious, but they also whisk you away to a tropical paradise with every bite. I love how quick and easy this recipe is, making it a fantastic solution on hectic days when breakfast feels like a race against the clock. Whether you’re trying to impress loved ones or just want a cozy weekend brunch, I promise these pancakes will keep everyone smiling!

    Why You’ll Love This Sweet Coconut Cream Pancakes

    There’s something special about these Sweet Coconut Cream Pancakes that makes them a hit for everyone in the family. First off, they blend simplicity with incredible taste. You can whip them up in just 25 minutes, making breakfast a breeze. Plus, the creamy coconut flavor dances on your taste buds, while the fluffy texture feels like a warm hug. Trust me; they’re perfect for any occasion!

    Ingredients for Sweet Coconut Cream Pancakes

    Gathering the right ingredients is half the battle when it comes to whipping up these delicious Sweet Coconut Cream Pancakes. Each one brings a unique flavor or texture that truly elevates the dish. Here’s what you’ll need:

    • All-purpose flour: The backbone of your pancake batter. It gives the pancakes that signature fluffiness.
    • Sugar: Just a hint of sweetness to enhance the coconut flavor and create a lovely golden crust.
    • Baking powder: This is your leavening agent, ensuring your pancakes rise beautifully as they cook.
    • Baking soda: Works in tandem with the baking powder to create a light texture while balancing acidity.
    • Salt: A pinch of salt enhances all the flavors. Don’t skip this one!
    • Coconut cream: The star ingredient! Its rich, creamy texture transforms a simple pancake into a tropical delight.
    • Large egg: Adds moisture and helps bind everything together for a richer pancake.
    • Melted butter: Brings a luscious flavor and ensures your pancakes stay moist and tender.
    • Vanilla extract: A splash in the mixture adds warmth and depth to the flavors.
    • Shredded coconut (optional): For that extra zing! This gives a delightful chewiness and a hint of nuttiness.

    All these ingredients come together like a symphony of flavors. And if you need exact quantities, don’t worry! They’re listed at the bottom of the article and ready for printing. Happy cooking!

    How to Make Sweet Coconut Cream Pancakes

    Now that we have all our ingredients ready, let’s roll up our sleeves and dive into the delightful process of making Sweet Coconut Cream Pancakes. Follow these steps, and soon the delicious aroma of pancakes will waft through your kitchen.

    Step 1: Mix the Dry Ingredients

    In a large bowl, start by whisking together the flour, sugar, baking powder, baking soda, and salt. This crucial step ensures that the ingredients are evenly distributed. Trust me; it makes a big difference in how fluffy your pancakes turn out. Feel free to use a sifter if you have one handy. It’s like giving your flour a cozy, airy hug!

    Step 2: Prepare the Wet Ingredients

    In another bowl, mix the coconut cream, egg, melted butter, and vanilla extract. Stir until everything is well combined. You want it to be creamy and smooth, like the gentle waves of the ocean. This mixture is what brings that tropical twist to your pancakes, and it smells heavenly!

    Step 3: Combine the Mixtures

    Now comes the fun part! Pour the wet ingredients into the dry ingredients. Gently stir until just combined. Don’t overmix; a few lumps are perfectly okay. It’s much like forming a new friendship—some quirks make it all the more interesting! If you’re adding shredded coconut, fold it in now for that delightful texture.

    Step 4: Heat the Skillet

    Grab a non-stick skillet and place it over medium heat. Lightly grease it with butter or oil. This step is crucial to avoid pancake disasters—the last thing you want is a pancake that sticks! Test the heat by sprinkling a few drops of water on the skillet; if they sizzle, you’re ready to go!

    Step 5: Cook the Pancakes

    Pour about 1/4 cup of batter onto the skillet for each pancake. Cook until you see bubbles forming on the surface—about 2 to 3 minutes. Then, flip them over and let them cook until they’re golden brown, which usually takes another minute or so. The sound of the pancakes sizzling is like music to my ears; it means you’re moments away from a delicious breakfast!

    Step 6: Serve and Enjoy

    Once cooked, transfer your sweet coconut cream pancakes to a warm plate. Stack them high like a delicious tower of joy! Serve them with your favorite toppings, whether it’s maple syrup, fresh fruit, or a sprinkle of powdered sugar. Each bite will be a special treat, reminiscent of sunny days and relaxing beaches. Bon appétit!

    Tips for Success

    • Use fresh coconut cream for the best flavor; it makes all the difference!
    • Don’t skip the greasing step; it prevents sticking, ensuring perfect pancakes.
    • Keep the heat on medium to prevent burning and get that golden color.
    • Rest the batter for a few minutes for fluffier pancakes.
    • Experiment with toppings—coconut whipped cream is heavenly on these!

    Equipment Needed

    • Mixing bowls: You’ll need two for mixing wet and dry ingredients. A large glass bowl works great!
    • Whisk: A whisk helps in blending the ingredients smoothly; a fork can also do the trick.
    • Non-stick skillet: Essential for cooking pancakes. A cast-iron skillet can be used too.
    • Spatula: A sturdy spatula is needed for flipping those fluffy pancakes.

    Variations of Sweet Coconut Cream Pancakes

    • Chocolate Chip Coconut Pancakes: Stir in some semi-sweet chocolate chips for a decadent twist that will satisfy any sweet tooth.
    • Banana Coconut Pancakes: Mash in a ripe banana for natural sweetness and a delightful flavor. It complements the coconut beautifully!
    • Gluten-Free Option: Substitute the all-purpose flour with a gluten-free flour blend. Just check the binding agents required on the packaging.
    • Coconut and Pineapple: Add crushed pineapple to the batter for a tropical vibe and a burst of juicy goodness.
    • Pumpkin Spice Pancakes: Mix in some pumpkin puree and a dash of pumpkin spice for a cozy fall-inspired breakfast.

    Serving Suggestions for Sweet Coconut Cream Pancakes

    • Fresh fruit: Serve with slices of banana, strawberries, or tropical mango for a refreshing touch.
    • Coconut syrup: Drizzle with coconut syrup for an extra layer of sweetness.
    • Whipped cream: Top with a dollop of coconut whipped cream for a decadent finish.
    • Hot drinks: Pair with a warm cup of coffee, chai tea, or a refreshing coconut smoothie.

    FAQs about Sweet Coconut Cream Pancakes

    Let’s address some common questions that might pop into your mind as you prepare these delightful Sweet Coconut Cream Pancakes. I’ve been there, so here are some answers to help you out!

    Can I make Sweet Coconut Cream Pancakes ahead of time?

    Absolutely! You can whip up the batter the night before and store it in the fridge. Just give it a gentle stir before cooking. You’ll wake up to the smell of coconut magic in the morning!

    Can I substitute coconut cream?

    Yes! If you can’t find coconut cream, you can use coconut milk, but your pancakes will be a bit less rich. For a dairy-free option, make sure to choose a creamy plant-based milk.

    How do I store leftovers?

    Leftover pancakes can be stored in an airtight container in the fridge for about 3 days. You can also freeze them! Just stack them with parchment paper in between each pancake, and pop them in a freezer bag.

    What toppings work best with these pancakes?

    These pancakes are delicious with various toppings! I recommend fresh fruits, coconut syrup, or a sprinkle of nuts for added texture. Coconut whipped cream takes it to the next level!

    Can kids help make these pancakes?

    For sure! Kids can measure ingredients, stir the batter, or even help pour the batter onto the skillet with your guidance. It’s a fun way for them to learn and enjoy the cooking process!

    Final Thoughts on Sweet Coconut Cream Pancakes

    As I flip the last pancake and watch the golden goodness sizzle, a warm feeling fills my heart. There’s something undeniably joyful about sharing these Sweet Coconut Cream Pancakes with family or friends. Each bite transports you to sun-kissed beaches and lazy Sunday mornings, reminding us of life’s simple pleasures. The ease of preparing this recipe makes it a cherished go-to for my busy mornings. So grab your mixing bowls and experience the magic of coconut! I promise it’ll become a beloved tradition in your home, just as it has mine.


    Print

    clock clock iconcutlery cutlery iconflag flag iconfolder folder iconinstagram instagram iconpinterest pinterest iconfacebook facebook iconprint print iconsquares squares iconheart heart iconheart solid heart solid icon

    Description

    Delicious and fluffy pancakes made with coconut cream, perfect for breakfast or brunch.


    • 1 cup all-purpose flour
    • 1 tablespoon sugar
    • 1 teaspoon baking powder
    • 1/2 teaspoon baking soda
    • 1/4 teaspoon salt
    • 1 cup coconut cream
    • 1 large egg
    • 2 tablespoons melted butter
    • 1 teaspoon vanilla extract
    • 1/4 cup shredded coconut (optional)

    1. In a large bowl, whisk together the flour, sugar, baking powder, baking soda, and salt.
    2. In another bowl, mix the coconut cream, egg, melted butter, and vanilla extract until well combined.
    3. Pour the wet ingredients into the dry ingredients and stir until just combined. If using, fold in the shredded coconut.
    4. Heat a non-stick skillet over medium heat and lightly grease it.
    5. Pour 1/4 cup of batter onto the skillet for each pancake. Cook until bubbles form on the surface, then flip and cook until golden brown on the other side.
    6. Repeat with the remaining batter, greasing the skillet as needed. Serve warm with your favorite toppings.

    Notes

    • For a dairy-free version, use a plant-based butter substitute.
    • These pancakes can be frozen and reheated for a quick breakfast option.
    • Prep Time: 15 minutes
    • Cook Time: 10 minutes
    • Category: Breakfast
    • Method: Pan-frying
    • Cuisine: American

    Nutrition

    • Serving Size: 2 pancakes
    • Calories: 320
    • Sugar: 6g
    • Sodium: 220mg
    • Fat: 18g
    • Saturated Fat: 10g
    • Unsaturated Fat: 5g
    • Trans Fat: 0g
    • Carbohydrates: 35g
    • Fiber: 2g
    • Protein: 5g
    • Cholesterol: 50mg

    Sharing is caring!

  • Pumpkin Butter Chicken

    Pumpkin Butter Chicken


    Introduction to Pumpkin Butter Chicken

    Hey there, fellow food lovers! If you’re looking for a quick and delightful meal that comforts both your mind and stomach, you’re in for a treat with my Pumpkin Butter Chicken. This savory dish marries tender chicken pieces with a creamy, rich pumpkin sauce that’ll make your taste buds dance. Perfect for busy moms and hardworking professionals, this recipe is not just easy to whip up, but it also has that wow factor to impress your loved ones. Let’s dive into this culinary adventure and bring some warmth to your dinner table!

    Why You’ll Love This Pumpkin Butter Chicken

    This Pumpkin Butter Chicken is a delightful solution for your hectic weeknights. It’s not only super easy to prepare but delivers a comforting, rich flavor that everyone will love. With just a handful of simple ingredients and a quick cooking process, you can have a satisfying dish on the table in no time. Plus, the unique twist of pumpkin adds warmth and nutritional value, making it a win-win for all!

    Ingredients for Pumpkin Butter Chicken

    To create this mouthwatering Pumpkin Butter Chicken, you’ll need a few essential ingredients that meld together for that perfect balance of flavor. Here’s everything you’ll require:

    • Boneless, Skinless Chicken Thighs: These are juicy and tender, making them ideal for absorbing all those delicious flavors.
    • Plain Yogurt: This helps tenderize the chicken while adding a creamy texture. Greek yogurt works great too.
    • Lemon Juice: A splash of acidity enhances flavor and complements the spices without overpowering them.
    • Ginger-Garlic Paste: A combination of grated ginger and minced garlic for an aromatic kick essential in Indian cuisine.
    • Spices:
      • Garam Masala: This warm spice blend is vital for that authentic Indian flavor.
      • Turmeric Powder: Known for its vibrant color and health benefits, it adds an earthy note.
      • Chili Powder: Adjust this according to your spice tolerance—more for heat, less for mildness.
      • Cumin and Coriander Powder: These spices enhance the overall depth of flavor.
    • Salt: Just a touch to season the dish enhances all the flavors.
    • Olive Oil or Ghee: Both work well for sautéing and add a lovely richness to the sauce.
    • Onion: Chopped finely, it creates a base for flavor when sautéed until soft.
    • Garlic and Ginger: Fresh minced garlic and grated ginger elevate the sauce to the next level.
    • Pumpkin Puree: The star ingredient that gives this dish its unique twist and creaminess.
    • Diced Tomatoes: These lend moisture and a bit of tanginess, balancing the creaminess of the sauce.
    • Heavy Cream: This ensures a rich and luxurious consistency in your sauce.
    • Chicken Broth: It adds depth to the sauce, keeping everything flavorful and cohesive.
    • Butter: A little pat of butter at the end adds an extra level of indulgence.
    • Brown Sugar: Optional for those who like a hint of sweetness to balance the spices.
    • Smoked Paprika, Cinnamon, and Nutmeg: For that warmth and depth that wrap around every bite.
    • Cilantro: Freshly chopped for garnish, it brightens the dish and adds a fresh element.

    For a full list of exact measurements and to print, don’t forget to scroll down to the bottom of the article!

    How to Make Pumpkin Butter Chicken

    Ready to embark on a delicious culinary journey? Making Pumpkin Butter Chicken is straightforward and enjoyable. Follow these simple steps to create a savory masterpiece that will have your family asking for seconds!

    Step 1: Marinate the Chicken

    First things first, let’s marinate that chicken! In a large bowl, mix your plain yogurt, lemon juice, ginger-garlic paste, garam masala, turmeric, chili powder, cumin, coriander, and salt. This will create a creamy, spicy marinade full of flavor.

    Once combined, add in the chicken pieces, ensuring they’re evenly coated. This marinating process is crucial; it allows the chicken to soak up all those tantalizing spices. Cover and refrigerate for at least 30 minutes, but if you can, let it sit for 2-4 hours or even overnight. Just think of it as flavor infusion in action!

    Step 2: Prepare the Pumpkin Butter Sauce

    Now, let’s whip up that luscious pumpkin butter sauce. In a large skillet or Dutch oven, heat up your olive oil or ghee over medium heat. Once it’s hot, toss in the finely chopped onion and sauté until it’s soft and translucent, which takes about 5-7 minutes.

    Add the minced garlic and grated ginger; let the aroma drift through the kitchen for about a minute. Now it’s time for the magic—mix in your pumpkin puree and diced tomatoes. Stir everything together with love, creating a beautiful, colorful base.

    Next, pour in your heavy cream and chicken broth, then add the butter, brown sugar (if using), and spices like smoked paprika, cinnamon, and nutmeg. Give it a good stir and bring this mixture to a gentle simmer. Let it simmer for 15-20 minutes. This cook time enhances all the flavors and allows the sauce to thicken beautifully.

    Step 3: Cook the Chicken

    With your sauce bubbling joyfully, it’s time to cook your marinated chicken! You have flexibility here—you can pan-fry, bake, or grill according to your preference.

    If you opt for pan-frying, heat a tablespoon of olive oil in another skillet over medium-high heat. Add the marinated chicken in a single layer. Cook for about 5-7 minutes per side until golden brown and cooked through. Aim for an internal temperature of 165°F (74°C).

    For a baking option, preheat your oven to 400°F (200°C), spread the chicken pieces on a parchment-lined baking sheet, and bake for 15-20 minutes.

    If grilling beckons, fire up your grill to medium-high heat, and cook for about 4-6 minutes per side. Choose whatever method fits your lifestyle best!

    Step 4: Combine and Serve

    Now comes the moment of glory! Once your chicken is perfectly cooked, add it to the simmering pumpkin butter sauce. Stir to coat each piece thoroughly, allowing the chicken to soak up that creamy goodness.

    Let it simmer in the sauce for an additional 5-10 minutes. This step allows the flavors to meld beautifully, creating a harmonious dish. When serving, ladle over a generous portion of warm basmati rice, making sure to get plenty of that velvety sauce.

    Last but certainly not least, sprinkle some fresh chopped cilantro on top. It not only adds a pop of color but a delightful freshness too. And if you’re feeling extra indulgent, serve with warm naan bread for dipping. Enjoy every bite of your comforting Pumpkin Butter Chicken!

    Tips for Success

    • Marinating overnight yields the best flavor—don’t rush it!
    • Adjust chili powder based on your family’s spice preference for a tailored experience.
    • Always taste and tweak the seasoning before serving; it makes all the difference.
    • Use fresh, high-quality spices for a vibrant and aromatic dish.
    • Don’t skip the cilantro—it’s the perfect finishing touch!

    Equipment Needed

    • Large Bowl: For marinating the chicken; a mixing bowl works just fine.
    • Skillet or Dutch Oven: Essential for cooking the sauce; a large pan will also do.
    • Measuring Cups and Spoons: For precision in your ingredients; anything available in your kitchen suffices.
    • Spatula or Wooden Spoon: For stirring; a sturdy cooking spoon can replace it.
    • Meat Thermometer: To check chicken doneness; if you don’t have one, cut the thickest piece to ensure it’s cooked through.

    Variations

    • Vegetarian Option: Substitute chicken with chickpeas or tofu for a hearty vegetarian dish.
    • Spicy Pumpkin Butter Chicken: For an extra kick, add finely chopped jalapeños or increase the chili powder.
    • Low-Fat Version: Use light cream or coconut milk instead of heavy cream to cut back on calories.
    • Herb-Infused: Add fresh bay leaves or rosemary during cooking for an aromatic twist.
    • Sweet Potato Twist: Mix in roasted sweet potatoes for added sweetness and texture.

    Serving Suggestions for Pumpkin Butter Chicken

    • Serve over fluffy basmati rice for a comforting base that soaks up the sauce.
    • Pair with warm naan or pita bread to dip into the creamy sauce.
    • Add a side of sautéed spinach or roasted vegetables for freshness.
    • Enjoy with a chilled glass of white wine or coconut water for a refreshing contrast.
    • Garnish with extra cilantro or a sprinkle of chili flakes for an inviting presentation.

    FAQs about Pumpkin Butter Chicken

    Got questions about this delightful Pumpkin Butter Chicken? You’re not alone! Here are some of the most common queries I encounter when sharing this recipe, along with answers to help you out.

    Can I make Pumpkin Butter Chicken ahead of time?

    Absolutely! You can prepare the pumpkin butter sauce and marinate the chicken a day in advance. Just store them separately in the refrigerator. When you’re ready to eat, simply cook the chicken and combine it with the sauce for a quick dinner solution!

    Is Pumpkin Butter Chicken spicy?

    The spice level can easily be adjusted! If you prefer a milder dish, simply reduce the amount of chili powder. For those who enjoy a bit of heat, feel free to increase it or add fresh chilies. Your spice tolerance, your rules!

    Can I freeze leftovers?

    Yes, you can freeze Pumpkin Butter Chicken! Just let it cool completely before transferring it to an airtight container. It can be stored for up to three months. Simply thaw in the refrigerator overnight and reheat on the stovetop when you’re ready to enjoy it again.

    What can I serve with Pumpkin Butter Chicken?

    This dish is very versatile! It pairs beautifully with fluffy basmati rice, warm naan bread, or even a fresh salad. If you’re seeking a healthy side, sautéed greens or roasted vegetables complement the creaminess of the sauce perfectly.

    Can I use other types of meat instead of chicken?

    Definitely! While chicken is traditional, you can swap it out for other proteins like shrimp or even turkey. If you’re going for a vegetarian version, chickpeas or paneer are fantastic alternatives that will soak up all those delicious flavors!

    Final Thoughts

    As you sit down to enjoy your homemade Pumpkin Butter Chicken, I hope you feel the warmth and love that went into every step of the process. This dish isn’t just about satisfying hunger; it’s a celebration of flavors and comfort. With its vibrant colors and rich textures, it brings a sense of joy to the table, fostering connection with family and friends. Whether it’s a busy weeknight or a special occasion, I know this recipe will create memories and delightful moments. Enjoy every spoonful, and remember: cooking can always be an adventure worth savoring!


    Print

    clock clock iconcutlery cutlery iconflag flag iconfolder folder iconinstagram instagram iconpinterest pinterest iconfacebook facebook iconprint print iconsquares squares iconheart heart iconheart solid heart solid icon

    Description

    A savory and creamy dish that combines tender chicken pieces with a rich pumpkin sauce for a delightful twist on traditional butter chicken.


    • 2 lbs boneless, skinless chicken thighs, cut into 1-inch pieces
    • 1 cup plain yogurt (Greek or regular)
    • 2 tablespoons lemon juice
    • 1 tablespoon ginger-garlic paste (equal parts grated ginger and minced garlic)
    • 1 teaspoon garam masala
    • 1 teaspoon turmeric powder
    • 1 teaspoon chili powder (adjust to your spice preference)
    • 1/2 teaspoon cumin powder
    • 1/2 teaspoon coriander powder
    • 1/2 teaspoon salt (or to taste)
    • 2 tablespoons olive oil or ghee
    • 1 medium onion, finely chopped
    • 2 cloves garlic, minced
    • 1 inch ginger, grated
    • 1 (15 ounce) can pumpkin puree (not pumpkin pie filling)
    • 1 (14.5 ounce) can diced tomatoes, undrained
    • 1 cup heavy cream
    • 1/2 cup chicken broth
    • 2 tablespoons butter
    • 1 tablespoon brown sugar (optional, for added sweetness)
    • 1 teaspoon garam masala
    • 1/2 teaspoon smoked paprika
    • 1/4 teaspoon cinnamon
    • 1/4 teaspoon nutmeg
    • Salt and pepper to taste
    • Cooked basmati rice, for serving
    • Fresh cilantro, chopped, for garnish

    1. Marinate the Chicken: In a large bowl, combine the yogurt, lemon juice, ginger-garlic paste, garam masala, turmeric powder, chili powder, cumin powder, coriander powder, and salt. Mix well. Add the chicken pieces and coat thoroughly. Cover and refrigerate for at least 30 minutes, or preferably 2-4 hours (or overnight).
    2. Prepare the Pumpkin Butter Sauce: Heat olive oil or ghee in a large skillet or Dutch oven over medium heat. Add the chopped onion and cook until softened and translucent, about 5-7 minutes. Add the minced garlic and grated ginger; cook for another minute until fragrant.
    3. Stir in the pumpkin puree and diced tomatoes (with their juice). Mix well to combine.
    4. Add the heavy cream, chicken broth, butter, brown sugar (if using), garam masala, smoked paprika, cinnamon, and nutmeg. Stir well to combine all the ingredients.
    5. Bring the sauce to a simmer, then reduce the heat to low. Let it simmer for 15-20 minutes, stirring occasionally, to allow the flavors to meld together.
    6. Taste the sauce and adjust the seasoning with salt and pepper as needed.
    7. Cook the Chicken: Pan-frying: Heat a tablespoon of olive oil in a separate skillet over medium-high heat. Add the marinated chicken in a single layer (you may need to do this in batches). Cook for 5-7 minutes per side, or until the chicken is cooked through and lightly browned.
    8. Baking: Preheat your oven to 400°F (200°C). Spread the marinated chicken on a baking sheet lined with parchment paper. Bake for 15-20 minutes, or until the chicken is cooked through.
    9. Grilling: Preheat your grill to medium-high heat. Grill the marinated chicken for 4-6 minutes per side, or until cooked through and lightly charred.
    10. Ensure the internal temperature of the chicken reaches 165°F (74°C).
    11. Combine and Serve: Once the chicken is cooked, add it to the simmering pumpkin butter sauce. Stir to coat the chicken evenly with the sauce.
    12. Let the chicken simmer in the sauce for another 5-10 minutes to allow the flavors to meld together even further.
    13. Serve the Pumpkin Butter Chicken hot over cooked basmati rice. Garnish with fresh chopped cilantro. Serve with warm naan bread for dipping into the delicious sauce, if desired. Enjoy!

    Notes

    • For a spicier dish, increase the amount of chili powder as desired.
    • Brown sugar is optional and can be adjusted based on sweetness preference.
    • Allowing the chicken to marinate longer enhances the flavor.
    • Prep Time: 20 minutes
    • Cook Time: 40 minutes
    • Category: Main Course
    • Method: Stovetop, Baking, Grilling
    • Cuisine: Indian

    Nutrition

    • Serving Size: 1 serving
    • Calories: 450
    • Sugar: 6g
    • Sodium: 800mg
    • Fat: 30g
    • Saturated Fat: 15g
    • Unsaturated Fat: 10g
    • Trans Fat: 0g
    • Carbohydrates: 20g
    • Fiber: 2g
    • Protein: 25g
    • Cholesterol: 120mg

    Sharing is caring!

  • Roasted Sweet Potato Salad

    Roasted Sweet Potato Salad


    Introduction to Roasted Sweet Potato Salad

    Welcome to my kitchen! Today, I’m excited to share a delightful recipe that has become a go-to in my busy household: Roasted Sweet Potato Salad. This vibrant dish is not only a feast for the eyes but also a nutritious powerhouse. Whether you’re juggling a hectic schedule or looking for something to impress at your next gathering, this salad checks all the boxes. It’s easy to prepare and packed with flavors that dance on your palate. Trust me, once you try this salad, you’ll find it hard to resist making it a regular part of your meal rotation!

    Why You’ll Love This Roasted Sweet Potato Salad

    This Roasted Sweet Potato Salad is a culinary gem that delivers on every front. First, it comes together in under 45 minutes, making it ideal for those busy weeknights. The combination of sweet potatoes and quinoa creates a hearty, satisfying meal that leaves you feeling nourished. Plus, it’s endlessly versatile! Whether eaten warm or cold, this salad can adapt to your schedule and still impress those you love.

    Ingredients for Roasted Sweet Potato Salad

    This Roasted Sweet Potato Salad is a delightful mix of ingredients, each bringing its unique flavor to the table. Here’s what you’ll need:

    • Sweet Potatoes: These vibrant veggies offer sweetness and a hearty texture, making them the star of the dish.
    • Extra Virgin Olive Oil: This adds flavor and helps the sweet potatoes roast beautifully, enhancing their natural sweetness.
    • Smoked Paprika: A sprinkle of this spice gives a warm, smoky depth to the sweet potatoes, creating that irresistible comfort food vibe.
    • Ground Cumin: This aromatic spice adds an earthy flavor, perfectly complementing the sweetness of the potatoes.
    • Sea Salt and Black Pepper: Essential seasonings that elevate the overall taste, just don’t overdo it!
    • Red Bell Pepper: These colorful bites add crunch and a hint of sweetness, making the salad more vibrant.
    • Red Onion: Finely chopped, they contribute a mild sharpness to balance the sweet flavors.
    • Cooked Quinoa: A protein-packed grain that adds heartiness while keeping the salad light and nutritious.
    • Feta Cheese (optional): If you’re looking for a creamy touch, crumbled feta brings a salty flavor that complements the sweetness.
    • Fresh Parsley: This bright herb adds freshness and a pop of color, making your salad beautiful and aromatic.
    • Fresh Lemon Juice: The zestiness of lemon juice ties everything together, adding brightness to the dish.
    • Honey or Maple Syrup: A hint of sweetness enhances the flavors; just skip the honey if you’re going vegan.

    You can find the exact quantities for each ingredient at the bottom of the article for easy printing!

    How to Make Roasted Sweet Potato Salad

    Making Roasted Sweet Potato Salad is a simple and rewarding experience. It’s like a warm hug for your taste buds! Follow these straightforward steps, and you’ll have a delicious dish that everyone will love.

    Step 1: Preheat Oven

    First things first, preheat your oven to 425°F (220°C). This temperature is perfect for roasting sweet potatoes until they’re golden and tender. While the oven heats up, you can prep the rest of your ingredients. Trust me; this step ensures the sweet potatoes brown beautifully.

    Step 2: Season the Sweet Potatoes

    In a large mixing bowl, toss the diced sweet potatoes with a couple tablespoons of extra virgin olive oil. Sprinkle in a teaspoon of smoked paprika and ground cumin, along with sea salt and freshly cracked black pepper. Let your senses guide you! Mix them until every cube is coated with those warm, fragrant spices. This will infuse the sweet potatoes with marvelous flavor.

    Step 3: Roast the Sweet Potatoes

    Now, line a baking sheet with parchment paper for easy clean-up. Spread the seasoned sweet potatoes in a single layer, making sure they have wiggle room. This is crucial! Roast them in your preheated oven for 25-30 minutes. Halfway through, stir or flip the sweet potatoes. This little tip helps ensure an even roast, so you get that perfect crispy outside and soft inside.

    Step 4: Prepare the Salad Base

    While the sweet potatoes are roasting, let’s create that colorful salad base. In a separate large mixing bowl, combine your cooked quinoa, diced red bell pepper, and finely chopped red onion. Add the fresh parsley, too. Just mix it all together! This vibrant combination brings life to your salad and adds tons of flavor.

    Step 5: Combine Ingredients

    Once the sweet potatoes are done roasting, let them cool for about five minutes. Now, add the warm sweet potatoes to your quinoa mixture. Gently fold everything together, being careful not to mash the sweet potatoes. You want those delicious cubes to stay intact and bring their charm to the salad.

    Step 6: Make the Dressing

    In a small bowl, whisk together the juice of one fresh lemon and either honey or maple syrup, depending on your taste preference. This zesty dressing is the finishing touch! Drizzle it over the salad and toss everything gently one last time. This brings all the ingredients together in a beautiful and mouthwatering way.

    Tips for Success

    • Make sure your sweet potatoes are cut evenly for consistent cooking.
    • For an easy clean-up, use parchment paper on your baking sheet.
    • Let roasted sweet potatoes cool a little before mixing to prevent wilting other salad ingredients.
    • Taste as you go; adjust seasonings and sweetness for your preference!
    • This salad can be customized with any veggies you have on hand.

    Equipment Needed

    • Baking Sheet: A standard sheet works wonders; you can use a large casserole dish if that’s what you have.
    • Mixing Bowls: A large bowl for mixing sweet potatoes and another for the salad base; you can even use a sturdy pot.
    • Whisk: A simple fork can be a good substitute when mixing that zesty dressing!
    • Cutting Board and Knife: Essential for prepping your sweet potatoes and vegetables.

    Variations of Roasted Sweet Potato Salad

    • Add Leafy Greens: Mix in spinach, arugula, or kale for an extra dose of nutrients and color.
    • Switch Up the Grains: Try farro, bulgur, or brown rice instead of quinoa for a different texture and flavor.
    • Incorporate Nuts or Seeds: Add a handful of walnuts, pecans, or sunflower seeds to enhance crunch and flavor.
    • Make it Spicy: Toss in diced jalapeños or a sprinkle of red pepper flakes for a kick of heat!
    • Change the Dressing: Use a tahini-based dressing or a balsamic vinaigrette to explore new flavors.

    Serving Suggestions for Roasted Sweet Potato Salad

    • Pair this salad with grilled chicken or fish for a complete meal.
    • Serve alongside crusty bread or warm pita for a hearty touch.
    • Enjoy with a refreshing sparkling water or herbal iced tea.
    • For a stunning presentation, serve in a mason jar or a large glass bowl.

    FAQs about Roasted Sweet Potato Salad

    Can I make Roasted Sweet Potato Salad ahead of time?

    Absolutely! It’s perfect for meal prep. You can roast the sweet potatoes and mix the salad base in advance. Just add the dressing right before serving to keep everything fresh. This way, you’ll have a delicious meal ready for those busy days!

    How long does Roasted Sweet Potato Salad last in the fridge?

    This salad can last about 3-5 days in the fridge if stored in an airtight container. Just remember to give it a gentle toss before enjoying again. If the sweet potatoes seem dry, a splash of extra dressing can refresh the flavors!

    Can I substitute quinoa with another grain?

    Yes! While quinoa gives a great texture, feel free to use farro, barley, or even brown rice. Each will bring a unique flavor and chewiness to your Roasted Sweet Potato Salad, making it even more delightful.

    Is this salad suitable for vegans?

    Yes, it is! Just skip the feta cheese and use maple syrup instead of honey in the dressing. You’ll have a delicious vegan Roasted Sweet Potato Salad that everyone will enjoy.

    What’s the best way to serve Roasted Sweet Potato Salad?

    This salad shines as a main dish or a side. It pairs beautifully with grilled proteins or served in a wrap with leafy greens for a quick lunch. Either way, you’re in for a treat!

    Final Thoughts

    Cooking this Roasted Sweet Potato Salad is more than just meal prep; it’s an experience that brings joy and warmth to my kitchen. Each vibrant ingredient dances together, creating a symphony of flavors that’s impossible to resist. Whether shared with family or enjoyed solo, this salad is a comforting hug on a plate. You’ll not only delight your taste buds but also nourish your body with wholesome ingredients. I truly hope you find the same pleasure in preparing and savoring this dish as I do. Here’s to happy cooking and even happier eating!


    Print

    clock clock iconcutlery cutlery iconflag flag iconfolder folder iconinstagram instagram iconpinterest pinterest iconfacebook facebook iconprint print iconsquares squares iconheart heart iconheart solid heart solid icon

    Description

    A vibrant and flavorful salad featuring roasted sweet potatoes, quinoa, and fresh vegetables, tossed with a zesty lemon dressing.


    • 2 large sweet potatoes, peeled and diced into bite-sized cubes
    • 2 tablespoons extra virgin olive oil
    • 1 teaspoon smoked paprika
    • 1 teaspoon ground cumin
    • Sea salt and freshly cracked black pepper to taste
    • 1 red bell pepper, diced into small pieces
    • 1/2 medium red onion, finely chopped
    • 1 cup cooked quinoa, cooled
    • 1/4 cup crumbled feta cheese (optional for a creamy touch)
    • 1/4 cup fresh parsley, finely chopped
    • Juice of 1 fresh lemon
    • 1 tablespoon honey or maple syrup (omit honey for a vegan salad)

    1. Start by preheating your oven to 425°F (220°C) to prepare for roasting.
    2. In a large mixing bowl, combine the cubed sweet potatoes with the olive oil, smoked paprika, ground cumin, salt, and pepper. Toss everything together until the sweet potatoes are evenly coated in the oil and spices.
    3. Line a large baking sheet with parchment paper and spread the seasoned sweet potatoes in a single layer. Make sure they have some space between them for even roasting.
    4. Roast the sweet potatoes in the preheated oven for 25-30 minutes, or until they are golden brown and tender. Make sure to stir or flip them halfway through the cooking time to promote even browning.
    5. While the sweet potatoes are roasting, prepare your salad base. In a separate large mixing bowl, combine the cooked quinoa, diced red bell pepper, finely chopped red onion, and chopped parsley. Mix well to combine the ingredients.
    6. Once the sweet potatoes have roasted, remove them from the oven and allow them to cool for about 5 minutes. Then, add the warm sweet potatoes to the quinoa mixture, stirring gently to combine without mashing the sweet potatoes.
    7. In a small bowl, whisk together the fresh lemon juice and honey (or maple syrup) until the mixture is fully combined. Drizzle this dressing over the salad and toss gently to coat everything evenly.

    Notes

    • For a vegan version, use maple syrup instead of honey.
    • Add more vegetables like spinach or arugula for extra nutrition.
    • This salad can be served warm or cold, making it perfect for meal prep.
    • Prep Time: 15 minutes
    • Cook Time: 30 minutes
    • Category: Salad
    • Method: Roasting
    • Cuisine: American

    Nutrition

    • Serving Size: 1 serving
    • Calories: 250
    • Sugar: 6g
    • Sodium: 200mg
    • Fat: 10g
    • Saturated Fat: 1.5g
    • Unsaturated Fat: 8.5g
    • Trans Fat: 0g
    • Carbohydrates: 38g
    • Fiber: 6g
    • Protein: 6g
    • Cholesterol: 5mg

    Sharing is caring!

  • Yellow Curry Shrimp Pasta

    Yellow Curry Shrimp Pasta


    Introduction to Yellow Curry Shrimp Pasta

    Ah, the joy of cooking! Have you ever wondered how to bring a delightful twist to pasta while keeping it simple and quick? Well, let me introduce you to my beloved Yellow Curry Shrimp Pasta! This dish is not just a feast for the taste buds but also a perfect answer for those busy days when you want something extraordinary yet effortless. It’s like a hug in a bowl, combining the richness of coconut milk with the warm spices of yellow curry and succulent shrimp. Your family will adore it, and it’ll make you feel like a culinary rockstar!

    Why You’ll Love This Yellow Curry Shrimp Pasta

    This Yellow Curry Shrimp Pasta is truly a lifesaver for those hectic weeknights! It’s quick, taking just 25 minutes from start to finish, making it perfect for busy moms like me. Plus, the flavors are out of this world! You get a creamy, spicy sauce that clings lovingly to your pasta, making every bite a delight. It’s an easy yet impressive dish that will have everyone coming back for seconds!

    Ingredients for Yellow Curry Shrimp Pasta

    Gathering the right ingredients is key to crafting a delightful Yellow Curry Shrimp Pasta. Here’s a quick rundown of what’s in this delicious dish, with some handy tips:

    • Linguine: This long, thin pasta is perfect for embracing the creamy sauce.
    • Raw Shrimp: Fresh, peeled, and deveined shrimp are the stars of the dish. They add a sweet, briny flavor that pairs beautifully with curry.
    • Coconut Milk: The creamy base for our sauce, coconut milk brings richness and a subtle sweetness that balances the spices.
    • Yellow Curry Paste: This is where the magic happens! The aromatic blend of spices gives the dish its signature warmth and flavor. Adjust to suit your spice tolerance.
    • Green Peas: Sweet and vibrant, they add a lovely pop of color and nutrition. They also help balance the richness of the sauce.
    • Fresh Coriander: A sprinkle of fresh herbs at the end adds brightness and a burst of flavor. If you’re not a fan, feel free to skip this!

    For those looking to switch things up, you might consider using whole wheat pasta for added fiber or adding bell peppers for extra veggies. Ingredients with exact measurements are available at the bottom of this article for your convenience.

    How to Make Yellow Curry Shrimp Pasta

    Getting this delicious Yellow Curry Shrimp Pasta on the table is a breeze! Let’s walk through the steps together. With just a bit of stirring and timing, you’ll have a meal that warms the heart and pleases the palate.

    Step 1: Cook the Linguine

    Start by bringing a large pot of salted water to a boil. The salt helps flavor your pasta, so don’t skip it!

    Add the linguine and cook it until al dente—about 9 minutes should do it.

    Once it’s ready, drain the pasta and set it aside. You want it to be perfectly cooked and waiting for our delicious sauce!

    Step 2: Prepare the Coconut Curry Sauce

    In a large skillet, pour in the coconut milk over medium heat. This will be the luscious base of our sauce.

    Next, whisk in your yellow curry paste until it’s completely blended in. Don’t be shy with that whisk—it’s the key to bringing all those flavors together!

    Step 3: Add Shrimp and Peas

    Now, it’s time for the stars of the dish! Add in the raw shrimp and green peas to your skillet. They’ll sizzle and start to absorb the flavors.

    Gently simmer everything for about 3 to 4 minutes. You’ll know it’s done when the shrimp turn a lovely pink and are cooked through.

    Step 4: Combine Pasta and Sauce

    Here’s where the magic happens! Toss the cooked linguine into the skillet with the shrimp curry sauce.

    Stir well to coat the pasta evenly with that vibrant, aromatic sauce. Make sure every strand is covered in creamy goodness.

    Step 5: Garnish and Serve

    You’re almost there! Grab some fresh coriander and sprinkle it generously over your pasta. It adds a fresh kick that elevates the dish!

    Now your Yellow Curry Shrimp Pasta is ready to impress. Serve it immediately and watch your loved ones dig in with delight!

    Tips for Success

    • Use fresh shrimp for the best flavor; frozen is okay, but thaw properly.
    • Feel free to adjust the yellow curry paste—start with a little and build up to your taste.
    • Don’t overcook the pasta; al dente is key for that perfect bite.
    • Add a squeeze of lime for extra brightness before serving!
    • Prep your ingredients beforehand to streamline the cooking process.

    Equipment Needed

    • Large Pot: Essential for boiling pasta; a Dutch oven works too!
    • Skillet: A non-stick skillet is perfect for cooking the sauce; a frying pan will do.
    • Whisk: Use this for mixing the curry paste; a fork works in a pinch.
    • Colander: Necessary for draining pasta; a slotted spoon can substitute if needed.

    Variations

    • Vegetarian Version: Swap shrimp for firm tofu or chickpeas to create a delightful meatless option.
    • Spicy Kick: Add sliced jalapeños or a dash of Sriracha for an extra layer of heat!
    • Vegetable Boost: Incorporate bell peppers, spinach, or zucchini for added nutrients and color.
    • Coconut Substitutes: Use almond milk or soy milk for a lighter base, though the flavor will change slightly.
    • Pasta Choices: Experiment with fettuccine or zucchini noodles if you’re looking for a different pasta experience.

    Serving Suggestions

    • Side Salad: Pair it with a light cucumber or mixed greens salad to balance the richness.
    • Beverages: Serve with chilled iced tea or a crisp Sauvignon Blanc for a refreshing combo.
    • Presentation: Serve in shallow bowls and garnish with extra coriander for a pop of green!
    • Crusty Bread: A warm, crusty baguette is perfect for soaking up the delicious sauce.

    FAQs about Yellow Curry Shrimp Pasta

    Can I make Yellow Curry Shrimp Pasta ahead of time?

    Absolutely! You can cook the pasta and make the sauce in advance. Just store them separately in airtight containers. When you’re ready to enjoy, reheat and combine!

    What if I don’t like shrimp?

    No worries! You can easily substitute shrimp with chicken, tofu, or any protein you prefer. Just adjust the cooking time as needed to ensure your substitute is fully cooked.

    Is this dish spicy?

    The spice level depends on the amount of yellow curry paste you use. Start with a small amount and taste as you go. You can always add more if you like it spicy!

    Can I use a different type of pasta?

    Sure! While linguine works well, you can swap it for any pasta shape you enjoy. Fettuccine, spaghetti, or even whole wheat varieties are great alternatives.

    How can I store leftovers?

    Leftovers should be stored in the refrigerator in an airtight container for up to 3 days. Gently reheat on the stovetop with a splash of coconut milk for extra creaminess!

    Final Thoughts

    Cooking Yellow Curry Shrimp Pasta brings a burst of joy into my kitchen. It’s a simple yet exquisite dish that never fails to impress. As the aromas fill your home, it transforms an ordinary weeknight into something special. I love watching my family gather around the table, their faces lighting up with delight. This recipe is not just about feeding bellies; it’s about creating moments and memories. With this easy, vibrant meal, you’re not just a home cook; you’re a culinary storyteller sharing love through food. Enjoy every bite and cherish each moment together!


    Print

    clock clock iconcutlery cutlery iconflag flag iconfolder folder iconinstagram instagram iconpinterest pinterest iconfacebook facebook iconprint print iconsquares squares iconheart heart iconheart solid heart solid icon

    Description

    A flavorful dish combining the richness of coconut milk and yellow curry with shrimp and pasta.


    • 10.5 oz linguine
    • 10.5 oz raw shrimp, peeled and deveined
    • 1 cup coconut milk
    • 1 tablespoon yellow curry paste
    • 1 cup green peas
    • Fresh coriander, for garnish

    1. Bring a large pot of salted water to a boil and cook linguine until al dente, about 9 minutes. Drain and set aside.
    2. In a large skillet, heat coconut milk over medium heat. Whisk in yellow curry paste until fully blended.
    3. Add shrimp and peas to the sauce. Simmer until shrimp are pink and cooked through, about 3 to 4 minutes.
    4. Toss cooked linguine with the shrimp curry sauce until evenly coated.
    5. Top with fresh coriander and serve immediately.

    Notes

    • Make sure the shrimp is fresh for the best flavor.
    • Adjust the amount of curry paste according to your spice preference.
    • Prep Time: 10 minutes
    • Cook Time: 15 minutes
    • Category: Main Course
    • Method: Stovetop
    • Cuisine: Thai

    Nutrition

    • Serving Size: 1 serving
    • Calories: 350
    • Sugar: 3g
    • Sodium: 600mg
    • Fat: 20g
    • Saturated Fat: 10g
    • Unsaturated Fat: 10g
    • Trans Fat: 0g
    • Carbohydrates: 30g
    • Fiber: 2g
    • Protein: 15g
    • Cholesterol: 150mg

    Sharing is caring!

  • Dill Pickle Sourdough Bread

    Dill Pickle Sourdough Bread


    Introduction to Dill Pickle Sourdough Bread

    Ah, the culinary joys of baking! Today, I’m thrilled to share my delightful twist on traditional sourdough: Dill Pickle Sourdough Bread. If you’re like me, juggling a whirlwind of daily tasks, this recipe is a beacon of hope. It’s not just about the tangy flavor that dances on your tongue, but also about crafting something extraordinary in your kitchen.

    Imagine the aroma wafting through your home, as you bring a unique bread to the table. Whether it’s for a family gathering or a cozy night in, this Dill Pickle Sourdough Bread is destined to impress. Let’s get started!

    Why You’ll Love This Dill Pickle Sourdough Bread

    This Dill Pickle Sourdough Bread is an absolute game-changer for busy moms and professionals alike. It’s simple, quick, and the flavors? Out of this world! Imagine crispy edges and a soft, tangy interior that pairs perfectly with any meal or sandwich. Plus, the satisfaction of making sourdough from scratch will bring a smile to your face, even on the busiest days. You’re going to love the joy this recipe brings to your kitchen!

    Ingredients for Dill Pickle Sourdough Bread

    Creating this Dill Pickle Sourdough Bread is a breeze with a list of simple, wholesome ingredients. Here’s what you’ll need:

    • Active sourdough starter: This is the backbone of your bread, bringing that signature tang and rise.
    • Filtered water: Using warm, quality water helps activate the starter and create a fluffy texture.
    • Dill pickle brine: Adds a delightful tang and infuses the bread with that irresistible pickle flavor.
    • Organic bread flour: Provides the structure and strength for a beautiful loaf.
    • Whole wheat flour: Offers added nutrition and a slightly nutty flavor to balance the bread.
    • Fine sea salt: Enhances flavor and is essential for proper fermentation of the dough.
    • Chopped dill pickles: These little gems pack a punch of flavor and texture, making each bite a surprise.
    • Fresh dill: Adds a burst of herbaceous goodness, elevating the pickle flavor.

    If you’re feeling adventurous, consider swapping out the dill pickles for jalapeños for a spicy kick, or experiment with your favorite herb mix in place of fresh dill. For exact measurements, check the bottom of the article for a handy printable version!

    How to Make Dill Pickle Sourdough Bread

    Ready to dive into creating your very own Dill Pickle Sourdough Bread? Let’s get our hands a little floury! Each step is filled with love, and I promise the result is worth it. Here’s a simple, practical guide to lead you through this culinary adventure.

    Step 1: Mix the Starter, Water, and Brine

    Preparing the Dough Base

    Start by placing your active sourdough starter in a large mixing bowl. Pour in the warm filtered water and dill pickle brine. Grab a fork and blend everything together until the starter is fully dissolved. This step is crucial for an even dough. Next, we’ll integrate our flours, sparking that sourdough magic!

    Step 2: Add Salt and Let Rest

    Importance of Resting

    Once the flour is in, sprinkle fine sea salt over the shaggy dough. Cover the bowl with a damp cloth, sealing in warmth and moisture for about 40 minutes. This resting period allows the salt to absorb into the dough, enriching the flavor and enhancing that lovely fermentation.

    Step 3: Knead the Dough

    Incorporating the Salt

    Now it’s time to knead! With clean hands, work the salt into the dough for about two minutes. Let that muscle memory kick in! After kneading, begin your first set of stretch and folds. We’re making the gluten strands stronger, which is the key to that chewy texture we all love.

    Step 4: Adding Dill Pickles and Fresh Dill

    How to Fold in Add-ins

    After your dough has rested, it’s time to add the fun stuff! Sprinkle in the chopped dill pickles and fresh dill on top of your dough. As you do your next stretch and fold, encase those vibrant mix-ins. This step is where the smiles come in, each bite will burst with flavor!

    Step 5: Bulk Fermentation

    Watching for the Right Rise

    Let your dough sit at room temperature, covered, and watch it rise. You’re looking for it to grow just shy of doubling in size, which usually takes about four hours at 74 degrees F. It’s like watching magic happen, don’t you think? Each hour brings more life to your dough!

    Step 6: Shaping the Dough

    Preparing for the Final Rise

    Once your dough has risen, gently tip it onto a floured work surface. Let it rest for 10-15 minutes. This step gives your dough a moment to relax before shaping it. Treat it kindly; it’s working hard! Once rested, shape it into a round loaf, seam side up, and place it in a flour-dusted banneton.

    Step 7: The Final Rise

    Options for Rising

    Now, it’s time for the final rise! You have options: let it rise at room temperature for about 1.5 hours or pop it in the fridge overnight for up to 12 hours. This longer fridge rise can deepen the flavor even more. Just think about how patient your sourdough will be, resting overnight like a cozy bear!

    Step 8: Preheating the Oven

    Getting Ready to Bake

    Before you’re ready to bake, preheat your oven with your Dutch oven inside at 450 degrees F. This high heat mimics the brilliant crust of a bakery loaf, so don’t skip this step! The heat buildup is essential for that beautiful crust we all love about sourdough.

    Step 9: Baking the Bread

    Ensuring Perfect Color and Texture

    When your oven is roaring hot, take the dough out of the banneton. Place a piece of parchment over the top, flip, and score with a sharp knife. This lets the steam escape and helps with that crusty exterior. Slide the dough on the parchment into the Dutch oven, cover it, and bake for 25 minutes. Then remove the lid, reduce the temperature to 435 degrees F, and bake for an additional 20 minutes.

    Step 10: Cooling the Bread

    Why Letting it Cool Matters

    As hard as it may be, resist the urge to slice right away. Allow your bread to cool for at least one hour on a wire rack. This cooling process is crucial for finishing that baking magic. Cutting too soon can lead to gummy bread, and nobody wants that! Enjoy the aroma filling your kitchen as you patiently wait!

    Tips for Success

    • Always use an active sourdough starter for best results; it should be bubbly and lively.
    • Don’t rush the resting periods; these are essential for flavor and texture development.
    • Pat the chopped dill pickles dry to avoid excess moisture that can weigh down your dough.
    • Invest in a kitchen scale for precise measurements, ensuring consistency.
    • Allow your bread to cool completely before slicing for a perfect texture.

    Equipment Needed

    • Mixing bowl: A large bowl is ideal; any sturdy container will do.
    • Dutch oven: A cast-iron pot works perfectly; you can use any oven-safe pot with a lid.
    • Kitchen scale: This is handy for precise measurements; measuring cups can work as an alternative.
    • Bench scraper: This simplifies handling sticky dough; a spatula will work in a pinch!
    • Wire rack: Great for cooling your bread; any elevated surface will suffice.

    Variations on Dill Pickle Sourdough Bread

    • Spicy Dill Pickle Sourdough: Add diced jalapeños or red pepper flakes for a spicy twist that’ll pickle your taste buds!
    • Herb-Infused Version: Incorporate a mix of fresh herbs like chives or thyme for added freshness and depth of flavor.
    • Cheddar Dill Sourdough: Mix in shredded sharp cheddar cheese alongside the dill pickles for a rich, savory experience.
    • Vegan Option: Use aquafaba (chickpea brine) instead of dill pickle brine for a vegan-friendly version while still retaining that delightful tang.
    • Seeded Sourdough: Add sesame seeds, poppy seeds, or sunflower seeds into the dough for extra texture and flavor.

    Serving Suggestions for Dill Pickle Sourdough Bread

    • Serve warm with a spread of cream cheese and smoked salmon for an elegant appetizer.
    • Pair slices with hearty soups or stews, as the bread’s tang complements rich flavors beautifully.
    • Enjoy it as the base for sandwiches, especially with turkey or ham!
    • Slice and toast for a crunchy bruschetta topped with your favorite savory toppings.
    • Accompany with a refreshing cucumber salad to enhance that pickle flavor.

    FAQs about Dill Pickle Sourdough Bread

    Can I use store-bought dill pickles instead of homemade?

    Absolutely! Store-bought dill pickles work perfectly. Just remember to pat them dry to avoid excess moisture in your dough.

    How do I know if my sourdough starter is active enough?

    Your sourdough starter should be bubbly and have doubled in size within 4-6 hours of feeding. If it meets these signs, it’s ready to kick off your Dill Pickle Sourdough Bread adventure!

    Can I freeze the dough or the baked bread?

    Yes! You can freeze the raw dough after shaping it. Alternatively, freeze the baked loaf once it’s cooled. Just make sure to wrap it tightly to avoid freezer burn.

    What should I do if my bread doesn’t rise properly?

    Don’t fret! If your bread doesn’t rise, check the warmth of your kitchen and the activity of your starter. A chilly environment or inactive starter can slow down fermentation. Try placing it in a warmer spot next time!

    How long will the Dill Pickle Sourdough Bread stay fresh?

    This bread is best enjoyed fresh but will stay good for 3-4 days at room temperature. For longer storage, slice and freeze. That way, you’ll always have some ready for toasting or sandwiches!

    Final Thoughts

    There’s something magical about pulling a loaf of fresh Dill Pickle Sourdough Bread from your oven. The soft, tangy slices bring joy to even the busiest days, creating smiles around the dinner table. Each bite transports you back to moments filled with laughter and love, making it more than just food; it’s a heartfelt reminder of home.

    So, whether you’re a seasoned baker or a curious newbie, this recipe invites you to embrace the warmth of your kitchen. I can’t wait for you to experience the delightful flavor and wonderful aroma that fills your space. Happy baking!


    Print

    clock clock iconcutlery cutlery iconflag flag iconfolder folder iconinstagram instagram iconpinterest pinterest iconfacebook facebook iconprint print iconsquares squares iconheart heart iconheart solid heart solid icon

    Description

    A unique and flavorful sourdough bread infused with the tangy taste of dill pickles and fresh dill.


    • 50 grams active sourdough starter
    • 260 grams filtered water, around 85 degrees F
    • 30 grams dill pickle brine
    • 375 grams organic bread flour
    • 35 grams whole wheat flour
    • 7 grams fine sea salt
    • 80 grams chopped dill pickles
    • 1 1/2 tablespoons finely chopped fresh dill

    1. In a large bowl, mix starter, water, and brine with a fork until starter is dispersed. Add flours, mixing with a spatula first, then switching to mixing with your hand until a shaggy dough is formed, so that flour is not visible.
    2. Sprinkle salt on top of dough. Cover bowl with a damp cloth and let sit for 40 minutes.
    3. Work the salt into the dough, kneading it strongly with your hands for two minutes. Then perform your 1st set of stretch and folds. Let dough rest for 30 minutes, covered.
    4. After the 30 minute rest, sprinkle the pickles and fresh dill evenly on top of the dough, encasing the mix-ins into the dough during the next stretch and fold.
    5. Perform 2 more sets of rests and stretch and fold, waiting the 30 minutes in between each, for a total of 4 stretch and fold sequences.
    6. Let the dough bulk ferment on your counter until just short of doubling, about 4 hours at 74 degrees F.
    7. Once the dough has risen, gently move it out onto a floured work surface and let it rest for 10-15 minutes before shaping.
    8. Shape the dough and place it seam side up in a flour dusted, linen lined banneton, cover and let rise for a final time.
    9. The final rise can happen in the fridge overnight or at room temperature for about 1 1/2 hours.
    10. Preheat the oven with the dutch oven inside to 450 degrees F. Place parchment over the dough, flip it over, and score the top.
    11. Place dough on parchment paper into the dutch oven, cover, and bake for 25 minutes. Then remove the cover, turn oven down to 435 degrees F and bake for an additional 20 minutes.
    12. Allow to cool for one hour before slicing.

    Notes

    • Pat the chopped dill pickles with a paper towel to remove excess moisture before adding them to the dough.
    • Final rise can be done up to 12 hours in the refrigerator.
    • For best results, wait one hour before slicing to avoid gummy bread.
    • Prep Time: 30 minutes
    • Cook Time: 45 minutes
    • Category: Bread
    • Method: Baking
    • Cuisine: American

    Nutrition

    • Serving Size: 1 slice
    • Calories: 150
    • Sugar: 1g
    • Sodium: 220mg
    • Fat: 2g
    • Saturated Fat: 0g
    • Unsaturated Fat: 1g
    • Trans Fat: 0g
    • Carbohydrates: 28g
    • Fiber: 1g
    • Protein: 5g
    • Cholesterol: 0mg

    Sharing is caring!

  • Raspberry Cheesecake Sourdough Bread

    Raspberry Cheesecake Sourdough Bread


    Introduction to Raspberry Cheesecake Sourdough Bread

    As a busy mom, I get it—finding time to create something special can feel impossible. That’s why I absolutely adore this Raspberry Cheesecake Sourdough Bread! Picture this: a gorgeous loaf, bursting with fresh raspberries and a luscious cream cheese filling. It’s like having dessert for breakfast, but it’s bread—so no guilt!

    This delightful recipe is not only an impressive treat for your loved ones but also a fun way to unwind in the kitchen. Plus, the intoxicating aroma while it bakes? Pure bliss! Trust me, this bread will quickly become a cherished part of your baking repertoire.

    Why You’ll Love This Raspberry Cheesecake Sourdough Bread

    If you’re anything like me, you appreciate recipes that strike the perfect balance between simplicity and indulgence. This Raspberry Cheesecake Sourdough Bread is a total game-changer! It’s easy to make, thanks to the forgiving nature of sourdough, and the taste is absolutely divine—with that delightful tang from the raspberries combined with creamy richness. Plus, your family and friends will rave about it, making you the star of your kitchen!

    Ingredients for Raspberry Cheesecake Sourdough Bread

    To whip up this enchanting Raspberry Cheesecake Sourdough Bread, you’ll need just a handful of ingredients that you might already have in your pantry or fridge! Here’s what you’ll need:

    • Bread flour: The backbone of our bread, it gives a wonderful structure and chewiness. Feel free to experiment with whole wheat flour for a nuttier flavor!
    • Active sourdough starter: This magical mix of flour and water captures wild yeast to leaven our bread and impart delicious flavor. If you don’t have a starter, consider buying one from a local bakery or online.
    • Salt: Just a touch adds depth and enhances the flavors in your bread. Remember, not all salts are created equal; I prefer kosher salt for its texture and flavor.
    • Water: Necessary for hydration, it helps the flour mingle and develops that lovely dough. It’s best to use filtered water, especially in areas with harsher tap water.
    • Sliced raspberries: These beauties not only add vibrant color but also a fruity zing. For this recipe, freeze-dried raspberries work wonders—they keep that summer essence without watering down our bread.
    • Cream cheese: For the dreamy, luscious filling, it adds richness and a hint of tang that plays beautifully with the raspberries.
    • Granulated sugar: A little sweetness balances the tartness of the raspberries. You can substitute with honey or maple syrup if you prefer a natural alternative.
    • Vanilla extract: Just a splash adds a warm, comforting aroma. Feel free to use almond extract for a delightful twist!

    All measurements for these ingredients are included at the bottom of the article and are available for printing, ensuring you have everything handy when you embark on this baking adventure!

    How to Make Raspberry Cheesecake Sourdough Bread

    This Raspberry Cheesecake Sourdough Bread may seem complex, but I promise it’s easier than it looks. Let’s take it step by step, and soon you’ll be savoring a delicious loaf that’s bursting with flavor!

    Step 1: Prepare the Dough

    First, ensure your workspace is clean and inviting. Knead the dough gently, letting your hands feel the texture. Let it rest at room temperature for about 3 hours. This is crucial, as a warm environment promotes yeast activity, helping your dough rise beautifully!

    Step 2: Make the Dough Mixture

    In a large mixing bowl, combine your active sourdough starter, water, and bread flour. Use a wooden spoon to mix everything until it forms a shaggy mass. The combined ingredients create the foundation of our Raspberry Cheesecake Sourdough Bread!

    Step 3: The Autolyse Stage

    Let the mixture sit for an hour. This step, known as autolyse, allows the flour to fully absorb the water. The dough will develop a better structure and texture, giving you that perfect chewiness we all love!

    Step 4: Add Salt and Rest

    Now it’s time to add salt. Sprinkle it over the dough and mix gently until incorporated. Leave it to rest for another 30 minutes. This will enhance the flavor of your bread and contribute to a delightful crunch in the crust!

    Step 5: Perform Stretch and Fold

    Here comes the fun part! You’ll perform a stretch and fold technique. Grab one edge of the dough and stretch it upward before folding it back onto itself. Repeat this for about 4 sides of the dough. This strengthens the gluten and promotes a beautiful rise!

    Step 6: Repeat the Folds

    Continue stretching and folding every 30 minutes, completing this process around 3-4 times. The dough should start to feel jiggly and double in size. This crucial technique transforms your dough into something truly special!

    Step 7: Prepare the Cream Cheese Filling

    While your dough is rising, let’s make the luscious cream cheese filling. In a small bowl, mix the softened cream cheese, granulated sugar, and vanilla extract until smooth. This creamy goodness will be the heart of our Raspberry Cheesecake Sourdough Bread!

    Step 8: Incorporate Raspberries

    Now, prepare your raspberries. If you’re using freeze-dried ones, just give them a quick rinse then lightly dry them. Fresh raspberries need a gentle wash and should be dried thoroughly so they don’t add excess moisture to the dough.

    Step 9: Shape the Dough

    When your dough has risen, it’s time to shape it! Stretch the dough flat into a rectangle, and evenly spread the cream cheese filling and raspberries over it. Fold the dough like an envelope, adding more filling as needed. Then, roll it tightly, shaping it into a ball.

    Step 10: Proof the Dough

    Place your beautiful shaped dough into a floured banneton or a lined bowl. Cover it with plastic wrap and refrigerate for at least 12 hours. This long proofing time helps develop the flavors and texture of your Raspberry Cheesecake Sourdough Bread!

    Step 11: Bake the Bread

    After the dough has fermented, remove it from the refrigerator. Let it sit for about an hour. Preheat your oven to an exhilarating 450°F (230°C). Once heated, carefully flip the dough onto parchment paper, score the top with a sharp knife, and transfer it to a preheated Dutch oven. Bake for 35 minutes, uncovering after 20 minutes to let it develop that golden crust!

    Step 12: Let it Cool

    Once baked, remove the loaf from the oven and let it cool on a rack before slicing. This step is vital; slicing too soon can make the inside gummy. Trust me, the wait will be worth every minute!

    Tips for Success

    • Ensure your sourdough starter is active and bubbly for best results.
    • Be patient with proofing; flavor develops over time, so don’t rush it!
    • Use a kitchen scale for accurate measurements—it’s a game-changer in baking.
    • Preheat your Dutch oven to maximize the bread’s oven spring.
    • For extra flavor, sprinkle a bit of sea salt on top before baking!

    Equipment Needed

    • Large mixing bowl: A sturdy bowl is essential. A glass or ceramic bowl holds heat well!
    • Wooden spoon: Perfect for mixing the dough. A silicone spatula works too!
    • Banneton proofing basket: Use this for shaping. If you don’t have one, a bowl lined with a floured towel does the trick!
    • Sharp knife or lame: Essential for scoring. A dedicated blade allows for precise cuts!
    • Dutch oven: Ideal for baking. If you don’t have one, any heavy oven-safe pot with a lid can work.

    Variations

    • Fruit Swap: Try using blueberries or strawberries instead of raspberries for a delicious twist on flavor!
    • Vegan Option: Substitute cream cheese with a plant-based alternative and use maple syrup instead of granulated sugar.
    • Nutty Delight: Add chopped nuts like walnuts or pecans to the cream cheese filling for added crunch and flavor.
    • Spiced Up: Incorporate a pinch of cinnamon or nutmeg into the dough for a warm, inviting flavor!
    • Chocolate Lovers: Fold in mini chocolate chips with the raspberries for a decadent addition!

    Serving Suggestions

    • Pair with a creamy cup of coffee or herbal tea for a delightful breakfast or afternoon snack.
    • Serve warm, drizzled with a light glaze made from powdered sugar and milk for a sweet touch.
    • Enjoy it alongside a fresh fruit salad for a colorful, refreshing meal.
    • Top with whipped cream for a festive dessert option at gatherings!

    FAQs about Raspberry Cheesecake Sourdough Bread

    Can I use fresh raspberries instead of freeze-dried?

    While fresh raspberries add a gorgeous burst of flavor, they contain too much moisture. This excess moisture can make the dough soggy. If you still want to try fresh, drain and dry them thoroughly before using.

    How do I store my Raspberry Cheesecake Sourdough Bread?

    To keep your delicious loaf fresh, store it in a bread bag or a plastic bag at room temperature. If you want to save it for later, consider freezing it. Just make sure it’s wrapped tightly!

    How long does it take for the sourdough to rise?

    The entire fermentation process might take around 12 to 24 hours, but remember, patience is key! The longer you let it proof, the more flavor will develop.

    Can I make this bread without a sourdough starter?

    While a sourdough starter is essential for the signature tangy flavor, you can use active dry yeast as a substitute. Keep in mind that using yeast changes the texture significantly!

    What should I do if my dough doesn’t rise?

    If your dough isn’t rising, it could be due to an inactive sourdough starter or a too-cool temperature. Be sure your starter is bubbly before use, and try to keep your dough in a warm spot for optimal rising conditions.

    Final Thoughts

    Embracing the art of baking this Raspberry Cheesecake Sourdough Bread has brought me countless joyful moments in the kitchen. Each bite is a harmonious blend of creamy richness and vibrant raspberries, transforming an ordinary day into a delightful occasion. The smiles from my family as they indulge in homemade goodness are priceless. Whether you’re savoring a slice with coffee or sharing it at a gathering, this bread never fails to impress. I hope you experience the joy and satisfaction that comes from creating this unique treasure—you deserve it!


    Print

    clock clock iconcutlery cutlery iconflag flag iconfolder folder iconinstagram instagram iconpinterest pinterest iconfacebook facebook iconprint print iconsquares squares iconheart heart iconheart solid heart solid icon

    Description

    Raspberry Cheesecake Sourdough Bread is a delightful fusion of rich cream cheese and fresh raspberries baked into a sourdough loaf, offering a unique twist on traditional bread.


    • 625 grams bread flour (about 4 cups)
    • 100 grams active sourdough starter (about 1 cup)
    • 10 grams salt (about 1 3/4 teaspoon)
    • 450 grams water (about 1 1/2 cup)
    • 1/2 cup sliced raspberries (use freeze-dried for best results)
    • 8 oz softened cream cheese
    • 2 tbsp granulated sugar
    • 1 tsp vanilla extract

    1. Prepare to knead the dough and let it rest for a total of 12 hours, with a minimum of 3 hours at room temperature.
    2. Combine sourdough starter, water, and flour in a large mixing bowl with a wooden spoon until mixed.
    3. Let the mixture sit for 1 hour (autolyse stage).
    4. Add salt and let sit for another 30 minutes.
    5. Perform the first stretch and fold or coil fold.
    6. Let rest for another 30 minutes and repeat the fold.
    7. Continue stretching and folding 3-4 more times until dough is jiggly and has doubled in size.
    8. Prepare the cream cheese filling by mixing softened cream cheese, sugar, and vanilla in a small bowl.
    9. Prepare raspberries by washing and lightly drying them.
    10. Stretch the dough into a rectangle and evenly distribute the cream cheese mixture and raspberries.
    11. Fold the dough like an envelope, adding more cream cheese and raspberries as needed.
    12. Roll the dough tightly and shape it into a ball.
    13. Place the dough in a floured banneton proofing basket or lined bowl, cover with plastic wrap, and refrigerate for at least 12 hours.
    14. Remove dough from the fridge, let it sit for about an hour, and preheat oven to 450°F (230°C).
    15. Carefully flip the dough onto parchment paper, score the top, and place it in a preheated Dutch oven.
    16. Bake the dough for 35 minutes, uncovering after 20 minutes to finish baking.
    17. Let cool on a rack before slicing.
    18. Store in a bread bag or plastic bag.

    Notes

    • Do not use frozen raspberries as they add too much moisture.
    • Flour the towel or banneton generously to prevent sticking.
    • Oven temperature should be hot for proper baking.
    • Prep Time: 1 hour
    • Cook Time: 35-55 minutes
    • Category: Bread
    • Method: Baking
    • Cuisine: American

    Nutrition

    • Serving Size: 1 slice
    • Calories: 250
    • Sugar: 6 grams
    • Sodium: 200 mg
    • Fat: 8 grams
    • Saturated Fat: 4 grams
    • Unsaturated Fat: 0 grams
    • Trans Fat: 0 grams
    • Carbohydrates: 38 grams
    • Fiber: 2 grams
    • Protein: 6 grams
    • Cholesterol: 20 mg

    Sharing is caring!

  • Lamb Chops With Buckwheat And Black Pepper Strawberries

    Lamb Chops With Buckwheat And Black Pepper Strawberries


    Introduction to Lamb Chops With Buckwheat And Black Pepper Strawberries

    Gather around, fellow food lovers! Today, I’m excited to share my recipe for Lamb Chops With Buckwheat And Black Pepper Strawberries. This dish isn’t just a meal; it’s an experience that brings a touch of gourmet flair to your family dining table. As a busy mom myself, I totally understand the need for quick, impressive solutions that wow loved ones while keeping prep simple. The deep flavors of seared lamb paired with the nutty buckwheat and the unexpected burst of sweetness from roasted strawberries make for a delightful and satisfying meal!

    Why You’ll Love This Lamb Chops With Buckwheat And Black Pepper Strawberries

    This dish is a true time-saver, perfect for busy nights when you want to impress. You’ll love how quickly the lamb sears, and the buckwheat cooks in a flash, making dinner a breeze. The unique combination of flavors—savory, nutty, and sweet—will have everyone raving. Plus, it’s a gorgeous plate that elevates any meal, ensuring your family feels special with minimal effort!

    Ingredients for Lamb Chops With Buckwheat And Black Pepper Strawberries

    When it comes to creating Lamb Chops With Buckwheat And Black Pepper Strawberries, having the right ingredients makes all the difference. Here’s what you’ll need:

    • Buckwheat or bulgur: This nutty grain provides a hearty base for the salad. It’s gluten-free and cooks up quickly!
    • Chard: Fresh chard adds a lovely color and slight earthiness. If chard is unavailable, spinach works well, too.
    • Lamb rack: Juicy lamb chops are the star of this dish. Look for chops that are bright red with a nice layer of fat for flavor.
    • Kosher salt: Essential for seasoning, it enhances the natural flavors of the meat and salad.
    • Freshly ground black pepper: Adds a welcome kick to both the lamb and the strawberries. Don’t skip this ingredient!
    • Neutral oil (like canola): Perfect for searing the lamb, as it has a high smoke point. Olive oil can work, but it’ll change the flavor a bit.
    • Strawberries: Look for ripe, sweet strawberries to roast. They bring a surprising sweetness that complements the savory lamb beautifully.
    • Dry red wine: This adds depth to the sauce and helps deglaze the pan, capturing all the flavor. Choose one that you enjoy drinking!
    • Extra-virgin olive oil: A drizzle at the end enriches the dish, giving that luxurious touch that makes it feel gourmet.

    Exact quantities of each ingredient can be found at the bottom of this article, easy to print for your next cooking adventure!

    How to Make Lamb Chops With Buckwheat And Black Pepper Strawberries

    Step 1: Prepare the Buckwheat

    To start, bring a medium pot of salted water to a roaring boil. Once it’s bubbling serenely, whisk in the buckwheat. It’s amazing how quickly this grain cooks! Reduce the heat to a gentle simmer and let it bubble away for about 10 to 12 minutes. You’re looking for it to become tender yet slightly chewy, just like a comforting hug. Once it’s done, drain any excess water and set it aside while you tackle the greens.

    Step 2: Wilt the Chard

    Next up, grab a medium bowl and toss in those gorgeous chard ribbons. You’ll want to pour the hot, drained buckwheat over the chard. The heat from the buckwheat will work wonders, wilting the greens just perfectly. This creates a beautiful blend, ready to take on the vibrant flavors to come.

    Step 3: Sear the Lamb Chops

    Time to focus on those stunning lamb chops! Season them generously with kosher salt and freshly ground black pepper—don’t be shy! In a large skillet, heat some neutral oil until it shimmers with excitement. Carefully place the lamb chops flat side down and sear for about 5 minutes, until they turn a mouthwatering golden brown. Flip them over, and sear the other side for about 3 minutes, aiming for that juicy medium-rare doneness. Once cooked, transfer them to a plate to rest; they’ll be even better later!

    Step 4: Prepare the Strawberries

    In the same skillet, you’ll find all that flavorful goodness left behind. Discard any excess fat into a heatproof dish, then heat more oil until it’s smoking. Toss in those delightful strawberries along with freshly cracked black pepper. Sear them for about 2 minutes until they start releasing their juices, which is when the magic happens! Remove the strawberries, then pour in dry red wine to deglaze the pan, scraping up all those brown bits. Reduce the wine by half, and then drizzle it over the strawberries for a sweet finish.

    Step 5: Combine and Serve

    Now it’s time to bring this gourmet dish together! In the bowl with the buckwheat and chard, add a few glugs of extra-virgin olive oil, and toss to combine. On four plates, evenly divide this lovely mixture. Next, slice the rack of lamb into eight beautiful chops and lay two on each plate. Ready for the crowning glory? Spoon the roasted strawberries and that luxurious reduced wine sauce right over the lamb. Your dinner is complete, and trust me, it’s worthy of a celebration!

    Tips for Success

    • Make sure your lamb chops are at room temperature before searing for even cooking.
    • Use a meat thermometer to check for perfect doneness—medium-rare is about 135°F.
    • For extra flavor, marinate the lamb in olive oil, garlic, and herbs a day in advance.
    • Keep an eye on the strawberries; they can go from raw to overcooked faster than you think!
    • Let the dish rest for a few minutes after plating to enhance flavors.

    Equipment Needed for Lamb Chops With Buckwheat And Black Pepper Strawberries

    • Medium pot: For cooking the buckwheat. A saucepan also works!
    • Large skillet: Ideal for searing lamb and preparing the strawberries. A frying pan can suffice.
    • Cooking spoon: Perfect for stirring and deglazing.
    • Strainer: To drain the buckwheat.

    Variations of Lamb Chops With Buckwheat And Black Pepper Strawberries

    • Herb-crusted lamb: Add a mixture of fresh herbs like rosemary, thyme, and parsley to your lamb before searing for extra flavor.
    • Veggie swap: Instead of chard, try kale or arugula for a different texture and taste in the salad.
    • Grain alternatives: Substitute buckwheat with quinoa or farro for a flavorful twist while keeping it gluten-free.
    • Spicy kick: Add a pinch of red pepper flakes to the strawberries for a zesty contrast to their sweetness.
    • Vegan option: Use grilled portobello mushrooms instead of lamb, and replace strawberries with roasted beets for an earthy flavor.

    Serving Suggestions for Lamb Chops With Buckwheat And Black Pepper Strawberries

    • Pair with roasted garlic mashed potatoes for a creamy side that complements the dish.
    • A crisp green salad with lemon vinaigrette offers a nice contrast.
    • Serve with a glass of the same dry red wine used in the recipe.
    • Garnish plates with fresh herbs for a vibrant presentation.

    FAQs about Lamb Chops With Buckwheat And Black Pepper Strawberries

    Can I use another type of meat instead of lamb?

    Absolutely! If lamb isn’t your thing, try using beef ribeyes or pork chops. They’ll still pair beautifully with the buckwheat and black pepper strawberries.

    How do I know when the lamb is cooked perfectly?

    The best way to check for doneness is with a meat thermometer. For medium-rare, aim for an internal temperature of 135°F. This ensures juicy lamb chops every time!

    What can I substitute for buckwheat if I can’t find it?

    You can easily swap buckwheat for quinoa or bulgur. Both are quick-cooking grains that will still create a delicious base for your salad.

    How can I make this dish ahead of time?

    Prep the buckwheat and chard earlier in the day, and refrigerate. Just sear the lamb and strawberries before serving, and you’ll have a scrumptious meal ready in no time!

    Are there any sides that would pair well with this gourmet meal?

    Definitely! A fresh green salad or roasted vegetables would complement the flavors beautifully, balancing the richness of the lamb with something light and vibrant.

    Final Thoughts on Lamb Chops With Buckwheat And Black Pepper Strawberries

    Cooking Lamb Chops With Buckwheat And Black Pepper Strawberries isn’t just about the food; it’s about creating moments of joy around the table. This dish showcases how simple ingredients can transform into a gourmet experience that delights both the palate and the soul. Every bite—savory lamb, nutty buckwheat, sweet roasted strawberries—takes you on a culinary adventure. Whether it’s a special occasion or a weeknight dinner, this recipe will surely impress. So, roll up your sleeves, savor the process, and enjoy the smiles it brings while serving your loved ones this delightful feast!


    Print

    clock clock iconcutlery cutlery iconflag flag iconfolder folder iconinstagram instagram iconpinterest pinterest iconfacebook facebook iconprint print iconsquares squares iconheart heart iconheart solid heart solid icon

    Description

    A gourmet dish featuring seared lamb chops served with a buckwheat and chard salad, complemented by roasted strawberries in a red wine reduction.


    • 1 cup buckwheat or bulgur
    • 10 stems chard, cut into ribbons
    • 1 rack of lamb (8 lamb chops, 1 to 2 pounds total)
    • Kosher salt
    • Freshly ground black pepper
    • Neutral oil, such as canola
    • 1 pound strawberries, hulled and halved
    • ½ cup dry red wine
    • Extra-virgin olive oil

    1. Bring a medium pot of salted water to a boil over high heat. Whisk in the buckwheat, return to a boil, lower the heat, and simmer until tender, 10 to 12 minutes.
    2. Place the chard ribbons into a medium bowl. Drain the buckwheat and then pour it over the chard, letting the heat from the buckwheat wilt the chard.
    3. Season the lamb chops liberally with salt and pepper. In a large skillet, heat neutral oil until smoking hot. Sear the lamb, flat side down, until deeply browned, about 5 minutes. Flip and sear the other side until medium-rare, about 3 minutes more. Remove from the pan to rest.
    4. Discard excess fat from the frying pan into a heatproof dish. Return the pan to high heat, add neutral oil, and heat until smoking. Add strawberries and black pepper. Sear the strawberries for about 2 minutes until juices start to leach. Remove the strawberries, then add red wine to deglaze the pan, scraping up the browned fond. Reduce the wine by half and pour it over the strawberries.
    5. Toss the buckwheat-chard mixture with a few glugs of extra-virgin olive oil.
    6. Slice the rack of lamb into eight chops. Dish the buckwheat-chard salad among four plates, place two chops on each plate, and spoon the roasted strawberries and reduced wine over the top.

    Notes

    • For a richer flavor, you can marinate the lamb in olive oil, garlic, and herbs overnight.
    • Ensure the strawberries are ripe for the best flavor.
    • This dish pairs well with a glass of the same dry red wine used in the recipe.
    • Prep Time: 20 minutes
    • Cook Time: 30 minutes
    • Category: Main Course
    • Method: Searing and roasting
    • Cuisine: Gourmet

    Nutrition

    • Serving Size: 1 serving
    • Calories: 550
    • Sugar: 8g
    • Sodium: 350mg
    • Fat: 30g
    • Saturated Fat: 10g
    • Unsaturated Fat: 15g
    • Trans Fat: 0g
    • Carbohydrates: 40g
    • Fiber: 7g
    • Protein: 35g
    • Cholesterol: 100mg

    Sharing is caring!

  • Blueberry Breakfast Cake

    Blueberry Breakfast Cake


    Introduction to Blueberry Breakfast Cake

    As the sun rises and the chaos of the day begins to unfold, I find that a slice of Blueberry Breakfast Cake can bring a little slice of calm into a hectic morning. Imagine starting your day with a sweet, moist cake bursting with juicy blueberries, all baked to golden perfection. This recipe not only tastes like happiness, but it’s also simple enough to whip up even on the busiest of days. Perfect for breakfast or a mid-morning treat, this delightful cake is bound to become a family favorite!

    Why You’ll Love This Blueberry Breakfast Cake

    This Blueberry Breakfast Cake is a true gem for busy mornings. It combines ease and taste in every bite, so you don’t have to sacrifice flavor for speed. The heavenly aroma wafting from your oven will make your family gather around, eager for a slice. Plus, it’s packed with nutritious blueberries, making it a charming way to start the day with something sweet but wholesome!

    Ingredients for Blueberry Breakfast Cake

    Gathering the ingredients for your Blueberry Breakfast Cake is half the fun! Here’s what you’ll need:

    • All-purpose flour – This will serve as the base for your cake, giving it structure and heartiness.
    • Sugar – A touch of sweetness is crucial to balance the tartness of the blueberries.
    • Baking powder – This magical ingredient provides the lift, making your cake deliciously fluffy.
    • Large egg – This binds your ingredients together, adding richness and moisture.
    • Milk – It adds creaminess and helps achieve that lovely cake texture.
    • Butter or margarine – Pot for softened butter for a decadent touch. It adds flavor and moisture.
    • Lemon peel – This tiny zest packs a punch, elevating the flavor profile with bright citrus notes.
    • Fresh or frozen blueberries – These beauties are the stars of the cake, adding not only flavor but also their vibrant color.
    • Additional sugar and flour for topping – These help create a delightful crumbly topping that adds texture and sweetness.
    • Walnuts – Chopped walnuts are optional, but they bring crunch and a nutty flavor that complements the blueberries.
    • Cinnamon – A sprinkle of ground cinnamon warms up the flavors, bringing comforting notes to your breakfast cake.
    • Cold butter for topping – Adding cold butter to the mixture creates that irresistible crumbly texture.

    For exact measurements, don’t forget to check the bottom of the article. Now that we’ve got our ingredients ready, let’s dive into the fun part – the baking!

    How to Make Blueberry Breakfast Cake

    Preheat the Oven

    First things first, preheat your oven to 350°F (175°C). This step is essential to ensure your Blueberry Breakfast Cake bakes evenly. While the oven heats, we can prepare the batter!

    Prepare the Dry Ingredients

    In a large bowl, whisk together the all-purpose flour, sugar, and baking powder. This combination is crucial, as it will help our cake rise beautifully. Then, cut in your softened butter until the mixture looks crumbly. Don’t worry if it feels a bit dry—it’ll come together once we add the wet ingredients!

    Mix the Wet Ingredients

    Now it’s time for the wet ingredients. In the same bowl, add the lightly beaten egg, milk, softened butter, and lemon peel. Mix everything until just moistened. If the batter feels too thick, use your hands to finish mixing. You want it blended, but a few lumps are totally okay!

    Fold in Blueberries

    Gently fold in your fresh or frozen blueberries. Be careful not to crush them; we want those juicy bursts in every bite of our blueberry dessert. Once added, spread the thick batter evenly into your greased baking pan. It may take a little effort, but trust me—it’s worth it!

    Prepare the Topping

    For a delightful crumbly topping, combine sugar, flour, chopped walnuts, and cinnamon in a mini food processor or a bowl. Add the cold butter and pulse until crumbly. If you’re doing this by hand, just cut in the butter with a fork. Sprinkle this topping evenly over your batter, giving it that sweet, crunchy finish.

    Bake the Cake

    Pop your pan into the preheated oven and bake for 40 to 45 minutes. To check for doneness, insert a toothpick into the center. If it comes out clean, your cake is ready! The delightful scent wafting through your kitchen will tell you when it’s almost done.

    Drizzle with Icing

    To make your Blueberry Breakfast Cake even more irresistible, combine powdered sugar and milk in a small bowl. Adjust the consistency until it’s drizzle-worthy. Once the cake has cooled down, drizzle this sweet icing over the top. Let it set before slicing into pieces!

    Tips for Success

    • Use room temperature ingredients for better mixing; it helps create a smoother batter.
    • When adding blueberries, coat them in a bit of flour first to prevent them from sinking.
    • If you have more time, let the batter rest for 10 minutes—it helps enhance the texture.
    • For extra flavor, add a pinch of salt; it balances the sweetness beautifully.
    • Slice the cake only after it’s fully cooled for clean cuts.

    Equipment Needed

    • 9-inch square baking pan – A standard pan works great, but feel free to use any similar-sized dish you have.
    • Mixing bowls – Any large bowl will do, or use your favorite glass or ceramic alternatives.
    • Whisk – A fork can suffice if you don’t have one handy.
    • Mini food processor or fork – Use either to prepare the topping.
    • Measuring cups and spoons – Essential for accurate ingredient quantities.

    Variations

    • Gluten-Free: Substitute all-purpose flour with a 1:1 gluten-free blend to cater to gluten sensitivities.
    • Dairy-Free: Replace milk with almond or oat milk, and use a dairy-free butter alternative for a delicious dairy-free option.
    • Vegan: Replace the egg with a flax egg (1 tablespoon ground flaxseed mixed with 2.5 tablespoons water) and use dairy-free alternatives for milk and butter.
    • Fruit Fusion: Mix in other berries like raspberries or blackberries for a unique twist on the flavor.
    • Nut-Free: Simply omit the walnuts or substitute with sunflower seeds to maintain crunch without the nuts.

    Serving Suggestions

    • Serve warm slices with a dollop of whipped cream or vanilla yogurt for a delightful contrast.
    • Pair your Blueberry Breakfast Cake with a steaming cup of coffee or a refreshing glass of orange juice.
    • For a beautiful presentation, dust with powdered sugar and garnish with fresh blueberries on top.
    • Cut into squares and serve alongside fresh fruit for a vibrant breakfast spread.

    FAQs about Blueberry Breakfast Cake

    Wondering about making this Blueberry Breakfast Cake? Here are some common questions I often hear, along with their answers!

    Can I use frozen blueberries? Absolutely! Frozen blueberries work perfectly. Just remember to fold them in gently to prevent crushing. They may take slightly longer to bake, so keep an eye on your cake!

    How should I store leftovers? If you have any leftover cake, store it in an airtight container at room temperature for up to three days. For longer storage, refrigerate it, but let it warm up a bit before serving for the best taste.

    Can I make this cake ahead of time? Yes, you can! Prepare the batter the night before, store it in the fridge, and then bake it in the morning. This makes it an awesome option for weekends or family brunches!

    What can I substitute for the egg? If you’re looking for a vegan option, a flax egg works well! Just mix 1 tablespoon of ground flaxseed with 2.5 tablespoons of water and let it sit for a few minutes to thicken.

    Can I add other fruits to the batter? Definitely! Feel free to mix in other berries, like raspberries or slices of peaches. Just be mindful of the moisture content to maintain the cake’s texture!

    Final Thoughts

    There’s something magical about serving a warm slice of Blueberry Breakfast Cake to your loved ones. Each bite is a celebration of simple ingredients coming together to create something truly delightful. Whether it’s a busy weekday or a leisurely weekend brunch, this cake adds a touch of sweetness to any morning. The joy of baking it fills your home with warmth and enticing aromas, sparking fond memories and conversations. So, roll up your sleeves, preheat that oven, and embrace the wholesome goodness of this blueberry dessert. You’ll be so glad you did!


    Print

    clock clock iconcutlery cutlery iconflag flag iconfolder folder iconinstagram instagram iconpinterest pinterest iconfacebook facebook iconprint print iconsquares squares iconheart heart iconheart solid heart solid icon

    Description

    A delicious and wholesome blueberry breakfast cake perfect for a morning treat.


    • 2 cups all-purpose flour, approximately 9 ounces
    • ½ cup sugar
    • 2 teaspoons baking powder
    • 1 large egg, lightly beaten
    • ½ cup milk
    • ¼ cup butter or margarine, softened (not melted)
    • 1 teaspoon grated lemon peel
    • 2 cups fresh or frozen blueberries
    • ⅓ cup sugar (for topping)
    • ¼ cup all-purpose flour (for topping)
    • ¼ cup walnuts, finely chopped (for topping)
    • ½ teaspoon ground cinnamon (for topping)
    • 3 tablespoons cold butter or margarine (for topping)

    1. Preheat the oven to 175°C (350°F) and spray or grease a 9-inch square baking pan.
    2. In a large bowl, whisk together the flour, sugar, and baking powder. Cut the butter into small pieces and add to the mixture.
    3. Add the egg, milk, softened butter, and lemon peel to the dry ingredients. Mix until just moistened. Finish mixing with your hands if needed to fully incorporate the flour. The batter will be very thick.
    4. Fold in the blueberries. The batter’s thickness may require extra effort. Spread the batter evenly into the prepared baking pan.
    5. In a mini food processor or bowl, combine the sugar, flour, walnuts, and cinnamon. Add the cold butter and pulse (or cut in by hand) until the mixture is crumbly. Avoid over-processing. Sprinkle the topping evenly over the batter.
    6. Bake in the preheated oven for 40-45 minutes, or until a toothpick inserted in the center comes out clean.
    7. Combine the powdered sugar and milk in a small bowl. Adjust the consistency by adding milk a few drops at a time if it’s too thick. Drizzle over the cooled cake, letting it set until the sugar solidifies.

    Notes

    • For added flavor, consider using lemon or orange zest.
    • Can be served warm or at room temperature.
    • Leftovers can be stored in an airtight container at room temperature for up to three days.
    • Prep Time: 15 minutes
    • Cook Time: 45 minutes
    • Category: Breakfast
    • Method: Baking
    • Cuisine: American

    Nutrition

    • Serving Size: 1 slice
    • Calories: 220
    • Sugar: 10g
    • Sodium: 150mg
    • Fat: 8g
    • Saturated Fat: 4g
    • Unsaturated Fat: 3g
    • Trans Fat: 0g
    • Carbohydrates: 35g
    • Fiber: 2g
    • Protein: 3g
    • Cholesterol: 30mg

    Sharing is caring!

  • Honey Sesame Chicken Broccoli

    Honey Sesame Chicken Broccoli


    Introduction to Honey Sesame Chicken Broccoli

    Life can feel like a wild race, can’t it? Between juggling work, family, and everything in between, finding time to whip up a delicious meal sometimes seems impossible. That’s where my Honey Sesame Chicken Broccoli comes in! This dish is a beautiful blend of tender chicken, vibrant broccoli, and a heavenly honey sesame sauce that’s not just quick to make but also a feast for the eyes. It’s perfect for those busy days when you want to impress your loved ones without spending hours in the kitchen. Let’s dive into this culinary adventure together!

    Why You’ll Love This Honey Sesame Chicken Broccoli

    This Honey Sesame Chicken Broccoli is a game-changer for busy nights. It combines ease and speed, allowing you to whip up a wholesome meal in just 35 minutes. The sweet and savory flavors explode in every bite, making it a favorite for picky eaters and foodies alike. Plus, it’s a healthier option that doesn’t skimp on taste. Your family will be asking for seconds, and you’ll be thrilled to serve it!

    Ingredients for Honey Sesame Chicken Broccoli

    Gathering the right ingredients is key to making my Honey Sesame Chicken Broccoli shine. Here’s what you’ll need:

    • Low sodium soy sauce or coconut aminos: Adds a savory umami flavor without the extra sodium punch.
    • Water: Used to help create the sauce’s perfect consistency.
    • Toasted sesame oil: This ingredient infuses a rich nutty flavor that elevates the entire dish.
    • Honey: Sweetens the sauce and balances the savory elements, contributing to that crave-worthy glaze.
    • Rice vinegar: Offers a slight tang to cut through the sweetness and round out the flavor profile.
    • Freshly grated ginger: Provides a spicy warmth that brings all the flavors together harmoniously.
    • Minced garlic: This aromatic powerhouse adds depth and enhances the overall taste of the dish.
    • Sesame seeds: These little guys bring texture and a pleasant crunch to the final presentation.
    • Cornstarch or arrowroot flour: Used in the sauce to create that thick, glossy finish we all love.
    • Boneless skinless chicken breast: The star of the show—tender, juicy bites that soak up all the delicious flavors.
    • All-purpose flour: Coating the chicken before cooking helps develop that scrumptious golden crust.
    • Coarse salt and ground black pepper: Essential seasonings to enhance the natural flavors of the dish.
    • Olive oil: Ensures the chicken cooks beautifully without sticking to the pan.
    • Broccoli florets: Fresh or frozen, they add vibrancy and contribute healthy fiber to your meal.
    • Green onions: A fresh and colorful garnish that gives each serving a bit of zing!

    For exact measurements and helpful notes on ingredient alternatives, like low-carb substitutions, be sure to check the printable recipe at the bottom of this article. Happy cooking!

    How to Make Honey Sesame Chicken Broccoli

    Prepare the Broccoli

    Start by filling a large pot with 2 to 3 inches of water. Don’t forget to add a teaspoon of salt! Bring it to a gentle simmer. Toss in the broccoli florets and cover the pot. Let them cook for about 6 minutes until they’re tender-crisp. When the time’s up, drain the broccoli in a colander and quickly rinse it under cold water. This stops the cooking and helps keep that vibrant green color!

    Make the Honey Sesame Sauce

    While the broccoli is cooling off, it’s sauce time! In a small bowl, combine your low sodium soy sauce (or coconut aminos), water, toasted sesame oil, honey, rice vinegar, grated ginger, minced garlic, cornstarch, and sesame seeds. Whisk it all together until the mixture is smooth and inviting. Set this flavorful concoction aside for later. Trust me, it’ll be worth the wait!

    Coat the Chicken

    Next up, it’s about getting that chicken ready. Place the bite-sized chicken pieces in a large zipper bag. In a separate bowl, whisk together cornstarch, all-purpose flour, coarse salt, and black pepper. Pour the seasoned flour mixture into the bag with the chicken, seal it, and shake! Make sure each piece of chicken gets an even coating to ensure that wonderful crust during cooking.

    Cook the Chicken

    Now, let’s pan-fry that chicken to golden perfection! Heat olive oil in a large skillet over medium heat. Once it’s hot, add the coated chicken in a single layer. Resist the urge to stir for the first 2 to 3 minutes. Let it brown nicely! After that, turn the pieces to cook all sides until they’re fully cooked and no longer pink in the center. This is where the magic happens!

    Combine Chicken and Sauce

    With the chicken all cooked and golden, it’s time to bring it all together. Pour your prepared honey sesame sauce right over the chicken in the skillet. Stir gently and let it simmer over medium-low heat. Keep stirring occasionally until the sauce thickens and turns glossy. The aroma will start enveloping your kitchen, and you’ll begin to feel excited for the finishing touches!

    Add the Broccoli

    Now, it’s time to fold in that beautiful broccoli! Carefully add the steamed broccoli to the skillet with the chicken and sauce. If your skillet is feeling a bit crowded, don’t hesitate to use a larger bowl to mix everything. Gently toss everything together to ensure the flavors meld perfectly. This is where you take your dish from good to truly fantastic!

    Garnish and Serve

    Last but not least, let’s add a bit of flair to your creation! Sprinkle freshly sliced green onions over the dish for a pop of color and flavor. Serve it warm over rice or quinoa, or enjoy it on its own. Your Honey Sesame Chicken Broccoli is now ready to impress!

    Tips for Success

    • Always prep your ingredients before cooking to streamline the process.
    • If your chicken pieces are slightly uneven, they might cook at different rates, so aim for similar sizes.
    • Don’t skip rinsing the broccoli; it helps maintain that beautiful color and crunch.
    • For extra flavor, consider marinating the chicken in the sauce for 30 minutes before cooking.
    • Feel free to adjust the sweetness by adding more or less honey based on your preference.

    Equipment Needed

    • Large pot for steaming broccoli
    • Colander for draining
    • Large skillet or frying pan for cooking chicken
    • Whisk for mixing sauces
    • Large zipper bag for coating chicken (or a bowl with a lid)
    • Measuring cups and spoons for precise ingredients

    Variations

    • Low-carb option: Swap out the broccoli for cauliflower for a deliciously different twist that’s still healthy and satisfying.
    • Add spices: For a kick, try adding a teaspoon of red pepper flakes or sriracha to the sauce.
    • Veggie overload: Enhance the dish by incorporating bell peppers, snap peas, or carrots for a colorful medley of flavors and textures.
    • Gluten-free variation: Use gluten-free soy sauce or coconut aminos, ensuring the entire dish remains gluten-free.
    • Substitute protein: Try using shrimp or tofu instead of chicken for a completely different protein perspective!

    Serving Suggestions for Honey Sesame Chicken Broccoli

    • Serve over steamed jasmine rice or quinoa for a satisfying, hearty meal.
    • Add a fresh cucumber salad on the side to balance the sweetness.
    • A chilled glass of unsweetened iced tea complements the flavors beautifully.
    • Garnish with additional sesame seeds for an extra touch of elegance.
    • For a family-style meal, serve it in a large bowl, encouraging everyone to dive in!

    FAQs about Honey Sesame Chicken Broccoli

    Can I make Honey Sesame Chicken Broccoli ahead of time?

    Absolutely! You can prep the chicken and sauce in advance and store them separately in the fridge. When you’re ready to eat, just follow the cooking instructions. The flavors will blend beautifully over time!

    What if I don’t have honey? Can I use another sweetener?

    Yes, if honey isn’t on hand, you can substitute it with maple syrup or agave nectar. Both options will still add that delightful sweetness to your Honey Sesame Chicken Broccoli.

    Is this recipe suitable for meal prep?

    Definitely! This dish stores well in airtight containers and can last up to three days in the refrigerator. It’s a fantastic option for those busy weeks when you need quick lunches or dinners.

    Can I freeze leftover Honey Sesame Chicken Broccoli?

    Yes, you can freeze leftovers! Just ensure they’re in an airtight container. Thaw in the fridge overnight before reheating for another satisfying meal.

    What can I serve with Honey Sesame Chicken Broccoli?

    You can pair it with jasmine rice, quinoa, or even noodles for a complete meal. A simple side salad or steamed dumplings would also complement the flavors nicely!

    Final Thoughts

    When it comes to family dinners, my Honey Sesame Chicken Broccoli creates not just a meal, but a moment of joy. The way those sweet and savory flavors dance together is a magic I love to share. Watching my loved ones savor every bite fills my heart with satisfaction. This recipe is more than just a quick fix; it’s a way to reconnect amidst our busy lives. So fire up that skillet, gather around the table, and let this dish remind us why sharing food is one of the simplest and most beautiful acts of love. Happy cooking and dining!


    Print

    clock clock iconcutlery cutlery iconflag flag iconfolder folder iconinstagram instagram iconpinterest pinterest iconfacebook facebook iconprint print iconsquares squares iconheart heart iconheart solid heart solid icon

    Description

    A delicious and healthy dish combining chicken, broccoli, and a sweet and savory honey sesame sauce.


    • 3 tablespoons low sodium soy sauce or coconut aminos
    • 3 tablespoons water
    • 1 tablespoon toasted sesame oil
    • 3 tablespoons honey
    • 2 teaspoons rice vinegar
    • 1 teaspoon freshly grated ginger
    • 2 cloves garlic, minced
    • 1 tablespoon sesame seeds
    • 2 teaspoons cornstarch or arrowroot flour
    • 1 pound boneless skinless chicken breast, cut into bite-sized pieces
    • 2 tablespoons cornstarch or arrowroot flour
    • 2 tablespoons all-purpose flour
    • 1/2 teaspoon coarse salt
    • 1/4 teaspoon ground black pepper
    • 2 tablespoons olive oil
    • 3 cups broccoli florets, fresh or frozen
    • 2 green onions, finely sliced

    1. Fill a large pot with 2 to 3 inches of water and add the broccoli with 1 teaspoon salt. Bring to a simmer, cover, and cook over low heat for 6 minutes until the broccoli is tender-crisp. Drain in a colander and rinse under cold water to stop cooking.
    2. In a small bowl, combine soy sauce (or coconut aminos), water, toasted sesame oil, honey, rice vinegar, grated ginger, minced garlic, cornstarch, and sesame seeds. Whisk until smooth and set aside.
    3. Place chicken pieces in a large zipper bag. In a separate bowl, whisk together the cornstarch, flour, salt, and pepper. Add the mixture to the bag, seal, and shake to evenly coat each piece of chicken.
    4. Heat olive oil in a large skillet over medium heat. Add chicken in a single layer and cook undisturbed for 2 to 3 minutes until golden. Turn to brown all sides, cooking until fully cooked through with no pink in the center.
    5. Once chicken is golden and cooked, pour the prepared sauce over the chicken in the skillet. Stir and bring to a simmer over medium-low heat. Continue cooking, stirring occasionally, until the sauce is thickened and glossy.
    6. Add the steamed broccoli to the skillet, if space allows, and gently fold to incorporate with the chicken and sauce. If needed, transfer to a larger bowl.
    7. Sprinkle with chopped green onions and serve warm.

    Notes

    • For a low-carb option, you may substitute regular broccoli with cauliflower.
    • This recipe can be easily doubled for meal prep or larger gatherings.
    • Store leftovers in an airtight container in the refrigerator for up to 3 days.
    • Prep Time: 15 minutes
    • Cook Time: 20 minutes
    • Category: Main Course
    • Method: Stovetop
    • Cuisine: Asian

    Nutrition

    • Serving Size: 1 serving
    • Calories: 320
    • Sugar: 10g
    • Sodium: 600mg
    • Fat: 9g
    • Saturated Fat: 1.5g
    • Unsaturated Fat: 6g
    • Trans Fat: 0g
    • Carbohydrates: 32g
    • Fiber: 3g
    • Protein: 28g
    • Cholesterol: 70mg

    Sharing is caring!