Category: Uncategorized

  • Pizza Grilled Cheese Sandwiches

    Pizza Grilled Cheese Sandwiches


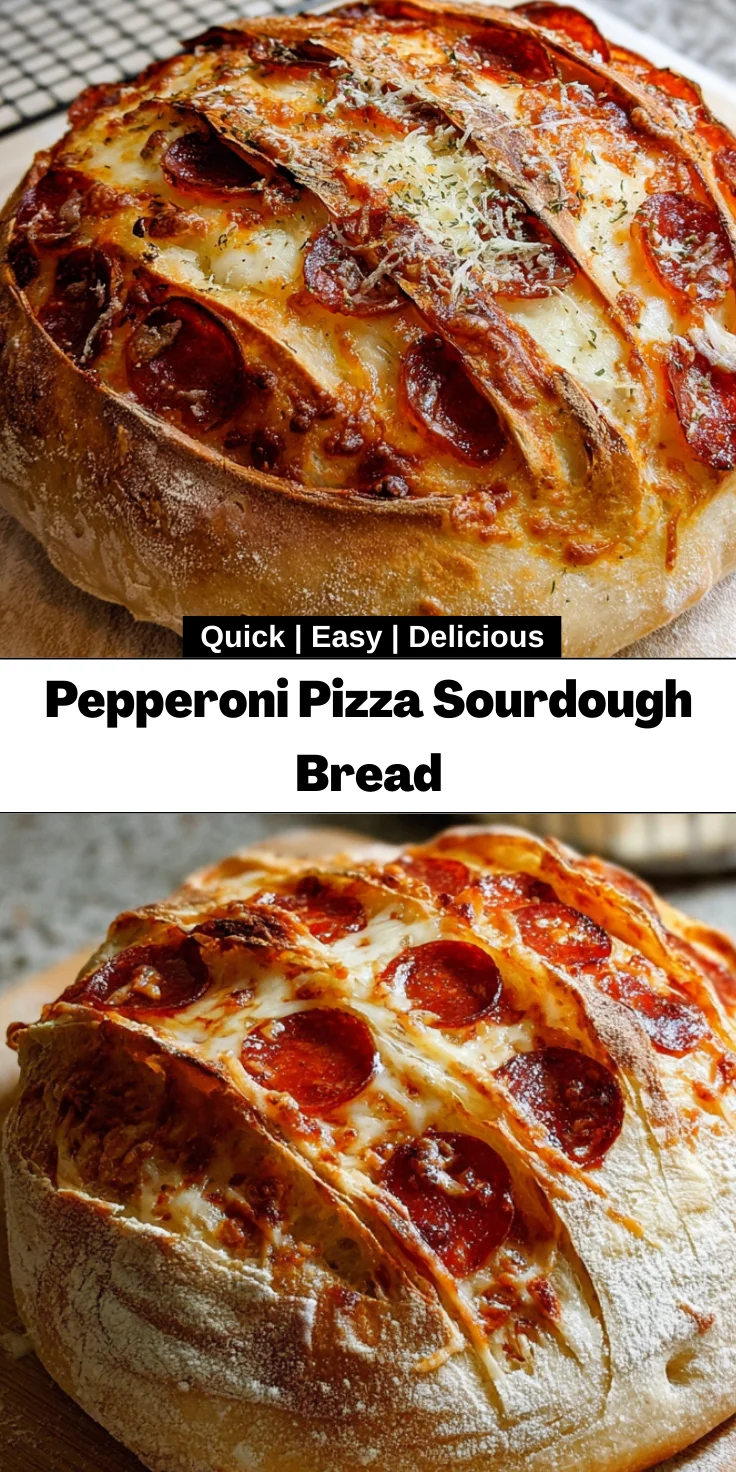
    Introduction to Pizza Grilled Cheese Sandwiches

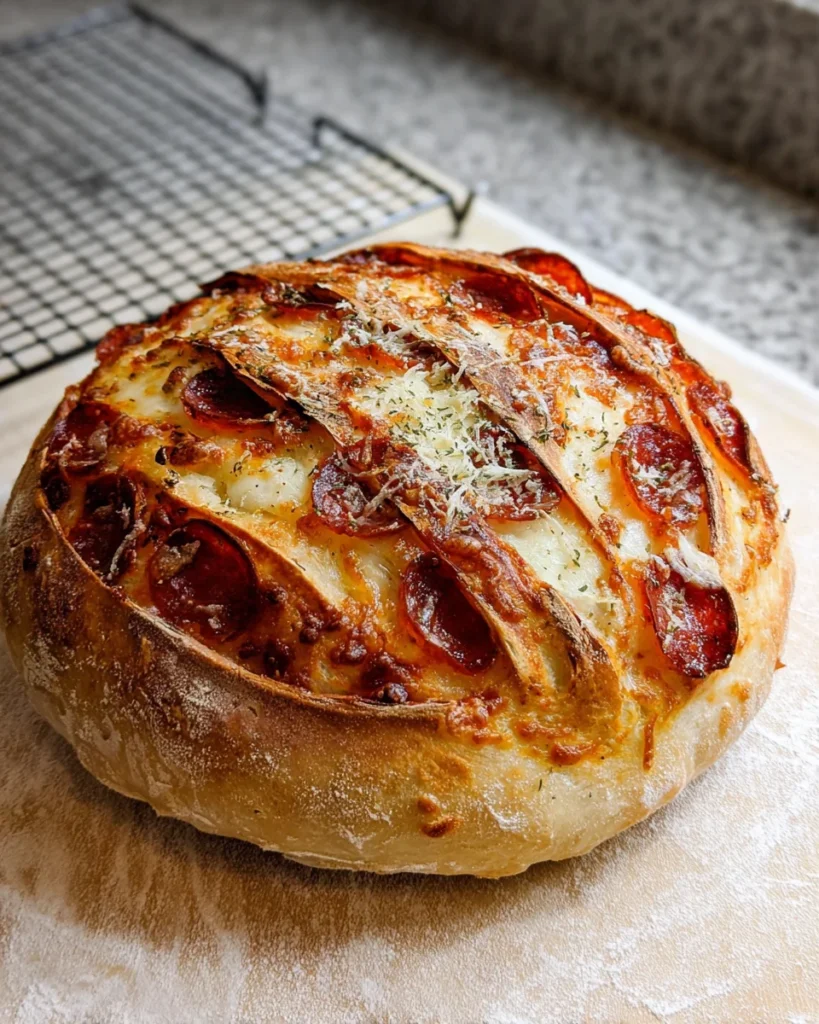
    As a busy mom juggling endless to-do lists, I understand the sacred chaos of meal times. That’s why I can’t stop raving about Pizza Grilled Cheese Sandwiches! They’re the ultimate comfort food, bringing together the beloved tastes of pizza and the gooey joy of grilled cheese. Picture yourself whipping these up in just 18 minutes—perfect for hectic evenings or a simple weekend treat. Whether you’re looking to impress the kiddos or share a magical moment with friends, these sandwiches are sure to be a hit. Trust me, every bite is a delightful reminder of the joy in home cooking.

    Why You’ll Love This Pizza Grilled Cheese Sandwiches

    If you’re pressed for time and craving something comforting, these Pizza Grilled Cheese Sandwiches are your answer. They combine familiar flavors that everyone loves, making them a crowd-pleaser for kids and adults alike. Plus, they’re incredibly easy to prepare, leaving you with more time for what truly matters—sharing laughs and stories around the table.

    Ingredients for Pizza Grilled Cheese Sandwiches

    To create your mouth-watering Pizza Grilled Cheese Sandwiches, gather the following ingredients:

    • Sourdough bread: Provides a crispy texture and a slightly tangy flavor that pairs beautifully with the other ingredients.
    • Unsalted butter: Adds richness and helps achieve that golden-brown crust. Feel free to substitute with olive oil for a healthier option.
    • Marinara sauce: This is the heart of your pizza flavor, giving a savory base for your toppings.
    • Mozzarella cheese: The star of the show! Its melty goodness makes all the difference in bringing your sandwich to life.
    • Grated Parmesan cheese: Adds a salty, nutty flavor, enhancing the overall taste of your sandwich.
    • Pepperoni slices: A classic pizza topping that adds a punch of flavor. You can swap it for veggies like bell peppers or mushrooms for a meatless option.
    • Garlic powder: A sprinkle of this spice brings depth and enhances the pizza vibe.
    • Dried oregano: This herb is quintessential in pizza recipes and rounds out the flavor profile beautifully.

    Keep in mind, you can definitely mix in more toppings like olives or bell peppers to suit your family’s taste! For those who prefer a healthier bite, consider using whole grain bread. Detailed ingredient quantities can be found at the bottom of the article, ready for you to print!

    How to Make Pizza Grilled Cheese Sandwiches

    Making Pizza Grilled Cheese Sandwiches is as easy as pie! Let’s break this down step by step, so you can impress your family without breaking a sweat.

    Preheat the Skillet

    Start by preheating your skillet or griddle over medium heat. This step is crucial. A properly heated surface will give your sandwiches that nice, crispy crust everyone loves. Don’t rush; a well-preheated pan is your best friend in achieving perfection!

    Butter the Bread

    Next, take out your softened unsalted butter and slather it generously on one side of each slice of sourdough bread. Trust me; this will make a world of difference in flavor. If you’re feeling adventurous, try adding a little garlic powder to the butter for a flavorful kick!

    Spread the Marinara Sauce

    Now, flip two slices over so the buttered side is facing down. Spread a healthy layer of marinara sauce on the unbuttered side of these slices. Remember, this sauce is your pizza’s foundation, so don’t hold back! The more, the merrier!

    Layer the Cheese and Toppings

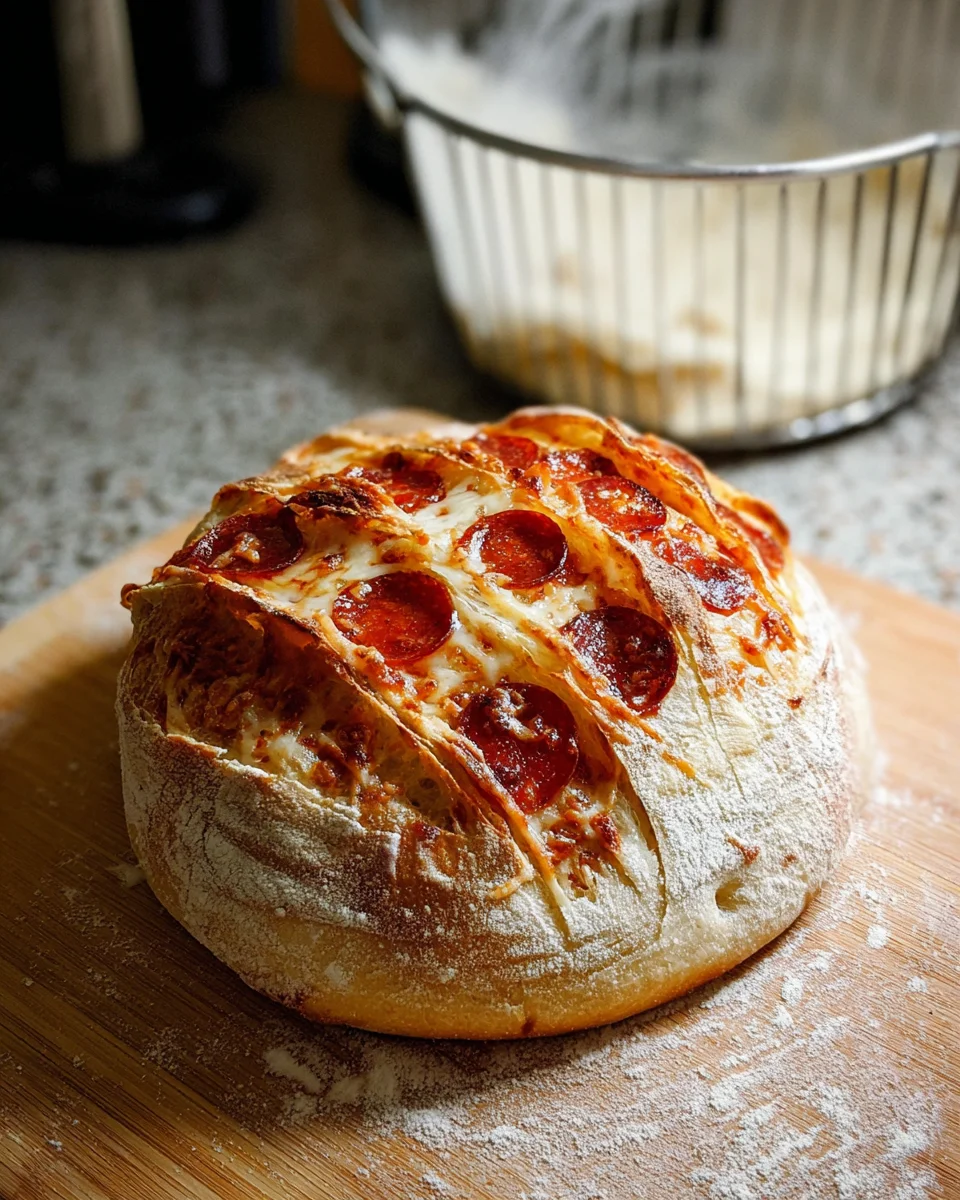
    Sprinkle a generous amount of shredded mozzarella cheese over the marinara sauce. This gooey cheese will bring joy to your grilling adventure. Following that, add some pepperoni slices—delicious little flavor bursts! Finish off with a sprinkle of grated Parmesan cheese, garlic powder, and dried oregano to amp up the pizza vibes.

    Assemble the Sandwiches

    Carefully place the other two slices of bread on top, ensuring the buttered sides are facing out. Now, you have your fabulous sandwiches ready to go. It’s like building a tasty little tower of deliciousness!

    Grill to Perfection

    Place the sandwiches on the preheated skillet. Cook for about 3-4 minutes on each side, or until the bread is a lovely golden brown and the cheese is melting like a dream. You can peep under the sandwich to check its progress—just don’t get too impatient! Once they’re beautifully grilled, remove them from heat and let them cool for a minute before slicing.

    And there you have it! Your magnificent Pizza Grilled Cheese Sandwiches are ready to be devoured. Get ready for some happy faces around the table!

    Tips for Success

    • Always preheat your skillet to ensure even cooking.
    • Use a mix of cheeses for added flavor—try provolone or cheddar!
    • Don’t rush the grilling process; let the bread become golden brown.
    • For a fun twist, add fresh basil or spinach inside the sandwich.
    • Use a panini press if you have one; it makes pressing easier!

    Equipment Needed

    • A skillet or griddle for grilling; a non-stick option works wonders!
    • Butter knife for spreading the butter and marinara sauce.
    • Spatula to flip the sandwiches without losing any cheesy goodness.
    • Cutting board and knife for slicing the sandwiches when they’re done.

    Variations

    • Add a kick with spicy pepperoncini or jalapeños for heat enthusiasts.
    • Pot for a veggie version by using mushrooms, bell peppers, and onions instead of meat.
    • Switch up the cheese! Go for gouda, fontina, or a smoky cheddar for unique flavors.
    • Try a basil pesto spread instead of marinara for a fresh herbaceous twist.
    • Create a breakfast version with scrambled eggs and bacon or sausage for a hearty start!

    Serving Suggestions

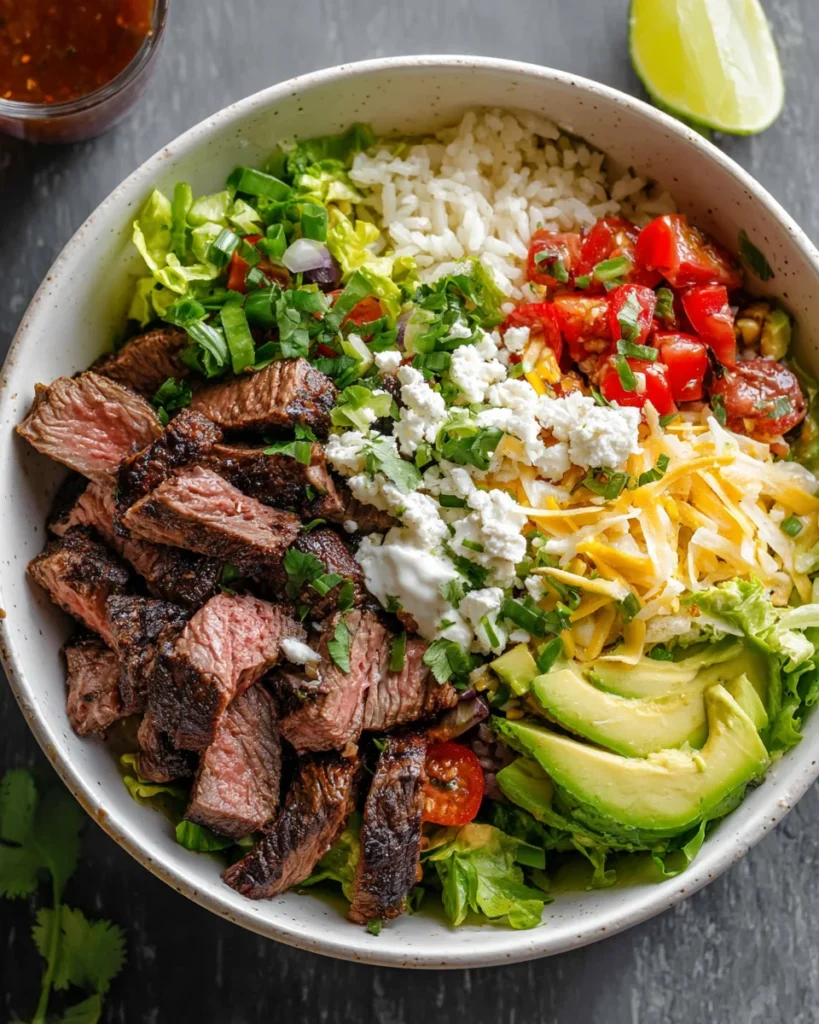
    • Pair with a fresh mixed greens salad for a light, refreshing contrast.
    • Serve alongside crunchy carrot sticks or celery for added crunch.
    • Accompany with a bowl of marinara sauce for dipping—extra flavor never hurts!
    • Enjoy with a glass of sparkling lemonade for a bubbly touch!

    FAQs about Pizza Grilled Cheese Sandwiches

    Can I use different types of bread for this recipe?
    Absolutely! While sourdough gives a lovely flavor, you can use whole grain, white, or even a gluten-free option. Just ensure the bread can hold the fillings without getting soggy.

    How do I store leftovers of Pizza Grilled Cheese Sandwiches?
    If you have leftovers, wrap them tightly in foil or plastic wrap and store them in the fridge. They can last for up to 2 days. Just reheat them on a skillet to regain that crispy goodness!

    Can I substitute the cheeses used in the sandwiches?
    Certainly! Feel free to mix different cheeses from mozzarella to sharp cheddar, or even something like gouda for a smoky flavor. The key is to choose cheeses that melt well.

    What can I serve with my Pizza Grilled Cheese Sandwiches?
    These sandwiches pair great with a fresh salad, some crunchy veggies, or even a comforting bowl of soup. Dip them in marinara sauce for an extra pizza touch!

    Are these Pizza Grilled Cheese Sandwiches kid-friendly?
    Yes! Kids love the gooey cheese and pizza flavors. You can even customize toppings to accommodate their preferences, making them perfect for picky eaters.

    Final Thoughts

    Creating Pizza Grilled Cheese Sandwiches is not just about feeding the family; it’s about crafting moments of joy around the kitchen table. Each bite is a delightful escape into a world of gooey cheesiness and classic pizza flavors, perfect for any day! These sandwiches offer a sense of nostalgia, reminding me of simpler times while tackling the hustle and bustle of motherhood. I hope you find as much happiness in making and sharing them as I do. So grab your ingredients, gather your loved ones, and enjoy this delicious adventure together. Happy cooking!


    Print

    clock clock iconcutlery cutlery iconflag flag iconfolder folder iconinstagram instagram iconpinterest pinterest iconfacebook facebook iconprint print iconsquares squares iconheart heart iconheart solid heart solid icon

    Description

    Delicious Pizza Grilled Cheese Sandwiches that combine the flavors of pizza with the gooey goodness of grilled cheese.


    • 4 slices of sourdough bread
    • 2 tablespoons unsalted butter, softened
    • 1/2 cup marinara sauce
    • 1 cup shredded mozzarella cheese
    • 1/4 cup grated Parmesan cheese
    • 1/4 cup pepperoni slices
    • 1/4 teaspoon garlic powder
    • 1/4 teaspoon dried oregano

    1. Preheat a skillet or griddle over medium heat.
    2. Butter one side of each slice of bread.
    3. On the unbuttered side of two slices, spread a layer of marinara sauce.
    4. Sprinkle mozzarella cheese evenly over the marinara sauce.
    5. Add a layer of pepperoni slices on top of the cheese.
    6. Sprinkle Parmesan cheese, garlic powder, and dried oregano over the pepperoni.
    7. Top with the remaining slices of bread, buttered side facing out.
    8. Place the sandwiches on the preheated skillet or griddle.
    9. Cook for 3-4 minutes on each side, or until the bread is golden brown and the cheese is melted.
    10. Remove from heat, let cool for a minute, then slice and serve.

    Notes

    • Feel free to add more toppings such as bell peppers or olives.
    • For a healthier option, use whole grain bread.
    • Prep Time: 10 minutes
    • Cook Time: 8 minutes
    • Category: Sandwich
    • Method: Grilling
    • Cuisine: American

    Nutrition

    • Serving Size: 1 sandwich
    • Calories: 400
    • Sugar: 4g
    • Sodium: 800mg
    • Fat: 20g
    • Saturated Fat: 10g
    • Unsaturated Fat: 8g
    • Trans Fat: 0g
    • Carbohydrates: 40g
    • Fiber: 2g
    • Protein: 18g
    • Cholesterol: 40mg

    Sharing is caring!

  • Caprese Pasta Salad with Balsamic Glaze

    Caprese Pasta Salad with Balsamic Glaze


    Introduction to Caprese Pasta Salad with Balsamic Glaze

    Oh, the joy of a light, refreshing dish on a warm day! My Caprese Pasta Salad with Balsamic Glaze is just what you need for busy days that demand quick, delicious meals. It’s bursting with Italian flavors and colors that make it not only tasty but visually delightful. Whether you’re feeding hungry kiddos or hosting friends for lunch, this salad is a real crowd-pleaser. Seriously, it’s perfect for those moments when you want something impressive yet easy, helping you score those “wow” points without a culinary meltdown. Let’s dive into the delicious world of Caprese Pasta Salad!

    Why You’ll Love This Caprese Pasta Salad with Balsamic Glaze

    This Caprese Pasta Salad with Balsamic Glaze offers a delightful balance of flavor and simplicity. It comes together in just 20 minutes, making it a lifesaver for busy moms and professionals alike. The fresh ingredients not only taste amazing but also promote healthy eating. Plus, it’s versatile—perfect for picnics, potlucks, or a light dinner. You’ll love how it adds a pop of color to your table, too!

    Ingredients for Caprese Pasta Salad with Balsamic Glaze

    Gathering the ingredients for your Caprese Pasta Salad with Balsamic Glaze is part of the fun! Here’s what you’ll need:

    • Cooked Pasta: I love using penne or rotini for their ability to capture sauce, but any pasta you have will do.
    • Cherry Tomatoes: Sweet and juicy, these bite-sized beauties add a pop of color and flavor. You can also use heirloom tomatoes for a twist!
    • Fresh Mozzarella Balls: Known as bocconcini, they bring a creamy texture. If you’re in a pinch, try regular mozzarella cut into cubes.
    • Fresh Basil Leaves: Nothing beats the aroma of fresh basil! It’s the heart of a Caprese salad. Dried basil works, but the flavor won’t be the same.
    • Olive Oil: A drizzle enhances flavor and brings everything together. Use high-quality extra virgin for the best taste.
    • Salt and Pepper: Simple seasoning to elevate the flavors. Remember, a little pinch goes a long way!
    • Balsamic Glaze: This sweet reduction beautifully ties the dish together. If you don’t have it, you can make it by simmering balsamic vinegar until thick.

    You can find the quantities of each ingredient at the bottom of the article, where they’re available for easy printing. Happy cooking!

    How to Make Caprese Pasta Salad with Balsamic Glaze

    Step 1: Cook the Pasta

    Let’s kick things off by cooking your pasta! Bring a pot of salted water to a rolling boil. I usually go with about 8 ounces of penne or rotini—both work great! Cook according to package directions until al dente. As it cooks, try to resist the urge to sneak bites (though I won’t judge if you do!).

    Once it’s done, drain the pasta in a colander, then give it a quick rinse under cold water. This not only stops the cooking but also helps it stay separate without becoming gummy. Set it aside to cool a bit while we prep the other ingredients!

    Step 2: Prepare the Salad Ingredients

    While the pasta cools, it’s time to get your salad ingredients ready. Start by halving the cherry tomatoes. Remember, using ripe, juicy tomatoes makes all the difference in flavor! Next up, grab your fresh mozzarella balls and halve those as well. If you’re using traditional mozzarella, cut them into bite-sized cubes.

    Now, let’s talk about the basil. I love tearing the leaves instead of chopping them; it releases a mesmerizing aroma! Feel free to toss in any extra herbs you might have on hand—thyme or parsley could add a nice touch!

    Step 3: Combine All Ingredients

    In a large bowl, combine your cooled pasta, halved tomatoes, mozzarella, and torn basil. This step is where the magic starts to happen! As you mix, imagine how all these colors will brighten your meal.

    Don’t rush this part—give it a good toss so all the ingredients are evenly distributed. I like to use my hands for this; it feels more personal! Plus, it’s so satisfying to see your salad come together.

    Step 4: Dress and Serve

    Now for the finishing touch! Drizzle about two tablespoons of olive oil over your salad, then season with a pinch of salt and pepper. Toss everything again gently, ensuring each piece gets a bit of that glimmering olive oil.

    Finally, the pièce de resistance: drizzle your balsamic glaze over the top. It’s like adding a sweet hug to your dish! Serve it chilled or at room temperature. Trust me, your loved ones will be begging for seconds!

    Tips for Success

    • Always salt your pasta water; it infuses flavor into the pasta.
    • Choose fresh, ripe tomatoes for the best taste.
    • Make the salad ahead of time and refrigerate for even better flavor!
    • Adjust the balsamic glaze to your taste—it can bring sweetness or tang.
    • Add grilled chicken or shrimp for extra protein if desired.

    Equipment Needed

    • Large Pot: For boiling pasta. A deep skillet can work in a pinch.
    • Colander: To drain the pasta. You can use a slotted spoon if you don’t have one.
    • Large Bowl: For mixing everything together. A serving bowl is perfect!
    • Measuring Cups: Handy for ingredients. A regular cup works, too.
    • Cutting Board and Knife: Necessary for chopping tomatoes and basil.

    Variations of Caprese Pasta Salad with Balsamic Glaze

    • Add Protein: Toss in grilled chicken, shrimp, or chickpeas for a heartier dish.
    • Change the Cheese: Substitute feta or goat cheese for a tangy twist.
    • Gluten-Free Option: Use gluten-free pasta to accommodate dietary needs.
    • Veggie Boost: Incorporate bell peppers, cucumbers, or olives for extra crunch and flavor.
    • Pesto Variation: Swap the olive oil for pesto for a vibrant herby kick!

    Serving Suggestions for Caprese Pasta Salad with Balsamic Glaze

    • Serve alongside grilled chicken or fish for a complete meal.
    • Pair with garlic bread for a delightful Italian feast.
    • Dress the salad with extra basil leaves for a vibrant presentation.
    • Enjoy with a glass of chilled white wine or sparkling water.

    FAQs about Caprese Pasta Salad with Balsamic Glaze

    What pasta should I use for Caprese Pasta Salad?

    You can use any short pasta, but I recommend penne or rotini. They hold the dressing beautifully, making every bite delicious!

    Can I make this salad in advance?

    Absolutely! Preparing your Caprese Pasta Salad with Balsamic Glaze ahead of time enhances the flavors. Just store it in the refrigerator and dress it right before serving.

    Is there a substitute for balsamic glaze?

    If you don’t have balsamic glaze, you can make your own by simmering balsamic vinegar until it’s thick and syrupy. It’s quick and incredibly easy!

    How can I make this dish vegan?

    To make a vegan version of this salad, simply omit the mozzarella or substitute it with vegan cheese or avocado. You’ll still have a flavorful and satisfying meal.

    What can I serve with Caprese Pasta Salad?

    This salad pairs wonderfully with grilled meats, garlic bread, or a light soup. You can also enjoy it as a refreshing picnic dish!

    Final Thoughts

    There’s something truly special about my Caprese Pasta Salad with Balsamic Glaze. It encapsulates the essence of summer meals: fresh, vibrant, and utterly satisfying. Every bite feels like a sunlit Italian afternoon, sparking joy and laughter around the table. Plus, it’s a dish that can bring families together, even on the busiest nights. I love how versatile it is, morphing effortlessly from a side to a main dish. Whether you’re sharing it with friends at a picnic or savoring it quietly at home, this recipe promises to bring smiles all around. So, grab those ingredients and let the magic begin!


    Print

    clock clock iconcutlery cutlery iconflag flag iconfolder folder iconinstagram instagram iconpinterest pinterest iconfacebook facebook iconprint print iconsquares squares iconheart heart iconheart solid heart solid icon

    Description

    A refreshing and flavorful Caprese Pasta Salad with Balsamic Glaze that brings together classic Italian ingredients.


    • 8 oz cooked pasta (penne or rotini)
    • 1 cup cherry tomatoes, halved
    • 1 cup fresh mozzarella balls (bocconcini), halved
    • ½ cup fresh basil leaves, torn
    • 2 tbsp olive oil
    • Salt and pepper, to taste
    • Balsamic glaze, for drizzling

    1. Cook pasta according to package; drain and cool.
    2. Combine pasta, tomatoes, mozzarella, and basil in a large bowl.
    3. Drizzle olive oil, season with salt and pepper, and toss gently.
    4. Drizzle balsamic glaze on top before serving.

    Notes

    • Feel free to add grilled chicken or shrimp for extra protein.
    • Can be served cold or at room temperature.
    • Prep Time: 10 minutes
    • Cook Time: 10 minutes
    • Category: Salad
    • Method: Mixing
    • Cuisine: Italian

    Nutrition

    • Serving Size: 1 serving
    • Calories: 320
    • Sugar: 3g
    • Sodium: 250mg
    • Fat: 14g
    • Saturated Fat: 5g
    • Unsaturated Fat: 9g
    • Trans Fat: 0g
    • Carbohydrates: 40g
    • Fiber: 3g
    • Protein: 12g
    • Cholesterol: 25mg

    Sharing is caring!

  • Cheesecake Fruit Salad

    Cheesecake Fruit Salad


    Introduction to Cheesecake Fruit Salad

    There’s something undeniably magical about desserts that are both refreshing and indulgent. Enter the cheesecake fruit salad, a delightful combination of juicy fruits and creamy goodness that makes my heart sing. As a busy home cook, I truly appreciate recipes that require minimal effort yet deliver maximum impact, and this salad does just that.

    Whether you’re hosting family gatherings or looking for a quick treat after dinner, this dessert is a stunning showstopper. Trust me, it’s the perfect way to end a meal on a high note, effortlessly bringing smiles to everyone’s faces.

    Why You’ll Love This Cheesecake Fruit Salad

    This cheesecake fruit salad is a dream come true for those, like me, who cherish simplicity in the kitchen. The ease of preparation means you can whip it up even on the busiest days.

    The refreshing taste of the fruits beautifully complements the luxurious creamy cheesecake filling, making it completely irresistible. Best of all, this dessert is a crowd-pleaser that suits both lively gatherings and cozy family dinners!

    Ingredients for Cheesecake Fruit Salad

    Creating this cheesecake fruit salad is a breeze with just a handful of fresh ingredients. Here’s what you’ll need:

    • Strawberries: Their sweetness and vibrant color make them a must-have.
    • Green Apples: These add a crisp, tart contrast that brightens the salad.
    • Grapes: Halved for easy snacking, they introduce a juicy bite.
    • Pineapple: Opt for fresh or canned, it brings tropical flair.
    • Bananas: Soft and sweet, they enhance the creamy texture.
    • Cream Cheese: This forms the base of our luscious cheesecake filling.
    • Powdered Sugar: Adjust this for sweetness to suit your taste!
    • Vanilla Extract: A splash of this enhances all the flavors.
    • Heavy Whipping Cream: Whipped to fluffy perfection gives richness.
    • Caramel Sauce: Drizzle this magical treat over the top for added sweetness.

    For peak freshness, visit your local farmers’ market or grocery store. Exact quantities are noted at the bottom of this article for your convenience!

    How to Make Cheesecake Fruit Salad

    Making cheesecake fruit salad is as easy as pie—or should I say, salad? Let’s dive right into the steps that ensure you create a stunning dessert everyone will love. Follow along, and you’ll be savoring every luscious bite in no time.

    Prepare the Fruit

    First things first, let’s get that fruit ready! Wash all the fruit thoroughly under cold water to remove any dirt. Hull the strawberries, peel the bananas, and chop everything into bite-sized pieces.

    Remember to pick fruits that are firm and colorful. Combine the chopped fruits in a large mixing bowl and gently toss them so they mix evenly. This colorful medley is the foundation for your cheesecake fruit salad!

    Make the Cheesecake Filling

    Now, onto the creamy goodness! In a mixing bowl, beat together the softened cream cheese, powdered sugar, and vanilla extract until it’s smooth. No one likes lumpy filling!

    In another bowl, whip the heavy cream until stiff peaks form. Gently fold the fluffy whipped cream into the cream cheese mixture until it’s all beautifully blended.

    This process adds an airy lightness to your cheesecake filling, making it simply divine when combined with the fruit. Trust me, your taste buds will thank you!

    Assemble the Fruit Salad

    Time to bring it all together! Pour your luscious cheesecake filling over the prepared fruit in the mixing bowl. Gently fold the mixture until the fruit is evenly coated.

    Taste a bit, and feel free to tweak the sweetness—maybe add more powdered sugar if you want it sweeter!

    Drizzle with Caramel

    Now for the fun part! Drizzle caramel sauce over the top of your salad. It enhances the flavor and adds a touch of decadence.

    You can also serve the caramel on the side for those who love extra sweetness!

    Serve

    Before you indulge, chill the cheesecake fruit salad in the refrigerator for at least one hour. This allows all the flavors to meld together beautifully.

    When it’s time to serve, consider garnishing with more caramel or a sprinkle of crushed graham crackers for a delightful finish. Enjoy every velvety bite!

    Tips for Success

    • Store leftover fruit salad in an airtight container in the fridge for up to 2 days.
    • Prepare the fruit and cheesecake filling a few hours in advance to save time.
    • For added flavor, consider mixing in some nuts or chocolate chips.
    • Experiment with seasonal fruits for a fresh twist.
    • Don’t be afraid to adjust sweetness—everyone’s taste is different!

    Equipment Needed

    • Mixing Bowls: A large bowl for combining the fruit and another for the cheesecake filling.
    • Whisk: Perfect for blending the cream cheese and whipping the cream.
    • Spatula: Use this for folding the whipped cream into the filling.
    • Cutting Board and Knife: Essential for chopping the fruits into bite-sized pieces.

    Variations

    • Berry Delight: Swap out the apples and add more berries like blueberries or raspberries for a burst of color and flavor.
    • Nutty Twist: Toss in some chopped walnuts or almonds for a crunchy texture that contrasts beautifully with the creamy filling.
    • Chocolate Lovers: Add mini chocolate chips to the cheesecake filling for a delightful chocolatey hint.
    • Healthier Version: Use Greek yogurt instead of cream cheese for a lighter take that still packs a creamy punch.

    Serving Suggestions

    • Fresh Mint: Garnish the salad with fresh mint leaves for a beautiful pop of color and a refreshing flavor.
    • Light Beverages: Pair with sparkling water or iced tea to cleanse the palate.
    • Savory Dishes: Complement with a light quiche or grilled chicken salad for a balanced meal.
    • Presentation: Serve the salad in a clear glass bowl to showcase the vibrant colors of the fruit.

    FAQs about Cheesecake Fruit Salad

    Curious about cheesecake fruit salad? Here are some common questions I get asked about this delightful dessert!

    How far in advance can I prepare cheesecake fruit salad?
    You can prepare this fruity treat a few hours ahead of time. Just remember to chill it in the fridge to let those flavors meld!

    How do I store leftovers?
    Leftover cheesecake fruit salad can be stored in an airtight container in the refrigerator for up to two days. Just be aware that the fruits may release some juice, but it’ll still taste delicious!

    Can I use frozen fruit?
    While fresh fruit is preferred for its texture, you can use thawed frozen fruit in a pinch. Just ensure it’s nicely drained to avoid excess moisture in your salad.

    What variations can I try?
    Feel free to mix in nuts, different fruits, or even chocolate chips. This cheesecake fruit salad is flexible, so get creative!

    Final Thoughts

    The cheesecake fruit salad is a refreshing treat that effortlessly combines creamy indulgence with vibrant, juicy flavors. It’s amazing how one dish can elevate gatherings and family meals, creating moments filled with joy and satisfaction.

    I love how versatile this dessert is; you can mix and match fruits or adjust the sweetness to suit your family’s preferences.

    So, whether you’re enjoying a sunny picnic or hosting a cozy dinner, this cheesecake fruit salad will shine as the star. I encourage you to make it your own and relish in every delicious bite!


    Print

    clock clock iconcutlery cutlery iconflag flag iconfolder folder iconinstagram instagram iconpinterest pinterest iconfacebook facebook iconprint print iconsquares squares iconheart heart iconheart solid heart solid icon

    Description

    A refreshing and creamy dessert combining fruits with a delicious cheesecake filling and a caramel drizzle.


    • 2 cups strawberries, hulled and sliced
    • 2 cups green apples, chopped
    • 1 cup grapes (red or green), halved
    • 1 cup pineapple chunks (fresh or canned), drained
    • 1 cup bananas, sliced
    • 8 oz cream cheese, softened
    • 1/2 cup powdered sugar
    • 1/2 tsp vanilla extract
    • 1 cup heavy whipping cream (chilled)
    • 1/2 cup caramel sauce (store-bought or homemade)

    1. Prepare the Fruit: Wash, peel, and chop all the fruit into bite-sized pieces. This includes strawberries, apples, grapes, pineapple, and bananas. Place all the fruit into a large mixing bowl and gently toss them together.
    2. Make the Cheesecake Filling: In a separate bowl, beat the softened cream cheese with powdered sugar and vanilla extract until smooth and creamy. In another mixing bowl, whip the chilled heavy cream until stiff peaks form. Once the cream is whipped, gently fold it into the cream cheese mixture until fully combined and smooth.
    3. Assemble the Fruit Salad: Pour the cheesecake mixture over the prepared fruit and gently fold everything together, ensuring the fruit is evenly coated with the creamy filling. Taste and, if necessary, adjust the sweetness by adding more powdered sugar.
    4. Drizzle with Caramel: Drizzle the caramel sauce generously over the top of the fruit salad. Alternatively, serve the caramel on the side for dipping.
    5. Serve: Chill the fruit salad in the refrigerator for at least 1 hour before serving to allow the flavors to meld.
    6. Garnish and Enjoy: For a finishing touch, garnish with extra caramel sauce or a sprinkle of crushed graham crackers for a bit of crunch. Enjoy this refreshing and indulgent fruit salad!

    Notes

    • Use fresh fruits for the best flavor.
    • Adjust the amount of powdered sugar based on your sweetness preference.
    • Can be prepared a few hours in advance for easier serving.
    • Prep Time: 20 minutes
    • Cook Time: 0 minutes
    • Category: Dessert
    • Method: Mixing
    • Cuisine: American

    Nutrition

    • Serving Size: 1 cup
    • Calories: 250
    • Sugar: 20g
    • Sodium: 150mg
    • Fat: 15g
    • Saturated Fat: 9g
    • Unsaturated Fat: 5g
    • Trans Fat: 0g
    • Carbohydrates: 30g
    • Fiber: 3g
    • Protein: 3g
    • Cholesterol: 40mg

    Sharing is caring!

  • Ham and Cheese Sourdough Croissant Loaf

    Ham and Cheese Sourdough Croissant Loaf


    Introduction to Ham and Cheese Sourdough Croissant Loaf

    Hey there, fellow food lovers! If you’re anything like me, dinner can sometimes feel like a race against the clock. But fear not! The Ham and Cheese Sourdough Croissant Loaf is here to save the day! Imagine pulling apart a warm, flaky loaf, the aroma of sourdough dancing in the air, while savory ham and gooey cheese ooze from within. This recipe isn’t just about nourishing your family; it’s an opportunity to impress friends at brunch, too. Trust me, you’ll feel like a culinary rockstar with this delightful treat waiting for you!

    Why You’ll Love This Ham and Cheese Sourdough Croissant Loaf

    This Ham and Cheese Sourdough Croissant Loaf brings together a knockout combination of flavors and textures. It’s an easy way to please everyone at the table without endless hours in the kitchen. You’ll love how the sourdough’s slight tang complements the rich ham and creamy cheese. Plus, it holds well in the fridge, making it a perfect meal prep option for busy days. Who knew weeknight dinners could feel so gourmet?

    Ingredients for Ham and Cheese Sourdough Croissant Loaf

    Let’s dive into the delicious components that make this Ham and Cheese Sourdough Croissant Loaf shine! Here’s what you’ll need:

    • Sourdough Starter: A ripe, bubbly starter gives your loaf that signature tang. It’s essentially the magic behind sourdough.
    • All-Purpose or Bread Flour: Either works beautifully in creating the dough. Choose bread flour for a chewier texture.
    • Water: The magic elixir! It hydrates the flour, allowing gluten to develop, essential for that perfect crumb.
    • Levain: This is a mixture of sourdough starter, water, and flour that adds complexity and flavor to the loaf.
    • Salt: A critical element that enhances flavors while keeping the yeast in check. Not too much, or your bread might end up salty!
    • Butter: Unsalted butter makes a rich, flaky texture, especially important during the lamination process. Trust me, it’s worth every calorie!
    • Gruyère Cheese: A perfect melter! This nutty cheese adds depth. You can also experiment with other cheeses like cheddar or mozzarella.
    • Diced Ham: The star of the filling! Pot for a savory, high-quality ham to enhance the richness of your loaf.

    You’ll find exact measurements and more details at the bottom of the article, ready for you to print. Feel free to swap out the ham for turkey or veggies for a lighter twist!

    How to Make Ham and Cheese Sourdough Croissant Loaf

    Now that you’ve gathered your ingredients, let’s roll up our sleeves and dive into making this mouthwatering Ham and Cheese Sourdough Croissant Loaf. I promise you, though it looks fancy, the process is quite straightforward. Ready? Let’s get started!

    Step 1: Prepare the Levain

    Start by mixing your ripe sourdough starter with all-purpose or bread flour and a bit of water. Aim for a smooth, thick consistency. Allow it to sit in a warm spot, ideally around 78-80°F, for about 10-12 hours. You’ll know it’s ready when it’s bubbly and has roughly doubled in size. This levain is where the magic begins!

    Step 2: Create the Dough

    In a large bowl, combine the ripe levain with additional water and salt. Then, add in the bread flour. Stir everything together until you form a wet, sticky dough. Don’t worry if it seems a bit messy at this stage! Let it rest covered in the bowl for 30 minutes. This is called autolyse, and it helps develop the gluten, making the dough stronger.

    Step 3: Stretch and Fold

    After the resting period, it’s time to incorporate cold butter. Gently stretch the dough from one side to the other, folding it over itself. Repeat this every 30 minutes for about 1.5 hours. It may feel awkward at first, but using a gentle touch keeps the butter chilled and ensures those flaky layers we crave in our croissant loaf.

    Step 4: Bulk Fermentation

    Now, let’s let your dough rise! Cover it and let it sit for about 6-7 hours. During this time, you’ll want to look for visible bubbles forming in the dough—that’s the sign that the yeast is doing its job. When it’s about 70% risen, you’ll know it’s ready for the next step!

    Step 5: Assemble the Croissant Loaf

    Time to build our masterpiece! Start by stretching the dough into a rectangle on a floured surface. Spread the shredded Gruyère cheese and diced ham over the surface. Then, gently fold the dough over the filling and roll it up tightly, like a Swiss roll. Pinch the edges to seal in all that cheesy goodness. This folding technique is pivotal for achieving those delightful layers!

    Step 6: Cold Fermentation

    Pop your shaped dough into the refrigerator. Let it cold ferment for anywhere from 12 to 18 hours. This part is crucial! Chilling the dough overnight helps develop flavor and ensures that beautiful flaky texture we all love.

    Step 7: Preheat and Bake

    On baking day, preheat your Dutch oven to 450°F for about 20 minutes. Just before baking, score the top of the dough with a sharp knife and sprinkle the remaining cheese on top. Carefully place the loaf in the Dutch oven. Cover it and bake for 25 minutes. After that, remove the lid and lower the temperature to 425°F for an additional 20 minutes until it’s golden brown and cooked through. Oh, that smell!

    Step 8: Cool and Serve

    Once baked, transfer your masterpiece to a cooling rack. Let it cool for at least 30 minutes before slicing. This waiting time can be tough, but it ensures the inside sets properly. When you’re ready to serve, simply cut a slice and revel in the joy of your creation—you’ve earned it!

    Tips for Success

    • Always keep your dough temperature around 70-72ºF to maintain butter’s chill.
    • Use parchment paper in your Dutch oven to prevent sticking and make cleanup easier.
    • Score the dough while it’s still cold for better control and nice aesthetics.
    • Be patient during cold fermentation—it’s worth the wait for those flaky layers!
    • Experiment with fillings to make the loaf your own. The possibilities are endless!

    Equipment Needed for Ham and Cheese Sourdough Croissant Loaf

    • Large Mixing Bowl: Any sturdy bowl will do, even your favorite salad bowl works in a pinch.
    • Dutch Oven: A heavy pot is ideal, but you can use a regular baking sheet with a pan of water to create steam.
    • Kitchen Scale: For precise measurements, but measuring cups are a good alternative for home cooks.
    • Bench Scraper: Handy for cutting and transferring dough, but a regular spatula will also work.
    • Baking Rack: Essential for cooling, but the countertop can serve just as well.

    Variations of Ham and Cheese Sourdough Croissant Loaf

    • Cheese Swaps: Try replacing Gruyère with cheddar, mozzarella, or a combination for a different flavor profile.
    • Herbed Delight: Add fresh herbs like rosemary, thyme, or chives to the filling for an aromatic twist.
    • Vegetarian Option: Substitute the ham with sautéed spinach and roasted red peppers for a delicious veggie version.
    • Spicy Kick: Incorporate jalapeños or pepper jack cheese for a zesty version that’ll wake up your taste buds!
    • Different Dough: Experiment with whole wheat flour or a gluten-free blend if you need dietary alternatives.

    Serving Suggestions for Ham and Cheese Sourdough Croissant Loaf

    • Fresh Salad: Pair with a crisp green salad for a light and refreshing balance.
    • Tomato Soup: Serve along with a warm bowl of tomato soup for a comforting combo.
    • Wine Pairing: A chilled white wine, like Sauvignon Blanc, enhances the flavors beautifully.
    • Presentation: Slice the loaf and arrange on a wooden board, garnished with fresh herbs for a rustic appeal.
    • Breakfast Twist: Enjoy a warm slice with a fried egg on top for a delightful brunch option.

    FAQs about Ham and Cheese Sourdough Croissant Loaf

    Can I make this Ham and Cheese Sourdough Croissant Loaf without a sourdough starter?

    Yes, you can! If you don’t have a sourdough starter, consider using active dry yeast instead for a quicker rise. Just adjust the recipe and use a yeast-based method for making the dough.

    How should I store leftover Ham and Cheese Sourdough Croissant Loaf?

    To maintain freshness, store any leftover slices in an airtight container at room temperature for up to two days. For longer storage, wrap it tightly and keep it in the fridge, where it can last up to a week.

    Can I freeze the Ham and Cheese Sourdough Croissant Loaf?

    Absolutely! This loaf freezes beautifully. Just slice it first, then wrap each piece in plastic wrap followed by foil. It will stay fresh for up to three months in the freezer. You can reheat slices straight from frozen!

    What can I pair with the Ham and Cheese Sourdough Croissant Loaf?

    This delightful loaf pairs wonderfully with a green salad, warm tomato soup, or even a glass of white wine. It’s super versatile—perfect for any meal!

    How can I customize the fillings for this loaf?

    The options are endless! Swap the ham for turkey, add roasted vegetables, or experiment with different cheeses. You can even play around with herbs and spices to make it your own.

    Final Thoughts

    Every slice of this Ham and Cheese Sourdough Croissant Loaf is a testament to the joy of home cooking. It’s more than just a meal; it’s about creating memories around the dinner table or sharing a slice during a cozy brunch. The crunchy exterior, the rich flavors of ham and melted cheese, and the delightful texture all come together to create a moment of pure happiness. I hope you find as much enjoyment in baking it as I have. It’s an adventure that’s well worth the time, and I can’t wait for you to savor it with your loved ones!


    Print

    clock clock iconcutlery cutlery iconflag flag iconfolder folder iconinstagram instagram iconpinterest pinterest iconfacebook facebook iconprint print iconsquares squares iconheart heart iconheart solid heart solid icon

    Description

    A delicious and flaky Ham and Cheese Sourdough Croissant Loaf that combines the tangy flavors of sourdough with savory ham and cheese filling.


    • 6 grams sourdough starter ripe, bubbly and active (about 1 teaspoon)
    • 60 grams all-purpose or bread flour (about 1/2 cup)
    • 60 grams water (about 1/4 cup)
    • 120 grams levain, ripe, bubbly and active (about ½ cup)
    • 340 grams water (about 1 cup plus 6 Tablespoons)
    • 10 grams salt (about 1 1/2 teaspoons)
    • 500 grams bread flour (about 3 1/2 cups)
    • 113 grams unsalted butter (about 1/2 cup)
    • 175 grams shredded Gruyère cheese, divided (150 grams for laminating plus 25 grams reserved for sprinkling)
    • 150 grams diced ham (about 1 cup)

    1. Prepare levain by mixing sourdough starter with all-purpose or bread flour and water. Let sit for 10-12 hours at 78-80°F.
    2. In a large bowl, mix ripe levain with water, salt, and bread flour until a wet, sticky dough forms. Cover and let rest for 30 minutes.
    3. Perform a series of stretch and folds every 30 minutes for 1 ½ hours, incorporating cold butter into the dough.
    4. Let the dough rise for 6-7 hours until it is about 70% risen and has bubbles visible.
    5. Stretch the dough into a rectangle, spread cheese and ham, fold it over and roll it up.
    6. Cover and refrigerate the shaped dough overnight or up to 12-18 hours for cold fermentation.
    7. Preheat a Dutch oven to 450°F for 20 minutes.
    8. Score the dough, sprinkle with remaining cheese, and place in the preheated Dutch oven.
    9. Bake covered for 25 minutes, then uncover and bake for an additional 20 minutes at 425°F until bread is cooked through.
    10. Let the bread cool on a baking rack before serving.

    Notes

    • Maintain a dough temperature of 70-72ºF to keep butter chilled.
    • Use parchment paper in the Dutch oven to prevent sticking.
    • Cold proofing is essential for flaky layers.
    • For best results, score the dough while it is still cold.
    • Prep Time: 10-12 hours (for levain) + 7-8 hours (for dough and cold fermentation)
    • Cook Time: 45 minutes
    • Category: Bread
    • Method: Baking
    • Cuisine: French

    Nutrition

    • Serving Size: 1 slice
    • Calories: 250
    • Sugar: 1g
    • Sodium: 500mg
    • Fat: 12g
    • Saturated Fat: 7g
    • Unsaturated Fat: 3g
    • Trans Fat: 0g
    • Carbohydrates: 30g
    • Fiber: 2g
    • Protein: 10g
    • Cholesterol: 30mg

    Sharing is caring!

  • Banana Chocolate Chip Streusel Muffins

    Banana Chocolate Chip Streusel Muffins


    Introduction to Banana Chocolate Chip Streusel Muffins

    Ah, the sweet aroma of freshly baked Banana Chocolate Chip Streusel Muffins wafting through the house—it’s like a warm hug for your senses! If you’re a busy mom or a professional juggling a hundred things at once, this recipe is your new best friend. These muffins are not only quick to whip up, but they also deliver that homey comfort we all crave. Imagine surprising your loved ones with these delicious treats on a Sunday morning or powering through your week with a delightful breakfast option. Let’s bake some joy together!

    Why You’ll Love This Banana Chocolate Chip Streusel Muffins

    These Banana Chocolate Chip Streusel Muffins are a game-changer for busy mornings! They’re so simple to make that even your kids can help out, turning baking into a family affair. The moistness of the bananas paired with the chocolate chips creates a scrumptious flavor explosion. Plus, the streusel topping adds a delightful crunch that makes each bite feel indulgent. You’ll not only savor the taste but also appreciate how quick and easy this recipe is!

    Ingredients for Banana Chocolate Chip Streusel Muffins

    Gathering the right ingredients is the first step towards muffin magic! Here’s what you’ll need to create your delicious Banana Chocolate Chip Streusel Muffins:

    • All-purpose flour: The base of our muffins. It gives them structure and fluffiness.
    • Baking soda: This little wonder helps the muffins rise and become light. It’s key for that perfect texture.
    • Salt: Just a pinch enhances the flavors, balancing the sweetness of the ingredients.
    • Ripe bananas: The stars of the show! The riper, the better. They’ll ensure your muffins are moist and flavorful.
    • Granulated sugar: Adds sweetness and helps create that lovely golden crust.
    • Large egg: Acts as a binder, giving the muffins a nice lift and enriching with protein.
    • Unsalted butter: Adds richness and a delightful buttery taste. Melt it for ultra-easy mixing!
    • Chocolate chips: Because what’s a muffin without a bit of chocolate? You can swap these for nuts if you prefer.
    • Brown sugar (for streusel): Brings a deep, caramel flavor to the topping. It’s all about that crunch!
    • Cinnamon: A warm, aromatic spice that adds a hint of warmth and coziness to your muffins.
    • Additional butter (for streusel): A little more for that crumbly goodness! It holds everything together.

    Feel free to look at the bottom of the article for exact quantities, printable options, and any substitutions you might want to explore. Enjoy crafting magic with these ingredients!

    How to Make Banana Chocolate Chip Streusel Muffins

    Let’s roll up our sleeves and dive into making these Banana Chocolate Chip Streusel Muffins! I promise, with each step, you’ll be one mix closer to muffin bliss. So grab your apron, and let’s get started!

    Step 1: Preheat the Oven

    The secret to baking perfect muffins is starting with a hot oven. Preheat your oven to 375°F (190°C). This temperature is just right for getting that golden crust while keeping the insides soft and moist. Trust me; it’s worth those few extra minutes of waiting!

    Step 2: Combine Dry Ingredients

    In a large mixing bowl, whisk together the all-purpose flour, baking soda, and salt. This step is crucial. Mixing these ingredients ensures an even distribution of the baking soda, avoiding any surprise lumps in your muffins. You want every bite to be deliciously fluffy!

    Step 3: Mix the Wet Ingredients

    In another bowl, mash those ripe bananas until they’re smooth. Then add the granulated sugar, the lightly beaten egg, and the melted unsalted butter. Stir them together until well combined. The trick here is to make sure there are no big banana chunks left. You want a nice, smooth mixture that’ll blend beautifully with the dry ingredients.

    Step 4: Combine Wet and Dry Ingredients

    Now, it’s time for the fun part! Pour the banana mixture into the bowl with the dry ingredients. Gently fold them together until just combined. Be careful not to overmix—this will keep your muffins light and airy. You’ll still see some dry flour, and that’s just fine!

    Step 5: Prepare the Streusel Topping

    In a small bowl, mix together the brown sugar, flour, and cinnamon. Then, cut in the tablespoon of butter until it resembles thick crumbs. This crunchy streusel will add a delightful texture to your muffins. The cinnamon brings in that cozy warmth we all love!

    Step 6: Fill the Muffin Cups

    Using a spoon or a cookie scoop, fill each muffin cup about three-quarters full with batter. This allows room for the muffins to rise without overflowing. Top each muffin with a generous sprinkle of the streusel topping. The more, the merrier!

    Step 7: Bake to Perfection

    Pop your muffin tin into the oven and bake for 20-25 minutes. The muffins are ready when a toothpick inserted into the center comes out clean. You’ll know they’re perfect by the golden brown hue and that delightful aroma filling your kitchen!

    Step 8: Cool and Serve

    After baking, allow the muffins to cool in the pan for about 5 minutes. This helps them hold their shape. Then, transfer them to a wire rack to cool completely. These muffins are best enjoyed warm, but they also store beautifully for those busy mornings!

    Tips for Success

    • Use very ripe bananas for maximum sweetness and moisture.
    • Don’t overmix the batter; it should be slightly lumpy for fluffy muffins.
    • Make your streusel topping in advance to save time.
    • Check muffins a minute or two early; ovens can vary.
    • Store leftovers in an airtight container to keep them fresh.

    Equipment Needed

    • Muffin tin: A standard muffin tin works best. If you don’t have one, use a cupcake pan.
    • Mixing bowls: Two large bowls are ideal for combining wet and dry ingredients.
    • Whisk and spatula: These will help you mix everything together smoothly.
    • Measuring cups: Essential for accurate ingredient measurement—use different size cups for dry and liquid.
    • Wire rack: Perfect for cooling your muffins evenly; a plate can work in a pinch!

    Variations on Banana Chocolate Chip Streusel Muffins

    • Nutty Delight: Add chopped walnuts or pecans for extra crunch and flavor. They pair beautifully with the banana and chocolate.
    • Chunky Chocolate: Use dark chocolate chips instead of semi-sweet for a richer flavor. You can also try adding white chocolate chips!
    • Dairy-Free Option: Substitute almond or coconut milk for the butter and use dairy-free chocolate chips for a vegan-friendly treat.
    • Fruit Fusion: Mix in some blueberries or diced apples for a fruity twist. They bring a refreshing pop to each bite.
    • Spicy Kick: Add a pinch of nutmeg or a dash of ginger for a warm, spiced flavor that brings out the best in your muffins.
    • Protein Boost: Stir in a scoop of your favorite protein powder to make these muffins a more filling snack.

    Serving Suggestions

    • Enjoy with Coffee: Pair your muffins with a hot cup of coffee or a latte for a delightful breakfast.
    • Fresh Fruit: Serve with sliced strawberries or a banana for a colorful plate.
    • Simple Presentation: Dust with powdered sugar on top for a lovely finishing touch.
    • Yogurt Dip: Offer a side of Greek yogurt for dipping or spreading.
    • Cool and Store: These muffins freeze well, making them perfect for a quick snack later.

    FAQs about Banana Chocolate Chip Streusel Muffins

    Can I use frozen bananas for this recipe?
    Absolutely! Just make sure to thaw and drain any excess liquid before mashing. Frozen bananas work just as well and can add great moisture!

    What can I substitute for chocolate chips if my family doesn’t like them?
    You can swap chocolate chips for chopped nuts, dried fruits, or even white chocolate chips. Get creative with your favorite flavors!

    How do I store leftover muffins?
    Store your Banana Chocolate Chip Streusel Muffins in an airtight container at room temperature for up to three days. You can also freeze them for longer shelf life!

    Can I make these muffins in advance?
    Definitely! You can prepare the batter the night before and keep it in the fridge. Just fill the muffin cups before baking in the morning for a fresh treat!

    What if my muffins come out too dense?
    If your muffins turn out dense, it might be due to overmixing the batter. Be gentle when folding wet and dry ingredients, leaving some lumps for that perfect fluffiness.

    Final Thoughts

    Baking these Banana Chocolate Chip Streusel Muffins is like diving into a cozy memory. Each bite transports me back to my grandmother’s kitchen, filled with laughter and the scent of warm spices. These muffins are more than just a delightful treat; they’re a way to create cherished moments with family. Whether it’s a rushed weekday morning or a lazy Sunday brunch, they bring joy to our table. I hope you experience the same warm bliss that fills my heart when I bake these. Happy baking, dear friends; may your kitchens smell of sweetness and love!


    Print

    clock clock iconcutlery cutlery iconflag flag iconfolder folder iconinstagram instagram iconpinterest pinterest iconfacebook facebook iconprint print iconsquares squares iconheart heart iconheart solid heart solid icon

    Description

    Delicious and moist banana chocolate chip muffins topped with a crumbly streusel.


    • 1 ¾ cups all-purpose flour
    • 1 teaspoon baking soda
    • ½ teaspoon salt
    • 4 ripe bananas, mashed
    • ¾ cup granulated sugar
    • 1 large egg, lightly beaten
    • 1/3 cup unsalted butter, melted
    • 1 cup chocolate chips
    • For the Streusel Topping:
    • 1/3 cup packed brown sugar
    • 2 tablespoons all-purpose flour
    • 1/8 teaspoon ground cinnamon
    • 1 tablespoon unsalted butter

    1. Preheat your oven to 375°F (190°C). Line a muffin tin with paper liners or grease with butter.
    2. In a large bowl, whisk together the flour, baking soda, and salt.
    3. In another bowl, mix the mashed bananas, sugar, egg, and melted butter until well combined.
    4. Pour the wet ingredients into the dry ingredients. Stir until just combined. Fold in the chocolate chips.
    5. In a small bowl, mix together brown sugar, flour, and cinnamon. Cut in the butter until the mixture resembles coarse crumbs.
    6. Fill the prepared muffin cups 3/4 full with the batter. Sprinkle the streusel topping evenly over each muffin.
    7. Bake for 20-25 minutes, or until a toothpick inserted into the center comes out clean.
    8. Allow the muffins to cool in the pan for 5 minutes, then transfer to a wire rack to cool completely.

    Notes

    • Ensure bananas are fully ripe for the best flavor.
    • Store muffins in an airtight container for up to 3 days.
    • Can substitute chocolate chips with nuts if desired.
    • Prep Time: 15 minutes
    • Cook Time: 25 minutes
    • Category: Baked Goods
    • Method: Baking
    • Cuisine: American

    Nutrition

    • Serving Size: 1 muffin
    • Calories: 210
    • Sugar: 15g
    • Sodium: 150mg
    • Fat: 7g
    • Saturated Fat: 4g
    • Unsaturated Fat: 2g
    • Trans Fat: 0g
    • Carbohydrates: 32g
    • Fiber: 2g
    • Protein: 3g
    • Cholesterol: 25mg

    Sharing is caring!

  • Bacon Onion Tomato Pie

    Bacon Onion Tomato Pie


    Introduction to Bacon Onion Tomato Pie

    Welcome, fellow home cooks! If you’re looking for a dish that balances comfort and flavor, then you’re in for a treat with this Bacon Onion Tomato Pie. As a busy mom, I know how challenging it can be to whip up something delicious after a long day, and this pie is like a warm hug on a plate. It’s perfect for impressing loved ones or for cozy nights in when you crave some hearty goodness. With simple ingredients and easy steps, this recipe will quickly become a family favorite that you can count on time and time again!

    Why You’ll Love This Bacon Onion Tomato Pie

    This Bacon Onion Tomato Pie is not only delicious but also incredibly easy to make. In just one hour, you can bring a savory masterpiece from your kitchen to the table. The combination of crispy bacon, sweet onions, and juicy tomatoes creates a flavor explosion that everyone will adore. It’s the ultimate comfort food that satisfies hunger without adding stress to your busy day. Trust me, this pie will become your go-to recipe!

    Ingredients for Bacon Onion Tomato Pie

    Gathering the right ingredients is essential for making this Bacon Onion Tomato Pie truly spectacular. Below, I’ve listed everything you’ll need, along with some helpful insights:

    • Pre-baked deep 9-inch pie shell: This is your base. Opt for store-bought for convenience, or make your own if you’re feeling adventurous.
    • Bacon: Use thick slices for that crispy goodness. Can’t have bacon? Turkey bacon is a tasty alternative.
    • Tomatoes: Two average-sized tomatoes add sweetness and juiciness. If fresh isn’t available, a can of diced tomatoes works fine.
    • Yellow onion: A big, thinly sliced yellow onion brings that savory flavor. Sweet onions can also be substituted for a milder taste.
    • Mozzarella cheese: This is your melty cheese partner. Feel free to mix in cheddar or gouda for a different twist!
    • Mayo and sour cream: These create a creamy texture. Greek yogurt can replace sour cream for a healthier option.
    • White flour: Just a tablespoon to help bind the cheese fondue. For gluten-free needs, cornstarch can be a great substitute.
    • Garlic powder: It’s an easy way to add flavor without the fuss of fresh garlic. Fresh minced garlic could be a bold substitute.
    • Salt and black pepper: Essential seasonings to enhance the flavors.
    • Fresh parsley or chives (optional): A sprinkle of this at the end can elevate the presentation and add a pop of color.

    Don’t forget, the exact quantities of these ingredients are at the bottom of the article for easy printing!

    How to Make Bacon Onion Tomato Pie

    Now that you’ve gathered all your ingredients, it’s time to bring this dish to life! Follow these simple steps, and you’ll have a delicious Bacon Onion Tomato Pie in no time.

    Step 1: Preheat the Oven

    First things first, preheat your oven to 350°F (175°C). This is crucial for achieving that golden, bubbly top. While your oven warms up, you can get everything else ready, making efficient use of your time!

    Step 2: Sauté the Onions

    Grab a medium skillet and add a bit of bacon grease. If you’re feeling cheeky, add a little olive oil too. Toss in your thinly sliced onions. Sauté them over medium heat until they’re soft and beautifully caramelized—about 10 minutes should do it. Be patient here; that sweetness is like the icing on the cake. Allow them to cool for a bit after taking them off the heat.

    Step 3: Layer the Ingredients

    Now for some delicious layering! Start with half the sautéed onions at the bottom of your pre-baked pie shell. Next, arrange half of the tomato slices on top, followed by half of your crispy bacon pieces. Then repeat this process! Finish with the remaining onions, tomatoes, and bacon. This thoughtful layering will ensure every bite is packed with flavor.

    Step 4: Prepare the Cheese Mixture

    Next up, in a mixing bowl, combine your shredded mozzarella, mayo, sour cream, flour, garlic powder, salt, and pepper. Stir until everything’s blended into a creamy, cheesy delight. This mixture is the rich secret that ties all the flavors together beautifully!

    Step 5: Assemble and Bake

    Spread that luscious cheese mixture evenly over your layered pie. It should cover all those glorious ingredients! Place the entire pie on a baking sheet—just in case it bubbles over! Bake for 35 to 40 minutes, or until the top is golden brown and bubbly. The aroma wafting through your kitchen will make you feel like a culinary rock star.

    Step 6: Cool and Garnish

    Once baked, carefully remove your Bacon Onion Tomato Pie from the oven. Let it cool for a few minutes; I know it’s tempting, but patience is key here! If you’d like, sprinkle some fresh parsley or chopped chives on top before slicing. This little touch not only adds color but elevates the presentation!

    Tips for Success

    • Cook the bacon until crisp for the best texture. It adds that crunch we all love.
    • Let your pie cool for a few minutes before cutting. This will help keep the layers intact.
    • Experiment with cheeses! Mixing cheeses can create a unique flavor profile.
    • For a fancy touch, serve with a side salad or steamed veggies.
    • Don’t skip the chives or parsley; they make a big difference visually and taste-wise!

    Equipment Needed for Bacon Onion Tomato Pie

    • Medium Skillet: A non-stick skillet works best; a regular one will do too.
    • Mixing Bowl: Any large bowl—glass or plastic is fine—for combining the cheese and other filling ingredients.
    • Baking Sheet: Use this to catch any drips from your pie while it bakes.
    • Pie Server: A versatile spatula or even a large knife works great for cutting and serving.

    Variations of Bacon Onion Tomato Pie

    • Vegetarian Version: Leave out the bacon and add sautéed mushrooms, spinach, or bell peppers for a hearty veggie twist.
    • Spicy Kick: Sprinkle some red pepper flakes or jalapeños into the layers for a zesty surprise that’ll tingle the taste buds!
    • Cheese Lovers: Experiment with different cheeses like feta, gouda, or pepper jack to create a unique flavor blend.
    • Gluten-Free Option: Use a gluten-free pie crust and substitute the flour in the cheese mixture with cornstarch for a safe yet tasty dish.
    • Herb Infusion: Add fresh herbs like basil or thyme to the cheese mixture for a fragrant touch that complements the sweetness of the tomatoes.

    Serving Suggestions for Bacon Onion Tomato Pie

    • Side Salad: A crisp green salad with a tangy vinaigrette pairs perfectly with the richness of the pie.
    • Roasted Vegetables: Serve alongside some roasted seasonal veggies for a vibrant and healthy plate.
    • Wine Pairing: A chilled white wine, like Sauvignon Blanc, complements the flavors beautifully.
    • Presentation: Slice into wedges and serve on colorful plates for a restaurant-like feel!

    FAQs about Bacon Onion Tomato Pie

    Let’s dive into some common questions about this delightful Bacon Onion Tomato Pie to ensure your cooking experience is smooth and enjoyable!

    Can I make Bacon Onion Tomato Pie ahead of time?

    Absolutely! You can prepare the pie a day in advance and store it in the refrigerator. Just cover it tightly with plastic wrap or foil. When you’re ready to bake, pop it in the oven as directed. A little extra time for those flavors to meld will only enhance your pie!

    Is this Bacon Onion Tomato Pie suitable for freezing?

    Yes, it freezes wonderfully! Once baked and cooled, wrap slices tightly in plastic wrap, then aluminum foil. This keeps it fresh in the freezer for up to three months. When you’re ready to enjoy, simply thaw in the refrigerator and reheat.

    What’s the best way to store leftovers?

    For storing leftovers, place them in an airtight container and keep them in the refrigerator. Enjoy within three days for the best flavor and quality. Reheat in the oven for that nice crispy texture!

    Can I customize the filling?

    Of course! Feel free to mix it up by adding veggies like bell peppers or spinach, or try a different type of cheese. Your creativity will make each pie uniquely yours!

    What can I serve with Bacon Onion Tomato Pie?

    This pie pairs beautifully with a fresh side salad or roasted veggies. A glass of white wine or sparkling lemonade will perfectly complement the rich flavors too.

    Final Thoughts

    Cooking this Bacon Onion Tomato Pie is more than just preparing a meal; it’s a way to bring warmth and joy to your kitchen. The delightful aroma fills your home, sparking anticipation and excitement. Each slice offers a comforting combination of flavors that elicits smiles from family and friends alike. Whether you’re serving it for a busy weeknight dinner or at a cozy gathering, this pie never fails to impress. I hope you’ll find as much happiness in creating and savoring this dish as I do. Happy cooking, and enjoy every bite of your delicious creation!


    Print

    clock clock iconcutlery cutlery iconflag flag iconfolder folder iconinstagram instagram iconpinterest pinterest iconfacebook facebook iconprint print iconsquares squares iconheart heart iconheart solid heart solid icon

    Description

    A flavorful pie filled with bacon, onions, and tomatoes, topped with a cheesy, creamy mixture.


    • One pre-baked deep 9-inch pie shell
    • 8 to 6 thick slices of bacon, fried crisp and chopped up
    • 2 average-sized tomatoes, sliced thin
    • 1 big yellow onion, sliced really thin
    • 1 1/2 cups mozzarella cheese, shredded
    • Half a cup of mayo
    • Half a cup of sour cream
    • 1 tablespoon regular white flour
    • 1/2 teaspoon garlic powder
    • 1/4 teaspoon salt
    • 1/4 teaspoon black pepper
    • 1 tablespoon fresh parsley or chives, chopped up (optional)

    1. Heat your oven up to 350°F (175°C) and let it get hot while you get everything else ready.
    2. Toss your thin onion slices into a medium skillet with some bacon grease and cook on medium till they’re soft and brown, around 10 minutes. Let them cool down for a bit.
    3. Start with half the onions in your pie crust, cover that with half the tomatoes, then sprinkle on half the bacon. Go again with the rest of the onions, tomatoes, and bacon to finish the layers.
    4. Mix the mozzarella, mayo, sour cream, flour, garlic powder, pepper, and salt together in a bowl till it all comes together.
    5. Smooth the cheesy mix right over everything else in the dish. Pop the whole thing onto a baking sheet and bake for 35 to 40 minutes or until that top is bubbly and nice and golden.
    6. Take it out of the oven and give it a few minutes to chill. If you want, sprinkle with fresh parsley or chives before you cut into it.

    Notes

    • Feel free to adjust the ingredients based on personal preferences.
    • This pie can be served warm or at room temperature.
    • Leftovers can be stored in the refrigerator for a few days.
    • Prep Time: 20 minutes
    • Cook Time: 40 minutes
    • Category: Main Dish
    • Method: Baking
    • Cuisine: American

    Nutrition

    • Serving Size: 1 slice
    • Calories: 350
    • Sugar: 2g
    • Sodium: 700mg
    • Fat: 28g
    • Saturated Fat: 10g
    • Unsaturated Fat: 15g
    • Trans Fat: 0g
    • Carbohydrates: 18g
    • Fiber: 1g
    • Protein: 10g
    • Cholesterol: 40mg

    Sharing is caring!

  • Peach Burrata Arugula Salad

    Peach Burrata Arugula Salad


    Introduction to Peach Burrata Arugula Salad

    There’s something magical about a fresh salad that just whispers “summer.” My Peach Burrata Arugula Salad does precisely that, bringing a symphony of flavors to your table without fuss. Whether you’re racing from work to family activities or prepping for a cozy weekend gathering, this salad is a delightful solution. With juicy peaches, creamy burrata, and peppery arugula, it’s a dish that not only impresses but also nourishes. Trust me, this vibrant combination will make you the star of your kitchen, pleasing everyone—even the pickiest of eaters!

    Why You’ll Love This Peach Burrata Arugula Salad

    This Peach Burrata Arugula Salad is a lifesaver for busy moms like me! It’s quick and requires no cooking, making it perfect for those hectic weeknights. The luscious sweetness of ripe peaches balances perfectly with the creamy burrata and the peppery kick of arugula. Plus, it’s versatile enough to shine as a stunning starter or a light meal. With just a handful of ingredients, you’ll savor every bite in no time!

    Ingredients for Peach Burrata Arugula Salad

    Creating this delightful Peach Burrata Arugula Salad is as simple as gathering a few fresh ingredients. Let’s dive in!

    • Fresh Arugula: This leafy green adds a lovely peppery bite, serving as the perfect base for our salad.
    • Ripe Peaches: Juicy and sweet, ripe peaches are the stars of this dish. Look for ones that are slightly soft to the touch.
    • Burrata Cheese: This creamy cheese provides rich texture and flavor, enhancing the salad’s overall indulgence.
    • Toasted Pecans or Walnuts (optional): These nuts offer a delightful crunch. If you’re nut-free, feel free to skip them.
    • Extra Virgin Olive Oil: A drizzle of this high-quality oil brings everything together, adding a fresh flavor.
    • Balsamic Glaze: A sweet-tangy finish, this glaze enhances the salad and ties the flavors beautifully.
    • Salt and Freshly Cracked Black Pepper: Just a pinch of these makes a world of difference by bringing out the flavors.
    • Fresh Basil Leaves (optional): These fragrant leaves add a burst of color and flavor, great for garnishing your salad.

    For ingredient quantities and a neat printable version of the recipe, look towards the end of the article. Trust me, you’re going to want to keep this one handy!

    How to Make Peach Burrata Arugula Salad

    Making my delicious Peach Burrata Arugula Salad is a breeze! Follow these simple steps to bring this refreshing dish to life.

    Prepare the Arugula

    First, rinse the fresh arugula under cool water to remove any dirt.

    Then, gently dry it using a salad spinner or by patting it with a clean kitchen towel.

    Place the arugula in a large serving bowl or platter, creating a beautiful base for the salad.

    Slice the Peaches

    Next, take your ripe peaches and slice them thinly.

    The thinner the slices, the more they marry with the flavors of the salad.

    Layer the peach slices evenly over the bed of arugula, adding a pop of color and sweetness.

    Add the Burrata

    Now it’s time for that creamy burrata to shine!

    Whether you have two small balls or one large piece, gently tear or place the burrata in the center of the salad.

    Let its creaminess ooze out, mingling with the peaches and arugula to create bursts of flavor in every bite.

    Incorporate the Nuts

    If you’re using nuts, sprinkle the toasted pecans or walnuts over the top.

    The crunch of the nuts contrasts beautifully with the softness of the burrata and peaches.

    If you’re nut-free, skip this step and feel free to add something else, like crispy chickpeas.

    Drizzle the Dressing

    Now it’s time for the finishing touch—dressing!

    Gently drizzle extra virgin olive oil and balsamic glaze over the salad.

    The olive oil adds richness while the balsamic glaze brings a sweet-tangy zest that ties it all together beautifully.

    Season and Serve

    Finally, season the salad with a light sprinkle of salt and freshly cracked black pepper.

    These little additions elevate the flavors even more, making them dance on your palate.

    Serve your Peach Burrata Arugula Salad immediately for the best experience, and watch your loved ones delight in each colorful bite!

    Tips for Success

    • Always use ripe peaches for maximum sweetness; they make all the difference!
    • Dress the salad just before serving to maintain crispness in the arugula.
    • Toast your nuts lightly for a richer flavor and added crunch.
    • Experiment with adding fresh herbs like mint or cilantro for a unique twist.
    • For leftovers, store the salad components separately to keep it fresh.

    Equipment Needed

    • Large Serving Bowl: Any oversized bowl will do, even a mixing bowl.
    • Chef’s Knife: A good knife is essential for slicing peaches smoothly.
    • Cutting Board: Use any stable cutting board to prep your ingredients.
    • Salad Spinner or Towels: Helpful for drying the arugula; towels work just as well.
    • Measuring Cups: These are great, but eyeballing is perfectly fine for the dressing!

    Variations

    • Add Grilled Chicken: For a heartier meal, include slices of grilled chicken to boost protein.
    • Try Different Cheeses: Swap burrata for goat cheese or feta to change the flavor profile.
    • Use Different Nuts: Experiment with almonds or pistachios for a delightful twist.
    • Make it Vegan: Substitute burrata with a plant-based cheese and skip the honey in the glaze for a vegan-friendly option.
    • Include Other Fruits: Add seasonal fruits like strawberries or figs for a colorful and fruity medley.

    Serving Suggestions

    • Pair the Peach Burrata Arugula Salad with a crisp white wine, like Sauvignon Blanc, for a refreshing complement.
    • Serve it alongside grilled shrimp or chicken for a well-rounded meal that’s sure to impress.
    • For presentation, arrange the salad on a rustic wooden platter, adding vibrant edible flowers for color.

    FAQs about Peach Burrata Arugula Salad

    Can I make this salad ahead of time?

    While it’s best enjoyed fresh, you can prep the ingredients ahead of time. Just keep the arugula, peaches, and burrata separate until you’re ready to serve. This way, your salad stays crisp and the burrata remains creamy!

    What can I substitute for burrata cheese?

    If burrata isn’t available, goat cheese or ricotta can be fantastic alternatives. Both pair vividly with peaches, ensuring your Peach Burrata Arugula Salad remains delicious.

    Can I use a different type of dressing?

    Absolutely! Feel free to swap balsamic glaze for a honey mustard dressing or even a citrus vinaigrette. Just remember, the key is to balance sweetness and acidity to enhance the overall flavors of the salad.

    What fresh herbs can enhance this salad?

    Fresh basil is a favorite, but mint or even dill can elevate your Peach Burrata Arugula Salad to new heights. Each herb adds its unique twist, making each bite an adventure!

    Is this salad gluten-free?

    Yes, this salad is naturally gluten-free! Just check that any dressing or optional toppings don’t contain gluten if you have dietary restrictions.

    Final Thoughts

    The joy of savoring my Peach Burrata Arugula Salad goes beyond just the delicious flavors. It’s about the moments shared around the table, laughter echoing as you enjoy a meal that feels special yet effortless. This salad brightens any day, making it a go-to for me. It’s refreshing, easy to prepare, and visually stunning—perfect for impressing family or friends. Whether it’s a busy weekday or a leisurely weekend gathering, this colorful dish promises to uplift everyone’s spirits, leaving you feeling accomplished as a home cook. Try it, and watch the magic unfold!


    Print

    clock clock iconcutlery cutlery iconflag flag iconfolder folder iconinstagram instagram iconpinterest pinterest iconfacebook facebook iconprint print iconsquares squares iconheart heart iconheart solid heart solid icon

    Description

    A refreshing salad combining the sweetness of peaches, creaminess of burrata, and peppery arugula.


    • 4 cups fresh arugula
    • 2 ripe peaches, thinly sliced
    • 8 oz burrata cheese (2 small balls or 1 large)
    • 1/4 cup toasted pecans or walnuts (optional)
    • 12 tbsp extra virgin olive oil
    • 1 tbsp balsamic glaze
    • Salt and freshly cracked black pepper, to taste
    • Optional: fresh basil leaves for garnish

    1. Rinse and dry the arugula and place it in a large serving bowl or platter.
    2. Slice the peaches thinly and layer them evenly over the arugula.
    3. Gently tear or place the burrata cheese in the center or spread around the salad.
    4. Sprinkle with toasted nuts if using, and a few fresh basil leaves for added flavor.
    5. Drizzle with olive oil and balsamic glaze.
    6. Finish with a light sprinkle of salt and freshly cracked black pepper to taste.
    7. Serve immediately as a fresh starter or light entrée.
    • Prep Time: 10 minutes
    • Cook Time: 0 minutes
    • Category: Salad
    • Method: No cooking required
    • Cuisine: American

    Nutrition

    • Serving Size: 1 serving
    • Calories: 250
    • Sugar: 5g
    • Sodium: 150mg
    • Fat: 20g
    • Saturated Fat: 6g
    • Unsaturated Fat: 14g
    • Trans Fat: 0g
    • Carbohydrates: 13g
    • Fiber: 3g
    • Protein: 8g
    • Cholesterol: 20mg

    Sharing is caring!

  • Pepperoni Pizza Sourdough Bread

    Pepperoni Pizza Sourdough Bread


    Introduction to Pepperoni Pizza Sourdough Bread

    Have you ever wished to combine the comforting flavors of pizza with the wholesome goodness of homemade sourdough? Well, let me introduce you to Pepperoni Pizza Sourdough Bread! This delightful creation brings together the best of both worlds, making it a fantastic choice for busy days or a cozy family night. With its crispy crust and cheesy, savory filling, it’s sure to impress your loved ones. Plus, the aroma wafting through your kitchen will have everyone racing to the table. So roll up your sleeves, and let’s embark on this delicious adventure together!

    Why You’ll Love This Pepperoni Pizza Sourdough Bread

    This Pepperoni Pizza Sourdough Bread is a game-changer in the kitchen! It’s not only simple to make but also bursts with flavor that’ll have your family asking for seconds. You’ll love how the sourdough tang pairs perfectly with gooey cheese and spicy pepperoni. Plus, it’s a delightful way to sneak in the comforting vibes of pizza without the takeout fuss. Trust me, your busy schedule will thank you for this delicious homemade option!

    Ingredients for Pepperoni Pizza Sourdough Bread

    Gathering the right ingredients is key to crafting this mouthwatering Pepperoni Pizza Sourdough Bread. Each component plays a vital role, combining to create a delightful taste experience. Here’s what you’ll need:

    • Active sourdough starter: This living culture adds the characteristic tang of sourdough. Make sure it’s bubbly and ready to go!
    • Warm water: Helps activate the starter and create a supple dough. Temperatures around 100°F (38°C) work wonders!
    • Bread flour: A high-protein flour to develop gluten structure, giving your loaf a perfect chew. If you’re in a pinch, all-purpose flour can work, too.
    • Salt: Enhances flavor and controls fermentation, marrying all the taste elements beautifully.
    • Pizza seasoning: A zesty blend of herbs like oregano and basil, infusing that classic pizza taste into your bread.
    • Shredded mozzarella cheese: Melts into gooey goodness, making each bite heavenly. Feel free to substitute with your favorite cheese!
    • Pepperoni slices: The star ingredient, bringing that rich, savory flavor. You can swap it for veggies or cooked sausage for a twist.

    Remember, precise amounts are waiting for you at the bottom of the article, ready for easy printing. Gather these ingredients, and let the fun begin!

    How to Make Pepperoni Pizza Sourdough Bread

    Now that you have your ingredients ready, it’s time to dive into the fun part! Making Pepperoni Pizza Sourdough Bread is as rewarding as it is delicious. Let’s break down the steps together, ensuring that each moment in the kitchen brings you closer to a delightful loaf.

    Step 1: Feed the Starter

    Feeding your sourdough starter is crucial. It wakes up the yeast, ensuring it’s active and bubbly. About 4-8 hours before starting your bread, mix equal parts of flour and water into your starter. After a delicious meal, it should double in size. Just remember, a happy starter equals great bread!

    Step 2: Combine Ingredients

    In a large bowl, mix your active sourdough starter with warm water. Stir it all together until the starter is fully dissolved. This step is vital because it gets everything mixed into a harmonious blend. You’re setting the stage for that wonderful fermentation that brings sourdough to life!

    Step 3: Add Flour and Salt

    Now, it’s time to add the bread flour and salt to your mixture. Gently incorporate them until no flour pockets remain. The flour is what gives your bread its structure, while the salt enhances flavor and makes sure fermentation happens at the right pace. Mixing well now means better bread later!

    Step 4: Rest the Dough

    Cover the bowl and let the dough rest for about an hour. This time allows the flour to hydrate and the flavors to begin melding. Look for your dough to puff up a bit, showing that it’s waking up and preparing for its next steps!

    Step 5: Stretch & Fold

    This technique builds gluten strength, crucial for a perfect chew. Every 30 minutes, reach into the bowl and pull the edges of the dough up and over itself. Do this 3-4 times, and watch your dough transform into a more elastic, lively texture. It’s a simple yet effective way to develop that structure!

    Step 6: Bulk Fermentation

    Now, cover the bowl again and let the dough ferment until bubbles form. This phase may take a couple of hours, depending on the temperature in your kitchen. The longer it ferments, the more complex the flavor becomes. Enjoy that unique sourdough scent while waiting!

    Step 7: Shaping the Dough

    Once your dough is bubbly and risen, it’s time to shape it. Lightly flour your countertop, and gently transfer the dough onto it. Shape it into a ball by folding the edges toward the center. Don’t rush this step; a well-shaped loaf helps with the final result!

    Step 8: Final Proofing

    Next, place your shaped dough in a floured banneton basket. Cover it and let it proof for 30 minutes to an hour, then pop it in the fridge for 4-24 hours. This extra time deepens the flavor. Don’t skip this step—it’s where the magic happens!

    Step 9: Scoring and Baking

    Preheat your oven to 450°F (230°C), placing your Dutch oven inside to heat up, too. Before baking, make a large cut on one side of the dough. This score lets the gases escape and helps your loaf rise beautifully. It’s a simple yet essential part of the process for achieving that delicious crust!

    Step 10: Bake

    Gently transfer your dough to the preheated Dutch oven. Cover and bake for 30 minutes, then uncover and bake for an additional 15 minutes. This method ensures that the crust reaches perfect golden-brown perfection while keeping the inside soft and chewy. Keep an eye on it towards the end!

    Step 11: Cool the Loaf

    Once baked, let your loaf cool on a wire rack for at least 1 hour. This step is important because cutting too soon can lead to a gummy texture. Plus, the cool air helps the flavors settle beautifully. Patience here pays off big time!

    Tips for Success

    • Ensure your sourdough starter is active and bubbly before you start.
    • Use warm, not hot, water to avoid killing the yeast.
    • Keep an eye on your dough; it may rise faster in warm environments.
    • Be gentle when shaping the dough to preserve the bubbles for a light crumb.
    • Patience is key during cooling—don’t rush the process!

    Equipment Needed

    • Large mixing bowl: Any large bowl will work, even a sturdy pot.
    • Banneton basket: A standard proofing basket is ideal, but a colander lined with a cloth does wonders too.
    • Dutch oven: If you don’t have one, a heavy oven-safe pot with a lid will suffice.
    • Wire rack: Any cooling rack will do for that perfect cooling situation.

    Variations to Explore

    • Veggie Lover’s Version: Replace pepperoni with your favorite vegetables like bell peppers, olives, or mushrooms for a fresh twist.
    • Cheesy Delight: Add a mix of cheeses, like provolone or cheddar, alongside mozzarella for extra flavor and complexity.
    • Spicy Kick: Incorporate jalapeños or crushed red pepper flakes for those who love a little heat in their bread.
    • Herbed Perfection: Experiment with fresh herbs like basil or thyme in the dough for an aromatic experience.
    • Whole Wheat Option: Substitute half of the bread flour with whole wheat flour for a nuttier, more wholesome loaf.

    Serving Suggestions for Pepperoni Pizza Sourdough Bread

    • Pair with marinara sauce: Serve slices with warm marinara for dipping, elevating that pizza vibe.
    • Fresh salad: A crispy green salad on the side adds a refreshing contrast.
    • Wine pairing: Enjoy with a light red wine, like Pinot Noir, to complement the flavors.
    • Garnish: Sprinkle fresh basil or parsley on top for a pop of color and freshness.

    FAQs about Pepperoni Pizza Sourdough Bread

    Can I use store-bought pizza seasoning instead of making my own?
    Absolutely! Store-bought pizza seasoning is a convenient option that can save you time while still infusing great flavor into your Pepperoni Pizza Sourdough Bread. Just be sure to check for any added ingredients you might want to avoid.

    What can I do if my sourdough won’t rise?
    If your sourdough isn’t rising, it might be due to an inactive starter. Make sure it’s bubbly and has been fed properly. Also, check your environment; sometimes, a warmer kitchen helps kick things into gear!

    Can I freeze the Pepperoni Pizza Sourdough Bread?
    Yes! Once your loaf has cooled completely, you can wrap it tightly in plastic wrap and then store it in a freezer bag. When you’re ready to enjoy it, just thaw it at room temperature or pop it in a toaster oven for a quick warm-up!

    How can I enhance the cheese flavor in my bread?
    To boost cheesy goodness, consider mixing different kinds of cheese or even sprinkling some on top before the final bake. The more, the merrier—after all, who doesn’t love extra cheese?

    What’s the best way to store leftover bread?
    To keep your Pepperoni Pizza Sourdough Bread fresh, wrap it in parchment paper and place it in a bread box or a paper bag. Avoid plastic, as it traps moisture and can make the crust soggy. Enjoy it fresh, or revisit a slice later!

    Final Thoughts

    Making Pepperoni Pizza Sourdough Bread is not just about baking; it’s about creating cherished moments with family and friends. This recipe brings the warmth of homemade pizza right to your kitchen, filling it with enticing aromas and heartfelt laughter. Each slice embodies a perfect blend of comfort and excitement, satisfying both busy schedules and those pizza cravings. Whether enjoyed as a cozy family dinner or a fun gathering with friends, this delightful bread is bound to become a beloved staple in your household. So, gather your ingredients and let the delightful journey of baking unfold!


    Print

    clock clock iconcutlery cutlery iconflag flag iconfolder folder iconinstagram instagram iconpinterest pinterest iconfacebook facebook iconprint print iconsquares squares iconheart heart iconheart solid heart solid icon

    Description

    Pepperoni Pizza Sourdough Bread is a must-try delight that combines the flavors of traditional pizza with the tangy taste of sourdough.


    • 125g active sourdough starter
    • 325g warm water
    • 500g bread flour
    • 10g salt
    • 10g pizza seasoning
    • 150g shredded mozzarella cheese
    • 200g pepperoni slices

    1. Feed the Starter: Before making your dough, feed your starter 4-8 hours in advance or until it’s doubled in size.
    2. Combine Ingredients: In a large bowl, mix the sourdough starter with the warm water until it’s fully dissolved.
    3. Add Flour and Salt: Add flour and salt to the mixture and stir until no flour pockets remain.
    4. Rest the Dough: Cover the bowl and let it rest for 1 hour.
    5. Stretch & Fold: Every 30 minutes, perform 3-4 sets of stretch and folds to build gluten strength.
    6. Bulk Fermentation: Cover the bowl and leave it to ferment until bubbles form and the dough rises.
    7. Shaping the Dough: Lightly flour your countertop, transfer the dough onto it, and shape it into a ball.
    8. Final Proofing: Place the dough in a floured banneton basket, cover, and let it rest for 30 minutes to an hour, then refrigerate for 4-24 hours.
    9. Scoring and Baking: Preheat the oven to 450°F (230°C) with a Dutch oven inside for at least 15 minutes.
    10. Score the Dough: Make a large cut along one side of the dough to allow gases to escape while baking.
    11. Bake: Transfer the dough into the preheated Dutch oven and bake covered for 30 minutes, then uncover and bake for an additional 15 minutes.
    12. Cool the Loaf: Let the bread cool on a wire rack for at least 1 hour before slicing.

    Notes

    • For a more sour flavor and easier digestion, proof longer in the fridge.
    • To prevent the bottom from over-browning, place a cookie sheet on the rack below the Dutch oven.
    • Cutting too soon may result in a gummy texture.
    • Prep Time: 8 hours
    • Cook Time: 45 minutes
    • Category: Bread
    • Method: Baking
    • Cuisine: Italian

    Nutrition

    • Serving Size: 1 slice
    • Calories: 250
    • Sugar: 1g
    • Sodium: 600mg
    • Fat: 15g
    • Saturated Fat: 6g
    • Unsaturated Fat: 6g
    • Trans Fat: 0g
    • Carbohydrates: 25g
    • Fiber: 2g
    • Protein: 10g
    • Cholesterol: 25mg

    Sharing is caring!

  • Carne Asada Bowls: Delicious and Easy Recipe Inside!

    Carne Asada Bowls: Delicious and Easy Recipe Inside!


    Introduction to Carne Asada Bowls

    Welcome to my kitchen, where we create meals that nourish both body and soul! If you’re on the hunt for a dish that promises flavor and ease, look no further than Carne Asada Bowls. This delightful bowl of goodness combines tender steak, seasoned rice, and vibrant veggies for a satisfying meal that’s perfect for busy weeknights. It’s a quick solution for when you’re juggling countless tasks or a special dish to impress your loved ones on a cozy evening. Trust me, once you try this recipe, it might just become your new favorite go-to!

    Why You’ll Love This Carne Asada Bowls

    Carne Asada Bowls are a celebration of easy cooking! This dish comes together in just 30 minutes, making it a perfect weeknight meal. The succulent steak pairs beautifully with fluffy rice and fresh vegetables, ensuring each bite bursts with flavor. Plus, it’s customizable; you can tailor it to suit picky eaters or dietary needs. With this recipe, I promise you’ll create a delicious family dinner without spending hours in the kitchen!

    Ingredients for Carne Asada Bowls

    Creating Carne Asada Bowls is all about fresh, vibrant ingredients that come together in harmony. Here’s what you’ll need:

    • Pre-cooked brown or white basmati rice: This is your base, offering a nutty flavor and a delightful texture. You can find it in most grocery stores or quickly prepare it at home.
    • Lime juice: It adds a zesty twist, enhancing the flavors of the rice and bringing everything to life.
    • Chopped cilantro: This herb gives a fresh, aromatic touch that brightens each bite.
    • Salt: Seasoning is crucial for bringing out the natural flavors of your ingredients.
    • Skirt, flank, or bavette steak: Choose your preferred cut for a juicy protein option that holds flavor beautifully.
    • Pepper: A crucial spice to balance the flavors and add a slight kick.
    • Smoked paprika and cumin: These spices offer depth and a hint of smokiness that elevates the dish.
    • Olive oil: Use this for cooking the steak and vegetables; it adds richness and aids in browning.
    • Sweet corn: This adds a pop of sweetness and color, which kids often love!
    • Black beans: A source of protein and fiber, black beans are hearty and nutritious.
    • Romaine lettuce: The crispy texture gives a nice crunch to each bowl, adding freshness.
    • Cherry tomatoes: Quartered for a burst of juiciness, they’re a tasty addition.
    • Avocado: Creamy and delicious, avocado adds richness and balances the other flavors.
    • Cotija or feta cheese: Crumbled on top, cheese adds a savory dimension to the bowls.
    • Sour cream and salsa (optional): These toppings can provide extra creaminess and flavor if you desire.
    • Tortilla chips (optional): They offer a satisfying crunch, perfect for scooping up every last bite!

    For specific measurements and a printable version, check out the end of the article. The vibrant colors and flavors of these ingredients are sure to make your Carne Asada Bowls not just a meal, but a delightful experience!

    How to Make Carne Asada Bowls

    Preparing the Rice

    Start by warming your pre-cooked brown or white basmati rice in a skillet over medium heat. Stir it occasionally to ensure even warming and to avoid sticking. Once it’s heated, sprinkle in lime juice, chopped cilantro, and a pinch of salt. This brightens the flavor of the rice beautifully! When it’s all mixed in, transfer the rice to a bowl and pop it in the oven on low to keep warm. This easy step lays a delicious foundation for your Carne Asada Bowls!

    Cooking the Steak

    Now it’s time to bring your steak to life! Start by rubbing it with olive oil, then season generously with salt, pepper, smoked paprika, and cumin. This spice blend will enhance the flavors wonderfully. Heat a skillet over high heat until it’s sizzling hot. Sear the steak for about 3 minutes on each side until a nice char forms. This gives that delightful grilled flavor! Once cooked, let the steak rest for a few minutes; this step keeps it juicy and tender.

    Heating the Vegetables

    With the steak resting, let’s warm the sweet corn and black beans! In the same skillet, add the corn and beans, heating over medium heat. This trick lets the veggies absorb all those lovely flavors left from the steak. Stir them gently until they’re warmed through, about 3-5 minutes. Just sprinkle a little salt and pepper to taste for extra flavor. This adds a colorful touch to your bowls and another layer of deliciousness!

    Preparing Final Ingredients

    As the veggies warm, it’s the perfect time to prep your fresh toppings. Start by shredding the romaine lettuce so it’s nice and fluffy. Then, quarter those vibrant cherry tomatoes for a juicy punch. Finally, slice your avocado into nice, creamy chunks. Keep these ingredients handy; they’ll add flavor, crunch, and color to your Carne Asada Bowls. Everything looks better when it’s fresh and bright!

    Assembling the Bowls

    Now comes the satisfying part—assembly! Begin with a generous layer of your zesty rice at the bottom of each bowl. Next, pile on the shredded lettuce, sliced steak, warmed corn, and black beans. Then, scatter the quartered tomatoes and diced avocado on top. Let’s finish off with crumbled cotija or feta cheese and, if you like, a dollop of sour cream and a sprinkle of salsa. Your Carne Asada Bowls are not only ready to eat, they’re a feast for the eyes too!

    Tips for Success

    • Use high-quality steak for the best flavor and tenderness.
    • Let the steak rest before slicing to keep it juicy.
    • Mix and match veggies to suit your family’s preferences.
    • Prep ingredients ahead of time for a quicker cooking process.
    • Don’t be afraid to experiment with extra spices or toppings.

    Equipment Needed

    • Skillet: A non-stick or cast iron skillet works best for searing the steak.
    • Bowls: Use large bowls for assembling your Carne Asada Bowls, or any deep plates you have on hand.
    • Knife and cutting board: Essential for slicing meat and chopping veggies.
    • Spatula: A sturdy spatula helps with flipping the steak and serving.

    Variations for Carne Asada Bowls

    • Grilled Vegetable Option: Swap out the steak for grilled zucchini, peppers, and onions for a delightful vegetarian twist.
    • Spicy Kick: Add jalapeños or sprinkle some chili flakes to amp up the heat and enjoy a fiery version!
    • Quinoa Base: For a healthier alternative, replace the rice with quinoa to boost the protein and fiber content.
    • Pico de Gallo: Top your bowls with homemade pico de gallo for added freshness and vibrant flavors.
    • Dairy-Free Option: Omit cheese and sour cream, and swap with avocado or a vegan yogurt for a creamy texture without dairy.
    • Different Proteins: Experiment with chicken, shrimp, or even tofu for a variety of flavors!

    Serving Suggestions for Carne Asada Bowls

    • Pair your Carne Asada Bowls with crispy tortilla chips for a delightful crunch.
    • Serve with a refreshing side salad dressed in lime vinaigrette.
    • Try a zesty mango or pineapple salsa for a sweet and spicy kick.
    • Pour a chilled glass of homemade lemonade or iced tea to complement the meal.
    • Garnish with extra lime wedges and cilantro for an eye-catching presentation!

    FAQs about Carne Asada Bowls

    Can I use different cuts of steak for Carne Asada Bowls?

    Absolutely! While skirt, flank, or bavette steak are traditional choices, you can use any flavorful cut you prefer. Just remember that cooking times may vary based on the thickness of the steak.

    How can I make Carne Asada Bowls vegetarian?

    For a vegetarian twist, simply swap the steak for grilled vegetables, black beans, or tofu. You can still enjoy all the delicious flavors with a fresh vegetable base!

    Can I prepare the ingredients ahead of time?

    Yes! You can cook the rice, grill the steak, and even chop the veggies a day in advance. This way, you’ll shave off valuable time during meal prep, making it perfect for those busy weeknights!

    What toppings should I add to my Carne Asada Bowls?

    Get creative! Some delightful toppings include sliced jalapeños for heat, sour cream for creaminess, and fresh avocado or salsa for freshness. The options are endless!

    How can I store leftovers?

    Leftovers can be stored in an airtight container in the refrigerator for up to 3 days. Just reheat gently in the microwave and enjoy a delicious meal again!

    Final Thoughts

    Making Carne Asada Bowls is not just about feeding your family—it’s about crafting a moment of joy around the table. This dish effortlessly combines savory flavors, fresh ingredients, and a splash of vibrant colors, making it a delightful experience for everyone involved. Whether you’re enjoying it on a busy weeknight or showcasing it at a gathering, it’s bound to impress. I love how customizable it is, making it a go-to choice for picky eaters or those craving something delicious. Trust me, each bowl becomes a heartfelt masterpiece that everyone will savor!


    Print

    clock clock iconcutlery cutlery iconflag flag iconfolder folder iconinstagram instagram iconpinterest pinterest iconfacebook facebook iconprint print iconsquares squares iconheart heart iconheart solid heart solid icon

    Description

    Carne Asada Bowls are a flavorful and easy dish that combines tender steak, seasoned rice, and fresh vegetables, perfect for a satisfying meal.


    • 2 cups pre-cooked brown or white basmati rice
    • 2 teaspoons lime juice
    • ¼ cup chopped cilantro
    • Salt to taste
    • 1 pound skirt, flank, or bavette steak
    • Salt and pepper to taste
    • 1 teaspoon smoked paprika
    • 1 teaspoon cumin
    • Olive oil
    • 1 cup sweet corn, canned or fresh
    • 1 cup black beans, canned, drained, and rinsed
    • 1 head romaine lettuce, shredded
    • 12 cherry tomatoes, quartered
    • 1 avocado, diced
    • ⅓ cup cotija or feta cheese, crumbled
    • 4 tablespoons sour cream (optional)
    • 4 tablespoons salsa (optional)
    • Tortilla chips (optional)

    1. In a skillet over medium heat, warm the pre-cooked rice. Mix in lime juice, cilantro, and salt to taste. Once warmed, transfer to a bowl and place it in the oven to keep warm.
    2. Rub the steak with olive oil and season it with salt, pepper, smoked paprika, and cumin. In a skillet over high heat, sear the steak for about 3 minutes per side, or until the outside is charred. Set aside the steak to rest before slicing.
    3. In the same skillet, warm the sweet corn and black beans over medium heat until heated through. Season with salt and pepper to taste.
    4. Shred the romaine lettuce and quarter the cherry tomatoes.
    5. Slice the rested steak thinly against the grain. Divide the warm rice among four serving bowls. Add shredded lettuce, sliced steak, warmed corn and beans, quartered cherry tomatoes, diced avocado, and crumbled cotija or feta cheese. Optionally, top with sour cream, salsa, and tortilla chips.

    Notes

    • Adding lime juice and cilantro elevates the rice flavor, providing a fresh, zesty base.
    • Resting the steak allows the juices to redistribute, ensuring a moist and flavorful steak.
    • Using the same skillet for the vegetables will give them a hint of the steak’s flavor.
    • Prep Time: 15 minutes
    • Cook Time: 15 minutes
    • Category: Main Dish
    • Method: Skillet
    • Cuisine: Mexican

    Nutrition

    • Serving Size: 1 bowl
    • Calories: 650
    • Sugar: 3g
    • Sodium: 900mg
    • Fat: 30g
    • Saturated Fat: 8g
    • Unsaturated Fat: 10g
    • Trans Fat: 0g
    • Carbohydrates: 70g
    • Fiber: 15g
    • Protein: 30g
    • Cholesterol: 100mg

    Sharing is caring!

  • Seafood Stuffed Potatoes: A Delicious Twist Awaits!

    Seafood Stuffed Potatoes: A Delicious Twist Awaits!


    Introduction to Seafood Stuffed Potatoes

    Welcome to my kitchen, where comfort food meets creativity! Today, I’m thrilled to share my take on Seafood Stuffed Potatoes, a delightful twist on the classic stuffed potato. These are not just any potatoes; they’re packed with savory seafood and topped with a luscious cheese sauce that will have your family coming back for more. If you’re like me, balancing life’s hustle can be tricky, so this recipe is a lifesaver for a quick weeknight dinner or a special treat to impress your loved ones. Let’s dive into this mouthwatering adventure!

    Why You’ll Love This Seafood Stuffed Potatoes

    These Seafood Stuffed Potatoes are a brilliant blend of ease and flavor. In just over an hour, you can create a dish that feels like a restaurant quality meal, right at home. They’re perfect for busy weeknights or when entertaining friends. Plus, who doesn’t love digging into a cheesy, seafood-filled delight? This recipe is truly a crowd-pleaser that makes dinnertime stress melt away!

    Ingredients for Seafood Stuffed Potatoes

    Gathering the right ingredients is key to making the best Seafood Stuffed Potatoes. Here’s what you’ll need:

    • Large baking-size Russet potatoes: They have a fluffy interior, perfect for holding that creamy filling.
    • Cream cheese: This adds richness and mellows the taste—don’t skip it!
    • Salt and pepper: A must-have seasoning duo for flavor enhancement.
    • Garlic powder: It provides a lovely aromatic kick to the potato mix.
    • Chives or green onions: These are wonderful for garnish, adding a pop of color and fresh flavor.
    • Crawfish tails: A classic seafood choice, they bring a delightful taste that’s hard to resist.
    • Shrimp: Peeled and deveined, these little guys cook up sweet and succulent.
    • Cajun seasoning: Use this for that spicy flair that makes the dish sing—adjust to your liking!
    • Onion powder: A great way to infuse depth without the hassle of chopping onions.
    • Liquid crab boil: It’s a flavorful enhancer that really lifts the seafood blend.
    • Butter: This adds richness to both the seafood and the cheese sauce.
    • Minced garlic: Fresh garlic imparts bold flavor, making your dish stand out.
    • Flour: Used in the cheese sauce to create a delightful creamy texture.
    • Half and half: This creamy liquid is perfect for achieving that luxurious cheese sauce.
    • Shredded American cheese: It melts beautifully, ensuring a gooey topping.
    • Shredded mozzarella: Adds stringiness and amazing flavor.
    • Shredded Monterey Jack: Its mild flavor beautifully complements the other cheeses.
    • Grated Parmesan cheese: A sprinkle adds a sophisticated touch and depth of flavor.

    You’ll find the exact quantities at the bottom of this article, making it easy to get cooking!

    How to Make Seafood Stuffed Potatoes

    Now that we’ve gathered our ingredients, let’s roll up our sleeves and dive into the fun part—making these scrumptious Seafood Stuffed Potatoes! Follow these simple steps, and I’ll share a few tips to ensure your dish turns out perfectly every time.

    Step 1: Prepare the Potatoes

    First, wash and scrub those Russet potatoes thoroughly. You want them clean since we’re eating the skins!

    Poke holes in each potato with a fork, allowing steam to escape while they’re baking.

    Next, you have two options for cooking: pop them into a preheated oven at 400°F for 40–50 minutes or use the microwave’s “potato” setting until they’re fork-tender.

    Whichever method you choose, be careful when handling hot potatoes!

    Once done, carefully cut a slit down each potato and scoop out the insides into a bowl, keeping those skins intact for filling later.

    Tip: Save the skins! They’ll be the perfect vessel for our delicious filling.

    Step 2: Cook the Seafood

    In a separate bowl, season the crawfish tails and shrimp with Cajun seasoning, onion powder, and a dash of liquid crab boil—this is where the magic happens!

    Melt half of the butter in a skillet over medium heat. Then, sauté minced garlic for about 30 seconds until fragrant.

    Add the seasoned seafood to the pan and cook for about 4–5 minutes, just until it turns opaque.

    Remove the seafood and set it aside.

    Don’t forget to reserve any liquid left in the pan—it’ll add wonderful flavor to our sauce!

    Step 3: Make the Cheese Sauce

    In the same skillet, melt the remaining butter over medium heat and whisk in flour until smooth.

    Next, pour in the reserved seafood liquid and half and half while whisking to avoid lumps.

    Let it simmer gently, stirring occasionally to thicken.

    Once it’s nice and creamy, stir in the leftover Cajun seasoning and onion powder.

    Now for the best part—add all your cheeses! Stir until they melt into a delightful, gooey cheese sauce.

    Don’t rush this process; patience is key for that perfect smooth texture!

    Step 4: Combine and Bake

    Here comes the fun!

    Take the scooped-out potato mixture and fold it into your sautéed seafood, mixing well to combine everything.

    Now, spoon this luxurious filling back into your potato skins. Top each potato generously with mozzarella cheese, letting it melt beautifully as it bakes.

    Finally, ladle that rich seafood cheese sauce over each potato, making sure they are thoroughly covered.

    Place the stuffed potatoes onto a baking sheet and pop them into the oven at 400°F for about 10 minutes, just until bubbly and golden.

    As they bake, you can almost taste the tantalizing flavors coming together!

    Tips for Success

    • Experiment with different seafood options; crab or lobster can elevate the dish!
    • For extra creaminess, add more cream cheese or sour cream to the potato mixture.
    • If you prefer a bit of crunch, sprinkle breadcrumbs or crushed crackers on top before baking.
    • Don’t skip the chives or green onions—they add freshness and color!
    • Make sure to taste your seafood mixture before stuffing; seasoning is key!

    Equipment Needed

    • Baking sheet: A simple tray works, but if you have a cast-iron skillet, it can add a nice touch!
    • Large mixing bowl: Any size works, just ensure it’s big enough for mixing the filling.
    • Skillet: Non-stick is ideal, but a regular pan will do just fine.
    • Fork: Essential for poking and mashing those potatoes!
    • Sharp knife: For slicing the potatoes open—safety first!

    Variations

    • Swap out crawfish for crab or even lobster for a luxurious twist on this dish!
    • For a vegetarian option, use sautéed mushrooms and spinach instead of seafood.
    • Add a bit of heat by mixing in diced jalapeños or your favorite hot sauce.
    • Try different cheese combinations, like pepper jack for a spicy kick or a smoked cheese for a unique flavor.
    • For a lower-carb version, substitute the potato skins with hollowed-out zucchini or bell peppers.

    Serving Suggestions

    • Pair these Seafood Stuffed Potatoes with a crisp green salad for a refreshing contrast.
    • Complement with a chilled glass of white wine, like Sauvignon Blanc or Chardonnay.
    • For a fun twist, serve with a side of garlic bread for extra dipping!
    • Garnish with additional chives or a squeeze of lemon for brightness.

    FAQs about Seafood Stuffed Potatoes

    Can I use frozen seafood for this recipe?
    Absolutely! Frozen shrimp and crawfish work just fine. Just make sure to thaw and drain them properly before cooking to avoid excess moisture in your stuffing.

    How can I make Seafood Stuffed Potatoes spicier?
    If you love heat, feel free to add more Cajun seasoning or a splash of your favorite hot sauce to the seafood mixture. You can also include diced jalapeños for an extra kick!

    Can I prepare Seafood Stuffed Potatoes ahead of time?
    Definitely! You can prepare everything up to the baking step. Just cover and refrigerate the stuffed potatoes, then bake them when you’re ready to serve—no one will know the difference!

    What type of cheese is best for the cheese sauce?
    While I love the classic American cheese for its meltability, you can mix it up! Cheddar, Gruyere, or a blend of your favorites will create a creamier and richer flavor.

    Are Seafood Stuffed Potatoes gluten-free?
    Yes, this recipe is gluten-free as long as you use a gluten-free flour for the cheese sauce. It’s a delightful indulgence that caters to various diets!

    Final Thoughts

    As I reflect on these Seafood Stuffed Potatoes, I can’t help but smile at the delightful memories they create at my dinner table.

    Each bite is a vibrant harmony of rich flavors and satisfying textures, bringing a taste of the seas right to your home.

    From busy weeknights to special occasions, these stuffed potatoes effortlessly blend ease with elegance.

    So, roll up your sleeves and let your culinary creativity shine!

    I’m confident these seafood gems will impress everyone, inviting laughter, stories, and the warmth of togetherness into your kitchen. Happy cooking, friends!


    Print

    clock clock iconcutlery cutlery iconflag flag iconfolder folder iconinstagram instagram iconpinterest pinterest iconfacebook facebook iconprint print iconsquares squares iconheart heart iconheart solid heart solid icon

    Description

    Seafood Stuffed Potatoes are a delicious twist on traditional stuffed potatoes, filled with a savory seafood mixture and topped with a rich cheese sauce.


    • 4 large baking-size Russet potatoes
    • 8 oz cream cheese, softened
    • Salt and pepper to taste
    • 1 tbsp garlic powder
    • Chives or green onions (for garnish)
    • 1 lb crawfish tails (drained of fat)
    • 1 lb raw shrimp, peeled and deveined
    • 2 tbsp Cajun seasoning (divided)
    • 2 tbsp onion powder (divided)
    • 2 tbsp liquid crab boil
    • 1 stick butter (divided)
    • 2 tbsp minced garlic
    • 4 tbsp flour
    • 2½ cups half and half
    • 2 cups shredded American cheese (Velveeta or similar)
    • 1 cup shredded mozzarella
    • ½ cup shredded Monterey Jack
    • ¼ cup grated Parmesan cheese

    1. Wash and scrub potatoes thoroughly. Poke holes with a fork for venting.
    2. Bake at 400°F for 40–50 minutes or microwave using the “potato” setting until fork-tender.
    3. Carefully cut a slit down each potato and scoop out the insides into a bowl, keeping skins intact.
    4. Mix the scooped potato with cream cheese, garlic powder, salt, and pepper. Cover to keep warm.
    5. In a bowl, season shrimp and crawfish with 1 tbsp Cajun seasoning, 1 tbsp onion powder, and 1 tbsp crab boil.
    6. Melt half the butter in a saucepan, sauté garlic for 30 seconds, then add seafood and cook 4–5 minutes. Remove and set aside.
    7. Reserve the liquid left in the pot.
    8. In the same pan, melt the remaining butter and whisk in flour until smooth.
    9. Pour in the reserved seafood liquid and half and half while whisking. Simmer.
    10. Stir in remaining Cajun seasoning and onion powder.
    11. Add all cheeses and stir until melted and smooth. Return seafood to sauce and warm through.
    12. Spoon potato mixture back into skins.
    13. Sprinkle mozzarella over each potato.
    14. Ladle seafood cheese sauce on top.
    15. Garnish with chives or green onions.

    Notes

    • Adjust the Cajun seasoning to your taste preference.
    • For a spicier version, add hot sauce to the seafood mixture.
    • Make sure seafood is cooked thoroughly before serving.
    • Prep Time: 20 minutes
    • Cook Time: 1 hour
    • Category: Main Dish
    • Method: Baking
    • Cuisine: Cajun

    Nutrition

    • Serving Size: 1 potato
    • Calories: 650
    • Sugar: 3g
    • Sodium: 1200mg
    • Fat: 42g
    • Saturated Fat: 24g
    • Unsaturated Fat: 15g
    • Trans Fat: 0g
    • Carbohydrates: 50g
    • Fiber: 5g
    • Protein: 30g
    • Cholesterol: 150mg

    Sharing is caring!