Category: Uncategorized

  • Chocolate Chip Peanut Butter Muffins: A Delicious Treat!

    Chocolate Chip Peanut Butter Muffins: A Delicious Treat!


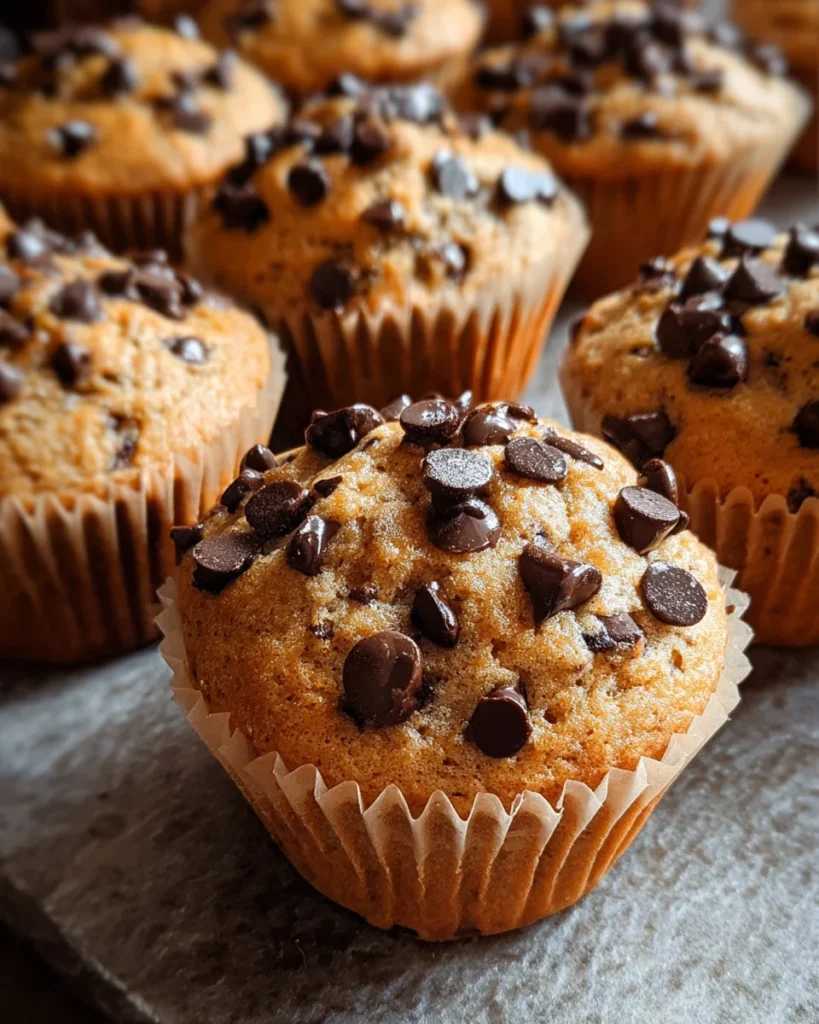
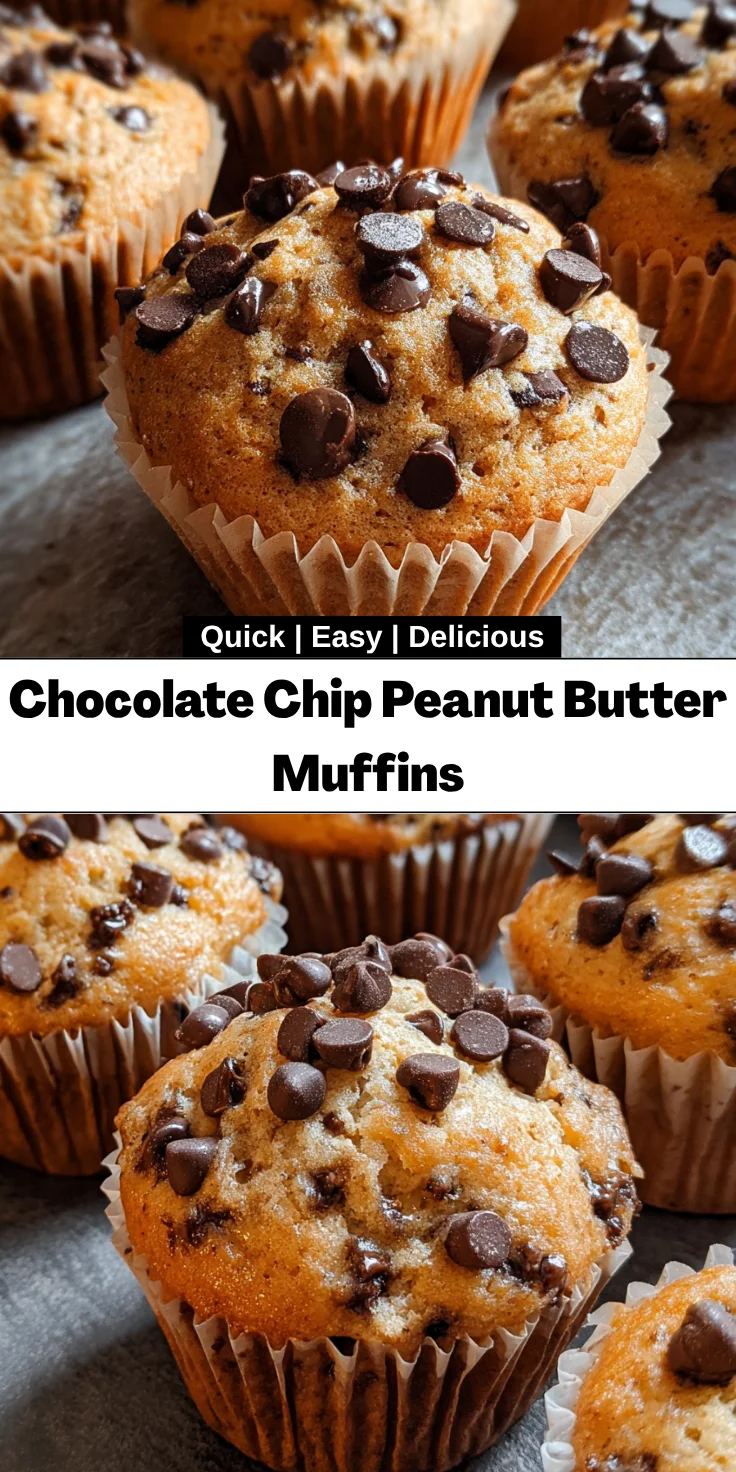
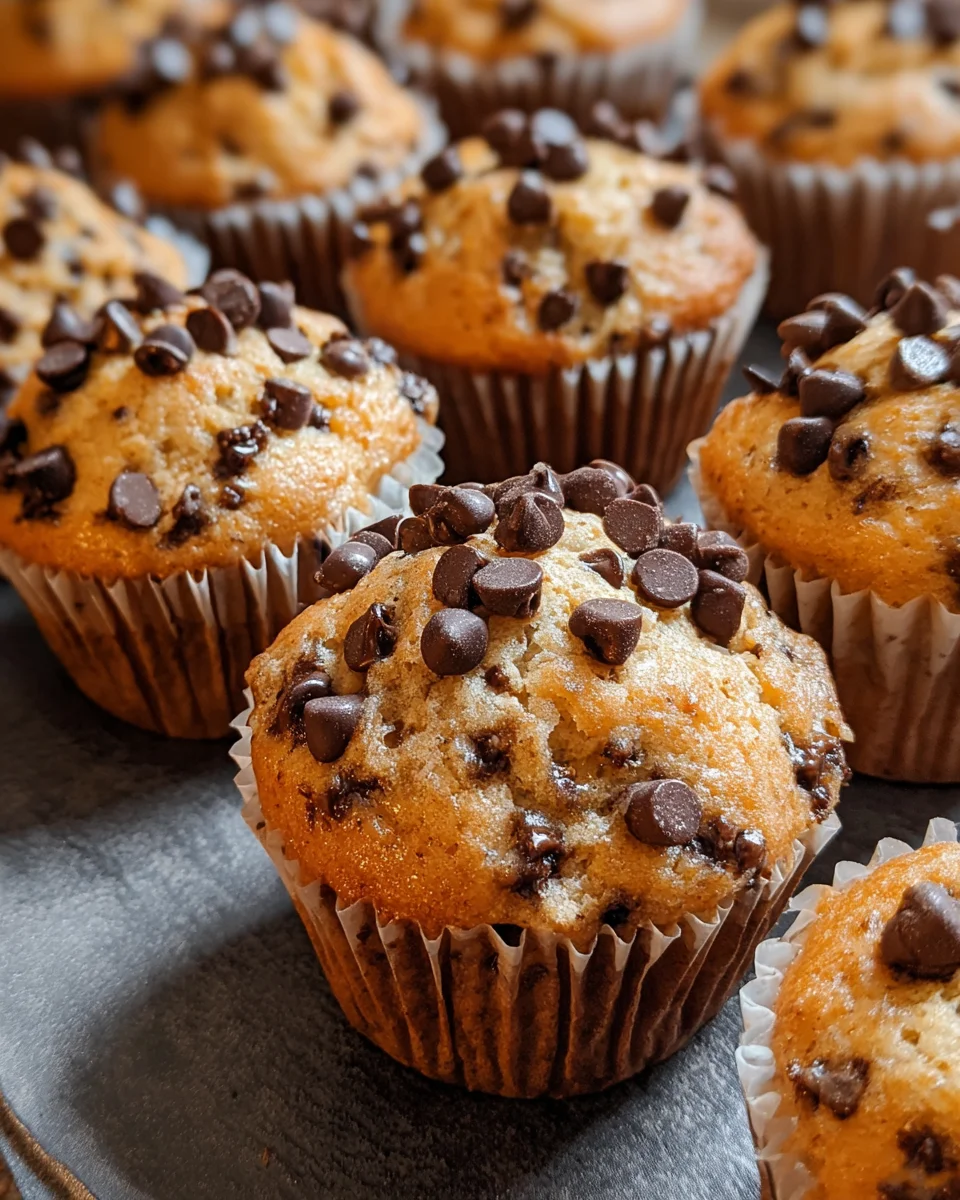
    Introduction to Chocolate Chip Peanut Butter Muffins

    There’s something magical about the aroma of freshly baked Chocolate Chip Peanut Butter Muffins wafting through your home. It wraps you in warmth, doesn’t it? As a busy mom, I know how challenging it can be to juggle meals and snacks while managing the daily hustle. That’s why this easy muffin recipe is my secret weapon! In just a little over half an hour, you can whip up these delightful muffins. They’re perfect for breakfast on-the-go or a sweet treat to impress your family. Trust me, everyone loves them!

    Why You’ll Love This Chocolate Chip Peanut Butter Muffins

    These Chocolate Chip Peanut Butter Muffins are a dream come true for busy moms and professionals. They come together in a flash, making them the ultimate time-saver for hectic mornings. Plus, the rich peanut butter and gooey chocolate chips create a symphony of flavors that will have everyone coming back for seconds. Not to mention, they’re versatile enough for breakfast, snacks, or even a delicious dessert!

    Ingredients for Chocolate Chip Peanut Butter Muffins

    Gathering the right ingredients is key to achieving those perfect Chocolate Chip Peanut Butter Muffins. Here’s what you’ll need to whip up this delightful treat. Keep in mind that exact measurements can be found at the end of the article for easy printing.

    Main Ingredients

    • All-purpose flour: This is the base for your muffins, giving them structure and fluffiness.
    • Granulated sugar: Adds sweetness and helps achieve a lovely golden crust.
    • Brown sugar: A deeper, caramel-like flavor that perfectly complements the peanut butter.
    • Baking powder: The rising agent that ensures your muffins are light and airy.
    • Salt: Just a pinch enhances the flavors of all the other ingredients.
    • Peanut butter: The star of the show! Use creamy or crunchy for your preferred texture.
    • Milk: Adds moisture and helps in achieving a tender crumb.
    • Vegetable oil: Keeps the muffins moist while making them easy to mix.
    • Egg: Acts as a binder and adds richness.
    • Vanilla extract: A splash of this transforms your muffins with a hint of warmth.
    • Chocolate chips: Bring on the chocolate goodness! You can never have too many.

    Optional Ingredients

    • Nuts: Add some crunch by throwing in walnuts or pecans!
    • Other types of chips: Swap chocolate chips with butterscotch or white chocolate for a fun twist.
    • Banana: Mashed banana can enhance moisture and create a delicious flavor combination.
    • Spices: A dash of cinnamon or nutmeg can elevate the flavor profile.

    How to Make Chocolate Chip Peanut Butter Muffins

    Now that you have your ingredients ready, it’s time to dive into the joy of baking! Making these Chocolate Chip Peanut Butter Muffins is so simple, it feels like magic. Just follow these steps, and before you know it, your kitchen will smell like a bakery!

    Step 1: Preheat Oven

    First things first, preheat your oven to 375°F (190°C). This step is crucial because it ensures your muffins bake evenly. Nothing’s worse than waiting eagerly only to find out your muffins are still stuck in a cold oven!

    Step 2: Combine Dry Ingredients

    In a large bowl, whisk together your all-purpose flour, granulated sugar, brown sugar, baking powder, and salt. Mixing these dry ingredients first is key. It helps distribute the baking powder evenly, leading to perfectly fluffy muffins.

    Step 3: Mix Wet Ingredients

    In a separate bowl, blend together the creamy peanut butter, milk, vegetable oil, egg, and vanilla extract. I like to use a hand mixer for this part. It makes the mixing process so quick and easy, yielding a smooth mixture that’s full of flavor!

    Step 4: Combine Mixtures

    Next, it’s time to bring it all together! Pour the wet ingredients into the dry ingredients and stir gently. You want to mix just until everything is combined. Overmixing can lead to dense muffins, and we want light and fluffy treats!

    Step 5: Fill Muffin Cups

    Now, divide the batter evenly among your muffin cups, filling each about 3/4 full. This is where you can sprinkle some extra chocolate chips on top for that perfect, gooey finish. Trust me, they will melt beautifully while baking!

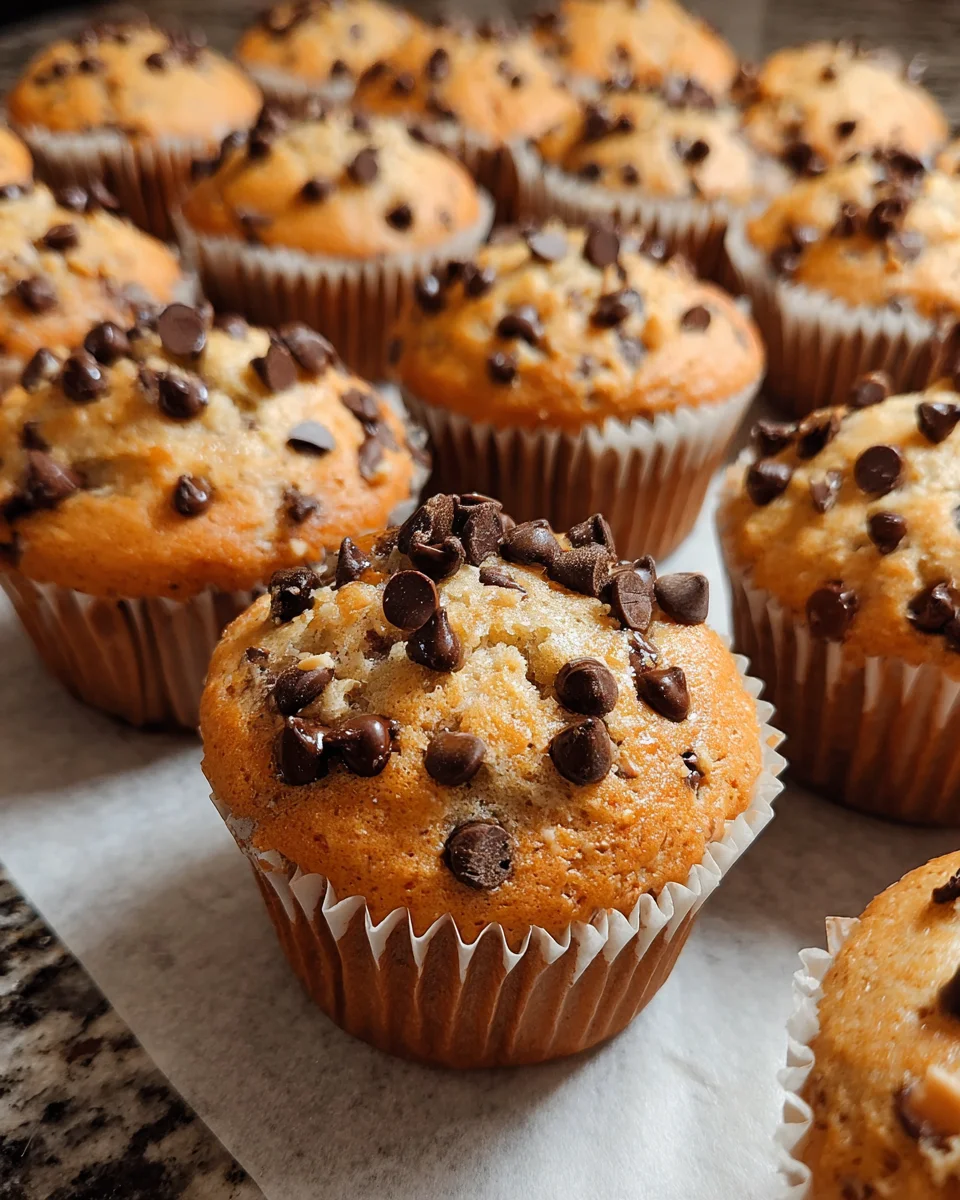
    Step 6: Bake and Cool

    Finally, pop those muffins in the oven and bake for about 18-20 minutes. They’re ready when a toothpick inserted into the center comes out clean. Once done, let them cool in the pan for about 5 minutes, then transfer to a wire rack. The anticipation will be worth it as you await that first warm bite!

    Tips for Success

    • Use room temperature ingredients for better mixing.
    • Measure flour correctly: spoon it into your measuring cup and level it off.
    • Don’t overmix; a few lumps in the batter are okay!
    • For extra moisture, add a tablespoon of yogurt or applesauce.
    • Experiment with mix-ins like dried fruit for a fun twist!

    Equipment Needed

    • Muffin tin: A standard 12-cup muffin pan works great; silicone pans are a fun alternative!
    • Mixing bowls: Use large bowls for mixing and a smaller one for wet ingredients.
    • Whisk: A whisk is perfect for dry ingredients; a hand mixer speeds up wet mixing!
    • Measuring cups and spoons: Essential for accuracy in your baking!
    • Cooling rack: A wire rack ensures muffins cool evenly; though a plate works in a pinch.

    Variations for Chocolate Chip Peanut Butter Muffins

    • Gluten-Free: Substitute all-purpose flour with a gluten-free blend for a safe treat.
    • Vegan: Replace the egg with a flax egg and use plant-based milk and oil to craft a completely vegan muffin.
    • Banana Chocolate Chip: Mash a ripe banana and mix it into the batter for added sweetness and moisture.
    • Nut Butter Swap: Experiment with almond or cashew butter for a different nutty flavor profile.
    • Double Chocolate: Add cocoa powder to the dry ingredients for a rich chocolatey twist!

    Serving Suggestions

    • Fresh Fruit: Serve with a side of sliced bananas or berries for a refreshing contrast.
    • Coffee or Tea: Pair with a warm cup of your favorite brew for the perfect morning combo.
    • Presentation: Arrange muffins on a colorful platter and dust with powdered sugar for a charming touch.

    FAQs about Chocolate Chip Peanut Butter Muffins

    As with any beloved recipe, questions tend to pop up. Here are some frequently asked questions about Chocolate Chip Peanut Butter Muffins that I hope will make your baking adventure even smoother!

    Can I make these muffins ahead of time?

    Absolutely! You can bake these muffins ahead of time. Store them in an airtight container for up to three days. If you want them to last longer, they freeze beautifully for up to three months!

    What if my muffin batter seems too thick?

    If your batter feels too thick, don’t worry! Simply add a splash more milk until you reach your desired consistency. This is a great tip to ensure your Chocolate Chip Peanut Butter Muffins stay light and fluffy.

    Can I substitute peanut butter with another nut butter?

    Yes, you can! Feel free to swap peanut butter for almond, cashew, or even sunflower seed butter if you have nut allergies. Each alternative will add its unique twist to the muffins!

    How can I ensure my muffins rise well?

    Great question! Make sure your baking powder is fresh and measure your flour accurately. Also, avoid overmixing your batter, which can prevent those gorgeous rises!

    Can I add more chocolate chips?

    Absolutely! You can never go wrong with more chocolate. Feel free to sprinkle extra chocolate chips on top before baking for a chocolate lover’s dream!

    Final Thoughts

    There’s something truly special about Chocolate Chip Peanut Butter Muffins. They weave delightful memories in the kitchen and make those busy mornings a little brighter. Every bite is a hug from home, blending the love of baking with simple ingredients. I cherish these muffins, for they not only satisfy cravings but also bring smiles to my family’s faces. So, as you bring out those baking tools, remember: it’s not just about the muffins, but the joy and connection created while making them. Happy baking, friends! Enjoy every delicious morsel!


    Print

    clock clock iconcutlery cutlery iconflag flag iconfolder folder iconinstagram instagram iconpinterest pinterest iconfacebook facebook iconprint print iconsquares squares iconheart heart iconheart solid heart solid icon

    Description

    Delicious and easy-to-make Chocolate Chip Peanut Butter Muffins that are perfect for breakfast or as a treat.


    • 1 3/4 cups all-purpose flour
    • 1/2 cup granulated sugar
    • 1/4 cup brown sugar, packed
    • 1 tablespoon baking powder
    • 1/2 teaspoon salt
    • 3/4 cup peanut butter, creamy or crunchy
    • 1 cup milk
    • 1/3 cup vegetable oil
    • 1 large egg
    • 1 teaspoon vanilla extract
    • 1 cup chocolate chips, plus extra for topping

    1. Preheat the oven to 375°F (190°C). Line a muffin tin with paper liners or grease with non-stick spray.
    2. In a large bowl, whisk together flour, granulated sugar, brown sugar, baking powder, and salt.
    3. In another bowl, blend peanut butter, milk, oil, egg, and vanilla extract until smooth.
    4. Add the wet ingredients to the dry ingredients, stirring just until combined. Fold in the chocolate chips.
    5. Divide the batter evenly among the muffin cups, filling each about 3/4 full. Sprinkle additional chocolate chips on top.
    6. Bake for 18-20 minutes, or until a toothpick inserted into the center comes out clean.
    7. Let the muffins cool in the pan for 5 minutes, then transfer to a wire rack to cool completely.

    Notes

    • Store leftovers in an airtight container for up to 3 days.
    • These muffins can be frozen for up to 3 months; thaw before serving.
    • Feel free to mix in nuts or substitute chocolate chips with other types of chips such as butterscotch or white chocolate.
    • Prep Time: 15 minutes
    • Cook Time: 20 minutes
    • Category: Baking
    • Method: Baking
    • Cuisine: American

    Nutrition

    • Serving Size: 1 muffin
    • Calories: 210
    • Sugar: 10g
    • Sodium: 150mg
    • Fat: 10g
    • Saturated Fat: 2g
    • Unsaturated Fat: 8g
    • Trans Fat: 0g
    • Carbohydrates: 28g
    • Fiber: 1g
    • Protein: 5g
    • Cholesterol: 20mg

    Sharing is caring!

  • Air Fryer Apple Fritters

    Air Fryer Apple Fritters


    Introduction to Air Fryer Apple Fritters

    As a busy mom, I know how precious time can be, especially during those hectic afternoons when everyone is hungry and patience is thin. That’s where these delightful Air Fryer Apple Fritters come into play! They’re not just a quick solution for a busy day; they’re a heartfelt treat that brings smiles to the entire family. The crispy exterior and warm, tender apple goodness inside will make your loved ones think you spent hours in the kitchen. Trust me, it’s the perfect way to turn a mundane day into something special with minimal effort!

    Why You’ll Love This Air Fryer Apple Fritters

    These Air Fryer Apple Fritters are a game-changer for busy nights. They come together in just 22 minutes, allowing you to whip up a delicious treat without sacrificing your precious time. The air fryer gives them that irresistible crispiness, so you’ll enjoy a guilt-free indulgence. Plus, who doesn’t adore the sweet aroma of apples and cinnamon wafting through the house? It’s a cozy hug in dessert form!

    Ingredients for Air Fryer Apple Fritters

    Creating delicious Air Fryer Apple Fritters starts with gathering some simple yet essential ingredients. Here’s what you’ll need:

    • Apples: Two medium apples will give you the sweet, juicy goodness that makes these fritters so delightful. Granny Smith or Honeycrisp work wonderfully for a balance of tart and sweet.
    • All-purpose flour: This is the base for your batter. It provides the structure that helps the fritters hold their shape.
    • Granulated sugar: A touch of sweetness to enhance the natural flavor of the apples. It’s what turns these fritters from good to oh-so-delicious!
    • Baking powder: This ingredient is crucial for giving your fritters that light and fluffy texture. It’s like magic for your batter!
    • Ground cinnamon: A warm spice that adds depth and enhances the apple flavor. The aroma of cinnamon alone is irresistible!
    • Ground nutmeg: Just a pinch of this spice takes your fritters to the next level, adding a warm, nutty flavor.
    • Eggs: They help bind the ingredients together and create that lovely fluffy texture.
    • Milk: This adds moisture to your batter. You can substitute with almond milk or oat milk if you’re looking for a dairy-free option.
    • Vanilla extract: A splash of this lovely extract elevates the sweetness and rounds out the flavors perfectly.
    • Powdered sugar: Used for dusting the finished fritters. It’s the final touch that makes them look as sweet as they taste!

    If you’re interested in exact quantities, they’re available at the bottom of the article for easy printing. Happy cooking!

    How to Make Air Fryer Apple Fritters

    Now that you have all your ingredients, it’s time to bring your Air Fryer Apple Fritters to life! I promise the process is straightforward and rewarding. Just follow these simple steps, and you’ll create a scrumptious treat that will have everyone coming back for more!

    Step 1: Prepare the Apples

    Begin with your apples. First, peel them to remove the skin. This step might seem tedious, but it’s worth it for that perfect bite!

    Next, core the apples to remove the seeds, then dice them into small pieces. Aim for about half an inch in size; this makes them easy to mix into the batter. The smaller pieces will cook quicker and add delightful apple pockets.

    Step 2: Make the Batter

    In a mixing bowl, combine the dry ingredients: flour, sugar, baking powder, cinnamon, and nutmeg. Whisk them together until well blended. This simple act is key for even flavor distribution!

    Using a whisk or fork works perfectly. Make sure there are no lumps—nothing should get in the way of that wonderful taste!

    Step 3: Combine Wet Ingredients

    In a separate bowl, whisk together the eggs, milk, and vanilla extract. This is where the magic begins! The milk adds moisture, while vanilla adds a touch of elegance.

    Make sure to mix well; you want everything to be smooth. The combination of these ingredients sets the rich foundation for your fritters.

    Step 4: Mix It All Together

    Now it’s time to combine the wet and dry ingredients. Gently fold the wet ingredients into the dry ones. Use a spatula or wooden spoon to mix, but be careful not to overmix!

    A few streaks of dry ingredients are okay. We want fluffy fritters, not dense rocks! Finally, gently fold in those lovely diced apples.

    Step 5: Preheat the Air Fryer

    Preheating the air fryer is a crucial step. It ensures your fritters start cooking right away, giving them that crispy exterior we all crave.

    Set your air fryer to 350°F (175°C) and let it preheat for about five minutes. Enjoy this short break while you relish the anticipation of those delicious fritters!

    Step 6: Shape the Fritters

    When the air fryer is ready, it’s time to shape your fritters. Using a spoon, drop generous spoonful of batter into the air fryer basket. Leave some space between each fritter to ensure they cook evenly.

    Depending on your air fryer, you might have to do this in batches. Trust me, the wait will be worth it!

    Step 7: Air Fry for Perfect Crispiness

    Cook the fritters for about 10 to 12 minutes, flipping them halfway for that golden-brown color all over.

    Keep an eye on them! Every air fryer has its own quirks, so adjust the timing if needed. You want them perfectly crisp, but not overdone!

    Step 8: Dust with Powdered Sugar

    Once they’re done, remove the fritters and let them cool for a moment. Finally, dust them generously with powdered sugar.

    This simple step transforms them into bite-sized works of art. That sweet touch is what invites everyone to dive in and enjoy your creation!

    Tips for Success

    • Always measure your ingredients accurately for consistent results.
    • Diced apples should be small to ensure they cook evenly.
    • Don’t overcrowd the air fryer basket—give fritters space to breathe!
    • Adjust cooking times based on your air fryer model; every appliance behaves a bit differently.
    • For a fun twist, try adding nuts or raisins for added texture.

    Equipment Needed for Air Fryer Apple Fritters

    • Air fryer: Your main tool for achieving that crispy texture.
    • Mixing bowls: Use two medium-sized bowls for wet and dry ingredients.
    • Whisk or fork: Essential for mixing the batter smoothly.
    • Spatula or wooden spoon: For gently folding in the apples.
    • Spoon: Perfect for dropping batter into the air fryer.

    Variations of Air Fryer Apple Fritters

    • Spiced Up: Add a pinch of cayenne or a dash of cardamom to the batter for an unexpected kick.
    • Fruit Fusion: Mix in other diced fruits like pears or berries for a colorful twist on flavor.
    • Nuts Galore: Stir in chopped walnuts or pecans for an added crunch in every bite!
    • Dairy-Free Option: Replace milk with almond or oat milk to make it dairy-free without compromising taste.
    • Gluten-Free Choice: Use a gluten-free flour blend to accommodate gluten sensitivities while enjoying the same deliciousness.

    Serving Suggestions for Air Fryer Apple Fritters

    • Pair with a scoop of vanilla ice cream for a decadent dessert.
    • Serve alongside a warm cup of spiced apple cider for a cozy treat.
    • Drizzle with caramel sauce or chocolate syrup for an extra indulgent touch.
    • Garnish with fresh mint for a pop of color and freshness.

    FAQs about Air Fryer Apple Fritters

    Can I use other fruits instead of apples?
    Absolutely! While this recipe focuses on apples, feel free to experiment with other fruits like pears or even a mix of berries. Just remember that the moisture content may vary, so adjust accordingly.

    How can I store leftover fritters?
    If you have any fritters left, let them cool completely. Then, store them in an airtight container in the fridge for up to 2 days. For best results, reheat them in the air fryer for a couple of minutes before serving again!

    What dipping sauces pair well with these fritters?
    These tasty Air Fryer Apple Fritters are delicious on their own, but they shine even more when serving with a drizzle of caramel sauce, a side of warm vanilla glaze, or even a yogurt dip for a refreshing contrast.

    Can I make the batter ahead of time?
    While freshly made batter yields the best results, you can prepare it in advance. Just store it covered in the refrigerator for up to 24 hours. Stir gently before using it to ensure everything is well combined.

    Why didn’t my fritters come out crispy?
    A few factors can affect crispiness: ensure you don’t overcrowd the air fryer and give them enough space to breathe. Additionally, make sure to preheat your air fryer properly and adjust the cooking time to suit your model. A few trial runs ensure perfection!

    Final Thoughts on Air Fryer Apple Fritters

    Creating Air Fryer Apple Fritters isn’t just about making a dessert; it’s about crafting moments of joy in your kitchen. The smell of warm apples and spicy cinnamon fills the air, wrapping around you like a cozy blanket. These fritters are perfect for sharing with family or enjoying as a little treat for yourself after a long day. With every bite, you’ll relish in the satisfying crunch and tender apple goodness. So, embrace the deliciousness and let these fritters be your go-to recipe whenever you need a sweet escape from the everyday hustle!


    Print

    clock clock iconcutlery cutlery iconflag flag iconfolder folder iconinstagram instagram iconpinterest pinterest iconfacebook facebook iconprint print iconsquares squares iconheart heart iconheart solid heart solid icon

    Description

    Delicious and crispy apple fritters made in an air fryer, perfect for a sweet treat.


    • Apples: 2 medium, peeled, cored, and diced
    • All-purpose flour: 1 cup (120g)
    • Granulated sugar: 1/4 cup (50g)
    • Baking powder: 1 teaspoon
    • Ground cinnamon: 1 teaspoon
    • Ground nutmeg: 1/4 teaspoon
    • Eggs: 2 large
    • Milk: 1/2 cup (120ml)
    • Vanilla extract: 1 teaspoon
    • Powdered sugar: for dusting

    1. Prepare the apples by peeling, coring, and dicing them into small pieces.
    2. Make the batter by combining flour, sugar, baking powder, cinnamon, and nutmeg in a mixing bowl.
    3. In a separate bowl, whisk together eggs, milk, and vanilla extract.
    4. Combine the wet and dry ingredients, stirring gently to avoid overmixing.
    5. Preheat the air fryer to 350°F (175°C) for about 5 minutes.
    6. Shape the fritters by dropping spoonfuls of batter into the air fryer basket, leaving space between each fritter.
    7. Air fry the fritters for 10-12 minutes, flipping halfway through for even browning.
    8. Prepare the glaze by dusting the cooked fritters with powdered sugar.

    Notes

    • For extra flavor, consider adding chopped nuts or raisins to the batter.
    • These fritters can be served warm or at room temperature.
    • Store any leftovers in an airtight container for up to 2 days.
    • Prep Time: 15 minutes
    • Cook Time: 12 minutes
    • Category: Dessert
    • Method: Air Frying
    • Cuisine: American

    Nutrition

    • Serving Size: 1 fritter
    • Calories: 150
    • Sugar: 8g
    • Sodium: 200mg
    • Fat: 4g
    • Saturated Fat: 1g
    • Unsaturated Fat: 3g
    • Trans Fat: 0g
    • Carbohydrates: 24g
    • Fiber: 1g
    • Protein: 3g
    • Cholesterol: 38mg

    Sharing is caring!

  • Soft & Chewy Pumpkin Chocolate Chip Oatmeal Cookies

    Soft & Chewy Pumpkin Chocolate Chip Oatmeal Cookies


    Introduction to Soft & Chewy Pumpkin Chocolate Chip Oatmeal Cookies

    As the leaves begin to change and the crisp air settles in, it’s time to embrace those cozy vibes. There’s nothing quite like a batch of Soft & Chewy Pumpkin Chocolate Chip Oatmeal Cookies to warm your heart and home. These delectable treats are perfect for busy days when you crave comfort in a quick, delicious bite. Imagine the sweet aroma wafting through your kitchen, inviting loved ones to gather around. Whether you’re a mom juggling tasks or a professional winding down, this recipe promises to deliver joy and satisfaction in every chewy mouthful.

    Why You’ll Love This Soft & Chewy Pumpkin Chocolate Chip Oatmeal Cookies

    You’ll fall head over heels for these Soft & Chewy Pumpkin Chocolate Chip Oatmeal Cookies because they check all the boxes! Seriously, they’re quick to whip up, taking only about 15 minutes of prep time. The combination of pumpkin and chocolate creates a delightful flavor explosion. Plus, they’re soft, chewy, and just the right amount of sweet, making them a perfect treat after a long day. Trust me, you’ll want to keep this recipe close!

    Ingredients for Soft & Chewy Pumpkin Chocolate Chip Oatmeal Cookies

    Let’s dive into the delightful components that make these Soft & Chewy Pumpkin Chocolate Chip Oatmeal Cookies a must-bake. Each ingredient added is like a note in a sweet symphony, coming together to bring you joy.

    • All-purpose flour: The base that binds everything together, providing structure.
    • Rolled oats: These add a hearty texture and a wholesome touch that makes each cookie chewy and satisfying.
    • Canned pumpkin puree: A natural, moistener that infuses a burst of fall flavor and keeps cookies tender.
    • Brown sugar: This gives cookies a rich, caramel-like sweetness, which pairs perfectly with the pumpkin.
    • Granulated sugar: It balances the flavors and adds sweetness without overpowering other components.
    • Baking soda: This is your friend for that perfect rise, ensuring the cookies stay soft and fluffy.
    • Ground cinnamon: A pinch of warmth, cinnamon brings a comforting aroma that screams “fall.”
    • Salt: Don’t underestimate this tiny ingredient; it enhances flavors and balances sweetness.
    • Large egg: A binder that adds richness and moisture to the dough.
    • Semi-sweet chocolate chips: The delightful bursts of chocolate that make every bite irresistible.

    For those looking to switch things up, consider using whole wheat flour for a healthier spin, or if you’re feeling adventurous, add some nuts or dried fruits. The ingredient quantities are neatly tucked away at the bottom of the article, ready for you to print out and keep handy!

    How to Make Soft & Chewy Pumpkin Chocolate Chip Oatmeal Cookies

    Baking these Soft & Chewy Pumpkin Chocolate Chip Oatmeal Cookies is a breeze! Follow these simple steps to create a batch that’ll make your home smell like fall—and your taste buds dance with joy.

    Step 1: Preheat the Oven

    Start by preheating your oven to 350°F (175°C). This ensures your cookies bake evenly. While the oven warms up, grease the baking sheets with parchment paper to prevent sticking. It’s like giving your cookies a cozy blanket as they bake!

    Step 2: Mix Dry Ingredients

    In a large bowl, whisk together your all-purpose flour, rolled oats, baking soda, ground cinnamon, and salt. This step builds the foundation for your cookies. The oats provide that hearty texture that makes these cookies so delightful to munch on!

    Step 3: Cream the Sugars and Butter

    In another bowl, cream together the brown sugar, granulated sugar, and softened butter until fluffy. I usually use an electric mixer for this—it makes life so much easier! When it’s light and airy, you know it’s ready. The trick here is to mix until the sugars and butter resemble a light cloud.

    Step 4: Combine Wet Ingredients

    Now, mix in the canned pumpkin puree and the egg into the sugar mixture. Blend until everything is well combined. It’ll have a rich, vibrant orange hue. This step is where the magic begins, bringing that wonderful fall flavor right into your dough!

    Step 5: Combine Dry and Wet Mixtures

    Gradually add the dry ingredients to the wet mixture. I like to do this in batches to avoid a flour explosion! Gently fold everything together until just mixed. Don’t overmix; it’s all about keeping that dough soft and chewy!

    Step 6: Stir in Chocolate Chips

    Fold in those delicious semi-sweet chocolate chips. They’re the stars of the show, adding delightful pops of sweetness in each bite! Picture those gooey pockets of chocolate melting just perfectly.

    Step 7: Bake the Cookies

    Using a tablespoon, drop mounds of dough onto your prepared baking sheets. Make sure to space them about two inches apart; they’ll spread a little while baking. Pop them in the preheated oven and bake for 10-12 minutes until the edges turn golden. Let them cool on the sheets for five minutes before transferring them to wire racks. You’ll be rewarded with soft and chewy cookies that practically melt in your mouth!

    Tips for Success

    • Always use room temperature butter for easier creaming.
    • Don’t skip the resting time; allowing cookies to cool on the baking sheet helps them maintain their softness.
    • For chewier cookies, slightly underbake them; they’ll continue to cook as they cool.
    • Experiment with mix-ins like nuts for added crunch.
    • Keep an eye on your oven—baking times can vary!

    Equipment Needed

    • Baking sheets: Use two sheets lined with parchment paper. If you don’t have parchment, greasing them works too!
    • Mixing bowls: A large bowl for the dry ingredients and a medium bowl for the wet. You can often get by with just one large bowl.
    • Whisk: Perfect for mixing dry ingredients. A fork works as a great alternative!
    • Electric mixer: Makes creaming sugars and butter a breeze, but a spatula will suffice if you prefer a workout!
    • Measuring cups and spoons: Essential for precision, but you can eyeball it for a more relaxed approach.

    Variations

    • Whole Wheat Flour: Swap all-purpose flour for whole wheat flour for a nuttier flavor and additional fiber.
    • Nut Butter: Add a swirl of peanut or almond butter into the dough for a rich and creamy texture.
    • White Chocolate Chips: For a sweeter twist, replace semi-sweet chocolate chips with white chocolate chips.
    • Spices: Experiment with nutmeg or ginger for a more robust fall flavor profile.
    • Dried Fruits: Mix in some cranberries or raisins for a chewier texture and a delightful pop of sweetness.
    • Gluten-Free Option: Use a gluten-free all-purpose flour blend to make these cookies gluten-free without sacrificing taste.

    Serving Suggestions for Soft & Chewy Pumpkin Chocolate Chip Oatmeal Cookies

    • Serve warm: Enjoy these cookies fresh out of the oven with a glass of cold milk.
    • Fall-themed platters: Arrange cookies on a decorative plate with autumn leaves for a festive touch.
    • Coffee pairing: Pair with a hot cup of coffee or chai tea for a perfect afternoon treat.
    • Icing drizzle: Enhance flavors by drizzling a light vanilla glaze over each cookie.
    • Ice cream sandwiches: Sandwich two cookies around a scoop of vanilla ice cream for a delicious dessert twist.

    FAQs about Soft & Chewy Pumpkin Chocolate Chip Oatmeal Cookies

    Can I freeze these cookies?
    Absolutely! These Soft & Chewy Pumpkin Chocolate Chip Oatmeal Cookies freeze wonderfully. Just wrap them individually in plastic wrap or store them in an airtight container before placing them in the freezer. They’ll be ready for you whenever a sweet craving strikes!

    How can I make these cookies more nutritious?
    For a healthier twist, consider using whole wheat flour instead of all-purpose flour. You can also reduce the sugar slightly or substitute it with a natural sweetener like honey or maple syrup. Adding nuts or seeds can also boost the nutritional value!

    What can I substitute for pumpkin puree?
    If you find yourself out of pumpkin puree, you can use unsweetened applesauce. While it creates a different flavor profile, it still keeps those cookies soft and moist! You might also try butternut squash puree if you have it handy.

    Why are my cookies not chewy?
    If your cookies turned out more cake-like than chewy, it might be due to overmixing the dough or baking for too long. Remember, underbaking slightly helps keep that chewy texture intact, so pull them out of the oven while they’re still soft in the center.

    How long do these cookies last?
    Stored in an airtight container at room temperature, these cookies will remain fresh for about a week. To maintain their soft texture, it’s best to keep them sealed and away from direct sunlight.

    Final Thoughts

    Baking these Soft & Chewy Pumpkin Chocolate Chip Oatmeal Cookies feels like wrapping yourself in a warm, cozy blanket. Each bite is a delightful reminder of fall’s charm, from the aroma filling your kitchen to the soft, chewy texture melting in your mouth. Whether you’re sharing them with family or savoring one with your afternoon coffee, these cookies bring a sense of joy and comfort. I hope this recipe becomes a cherished part of your seasonal traditions, creating memories that you and your loved ones will treasure for years to come. Happy baking!


    Print

    clock clock iconcutlery cutlery iconflag flag iconfolder folder iconinstagram instagram iconpinterest pinterest iconfacebook facebook iconprint print iconsquares squares iconheart heart iconheart solid heart solid icon

    Description

    Deliciously soft and chewy cookies made with pumpkin puree and chocolate chips, perfect for fall.


    • 1 cup all-purpose flour
    • 1 cup rolled oats
    • 1 cup canned pumpkin puree
    • 1/2 cup brown sugar
    • 1/4 cup granulated sugar
    • 1 tsp baking soda
    • 1 tsp ground cinnamon
    • 1/4 tsp salt
    • 1 large egg
    • 1/2 cup semi-sweet chocolate chips

    1. Preheat oven to 350°F (175°C) and line two baking sheets with parchment paper.
    2. In a large bowl, whisk together flour, oats, baking soda, cinnamon, and salt.
    3. In another bowl, cream together brown sugar, granulated sugar, and softened butter until fluffy.
    4. Mix in pumpkin puree and egg until well combined.
    5. Gradually add dry ingredients to the wet mixture; fold gently until just mixed.
    6. Stir in chocolate chips.
    7. Drop tablespoons of dough onto prepared baking sheets, spaced two inches apart.
    8. Bake for 10-12 minutes until edges are golden. Cool on baking sheets for five minutes before transferring to wire racks.

    Notes

    • For a healthier version, consider using whole wheat flour instead of all-purpose flour.
    • Store cookies in an airtight container to maintain softness.
    • Prep Time: 15 minutes
    • Cook Time: 12 minutes
    • Category: Dessert
    • Method: Baking
    • Cuisine: American

    Nutrition

    • Serving Size: 1 cookie
    • Calories: 120
    • Sugar: 8g
    • Sodium: 65mg
    • Fat: 4g
    • Saturated Fat: 2g
    • Unsaturated Fat: 2g
    • Trans Fat: 0g
    • Carbohydrates: 18g
    • Fiber: 1g
    • Protein: 2g
    • Cholesterol: 15mg

    Sharing is caring!

  • Beef-Stuffed Shells with Creamy Ricotta

    Beef-Stuffed Shells with Creamy Ricotta


    Introduction to Beef-Stuffed Shells with Creamy Ricotta

    When life gets busy, and dinner feels like a daunting task, Beef-Stuffed Shells with Creamy Ricotta swoops in like a culinary superhero! Picture this: tender pasta shells cradling a warm, cheesy blend of beef and ricotta that’s baked to perfection. Trust me, this dish is not just a recipe; it’s a hug in a bowl. Perfect for busy moms and working professionals like us, it combines ease and flavor with a sprinkle of love. Get ready to impress your family and soothe your own soul with this delightful meal!

    Why You’ll Love This Beef-Stuffed Shells with Creamy Ricotta

    This dish is a lifesaver in the kitchen! It’s simple enough for a quick weeknight dinner but impressive enough to wow guests. With just a handful of ingredients and minimal prep, Beef-Stuffed Shells with Creamy Ricotta can be on your table in about an hour. Plus, the combination of oozy cheese and savory beef creates a flavor explosion that will have everyone asking for seconds. It’s comfort food at its finest!

    Ingredients for Beef-Stuffed Shells with Creamy Ricotta

    Gathering the right ingredients is the first step to creating these heavenly Beef-Stuffed Shells with Creamy Ricotta. Here’s what you’ll need:

    • Large pasta shells: These serve as the perfect pockets for our filling. Choose a good brand for a reliable, sturdy shell.
    • Ground beef: Rich in flavor, it’s the heart of the dish. You can substitute with ground turkey or chicken for a leaner option.
    • Ricotta cheese: Creamy and slightly sweet, it adds richness. Feel free to use a low-fat version if you prefer.
    • Shredded mozzarella cheese: This melty goodness brings that ooey-gooey texture. Use fresh mozzarella for a more authentic taste.
    • Grated Parmesan cheese: A sprinkle adds depth and nuttiness. You can use Pecorino Romano for a sharper flavor.
    • Egg: Acts as a binder for the filling, keeping everything together. If you’re vegan, silken tofu can work as a substitute.
    • Marinara sauce: A flavorful base that ties the dish together. Store-bought or homemade works fabulously.
    • Italian seasoning: A blend of herbs for that classic Italian taste. You can easily substitute with oregano, basil, and thyme.
    • Salt and pepper: These staples enhance all the flavors. Adjust according to your taste preferences.

    All ingredient quantities are at the bottom of the article for your convenience and easy printing.

    How to Make Beef-Stuffed Shells with Creamy Ricotta

    Now that we have all our ingredients ready, let’s dive into making these scrumptious Beef-Stuffed Shells with Creamy Ricotta. Follow these steps closely for a delicious result!

    Step 1: Preheat the Oven

    Preheating your oven to 375°F (190°C) is crucial. It ensures an even bake and that your cheese gets all bubbly and golden. Trust me, there’s nothing like the smell of cheese melting in the oven to make your mouth water!

    Step 2: Cook the Pasta Shells

    Cook the large pasta shells according to the package instructions until they’re al dente. This usually takes about 8-10 minutes. Be sure not to overcook them, as they’ll soften more in the oven. Once cooked, drain the shells and set them aside to cool slightly. You want them ready for stuffing when the filling is done.

    Step 3: Brown the Ground Beef

    In a skillet, over medium heat, brown the ground beef until it’s no longer pink, which should take about 5-7 minutes. Make sure to break up the meat, so it cooks evenly. Once cooked, drain the excess fat—it’s important for keeping the dish clean and not overly greasy.

    Step 4: Prepare the Cheese Mixture

    In a large bowl, mix the cooked beef with ricotta cheese, half a cup of shredded mozzarella, grated Parmesan, the egg, and Italian seasoning. Add salt and pepper to taste. Stir until everything is well combined and creamy. This filling is the heart of your beef-stuffed shells, so make sure to get every bit mixed deliciously!

    Step 5: Stuff the Shells

    Now comes the fun part—stuffing the shells! Take a pasta shell and gently fill it with your beef and cheese mixture. Aim for about one to two tablespoons in each shell. Don’t overstuff; you want them snug, not bursting. Lay them seam-side up in the baking dish as you go.

    Step 6: Assemble in Baking Dish

    Spread 1 cup of marinara sauce on the bottom of your baking dish to prevent the shells from sticking. Then, place the stuffed shells neatly in a single layer. Drizzle the remaining marinara sauce over the top. Don’t be shy; cover those shells generously! Finally, sprinkle the rest of the shredded mozzarella on top.

    Step 7: Bake to Perfection

    Cover your baking dish with foil and pop it into the preheated oven. Bake the shells for 25 minutes to allow all those flavors to meld together. After that, remove the foil and bake for an additional 10 minutes. You want to see a beautifully melted, golden cheese topping. Let those bubbles and the aroma waft through your home—everyone will come running!

    Tips for Success

    • Use freshly grated cheese for optimal melting and flavor.
    • If you have time, let the filling cool before stuffing the shells.
    • Experiment with spices to customize the flavor—try a pinch of red pepper flakes for heat!
    • To prevent sticking, lightly oil the baking dish before adding the sauce.
    • Don’t skip the foil! It keeps the moisture in while baking.

    Equipment Needed

    • Baking dish: A 9×13 inches dish works well, but any oven-safe dish will do.
    • Skillet: For browning the beef; a non-stick skillet makes cleanup easier.
    • Mixing bowl: A large bowl is best for combining your filling.
    • Wooden spoon: Great for mixing and stuffing!
    • Foil: Use for covering the dish while baking.

    Variations for Beef-Stuffed Shells with Creamy Ricotta

    • Vegetarian Option: Substitute ground beef with sautéed mushrooms, spinach, or a mix of your favorite vegetables for a delightful twist.
    • Spicy Kick: Add chopped jalapeños or red pepper flakes to the cheese mixture for a zesty flavor that’ll awaken your taste buds.
    • Cheese Lover’s Dream: Mix in additional cheeses like feta or gouda into the filling for a complex, savory flavor.
    • Whole Wheat or Gluten-Free: Use whole wheat pasta shells or gluten-free varieties to accommodate dietary preferences.
    • Herb Infusion: Fresh basil or parsley can be added to the filling for a burst of freshness and vibrant flavor.

    Serving Suggestions for Beef-Stuffed Shells with Creamy Ricotta

    • Fresh Salad: Pair with a crisp Caesar or mixed greens salad drizzled with balsamic vinaigrette for a refreshing contrast.
    • Garlic Bread: Serve warm, buttery garlic bread on the side to soak up any leftover marinara sauce.
    • Wine Pairing: A light red wine, like Chianti, complements the rich flavors beautifully.
    • Garnish: Sprinkle fresh parsley or basil on top for a pop of color and flavor.

    FAQs about Beef-Stuffed Shells with Creamy Ricotta

    As I’ve shared my love for Beef-Stuffed Shells with Creamy Ricotta, I often find myself answering a few common questions. Let’s dive into some of those queries!

    Can I make this dish ahead of time?

    Absolutely! You can prepare the stuffed shells in advance and store them in the fridge for up to 24 hours. Just cover them tightly to keep them fresh. Bake them straight from the fridge, but add some extra time to ensure they heat through.

    Can I freeze beef-stuffed shells?

    Yes, these stuffed shells freeze excellently! Assemble them in a dish without baking, cover with foil, and freeze. You can bake them directly from frozen, but be ready for a longer cooking time.

    What can I serve with beef-stuffed shells?

    Consider pairing your creamy ricotta shells with a side salad or garlic bread for a complete meal. A glass of red wine beside it wouldn’t hurt either!

    Is there a vegetarian version of this recipe?

    Definitely! Replace ground beef with sautéed veggies like mushrooms or spinach for a delicious vegetarian alternative that still packs a flavorful punch.

    How do I make the filling more flavorful?

    Feel free to get creative! Adding herbs like basil or a splash of Worcestershire sauce can elevate the taste. You could also sprinkle in some extra Italian seasoning for that authentic touch.

    Final Thoughts

    Creating Beef-Stuffed Shells with Creamy Ricotta is not just about putting a meal on the table; it’s about bringing a family together. The aroma that fills your home while these shells bake is like a warm embrace, welcoming everyone in. Each bite is a delightful fusion of comforting flavors that can turn an ordinary day into something special. Whether you’re sharing dinner with loved ones or enjoying a quiet night in, this dish wraps you in culinary joy. So roll up your sleeves, pour your heart into it, and enjoy the magic that happens in the kitchen!


    Print

    clock clock iconcutlery cutlery iconflag flag iconfolder folder iconinstagram instagram iconpinterest pinterest iconfacebook facebook iconprint print iconsquares squares iconheart heart iconheart solid heart solid icon

    Description

    Heavenly Beef-Stuffed Shells filled with a creamy mixture of ricotta and ground beef, baked to perfection.


    • 12 large pasta shells
    • 1 pound ground beef
    • 1 cup ricotta cheese
    • 1 cup shredded mozzarella cheese
    • 1/2 cup grated Parmesan cheese
    • 1 egg
    • 2 cups marinara sauce
    • 1 teaspoon Italian seasoning
    • Salt and pepper to taste

    1. Preheat the oven to 375°F (190°C).
    2. Cook the pasta shells according to package instructions until al dente; drain and set aside.
    3. In a skillet, brown the ground beef over medium heat; drain excess fat.
    4. In a bowl, combine the cooked beef, ricotta cheese, 1/2 cup mozzarella cheese, Parmesan cheese, egg, Italian seasoning, salt, and pepper.
    5. Stuff each pasta shell with the beef and cheese mixture.
    6. Spread 1 cup of marinara sauce on the bottom of a baking dish.
    7. Place the stuffed shells in the baking dish and cover with remaining marinara sauce.
    8. Sprinkle the remaining mozzarella cheese on top.
    9. Cover with foil and bake for 25 minutes.
    10. Remove the foil and bake for an additional 10 minutes until cheese is bubbly and golden.

    Notes

    • Feel free to add more spices for additional flavor.
    • Leftovers can be stored in the refrigerator for up to three days.
    • Prep Time: 20 minutes
    • Cook Time: 35 minutes
    • Category: Main Dish
    • Method: Baking
    • Cuisine: Italian

    Nutrition

    • Serving Size: 1 serving
    • Calories: 500
    • Sugar: 5g
    • Sodium: 900mg
    • Fat: 25g
    • Saturated Fat: 10g
    • Unsaturated Fat: 15g
    • Trans Fat: 0g
    • Carbohydrates: 45g
    • Fiber: 3g
    • Protein: 30g
    • Cholesterol: 80mg

    Sharing is caring!

  • Strawberry Cheesecake Cinnabon Rolls

    Strawberry Cheesecake Cinnabon Rolls


    Introduction to Strawberry Cheesecake Cinnabon Rolls

    Hey there, fellow food lovers! If you’re anything like me, you adore a sweet treat that’s both indulgent and easy to whip up. Enter the delightful world of Strawberry Cheesecake Cinnabon Rolls! Imagine soft, warm cinnamon rolls swirled with creamy cheesecake and fresh strawberries. It’s a glorious combination that can brighten up even the busiest of days. Perfect for a cozy brunch or a quick solution for a busy weekday dessert, these rolls will impress your family and friends who might think you spent hours in the kitchen. Let’s dive into this mouthwatering adventure!

    Why You’ll Love This Strawberry Cheesecake Cinnabon Rolls

    These Strawberry Cheesecake Cinnabon Rolls are a dream for busy moms and professionals alike! They’re not just quick to make, but every bite is a perfect balance of sweet and tangy. The combination of soft dough, creamy cheesecake, and juicy strawberries creates a delightful experience that feels special without the fuss. Plus, you’ll have the joy of homemade goodness without spending your whole day in the kitchen. Who wouldn’t love that?

    Ingredients Strawberry Cheesecake Cinnabon Rolls

    Gathering the right ingredients is essential for creating the ultimate Strawberry Cheesecake Cinnabon Rolls. Here’s what you’ll need:

    • Cinnamon Roll Dough: You can use store-bought dough for a quick option or make your own from scratch to impress. I often choose the latter for that homemade touch!
    • For the Cheesecake Filling:
    • Cream Cheese: Softened cream cheese gives the filling its creamy texture. Make sure it’s at room temperature for easy mixing.
    • Fresh Strawberries: Diced for sweetness and flavor, strawberries add a fruity burst. You can substitute with other berries if desired.
    • Sugar: Just a little sugar helps sweeten the cream cheese and complements the strawberries perfectly.
    • Vanilla Extract: A touch of vanilla enhances the flavors of the filling and makes everything more delicious.
    • For the Frosting:
    • Cream Cheese: You will need more softened cream cheese for the frosting, which is vital for that rich, decadent topping.
    • Butter: Softened butter adds richness to the frosting, creating a smoother consistency.
    • Powdered Sugar: This sugary goodness is what makes the frosting sweet and fluffy.
    • Vanilla Extract: A bit more vanilla in the frosting rounds out the flavors beautifully.

    For exact measurements for each ingredient, check the bottom of the article where they are available for printing. These ingredients make every bite a satisfying moment, so let’s gather them up and get ready to create something amazing!

    How to Make Strawberry Cheesecake Cinnabon Rolls

    Now, let’s embark on this delightful journey of making Strawberry Cheesecake Cinnabon Rolls. I promise you it’s easier than it sounds! Each step is straightforward, and soon enough, you’ll have a fresh batch of these decadent rolls.

    Prepare the Dough

    First, let’s get that dough ready! If you’re using store-bought dough, follow the package instructions closely. If you prefer homemade, mix your ingredients until they form a soft dough, then let it rise in a warm spot until doubled in size. I like to prepare mine the night before so it’s ready to go the next day.

    Make the Cheesecake Filling

    Time to make the heavenly filling! In a medium bowl, combine softened cream cheese, diced strawberries, sugar, and vanilla extract. Mix well until you achieve a smooth and creamy consistency. This filling needs to be luxurious, so don’t rush it! Scrape down the sides for an even blend—trust me, it makes a difference.

    Roll Out the Dough

    Once your dough has risen, lightly flour your work surface and roll it out into a rectangle. Aim for about ¼ inch thick; this thickness keeps everything fluffy while allowing for a delightful swirl. Be gentle; if you push too hard, it can lose its soft texture!

    Add the Filling

    Now, spread the creamy cheesecake filling evenly over the rolled-out dough, leaving a small border around the edges. Use a spatula for this—it’ll help achieve a smooth layer without making a mess. Don’t forget to cover every inch to ensure each bite is filled with flavor. No gaps!

    Roll and Slice

    Here comes the fun part! Starting from one of the longer edges, carefully roll the dough into a tight log. After that, slice it into equal pieces, about 1 to 1 ½ inches thick. I like to use a sharp knife or dental floss for clean cuts without squishing them. Just slide it right under the roll and pull evenly—voilà!

    Bake the Rolls

    Preheat your oven to 350°F (175°C). Place the sliced rolls into a greased baking dish, giving them a little space to rise. Bake them for about 25-30 minutes, or until they’re golden brown and puffed up beautifully. You’ll know they’re done when your kitchen smells heavenly—trust your nose!

    Prepare the Frosting

    While those rolls are baking, let’s whip up the frosting! In a bowl, beat together the softened cream cheese, butter, powdered sugar, and a splash of vanilla extract until it’s smooth and creamy. You want it to be spreadable but still thick enough to sit on top of those warm rolls. I could practically eat it by the spoonful!

    Frost and Serve

    Once the rolls are baked to perfection, remove them from the oven and let them cool for just a few minutes. This is the best time to frost them while they’re still warm. Generously spread that glorious cream cheese frosting all over the top. Enjoy every minute of it! Serve these beauties warm, and watch your family’s faces light up!

    Tips for Success

    • Always use softened cream cheese for smooth mixing—no lumps allowed!
    • Don’t overwork the dough; gently knead it just until it comes together.
    • Roll the dough evenly to avoid uneven baking.
    • Let the baked rolls cool slightly before frosting; it helps the frosting stick better.
    • Enjoy them warm for the best flavor and texture!

    Equipment Needed

    • Baking Dish: A 9×13 inch dish works perfectly, but any oven-safe dish will do.
    • Rolling Pin: If you don’t have one, a wine bottle can double as a great alternative!
    • Mixing Bowls: Any size will work, but a medium one is ideal for the filling.
    • Spatula: A rubber or silicone spatula helps spread the filling smoothly.
    • Sharp Knife: Essential for slicing your rolls cleanly; a pizza cutter can work too!

    Variations

    • Berry Medley: Swap out strawberries for a mix of blueberries, raspberries, and blackberries for a berry burst of flavors.
    • Chocolate Drizzle: Drizzle melted chocolate over the frosted rolls for an indulgent touch that chocolate lovers will adore.
    • Nutty Addition: Add chopped pecans or walnuts into the cheesecake filling for a delightful crunch and nutty flavor.
    • Gluten-Free Option: Use gluten-free cinnamon roll dough to meet dietary needs while enjoying the same delicious taste.
    • Cinnamon-Sugar Sprinkle: Before rolling up the dough, sprinkle a mixture of cinnamon and sugar over the filling for an extra sweet touch.

    Serving Suggestions

    • Pair with a cup of freshly brewed coffee for a delightful breakfast treat.
    • Add a scoop of vanilla ice cream on the side for a decadent dessert.
    • Garnish with extra sliced strawberries for a pop of color and freshness.
    • Serve on a beautiful platter to impress your guests at brunch!

    FAQs about Strawberry Cheesecake Cinnabon Rolls

    Can I make the dough ahead of time?
    Absolutely! You can prepare the dough a day in advance and let it rise in the fridge overnight. Just take it out when you’re ready, roll it out, and continue with the recipe. This makes mornings a breeze!

    What if I don’t have fresh strawberries?
    No problem! You can substitute with frozen strawberries. Just thaw them first and chop them up. You might want to drain any excess juice to keep the filling from getting too runny.

    How do I store leftovers?
    If you happen to have any leftovers—which is rare—you can keep them in an airtight container in the fridge for up to three days. Just warm them up gently before enjoying to bring back that fresh-out-of-the-oven experience!

    Can I freeze Strawberry Cheesecake Cinnabon Rolls?
    Yes! Once baked, let them cool completely, then freeze them in a single layer on a baking sheet. After they’re frozen, transfer them to a freezer bag. They should be good for a couple of months!

    What can I substitute for cream cheese?
    If you’re out of cream cheese, you can use mascarpone or a vegan cream cheese alternative. They’ll still give you that rich and creamy texture we all love in these Strawberry Cheesecake Cinnabon Rolls.

    Final Thoughts

    Creating Strawberry Cheesecake Cinnabon Rolls is more than just baking; it’s about turning everyday moments into cherished memories. The aroma wafting through your home, the warmth of freshly baked rolls, and the joy of sharing them with loved ones is simply priceless. This recipe invites you to slow down and indulge in the sweet pleasures of life, even on the busiest of days. So roll up your sleeves and let these delightful treats bring smiles and satisfaction to your table. Trust me, your taste buds will thank you, and your family will keep asking for more!


    Print

    clock clock iconcutlery cutlery iconflag flag iconfolder folder iconinstagram instagram iconpinterest pinterest iconfacebook facebook iconprint print iconsquares squares iconheart heart iconheart solid heart solid icon

    Description

    Delicious strawberry cheesecake cinnamon rolls, a perfect sweet treat for any occasion.


    • Cinnamon Roll Dough: Store-bought or homemade
    • For the Cheesecake Filling:
    • 4 oz cream cheese, softened
    • 1 cup fresh strawberries, diced
    • 2 tablespoons sugar
    • 1 teaspoon vanilla extract
    • For the Frosting:
    • 4 oz cream cheese, softened
    • 2 tablespoons butter, softened
    • 1 cup powdered sugar
    • 1 teaspoon vanilla extract

    1. Prepare the Dough: Prepare the cinnamon roll dough according to the package instructions or use your favorite homemade recipe.
    2. Make the Cheesecake Filling: In a medium bowl, mix the softened cream cheese, diced fresh strawberries, sugar, and vanilla extract until well combined.
    3. Roll Out the Dough: Roll the prepared dough into a rectangle on a lightly floured surface.
    4. Add the Filling: Spread the strawberry cheesecake filling evenly over the rolled-out dough, covering it from edge to edge.
    5. Roll and Slice: Carefully roll the dough into a log, starting from one of the longer edges. Slice the log into individual rolls, about 1 to 1 1/2 inches thick.
    6. Bake the Rolls: Place the sliced rolls into a greased baking dish. Bake according to the cinnamon roll dough instructions, or until the rolls are golden brown and cooked through (usually about 25-30 minutes at 350°F/175°C).
    7. Prepare the Frosting: While the rolls are baking, prepare the cream cheese frosting. In a bowl, beat together softened cream cheese, butter, powdered sugar, and vanilla extract until smooth and creamy.
    8. Frost and Serve: Once the rolls are done baking, generously frost them with the cream cheese icing while still warm. Serve and enjoy!

    Notes

    • If using store-bought dough, make sure to follow the instructions for optimal results.
    • These rolls are best served warm with a generous amount of frosting.
    • Prep Time: 20 minutes
    • Cook Time: 30 minutes
    • Category: Dessert
    • Method: Baking
    • Cuisine: American

    Nutrition

    • Serving Size: 1 roll
    • Calories: 350
    • Sugar: 15g
    • Sodium: 200mg
    • Fat: 15g
    • Saturated Fat: 8g
    • Unsaturated Fat: 5g
    • Trans Fat: 0g
    • Carbohydrates: 48g
    • Fiber: 1g
    • Protein: 5g
    • Cholesterol: 30mg

    Sharing is caring!

  • Red Velvet Cookie Sandwiches

    Red Velvet Cookie Sandwiches


    Introduction to Red Velvet Cookie Sandwiches

    There’s something truly special about Red Velvet Cookie Sandwiches that makes them a joy to bake and share. Whether it’s a busy weeknight craving or a delightful treat for the kids’ lunchboxes, these cookies bring happiness in every bite. With their vibrant color and creamy frosting, they’re not just delicious—they’re a showstopper at any gathering. Imagine surprising your loved ones with these treats! They’re perfect for making memories or simply indulging after a long day. Trust me, once you make these scrumptious sandwiches, life will surely feel just a bit sweeter.

    Why You’ll Love This Red Velvet Cookie Sandwiches

    You’ll adore these Red Velvet Cookie Sandwiches for their ease and delightful flavors. They’re quick to whip up, making them a fantastic option for busy moms like us. Every cookie is soft, chewy, and bursting with a rich, chocolatey taste. Plus, the creamy frosting is simply irresistible! Whether it’s a surprise dessert for your family or a sweet treat for friends, these cookie sandwiches are bound to impress.

    Ingredients for Red Velvet Cookie Sandwiches

    To create these delightful Red Velvet Cookie Sandwiches, you’ll need a handful of ingredients that work in harmony to deliver flavor and comfort. Here’s what you’ll gather:

    • All-purpose flour: This forms the base of your cookies, providing structure and that signature chewy texture.
    • Cocoa powder: A touch of cocoa adds depth and a subtle chocolate flavor to the cookies.
    • Baking soda: This is your leavening agent, helping the cookies rise and stay soft.
    • Salt: Just a pinch to enhance the sweetness and balance flavors.
    • Unsalted butter: Creamy and rich, it adds moisture and contributes to a tender cookie.
    • Sugar: Granulated sugar to sweeten, while light brown sugar enhances the flavor with a hint of caramel.
    • Egg: This binds the ingredients together, giving structure to your cookies.
    • Vanilla extract: A splash for that beloved warm flavor that elevates your cookies.
    • Vinegar: Used to react with baking soda, enhancing the texture and color of the cookies.
    • Red food coloring: The star of the show! A must for that iconic red velvet hue.
    • Cream cheese: This is essential for the creamy frosting that fills your sandwich cookies.
    • Powdered sugar: For sweetening the frosting to perfection, giving it a lovely, smooth finish.
    • Sprinkles (optional): Fun and festive, they can dress up your cookie sandwiches for special occasions.

    For exact measurements and to have this recipe handy, scroll down to the bottom of the article. Happy baking!

    How to Make Red Velvet Cookie Sandwiches

    Preheat and Prepare

    First things first, let’s warm up that oven! Preheat it to 350°F (180°C). While it’s heating, line your baking sheets with parchment paper or use silicone baking mats. This ensures easy removal and cleanup later. Getting this step right makes the subsequent baking even smoother, trust me!

    Mix the Dry Ingredients

    Now, grab a medium bowl and combine your all-purpose flour, cocoa powder, baking soda, and salt. This dry mix is the foundation for your cookies, setting you up for success. Just whisk them together until they’re well blended. Feel free to give this mix the attention it deserves; it helps to ensure a perfect cookie base!

    Cream the Butter and Sugars

    In a larger bowl, it’s time to whip up the butter and sugars! Using a mixer, blend the unsalted butter with both granulated and light brown sugars until the mixture turns light and fluffy—about 2 to 3 minutes. This step is crucial; the fluffiness gives the cookies that melt-in-your-mouth texture everyone will swoon over!

    Add the Egg and Flavorings

    Now that your butter-sugar blend is perfect, crack in your large egg. Mix well until it’s fully incorporated. Next up, pour in the vanilla extract, vinegar, and red food coloring. This combination not only adds flavor but also gives those beautiful red velvet vibes. Make sure all ingredients are mixed nicely for that signature taste!

    Combine Wet and Dry Mixtures

    Time to bring it all together! Gradually add the dry ingredients to your wet mixture, mixing just until combined. Be careful not to over-mix; we want fluffy, tender cookies, not tough ones. You’ll know it’s ready when there are no dry patches—just a lovely, red-tinged dough!

    Shape the Cookie Dough

    Now, let’s portion out your dough! Use a tablespoon to scoop out about 1.5 tablespoons of dough. Roll them gently into balls and space them about 2 inches apart on your baking sheet. This gives them room to spread while baking. It’s like giving them a cozy spot to grow!

    Bake the Cookies

    Slide those sheets into your preheated oven and bake for 7 to 9 minutes. The cookies should look set but still soft in the center. Be careful not to overbake; a gentle touch is what makes them delightful! Trust your instincts; these Red Velvet Cookie Sandwiches are a labor of love!

    Cool the Cookies

    Once they’re out of the oven, let the cookies cool on the baking sheets for about 4 to 5 minutes. This cooling time helps them firm up nicely. After they’ve cooled a bit, transfer them onto a wire rack to cool completely. Patience is key here—good things come to those who wait!

    Prepare the Cream Cheese Frosting

    While the cookies cool, let’s whip up that luscious cream cheese frosting. In a mixing bowl, combine the softened cream cheese and unsalted butter. Beat until the mixture is smooth and creamy. Gradually add half of the powdered sugar and mix again. Then, throw in the remaining sugar along with the vanilla extract. Mix until smooth and velvety. It should make you want to dive right in!

    Assemble the Sandwiches

    Now comes the fun part! Take your cooled cookies and pipe frosting onto the flat side of one cookie. Place another cookie on top to create a sandwich. Repeat this until all your cookies are filled. You could totally take this opportunity to sneak a taste of that frosting—it’s too good to resist!

    Add Finishing Touches

    To make these cookie sandwiches even more delightful, add sprinkles to the edges of the frosting if you like. This little detail adds a pop of color and fun. Once you’ve finished assembling all the sandwiches, pop them in the refrigerator until you’re ready to serve. Your Red Velvet Cookie Sandwiches will be the star of the show!

    Tips for Success

    • Use room temperature ingredients for the best texture.
    • Don’t overmix the dough to keep cookies fluffy.
    • Watch the baking time closely to avoid overbaking.
    • Let the cookies cool fully before frosting to prevent melting.
    • Feel free to adjust food coloring for a bolder hue.
    • Store in an airtight container to keep them soft.

    Equipment Needed

    • Baking sheets: A must for any cookie recipe; use any sturdy sheet available.
    • Parchment paper or silicone baking mats: Great for easy cleanup and cookie release.
    • Mixing bowls: Use varying sizes for dry and wet ingredients.
    • Hand mixer or stand mixer: Essential for creaming butter and sugars.
    • Piping bag or plastic zip-lock: Perfect for frosting assembly.

    Variations

    • Gluten-free: Substitute all-purpose flour with a gluten-free blend to accommodate dietary needs.
    • Coconut cream frosting: Swap cream cheese frosting for coconut cream frosting for a tropical twist.
    • Chocolate chips: Fold in mini chocolate chips into the cookie dough for added sweetness and texture.
    • Nuts: Add chopped walnuts or pecans for a delightful crunch within the cookie sandwiches.
    • Different colors: Get creative and use other food coloring for unique holiday-themed cookie sandwiches.

    Serving Suggestions

    • Pair these Red Velvet Cookie Sandwiches with a cold glass of milk for a classic treat.
    • Serve them alongside a rich coffee or hot cocoa for an indulgent dessert experience.
    • For a special touch, display on a decorative stand at gatherings.
    • Add a fresh strawberry or raspberry on the side for a pop of color.

    FAQs about Red Velvet Cookie Sandwiches

    Can I make these Red Velvet Cookie Sandwiches ahead of time?

    Absolutely! You can bake the cookies in advance and store them in an airtight container for a few days. Just frost them right before serving to keep the filling fresh and creamy.

    What’s the best way to store leftover cookie sandwiches?

    To keep those delightful cookie sandwiches fresh, store them in an airtight container at room temperature. They’ll stay soft for about 3-4 days.

    Can I freeze Red Velvet Cookie Sandwiches?

    Yes! You can freeze the assembled sandwiches for up to 2 months. Just wrap them tightly in plastic wrap or aluminum foil. They’ll be great for when those cookie cravings hit!

    What can I substitute for cream cheese frosting?

    If cream cheese isn’t your style, you can use whipped buttercream or even a chocolate ganache. Both will add their own special touch to these Red Velvet Cookie Sandwiches!

    Can I make these cookie sandwiches without food coloring?

    Yes, you can! If you prefer a more natural look, feel free to skip the food coloring. Your cookies will still taste delicious, though they won’t have that classic red hue.

    Final Thoughts

    Creating these Red Velvet Cookie Sandwiches is more than just a baking project; it’s about cultivating joy and connection. Whether you’re sharing them with family, friends, or simply indulging solo, each bite brings a wave of happiness. The vibrant color and creamy filling spark smiles and sweet moments. Plus, with easy steps and delightful results, you can play the role of a pastry chef right at home. Life can get hectic, but these little treats remind us to take a pause and savor sweet experiences. So go on, bake some love into your day!


    Print

    clock clock iconcutlery cutlery iconflag flag iconfolder folder iconinstagram instagram iconpinterest pinterest iconfacebook facebook iconprint print iconsquares squares iconheart heart iconheart solid heart solid icon

    Description

    Delicious red velvet cookie sandwiches filled with creamy frosting, perfect for any occasion.


    • 2 1/4 cups + 1 tbsp (300g) all-purpose flour
    • 2 tbsp (14g) natural unsweetened cocoa powder
    • 3/4 tsp baking soda
    • 3/4 tsp salt
    • 3/4 cup (168g) unsalted butter, room temperature
    • 1/2 cup (104g) sugar
    • 1/2 cup (112g) light brown sugar
    • 1 large egg
    • 1 1/2 tsp vanilla extract
    • 2 tsp vinegar
    • 1 1/2 tbsp red food coloring
    • 8 oz (226g) cream cheese, room temperature
    • 6 tbsp (86g) unsalted butter, room temperature
    • 4 cups (460g) powdered sugar
    • 1 tsp vanilla extract
    • Sprinkles (optional)

    1. Preheat oven to 350°F (180°C). Line baking sheets with parchment paper or silicone baking mats. Set aside.
    2. Combine the flour, cocoa powder, baking soda and salt in a medium bowl and set aside.
    3. Cream the butter and sugars together in a large mixer bowl on medium speed until light in color and fluffy, 2-3 minutes.
    4. Add the egg and mix until well combined.
    5. Add the vanilla extract, vinegar and red food coloring and mix until well combined.
    6. Add the dry ingredients and mix just until well combined.
    7. Create 1 1/2 tablespoon sized balls of cookie dough. Gently roll into a ball and set the balls on the baking sheet, about 2 inches apart.
    8. Bake cookies for 7-9 minutes. The cookies will spread and the centers will look soft, but should just look done.
    9. Remove from the oven and allow to cool on baking sheets for 4-5 minutes before transferring to a wire rack to cool completely.
    10. Combine the cream cheese and butter in a large mixer bowl and mix until well combined and smooth.
    11. Add about half of the powdered sugar and mix until well combined and smooth.
    12. Add the vanilla extract and mix until well combined and smooth.
    13. Add the remaining powdered sugar and mix until well combined and smooth.
    14. Add the frosting to a piping bag and pipe frosting onto one cookie at a time, then add a second cookie on top to create the sandwich.
    15. Add sprinkles to the sides of the frosting, if desired. Refrigerate until ready to serve.
    16. Serve at room temperature and enjoy within 3-4 days.

    Notes

    • Cookies firm up as they cool, do not overbake.
    • Best enjoyed within 3-4 days of making.
    • Prep Time: 20 minutes
    • Cook Time: 10 minutes
    • Category: Dessert
    • Method: Baking
    • Cuisine: American

    Nutrition

    • Serving Size: 1 sandwich
    • Calories: 250
    • Sugar: 18g
    • Sodium: 180mg
    • Fat: 10g
    • Saturated Fat: 5g
    • Unsaturated Fat: 3g
    • Trans Fat: 0g
    • Carbohydrates: 36g
    • Fiber: 1g
    • Protein: 2g
    • Cholesterol: 25mg

    Sharing is caring!

  • Zesty Greek Orzo Salad

    Zesty Greek Orzo Salad


    Introduction to Zesty Greek Orzo Salad

    Hey there, fellow food lovers! If you’re looking for something fresh, vibrant, and absolutely delightful, you’re in for a treat with this Zesty Greek Orzo Salad. This salad is not just a dish; it’s an experience that brings the essence of summer right to your kitchen, even on the busiest days. I love whipping it up as a quick solution for those hectic nights when I want something nourishing yet delicious. Trust me, whether you’re feeding your family or impressing friends, this salad is sure to make everyone smile!

    Why You’ll Love This Zesty Greek Orzo Salad

    This Zesty Greek Orzo Salad is a dream come true for anyone juggling a busy life. It’s incredibly easy to make, taking only 25 minutes from start to finish! The vibrant flavors burst in your mouth, making it a tasty option for lunches, picnics, or family dinners. Plus, it’s customizable, allowing you to swap ingredients to please even the pickiest eaters. Who wouldn’t love a salad that’s quick, nutritious, and absolutely delicious?

    Ingredients for Zesty Greek Orzo Salad

    Gathering the right ingredients for your Zesty Greek Orzo Salad is half the fun! Here’s what you’ll need:

    • Orzo pasta: These tiny pasta pieces soak up flavors wonderfully and are the star of the dish. Make sure to cook it al dente for the perfect texture.
    • Cherry tomatoes: Juicy and sweet, they add a burst of freshness. Halving them allows their juices to mingle throughout the salad.
    • Cucumber: Crunchy and refreshing, cucumbers offer a nice contrast to the other flavors while keeping things light.
    • Red onion: A bit of sharpness complements the salad beautifully. Finely chopped red onion will add a subtle zing without overwhelming the other ingredients.
    • Kalamata olives: Salty and briny, these olives give that authentic Greek flavor. If you’re not a fan, feel free to swap them for green olives.
    • Feta cheese: Creamy and tangy, crumbled feta makes this salad sing! If you’re looking for a vegan option, just omit it or use a plant-based alternative.
    • Fresh parsley: Chopped parsley adds color and a fresh herbal note. It’s a simple touch that really brightens the dish.
    • Olive oil: A good-quality olive oil elevates the vinaigrette, adding richness and depth. You can also explore flavored oils for an extra kick!
    • Lemon juice: Bright and zesty, fresh lemon juice brings everything together, giving the salad a refreshing taste.
    • Dijon mustard: This little ingredient adds a tangy kick that boosts the salad’s flavor complexity.
    • Garlic: Minced garlic brings warmth and a gentle kick. You can adjust it based on your preference for intensity.
    • Dried oregano: A classic herb in Mediterranean cuisine, oregano adds a wonderful aroma and flavor that speaks to the salad’s Greek roots.
    • Salt and pepper: Essential for seasoning! Adjust these according to your taste to enhance all the flavors.

    For the exact quantities of each ingredient, be sure to check at the bottom of the article where you can print this recipe out for convenience!

    How to Make Zesty Greek Orzo Salad

    Making this Zesty Greek Orzo Salad is a fun and rewarding experience! Follow these easy steps, and you’ll have a delicious and colorful salad ready in no time!

    Step 1: Cook the Orzo Pasta

    Start by bringing 1 ½ cups of water to a boil in a medium saucepan.

    Add the orzo pasta and cook it according to the package instructions. Usually, it takes about 8-10 minutes to achieve that perfect al dente texture. Not too soft, just the right bite!

    Once done, drain the pasta and rinse it under cold water. This stops the cooking process and keeps the orzo from becoming mushy.

    Step 2: Prepare the Vegetables

    While your orzo is cooking, it’s time to chop up the fresh veggies.

    Start with the cherry tomatoes; halving them releases their juices, making every bite juicy and flavorful. Then dice the cucumber for that delightful crunch.

    When it comes to the red onion, remember to chop it finely. This way, everyone gets just the right hint of flavor without bites that are too overpowering.

    Finally, slice the Kalamata olives for that classic Greek touch!

    Step 3: Make the Lemon Vinaigrette

    Now let’s whip up the zesty lemon vinaigrette! In a small bowl or jar, combine olive oil, fresh lemon juice, and Dijon mustard. Don’t forget to add the minced garlic and dried oregano.

    Whisk or shake vigorously until the vinaigrette is well mixed. This emulsification process is key— it brings all the flavors together, like a loving embrace for your salad!

    Step 4: Combine Ingredients

    In a large mixing bowl, combine the cooked orzo with the chopped vegetables.

    Next, gently pour the lemon vinaigrette over your salad mixture. Toss everything together carefully, so the vegetables don’t get squished.

    A gentle touch ensures your salad looks vibrant and fresh when serving!

    Step 5: Adjust Seasoning and Chill

    Now for the fun part—taste testing! Adjust the seasoning with salt and pepper to suit your palate.

    For the best flavor, place your salad in the refrigerator to chill for at least 30 minutes. This allows the ingredients to meld beautifully. Serve it cold or at room temperature, and enjoy the refreshing bliss of your Zesty Greek Orzo Salad!

    Tips for Success

    • Always rinse the orzo after cooking to prevent clumping. Trust me; it makes a difference!
    • Use the freshest vegetables you can find. Crisp cucumbers and ripe tomatoes elevate your salad.
    • Give your vinaigrette a taste test. Feel free to tweak the lemon or seasoning to suit your flavor preferences.
    • Make it a day ahead! This salad gets even better as it sits in the fridge.
    • Keep it colorful! A mix of veggies not only enhances the dish visually but adds different nutrients.

    Equipment Needed

    • Medium saucepan: Essential for cooking the orzo. A large pot works, too, if that’s what you have on hand.
    • Mixing bowl: A large bowl for combining all your ingredients. Any bowl you have will do!
    • Whisk or jar with a lid: Perfect for mixing the vinaigrette. A fork can work in a pinch!
    • Cutting board and knife: Necessary for prepping those fresh veggies. A good quality knife makes chopping easier!

    Variations of Zesty Greek Orzo Salad

    • Protein-Packed: Add grilled chicken or shrimp for a heartier meal. This variation is great if you’re looking to increase your protein intake.
    • Extra Veggies: Toss in some bell peppers, spinach, or zucchini for extra color and nutrients. The more, the merrier!
    • Quinoa Swap: If you’re seeking a gluten-free option, substitute orzo with quinoa. It has a lovely nutty flavor that complements the salad well.
    • Herb Infusion: Experiment with fresh herbs like mint or dill. They can add a new dimension and freshness to your salad!
    • Spicy Kick: For those who enjoy a bit of heat, add a pinch of crushed red pepper flakes or diced jalapeños to the vinaigrette.
    • Creamy Twist: Mix in some avocado or replace feta with a dollop of Greek yogurt for a creamy texture.

    Serving Suggestions for Zesty Greek Orzo Salad

    • Pair with Grilled Meats: This salad complements grilled chicken or lamb beautifully. It adds a refreshing side to any main dish.
    • Serve with Pita Bread: Soft pita rounds are perfect for scooping up this zesty goodness!
    • Refreshing Beverages: Enjoy with iced tea or a chilled glass of white wine for a delightful meal.
    • Colorful Presentation: Serve in a large wooden bowl to emphasize freshness—don’t forget to garnish with extra parsley!

    FAQs about Zesty Greek Orzo Salad

    Can I make Zesty Greek Orzo Salad ahead of time?
    Absolutely! This salad is fantastic for meal prep. Make it a day in advance, and let those flavors meld beautifully in the fridge.

    What can I substitute for orzo in this recipe?
    If you’re looking for a gluten-free version, quinoa is a great alternative. You could also try using farro or even rice for a different texture!

    Is this Zesty Greek Orzo Salad suitable for vegans?
    Yes, simply omit the feta cheese or replace it with a plant-based alternative. The rest of the ingredients are all vegan-friendly!

    Can I add protein to this salad?
    Definitely! Grilled chicken, shrimp, or chickpeas make excellent additions, transforming your orzo salad into a heartier meal.

    How long does this salad last in the fridge?
    Zesty Greek Orzo Salad can be stored in the refrigerator for up to 3-4 days. Just be sure to keep it in an airtight container!

    Final Thoughts

    In the hustle and bustle of our daily lives, this Zesty Greek Orzo Salad shines like a beacon of freshness and flavor. It’s more than just a side; it’s a celebration of vibrant ingredients that come together in a symphony of taste. Each bite is a joyful reminder to savor the moment, whether you’re sharing it with family or enjoying it solo. So, next time you find yourself in need of a quick, refreshing meal, remember this delightful salad. Trust me, it’ll quickly become a staple in your kitchen, bringing smiles and satisfaction to your table!


    Print

    clock clock iconcutlery cutlery iconflag flag iconfolder folder iconinstagram instagram iconpinterest pinterest iconfacebook facebook iconprint print iconsquares squares iconheart heart iconheart solid heart solid icon

    Description

    A refreshing salad featuring orzo pasta, fresh vegetables, and a zesty lemon vinaigrette.


    • 1 cup orzo pasta
    • 1 ½ cups water
    • 1 cup cherry tomatoes, halved
    • 1 cucumber, diced
    • ½ red onion, finely chopped
    • ½ cup Kalamata olives, pitted and sliced
    • ½ cup feta cheese, crumbled
    • ¼ cup fresh parsley, chopped
    • Salt and pepper to taste
    • For the Lemon Vinaigrette:
    • ¼ cup olive oil
    • 2 tablespoons fresh lemon juice
    • 1 teaspoon Dijon mustard
    • 1 clove garlic, minced
    • ½ teaspoon dried oregano
    • Salt and pepper to taste

    1. In a medium saucepan, bring 1 ½ cups of water to a boil. Add the orzo pasta and cook according to package instructions, usually about 8-10 minutes, until al dente. Drain and rinse under cold water to stop the cooking process. Set aside.
    2. While the orzo is cooking, chop the cherry tomatoes, cucumber, red onion, and olives. Place them in a large mixing bowl.
    3. In a small bowl or jar, combine the olive oil, fresh lemon juice, Dijon mustard, minced garlic, dried oregano, salt, and pepper. Whisk or shake well until emulsified.
    4. Add the cooked and cooled orzo to the bowl with the chopped vegetables. Pour the lemon vinaigrette over the salad and toss gently to combine.
    5. Gently fold in the crumbled feta cheese and chopped parsley, ensuring they are evenly distributed throughout the salad.
    6. Taste the salad and adjust seasoning with salt and pepper as needed. Chill in the refrigerator for at least 30 minutes before serving to allow the flavors to meld. Serve cold or at room temperature.

    Notes

    • For a vegan option, omit the feta cheese or use a plant-based alternative.
    • This salad can be made ahead of time and stored in the refrigerator for several days.
    • Prep Time: 15 minutes
    • Cook Time: 10 minutes
    • Category: Salad
    • Method: No Cook
    • Cuisine: Greek

    Nutrition

    • Serving Size: 1 cup
    • Calories: 250
    • Sugar: 3g
    • Sodium: 400mg
    • Fat: 15g
    • Saturated Fat: 3g
    • Unsaturated Fat: 10g
    • Trans Fat: 0g
    • Carbohydrates: 23g
    • Fiber: 3g
    • Protein: 6g
    • Cholesterol: 10mg

    Sharing is caring!

  • Fried Cabbage with Shrimp, Sausage & Bacon

    Fried Cabbage with Shrimp, Sausage & Bacon


    Introduction to Fried Cabbage with Shrimp, Sausage & Bacon

    Let’s be honest: life gets hectic. With work, kids, and a million things on our plates, sometimes dinner can feel like a chore. That’s where my Fried Cabbage with Shrimp, Sausage & Bacon comes in. It’s a flavorful dish that brings together hearty, savory ingredients in just 40 minutes! Not only is it quick to prepare, but this meal also packs a punch with delicious flavors that will impress your loved ones. Whether you’re just cooking for yourself or your whole family, this dish promises to be a delightful treat on any busy day.

    Why You’ll Love This Fried Cabbage with Shrimp, Sausage & Bacon

    This dish is not just easy to whip up, it’s also incredibly satisfying. In less than 40 minutes, you’ll have a mouthwatering meal that blends the smoky flavors of sausage and bacon with tender cabbage and juicy shrimp. Plus, the versatility allows you to enjoy it as a main course or a hearty side. It’s comfort food that fits perfectly into your busy schedule without compromising on taste.

    Ingredients Used in Fried Cabbage with Shrimp, Sausage & Bacon

    Let’s dive into the deliciousness that makes up my Fried Cabbage with Shrimp, Sausage & Bacon. Each ingredient plays a vital role in the overall flavor and texture of this dish. Here’s what you’ll need:

    • Cabbage: This leafy green adds bulk and absorbs the savory flavors. I find that a medium-sized head works perfectly for four servings.
    • Smoked Sausage: Sliced smoked sausage brings a delightful smokiness. You can use turkey sausage if you prefer a lighter option.
    • Bacon: The crispy bacon adds a salty crunch that takes the dish over the top. Feel free to swap in turkey bacon for a healthier twist.
    • Shrimp: Peeled and deveined shrimp cook quickly, adding a lovely seafood touch. Fresh or frozen both work beautifully!
    • Onion: Diced onion introduces a sweet earthy flavor. I prefer yellow or white onions for their sweetness in sautéing.
    • Garlic: Minced garlic gives the dish a fragrant kick. Fresh garlic is unbeatable, but jarred can save you time!
    • Olive Oil: This is essential for sautéing the ingredients to perfection. If you want a hint of spice, feel free to try chili-infused olive oil!
    • Salt and Pepper: Simple seasonings to elevate all the flavors. Adjust to your taste, as some sausages may already be salty.

    For exact measurements of each ingredient, you can find them at the bottom of the article for easy printing. Happy cooking!

    How to Make Fried Cabbage with Shrimp, Sausage & Bacon

    Now let’s get cooking! This Fried Cabbage with Shrimp, Sausage & Bacon recipe is easy to follow, and I promise you’ll be left with a plate full of deliciousness. Follow the steps below, and you’ll see how quickly this savory dish comes together.

    Step 1: Prepare the Cabbage

    First things first: let’s get that cabbage ready. Remove the outer leaves and rinse it under cold water. Then, slice it thinly so it cooks evenly. It’s like unraveling a tasty treasure waiting to be sautéed. You can even use pre-shredded cabbage from the grocery store to save some time!

    Step 2: Cook the Bacon

    Next up, it’s bacon time! In a large skillet, cook the chopped bacon on medium heat. Keep an eye on it; you want it crispy and golden, just enough to unlock that irresistible smoky flavor. Once it’s done, transfer the bacon to a paper towel-lined plate. Don’t toss the bacon grease yet; we will use that for maximum flavor!

    Step 3: Sauté Onion and Garlic

    In the same skillet with the leftover bacon grease, sauté the diced onion and minced garlic. This will create a fragrant base for your dish. Cook until the onion becomes translucent, which should take about 3-5 minutes. The aroma is mouthwatering, isn’t it? If you’re short on time, feel free to use pre-diced onions!

    Step 4: Add Sausage and Shrimp

    Now, let’s amp up the flavor! Add the sliced smoked sausage to the skillet and cook until browned. A few minutes will do the trick. After that, toss in the shrimp. They’ll turn a beautiful shade of pink when they’re done, usually within 3-4 minutes. It’s a joyful sight, especially when you see those colors dance in your pan!

    Step 5: Incorporate Cabbage

    Time for the star of the show: the cabbage! Stir it into the skillet, letting it mix with all those flavors. Cook until it’s slightly wilted and tender, which should take about 5-7 minutes. This is where the magic truly happens—the cabbage absorbs all the delightful goodness from the other ingredients.

    Step 6: Season and Serve

    Lastly, sprinkle some salt and pepper to taste and give it a good stir. Now, plate your Fried Cabbage with Shrimp, Sausage & Bacon and don’t be shy about topping it with that crispy bacon you set aside earlier. Serve hot, and watch your family devour this treasure in no time!

    Tips for Success

    • Don’t rush the cooking process; allow each ingredient to develop its flavor.
    • For extra crunch, add fresh vegetables like bell peppers or carrots.
    • Use a large skillet to prevent overcrowding, which allows even cooking.
    • If using frozen shrimp, ensure they are fully thawed to avoid excess water.
    • Feel free to adjust seasonings depending on your preference for heat or salt.

    Equipment Needed for Fried Cabbage with Shrimp, Sausage & Bacon

    • Large skillet: A non-stick skillet works best for easy cooking.
    • Cutting board: Essential for chopping your veggies and sausage safely.
    • Sharp knife: A good knife ensures smooth slicing and dicing.
    • Slotted spoon: Perfect for removing ingredients without excess grease.
    • Measuring spoons: Useful for precise seasoning, though not entirely necessary.

    Variations on Fried Cabbage with Shrimp, Sausage & Bacon

    • For a spicy kick, toss in some diced jalapeños or red pepper flakes to heat things up.
    • Try using different proteins like chicken, turkey, or tofu for a vegetarian version.
    • Add some fresh herbs like cilantro or parsley for a pop of color and freshness.
    • Substitute the smoked sausage with a spicy chorizo for a bold flavor twist.
    • Incorporate other vegetables like zucchini or bell peppers for added nutrition and color.

    Serving Suggestions for Fried Cabbage with Shrimp, Sausage & Bacon

    • Pair this dish with fluffy rice or crusty bread to soak up the delicious flavors.
    • Finish with a sprinkle of fresh parsley for color and freshness.
    • Serve alongside a crisp salad for a refreshing balance.
    • Consider a light white wine or iced tea to complement the meal.
    • For a touch of elegance, use colorful plates to brighten up your table.

    FAQs about Fried Cabbage with Shrimp, Sausage & Bacon

    Cooking is often filled with questions, especially when it comes to a delightful dish like Fried Cabbage with Shrimp, Sausage & Bacon. Here are some frequently asked questions to help you on your culinary journey.

    Can I use frozen shrimp in this recipe?

    Absolutely! Frozen shrimp are a great time-saver. Just make sure to thaw them completely before sautéing, so they don’t release too much water into the dish.

    What can I substitute for sausage?

    If you’d like a lighter option, turkey sausage works wonderfully. For a vegetarian choice, try using plant-based sausage or even chickpeas for protein!

    Is this dish suitable for meal prep?

    Yes! Fried Cabbage with Shrimp, Sausage & Bacon stores nicely in an airtight container in the fridge for a few days. It’s perfect for reheating during a busy week!

    Can I add more vegetables to this dish?

    Definitely! Feel free to add bell peppers, carrots, or even spinach for extra nutrients and color. The dish can be as versatile as your veggies!

    How spicy is this dish? Can I adjust the heat?

    The dish is not inherently spicy, but you can easily adjust the heat by adding crushed red pepper flakes or diced jalapeños according to your taste. Enjoy experimenting!

    Final Thoughts

    Making Fried Cabbage with Shrimp, Sausage & Bacon has been an absolute joy in my kitchen. This dish brings warmth and comfort to the table, creating a delightful experience for family dinners or quick weeknight meals. The combination of flavors—smoky sausage, crispy bacon, and tender cabbage—truly creates a symphony of taste. Not only is it satisfying, but it also allows for personal touches, ensuring every cook can make it their own. As the aroma wafts through your home, you’ll realize this recipe isn’t just a meal; it’s a moment of connection around the dining table!


    Print

    clock clock iconcutlery cutlery iconflag flag iconfolder folder iconinstagram instagram iconpinterest pinterest iconfacebook facebook iconprint print iconsquares squares iconheart heart iconheart solid heart solid icon

    Description

    A delicious dish combining fried cabbage with shrimp, sausage, and bacon for a savory flavor experience.


    • 1 medium-sized cabbage
    • 1 pound smoked sausage, sliced
    • 6 slices bacon, chopped
    • 1 pound shrimp, peeled and deveined
    • 1 onion, diced
    • 3 cloves garlic, minced
    • 2 tablespoons olive oil
    • Salt and pepper to taste

    1. Prepare the cabbage by slicing it thinly after removing the outer leaves and rinsing.
    2. Cook the chopped bacon until crispy and brown, then set aside.
    3. Sauté diced onion and minced garlic in bacon grease until translucent.
    4. Add sliced sausage to the skillet with onion and garlic, cook until browned, then add shrimp and cook until pink.
    5. Stir in the cabbage and cook until slightly wilted and tender.
    6. Season with salt and pepper to taste.
    7. Serve hot and enjoy!

    Notes

    • Feel free to adjust the seasoning according to your taste.
    • This dish can be served as a main course or a side dish.
    • Leftovers can be stored in an airtight container in the fridge for a few days.
    • Prep Time: 15 minutes
    • Cook Time: 25 minutes
    • Category: Main Course
    • Method: Stovetop
    • Cuisine: American

    Nutrition

    • Serving Size: 1 serving
    • Calories: 350
    • Sugar: 2g
    • Sodium: 800mg
    • Fat: 20g
    • Saturated Fat: 6g
    • Unsaturated Fat: 11g
    • Trans Fat: 0g
    • Carbohydrates: 20g
    • Fiber: 4g
    • Protein: 25g
    • Cholesterol: 150mg

    Sharing is caring!

  • Spicy Lemon Garlic Shrimp

    Spicy Lemon Garlic Shrimp


    Introduction to Spicy Lemon Garlic Shrimp

    Let’s face it, some days you just want dinner to be quick, easy, and packed with flavor. That’s where my Spicy Lemon Garlic Shrimp comes into play. This dish is a burst of zesty goodness that hits all the right notes. It’s perfect for busy moms like us who need a scrumptious meal on the table in no time. With just a handful of fresh ingredients, you can whip up a delightful dinner that will impress your family and friends. Trust me, this is one recipe you’ll want to keep on repeat!

    Why You’ll Love This Spicy Lemon Garlic Shrimp

    This Spicy Lemon Garlic Shrimp is not just a meal; it’s a lifesaver on hectic weekdays! It comes together in under 20 minutes, freeing up precious time for you to kick back or help the kids with homework. The delightful combination of vibrant citrus and aromatic garlic will have everyone around the table swooning. Plus, it’s versatile enough to pair with rice, pasta, or even a light salad, making it a win for any busy kitchen!

    Ingredients for Spicy Lemon Garlic Shrimp

    Let’s dive into what you’ll need for this scrumptious dish. The best part? Most of these ingredients are likely already in your pantry or fridge!

    • Large shrimp: Peeled and deveined for easy cooking and maximum flavor.
    • Olive oil: A staple in my kitchen. It adds richness while keeping the dish light.
    • Garlic: Freshly minced brings a spicy aroma that makes your taste buds dance with excitement.
    • Red chili flakes: This is what gives our shrimp its spice! Adjust to your personal heat preference.
    • Fresh lemon juice: Brightens the dish and balances the richness of the butter.
    • Lemon zest: A little sprinkle packs a punch of lemony freshness!
    • Unsalted butter: For a luxurious finish that ties all the flavors together.
    • Fresh parsley: This adds a pop of color and a fresh herbaceous note.
    • Salt and pepper: Simple seasoning to enhance the dish’s innate flavors.

    If you’re looking for optional ingredients, consider adding a splash of white wine or even some diced tomatoes to enrich the sauce. For substitutions, frozen shrimp will work in a pinch, but fresh is always best for flavor. The exact quantities for all these ingredients are at the bottom of the article for your convenience!

    How to Make Spicy Lemon Garlic Shrimp

    Now that you have all your ingredients ready, let’s jump right into making this fabulous Spicy Lemon Garlic Shrimp!

    Step 1: Peel and Devein the Shrimp

    If you haven’t done this yet, grab your shrimp and get to peeling! It’s quick work; just remove the shell and the dark vein along the back. Pat them dry with a paper towel. Dry shrimp soak up flavors better. Plus, it helps them sear nicely!

    Step 2: Heat the Olive Oil

    Next, heat two tablespoons of olive oil in a large skillet over medium-high heat. The oil should shimmer lightly; this means it’s hot and ready! Using a nice, non-stick skillet helps prevent any shrimp from sticking.

    Step 3: Add the Garlic and Chili Flakes

    Now, let’s bring on that incredible aroma! Toss the minced garlic and red chili flakes into the skillet. Stir them for about a minute until fragrant. Just be careful not to burn the garlic—it can turn bitter in a heartbeat!

    Step 4: Cook the Shrimp

    Time to add the shrimp! Arrange them in a single layer in the skillet. Let them cook for about 2 minutes per side until they turn pink and opaque. Remember, overcooked shrimp can become rubbery. So keep an eye on them!

    Step 5: Stir in the Lemon Juice and Butter

    Lower the heat to medium. Now, it’s time for the stars of the show: lemon juice and butter! Stir these in and allow them to coat the shrimp evenly. This is where your dish transforms into a luscious, tangy delight.

    Step 6: Season the Dish

    Sprinkle the shrimp with salt and pepper to taste. It’s amazing how just a bit of seasoning can elevate your dish! Feel free to adjust based on your preference; taste as you go!

    Step 7: Toss in Fresh Parsley

    Remove the skillet from heat and toss in the chopped fresh parsley. Not only does it add a color boost, but it also brings a fresh note to the dish. Give everything a good stir to mix and mingle those flavors.

    Step 8: Serve Hot

    Your Spicy Lemon Garlic Shrimp is ready to shine! Transfer it to a serving dish and enjoy immediately. Pair it with a side of rice or pasta to soak up all that delicious sauce. Trust me, you’ll want every last drop!

    Tips for Success

    • Always use fresh shrimp for maximum flavor and tenderness.
    • Don’t rush the garlic; let it become fragrant but not burnt.
    • Adjust the chili flakes to cater to your family’s spice tolerance.
    • For best results, pat your shrimp dry before cooking.
    • Experiment with adding vegetables like bell peppers for extra color and nutrients.

    Equipment Needed

    • Large skillet: A non-stick version makes cooking easier, but any skillet will do!
    • Spatula: A silicone spatula is great for stirring without scratching your skillet.
    • Measuring spoons: Handy for precise ingredient amounts.
    • Knife and cutting board: Essential for chopping herbs and garlic.

    Variations of Spicy Lemon Garlic Shrimp

    • Garlic Butter Shrimp: Omit the chili flakes for a creamy garlic version that’s still rich and satisfying.
    • Lemon Herb Shrimp: Add fresh herbs like thyme or oregano for a fragrant twist; this adds layers of flavor.
    • Vegetable Medley: Toss in sliced bell peppers, zucchini, or asparagus with the shrimp for a colorful and nutritious addition.
    • Coconut Curry Shrimp: Add a splash of coconut milk and a tablespoon of curry powder for an exotic spin that’s creamy and aromatic.
    • Spicy Shrimp Tacos: Use this shrimp as a filling for tacos. Serve with avocado and slaw for a fun, casual meal!

    Serving Suggestions for Spicy Lemon Garlic Shrimp

    • Pair the shrimp with fluffy jasmine rice to soak up that zesty sauce.
    • Serve over al dente pasta, drizzling with extra lemon juice for brightness.
    • Accompany with a light salad, perhaps with arugula and cherry tomatoes.
    • Enjoy with a crisp white wine, like Sauvignon Blanc, for a refreshing complement.
    • Garnish with additional lemon wedges and parsley for a vibrant presentation!

    FAQs about Spicy Lemon Garlic Shrimp

    Curious about making your Spicy Lemon Garlic Shrimp? Let me address some common questions that often pop up!

    Can I use frozen shrimp for this recipe?

    Absolutely! Just make sure to thaw them properly before cooking. That way, you ensure they cook evenly and maintain their lovely texture.

    How spicy is the Spicy Lemon Garlic Shrimp?

    The spice level really depends on how much red chili flakes you add. Start with a small amount, taste it, and adjust to find your sweet spot. You can always add more heat!

    What’s the best way to store leftovers?

    Store any leftovers in an airtight container in the fridge for up to two days. Reheat gently on the stove to preserve the flavors. Just don’t overcook!

    Is this dish suitable for meal prep?

    Yes! You can prepare the shrimp in advance. Just don’t toss in the parsley until ready to serve. It adds freshness that might get lost during storage.

    What can I add for extra flavor?

    Try a splash of white wine when you add the shrimp. It deepens the flavor tremendously. You can also experiment with different herbs like dill or cilantro for a fun twist!

    Final Thoughts

    Every time I make this Spicy Lemon Garlic Shrimp, it feels like a little culinary celebration at home. The bold flavors and quick prep time make it a go-to recipe that conquers weeknight chaos beautifully. This dish is more than just food; it’s a delightful experience that brings everyone together at the table. Watching my loved ones relish each bite fills my heart with joy. So, whether you’re a busy mom or a professional hustling through the day, let this shrimp dish be your secret weapon in creating delicious memories without the fuss. Happy cooking!


    Print

    clock clock iconcutlery cutlery iconflag flag iconfolder folder iconinstagram instagram iconpinterest pinterest iconfacebook facebook iconprint print iconsquares squares iconheart heart iconheart solid heart solid icon

    Description

    A quick and zesty shrimp dish with bold flavors of lemon, garlic, and a touch of spice.


    • 1 lb large shrimp, peeled and deveined
    • 2 tablespoons olive oil
    • 4 cloves garlic, minced
    • 1 teaspoon red chili flakes (adjust to taste)
    • 2 tablespoons fresh lemon juice
    • 1 teaspoon lemon zest
    • 1 tablespoon unsalted butter
    • 1 tablespoon chopped fresh parsley
    • Salt and pepper, to taste

    1. Peel and Devein: If not already done, peel and devein the shrimp, patting them dry with a paper towel.
    2. Heat the Oil: Heat the olive oil in a large skillet over medium-high heat.
    3. Add the Garlic: Add the minced garlic and red chili flakes to the skillet, stirring for about 1 minute until fragrant.
    4. Add the Shrimp: Place the shrimp in the skillet in a single layer. Cook for 2 minutes per side until pink and opaque.
    5. Add Lemon and Butter: Lower the heat to medium. Stir in the lemon juice, lemon zest, and butter, coating the shrimp evenly in the sauce.
    6. Season: Sprinkle with salt and pepper to taste.
    7. Add Parsley: Remove the skillet from heat and toss in the fresh parsley.
    8. Serve Hot: Transfer to a serving dish and enjoy immediately.

    Notes

    • Adjust the chili flakes for your desired level of spiciness.
    • Serve this dish over rice or pasta for a heartier meal.
    • Fresh shrimp will yield the best flavor and texture.
    • Prep Time: 10 minutes
    • Cook Time: 10 minutes
    • Category: Main Course
    • Method: Sauté
    • Cuisine: Seafood

    Nutrition

    • Serving Size: 1 serving
    • Calories: 220
    • Sugar: 0g
    • Sodium: 400mg
    • Fat: 12g
    • Saturated Fat: 2g
    • Unsaturated Fat: 10g
    • Trans Fat: 0g
    • Carbohydrates: 2g
    • Fiber: 0g
    • Protein: 24g
    • Cholesterol: 200mg

    Sharing is caring!

  • Zucchini Pizza Boats

    Zucchini Pizza Boats


    Introduction to Zucchini Pizza Boats

    Ah, the joy of whipping up a delicious meal that feels indulgent but is actually healthy! Zucchini Pizza Boats are a fantastic way to enjoy all the flavors of your favorite pizza, minus the carbs. As a busy mom, I’ve often found myself juggling dinner plans while keeping my family’s taste buds happy. These little boats are not just quick; they’re also a surefire way to impress your loved ones. Picture this: a cozy evening together, laughter, and the aroma of cheesy goodness wafting from the oven. It’s just perfection!

    Why You’ll Love This Zucchini Pizza Boats

    Let’s be honest: we all crave a satisfying meal, especially on those hectic nights! Zucchini Pizza Boats tick all the boxes. They’re super easy to prepare and bake, perfect for busy schedules. Plus, you can customize them endlessly! With a delightful mix of flavors in every bite, even picky eaters will be asking for seconds. Who wouldn’t fall in love with these tasty, low-carb delights?

    Ingredients for Zucchini Pizza Boats

    Getting the ingredients together for Zucchini Pizza Boats is a breeze! Here’s what you’ll need:

    • Zucchini: The star of the show! Choose medium zucchinis, as they have just the right size to hold your toppings without being too watery.
    • Marinara Sauce: This zesty sauce brings that classic pizza flavor! Choose a brand you love or whip up a homemade version if you have time.
    • Mozzarella Cheese: This ooey-gooey cheese is essential for that melty goodness! You can also try a dairy-free option if needed.
    • Mini Pepperoni Slices: These bite-sized slices add a delightful crunch and spice to each boat. If you’re looking for a healthier option, turkey pepperoni works well too!
    • Italian Seasoning: This blend of herbs elevates the flavor profile, making it reminiscent of classic Italian dishes. If you’re feeling adventurous, try adding some red pepper flakes for a kick.

    You can customize these delicious zucchini boats with your favorite pizza toppings! Think bell peppers, olives, or even some cooked sausage. The possibilities are endless!

    For exact quantities of each ingredient, check out the bottom of the article where you can find the full recipe ready for printing. Happy cooking!

    How to Make Zucchini Pizza Boats

    Now that we have all our ingredients prepped, let’s dive into the delicious journey of making Zucchini Pizza Boats! It’s a fun and interactive way to get the kids involved in the kitchen, too. Just follow these simple steps, and you’ll be treating your family to a culinary masterpiece in no time!

    Step 1: Preheat the Oven

    The first step in our delicious adventure is to preheat the oven to 400°F. This is crucial because it ensures the zucchini cooks evenly, giving you that perfect cheesy, bubbly topping. Just like a warm hug, a preheated oven sets the stage for great things to come!

    Step 2: Prepare the Zucchini

    Next up, grab your zucchinis and slice them in half lengthwise. Use a spoon to scoop out the centers, making little “boats” that can hold all our tasty toppings. Aim for a good 1/4-inch thickness for the walls to ensure that they’re sturdy enough to support the filling. You can save that scooped-out flesh for a veggie stir-fry or a smoothie. Waste not, want not!

    Step 3: Fill the Boats

    Time to get creative! Spread a generous spoonful of marinara sauce into each zucchini half. Then, sprinkle it with shredded mozzarella cheese and top it with mini pepperoni slices. If you’re feeling adventurous, add diced bell peppers or mushrooms. Make sure to sprinkle the Italian seasoning on top for that ultimate pizza flavor. It’s an exciting art project that’s also delicious!

    Step 4: Bake to Perfection

    Now, it’s time to pop those beauties into the oven! Bake your Zucchini Pizza Boats for about 15 to 20 minutes. Keep an eye on them until the cheese is bubbly and golden. When you see that delightful sight, you’ll know they’re ready to be devoured. Let them cool for a minute, and then serve them up. Brace yourself for the delighted cheers from your family!

    Tips for Success

    • Use a cookie sheet for even baking. Lining it with parchment can prevent sticking.
    • Don’t overfill the zucchini! Leave some space for the cheese to melt perfectly.
    • Consider parboiling the zucchini for a few minutes for extra tenderness.
    • Experiment with different cheeses for unique flavors, like gouda or cheddar.
    • Serve with fresh basil on top for a gourmet touch!

    Equipment Needed

    • Cutting Board: A sturdy surface for prepping your zucchinis. A plate works too in a pinch.
    • Sharp Knife: Essential for slicing zucchinis. A butter knife can work for softer zucchinis.
    • Spoon: Perfect for scooping out the insides. A melon baller adds a fun touch!
    • Baking Sheet: Use a cookie sheet for even baking. A glass dish can also do the trick.
    • Oven Mitts: Safety first! Avoid burns when taking those delicious boats out.

    Variations of Zucchini Pizza Boats

    • Vegetarian Delight: Load your boats with spinach, mushrooms, and bell peppers instead of meat. A fantastic way to sneak in some greens!
    • Spicy Twist: Add jalapeños or crushed red pepper flakes for a fiery kick. Perfect for those who crave a little heat!
    • Meat Lover’s: Substitute mini pepperoni with cooked sausage, ground beef, or bacon bits for a meaty feast!
    • Cheesy Gourmet: Mix different cheeses like goat cheese or feta along with mozzarella. It adds a rich, tangy flavor.
    • Dairy-Free Option: Use vegan cheese or a cashew cream mixture for a delectable dairy-free experience.
    • Southwestern Style: Blend in black beans, corn, and a sprinkle of taco seasoning for a unique twist on flavors.

    Serving Suggestions for Zucchini Pizza Boats

    • Fresh Salad: Pair your zucchini boats with a crisp green salad for a refreshing contrast.
    • Garlic Bread: Serve with homemade or store-bought garlic bread for a comforting side.
    • Wine Pairing: Enjoy with a chilled glass of white wine, like Pinot Grigio, for a lovely evening.
    • Garnish: Finish with a sprinkle of fresh basil or parsley for a vibrant pop of color!

    FAQs about Zucchini Pizza Boats

    Can I prepare Zucchini Pizza Boats in advance?
    Absolutely! You can prep the zucchinis and fill them with toppings a few hours ahead. Just cover them and store in the fridge until you’re ready to bake. This makes for a great last-minute dinner solution!

    Are Zucchini Pizza Boats suitable for a low-carb diet?
    Yes! Zucchini Pizza Boats are a fantastic low-carb alternative to traditional pizza. They satisfy those pizza cravings without the guilt. Just another reason why these healthy pizza boats are a winner!

    What are some good toppings for Zucchini Pizza Boats?
    The sky’s the limit! You can use various toppings—think diced olives, fresh veggies, cooked ham, or even a drizzle of pesto. Get creative according to your tastes and dietary preferences!

    How do I store leftovers?
    If you have any leftovers, place them in an airtight container. They should last 2-3 days in the fridge. To reheat, simply pop them back in the oven for a few minutes to restore their cheesy goodness.

    Can I freeze Zucchini Pizza Boats?
    Yes! After baking, let them cool completely, then freeze in a single layer. Once frozen, transfer them to a freezer bag. When you’re ready to enjoy, reheat them in the oven from frozen for 25-30 minutes. A perfect make-ahead lunch!

    Final Thoughts

    Making Zucchini Pizza Boats has transformed my approach to family dinners. They are the perfect blend of fun, flavor, and health. Every bite is a celebration of creativity that brings my loved ones together. Whether it’s a busy weeknight or a weekend gathering, these little boats always steal the show. Plus, they offer a guilt-free escape from traditional pizza cravings that leave you feeling heavy. Embrace this delightful recipe, and I assure you, your family will cherish these moments. Get ready for happy faces and satisfied tummies—bon appétit!


    Print

    clock clock iconcutlery cutlery iconflag flag iconfolder folder iconinstagram instagram iconpinterest pinterest iconfacebook facebook iconprint print iconsquares squares iconheart heart iconheart solid heart solid icon

    Description

    Zucchini Pizza Boats are a delicious and healthy twist on traditional pizza, featuring zucchini as the base instead of dough.


    • 2 medium zucchinis, halved lengthwise
    • 1/2 cup marinara sauce
    • 1 cup shredded mozzarella cheese
    • 1/4 cup mini pepperoni slices
    • 1 tsp Italian seasoning

    1. Preheat oven to 400°F. Scoop out zucchini centers to create “boats.”
    2. Fill each boat with marinara sauce, cheese, and pepperoni. Sprinkle with Italian seasoning.
    3. Bake for 15–20 minutes until cheese is melted and bubbly.

    Notes

    • Feel free to customize with your favorite pizza toppings.
    • Make sure to remove enough of the zucchini flesh to hold the filling.
    • Prep Time: 10 minutes
    • Cook Time: 20 minutes
    • Category: Main Dish
    • Method: Baking
    • Cuisine: Italian

    Nutrition

    • Serving Size: 1 boat
    • Calories: 200
    • Sugar: 3g
    • Sodium: 300mg
    • Fat: 12g
    • Saturated Fat: 6g
    • Unsaturated Fat: 4g
    • Trans Fat: 0g
    • Carbohydrates: 10g
    • Fiber: 3g
    • Protein: 10g
    • Cholesterol: 30mg

    Sharing is caring!