Category: Uncategorized

  • Grilled Chicken & Broccoli Bowls with Creamy Garlic Sauce Delight!

    Grilled Chicken & Broccoli Bowls with Creamy Garlic Sauce Delight!


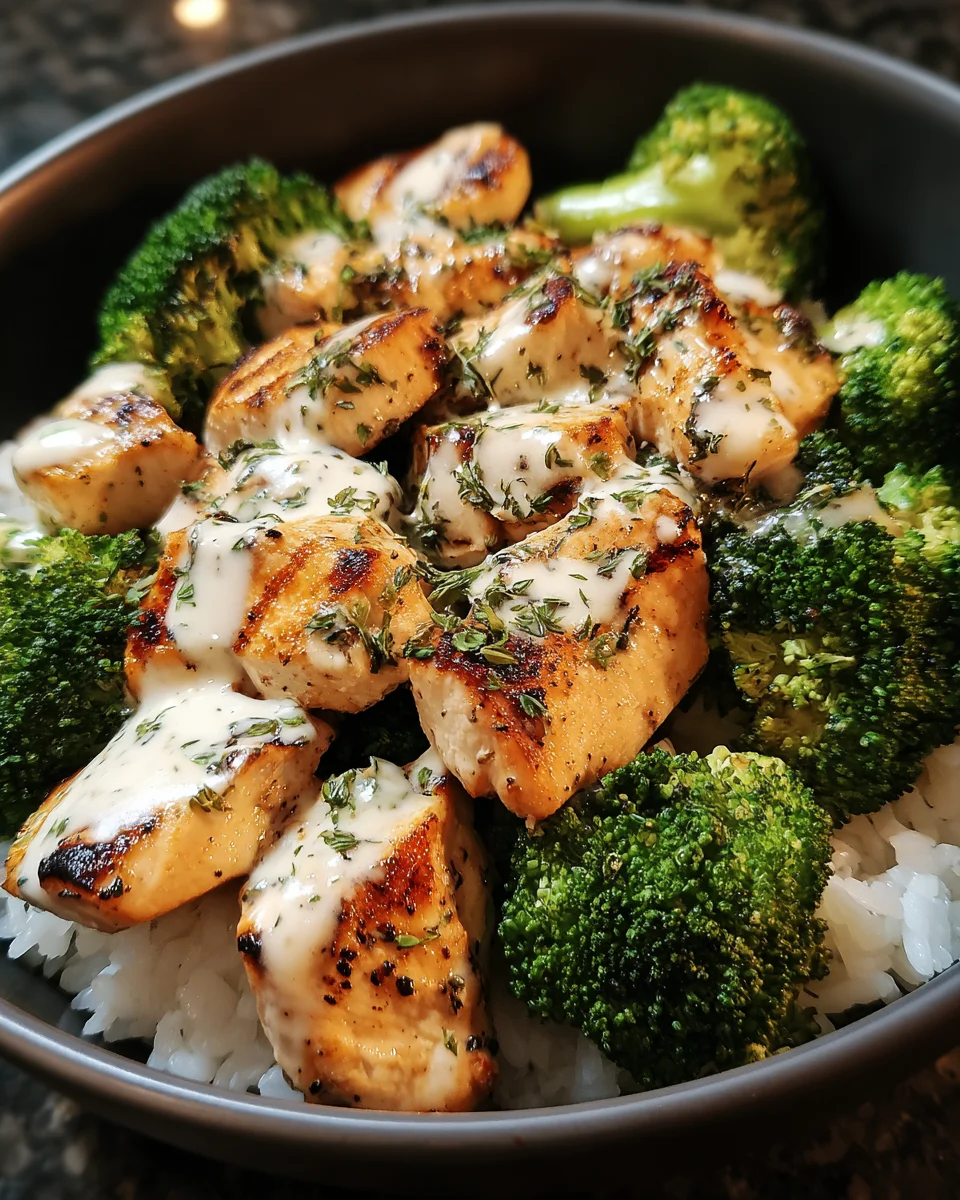
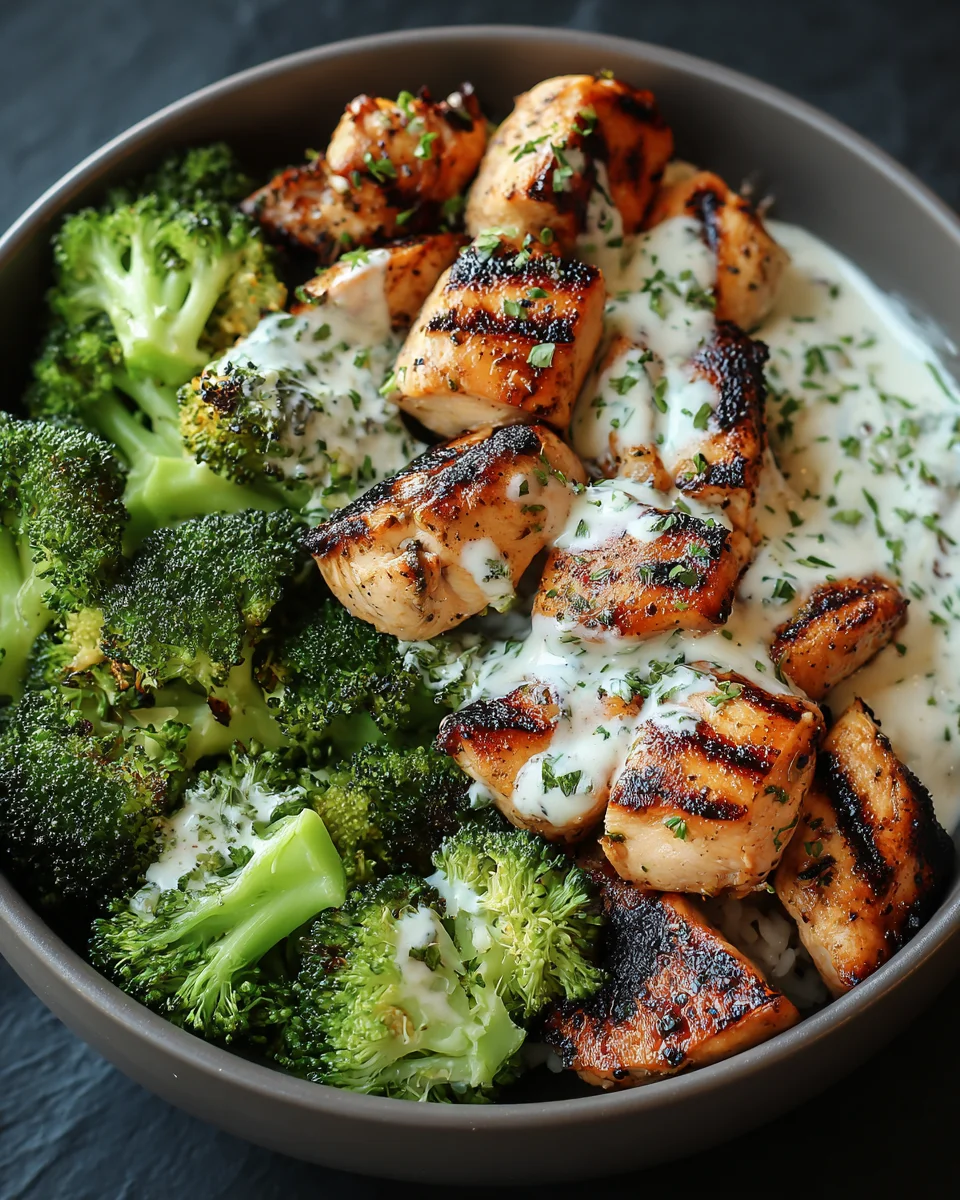
    Introduction to Grilled Chicken & Broccoli Bowls with Creamy Garlic Sauce

    Hey there, fellow home cooks! If you’re anything like me, you know the struggle of juggling work, family, and meal prep. That’s why I’m thrilled to share my recipe for Grilled Chicken & Broccoli Bowls with Creamy Garlic Sauce. This dish is not only delicious but also a quick solution for those busy weeknights when you want something healthy and satisfying. It brings a delightful mix of flavors that will have everyone at the table asking for seconds, or at least for the recipe!

    Why You’ll Love This Grilled Chicken & Broccoli Bowls with Creamy Garlic Sauce

    This Grilled Chicken & Broccoli Bowls with Creamy Garlic Sauce is everything a busy mom could want: it’s easy to prepare, packed with nutrients, and bursting with flavor. You’ll find that it comes together in just 30 minutes, making it a lifesaver for hectic evenings. The creamy garlic sauce adds a touch of indulgence, transforming a simple meal into a hearty culinary experience that your whole family will adore!

    Ingredients for Grilled Chicken & Broccoli Bowls with Creamy Garlic Sauce

    Getting the right ingredients is the key to making mouthwatering Grilled Chicken & Broccoli Bowls with Creamy Garlic Sauce. Here’s what you’ll need:

    • Chicken Breasts: Skinless and boneless, these are the lean protein that keeps you satisfied.
    • Fresh Broccoli: Vibrant green florets add crunch and nutrition. Choose fresh ones for the best flavor.
    • Olive Oil: This helps to season and grill the chicken and broccoli, adding a rich taste.
    • Salt and Pepper: Essential for enhancing flavors; don’t skimp on these basics!
    • Greek Yogurt: The star of the creamy garlic sauce. It brings tanginess and creaminess without too many calories.
    • Garlic: Minced garlic gives the sauce that irresistible kick. Adjust the amount based on your garlic love!
    • Lemon Juice: A splash of freshness that brightens all the flavors in the dish.
    • Parmesan Cheese: For a touch of richness; this grated cheese elevates the sauce to new levels.
    • Fresh Herbs: Parsley or chives make for a beautiful garnish and fresh taste, though these are totally optional.
    • Cooked Rice or Quinoa: Great options for a filling base. Feel free to skip these if you prefer a low-carb meal.

    Remember, the ingredient amounts and exact measurements are at the bottom of this article for easy printing!

    How to Make Grilled Chicken & Broccoli Bowls with Creamy Garlic Sauce

    Step 1: Prep Your Ingredients

    Let’s get started by prepping our ingredients! First, grab those chicken breasts and trim off any extra fat. Cut them into even pieces for uniform grilling. Next, take your fresh broccoli and chop it into bite-sized florets. You want them tender enough to enjoy but not mushy. Finally, mince the garlic; this will be the flavor powerhouse of your creamy sauce. It’s all about having everything ready before you dive into cooking. Trust me, it makes the process smooth and enjoyable!

    Step 2: Grill the Chicken and Broccoli

    Now, it’s time to fire up the grill! Coat your chicken and broccoli with olive oil, a sprinkle of salt, and a dash of pepper. This gets those flavors mingling beautifully. Preheat your grill to a medium-high setting. Place the chicken on the grill and cook for about 5-6 minutes on each side. You’ll know it’s done when it’s no longer pink inside.

    While the chicken is grilling, toss your broccoli on the grill too! Grill it for about 6-8 minutes, turning occasionally until it’s just tender and you see some lovely char spots. The combination of grilled chicken and broccoli brings out such wonderful flavors. You’ll savor the smoky aromas wafting through the kitchen as they cook.

    Step 3: Make the Creamy Garlic Sauce

    Let’s whip up that indulgent creamy garlic sauce! In a mixing bowl, combine Greek yogurt, minced garlic, lemon juice, and grated Parmesan cheese. Season with salt and pepper to taste. Whisk everything together until you get a smooth and creamy consistency. If it feels too thick, a dash of water or extra lemon juice can help adjust the texture to your liking. This sauce is the perfect blend of tangy and creamy, enhancing all those delicious flavors in your bowls!

    Step 4: Assemble the Bowls

    It’s time for the fun part—assembly! If you’re using it, layer cooked rice or quinoa at the bottom of your serving bowls. These grains create a cozy base and help soak up all that yummy sauce. Next, arrange the grilled chicken pieces and broccoli florets on top. Generously drizzle your creamy garlic sauce over everything—you want every bite to have that luscious flavor. Finally, sprinkle fresh herbs on top for an extra pop of color and flavor if you’re using them. Enjoy your masterpiece!

    Tips for Success

    • Always preheat your grill for even cooking.
    • Marinate the chicken for at least 30 minutes if you have time; it’ll add more flavor!
    • Use a meat thermometer to ensure chicken reaches 165°F for safety.
    • Char your broccoli lightly for great flavor but don’t overcook it.
    • Feel free to tweak the garlic in the sauce based on your taste preferences.

    Equipment Needed

    • Grill: A gas or charcoal grill works beautifully; a grill pan is a great alternative if you’re indoors.
    • Mixing Bowl: You’ll need one for the creamy garlic sauce; any bowl will do!
    • Whisk: Useful for blending the sauce; a fork can work just as well in a pinch.
    • Tongs: Ideal for flipping chicken and broccoli on the grill.
    • Knife and Cutting Board: Essential for prepping your ingredients.

    Flavorful Variations

    • Spicy Kick: Add a pinch of red pepper flakes to the garlic sauce for a bit of heat.
    • Asian Twist: Replace olive oil with sesame oil and add soy sauce to the marinade for an Asian-inspired flavor.
    • Herbed Chicken: Marinate the chicken in Italian seasoning or fresh herbs like rosemary and thyme for an aromatic taste.
    • Cheesy Delight: Swap out the Parmesan with feta cheese for a tangy twist in your creamy sauce.
    • Vegan Option: Use tofu or tempeh instead of chicken and replace Greek yogurt with a vegan yogurt alternative for a plant-based version.

    Serving Suggestions

    • Side Salad: A fresh greens salad with a light vinaigrette pairs nicely with the bowls.
    • Refreshing Drink: Serve with sparkling water or a light lemonade to complement the flavors.
    • Presentation: Serve in colorful bowls for a visually appealing meal that delights the senses.
    • Extra Garnish: A sprinkle of sesame seeds or a dash of paprika can add a pop of color.

    FAQs about Grilled Chicken & Broccoli Bowls with Creamy Garlic Sauce

    Can I use frozen broccoli instead of fresh? Absolutely! Just be sure to thaw and drain it well before grilling. Frozen broccoli may not have the same texture, but it’ll work in a pinch.

    How can I store leftovers from the Grilled Chicken & Broccoli Bowls? After enjoying your meal, store leftovers in an airtight container in the fridge for up to 3 days. Reheat gently in the microwave or on the stove to maintain the flavors.

    Can I make the creamy garlic sauce ahead of time? Yes, you can! Prepare your sauce up to a day in advance. Just keep it covered in the refrigerator. Give it a quick stir before serving to rehydrate the ingredients.

    Is this recipe gluten-free? Yes! The Grilled Chicken & Broccoli Bowls with Creamy Garlic Sauce is completely gluten-free. Just make sure any grains used, like rice or quinoa, are certified gluten-free.

    What can I serve with these bowls for a complete meal? For a complete meal, consider adding a light salad, crusty bread, or a side of roasted vegetables to complement the chicken and broccoli.

    Final Thoughts

    As you savor your Grilled Chicken & Broccoli Bowls with Creamy Garlic Sauce, I hope you find a moment of joy amid the hustle and bustle. This dish embodies the comfort of home-cooked meals while ensuring you feel good about what you’re eating. Whether you’re feeding a crowd or enjoying a quiet dinner, it caters to both the heart and the taste buds. So roll up your sleeves, fire up that grill, and indulge in a healthy yet delicious dinner that proves you can have it all, even on the busiest of nights!


    Print

    clock clock iconcutlery cutlery iconflag flag iconfolder folder iconinstagram instagram iconpinterest pinterest iconfacebook facebook iconprint print iconsquares squares iconheart heart iconheart solid heart solid icon

    Description

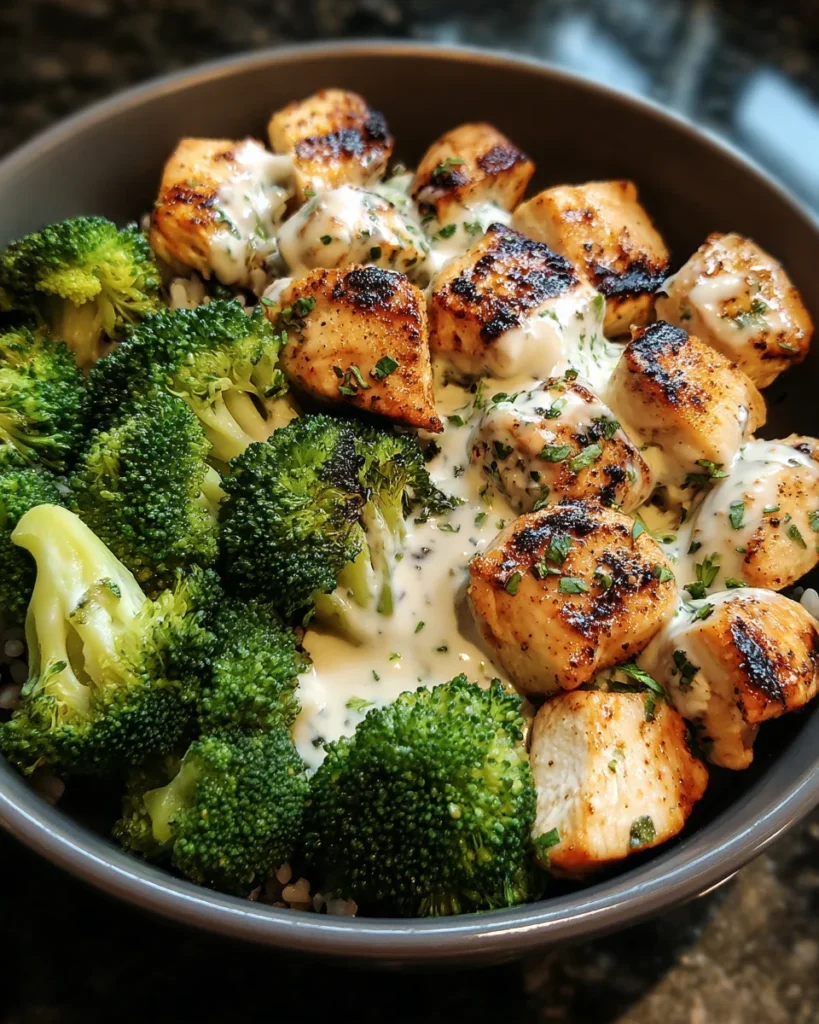
    A delicious and healthy recipe combining grilled chicken and fresh broccoli topped with a creamy garlic sauce.


    • 2 skinless, boneless chicken breasts
    • 3 cups fresh broccoli florets
    • 2 tbsp olive oil
    • Salt and pepper, to taste
    • 1/2 cup Greek yogurt
    • 2 cloves garlic, minced
    • 1 tbsp lemon juice
    • 1/4 cup grated Parmesan cheese
    • Fresh herbs (parsley or chives) for garnish (optional)
    • Cooked rice or quinoa, as base (optional)

    1. Prep Your Ingredients: Trim and cut the chicken breasts into even pieces for quick and even grilling. Chop the broccoli into bite-sized florets and mince fresh garlic for the sauce.
    2. Grill the Chicken and Broccoli: Lightly coat chicken and broccoli with olive oil, salt, and pepper. Grill chicken over medium-high heat for 5-6 minutes per side until cooked through and juicy. Grill broccoli simultaneously until just tender with char spots, about 6-8 minutes.
    3. Make the Creamy Garlic Sauce: In a bowl, combine Greek yogurt, minced garlic, lemon juice, grated Parmesan, salt, and pepper. Whisk until smooth and creamy, adjusting seasoning to taste.
    4. Assemble the Bowls: If using, layer cooked rice or quinoa as a base. Top with grilled chicken and broccoli, then generously drizzle with the creamy garlic sauce. Garnish with fresh herbs if desired.

    Notes

    • For a low-carb version, skip the cooked rice or quinoa.
    • Feel free to adjust the amount of garlic based on your preference.
    • Prep Time: 15 minutes
    • Cook Time: 15 minutes
    • Category: Main Course
    • Method: Grilling
    • Cuisine: American

    Nutrition

    • Serving Size: 1 bowl
    • Calories: 450
    • Sugar: 2g
    • Sodium: 600mg
    • Fat: 18g
    • Saturated Fat: 5g
    • Unsaturated Fat: 8g
    • Trans Fat: 0g
    • Carbohydrates: 34g
    • Fiber: 5g
    • Protein: 40g
    • Cholesterol: 90mg

    Sharing is caring!

  • Grilled Steak and Shrimp Skewers with Garlic Butter

    Grilled Steak and Shrimp Skewers with Garlic Butter


    Introduction to Grilled Steak and Shrimp Skewers with Garlic Butter

    As a busy mom, I understand the challenge of preparing a meal that pleases everyone in the family. That’s where these wonderful grilled steak and shrimp skewers with garlic butter come into play! They’re not just quick to whip up; they offer a delightful burst of flavor that will have your taste buds dancing with joy. Plus, these skewers are perfect for busy weeknights or backyard gatherings. On top of that, they require minimal cleanup, letting you relax and enjoy the moment. Let’s dive into this culinary adventure together!

    Why You’ll Love This Grilled Steak and Shrimp Skewers with Garlic Butter

    You’re going to fall head over heels for these grilled steak and shrimp skewers with garlic butter! They’re incredibly easy to prepare, allowing you to spend less time in the kitchen and more time with your loved ones. In just about 40 minutes, you can serve a meal that’s bursting with flavor, making it perfect for busy weeknights or casual weekend get-togethers. Trust me; your family will be asking for seconds!

    Ingredients Grilled Steak and Shrimp Skewers with Garlic Butter

    Gathering the right ingredients is essential for these grilled steak and shrimp skewers with garlic butter. The beauty of this recipe lies in its simplicity, yet each ingredient plays a key role in delivering amazing flavors.

    • Sirloin steak: Tender and juicy, sirloin steak is perfect for skewers. It absorbs spices beautifully while grilling.
    • Large shrimp: Peeled and deveined, they cook quickly and add a lovely sweetness for balance.
    • Olive oil: This helps marinate both the steak and shrimp while also giving them a beautiful sear on the grill.
    • Smoked paprika: Adds a smoky depth to the skewers, making each bite irresistibly flavorful.
    • Garlic powder: Enhances the garlic flavor and complements both proteins remarkably.
    • Salt and pepper: Basic seasonings that elevate all the flavors, ensuring nothing feels bland.
    • Unsalted butter: The star of our sauce! It brings richness and a creamy texture that drapes over the skewers.
    • Garlic: Freshly minced garlic adds an aromatic punch to the butter sauce.
    • Fresh parsley: Not only brings color but also a fresh taste that brightens the dish.
    • Lemon juice: A splash of lemon adds a zingy brightness, really waking up the flavors.
    • Optional add-ins: Consider tossing in some bell peppers or onions for extra crunch and flavor.
    • For a spicy kick: Add cayenne pepper to the marinade to turn up the heat a notch!

    For the exact quantities of these ingredients, just scroll to the bottom of the article where they’re all listed for easy printing. Happy cooking!

    How to Make Grilled Steak and Shrimp Skewers with Garlic Butter

    Step 1: Marinate the Steak

    To achieve excellent flavor, start by marinating the cubed sirloin steak. Place the steak in a large bowl and drizzle it with olive oil, smoked paprika, garlic powder, salt, and pepper. Mix everything well. Let the steak marinate for at least 30 minutes. This step not only infuses the meat with flavor but also helps it stay tender on the grill. Trust me; it’s worth the time!

    Step 2: Prepare the Shrimp

    Next, let’s turn our attention to the shrimp. In another bowl, toss the peeled and deveined shrimp with olive oil, salt, and pepper. Make sure each shrimp is well-coated to enhance their naturally sweet flavor. It’s a simple step, but it makes a world of difference. Set them aside while your steak finishes marinating.

    Step 3: Make the Garlic Butter Sauce

    This garlic butter sauce is what takes your skewers from ordinary to extraordinary! In a small saucepan, melt the unsalted butter over low heat. Once melted, add the minced garlic and sauté for about 1-2 minutes until fragrant, but don’t let it burn. Remove from heat and whisk in fresh parsley, lemon juice, and a pinch of salt. The rich, aromatic sauce will drench your skewers in irresistible flavor!

    Step 4: Assemble the Skewers

    Assembling the skewers is the fun part! Grab your marinated steak and seasoned shrimp. Begin threading the steak and shrimp onto the skewers, alternating between them for an appealing presentation. If you want to add a pop of color, throw in some bell peppers or onions between the meat. This not only looks great but also adds extra flavor!

    Step 5: Grill the Skewers

    Now it’s time to fire up the grill! Preheat it to medium-high heat. Grill the skewers for about 3-4 minutes on each side. Adjust the cook time based on your preference for steak doneness. For medium-rare, aim for a nice sear but don’t overcook. The shrimp should turn pink and opaque, signaling they’re perfectly cooked.

    Step 6: Serve with Garlic Butter

    At last, the final touch! Once you remove the skewers from the grill, drizzle the glorious garlic butter sauce over the top. The warm sauce will melt slightly, coating everything in deliciousness. Serve immediately and watch everyone enjoy this mouthwatering dish!

    Tips for Success

    • Soak wooden skewers in water for at least 30 minutes to prevent burning.
    • Allow the marinated steak and shrimp to sit for an hour for extra flavor infusion, if time permits.
    • Use a meat thermometer to check for desired doneness—130°F for medium-rare.
    • Keep a close eye on the grill; shrimp cook quickly, so don’t walk away!
    • Experiment with spices and herbs to create your unique flavor profile.

    Equipment Needed

    • Grill: A charcoal or gas grill will work beautifully. If you lack one, a grill pan on the stovetop works too!
    • Skewers: Metal skewers are reusable and sturdy. If using wooden ones, remember to soak them first.
    • Bowl: You’ll need a large mixing bowl for marinating.
    • Small saucepan: Essential for preparing that mouthwatering garlic butter sauce.
    • Meat thermometer: Handy for checking steak doneness, ensuring perfect cooking every time.

    Variations

    • Vegetarian Skewers: Swap out the steak and shrimp for hearty vegetables like zucchini, mushrooms, and cherry tomatoes for a colorful and delicious option.
    • Spicy Marinade: Infuse some heat by adding a tablespoon of sriracha or your favorite hot sauce to the marinade for a fiery kick.
    • Herbaceous Twist: Experiment with fresh herbs like thyme or rosemary in the marinade or garlic butter sauce for an aromatic flavor boost.
    • Citrus Infusion: Use lime juice instead of lemon for a slightly different but equally bright flavor in the garlic butter sauce.
    • Gluten-Free Option: Ensure all ingredients, including spices and sauces, are labeled gluten-free to cater to dietary restrictions.

    Serving Suggestions

    • Fresh Salad: Pair your skewers with a light green salad or coleslaw for a refreshing contrast.
    • Grilled Veggies: Serve alongside grilled vegetables like zucchini and bell peppers for a colorful plate.
    • Cocktail Pairing: Enjoy with a chilled glass of white wine or a crisp cucumber-infused cocktail.
    • Plating: Arrange skewers on a wooden board for a rustic presentation that’s sure to impress.

    FAQs about Grilled Steak and Shrimp Skewers with Garlic Butter

    Can I make these skewers ahead of time?
    Absolutely! You can marinate the steak and shrimp a day in advance. Just remember to keep them in the refrigerator until you’re ready to grill. This also helps the flavors develop more!

    What other proteins can I use for the skewers?
    While steak and shrimp are a winning duo, you can easily swap in chicken or even salmon. Just ensure they are cut into similar sizes for even cooking.

    How do I know when the steak and shrimp are cooked perfectly?
    Use a meat thermometer for the steak. For medium-rare, aim for about 130°F. For shrimp, they’re perfectly cooked when they turn pink and opaque. No more than 4 minutes per side is usually ideal!

    What if I don’t have a grill?
    No worries! You can use a grill pan on your stovetop. It will give you those lovely grill marks and keep the flavors intact. Just make sure to cook in batches if necessary.

    Can I customize the garlic butter sauce?
    Of course! Feel free to add herbs like dill or rosemary for a different flavor. Or, mix in a bit of chili powder for a zesty twist!

    Final Thoughts

    Creating grilled steak and shrimp skewers with garlic butter is more than just preparing a meal; it’s about crafting a delightful experience for your family. Each skewer is a burst of flavor, and the ease of preparation makes it a go-to for busy evenings. The warm, buttery garlic sauce brings a comforting touch that wraps around everything, making each bite unforgettable. Watching my family enjoy these skewers together brings me so much joy, reminding me that delicious meals can foster connection and love. So, gather your loved ones, fire up that grill, and let the delicious memories unfold!


    Print

    clock clock iconcutlery cutlery iconflag flag iconfolder folder iconinstagram instagram iconpinterest pinterest iconfacebook facebook iconprint print iconsquares squares iconheart heart iconheart solid heart solid icon

    Description

    Delightful grilled steak and shrimp skewers drizzled with garlic butter, perfect for a flavorful meal.


    • 1 pound Sirloin steak, Cut into 1-inch cubes
    • 1 pound Large shrimp, Peeled and deveined
    • 2 tablespoons Olive oil, For marinating the steak and shrimp
    • 1 teaspoon Smoked paprika, Adds a smoky flavor
    • 1 teaspoon Garlic powder, Enhances the garlic flavor
    • to taste Salt and pepper, For seasoning
    • 1/2 cup Unsalted butter, Melted for the sauce
    • 4 cloves Garlic, Minced
    • 2 tablespoons Fresh parsley, Chopped
    • 1 tablespoon Lemon juice, Adds brightness to the sauce
    • to taste Salt, For seasoning the sauce

    1. In a large bowl, combine the cubed sirloin steak with olive oil, smoked paprika, garlic powder, salt, and pepper. Mix well and let marinate for at least 30 minutes.
    2. In another bowl, toss the peeled and deveined shrimp with olive oil, salt, and pepper. Set aside.
    3. In a small saucepan, melt the unsalted butter over low heat. Add the minced garlic and cook for 1-2 minutes until fragrant. Remove from heat and stir in parsley, lemon juice, and a pinch of salt.
    4. Thread the marinated steak and shrimp onto skewers, alternating between the two. If using wooden skewers, soak them in water for 30 minutes beforehand.
    5. Preheat the grill to medium-high heat. Grill the skewers for about 3-4 minutes on each side, until the steak reaches desired doneness and the shrimp are pink and opaque.
    6. Remove the skewers from the grill and drizzle the garlic butter sauce over the top before serving.

    Notes

    • Soaking wooden skewers prevents burning on the grill.
    • Feel free to add vegetables like bell peppers or onions for extra flavor.
    • For a spicier kick, add cayenne pepper to the marinade.
    • Prep Time: 30 minutes
    • Cook Time: 10 minutes
    • Category: Grill
    • Method: Grilling
    • Cuisine: American

    Nutrition

    • Serving Size: 1 skewer
    • Calories: 300
    • Sugar: 1g
    • Sodium: 500mg
    • Fat: 20g
    • Saturated Fat: 10g
    • Unsaturated Fat: 8g
    • Trans Fat: 0g
    • Carbohydrates: 2g
    • Fiber: 0g
    • Protein: 25g
    • Cholesterol: 150mg

    Sharing is caring!

  • TikTok-Inspired Pizza Toast

    TikTok-Inspired Pizza Toast


    Introduction to TikTok-Inspired Pizza Toast

    Have you ever found yourself racing against the clock, craving something delicious yet quick? Let me introduce you to my new favorite obsession: TikTok-Inspired Pizza Toast. This delightful recipe is not just a joy to make but also a treat for your taste buds.

    Imagine sinking your teeth into crispy, golden bread topped with bubbling cheese and fresh ingredients. It’s the kind of meal that pulls everyone to the kitchen. Perfect for busy weeknights or as a fun snack for the family, TikTok-Inspired Pizza Toast is here to save your day!

    Why You’ll Love This TikTok-Inspired Pizza Toast

    This TikTok-Inspired Pizza Toast is a game changer for busy moms and professionals! It’s incredibly easy to whip up, taking just 10 minutes from start to finish. The taste is simply unforgettable, with every bite bursting with flavor. Plus, it’s customizable, making it perfect for picky eaters. Whether you’re treating yourself or impressing loved ones, this recipe delivers delightful satisfaction with minimal effort. Trust me, your taste buds will thank you!

    Ingredients for TikTok-Inspired Pizza Toast

    Let’s talk ingredients for this magical creation. You’ll be surprised at how simple yet fabulous they are!

    • Sourdough bread: The star of your toast! I love its crispy crust and soft, airy interior. It elevates everything.
    • Olive oil: A drizzle of this liquid gold adds flavor and helps the bread achieve that beautiful golden color.
    • Marinara or pizza sauce: Use your favorite store-bought version or homemade. It adds that classic Italian flavor we all adore.
    • Tomatoes: Fresh tomato slices give brightness and juiciness. Choose ripe, flavorful ones for the best taste.
    • Mozzarella cheese: The ooey-gooey goodness! It melts beautifully, creating a heavenly stretch that pizza lovers crave.
    • Dried oregano: Just a sprinkle to bring that herbaceous note reminiscent of your favorite pizzeria.
    • Salt and pepper: Essential pantry staples to elevate every bite. Use them to taste!
    • Optional ingredients: Feeling adventurous? Add chili flakes for heat, a drizzle of hot honey for sweetness, or chili oil for a spicy kick. Fresh basil as a garnish makes it look and taste divine!

    With these ingredients, you’re halfway to creating something special! For exact quantities and easy printing, refer to the end of this article. Trust me; you won’t want to miss this!

    How to Make TikTok-Inspired Pizza Toast

    Are you ready to dive into the kitchen and whip up some TikTok-Inspired Pizza Toast? Let’s transform simple ingredients into something extraordinary. Follow me through these easy steps, and feel your culinary creativity shine!

    Step 1: Prepare the Sourdough

    First things first, grab your sourdough bread. I can’t stress enough how important it is to use quality sourdough. Its distinctive crust keeps everything together while adding that spectacular crunch.

    Brush each slice of sourdough with a generous tablespoon of olive oil. This will give your toast a beautiful golden color as it toasts. You can use a pastry brush or just pour a little olive oil on and spread it around with the back of a spoon!

    Now, pop your bread in a skillet or toaster oven. Toast until it’s lightly golden, which should take just a few minutes. The scent of warming sourdough is heavenly, isn’t it?

    Step 2: Sauce It Up!

    Next, let’s sauce up that beautiful bread! Spread a generous spoonful of marinara or pizza sauce on each slice. Don’t be shy; this flavor-packed layer is key!

    Using fresh sauce makes a world of difference, but even a jarred version can work wonders. Just make sure it’s something you love. Enjoy the vibrant color and aroma as you spread it evenly on the toasts.

    Step 3: Layering with Love

    It’s now time to build your pizza masterpiece. Start by layering those fresh tomato slices right on top of the sauce. They add a juicy burst that counterbalances the cheese.

    Now, sprinkle your mozzarella cheese on top. Aim for an even layer, so every bite is picture-perfect! This ooey-gooey cheese will melt sensationally. Remember to add a pinch of dried oregano, and season with salt and pepper for that burst of flavor.

    Step 4: Broil for Perfection

    Pop your prepared toasts under a broiler or back into that toaster oven. Broil them for about 3 to 5 minutes until the cheese is bubbling and turning golden. Keep an eye on them because things can go from golden to burnt in the blink of an eye!

    The sight of your cheese melting and bubbling like magic is absolutely rewarding. So satisfying!

    Step 5: Final Touches

    You’ve made it this far; let’s make it fancy! For an extra burst of flavor, drizzle some hot honey or chili oil for that spicy kick. If you’re feeling bold, toss on some chili flakes.

    And don’t forget fresh basil as a garnish. Not only does it look beautiful, but it also adds a lovely herbal note that elevates your TikTok-Inspired Pizza Toast to a whole new level!

    Tips for Success

    • Don’t skip toasting the bread first; it keeps the texture crispy!
    • Use high-quality marinara for a rich flavor.
    • Experiment with different cheeses like cheddar or provolone.
    • Keep a close eye while broiling to avoid burnt edges.
    • Customize toppings based on family preferences for a fun twist.

    Equipment Needed

    • Skillet or toaster oven: If you don’t have one, a regular oven works too!
    • Pastry brush or spoon: A simple spoon can spread olive oil easily.
    • Baking sheet: Useful for broiling your pizza toast if using an oven.
    • Kitchen knife: Essential for slicing tomatoes and herbs.

    Variations

    • Veggie Delight: Add sliced bell peppers, mushrooms, or spinach for a heartier topping that packs in extra nutrients.
    • Meat Lover’s: Top with cooked sausage, pepperoni, or even shredded chicken for those craving protein.
    • Gluten-Free: Swap sourdough for your favorite gluten-free bread to enjoy this recipe worry-free!
    • Caprese Style: Use fresh mozzarella and add a drizzle of balsamic glaze after broiling for a fresh twist!
    • Breakfast Pizza Toast: Top with a sunny-side-up or poached egg for a savory breakfast option.

    Serving Suggestions

    • Pair with a simple side salad for a refreshing crunch.
    • A glass of iced tea or a light white wine complements the flavors beautifully.
    • For presentation, serve on a colorful plate, garnished with fresh basil.
    • Cut the toast into fun shapes for a playful twist, especially loved by kids!

    FAQs about TikTok-Inspired Pizza Toast

    Curious minds want to know! Here are some frequently asked questions about TikTok-Inspired Pizza Toast. These should help clarify any cooking mysteries you might have before diving in!

    Can I use other types of bread for this recipe?

    Absolutely! While sourdough adds a wonderful texture, feel free to experiment with ciabatta, French bread, or even whole grain. Just remember that each bread will provide a different flavor and crunch.

    How can I make my TikTok-Inspired Pizza Toast spicier?

    If you love heat, sprinkle chili flakes before broiling or drizzle chili oil on top right before serving. A splash of hot honey can also complement the spice beautifully!

    Is it possible to make this recipe ahead of time?

    I recommend preparing the toppings ahead of time, but it’s best to toast the bread just before serving. This keeps the texture delightful and crispy!

    Can I add more veggies to this pizza toast?

    Definitely! Feel free to pile on thinly sliced bell peppers, spinach, or even artichokes. The sky’s the limit! Just make sure they are adequately layered to avoid sogginess.

    What’s the best way to store leftovers?

    If you have any leftovers, store them in an airtight container in the fridge for up to two days. Reheat in the oven or toaster to bring back that crispy goodness!

    Final Thoughts

    Creating TikTok-Inspired Pizza Toast is more than just making a meal; it’s about gathering your loved ones around the kitchen. This recipe brings joy and laughter, transforming simple ingredients into something spectacular. Whether it’s a quick dinner on a busy night or a fun snack while binge-watching your favorite show, this toast is a versatile hero. With endless topping possibilities, it invites creativity and customization. So, roll up your sleeves and get cooking! I guarantee the smiles on everyone’s faces will make all the effort worthwhile.


    Print

    clock clock iconcutlery cutlery iconflag flag iconfolder folder iconinstagram instagram iconpinterest pinterest iconfacebook facebook iconprint print iconsquares squares iconheart heart iconheart solid heart solid icon

    Description

    A fun and delicious recipe for TikTok-Inspired Pizza Toast that’s easy to make and full of flavor.


    • 2 slices sourdough bread
    • 1 tbsp olive oil
    • ½ cup marinara or pizza sauce
    • 1 small tomato, thinly sliced
    • ½ cup shredded mozzarella cheese
    • ¼ tsp dried oregano
    • Salt and pepper, to taste
    • Optional: chili flakes, hot honey, or chili oil for drizzling
    • Optional: fresh basil, for garnish

    1. Brush each slice of sourdough with olive oil and toast in a skillet or toaster oven until lightly golden.
    2. Spread a generous spoonful of marinara over each slice. Layer with tomato slices, sprinkle with mozzarella, and season with oregano, salt, and pepper.
    3. Pop the toast under a broiler or in a toaster oven for 3–5 minutes, until the cheese is bubbling and golden.
    4. Drizzle with hot honey, chili oil, or sprinkle with chili flakes. Top with fresh basil if you’ve got it.

    Notes

    • Feel free to customize toppings based on your preferences.
    • Serve immediately for the best texture.
    • Prep Time: 5 minutes
    • Cook Time: 5 minutes
    • Category: Snack
    • Method: Broiling
    • Cuisine: Italian-American

    Nutrition

    • Serving Size: 1 slice
    • Calories: 250
    • Sugar: 3g
    • Sodium: 350mg
    • Fat: 10g
    • Saturated Fat: 4g
    • Unsaturated Fat: 6g
    • Trans Fat: 0g
    • Carbohydrates: 30g
    • Fiber: 2g
    • Protein: 12g
    • Cholesterol: 20mg

    Sharing is caring!

  • Mediterranean Chicken And Rice

    Mediterranean Chicken And Rice


    Introduction to Mediterranean Chicken And Rice

    As a busy mom, I know that finding a quick yet delicious meal can feel like searching for a needle in a haystack. That’s where this Mediterranean Chicken And Rice comes to the rescue! With tender chicken, fresh kale, and beautiful spices, it transforms any weeknight dinner into a delightful experience. It’s perfect for impressing your loved ones or simply treating yourself to a wholesome meal. In just 35 minutes, you can bring a taste of the Mediterranean right to your table. Trust me, this recipe is a game-changer for those hectic days!

    Why You’ll Love This Mediterranean Chicken And Rice

    This Mediterranean Chicken And Rice is not just a dish; it’s a lifesaver for those chaotic weeknights. In just 35 minutes, you can whip up a wholesome meal that’s bursting with flavor. The best part? It’s incredibly easy to make! With simple ingredients and minimal prep, you’ll relish the chance to serve something healthy that your family will adore. Trust me, this recipe will become a staple in your home!

    Ingredients for Mediterranean Chicken And Rice

    To create this comforting Mediterranean Chicken And Rice, you’ll need a handful of fresh ingredients. Here’s what you’ll be gathering:

    • Boneless, skinless chicken breast or thighs: Tender and juicy, chicken is the star here. I often opt for thighs for their flavor, but breasts work beautifully too!
    • Olive oil: A staple in Mediterranean cooking, it adds richness and helps with the searing process. Extra virgin brings out the best flavors, trust me.
    • Salt: This essential seasoning elevates all the other flavors. It’s like the fairy godmother of your ingredients!
    • Italian seasoning: A lovely blend of herbs that brings an aromatic touch. It mirrors the Mediterranean vibe perfectly.
    • Garlic powder: A sprinkle of this magic dust delivers a warm, savory essence. Fresh garlic is great, but this saves time!
    • Medium onion: Chopped onion adds sweetness and depth to your dish. I love how it mellows as it cooks.
    • Garlic cloves: For that robust flavor! When sautéed, garlic becomes fragrant and delicious.
    • Kale: Packed with nutrients, this leafy green adds color and a slight earthy taste. It wilts beautifully, giving a nice texture.
    • Vegetable broth: This adds moisture and seasoning. If you have chicken broth on hand, feel free to swap!
    • Sundried tomatoes in olive oil: These little bites of flavor add a tangy sweetness. They infuse the dish with a sunny burst!
    • Cooked rice: Choose jasmine or basmati for a fluffy texture. It serves as the pleasant base for all these delightful ingredients.

    For specific quantities and food prep, check below. Let’s gather these ingredients and get cooking!

    How to Make Mediterranean Chicken And Rice

    Step 1: Prep the Chicken

    First things first, let’s get that chicken ready! I like to cut the boneless, skinless chicken into bite-sized pieces. This ensures that it cooks evenly and is easy to enjoy. Toss the chicken in a bowl with olive oil, salt, garlic powder, and Italian seasoning. It’s amazing how those simple ingredients transform chicken into something flavorful. You can easily do this while waiting for the skillet to heat up. The longer it sits, the better it absorbs those lovely spices!

    Step 2: Cook the Chicken

    Now, let’s sear the chicken! Heat your skillet over medium-high heat until it’s nice and hot. Once heated, add the chicken in a single layer. Let it sear for about 5 minutes without moving it—this helps achieve a beautiful golden color. After that, stir it around and let it cook for another 3-5 minutes until it’s cooked through. Make sure the chicken pieces are evenly cooked to ensure they’re juicy! Nothing worse than dry chicken in a dish, right?

    Step 3: Sauté the Veggies

    With the chicken cooked and set aside, it’s vegetable time! Lower the heat to medium and toss in the chopped onions. Cook them for about 2-3 minutes, just until they become translucent. As the onions soften, add minced garlic for that amazing aroma. The scent of sautéing garlic is like a warm hug in your kitchen! Stir for another minute, ensuring everything gets friendly together. It’s the foundation of our Mediterranean Chicken And Rice!

    Step 4: Add the Kale

    Next up, let’s get that vibrant kale into the mix. Add the chopped kale to the skillet. Pour in the vegetable broth and add the remaining seasonings. You want to stir everything well. Cook until the kale wilts, about 2-3 minutes. The key is not to overcook it; we want it soft yet still holding its beautiful color. This adds not just nutrition but also a delightful texture to the dish!

    Step 5: Bring it All Together

    Finally, it’s time for the magic moment! Add the cooked rice, seared chicken, and those delicious sundried tomatoes into the skillet. Stir until everything is well combined. The rice absorbs all those flavors beautifully! Once mixed, cover the skillet and turn off the heat. Let it rest for about 5 minutes. This allows the flavors to meld, making each bite memorable. Trust me; it’s worth the wait!

    Tips for Success

    • Always use a sharp knife for cutting chicken to ensure even pieces.
    • Don’t overcrowd the pan when searing chicken; this helps achieve that golden, crispy exterior.
    • For extra flavor, let the chicken marinate for 30 minutes!
    • Adjust the seasoning according to your family’s preferences before serving.
    • Feel free to swap kale for spinach for a different flavor and texture!

    Equipment Needed

    • Skillet: A non-stick or cast-iron will work wonders for searing chicken.
    • Cutting board: Essential for chopping veggies and chicken safely; a bamboo one is great.
    • Knife: A sharp chef’s knife makes all the difference in prep time.
    • Measuring cups: Handy for portioning rice and liquid ingredients accurately.
    • Spatula: Perfect for stirring and serving; a wooden or silicone one prevents scratching.

    Variations of Mediterranean Chicken And Rice

    • For a vegetarian twist, replace chicken with chickpeas or tofu. They soak up the flavor beautifully!
    • Add a splash of lemon juice just before serving for a refreshing zesty kick.
    • Incorporate bell peppers and zucchini for extra veggies and varied textures.
    • If you’re watching carbs, substitute rice with quinoa or cauliflower rice.
    • For a spicy touch, sprinkle in some crushed red pepper flakes while cooking the chicken.

    Serving Suggestions

    • Pair your Mediterranean Chicken And Rice with a crisp green salad for added freshness.
    • A chilled glass of white wine or sparkling water with lemon makes a lovely drink.
    • Top with crumbled feta cheese for an extra burst of flavor.
    • Serve with warm pita bread to soak up all the deliciousness!
    • For a colorful presentation, garnish with fresh parsley or basil.

    FAQs about Mediterranean Chicken And Rice

    Curious about this delicious Mediterranean Chicken And Rice? Here are some common questions I often receive:

    Can I use brown rice instead of white? Absolutely! Just adjust the cooking time, as brown rice takes longer to cook.

    Is this dish freezer-friendly? Yes, it freezes well! Just make sure to store it in an airtight container for up to three months.

    Can I make this recipe ahead of time? Definitely! You can prep everything a day in advance, making dinnertime a breeze.

    What can I substitute for kale? Spinach or Swiss chard works great; both add a lovely touch of flavor!

    Is it necessary to use sundried tomatoes? While they add flavor, you can easily skip them or replace them with fresh tomatoes for a lighter option.

    Final Thoughts

    Creating this Mediterranean Chicken And Rice is more than just preparing a meal; it’s about crafting a memorable moment for you and your family. Each bite bursts with vibrant flavors, transporting you to sunny shores and bustling markets. It’s a comforting dish that comes together in no time, making it perfect for busy lives. I cherish the smiles around the table as we share stories over this delightful dish. So, go ahead—try this recipe, and turn your dinner time into a mini Mediterranean escape that your family will eagerly look forward to!


    Print

    clock clock iconcutlery cutlery iconflag flag iconfolder folder iconinstagram instagram iconpinterest pinterest iconfacebook facebook iconprint print iconsquares squares iconheart heart iconheart solid heart solid icon

    Description

    Mediterranean Chicken And Rice is a Flavorful Delight, combining tender chicken, fresh kale, and aromatic spices with fluffy rice.


    • 1 pound boneless, skinless chicken breast or thighs
    • 1 tbsp olive oil
    • 2 tsp salt, divided
    • 2 tsp Italian seasoning, divided
    • 2 tsp garlic powder, divided
    • 1 medium onion
    • 2 medium garlic cloves
    • 1 bunch kale
    • 1/2 cup vegetable broth
    • 1/4 cup sundried tomatoes in olive oil
    • 2.5 cups cooked rice (jasmine or basmati)

    1. Prep the chicken: Cut your chicken into bite-sized pieces and toss with olive oil, 1 teaspoon of garlic powder, salt, and Italian seasoning.
    2. Cook the chicken: Heat a skillet on medium-high heat, add chicken in an even layer, let it sear for about 5 minutes, then stir and cook for another 3-5 minutes until done.
    3. Sauté the veggies: Remove the chicken, lower heat to medium, add chopped onions and cook for 2-3 minutes, then add garlic and cook for another minute.
    4. Add the kale: Stir in chopped kale, vegetable broth, and remaining seasonings. Cook for 2-3 minutes until kale wilts but maintains texture.
    5. Bring it all together: Add cooked rice, chicken, and sundried tomatoes to the pan with sautéed kale. Stir well, cover, turn off heat, and let sit for about 5 minutes.

    Notes

    • Use a sharp knife for cutting the chicken to ensure uniform cooking.
    • Don’t overcrowd the pan when cooking the chicken to achieve a good sear.
    • Adjust the seasoning to taste before serving.
    • Prep Time: 15 minutes
    • Cook Time: 20 minutes
    • Category: Main Course
    • Method: Skillet
    • Cuisine: Mediterranean

    Nutrition

    • Serving Size: 1 serving
    • Calories: 450
    • Sugar: 3g
    • Sodium: 600mg
    • Fat: 14g
    • Saturated Fat: 2g
    • Unsaturated Fat: 10g
    • Trans Fat: 0g
    • Carbohydrates: 60g
    • Fiber: 3g
    • Protein: 30g
    • Cholesterol: 70mg

    Sharing is caring!

  • Ground Turkey and Zucchini Skillet

    Ground Turkey and Zucchini Skillet


    Introduction to Ground Turkey and Zucchini Skillet

    Welcome to the world of easy, flavorful dinners! If you’re anything like me, juggling family commitments and work can sometimes leave little time for elaborate meals. That’s where my Ground Turkey and Zucchini Skillet comes in, a quick solution for your busy days. This dish brings together healthy ground turkey and fresh zucchini in a way that’s not only delicious but super satisfying. Picture the melted cheese bubbling on top—doesn’t that just make your mouth water? Let’s dive into this recipe, so you can impress your loved ones and enjoy stress-free cooking!

    Why You’ll Love This Ground Turkey and Zucchini Skillet

    This Ground Turkey and Zucchini Skillet is the ultimate one-pan wonder! It comes together in just 35 minutes, making it perfect for hectic weeknights. The combination of lean turkey and fresh zucchini keeps it healthy without sacrificing flavor. Plus, with minimal cleanup required, you can enjoy more quality time with your family. Trust me, this dish will quickly become a staple in your dinner rotation!

    Ingredients for Ground Turkey and Zucchini Skillet

    This Ground Turkey and Zucchini Skillet is packed with wholesome ingredients that you probably already have in your kitchen. Let’s break them down, shall we?

    • Ground Turkey: Lean, protein-packed, and perfect for a healthy dinner.
    • Zucchini: Fresh and versatile, zucchini adds moisture and a lovely texture to the dish.
    • Olive Oil: A heart-healthy fat that starts us off with a flavorful base.
    • Onion: Adds sweetness and depth; I love using yellow or white onions for their mild flavor.
    • Garlic: Aromatic and savory, it makes everything better! Fresh garlic is best, but garlic powder works in a pinch.
    • Dried Oregano: A sprinkle of this herb brings a hint of earthiness to each bite.
    • Paprika: Adds a subtle smokiness, enhancing the dish’s overall flavor.
    • Red Pepper Flakes: For those who enjoy a little heat! Adjust according to your spice tolerance.
    • Salt and Black Pepper: Essential seasonings that brighten every flavor.
    • Chicken Broth: Keeps everything moist and infuses deliciousness. You can use low-sodium if that’s your preference.
    • Shredded Mozzarella Cheese: The star of the show! Melty and gooey, it creates that delightful topping.

    Feel free to mix it up! You could toss in some bell peppers or spinach for extra nutrients. Or, for a heartier meal, serve the skillet over rice or quinoa. All ingredient measurements are at the bottom of the article for easy printing, so you can get cooking in no time!

    How to Make Ground Turkey and Zucchini Skillet

    Making this Ground Turkey and Zucchini Skillet is a breeze. I’ll walk you through the steps, so you can enjoy a healthy and delicious meal in no time. Let’s get cooking!

    Step 1: Prepare the Skillet

    Begin by heating a large skillet over medium heat. I love a good non-stick skillet here; it works wonders for easy cleanup.

    Once hot, add a tablespoon of olive oil, swirling it around to coat the bottom. This creates a flavorful base for our dish.

    Step 2: Cook the Ground Turkey

    Now, it’s time to add 1 pound of ground turkey to the skillet. Using a wooden spoon or spatula, break it apart as it cooks.

    Let it sizzle for about 5 to 7 minutes. Make sure to stir occasionally. You’re looking for that beautiful golden-brown color, with no pink remaining.

    Step 3: Add the Vegetables

    While your turkey browns, chop half a medium onion into tiny pieces. This will keep things nice and uniform!

    Once the turkey is cooked, toss the chopped onion into the skillet. Stir it in and cook for about 3 to 4 minutes, until the onion turns soft and translucent. Next, peel and mince those 2 cloves of garlic, because we all know garlic makes everything better!

    When the onion is ready, add in the minced garlic. Stir it for about 30 seconds until it releases that wonderful fragrance.

    Step 4: Incorporate the Spices

    Time to get a bit creative! Sprinkle in ½ teaspoon dried oregano, ½ teaspoon paprika, ¼ teaspoon red pepper flakes, ½ teaspoon salt, and ¼ teaspoon black pepper.

    Stir well to coat everything in those aromatic spices. Trust me, your kitchen will start to smell heavenly!

    Step 5: Stir in Zucchini and Chicken Broth

    Now, grab those 2 medium zucchinis. Slice them in half lengthwise, and then cut each half into half-moon shapes.

    Add the zucchini to the skillet, mixing it with the turkey and onions. Then, pour in ¼ cup of chicken broth, stirring to combine.

    Cover the skillet and let it cook for 7 to 10 minutes. You’ll want the zucchini to become tender and release some of its moisture.

    Step 6: Melt the Cheese

    Once the zucchini is cooked to your liking, uncover the skillet and give everything a gentle stir to redistribute those delicious veggies.

    Now comes the fun part! Sprinkle ½ cup of shredded mozzarella cheese evenly over the top. Cover the skillet again, and let it cook for an additional 2 to 3 minutes. You want that cheese to melt and bubble up nicely.

    Once it’s gloriously melted, remove the skillet from heat. There you have it, a delightful Ground Turkey and Zucchini Skillet, ready to be served!

    Tips for Success

    • Prep your ingredients before cooking to streamline the process.
    • Adjust seasoning to taste; don’t hesitate to add more spices if you prefer.
    • Use a lid while cooking for softer zucchini—steam works wonders!
    • Experiment with additional veggies for more nutrients and flavor.
    • For a creamier texture, consider adding a splash of cream before serving.

    Equipment Needed

    • Large skillet: A non-stick skillet works great, but any large frying pan will do.
    • Wooden spoon or spatula: Use these for stirring and breaking up the turkey.
    • Cutting board and knife: Essential for chopping veggies efficiently.
    • Measuring cups: Handy for measuring broth and cheese accurately.

    Variations of Ground Turkey and Zucchini Skillet

    • Spicy Southwest Twist: Add black beans, diced tomatoes, and corn for a Tex-Mex flair. A sprinkle of taco seasoning would complement this variation beautifully!
    • Mediterranean Style: Incorporate olives, artichoke hearts, and feta cheese for a refreshing Mediterranean spin. The combo of flavors will transport you straight to the coast!
    • Low-Carb Delight: Swap out zucchini for riced cauliflower for a lower-carb option. It still lends that wonderful veggie texture without the extra carbs.
    • Herb-Infused: Substitute the dried spices with fresh herbs like basil or parsley. Fresh herbs can elevate the dish in surprising ways!
    • Veggie-Packed: Add bell peppers, carrots, or spinach for an extra nutrient boost. The more the merrier when it comes to colorful veggies!

    Serving Suggestions for Ground Turkey and Zucchini Skillet

    • Serve over a bed of fluffy rice or quinoa for a filling meal.
    • A side of garlic bread pairs perfectly for those bread lovers!
    • Garnish with fresh basil or parsley for a burst of color.
    • Enjoy with a crisp salad for added freshness.
    • A glass of sparkling water with lemon complements the savory flavors beautifully.

    FAQs about Ground Turkey and Zucchini Skillet

    Here are some common questions I often hear about the Ground Turkey and Zucchini Skillet. Let’s tackle them together!

    Can I make this dish ahead of time?
    Absolutely! You can prepare it a day in advance. Just reheat it on the stove when you’re ready to serve. It’s just as delicious the next day!

    What can I substitute for ground turkey?
    If turkey isn’t your thing, lean ground chicken or even plant-based alternatives work great. Just remember to adjust the cooking times accordingly.

    Can I freeze the Ground Turkey and Zucchini Skillet?
    Yes, this dish freezes well! Just allow it to cool completely before storing it in an airtight container. It can last for up to 3 months in the freezer.

    How can I make it more spicy?
    If you like a kick, toss in an extra dash of red pepper flakes or even some diced jalapeños. Experimenting with your spice preference can make it even more exciting!

    Is this recipe kid-friendly?
    Definitely! The combination of flavors is mild yet tasty. If your little ones are picky about veggies, consider blending the zucchini into the turkey mixture for a sneakier approach!

    Final Thoughts

    Cooking should be a joyful experience, not a chore. This Ground Turkey and Zucchini Skillet embodies that sentiment perfectly. Each time I make it, I’m reminded that healthy can also be delicious. It’s a feel-good meal that brings my family together at the table. Watching my loved ones enjoy every bite while I savor the simplicity of preparation makes it worthwhile. Plus, it adapts wonderfully to whatever you have on hand, making it a canvas for creativity. So go ahead, relish in the flavors and enjoy the moments that come with sharing a home-cooked meal!


    Print

    clock clock iconcutlery cutlery iconflag flag iconfolder folder iconinstagram instagram iconpinterest pinterest iconfacebook facebook iconprint print iconsquares squares iconheart heart iconheart solid heart solid icon

    Description

    Welcome to the world of easy, flavorful dinners! If you’re anything like me, juggling family commitments and work can sometimes leave little time for elaborate meals. That’s where my Ground Turkey and Zucchini Skillet comes in, a quick solution for your busy days. This dish brings together healthy ground turkey and fresh zucchini in a way that’s not only delicious but super satisfying. Picture the melted cheese bubbling on top—doesn’t that just make your mouth water? Let’s dive into this recipe, so you can impress your loved ones and enjoy stress-free cooking!


    • 1 lb ground turkey
    • 2 medium zucchinis
    • 1 tablespoon olive oil
    • 1⁄2 medium onion
    • 2 cloves garlic
    • 1⁄2 teaspoon dried oregano
    • 1⁄2 teaspoon paprika
    • 1⁄4 teaspoon red pepper flakes
    • 1⁄2 teaspoon salt
    • 1⁄4 teaspoon black pepper
    • 1⁄4 cup chicken broth
    • 1⁄2 cup shredded mozzarella cheese

    1. Heat a large skillet over medium heat.
    2. Add the olive oil to the skillet, swirling it to coat the bottom.
    3. Once the oil is hot, add the ground turkey to the skillet.
    4. Break up the ground turkey with a wooden spoon or spatula as it cooks.
    5. Cook the turkey for about 5-7 minutes, stirring occasionally, until it is fully browned and no longer pink.
    6. Chop the onion into small pieces while the turkey cooks.
    7. Peel and mince the garlic cloves.
    8. Slice the zucchinis in half lengthwise, then slice each half into half-moon shapes.
    9. Once the turkey is cooked through, add the chopped onion to the skillet.
    10. Stir the onion into the turkey and cook for about 3-4 minutes, until it becomes soft and translucent.
    11. Add the minced garlic to the skillet, stirring it in for about 30 seconds, or until fragrant.
    12. Sprinkle the dried oregano, paprika, red pepper flakes, salt, and black pepper over the turkey mixture.
    13. Stir well to evenly distribute the spices throughout the skillet.
    14. Add the sliced zucchini to the skillet, stirring to combine with the turkey and onion mixture.
    15. Pour the chicken broth into the skillet, stirring to incorporate.
    16. Cover the skillet and cook for 7-10 minutes, or until the zucchini is tender and has released its moisture.
    17. Once the zucchini is cooked, remove the lid and stir the mixture to redistribute the vegetables.
    18. Sprinkle the shredded mozzarella cheese evenly over the top of the turkey and zucchini mixture.
    19. Cover the skillet again and cook for an additional 2-3 minutes, or until the cheese is melted and bubbly.
    20. Once the cheese has melted, remove the skillet from the heat.
    21. Serve the Ground Turkey and Zucchini Skillet immediately, either on its own or with your preferred side.

    Notes

    • Feel free to add other vegetables such as bell peppers or spinach for more nutrients.
    • This dish can be served over rice or quinoa for a heartier meal.
    • Leftovers can be stored in the fridge for up to 3 days.
    • Prep Time: 10 minutes
    • Cook Time: 25 minutes
    • Category: Dinner
    • Method: Skillet
    • Cuisine: American

    Nutrition

    • Serving Size: 1 serving
    • Calories: 320
    • Sugar: 3g
    • Sodium: 600mg
    • Fat: 16g
    • Saturated Fat: 6g
    • Unsaturated Fat: 8g
    • Trans Fat: 0g
    • Carbohydrates: 10g
    • Fiber: 2g
    • Protein: 30g
    • Cholesterol: 90mg

    Sharing is caring!

  • Banana Cake Cream Cheese Roll

    Banana Cake Cream Cheese Roll


    Introduction to Banana Cake Cream Cheese Roll

    Hey there, fellow home cooks! If you’re anything like me, some days you just need a little slice of joy to brighten things up. That’s exactly what the Banana Cake Cream Cheese Roll delivers! It’s quick, delicious, and impressively beautiful—perfect for busy days when you still want to indulge your loved ones.

    Imagine a soft banana-flavored cake, lovingly filled with creamy cheese and topped with a sweet glaze. It’s a treat that feels fancy without all the fuss. Let’s dive into this delightful recipe and make some kitchen magic happen!

    Why You’ll Love This Banana Cake Cream Cheese Roll

    This Banana Cake Cream Cheese Roll is a lifesaver for busy moms and professionals alike. It’s not just easy to make but also incredibly satisfying to eat. The flavors blend beautifully, creating a scrumptious treat that will have everyone asking for seconds.

    Plus, it’s versatile enough to brighten up a regular weekday or steal the show at special occasions. Trust me, your taste buds will thank you!

    Ingredients for Banana Cake Cream Cheese Roll

    Before we start whipping up some deliciousness, let’s gather our ingredients. Each component plays a crucial role in making this Banana Cake Cream Cheese Roll a mouthwatering delight. While the exact measurements are at the bottom of the article for your easy printing, here’s a quick overview of what you’ll need:

    Cream Cheese Filling

    This filling is the heartbeat of the roll. Softened cream cheese brings that luscious, tangy creaminess, while granulated sugar sweetens the mix. Don’t forget about the egg and a splash of milk—they create that smooth, velvety texture we all crave!

    Cake Batter

    The cake layer is light and fluffy, thanks to the four eggs we’ll use. They add richness and help the cake rise perfectly. With mashed banana, you’ll get a lovely natural sweetness along with a hint of banana flavor. The flour, baking powder, and baking soda give it structure without making it too dense. And a touch of vanilla extract introduces warmth to each bite.

    Glaze Ingredients

    What’s a roll without a glorious glaze? We’ll need softened cream cheese again, whisked together with powdered sugar, milk, and vanilla extract. This glaze adds a sweet finishing touch that takes this dessert to the next level. You can drizzle it on generously or just a light coating if you prefer less sweetness.

    Optional Mix-ins

    Add some personality to your Banana Cake Cream Cheese Roll! Think chopped pecans for crunch, dried cranberries for a pop of color and tartness, or candied ginger for a spicy kick. Feel free to get creative with these additions—they can transform the flavor profile completely!

    How to Make Banana Cake Cream Cheese Roll

    Now that we have everything ready, it’s time to bring this Banana Cake Cream Cheese Roll to life! I promise you, this process is easier than it seems. Let’s break it down step by step.

    Prepare the Baking Pan

    Start by greasing a 15 x 10 x 1 inch jelly roll pan and lining it with parchment paper. This is a super important step to ensure our cake doesn’t stick. Preheat your oven to 375°F. The combination of preheating and greasing sets the stage for a perfect roll!

    Make the Cream Cheese Filling

    In a small bowl, blend the softened cream cheese with granulated sugar until smooth using an electric mixer. The texture should be creamy and inviting! Add one egg and three tablespoons of whole milk, beating at medium speed until fully incorporated. Now, spread this luscious filling evenly into the prepared pan. Oh, this filling is like a hug in a bite!

    Prepare the Fruit and Nut Mixture

    Chop up the pecans, candied ginger, and dried cranberries on a cutting board. The sweet and nutty aroma will fill your kitchen. Set aside a third cup of this fruity-nutty mixture for later, and keep the rest ready for the batter. This blend adds both texture and flavor, trust me!

    Mix the Dry Ingredients

    In another bowl, whisk together the all-purpose flour, baking powder, and baking soda. This combined mixture will give our cake structure and lift. Set it aside for now while we prepare the batter. It’s all coming together beautifully!

    Create the Cake Batter

    In a large bowl, beat the egg yolks with vanilla extract until the mixture is thick and lemon-colored—around five minutes should do the trick. Gradually mix in a third cup of granulated sugar, then stir in the mashed bananas along with the reserved fruit and nut blend. This batter will be light yet flavorful, a dance of sweetness!

    Whip the Egg Whites

    In a clean bowl, beat the egg whites at medium-high speed until soft peaks form. Gradually add the remaining granulated sugar, then beat on high until stiff peaks are achieved. This is all about creating that perfect fluffy texture. It’s like magic, but with eggs!

    Combine Mixtures

    Gently fold the egg yolk mixture into the beaten egg whites. You want to combine these without deflating that lovely airiness you just created. Next, add in half of the flour mixture and fold gently. Then, add the remaining flour mixture and fold until just combined. Avoid overmixing, as we want to maintain that fluffiness!

    Bake the Cake

    Carefully pour the cake batter over the cream cheese filling in the pan. Spread it evenly to all corners—this is where the magic happens! Bake it for about 15 to 20 minutes until the cake is set and light golden. You’ll know it’s ready when a toothpick inserted into the center comes out clean.

    Roll the Cake

    While the cake is baking, lay out a clean kitchen towel and dust it generously with powdered sugar. Once the cake is done, let it cool in the pan for about five minutes. Run a knife around the edges, flip the cake out onto the towel, and remove the parchment. Beginning at the short end, roll the cake with the towel into a log, seam-side down. Give it about ten minutes to cool and set the shape.

    Prepare the Glaze

    In a small bowl, blend the softened cream cheese with powdered sugar, vanilla extract, and a little milk until it’s smooth and drizzleable. This glaze is the cherry on top of our already fabulous creation! Adjust the milk to get your desired consistency, because we all have preferences!

    Glaze and Serve

    Once the rolled cake has cooled completely, transfer it to a serving platter. Spread that glorious glaze evenly over the top. Then, sprinkle with the reserved chopped pecans, cranberries, and candied ginger. Your Banana Cake Cream Cheese Roll is now ready to impress—enjoy every slice!

    Tips for Success

    • Always ensure your cream cheese is completely softened for a smooth filling.
    • When rolling the cake, don’t pull too tight; a gentle roll keeps it fluffy.
    • Dust your work surface with powdered sugar to prevent sticking while rolling.
    • Feel free to customize the filling and mix-ins based on your family’s tastes.
    • If the roll cracks, don’t fret! A drizzle of glaze will hide imperfections.

    Equipment Needed

    • 15 x 10 x 1 inch jelly roll pan (or use a baking sheet with edges)
    • Parchment paper (wax paper can be an alternative)
    • Mixing bowls (a large one and a small one)
    • Electric mixer (a whisk works too, but it’ll take longer)
    • Rubber spatula (a wooden spoon can suffice)

    Variations on Banana Cake Cream Cheese Roll

    • Substitute the all-purpose flour for a gluten-free blend to make this recipe gluten-free. It works just as well!
    • Swap out regular granulated sugar for coconut sugar or a sugar substitute to lower the glycemic index.
    • Add a tablespoon of cocoa powder to the cake batter for a chocolatey twist on the classic banana flavor.
    • Use nut butter, like almond or peanut butter, in the cream cheese filling for a rich, nutty taste.
    • Change up the glaze by adding a hint of orange or lemon zest for a refreshing citrus flavor.

    Serving Suggestions for Banana Cake Cream Cheese Roll

    • Pair it with a scoop of vanilla ice cream for a decadent dessert experience.
    • Serve it alongside a fresh fruit salad for a light, refreshing contrast.
    • Enjoy with a hot cup of coffee or tea to balance the sweetness.
    • Slice it into smaller pieces for brunch gatherings or potlucks.

    FAQs about Banana Cake Cream Cheese Roll

    Can I make this Banana Cake Cream Cheese Roll gluten-free?

    Absolutely! Just replace the all-purpose flour with a gluten-free flour blend. It works beautifully, and your friends with dietary restrictions will appreciate the thoughtful touch.

    How can I store the Banana Cake Cream Cheese Roll?

    You can store this delightful treat in the refrigerator, tightly wrapped. It stays fresh for up to three days. Just remember to let it come to room temperature before serving for the best taste.

    Can I use frozen bananas?

    Yes! Frozen bananas work just fine. Just remember to thaw them beforehand and mash them up nicely. They add great flavor, and no one will know they came from the freezer!

    What if my roll cracks while baking?

    No need to panic! If the Banana Cake Cream Cheese Roll cracks, just drizzle some glaze over the cracks. It hides imperfections and tastes incredibly delicious—it’s a win-win!

    Can I prepare this roll ahead of time?

    Definitely! You can make this Banana Cake Cream Cheese Roll a day in advance. Just keep it in the fridge until you’re ready to serve. It’ll make your life a whole lot easier!

    Final Thoughts

    Creating this Banana Cake Cream Cheese Roll is like sprinkling a little joy into your day. The blend of flavors and textures is pure bliss, and I can’t help but smile when I share it with family and friends. Whether it’s a quick treat on a busy weekday or a show-stopping dessert at a gathering, this recipe shines in every setting. Plus, the ease of making it means you won’t spend hours in the kitchen. So, roll up those sleeves and bask in the delight of creating something wonderfully delicious. You—and your loved ones—are going to absolutely adore it!


    Print

    clock clock iconcutlery cutlery iconflag flag iconfolder folder iconinstagram instagram iconpinterest pinterest iconfacebook facebook iconprint print iconsquares squares iconheart heart iconheart solid heart solid icon

    Description

    A delightful Banana Cake Cream Cheese Roll filled with a creamy cheese mixture and rolled with a banana-flavored cake, topped with a sweet glaze and pecans.


    • 7 ounces cream cheese, softened
    • 1/2 cup granulated sugar
    • 1 large egg
    • 3 tablespoons whole milk
    • 1/2 cup all-purpose flour
    • 1/2 teaspoon baking powder
    • 1/4 teaspoon baking soda
    • 4 large eggs, separated
    • 1/2 teaspoon vanilla extract
    • 2/3 cup granulated sugar, divided
    • 2/3 cup mashed banana (1 large or 2 small bananas)
    • 1/3 cup pecans, chopped
    • 1/4 cup dried cranberries
    • 1/4 cup candied ginger, chopped
    • 1 ounce cream cheese, softened (for glaze)
    • 3/4 cup powdered sugar (for glaze)
    • 1 teaspoon vanilla extract (for glaze)
    • 2 to 3 teaspoons whole milk (for glaze)

    1. Grease a 15 x 10 x 1 inch jelly roll pan and line it with parchment paper. Preheat oven to 375°F.
    2. In a small bowl, blend 7 ounces of softened cream cheese with 1/2 cup granulated sugar until smooth using an electric mixer. Add 1 egg and 3 tablespoons whole milk, beating on medium speed until fully incorporated. Evenly spread the cream cheese filling into the prepared pan.
    3. Coarsely chop pecans, candied ginger, and dried cranberries together on a cutting board. Set aside 1/3 cup of this mixture for the batter and reserve the remainder for topping.
    4. Whisk together 1/2 cup all-purpose flour, 1/2 teaspoon baking powder, and 1/4 teaspoon baking soda in a bowl. Set aside.
    5. In a large bowl, beat 4 egg yolks with 1/2 teaspoon vanilla extract on medium speed for about 5 minutes, until thick and lemon-colored. Gradually beat in 1/3 cup granulated sugar. Mix in mashed banana and 1/3 cup of chopped pecan, cranberry, and ginger blend.
    6. In a clean separate bowl, beat 4 egg whites at medium-high speed until soft peaks form. Gradually add remaining 1/3 cup granulated sugar, beating on high until stiff peaks are achieved.
    7. Gently fold the egg yolk mixture into the beaten egg whites. Add half of the flour mixture and fold gently; then add the remaining flour mixture and fold until just combined without overmixing.
    8. Carefully pour the cake batter over the cream cheese filling in the pan, spreading evenly to corners. Bake for 15 to 20 minutes until cake is set and light golden.
    9. While the cake is baking, lay out a clean kitchen towel and dust it generously with powdered sugar to prevent sticking.
    10. After baking, let the cake cool in the pan for 5 minutes. Release the edges with a knife, flip the cake out onto the powdered sugar-dusted towel, and remove parchment. Beginning at the short end, roll the cake with the towel into a log. Place seam-side down and cool for 10 minutes to set the shape.
    11. Transfer the rolled cake to a serving platter and let it cool completely before glazing.
    12. In a small bowl, blend 1 ounce softened cream cheese with 3/4 cup powdered sugar, 1 teaspoon vanilla extract, and 2 to 3 teaspoons milk until smooth and drizzleable.
    13. Spread the glaze evenly over the cooled cake roll, then sprinkle with the reserved chopped pecans, cranberries, and candied ginger.

    Notes

    • Ensure the cream cheese is fully softened to avoid lumps in the filling.
    • Feel free to adjust the sugar in the glaze according to your preference.
    • This cake can be made a day in advance; just keep it chilled until serving.
    • Prep Time: 30 minutes
    • Cook Time: 20 minutes
    • Category: Dessert
    • Method: Baking
    • Cuisine: American

    Nutrition

    • Serving Size: 1 slice
    • Calories: 250
    • Sugar: 20g
    • Sodium: 150mg
    • Fat: 10g
    • Saturated Fat: 4g
    • Unsaturated Fat: 5g
    • Trans Fat: 0g
    • Carbohydrates: 35g
    • Fiber: 1g
    • Protein: 4g
    • Cholesterol: 100mg

    Sharing is caring!

  • Crockpot Sausage Casserole

    Crockpot Sausage Casserole


    Introduction to Crockpot Sausage Casserole

    There’s something heartwarming about coming home to the savory aroma of a delicious meal waiting just for you. That’s where my Crockpot Sausage Casserole shines! This recipe is perfect for busy evenings when you need a nutritious dinner without all the fuss. With tender smoked sausage, hearty potatoes, and flavorful vegetables, it’s pure comfort food at its finest. Plus, it’s super easy to throw together. Just set your crockpot and let it do the magic while you catch up with the family. Trust me, this meal will quickly become a weeknight favorite!

    Why You’ll Love This Crockpot Sausage Casserole

    This Crockpot Sausage Casserole is the answer to your weeknight dinner woes! It’s all about ease—simply toss everything into the crockpot and let the flavors meld beautifully while you tackle your to-do list.

    The speed of preparation and the delicious taste will have your family asking for seconds. It’s a satisfying meal that not only fills bellies but warms hearts, making it the perfect choice for busy moms and professionals alike!

    Ingredients for Crockpot Sausage Casserole

    Here’s a delightful lineup for your Crockpot Sausage Casserole. Each ingredient plays a role in creating the wonderful flavors that will dance on your palate!

    • Smoked sausage: I love using smoked sausage for its rich and savory flavor. You can choose turkey sausage for a lighter option or even bratwurst if you’re feeling adventurous.
    • Potatoes: Diced potatoes add heartiness to this dish. You can use regular potatoes or opt for baby potatoes. They both absorb flavors beautifully as they cook.
    • Onion: Chopped onion infuses the casserole with a sweet, aromatic flavor. It’s a must-have for that comforting home-cooked feel!
    • Bell pepper: Every color of bell pepper works here. I enjoy using a mix for a vibrant touch, adding both sweetness and crunch.
    • Diced tomatoes: A can of diced tomatoes contributes moisture and tang. If you prefer a smokier taste, consider using fire-roasted diced tomatoes.
    • Chicken broth: This forms the savory base of our casserole. Low-sodium chicken broth is a great choice if you’re watching your salt intake.
    • Paprika: Just a little sprinkle of paprika adds warmth and depth to the flavor profile. For a bit of heat, feel free to explore spicy paprika or add red pepper flakes.

    Don’t forget, if you have leftover veggies lurking in your fridge, toss them in! The exact quantities for each ingredient are available at the bottom of the article for printing. Let your creativity shine as you whip up this comforting dish!

    How to Make Crockpot Sausage Casserole

    Now that you have all the ingredients ready, it’s time for the fun part—cooking! This Crockpot Sausage Casserole is as simple as pie. Let’s dive into the steps that will take you to a delicious meal with minimal effort.

    Prepare Your Ingredients

    First, let’s get rolling with the prep!

    Start by slicing the smoked sausage into bite-sized pieces. Aim for thick slices; they’ll hold up wonderfully during cooking.

    Then, dice your potatoes. If you’re using regular potatoes, peel them first. But if you opt for baby potatoes, just give them a good rinse and cut them in half or quarters.

    Next, chop your onion and bell peppers into uniform pieces. This way, they’ll cook evenly and blend well with the rest of the ingredients. Think of these fresh veggies as little flavor nuggets!

    Combine Ingredients in the Crockpot

    Time to bring all those ingredients together!

    Grab your crockpot and layer in the sliced sausage first. Then, add in the diced potatoes, followed by the chopped onion and bell pepper.

    Open that can of diced tomatoes and pour them in, juice and all.

    Now, pour in the chicken broth for the ultimate flavor base. To finish, sprinkle the paprika over the top.

    Give it a gentle stir, making sure to distribute everything evenly. Just like that, you’ve set the stage for a magical flavor experience!

    Set the Cooking Time

    Now, let’s set the clock!

    Cover your crockpot and set it to low. Cook for 5 to 6 hours.

    During this time, your kitchen will fill with mouthwatering scents. Don’t peek too often; you want the steam to do its thing!

    When your cooking time is up, check that the potatoes are fork-tender. If they are, congratulations! You’re almost there!

    Serve and Enjoy

    The finale is here! Time to serve up that warm bowl of comforting goodness.

    Stir the casserole gently before serving to mix the ingredients.

    I love pairing it with a simple green salad or some crusty bread to soak up all that delicious broth.

    You can also sprinkle fresh herbs like parsley or basil on top for a pop of color and flavor.

    Enjoy this Crockpot Sausage Casserole as a warm hug on a plate, and don’t forget to relish the compliments from your family!

    Tips for Success

    • Prep your ingredients the night before to save time.
    • Don’t skip the paprika; it elevates the flavor!
    • Experiment with different veggies based on what you have.
    • Stir the casserole halfway through cooking for even flavor distribution.
    • Use leftovers for a quick lunch the next day—it’s even better reheated!

    Equipment Needed

    • Crockpot: Essential for this recipe. A slow cooker works too!
    • Cutting board and knife: For chopping veggies and slicing sausage.
    • Measuring cups and spoons: Handy for precise ingredient quantities.
    • Serving spoon: Perfect for dishing out your delicious casserole.

    Variations

    • Protein swaps: Try chicken sausage or even tofu for a vegetarian twist!
    • Cheesy delight: Add shredded cheese, like cheddar or mozzarella, 30 minutes before serving for a melty topping.
    • Herb enhancement: Toss in fresh herbs like thyme or rosemary for a fragrant boost!
    • Sweet and savory: Incorporate a diced sweet potato for a touch of sweetness and a nutritional punch.
    • Gluten-free option: If gluten is a concern, ensure your sausage and broth are labeled gluten-free for peace of mind.

    Serving Suggestions

    • Green salad: A crisp green salad with a simple vinaigrette pairs wonderfully.
    • Crusty bread: Serve with warm, crusty bread to soak up the savory broth.
    • Refreshing beverages: I recommend a chilled iced tea or sparkling lemon water to complement the flavors.
    • Presentation: Garnish with fresh parsley for a pop of color; it makes serving feel special!

    FAQs about Crockpot Sausage Casserole

    Let’s tackle some common questions about this Crockpot Sausage Casserole so you can dive right into making this comforting dish without any confusion!

    Can I use other types of sausage?

    Absolutely! Feel free to experiment with chicken sausage, turkey sausage, or even a spicy variety if your family enjoys a kick. Your dish will still be delicious and satisfying!

    How long can leftovers be stored?

    Any leftover Crockpot Sausage Casserole can be stored in an airtight container in the fridge for 3-4 days. Simply reheat for lunch or dinner another day!

    Can I freeze this casserole?

    You sure can! Just let it cool completely, then place it in a freezer-safe container. It will keep well for about 2-3 months. Reheat thoroughly before enjoying.

    How do I make this dish spicier?

    If you’re looking for a bit of heat, consider adding red pepper flakes or using spicy sausage. You could also sprinkle some hot sauce right before serving!

    Is this casserole gluten-free?

    Yes! Just double-check your sausage and broth for gluten-free labels to ensure everyone at the table can enjoy this hearty meal without any worries.

    Final Thoughts

    Cooking should be a joyful experience, and my Crockpot Sausage Casserole truly embodies that spirit. With minimal effort, you can whip up a meal that brings comfort and satisfaction to your family. It’s amazing how a simple dish can become the centerpiece of cherished family moments and laughter around the dinner table. The rich flavors meld together, making each bite a warm embrace. So, let your crockpot work its magic while you savor the time with your loved ones. Enjoy the smiles and compliments as this recipe transforms ordinary evenings into extraordinary ones!


    Print

    clock clock iconcutlery cutlery iconflag flag iconfolder folder iconinstagram instagram iconpinterest pinterest iconfacebook facebook iconprint print iconsquares squares iconheart heart iconheart solid heart solid icon

    Description

    A hearty and delicious crockpot recipe that combines smoked sausage with potatoes and fresh vegetables, simmered to perfection for a comforting meal.


    • 1 lb smoked sausage, sliced
    • 4 potatoes, diced (or more baby potatoes)
    • 1 onion, chopped
    • 1 bell pepper, chopped
    • 1 can (14.5 oz) diced tomatoes
    • 2 cups chicken broth
    • 1 tsp paprika

    1. Add sausage, potatoes, onion, bell pepper, diced tomatoes, chicken broth, and paprika to the crockpot.
    2. Cook on low for 5-6 hours until the potatoes are tender.

    Notes

    • Feel free to use any leftover vegetables you have in your pantry.
    • If you prefer a spicier dish, add some red pepper flakes.
    • Prep Time: 15 minutes
    • Cook Time: 5-6 hours
    • Category: Main Dish
    • Method: Crockpot
    • Cuisine: American

    Nutrition

    • Serving Size: 1 serving
    • Calories: 350
    • Sugar: 3g
    • Sodium: 800mg
    • Fat: 22g
    • Saturated Fat: 8g
    • Unsaturated Fat: 10g
    • Trans Fat: 0g
    • Carbohydrates: 25g
    • Fiber: 3g
    • Protein: 15g
    • Cholesterol: 50mg

    Sharing is caring!

  • Mediterranean Ground Beef Stir-Fry

    Mediterranean Ground Beef Stir-Fry


    Introduction to Mediterranean Ground Beef Stir-Fry

    Life can be a whirlwind, can’t it? With dinner time looming and everyone’s stomach growling, finding a quick solution is key. That’s where my Mediterranean Ground Beef Stir-Fry comes in like a delicious hero! Packed with vibrant veggies and aromatic spices, this dish is not just flavorful; it’s a breeze to prepare. Whether you’re impressing your loved ones or just need a nourishing meal on a hectic day, this recipe will become your go-to gem. Trust me, it’s going to tantalize your taste buds and become a family favorite in no time!

    Why You’ll Love This Mediterranean Ground Beef Stir-Fry

    This Mediterranean Ground Beef Stir-Fry is a lifesaver for busy nights. It comes together in less than 30 minutes, making it perfect for those evenings when you’re scrambling for a meal. The blend of spices kicks your taste buds into high gear while keeping things healthy and satisfying. Plus, with its colorful veggies, it’s as visually appealing as it is delicious. Who said quick meals had to be boring?

    Ingredients for Mediterranean Ground Beef Stir-Fry

    Now, let’s gather everything you need for this vibrant dish! Each ingredient plays a role in building flavor and nourishment. Here’s what you’ll need:

    • Ground beef: I recommend choosing an 85% lean option for the perfect balance of flavor and health. You can swap it out for ground turkey or chicken if you prefer.
    • Olive oil: This liquid gold is essential for sautéing. It adds a rich flavor and is loaded with healthy fats.
    • Onion: A finely chopped onion brings a sweet aroma and depth to the stir-fry, making it irresistible.
    • Garlic: I can never get enough of garlic! Minced garlic adds a zesty punch that elevates the dish.
    • Bell pepper: Use red or yellow for a pop of color. They’re sweet and crunchy, making them a perfect addition.
    • Zucchini: Diced zucchini adds a mild flavor and a lovely texture that complements the heartiness of the beef.
    • Cherry tomatoes: These little gems add sweetness and juiciness, brightening the dish with their fresh flavor.
    • Kalamata olives: A Mediterranean staple, these olives impart a robust, briny taste that enhances all other flavors.
    • Fresh parsley: Chopped parsley not only adds freshness but also a vibrant green color to your meal.
    • Spices: A blend of salt, black pepper, ground cumin, smoked paprika, dried oregano, and optional red pepper flakes brings the Mediterranean essence right to your kitchen.
    • Lemon juice: A splash of fresh lemon juice adds brightness and balances the richness of the beef.
    • Feta cheese: Crumbled feta gives a creamy, tangy finish that makes each bite heavenly.
    • Toasted pine nuts: These little nuggets add a delightful crunch and a hint of nuttiness to the stir-fry.
    • Sumac (optional): This tangy spice is a fantastic way to introduce more flavor, so consider adding it if you have some on hand!

    For the exact quantities, check out the end of this article where you can find everything conveniently laid out for printing!

    How to Make Mediterranean Ground Beef Stir-Fry

    Now it’s time to roll up your sleeves and dive into this flavorful adventure! Making Mediterranean Ground Beef Stir-Fry is easier than you think. Follow these simple steps, and you’ll have a beautiful dish on the table in no time!

    Step 1: Sauté Onion and Garlic

    Start by heating olive oil in a large skillet over medium heat. As the oil warms, toss in the finely chopped onion. I usually let it sauté for about 2-3 minutes, just until it softens and turns translucent.

    Next, add the minced garlic and stir it in. Let it cook for about 30 seconds until you catch that delicious, fragrant smell filling your kitchen. This is when your Mediterranean Ground Beef Stir-Fry starts coming to life!

    Step 2: Brown the Ground Beef

    Now, it’s time to add the ground beef into the pan. Break it up with a wooden spoon as it cooks, letting it change from pink to a beautiful brown. This should take about 5-7 minutes. I always season the beef with salt, black pepper, cumin, smoked paprika, oregano, and those optional red pepper flakes for heat. It’s such a fantastic blend of spices!

    Step 3: Add Vegetables

    Once the beef is browned, stir in the diced bell pepper and zucchini. These veggies add a satisfying crunch and vibrant color to your dish. Cook for another 5 minutes until they’re slightly tender. Then, toss in the cherry tomatoes and kalamata olives, stirring well. Let it all cook together for 2 more minutes to meld the flavors beautifully.

    Step 4: Finish with Fresh Ingredients

    Remove the skillet from the heat. Add chopped fresh parsley and drizzle in the lemon juice. This step brightens everything up! Finally, sprinkle crumbled feta cheese on top and toss in toasted pine nuts for that extra crunch. If you’ve opted for sumac, sprinkle it over your dish for an additional zing!

    And there you have it! Your Mediterranean Ground Beef Stir-Fry is ready to shine on your dinner table. I promise, the vibrant colors and amazing aromas will make everyone eager to dig in!

    Tips for Success

    • Don’t rush the sautéing process; allowing the onions and garlic to caramelize adds depth.
    • Use a wooden spoon to break up the beef; it helps achieve even cooking.
    • Add veggies gradually to retain their crunchiness; you want that lovely textural contrast.
    • For extra flavor, let the dish sit for a few minutes before serving.
    • Feel free to customize with your favorite veggies or spices!

    Equipment Needed

    • Large skillet or frying pan: A non-stick option works wonders for easy cleanup.
    • Wooden spoon: Perfect for breaking up the ground beef and stirring.
    • Knife and cutting board: Essential for chopping veggies safely and efficiently.
    • Measuring spoons: Handy for precise seasoning.

    Variations

    • Swap the protein: For a lighter option, try ground turkey or chicken instead of beef. You can even use plant-based meat for a vegetarian twist!
    • Add more greens: Toss in spinach or kale at the end for an extra boost of nutrients and a pop of color.
    • Change the cheese: If feta isn’t your style, crumbled goat cheese or shredded mozzarella works great too!
    • Go spicy: For heat lovers, add diced jalapeños or use hot pepper flakes for a fiery kick.
    • Gluten-free option: This recipe is naturally gluten-free, but always ensure any packaged ingredients are certified gluten-free.
    • Herb variations: Swap fresh parsley for basil or cilantro to change the flavor profile and add new dimensions of taste!

    Serving Suggestions

    • Serve with fluffy rice or couscous for a hearty meal that soaks up all the delicious juices.
    • Pita bread or crusty bread makes a great side for dipping and mopping up every last bite.
    • Pair with a light salad featuring mixed greens, cucumber, and a lemon vinaigrette for freshness.
    • A chilled glass of white wine complements the flavors beautifully; try a Sauvignon Blanc.
    • For a vibrant presentation, garnish with lemon wedges and extra parsley on the side.

    FAQs about Mediterranean Ground Beef Stir-Fry

    What can I use instead of ground beef in this recipe?
    Absolutely! You can substitute ground turkey, chicken, or even a plant-based meat alternative. Each option offers a unique flavor profile while keeping the Mediterranean essence intact.

    Can I make Mediterranean Ground Beef Stir-Fry ahead of time?
    Yes, this dish is perfect for meal prep! You can prepare it in advance, store it in an airtight container in the fridge, and enjoy it throughout the week. Just reheat it on the stove or microwave before serving.

    Is this stir-fry suitable for picky eaters?
    Definitely! With its colorful veggies and hearty flavors, this Mediterranean Ground Beef Stir-Fry can win over even the fussiest eaters. You can easily adjust the vegetables and spices to accommodate their preferences.

    How do I store leftovers of this stir-fry?
    To store leftovers, place them in an airtight container and refrigerate. They’ll stay fresh for about 3-4 days. Simply reheat before serving, and it’ll taste just as delicious!

    Can I freeze Mediterranean Ground Beef Stir-Fry?
    Yes! This dish freezes well. After cooking, let it cool completely, then transfer it to a freezer-safe container. It can be frozen for up to 3 months. Thaw in the fridge overnight before reheating!

    Final Thoughts

    Cooking is like an art, and this Mediterranean Ground Beef Stir-Fry is my canvas. It brings joy not just in the eating but in the crafting. The delightful aromas wafting through my kitchen create a warm embrace for family mealtime. The vibrant colors and satisfying crunch of freshly cooked veggies make each bite a celebration.

    Try this dish for a quick weeknight dinner and watch it become a kitchen favorite. It’s perfect for those busy days when your heart craves something special. Share it with loved ones, and enjoy the smiles it brings to your table!


    Print

    clock clock iconcutlery cutlery iconflag flag iconfolder folder iconinstagram instagram iconpinterest pinterest iconfacebook facebook iconprint print iconsquares squares iconheart heart iconheart solid heart solid icon

    Description

    A flavorful Mediterranean-style stir-fry featuring ground beef and fresh vegetables, enhanced with aromatic spices.


    • 1 lb (450 g) ground beef, 85% lean or higher
    • 1 tbsp olive oil
    • 1 small onion, finely chopped
    • 3 cloves garlic, minced
    • 1 bell pepper (red or yellow), diced
    • 1 small zucchini, diced
    • ½ cup cherry tomatoes, halved
    • ¼ cup kalamata olives, sliced
    • 2 tbsp fresh parsley, chopped
    • ½ tsp salt (adjust to taste)
    • ½ tsp black pepper
    • 1 tsp ground cumin
    • 1 tsp smoked paprika
    • ½ tsp dried oregano
    • ¼ tsp red pepper flakes (optional, for heat)
    • 1 tbsp fresh lemon juice
    • ¼ cup crumbled feta cheese
    • ¼ cup toasted pine nuts
    • ½ tsp sumac (optional, for extra tang)

    1. Heat the olive oil in a large skillet over medium heat. Add chopped onion and sauté for 2–3 minutes until soft and translucent. Stir in minced garlic and cook for 30 seconds until fragrant.
    2. Add ground beef to the pan, breaking it up with a wooden spoon. Season with salt, black pepper, cumin, smoked paprika, oregano, and red pepper flakes. Cook for 5–7 minutes, stirring occasionally, until the beef is browned and fully cooked.
    3. Stir in diced bell pepper and zucchini. Cook for 5 minutes until slightly tender. Add cherry tomatoes and kalamata olives; stir to combine. Cook for 2 more minutes.
    4. Remove from heat. Stir in fresh parsley and lemon juice. Top with crumbled feta cheese, toasted pine nuts, and sumac if desired.

    Notes

    • Feel free to adjust the seasoning based on your taste preferences.
    • For a spicier dish, increase the amount of red pepper flakes.
    • This dish pairs well with rice or pita bread for a complete meal.
    • Prep Time: 10 minutes
    • Cook Time: 20 minutes
    • Category: Main Dish
    • Method: Stir-fry
    • Cuisine: Mediterranean

    Nutrition

    • Serving Size: 1 serving
    • Calories: 400
    • Sugar: 3g
    • Sodium: 600mg
    • Fat: 25g
    • Saturated Fat: 8g
    • Unsaturated Fat: 12g
    • Trans Fat: 0g
    • Carbohydrates: 12g
    • Fiber: 3g
    • Protein: 30g
    • Cholesterol: 90mg

    Sharing is caring!

  • Lemon Zucchini Bars with Glaze

    Lemon Zucchini Bars with Glaze


    Introduction to Lemon Zucchini Bars with Glaze

    Welcoming the warmth of summer in your kitchen can be as simple as baking a batch of Lemon Zucchini Bars with Glaze. These delightful treats blend the moistness of fresh zucchini with a zing of lemon, creating a nostalgic flavor that evokes laughter and sunshine. As a busy mom who juggles work, kids, and the occasional chaotic dinner time, I’ve found that this recipe is not only quick but also brings smiles to everyone’s faces. Trust me, you’ll want to keep this recipe handy for those “need a sweet fix” moments!

    Why You’ll Love This Lemon Zucchini Bars with Glaze

    There’s something magical about how easily these Lemon Zucchini Bars with Glaze come together. You can whip them up in just under an hour, making them perfect for those busy weekends or unexpected guests. Plus, the refreshing lemon flavor combined with the subtle sweetness of zucchini creates a delightful balance. They’re an ideal treat for both dessert lovers and health-conscious eaters, proving that you can indulge without guilt!

    Ingredients for Lemon Zucchini Bars with Glaze

    Gathering the right ingredients is the first step to creating your Lemon Zucchini Bars with Glaze. Here’s the lineup:

    • All-purpose flour: This forms the base, giving structure to our bars. If you need a gluten-free option, try using almond or coconut flour.
    • Baking powder: This helps the bars rise, ensuring a light and fluffy texture. Make sure it’s fresh for maximum effectiveness!
    • Baking soda: A must for balancing acidity and aiding in leavening along with baking powder.
    • Salt: Just a pinch enhances the flavors and balances the sweetness! Trust me, it’s a game-changer.
    • Unsalted butter: Adds richness and moisture; use room temperature butter for easy creaming.
    • Granulated sugar: Sweetness is essential! Brown sugar can also be used for a deeper flavor, if you like a twist.
    • Large eggs: They bind the ingredients together and contribute to the texture. If you’re vegan, flax eggs work well too!
    • Vanilla extract: A splash enhances the flavor profile, making it even more comforting.
    • Plain yogurt or sour cream: This adds moisture and tang. Greek yogurt is an excellent substitute, boosting the protein content.
    • Grated zucchini: The star of the show! It keeps the bars moist and adds a subtle veggie goodness. Just remember to squeeze out the excess moisture.
    • Fresh lemon juice: Bright and zesty, it gives those bars their signature flavor. You can substitute with bottled lemon juice in a pinch but fresh is always best!
    • Lemon zest: This adds an extra punch of lemony goodness without the tartness. Grate it finely for a more intense flavor.
    • Powdered sugar: This is for our sweet glaze; it dissolves quickly for a smooth finish.
    • Milk or lemon juice: Used to thin out the glaze to the right consistency, adding an optional squeeze of lemon juice for more flavor.

    For exact quantities, check out the bottom of the article where you can find everything listed and ready for printing. Happy baking!

    How to Make Lemon Zucchini Bars with Glaze

    Prepping the Oven and Baking Pan

    Start by preheating your oven to 350°F (175°C), letting it warm up nicely. A well-preheated oven ensures even baking, which is key for texture. As the oven heats, grab your 8×8 inch baking pan.

    Grease the pan with some butter or cooking spray, then dust it with flour to prevent sticking. For an easy lift, you can also line the bottom with parchment paper. Don’t skimp on this step – trust me, it will make your life easier when you’re ready to serve!

    Mixing the Dry Ingredients

    Grab a medium bowl and whisk together the all-purpose flour, baking powder, baking soda, and salt. These guys are essential for our Lemon Zucchini Bars with Glaze.

    The flour provides the strength, while baking powder and baking soda work together to give the bars a lovely rise. The salt enhances sweetness and brings all the flavors together. Be sure to mix well!

    Creaming the Butter and Sugar

    In a larger bowl, it’s time to cream together softened butter and granulated sugar. Use an electric mixer on medium speed until the mixture turns light and fluffy – think clouds! This process usually takes about 3 minutes.

    This step is crucial because it incorporates air into the butter. A well-creamed mixture means light and tender bars. If you want to experiment, try swapping half the granulated sugar with brown sugar for a richer flavor.

    Incorporating the Eggs and Vanilla

    Next, you’ll add in the large eggs, one at a time. Make sure to mix well after each addition. This helps create that perfect texture we all love!

    After the eggs, add the vanilla extract. The aroma is incredible! Just like that, you’ve built a delightful base that’s sweet and creamy.

    Preparing the Yogurt Mixture

    In a small bowl, whisk together the plain yogurt or sour cream and fresh lemon juice. This tanginess adds a lovely depth of flavor to your bars.

    The yogurt also keeps the bars tender and moist. If you don’t have yogurt handy, Greek yogurt makes for a fantastic substitute, plus it adds protein!

    Combining Ingredients

    Now, it’s time to combine everything. Start by adding about a third of the dry ingredients to your wet mixture. Alternate this with half of the yogurt mixture, mixing gently just until combined.

    Repeat with another third of the dry, followed by the rest of the yogurt mix, and finish with the last of the dry. Remember – no overmixing! This will keep your bars perfectly tender.

    Adding Zucchini and Lemon Zest

    Now for the star of our show! Gently fold in the grated zucchini and lemon zest. I like to use a spatula here – it helps preserve the fluffiness.

    This step not only enhances the flavor but adds a lovely texture. The zucchini keeps everything moist without overpowering the lemony freshness. A beautiful balance!

    Pouring and Baking

    Pour the batter into your prepared baking pan, then spread it out evenly with a spatula. Give the pan a gentle tap on the counter; this helps eliminate any air bubbles.

    Slide your pan into the oven and bake for 30-35 minutes. You’ll know they’re done when a toothpick inserted into the center comes out clean. Just resist the urge to peek too often; every second counts!

    Cooling and Glazing

    Once baked, remove the bars from the oven and let them cool in the pan for about 15-20 minutes. This cooling time is crucial for setting up the texture perfectly.

    Afterward, transfer them to a wire rack to cool completely. While they cool, whisk together your powdered sugar with either milk or lemon juice until you reach a smooth, pourable consistency. Drizzle this glaze generously over the cooled bars, allowing it to set beautifully!

    Tips for Success

    • Always squeeze excess moisture from the grated zucchini for better texture.
    • Use a reliable oven thermometer to ensure accurate baking temperatures.
    • Don’t skip lining the baking pan, as it makes removing the bars a breeze!
    • Check the glaze consistency; it should be smooth but not too runny.
    • Feel free to experiment with different citrus flavors for a fun twist!

    Equipment Needed for Lemon Zucchini Bars with Glaze

    • 8×8 inch baking pan – a round pan works too, just adjust the baking time.
    • Mixing bowls – ideally, a set with varying sizes for convenience.
    • Whisk – a fork can work if you’re in a pinch!
    • Electric mixer – a sturdy spatula for mixing by hand is fine too.
    • Measuring cups and spoons – kitchen scale is a great alternative.

    Variations on Lemon Zucchini Bars with Glaze

    • Chocolate Chip Surprise: Add a half-cup of chocolate chips for a delightful chocolatey twist that pairs beautifully with lemon.
    • Nuts Galore: Fold in a cup of chopped walnuts or pecans for added crunch and a nutty flavor that complements the sweetness.
    • Herbal Infusion: Experiment with fresh herbs like mint or basil to elevate the flavor profile. A touch of basil can add an unexpected but delightful depth!
    • Whole Wheat Flour: Substitute half or all of the all-purpose flour with whole wheat flour for a more wholesome option packed with fiber.
    • Gluten-Free Variations: Swap the all-purpose flour with a gluten-free blend to cater to gluten sensitivities while still enjoying these delicious bars.
    • Fruity Zing: Add a cup of fresh berries, such as blueberries or raspberries, for a burst of added flavor and vibrant color.

    Serving Suggestions for Lemon Zucchini Bars with Glaze

    • Pair with a scoop of vanilla ice cream for a delightful contrast in temperatures.
    • Serve alongside a refreshing fruit salad to enhance the refreshing lemon flavor.
    • A cup of hot herbal tea complements these bars beautifully, adding warmth.
    • Add fresh mint leaves for a pop of color and aromatic flair.
    • Present these bars on a colorful platter to impress your guests!

    FAQs about Lemon Zucchini Bars with Glaze

    Can I make Lemon Zucchini Bars with Glaze ahead of time?

    Absolutely! These bars store beautifully. You can bake them a day in advance and keep them covered at room temperature. Just add the glaze right before serving for that fresh finish.

    What can I substitute for zucchini if I can’t find it?

    If zucchini is unavailable, finely grated carrots can work as a great substitute. They add natural sweetness and moisture too, though the flavor will be a bit different!

    How do I know when my bars are done baking?

    Insert a toothpick into the center of the bars. If it comes out clean or with a few moist crumbs, they’re ready! Avoid overbaking to keep them moist.

    Are Lemon Zucchini Bars with Glaze healthy?

    These bars are a delightful balance of sweet and nutritious! With the health benefits of zucchini and a yogurt base, they provide a lighter dessert option. Enjoy in moderation!

    Can I freeze Lemon Zucchini Bars with Glaze?

    Yes, you can freeze these bars! Simply wrap them tightly in plastic wrap and then in foil. They keep well for up to three months. Thaw in the fridge before enjoying!

    Final Thoughts

    Making Lemon Zucchini Bars with Glaze isn’t just a baking task; it’s a journey of flavors that fills your kitchen with warmth and comfort. Each bar, with its zesty lemon notes and moist zucchini goodness, tells a story of homemade love. You’ll feel a sense of accomplishment as you share these delightful treats with your family or friends. Trust me, they’ll be reaching for seconds! This recipe is a reminder that even in our busy lives, we can create little moments of joy through simple, delicious treats. Get ready for smiles all around!


    Print

    clock clock iconcutlery cutlery iconflag flag iconfolder folder iconinstagram instagram iconpinterest pinterest iconfacebook facebook iconprint print iconsquares squares iconheart heart iconheart solid heart solid icon

    Description

    Lemon Zucchini Bars with Glaze is a delightful treat that combines the moistness of zucchini with the fresh flavor of lemon, topped with a sweet glaze.


    • 1 ½ cups all-purpose flour
    • 1 teaspoon baking powder
    • ½ teaspoon baking soda
    • ¼ teaspoon salt
    • ½ cup unsalted butter, softened
    • 1 cup granulated sugar
    • 2 large eggs
    • 1 teaspoon vanilla extract
    • ½ cup plain yogurt or sour cream
    • 1 cup grated zucchini, lightly squeezed to remove excess moisture
    • ½ cup fresh lemon juice (from about 23 lemons)
    • 1 tablespoon lemon zest
    • 1 ½ cups powdered sugar
    • 23 tablespoons milk or lemon juice

    1. Preheat oven to 350°F (175°C). Grease and flour an 8×8 inch baking pan.
    2. In a medium bowl, whisk together flour, baking powder, baking soda, and salt.
    3. In a large bowl, cream together softened butter and granulated sugar until light and fluffy.
    4. Beat in eggs one at a time, then stir in vanilla extract.
    5. In a small bowl, whisk together yogurt or sour cream and lemon juice.
    6. Alternately add the dry ingredients and the yogurt mixture to the wet ingredients, beginning and ending with the dry ingredients. Mix until just combined. Do not overmix.
    7. Gently fold in the grated zucchini and lemon zest.
    8. Pour batter into the prepared baking pan and spread evenly.
    9. Bake for 30-35 minutes, or until a toothpick inserted into the center comes out clean.
    10. Let the bars cool in the pan for 15-20 minutes before transferring to a wire rack to cool completely.
    11. While the bars cool, prepare the glaze: In a small bowl, whisk together powdered sugar and milk or lemon juice until smooth and pourable.
    12. Once the bars are completely cool, drizzle the glaze over the top.
    13. Let the glaze set before cutting the bars into squares.

    Notes

    • Make sure to squeeze out excess moisture from the grated zucchini for the best texture.
    • The glaze can be adjusted with more milk or lemon juice depending on desired consistency.
    • These bars can be stored in an airtight container at room temperature for up to 3 days.
    • Prep Time: 20 minutes
    • Cook Time: 35 minutes
    • Category: Dessert
    • Method: Baking
    • Cuisine: American

    Nutrition

    • Serving Size: 1 bar
    • Calories: 180
    • Sugar: 16g
    • Sodium: 100mg
    • Fat: 7g
    • Saturated Fat: 4g
    • Unsaturated Fat: 2g
    • Trans Fat: 0g
    • Carbohydrates: 26g
    • Fiber: 1g
    • Protein: 2g
    • Cholesterol: 40mg

    Sharing is caring!

  • Bacon Jam Cheeseburger Sliders

    Bacon Jam Cheeseburger Sliders


    Introduction to Bacon Jam Cheeseburger Sliders

    There’s something deliciously comforting about sliders, and when you add bacon jam, it takes them to a whole new level! As a busy mom, I know we all crave quick solutions that don’t skimp on flavor, and these Bacon Jam Cheeseburger Sliders are just that.

    Whether you’re hosting a casual get-together or need a fun dinner for the family, these sliders impress every time. They strike the perfect balance between savory and sweet, making them an unforgettable addition to your recipe rotation. So, let’s dive into the flavors that await!

    Why You’ll Love This Bacon Jam Cheeseburger Sliders

    If you’re searching for a dish that’s super easy yet incredibly tasty, these Bacon Jam Cheeseburger Sliders are for you! They come together quickly, allowing you to spend less time in the kitchen and more with your loved ones. Plus, who can resist the combo of gooey cheese, savory beef, and that irresistible bacon jam? It’s sure to please picky eaters and foodies alike, transforming your meal into a savory celebration!

    Ingredients for Bacon Jam Cheeseburger Sliders

    Gathering the right ingredients is crucial for making mouthwatering Bacon Jam Cheeseburger Sliders. Here’s a quick rundown, and if you need exact measurements, you can find those at the bottom of the article.

    • Ground Chuck: The star of your sliders. I recommend using 80/20 for a juicy, flavorful burger.
    • Salt and Black Pepper: Essential seasonings to enhance the natural flavors of the beef.
    • Garlic Powder: Adds depth and a bit of savory goodness to the patties.
    • Bacon: Chopped bacon creates that luscious jam. Feel free to use smoked bacon for additional flavor!
    • White Onion: This adds sweetness and a touch of crunch to the jam.
    • Garlic Cloves: Fresh garlic gives the jam a zesty kick and aroma that’s simply irresistible.
    • Brown Sugar: This balances the salty bacon with a hint of sweetness in the jam.
    • Bourbon: A splash of bourbon enhances the richness of the jam. If you prefer, you can swap this with apple juice for a non-alcoholic version.
    • Apple Cider Vinegar: Adds a tangy note, brightening up the flavors in the jam.
    • Maple Syrup: For that delicious sweetness in the bacon jam. Adjust to your liking depending on how sweet you want it.
    • American Cheese: Melty and creamy, it’s the perfect topping for these sliders.
    • Slider Buns: Soft and fluffy, they cradle all the flavors beautifully. You can choose whole wheat or gluten-free options according to your needs.
    • Wagyu Tallow or Cooking Spray: Helps with cooking and adds a touch of richness when frying the patties.

    These ingredients blend seamlessly to create the flavors everyone will rave about. Ready to whip them up? Let’s get cooking!

    How to Make Bacon Jam Cheeseburger Sliders

    Prepare the Beef Patties

    To start, flatten your ground chuck into a baking pan. This helps keep them uniform while cooking. Sprinkle salt, black pepper, and garlic powder evenly over the meat. These seasonings really boost the flavor. Next, chill the seasoned beef in the fridge. This makes a firmer patty when it hits the heat, keeping juices locked in for that juicy bite you crave!

    Make the Bacon Jam

    Now, let’s whip up that irresistible bacon jam! In a skillet over medium heat, sauté chopped bacon until crispy. Remove the bacon, then discard half of the grease. Add diced white onion to the skillet and cook for about 10 minutes until softened. Toss in minced garlic and cook for another 4-5 minutes. Mix in your reserved bacon, brown sugar, bourbon, apple cider vinegar, and maple syrup, and let it all simmer until thickened, around 10-15 minutes.

    Cook the Patties

    Heat a griddle or skillet over medium heat and apply wagyu tallow or cooking spray. Now, add your beef patties to the hot surface. Cook one side for about 4-6 minutes. Sprinkle a little more salt, pepper, and garlic powder on the uncooked side before flipping. After flipping, it’s time to add a slice of American cheese on top and let it melt for another 2 minutes. Yum!

    Toast the Buns

    Don’t forget about the buns! Toast them on the griddle or skillet until they’re golden brown. This simple step adds extra flavor and crunch, ensuring every bite is delightful.

    Assemble Sliders

    To bring it all together, place those gooey cheese-topped patties on the bottom halves of the slider buns. Generously dollop the warm bacon jam on top of each patty. Finally, cap them off with the top halves of the buns, slice each slider, and serve warm. Everyone will be reaching for seconds!

    Tips for Success

    • Be mindful of cooking times to ensure your patties are juicy and not overcooked.
    • Feel free to customize the bacon jam sweetness to match your family’s taste preferences.
    • Use a meat thermometer for perfect doneness—160°F makes for a safe burger!
    • Prep ingredients ahead of time to save on cooking stress during busy evenings.
    • Don’t rush the bacon jam—let it simmer for the best flavor!

    Equipment Needed

    • Skillet or Griddle: Ideal for cooking patties and bacon jam. You can use a non-stick skillet if that’s what you have on hand.
    • Baking Pan: Perfect for flattening and chilling the ground chuck, but any large dish works too.
    • Spatula: Essential for flipping your patties with ease. A slotted spatula is even better for draining excess grease.

    Variations

    • Spicy Kick: Add a splash of hot sauce or diced jalapeños to the bacon jam for a spicy twist!
    • Turkey Sliders: Swap out ground chuck for ground turkey for a lighter option. Season well to enhance flavor!
    • Veggie Patties: Replace beef with store-bought veggie patties for a meatless version everyone will enjoy.
    • Gourmet Cheese: Try swapping American cheese for cheddar or blue cheese for a flavor upgrade that packs a punch.
    • Herbs and Spices: Add fresh herbs like thyme or rosemary to the beef mixture for a fresh, herby taste.

    Serving Suggestions

    • Pair your sliders with crispy sweet potato fries for a delicious contrast.
    • Serve with a fresh garden salad to balance the richness of the sliders.
    • For drinks, consider pairing with a light beer or sparkling lemonade.
    • Garnish sliders with pickles or fresh herbs for an extra pop of color.

    FAQs about Bacon Jam Cheeseburger Sliders

    Can I make the bacon jam ahead of time?

    Absolutely! In fact, making the bacon jam ahead allows the flavors to meld beautifully. Just store it in a sealed jar in the fridge for up to a week. Reheat it gently before serving to bring back that heavenly aroma.

    What can I use instead of ground chuck?

    If you want a lighter option, ground turkey or chicken works well. Just remember to season it generously to enhance the flavor, as these lean meats can be more bland than beef.

    Are these sliders gluten-free?

    Yes! Simply choose gluten-free slider buns, and you’re set to enjoy a gluten-free version of these irresistible Bacon Jam Cheeseburger Sliders. Don’t forget to double-check your other ingredients for gluten content!

    How can I adjust the sweetness of the bacon jam?

    It’s easy to customize! A little less brown sugar or maple syrup will give you a less sweet jam. Alternatively, add a bit more for a sweeter touch. Just taste as you go to find the perfect balance for your palate.

    Can I freeze the sliders after cooking?

    Definitely! These sliders freeze really well. Just wrap them individually in plastic wrap and store them in a freezer-safe bag. They can be reheated in the oven for a quick meal later on.

    Final Thoughts

    Creating these Bacon Jam Cheeseburger Sliders is more than just cooking; it’s about bringing people together over a shared love for delicious food. Each slider embodies a joyful burst of flavors, uniting family and friends around the table. You’ll cherish the smiles and satisfied bellies while enjoying the simple pleasure of savoring every bite. Whether for a special occasion or a weeknight treat, this recipe is a guaranteed hit that showcases love for home-cooked meals. So roll up your sleeves and dive into this culinary adventure; you’ll be delighted by the results!


    Print

    clock clock iconcutlery cutlery iconflag flag iconfolder folder iconinstagram instagram iconpinterest pinterest iconfacebook facebook iconprint print iconsquares squares iconheart heart iconheart solid heart solid icon

    Description

    Irresistibly tasty Bacon Jam Cheeseburger Sliders, perfect for any occasion.


    • 2 pounds 80/20 ground chuck
    • 1 tablespoon salt
    • 1 tablespoon black pepper
    • 1 tablespoon garlic powder
    • 1 pound bacon, chopped
    • 1 white onion, diced
    • 4 garlic cloves, minced
    • 1/2 cup brown sugar
    • 1/4 cup bourbon
    • 1/4 cup apple cider vinegar
    • 1/2 cup maple syrup
    • 69 slices American cheese
    • 12 slider buns
    • Wagyu tallow or cooking spray

    1. Flatten ground chuck in a baking pan. Season evenly with salt, pepper, and garlic powder. Refrigerate until ready to cook.
    2. In a skillet over medium heat, cook bacon until crisp. Remove bacon and discard half of the rendered grease. Add diced onion and cook for 10 minutes until softened. Stir in minced garlic and cook for an additional 4-5 minutes. Return cooked bacon to the skillet and cook for 1-2 minutes. Add brown sugar, bourbon, apple cider vinegar, and maple syrup. Simmer mixture for 10-15 minutes until thickened. Transfer to a jar for use.
    3. Heat a griddle or skillet to medium heat and spray with wagyu tallow or cooking spray. Cook the patties on one side for 4-6 minutes. Season the exposed side with salt, pepper, and garlic powder before flipping. After flipping, add a slice of American cheese and cook for 2 additional minutes.
    4. Toast slider buns on the griddle or skillet until golden brown.
    5. Assemble sliders by placing patties onto the bottom halves of the buns. Add a generous portion of bacon jam on top of each patty. Cover with the top halves of the buns. Slice each slider and serve warm.

    Notes

    • Feel free to adjust the sweetness of the bacon jam by modifying the amount of brown sugar and maple syrup.
    • For a smokier flavor, you can use smoked bacon.
    • These sliders can be served as appetizers or a main dish.
    • Prep Time: 30 minutes
    • Cook Time: 45 minutes
    • Category: Appetizers
    • Method: Skillet
    • Cuisine: American

    Nutrition

    • Serving Size: 1 slider
    • Calories: 350
    • Sugar: 10g
    • Sodium: 800mg
    • Fat: 21g
    • Saturated Fat: 8g
    • Unsaturated Fat: 10g
    • Trans Fat: 0g
    • Carbohydrates: 25g
    • Fiber: 1g
    • Protein: 18g
    • Cholesterol: 60mg

    Sharing is caring!