Author: IHAAL Team

  • Creamsicle Orange Soft Chewy Cookies

    Creamsicle Orange Soft Chewy Cookies


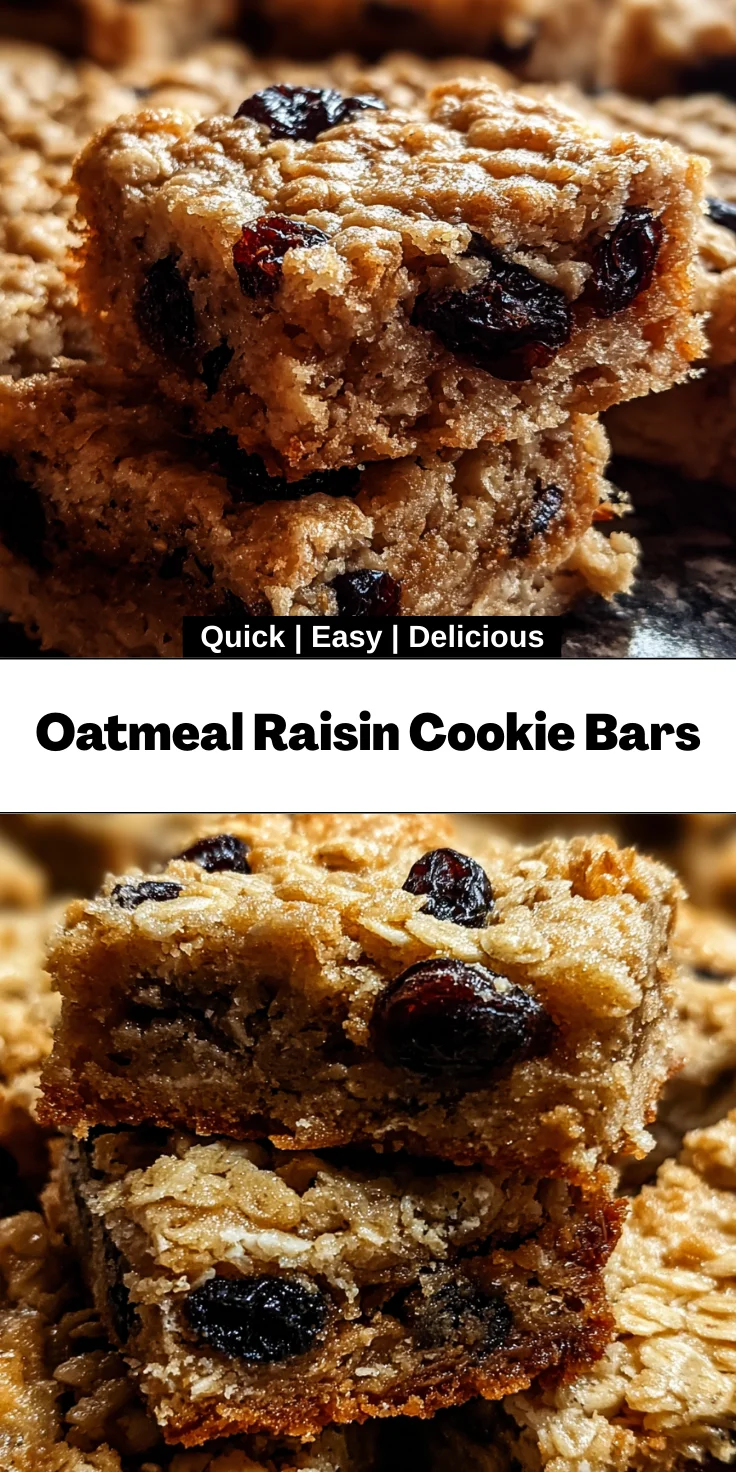
    Introduction to Creamsicle Orange Soft Chewy Cookies

    There’s something undeniably magical about the combination of creamy, orange goodness and sweet, chewy cookies. It takes me back to summer days spent enjoying a velvety creamsicle, the ice cream’s coolness mingling with sunshine on my skin. These Creamsicle Orange Soft Chewy Cookies embody that nostalgic flavor while being a breeze to whip up in your kitchen. With a soft, chewy texture and a fresh citrusy zing, they are the perfect solution for busy moms or professionals looking to brighten their days. Whether for family gatherings, casual get-togethers, or just to indulge in a little self-love, these cookies are your go-to treat.

    Why You’ll Love This Creamsicle Orange Soft Chewy

    One of the best things about these Creamsicle Orange Soft Chewy Cookies is how quick and easy they are to make. In just under half an hour, you’ll have warm, delightful cookies that burst with unique flavors—think citrusy orange and creamy white chocolate. The balance of soft and chewy textures will have everyone reaching for seconds, making them perfect for busy weekdays or potlucks with friends!

    Ingredients for Creamsicle Orange Soft Chewy Cookies

    To create these delightful Creamsicle Orange Soft Chewy Cookies, you’ll need a handful of essential ingredients that work magic together. Start with white cake mix, which adds softness and a fluffy texture, making each bite feel like a cloud. The orange gelatin powder infuses the cookies with a vibrant citrus flavor that dances on your taste buds. Don’t forget the white chocolate chips for a touch of sweetness that balances the zesty orange perfectly. For those who prefer alternatives, you can use unsalted butter for a lighter taste or even dairy-free chocolate chips if needed. Detailed measurements are available at the end!

    How to Make Creamsicle Orange Soft Chewy Cookies

    Ready to dive into a delightful baking adventure? Let’s get started with these Creamsicle Orange Soft Chewy Cookies! Follow these simple steps, and you’ll have a scrumptious treat in just no time. Trust me; your kitchen will smell heavenly, and your family will thank you!

    Step 1: Preheat the Oven

    First thing’s first! Preheat your oven to 350°F. This is a crucial step, as the right temperature ensures your cookies bake evenly and rise beautifully. While the oven warms up, grab two large baking sheets.

    Preparing the Baking Sheets

    I like to line my sheets with parchment paper or silicone baking mats. This not only protects your cookies from sticking but also makes cleanup a breeze. Trust me, after a long day, you’ll appreciate a little less mess!

    Step 2: Combine Dry Ingredients

    In a large mixing bowl, whisk together your white cake mix, orange gelatin powder, and fresh orange zest. Whisking is vital; it ensures everything is evenly mixed to achieve optimal cookie consistency.

    Whisking for Uniform Texture

    Don’t rush this step! A well-combined dry mixture creates cookies that are perfectly soft and chewy, allowing those delightful flavors to blend beautifully.

    Step 3: Add Wet Ingredients

    Now it’s time to add your softened butter and room-temperature eggs to the dry mixture. Mix them in until they’re completely incorporated. This will produce a luscious, smooth dough that’s almost irresistible!

    Mixing Tips for Smooth Dough

    Be sure to scrape down the sides and bottom of the bowl as you mix. This avoids any lumps and helps you achieve that dreamy cookie dough texture we all love!

    Step 4: Fold in White Chocolate Chips

    Gently fold in the white chocolate chips after your dough is smooth. Folding helps maintain that lovely soft texture we want in these cookies.

    Achieving Even Distribution

    Using a spatula, be gentle—this isn’t a wrestling match! The goal is to ensure that every cookie has its fair share of that creamy sweetness.

    Step 5: Portion the Dough

    Using a 1 ½ tablespoon cookie scoop, portion the dough and roll it into balls. This step is crucial for uniformity, which means even baking and lovely presentation!

    Using a Cookie Scoop for Consistency

    Using a cookie scoop gives you cookies that are all the same size. Imagine serving a platter of cookies that look as good as they taste—now that’s a winner!

    Step 6: Bake and Cool

    Place the dough balls on your prepared baking sheets, spacing them about 2 inches apart. Bake for 10 to 13 minutes, until the edges are set but the centers are still soft. You want that perfect warmth of freshly baked cookies!

    Timing for Perfect Cookies

    When they come out of the oven, let them cool on the baking sheets for 10 minutes. This helps them stay soft as they continue baking slightly from the residual heat. Then transfer them to a cooling rack and enjoy!

    Tips for Success

    To achieve the best Creamsicle Orange Soft Chewy Cookies, start by ensuring your butter is softened but not melted. This keeps the cookies delightfully chewy!

    Store leftovers in an airtight container at room temperature for up to a week to maintain freshness. If you prefer a softer texture, reduce the baking time by a minute or two—your taste buds will thank you for the experimentation!

    Equipment Needed

    Gathering the right tools will make your baking experience smooth and enjoyable. You’ll need mixing bowls, a whisk for combining, a cookie scoop for even portions, and baking sheets to showcase your creations. If you don’t have a scoop, fear not—a regular spoon works just fine!

    Variations

    Unleash your creativity with these Creamsicle Orange Soft Chewy Cookies! Consider adding chopped nuts for a delightful crunch, or swap the orange for lemon for a zesty twist. If you’re looking for gluten-free options, try using a gluten-free cake mix. For extra flavor, sprinkle in cinnamon or nutmeg!

    Serving Suggestions

    These Creamsicle Orange Soft Chewy Cookies shine when paired with a warm cup of coffee or refreshing iced tea. For a delightful presentation, arrange them on a colorful platter with vibrant napkins. Consider adding fresh fruit, like orange slices or juicy berries, for a balanced and eye-catching dessert table!

    FAQs about Creamsicle Orange Soft Chewy Cookies

    Got questions about these delightful Creamsicle Orange Soft Chewy Cookies? You’re not alone! Here are some frequently asked questions that might help.

    How should I store these cookies? Keep your cookies in an airtight container at room temperature for up to a week. This ensures they stay fresh and chewy!

    Can I freeze the dough? Absolutely! You can freeze cookie dough balls for up to three months. When you’re ready to bake, just let them thaw in the fridge overnight, then bake as directed.

    Are there any dietary modifications? If needed, swap out butter for coconut oil for a dairy-free option or use gluten-free cake mix to adapt for gluten sensitivity.

    What else can I add? Feel free to throw in nuts or other flavored chips to customize these treats further. There’s no wrong way to enjoy these cookies!

    Final Thoughts

    Bringing these Creamsicle Orange Soft Chewy Cookies to life in your kitchen is more than just baking; it’s about creating joyful moments for both you and those you love. The unique blend of creamy white chocolate and zesty orange flavors creates a delightful treat that leaves a lasting impression. As you enjoy these warm cookies fresh from the oven, I hope you feel the love and happiness they bring. So don’t hesitate—experiment with the recipe, make it your own, and share these little bites of sunshine with family and friends. Happy baking!


    Print

    clock clock iconcutlery cutlery iconflag flag iconfolder folder iconinstagram instagram iconpinterest pinterest iconfacebook facebook iconprint print iconsquares squares iconheart heart iconheart solid heart solid icon

    Description

    Delicious and soft chewy cookies flavored with orange and white chocolate, reminiscent of a creamsicle.


    • 1 box (approximately 15.25 oz) white cake mix
    • 1 box (3 oz) orange gelatin powder
    • 2 tablespoons fresh orange zest
    • 1/2 cup (1 stick) salted butter, softened to room temperature
    • 2 large eggs, at room temperature
    • 1 cup white chocolate chips

    1. Preheat the oven to 350°F. Line two large baking sheets with parchment paper or silicone baking mats and set aside.
    2. In a large bowl, whisk together the white cake mix, orange gelatin powder, and fresh orange zest until evenly combined.
    3. Add softened butter and eggs to the dry mixture. Mix thoroughly, scraping down the sides and bottom of the bowl as needed to form a uniform dough.
    4. Gently fold the white chocolate chips into the cookie dough until evenly distributed.
    5. Using a 1 ½ tablespoon cookie scoop, portion dough and roll into balls. Place each ball on the prepared baking sheets, spacing about 2 inches apart.
    6. Bake for 10 to 13 minutes, or until the edges are set but centers remain soft. Remove from the oven and allow cookies to cool on the baking sheet for 10 minutes before transferring to a cooling rack.

    Notes

    • Store cookies in an airtight container at room temperature for up to a week.
    • For an extra burst of flavor, add more orange zest or a splash of orange extract if desired.
    • Prep Time: 15 minutes
    • Cook Time: 10-13 minutes
    • Category: Dessert
    • Method: Baking
    • Cuisine: American

    Nutrition

    • Serving Size: 1 cookie
    • Calories: 150
    • Sugar: 10g
    • Sodium: 100mg
    • Fat: 6g
    • Saturated Fat: 4g
    • Unsaturated Fat: 2g
    • Trans Fat: 0g
    • Carbohydrates: 21g
    • Fiber: 0g
    • Protein: 2g
    • Cholesterol: 30mg

    Sharing is caring!

  • Pumpkin Chocolate Chip Cookies

    Pumpkin Chocolate Chip Cookies


    Introduction to Pumpkin Chocolate Chip Cookies

    With the autumn breeze rustling through the trees, there’s nothing quite like the warm, comforting aroma of Pumpkin Chocolate Chip Cookies wafting from your kitchen. It’s why I adore this recipe so much! These cookies are a perfect blend of cozy pumpkin flavors and rich chocolate, making them an ideal treat for busy days when you want to whip up something special. Whether it’s an afternoon snack for the kids or a sweet indulgence after a hectic workday, baking these cookies feels like wrapping yourself in a hug of joy and deliciousness.

    Why You’ll Love This Pumpkin Chocolate Chip Cookies

    These Pumpkin Chocolate Chip Cookies are the ultimate cookie experience! They’re incredibly easy to make, which is perfect for my fellow busy moms juggling multiple tasks. Not only do they bake in just 13 minutes, but the blend of pumpkin and chocolate creates a delightful contrast that dances on your palate. Plus, they’re a fantastic way to bring the flavors of fall into your home, without requiring hours in the kitchen!

    Ingredients for Pumpkin Chocolate Chip Cookies

    Gathering the right ingredients is half the fun of baking these luscious Pumpkin Chocolate Chip Cookies. Here’s what you’ll need:

    • All-purpose flour: This is the foundation of your cookies, providing structure and texture. For a gluten-free alternative, consider using almond flour or a gluten-free blend.
    • Baking powder and baking soda: These leavening agents ensure your cookies rise perfectly. They create that light and fluffy texture we love.
    • Ground spices: Cinnamon, ginger, nutmeg, and cloves will take your cookies to cozy heights. Feel free to adjust them based on your taste preference.
    • Salt: This humble ingredient balances out the sweetness and enhances the flavors, bringing everything together beautifully.
    • Sugars: Using both granulated and light-brown sugar gives the cookies depth; brown sugar adds moisture and a lovely caramel flavor.
    • Vegetable oil: This keeps the cookies moist and chewy. If you’re looking for a healthier option, you could use coconut oil.
    • Egg: The egg acts as a binder, helping all the ingredients hold together while adding richness to the cookies.
    • Vanilla extract: A splash of this enhances the overall flavor, creating a harmonious blend with pumpkin and chocolate.
    • Canned pumpkin puree: This is the star of the show! It adds moisture, flavor, and a beautiful orange hue. Be sure it’s pure pumpkin, not pumpkin pie filling.
    • Semi-sweet chocolate chips: These chocolatey morsels bring the sweet balance; feel free to use milk or dark chocolate for a twist!

    Don’t forget, you’ll find the exact quantities needed for these ingredients listed at the bottom of the article, ready for printing!

    How to Make Pumpkin Chocolate Chip Cookies

    Step 1: Preheat the Oven

    Before you embark on your cookie adventure, preheating your oven to 350 degrees is a must. This ensures your Pumpkin Chocolate Chip Cookies bake evenly from start to finish. While that oven warms up, line your baking sheets with silicone mats or parchment paper. This little step makes cleanup so much easier! Trust me, you’ll be grateful later when your cookies don’t stick.

    Step 2: Combine Dry Ingredients

    Mixing your dry ingredients is an important step that sets the stage for success. In a mixing bowl, whisk together the all-purpose flour, baking powder, baking soda, and your warm spices—cinnamon, ginger, nutmeg, and cloves. This process not only evenly distributes the leavening agents but also activates the flavors, making every bite of your cookies burst with that comforting fall taste we all cherish.

    Step 3: Mix the Wet Ingredients

    In a separate bowl, take the time to combine your granulated sugar, brown sugar, and vegetable oil. Mixing these ingredients together until fully blended is crucial. This step not only helps the sugars dissolve, creating a lovely texture, but also allows the oil to incorporate air. Next, add your egg and vanilla extract. This magical mix will act as the creamy base for those delightful cookies!

    Step 4: Add Pumpkin Puree

    Now, it’s time to introduce the star of your show: the canned pumpkin puree! Gently fold it into your wet ingredient mixture. Pumpkin not only adds a beautiful color but infuses the cookies with moistness and irresistible flavor as well. The rich, creamy texture will make your batter luscious and inviting. Just wait until you smell it!

    Step 5: Combine Dry and Wet Ingredients

    Slowly add the dry mixture to the wet ingredients. This step is where patience pays off! With the mixer on low speed, blend just until they’re nearly combined. Overmixing can lead to tough cookies, and nobody wants that! So, be gentle and scrape the bowl as needed, leaving some flour visible. The batter should feel thick and a bit wet; trust me, it’s going to be delightful!

    Step 6: Fold in Chocolate Chips

    Here comes the fun part—gently folding in the semi-sweet chocolate chips! Using a rubber spatula, incorporate them evenly throughout the dough. This ensures that every cookie will get a perfect bite of chocolate goodness. Be careful not to overwork the dough; we want our cookies to be soft and chewy, with sweet spots of melted chocolate that make each bite a treat!

    Step 7: Form the Cookies

    Time to bring your cookies to life! Using a tablespoon, drop the cookie dough onto your prepared baking sheets. Make sure to space them about two inches apart; they’ll spread while baking. The anticipation of those soft cookies growing larger in the oven is palpable. Imagine the warm, gooey bites waiting for you to enjoy!

    Step 8: Bake

    With your cookies on the way to greatness, slide them into the preheated oven. Set a timer for 11 to 13 minutes. Keep an eye on them—when the edges are lightly golden and the centers appear nearly set, it’s showtime! Remember, they’ll continue to firm up while cooling, so don’t wait until they look completely done.

    Step 9: Cool and Store

    Once baked to perfection, allow your cookies to cool on the baking sheets for a few minutes. This helps them firm up and makes it easier to transfer. Then, gently move them to a wire rack to cool completely. To keep your cookies fresh and delicious, store them in a single layer in an airtight container. This way, they can maintain their cozy softness and warm flavors for days to come!

    Tips for Success

    • Measure flour properly by spooning and leveling to avoid dense cookies.
    • Let your ingredients, especially eggs, come to room temperature for better mixing.
    • For an added spice kick, sprinkle a bit of extra cinnamon on top before baking.
    • Don’t skip the cooling time! This ensures they set up perfectly.
    • Enjoy them warm for that gooey chocolate experience; it’s heavenly!

    Equipment Needed

    • Mixing bowls: Pot for glass or metal for durability.
    • Electric stand mixer: A hand mixer works if you don’t have one.
    • Baking sheets: Pans can be lined with parchment if you lack silicone mats.
    • Rubber spatula: A wooden spoon can be a fine substitute.
    • Wire rack: Use a plate if you need a cooling surface.

    Variations of Pumpkin Chocolate Chip Cookies

    • Nutty addition: Add chopped walnuts or pecans for a delightful crunch that complements the soft texture.
    • Gluten-free twist: Substitute all-purpose flour with a 1:1 gluten-free baking blend for a deliciously gluten-free treat.
    • Spiced up: Experiment with adding a pinch of cayenne pepper or cardamom for a unique flavor kick that surprises your taste buds.
    • Chocolate lovers: Use dark chocolate chips or chunks for a richer chocolate flavor that pairs beautifully with pumpkin.
    • Vegan option: Replace the egg with a flax egg (1 tablespoon ground flaxseed mixed with 2.5 tablespoons water) and use coconut oil instead of vegetable oil.

    Serving Suggestions for Pumpkin Chocolate Chip Cookies

    • Pair these cookies with a warm cup of spiced chai or pumpkin spice latte for a cozy fall treat.
    • Serve alongside a scoop of vanilla ice cream for an indulgent dessert experience.
    • Present them on a festive platter, garnished with autumn leaves for a charming touch at gatherings.

    FAQs about Pumpkin Chocolate Chip Cookies

    How do I store Pumpkin Chocolate Chip Cookies?

    To keep your Pumpkin Chocolate Chip Cookies fresh, store them in an airtight container at room temperature. This helps maintain their chewy texture and delightful flavor. You can also freeze them for up to three months if you’d like to save some for later. Just make sure to separate them with parchment paper!

    Can I use fresh pumpkin instead of canned?

    Absolutely! You can roast and puree fresh pumpkin to use in this recipe. Just be sure to remove any excess moisture, as this can affect the cookie’s texture. Fresh pumpkin adds an authentic taste that truly shines!

    What can I substitute for vegetable oil?

    If you prefer a healthier option, you can replace vegetable oil with coconut oil or even unsweetened applesauce. Both alternatives maintain moisture while adding unique flavors to your Pumpkin Chocolate Chip Cookies.

    How can I enhance the pumpkin flavor?

    To amplify the pumpkin flavor, consider adding a bit more pumpkin puree or increasing the ground spices, like cinnamon or nutmeg. Tossing in a teaspoon of pumpkin pie spice can also create an extra layer of warmth that complements the chocolate beautifully.

    Can these cookies be made ahead of time?

    Yes! You can prepare the dough a day in advance and refrigerate it, covered, until you’re ready to bake. Just remember to bring the dough to room temperature before baking for the best results. Making your Pumpkin Chocolate Chip Cookies ahead of time is a great way to save on prep during busy weeks!

    Final Thoughts

    There’s something truly magical about baking Pumpkin Chocolate Chip Cookies. Each batch fills your home with the warmth of spices and rich chocolate, creating a sweet refuge from a busy world. As you take that first bite, you’ll remember the simple joy of family and sharing. Whether you’re savoring them with your morning coffee or surprising the kids after school, these cookies are more than just a treat; they’re a celebration of fall’s essence. So, roll up your sleeves, embrace the spirit of the season, and indulge in the comforting flavors that these cookies bring to your home.


    Print

    clock clock iconcutlery cutlery iconflag flag iconfolder folder iconinstagram instagram iconpinterest pinterest iconfacebook facebook iconprint print iconsquares squares iconheart heart iconheart solid heart solid icon

    Description

    Delicious pumpkin chocolate chip cookies that are perfect for fall, combining the flavors of pumpkin and chocolate.


    • 2 cups (250g) all-purpose flour
    • 2 tsp baking powder
    • 3/4 tsp baking soda
    • 1 1/2 tsp ground cinnamon
    • 1/2 tsp ground ginger
    • 1/2 tsp ground nutmeg
    • 1/8 tsp ground cloves
    • 1/2 tsp salt
    • 1/2 cup (100g) granulated sugar
    • 1/2 cup (110g) packed light-brown sugar
    • 1/2 cup (120ml) vegetable oil
    • 1 large egg
    • 1 tsp vanilla extract
    • 1 cup (240g) canned pumpkin puree
    • 1 1/2 cups (255g) semi-sweet chocolate chips

    1. Preheat oven to 350 degrees. Line baking sheets with silicone baking mats or parchment paper.
    2. In a mixing bowl, whisk together flour, baking powder, baking soda, cinnamon, nutmeg, ginger, cloves and salt for 20 seconds, set aside.
    3. In the bowl of an electric stand mixer fitted with the paddle attachment, blend together granulated sugar, brown sugar and vegetable oil until combined.
    4. Mix in egg and vanilla then blend in pumpkin puree.
    5. With mixer on low speed, slowly add in flour mixture and mix just until nearly combined, scraping down the sides of the bowl as needed (batter will be pretty wet).
    6. With a rubber spatula, fold in chocolate chips while folding batter to evenly combine.
    7. Drop dough 2 Tbsp at a time onto baking sheets lined with silicone liners or parchment paper, spacing cookies two inches apart.
    8. Bake in preheated oven until cookies are nearly set about 11 – 13 minutes.
    9. Allow to cool several minutes before transferring to a wire rack to cool.
    10. Store in a single layer in an airtight container for best texture.

    Notes

    • These cookies taste best after being stored in an airtight container for a few hours.
    • Ensure to measure the flour correctly by spooning and leveling it.
    • Prep Time: 15 minutes
    • Cook Time: 13 minutes
    • Category: Dessert
    • Method: Baking
    • Cuisine: American

    Nutrition

    • Serving Size: 1 cookie
    • Calories: 150
    • Sugar: 10g
    • Sodium: 70mg
    • Fat: 6g
    • Saturated Fat: 0.5g
    • Unsaturated Fat: 4.5g
    • Trans Fat: 0g
    • Carbohydrates: 20g
    • Fiber: 1g
    • Protein: 2g
    • Cholesterol: 15mg

    Sharing is caring!

  • Zesty Lemon Meltaway Cookies

    Zesty Lemon Meltaway Cookies


    Introduction to Zesty Lemon Meltaway Cookies

    Have you ever craved a treat that’s both refreshing and melts in your mouth? That’s exactly what you get with these Zesty Lemon Meltaway Cookies! As a busy mom, I know the struggle of finding that perfect balance between quick, delicious desserts and the demands of daily life. With just a few simple ingredients, these cookies not only satisfy your sweet tooth but also brighten your day with their delightful lemon flavor. Whether you’re whipping them up for a family gathering or a cozy night in, they’re bound to impress your loved ones and elevate your dessert game!

    Why You’ll Love This Zesty Lemon Meltaway Cookies

    These Zesty Lemon Meltaway Cookies are the epitome of dessert bliss! They’re easy to whip up, taking just over half an hour from start to finish. Honestly, you can’t beat their light, zesty flavor that dances on your taste buds. Plus, they’re perfect for any occasion. Whether it’s a casual weekend treat or a festive celebration, these cookies never fail to bring a smile. Trust me, every bite is a moment of joy!

    Ingredients for Zesty Lemon Meltaway Cookies

    Before diving into the delightful baking process, let’s gather the ingredients for our Zesty Lemon Meltaway Cookies. Here’s what you’ll need:

    • Unsalted butter: This is the base for our cookies, giving them that rich, melt-in-your-mouth texture.
    • Powdered sugar: It lends sweetness and a smooth texture—perfect for meltaway cookies.
    • Fresh lemon juice: Adds a burst of zesty flavor that works wonders in this recipe.
    • Lemon zest: The finely grated peel enhances the lemony aroma without overpowering the taste.
    • Vanilla extract: A touch of warmth to balance out the citrus, making each bite irresistible.
    • All-purpose flour: The main structure for the cookies; it’s essential to achieve that meltaway consistency.
    • Cornstarch: This secret ingredient ensures our cookies are soft and tender, practically dissolving in your mouth.
    • Salt: Just a pinch to enhance the flavors and balance the sweetness.
    • Optional glaze ingredients: You can elevate your cookies with an additional lemon glaze made from powdered sugar and lemon juice, with a bit of zest for added flair.

    You can find the exact amounts of each ingredient at the bottom of this article, available for easy printing. Trust me, it’s worth reaching for the freshest lemon you can find—your taste buds will thank you!

    How to Make Zesty Lemon Meltaway Cookies

    Now that we have our ingredients ready, let’s jump into making these Zesty Lemon Meltaway Cookies. Follow these simple steps, and soon you’ll be indulging in their delightful flavors. I promise, it’ll be worth the little bit of effort!

    Step 1: Prepare Your Oven and Baking Sheet

    First things first, preheat your oven to 350°F. While it’s heating up, line a baking sheet with parchment paper. This will prevent the cookies from sticking and make cleanup a breeze. Your kitchen will soon fill with the tantalizing aroma of citrus goodness!

    Step 2: Creaming the Butter and Sugar

    In a large mixing bowl, use a mixer to beat the softened butter with powdered sugar until it becomes pale and fluffy. This should take about 2-3 minutes. You want a light texture that incorporates air, making your cookies melt in your mouth. Don’t rush this step; it’s key to their meltaway magic!

    Step 3: Add Lemon Ingredients

    Next, mix in the fresh lemon juice, grated lemon zest, and vanilla extract. Make sure to blend until everything is well combined. This step is where the cookies start to shine, as the zesty lemon flavor truly comes alive. Trust me; this fragrance will make your mouth water!

    Step 4: Combine Dry Ingredients

    In a separate bowl, whisk together the all-purpose flour, cornstarch, and salt. Gradually add this dry mixture to your butter mixture. Stir until a soft, cohesive dough forms. The cornstarch here helps achieve that delightful meltaway texture. No one likes a cookie that’s too dense, right?

    Step 5: Forming the Dough

    Now, scoop tablespoon-sized portions of the dough and roll them into balls. Place them on your prepared baking sheet, leaving some space between each ball. Gently flatten each ball a bit with your fingertips. This will help them bake evenly and get that delightful shape.

    Step 6: Baking the Cookies

    Bake your cookies in the preheated oven for about 10-12 minutes. You’ll know they’re done when they’re set but still look pale. Once baked, let them cool on the baking sheet for 5 minutes before transferring them to a wire rack. This helps them firm up just a bit!

    Step 7: Making the Lemon Glaze

    While your cookies are cooling, let’s whip up that luscious lemon glaze. In a small bowl, whisk together powdered sugar with fresh lemon juice until smooth. If you like, you can add additional lemon zest for an extra zesty kick. This glaze will give your cookies a deliciously sweet and tangy finish!

    Step 8: Final Touches

    Once the cookies have cooled down completely, gently drizzle or dip each cookie into your lemon glaze. Let them set for about 15 minutes before serving. This final touch adds a beautiful sheen and a burst of flavor that complements the cookies perfectly.

    Tips for Success

    • Use fresh lemons for the best flavor. The zest and juice truly make a difference!
    • Sift the powdered sugar for a lump-free glaze.
    • Be careful not to overbake your cookies; they should remain pale.
    • Chill your dough for 15 minutes in the fridge for easier handling.
    • Store cookies in an airtight container to maintain their meltaway texture.

    Equipment Needed

    • Mixing bowls: Use a large bowl for mixing; a glass or metal bowl works well.
    • Hand or stand mixer: A stand mixer is great, but a handheld one will do just fine.
    • Baking sheet: A half-sheet pan is ideal, or any flat baking dish will work.
    • Parchment paper: Substitute with a silicone baking mat if you have one.
    • Wire rack: A cooling rack is helpful but not essential; just use a plate if needed!

    Variations

    • Herbal Twist: Add a teaspoon of finely chopped fresh rosemary or mint to the dough for a delightful herbal note.
    • Gluten-Free Option: Substitute all-purpose flour with a gluten-free blend for a tasty alternative that everyone can enjoy.
    • Chocolate Lovers: Mix in mini chocolate chips or drizzle melted chocolate over the glazed cookies for a rich contrast.
    • Fruit-Filled: Incorporate dried cranberries or blueberries into the dough for a fun burst of flavor and color.
    • Reduced Sugar: Use a sugar substitute for a lighter version, keeping the sweetness but lightening up the calories.

    Serving Suggestions

    • Pair your Zesty Lemon Meltaway Cookies with a refreshing cup of herbal tea for a delightful afternoon treat.
    • Present them on a beautiful platter, garnished with fresh lemon slices and mint leaves for an elegant touch.
    • Serve alongside a scoop of vanilla ice cream to elevate the lemon experience.
    • For gatherings, stack them high and sprinkle with additional powdered sugar for added charm.

    FAQs about Zesty Lemon Meltaway Cookies

    Can I freeze Zesty Lemon Meltaway Cookies?

    Absolutely! These cookies freeze wonderfully. Just place them in an airtight container, separating layers with parchment paper. They can be frozen for up to three months. When you’re ready to enjoy them, simply thaw at room temperature.

    What can I use instead of cornstarch?

    If you don’t have cornstarch on hand, you can replace it with an equal amount of all-purpose flour. However, it might slightly alter the meltaway texture. Cornstarch really works magic for that soft, tender outcome!

    Can I make these cookies without lemon?

    While these cookies are all about that zesty lemon flavor, you could experiment with other citrus fruits! Lime or orange juice and zest can offer a unique twist, still keeping with the meltaway spirit.

    What’s the best way to store these cookies?

    Store your Zesty Lemon Meltaway Cookies in an airtight container at room temperature. They’ll stay fresh for about five days, but I promise they won’t last that long in my household!

    Can I substitute the sugar?

    You can swap in a natural sugar substitute for a lighter cookie. Just ensure it’s suitable for baking, as some sweeteners behave differently in recipes, thus tweaking the texture and taste of your meltaway cookies!

    Final Thoughts

    There’s something truly magical about baking Zesty Lemon Meltaway Cookies. Each bite is a burst of sunshine, transporting you to a warm afternoon filled with laughter and sweet moments. Whether you’re making them for family, friends, or just to indulge in self-care, these cookies evoke happiness and bring joy to your kitchen. Plus, their simplicity means anyone can dive in, regardless of baking experience. So, the next time you’re in the mood for a treat, remember these cookies. They’re more than just delicious—they’re a sweet reminder of life’s little pleasures, ready to be shared and celebrated!


    Print

    clock clock iconcutlery cutlery iconflag flag iconfolder folder iconinstagram instagram iconpinterest pinterest iconfacebook facebook iconprint print iconsquares squares iconheart heart iconheart solid heart solid icon

    Description

    Delightful and refreshing cookies that melt in your mouth with a zesty lemon flavor.


    • 1 cup unsalted butter, softened
    • 1/2 cup powdered sugar
    • 2 tablespoons fresh lemon juice
    • 1 tablespoon finely grated lemon zest
    • 1 teaspoon vanilla extract
    • 2 cups all-purpose flour
    • 1/2 cup cornstarch
    • 1/4 teaspoon salt
    • 1 cup powdered sugar (for glaze)
    • 2 tablespoons fresh lemon juice (for glaze)
    • 1 teaspoon finely grated lemon zest (optional, for glaze)

    1. Set oven to 350°F and line a baking sheet with parchment paper.
    2. In a large bowl, beat softened butter with powdered sugar using a mixer until pale and fluffy.
    3. Mix in lemon juice, lemon zest, and vanilla extract until combined.
    4. Whisk together flour, cornstarch, and salt in a separate bowl. Gradually add to the wet ingredients, mixing until a soft dough forms.
    5. Scoop tablespoon-sized portions of dough, form into balls, and arrange on the prepared baking sheet. Slightly flatten each with fingertips.
    6. Bake for 10 to 12 minutes, until cookies are just set and still pale. Remove from the oven and cool on the baking sheet for 5 minutes before transferring to a wire rack.
    7. In a small bowl, whisk powdered sugar with lemon juice until smooth. Add lemon zest for extra flavor if desired.
    8. Once cooled, drizzle or dip each cookie with the lemon glaze. Let set for 15 minutes before serving.

    Notes

    • For best results, use fresh lemon juice and zest.
    • Store cookies in an airtight container to maintain their meltaway texture.
    • Prep Time: 20 minutes
    • Cook Time: 12 minutes
    • Category: Dessert
    • Method: Baking
    • Cuisine: American

    Nutrition

    • Serving Size: 1 cookie
    • Calories: 116
    • Sugar: 8g
    • Sodium: 37mg
    • Fat: 6g
    • Saturated Fat: 4g
    • Unsaturated Fat: 2g
    • Trans Fat: 0g
    • Carbohydrates: 15g
    • Fiber: 0g
    • Protein: 1g
    • Cholesterol: 30mg

    Sharing is caring!

  • Lemon Chia Scones

    Lemon Chia Scones


    Introduction to Lemon Chia Scones

    Hey there, fellow food lovers! If you’re looking for a delightful treat that fits seamlessly into your busy life, look no further than these scrumptious Lemon Chia Scones. Picture this: a sunny morning, the aroma of fresh citrus wafting through your kitchen, and a warm, tender scone with a bright glaze waiting for you. These gluten-free beauties are perfect for breakfast on the go or a sweet afternoon snack. Plus, they’re quick to whip up, making them an ideal choice for those hectic weekdays. Trust me, your taste buds will thank you!

    Why You’ll Love This Lemon Chia Scones

    These Lemon Chia Scones are not just a treat; they’re a lifesaver for busy moms and professionals. In just about 15 minutes, you can mix up a batch, filling your home with a refreshing lemony scent. The flavors are enchanting, with the tangy glaze providing a delightful contrast to the soft scones. Plus, they’re gluten-free, catering to different dietary needs without sacrificing taste. You’ll find this recipe a joyful addition to your baking repertoire!

    Ingredients for Lemon Chia Scones

    Gathering the right ingredients is half the fun, and I’ve got you covered! Here’s what you’ll need for these zesty Lemon Chia Scones:

    • Coconut oil: This solid fat gives the scones a rich, tender texture while keeping them dairy-free. It’s like a warm hug in each bite!
    • Gluten-free flour: I recommend Bob’s Red Mill gluten-free 1-to-1 flour. It’s a reliable option that makes the scones light and fluffy.
    • Sugar: A touch of sweetness to balance the tartness of the lemons. Feel free to adjust according to your preference!
    • Baking powder: This magical ingredient helps the scones rise, promising that perfect lift. Think of it as the little engine that could!
    • Chia seeds: Not just for health enthusiasts! These little guys add a pop of nutrition and a delightful crunch.
    • Salt: A sprinkle enhances all the flavors and rounds out the sweetness beautifully. It’s the unsung hero of baking!
    • Greek yogurt: Creamy and tangy, it adds moisture. If you prefer dairy-free options, coconut yogurt works wonders here too.
    • Almond milk: Use any milk you love! Almond milk keeps it light, but sea salt caramel or oat milk could also jazz things up.
    • Lemon juice: Freshly squeezed is best! It gives a bright burst of flavor throughout the scones.
    • Lemon zest: This tiny addition boasts a huge flavor punch. It’s the secret weapon for that zingy freshness.
    • Powdered sugar: For the glaze, this adds a lovely sweetness and smooth texture. You can even replace it with maple syrup if you’re feeling adventurous.
    • Water: Just a drizzle for the glaze to bring it all together, ensuring it’s spreadable yet not too runny.

    For exact measurements, be sure to check at the bottom of this article. I promise every bit of these ingredients works in harmony to create the scones of your dreams!

    How to Make Lemon Chia Scones

    Step 1: Prepare Ingredients

    First things first, let’s measure out our coconut oil. I like to scoop it into a measuring cup and then pop it in the fridge. This helps it firm up nicely. While that’s chilling, preheat your oven to 350°F and line a baking pan with parchment paper. This makes cleanup a breeze, and those scones won’t stick!

    Step 2: Mix the Dry Ingredients

    In a large mixing bowl, combine gluten-free flour, sugar, baking powder, chia seeds, and salt. Use a whisk to blend everything together until it’s well mixed. This step is super important, as it helps to ensure that every bite of your Lemon Chia Scones is just as delightful as the last!

    Step 3: Prepare the Wet Ingredients

    Now, let’s mix the wet ingredients in a separate bowl. Combine Greek yogurt, almond milk, lemon juice, and the lovely lemon zest. Whisk until smooth. The tangy yogurt contrasts beautifully with the sweetness of the scones. It’s like a vibrant flavor parade in this bowl!

    Step 4: Incorporate Coconut Oil

    Once your coconut oil is solid but not frozen, take it out of the fridge and cut it into small, pea-sized pieces. Toss those bits into your dry ingredients. Using a pastry cutter or your fingers, mix it in until the mixture resembles coarse crumbs. Remember, we want that tender texture!

    Step 5: Form the Dough

    Next, pour your wet mixture into the dry mixture. Stir everything together until it forms a crumbly dough. Don’t overmix; you want the dough to be just combined. If you have a few dry patches, that’s okay. They’ll get incorporated when we shape the scones!

    Step 6: Shape the Scones

    Now comes the fun part! Pour the dough onto the baking pan and gently press it into a large disc about an inch tall. Use a sharp knife to cut the disc into either 6 or 8 wedges. This is where you can let your creativity shine! Space them apart on the pan, so they have room to expand while baking.

    Step 7: Bake to Perfection

    Time to bake these beauties! Place the scone pan in your preheated oven and bake for 15-17 minutes. To check for doneness, gently press the tops. They should feel solid and set. Your kitchen will start smelling like a lemon-scented paradise, and you’ll know they’re almost ready!

    Step 8: Prepare the Lemon Glaze

    While the scones cool, whip up the lemon glaze! In a small bowl, whisk together powdered sugar, lemon juice, and a bit of water until smooth. It should be thick yet pourable. Once your scones are cooled down, drizzle that luscious glaze over the top. Now, step back and admire your creation!

    Tips for Success with Lemon Chia Scones

    • Make sure your coconut oil is solid but not rock-hard. It helps achieve that flaky texture.
    • Measuring your flour correctly is crucial. Use the spoon-and-level method for accuracy!
    • Don’t skip the chilling step for the coconut oil. It truly makes a difference.
    • For added flavor, try mixing in poppy seeds or nuts!
    • Store leftover scones in an airtight container to keep them fresh and tasty.

    Equipment Needed

    • Mixing bowls: Use any size that feels comfortable. A large bowl works great for mixing!
    • Measuring cups and spoons: Essential for accuracy in your Lemon Chia Scones. Get those exact measurements right!
    • Baking pan: A half-sheet pan or any flat baking dish will do.
    • Parchment paper: A handy alternative to grease the pan and prevent sticking.
    • Pastry cutter or fork: For those of us who enjoy mixing fats into flour!

    Variations on Lemon Chia Scones

    • Blueberry Lemon Chia Scones: Add 1 cup of fresh or frozen blueberries for a burst of fruity flavor and color.
    • Herb-Infused Scones: Mix in 1-2 tablespoons of fresh chopped herbs like rosemary or thyme to elevate your scones with an aromatic twist.
    • Poppy Seed Lemon Chia Scones: Incorporate 2 tablespoons of poppy seeds for a delightful crunch and hint of nutty flavor.
    • Almond Joy Scones: Add 1/2 cup of shredded coconut and 1/4 cup of chopped almonds for a tropical vibe.
    • Orange Chia Scones: Swap out the lemon juice and zest for fresh orange juice and zest for a citrusy spin.

    Serving Suggestions for Lemon Chia Scones

    • Pair with a cup of herbal tea or a refreshing iced coffee for a delightful afternoon break.
    • Serve with a dollop of clotted cream or lemon curd for an extra indulgent treat.
    • Dress up your scone presentation by garnishing with fresh berries or mint leaves.

    FAQs about Lemon Chia Scones

    What makes these Lemon Chia Scones gluten-free?

    These Lemon Chia Scones use gluten-free flour, specifically Bob’s Red Mill gluten-free 1-to-1 flour. This ensures they’re safe for anyone avoiding gluten without sacrificing taste or texture!

    Can I use a different oil instead of coconut oil?

    Absolutely! If you’re not a fan of coconut oil, you can try using unsalted butter or a neutral oil like canola oil. Just remember, the flavor will change a bit, but they’ll still be delicious!

    How do I store leftovers?

    To keep your scones fresh, simply store them in an airtight container at room temperature. They’re best enjoyed within a couple of days, but you can also freeze them for longer preservation!

    Can I make these scones dairy-free?

    Yes! Just swap the Greek yogurt for coconut yogurt, and you’re all set. Your scones will remain just as moist and tasty, making them a wonderful dairy-free option.

    How can I make the glaze less sweet?

    If you prefer a less sweet glaze, just reduce the amount of powdered sugar in the lemon glaze recipe. You can also add a bit more lemon juice for a zesty kick!

    Final Thoughts

    Creating these Lemon Chia Scones is not just about baking; it’s about bringing joy and delightful aromas into your home. The moment those golden-brown scones emerge from the oven, your heart will flutter with anticipation. Each bite delivers a burst of lemony goodness, reminding us that simple ingredients can spark happiness. Whether you’re savoring them with coffee or sharing with friends, these scones can brighten any day. I truly believe that in the chaos of life, taking a moment to enjoy a homemade treat can be the sweetest of gifts to ourselves.


    Print

    clock clock iconcutlery cutlery iconflag flag iconfolder folder iconinstagram instagram iconpinterest pinterest iconfacebook facebook iconprint print iconsquares squares iconheart heart iconheart solid heart solid icon

    Description

    Delicious and gluten-free lemon chia scones, perfect for any time of the day.


    • 1/3 cup coconut oil, solid
    • 2 cups gluten-free flour (I use Bob’s Red Mill gluten-free 1-to-1 flour)
    • 1/4 cup sugar
    • 1 tbsp baking powder
    • 1 tbsp chia seeds
    • 1/2 tsp salt
    • 1/2 cup Greek yogurt (or coconut yogurt, if dairy-free)
    • 2 tbsp almond milk (or milk of choice)
    • 2 tbsp lemon juice
    • Zest of 2 lemons
    • 1/2 cup powdered sugar (for glaze)
    • 1 tbsp lemon juice (for glaze)
    • 1 tbsp water (for glaze)

    1. Measure out your coconut oil and place it in the fridge. Preheat your oven to 350°F and line a pan with parchment paper.
    2. In a large mixing bowl, combine the flour, sugar, baking powder, chia seeds, and salt.
    3. In a separate bowl, mix the Greek yogurt, almond milk, lemon juice, and zest until well combined.
    4. Remove the coconut oil from the fridge and cut it into small, pea-sized pieces. Add these to the dry ingredients.
    5. Add the wet ingredients to the dry ingredients and stir to form a crumbly dough.
    6. Pour the scone dough onto the baking pan and press it together into a large disc, about an inch tall.
    7. Using a sharp knife, cut the dough into either 6 or 8 scones and space them apart on the pan.
    8. Bake for 15-17 minutes until the tops are set and feel solid when pressed.
    9. Whisk together the lemon glaze ingredients in a small bowl until smooth.
    10. Let your scones cool, then top them with the lemon glaze and enjoy!

    Notes

    • Store any leftovers in an airtight container.
    • These scones can be enjoyed fresh or toasted.
    • Adjust the sweetness of the glaze to your liking.
    • Prep Time: 15 minutes
    • Cook Time: 17 minutes
    • Category: Baked Goods
    • Method: Baking
    • Cuisine: American

    Nutrition

    • Serving Size: 1 scone
    • Calories: 210
    • Sugar: 7g
    • Sodium: 150mg
    • Fat: 10g
    • Saturated Fat: 8g
    • Unsaturated Fat: 2g
    • Trans Fat: 0g
    • Carbohydrates: 27g
    • Fiber: 2g
    • Protein: 3g
    • Cholesterol: 0mg

    Sharing is caring!

  • Mini S’mores Brownie Pies

    Mini S’mores Brownie Pies


    Introduction to Mini S’mores Brownie Pies

    Imagine a treat that wraps up the nostalgic flavors of a campfire classic and the indulgent richness of brownies—enter Mini S’mores Brownie Pies! As a busy mom, I often find myself juggling countless tasks, so this recipe is my go-to solution for a quick yet impressive dessert. With minimal prep and baking time, these little pies are perfect for satisfying sweet cravings at a moment’s notice. Whether it’s a cozy family night or an impromptu gathering with friends, you’ll love how these mini delights bring smiles all around. Let’s dive into this delicious adventure!

    Why You’ll Love This Mini S’mores Brownie Pies

    These Mini S’mores Brownie Pies are not just a dessert; they’re a lifesaver! With their incredible ease and speed, they fit perfectly into our busy lives. Each bite is a delightful explosion of chocolatey goodness, paired with the nostalgic crunch of graham crackers and the gooey joy of marshmallows. Plus, kids and adults alike will be begging for seconds, making them a surefire crowd-pleaser at any gathering!

    Ingredients for Mini S’mores Brownie Pies

    Gathering the right ingredients is part of the fun! Here’s what you need to create these delightful Mini S’mores Brownie Pies:

    • Brownie mix: This is your base. Pot for a box that fits your taste, as this provides the rich, chocolate flavor we love.
    • Graham cracker pie crusts: The crunchy foundation balances the gooey toppings. Mini versions make for perfectly portioned desserts.
    • Mini marshmallows: These fluffy clouds of sweetness are essential. They melt beautifully, giving that classic s’mores experience.
    • Chocolate chips: Use semi-sweet or milk chocolate chips based on your preference. They add a delightful burst of chocolatey goodness.

    If you’re feeling adventurous, consider adding some chopped nuts or a drizzle of caramel sauce for extra flavor. You can find ingredients with exact quantities listed at the bottom of the article, perfect for printing during your next grocery run!

    How to Make Mini S’mores Brownie Pies

    Prepare the Oven and Pie Crusts

    First, it’s time to set the scene for your baking adventure! Preheat your oven to 350°F (175°C). This is crucial! While the oven warms up, grab your mini graham cracker pie crusts. Line them up on a rimmed baking sheet, which helps catch any batter that might overflow. Trust me, this step will save you from a messy oven later. Plus, these little crusts are just waiting to be filled with all that brownie goodness!

    Mix Brownie Batter

    Now, let’s bring the magic to life by mixing the brownie batter! In a mixing bowl, combine the brownie mix with the required eggs, oil, and water as stated on the box. Stir until everything is blended and smooth. It’s like a chocolate dream coming together! Just remember, don’t over-mix it; a few lumps are perfectly fine. This simple step leads us to the rich base that makes our Mini S’mores Brownie Pies utterly delicious.

    Fill and Bake

    Grab those prepared pie crusts and fill each one with the heavenly brownie batter. Fill them no more than two-thirds full. This helps prevent any overflow during baking. Slide the baking sheet into your preheated oven and set a timer for 20 to 25 minutes. Keep an eye on them! You want a toothpick inserted into the center to come out with a few moist crumbs, signaling that they’re ready for the next delicious stage.

    Add Toppings

    Once your pies are baked to perfection, it’s time for the fun part—adding toppings! Carefully take the baking sheet out of the oven, and while the pies are still warm, sprinkle a generous amount of mini marshmallows and chocolate chips over each one. Don’t be shy here! Pop the baking sheet back into the oven for another 3 to 5 minutes. You want the marshmallows puffy and just slightly golden, creating that iconic s’mores look and taste.

    Cool and Serve

    Patience is key here, my friend! Let your Mini S’mores Brownie Pies cool on a rack for about 10 to 15 minutes. This allows the toppings to set just right. They are delicious warm but also taste amazing at room temperature! Serve them on a pretty plate, perhaps with some fresh berries on the side or a scoop of ice cream for extra flair. Gather your loved ones and watch these little delights disappear!

    Tips for Success

    • Don’t rush the preheating; it’s essential for even baking.
    • Use an ice cream scoop for easy and even batter distribution.
    • Feel free to experiment with flavors of chocolate chips!
    • Keep an eye on the marshmallows during the last bake—burnt is not the goal!
    • Let the pies cool completely for easier serving and better flavor.

    Equipment Needed

    • Baking sheet: A rimmed baking sheet is essential; a standard tray works too.
    • Mixing bowl: Any large bowl will do! A glass or metal bowl is great for mixing.
    • Whisk or spatula: For mixing the batter; a wooden spoon is a trusty alternative.
    • Toothpick: Use this to test the brownies for doneness; skewers are a handy substitute.

    Variations

    • Nutty Delight: Add chopped walnuts or pecans to the brownie batter for a crunchy texture.
    • Peanut Butter Swirl: Drop spoonfuls of creamy peanut butter into the brownie mix before baking for a rich flavor.
    • Gluten-Free Option: Use a gluten-free brownie mix and gluten-free pie crusts to accommodate dietary needs.
    • Mint Chocolate: Swap in mint chocolate chips for a refreshing twist that adds a touch of coolness.
    • Fruity Fun: Add fresh raspberries or sliced strawberries into the topping for a fruity explosion.

    Serving Suggestions

    • Fresh Berries: Serve with strawberries or raspberries for a burst of freshness.
    • Iced Coffee: Pair with a chilled iced coffee or hot cocoa for that cozy vibe.
    • Ice Cream: A scoop of vanilla or chocolate ice cream on the side adds extra decadence.
    • Festive Platter: Arrange the pies on a colorful platter, garnished with mint leaves for a pop of color.

    FAQs about Mini S’mores Brownie Pies

    Can I use homemade brownie batter instead of a mix? Absolutely! If you have a go-to brownie recipe, feel free to whip up a batch and use that in your mini pies. Just be sure to maintain the same consistency for best results!

    How do I store leftover Mini S’mores Brownie Pies? Store any leftovers in an airtight container at room temperature for up to three days. If you want to keep them longer, consider refrigerating for up to a week, but they taste best fresh!

    Can I make these Mini S’mores Brownie Pies ahead of time? Yes! You can prepare and bake the pies in advance, then simply reheat them for a few minutes before serving. Alternatively, assemble them and bake just before serving for maximum freshness!

    What can I substitute for mini graham cracker pie crusts? You can use chocolate cookie crusts or even traditional pie crusts if you prefer. Just make sure they are mini-sized to keep things cute and portable!

    Is there a way to make these Mini S’mores Brownie Pies gluten-free? Yes! Just opt for a gluten-free brownie mix and gluten-free mini pie crusts. The flavors remain irresistible, and everyone can enjoy this dessert!

    Final Thoughts

    Making Mini S’mores Brownie Pies is not just about dessert; it’s an experience filled with joy and laughter. These little treats transform any occasion into a delightful celebration. Whether it’s a family movie night or a spontaneous gathering, they bring everyone together in sweet harmony. I love watching my kids’ faces light up with each gooey bite, and believe me, they don’t last long! So the next time you’re feeling overwhelmed, remember this easy recipe can create delicious memories without the hassle. Dive into baking these bites of happiness, and enjoy the delightful smiles they bring!


    Print

    clock clock iconcutlery cutlery iconflag flag iconfolder folder iconinstagram instagram iconpinterest pinterest iconfacebook facebook iconprint print iconsquares squares iconheart heart iconheart solid heart solid icon

    Description

    Mini S’mores Brownie Pies are a delightful dessert that combines the rich taste of brownies with the beloved flavors of s’mores.


    • 1 package brownie mix, plus required eggs, oil, and water as indicated on packaging
    • 8 mini graham cracker pie crusts
    • 1 cup mini marshmallows
    • 3/4 cup chocolate chips, semi-sweet or milk chocolate

    1. Set oven to 350°F (175°C) and allow to fully preheat.
    2. Combine brownie mix with eggs, oil, and water in a mixing bowl according to package instructions. Stir until smooth.
    3. Place mini graham cracker pie crusts onto a rimmed baking sheet for stability.
    4. Spoon brownie batter into each prepared crust, filling no more than two-thirds full to allow space for rising.
    5. Bake in preheated oven for 20 to 25 minutes, or until a toothpick inserted into the center yields a few moist crumbs.
    6. Remove pies from the oven. Evenly distribute mini marshmallows and chocolate chips over each warm brownie pie.
    7. Return baking sheet to the oven and bake for an additional 3 to 5 minutes, until marshmallows are puffed and lightly golden.
    8. Transfer pies to a rack and cool for 10 to 15 minutes before serving. Enjoy warm or at room temperature.

    Notes

    • Make sure not to overfill the pie crusts to prevent spillage.
    • For variation, consider using different types of chocolate chips.
    • These pies can be enjoyed warm or at room temperature.
    • Prep Time: 15 minutes
    • Cook Time: 30 minutes
    • Category: Dessert
    • Method: Baking
    • Cuisine: American

    Nutrition

    • Serving Size: 1 pie
    • Calories: 180
    • Sugar: 12g
    • Sodium: 120mg
    • Fat: 7g
    • Saturated Fat: 3g
    • Unsaturated Fat: 4g
    • Trans Fat: 0g
    • Carbohydrates: 26g
    • Fiber: 1g
    • Protein: 2g
    • Cholesterol: 25mg

    Sharing is caring!

  • Chocolate Peanut Butter Swirl Muffins

    Chocolate Peanut Butter Swirl Muffins


    Introduction to Chocolate Peanut Butter Swirl Muffins

    Are you ready to indulge in a moment of sweet bliss? If yes, then these Chocolate Peanut Butter Swirl Muffins are just what you need! Balancing rich chocolate with creamy peanut butter, they truly evoke comfort in every bite. Whether you’re rushing through a busy morning or enjoying a cozy afternoon break, these muffins are a quick solution, bringing joy to your kitchen. Imagine the smiles on your loved ones’ faces when they taste these delightful treats. So roll up your sleeves, let’s create a moment of deliciousness together!

    Why You’ll Love This Chocolate Peanut Butter Swirl Muffins

    When life gets busy, these Chocolate Peanut Butter Swirl Muffins come to the rescue! They’re incredibly easy to whip up, needing just about 15 minutes of prep. The delightful combination of chocolate and peanut butter creates a taste sensation that pleases even the pickiest eaters. Plus, they’re perfect for breakfast, snacks, or even dessert. With minimal mess and maximum flavor, what’s not to love?

    Ingredients for Chocolate Peanut Butter Swirl Muffins

    Gathering your ingredients is part of the fun! Here’s what you need for these delightful Chocolate Peanut Butter Swirl Muffins:

    • All-purpose flour: The foundation of your muffins. It provides structure and texture.
    • Granulated sugar: This sweetener gives the muffins their signature sweetness and helps with browning.
    • Unsweetened cocoa powder: Adding rich chocolate flavor without extra sugar, this is a must for all chocolate lovers.
    • Baking powder: A leavening agent that helps your muffins rise and become fluffy.
    • Salt: Just a pinch enhances sweetness and balances all the flavors beautifully.
    • Buttermilk: It adds moisture and richness; if you don’t have it, regular milk with a splash of vinegar or lemon juice works just fine.
    • Vegetable oil (or melted butter): This makes the muffins tender. Use melted butter for extra flavor; it’ll be worth it!
    • Large eggs: These bind the ingredients and help them rise, giving your muffins that perfect texture.
    • Vanilla extract: It brings warmth and depth to the muffins, no baked good is complete without it!
    • Creamy peanut butter: The star of the show! It creates those creamy swirls and adds that irresistible nutty flavor.
    • Chocolate chips (optional but recommended): For those who crave extra chocolatey goodness, toss these in for an even richer experience!

    Don’t worry, you’ll find the exact measurements for these ingredients at the bottom of the article, perfect for printing and hassle-free baking!

    How to Make Chocolate Peanut Butter Swirl Muffins

    Baking these Chocolate Peanut Butter Swirl Muffins is an adventure in itself! With just a few simple steps, you’ll unlock a world of rich flavors and delightful aromas. Let’s dive in!

    Step 1: Preheat and Prep

    Your first task is to preheat the oven to 375°F (190°C). While it’s warming up, take a moment to line a muffin tin with paper liners. This step ensures easy removal later on, so don’t skip it!

    Step 2: Mix Dry Ingredients

    Now it’s time to whip up the dry ingredients! In a large bowl, whisk together the all-purpose flour, granulated sugar, cocoa powder, baking powder, and salt until everything’s combined. Think of this as your dry canvas, ready for the masterpiece to come!

    Step 3: Combine Wet Ingredients

    In a separate bowl, whisk together the buttermilk, vegetable oil (or melted butter), eggs, and vanilla extract. Mix until everything’s nice and creamy. This step adds the moisture and flavor that will make your muffins so irresistible.

    Step 4: Blend Wet and Dry

    Next, gently add the wet mixture into the dry ingredients. Stir until just combined; remember, overmixing can lead to dense muffins. If you’re feeling adventurous, fold in some chocolate chips for that extra chocolatey goodness!

    Step 5: Create Swirls

    Time for the fun part! Scoop spoonfuls of batter into each muffin cup, filling them about halfway. Now, drop small dollops of creamy peanut butter on top. Using a toothpick or a skewer, gently swirl the peanut butter into the batter; this creates those beautiful marbled effects.

    Step 6: Bake

    Pop those deliciously swirled muffins into your preheated oven and bake for about 18-20 minutes. You’ll know they’re ready when a toothpick inserted into the center comes out clean. The aroma wafting through your kitchen will be heavenly!

    Step 7: Cool and Enjoy

    After baking, allow the muffins to cool in the tin for a few minutes. Once they’re just cool enough to handle, transfer them to a wire rack. Letting them cool completely helps maintain that perfect texture. Then enjoy your warm Chocolate Peanut Butter Swirl Muffins!

    Tips for Success

    • Measure ingredients accurately for consistent results; a kitchen scale can be your best friend!
    • Don’t overmix the batter; a few lumps are perfectly fine!
    • Let the muffins cool completely for the best texture and flavor.
    • Consider adding a sprinkle of sea salt on top before baking for a sweet and salty twist!
    • Experiment with different nut butters for a unique spin on the classic recipe!

    Equipment Needed

    • Muffin tin: Essential for baking, but you can use a cupcake pan if that’s what you have.
    • Mixing bowls: A set of various sizes is great, but even one large bowl works perfectly.
    • Whisk: For mixing ingredients; a fork can suffice in a pinch!
    • Measuring cups and spoons: Accurate measuring is crucial, but you can use a scale too!
    • Spatula: For scooping the batter; a large spoon will do just fine!

    Variations of Chocolate Peanut Butter Swirl Muffins

    • Nut-Free Option: Use sunflower seed butter instead of peanut butter for a delicious nut-free alternative that still has that creamy texture.
    • Gluten-Free: Substitute all-purpose flour with a gluten-free baking blend to accommodate gluten sensitivities while still enjoying those rich flavors.
    • Healthier Twist: Replace half the sugar with mashed bananas or applesauce for a naturally sweetened version that adds moisture.
    • Vegan Version: Use flax eggs instead of regular eggs and almond milk instead of buttermilk for a delightful vegan treat.
    • Double Chocolate: For chocolate lovers, add cocoa nibs alongside the chocolate chips for an extra chocolatey crunch!

    Serving Suggestions

    • Pair your Chocolate Peanut Butter Swirl Muffins with a tall glass of cold milk for a comforting combo.
    • Serve them alongside fresh fruit or a light yogurt for a balanced breakfast.
    • For a special treat, dust with powdered sugar before serving for an elegant touch.
    • Present warm muffins on a pretty platter, adding a few chocolate chips on top for visual appeal.
    • Try them with a dollop of whipped cream for a dessert twist!

    FAQs about Chocolate Peanut Butter Swirl Muffins

    Can I use whole wheat flour instead of all-purpose flour?

    Absolutely! You can substitute whole wheat flour for all-purpose flour, though the muffins might be a bit denser. I love the added nuttiness it brings!

    How do I store the muffins to keep them fresh?

    Store your Chocolate Peanut Butter Swirl Muffins in an airtight container at room temperature for up to three days. If you want to keep them for longer, pop them in the freezer!

    Can I make this recipe without eggs?

    Yes, you can! Use flax eggs (1 tablespoon of ground flaxseed mixed with 2.5 tablespoons of water) as a great egg substitute for a vegan-friendly option. They work wonders in moist recipes like muffins!

    How do I know when the muffins are done baking?

    Check for doneness by inserting a toothpick into the center of a muffin. If it comes out clean or with just a few moist crumbs, they’re ready to come out of the oven!

    Can I add other mix-ins to the muffin batter?

    Definitely! Feel free to mix in nuts, dried fruit, or even shredded coconut. The combinations are endless, so let your creativity run wild!

    Final Thoughts

    Baking these Chocolate Peanut Butter Swirl Muffins is more than just making another treat; it’s about creating delightful moments in the kitchen. The aroma of chocolate and peanut butter swirling together will make your heart smile. They embody comfort and joy, perfect for sharing with family or indulging in during a well-deserved break. Each bite offers a taste of nostalgia, making everyday moments feel special. So gather your loved ones and whip up a batch—together you’ll savor not just these muffins, but the sweet memories that come with them!


    Print

    clock clock iconcutlery cutlery iconflag flag iconfolder folder iconinstagram instagram iconpinterest pinterest iconfacebook facebook iconprint print iconsquares squares iconheart heart iconheart solid heart solid icon

    Description

    Delicious Chocolate Peanut Butter Swirl Muffins that combine rich chocolate and creamy peanut butter flavors.


    • 1 3/4 cups all-purpose flour
    • 1/2 cup granulated sugar
    • 1/4 cup unsweetened cocoa powder
    • 2 teaspoons baking powder
    • 1/2 teaspoon salt
    • 3/4 cup buttermilk (or milk with 1 tablespoon vinegar or lemon juice)
    • 1/2 cup vegetable oil (or melted butter for richer flavor)
    • 2 large eggs
    • 1 teaspoon vanilla extract
    • 1/3 cup creamy peanut butter
    • 1/2 cup chocolate chips (optional but recommended for added richness)

    1. Preheat and Prep: Preheat the oven to 375°F (190°C) and line a muffin tin with paper liners.
    2. Mix Dry Ingredients: In a bowl, whisk together flour, sugar, cocoa powder, baking powder, and salt.
    3. Combine Wet Ingredients: In a separate bowl, whisk together buttermilk, vegetable oil (or melted butter), eggs, and vanilla extract until well combined.
    4. Blend Wet and Dry: Add the wet ingredients to the dry ingredients and stir until just combined. Be careful not to overmix. Fold in chocolate chips if using.
    5. Create Swirls: Scoop spoonfuls of batter into each muffin cup, filling them about halfway. Drop small dollops of peanut butter on top of the batter. Use a toothpick or a skewer to swirl the peanut butter into the batter, creating a marbled effect.
    6. Bake: Bake for about 18-20 minutes or until a toothpick inserted into the center of a muffin comes out clean.
    7. Cool and Enjoy: Allow the muffins to cool in the tin for a few minutes before transferring them to a wire rack to cool completely.

    Notes

    • Adjust baking time according to your oven’s performance.
    • Store muffins in an airtight container for up to 3 days.
    • These muffins can be frozen for up to 2 months.
    • Prep Time: 15 minutes
    • Cook Time: 20 minutes
    • Category: Dessert
    • Method: Baking
    • Cuisine: American

    Nutrition

    • Serving Size: 1 muffin
    • Calories: 210
    • Sugar: 10g
    • Sodium: 200mg
    • Fat: 10g
    • Saturated Fat: 2g
    • Unsaturated Fat: 8g
    • Trans Fat: 0g
    • Carbohydrates: 28g
    • Fiber: 2g
    • Protein: 5g
    • Cholesterol: 40mg

    Sharing is caring!

  • Asian Pasta Salad

    Asian Pasta Salad


    Introduction to Asian Pasta Salad

    When life gets hectic, I often find myself craving a dish that’s not only quick to whip up but also bursting with color and flavor. Enter my go-to Asian Pasta Salad! It’s a delightful blend of vibrant veggies and creamy dressing that transforms any meal into a celebration.

    This salad is not just another side dish; it’s perfect for busy moms like us who want something easy yet impressive. Whether you’re prepping for a picnic or simply wanting a zesty lunch, this Asian Pasta Salad is your quick solution for a busy day!

    Why You’ll Love This Asian Pasta Salad

    This Asian Pasta Salad is a delightful marriage of speed and taste, making it a perfect choice for your busy life. With its fresh ingredients, it comes together in just 30 minutes, giving you more time to enjoy with family.

    No more bland salads here! Each colorful bite is packed with flavor and crunch, ensuring that even the pickiest eaters at the table will be going back for seconds. It’s refreshing, satisfying, and oh-so-easy to prepare!

    Ingredients for Asian Pasta Salad

    Gathering the right ingredients for this vibrant Asian Pasta Salad is half the fun! Here’s what you’ll need:

    • Sugar snap peas: Sweet and crunchy, these little gems add a delightful snap to each bite.
    • Seedless cucumber: For a refreshing crunch, diced perfectly. Leave the skin on for added color and nutrients!
    • Green onions: Sliced thin, they lend a mild onion flavor that brightens up the dish without overpowering it.
    • Red onion: Adding a punch of color and a zesty bite that balances well with the creamy dressing.
    • Mini tri-colored peppers: A medley of sweetness and crunch, these peppers brighten up your salad both in taste and appearance.
    • Frozen shelled edamame: When thawed, these little protein powerhouses elevate the dish and complement the other textures.
    • Tri-color rotini noodles: Their spiraled shape holds onto the dressing beautifully, ensuring every bite is flavorful.
    • Creamy poppy seed dressing: This adds a luscious, sweet creaminess that ties all the flavors together in a delightful way.
    • Mini chicken and cilantro won tons: These little bites bring texture and a savory element. Trader Joe’s is my go-to for these delicious won tons!

    You can find the exact measurements at the end of the article, available for easy printing.

    How to Make Asian Pasta Salad

    Now that you have a colorful array of ingredients, let’s dive into making this delicious Asian Pasta Salad. Trust me, the steps are simple! Each segment flows into the next like a culinary dance. Let’s get cooking!

    Step 1 – Cook the Pasta

    Begin by boiling water in a large pot. Once it’s bubbling like a hot spring, add your tri-color rotini noodles. Cook according to the package instructions until they’re al dente. You want the pasta to have a bit of bite—just like springy noodles!

    When the pasta is ready, drain it and give it a quick rinse with cold water. This not only stops the cooking process but also helps cool it down quickly, ensuring it’s fresh for the salad.

    Step 2 – Prepare the Won Tons

    While your pasta cooks, it’s time to focus on those mini won tons. You can add them to the boiling pasta during its last two minutes of cook time, or boil them separately for two minutes. Both methods work like a charm!

    After cooking, drain and rinse them in cold water as well. You don’t want them sticking together. Plus, cooling helps them blend in perfectly with your vibrant salad.

    Step 3 – Chop the Vegetables

    Now, let’s turn our attention to the vegetables! Grab your cutting board and chop those sugar snap peas, cucumber, green onions, red onion, and mini peppers into uniform, bite-sized pieces. You want consistency here for both flavor and presentation.

    It’s almost like creating a rainbow on your plate! Each vegetable will add its unique crunch and tastiness, making every bite a delightful surprise.

    Step 4 – Combine Ingredients

    In a large mixing bowl, combine the cooled pasta, won tons, and all those chopped veggies. Grab your thawed edamame and toss them in too. It’s like a colorful party happening right in your bowl!

    Toss everything together gently. Make sure each ingredient gets to know its neighbors—this is the moment where magic happens!

    Step 5 – Add Dressing and Chill

    Finally, it’s time to add that creamy poppy seed dressing. Drizzle it over the mixture and toss everything together until it’s evenly coated. This dressing is the secret hug that brings all the flavors together!

    To make it even better, cover the salad and refrigerate it overnight. I promise, waiting makes all those flavors meld together into something incredibly delicious. When you’re ready to serve, the freshness will be a hit!

    Tips for Success

    • Use fresh vegetables for the best flavor and crunch.
    • Let the salad chill overnight; it enhances the taste!
    • Feel free to experiment with other veggies for variety.
    • Make extra dressing on the side if you love that creamy flavor.
    • Store leftovers in an airtight container to maintain freshness.

    Equipment Needed

    • Large pot: Any sturdy pot will do for boiling pasta.
    • Colander: Use this to drain pasta and won tons; a fine-mesh sieve works too.
    • Cutting board: Essential for chopping veggies; a plastic or wooden board is perfect.
    • Mixing bowl: A large bowl is key for combining ingredients; any size that fits your needs works.

    Variations of Asian Pasta Salad

    • Vegetarian Delight: Omit the won tons and replace them with baked tofu or grilled veggies for a meatless version that’s still hearty.
    • Spicy Kick: Add sliced jalapeños or a drizzle of sriracha for those who love a little heat in their salad.
    • Nuts and Seeds: Toss in some toasted sesame seeds or chopped peanuts for an added crunch and nutritional punch.
    • Asian Flavors: Incorporate ingredients like mandarin oranges or water chestnuts for a sweeter, tropical twist.
    • Different Dressings: Experiment with other dressings, like sesame ginger or a light vinaigrette, to change up the flavor profile.

    Serving Suggestions for Asian Pasta Salad

    • Pair with grilled chicken or shrimp for a protein boost and an easy meal.
    • Serve with crispy spring rolls for a delightful texture contrast.
    • Complement with chilled green tea or lemonade for a refreshing drink.
    • Garnish with sesame seeds or extra green onions for a pop of color.

    FAQs about Asian Pasta Salad

    Can I make Asian Pasta Salad ahead of time?

    Absolutely! In fact, making it a day in advance allows the flavors to meld beautifully. Just remember to keep it in the fridge until serving.

    What can I substitute for won tons?

    If you’re looking for an alternative, try adding grilled chicken, baked tofu, or even tempeh. This way, you can customize your Asian Pasta Salad to fit your dietary needs!

    How long does Asian Pasta Salad last in the fridge?

    This salad can last up to three days in an airtight container. However, it’s best enjoyed within a couple of days for optimal freshness.

    Can I use a different dressing?

    Of course! While the creamy poppy seed dressing is a favorite, feel free to experiment with sesame ginger, peanut sauce, or even a light vinaigrette for a different flavor twist in your Asian Pasta Salad.

    Is this salad gluten-free?

    To make your Asian Pasta Salad gluten-free, swap the tri-color rotini noodles for gluten-free pasta. Simple as that, and you still get to enjoy all that flavor!

    Final Thoughts

    As you dive into this delightful Asian Pasta Salad, remember that cooking is not just about ingredients but creating joyful moments at the table. This colorful salad brings a splash of flavor and excitement, transforming any meal into a feast of friendship and connection.

    Whether you’re sharing it with loved ones or enjoying it solo, it’s a reminder that quick meals can still be bursting with personality. With every bite, savor the harmony of textures and tastes—each one a testament to the magic that happens when good food meets good company.


    Print

    clock clock iconcutlery cutlery iconflag flag iconfolder folder iconinstagram instagram iconpinterest pinterest iconfacebook facebook iconprint print iconsquares squares iconheart heart iconheart solid heart solid icon

    Description

    A refreshing and colorful Asian Pasta Salad packed with vegetables, pasta, and a creamy poppy seed dressing.


    • 1 cup sugar snap peas, diced
    • 1 seedless cucumber, unpeeled and diced
    • 6 green onions, sliced
    • 1 cup red onion, diced
    • 1 cup mini tri-colored peppers, diced
    • 1 to 1.5 cups frozen shelled edamame, thawed
    • 1 box tri-color rotini noodles
    • 1 bottle creamy poppy seed dressing
    • 1 bag mini chicken and cilantro won tons (Trader Joe’s)

    1. Cook rotini according to package directions until al dente. Drain, rinse with cold water and cool completely.
    2. Either add won tons to pasta during the last two minutes of cooking or boil separately for two minutes. Drain, rinse with cold water and cool.
    3. Chop all vegetables into uniform, bite-sized pieces. Slice mini peppers or dice larger peppers if using.
    4. In a large bowl, combine cooled pasta, won tons, prepared vegetables and thawed edamame.
    5. Add poppy seed dressing and toss until all ingredients are well coated. Cover and refrigerate overnight for flavors to develop.

    Notes

    • For a vegetarian version, omit the mini won tons or replace them with a vegetarian option.
    • Feel free to customize the vegetables based on your preference or seasonal availability.
    • This salad tastes even better the next day as the flavors meld together.
    • Prep Time: 20 minutes
    • Cook Time: 10 minutes
    • Category: Salad
    • Method: Mixing
    • Cuisine: Asian

    Nutrition

    • Serving Size: 1 cup
    • Calories: 250
    • Sugar: 4g
    • Sodium: 400mg
    • Fat: 10g
    • Saturated Fat: 1g
    • Unsaturated Fat: 8g
    • Trans Fat: 0g
    • Carbohydrates: 34g
    • Fiber: 5g
    • Protein: 8g
    • Cholesterol: 5mg

    Sharing is caring!

  • Blueberry Pie Fudge

    Blueberry Pie Fudge


    Introduction to Blueberry Pie Fudge

    Hey there, fellow food lovers! If you’re on the hunt for a scrumptious treat that combines the joy of blueberry pie with the creamy delight of fudge, then you’re in for a real treat with this Blueberry Pie Fudge. This recipe is perfect for busy days when you want a sweet escape without spending hours in the kitchen. Imagine cutting into a rich, velvety square of fudge that bursts with the flavors of fresh blueberries. It’s an impressive dish that will wow your loved ones and make you the star of any gathering. Let’s embark on this delicious journey together!

    Why You’ll Love This Blueberry Pie Fudge

    This Blueberry Pie Fudge is a delightful blend of simplicity and flavor. With just a handful of ingredients, you can whip up a batch in no time. It’s an efficient way to satisfy your sweet tooth while adding a fruity twist to traditional fudge. Plus, each bite offers a creamy, rich flavor that evokes the warmth of summer evenings spent enjoying blueberry pie with family. Trust me, your taste buds will thank you!

    Ingredients for Blueberry Pie Fudge

    Before we dive into the magic of making Blueberry Pie Fudge, let’s gather our ingredients! Here’s what you’ll need:

    • Blueberries: Fresh is best! Their vibrant color and juicy burst bring the taste of summer right into your kitchen.
    • Lemon juice: A splash brightens up the blueberries, enhancing their flavor while adding a zingy twist to your fudge.
    • Cornstarch: This thickener helps create the perfect blueberry filling. It’s a must for that smooth, fudge-like consistency.
    • Sweetened condensed milk: This is the secret to making your fudge incredibly creamy and rich. It’s sweet and oh-so-decadent!
    • White chocolate: The star player! Go for high-quality chocolate for the best flavor. It adds sweetness and creaminess to your fudge.
    • Butter: A little bit of butter helps with the melt-in-your-mouth texture. It’s like a warm hug in every bite!
    • Salt: Just a pinch balances the sweetness and enhances all the flavors. Trust me, it makes a difference!

    If you’d like to get creative, consider adding a splash of vanilla extract or a sprinkle of cinnamon for an extra layer of warmth. Feel free to check the bottom of the article for exact measurements; they’re all there and ready for printing when you’re set to make your delicious fudge!

    How to Make Blueberry Pie Fudge

    Now that we have our ingredients ready, it’s time to dive into the process of creating this delicious Blueberry Pie Fudge! Follow these simple steps, and I promise you’ll have a sweet treat that will leave everyone asking for seconds. Let’s get started!

    Step 1: Prepare the Blueberry Filling

    Start by cooking the blueberries in a medium saucepan over medium heat. Add in the lemon juice and cornstarch. Stir the mixture until it starts to thicken up, which should take about five minutes.

    Once thickened, remove it from the heat and strain the mixture using a fine-mesh sieve. This will give you a smooth blueberry filling, free of skins and excess liquid!

    Step 2: Line Your Pan

    Grab an 8×8-inch baking pan and line it with greased parchment paper. This step is crucial, as it prevents the fudge from sticking to the pan.

    Greasing the paper ensures that you can lift out the fudge with ease when it’s time to slice. Believe me, no one wants to tackle a sticky fudge situation!

    Step 3: Melt the Fudge Base

    Next, set up a double boiler on the stove. Fill the bottom pot with water (but make sure it doesn’t touch the top pot) and bring it to a gentle simmer.

    Add the white chocolate, sweetened condensed milk, butter, and salt to the top pot. Stir gently as everything melts together until it becomes smooth. The aroma of melting chocolate is simply divine!

    Step 4: Incorporate the Blueberry Filling

    Now, it’s time to bring those blueberry flavors to life! Carefully fold in most of the blueberry filling into the melted fudge base.

    Be gentle as you fold; you don’t want to overmix and lose that beautiful marbled effect. Save a little bit of the filling for the top—it’ll look pretty, and taste fantastic!

    Step 5: Pour and Swirl

    Pour the fudge mixture into your lined pan, spreading it into an even layer. Now for the fun part—dot the top with the reserved blueberry filling.

    Grab a toothpick or a knife and swirl the blueberry filling into the fudge. This not only creates a pretty design but also enhances the flavor with bursts of blueberry goodness in each bite!

    Step 6: Chill the Fudge

    Pop your fudge into the fridge and let it chill for about two hours. This is the waiting game, but it’s essential to ensure your fudge sets properly.

    Letting it chill helps develop that perfect, creamy consistency we all crave in fudge!

    Step 7: Slice and Serve

    Once the fudge is set, remove it from the fridge. Gently lift it out of the pan by pulling on the parchment paper.

    Peel off the paper and place the fudge on a cutting board. Slice it into squares, and voilà! You have a delightful treat ready to be devoured!

    Tips for Success

    • Use fresh blueberries for the best flavor; frozen will work in a pinch but may alter texture.
    • Keep a close eye on the melting process to prevent the chocolate from seizing.
    • Don’t rush the chilling time; it’s crucial for the perfect texture.
    • Feel free to experiment with the blueberry filling! A touch of cinnamon can elevate the taste.
    • Store leftovers in an airtight container to maintain freshness.

    Equipment Needed

    • Medium saucepan: For cooking the blueberry filling. A regular pot works just fine!
    • Double boiler: Ideal for melting ingredients. If you don’t have one, use a heatproof bowl over a pot of simmering water.
    • 8×8-inch baking pan: Essential for setting your fudge. Any similar-sized pan will do!
    • Fine-mesh sieve: Great for straining the blueberry filling. A regular strainer can also work!
    • Parchment paper: Essential for easy removal. You can lightly grease the pan instead if you’re out.

    Variations for Blueberry Pie Fudge

    • Chocolate Swirl: For a chocolate lover’s twist, add a swirl of melted milk or dark chocolate on top before chilling!
    • Nutty Addition: Incorporate chopped nuts like pecans or walnuts into the fudge for an extra crunch and flavor contrast.
    • Vegan Option: Substitute sweetened condensed milk with coconut cream, and use dairy-free white chocolate for a vegan-friendly treat.
    • Pie Spice: Add a dash of pumpkin pie spice for a warm flavor boost that pairs nicely with the blueberries.
    • Fruit Variations: Swap blueberries for raspberries or strawberries for a different berry treat while keeping the same delicious creaminess!

    Serving Suggestions for Blueberry Pie Fudge

    • Pair with Ice Cream: A scoop of vanilla or lemon sorbet complements this fudge perfectly.
    • Garnish with Fresh Berries: Add a few blueberries on top for a pop of color and freshness.
    • Serve with Coffee or Tea: Enjoy with a rich cup of coffee or sweet herbal tea.
    • Presentation: Place fudge squares on a decorative platter and dust with powdered sugar for an elegant look.
    • Wrap as Gifts: Individually wrap squares in cellophane for sweet homemade gifts!

    FAQs about Blueberry Pie Fudge

    Can I use frozen blueberries for this recipe?

    Yes, you can! Frozen blueberries work in a pinch, but fresh blueberries yield the best flavor and texture. Just remember to thaw and drain the frozen ones before using.

    How long does Blueberry Pie Fudge last?

    When stored in an airtight container in the fridge, this Blueberry Pie Fudge can last up to two weeks. You can also freeze it for longer storage!

    Can I make this fudge ahead of time?

    Absolutely! One of the great things about Blueberry Pie Fudge is that it’s perfect for making ahead of time. Just let it chill and store it for later enjoyment.

    What can I do if my fudge doesn’t set properly?

    If your fudge is too soft, it may need a bit more chilling time. If it still doesn’t set, try adding a touch more cornstarch in the future to thicken the filling.

    Is Blueberry Pie Fudge suitable for vegetarians?

    Yes! This recipe is vegetarian-friendly, making it a tasty treat everyone can enjoy.

    Final Thoughts

    As you dive into making this Blueberry Pie Fudge, remember it’s more than just a dessert—it’s a delightful experience to share with family and friends. Each creamy square carries the essence of summer and cozy gatherings, instantly transporting you to simpler times. The vibrant colors and flavors are sure to spark joy, whether enjoyed on a rainy afternoon or as a sweet surprise at a potluck. I hope this recipe inspires you to create lasting memories at your kitchen table, where laughter and deliciousness come together with every bite!


    Print

    clock clock iconcutlery cutlery iconflag flag iconfolder folder iconinstagram instagram iconpinterest pinterest iconfacebook facebook iconprint print iconsquares squares iconheart heart iconheart solid heart solid icon

    Description

    A rich and creamy fudge infused with the delightful flavors of blueberry pie.


    • 1 cup blueberries
    • 1 tablespoon lemon juice
    • 2 teaspoons cornstarch
    • 14 oz sweetened condensed milk
    • 20 oz white chocolate
    • 3 tablespoons butter
    • 1/8 teaspoon salt

    1. Cook blueberries with lemon and cornstarch until thick. Strain and set aside.
    2. Line an 8×8 pan with greased parchment paper.
    3. Melt white chocolate, sweetened condensed milk, butter, and salt in a double boiler until smooth.
    4. Fold in most of the blueberry filling, leaving some for the top. Don’t overmix.
    5. Pour into the pan, dot with the remaining filling and swirl.
    6. Chill for 2 hours.
    7. Remove from the pan, peel off the paper, and slice.

    Notes

    • Ensure that the double boiler does not allow water to touch the melting ingredients.
    • For best flavor, use fresh blueberries.
    • Prep Time: 30 minutes
    • Cook Time: 15 minutes
    • Category: Dessert
    • Method: Stovetop and Chilling
    • Cuisine: American

    Nutrition

    • Serving Size: 1 square
    • Calories: 180
    • Sugar: 22g
    • Sodium: 50mg
    • Fat: 8g
    • Saturated Fat: 4g
    • Unsaturated Fat: 2g
    • Trans Fat: 0g
    • Carbohydrates: 26g
    • Fiber: 1g
    • Protein: 2g
    • Cholesterol: 10mg

    Sharing is caring!

  • Hawaiian Sourdough Banana Bread

    Hawaiian Sourdough Banana Bread


    Introduction to Hawaiian Sourdough Banana Bread

    There’s something truly magical about Hawaiian Sourdough Banana Bread that brings a smile to my face. The blend of sweet bananas, tropical flavors, and the nutty crunch of macadamia nuts creates a symphony in your mouth. As a busy mom myself, I appreciate a recipe that’s not just quick but also truly impressive. This delightful bread is perfect for breakfast, an afternoon snack, or as a charming treat for friends. The best part? You can whip it up in no time, making it a go-to solution for busy days when flavor is non-negotiable.

    Why You’ll Love This Hawaiian Sourdough Banana Bread

    This Hawaiian Sourdough Banana Bread is a game-changer for busy days. It combines the ease of using pantry staples with a burst of tropical flavor that feels like a mini-vacation in every slice. Plus, it uses sourdough discard, making it a smart option for those who love zero waste. Not to mention, your family will rave about its moistness and delightful crunch from macadamia nuts. It’s truly a crowd-pleaser!

    Ingredients for Hawaiian Sourdough Banana Bread

    Gathering your ingredients is a key part of the joy in cooking, especially with this Hawaiian Sourdough Banana Bread. Here’s what you’ll need:

    • Sugar: Adds sweetness and moisture, helping create that perfect loaf.
    • Butter: Room temperature butter blends smoothly, giving the bread a rich flavor and tender crumb.
    • Eggs: These act as a binding agent and help the bread rise, contributing to its fluffiness.
    • Flour: The base of the bread, providing structure. Opt for all-purpose flour for the best results.
    • Baking soda: This leavening agent reacts with the sourdough to help the bread rise and achieve that tender texture.
    • Salt: Just a pinch enhances the flavors, balancing the sweetness.
    • Sourdough discard: Not just a way to reduce waste, it adds a delightful tang and moisture to the bread.
    • Macadamia nuts: Their buttery flavor and crunchy texture add a wonderful bite. You can use pecans or walnuts as alternatives.
    • Vanilla extract: A splash of vanilla elevates flavor, making every bite intoxicating.
    • Mashed bananas: The star of the show, they bring natural sweetness and moisture.
    • Crushed pineapple: It introduces a tropical flair—make sure it’s well-drained to avoid excess moisture.
    • Shredded coconut: Adds texture and sweetness, mimicking the islands’ charm. You can opt for unsweetened if you prefer.

    For exact measurements, look at the end of the article where everything is neatly compiled for you to print. Happy baking!

    How to Make Hawaiian Sourdough Banana Bread

    Prepare the Batter

    Let’s start by making that heavenly batter that makes Hawaiian Sourdough Banana Bread so special. In your stand mixer, cream together the room-temperature butter and sugar on medium speed until the mixture is light and fluffy.

    Next, add the eggs one at a time, mixing well after each addition. We’re aiming for a pale yellow color that’s rich and airy. In another bowl, sift the flour, baking soda, and salt together. This step is essential, as it ensures an even distribution of leavening.

    Now, gently alternate adding the dry ingredients and your sourdough discard to the egg mixture. Don’t forget to scrape the bowl’s sides occasionally. Mix just until everything is incorporated, avoiding over-mixing to keep that fluffiness intact.

    Mixing in the Flavorful Ingredients

    Once your batter is ready, it’s time to sprinkle in the fun! Add the chopped macadamia nuts for that delightful crunch, along with the vanilla extract that will make your kitchen smell heavenly.

    Now for the pièce de resistance—fold in the mashed bananas, crushed pineapple, and shredded coconut. This is where the magic happens! Ensure the pineapple is well-drained to avoid sogginess. Stir gently until everything is just combined. No need to overdo it—less is more!

    Baking the Bread

    Preheat your oven to 350 degrees F, allowing the heat to build while you get your loaf pan ready. Grease a 9×5 inch loaf pan, ensuring every nook is covered so your bread slides right out after baking. Pour the batter into the pan, smoothing the top with a spatula.

    If you’re feeling fancy, sprinkle some extra chopped macadamia nuts on top before baking. Slide your loaf pan into the oven and bake for 60-65 minutes. To check for doneness, insert a toothpick in the center; it should come out clean when the bread is perfectly baked. The internal temperature should hit between 200-205 degrees F. Your kitchen is going to smell divine!

    Tips for Success

    • Ensure your bananas are ripe for maximum sweetness and moisture.
    • Always drain the crushed pineapple well to prevent a soggy loaf.
    • Use a toothpick test to avoid overbaking; check it often after 55 minutes.
    • Let the bread cool in the pan for 10 minutes to prevent sticking.
    • Experiment with mix-ins like chocolate chips or dried fruits for a twist!

    Equipment Needed

    • Stand Mixer: A hand mixer works too if that’s what you have on hand.
    • Loaf Pan: Any 9×5 inch pan will do, even a glass one!
    • Mixing Bowls: Essential for combining ingredients; you can use any size.
    • Spatula: Handy for folding in ingredients; a wooden spoon works well too!
    • Measuring Cups and Spoons: Accurate measurements ensure the best results.

    Variations on Hawaiian Sourdough Banana Bread

    • For a chocolatey twist, add a cup of semi-sweet chocolate chips to the batter.
    • Replace macadamia nuts with walnuts or pecans for a different nutty flavor.
    • Add a teaspoon of cinnamon or nutmeg for a warm, spiced flavor.
    • For a gluten-free version, use a gluten-free all-purpose flour blend.
    • Mix in some dried cranberries or chopped dates for added sweetness and texture.
    • Substitute coconut milk for the butter for a dairy-free option.

    Serving Suggestions for Hawaiian Sourdough Banana Bread

    • Serve warm with a generous slather of butter for an indulgent treat.
    • Pair with fresh fruit, like sliced strawberries or pineapple, for a refreshing contrast.
    • Enjoy alongside a hot cup of coffee or tea to elevate your afternoon snack.
    • For a tropical twist, drizzle with honey or maple syrup before serving.
    • Present on a decorative platter with a side of whipped cream for a brunch delight.

    FAQs about Hawaiian Sourdough Banana Bread

    Can I use fresh pineapple instead of canned?

    Absolutely! If you have fresh pineapple, go ahead and use it. Just make sure to slice it finely and drain any excess juice before adding it to your batter. It’ll give your Hawaiian Sourdough Banana Bread a fresh, vibrant flavor!

    What can I do with leftover sourdough discard?

    Your sourdough discard has a plethora of possibilities! In addition to this banana bread, you can use it in pancakes, waffles, or even pizza dough. It’s a fantastic way to prevent food waste while elevating your baked goods.

    Can I make this bread ahead of time?

    Yes, you can! Hawaiian Sourdough Banana Bread stays fresh for about a week when stored properly in an airtight container. It also freezes beautifully for up to three months. Just slice it and wrap it tightly before freezing!

    How do I know when my banana bread is done baking?

    Check for doneness by inserting a toothpick into the center of the loaf. If it comes out clean or with just a few crumbs attached, you’re good to go! Aim for a loaf that’s golden brown and has risen nicely.

    Can I substitute other nuts or add chocolate chips?

    Definitely! Feel free to mix in your favorite nuts, like walnuts or almonds, or even throw in some chocolate chips. This Hawaiian Sourdough Banana Bread is versatile, so customize it to suit your family’s taste buds!

    Final Thoughts

    Baking this Hawaiian Sourdough Banana Bread isn’t just about whipping up a delicious treat; it’s an opportunity to create memories around the kitchen. With each slice, you’re not only indulging in the comforting flavors of banana, macadamia nuts, and coconut, but you’re also sharing a delightful piece of tropical paradise with your loved ones. This recipe proves that you can bring a taste of aloha into your home, even on the busiest days. So, grab those ripe bananas and sourdough discard—you’re just a few steps away from a baking adventure that will warm hearts and satisfy cravings!


    Print

    clock clock iconcutlery cutlery iconflag flag iconfolder folder iconinstagram instagram iconpinterest pinterest iconfacebook facebook iconprint print iconsquares squares iconheart heart iconheart solid heart solid icon

    Description

    A deliciously moist and flavorful Hawaiian Sourdough Banana Bread enhanced with macadamia nuts, pineapple, and coconut.


    • 1 cup sugar (220g)
    • 1/2 cup butter, room temperature (113g)
    • 2 eggs (100g)
    • 1 2/3 cups sifted flour (230g)
    • 1 tsp baking soda (4g)
    • 1/4 tsp salt (2g)
    • 1/3 cup discard (100g)
    • 1/2 cup macadamia nuts, chopped dry roasted (65g)
    • 1 tsp vanilla extract (4g)
    • 1 cup mashed bananas (250g)
    • 1/2 cup crushed pineapple, drained (145g)
    • 1/4 cup shredded coconut, sweetened (25g)

    1. In a stand mixer with a paddle attachment, cream room-temperature butter and sugar on medium speed.
    2. Once combined, add the eggs to the mixture, one at a time. Continue to beat on medium speed until it is light, fluffy, and pale yellow in color.
    3. In a separate bowl, sift the flour, baking soda, and salt together.
    4. Alternate adding the dry ingredients and sourdough discard to the egg mixture. Occasionally stop mixing to scrape the sides of the bowl. Mix until all the flour has been combined with the wet ingredients.
    5. Next, add the chopped macadamia nuts and vanilla extract.
    6. Lastly, add the mashed banana, crushed pineapple (make sure to drain the extra pineapple juice), and coconut flakes to the batter. Mix on medium until just combined.
    7. Preheat the oven to 350 degrees F.
    8. Add the batter to a greased 9×5 loaf pan. Sprinkle with additional chopped macadamia nuts, if desired. Bake for 60-65 minutes or until a toothpick comes out clean. The internal temperature of a baked banana bread loaf should be between 200-205 degrees F.
    9. Remove from the oven and cool on a wire rack for 10 minutes before slicing.

    Notes

    • Ensure that the crushed pineapple is drained well to avoid excess moisture in the batter.
    • Customize with additional nuts or chocolate chips if desired.
    • Store leftovers in an airtight container for up to a week.
    • Prep Time: 15 minutes
    • Cook Time: 65 minutes
    • Category: Baked Goods
    • Method: Baking
    • Cuisine: Hawaiian

    Nutrition

    • Serving Size: 1 slice
    • Calories: 250
    • Sugar: 15g
    • Sodium: 150mg
    • Fat: 10g
    • Saturated Fat: 4g
    • Unsaturated Fat: 6g
    • Trans Fat: 0g
    • Carbohydrates: 38g
    • Fiber: 2g
    • Protein: 3g
    • Cholesterol: 45mg

    Sharing is caring!

  • Oatmeal Raisin Cookie Bars

    Oatmeal Raisin Cookie Bars


    Introduction to Oatmeal Raisin Cookie Bars

    Life can often feel like a whirlwind, especially for busy moms and professionals like us. That’s why I absolutely adore baking these Oatmeal Raisin Cookie Bars. They’re not just any sweet treat; they are my go-to solution for those days when time slips away. The chewy, wholesome blend of oats and sweet bursts of raisins melts into a delightful bar that will impress your loved ones. This recipe is wonderfully simple yet satisfying, perfect for dessert or an afternoon snack. Trust me; your taste buds won’t regret it!

    Why You’ll Love This Oatmeal Raisin Cookie Bars

    Let’s face it, life gets busy, and we need desserts that don’t add to the chaos. These Oatmeal Raisin Cookie Bars are the answer! They come together in just 15 minutes of prep time, leaving you more moments to enjoy with family. The chewy texture and delicious flavor make them delightful, plus they’re ideal for snacking or dessert. This recipe makes sweet indulgence easy and satisfying for everyone!

    Ingredients for Oatmeal Raisin Cookie Bars

    Gathering the right ingredients is the heart of this recipe. For these scrumptious Oatmeal Raisin Cookie Bars, you’ll need a handful of staples that most baking enthusiasts already have in their kitchens.

    • Unsalted butter: Make sure it’s soft for easy mixing. It adds tenderness and rich flavor.
    • Brown sugar: This sweet, moist sugar gives that lovely chewy texture.
    • Granulated sugar: A classic sweetener that helps with lift and sweetness.
    • Large eggs: They bind the ingredients while adding moisture.
    • Vanilla extract: Adds a warm aroma and depth of flavor, making everything better!
    • All-purpose flour: The base ingredient that holds everything together.
    • Baking soda: This leavening agent helps your bars rise and become fluffy.
    • Cinnamon: A dash of this warms up the flavor, transporting you to cozy, nostalgic moments.
    • Salt: Just a pinch enhances all the different flavors, balancing the sweetness.
    • Old-fashioned oats: They provide that chewy texture we all love!
    • Raisins: Sweet, plump bites that add a lovely burst of flavor in every bar.

    Feeling adventurous? Consider adding optional ingredients like chocolate chips for a decadent twist or nuts for extra crunch! If you need alternatives, you can swap out the raisins for dried cranberries or apricots for a fun variation.

    The exact measurements you need are conveniently located at the bottom of the article, all ready for easy printing. Happy baking!

    How to Make Oatmeal Raisin Cookie Bars

    Now that we’ve gathered our ingredients, let’s dive into making these delightful Oatmeal Raisin Cookie Bars! Baking is like a dance; each step leads you closer to a delicious treat. Follow me along this journey, and I’ll share helpful tips to ensure your bars turn out scrumptious!

    Step 1: Preheat the Oven

    First things first, preheat your oven to 350°F (175°C). This step ensures our bars bake evenly. A hot oven is essential for that perfect texture!

    Step 2: Cream the Butter and Sugars

    In a large mixing bowl, cream together the softened unsalted butter, brown sugar, and granulated sugar. Use a hand mixer or stand mixer on medium speed. This process should take about 2-3 minutes, yielding a light and fluffy mixture. This is where the magic begins!

    Step 3: Add Eggs and Vanilla

    Next, add the two large eggs, along with the vanilla extract. Mix until everything is nice and smooth. The eggs add moisture and help bind the ingredients, while vanilla gives warmth to the overall flavor.

    Step 4: Mix Dry Ingredients

    In a separate bowl, whisk together all-purpose flour, baking soda, cinnamon, and salt. This dry mix helps to distribute the leavening agent and spices evenly throughout the batter. You want every bite of your Oatmeal Raisin Cookie Bars to be full of flavor!

    Step 5: Combine Mixtures

    Gradually add your dry ingredients to the wet mixture. I like to do this in batches; it makes it easier to combine without over-mixing. Once combined, stir in your old-fashioned oats and raisins. This is where the bars start to take shape, chunky and inviting!

    Step 6: Spread the Batter

    Now, it’s time to spread your batter evenly into a greased 9×13-inch baking pan. Use a spatula for this; it’ll give you a nice, even layer. Don’t worry if it’s a bit thick; it spreads well as it bakes!

    Step 7: Bake the Bars

    Place the baking pan in your preheated oven and bake for 25-30 minutes. Keep an eye on them; you want golden brown edges and a slightly soft center. They will firm up as they cool, so don’t overbake!

    Step 8: Cool and Cut

    Once baked, remove the pan from the oven and let the bars cool completely. This will take about 20 minutes. Patience is key! When they’re cool, cut them into squares with a sharp knife. Now, you’re ready to delve into the sweet, chewy goodness of Oatmeal Raisin Cookie Bars!

    Tips for Success

    • Always use softened butter for easy mixing and a smooth batter.
    • Measure your ingredients accurately for consistent results.
    • Don’t skip the cooling step; it helps the bars set perfectly.
    • For extra flavor, toast your oats or nuts before adding them.
    • Cut the bars with a sharp knife for clean edges.
    • Store leftovers in an airtight container to keep them fresh and chewy.

    Equipment Needed

    • Mixing bowls: A set of various sizes for combining ingredients.
    • Hand mixer or stand mixer: To cream the butter and sugars quickly. A whisk will work too!
    • Baking pan: A 9×13-inch pan is ideal, but a smaller pan can work, just adjust baking time.
    • Spatula: Perfect for spreading the batter evenly.
    • Measuring cups and spoons: Essential for accurate ingredient amounts.

    Variations

    • Nutty Delight: Add chopped walnuts or pecans to the batter for a delightful crunch.
    • Chocolate Lovers: Toss in some chocolate chips or chunks for a sweet surprise in every bite!
    • Fruit Medley: Substitute raisins with dried cranberries, apricots, or cherries for a flavorful twist.
    • Gluten-Free Option: Use gluten-free all-purpose flour to make these bars friendly for those with dietary restrictions.
    • Spiced Up: Experiment with spices like nutmeg or ginger for a festive flavor that’s perfect for the holidays.
    • Vegan Version: Replace the eggs with flaxseed meal mixed with water and use vegan butter to make these perfect for a plant-based diet.

    Serving Suggestions

    • Enjoy these Oatmeal Raisin Cookie Bars warm, paired with a scoop of vanilla ice cream for an indulgent treat.
    • Serve with a glass of cold milk or a warm cup of tea for a cozy snack break.
    • For a festive touch, sprinkle powdered sugar on top before serving.
    • Cut into fun shapes with cookie cutters for special occasions!

    FAQs about Oatmeal Raisin Cookie Bars

    When it comes to baking these delightful Oatmeal Raisin Cookie Bars, I often get a few common questions. Here are some answers that might help you on your baking journey!

    Can I use quick oats instead of old-fashioned oats?

    It’s best to stick with old-fashioned oats for this recipe. They create that chewy texture we all love. Quick oats can make the bars a bit mushy, so I recommend saving them for another recipe!

    How should I store my Oatmeal Raisin Cookie Bars?

    Keep the bars in an airtight container at room temperature for up to a week. If you want them to last longer, pop them in the fridge for up to two weeks. They freeze well too!

    Can I make these bars ahead of time?

    Absolutely! These bars are great for prepping in advance. Just bake, cool, and store them in an airtight container. They’ll only get better as the flavors mingle over time.

    What can I substitute for eggs if I want to make them vegan?

    You can replace each egg with a tablespoon of flaxseed meal mixed with three tablespoons of water. Let it sit for a few minutes until it gels, and you’ll be good to go!

    Can I add more ingredients without changing the texture?

    Yes! Feel free to add nuts, chocolate chips, or other dried fruits. Just be cautious not to overload the batter, as it could affect the texture. A handful of extras should do the trick!

    Final Thoughts

    Baking these Oatmeal Raisin Cookie Bars has become one of my favorite culinary adventures. They capture the essence of home-baked goodness, filling the kitchen with warmth and delightful aromas. Each bite transports me back to cherished family moments, where laughter and love abound.

    This recipe is not just about satisfying a sweet tooth; it’s about creating experiences and memories. As you whip up these bars, take a moment to appreciate the joy that comes from sharing them with loved ones. With each chewy, flavorful bite, you’re gifting them a little piece of happiness. Enjoy every moment!


    Print

    clock clock iconcutlery cutlery iconflag flag iconfolder folder iconinstagram instagram iconpinterest pinterest iconfacebook facebook iconprint print iconsquares squares iconheart heart iconheart solid heart solid icon

    Description

    Delicious and chewy oatmeal raisin cookie bars that are perfect for dessert or a sweet snack.


    • 1 cup unsalted butter, softened
    • 1 cup brown sugar
    • 1/2 cup granulated sugar
    • 2 large eggs
    • 1 teaspoon vanilla extract
    • 1 1/2 cups all-purpose flour
    • 1 teaspoon baking soda
    • 1 teaspoon cinnamon
    • 1/2 teaspoon salt
    • 3 cups old-fashioned oats
    • 1 cup raisins

    1. Preheat the oven to 350°F (175°C) and grease a 9×13-inch baking pan.
    2. In a large bowl, cream together the butter, brown sugar, and granulated sugar until light and fluffy.
    3. Add the eggs and vanilla extract, and mix until well combined.
    4. In a separate bowl, whisk together the flour, baking soda, cinnamon, and salt.
    5. Gradually add the dry ingredients to the butter mixture, mixing until just combined. Stir in the oats and raisins.
    6. Spread the batter evenly into the prepared baking pan.
    7. Bake for 25-30 minutes, or until golden brown.
    8. Let the bars cool completely before cutting into squares. Enjoy these soft and chewy Oatmeal Raisin Cookie Bars!

    Notes

    • Make sure butter is softened for easy mixing.
    • Store in an airtight container for freshness.
    • Feel free to add nuts or chocolate chips for additional flavor.
    • Prep Time: 15 minutes
    • Cook Time: 30 minutes
    • Category: Dessert
    • Method: Baking
    • Cuisine: American

    Nutrition

    • Serving Size: 1 bar
    • Calories: 200
    • Sugar: 12g
    • Sodium: 150mg
    • Fat: 8g
    • Saturated Fat: 5g
    • Unsaturated Fat: 2g
    • Trans Fat: 0g
    • Carbohydrates: 30g
    • Fiber: 2g
    • Protein: 3g
    • Cholesterol: 35mg

    Sharing is caring!