Author: IHAAL Team

  • Shrimp Stuffed Jalapeño Poppers

    Shrimp Stuffed Jalapeño Poppers


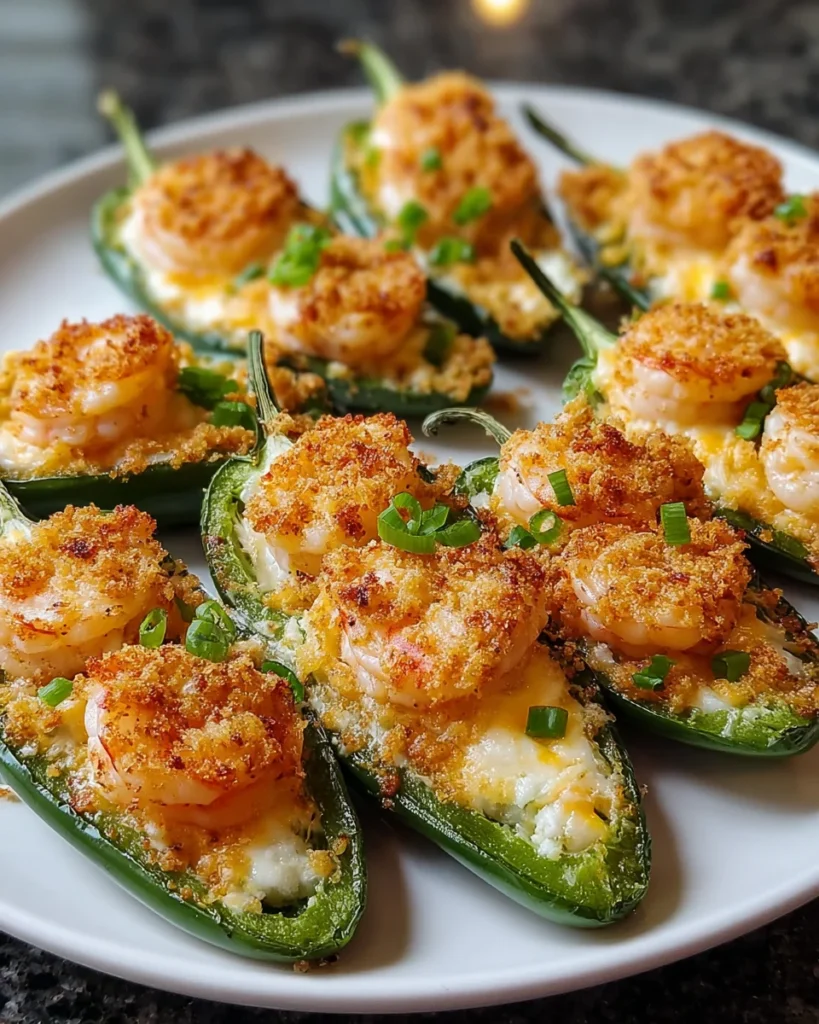
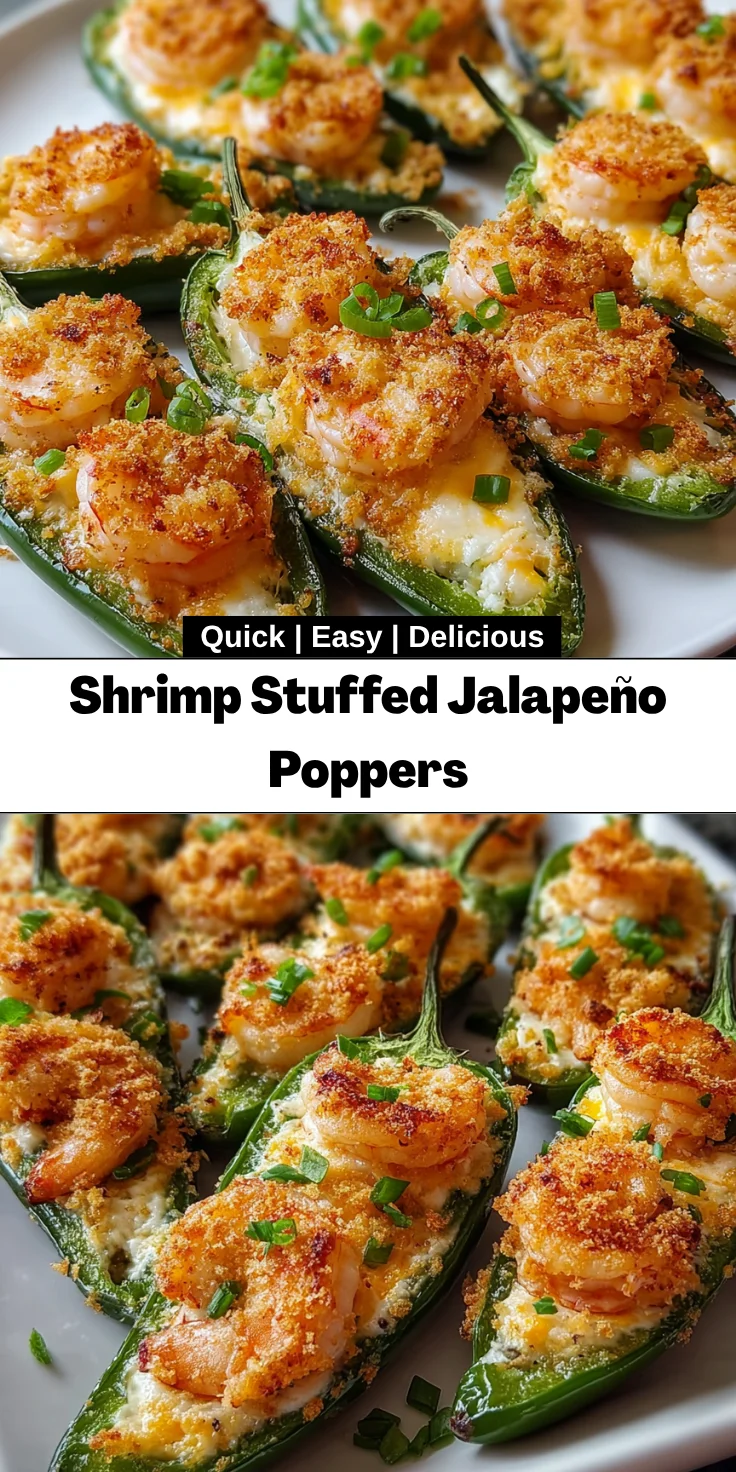
    Introduction to Shrimp Stuffed Jalapeño Poppers

    Trying to find the time to cook something tasty when you’re a busy mom can feel like a bit of a juggling act. Enter Shrimp Stuffed Jalapeño Poppers. A tasty variation on the traditional starter, these combine the heat of fresh jalapeños with a luxurious shrimp filling. Not only are these poppers delicious, but they take no time at all to make and really are quite a show at your next get together. You’ll love how they can so easily impress your loved ones and add some spice into your routine!

    Why You’ll Love This Shrimp Stuffed Jalapeño Poppers

    These Shrimp Stuffed Jalapeño Poppers are not just a feast for the taste buds, but also a lifesaver for a hectic schedule! With a prep time of only 15 minutes and a cook time of just 20 minutes, you can have these delicious bites ready in under an hour. They’re perfect for entertaining guests or simply enjoying a cozy night in. Plus, the blend of creamy shrimp and spicy jalapeños makes each bite a flavor explosion!

    Ingredients for Shrimp Stuffed Jalapeño Poppers

    Gathering the right ingredients is half the fun of cooking these Shrimp Stuffed Jalapeño Poppers. Each component plays a crucial role in building flavor and texture. Here’s what you’ll need:

    • Fresh jalapeños: Medium-sized are ideal as they strike a balance between heat and flavor. If you’re cautious about spiciness, consider using sweet bell peppers instead.
    • Peeled and deveined shrimp: This key ingredient brings a tender, savory bite. For a quicker option, you can use pre-cooked shrimp, just chop them up!
    • Cream cheese: Softened to make mixing easier, this creamy goodness adds rich texture. You can substitute with Greek yogurt for a lighter twist.
    • Shredded cheddar cheese: This melty addition provides richness. Feel free to experiment with pepper jack for extra heat!
    • Garlic: Minced for flavor depth, garlic brightens the whole filling. Use garlic powder if you’re short on fresh garlic.
    • Onion powder: Just a touch enhances the overall taste without overwhelming the shrimp.
    • Lime juice: A splash brings a zesty brightness. Fresh limes are best, but bottled juice works in a pinch.
    • Breadcrumbs: They create a crispy coating. Panko breadcrumbs are a great choice for extra crunch!
    • Large egg: It binds the filling together beautifully. For a vegan option, a flaxseed meal substitution works wonders.
    • Salt and pepper: To taste, ensuring balance in your dish. Feel free to add other seasonings like paprika or cayenne for a flavor kick.
    • Oil for frying: Canola or vegetable oil is perfect for this recipe, adding richness. If you’re frying, be sure to use enough to cover the bottom of the pan.

    Don’t worry! If you’d like precise measurements, you can find them at the bottom of this article, available for easy printing.

    How to Make Shrimp Stuffed Jalapeño Poppers

    Prepare the Jalapeños

    To start making these Shrimp Stuffed Jalapeño Poppers, you’ll first need to prep your jalapeños. Slice each jalapeño in half lengthwise, revealing their vibrant green flesh. Next, gently remove the seeds and membranes using a small spoon or a knife. Trust me, this step is crucial! By taking out the seeds, you reduce the heat and ensure your poppers are just spicy enough to enjoy. You can set your cleaned jalapeños aside and move on to the filling; you want them ready to go!

    Make the Filling

    In a mixing bowl, combine your chopped shrimp, cream cheese, shredded cheddar cheese, minced garlic, onion powder, lime juice, salt, and pepper. Mix it all together until it’s beautifully smooth. If the mixture seems too thick, you can add a touch more cream cheese or a bit of lime juice. The goal is to achieve a creamy, spreadable filling that tastes oh-so-good! Pro tip: Letting the mixture sit for a few minutes allows the flavors to meld together beautifully, enhancing the overall taste!

    Stuff the Jalapeños

    Now, let’s fill those jalapeños! Using a spoon or piping bag makes this part much quicker and less messy. Carefully take your creamy shrimp mixture and generously fill each jalapeño half. Don’t skimp on the filling—make it heaping! This is where all the flavor lies. If you’re using a piping bag, it can make the whole process feel like a culinary magic trick. Once filled, place them on a baking sheet, ready for coating!

    Coat the Poppers

    Next up, it’s coating time! Take each stuffed jalapeño and dip it into the beaten egg, allowing the egg to coat evenly. Then, roll the jalapeño in breadcrumbs, pressing slightly to ensure they stick. This coating brings extra crunch to your poppers, making them even more delicious. Panko breadcrumbs are a fantastic option for a light, crispy finish. Do this for each popper, and place them back on the baking sheet when done. Your poppers are now ready for their time in the oven!

    Bake the Poppers

    Preheat your oven to 375°F (190°C) and bake the coated jalapeños for about 15-20 minutes. Keep an eye on them! You’ll know they’re done when the breadcrumbs turn a lovely golden brown, and the filling is bubbling. Letting them bake gives that crispy exterior we all crave. The delightful aroma that fills your kitchen is just a bonus! Once they’re perfectly baked, take them out and let them rest for a few minutes.

    Serve and Enjoy

    When it’s time to serve your Shrimp Stuffed Jalapeño Poppers, don’t forget the dipping sauces! A cool ranch or a zesty cilantro-lime sauce complements the heat beautifully. Place your poppers on a platter, and watch them disappear like magic at your gatherings. They’re best enjoyed warm, where the filling is gooey and each bite is an explosion of flavor. You’ll definitely impress everyone with this dish!

    Tips for Success

    • Always use gloves when handling jalapeños to protect your hands from their heat.
    • For a creamier filling, let the cream cheese soften at room temperature before mixing.
    • Make sure to press the breadcrumbs onto the poppers for better adherence.
    • Adjust the spice level by using fewer seeds or substituting with milder peppers.
    • Feel free to prepare these ahead and freeze before baking for a quick snack!

    Equipment Needed

    • Baking sheet: A standard sheet works perfectly, but a stoneware pan can give you an even crunch.
    • Mixing bowl: Any medium bowl will do; just ensure it’s big enough to hold your filling.
    • Spoon or piping bag: For filling the jalapeños; a bag can make it neat!
    • Measuring cups: Essential for accuracy, though you can eye it if you’re confident!
    • Whisk: Handy for beating the egg, but a fork works just as well.

    Variations of Shrimp Stuffed Jalapeño Poppers

    • Spicy Crabbies: Swap out the shrimp for lump crab meat for a luxurious twist. A splash of Old Bay seasoning elevates the flavor!
    • Vegetarian Delight: Replace shrimp with extra veggies like bell peppers and corn, mixed with cream cheese and spices for a lighter option.
    • Cheesy Bacon Bliss: Add crispy bacon bits to the shrimp filling for a smoky flavor that takes your poppers to the next level.
    • Asian-influenced: Instead of lime juice, use soy sauce and add sesame oil for a unique filling — delicious with a side of sweet chili sauce.
    • Herbed Infusion: Mix in fresh herbs like cilantro or parsley for a refreshing taste that brightens up each bite.

    Serving Suggestions for Shrimp Stuffed Jalapeño Poppers

    • Pair with a refreshing cucumber salad for a crunchy contrast.
    • Serve alongside tortilla chips and salsa for a festive touch.
    • Offer a variety of dipping sauces like guacamole or ranch dressing.
    • Garnish with fresh cilantro or parsley for a vibrant presentation.
    • Enjoy with a chilled glass of lemonade or iced tea!

    FAQs about Shrimp Stuffed Jalapeño Poppers

    Got questions? I’ve got answers! Let’s dive into some common inquiries about Shrimp Stuffed Jalapeño Poppers that might pop into your mind while preparing this delectable dish.

    Can I make Shrimp Stuffed Jalapeño Poppers ahead of time?

    Absolutely! You can prep these poppers a day in advance. Just stuff and coat them, then cover tightly and refrigerate. When you’re ready, bake them fresh for your guests!

    What dipping sauces pair well with these poppers?

    For a zesty kick, try ranch dressing or a spicy aioli. Guacamole is another fantastic option that complements the flavors beautifully. Your guests will love the variety!

    How spicy are the jalapeños in this recipe?

    The spice level largely depends on the jalapeños themselves. Removing the seeds and membranes helps tone down the heat. If you’d like less spice, opt for milder peppers like Anaheim or use fewer jalapeños.

    Can I freeze leftover poppers?

    Yes! Once fully cool, place them in an airtight container or freezer bag. They can last for up to three months. Just reheat in the oven for a tasty snack on a busy day!

    Can I make these poppers gluten-free?

    Absolutely! Just substitute regular breadcrumbs with gluten-free breadcrumbs. They’ll still achieve that delightful crunch and flavor you love. Enjoy with no worries!

    Final Thoughts

    Making Shrimp Stuffed Jalapeño Poppers combines the joy of cooking with the delight of sharing a flavorful treat. These poppers are more than just a dish; they create cherished memories when gathered with loved ones. The crispy exterior and creamy filling are sure to impress, turning any meal into a special occasion. Plus, the versatility of this recipe means you can adapt it to suit your family’s tastes. So, roll up your sleeves, get cooking, and savor the smiles that your delicious creations will bring!


    Print

    clock clock iconcutlery cutlery iconflag flag iconfolder folder iconinstagram instagram iconpinterest pinterest iconfacebook facebook iconprint print iconsquares squares iconheart heart iconheart solid heart solid icon

    Description

    Shrimp Stuffed Jalapeño Poppers are a delightful appetizer that combines the heat of fresh jalapeños with a creamy shrimp filling, creating a crispy and flavorful treat.


    • 12 fresh jalapeños: Choose medium-sized for the perfect balance of heat.
    • 1 pound shrimp: Peeled, deveined, and chopped.
    • 8 ounces cream cheese: Softened for easy mixing.
    • 1 cup shredded cheddar cheese: For added richness.
    • 2 cloves garlic: Minced for flavor depth.
    • 1 teaspoon onion powder: Enhances overall taste.
    • 1 teaspoon lime juice: Adds brightness to the filling.
    • 1 cup breadcrumbs: For a crispy coating.
    • 1 large egg: Binds the filling.
    • Salt and pepper: To taste.
    • Oil for frying: Canola or vegetable oil works well.

    1. Prepare the Jalapeños: Preheat your oven to 375°F (190°C). Slice each jalapeño in half lengthwise and remove the seeds and membranes.
    2. Make the Filling: In a mixing bowl, combine chopped shrimp, cream cheese, cheddar cheese, garlic, onion powder, lime juice, salt, and pepper. Mix until smooth.
    3. Stuff the Jalapeños: Fill each jalapeño half with the shrimp mixture using a spoon or piping bag.
    4. Coat the Poppers: Dip each stuffed jalapeño in beaten egg, then roll in breadcrumbs to coat.
    5. Bake the Poppers: Place coated jalapeños on a baking sheet and bake for 15-20 minutes until golden brown and filling is hot.
    6. Serve and Enjoy: Let cool slightly before serving. Best enjoyed warm with a dipping sauce.

    Notes

    • Use gloves when handling jalapeños to avoid irritation.
    • Customize the spice level by adjusting the amount of jalapeños or even using milder peppers.
    • These poppers can be made ahead of time and frozen before baking.
    • Prep Time: 15 minutes
    • Cook Time: 20 minutes
    • Category: Appetizer
    • Method: Baking
    • Cuisine: Mexican

    Nutrition

    • Serving Size: 2 poppers
    • Calories: 250
    • Sugar: 1g
    • Sodium: 450mg
    • Fat: 15g
    • Saturated Fat: 6g
    • Unsaturated Fat: 7g
    • Trans Fat: 0g
    • Carbohydrates: 20g
    • Fiber: 1g
    • Protein: 10g
    • Cholesterol: 85mg

    Sharing is caring!

  • Sheet Pan Chicken Pitas with Herby Ranch

    Sheet Pan Chicken Pitas with Herby Ranch


    Introduction to Sheet Pan Chicken Pitas with Herby Ranch

    Welcome to the happy home of home cooking! Here’s my favorite: Sheet Pan Chicken Pitas with Herby Ranch. This carries itself as a solution for those windy weeknights when you’ve lost count of all the balls you’re juggling. Soft chicken, colorful crispy veggies, and creamy herby flavors do a happy tango in a single puffy pita. It’s a simple dinner that’s sure to win over the ‘but I don’t like that’ crowd and get you out of the kitchen double time – perfect for busy moms and professionals.

    Why You’ll Love This Sheet Pan Chicken Pitas with Herby Ranch

    Let’s face it—life gets busy! This Sheet Pan Chicken Pitas with Herby Ranch recipe shines as a beacon for anyone needing quick meal solutions. With just a single pan involved, clean-up is a breeze. You’ll love how easy it is to customize the veggies and adjust seasonings to suit your family’s taste. Plus, the vibrant flavors of roasted chicken and fresh herbs offer a delightful taste sensation that’ll have everyone coming back for seconds!

    Ingredients for Sheet Pan Chicken Pitas with Herby Ranch

    Beneath the surface of simplicity, each ingredient in this recipe holds a unique charm. Here’s what you’ll need to whip up these delightful pitas:

    • Boneless, skinless chicken breasts or thighs: Use breasts for a leaner option, or thighs for a bit more flavor and juiciness. Both work beautifully here.
    • Bell peppers: A colorful mix of bell peppers not only adds a pop of color but also layers of sweetness. Go bold with reds, yellows, and greens!
    • Red onion: Sweet and slightly tangy, it caramelizes during roasting, enhancing the overall flavor of your dish.
    • Olive oil: This staple helps the vegetables caramelize and keeps the chicken moist. It’s a healthier fat option that pairs well with herb flavors.
    • Garlic powder: A convenient way to provide that savory punch without overpowering the dish. A must for any flavorful meal!
    • Paprika: Whether you choose smoked or sweet, paprika adds rich, warm flavors. It elevates the roasting experience to another level!
    • Salt and pepper: Essential in bringing out the flavors of the chicken and veggies, don’t skip these basic seasonings.
    • Greek yogurt or sour cream: These creamy ingredients form the base of your herby ranch dressing, offering tanginess and reducing calorie counts compared to heavy creams.
    • Mayonnaise: A dollop keeps the dressing creamy and rich. You can substitute with a light option if you prefer.
    • Fresh dill and parsley: These herbs bring freshness to the table! Use fresh when possible, but dried will do in a pinch.
    • Onion powder: It complements the garlic perfectly, layering in flavor within the dressing.
    • Lemon juice: A splash of zing adds brightness, balancing out the richness of your dressing.
    • Pita bread: Pot for store-bought for convenience or homemade for a personal touch. Fluffy pockets hold all the good stuff!
    • Fresh greens: Adding arugula or spinach enhances nutrition and offers a refreshing crunch.
    • Sliced cucumbers and tomatoes: These lend extra crunch and juicy brightness to your pitas, making every bite refreshing.

    You can find exact measurements for these ingredients at the bottom of the article, available for printing. So gather your goodies and let’s get started on this delicious adventure!

    How to Make Sheet Pan Chicken Pitas with Herby Ranch

    Step 1: Preheat the Oven

    First, let’s get that oven warmed up to 400°F (200°C). Preheating is essential! It ensures that your chicken and veggies start cooking evenly from the moment they enter the oven. Waiting patiently for those few minutes transforms your ingredients into roasted perfection.

    Step 2: Prepare Chicken and Vegetables

    In a big bowl, combine the chicken, sliced bell peppers, and red onion. Drizzle with olive oil. Then, sprinkle the garlic powder, paprika, salt, and pepper over the top. Now comes the fun part: toss everything together until every piece is well-coated. This way, those flavors blend beautifully! If you have time, letting the chicken marinate for about 30 minutes can boost the taste. Happy cooking!

    Step 3: Spread on the Sheet Pan

    Now, grab your trusty sheet pan and line it with parchment paper if you’d like to keep things tidy. Spread your chicken and vegetable mixture evenly across the pan. This distributes the heat evenly as they roast and prevents any soggy spots. Keep their distance, so they can caramelize nicely!

    Step 4: Roast Ingredients

    Time to roast! Slide your pan into the preheated oven and let the magic happen. Bake for about 25–30 minutes. Check for doneness; the chicken should reach 165°F (75°C) and look golden brown. The veggies must be tender and slightly charred for that delicious roasted flavor. You’ll know it’s ready when the aroma fills your kitchen!

    Step 5: Make the Herby Ranch Dressing

    While everything is roasting, let’s whip up the herby ranch dressing. In a mixing bowl, combine Greek yogurt, mayonnaise, dill, parsley, garlic powder, onion powder, and lemon juice. Stir them together until smooth and creamy. This dressing is packed with freshness! Adjust it to taste with salt and pepper. Don’t skimp on this step, as it ties your dish together!

    Step 6: Assemble Your Pitas

    Once your chicken and veggies are ready, slice the chicken into juicy strips. Warm the pita bread briefly in the oven if you like. Now, the assembly begins! Place a handful of fresh greens into each pita. Add the chicken and roasted veggies. Drizzle the herby ranch dressing generously over the top. You can personalize it by tossing in sliced cucumbers or tomatoes for that extra crunch! Ready, set, enjoy!

    Tips for Success

    • Don’t overcrowd the sheet pan; give ingredients room to roast evenly.
    • Allow the chicken to marinate with spices for at least 30 minutes for deeper flavor.
    • Feel free to swap out veggies based on your family’s favorites or what’s in season.
    • Store any leftovers in an airtight container for up to three days.
    • Double the herby ranch dressing to have extra for salads or dipping!

    Equipment Needed

    • Sheet pan: A standard baking sheet works perfectly, or you can use a large roasting pan.
    • Mixing bowl: Any large bowl will do for combining your ingredients; a glass or ceramic one is ideal.
    • Cooking utensils: Use spatulas or tongs for easy flipping and serving.
    • Cooking thermometer: A handy tool to check the chicken’s doneness, ensuring it’s cooked safely.
    • Measuring cups and spoons: Essential for precise ingredient amounts, but feel free to eyeball it!

    Variations for Sheet Pan Chicken Pitas with Herby Ranch

    • Spicy Kick: Add a dash of cayenne pepper or red pepper flakes to the chicken for a bit of heat. It’ll give your dish an exciting twist!
    • Vegetarian Delight: Swap the chicken for chickpeas or tofu. Season with the same spices for a robust flavor that’s still satisfying!
    • Different Herbs: Experiment with fresh mint or basil instead of dill and parsley in your herby ranch dressing to create a unique flavor profile.
    • Whole Wheat Pitas: Opt for whole wheat or gluten-free pitas to cater to different dietary needs and add extra nutrients!
    • Cheesy Addition: Sprinkle crumbled feta or shredded cheese inside the pitas for a gooey, cheesy experience that complements the savory chicken beautifully.

    Serving Suggestions for Sheet Pan Chicken Pitas with Herby Ranch

    • Fresh Salad: Serve with a light arugula or mixed greens salad drizzled with balsamic vinaigrette for a refreshing contrast.
    • Refreshing Beverages: Pair with sparkling water infused with lemon or a chilled glass of white wine for a delightful meal experience.
    • Presentation: Arrange pitas on a colorful platter, garnished with herbs for a burst of color and added appeal!

    FAQs about Sheet Pan Chicken Pitas with Herby Ranch

    Can I use frozen chicken for this recipe?
    While frozen chicken is convenient, I recommend using fresh chicken for the best texture and flavor. If frozen, thaw it in the fridge overnight before preparing.

    How do I store leftovers from my Sheet Pan Chicken Pitas?
    Store any leftovers in an airtight container in the fridge for up to three days. Just reheat the chicken and veggies in the oven for that fresh-roasted taste!

    Can I make the herby ranch dressing ahead of time?
    Absolutely! You can prepare the dressing a day in advance. Just store it in the fridge in a sealed container, and it’ll be ready when you are.

    What vegetables work best with this recipe?
    You can use a variety of veggies! Zucchini, asparagus, or mushrooms are all fantastic options. Feel free to mix and match based on your family’s preferences.

    Is this recipe gluten-free?
    Yes, this Sheet Pan Chicken Pitas recipe can easily be made gluten-free by using gluten-free pita bread. Enjoy your flavorful meal without worry!

    Final Thoughts

    As I serve up these Sheet Pan Chicken Pitas with Herby Ranch, I can’t help but smile at the joy they bring to our family table. It’s the kind of meal that invites laughter and conversation, turning a regular weeknight into something special. The delicious blend of flavors and textures makes everyone happy, from picky eaters to culinary adventurers. Plus, the ease of preparation means I get to enjoy a moment of peace too! Whether it’s a busy night or a laid-back weekend, this recipe truly delivers comfort and nourishment wrapped up in delightful pitas!


    Print

    clock clock iconcutlery cutlery iconflag flag iconfolder folder iconinstagram instagram iconpinterest pinterest iconfacebook facebook iconprint print iconsquares squares iconheart heart iconheart solid heart solid icon

    Description

    A delicious and easy recipe for chicken pitas loaded with roasted vegetables and herby ranch dressing.


    • 1 pound boneless, skinless chicken breasts (or thighs for more flavor)
    • 2 cups bell peppers (sliced; use a mix of colors for visual appeal)
    • 1 cup red onion (sliced)
    • 2 tablespoons olive oil
    • 1 teaspoon garlic powder
    • 1 teaspoon paprika (smoked paprika adds extra depth)
    • Salt and pepper to taste
    • 1/2 cup Greek yogurt (or sour cream)
    • 1/4 cup mayonnaise
    • 1 tablespoon fresh dill (chopped; or 1 teaspoon dried dill)
    • 1 tablespoon fresh parsley (chopped)
    • 1 teaspoon garlic powder
    • 1 teaspoon onion powder
    • 1 tablespoon lemon juice
    • Pita bread (store-bought or homemade)
    • Fresh greens (like arugula or spinach)
    • Sliced cucumbers and tomatoes (for added crunch)

    1. Preheat your oven to 400°F (200°C).
    2. In a large bowl, combine the chicken, sliced bell peppers, and red onion. Drizzle with olive oil, then sprinkle with garlic powder, paprika, salt, and pepper. Toss until well coated.
    3. Spread the chicken and vegetable mixture evenly on a large sheet pan.
    4. Place the sheet pan in the preheated oven and roast for 25-30 minutes, or until the chicken is cooked through and the vegetables are tender.
    5. While the chicken and vegetables are roasting, prepare the herby ranch dressing by whisking together Greek yogurt, mayonnaise, dill, parsley, garlic powder, onion powder, lemon juice, salt, and pepper until smooth and creamy.
    6. Remove the chicken and vegetables from the oven. Slice the chicken into strips and warm the pita bread in the oven if desired.
    7. To assemble, place greens in each pita, add the chicken and roasted veggies, and drizzle with herby ranch dressing.
    8. Serve warm, with extra herby ranch on the side for dipping.

    Notes

    • Feel free to use any mix of vegetables you like.
    • For added flavor, marinate the chicken in the spices for 30 minutes before cooking.
    • This dish is great for meal prep and can be stored in the fridge for a few days.
    • Prep Time: 15 minutes
    • Cook Time: 30 minutes
    • Category: Main Dish
    • Method: Roasting
    • Cuisine: Mediterranean

    Nutrition

    • Serving Size: 1 pita
    • Calories: 450
    • Sugar: 3g
    • Sodium: 700mg
    • Fat: 20g
    • Saturated Fat: 3g
    • Unsaturated Fat: 15g
    • Trans Fat: 0g
    • Carbohydrates: 36g
    • Fiber: 5g
    • Protein: 30g
    • Cholesterol: 75mg

    Sharing is caring!

  • Lemon Cheesecake Bars

    Lemon Cheesecake Bars


    Introduction to Lemon Cheesecake Bars

    So let’s dicsuss Lemon Cheesecake Bars– the cool icy-sweet treat
    even on the most hectic days of the week. As an enthusiastic amateur chef, I adore receips that cut rihgt throught he anarchy of my life, offering utter contentment with every bean- these bars fit that description! They’re ridiculously easy to put together so perfect for when I really want to blow my family or friends away but don’t want to spend my whole day in the kitchen: every time I roll these out for potluck dinners, or birthday parties, or even just a Sunday afternoon, they always come through for me. Trust me, they will make your mouth sing, and you’ll be anointed at the new dessert throne!

    Why You’ll Love This Lemon Cheesecake Bars

    These Lemon Cheesecake Bars are a delightful combination of creamy and tangy flavors, bringing sunshine to any occasion. They’re quick to prepare, making them a perfect choice for busy moms and professionals like us who crave delicious desserts without the hassle. With minimal effort and just a few simple ingredients, you’ll impress your loved ones every time you serve them. Plus, they’re a great way to bring a taste of spring to your table anytime of the year!

    Ingredients for Lemon Cheesecake Bars

    Let’s dive into the wonderful world of ingredients that create these Lemon Cheesecake Bars. This recipe calls for a delightful mix that gives you that creamy, dreamy texture paired with the perfect balance of tart and sweet!

    • Graham cracker crumbs – The foundation of our crust, giving it that delicious crunch and nostalgic flavor.
    • Granulated sugar – Sweetness is essential, and it balances the tartness of the lemons beautifully.
    • Unsalted butter – This adds richness to the crust; melted butter binds everything together, adding moisture.
    • Ground cinnamon – A warm spice that creates depth in the crust. It complements the lemon perfectly.
    • Lemon zest – This adds a pop of brightness and amplifies the lemon flavor throughout the dessert.
    • Full-fat cream cheese – The star of our cheesecake filling! It provides that rich, creamy texture we all love.
    • Vanilla extract – Adds a hint of warmth and enhances the overall flavor of the cheesecake.
    • Eggs – They play a crucial role in providing structure and stability to the cheesecake.
    • Lemon juice – Freshly squeezed for the best flavor! It brightens the filling and adds that delightful tang.
    • All-purpose flour – Just a touch to help hold the cheesecake together and maintain its creamy consistency.
    • Lemon curd – This luscious swirl brings an extra layer of lemony goodness, making every bite heavenly.

    The exact measurements for all these ingredients can be found at the bottom of the article. Happy baking!

    How to Make Lemon Cheesecake Bars

    Step 1: Preheat the Oven

    The first and crucial step is to preheat your oven to 325°F. This ensures that the heat is just right for baking our Lemon Cheesecake Bars. An even temperature means your dessert will bake perfectly, avoiding a soggy bottom and ensuring a scrumptious rise. Don’t skip this step; your bars will thank you later!

    Step 2: Prepare the Baking Pan

    Grab a 9-inch square baking pan and line it with parchment paper. I love this trick! Just leave some overhang on the sides. This little detail makes it super easy to lift the bars out later. Plus, no more sticky mess—just perfect, clean edges when you slice into them!

    Step 3: Make the Crust

    In a medium bowl, mix the graham cracker crumbs, sugar, ground cinnamon, lemon zest, and melted butter. Stir until it’s all combined and resembles damp sand. Now, press this mixture evenly into the bottom of your prepared baking pan. Use the back of a measuring cup or your fingers for a firmly packed crust. It’s the solid base your delicious cheesecake layer needs, so press hard enough!

    Step 4: Prepare the Cheesecake Mixture

    For the cheesecake, start by beating the room-temperature cream cheese in a large mixing bowl. Add granulated sugar and vanilla extract, and mix until smooth and creamy, about three minutes on medium speed. Scrape down the sides of the bowl to make sure everything’s blended. We’re aiming for that velvety texture that makes each bite irresistible. Then, it’s time to toss in those eggs—one at a time, mixing well after each addition!

    Step 5: Combine and Pour

    Once you’ve mixed in the eggs, add the fresh lemon juice and give it another quick stir. Now, gently fold in the flour. This step helps bind the cheesy goodness without overmixing. When everything looks well combined, pour this creamy mixture over the crust. Spread it evenly with a spatula to create a smooth surface for that heavenly topping to come!

    Step 6: Add Lemon Curd Swirls

    Here comes the fun part—swirling in the lemon curd! Using a knife or toothpick, gently swirl the lemon curd into the cream cheese layer. You want to create beautiful swirls, not mix it completely. Each alluring swirl brings a pop of flavor and a lovely visual, making these bars even more tempting!

    Step 7: Baking Time

    Now, it’s time to bake! Pop the pan in the preheated oven for about 35 to 40 minutes. Keep an eye on them—you want the edges to be set but the center should still have a slight jiggle. If they’re browning too quickly, cover with foil for the last few minutes. This will help your Lemon Cheesecake Bars cook evenly without burning!

    Step 8: Cooling and Refrigeration

    Once baked, remove the pan from the oven and let it cool at room temperature for about 30 minutes. Patience is key here! After cooling, place the bars in the refrigerator for at least 8 hours, if you can wait that long. Chilling allows the flavors to meld beautifully, giving you that fantastic, creamy texture that makes this dessert unforgettable!

    Tips for Success

    • Always use room-temperature cream cheese for a smoother mixture.
    • Wrap the edges of the baking pan with foil if they start to brown before the center is set.
    • Let the bars chill overnight to enhance the flavors.
    • Feel free to adjust the sweetness to suit your taste.
    • Use a sharp knife for clean slices after chilling.

    Equipment Needed

    • 9-inch square baking pan – A round pan works too if that’s what you have.
    • Parchment paper – You can use aluminum foil in a pinch, but parchment is better for easy removal.
    • Mixing bowls – Just any to mix your ingredients, but a large one is ideal.
    • Hand mixer – A whisk works well too; just be prepared for a workout!
    • Spatula – Useful for spreading the cheesecake mixture smoothly.

    Variations for Lemon Cheesecake Bars

    • Berry Bliss: Add fresh or frozen berries like blueberries or raspberries to the cream cheese mixture for a delightful fruity twist.
    • Gluten-Free Option: Substitute graham cracker crumbs with gluten-free cookie crumbs or almond flour for a gluten-friendly dessert.
    • Coconut Dream: Mix in shredded coconut into the crust or sprinkle it on top of the lemon curd for a tropical flair that’s irresistible!
    • Chocolate Lover’s: Drizzle melted chocolate over the cooled bars for a rich contrast to the creamy lemon flavor.
    • Vegan Version: Use nut cream cheese, aquafaba instead of eggs, and maple syrup as a sweetener for a plant-based treat!

    Serving Suggestions

    • Pair with a dollop of whipped cream for an extra creamy touch.
    • Serve alongside fresh berries like strawberries or raspberries for a burst of freshness.
    • Enjoy with a refreshing glass of iced tea or lemonade to complement the zesty flavor.
    • Garnish with lemon slices or zest for a beautiful presentation that pops!
    • Add a sprig of mint for an elegant finishing touch on each plate.

    FAQs about Lemon Cheesecake Bars

    Let’s tackle some frequently asked questions about these delicious Lemon Cheesecake Bars. After all, I know that a smooth baking experience makes for a happier kitchen! Here are some of the questions I often hear from fellow bakers:

    Can I use low-fat cream cheese?

    While low-fat options can work, I recommend sticking with full-fat cream cheese for the creamiest texture. Low-fat varieties tend to result in a less rich flavor.

    How do I know when my bars are done baking?

    You want the edges to be set, while the center should still jiggle slightly. A good rule of thumb is to check around the 35-minute mark. If the edges darken, cover them loosely with foil.

    Can I make these bars ahead of time?

    Absolutely! In fact, making them a day in advance enhances the flavors. Just be sure to refrigerate them overnight and cover with plastic wrap.

    What’s the best way to cut Lemon Cheesecake Bars?

    Using a sharp, hot knife is key for clean slices. Simply dip the knife in hot water, wipe it, and then cut through the bars for perfectly smooth edges!

    Can I freeze Lemon Cheesecake Bars?

    You can! Just wrap the cooled bars tightly in plastic wrap and then in aluminum foil. Thaw them in the refrigerator, and you’ll still enjoy that rich taste!

    Final Thoughts

    Making Lemon Cheesecake Bars is like crafting a little piece of joy in your kitchen. With every bite, you get that luscious creaminess paired with a zesty zing that can brighten anyone’s day. I love how easy they are to whip up, yet they feel so special and indulgent. Whether you’re celebrating a festive occasion or simply looking for a sweet treat after dinner, these bars never disappoint. The joy on my family’s faces when they enjoy these delightful squares is priceless. I hope this recipe brings you as much happiness as it brings me!


    Print

    clock clock iconcutlery cutlery iconflag flag iconfolder folder iconinstagram instagram iconpinterest pinterest iconfacebook facebook iconprint print iconsquares squares iconheart heart iconheart solid heart solid icon

    Description

    Lemon Cheesecake Bars are a creamy and tangy dessert with a delicious graham cracker crust and a rich cheesecake filling swirled with lemon curd.


    • 1 ½ Cups graham cracker crumbs
    • 3 Tablespoons granulated sugar
    • 7 Tablespoons unsalted butter, melted
    • 1 Teaspoon ground cinnamon
    • 1 Teaspoon lemon zest
    • 24 Ounces cream cheese, full-fat, at room temperature
    • ½ Cup granulated sugar
    • 1 Teaspoon vanilla extract
    • 3 eggs, at room temperature
    • juice from half a lemon
    • 5 Tablespoons all-purpose flour
    • ¾ Cup lemon curd

    1. Preheat the oven to 325°F.
    2. Line a 9-inch square baking pan with parchment paper, leaving an overhang on the sides for easy removal.
    3. In a medium bowl, combine the graham cracker crumbs, granulated sugar, cinnamon, lemon zest and melted butter. Mix until well combined.
    4. Press the mixture evenly into the bottom of the prepared pan and set aside.
    5. In a large mixing bowl, beat the cream cheese, sugar and vanilla extract until smooth and creamy, about 3 minutes on medium speed.
    6. Add the eggs one at a time, mixing well after each addition.
    7. Add the lemon juice and mix.
    8. Fold in the flour gently and pour the cream cheese mixture over the crust.
    9. Gently swirl the lemon curd into the cream cheese layer using a knife or toothpick.
    10. Bake in the preheated oven for 35 to 40 minutes or until the edges are set and the center is slightly jiggly. Add foil on top partway through cooking if they brown too fast.
    11. Cool for half an hour at room temperature and then refrigerate the bars for at least 8 hours before slicing and serving.

    Notes

    • Make sure the cream cheese is at room temperature for easier mixing.
    • Chilling the bars overnight enhances the flavor.
    • You can adjust the sweetness by adding more or less sugar according to personal preference.
    • Prep Time: 20 minutes
    • Cook Time: 40 minutes
    • Category: Dessert
    • Method: Baking
    • Cuisine: American

    Nutrition

    • Serving Size: 1 bar
    • Calories: 250
    • Sugar: 20g
    • Sodium: 200mg
    • Fat: 14g
    • Saturated Fat: 8g
    • Unsaturated Fat: 3g
    • Trans Fat: 0g
    • Carbohydrates: 27g
    • Fiber: 1g
    • Protein: 4g
    • Cholesterol: 120mg

    Sharing is caring!

  • Blueberry Glazed Donut

    Blueberry Glazed Donut


    Introduction to Blueberry Glazed Donut

    There is that magic in the air when freshly baked goodies are being prepared at home. Imagining a blueberry glazed donut does for me instantly flood my mind with pleasant recollections of weekend sleep-ins and family brunch. So, here’s the recipe you could make in a rush when you have so much to do but still want to have a super yummy snack to munch on. Yeah, that would definitely do for either a special surprise for the loved ones or an instant pick-me-up for you.

    Why You’ll Love This Blueberry Glazed Donut

    Who doesn’t adore a simple yet scrumptious treat? These Blueberry Glazed Donuts are not just quick to make but also bursting with flavor. Imagine soft donuts topped with a luscious blueberry glaze that melts in your mouth! They’re perfect for breakfast, dessert, or whenever you’re craving something sweet. Plus, they’re a fantastic way to brighten anyone’s day, ensuring smiles all around with minimal effort!

    Ingredients for Blueberry Glazed Donut

    When it comes to crafting the perfect Blueberry Glazed Donut, having the right ingredients is essential. Here’s what you’ll need:

    • All-purpose flour: The foundation for your donuts, providing structure and a soft texture. You can substitute with whole wheat flour for a healthier twist.
    • Granulated sugar: This gives sweetness and helps achieve the delightful golden color. Consider using coconut sugar for a natural alternative.
    • Baking powder: A key leavening agent that ensures your donuts rise perfectly. Double-check your baking powder’s freshness for the best results!
    • Salt: Enhances overall flavor and balances sweetness. Just a pinch goes a long way!
    • Whole milk: For moisture and richness. You can use almond milk or oat milk for a dairy-free version.
    • Large eggs: They bind the ingredients and contribute to the donut’s fluffy texture. If you prefer an egg-free option, try flax eggs or applesauce.
    • Melted butter: Adds a buttery flavor and tenderness. Vegan butter works perfectly as a substitute!
    • Vanilla extract: For that lovely aromatic essence. However, you could use almond extract for a unique twist.
    • Fresh blueberries: The star of the show, providing vibrant flavor and beautiful color. If fresh aren’t available, frozen blueberries can work too; just thaw and pat dry.
    • Powdered sugar: Essential for the glaze, giving it that sweet, smooth finish. You can also use confectioners’ sugar from cane alternatives for a different sweetness level.
    • Blueberry juice: Adds extra blueberry flavor to the glaze. You can juice fresh blueberries or buy it ready-made.
    • Graham cracker crumbs: They add a nice crunch on top of the glaze for texture. Swap them with crushed nuts or gluten-free crumbs for dietary needs.

    For precise quantities, look at the recipe below. These ingredients will make your Blueberry Glazed Donut experience unforgettable!

    How to Make Blueberry Glazed Donut

    Step 1: Prepare the Oven and Donut Pan

    First things first, let’s get that oven preheating to 375°F (190°C). Preheating ensures that your Blueberry Glazed Donuts bake evenly and turn out fluffy. While the oven warms up, generously grease your donut pan with butter or cooking spray. This little step prevents sticking and makes cleanup a breeze!

    Step 2: Mix Dry Ingredients

    In a large mixing bowl, whisk together 2 cups of all-purpose flour, 1/2 cup of granulated sugar, 2 teaspoons of baking powder, and 1/2 teaspoon of salt. This blend creates a light structure for your donuts. Make sure to combine them thoroughly, ensuring no clumps remain. A well-mixed dry mix means your donuts will rise beautifully and bake evenly, so give it a good whisk!

    Step 3: Combine Wet Ingredients

    In another bowl, mix 3/4 cup of whole milk, 2 large eggs, 1/4 cup of melted butter, and 1 teaspoon of vanilla extract together. Whisk these ingredients until smooth and well combined. This mixture brings moisture to your batter and talks sweetness into each bite. It’s essential to mix until there are no lumps left. Trust me, this step lays the foundation for the perfect donut texture!

    Step 4: Combine Wet and Dry Ingredients

    Now, pour the wet mixture into the center of the dry mix and fold gently with a spatula. Be careful not to overmix! Incorporating the two mixtures should be done just until the flour disappears, leaving the batter a bit lumpy. Overmixing can result in tough donuts, and who wants that? A gentle touch is key here!

    Step 5: Pipe the Batter

    To get that perfect donut shape, transfer your batter into a piping bag or a ziplock bag with a corner cut off. This makes filling the donut pan easy and neat! Fill each cavity about three-quarters full to allow room for rising. This special step sets the stage for your beautiful Blueberry Glazed Donuts!

    Step 6: Baking the Donuts

    Pop that pan into your preheated oven and let it bake for about 16-18 minutes. You’ll know they’re ready when the tops are golden and spring back lightly when touched. Once baked, let them cool in the pan for 5 minutes. Then, carefully transfer them to a wire rack to cool completely—a crucial step for a perfect glaze later!

    Step 7: Prepare the Blueberry Glaze

    While your donuts are cooling, it’s time to make the heavenly blueberry glaze! Start by mashing 1/2 cup of fresh blueberries in a small bowl. Use a fine-mesh sieve to strain the mash, extracting the juice. Then, mix this juice with 2 cups of powdered sugar until smooth and glossy. This luscious glaze adds the best blueberry flavor to your donuts!

    Step 8: Glaze the Donuts

    Once your donuts are completely cool, dip the tops into the blueberry glaze, allowing the excess to drip off. The glaze should coat each donut beautifully. Immediately sprinkle graham cracker crumbs on top, gently pressing a few fresh blueberries into the glaze. This gives a lovely crunch and texture, turning your donuts into a stunning treat!

    Tips for Success

    • Mix gently! Overmixing can lead to tough donuts, so fold just until combined.
    • Ensure your oven is fully preheated before baking for even results.
    • Let donuts cool before glazing to prevent the glaze from melting away.
    • Experiment with the glaze thickness by adjusting the blueberry juice or powdered sugar.
    • Use fresh blueberries for the best flavor, but frozen can work in a pinch!

    Equipment Needed

    • Donut pan: Essential for shaping your Blueberry Glazed Donuts. If you don’t have one, a muffin tin works as an alternative.
    • Mixing bowls: Use two for combining wet and dry ingredients; any size works!
    • Whisk: Perfect for mixing ingredients. A fork can also get the job done.
    • Piping bag or ziplock bag: For easy batter transfer. A spoon can work too, but it’s messier!
    • Wire rack: Ideal for cooling your donuts. A plate will suffice in a pinch.

    Variations

    • Apple Cinnamon Donuts: Substitute blueberries with diced apples and add a teaspoon of cinnamon to the batter for a cozy twist!
    • Chocolate Chip Donuts: Fold in mini chocolate chips instead of blueberries for a decadent variation that chocolate lovers will adore.
    • Lemon Glaze: Swap out the blueberry glaze for a tangy lemon glaze by using fresh lemon juice and zest for a refreshing option.
    • Gluten-Free Version: Use a gluten-free all-purpose flour blend to make these donuts suitable for those with gluten sensitivities.
    • Vegan Donuts: Replace eggs with flax eggs and use almond milk and vegan butter to create a delicious plant-based version.

    Serving Suggestions for Blueberry Glazed Donut

    • Pair your Blueberry Glazed Donuts with a cup of freshly brewed coffee or a fruity tea for a delightful morning treat.
    • Serve with a side of Greek yogurt topped with honey for a balanced breakfast option.
    • For a lovely presentation, plate them on a bright-colored platter and garnish with extra fresh blueberries.
    • Drizzle maple syrup over the donuts for an extra sweet touch during weekend brunch!

    FAQs about Blueberry Glazed Donut

    Can I use frozen blueberries for the Blueberry Glazed Donut?
    Absolutely! Frozen blueberries work well, just be sure to thaw and pat them dry before adding them to your batter. This helps avoid excess moisture and keeps your donuts from becoming too soggy.

    How long can I store leftover donuts?
    You can store your Blueberry Glazed Donuts in an airtight container for up to 2 days. To keep them fresh, place a piece of paper towel inside to absorb any excess moisture.

    Can I make the batter ahead of time?
    It’s best to bake the donuts fresh. However, you can prepare the dry ingredients in advance and store them in a sealed container. Just mix everything together when you’re ready!

    What if I don’t have a donut pan?
    No worries! You can use a muffin tin instead. Just fill the cavities and adjust the baking time as needed. The result will be delightful donut-like muffins!

    Is there a way to make these donuts healthier?
    Certainly! You can use whole wheat flour, reduce the sugar, or substitute applesauce for some of the butter. These small changes can make your Blueberry Glazed Donuts a bit lighter without sacrificing flavor!

    Final Thoughts

    Creating these Blueberry Glazed Donuts is more than just baking; it’s a delightful journey filled with joy and sweet memories. Each bite transports me back to those cozy mornings with family, laughter, and love. The vibrant blueberry flavor brings sunshine even on the cloudiest days. Whether shared at brunch or savored alone, these donuts promise to spread happiness. Remember, cooking is about connection—cooking with love transforms simple ingredients into cherished moments. I truly hope you enjoy baking and sharing this recipe as much as I do. Dig in and let the smiles begin!


    Print

    clock clock iconcutlery cutlery iconflag flag iconfolder folder iconinstagram instagram iconpinterest pinterest iconfacebook facebook iconprint print iconsquares squares iconheart heart iconheart solid heart solid icon

    Description

    Delicious blueberry glazed donuts that are easy to make and perfect for any occasion.


    • 2 cups all-purpose flour
    • 1/2 cup granulated sugar
    • 2 teaspoons baking powder
    • 1/2 teaspoon salt
    • 3/4 cup whole milk
    • 2 large eggs
    • 1/4 cup melted butter
    • 1 teaspoon vanilla extract
    • 1 1/2 cups fresh blueberries
    • 2 cups powdered sugar
    • 3 tablespoons blueberry juice
    • 1/2 cup graham cracker crumbs

    1. Preheat your oven to 375°F (190°C) and generously grease a donut pan with butter or cooking spray.
    2. In a large mixing bowl, whisk together the flour, sugar, baking powder, and salt until well combined. Create a well in the center of the dry ingredients.
    3. In a separate bowl, whisk together the milk, eggs, melted butter, and vanilla extract until smooth. Pour the wet ingredients into the well of the dry ingredients and gently fold together until just combined.
    4. Transfer the batter to a piping bag or a ziplock bag with the corner cut off. Pipe the batter into the prepared donut pan, filling each cavity about three-quarters full.
    5. Bake for 16-18 minutes, or until the donuts are golden and spring back when lightly touched. Let them cool in the pan for 5 minutes, then transfer to a wire rack to cool completely.
    6. While the donuts cool, make the blueberry glaze by mashing 1/2 cup of fresh blueberries in a small bowl and straining through a fine-mesh sieve to extract the juice.
    7. In a medium bowl, whisk together the powdered sugar and 3 tablespoons of blueberry juice until smooth and glossy.
    8. Once the donuts are completely cool, dip the top of each donut into the blueberry glaze and allow the excess to drip off.
    9. Place the glazed donuts on a wire rack and immediately sprinkle the graham cracker crumbs over the wet glaze, gently pressing a few fresh blueberries on top of each donut.
    10. Let the glaze set for about 15 minutes before serving.

    Notes

    • Do not overmix the batter to ensure tender donuts.
    • Adjust the glaze thickness to your preference by adding more juice or powdered sugar.
    • Store leftovers in an airtight container for up to 2 days.
    • Prep Time: 20 minutes
    • Cook Time: 18 minutes
    • Category: Dessert
    • Method: Baking
    • Cuisine: American

    Nutrition

    • Serving Size: 1 donut
    • Calories: 210
    • Sugar: 15g
    • Sodium: 150mg
    • Fat: 6g
    • Saturated Fat: 3g
    • Unsaturated Fat: 2g
    • Trans Fat: 0g
    • Carbohydrates: 36g
    • Fiber: 1g
    • Protein: 3g
    • Cholesterol: 40mg

    Sharing is caring!

  • Banana Bread Cinnamon Rolls

    Banana Bread Cinnamon Rolls


    Introduction to Banana Bread Cinnamon Rolls

    Here’s one little island of paradise: Banana bread meets cinnamon rolls! Not just a treat; a warm hug on a busy morning with these Banana Bread Cinnamon Rolls. I understand how hectic life can get when running around with a family and/or career and everything in between. It leaves time for little else but doesn’t mean you don’t want to enjoy something that’s so warm and comforting. Truly easy to make, not time-consuming, and are sweet and soft as a feather. Well, let’s enjoy this pleasant baking trip!

    Why You’ll Love This Banana Bread Cinnamon Rolls

    These Banana Bread Cinnamon Rolls are perfect for busy moms like us! They combine the irresistible flavors of banana bread and cinnamon rolls into one fluffy delight. The recipe is easy to follow, even for those new to baking. Plus, the rolls are quick to prepare and deliver a taste that’ll have your family raving. You’ll love how they fill your home with mouthwatering aromas, creating moments that feel like warm snapshots of joy!

    Ingredients for Banana Bread Cinnamon Rolls

    Gathering the right ingredients is key to making these delightful Banana Bread Cinnamon Rolls. Here’s what you’ll need:

    • All-purpose flour: This is the base of our rolls, giving them structure and fluffiness.
    • Granulated sugar: A little sweetness to balance the flavors and enhance browning.
    • Instant yeast: This helps your rolls rise, creating that pillowy texture we adore.
    • Salt: Just a pinch enhances all flavors, rounding out the sweetness beautifully.
    • Warm milk: It activates the yeast and keeps the dough moist.
    • Ripe bananas: They add natural sweetness and moisture, making the rolls irresistibly tender.
    • Melted butter: Adds richness and flavor to both the dough and filling.
    • Egg: This contributes to the dough’s structure, richness, and color.
    • Brown sugar: It gives the filling a delightful caramel note that pairs perfectly with cinnamon.
    • Ground cinnamon: The star of our filling, this spice brings warmth and coziness to each bite.
    • Softened butter for filling: This helps the brown sugar and cinnamon adhere to the dough, creating a gooey delight.
    • Cream cheese: The main component of our frosting, bringing tanginess and creaminess.
    • Butter for frosting: It adds richness, making the frosting smooth and spreadable.
    • Powdered sugar: This sweetens the frosting while giving it the perfect texture.
    • Vanilla extract: Just a splash for added depth and a hint of warmth.

    For those who want to get creative, consider adding chopped nuts or chocolate chips to the filling. You can find the measurements for these ingredients at the bottom of this article for easy printing!

    How to Make Banana Bread Cinnamon Rolls

    Step 1 – Prepare the Dough

    To create soft, fluffy rolls, it all starts with the dough. In a large mixing bowl, I combine the all-purpose flour, granulated sugar, instant yeast, and salt. While I’m mixing the dry ingredients, I whisk together the warm milk, mashed bananas, melted butter, and egg in another bowl. Timing is key here; make sure your milk is warm, not hot, to avoid killing the yeast. Once combined, I pour the wet mixture into the dry and stir until a soft dough forms. I then turn the dough onto a floured surface and knead it for about 8-10 minutes. This step is crucial; it develops gluten, which gives the rolls their lovely texture. Trust me, your hands may get a bit messy, but it’s worth every bit for that glorious end result!

    Step 2 – First Rise

    Once kneaded, it’s time for the dough’s first rise—this is when the magic happens! I place my dough in a greased bowl and cover it with a clean kitchen towel. This keeps it warm while it rises. I usually let it rest in a cozy spot for about 60-90 minutes until it doubles in size. Why is this step so crucial? Well, the yeast is busy eating that sugar and releasing carbon dioxide, which puffs the dough up into delightful, fluffy goodness. So, be patient and let it do its thing!

    Step 3 – Roll and Fill

    With my dough nicely risen, I punch it down to release some of that built-up air. Now, I roll it out on a floured surface into a large rectangle, about a quarter-inch thick. Make sure it’s even—nothing worse than lopsided rolls! Next, I generously spread softened butter over the dough, followed by a mix of brown sugar and ground cinnamon. This is where the magic lies, ladies! You can even add in some chopped nuts or chocolate chips if you’re feeling adventurous. I then roll up the dough tightly from the long end, creating a log that promises sweet, cinnamon-filled bites just waiting to be baked.

    Step 4 – Cut and Second Rise

    Now comes the cutting part—my favorite! I use a sharp knife or even dental floss (yes, you read that right!) to slice the log into about nine equal pieces. Placing them in a greased 9×13 inch baking dish, I make sure to leave a little space between each roll for expansion. After that, I cover them again and let them rise for another 30-45 minutes. This second rise is essential for achieving that airy texture we crave. It’s when they transform from little blobs into fluffy rolls bursting with anticipation!

    Step 5 – Bake

    With my oven preheated to 350°F (175°C), it’s finally time to bake. I pop the rolls in the oven and keep a close eye. After about 25-30 minutes, they turn a lovely golden brown, filling my kitchen with a heavenly aroma. The anticipation builds, and I can already feel my family gathering, eager to taste these fluffy delights. Once they’re baked, I pull them out and let them sit for just a moment. The smell wafting through the air is pure bliss!

    Step 6 – Frosting Preparation

    As the rolls cool slightly, I start on the cream cheese frosting—oh, yes! In a mixing bowl, I beat together softened cream cheese, butter, powdered sugar, and vanilla extract until it’s smooth and creamy. The key is to be generous with the frosting, especially when the rolls are still warm; it melts just right and seeps into every crevice, creating a moist, dreamy finish. Once you’ve frosted these beauties, it’s time to serve them warm, and watch everyone’s eyes light up. I can’t wait for you to taste this morning magic!

    Tips for Success

    • Use very ripe bananas for maximum flavor and moistness in your rolls.
    • Don’t rush the rising times—patience is key for fluffy rolls!
    • Ensure your cream cheese is softened before mixing for a smooth frosting.
    • Experiment with different fillings like nuts or chocolate chips for added texture.
    • Store leftover rolls in an airtight container to keep them fresh.

    Equipment Needed

    • Mixing bowls: Use any large bowls on hand; even a deep plate will work in a pinch.
    • Rolling pin: A wine bottle makes a great substitute if you don’t have one!
    • Sharp knife: Use a serrated knife or dental floss for slicing the log.
    • 9×13 inch baking dish: An oven-safe dish or even a glass pan can do the trick.
    • Whisk: A fork can be used if a whisk isn’t available for mixing.

    Variations for Banana Bread Cinnamon Rolls

    • Nutty Delight: Add chopped walnuts or pecans to the filling for a satisfying crunch!
    • Chocolate Lovers: Stir in mini chocolate chips alongside the cinnamon and brown sugar for an indulgent twist.
    • Maple Flavor: Substitute maple syrup for the granulated sugar for a unique, sweet twist.
    • Vegan Option: Use almond milk, flaxseed egg, and coconut oil instead of dairy ingredients for a plant-based version.
    • Spiced Variation: Mix in other warm spices like nutmeg or ginger for an enchanting flavor depth.

    Serving Suggestions

    • Fresh Fruit: Serve with a side of sliced strawberries or blueberries for a refreshing balance.
    • Coffee or Tea: Pair your rolls with a warm cup of coffee or fragrant herbal tea.
    • Presentation: Dust the finished rolls with a sprinkle of powdered sugar for a delightful touch.
    • Family Style: Serve the rolls straight from the baking dish for a cozy, inviting look.

    FAQs about Banana Bread Cinnamon Rolls

    Can I use whole wheat flour instead of all-purpose flour?

    Yes, you can! Whole wheat flour will give your Banana Bread Cinnamon Rolls a heartier texture and nutty flavor. Just remember, it might require a bit more liquid since it’s denser.

    Can I prepare the dough in advance?

    Absolutely! You can prepare the dough the night before and store it in the fridge. Just let it come to room temperature before proceeding with the second rise when you’re ready to bake your rolls.

    How do I store leftover rolls?

    To keep your rolls fresh, store them in an airtight container at room temperature for up to three days. You can also freeze them wrapped tightly in plastic wrap for longer storage.

    Can I make the frosting ahead of time?

    Yes! You can prepare the cream cheese frosting a day ahead, just store it in the fridge, and bring it to room temperature before spreading it on your warm rolls!

    What can I do if my rolls don’t rise?

    If your rolls fail to rise, check if your yeast is active. It should be bubbly when mixed with warm milk. If your kitchen is too cold, place the dough in a warmer spot to encourage rising.

    Final Thoughts

    Oh, the joy that these Banana Bread Cinnamon Rolls bring to my kitchen is simply unmatched! Each bite feels like a warm embrace, offering comfort and sweetness. Whether it’s a busy weekday morning or a cozy weekend brunch, they’re the perfect treat to share with loved ones. Watching my family’s faces light up as they savor these fluffy delights is pure magic. I truly hope you find the same joy in making and enjoying them! So roll up your sleeves, embrace your inner baker, and let this delicious adventure create cherished moments in your home!


    Print

    clock clock iconcutlery cutlery iconflag flag iconfolder folder iconinstagram instagram iconpinterest pinterest iconfacebook facebook iconprint print iconsquares squares iconheart heart iconheart solid heart solid icon

    Description

    Deliciously fluffy banana bread cinnamon rolls topped with cream cheese frosting.


    • 3 cups all-purpose flour
    • 1/4 cup granulated sugar
    • 2 1/4 teaspoons instant yeast
    • 1/2 teaspoon salt
    • 3/4 cup warm milk
    • 2 ripe bananas, mashed
    • 1/4 cup melted butter
    • 1 large egg
    • 1/2 cup brown sugar
    • 2 tablespoons ground cinnamon
    • 3 tablespoons softened butter for filling
    • 8 oz cream cheese, softened
    • 1/4 cup butter for frosting
    • 2 cups powdered sugar
    • 1 teaspoon vanilla extract

    1. In a large mixing bowl, combine flour, granulated sugar, instant yeast, and salt. In a separate bowl, mix together warm milk, mashed bananas, melted butter, and egg until well combined.
    2. Pour the wet ingredients into the dry ingredients and mix until a soft dough forms. Knead the dough on a lightly floured surface for 8-10 minutes until smooth and elastic.
    3. Place the dough in a greased bowl, cover with a clean kitchen towel, and let it rise in a warm place for about 60-90 minutes or until doubled in size.
    4. Once risen, punch down the dough and roll it out on a floured surface into a large rectangle about 1/4 inch thick.
    5. Spread the softened butter evenly over the dough, then sprinkle the brown sugar and cinnamon mixture generously across the entire surface.
    6. Roll the dough tightly from the long end to create a log.
    7. Using a sharp knife or dental floss, cut the log into 9 equal pieces. Place the rolls in a greased 9×13 inch baking dish, leaving a little space between each roll.
    8. Cover and let them rise for another 30-45 minutes until puffy.
    9. Preheat your oven to 350°F (175°C). Bake the cinnamon rolls for 25-30 minutes or until golden brown on top.
    10. While the rolls are baking, prepare the cream cheese frosting by beating together softened cream cheese, butter, powdered sugar, and vanilla extract until smooth and creamy.
    11. Spread the frosting generously over the warm cinnamon rolls as soon as they come out of the oven. Serve warm and enjoy!

    Notes

    • Ensure the bananas are ripe for the best flavor.
    • For additional texture, you may add chopped nuts or chocolate chips to the filling.
    • Store any leftovers in an airtight container for up to 3 days.
    • Prep Time: 30 minutes
    • Cook Time: 30 minutes
    • Category: Dessert
    • Method: Baking
    • Cuisine: American

    Nutrition

    • Serving Size: 1 roll
    • Calories: 350
    • Sugar: 15g
    • Sodium: 250mg
    • Fat: 15g
    • Saturated Fat: 9g
    • Unsaturated Fat: 3g
    • Trans Fat: 0g
    • Carbohydrates: 50g
    • Fiber: 2g
    • Protein: 4g
    • Cholesterol: 40mg

    Sharing is caring!

  • One-Skillet Creamy Honey BBQ Steak

    One-Skillet Creamy Honey BBQ Steak


    Introduction to One-Skillet Creamy Honey BBQ Steak

    Hey friends, and foodies in particular! There are moments when time seems to be running against you, and you desire something fast but yummy, isn’t it? Well, so here is my One-Skillet Creamy Honey BBQ Steak for the rescue of just that occasion. This would not just be a dish but an utterly delectable commodity for the evening on most busy nights with no time to spare in the kitchen. The creaminess along with the sweetness of the barbecue sauce doesn’t just promise to fill up your belly but your loved ones too, mark my words. This is going to be your number one on the hit parade, believe me.

    Why You’ll Love This One-Skillet Creamy Honey BBQ Steak

    This One-Skillet Creamy Honey BBQ Steak is a dream come true for busy moms and professionals alike. It’s quick to whip up, taking just 45 minutes from start to finish! The rich flavors of honey, BBQ sauce, and creamy cheese come together perfectly to create a delightful meal that your family will adore. Plus, cleanup is a breeze since everything is made in one skillet. What’s not to love?

    Ingredients for One-Skillet Creamy Honey BBQ Steak

    Gathering the right ingredients is key to creating this mouthwatering One-Skillet Creamy Honey BBQ Steak. Here’s what you’ll need:

    • Flank steak: Thinly sliced for tenderness. If you can’t find flank steak, sirloin or skirt steak work beautifully too.
    • Olive oil: For searing the steak. It adds flavor and helps achieve that perfect browning.
    • Soy sauce: Brings salty depth and umami to the marinade.
    • Worcestershire sauce: A splash of this tangy sauce enhances the steak’s deliciousness.
    • Garlic powder: A quick favorite for an instant punch of flavor.
    • Smoked paprika: Gives a lovely smokiness that complements the BBQ sauce.
    • Salt and freshly ground black pepper: Essential for seasoning, adjusting to taste enhances every dish.
    • Barbecue sauce: Your favorite brand or homemade, the heart of the dish!
    • Honey: For that irresistible sweetness. Feel free to use agave syrup as an alternative.
    • Dijon mustard: Adds a zesty kick that brings balance to the sweetness.
    • Apple cider vinegar: Offers a little tang and brightens up the flavors.
    • Chili powder: Optional, but it ups the ante on spice for those who love a kick.
    • White rice: A perfect base to soak in all the creamy sauce. Jasmine rice is a great choice!
    • Low-sodium beef broth: Enhances the rice’s flavor and keeps the dish light.
    • Heavy cream: Makes the dish luxuriously creamy. You could substitute with coconut milk for a lighter option.
    • Shredded cheddar cheese: Adds creaminess and tang! Feel free to experiment with other cheeses.
    • Butter: Essential for sautéing the onions and garlic, creating an aromatic foundation.
    • Onion and garlic: They’re key aromatics to build a flavorful base for our dish.
    • Fresh parsley: For garnish, it brightens up the dish visually and adds a fresh finish.

    For exact measurements of each ingredient, check the bottom of the article, where you’ll find everything laid out for printing!

    How to Make One-Skillet Creamy Honey BBQ Steak

    Now that we have our ingredients ready, let’s dive into making this delightful One-Skillet Creamy Honey BBQ Steak! Follow these practical steps for a quick and satisfying meal.

    Prepare the Marinade

    In a medium bowl, combine soy sauce, Worcestershire sauce, garlic powder, smoked paprika, salt, and freshly ground black pepper.

    Once well mixed, add the thinly sliced flank steak, tossing it to coat thoroughly.

    Let it marinate for at least 15 minutes or up to an hour in the refrigerator. The longer, the better for flavor absorption!

    Create the BBQ Sauce

    In a small bowl, whisk together the barbecue sauce, honey, Dijon mustard, apple cider vinegar, garlic powder, and chili powder if you choose to spice things up.

    This sauce is what makes the dish special—it combines sweet and tangy notes with a little kick, adding depth to every bite!

    Sear the Steak

    Heat the olive oil in a large skillet over medium-high heat until hot but not smoking.

    Carefully add your marinated flank steak in a single layer. Sear for about 2-3 minutes on each side until nicely browned.

    Don’t rush this step; a perfect sear caramelizes the meat beautifully. Remove the steak and keep it warm under foil.

    Sauté the Aromatics

    Lower the heat to medium, and melt the butter in the same skillet.

    Add the finely chopped onion and minced garlic, sautéing for about 3-4 minutes until the onion is soft and the garlic is fragrant.

    Don’t forget to scrape up any browned bits stuck to the pan; they’re packed with flavor!

    Cook the Rice

    Add uncooked white rice into the skillet. Stir it well to coat with all those delicious flavors, toasting it for 1-2 minutes until lightly golden.

    Pour in the low-sodium beef broth, mixing everything together. Bring it to a boil, then reduce the heat to low, cover, and let simmer for 15-18 minutes.

    This simmers until the rice becomes tender and absorbs most of the liquid. Perfect, fluffy rice is just around the corner!

    Combine Ingredients

    After the rice is cooked, stir in the heavy cream and shredded cheddar cheese.

    Mix until the cheese melts into a beautifully creamy consistency. Taste and adjust seasoning with salt and pepper as needed!

    Finish with the Sauce

    Now, return the seared steak along with any juices back to the skillet.

    Pour your sweet and tangy honey BBQ sauce over the steak and rice. Mix everything together well.

    Let it simmer for another 2-3 minutes, allowing the flavors to meld beautifully. The sauce will thicken slightly, bringing everything together.

    And voila! Your One-Skillet Creamy Honey BBQ Steak is ready to devour!

    Tips for Success

    • After marinating, let the steak come to room temperature for even cooking.
    • Use a skillet that distributes heat evenly to avoid hot spots while cooking.
    • Don’t overcrowd the skillet when searing the steak; cook in batches if necessary.
    • Taste as you go! Adjust seasoning to ensure flavor perfection.
    • Leftovers? This dish reheats beautifully, maintaining its creamy goodness!

    Equipment Needed

    • Large skillet: A non-stick skillet works great. A cast-iron skillet adds wonderful flavor.
    • Medium bowl: For marinating the steak; any mixing bowl will do.
    • Whisk: A fork will work in a pinch for mixing sauce ingredients.
    • Measuring cups and spoons: Essential for accuracy in ingredient quantities.
    • Cutting board and knife: For slicing steak and chopping veggies.

    Variations

    • Vegetarian option: Swap flank steak with sautéed mushrooms, tempeh, or a mix of your favorite vegetables for a plant-based twist.
    • Add some heat: Incorporate jalapeños or crushed red pepper flakes for those who crave a spicy kick!
    • Gluten-free: Ensure your soy sauce and barbecue sauce are gluten-free to keep this dish suitable for everyone.
    • Cheesy alternatives: Try pepper jack cheese instead of cheddar for a creamy and spicy surprise.
    • Different grains: Use quinoa or cauliflower rice for a healthier grain alternative or low-carb meal.

    Serving Suggestions for One-Skillet Creamy Honey BBQ Steak

    • Pair with a crisp garden salad for freshness and crunch.
    • Serve alongside grilled vegetables to enhance the dish’s flavor.
    • A glass of chilled white wine or iced tea complements this savory meal beautifully.
    • Garnish with extra parsley for a pop of color on your plate.
    • Make sure to have some crusty bread on hand to soak up that creamy sauce!

    FAQs about One-Skillet Creamy Honey BBQ Steak

    Can I use a different cut of beef for this recipe?
    Absolutely! While flank steak offers great tenderness, you can substitute it with sirloin or skirt steak. Each will bring its unique flavor, and your dish will still shine!

    How can I make this One-Skillet Creamy Honey BBQ Steak lighter?
    To lighten this dish, consider using chicken breast instead of beef or swapping heavy cream for a low-fat alternative like Greek yogurt or coconut milk. You still get that creamy texture without the extra calories!

    What should I serve with this dish?
    I recommend pairing this steak with fresh greens, grilled vegetables, or a side of crusty bread to soak up all those gorgeous creamy flavors. You could even add a light white wine or iced tea for a refreshing touch!

    How can I store leftovers?
    If you have leftovers (which sometimes happens!), store them in an airtight container in the fridge for up to 3 days. Just heat them in the microwave or on the stove, stirring gently, to enjoy that creamy goodness again!

    Can I prepare this dish in advance?
    While it’s best enjoyed fresh, you can marinate the steak ahead of time and store it in the fridge for up to 24 hours. Just toss everything together when you’re ready for a quick meal!

    Final Thoughts on One-Skillet Creamy Honey BBQ Steak

    There’s something incredibly satisfying about bringing this One-Skillet Creamy Honey BBQ Steak to the table. The sweet and savory dance of flavors, combined with that luscious, creamy texture, makes every bite unforgettable. I love how easily this meal comes together, even on the busiest of days. It’s a delightful way to gather the family around the dinner table and share a comforting dish. Plus, the ease of cleanup means you can enjoy more quality time with your loved ones. Trust me, once you try this, you’ll be calling it your new favorite weeknight hero!


    Print

    clock clock iconcutlery cutlery iconflag flag iconfolder folder iconinstagram instagram iconpinterest pinterest iconfacebook facebook iconprint print iconsquares squares iconheart heart iconheart solid heart solid icon

    Description

    A quick and delicious one-skillet meal featuring creamy honey BBQ steak served over a savory rice base.


    • 450g flank steak, sliced thinly
    • 1 tablespoon olive oil
    • 2 tablespoons soy sauce
    • 1 tablespoon Worcestershire sauce
    • 1 teaspoon garlic powder
    • 1 teaspoon smoked paprika
    • Salt and freshly ground black pepper, to taste
    • 120ml barbecue sauce
    • 2 tablespoons honey
    • 1 tablespoon Dijon mustard
    • 1 tablespoon apple cider vinegar
    • 1 teaspoon garlic powder
    • 0.5 teaspoon chili powder (optional)
    • 180g uncooked white rice, long-grain or jasmine
    • 420ml low-sodium beef broth
    • 120ml heavy cream
    • 50g shredded cheddar cheese
    • 1 tablespoon butter
    • 1 small onion, finely chopped
    • 3 garlic cloves, minced
    • Salt and freshly ground black pepper, to taste
    • Fresh parsley, chopped, for garnish

    1. In a medium bowl, combine soy sauce, Worcestershire sauce, garlic powder, smoked paprika, salt, and pepper. Add sliced flank steak and toss to coat thoroughly. Let marinate for at least 15 minutes or up to 1 hour in the refrigerator.
    2. In a small bowl, whisk together barbecue sauce, honey, Dijon mustard, apple cider vinegar, garlic powder, and chili powder if using. Set aside for later use.
    3. Heat olive oil in a large skillet over medium-high heat. Sear marinated steak in a single layer for 2–3 minutes per side, or until browned and cooked to preference. Remove steak and keep warm, loosely covered with foil.
    4. Lower heat to medium and add butter, chopped onion, and minced garlic to the same skillet. Sauté for 3–4 minutes until onions are soft and garlic is fragrant, scraping up any browned bits.
    5. Add uncooked rice to the skillet, stirring well to coat in the mixture. Toast for 1–2 minutes until lightly golden. Pour in beef broth, stir to combine, bring to a boil, then reduce heat to low, cover, and let simmer for 15–18 minutes until rice is tender and most liquid absorbed.
    6. When rice is cooked, stir in heavy cream and shredded cheddar cheese. Mix until cheese melts and sauce becomes creamy. Taste and adjust seasoning with salt and pepper if necessary.
    7. Return seared steak and any accumulated juices to the skillet. Pour prepared honey BBQ sauce over the steak and rice. Mix thoroughly and let simmer for 2–3 minutes so flavors meld and sauce thickens slightly.
    8. Remove from heat and garnish with chopped fresh parsley. Serve immediately while hot, enjoying the creamy, sweet, and savory flavors directly from the skillet.

    Notes

    • For a spicier kick, add more chili powder or a dash of hot sauce.
    • Feel free to substitute flank steak with another cut of your choice.
    • This dish can also be served with a side of vegetables for added nutrition.
    • Prep Time: 15 minutes
    • Cook Time: 30 minutes
    • Category: Main Course
    • Method: Skillet
    • Cuisine: American

    Nutrition

    • Serving Size: 1 plate
    • Calories: 550
    • Sugar: 10g
    • Sodium: 800mg
    • Fat: 25g
    • Saturated Fat: 10g
    • Unsaturated Fat: 12g
    • Trans Fat: 0g
    • Carbohydrates: 50g
    • Fiber: 2g
    • Protein: 30g
    • Cholesterol: 80mg

    Sharing is caring!

  • Frito Cowboy Cabbage Salad

    Frito Cowboy Cabbage Salad


    Introduction to Frito Cowboy Cabbage Salad

    Y’all ready to hear about one of my family’s favorite fast-fix meals—Frito Cowboy Cabbage Salad. With how busy our days can get, who really has time to prepare meals ahead of time? This is the answer—a terrific, super-crunchy and flavorful salad to brighten up those dinner routines. Something that looks impressive, but without all the fuss of a tricky recipe. A great veggie mix together with savory beans and some bit of spiciness from the chipotle dressing-that’s what makes my family love this dish even more. Best yet, I can throw it together in 15 minutes!

    Why You’ll Love This Frito Cowboy Cabbage Salad

    This Frito Cowboy Cabbage Salad is truly a lifesaver on busy days. With minimal prep time and no cooking required, you can have a delightful meal ready in minutes. The crunch of the Fritos paired with the fresh veggies creates a symphony of flavors and textures that your taste buds will adore. Plus, it’s versatile enough to adapt to whatever you have on hand, making it a fantastic option for any family gathering!

    Ingredients for Frito Cowboy Cabbage Salad

    Creating a delicious Frito Cowboy Cabbage Salad begins with a vibrant mix of ingredients. Let’s dive into what you’ll need:

    • Coleslaw mix: This pre-packaged mix saves time and adds crispness to your salad. You can also make your own with shredded cabbage and carrots.
    • Black beans: Rinsed and drained, they add protein and a creamy texture to the salad. Feel free to swap with pinto beans for a different flavor.
    • Canned corn kernels: Sweet and crunchy, they elevate the salad’s taste. If you have fresh corn, grilling it adds char and depth!
    • Jalapeño pepper: For those who crave heat, this diced pepper brings a spicy kick. Adjust the amount based on your heat tolerance.
    • Red bell pepper: Sweet and colorful, it complements the dish beautifully. Yellow or orange bell peppers work as great substitutes!
    • Green onions: Their mild flavor adds freshness. However, you can use regular onions if you prefer a more pronounced taste.
    • Fresh cilantro: This herb adds a burst of brightness. If you’re not a fan, fresh parsley is an excellent alternative.
    • Taco seasoning: Packed with flavor, this spice blend enhances the salad’s southwestern flair. A homemade mix can be tailored to your taste.
    • Ground cumin: Earthy and aromatic, it enriches the overall flavor. A dash of paprika could also work in a pinch.
    • Chili Cheese Fritos: The star of the show, they provide crunch and the necessary salty kick. Consider using plain Fritos if you prefer a less intense flavor.
    • Sour cream: Adds creaminess to the dressing. Greek yogurt can be a healthier substitute if desired.
    • Mayonnaise: It lends a rich taste to the dressing, but using an avocado-based mayo can lighten it up.
    • Fresh lime juice: Provides acidity that balances the flavors beautifully. Lemon juice can be swapped for a slightly different zing.
    • Chipotle sauce: This adds a delicious smokiness to the dressing. You can adjust the amount based on how spicy you like it.

    For the exact measurements, you’ll find them at the bottom of the article, available for printing!

    How to Make Frito Cowboy Cabbage Salad

    Step 1: Combine the Salad Ingredients

    To start this delightful journey, grab a large bowl and toss in the coleslaw mix, black beans, and corn. Then, add the diced jalapeño and red bell pepper for that extra burst of color. Don’t forget the sliced green onions and chopped cilantro, as they add brightness. Sprinkle in the taco seasoning and ground cumin, giving everything a good mix. I love using my hands for this—it feels more personal and gives the salad a homely touch. Just make sure it’s all well combined, and you’re off to a great start!

    Step 2: Prepare the Chipotle Dressing

    Now, let’s whip up that irresistible chipotle dressing! In a medium bowl, combine the sour cream, mayonnaise, fresh lime juice, and chipotle sauce. Grab a whisk and blend everything until it’s smooth and creamy. The lime juice adds a refreshing zing, while the chipotle sauce provides a smoky flavor that gives this dressing a kick. If it’s too thick, feel free to add a teaspoon of water or more lime juice to adjust the consistency. It’s all about finding that perfect balance!

    Step 3: Mix the Dressing with the Salad

    With the dressing ready, it’s time to combine everything! Pour that tantalizing chipotle dressing over your colorful salad mixture. Gently toss everything together, ensuring every bit of vegetable gets coated evenly. Use a spatula to fold, rather than stir, if you want to keep the delicate ingredients intact. The dressing elevates the flavors, making each bite a burst of deliciousness. Just picture those inviting colors blending together—it’s almost a masterpiece before we add the Fritos!

    Step 4: Fold in Fritos

    Don’t forget the cherry on top—the Chili Cheese Fritos! Carefully fold them in, leaving a handful aside for later. This will ensure that they hold their crunch, adding that signature texture to our salad. I like to do this part last because nobody wants a soggy chip! Give it a gentle mix, and your Frito Cowboy Cabbage Salad is coming together beautifully. Crunchy, creamy, and oh-so-satisfying, it’s hard to resist at this point!

    Step 5: Serve Fresh

    Finally, the moment we’ve been waiting for—serve it fresh! This salad is best enjoyed right away to savor the crispness of those Fritos. If you want an elegant presentation, serve it in a vibrant bowl and sprinkle the reserved Fritos on top. Gather your family around, and dig in for a flavorful experience. Enjoy every crunchy, zesty bite!

    Tips for Success

    • For extra crunch, store Fritos separately and mix them in just before serving.
    • Mix the salad ingredients a few hours ahead, but add dressing right before eating.
    • Vary the veggies based on what’s in season or in your fridge for a unique twist.
    • Adjust the chipotle sauce for your heat preference—start small and taste as you go.
    • Garnish with additional cilantro for a fresh finish if desired.

    Equipment Needed

    • Large mixing bowl: Essential for combining ingredients; a sturdy pot works if you don’t have a bowl.
    • Medium mixing bowl: Ideal for dressing; a jar with a lid can substitute for easy shaking.
    • Whisk or fork: For blending dressing; a spoon can do the job in a pinch.
    • Spatula: Useful for gentle mixing; your hands are always an option, too.

    Variations of Frito Cowboy Cabbage Salad

    • Add diced avocado for a rich, creamy texture.
    • Incorporate shredded chicken or turkey for added protein.
    • Try adding diced tomatoes or cucumber for freshness.
    • Swap the black beans for chickpeas for a different flavor profile.
    • Use a dairy-free dressing by substituting sour cream and mayo with plant-based alternatives.
    • Experiment with different flavored Fritos, like barbecue or ranch, for a unique twist!

    Serving Suggestions for Frito Cowboy Cabbage Salad

    • Pair it with grilled chicken or steak for a hearty meal.
    • Serve alongside freshly baked corn muffins for a satisfying combo.
    • A light white wine or sparkling water complements the flavors wonderfully.
    • For a festive touch, serve in individual bowls with lime wedges.
    • Add a sprinkle of extra cilantro on top for a beautiful finish!

    FAQs about Frito Cowboy Cabbage Salad

    Can I make Frito Cowboy Cabbage Salad ahead of time?
    Yes, you can prepare the salad ingredients a few hours in advance. However, add the Fritos just before serving to keep them crispy and crunchy!

    Is this salad suitable for a vegetarian diet?
    Absolutely! This Frito Cowboy Cabbage Salad is vegetarian, and it’s packed with delicious veggies and protein-rich black beans.

    What can I substitute for chipotle sauce?
    If you’re not keen on spicy, you can use mild salsa or omit the chipotle for a more kid-friendly version.

    How can I store leftovers?
    Store the salad in an airtight container in the fridge for up to two days, but the Fritos may lose their crunch!

    Final Thoughts

    Frito Cowboy Cabbage Salad is more than just a delicious dish; it’s an experience that brings family and friends together. Each vibrant bite bursts with flavor and crunch, making meal times feel special, even on the busiest of days. I love how versatile this recipe is—perfect for potlucks, picnics, or simply a cozy dinner at home. Plus, it’s incredibly easy to whip up, ensuring that you can enjoy a homemade meal without the hassle. So, gather your loved ones, savor those flavors, and remember that good food makes for great memories!


    Print

    clock clock iconcutlery cutlery iconflag flag iconfolder folder iconinstagram instagram iconpinterest pinterest iconfacebook facebook iconprint print iconsquares squares iconheart heart iconheart solid heart solid icon

    Description

    A refreshing and crunchy cowboy cabbage salad topped with savory ingredients and a spicy chipotle dressing.


    • 1 bag (16 ounces) coleslaw mix
    • 1 can (15 ounces) black beans, rinsed and drained
    • 1 1/2 cups canned corn kernels, drained
    • 1 medium jalapeño pepper, seeded and finely diced
    • 1 small red bell pepper, seeded and finely diced
    • 3 green onions, finely sliced
    • 1/4 cup fresh cilantro, finely chopped
    • 1 tablespoon taco seasoning
    • 1/2 teaspoon ground cumin
    • 1 bag (9.75 ounces) Chili Cheese Fritos, divided
    • 1/2 cup sour cream
    • 1/2 cup mayonnaise
    • 1/4 cup fresh lime juice
    • 2 tablespoons chipotle sauce from canned chipotles in adobo

    1. Place the coleslaw mix, black beans, corn, jalapeño pepper, red bell pepper, green onions, cilantro, taco seasoning, and ground cumin in a large bowl. Gently toss until the mixture is thoroughly combined.
    2. In a medium bowl, whisk together sour cream, mayonnaise, lime juice, and chipotle sauce until the dressing is smooth and uniform.
    3. Pour the chipotle dressing over the coleslaw mixture and toss gently to coat all vegetables evenly.
    4. Fold in all but a handful of the Chili Cheese Fritos, ensuring they are distributed throughout. Just prior to serving, sprinkle the reserved Fritos on top to maintain their crisp texture.
    5. Serve immediately for optimum freshness and crunch.

    Notes

    • Adjust the amount of jalapeño to control the spiciness.
    • This salad can be made a few hours in advance; however, add Fritos just before serving to keep them crispy.
    • Prep Time: 15 minutes
    • Cook Time: 0 minutes
    • Category: Salad
    • Method: Mixing
    • Cuisine: American

    Nutrition

    • Serving Size: 1 serving
    • Calories: 250
    • Sugar: 2g
    • Sodium: 430mg
    • Fat: 15g
    • Saturated Fat: 3g
    • Unsaturated Fat: 10g
    • Trans Fat: 0g
    • Carbohydrates: 28g
    • Fiber: 6g
    • Protein: 6g
    • Cholesterol: 10mg

    Sharing is caring!

  • Savory Sausage Egg Bites

    Savory Sausage Egg Bites


    Introduction to Savory Sausage Egg Bites

    I’m pretty sure many moms will relate to this: mornings are just crazy. Trying to get everybody up and then get myself ready for the day is always such a race against time. And so, enter the Savory Sausage Egg Bites! Not just a time-saving solution for your busy day – a tasty one to boot as well! Just picture convenient tiny protein-filled breakfasts-to-go that are as good-looking as they are yummy and simple to prepare in advance. Seriously, those adorable little bites of joy will win over your special people on every level.

    Why You’ll Love This Savory Sausage Egg Bites

    These Savory Sausage Egg Bites are a breakfast game-changer! They’re not only incredibly easy to whip up, but they’re also a fantastic option for busy mornings. You can make them ahead of time, saving you precious minutes when the clock is ticking. The delightful combination of eggs, cheese, and sausage creates a flavor explosion in every bite that your family will adore. Trust me, your mornings just got a whole lot tastier!

    Ingredients for Savory Sausage Egg Bites

    Gathering the right ingredients for your Savory Sausage Egg Bites is simple and fun! Here’s what you’ll need:

    • Eggs: The star of the show! Eggs provide protein, creaminess, and structure to the bites.
    • Shredded cheese: I love using a sharp cheddar for its richness, but feel free to explore other varieties like Monterey Jack or pepper jack. A gooey cheese really amps up the flavor!
    • Diced bell pepper: This adds a vibrant splash of color and a sweet crunch. You can substitute with any bell pepper color or even zucchini for a different twist.
    • Cooked sausage crumbles: Sausage brings a savory, hearty taste. Ground turkey sausage or even a plant-based option works great, too, if you’re looking for alternatives.

    Each ingredient brings something unique to the table, whether it’s the protein from the eggs or the savory goodness of the sausage. You can find the exact quantities at the bottom of the article, where they’re available for printing. But these flexible ingredients allow you to customize the recipe to your family’s tastes or dietary needs!

    How to Make Savory Sausage Egg Bites

    Preparing the Egg Mixture

    Let’s kick things off by whisking those eggs! In a medium mixing bowl, crack open four large eggs. Add in the shredded cheese and diced bell pepper. You’ll want to mix them until everything is combined smoothly. Think of it as blending a beautiful sunrise of colors and flavors! This mixture will become the fluffy base for your egg bites. Don’t rush—take a moment to appreciate the vibrant yellows and reds. It’s such a cheerful sight to start the day with!

    Adding the Sausage

    Now, it’s time to fold in the cooked sausage crumbles. Gently add the sausage to your egg mixture. Use a spatula to incorporate it evenly, ensuring each bite will be packed with savory goodness. The key here is to be gentle so that the eggs stay fluffy. Picture yourself mixing a treasure trove of flavors, and you’ll be set!

    Filling the Muffin Tin

    Next, let’s prepare the muffin tin. First, lightly grease the cups with cooking spray or a dab of oil. This helps your egg bites pop out easily later. Pour your egg mixture evenly into the six cups, filling each about three-quarters full. Channel your inner artist as you create beautiful, colorful little cups of joy ready for baking!

    Baking the Egg Bites

    Now it’s time to bake. Preheat your oven to 375°F (190°C). Place the muffin tin in the oven and set a timer for 18 minutes. While they bake, you’ll notice a delicious aroma filling your kitchen. To check if they’re done, give the bites a gentle shake; the centers should be set but still slightly jiggly. They’ll firm up as they cool.

    Cooling and Serving

    Once baked, remove the muffin tin from the oven and let the egg bites cool for about five minutes. This waiting period makes them easier to handle. Carefully pop them out using a fork or your fingers. Serve them warm, or store them for later. The best part? They can be enjoyed in so many ways, from a quick snack to a lovely brunch centerpiece!

    Tips for Success

    • Always whisk your eggs until fully combined for fluffier bites.
    • Experiment with different cheeses for delightful flavor variations.
    • For extra flavor, try adding spices like paprika or garlic powder.
    • Make sure to grease the muffin tin well for easy removal.
    • Let your egg bites cool before serving to set their shape.

    Equipment Needed

    • Muffin tin: Essential for shaping your egg bites; a silicone muffin pan can make removal easier.
    • Mixing bowl: Used for whisking the egg mixture; a large bowl helps avoid spills.
    • Whisk: Perfect for beating eggs; a fork works in a pinch!
    • Spatula: Great for folding ingredients and serving the egg bites.

    Variations on Savory Sausage Egg Bites

    • Veggie Delight: Add spinach, mushrooms, or kale for a nutrient boost and a colorful twist.
    • Spicy Kick: Incorporate jalapeños or crushed red pepper flakes for a zingy heat that wakes up your taste buds.
    • Herb Infusion: Fresh herbs like chives, parsley, or dill can elevate the flavors and add a fresh aroma.
    • Cheesy Bacon Bites: Swap sausage for crispy bacon and use a mix of cheeses like mozzarella and gouda for extra indulgence.
    • Lower-Carb Option: Use egg whites instead of whole eggs and add more veggies for a lighter, protein-rich breakfast.

    Serving Suggestions for Savory Sausage Egg Bites

    • Fresh Fruit: Pair with a colorful fruit salad for a refreshing contrast.
    • Yogurt: Serve with a side of Greek yogurt drizzled with honey for added sweetness.
    • Coffee or Tea: Enjoy alongside your favorite morning beverage for a perfect start.
    • Presentation: Arrange on a platter with fresh herbs for a beautiful brunch display.

    FAQs about Savory Sausage Egg Bites

    Many of you might have questions about these delightful Savory Sausage Egg Bites. Here are some common queries to help make your cooking experience even easier!

    Can I make these egg bites ahead of time?

    Absolutely! These Savory Sausage Egg Bites are perfect for meal prep. You can make a batch ahead of time and store them in the fridge for up to five days. Just reheat in the microwave when you’re ready to enjoy!

    Can I freeze egg bites for later?

    Yes! These bites freeze beautifully. Just place them in an airtight container or freezer bag after they’ve cooled. When you’re ready to eat, thaw overnight in the fridge and reheat in the microwave.

    What can I substitute for sausage?

    If you’re looking for alternatives, ground turkey or chicken sausage works wonders! You could even try plant-based sausage for a vegetarian twist, maintaining that savory richness you’re after.

    How do I know when the egg bites are done baking?

    Great question! Your Savory Sausage Egg Bites are ready when the centers are set but slightly jiggle. A gentle shake of the muffin tin does the trick to check for doneness.

    Can I add spices or other ingredients?

    Definitely! Feel free to get creative with spices like garlic powder, paprika, or fresh herbs. They’re a blank canvas for whatever flavor profiles your family enjoys!

    Final Thoughts

    Creating these Savory Sausage Egg Bites is more than just cooking; it’s about bringing joy to your mornings. With every bite, you’re not only serving a delicious breakfast but also spending less time in the kitchen and more time with your loved ones. Whether you’re rushing to work or enjoying a leisurely weekend brunch, these little bites fit perfectly into any schedule. So why not whip up a batch today? You’ll find that they’re not just a meal; they’re an opportunity for connection, laughter, and shared moments around the breakfast table. Enjoy every scrumptious bite!


    Print

    clock clock iconcutlery cutlery iconflag flag iconfolder folder iconinstagram instagram iconpinterest pinterest iconfacebook facebook iconprint print iconsquares squares iconheart heart iconheart solid heart solid icon

    Description

    Savory Sausage Egg Bites are a delicious and easy breakfast option, perfect for meal prep or serving to guests.


    • 4 large eggs
    • 1/2 cup shredded cheese
    • 1/4 cup diced bell pepper
    • 1/3 cup cooked sausage crumbles

    1. In a medium mixing bowl, whisk eggs, shredded cheese, and diced bell pepper until fully combined.
    2. Fold the cooked sausage crumbles into the egg mixture, ensuring an even distribution.
    3. Lightly grease a muffin tin and divide the mixture evenly among 6 cups.
    4. Place the muffin tin in a preheated oven at 375°F (190°C) and bake for 18 minutes, or until centers are set.
    5. Allow the egg bites to cool slightly in the pan before removing and serving.

    Notes

    • Customize by adding your favorite vegetables or spices to the egg mixture.
    • These egg bites can be stored in the refrigerator for up to 5 days.
    • Reheat in the microwave for 30-60 seconds before serving.
    • Prep Time: 10 minutes
    • Cook Time: 18 minutes
    • Category: Breakfast
    • Method: Baking
    • Cuisine: American

    Nutrition

    • Serving Size: 1 egg bite
    • Calories: 120
    • Sugar: 1g
    • Sodium: 250mg
    • Fat: 8g
    • Saturated Fat: 3g
    • Unsaturated Fat: 4g
    • Trans Fat: 0g
    • Carbohydrates: 2g
    • Fiber: 0g
    • Protein: 10g
    • Cholesterol: 200mg

    Sharing is caring!

  • Cowboy Butter Roasted Vegetables

    Cowboy Butter Roasted Vegetables


    Introduction to Cowboy Butter Roasted Vegetables

    Howdy there, busy bees! Here is the super-simple and wonderful way to jazz up the dinner table – Cowboy Butter Roasted Vegetables. A total lifesaver on super-busy weeknights, when every minute counts are getting dinner on the table. Whether you’re working, being mommy or daddy to kids, or a million other things, this is an easy and very impressive thing to do. Just picture bright colors and delicious scents filling your kitchen as those veggies roast to perfection; surely, it’s a dish that your loved ones will love!

    Why You’ll Love This Cowboy Butter Roasted Vegetables

    Let me tell you, this recipe is a game changer! The beauty of Cowboy Butter Roasted Vegetables lies in its simplicity. With just a few ingredients and minimal effort, you can create a dish bursting with flavor. Plus, the roasting process enhances the natural sweetness of the vegetables. Whether you’re serving it as a side or main, it’s a guaranteed hit at any table!

    Ingredients for Cowboy Butter Roasted Vegetables

    Gathering the right ingredients is half the fun, isn’t it? For this Cowboy Butter Roasted Vegetables recipe, you’ll want a colorful mix of fresh veggies to truly bring it to life. Here’s what you’ll need:

    • Mixed Vegetables: Choose a vibrant combination like carrots, bell peppers, zucchini, and broccoli. Feel free to swap in your favorites, such as asparagus or Brussels sprouts. The more colorful the veggies, the more enticing the dish!
    • Unsalted Butter: This is where the magic happens! Softened butter creates that rich, luscious coating for the veggies. It can be room temperature for easier mixing.
    • Garlic: A must-have for flavor! Minced garlic adds that savory depth that makes you go back for seconds.
    • Fresh Parsley and Chives: These herbs bring brightness and balance. They add a fresh note, rounding out the dish beautifully.
    • Fresh Thyme: Earthy and aromatic, thyme offers a lovely hint of complexity. It’s one of my go-to herbs for roasted veggies.
    • Chili Flakes: If you like just a touch of heat, chili flakes infuse a bit of excitement into your dish without overpowering it.
    • Smoked Paprika: The secret weapon! This spice adds a delightful smokiness that transports your taste buds right to the Wild West!
    • Lemon Zest and Juice: These citrus elements brighten everything up with a burst of freshness. They’re essential for cutting through the richness of the butter.
    • Salt and Black Pepper: Simple but vital! They elevate all the flavors, ensuring a balanced taste.
    • Additional Chopped Herbs (optional): For garnishing, consider sprinkling on more herbs to make the dish pop visually and flavor-wise. It’s like icing on a cake!

    You’ll find the exact quantities at the bottom of the article for easy printing. Now, let’s get cooking!

    How to Make Cowboy Butter Roasted Vegetables

    Preheat and Prepare

    First things first, let’s get that oven preheating to 425°F. I can’t stress enough how important this is! A hot oven helps the vegetables cook evenly and develop that wonderful caramelized flavor. Next, grab a large baking sheet and line it with parchment paper. This little trick not only makes cleanup a breeze but also keeps the veggies from sticking. Trust me, your future self will thank you for this simple step.

    Make the Cowboy Butter Mixture

    Now it’s time for the fun part – making the Cowboy Butter mixture! In a medium bowl, mix the softened butter with minced garlic, parsley, chives, thyme, chili flakes, and smoked paprika. As the butter turns creamy, the aromas of garlic and herbs will start to dance around your kitchen. I love the pop of color from the fresh herbs; it makes the butter feel alive! Add salt, black pepper, and lemon zest for that extra layer of flavor. Give it a good stir until everything is blended together beautifully. This mixture is the heart of our Cowboy Butter Roasted Vegetables, coating them in rich, savory goodness.

    Coat the Vegetables

    In a large bowl, toss the mixed vegetables with your Cowboy Butter blend. Make sure every piece is evenly coated. Use your hands or a spatula to ensure the butter is spread all over the veggies. This step is so important because it ensures that all those delicious flavors will soak into every bite of vegetable. The more even the coating, the better the taste!

    Roast the Vegetables

    Now, spread your beautifully coated vegetables in a single layer on the lined baking sheet. Give them a little space – crowding them can lead to steaming rather than roasting. Pop them into the oven for 25 to 30 minutes. Halfway through, give them a little stir. This helps them roast evenly and achieve that perfect caramelization you’re aiming for. You’ll know they’re ready when they’re golden at the edges, and the kitchen fills with that tempting roasted aroma. Just imagine the symphony of flavors about to grace your dinner table!

    Finish and Serve

    Once your veggies are done, it’s time to finish them off! Drizzle some fresh lemon juice over the roasted vegetables for that zesty kick. Toss them gently to combine everything once more. For a beautiful presentation, transfer them to a serving platter and sprinkle on additional chopped herbs. This little touch visually elevates your dish, making it even more inviting. Enjoy your delicious Cowboy Butter Roasted Vegetables warm!

    Tips for Success

    • Always preheat your oven to ensure even cooking.
    • Use fresh vegetables for the best flavor and nutrition.
    • Don’t overcrowd the baking sheet; it’ll lead to steaming.
    • Experiment with different vegetables and spices for variety.
    • Keep an eye on roasting time – every oven varies!
    • For extra flavor, let leftovers sit in the fridge overnight before reheating.

    Equipment Needed

    • Baking Sheet: A large, rimmed baking sheet is ideal. If you don’t have one, a roasting pan will do.
    • Parchment Paper: For easy cleanup. Aluminum foil works as an alternative, but parchment is better for non-sticking.
    • Mixing Bowl: Any medium-sized bowl will work for mixing the Cowboy Butter.
    • Spatula or Tongs: Useful for tossing the vegetables, but your hands work too!

    Variations on Cowboy Butter Roasted Vegetables

    • Add Protein: For a heartier dish, consider adding chicken or shrimp. Just toss them in the Cowboy Butter as well!
    • Go Vegan: Swap the butter for a plant-based alternative, like coconut oil or vegan butter, for a delicious dairy-free version.
    • Spice It Up: Add more chili flakes or a dash of cayenne for an extra kick. Or, try switching out the smoked paprika for chipotle powder for a smoky heat.
    • Mix in Roots: Add starchy vegetables like sweet potatoes or butternut squash. They add natural sweetness and pair wonderfully with the spices!
    • Herb Variations: Experiment with different herbs like rosemary or dill for unique flavor profiles. Each herb imparts its own delightful twist!
    • Cheesy Version: Just before serving, sprinkle some grated Parmesan or feta over the roasted veggies for a rich finish.

    Serving Suggestions for Cowboy Butter Roasted Vegetables

    • Pair these flavorful vegetables with grilled chicken or steak for a satisfying meal.
    • Serve alongside quino or brown rice to enhance the dish’s wholesome appeal.
    • A cold glass of white wine or sparkling water complements the rich flavors perfectly.
    • For a colorful presentation, serve in a rustic wooden bowl.

    FAQs about Cowboy Butter Roasted Vegetables

    Can I use frozen vegetables for this recipe?
    Absolutely! While fresh vegetables bring a wonderful texture, frozen veggies will work in a pinch. Just be sure to thaw and pat them dry before tossing them with the Cowboy Butter to avoid excess moisture during roasting.

    How can I store leftovers?
    Leftover Cowboy Butter Roasted Vegetables can be stored in an airtight container in the fridge for up to 3 days. They make fantastic additions to salads or grain bowls, or can simply be reheated in the oven or microwave!

    Can I prepare the cowboy butter mixture ahead of time?
    Yes! You can make the Cowboy Butter mixture in advance, store it in the fridge, and simply toss it with the veggies right before roasting. It’ll save you time on busy evenings!

    What kind of dishes pair well with these roasted vegetables?
    These Cowboy Butter Roasted Vegetables are versatile! They complement grilled meats, pasta dishes, or even simple grains like quinoa or rice. The rich flavors beautifully balance lighter proteins!

    How spicy are these vegetables?
    The spice level is mild, thanks to the presence of chili flakes. If you prefer more heat, feel free to double the amount or add a dash of your favorite hot sauce. Just keep it fun!

    Final Thoughts

    As I wrap up this delightful journey of creating Cowboy Butter Roasted Vegetables, I can’t help but feel a sense of joy. This recipe encapsulates the magic of simple ingredients transforming into something extraordinary. Each bite is a harmonious blend of flavors and textures that not only warms the belly but also the heart. Whether you’re entertaining guests or just making a cozy family meal, these roasted vegetables are sure to impress. So grab your apron, unleash your inner cowboy, and enjoy this flavorful dish that brings everyone together around the table!


    Print

    clock clock iconcutlery cutlery iconflag flag iconfolder folder iconinstagram instagram iconpinterest pinterest iconfacebook facebook iconprint print iconsquares squares iconheart heart iconheart solid heart solid icon

    Description

    A flavorful medley of roasted vegetables coated in a rich cowboy butter mixture.


    • 4 cups mixed vegetables (such as carrots, bell peppers, zucchini, broccoli), cut into bite-sized pieces
    • 6 tablespoons unsalted butter, softened
    • 3 cloves garlic, minced
    • 1 tablespoon fresh parsley, finely chopped
    • 1 teaspoon fresh chives, finely chopped
    • 1 teaspoon fresh thyme leaves
    • 1/2 teaspoon chili flakes
    • 1/2 teaspoon smoked paprika
    • 1/2 teaspoon salt
    • 1/4 teaspoon black pepper
    • Zest of 1 lemon
    • Juice of 1/2 lemon
    • Additional chopped herbs, for garnish (optional)

    1. Preheat the oven to 425°F. Line a large baking sheet with parchment paper.
    2. In a medium bowl, blend the softened butter, minced garlic, parsley, chives, thyme, chili flakes, smoked paprika, salt, black pepper, and lemon zest until thoroughly combined.
    3. Place the mixed vegetables in a large bowl. Add the cowboy butter and toss until all the vegetables are evenly coated.
    4. Spread the coated vegetables in a single layer on the prepared baking sheet.
    5. Roast in the preheated oven for 25 to 30 minutes, stirring halfway through, until the vegetables are golden and caramelized at the edges.
    6. Remove from the oven, drizzle with lemon juice, and toss gently to combine. Transfer to a serving platter and garnish with additional herbs if desired. Serve warm.

    Notes

    • Feel free to use any combination of your favorite vegetables.
    • Adjust the spices according to your taste preference.
    • Prep Time: 10 minutes
    • Cook Time: 30 minutes
    • Category: Side Dish
    • Method: Roasting
    • Cuisine: American

    Nutrition

    • Serving Size: 1 serving
    • Calories: 210
    • Sugar: 4g
    • Sodium: 250mg
    • Fat: 18g
    • Saturated Fat: 10g
    • Unsaturated Fat: 8g
    • Trans Fat: 0g
    • Carbohydrates: 12g
    • Fiber: 3g
    • Protein: 3g
    • Cholesterol: 30mg

    Sharing is caring!

  • Scrambled Pancake Bites Fluffy

    Scrambled Pancake Bites Fluffy


    Introduction to Scrambled Pancake Bites Fluffy

    Being a mom on the run, I’m always looking for quick fixes to keep the troops happy and fed. That’s how I found these adorable Scrambled Pancake Bites Fluffy. Take the comforting flavor of traditional pancakes and take it into little bite-sized pieces of joy … imagine … sitting down to warm, fluffy breakfast with your loved ones without all the fuss. Hearing this recipe not only brings smiles but offers a fun twist everyone is sure to adore; let’s dive into this delicious adventure!

    Why You’ll Love This Scrambled Pancake Bites Fluffy

    There’s something truly special about these Scrambled Pancake Bites Fluffy! First, they’re quick to whip up, making breakfast a breeze on those hectic mornings. Second, their fluffy texture is simply irresistible, ensuring even the pickiest eaters will happily dig in. Plus, the joy of serving fun, bite-sized pancakes gives your family a breakfast experience that feels fresh yet familiar. Who knew breakfast could be this delightful?

    Ingredients for Scrambled Pancake Bites Fluffy

    Let’s gather the perfect ingredients for our Scrambled Pancake Bites Fluffy! These staples will give you the fluffy delight we’re after.

    • Pancake mix: This is the foundation of our bites, offering convenience and quick preparation. Choose your favorite brand for best results!
    • Large eggs: They lend richness and moisture, making our bites fluffy. Always opt for fresh eggs from a reliable source when possible.
    • Milk: Adding the creamy texture, milk helps bring all the ingredients together. You can substitute with almond or oat milk for a dairy-free version.
    • Ground cinnamon: This spice adds warmth and flavor! It’s the secret ingredient for that cozy breakfast aroma.
    • Ground nutmeg: A pinch of this elevates the flavor profile, adding depth. A little goes a long way!
    • Unsalted butter: Used for melting in the skillet, it helps achieve that gorgeous golden color and enhances the taste.
    • Warm maple syrup: The sweet final touch! Don’t skimp on it—this is what makes every bite heavenly.

    Feel free to customize this recipe! Options like chocolate chips or blueberries can be tossed in for added flair. If you’re looking for exact measurements, don’t worry! Those details are at the bottom of the article and ready for printing. Now let’s get to the cooking part!

    How to Make Scrambled Pancake Bites Fluffy

    Let’s jump into the joy of cooking these Scrambled Pancake Bites Fluffy! Follow my simple steps, and you’ll have a delightful breakfast in no time. Each step is designed to be easy and approachable, so even the busiest mornings won’t stand in your way!

    Step 1: Prepare the Batter

    Start by grabbing a mixing bowl. Whisk together pancake mix, eggs, milk, cinnamon, and nutmeg until you achieve a smooth consistency. I always enjoy the sound of the whisk—it’s like music in my kitchen. Make sure there are no lumps left. The fluffier the batter, the fluffier your bites!

    Step 2: Heat the Skillet

    Next, it’s time to heat things up! Place a large nonstick skillet over medium heat. Toss in a tablespoon of unsalted butter and watch it melt. The butter should be bubbling and slightly foamy when it’s ready. Keep an eye on it; too much heat can lead to burnt butter, and nobody likes that!

    Step 3: Cook the Batter

    With the skillet nicely heated, pour the batter in. Spread it out so it forms an even layer across the pan. This is where the magic begins! Cooking time is crucial; keep a close watch. After a minute, the edges will begin to set. You’ll want to create small bites instead of a giant pancake.

    Step 4: Scramble and Separate

    Now comes the fun part! Use a spatula to gently scramble the batter as it cooks. Picture yourself separating the batter into fluffy, bite-sized pieces. This method gives you that delightful combination of pancake and scrambled eggs in one. Stir as needed, but don’t overwork them. We want the bites fluffy and tender!

    Step 5: Serve with Maple Syrup

    Once the pancake bites are just set—about 3 to 4 minutes of cooking—it’s time to serve! Transfer them onto plates and drizzle generously with warm maple syrup. You can’t forget this final touch—it really brings the dish together. Imagine those fluffy bites melting in your mouth with each sweet sip of syrup. Oh, what a breakfast treat!

    Tips for Success

    • Always whisk the batter until smooth, ensuring no lumps for fluffiness.
    • Keep the skillet at medium heat; too high can burn the bites.
    • Don’t rush the cooking time; patience makes for perfectly fluffy bites.
    • Add your preferred mix-ins for extra flavor, like berries or nuts.
    • Leftovers can be stored in the fridge and reheated for a quick snack!

    Equipment Needed

    • Mixing bowl: A medium-sized one works perfectly. If you don’t have one, any large bowl will do!
    • Whisk: Essential for mixing. A fork can work in a pinch, too!
    • Nonstick skillet: The ideal choice for even cooking. If you don’t have one, a regular skillet with a bit of extra butter will suffice.
    • Spatula: A silicone or rubber spatula helps gently scramble those bites. Wooden ones are great alternatives!

    Variations

    • Gluten-Free: Substitute regular pancake mix with a gluten-free variety to accommodate dietary needs.
    • Vegan Option: Use a plant-based pancake mix, replace eggs with flaxseed meal and water, and swap milk for almond or soy milk.
    • Chocolate Lovers: Add a handful of chocolate chips to the batter for a sweet treat that kids will adore!
    • Berry Burst: Toss in fresh blueberries or diced strawberries for a fruity kick and added nutrition.
    • Nutty Goodness: Incorporate chopped nuts like walnuts or pecans for a delightful crunch and extra protein.

    Serving Suggestions

    • Fruit Salad: A refreshing fruit salad pairs wonderfully with these bites, adding a colorful touch to your breakfast plate.
    • Yogurt: Serve with a dollop of Greek yogurt for added creaminess and protein.
    • Juice or Smoothies: Accompany your meal with fresh juice or a smoothie for a vibrant contrast.
    • Presentation: Use fun plates or colorful bowls to make serving appealing to kids!

    FAQs about Scrambled Pancake Bites Fluffy

    Here are some common questions I’ve heard about these delightful Scrambled Pancake Bites Fluffy. I hope my answers help you whip them up with ease!

    Can I make Scrambled Pancake Bites Fluffy ahead of time?
    Absolutely! You can prepare the batter the night before and store it in the fridge. Just give it a good stir before cooking. These bites also reheat well in a skillet!

    How do I store leftovers?
    Place any leftovers in an airtight container in the refrigerator for up to three days. Reheat them in the skillet or microwave—just don’t overdo it, or they’ll lose that fluffy texture!

    Can I freeze Scrambled Pancake Bites Fluffy?
    Yes! Once they’ve cooled, place them in a freezer-safe bag and store for up to a month. Thaw and reheat them whenever you need a quick breakfast fix.

    What can I substitute if I don’t have pancake mix?
    If you’re low on pancake mix, you can combine equal parts flour, baking powder, and a pinch of salt. It’s an easy, last-minute alternative that still yields fluffy bites!

    Can I add ingredients to customize my bites?
    Definitely! Feel free to mix in your favorite flavors, like blueberries, diced apples, or even a touch of vanilla extract. The sky’s the limit with these delightful bites!

    Final Thoughts

    There’s something truly special about gathering around the table for a warm breakfast of Scrambled Pancake Bites Fluffy. Not only do they bring smiles and laughter, but their fluffy, tender texture delights both young and old. This recipe effortlessly combines ease with scrumptiousness, making your busy mornings feel like a special occasion. Whether you’re a seasoned cook or just starting your culinary journey, these bites are sure to impress! With a drizzle of maple syrup and some fresh fruit, you’ve got a breakfast that warms the heart. Let’s continue making delicious memories one pancake bite at a time!


    Print

    clock clock iconcutlery cutlery iconflag flag iconfolder folder iconinstagram instagram iconpinterest pinterest iconfacebook facebook iconprint print iconsquares squares iconheart heart iconheart solid heart solid icon

    Description

    A delicious twist on traditional pancakes, these Scrambled Pancake Bites are fluffy and easy to make, perfect for breakfast!


    • 1 1/2 cups pancake mix
    • 2 large eggs
    • 1 cup milk
    • 1/2 teaspoon ground cinnamon
    • 1/4 teaspoon ground nutmeg
    • 2 tablespoons unsalted butter
    • Warm maple syrup, for serving

    1. In a mixing bowl, whisk together pancake mix, eggs, milk, cinnamon, and nutmeg until the mixture is smooth and no lumps remain.
    2. Add 1 tablespoon unsalted butter to a large nonstick skillet and melt over medium heat until bubbling.
    3. Pour the batter into the skillet, spreading it to an even layer.
    4. As the edges begin to set, use a spatula to gently scramble and separate the batter into small bites, similar to scrambled eggs.
    5. Continue to cook, stirring gently until pancake bites are just set and fluffy, about 3 to 4 minutes.
    6. Transfer cooked pancake bites to serving plates. If preparing in batches, add the remaining butter to the pan as needed.
    7. Serve immediately with a generous drizzle of warm maple syrup.

    Notes

    • Make sure not to overcook the bites to keep them fluffy.
    • Feel free to add chocolate chips or blueberries for extra flavor.
    • These can also be made ahead of time and reheated in a skillet.
    • Prep Time: 10 minutes
    • Cook Time: 10 minutes
    • Category: Breakfast
    • Method: Skillet
    • Cuisine: American

    Nutrition

    • Serving Size: 1 serving
    • Calories: 250
    • Sugar: 5g
    • Sodium: 320mg
    • Fat: 10g
    • Saturated Fat: 4g
    • Unsaturated Fat: 5g
    • Trans Fat: 0g
    • Carbohydrates: 36g
    • Fiber: 1g
    • Protein: 7g
    • Cholesterol: 120mg

    Sharing is caring!