Author: IHAAL Team

  • Spicy Mexican Corn Bites

    Spicy Mexican Corn Bites


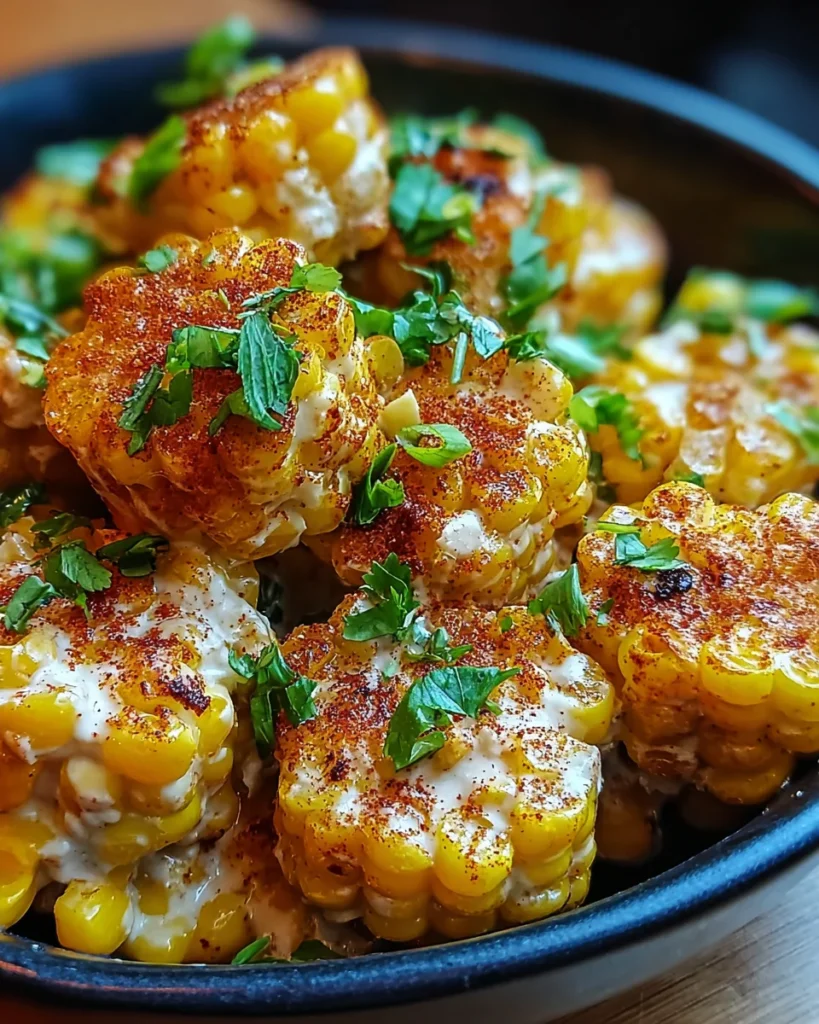
    Introduction to Spicy Mexican Corn Bites

    Do you ever find yourself wanting something warm, flavorful, and comforting all at once? That’s it exactly: the Spicy Mexican Corn Bites. Little gems for the busy mom – like us, always on the run but wanting to serve something yummy and fulfilling. Think sweet corn with creamy goodness and just the right kick of spice dancing on your taste buds. Any night that’s game night, any night that’s family dinner, these corn bites take centre stage and everyone comes back for more!

    Why You’ll Love This Spicy Mexican Corn Bites

    These Spicy Mexican Corn Bites are a delightful fusion of simplicity and flavor. With just 20 minutes from start to finish, they’re the perfect fast snack for busy evenings. The balance of creaminess and spice makes them a crowd favorite. Plus, they’re vegetarian, so everyone can enjoy them! Trust me; once you make these little bites, they’ll become a staple in your kitchen! Your family will thank you!

    Ingredients for Spicy Mexican Corn Bites

    Let’s dive into the ingredients that make these Spicy Mexican Corn Bites a must-try! You might have most of these in your pantry already, which is always a win. Here’s what you’ll need:

    • Mayonnaise: This creates a smooth and creamy base that enhances the flavor.
    • Sour cream: Bringing tanginess to the mix, sour cream balances the richness of the mayonnaise.
    • Fresh lime juice: A burst of citrus that brightens up all the flavors in this dish.
    • Corn kernels: The star of the show! You can use fresh, frozen, or canned corn. Just make sure to drain if canned.
    • Chili powder: This spice packs a punch! Adjust it to suit your family’s spice tolerance. I always love a little extra kick.
    • Smoked paprika: Adds a rich, smoky flavor that takes these bites to the next level.
    • Ground cumin: Earthy and warm, it complements the corn perfectly.
    • Cayenne pepper (optional): For those who crave heat, feel free to sprinkle in a pinch more for extra spice!

    All the measurements are detailed at the bottom of the article, so you can easily print them out. If you need a substitute for mayonnaise, try Greek yogurt for a lighter touch. And when it comes to corn, don’t overthink—whatever you have will work beautifully!

    How to Make Spicy Mexican Corn Bites

    Now that you have all your ingredients ready, let’s jump into making these Spicy Mexican Corn Bites! Trust me, each step is simple and fun. You’ll be amazed at how quickly they come together. Grab your mixing bowls and skillet, and let’s get cooking!

    Step 1 – Mix the Creamy Base

    Start by taking a large mixing bowl and whisking together the mayonnaise, sour cream, and fresh lime juice. I find that using a good-quality whisk makes a difference in getting everything nice and smooth! Whisk until the mixture is completely combined and you can’t see any separating lines. This creamy base is the heart of the Spicy Mexican Corn Bites, creating that luscious texture we all love. Smooth and inviting, it sets the stage for all that delicious corn!

    Step 2 – Combine with Corn and Spices

    Next, gently fold in the corn kernels into your creamy base. Make sure each kernel gets a loving coating of that heavenly mixture. Then, sprinkle in the chili powder, smoked paprika, ground cumin, and optional cayenne pepper. Stir carefully until the spices are evenly distributed throughout the corn. This step is all about balance—ensuring each bite bursts with flavor. The fragrant spices will fill your kitchen, and trust me; you won’t be able to resist tasting a bit!

    Step 3 – Preheat the Skillet

    Now, it’s time to warm up your skillet over medium heat. This step is essential for achieving that golden-brown crispiness! Let the skillet heat for a few minutes. If you rush this, your bites might not cook evenly. A properly preheated surface is crucial for that perfect crunch around the edges. Your taste buds will thank you!

    Step 4 – Form and Cook the Bites

    Once your skillet is ready, it’s time to create those inviting little bites! Spoon portions of the corn mixture into the skillet to form small, bite-sized rounds. I love using a tablespoon for this—it’s just the right size. Cook for about 2-3 minutes per side, flipping them once, until you see that beautiful golden color. The edges should become crisp and delightful, giving each bite that satisfying texture. Feel free to taste test one—you know, for quality control!

    Step 5 – Serve and Garnish

    Finally, transfer the finished corn bites onto a serving plate. To make it extra festive, top them with fresh cilantro, crumbled queso fresco, or another sprinkle of chili powder if you want more heat. Arrange them artfully, and watch how they disappear in seconds! These bites are not just a treat for the palate, they’re a feast for the eyes too!

    Tips for Success

    • Use fresh ingredients for the best flavor. Frozen corn works well, too!
    • Don’t rush the whisking; a smooth base makes a big difference in texture.
    • Experiment with spices! Adjust the heat to suit your family’s taste preferences.
    • Keep your skillet at medium heat to avoid burning the bites.
    • These bites can be made ahead and reheated in the oven for a quick snack!

    Equipment Needed

    • Large mixing bowl: Essential for combining your creamy base. Any sturdy bowl will do!
    • Whisk: A good whisk helps create a smooth texture. A fork works in a pinch!
    • Non-stick skillet: Perfect for cooking the corn bites without sticking. A regular skillet works too—just add a bit more oil!
    • Tablespoon: Great for spooning out the mixture. Use a cookie scoop for uniform bites!

    Variations

    • Cheesy Delight: Mix in shredded cheese like cheddar or Monterey Jack for a richer flavor.
    • Herbed Twist: Add fresh herbs like cilantro or parsley for an extra burst of freshness.
    • Spicy Southwest: Incorporate diced jalapeños for an added kick that brings the heat!
    • Veggie Boost: Fold in minced bell peppers or diced zucchini for added texture and nutrition.
    • Gluten-Free Option: Made with the specified ingredients, these bites are naturally gluten-free!

    Serving Suggestions

    • Pair with tangy salsa for dipping; the contrast is divine!
    • Serve alongside creamy avocado dip for a delightful twist.
    • Offer fresh lime wedges to squeeze over the bites for an extra zing.
    • A chilled margarita complements these flavors beautifully!

    FAQs about Spicy Mexican Corn Bites

    Can I make these Spicy Mexican Corn Bites ahead of time?

    Absolutely! You can prepare the mixture in advance and store it in the fridge. Just make sure to cook them right before serving to enjoy that warm, crispy texture!

    What’s a good dipping sauce for these corn bites?

    Look no further than salsa! Its fresh, zesty flavor beautifully complements the rich creaminess of the bites. You could also serve them with a cheese dip for a satisfying treat.

    Can I adjust the spice level in the recipe?

    Definitely! You can control the spice by increasing or decreasing the chili powder and cayenne pepper. Start with a little and gradually add more until it suits your taste!

    What is the best way to store leftovers?

    To keep them fresh, place any leftover corn bites in an airtight container. They can last in the fridge for up to 3 days. Reheat them in a skillet for the best results!

    Can I bake these instead of frying?

    Yes! For a healthier option, you can bake the corn bites at 400°F (200°C) on a lined baking sheet for about 15–20 minutes. Ensure you flip them halfway for an even golden finish.

    Final Thoughts

    As I reflect on these Spicy Mexican Corn Bites, I can’t help but smile. They bring joy not just in flavor, but in the moments they create. Sharing these bites with family brings laughter, stories, and connection. They’re quick enough for those busy days yet special enough for gatherings. Plus, they cater to all taste buds—making everyone feel included. Whether you dip them in salsa or enjoy them just as they are, each crunchy bite brings warmth to your home. I hope these bites become a cherished recipe in your kitchen, just like they are in mine!


    Print

    clock clock iconcutlery cutlery iconflag flag iconfolder folder iconinstagram instagram iconpinterest pinterest iconfacebook facebook iconprint print iconsquares squares iconheart heart iconheart solid heart solid icon

    Description

    Spicy Mexican Corn Bites are a flavorful snack made with a creamy base and seasoned corn, perfect for any gathering.


    • 60 ml mayonnaise
    • 60 ml sour cream
    • 15 ml freshly squeezed lime juice
    • 320 g corn kernels (fresh, frozen, or canned)
    • 5 ml chili powder, adjustable to taste
    • 2.5 ml smoked paprika
    • 2.5 ml ground cumin
    • 1.25 ml cayenne pepper (optional)

    1. In a large mixing bowl, whisk together mayonnaise, sour cream, and fresh lime juice until the mixture is fully smooth and homogenized.
    2. Fold the corn kernels into the creamy base, ensuring that each kernel is thoroughly coated. Sprinkle in the chili powder, smoked paprika, ground cumin, and optional cayenne pepper. Stir well until the spices are evenly distributed.
    3. Warm a non-stick skillet over medium heat until evenly heated.
    4. Spoon portions of the corn mixture into the preheated skillet to form small, bite-sized rounds. Cook for 2–3 minutes per side, flipping once, until golden brown and crisp at the edges.
    5. Transfer the finished corn bites to a serving plate. Top with fresh cilantro, crumbled queso fresco, or an additional sprinkle of chili powder as desired.

    Notes

    • Adjust the spices based on your heat preference.
    • Can be served with salsa or cheese dip for extra flavor.
    • These bites can also be baked in the oven for a healthier option.
    • Prep Time: 10 minutes
    • Cook Time: 10 minutes
    • Category: Snack
    • Method: Skillet
    • Cuisine: Mexican

    Nutrition

    • Serving Size: 1 serving
    • Calories: 250
    • Sugar: 3g
    • Sodium: 250mg
    • Fat: 15g
    • Saturated Fat: 2g
    • Unsaturated Fat: 11g
    • Trans Fat: 0g
    • Carbohydrates: 25g
    • Fiber: 3g
    • Protein: 5g
    • Cholesterol: 15mg

    Sharing is caring!

  • Crazy Good Street Corn Chicken

    Crazy Good Street Corn Chicken


    Introduction to Crazy Good Street Corn Chicken

    As a mom on the run, I totally get it feeds a daunting task to make dinner for everyone with those crazy schedules that everyone seems to have. So, without further ado, I present to you my Crazy Good Street Corn Chicken! More than a dish, it’s an explosion of flavors that brightens up the dinner table with seasoned grilled chicken and juicy corn with a zesty salsa- the end-all to those busy evenings. And this includes the pickiest of eaters in your family wherein they cannot even turn their nose up at it. Seriously, you will wonder how you ever lived without this after your first taste.

    Why You’ll Love This Crazy Good Street Corn Chicken

    This Crazy Good Street Corn Chicken is a game changer for busy moms and professionals alike! It brings together quick prep time and an explosion of flavors that feels like a fiesta on a plate. You can have this delicious meal ready in about an hour. Plus, it’s packed with fresh ingredients that leave you and your family satisfied. Who knew feeding your loved ones could be this fun and easy?

    Ingredients for Crazy Good Street Corn Chicken

    Gathering the right ingredients for this Crazy Good Street Corn Chicken is half the fun! Here’s what you’ll need:

    • Boneless, skinless chicken thighs: They stay juicy and tender when grilled, making them perfect for this dish.
    • Olive oil: A must for marinating and grilling. It adds flavor and moisture.
    • Ground cumin, coriander, and turmeric: These spices create a warm and aromatic profile that’s utterly captivating.
    • Garlic powder and dried oregano: Classic seasonings that elevate the chicken’s flavor.
    • Cayenne pepper: Optional, but if you like a kick, sprinkle a bit in! It adds excitement without overwhelming.
    • Kosher salt and freshly ground black pepper: Simple seasonings that help bring all the flavors together.
    • Fresh corn: Grilling fresh corn enhances its sweetness and gives that coveted char taste.
    • Avocado: Adds creaminess to the salsa and richness to the entire dish.
    • Jalapeno pepper: Great for bringing some heat; add more or less based on your spice tolerance.
    • Fresh cilantro and red onion: They are essential for making the corn salsa vibrant and delightful.
    • Lime: A squeeze of lime juice brings everything to life with its refreshing acidity.
    • Raw cashews: Blending them makes a creamy, dreamy sauce that ties everything together.
    • Soft corn tortillas: They serve as the lovely vehicle for all those delicious fillings.
    • Extra jalapenos and cilantro: Feel free to garnish as you wish for an extra flavor boost!

    For those looking to switch things up, consider grilled veggies or tofu as a filling option. You can find all the ingredients with exact measurements at the bottom of the article for easy printing. Happy cooking!

    How to Make Crazy Good Street Corn Chicken

    Creating this Crazy Good Street Corn Chicken is a delightful culinary adventure! Follow these simple steps for a meal your family will rave about.

    Step 1: Prepare the Cashew Sauce

    Start by soaking the raw cashews in warm water. Give them at least 2 hours to relax; if you’re in a pinch, boiling them for 30 minutes works too. Once softened, drain the cashews and toss them into a blender. Add jalapeno, garlic, lime juice, salt, onion powder, and black pepper. Blend until smooth and creamy; this sauce is the heart of your dish, enhancing each bite with its zesty goodness!

    Step 2: Marinate the Chicken

    In a bowl, combine your chicken thighs with olive oil, ground cumin, coriander, turmeric, garlic powder, oregano, cayenne, salt, and pepper. Rub the spices in well; this step is crucial for flavor development. Let the chicken marinate for at least 30 minutes. If time allows, going for an hour will make it even tastier!

    Step 3: Prepare the Corn

    Next, grab your ears of corn and brush them with olive oil. Sprinkle on some cumin, chili powder, salt, and pepper. This little seasoning ritual does wonders for enhancing the corn’s natural sweetness. You want that perfect balance of smoky and sweet when you grill it!

    Step 4: Grill the Chicken and Corn

    Preheat your grill to a hot 400°F. Lay the marinated chicken on the grill, cooking for about 6-8 minutes on each side. Ensure it reaches an internal temperature of 165°F. While the chicken grills, toss the corn on as well. Grill the corn for about 15-20 minutes, rotating occasionally, until it gets perfectly charred and tender.

    Step 5: Assemble the Ingredients

    Once everything is cooked, let the chicken rest for a few minutes before chopping it into bite-sized pieces. Use a knife to slice down the corn kernels, letting them tumble into a bowl. In another bowl, combine those kernels with diced avocado, jalapeno, cilantro, red onion, lime juice, and season with salt and pepper to taste. Your corn salsa is ready! Now, gently warm up your tortillas on the grill or in a skillet. This will make them supple and ready to hold all that deliciousness.

    Step 6: Serve and Enjoy

    It’s time to plate this masterpiece! Spread a generous layer of your creamy jalapeno lime cashew sauce on each tortilla. Next, pile on the chopped chicken, top it with your vibrant street corn salsa, and add slices of extra jalapenos and cilantro for garnish. Serve immediately, and watch as everyone dives into this feast! Trust me, they’ll be asking for seconds.

    Tips for Success

    • Don’t skip marinating the chicken; it’s essential for deeper flavors.
    • Soaking the cashews is crucial for that creamy sauce—plan ahead!
    • Grilling the corn until slightly charred enhances its natural sweetness.
    • Feel free to customize the salsa to suit your family’s preferences.
    • Serve immediately for the best taste; tacos are always better fresh!

    Equipment Needed

    • Grill or grill pan: If you don’t have a grill, a stovetop grill pan works wonders.
    • Blender: Essential for making that creamy cashew sauce; a food processor can work too.
    • Cutting board and knife: Helpful for chopping chicken and veggies.
    • Tongs: Perfect for flipping the chicken and corn without fuss.
    • Bowl: For marinating chicken and mixing salsa ingredients.

    Variations

    • Vegetarian option: Replace the chicken with grilled zucchini, bell peppers, or portobello mushrooms for a satisfying meal that packs in veggies.
    • Spice it up: Try adding a chipotle pepper or some smoked paprika to the cashew sauce for an extra smoky kick.
    • DIY tortillas: Make your own tortillas from scratch for an authentic touch; it’s easier than you might think!
    • Balance it out: Serving the tacos at a salad bar style allows everyone to customize their toppings, making it suitable for all tastes.
    • Dairy option: If you love cheese, add crumbled feta or cotija cheese on top of the salsa for creaminess and tang.

    Serving Suggestions

    • Pair these tacos with a crisp salad for a refreshing contrast.
    • Serve with homemade guacamole and tortilla chips for added crunch.
    • Enjoy with a cold glass of limeade or a light beer to complement the spices.
    • For presentation, arrange the tacos on a colorful platter for visual delight.

    FAQs about Crazy Good Street Corn Chicken

    Got questions about this Crazy Good Street Corn Chicken? You’re not alone! Here are a few common inquiries I often hear:

    Can I make the cashew sauce ahead of time?
    Absolutely! The cashew sauce can be made a day ahead and stored in the fridge. Just give it a good stir before serving to refresh its creamy texture.

    How do I store leftovers?
    Leftovers can be stored in an airtight container in the fridge for up to three days. Rewarm the chicken and corn before assembling your tacos again!

    Can I grill the chicken indoors?
    Yes! If grilling outdoors isn’t an option, use a grill pan on your stovetop. It gives you those lovely grill marks and keeps the flavor intact.

    What if I don’t have cashews?
    No worries! You can swap them for sunflower seeds or even silken tofu for a different twist on your creamy sauce.

    Is this dish gluten-free?
    Yes! The *Crazy Good Street Corn Chicken* is naturally gluten-free. Just make sure your tortillas are labeled as gluten-free if needed!

    Final Thoughts

    Creating this Crazy Good Street Corn Chicken is truly a joyful experience that brings loved ones together around the dinner table. The combination of flavors and textures is sure to delight even the pickiest of eaters, making it a family favorite in no time. Plus, the ease of preparation means you can enjoy a homemade meal without feeling overwhelmed. As the laughter and chatter flow, you’ll know you made the right choice. Trust me, every bite will remind you why cooking can be so fulfilling and delicious. Happy cooking, friends!


    Print

    clock clock iconcutlery cutlery iconflag flag iconfolder folder iconinstagram instagram iconpinterest pinterest iconfacebook facebook iconprint print iconsquares squares iconheart heart iconheart solid heart solid icon

    Description

    Crazy Good Street Corn Chicken is a delicious, flavorful dish featuring seasoned grilled chicken, grilled corn, and a zesty corn salsa, all served in soft corn tortillas with a creamy jalapeno lime cashew sauce.


    • 1 pound boneless, skinless chicken thighs
    • 1 tablespoon olive oil
    • 1 teaspoon ground cumin
    • 1 teaspoon ground coriander
    • 1 teaspoon ground turmeric
    • 1/2 teaspoon garlic powder
    • 1/2 teaspoon dried oregano
    • 1/4 teaspoon cayenne pepper (optional)
    • 1/2 teaspoon kosher salt
    • Freshly ground black pepper
    • 2 ears corn, husked and washed
    • 2 teaspoons olive oil
    • 1/2 teaspoon ground cumin
    • 1/2 teaspoon chili powder
    • 1 ripe avocado, diced
    • 1 jalapeno pepper, thinly sliced
    • 1/3 cup finely diced fresh cilantro
    • 1/4 cup finely diced red onion
    • 1 lime, juiced
    • 1/2 cup raw cashews
    • 1/3 cup water, plus more if needed for thinning
    • 1 clove garlic
    • 2 tablespoons fresh lime juice
    • 3/4 teaspoon kosher salt
    • 1/4 teaspoon onion powder
    • 8 soft corn tortillas
    • Extra thinly sliced jalapenos
    • Extra fresh cilantro

    1. Soak cashews in warm water for at least 2 hours, or boil for 30 minutes.
    2. Drain cashews and blend with 1/3 cup water, jalapeno, garlic, lime juice, salt, onion powder, and black pepper until smooth.
    3. Combine chicken thighs with olive oil, cumin, coriander, turmeric, garlic powder, oregano, cayenne, salt, and black pepper in a bowl. Marinate for 30 minutes to 1 hour.
    4. Brush corn with olive oil and sprinkle with cumin, chili powder, salt, and pepper.
    5. Preheat grill to 400°F and grill chicken for 6-8 minutes per side, until cooked through. Grill corn for 15-20 minutes, turning occasionally.
    6. Let chicken rest, then chop into bite-sized pieces. Remove corn kernels.
    7. Mix corn kernels with avocado, jalapeno, cilantro, red onion, lime juice, and season with salt and pepper.
    8. Char tortillas on flame or skillet, then spread jalapeno lime cashew sauce on each.
    9. Top tortillas with chicken, street corn salsa, jalapenos, and cilantro. Serve immediately.

    Notes

    • For a vegan option, replace chicken with grilled vegetables or tofu.
    • Adjust the amount of jalapeno in the sauce based on heat preference.
    • The marinated chicken can be stored in the fridge for up to 24 hours before cooking.
    • Add cheese or other toppings as desired.
    • Prep Time: 30 minutes
    • Cook Time: 30 minutes
    • Category: Main Dish
    • Method: Grilling
    • Cuisine: Mexican

    Nutrition

    • Serving Size: 1 tortilla with filling
    • Calories: 420
    • Sugar: 3g
    • Sodium: 580mg
    • Fat: 23g
    • Saturated Fat: 3g
    • Unsaturated Fat: 19g
    • Trans Fat: 0g
    • Carbohydrates: 30g
    • Fiber: 6g
    • Protein: 23g
    • Cholesterol: 75mg

    Sharing is caring!

  • Cheddar Bacon Potato Wedges

    Cheddar Bacon Potato Wedges


    Introduction to Cheddar Bacon Potato Wedges

    As a busy mom of three and a very passionate home cook, I know all too well the kind of chaos that can reign through the day. But, let me tell you about one calming recipe amid the storm: Cheddar Bacon Potato Wedges. These crispy wedges aren’t just an easy snack – they’re a veritable foodie indulgence that will knock the socks off your loved ones be it at a movie night or when entertaining friends with your culinary finesse. Well, that’s something that will help you make most of your memorable time moments. You won’t take much time to prepare them.

    Why You’ll Love This Cheddar Bacon Potato Wedges

    Let’s face it: we all crave something delicious without spending hours in the kitchen. These Cheddar Bacon Potato Wedges are the answer. They’re incredibly easy to make, taking just 45 minutes from start to finish. The delightful crunch paired with gooey cheese and savory bacon makes each bite irresistible. Whether it’s a weeknight treat or a special gathering, these wedges will have everyone rushing back for more!

    Ingredients for Cheddar Bacon Potato Wedges

    Gathering your ingredients is the first step to culinary glory! For these Cheddar Bacon Potato Wedges, you’ll need:

    • Baking potatoes: Choose large, starchy potatoes; they crisp up beautifully when fried!
    • Vegetable oil: Essential for frying until golden. Canola or peanut oil work well, too!
    • Kosher salt: This enhances every flavor. Adjust to your taste preference!
    • Coarse ground black pepper: Adds a kick! Feel free to add more if you love heat.
    • Shredded Cheddar cheese: The star of the show! Swap with Monterey Jack or even a spicy cheese for a twist.
    • Bacon: Cooked crispy and crumbled, bacon gives a savory crunch. Try turkey bacon for a lighter option!

    All ingredients with precise quantities can be found at the bottom of this article, ready for printing. Remember, you can customize these Cheddar Bacon Potato Wedges based on what you have at home or your family’s taste buds! The world of flavors is at your fingertips!

    How to Make Cheddar Bacon Potato Wedges

    Ready to turn those ingredients into something delicious? Let’s get started! Making Cheddar Bacon Potato Wedges is as exciting as it is simple. Follow along step by step, and you’ll have crispy, cheesy wedges in just about 45 minutes.

    Step 1: Preheat the Oven

    The first thing you’ll want to do is preheat your oven to 350°F. This step is key because it ensures your potato wedges will bake uniformly once they’re ready. While the oven warms up, take a moment to tidy your cooking space. A clean area makes for a smooth cooking experience—trust me, it’s less stressful!

    Step 2: Cut Your Potatoes

    Next up, grab your large baking potatoes. Cut each potato in half lengthwise. From there, slice each half into three equal wedges, resulting in 18 mouthwatering pieces. It’s crucial to create a flat surface by trimming a small amount off the top of each wedge. Why? This allows the potatoes to cook evenly and helps them fry up crispy!

    Step 3: Fry the Potato Wedges

    Now, let’s get frying! Heat about 2 inches of vegetable oil in a large pot to 350°F. It’s important to use a thermometer for accuracy. Fry the potato wedges in small batches. This prevents overcrowding and helps them become wonderfully golden brown. Fry them for 4-6 minutes per batch, until they’re crispy and lightly browned. When they’re done, transfer them to a paper towel-lined tray to drain off any excess oil.

    Step 4: Season and Arrange

    With your crispy wedges ready, it’s time to season! Place the fried potato wedges on a baking sheet. Evenly sprinkle kosher salt and coarse black pepper across them. This step is vital for enhancing the flavor. We want each bite of these cheesy snacks to explode with deliciousness!

    Step 5: Add Cheese and Bacon

    It’s cheese time! Sprinkle a generous amount of shredded Cheddar cheese over the potato wedges. Layering it gives the perfect cheesy melt. Then, top them with half of the crumbled bacon. This creates a mouthwatering blend of flavors that keeps everyone coming back for more!

    Step 6: Bake to Perfection

    Lastly, pop those loaded wedges into the preheated oven. Bake for about 15 minutes, or until the cheese is melted and bubbly. Keep an eye on them! In the last 5 minutes, sprinkle the remaining bacon on top for an extra crunchy finish. Once they’re done, remove them from the oven and feast your eyes on your masterpiece!

    Tips for Success

    • Make sure your oil is hot enough before frying—this ensures crispy edges!
    • For extra flavor, consider marinating the potato wedges in olive oil, garlic, and herbs before frying.
    • Don’t overcrowd the pot when frying; it’s better to fry in batches for even cooking.
    • Experiment with different types of cheese or toppings based on your family’s favorites!
    • Serve immediately for the best taste; they won’t stay crispy for long!

    Equipment Needed for Cheddar Bacon Potato Wedges

    • Large pot: Essential for frying; a deep skillet can work, too.
    • Thermometer: To ensure your oil reaches the perfect frying temperature.
    • Baking sheet: For crisping up the wedges in the oven.
    • Paper towels: Perfect for draining excess oil after frying.
    • Sharp knife: A good knife for cutting the potatoes with ease.

    Variations of Cheddar Bacon Potato Wedges

    • Loaded Style: Top with sour cream, green onions, and jalapeños for a loaded potato experience!
    • Spicy Kick: Add diced jalapeños or sprinkle cayenne pepper for those who love some heat!
    • Cheesy Trio: Experiment with a blend of cheeses like Pepper Jack, Gouda, or Parmesan for a flavor explosion.
    • Herb Infusion: Mix in fresh herbs like rosemary or thyme before baking for a fragrant lift.
    • Sweet Potato Twist: Substitute regular potatoes with sweet potatoes for a naturally sweet and nutritious option.

    Serving Suggestions for Cheddar Bacon Potato Wedges

    • Dipping Sauces: Serve with ranch, sour cream, or a zesty chipotle mayo for extra flavor.
    • Pair with Drinks: A cold beer or fizzy soda complements the savory taste perfectly.
    • Presentation: Arrange wedges on a rustic platter for a casual, inviting vibe at your gathering.

    FAQs about Cheddar Bacon Potato Wedges

    Can I make these Cheddar Bacon Potato Wedges ahead of time?
    Yes, you can prep the potatoes and fry them in advance. Just reheat in the oven before serving! This way, you’ll have a stress-free snack on hand.

    What can I use instead of Cheddar cheese?
    Feel free to swap Cheddar with your favorite cheese, like Monterey Jack or Colby for a milder flavor. Or go for a spicy cheese to spice things up!

    How do I keep the potato wedges crispy?
    Make sure to fry them in hot oil to achieve that golden crunch. Also, serve them right away for the best texture, as they’ll lose crispiness over time.

    Can these wedges be frozen?
    Yes, after frying, let them cool completely and freeze in an airtight container. Reheat from frozen in the oven for a quick snack later!

    What are some dipping sauces that pair well with these wedges?
    Delicious options include ranch dressing, spicy aioli, or even a tangy barbecue sauce. Dipping makes everything more fun!

    Final Thoughts

    Creating these Cheddar Bacon Potato Wedges is more than just making a snack; it’s about crafting delightful moments in the kitchen. The joy of watching my family dive into a plate of these crispy, cheesy bites fills my heart. Each wedge brings laughter, stories, and a sense of togetherness. Whether it’s a cozy movie night or a gathering with friends, these wedges always steal the spotlight. So why wait? Gather your loved ones and share this wonderful treat. It’s guaranteed to become a cherished recipe in your home, just as it has in mine!


    Print

    clock clock iconcutlery cutlery iconflag flag iconfolder folder iconinstagram instagram iconpinterest pinterest iconfacebook facebook iconprint print iconsquares squares iconheart heart iconheart solid heart solid icon

    Description

    Delicious Cheddar Bacon Potato Wedges that are crispy, cheesy, and packed with flavor.


    • 3 large baking potatoes
    • vegetable oil, for frying
    • 1/2 teaspoon kosher salt
    • 1/4 teaspoon coarse ground black pepper
    • 1 1/2 cups shredded Cheddar cheese
    • 8 slices bacon, cooked and crumbled

    1. Preheat oven to 350°F.
    2. Cut the potatoes in half lengthwise, then slice each half into three equal wedges to yield 18 pieces. Slice a small amount off the top side of each wedge to create a flat surface.
    3. Heat 2 inches of vegetable oil in a large pot to 350°F. Fry the potato wedges in batches until golden brown, then transfer to a paper towel-lined tray to drain.
    4. Arrange the fried potato wedges on a baking sheet and season evenly with kosher salt and coarse black pepper.
    5. Sprinkle the shredded Cheddar cheese evenly over the potato wedges. Top with half of the crumbled bacon.
    6. Bake in the preheated oven for 15 minutes, until the cheese is melted. Sprinkle with the remaining bacon and bake for an additional 5 minutes.

    Notes

    • Ensure the oil is at the right temperature for frying to achieve crispy wedges.
    • Feel free to substitute the Cheddar cheese with your favorite cheese for different flavors.
    • Can serve with dipping sauces like ranch or sour cream.
    • Prep Time: 15 minutes
    • Cook Time: 30 minutes
    • Category: Appetizer
    • Method: Frying and Baking
    • Cuisine: American

    Nutrition

    • Serving Size: 1 serving
    • Calories: 300
    • Sugar: 1g
    • Sodium: 600mg
    • Fat: 20g
    • Saturated Fat: 8g
    • Unsaturated Fat: 10g
    • Trans Fat: 0g
    • Carbohydrates: 30g
    • Fiber: 3g
    • Protein: 8g
    • Cholesterol: 30mg

    Sharing is caring!

  • Chocolate Chip Cookie Dough Truffles

    Chocolate Chip Cookie Dough Truffles


    Introduction to Chocolate Chip Cookie Dough Truffles

    Let’s take a trip back to those warm moments in the kitchen, the smell of just-baked goods in the air. Chocolate Chip Cookie Dough Truffles aren’t just treats, they’re little bites of happiness. These scrumptious delights are the answer to your sweet tooth’s wildest dreams for any kind of day – whether a busy one or for a special gathering. They take very little time but pack in so much flavor; perfect for whirlwind weekdays or slow Sunday afterternoons. Trust me, these truffles will impress your loved ones and satisfy your craving in the most delightful way!

    Why You’ll Love This Chocolate Chip Cookie Dough Truffles

    These Chocolate Chip Cookie Dough Truffles are a game changer! They’re incredibly easy to whip up, making them perfect for busy moms or professionals like me. With just a quick mix and chill, you’ll have a delightful dessert that pleases everyone. Plus, who can resist the rich combination of cookie dough and chocolate? It’s a sweet escape that satisfies cravings without demanding hours in the kitchen!

    Ingredients for Chocolate Chip Cookie Dough Truffles

    Gathering the right ingredients is the first step in your truffle-making adventure. Here’s what you need:

    • Unsalted butter: Softened to create a creamy base, it adds richness to the cookie dough.
    • Brown sugar: This sweet ingredient brings moisture and a comforting caramel flavor to your truffles.
    • Granulated sugar: Balances the sweetness and gives your truffles that perfect sugary crunch.
    • Vanilla extract: A splash of this magical liquid enhances the overall flavor, making everything taste more decadent.
    • Heat-treated all-purpose flour: This ingredient forms the bulk of your dough. Heat treating ensures safety by eliminating any raw flour bacteria.
    • Salt: Just a pinch to enhance the sweetness and depth of all the flavors at play.
    • Milk: A tablespoon here can help bind the dough if it feels too crumbly, adding just the right texture.
    • Mini chocolate chips: These tiny morsels are folded into the dough, ensuring every bite is bursting with chocolatey goodness.
    • Semisweet chocolate chips: This creates the luscious coating for your truffles, adding a beautiful contrast to the cookie dough inside.
    • Coconut oil or vegetable shortening (optional): If you want your melted chocolate to have a nice glossy finish, a touch of this optional ingredient will do the trick!

    For exact measurements, check out the bottom of the article for a printer-friendly version!

    How to Make Chocolate Chip Cookie Dough Truffles

    Step 1: Prepare the Cookie Dough

    First, let’s create that dreamy cookie dough that’ll be the heart of our truffles. In a medium bowl, add the softened unsalted butter, brown sugar, and granulated sugar. Using a hand mixer or whisk, beat these ingredients together until the mixture is light and fluffy, resembling sweet clouds! It should take about 2-3 minutes. Now, introduce the vanilla extract and mix it well until everything is beautifully combined. This step is crucial—it’s where you’re building the foundation for the flavor. Just imagine the aroma filling your kitchen as you blend these delightful ingredients! This velvety dough will soon be transformed into a truffle that’s hard to resist.

    Step 2: Combine Dry Ingredients

    Next up, we’ll add the dry ingredients to our lovely butter-sugar mix. Carefully sift the heat-treated all-purpose flour and salt into the creamed mixture, a little at a time. It’s essential to avoid lumps in your dough, so take your time with this step. Gently fold the dry ingredients using a spatula or wooden spoon. As you mix, picture the dough slowly coming together—it should be thick and pliable. If it feels crumbly, don’t fret; add milk a tablespoon at a time until it binds perfectly. Trust me, this dough will soon become your favorite! You may find yourself sneaking a taste before moving on!

    Step 3: Add Chocolate Chips and Form Truffles

    Now, it’s time for the delightful chocolate chips! Gently fold in the mini chocolate chips, spreading them throughout the dough evenly. Each bite will pack a chocolate punch! Using a small cookie scoop or your hands, form bite-sized portions from the cookie dough. Roll them into perfect little balls—imagine creating tiny delectable treasures! Place these little gems onto a parchment-lined baking sheet. Don’t worry if they’re not perfect; each truffle has its character. The beauty of this step is watching them transform from cookie dough into truffle balls, each one promising a sweet surprise. Make sure to leave a bit of space between them, as they might expand a tad while chilling!

    Step 4: Firming Up the Truffles

    To ensure our truffles are easy to coat, we need to firm them up! Transfer the baking sheet filled with your dough balls into the freezer. Allow them to chill for about 15-20 minutes. This step is essential because it helps the dough hold its shape well when you dip them in chocolate later. Besides, this short wait will only build the anticipation for the sweet bliss about to arrive!

    Step 5: Melt the Chocolate

    While the truffles are chilling, let’s focus on the luxurious chocolate coating. In a microwave-safe bowl, combine the semisweet chocolate chips with a little coconut oil or vegetable shortening if you like. This optional step gives the chocolate a fabulous shine. Melt the mixture in the microwave, setting it for 30-second intervals. Make sure to stir it between these intervals to ensure it melts evenly. Alternatively, if you prefer, you can melt the chocolate using a double boiler over gentle simmering water. The goal here is smooth, creamy chocolate perfection!

    Step 6: Dip and Coat the Truffles

    It’s the moment we’ve all been waiting for! Retrieve the chilled dough balls from the freezer. Using a fork or toothpick, dip each truffle into the melted chocolate, ensuring it gets a nice, thick coat. Let any excess chocolate drip off before returning it to the parchment-lined sheet. If you’re feeling extra creative, now’s the time to sprinkle a few extra mini chocolate chips or colorful sprinkles on top! They’ll add a delightful pop of color and texture. This is where the magic happens, transforming simple truffles into irresistible delights that are as beautiful as they are tasty.

    Step 7: Let the Chocolate Set

    Once you’ve coated all the truffles, it’s time for them to cool! Allow the chocolate to set either at room temperature or pop them in the fridge for a faster result. This chocolate will harden beautifully, creating a satisfying shell around that delicious cookie dough center. Depending on your kitchen’s temperature, this could take up to 30 minutes. Once set, these Chocolate Chip Cookie Dough Truffles are ready for serving! Store any leftovers in an airtight container in the fridge but let’s be real—you might not have any left!

    Tips for Success

    • Make sure to heat-treat your flour for safety—this step is essential!
    • Use room temperature butter for easy creaming; it makes a world of difference.
    • Don’t rush the chilling process; firm truffles coat better.
    • Experiment with different chocolate for coatings to discover new flavor combinations.
    • Double the recipe for parties; these truffles disappear quickly!

    Equipment Needed for Chocolate Chip Cookie Dough Truffles

    • Mixing bowls: You’ll need at least two; a sturdy alternative is a large pot!
    • Hand mixer or whisk: A good old-fashioned whisk works wonders; just be ready to build those arm muscles!
    • Spoon or cookie scoop: A cookie scoop ensures even portions, but a spoon works just fine too.
    • Parchment paper: This keeps your truffles from sticking; wax paper is a helpful substitute.
    • Microwave-safe bowl: A regular bowl can do the job as long as you’re cautious while melting!

    Variations of Chocolate Chip Cookie Dough Truffles

    • Peanut Butter Swirl: Add a couple of tablespoons of creamy peanut butter to the dough for a nutty twist that pairs wonderfully with chocolate.
    • Nut-Free Option: Swap out mini chocolate chips with carob chips or dried fruit for a nut-free delight!
    • Vegan Variation: Replace the butter with coconut oil and use dairy-free chocolate chips to make these truffles vegan-friendly.
    • Gluten-Free Version: Substitute the heat-treated flour with a gluten-free blend to accommodate gluten sensitivities.
    • Minty Fresh: Add 1-2 drops of peppermint extract to the dough for a refreshing mint chocolate flavor!
    • Coconut Delight: Mix shredded coconut into the dough and use white chocolate for coating to create tropical truffles.

    Serving Suggestions for Chocolate Chip Cookie Dough Truffles

    • Pair these truffles with a glass of chilled milk or a steaming cup of coffee for a delightful treat.
    • Serve them on a colorful platter, garnished with fresh berries for a pop of color and freshness.
    • For a fun presentation, place truffles in mini cupcake liners for an adorable display.
    • Sprinkle some sea salt on top right before serving for a sweet and salty flavor explosion.
    • Try adding a drizzle of caramel sauce for an extra layer of indulgence!

    FAQs about Chocolate Chip Cookie Dough Truffles

    Can I eat these Chocolate Chip Cookie Dough Truffles raw?

    While these truffles are made with heat-treated flour, they are still best enjoyed after the chocolate coating sets. The combination of raw cookie dough flavor and rich chocolate creates a delightful experience!

    How do I store my Chocolate Chip Cookie Dough Truffles?

    Store these truffles in an airtight container in the fridge. They’ll stay fresh for up to a week, but I doubt they’ll last that long—they’re simply too delicious!

    Can I use different types of chocolate?

    Absolutely! Feel free to mix it up with milk chocolate, dark chocolate, or even white chocolate for coating. Each type brings its own unique flavor to the truffles.

    Can I make these truffles in advance?

    You can prepare the cookie dough and shape the truffles ahead of time. Just keep them in the fridge until you’re ready to coat them in chocolate. It’s a great way to save time!

    What if my dough is too crumbly?

    If your cookie dough feels crumbly, add a tablespoon of milk while mixing, one at a time, until you achieve a soft and pliable consistency. This will help bind everything together for perfect truffles!

    Final Thoughts on Chocolate Chip Cookie Dough Truffles

    Creating Chocolate Chip Cookie Dough Truffles is truly a culinary adventure filled with joy. These sweet little bites are not only a treat for your tastebuds but also an escape from the hustle and bustle of daily life. With every truffle you make, your kitchen fills with warmth and laughter, whether it’s for family gatherings or delicious self-indulgence. As you savor these dreamy treats, remember that life’s little pleasures are often found in simple recipes like this. Don’t be surprised if these truffles become a beloved staple in your dessert repertoire!


    Print

    clock clock iconcutlery cutlery iconflag flag iconfolder folder iconinstagram instagram iconpinterest pinterest iconfacebook facebook iconprint print iconsquares squares iconheart heart iconheart solid heart solid icon

    Description

    Delicious chocolate chip cookie dough truffles made with creamy cookie dough and coated in rich chocolate.


    • 1/2 cup unsalted butter, softened
    • 1/2 cup packed brown sugar
    • 1/4 cup granulated sugar
    • 2 teaspoons vanilla extract
    • 1 1/4 cups all-purpose flour, heat-treated
    • 1/4 teaspoon salt
    • 1 tablespoon milk, as needed
    • 1 cup mini chocolate chips
    • 1 1/2 cups semisweet chocolate chips
    • 1 tablespoon coconut oil or vegetable shortening, optional

    1. In a medium bowl, combine the softened unsalted butter, brown sugar, and granulated sugar. Using a hand mixer or whisk, beat until the mixture is light and fluffy. Add vanilla extract and mix until well combined.
    2. Gradually sift the heat-treated all-purpose flour and salt into the creamed mixture. Mix gently until a thick, pliable dough forms. If the dough appears crumbly, add milk one tablespoon at a time until the dough binds together.
    3. Gently fold mini chocolate chips into the dough, ensuring even distribution. Using a small cookie scoop or spoon, form bite-sized portions and roll into balls. Place the dough balls onto a parchment-lined baking sheet.
    4. Transfer the baking sheet with dough balls to the freezer for 15-20 minutes, allowing the truffles to firm up for easier coating.
    5. In a microwave-safe bowl, combine semisweet chocolate chips with coconut oil or vegetable shortening if desired. Microwave in 30-second intervals, stirring between each, until melted and smooth. Alternatively, melt in a double boiler over gently simmering water.
    6. Dip each chilled dough ball into the melted chocolate, using a fork or toothpick to ensure thorough coating. Let excess chocolate drip off and return to the parchment-lined sheet. Optionally, garnish with extra mini chocolate chips or sprinkles while the coating is wet.
    7. Allow truffles to set at room temperature or refrigerate until the chocolate hardens completely. Once set, serve or store as desired.

    Notes

    • Ensure to heat-treat the flour for safety.
    • Store truffles in an airtight container in the fridge for up to a week.
    • Use different types of chocolate for coating to vary flavors.
    • Prep Time: 30 minutes
    • Cook Time: 0 minutes
    • Category: Dessert
    • Method: No-Bake
    • Cuisine: American

    Nutrition

    • Serving Size: 1 truffle
    • Calories: 100
    • Sugar: 10g
    • Sodium: 50mg
    • Fat: 6g
    • Saturated Fat: 3g
    • Unsaturated Fat: 2g
    • Trans Fat: 0g
    • Carbohydrates: 10g
    • Fiber: 1g
    • Protein: 1g
    • Cholesterol: 10mg

    Sharing is caring!

  • Chicken Spinach Cheese Rollatini

    Chicken Spinach Cheese Rollatini


    Introduction to Chicken Spinach Cheese Rollatini

    It can be tough to get much time to prepare a great meal from scratch. That is if you’re a working mommy of two and generally, every other thing feels like searching for a needle in a haystack. Enter my Chicken Spinach Cheese Rollatini. It’s flavor-packed, this I promise, and it’s a crowd- pleaser. Seriously, who can roll tender chicken up with creamy, cheesy filling and not just love the taste of it but have their heart melted as well? It doesn’t have to be so hard to get dinner on the table during a busy week or plan the best meal for a special time. You just need this recipe up your sleeve.

    Why You’ll Love This Chicken Spinach Cheese Rollatini

    This Chicken Spinach Cheese Rollatini is perfect for my fellow busy moms and professionals. It’s not just a meal; it’s an experience! Quick to prepare and bursting with flavor, it’s the answer to those busy weeknights. The combination of juicy chicken and a rich, cheesy filling will have your family asking for seconds. Plus, it’s a fantastic way to sneak in some greens without anyone noticing!

    Ingredients for Chicken Spinach Cheese Rollatini

    Gathering the right ingredients is the first step to culinary magic! For this Chicken Spinach Cheese Rollatini, you’ll need:

    • Boneless, skinless chicken breasts: These serve as the tender canvas for your cheesy filling.
    • Salt and black pepper: These basic seasonings enhance the flavor of the chicken.
    • Italian seasoning: A delightful blend that brings warmth and complexity to every bite.
    • Olive oil: A flavorful touch to brush on top, helping that crumb coating turn golden.
    • Ricotta cheese: The creamy star of your filling, providing rich texture.
    • Shredded mozzarella cheese: Adds melt-in-your-mouth goodness that keeps things deliciously gooey.
    • Grated Parmesan cheese: The sharpness of Parmesan complements the other cheeses beautifully.
    • Fresh spinach: Whether fresh or frozen, spinach gives a pop of color and nutrients.
    • Garlic: A hint of garlic adds aromatic depth and savory charm.
    • Nutmeg (optional): A pinch takes the filling up a notch, enhancing the flavors.
    • Italian-style breadcrumbs: For that crunchy exterior that contrasts the creamy filling.
    • Beaten eggs: Helps the breadcrumbs stick and creates a perfect outer layer.
    • Flour: This simple step assists with the dredging process, ensuring your rollatini stays intact.
    • Marinara sauce (optional): A lovely topping that adds tang and richness to each roll.
    • Fresh basil or parsley (optional): A sprightly garnish to elevate presentation.

    Don’t worry; if you’re looking for precise measurements, check the bottom of the article for those details. You can even print them out for easy access!

    How to Make Chicken Spinach Cheese Rollatini

    Preparing the Chicken

    First, let’s tackle the chicken. Lay the boneless, skinless chicken breasts between two sheets of parchment paper. Using a meat mallet, pound them evenly to about ¼ inch thick. This step not only tenderizes the meat but helps it cook uniformly, ensuring juicy bites. Now, season both sides generously with salt, black pepper, and a sprinkle of Italian seasoning. These simple flavors set a solid foundation for your rollatini.

    Making the Filling

    Now for the star of the show—the filling! In a medium bowl, combine the ricotta, shredded mozzarella, and grated Parmesan. Stir in the sautéed spinach, minced garlic, and a dash of nutmeg if you’re feeling adventurous. Mix everything until it’s creamy, vibrant, and inviting. The filling should be thick yet spreadable, bursting with flavors that promise to complement the tender chicken. Take a moment to taste; it’s a sneak peek of the deliciousness that awaits!

    Assembling the Rollatini

    Time for some hands-on fun! Place a generous spoonful of the creamy filling (about 2-3 tablespoons) in the center of each chicken breast. Gently roll the chicken around the filling, tucking in the sides as you go to avoid any leaks. Secure each roll with toothpicks or kitchen twine to keep them cozy. Don’t worry if they aren’t perfect; they’re going to taste amazing, no matter their looks! Place them seam-side down in a greased baking dish, ready for the next tasty step.

    Dredging and Baking

    Let’s make those rollatini crispy! Set up a dredging station with three bowls: one for flour, another for beaten eggs, and a third for a mix of breadcrumbs and Parmesan. First, roll each chicken piece in flour to help the egg stick, then dip it into the beaten egg, followed by the breadcrumb mixture. Lay them back in the baking dish. Preheat your oven to 375°F (190°C) and lightly brush the tops with olive oil. Bake for 25-30 minutes until golden brown and cooked through. Your kitchen will smell heavenly!

    Tips for Success

    • Make sure to pound the chicken evenly for uniform cooking.
    • Use fresh spinach when possible for a brighter flavor, but frozen works too—just drain it well.
    • Don’t skimp on seasoning; it’s key to elevating the dish’s taste.
    • For added crispiness, broil the rollatini for a few minutes after baking.
    • Let the rollatini rest for a couple of minutes before serving to enhance flavors.

    Equipment Needed

    • Meat mallet or rolling pin: To pound the chicken evenly.
    • Parchment paper: Keeps your workspace clean and prevents sticking.
    • Medium bowl: For mixing the cheesy filling.
    • Baking dish: A reliable vessel for cooking and serving.
    • Three bowls: Essential for setting up your dredging station.

    Variations

    • Vegetarian Option: Substitute chicken with large Portobello mushrooms and keep the delicious spinach and cheese filling.
    • Gluten-Free: Use gluten-free breadcrumbs for those avoiding gluten; it’s just as tasty!
    • Spicy Kick: Add a pinch of red pepper flakes or diced jalapeños to the filling for a spicy twist.
    • Herb Infusion: Mix in fresh herbs like basil or oregano into the filling for an aromatic boost.
    • Cheesy Delight: Experiment with additional cheeses, like feta or goat cheese, for a rich flavor profile.

    Serving Suggestions

    • Pair your Chicken Spinach Cheese Rollatini with a crisp garden salad for a refreshing balance.
    • Serve with garlic bread to soak up any leftover marinara sauce—yum!
    • A glass of chilled white wine, like Sauvignon Blanc, complements the dish beautifully.
    • Garnish with fresh basil or parsley for a pop of color and flavor.

    FAQs about Chicken Spinach Cheese Rollatini

    As a fellow food lover, I often find myself wondering about the nitty-gritty details of a recipe. Here are some common questions I’ve encountered about Chicken Spinach Cheese Rollatini and my thoughts on them!

    Can I prepare Chicken Spinach Cheese Rollatini ahead of time?
    Absolutely! You can assemble the rollatini and store them in the fridge for up to 24 hours before baking. Just make sure to cover them tightly to keep them fresh.

    What can I substitute for ricotta cheese?
    If you don’t have ricotta on hand, a mix of cream cheese and Greek yogurt works nicely. It’ll give you that creamy texture without sacrificing flavor.

    Can I freeze Chicken Spinach Cheese Rollatini?
    Yes! Once baked and cooled, you can freeze the rollatini. Just wrap each one tightly in plastic wrap before placing them in a freezer bag. When you’re ready, thaw in the fridge and reheat in the oven.

    What side dishes go well with Chicken Spinach Cheese Rollatini?
    This dish pairs beautifully with a simple pasta salad, roasted vegetables, or a classic Caesar salad. Just imagine that juicy rollatini sitting alongside these options!

    Are there low-carb options for Chicken Spinach Cheese Rollatini?
    Definitely! You can use zucchini slices or eggplant instead of chicken for a tasty low-carb alternative. Just layer them with the filling and bake!

    Final Thoughts

    Cooking my Chicken Spinach Cheese Rollatini is not just about putting dinner on the table; it’s about creating moments of joy with loved ones. The aroma wafting through your kitchen will draw everyone in, eager for a taste. Each bite is a warm hug of flavors, blending creaminess with the satisfaction of a well-cooked meal. Plus, it’s a rewarding experience to whip up something that looks and tastes gourmet, right at home. So, gather your family around and share those delicious rollatini with laughter and stories, making mealtime a cherished memory.


    Print

    clock clock iconcutlery cutlery iconflag flag iconfolder folder iconinstagram instagram iconpinterest pinterest iconfacebook facebook iconprint print iconsquares squares iconheart heart iconheart solid heart solid icon

    Description

    Chicken Spinach Cheese Rollatini is a delicious dish that features rolled chicken breast stuffed with a creamy spinach and cheese filling, coated with breadcrumbs, and baked to perfection.


    • 4 boneless, skinless chicken breasts, pounded to ¼ inch thick
    • ½ tsp salt
    • ½ tsp black pepper
    • 1 tsp Italian seasoning
    • 1 tbsp olive oil, for brushing
    • 1 cup ricotta cheese
    • ½ cup shredded mozzarella cheese
    • ¼ cup grated Parmesan cheese
    • 1 cup fresh spinach, chopped and sautéed or frozen, thawed and drained
    • 1 clove garlic, minced
    • ¼ tsp nutmeg, optional
    • 1 cup Italian-style breadcrumbs
    • ½ cup grated Parmesan cheese
    • 2 eggs, beaten
    • ¼ cup flour, for dredging
    • 1 cup marinara sauce (optional)
    • ½ cup shredded mozzarella (optional)
    • Fresh basil or parsley, chopped, for garnish

    1. Lay chicken breasts between two sheets of parchment paper. Pound evenly with a meat mallet until about ¼ inch thick. Season both sides with salt, pepper, and Italian seasoning.
    2. In a medium bowl, mix together ricotta, mozzarella, Parmesan, sautéed spinach, garlic, and nutmeg. Stir until well combined and creamy.
    3. Spoon 2–3 tablespoons of filling onto the center of each chicken breast. Roll tightly, tucking in the sides if possible. Secure with toothpicks or tie with kitchen twine.
    4. Set up a dredging station with flour in one bowl, beaten eggs in another, and a mix of breadcrumbs and Parmesan in a third. Dredge each roll in flour, dip in egg, then coat with the breadcrumb mixture. Place seam-side down in a greased baking dish.
    5. Preheat your oven to 375°F (190°C). Lightly brush each roll with olive oil. Bake for 25–30 minutes, until the chicken is cooked through and the coating is golden brown.
    6. Spoon marinara sauce over each rollatini and top with shredded mozzarella. Return to the oven for an additional 5–7 minutes, or until the cheese is melted and bubbly. Garnish with fresh basil or parsley before serving.

    Notes

    • Using fresh spinach gives a better flavor, but frozen works in a pinch.
    • For a healthier option, you can bake the rollatini without frying.
    • Prep Time: 20 minutes
    • Cook Time: 35-40 minutes
    • Category: Main Course
    • Method: Baking
    • Cuisine: Italian

    Nutrition

    • Serving Size: 1 rollatini
    • Calories: 450
    • Sugar: 2g
    • Sodium: 800mg
    • Fat: 20g
    • Saturated Fat: 8g
    • Unsaturated Fat: 10g
    • Trans Fat: 0g
    • Carbohydrates: 30g
    • Fiber: 2g
    • Protein: 35g
    • Cholesterol: 120mg

    Sharing is caring!

  • S’mores Cracker Cookies

    S’mores Cracker Cookies


    Introduction to S’mores Cracker Cookies

    Does time always seem to be slipping through your fingers, especially when you find yourself in the kitchen? Yup, I thought so! Which is why I’m over the moon to share this ultracrisp and easy S’mores Cracker Cookies recipe that will bring you all the childhood memories of s’mores but in a no-bake bliss. Well, these will be perfect for all you busy mommies – they’re cute and quick to make. So, whether you have people popping over or just need something to brighten ‘dulling’ days, these S’mores Cracker Cookies will be your new favorite indulgence!

    Why You’ll Love This S’mores Cracker Cookies

    These S’mores Cracker Cookies are a magical mix of flavors and textures. They come together in just 30 minutes, making them the ultimate quick treat! Each cookie sandwich is a delightful explosion of chocolatey goodness, sweet marshmallow crème, and crispy crackers. Plus, you can customize them with different toppings, ensuring every bite feels like a sweet adventure. Perfect for charming your family or impressing guests with little effort!

    Ingredients for S’mores Cracker Cookies

    Gathering the right ingredients is half the fun! For these S’mores Cracker Cookies, you’ll need:

    • Ritz crackers: The crispy, buttery base that adds crunch and savory flavor. They’re a fantastic complement to the sweetness of the filling.
    • Marshmallow crème: This fluffy delight acts as the “glue” in our cookie sandwich, providing that luscious, ooey-gooey texture that we all love.
    • Chocolate almond bark: This is your magic melting chocolate! It coats the cookies in rich, creamy goodness and is super easy to use. You can also substitute it with dark or milk chocolate if you’re feeling adventurous.
    • Graham crackers (crushed): Adding a sprinkle of these will give your cookies an extra crunchy texture and a classic s’mores flavor. The more crunch, the better!
    • Marshmallow bits: These are optional, but they add charming little pops of flavor and cuteness. Perfect for elevating your cookie game!
    • Mini chocolate chips: Another optional ingredient, but who can resist the allure of extra chocolate? They bring a fun twist to each bite.

    Don’t worry if you’re not sure where to get everything; your local grocery store should have all these ingredients. For exact quantities, scroll down to the end of the article; you’ll find everything you need for printing!

    How to Make S’mores Cracker Cookies

    Getting started on these S’mores Cracker Cookies is a breeze! I’ll walk you through each step. Soon, you’ll have these little slices of heaven ready to share—or not! Who could blame you for wanting to keep them all to yourself?

    Step 1: Melt the Chocolate

    First, grab a microwave-safe bowl and break the chocolate almond bark into smaller pieces. This helps it melt evenly. Microwave it in 40-second intervals. Make sure to stir in between until it’s completely smooth and melted. Just keep an eye on it; we don’t want any burnt chocolate ruining our dreamy treat!

    Step 2: Assemble the Cookie Sandwiches

    Now, line up those Ritz crackers on a long sheet of wax paper. They are ready for their marshmallow crème filling! Place a small dollop of marshmallow crème in the center of half the crackers. Then, place another cracker on top, pressing them together gently. This seals in that sweet, gooey goodness. Make sure the marshmallow crème is evenly distributed; nobody likes a half-filled sandwich!

    Step 3: Dip in Chocolate

    Time for the fun part—dipping! Using a fork or candy tongs, carefully grab one cracker sandwich and dip it into the melted chocolate. Be sure to cover it completely. Afterward, gently tap the fork on the edge of the bowl to shake off any excess chocolate. We want just the right amount coating our cookies without making a mess!

    Step 4: Add Toppings

    While the chocolate is still warm, sprinkle on your preferred toppings. Think graham cracker crumbles for that classic taste or some mini chocolate chips for extra sweetness. If you have marshmallow bits, toss those on, too! This is your chance to get creative and make the cookies as delightful as possible.

    Step 5: Set and Store

    Now comes the hardest part—waiting! Let the cookie sandwiches set on the wax paper until the chocolate hardens. This will take some time, but it’s worth it! Once the chocolate is firm, store the cookies in an airtight container. They’ll stay fresh for about 5 to 7 days—if they last that long!

    Tips for Success

    • Ensure your chocolate is melted completely for a smooth coat.
    • Use a fork to dip the sandwiches; it keeps your fingers clean!
    • Let the chocolate cool slightly before adding toppings for better adhesion.
    • Experiment with toppings to suit your family’s taste preferences.
    • Keep an eye on the time while melting chocolate; patience is key!

    Equipment Needed for S’mores Cracker Cookies

    • Microwave-safe bowl: Essential for melting chocolate. A glass bowl works great too!
    • Fork or candy tongs: Helps with dipping without messy fingers. A slotted spoon can be a handy alternative!
    • Wax paper: Perfect for setting your cookies. Parchment paper will do the trick as well!
    • Measuring cup: Useful for measuring toppings if you want to be precise.

    Variations of S’mores Cracker Cookies

    • Chocolate Chip Cookie Base: Swap out Ritz crackers for chocolate chip cookies for a gooey, indulgent twist on the classic.
    • Peanut Butter Delight: Use peanut butter crackers instead of Ritz for a delightful sweet-and-salty flavor combination.
    • Dark Chocolate Drizzle: Try using dark chocolate almond bark for a richer taste. It pairs wonderfully with the sweetness of marshmallow crème.
    • Fruit Toppings: Add sliced strawberries or bananas on top of the marshmallow crème for a fresh, fruity take!
    • Minty Fresh: Incorporate peppermint extract into the chocolate for a seasonal minty flavor, perfect for the holidays!
    • Nut-Free Version: Stick to simple toppings like sprinkles or coconut flakes to keep it safe for nut allergies.

    Serving Suggestions for S’mores Cracker Cookies

    • Pair these cookies with a cold glass of milk for a delightful classic combo.
    • Create a fun dessert platter by arranging them with fresh fruit like strawberries or apple slices.
    • Serve them at parties alongside a hot cup of cocoa for a cozy treat.
    • For a festive touch, display them on a decorative plate with colorful napkins!

    FAQs about S’mores Cracker Cookies

    Got questions? I’ve got answers! Here are some of the most common queries about S’mores Cracker Cookies:

    Can I use other types of crackers?
    Absolutely! While Ritz crackers add a buttery crunch, you can try graham crackers or even flavored ones like peanut butter for a unique twist. It’s all about your taste preferences!

    How should I store these cookies for freshness?
    Once your S’mores Cracker Cookies are fully set, keep them in an airtight container at room temperature. They’ll stay fresh for about 5 to 7 days—if you can resist eating them all right away!

    Can I make these cookies ahead of time?
    Definitely! These cookies are perfect for meal prepping. You can make them a day or two in advance, just store them properly, and they’ll be ready to enjoy when you are!

    What can I do with leftover chocolate?
    Don’t waste any chocolate! You can drizzle it over fruits, pretzels, or even popcorn for a sweet treat. It’s an excellent way to indulge a little more!

    Are there any dietary alternatives for this recipe?
    Certainly! You can use dairy-free chocolate and gluten-free crackers to make these S’mores Cracker Cookies suitable for a variety of diets. Check labels to confirm they meet your needs!

    Final Thoughts

    Creating S’mores Cracker Cookies is more than just a recipe; it’s an opportunity to spark joy in your kitchen. The delightful blend of flavors and textures comes together effortlessly, making every bite feel like a little celebration. From the first step of melting the chocolate to the moment you share them with loved ones, these cookies have a magical way of brightening up a busy day. So gather your family, make some memories, and indulge in these sweet treats. Trust me, once you try them, you’ll wonder how you ever lived without these charming delights!


    Print

    clock clock iconcutlery cutlery iconflag flag iconfolder folder iconinstagram instagram iconpinterest pinterest iconfacebook facebook iconprint print iconsquares squares iconheart heart iconheart solid heart solid icon

    Description

    Delightful S’mores Cracker Cookies combining Ritz crackers, marshmallow crème, and chocolate for a sweet treat.


    • 48 Ritz crackers
    • 7 oz. marshmallow crème
    • 24 oz. chocolate almond bark
    • 1 cup graham crackers, crushed
    • marshmallow bits, optional
    • mini chocolate chips, optional

    1. In a microwave-safe bowl, melt the chocolate almond bark, in 40-second intervals, until completely melted.
    2. Place the Ritz crackers on a long sheet of wax paper.
    3. Add a small dollop of marshmallow crème to the center of half the crackers. Place another cracker on top of the marshmallow crème. Press crackers together, ensuring the marshmallow crème has been distributed evenly.
    4. Use a fork or candy tongs to grab a cracker sandwich and dip it into melted chocolate. Carefully tap the fork on the side of the bowl, removing extra chocolate from the crackers.
    5. Place the dipped cracker back onto the wax paper. Immediately sprinkle graham cracker crumbles, tiny marshmallows, and/or mini chocolate chips on top of the cookies, if desired.
    6. Allow the crackers to set on the wax paper until the chocolate rehardens.
    7. Store in an air-tight container for up to 5 to 7 days.

    Notes

    • Ensure the chocolate is completely melted for a smooth coating.
    • Using a fork helps avoid messy fingers when dipping.
    • Experiment with different toppings for variety.
    • Prep Time: 20 minutes
    • Cook Time: 10 minutes
    • Category: Dessert
    • Method: No-Bake
    • Cuisine: American

    Nutrition

    • Serving Size: 1 cookie sandwich
    • Calories: 160
    • Sugar: 10g
    • Sodium: 150mg
    • Fat: 8g
    • Saturated Fat: 3g
    • Unsaturated Fat: 5g
    • Trans Fat: 0g
    • Carbohydrates: 22g
    • Fiber: 1g
    • Protein: 1g
    • Cholesterol: 0mg

    Sharing is caring!

  • Air Fryer Garlic Naan Bread

    Air Fryer Garlic Naan Bread


    Introduction to Air Fryer Garlic Naan Bread

    Welcome to a tasty journey with your kitchen…” ― Levine, “Air Fryer Garlic Naan (Circle of Moms)” A delicious, convenient and fast home-cooked food must not be a pain and sacrifice to prepare. “That’s why I’m so excited to share my recipe for Air Fryer Garlic Naan Bread,” Foley writes. One of the easiest, most loved snacks around the world is hot garlic naan. Infused with warm, delicious garlic flavors and tender texture of naan—done in a fraction of the time, it’s perfect for those busy evenings when you want to impress your family or just spoil yourself with a great flavor experience. “Trust me, this naan is going to be your new favorite quick-fix!”

    Why You’ll Love This Air Fryer Garlic Naan Bread

    This Air Fryer Garlic Naan Bread is a game changer for busy folks like us. It’s super easy to whip up, taking just over an hour from start to finish. The air fryer cooks it to perfection, giving you that delightful golden-brown crust without the fuss of a traditional oven. Plus, the aroma of garlic wafting through your home will have everyone gathering around the table, eager for a taste!

    Ingredients for Air Fryer Garlic Naan Bread

    Gathering your ingredients is like setting the stage for a culinary performance. For this delicious Air Fryer Garlic Naan Bread, you’ll need a few staples and some wonderful flavors. Here’s what you’ll require:

    • Active dry yeast: This is the magic that makes your naan rise and become perfectly fluffy. Look for a good quality brand for best results.
    • Warm water: It’s crucial for activating the yeast. Just warm enough to feel comfortable, not too hot!
    • Granulated sugar: This helps ignite the yeast, adding a touch of sweetness to balance the savory garlic.
    • Whole milk: This adds richness to the dough, contributing to that soft, pillowy texture we all love.
    • Plain Greek yogurt: A secret ingredient that enhances flavor and keeps the naan moist. Substitutes like regular yogurt can work too.
    • Neutral oil: I use vegetable or canola oil, which keeps the naan from sticking and aids in the cooking process.
    • Minced garlic: The star of the show! Use freshly minced garlic for a pungent punch or garlic powder as a substitute in a pinch.
    • All-purpose flour: This is the backbone of your naan, creating that wonderful bread structure. Feel free to experiment with whole wheat flour for a healthier twist.
    • Baking powder: This adds extra lift to the dough, ensuring it’s not too dense.
    • Fine salt: A little salt enhances all the flavors, making everything pop.
    • Unsalted butter: Essential for that delicious garlic butter coating. You could swap with olive oil for a lighter option.
    • Chopped parsley: This adds a fresh and vibrant finish to your garlic naan. Don’t have any? Chives work just as well!

    For exact quantities, don’t forget to check the bottom of the article where all the details are available for printing!

    How to Make Air Fryer Garlic Naan Bread

    Step 1: Prepare the Yeast Mixture

    Activating the yeast is the critical first step to a successful Air Fryer Garlic Naan Bread. Start by combining the warm water, granulated sugar, and active dry yeast in a mixing bowl. Stir gently and let it sit for about 10 minutes. This waiting period allows the yeast to bubble up and become foamy, proving it’s alive and ready to work its magic. The foamy texture indicates the yeast is activated, and it’s the foundation for that fluffy naan we crave!

    Step 2: Combine Dough Ingredients

    Once your yeast is bubbling with excitement, it’s time to combine the other ingredients. Add the all-purpose flour, whole milk, plain Greek yogurt, minced garlic, neutral oil, baking powder, and fine salt to the yeast mixture. With a dough hook or a sturdy spatula, mix on medium speed until everything is combined and a soft dough starts forming. Don’t worry if it’s a bit sticky! The goal is a smooth, elastic dough that will soon become your naan.

    Step 3: Knead and Rise the Dough

    Now comes the hands-on part—kneading! Turn your dough out onto a lightly floured surface and knead it for about three minutes. This process develops the gluten, giving the naan its delightful chewiness. Once kneaded, place your dough in an oiled bowl and cover it with plastic wrap. Let it rise in a warm spot for about an hour or until it doubles in size. A good rise can be the difference between flat and fluffy naan!

    Step 4: Shape the Naan

    After the dough has risen beautifully, it’s time to shape it into naan. Gently punch down the dough to release the air before dividing it into 10 equal portions. Roll each piece into a ball and then flatten these balls into discs that will fit either one or two at a time in your air fryer basket. Aim for a thickness of about half an inch; this way, they won’t overcook in the air fryer and will maintain that soft interior we all love.

    Step 5: Air Fry the Naan

    Prepping for the air fryer is the next exciting step! Preheat your air fryer to 188°C (370°F), then place one or two naan discs in the basket. Lightly spray them with oil to enhance browning. Cook for six minutes, flip them over, and continue cooking for an additional three minutes until you see that lovely golden color. Keep an eye on them; air fryer times can vary, and you want that perfect balance of crispy outside and soft inside!

    Step 6: Garlic Butter Coating

    Garlic butter is what takes this naan to an entirely new level. In a heatproof bowl, melt unsalted butter and stir in the remaining minced garlic and finely chopped parsley. This mixture not only adds a delicious aroma but also a fantastic flavor. Once you pull the naan from the air fryer, brush it generously with this buttery goodness while it’s still warm. Urge your family to dig in immediately—the warm naan and garlic butter combo is the ultimate treat!

    Tips for Success

    • Use fresh ingredients, especially garlic, for the best flavor.
    • Always check the yeast for foaming to ensure it’s active.
    • Don’t rush the rising process; patience pays off with fluffier naan.
    • Adjust cooking time based on your air fryer model; all models vary.
    • Serve immediately for the best taste and texture.

    Equipment Needed

    • Mixing bowls: Essential for combining ingredients; glass or stainless steel works well.
    • Dough hook or spatula: A dough hook makes mixing easier, but a sturdy spatula will do.
    • Air fryer: The star of the show! An oven works if you don’t have one.
    • Rolling pin: A simple tool for flattening the dough; a wine bottle can substitute!

    Variations of Air Fryer Garlic Naan Bread

    • Cheesy Naan: Add shredded mozzarella or cheddar cheese to the dough for a gooey, cheesy twist. You can even sprinkle some cheese on top before air frying!
    • Herbed Naan: Experiment with herbs! Try adding dried herbs like oregano, thyme, or rosemary to the dough for an aromatic flavor enhancement.
    • Spicy Naan: Mix in finely chopped jalapeños or crushed red pepper flakes for a spicy kick that pairs wonderfully with dips and curries.
    • Whole Wheat Naan: Swap out half or all of the all-purpose flour with whole wheat flour for a more nutritious option that maintains great flavor.
    • Garlic and Coriander: Replace parsley with fresh chopped coriander to give your naan a different herbal flair.

    Serving Suggestions for Air Fryer Garlic Naan Bread

    • Pair it with your favorite curry or spicy chickpeas for a complete meal.
    • Serve alongside a cooling yogurt sauce or mint chutney for dipping.
    • Enjoy it as a side with soups, stews, or grilled meats.
    • Present it on a wooden board with fresh herbs for a rustic touch.

    FAQs about Air Fryer Garlic Naan Bread

    Can I use instant yeast instead of active dry yeast? Absolutely! Simply skip the activation step and mix the instant yeast directly with the dry ingredients. Your Air Fryer Garlic Naan Bread will still turn out delightful!

    How do I store leftover naan? Store leftover naan in an airtight container at room temperature for up to two days. For longer storage, wrap them in plastic and freeze. Reheat them in the air fryer for a few minutes before serving!

    Can I make the naan gluten-free? Yes! Substitute all-purpose flour with a gluten-free flour blend. Just be cautious about the absorption; you might need to adjust the liquid slightly.

    What can I pair the garlic naan with? Air Fryer Garlic Naan Bread shines when paired with flavorful curries, soups, or even as a wrap for grilled veggies! Think of it as an edible hug for your favorite dishes.

    Can I add other flavors to the naan dough? Definitely! Feel free to get creative. You can mix in herbs, spices, or even a bit of cheese to elevate your naan experience.

    Final Thoughts

    Cooking can often feel like a race against time, but my recipe for Air Fryer Garlic Naan Bread will bring a warm pause to those hectic days. The joy of pulling freshly baked naan from the air fryer fills your kitchen with irresistible aromas, instantly transforming your meal into a feast. Whether it’s a weeknight dinner or a special gathering, this naan adds a delightful touch of warmth and flavor to any table. Trust me, once you start making this garlic naan, you might just find it hard to stop sharing it with loved ones!


    Print

    clock clock iconcutlery cutlery iconflag flag iconfolder folder iconinstagram instagram iconpinterest pinterest iconfacebook facebook iconprint print iconsquares squares iconheart heart iconheart solid heart solid icon

    Description

    Air Fryer Garlic Naan Bread is a quick and delicious treat that combines the classic flavors of garlic with a traditional Indian bread, cooked to perfection in an air fryer.


    • 1.5 teaspoons active dry yeast
    • 60 millilitres warm water
    • 2 teaspoons granulated sugar
    • 180 millilitres whole milk
    • 180 millilitres plain Greek yogurt
    • 60 millilitres neutral oil
    • 2 tablespoons minced garlic
    • 500 grams all-purpose flour
    • 1 teaspoon baking powder
    • 1.5 teaspoons fine salt
    • 2 tablespoons minced garlic
    • 70 grams unsalted butter
    • 2 teaspoons finely chopped parsley

    1. Combine active dry yeast, sugar, and warm water in a mixing bowl. Allow to rest for 10 minutes until foamy.
    2. Add flour, milk, yogurt, minced garlic, oil, baking powder, and salt to the yeast mixture. Using a dough hook, mix on medium speed until a smooth dough ball forms.
    3. Transfer dough onto a lightly floured surface and knead by hand for 3 minutes. Place in a lightly oiled bowl, cover with plastic wrap, and let it rise for 1 hour or until doubled in size.
    4. Turn out dough onto a floured surface. Divide into 10 equal portions and shape each into a ball. Flatten each ball into a disc to fit your air fryer basket.
    5. Place one or two flattened discs in the air fryer basket, spray lightly with oil, and cook at 188°C for 6 minutes. Flip and continue cooking for an additional 3 minutes until golden.
    6. While naan cooks, melt butter in a heatproof bowl. Stir in minced garlic and parsley.
    7. Brush cooked naan immediately with the garlic butter mixture before serving.

    Notes

    • Make sure the water is warm, not hot, to activate the yeast properly.
    • You can add more or less garlic to taste.
    • Store leftover naan in an airtight container for up to 2 days.
    • Prep Time: 20 minutes
    • Cook Time: 15 minutes
    • Category: Bread
    • Method: Air Fryer
    • Cuisine: Indian

    Nutrition

    • Serving Size: 1 piece
    • Calories: 160
    • Sugar: 2g
    • Sodium: 200mg
    • Fat: 7g
    • Saturated Fat: 4g
    • Unsaturated Fat: 2g
    • Trans Fat: 0g
    • Carbohydrates: 20g
    • Fiber: 1g
    • Protein: 4g
    • Cholesterol: 15mg

    Sharing is caring!

  • Cheese Herb Fatayer Bites

    Cheese Herb Fatayer Bites


    Introduction to Cheese Herb Fatayer Bites

    Cheese Herb Fatayer Bites. The flash of time running in and out of our busy lives. Cheese Herb Fatayer Bites are my spick and span solution around the table. Three children? I’m a mom in motion— I get it. And, after a long workday, it’s hard to prepare something delightful that offers solace These bites take no time at all to make, yet look impressive and taste incredible – perfect for serving at a gathering or enjoyed as a ‘quick’ snack, that’s really for those fugitive moments when comfort food is all you’re craving. Trust me, these cheeky little cheese filled pockets of joy will have your heart from the very first bite.

    Why You’ll Love This Cheese Herb Fatayer Bites

    There’s something magical about the simplicity of Cheese Herb Fatayer Bites. They come together in no time, making them ideal for busy evenings or unexpected guests. Just imagine the lovely aroma filling your kitchen as they bake! Plus, the cheesy, herbaceous filling is a crowd-pleaser, satisfying both kids and adults alike. Trust me, once you serve these bites, they’ll be a hit, and you’ll feel like a culinary superstar!

    Ingredients for Cheese Herb Fatayer Bites

    Gathering the right ingredients is the first step toward creating your Cheese Herb Fatayer Bites. Here’s what you’ll need, along with a few tips:

    • All-purpose flour: The backbone of your dough, giving it a light and fluffy texture. You can also use whole wheat flour for a heartier bite.
    • Instant yeast: This magical ingredient helps the dough rise quickly, making your preparation time shorter. Ensure it’s fresh for the best results.
    • Granulated sugar: Just a touch, to feed the yeast and enhance the dough’s flavor subtly.
    • Fine salt: Essential for flavor, balance the savory notes of cheese and herbs.
    • Olive oil: Adds richness to the dough while keeping it tender. You could substitute with melted butter or vegetable oil if desired.
    • Warm water: The warmer, the better—just not too hot! It activates the yeast, creating that delightful rise.
    • Feta cheese: Brings a salty, tangy flavor, which pairs beautifully with other cheeses in the filling.
    • Mozzarella cheese: Melts wonderfully, providing that gooey, cheesy goodness we all adore.
    • Fresh parsley: A must for adding a fresh touch to your filling; swap it out for dill for a different flavor profile!
    • Fresh mint: Adds a unique zest; it’s an excellent complement to the cheese. Feel free to omit if you’re not a fan.
    • Lemon zest: Just a hint of brightness that lifts the flavors. You can replace it with lime zest for a twist.
    • Salt and black pepper: Essential for seasoning; adjust to your personal taste.
    • Egg: Used for the egg wash, giving your pastries a beautiful golden finish.
    • Water: Just a splash to mix with the egg for brushing.

    For those exact measurements, simply scroll down to the bottom of the article for a printable version of the recipe!

    How to Make Cheese Herb Fatayer Bites

    Creating your Cheese Herb Fatayer Bites is a simple yet gratifying journey! Gather your ingredients, roll up your sleeves, and let’s bring these delicious pastries to life step by step.

    Step 1: Prepare the Yeast Mixture

    Start by taking your warm water and adding a teaspoon of sugar along with the instant yeast. Stir gently and let it sit for about 5 to 10 minutes. You’ll know it’s ready when it starts to foam like a bubbly bath! This indicates that your yeast is lively and will give your dough that lovely rise.

    Step 2: Make the Dough

    In a large mixing bowl, combine the all-purpose flour and fine salt. Make a well in the center and pour in the activated yeast mixture along with the olive oil. Stir until a rough dough forms. It should feel slightly tacky but manageable. If it’s too sticky, don’t be afraid to sprinkle a little more flour. We’re aiming for a soft, pliable dough here!

    Step 3: Knead the Dough

    Transfer your dough onto a lightly floured surface. Knead for about 5 to 7 minutes. You’ll know it’s ready when it’s smooth, elastic, and springs back when poked. It’s like giving your dough a little workout; enjoy the process and embrace that glorious doughy texture in your hands!

    Step 4: Let the Dough Rise

    Place your kneaded dough in an oiled bowl, cover it with a clean towel, and let it rise for 30 minutes. You want it to double in size! A good hint: if you gently press a finger into the dough, it should leave a slight indentation. This means it’s ready for the next step!

    Step 5: Prepare the Cheese Filling

    In a separate bowl, blend together your crumbled feta cheese, shredded mozzarella, chopped parsley, chopped mint, and lemon zest. Mix thoroughly, ensuring every bite carries that delightful balance of flavors. Season with a pinch of salt and pepper, adjusting to your taste. This filling is where the magic happens!

    Step 6: Preheat Oven and Prepare Baking Sheet

    Preheat your oven to 375°F (190°C) while you prep your baking sheet with parchment paper. Preheating is crucial! It ensures your Cheese Herb Fatayer Bites bake evenly and develop a beautiful golden crust.

    Step 7: Shape the Bites

    After the dough has risen, punch it down gently. Divide it into 16 equal pieces and roll each piece into a ball. On a floured surface, roll each ball into a 4-inch circle. Place a tablespoon of your cheese filling in the center, then fold the edges over to create a triangle shape. Make sure to pinch the seams tightly; we don’t want any cheesy escapes happening!

    Step 8: Brush and Bake

    Mix the beaten egg with a tablespoon of water to create an egg wash. Brush the tops of each fatayer with this mixture for a lovely, golden finish. Place them on your prepared baking sheet and pop them in the oven for 12 to 15 minutes, until they are golden brown and crisp. The aroma wafting through your kitchen will be irresistible!

    Tips for Success

    • Always check your yeast’s expiration date for the best results.
    • Use warm, not hot, water to avoid killing the yeast.
    • Don’t rush the rising process; it greatly affects texture.
    • Experiment with different herbs to find your favorite flavor combination.
    • If the dough feels too dry, add a little water; if too wet, sprinkle in more flour.

    Equipment Needed

    • Mixing bowls: A large bowl for dough and a smaller one for the filling.
    • Rolling pin: Use a wine bottle if you don’t have one handy!
    • Parchment paper: Helps with easy cleanup; aluminum foil works too.
    • Baking sheet: A standard sheet pan will do the trick.
    • Whisk: Essential for mixing; a fork can be a quick substitute.

    Variations

    • Spinach and Feta: Swap out half of the cheese for fresh sautéed spinach for a lighter, veggie-packed option.
    • Spicy Twist: Add a pinch of red pepper flakes to the cheese filling for a little kick that older kids (and adults) will love.
    • Gluten-Free: Use a gluten-free flour blend instead of all-purpose flour to make these treats suitable for gluten-sensitive friends and family.
    • Herb-Infused: Experiment with different herbs, like thyme or basil, to tailor each batch to your family’s taste preferences.
    • Meat Lovers: Mix in some cooked, crumbled sausage or ground lamb in the cheese filling for a heartier version.

    Serving Suggestions

    • Fresh Salad: Pair with a simple arugula or mixed greens salad for a refreshing contrast.
    • Dipping Sauces: Serve alongside tzatziki or spicy harissa for extra deliciousness.
    • Presentation: Arrange on a beautiful platter, garnished with fresh herbs for a stunning display.
    • Drinks: A crisp white wine or sparkling lemonade perfectly complements these savory bites.

    FAQs about Cheese Herb Fatayer Bites

    As I dive deeper into the world of cheese-filled pastries, I often get asked a few common questions. Here are some of the most frequently asked queries regarding Cheese Herb Fatayer Bites:

    Can I make Cheese Herb Fatayer Bites ahead of time?

    Absolutely! You can prepare the dough and the cheese filling a day in advance. Just store everything separately in the refrigerator. When you’re ready to bake, assemble and pop them into the oven, and you’ll have warm snacks in minutes!

    How should I store leftover Cheese Herb Fatayer Bites?

    Place any leftovers in an airtight container in the fridge for up to three days. You can reheat them in the oven at 350°F (175°C) for about 10 minutes to regain that delightful crispiness!

    Can I freeze these bites?

    For sure! Cheese Herb Fatayer Bites freeze exceptionally well. Just freeze them before baking. When you’re ready to enjoy, bake them directly from the freezer, adding a few extra minutes to the cooking time.

    What can I serve with Cheese Herb Fatayer Bites?

    These bites pair beautifully with a fresh salad or savory dipping sauce, like tzatziki or a spicy marinara. The contrasts in flavor elevate the entire experience!

    What’s the best way to achieve a flaky pastry?

    To ensure fluffy and flaky bites, don’t skip the rising step! Allow the dough enough time to prove, and be gentle with it during shaping. This helps develop those beautiful layers everyone loves!

    Final Thoughts

    Making Cheese Herb Fatayer Bites isn’t just about cooking; it’s a delightful experience that brings warmth and joy to my kitchen. Each bite is a burst of cheesy goodness, where the flavors dance together perfectly, creating happy moments with loved ones. Whether it’s for a cozy family gathering, a snack on a busy evening, or a fabulous appetizer for friends, these savory pastries are always a hit. I can’t help but smile as I watch everyone enjoy them, and I hope you find just as much happiness in every cheesy, herby bite!


    Print

    clock clock iconcutlery cutlery iconflag flag iconfolder folder iconinstagram instagram iconpinterest pinterest iconfacebook facebook iconprint print iconsquares squares iconheart heart iconheart solid heart solid icon

    Description

    Cheese Herb Fatayer Bites are delightful savory pastries filled with a cheesy herb mixture, perfect as appetizers or snacks.


    • 2 cups all-purpose flour
    • 1 teaspoon instant yeast
    • 1 teaspoon granulated sugar
    • 1/2 teaspoon fine salt
    • 3 tablespoons olive oil
    • 3/4 cup warm water, more as needed
    • 1 cup feta cheese, crumbled
    • 1 cup mozzarella cheese, shredded
    • 2 tablespoons fresh parsley, chopped
    • 1 tablespoon fresh mint, chopped
    • 1 teaspoon lemon zest
    • Salt and black pepper, to taste
    • 1 egg, beaten
    • 1 tablespoon water

    1. In a bowl, combine warm water with sugar and instant yeast, allowing the mixture to sit for 5 to 10 minutes until foamy.
    2. In a large mixing bowl, whisk together all-purpose flour and salt.
    3. Add the activated yeast mixture and olive oil to the flour mixture, stirring until a rough dough forms.
    4. Transfer the dough to a lightly floured surface and knead for 5 to 7 minutes until smooth and elastic.
    5. Place the dough in a lightly oiled bowl, cover with a clean towel, and let rise for 30 minutes until doubled in volume.
    6. In a separate bowl, combine crumbled feta, shredded mozzarella, chopped parsley, chopped mint, lemon zest, and a pinch of salt and pepper. Mix thoroughly and set aside.
    7. Preheat oven to 375°F (190°C) and line a baking sheet with parchment paper.
    8. Punch down the risen dough and divide it into 16 equal pieces. Roll each piece into a ball.
    9. On a lightly floured surface, roll each ball into a 4-inch diameter circle.
    10. Place 1 tablespoon of cheese mixture in the center of each dough circle.
    11. Lift and fold edges of each circle to create a triangle shape, pinching seams tightly to seal in the filling.
    12. Arrange the fatayer on the prepared baking sheet. Mix beaten egg with water and brush tops evenly.
    13. Bake in the preheated oven for 12 to 15 minutes, or until golden brown and crisp.
    14. Transfer to a wire rack and let cool slightly before serving warm.

    Notes

    • Make sure the water is warm but not hot to activate the yeast properly.
    • You can use any combination of herbs you like for the filling.
    • These bites can be frozen before baking; just bake them straight from the freezer for a few extra minutes.
    • Prep Time: 45 minutes
    • Cook Time: 15 minutes
    • Category: Appetizers
    • Method: Baking
    • Cuisine: Middle Eastern

    Nutrition

    • Serving Size: 1 piece
    • Calories: 150
    • Sugar: 1g
    • Sodium: 300mg
    • Fat: 9g
    • Saturated Fat: 4g
    • Unsaturated Fat: 3g
    • Trans Fat: 0g
    • Carbohydrates: 12g
    • Fiber: 1g
    • Protein: 5g
    • Cholesterol: 30mg

    Sharing is caring!

  • Mini Crème Brûlée Cheesecakes

    Mini Crème Brûlée Cheesecakes


    Introduction to Mini Crème Brûlée Cheesecakes

    The perfect dessert is the culinary equivalent of finding a gem in the rough – subtle and delightfully delicious. At least, that’s my experience with Mini Crème Brûlée Cheesecakes, which sport a cheesy cake base and the splash of a traditional crème brûlée. Good for serving to most people, really. Hosting a dinner party or wanting to simply amaze your kids with “fancy” food in the middle of the week isn’t hard with this recipe in hand. It provides a way to do so very quickly, without making many dishes dirty. Just a few simple ingredients can prepare you to dazzle your guests and delight your kids.

    Why You’ll Love This Mini Crème Brûlée Cheesecake

    Imagine diving into a mini cheesecake that is velvety smooth and drizzled with caramel perfection. That’s what you’ll get with these Mini Crème Brûlée Cheesecakes! They are easy to whip up, making them perfect for busy days. Plus, they pack an impressive flavor punch. Your guests will be raving about them long after dessert is over. Trust me, once you try these, they’ll become a regular in your dessert rotation.

    Ingredients for Mini Crème Brûlée Cheesecakes

    Let’s gather our magical ingredients to create these Mini Crème Brûlée Cheesecakes. Each one plays a vital role in crafting this delightful dessert. Here’s what you’ll need:

    • Graham cracker crumbs: These form the base, giving our cheesecakes a crunch. You can also use digestive biscuits if you prefer something a little different.
    • Unsalted butter: This adds richness to the crust. Make sure to melt it well for an easily compactable mix.
    • Granulated sugar: For sweetness in both the crust and the filling. Don’t skimp on this; it’s part of the charm!
    • Salt: Just a pinch brings out the sweetness and rounds out the flavor—don’t underestimate it!
    • Cream cheese: The star of the show, giving that luxurious creaminess. Bring it to room temperature for smooth mixing.
    • Large egg yolks: They add richness and help create a silky texture. Remember to keep them fresh!
    • Vanilla extract: For a hint of warmth and sophistication. Always opt for pure vanilla for the best flavor.
    • Whipping cream: This creamier element takes our filling to the next level. Chill it before use—it makes a difference!
    • Granulated sugar (for topping): Don’t forget this! It caramelizes beautifully on top, creating that iconic brûlée crust.

    For exact quantities of each ingredient, scroll down to the bottom of the article where they are clearly laid out for you to print. Now, let’s dive into the fun part—making these mouthwatering Mini Crème Brûlée Cheesecakes.

    How to Make Mini Crème Brûlée Cheesecakes

    Creating these Mini Crème Brûlée Cheesecakes is easier than you might think. Follow my simple steps, and soon you’ll have a delicious treat that’s perfect for any occasion. Let’s dive right in!

    Step 1: Preheat and Prepare the Pan

    First, preheat your oven to 300°F (150°C). This sets the perfect stage for baking.

    Next, grab your mini cheesecake pan with removable bottoms. Greasing the pan is essential—it helps with easy removal later.

    Step 2: Make the Crust

    Now, let’s create that tasty crust! Mix your graham cracker crumbs, melted butter, sugar, and salt in a bowl until it looks like wet sand.

    Take a tablespoon of the mixture and press it firmly into each cavity of the pan. Compacting it well ensures a sturdy base for our cheesecakes.

    Step 3: Prepare the Cheesecake Filling

    In a large mixing bowl, beat the cream cheese and sugar together until it’s smooth and creamy. This is where the magic begins!

    Then, add the egg yolks one at a time, mixing just until combined. Stir in the vanilla extract. Trust me, the aroma will take you places!

    Finally, pour in the chilled whipping cream and mix until everything is smooth. This step makes all the difference!

    Step 4: Fill the Mini Cheesecake Pan

    Using a ladle or a small measuring cup, fill each cavity of the prepared pan to the top. Smooth the surface with a spatula—presentation is key!

    Step 5: Bake the Mini Cheesecakes

    Time to bake! Place your pan in the oven and bake for about 15 minutes. Keep an eye on them around the 12-minute mark.

    If you see any puffing or overflowing, it’s time to take them out. We want them perfectly set, not overcooked!

    Step 6: Cooling and Chilling

    Once baked, allow the cheesecakes to cool completely in the pan. This is crucial—I suggest patience here!

    Once they’re cool, transfer them to the refrigerator. Chill them for a minimum of six hours, or overnight for the best flavor.

    Step 7: Brûlée the Topping

    Finally, the fun part! Before serving, sprinkle a teaspoon of granulated sugar evenly on each cheesecake.

    Using a kitchen torch, caramelize the sugar until it bubbles and turns a lovely golden brown. Let them set for a couple of minutes before serving—this creates that signature crispy topping.

    And there you have it—gorgeous Mini Crème Brûlée Cheesecakes that will wow everyone!

    Tips for Success

    • Ensure all ingredients, especially cream cheese and eggs, are at room temperature for a smoother cheesecake.
    • Don’t rush the cooling process; letting them chill properly enhances the flavors.
    • Keep an eye on the cheesecakes while baking; every oven is slightly different!
    • Use a high-quality kitchen torch for perfect sugar caramelization.
    • Experiment with flavor extracts, like almond or lemon, for a twist on the classic!

    Equipment Needed

    • Mini cheesecake pan: A must-have for that perfect shape. If you don’t have one, muffin tins work too!
    • Mixing bowls: Use a set of different sizes for convenience in mixing.
    • Electric mixer: Ideal for achieving smooth fillings; a whisk can work if you’re up for a workout!
    • Kitchen torch: Essential for caramelizing; alternatively, you can use the broiler method if you don’t have one.
    • Spatula: For spreading and filling; handy tool for any baking project!

    Variations

    • Chocolate Mini Crème Brûlée Cheesecakes: Add melted chocolate to the filling for a rich twist. Just fold it in before filling the pan!
    • Fruit-Infused Cheesecakes: Blend in pureed berries—like strawberries or raspberries—into the filling for a fruity flair. You can also top with fresh fruit before the brûlée topping.
    • Gluten-Free Option: Substitute graham cracker crumbs with gluten-free cookies or almond flour for a delightful crust without the gluten.
    • Vegan Version: Use vegan cream cheese and a flaxseed egg substitute. Coconut cream can be a creamy replacement for the whipping cream!
    • Cheesecake Swirl: Swirl in a layer of fruit preserves or caramel sauce into the filling for a beautiful and delicious marbled effect.

    Serving Suggestions

    • Fresh Berries: Serve with a side of mixed berries for a burst of color and refreshing taste.
    • Whipped Cream: A dollop of freshly whipped cream adds extra creaminess.
    • Coffee or Tea: Pair the cheesecakes with a robust coffee or a fragrant herbal tea.
    • Elegant Presentation: Arrange on a decorative platter with mint leaves for a beautiful touch.
    • Chilled Dessert Wine: A sweet dessert wine can complement the rich flavors brilliantly.

    FAQs about Mini Crème Brûlée Cheesecakes

    Can I make Mini Crème Brûlée Cheesecakes ahead of time?

    Absolutely! These cheesecakes are perfect for prepping in advance. You can make them a day or two ahead and keep them in the fridge. Just add the brûlée topping right before serving for that delightful crunch.

    What can I use if I don’t have a kitchen torch?

    If you don’t own a kitchen torch, no worries! Use your oven’s broiler instead. Just sprinkle sugar on top and place them under the broiler for a couple of minutes. Keep an eye on them to prevent burning!

    How do I know when the Mini Crème Brûlée Cheesecakes are done baking?

    They should be slightly jiggly in the center but set around the edges. If the tops puff up too much, that’s your cue to take them out. They will continue to set as they cool!

    Can I customize the flavor of these cheesecakes?

    Definitely! Feel free to add your favorite flavor extracts like almond or even citrus zest for a refreshing twist. You can also play around with mix-ins like chocolate or fruit puree.

    What should I do if I have leftover cheesecakes?

    If you’re lucky enough to have leftover Mini Crème Brûlée Cheesecakes, store them in an airtight container in the fridge. They should stay delicious for about 2-3 days. Just remember to add the topping before serving!

    Final Thoughts

    Creating these Mini Crème Brûlée Cheesecakes has been such a rewarding experience for me. Each bite brings together the creamy texture of cheesecake and the irresistible crunch of a caramelized topping. It’s like a little party in your mouth! I love how versatile this recipe is, allowing for endless variations. Whether you’re celebrating a special occasion or simply indulging after a long day, these mini desserts will surely bring smiles all around. Trust me, you’ll find joy not just in the making, but in sharing them with those you love. Happy baking, my fellow dessert enthusiasts!


    Print

    clock clock iconcutlery cutlery iconflag flag iconfolder folder iconinstagram instagram iconpinterest pinterest iconfacebook facebook iconprint print iconsquares squares iconheart heart iconheart solid heart solid icon

    Description

    Delicious mini cheesecakes with a creamy crème brûlée topping that will impress your guests.


    • 2 cups graham cracker crumbs
    • 1/2 cup unsalted butter, melted
    • 2 tablespoons granulated sugar
    • 1 pinch salt
    • 500 g cream cheese, room temperature
    • 1/2 cup granulated sugar
    • 4 large egg yolks, room temperature
    • 1 1/2 teaspoons vanilla extract
    • 1/2 cup whipping cream (35%), chilled
    • 12 teaspoons granulated sugar (for topping)

    1. Preheat oven to 300°F (150°C). Grease a mini cheesecake pan with removable bottoms.
    2. Mix graham cracker crumbs, melted butter, sugar, and salt until sandy. Press 1 tablespoon into each cavity and compact.
    3. Beat cream cheese and sugar until smooth. Add yolks one at a time, mixing just until combined. Stir in vanilla.
    4. Add chilled cream and mix until smooth.
    5. Fill cavities to the top with batter and smooth the surface.
    6. Bake for 15 minutes, checking around the 12-minute mark. Remove if puffing or overflowing.
    7. Cool completely, then refrigerate at least 6 hours.
    8. Before serving, sprinkle 1 teaspoon sugar on each cheesecake and caramelize with a kitchen torch. Let set 1–2 minutes before serving.

    Notes

    • For best results, make sure all ingredients are at room temperature before starting.
    • Using a kitchen torch for caramelizing sugar enhances the flavor and presentation.
    • Prep Time: 30 minutes
    • Cook Time: 15 minutes
    • Category: Dessert
    • Method: Baking
    • Cuisine: French

    Nutrition

    • Serving Size: 1 cheesecake
    • Calories: 250
    • Sugar: 15g
    • Sodium: 180mg
    • Fat: 18g
    • Saturated Fat: 10g
    • Unsaturated Fat: 6g
    • Trans Fat: 0g
    • Carbohydrates: 20g
    • Fiber: 0g
    • Protein: 3g
    • Cholesterol: 90mg

    Sharing is caring!

  • Homemade Apple Bars Flaky

    Homemade Apple Bars Flaky


    Introduction to Homemade Apple Bars Flaky

    Welcome to my kitchen. If you are anything like me, you are always on the hunt for fairly easy, yummy treats that will blow your company away. That’s where these Homemade Apple Bars Flaky come in. They’re not just one more dessert; they’re a hug on a busy day or a sweet note to share with loved ones. Think of buttery, flaky layers wrapped around tender spiced apples for that delightful harmony of flavor. That’s all it takes to have a little bit of nostalgia and love ladled onto your table and have this dessert the undeniable hit with everyone.

    Why You’ll Love This Homemade Apple Bars Flaky

    These Homemade Apple Bars Flaky are perfect for anyone juggling busy schedules. They come together quickly, making them a fantastic last-minute dessert. The flaky crust is not only a delight to bite into, but it also perfectly contrasts the sweet, spiced apple filling. Plus, they can be made ahead of time and served warm or chilled, making them versatile for any occasion. You can truly impress your loved ones with minimal effort!

    Ingredients for Homemade Apple Bars Flaky

    Before we dive into the kitchen mayhem, let’s gather our ingredients for these irresistible Homemade Apple Bars Flaky. Each one plays a crucial role in crafting that perfect bite. Here’s what you’ll need:

    • All-purpose flour: The foundation of our flaky crust. A staple in any baking pantry, it lends structure and puff to the bars.
    • Softened shortening: This magical ingredient is key to achieving that irresistible flaky texture. You can substitute it with butter for a richer flavor.
    • Salt: A pinch of salt elevates flavors, balancing the sweetness of the apples beautifully.
    • Egg yolk: Helps bind the dough while adding richness. Keep the egg white handy for later!
    • Milk: It brings moisture to the dough, making it easier to roll out.
    • Sliced apples: The star of the show. Choose your favorite varieties—Granny Smith for tartness or Honeycrisp for sweetness.
    • White sugar: Sweetens the apple filling. Feel free to adjust based on the apples’ natural sweetness.
    • Ground cinnamon: Adds warmth and a lovely hint of spice—perfect for cozy fall vibes.
    • Additional salt: Trust me, this enhances the flavors of your filling even more!
    • All-purpose flour (again): Used in the apple filling to help thicken juices that will bubble up while baking.
    • Tapioca: A little known secret to avoiding a soggy bottom crust, it helps soak up extra moisture from the apples.
    • Egg white: This will make your top crust shiny and delightful; it’s the finishing touch that adds a bit of elegance.
    • White sugar (for sprinkling): A simple sprinkle on top before baking gives a sweet crunch to your crispy bars.

    All the exact quantities are at the bottom of the article and are available for printing. Happy baking!

    How to Make Homemade Apple Bars Flaky

    Now that we have our ingredients, let’s get to the fun part—making these Homemade Apple Bars Flaky! Follow these simple steps, and you’ll be savoring the sweet aroma of baked apples in no time.

    Step 1: Prepare the Dough

    Start by blending together the all-purpose flour, softened shortening, and salt in a large bowl. You want these ingredients nicely incorporated, creating that flaky texture. It’s like mixing a cloud with a sprinkle of magic!

    In a separate bowl, beat the egg yolk and milk until they’re smooth. This mixture will hydrate our dough and add richness. Gradually fold this wet mix into the flour mixture and combine until you see a soft, cohesive dough form. No need to overwork it; this dough prefers a gentle touch!

    Divide the dough in half and roll out one portion on a floured surface. You’ll want this sheet to fit your greased 11″ x 17″ cookie sheet. Aim for about a quarter-inch thickness. Don’t sweat if it’s not perfect; it’s going to taste amazing either way!

    Step 2: Create the Apple Filling

    Now, let’s focus on the filling that will shine in our bars! Take your sliced apples and toss them in a bowl with white sugar, ground cinnamon, salt, and the additional all-purpose flour.

    This mixture is essential! The flour will help absorb any juices released during baking, keeping our bottom crust flaky instead of soggy. So, mix until the apples are well coated, releasing delicious scents that make your kitchen feel like a cozy café.

    Once mixed, pour the apple filling evenly over your rolled-out dough in the cookie sheet. It should look like a lovely apple blanket just waiting to be covered!

    Step 3: Assemble and Bake

    Roll out the second half of the dough just like the first. Place this over the top of the apple filling. Pinch the edges to seal in the luscious apple goodness. You want every bite to be bursting with flavor!

    Whip the egg white until frothy, then brush it gently over the top crust for that glossy finish. Don’t forget to sprinkle some white sugar over the entire top before popping it into the oven. This will give your bars a delightful crunch.

    Preheat your oven to 350ºF (175ºC) and bake for 35-40 minutes. Keep an eye out for that beautiful golden-brown crust. Once they’re ready, let the bars cool for a bit before slicing. Trust me; a little patience goes a long way!

    Tips for Success

    • Use chilled shortening to enhance the flakiness of your dough.
    • Let the apple filling rest for a few minutes to allow flavors to meld.
    • Try different apple varieties for unique flavor combinations.
    • Don’t skip the sprinkling of sugar on top—it creates a delightful crunch!
    • Cool completely before cutting for tidy, beautiful bars.

    Equipment Needed

    • Mixing bowls: You can use any size bowls you have; just make sure there’s enough space for mixing!
    • Rolling pin: A good substitute is a wine bottle if you don’t have one handy.
    • 11″ x 17″ cookie sheet: A similar-sized baking dish will work just fine.
    • Spatula: Great for spreading the filling and dough evenly!

    Variations

    • Nutty Delight: Add chopped walnuts or pecans to the apple filling for an extra crunch.
    • Dried Fruits: Toss in some raisins or dried cranberries with the apples for a chewy texture.
    • Spiced Up: Experiment with a mix of spices, such as nutmeg or allspice, alongside the cinnamon for deeper flavor.
    • Gluten-Free: Substitute all-purpose flour with a gluten-free baking blend for a delicious alternative.
    • Vegan Option: Swap shortening with coconut oil and skip the egg for a plant-based version!

    Serving Suggestions

    • Serve warm with a scoop of vanilla ice cream for an indulgent treat.
    • Pair with a dollop of whipped cream and a sprinkle of cinnamon.
    • Enjoy with a cup of hot tea or spiced apple cider for a cozy afternoon.
    • For a touch of elegance, dust with powdered sugar before serving!

    FAQs about Homemade Apple Bars Flaky

    As you embark on your delicious journey with these Homemade Apple Bars Flaky, you might have a few questions. Don’t worry—I’ve got you covered!

    Can I make the dough ahead of time?
    Absolutely! You can prepare the dough a day in advance and store it in the refrigerator. Just make sure to wrap it tightly so it doesn’t dry out.

    How do I store leftover apple bars?
    To keep your apple bars fresh, store them in an airtight container at room temperature for up to three days. They can also be refrigerated for a week. You can even freeze them for up to two months!

    What if I don’t have shortening?
    No fears! You can substitute the shortening with unsalted butter. It will create a rich flavor while still giving you that delightful flaky texture.

    Can I use frozen apples?
    Yes, you can! Frozen apples work well, but be sure to thaw and drain them before mixing with the sugar and spices to prevent excess moisture.

    What should I do if my crust is too dry?
    If your crust seems too crumbly, add a tablespoon of milk at a time until it holds together. It should feel like a soft dough but still remain pliable. Happy baking!

    Final Thoughts

    There’s something magical about preparing Homemade Apple Bars Flaky that brings me back to cherished memories spent in the kitchen. Each slice is a delightful reminder that simple ingredients can create lasting joy and warmth. Whether it’s a family gathering or a midweek treat, these bars are sure to evoke smiles all around. Plus, the aroma while they bake? Pure bliss! So, gather your loved ones and indulge in the comfort of these homemade delights. Trust me, your kitchen will become a haven of sweetness and laughter, one flaky bar at a time!


    Print

    clock clock iconcutlery cutlery iconflag flag iconfolder folder iconinstagram instagram iconpinterest pinterest iconfacebook facebook iconprint print iconsquares squares iconheart heart iconheart solid heart solid icon

    Description

    Deliciously flaky bars filled with sweet apples, perfect for any dessert lover.


    • 2 1/2 cups all-purpose flour
    • 1 cup softened shortening
    • 1 teaspoon salt
    • 1 egg yolk
    • 1/2 cup milk
    • 7 sliced apples
    • 1 1/4 cups white sugar
    • 1/4 teaspoon ground cinnamon
    • 1/4 teaspoon salt
    • 2 tablespoons all-purpose flour
    • 2 teaspoons tapioca
    • 1 egg white
    • white sugar (for sprinkling)

    1. Blend flour, shortening, and salt together in a bowl. Set aside.
    2. In a separate bowl, mix egg yolk and milk thoroughly.
    3. Add the egg yolk and milk mixture to the flour mixture. Mix until a uniform dough forms.
    4. Divide the dough in half. Roll out one half on a floured surface to fit an 11″x17″ greased cookie sheet. Set aside.
    5. In a bowl, mix sliced apples, sugar, cinnamon, salt, and all-purpose flour until combined. Pour the mixture over the prepared bottom crust.
    6. Evenly sprinkle tapioca over the apple filling.
    7. Roll out the remaining dough to match the size of the cookie sheet. Place it over the apple filling.
    8. Whip the egg white and brush it over the top crust. Sprinkle white sugar evenly over the top.
    9. Preheat the oven to 350ºF (175ºC). Bake for 35-40 minutes, or until the crust is golden brown.

    Notes

    • Let the bars cool before slicing for cleaner cuts.
    • Can be served warm or chilled.
    • Adjust sugar based on the sweetness of apples used.
    • Prep Time: 20 minutes
    • Cook Time: 40 minutes
    • Category: Dessert
    • Method: Baking
    • Cuisine: American

    Nutrition

    • Serving Size: 1 bar
    • Calories: 220
    • Sugar: 14g
    • Sodium: 150mg
    • Fat: 9g
    • Saturated Fat: 3g
    • Unsaturated Fat: 6g
    • Trans Fat: 0g
    • Carbohydrates: 33g
    • Fiber: 1g
    • Protein: 2g
    • Cholesterol: 20mg

    Sharing is caring!