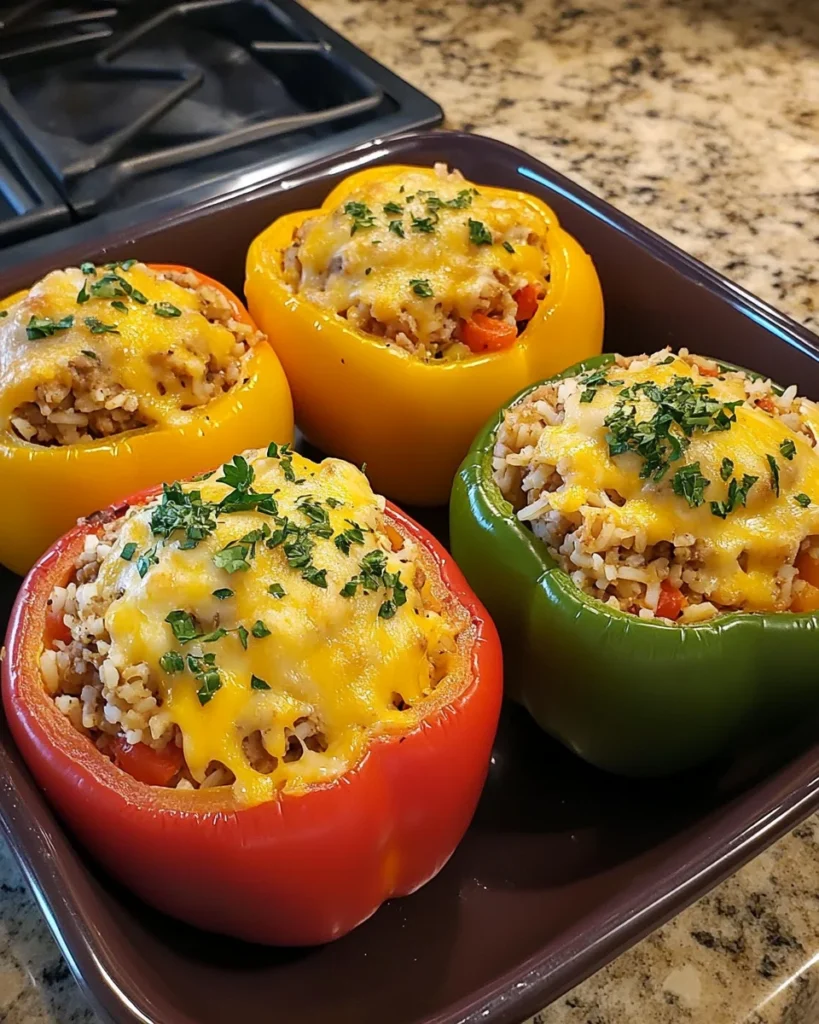
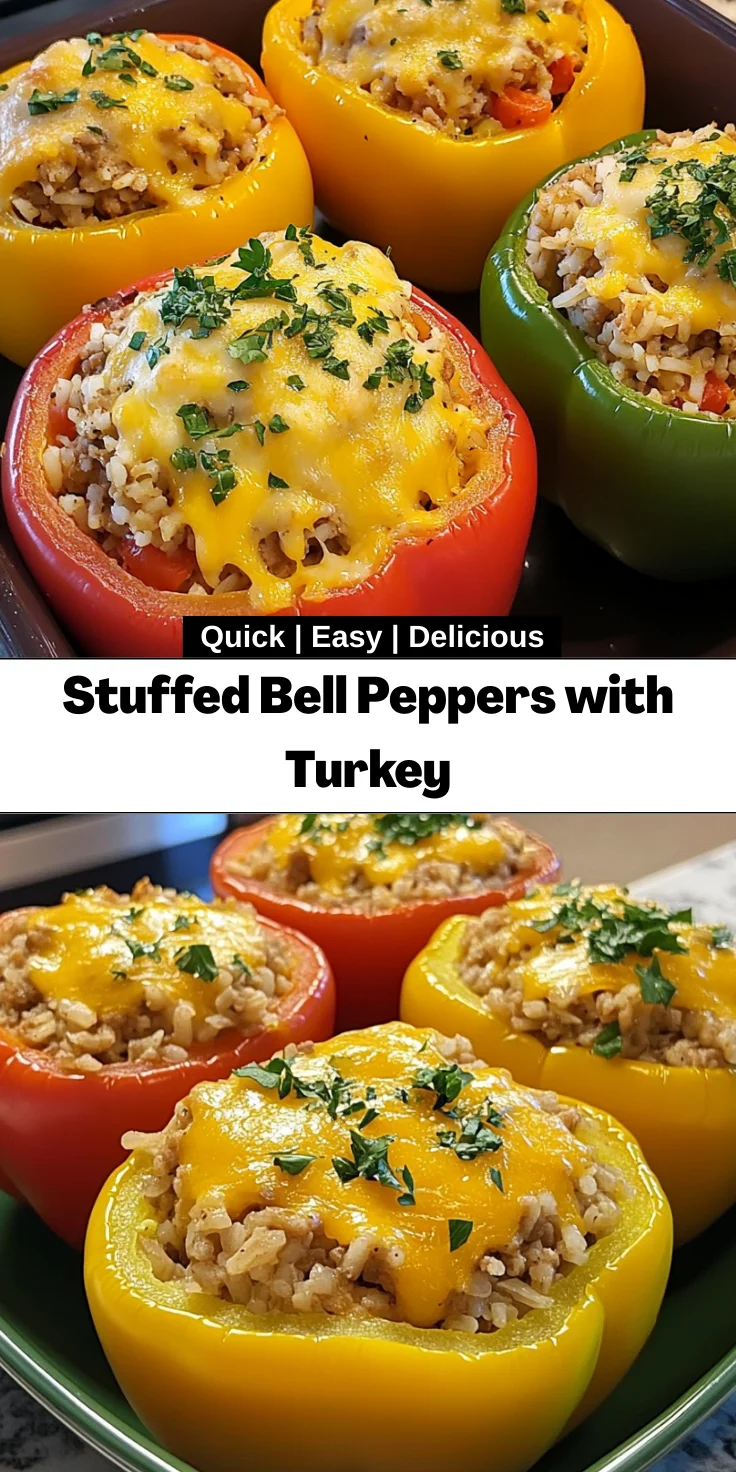
Introduction to Stuffed Bell Peppers with Turkey
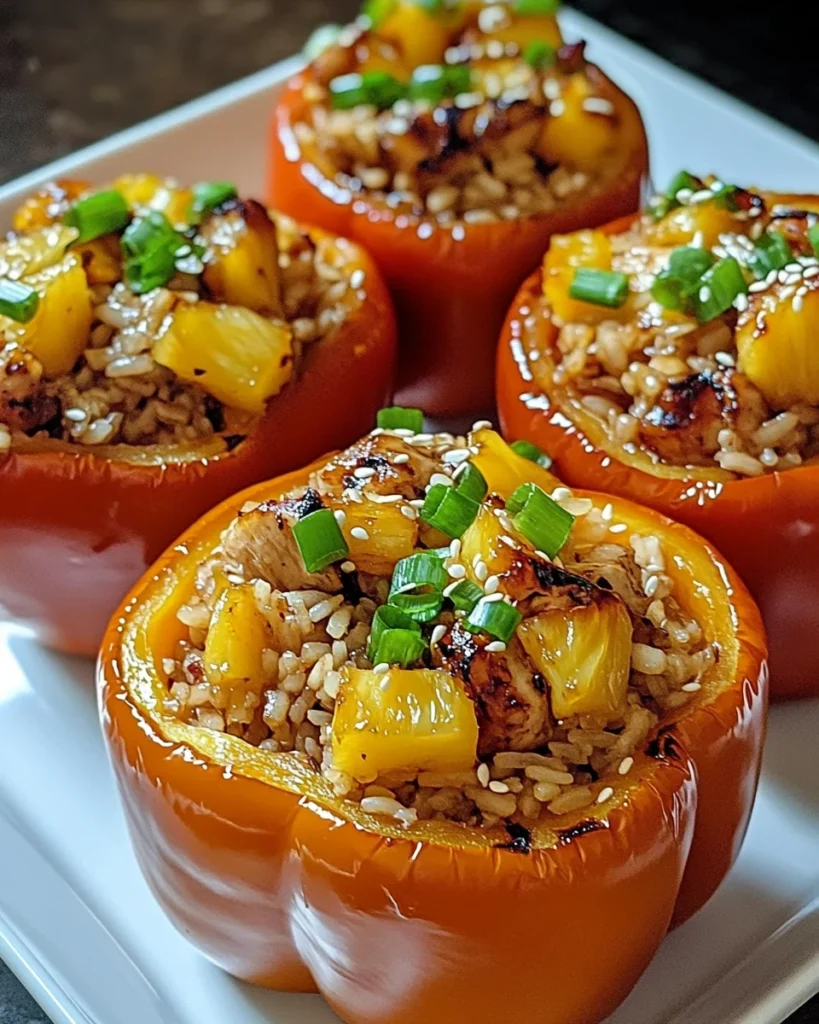
When life gets hectic, finding a meal that’s both nutritious and easy can feel like searching for a needle in a haystack. That’s where my Stuffed Bell Peppers with Turkey come in! These vibrant, flavor-packed peppers offer a delightful solution for busy days when you want something hearty and healthy. With only a handful of ingredients, it’s a recipe that allows you to savor a comforting dish without endless hours in the kitchen. Trust me, your family will appreciate the effort, and you’ll find joy in sharing this delicious meal around the dinner table.
Why You’ll Love This Stuffed Bell Peppers with Turkey
These Stuffed Bell Peppers with Turkey are not only a feast for the eyes but also a quick and satisfying meal. With minimal prep and fuss, you’ll spend less time in the kitchen and more time enjoying dinner with your loved ones. Plus, the combination of spices and hearty turkey makes every bite burst with flavor. It’s a wonderful way to nourish your family while keeping dinner stress-free!
Ingredients for Stuffed Bell Peppers with Turkey
Gathering fresh, vibrant ingredients is the first step on our culinary adventure. For these Stuffed Bell Peppers with Turkey, you’ll need:
- Bell peppers: Choose any color you love—red, yellow, green, or orange. Each brings a unique sweetness that adds to the dish.
- Ground turkey: A lean protein option that keeps the dish healthy while providing a hearty base.
- Cooked rice: Whether you prefer white or brown rice, it adds delightful texture and helps bind the filling.
- Onion: Finely chopped, it adds a subtle sweetness and depth of flavor to the filling.
- Garlic: Minced garlic is essential for that aromatic kick that transforms the dish.
- Diced tomatoes: Canned and drained, they add moisture and a splash of acidity, balancing the flavors beautifully.
- Italian seasoning: This blend elevates the dish with its signature taste, enhancing every bite.
- Salt and pepper: Simple but essential seasonings that bring out the flavors of the other ingredients—add these to taste.
- Shredded cheese: Cheddar or mozzarella on top creates a creamy, gooey finish that everyone adores.
- Olive oil: Used for sautéing, it lends a rich flavor to the filling while keeping things healthy.
- Fresh parsley: Chopped and sprinkled on top, it not only garnishes the peppers but adds freshness.
Keep in mind, you can find the ingredient quantities at the bottom of the article for your convenience. Feel free to make substitutions where necessary; for instance, ground chicken or beef works beautifully if you prefer. Let your creativity flow, and personalize this dish to suit your family’s tastes!
How to Make Stuffed Bell Peppers with Turkey
Let’s dive into the delicious process of creating these Stuffed Bell Peppers with Turkey. Each step is simple, making this an enjoyable culinary experience even on your busiest days. Grab your apron, and let’s get started!
Prepare the Bell Peppers
First things first, preheat your oven to 375°F (190°C).
Cut the tops off the bell peppers, and don’t toss those lids! You can chop them and add them to the filling for extra flavor. Remove the seeds and membranes inside the peppers.
Next, brush the outside lightly with olive oil. This will give them a beautiful roasted finish. Place the peppers upright in a baking dish, ready for their colorful stuffing!
Sauté the Onions and Garlic
In a large skillet, heat a couple of tablespoons of olive oil over medium heat.
Add the finely chopped onion and sauté until it’s translucent, about 3-4 minutes. You’ll know it’s time to move on when the aroma fills your kitchen and brings a smile to your face.
Then add the minced garlic and cook for an additional minute. Trust me, this is the moment that takes your kitchen from ordinary to extraordinary!
Cook the Turkey Filling
Now, let’s bring in the star of the dish: ground turkey. Add it to the skillet, breaking it up with a spatula as you cook.
Let it brown for about 5-7 minutes. As it cooks, the turkey will absorb those lovely flavors from the onions and garlic.
Once it’s browned, stir in the cooked rice, drained diced tomatoes, Italian seasoning, salt, and pepper. Cook everything together for another 2-3 minutes, allowing the flavors to meld. You want to create a delicious filling that makes your taste buds sing!
Stuff the Peppers
It’s time for the fun part! Carefully fill each bell pepper with the turkey mixture. Pack it down slightly so it fits snugly.
Don’t be shy—make sure each pepper is generously stuffed!
Top each one with a handful of shredded cheese. It will melt and create a delectable, golden crust as it bakes!
Bake the Stuffed Peppers
Cover your baking dish with aluminum foil. Pop it into the preheated oven and bake for 25 minutes.
This steaming process keeps the peppers tender. After that, remove the foil and let the cheese get bubbly and golden for another 10-15 minutes.
When you pull them out of the oven, let them cool for a few minutes. Garnish with fresh parsley before serving, and watch your family’s faces light up with delight!
Tips for Success
- Always choose firm bell peppers for better stuffing stability.
- Feel free to prep the filling ahead of time for a quick assembly on busy nights.
- If you’re short on time, microwave the peppers for a few minutes before stuffing.
- Experiment with different cheeses for varied flavors and textures.
- Keep a close eye on baking to prevent overcooking—tender is the goal!
Equipment Needed
- Baking dish: A glass or ceramic dish works beautifully for even cooking.
- Large skillet: Essential for sautéing the filling; a non-stick pan makes cleanup easier.
- Cutting board: A sturdy surface for chopping ingredients safely.
- Knife: A sharp chef’s knife speeds up prep time.
- Measuring cups: For precise ingredient measurements, especially useful if you’re making a larger batch.
Variations of Stuffed Bell Peppers with Turkey
- Quinoa Swap: Replace rice with cooked quinoa for a protein-packed, gluten-free option that adds a nice nutty flavor.
- Vegetable Medley: Stir in chopped veggies like zucchini, spinach, or mushrooms to boost nutrition and add texture.
- Mexican Twist: Spice things up with taco seasoning instead of Italian, and top with salsa and avocado for a zesty finish.
- Cheesy Delight: Mix in cream cheese or ricotta with the turkey filling for an ultra-creamy texture.
- Herbed Variation: Incorporate fresh herbs like basil, cilantro, or oregano for a burst of fresh flavor in every bite.
Serving Suggestions
- Side Salads: Pair with a light arugula or spinach salad, dressed simply with olive oil and lemon.
- Whole Grain Bread: Serve with crusty whole grain bread to soak up any juices.
- Refreshing Drinks: Complement your meal with iced tea or a crisp white wine.
- Garnish Wisely: Add extra fresh parsley or a sprinkle of red pepper flakes for a pop of color and flavor.
FAQs about Stuffed Bell Peppers with Turkey
Got questions about these delightful Stuffed Bell Peppers with Turkey? You’re not alone! Here are a few common queries I’ve encountered, along with helpful answers to make your cooking experience smoother.
Can I make these ahead of time?
Absolutely! You can prepare the filling and stuff the peppers a day in advance. Just cover and refrigerate them until you’re ready to bake. This makes it super convenient for busy nights!
What can I substitute for ground turkey?
If turkey isn’t your preference, ground chicken or beef works wonderfully as alternatives. You could even try plant-based meat for a vegetarian twist!
How do I store leftovers?
Store any leftover Stuffed Bell Peppers with Turkey in an airtight container in the fridge for up to 3 days. Just reheat them in the microwave or oven for a quick meal later!
Can I freeze stuffed peppers?
Yes, indeed! You can freeze uncooked stuffed peppers for up to 3 months. Just wrap them tightly and toss them in the freezer. When you’re ready, bake from frozen, adding a little extra time to the cooking process.
What can I serve with this dish?
These stuffed peppers are versatile! Pair them with a fresh salad, some roasted vegetables, or even a side of quinoa for a heartier meal. The options are endless!
Final Thoughts
There’s something truly magical about sharing a plate of Stuffed Bell Peppers with Turkey with family and friends. This meal brings comfort and wholesome goodness, all wrapped in a colorful pepper. It’s an invitation to slow down and enjoy each bite, celebrating the delicious flavors mingling together.
Whether it’s a busy weeknight or a special gathering, these stuffed peppers effortlessly adapt. Each time I make them, I’m reminded of the joy in cooking and the warmth of gathering around the table. Try them out and discover the happiness that unfolds with each delicious serving!
Description
When life gets hectic, finding a meal that’s both nutritious and easy can feel like searching for a needle in a haystack. That’s where my Stuffed Bell Peppers with Turkey come in! These vibrant, flavor-packed peppers offer a delightful solution for busy days when you want something hearty and healthy. With only a handful of ingredients, it’s a recipe that allows you to savor a comforting dish without endless hours in the kitchen. Trust me, your family will appreciate the effort, and you’ll find joy in sharing this delicious meal around the dinner table.
- 4 large Bell peppers (Any color: red, yellow, green, or orange)
- 1 pound Ground turkey (Lean meat providing protein)
- 1 cup Cooked rice (White or brown rice adds texture)
- 1 small Onion (Finely chopped for flavor)
- 2 cloves Garlic (Minced for aroma and flavor)
- 1 can Diced tomatoes (14.5 oz, drained for moisture)
- 1 teaspoon Italian seasoning (Enhances overall taste)
- to taste Salt (Essential for flavor)
- to taste Pepper (Essential for flavor)
- 1 cup Shredded cheese (Cheddar or mozzarella for topping)
- 2 tablespoons Olive oil (For sautéing the filling)
- to taste Fresh parsley (Chopped for garnish)
- Preheat your oven to 375°F (190°C).
- Cut off the tops of the bell peppers and remove seeds and membranes. Brush the outside with olive oil and place upright in a baking dish.
- In a large skillet, heat olive oil over medium heat. Sauté the chopped onion until translucent, about 3-4 minutes.
- Add minced garlic and cook for an additional minute.
- Add ground turkey to the skillet, breaking it apart as it cooks until browned, about 5-7 minutes.
- Stir in cooked rice, drained diced tomatoes, Italian seasoning, salt, and pepper. Cook for another 2-3 minutes until heated through.
- Fill each bell pepper with the turkey mixture, packing it down slightly. Top with shredded cheese.
- Cover the baking dish with aluminum foil and bake for 25 minutes. Remove the foil and bake for an additional 10-15 minutes until cheese is melted and peppers are tender.
- Let cool for a few minutes before serving. Garnish with fresh parsley.
Notes
- Feel free to use any color of bell peppers based on your preference.
- You can substitute ground turkey with ground chicken or beef if desired.
- This dish can be made ahead of time and stored in the refrigerator before baking.
- For a spicy kick, add some crushed red pepper flakes to the filling.
- Prep Time: 15 minutes
- Cook Time: 40-45 minutes
- Category: Main Course
- Method: Baking
- Cuisine: American
Nutrition
- Serving Size: 1 stuffed pepper
- Calories: 350
- Sugar: 5g
- Sodium: 600mg
- Fat: 15g
- Saturated Fat: 6g
- Unsaturated Fat: 5g
- Trans Fat: 0g
- Carbohydrates: 35g
- Fiber: 3g
- Protein: 25g
- Cholesterol: 75mg