Author: IHAAL Team

  • Texas BBQ Baked Beans

    Texas BBQ Baked Beans


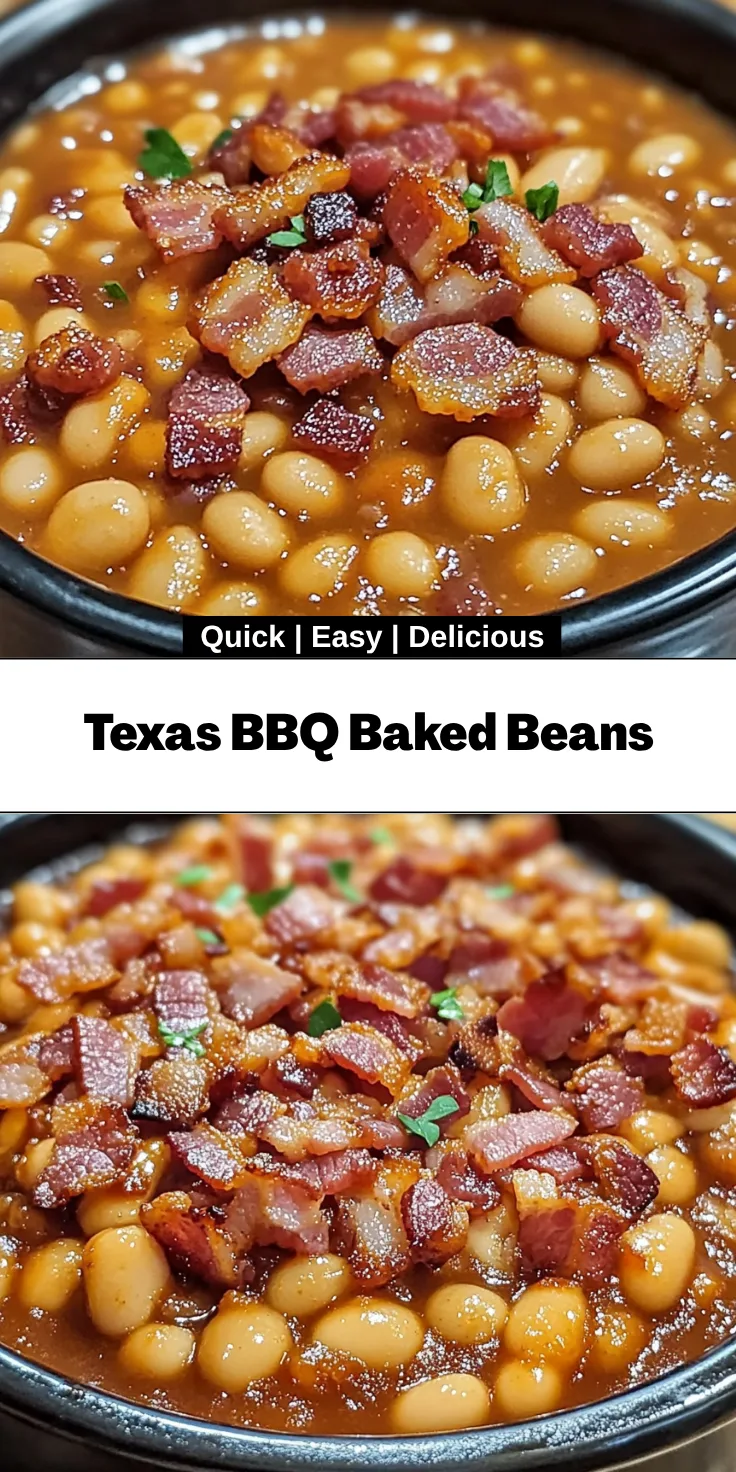
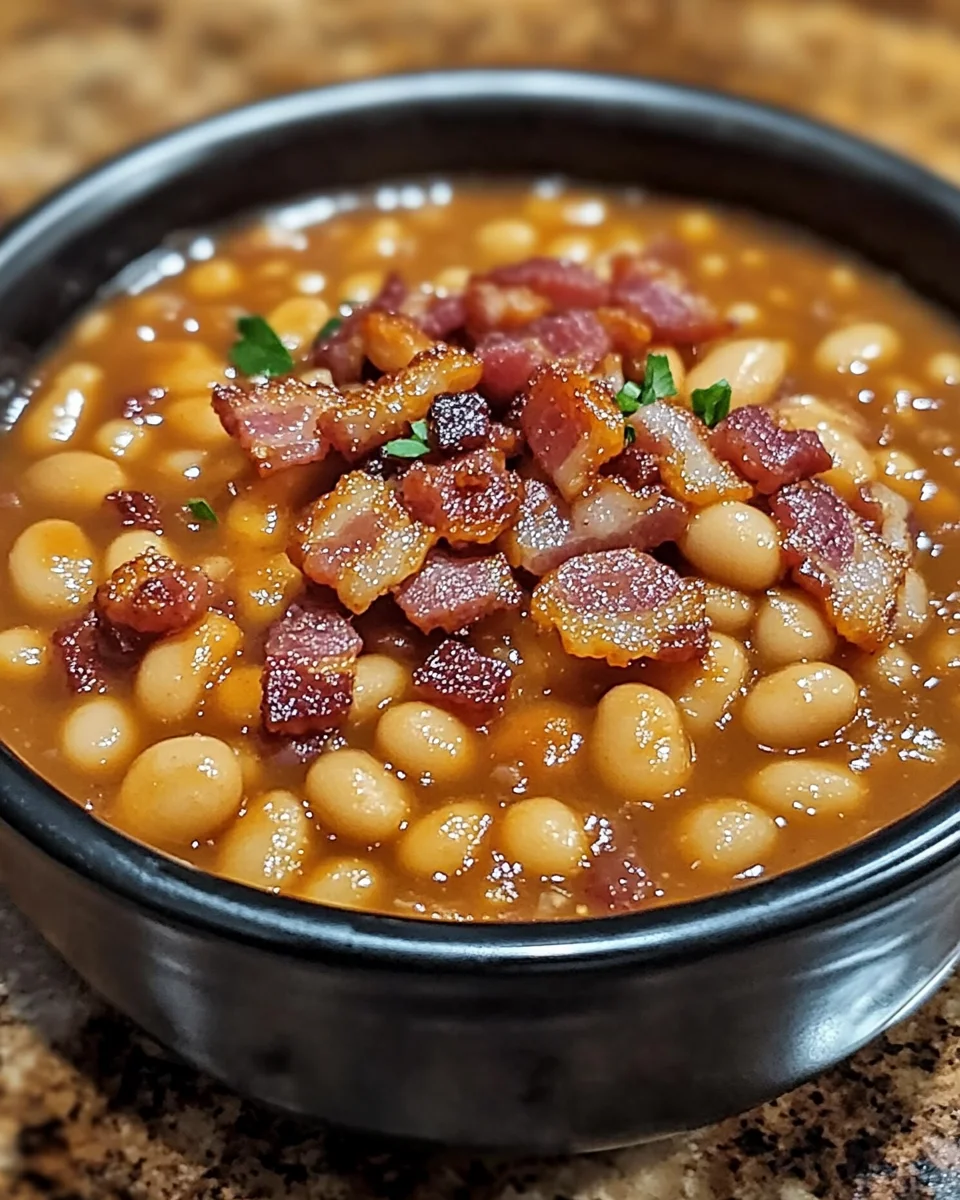
    Introduction to Texas BBQ Baked Beans

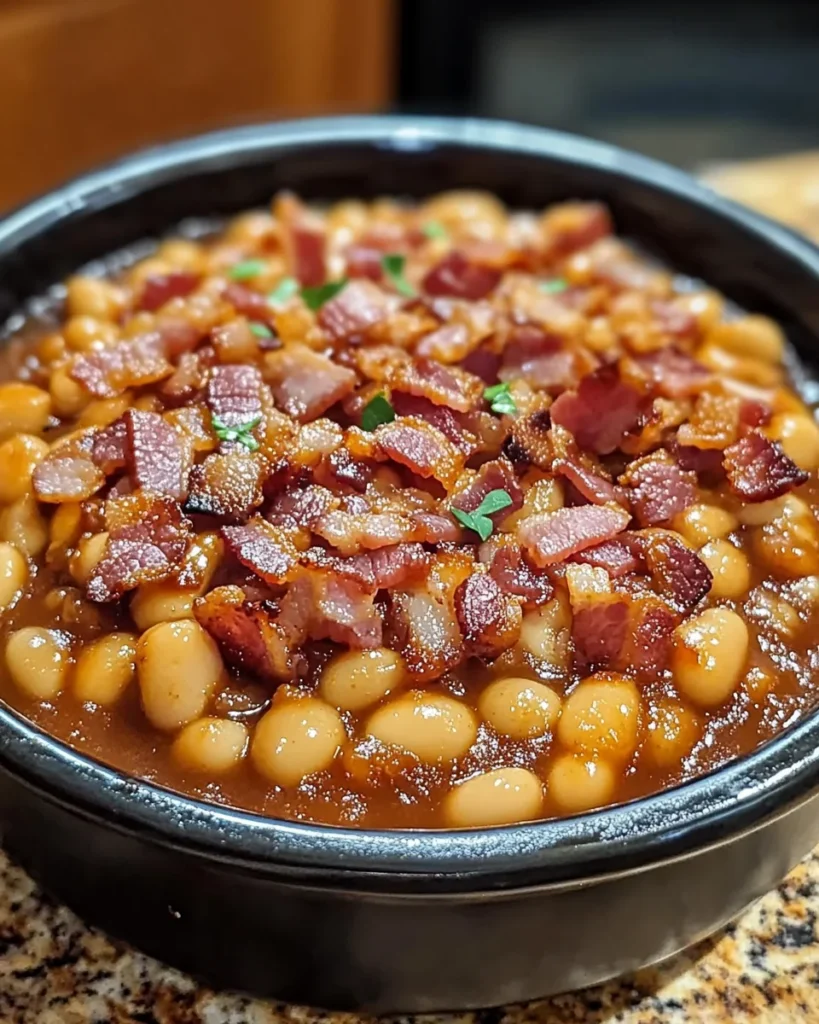
    Hey there, fellow home cooks! If you’re anything like me, you’re always on the lookout for easy yet delightful recipes that can make mealtime a breeze. Let me share my love for Texas BBQ Baked Beans, a dish that’s not only packed with flavor but also quick to whip up. It’s the perfect side dish to complete any family gathering or backyard barbecue. With a rich blend of sweet and smoky flavors, these beans are sure to impress your loved ones. Trust me, they’ll be asking for seconds!

    Why You’ll Love This Texas BBQ Baked Beans

    These Texas BBQ Baked Beans are a true game changer for busy moms and professionals alike. In just over an hour, you can have a mouthwatering side dish that’s bursting with flavor. They’re endlessly versatile, pairing perfectly with grilled meats or even as a standalone vegetarian delight. Plus, they make excellent leftovers, so you can enjoy them again without the extra prep. Deliciousness doesn’t get easier than this!

    Ingredients in Texas BBQ Baked Beans

    Let’s dive into the scrumptious ingredients that make Texas BBQ Baked Beans a standout side dish.

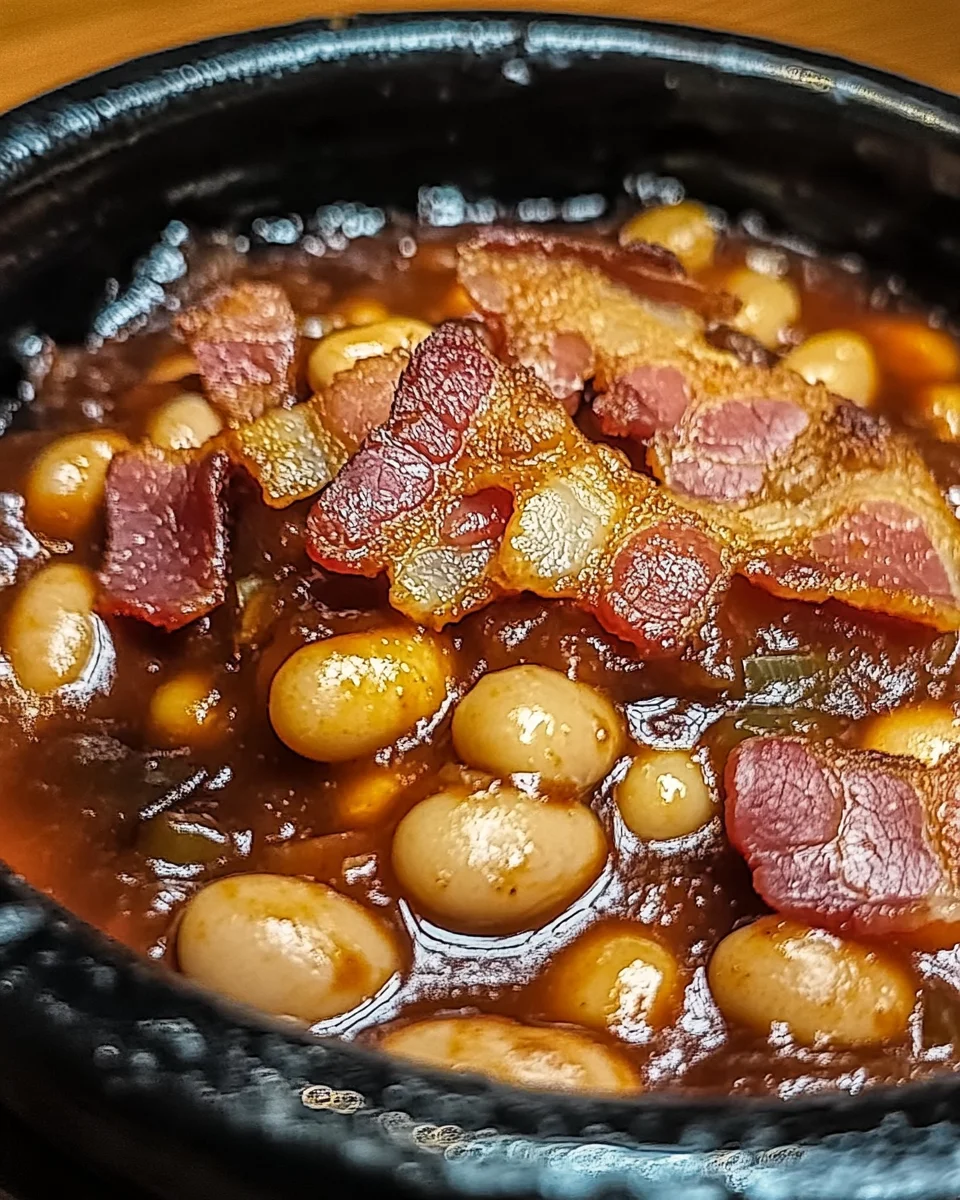
    • Navy Beans: These small, creamy beans are the heart and soul of this dish. They’re rich in fiber and protein, making them both hearty and healthy.
    • Ketchup: This tangy treat adds a fantastic base flavor, balancing sweetness with acidity. Plus, it’s a great crowd-pleaser!
    • Brown Sugar: It brings a rich, caramel-like sweetness that melts beautifully into the sauce, creating that signature flavor.
    • Molasses: A deep, robust flavor that adds complexity. Molasses is also packed with vitamins and minerals, making it a wholesome choice.
    • Yellow Mustard: Just a touch of this zesty condiment gives your beans a punch of flavor that cuts through the sweetness.
    • Garlic Powder: This brings a hint of aromatic goodness. It’s convenient and gives a warm, savory depth to the dish.
    • Onion Powder: Just like garlic powder, it adds that comforting flavor profile that makes every spoonful feel homey.
    • Bacon: Crunchy, savory goodness folded right in! It not only enhances flavor but also adds a delightful texture. You can always use turkey bacon for a lighter twist.

    If you want to kick things up a notch, feel free to toss in diced jalapeños for a spicy kick! The exact quantities of each ingredient are at the bottom of this article for easy printing. Enjoy the journey of flavor!

    How to Make Texas BBQ Baked Beans

    Step 1: Preheat the Oven

    Start your delicious journey by preheating your oven to 350°F (175°C). A hot oven is crucial to achieving that perfect, bubbly texture in your Texas BBQ Baked Beans. Once it’s warm, you’re ready to mix things up!

    Step 2: Combine Ingredients

    In a large mixing bowl, combine the drained navy beans, ketchup, brown sugar, molasses, and yellow mustard. Sprinkle in the garlic and onion powders for that extra punch. Stir everything together until you see a beautiful, uniform mixture that excites your taste buds. Trust me, it’ll smell heavenly!

    Step 3: Add Bacon

    Now, fold in the crispy chopped bacon. This is where your beans get that irresistible savory flavor. The bacon sneaks in that delightful crunch and brings everything together. If you’re using turkey bacon, it’ll work just as well without losing any satisfaction.

    Step 4: Transfer to Baking Dish

    Grab an 8×8-inch baking dish and transfer your bean mixture. Spread it out evenly so every bite has harmonious flavors. Don’t worry about perfection—rustic is totally fine here. It’s all about love, right?

    Step 5: Bake

    Slide the dish into your preheated oven and bake for 45 to 50 minutes. You’ll want to keep an eye on it, as the beans bubble and the sauce thickens to a glorious finish. Your kitchen will start to smell fantastic—neighbors might even come knocking!

    Step 6: Cool and Serve

    Once they come out of the oven, let the beans cool a bit. This will allow the flavors to deepen. Scoop them into bowls and serve warm. Just picture your family coming together, with smiles all around, ready to dig into this flavorful side dish. Isn’t that what it’s all about?

    Tips for Success

    • Use freshly cooked bacon for better flavor; it brings out the best in your beans.
    • Don’t skip the preheating step; it’s essential for even cooking.
    • Experiment with spices! A pinch of smoked paprika or cumin can elevate your dish.
    • For easier cleanup, line your baking dish with parchment paper.
    • Store leftovers in an airtight container; they’ll taste even better the next day!

    Equipment Needed

    • Baking Dish: An 8×8-inch dish works perfectly. Alternatively, use a casserole dish.
    • Mixing Bowl: A large bowl is essential for combining ingredients. A pot can work in a pinch.
    • Spoon: A sturdy spoon for mixing. A spatula can also be useful.
    • Measuring Cups: Necessary for precise ingredients; even a regular mug can help.

    Variations

    • Spicy Twist: Add diced jalapeños to the mix for a zesty kick. They’ll give your beans an extra layer of excitement!
    • Vegetarian Delight: Skip the bacon and replace it with smoked paprika or liquid smoke for that smoky flavor without meat. Vegan friendly!
    • Sweet and Tangy: Include a splash of apple cider vinegar for a nice tang that balances the sweetness of the beans.
    • Southwestern Style: Toss in some corn and bell peppers to turn your Texas BBQ Baked Beans into a vibrant, hearty dish.
    • Healthier Option: Use maple syrup instead of brown sugar and molasses for a natural sweetener with added nutrients.

    Serving Suggestions

    • Pair your Texas BBQ Baked Beans with grilled chicken or ribs for a classic barbecue feast.
    • Serve alongside cornbread or a fresh salad to balance those hearty flavors.
    • A chilled glass of sweet tea complements the dish beautifully.
    • For presentation, garnish with chopped fresh parsley or green onions for a pop of color.

    FAQs about Texas BBQ Baked Beans

    Can I make Texas BBQ Baked Beans ahead of time?

    Absolutely! These delicious beans can be made a day in advance. Just reheat them in the oven before serving. They’ll even taste better after the flavors have mingled overnight.

    What can I serve with Texas BBQ Baked Beans?

    These beans are a versatile side dish. They pair well with grilled meats, smoked brisket, or even veggie burgers. Add a fresh salad or cornbread for a complete meal.

    How do I store leftovers?

    Store any leftovers in an airtight container in the fridge. They can last up to five days. For longer storage, freeze them in portions. Just thaw before reheating.

    Are Texas BBQ Baked Beans gluten-free?

    Yes! This recipe is naturally gluten-free, making it a fantastic option for everyone around the table. Just be sure to check the labels on your condiments to be sure.

    Can I customize the spice level?

    Definitely! If you prefer a bit more heat, add some diced jalapeños or a dash of hot sauce. Adjust it to match your family’s taste. Cooking is all about experimenting!

    Final Thoughts

    Cooking Texas BBQ Baked Beans is more than just a recipe; it’s about creating moments with your loved ones. The aroma filling your kitchen as they bake will instantly transport you to backyard barbecues and family gatherings. Every spoonful bursts with flavor, reminding us of the simple joys of shared meals. Plus, with minimal prep, they’re the perfect solution for busy days. So, fire up that oven and embrace the warmth this dish brings to your table. After all, great food has a magical way of turning any dinner into a cherished memory!


    Print

    clock clock iconcutlery cutlery iconflag flag iconfolder folder iconinstagram instagram iconpinterest pinterest iconfacebook facebook iconprint print iconsquares squares iconheart heart iconheart solid heart solid icon

    Description

    A delicious and flavorful recipe for Texas BBQ Baked Beans, perfect as a side dish.


    • 1 can (15 oz) navy beans, drained and rinsed
    • 1/2 cup ketchup
    • 1/4 cup brown sugar
    • 2 tbsp molasses
    • 2 tbsp yellow mustard
    • 1/2 tsp garlic powder
    • 1/2 tsp onion powder
    • 4 slices cooked bacon, chopped

    1. Preheat the oven to 350°F (175°C).
    2. In a mixing bowl, combine navy beans, ketchup, brown sugar, molasses, mustard, garlic powder, and onion powder. Mix well.
    3. Fold in the chopped bacon until evenly distributed.
    4. Transfer the bean mixture to a baking dish and spread it out in an even layer.
    5. Bake in the preheated oven for 45-50 minutes, or until the beans are bubbly and the sauce has thickened.
    6. Let it cool slightly before serving as a delicious side dish.

    Notes

    • For a spicier version, add diced jalapeños.
    • These beans can be made ahead of time and reheated.
    • Prep Time: 10 minutes
    • Cook Time: 45-50 minutes
    • Category: Side Dish
    • Method: Baking
    • Cuisine: American

    Nutrition

    • Serving Size: 1/4 of the recipe
    • Calories: 250
    • Sugar: 10g
    • Sodium: 450mg
    • Fat: 9g
    • Saturated Fat: 3g
    • Unsaturated Fat: 4g
    • Trans Fat: 0g
    • Carbohydrates: 38g
    • Fiber: 8g
    • Protein: 9g
    • Cholesterol: 15mg

    Sharing is caring!

  • Nutella Hazelnut Brownies

    Nutella Hazelnut Brownies


    Introduction to Nutella Hazelnut Brownies

    When I think of comfort food, Nutella Hazelnut Brownies instantly come to mind. There’s something magical about a fudgy brownie, rich with chocolate and that unmistakable nutty flavor. If you’re a busy mom or professional like me, this recipe is the perfect solution to satisfy your sweet cravings without spending hours in the kitchen. Just imagine serving these delightful brownies to your family or friends. Their eyes will light up with joy, and you’ll feel that warm, fuzzy happiness of sharing something truly delicious! Let’s dive into this heavenly experience together.

    Why You’ll Love This Nutella Hazelnut Brownies

    You’ll adore these Nutella Hazelnut Brownies because they bring together simplicity and indulgence in every bite. They come together so quickly, making them a go-to when time is tight. Plus, the rich chocolate flavor paired with crunchy hazelnuts creates a heavenly treat that’s simply irresistible. Whether it’s a family gathering or a cozy night in, these brownies are bound to impress and disappear in no time!

    Ingredients for Nutella Hazelnut Brownies

    Gathering the right ingredients is the step that makes cooking feel like a well-choreographed dance. For these Nutella Hazelnut Brownies, you’ll need a delightful mix of essential ingredients, each playing its part in creating that million-dollar flavor. The exact quantities are at the bottom of the article, but let me give you a quick rundown on what you’ll need.

    Essential Ingredients

    • Eggs: These help bind everything together, adding a rich texture to the brownies.
    • Vanilla extract: A splash of vanilla adds a warm scent, elevating the chocolate experience.
    • Sugar: This sweetens the mix and enhances the fudgy consistency we crave.
    • Unsalted butter: Adds moisture and richness, making every bite melt in your mouth.
    • Nutella: The hero of our recipe! This chocolate hazelnut spread brings that irresistible creamy flavor.
    • Semisweet chocolate: Chopped and melted, it deepens the chocolatey goodness shall we say?
    • Chocolate chips: These morsels create pockets of gooey, melty bliss in each brownie.
    • Hazelnuts: Chopped and toasted, they add a delightful crunch and nutty flavor to the dish.
    • Salt: Just a pinch! It helps to bring out the flavors in the brownies.
    • All-purpose flour: This gives structure to the brownies, so they don’t fall apart.
    • Baking powder: A little lift to ensure your brownies don’t feel too heavy.

    Optional Ingredients and Substitutions

    • Nut butter: Swap Nutella for peanut butter or almond butter if you’re feeling adventurous.
    • Dairy-free chocolate: For a dairy-free version, use non-dairy chocolate and butter substitutes.
    • Chopped chocolate: Feel free to mix in different types of chocolate chips or bars to customize the flavor.
    • Spices: A pinch of cinnamon can add warmth, while espresso powder can enhance the chocolate flavor.
    • Gluten-free flour: Use a one-to-one baking blend to make these brownies gluten-free!

    How to Make Nutella Hazelnut Brownies

    Now that you’ve rounded up all your ingredients, it’s time to bring this recipe to life. Making Nutella Hazelnut Brownies is almost like weaving a delicious tapestry. Each step adds a layer of flavor and texture, creating a treat that your taste buds will thank you for. Let’s explore the steps together!

    Step 1: Prepare Your Oven and Pan

    First things first, preheat your oven to 325°F. This step is crucial for achieving that perfect fudgy texture. Next, grab a 9-inch square pan and line it with parchment paper. Allow the paper to hang over the edges; you’ll thank yourself later when you pull the brownies out. A quick spray of nonstick spray gives you added assurance that your brownies won’t stick!

    Step 2: Melt Butter and Chocolate

    In a medium-sized pan over low heat, combine your unsalted butter, chopped semisweet chocolate, and 1 cup of the chocolate chips. Stir it gently, watching the magic happen as they melt together into a smooth, glossy mixture. Keep an eye on it, so it doesn’t burn. Once everything is melted and combined, let it cool slightly before moving to the next step. This prevents curdling when you add the eggs.

    Step 3: Mix Wet Ingredients

    In a large mixing bowl, whisk together the eggs, Nutella, sugar, and vanilla extract. Go ahead and mix it until it’s nice and smooth. The Nutella will make it a bit thick, but don’t worry! Once the slightly cooled chocolate mixture joins this blend, you’ll see everything coming together beautifully. Make sure there are no lumps—smooth is the key.

    Step 4: Combine Dry Ingredients

    In a separate bowl, sift together the all-purpose flour, baking powder, and salt. This step is all about aeration and ensuring even mixing. Gradually mix these dry ingredients into your wet batter. Don’t rush—gently fold it together until just combined. Now, toss in the rest of the chocolate chips and a cup of toasted hazelnuts for that delightful crunch. You’ll love how they enhance the texture!

    Step 5: Bake the Brownies

    With everything ready, pour the batter into your prepared pan. Spread it evenly, then sprinkle the remaining chopped hazelnuts on top for a little extra flair. Bake in the preheated oven for about 40 minutes. After this, cover the pan with foil and continue baking for an additional 10–15 minutes. This will help set the center while keeping the outer edges soft. Once done, let it cool completely in the pan. This key step ensures clean cuts and beautifully shaped brownies!

    Tips for Success

    • Use room-temperature eggs for better incorporation into the batter.
    • Don’t skip lining the pan; it makes removal easy and mess-free.
    • Let the brownies cool completely before cutting them to avoid crumbling.
    • For a deeper flavor, use high-quality semisweet chocolate.
    • Try adding a sprinkle of sea salt on top before baking for a sweet-savory twist.

    Equipment Needed

    • 9-inch square pan: Necessary for baking; a round pan will work in a pinch.
    • Parchment paper: Helps with easy removal; aluminum foil can also suffice.
    • Medium-sized pan: For melting chocolate; a microwave-safe bowl can be a quick alternative.
    • Mixing bowls: Both large and medium; any size will do as long as they’re sturdy.
    • Whisk: Perfect for mixing; a fork can also get the job done!

    Variations

    • Nut-Free Brownies: Swap out the hazelnuts for a delightful mix of seeds like sunflower or pumpkin for crunch without the nuts.
    • Vegan Version: Replace the eggs with flaxseed meal mixed with water and use coconut oil instead of butter for a plant-based treat.
    • Mint Chocolate Brownies: Add a few drops of peppermint extract to the batter for a refreshing twist that pairs beautifully with chocolate.
    • Caramel Swirl: Drizzle warm caramel sauce into the brownie batter for an indulgent sweet surprise in every bite.
    • Double Chocolate: For an extra chocolaty experience, increase the amount of semisweet chocolate or add white chocolate chips along with the standard ones.

    Serving Suggestions

    • Ice Cream: Serve warm Nutella Hazelnut Brownies with a scoop of vanilla or hazelnut ice cream for an indulgent dessert.
    • Fresh Berries: Add a side of fresh raspberries or strawberries to brighten the plate and balance the richness.
    • Drizzle: Finish with a drizzle of chocolate or caramel sauce for an elegant presentation.
    • Coffee or Tea: Pair these brownies with a cup of coffee or tea for a cozy afternoon treat.
    • Dusting of Powdered Sugar: A light dusting adds a beautiful touch without overpowering the flavors.

    FAQs about Nutella Hazelnut Brownies

    Can I use hazelnut flour instead of all-purpose flour?

    While you can use hazelnut flour for a nuttier flavor, it will change the texture. I recommend sticking to all-purpose flour or a one-to-one gluten-free blend for the best results.

    How do I store leftover brownies?

    Keep your Nutella Hazelnut Brownies in an airtight container at room temperature. They’ll stay fresh for up to a week. Just make sure they’re completely cool before storing them, or you’ll end up with a sticky mess!

    Can I freeze these brownies?

    Absolutely! Wrap the brownies tightly in plastic wrap and then place them in a freezer-safe container. They can last up to three months in the freezer—just thaw them overnight in the fridge when you’re ready to enjoy.

    What’s the best way to know when the brownies are done?

    To check for doneness, you can use the toothpick method. Insert a toothpick in the center; it should come out with a few moist crumbs but not wet batter. Remember, they’ll continue to cook a bit as they cool!

    Can I add other mix-ins to the brownies?

    Definitely! Feel free to add a variety of mix-ins like white chocolate chips, dried fruits, or even a sprinkle of your favorite nuts for extra texture and flavor.

    Final Thoughts

    Baking Nutella Hazelnut Brownies is like creating a love letter to sweetness that you can savor. Each bite offers a warm hug of chocolate and the delightful crunch of hazelnuts, bringing a smile to everyone’s face. Whether it’s a hectic weeknight or a special celebration, these brownies will always stand out. It warms my heart to know they’re sharing joy with loved ones. So roll up your sleeves, gather your ingredients, and let the delightful aroma fill your home. Trust me, every moment spent making these brownies is a moment well invested in happiness!


    Print

    clock clock iconcutlery cutlery iconflag flag iconfolder folder iconinstagram instagram iconpinterest pinterest iconfacebook facebook iconprint print iconsquares squares iconheart heart iconheart solid heart solid icon

    Description

    When I think of comfort food, Nutella Hazelnut Brownies instantly come to mind. There’s something magical about a fudgy brownie, rich with chocolate and that unmistakable nutty flavor. If you’re a busy mom or professional like me, this recipe is the perfect solution to satisfy your sweet cravings without spending hours in the kitchen. Just imagine serving these delightful brownies to your family or friends. Their eyes will light up with joy, and you’ll feel that warm, fuzzy happiness of sharing something truly delicious! Let’s dive into this heavenly experience together.


    • 3 large eggs
    • 2 teaspoons vanilla extract
    • 1 cup sugar
    • 1 cup unsalted butter
    • ⅓ cup Nutella (chocolate hazelnut spread)
    • 4 ounces semisweet chocolate, chopped
    • 1¾ cups semisweet chocolate chips, divided
    • 1¼ cups coarsely chopped hazelnuts, toasted, divided
    • ½ teaspoon salt
    • ⅔ cup all-purpose flour
    • ½ tablespoon baking powder

    1. Turn your oven to 325°F. Line a 9-inch square pan with parchment, making sure the paper hangs over the edges. Spray with nonstick spray.
    2. In a medium-sized pan on low heat, stir together the butter, chopped chocolate, and 1 cup of the chocolate chips. Keep mixing until it’s smooth and shiny. Let it cool a little afterward.
    3. In a big bowl, whisk eggs, Nutella, sugar, and vanilla well. Combine this with the slightly cooled chocolate mixture until it’s blended.
    4. Sift the flour, salt, and baking powder together. Slowly mix it into the wet batter. Add the last of the chocolate chips and 1 cup of the hazelnuts, stirring gently.
    5. Pour everything into the pan you prepped earlier. Scatter the rest of the hazelnuts on top. Bake for 40 minutes. Cover the pan with foil and bake another 10–15 minutes until the center is mostly set. Let it cool fully before cutting.

    Notes

    • For extra flavor, use high-quality semisweet chocolate.
    • Allow the brownies to cool completely for easier cutting.
    • You can store these brownies in an airtight container for up to a week.
    • Prep Time: 15 minutes
    • Cook Time: 55 minutes
    • Category: Dessert
    • Method: Baking
    • Cuisine: American

    Nutrition

    • Serving Size: 1 brownie
    • Calories: 250
    • Sugar: 20g
    • Sodium: 150mg
    • Fat: 15g
    • Saturated Fat: 8g
    • Unsaturated Fat: 7g
    • Trans Fat: 0g
    • Carbohydrates: 30g
    • Fiber: 2g
    • Protein: 3g
    • Cholesterol: 85mg

    Sharing is caring!

  • Banana Split Fluff Salad

    Banana Split Fluff Salad


    Introduction to Banana Split Fluff Salad

    Summer is the perfect time for light, refreshing treats, and nothing is quite as delightful as a Banana Split Fluff Salad. This dessert is a nostalgic twist on the classic banana split, transforming it into a fluffy, creamy salad that takes minimal effort to prepare. Whether you’re hosting a backyard barbecue or simply need a quick solution for a busy day, this salad is sure to impress your loved ones. It’s easy to make, can be prepped in advance, and offers that comforting taste of summer that we all crave.

    Why You’ll Love This Banana Split Fluff Salad

    This Banana Split Fluff Salad is a real game-changer for busy days. It comes together in just 15 minutes, with zero cooking involved—talk about a homemaker’s dream! The creamy texture and burst of fruity flavors will sweep you off your feet. Plus, it’s perfect for gatherings with friends or family. Who wouldn’t love a dessert that’s as easy to make as it is to devour?

    Ingredients for Banana Split Fluff Salad

    Gathering the ingredients for this Banana Split Fluff Salad is half the fun! Here’s what you’ll need:

    • Instant banana pudding mix: This acts as the creamy base and gives that signature banana flavor.
    • Canned crushed pineapple: The juice makes the pudding rich and sweet while adding a tart punch.
    • Cool Whip: A fluffy, airy addition that lightens everything up—perfect for those summer vibes!
    • Ripe bananas: Slice them right before serving to keep them fresh and bright. They bring that essential tropical feel!
    • Fresh strawberries: Their sweetness complements the fluff and adds a vibrant splash of color.
    • Mini marshmallows: These little bites of sweetness add a fun texture that you’ll enjoy with every spoonful.
    • Maraschino cherries: Perfect for that classic banana split look! Use some for mixing and some for topping.
    • Semisweet chocolate chips: A delightful little surprise, they blend beautifully with the fruity flavors.
    • Chopped peanuts or walnuts: A crunchy element that provides contrast, plus a nutty flavor that rounds things out!
    • Whipped cream: For topping, because let’s be honest, who doesn’t want a little extra fluff?
    • Sprinkles: The finishing touch! They add whimsy and fun, perfect for impressing the kiddos (and adults, too).

    You can get creative with this recipe! Feel free to swap out fruits based on your family’s favorites or what’s available at your local market. For exact measurements and tips on substitutions, check the bottom of the article where everything is neatly laid out for printing.

    How to Make Banana Split Fluff Salad

    Making this Banana Split Fluff Salad is as easy as pie—or should I say, a slice of banana split? Grab your ingredients, and let’s get started on this delightful summer treat!

    Step 1: Prepare the Pudding Base

    In a large mixing bowl, whisk together the instant banana pudding mix with the juice from the crushed pineapple. Just keep whisking until the mixture is smooth and thick. This step brings that classic banana flavor into play!

    Step 2: Incorporate the Cool Whip

    Now it’s time to lighten things up! Gently fold in the Cool Whip. The lightness adds an airy feel that makes this salad a fluffy dream. Mix cautiously to avoid deflating that glorious creaminess.

    Step 3: Add the Fruits and Mix-ins

    Here comes the fun part! Toss in your sliced bananas, chopped strawberries, and those irresistible mini marshmallows. Don’t forget the maraschino cherries, chocolate chips, and chopped nuts! Gently fold everything together until fully coated with your banana pudding mixture. Just think of how colorful and vibrant this looks!

    Step 4: Chill to Perfection

    Cover your bowl with plastic wrap and pop it into the fridge. Let it chill for about 2 to 4 hours. Chill time is essential; it allows the flavors to meld and intensify, ensuring every bite is packed with deliciousness!

    Step 5: Serve and Garnish with Delight

    When you’re ready to wow your family and friends, scoop the salad into bowls. Top each serving with extra chocolate chips, chopped nuts, and maraschino cherries. A dollop of whipped cream and a sprinkle of colorful sprinkles make everything pop! Your Banana Split Fluff Salad is ready to be devoured!

    Tips for Success

    • Make the Banana Split Fluff Salad a few hours ahead for the best flavor.
    • Slice bananas right before serving to keep them fresh and prevent browning.
    • Experiment with different fruits like blueberries or kiwi for a unique twist.
    • Use a heavy-duty mixing bowl to handle the fluffy texture without making a mess.
    • Store leftovers in an airtight container in the fridge for up to three days.

    Equipment Needed

    • Mixing bowl: A large bowl works best; alternatively, a sturdy pot can do the trick.
    • Whisk: Essential for mixing; a fork can also suffice in a pinch.
    • Spatula: A silicone spatula allows for gentle folding without damaging the fluff.
    • Measuring cups: Handy for those precise ingredient portions, though you could eyeball it too!
    • Plastic wrap: Keeps your salad fresh while chilling; a lid works just as well.

    Variations for Banana Split Fluff Salad

    • Tropical Twist: Add diced mango and shredded coconut for a fun tropical flavor.
    • Chocolate Lover’s Delight: Swap in chocolate pudding mix instead of banana for a double chocolate treat.
    • Nut-Free Version: Omit the nuts and add sunflower seeds for a crunchy bite without allergens.
    • Low-Sugar Option: Use sugar-free pudding mix and Cool Whip for a lighter dessert that still tastes divine.
    • Vegan Adaptation: Substitute coconut whipped cream and a plant-based pudding mix for a vegan-friendly dessert.

    Serving Suggestions

    • Pair the Banana Split Fluff Salad with grilled chicken or pork for a delightful summer meal.
    • Serve it alongside refreshing beverages like lemonade or iced tea to complement the sweetness.
    • For a fun presentation, use colorful bowls and sprinkle extra toppings on each serving.
    • Consider creating a buffet-style dessert table for gatherings; it’s a crowd-pleaser!

    FAQs about Banana Split Fluff Salad

    Have questions about this delightful Banana Split Fluff Salad? You’re not alone! Here are some common queries I often hear from fellow home cooks, along with my tasty answers:

    Can I make Banana Split Fluff Salad ahead of time?
    Absolutely! In fact, making it a few hours in advance allows the flavors to meld beautifully. Just keep it chilled until you’re ready to serve.

    What fruits can I use in this salad?
    You can get creative! While bananas and strawberries are classic, you can also try blueberries, kiwis, or even peaches for a different flavor profile.

    How long does Banana Split Fluff Salad last in the fridge?
    It should stay fresh for about three days in an airtight container. However, the bananas might brown a bit, so for the best look, enjoy it within the first couple of days.

    Can I make a healthier version of this salad?
    Definitely! Use sugar-free pudding mix and Cool Whip. You can also substitute fruits like blueberries, which are rich in nutrients and flavor.

    Is Banana Split Fluff Salad suitable for kids?
    Without a doubt! It’s a fun, colorful dessert that kids love. Plus, it’s a great way to sneak in some fruit while they enjoy the sweetness!

    Final Thoughts

    This Banana Split Fluff Salad brings summer joy to your table, wrapping nostalgia and flavors in a light, fluffy dessert. Each spoonful is like a stroll through a sunlit park, evoking those sweet and carefree days. It’s a delightful way to gather family and friends, creating connections over a bowl of happiness. As you prepare it, remember that the best ingredient is love, infused with laughter and shared moments. So whip up this luscious treat, and watch as smiles light up the room—a perfect reminder that dessert can be both easy and spectacular!


    Print

    clock clock iconcutlery cutlery iconflag flag iconfolder folder iconinstagram instagram iconpinterest pinterest iconfacebook facebook iconprint print iconsquares squares iconheart heart iconheart solid heart solid icon

    Description

    Summer is the perfect time for light, refreshing treats, and nothing is quite as delightful as a Banana Split Fluff Salad. This dessert is a nostalgic twist on the classic banana split, transforming it into a fluffy, creamy salad that takes minimal effort to prepare. Whether you’re hosting a backyard barbecue or simply need a quick solution for a busy day, this salad is sure to impress your loved ones. It’s easy to make, can be prepped in advance, and offers that comforting taste of summer that we all crave.


    • 1 box (3.4 ounces) instant banana pudding mix
    • 1 can (40 ounces) crushed pineapple in juice, undrained
    • 1 tub (8 ounces) Cool Whip, thawed
    • 3 large ripe bananas, sliced
    • 16 ounces fresh strawberries, hulled and chopped
    • 4 cups mini marshmallows
    • 1 jar (10 ounces) maraschino cherries, drained well, some reserved for topping
    • 1/2 cup semisweet chocolate chips, plus extra for topping
    • 1/2 cup chopped peanuts or walnuts, plus extra for topping
    • Whipped cream, for topping
    • Sprinkles, for topping

    1. In a large mixing bowl, whisk together the instant banana pudding mix and the juice from the crushed pineapple until smooth and thickened.
    2. Fold in the Cool Whip until well incorporated.
    3. Add sliced bananas, chopped strawberries, mini marshmallows, maraschino cherries, chocolate chips, and chopped nuts to the bowl. Gently fold the mixture until everything is well coated with the banana pudding mixture.
    4. Refrigerate the mixture for 2-4 hours to allow the flavors to meld together and the dessert to set.
    5. Before serving, garnish with additional chocolate chips, chopped nuts, maraschino cherries, dollops of whipped cream, and sprinkles.

    Notes

    • For best results, make the salad a few hours in advance to let the flavors develop.
    • Feel free to substitute other fruits based on your preference.
    • This dessert is best served chilled.
    • Prep Time: 15 minutes
    • Cook Time: 0 minutes
    • Category: Dessert
    • Method: Mixing and Refrigerating
    • Cuisine: American

    Nutrition

    • Serving Size: 1 cup
    • Calories: 180
    • Sugar: 22g
    • Sodium: 70mg
    • Fat: 7g
    • Saturated Fat: 2g
    • Unsaturated Fat: 5g
    • Trans Fat: 0g
    • Carbohydrates: 29g
    • Fiber: 1g
    • Protein: 2g
    • Cholesterol: 5mg

    Sharing is caring!

  • M&M’s Ferrero Oreo Roll Cake

    M&M’s Ferrero Oreo Roll Cake


    Introduction to M&M’s Ferrero Oreo Roll Cake

    Hey there, fellow dessert lovers! If you’re anything like me, you know how vital it is to have a delicious, quick solution for those bustling days. Enter the M&M’s Ferrero Oreo Roll Cake—a showstopper that’s easier to whip up than you’d think! This indulgent roll cake is perfect for impressing guests or enjoying a sweet treat after dinner with the family. With a rich chocolate base and delightful fillings, it’s truly a cake made for every occasion. Let’s dive into this delightful recipe and make some sweet memories!

    Why You’ll Love This M&M’s Ferrero Oreo Roll Cake

    This M&M’s Ferrero Oreo Roll Cake is a fantastic treat that balances simplicity with luscious flavors. It comes together quickly, making it perfect for busy moms and professionals. The combination of chocolate, cream, and crunchy Oreos provides a taste sensation that everyone will adore. Plus, its gorgeous appearance means you can serve it at gatherings, and it’ll have your guests raving—in just under two hours!

    Ingredients for M&M’s Ferrero Oreo Roll Cake

    Now, let’s get into the heart of this delectable M&M’s Ferrero Oreo Roll Cake—its ingredients! Each component plays a vital role in creating that dreamy flavor and texture. Here’s what you’ll need:

    • All-purpose flour: The backbone of the cake, giving it structure and lightness.
    • Cocoa powder: For that rich, chocolatey essence that makes every bite heavenly.
    • Sugar: Adds sweetness, balancing the chocolate’s bitterness perfectly.
    • Eggs: They provide moisture and help bind the cake together, creating that fluffy feel.
    • Baking powder: A crucial leavening agent that helps the cake rise beautifully.
    • Milk: Enhances the batter’s creaminess, ensuring a moist cake every time.
    • Melted butter: Adds richness and depth to the flavor, making each slice divine.
    • Vanilla extract: A splash of this adds warmth and elevates the dessert’s aroma.
    • Heavy cream: Used for whipping into fluffy goodness, this cream is crucial for the filling.
    • Crushed Oreo cookies: These little pieces add a delightful crunch and flavor that complements the chocolate.
    • Ferrero Rocher chocolates: Chopped for that luxurious taste and elegant texture, they’re the cherry on top!
    • M&M’s for garnish: For a burst of color and fun crunch, these candies finish off your cake perfectly.
    • Chocolate ganache: This silky, rich topping adds extra indulgence and makes the cake truly eye-catching.

    Don’t forget, the ingredient quantities are listed at the bottom of the article for easy printing! Feel free to get creative by playing around with different toppings and fillings. Maybe some crushed nuts for an extra crunch, or substituting with gluten-free flour—make this cake your own!

    How to Make M&M’s Ferrero Oreo Roll Cake

    Ready to get your hands dirty and create a masterpiece? Making the M&M’s Ferrero Oreo Roll Cake is a fun adventure. Follow these simple steps and let your culinary creativity shine!

    Preheat and Prepare the Baking Sheet

    First things first, let’s get that oven fired up! Preheat your oven to 350°F (175°C). Do this now so it’s ready when you need it.

    Next, grab a 9×13-inch baking sheet. Grease it lightly and line it with parchment paper. This step is crucial, as it prevents sticking and makes for easy removal later. The parchment paper is like a little safety net for your cake!

    Make the Chocolate Batter

    In a mixing bowl, sift together your flour, cocoa powder, and baking powder. This ensures any lumps are gone and keeps the batter light.

    In another larger bowl, whisk those eggs and sugar together until they’re light and fluffy. It should almost look like a creamy cloud! Now, gently fold in your dry ingredients. Pour in the milk, melted butter, and vanilla extract. Mix everything until it’s smooth, silky, and oh-so-chocolatey!

    Bake the Cake

    Pour your luscious batter into the prepared baking sheet, spreading it evenly. Pop it in the oven and set your timer for 10 to 12 minutes. Keep an eye on it; the cake is ready when it springs back when lightly touched.

    Don’t worry if it’s a little wobbly; that’s just what it should be like. Removing it from the oven at the right time is key to a successful roll cake!

    Roll the Cake

    As soon as your cake is out of the oven, it’s rolling time! Carefully flip the cake onto a clean kitchen towel. Roll it up gently, towel and all, while it’s still warm, starting from a short end.

    This technique helps prevent cracks later on. Let it cool completely in this rolled-up shape—trust me, it makes a difference!

    Prepare the Filling

    While your cake cools, it’s time to whip that cream! Using a hand mixer or stand mixer, beat your heavy cream until stiff peaks form. Just keep going until it’s fluffy but be cautious not to over-whip it—it should be light and airy. Gently fold in the crushed Oreos and chopped Ferrero Rocher chocolates. Oh, the delightful crunch!

    Assemble the Cake

    Once the cake has cooled down, it’s time to unroll it carefully. Spread the delicious filling evenly over the surface, leaving just a tiny border around the edges.

    Now, re-roll the cake gently, being sure to hold onto that delicious filling. Wrap it up in plastic wrap and pop it in the fridge for at least an hour. This step helps everything set—so patient hands will reward you with a beautiful slice!

    Final Touches

    After chilling, remove your masterpiece from the fridge. Drizzle that rich chocolate ganache over the top, letting it pool in delicious puddles.

    Finally, sprinkle a generous handful of M&M’s on top for a pop of color and extra crunch. Slice into this fabulous M&M’s Ferrero Oreo Roll Cake and serve it up to your eager family or guests. Get ready for the oohs and aahs!

    Tips for Success

    • Always preheat your oven for even baking; it makes a world of difference!
    • Use room temperature eggs for a fluffier batter.
    • Make sure to sift your dry ingredients to avoid clumps.
    • Let the cake cool completely before unrolling to prevent cracks.
    • When whipping cream, stop as soon as stiff peaks form for the best texture.

    Equipment Needed

    • 9×13-inch baking sheet: You can substitute with a similar-sized pan if needed.
    • Parchment paper: Wax paper works in a pinch, though it’s not as reliable.
    • Mixing bowls: A large and medium bowl will do; just ensure they’re sturdy.
    • Hand mixer or stand mixer: You can whip the cream by hand if you’re feeling strong!
    • Plastic wrap: Aluminum foil can work for refrigerating your rolled cake.

    Variations

    • Gluten-Free Option: Substitute all-purpose flour with a 1:1 gluten-free baking blend for a delicious gluten-free treat.
    • Nuts Galore: Add chopped nuts like hazelnuts or almonds into the filling for a delightful crunch and extra flavor.
    • Fruit Twist: Incorporate crushed strawberries or raspberries into the filling for a fruity twist that complements the chocolate beautifully.
    • Healthier Alternative: Use a sugar substitute and low-fat cream to make a lighter version without sacrificing flavor.
    • Vegan Style: Replace eggs with flaxseed meal mixed with water and use coconut cream for a delightful vegan-friendly version.

    Serving Suggestions for M&M’s Ferrero Oreo Roll Cake

    • Pair with Coffee: A cup of coffee or espresso complements the rich chocolate flavors.
    • Fresh Berries: Serve with fresh strawberries or raspberries for a pop of color and freshness.
    • Whipped Cream: Add a dollop of whipped cream for extra indulgence.
    • Pretty Presentation: Dust with powdered sugar or drizzle extra ganache for a beautiful serving.

    FAQs about M&M’s Ferrero Oreo Roll Cake

    What can I use instead of Ferrero Rocher?

    If you can’t find Ferrero Rocher chocolates, you can easily substitute them with any chocolate hazelnut candies or even chopped nuts for that crunchy texture. Feel free to experiment!

    How long can I store the M&M’s Ferrero Oreo Roll Cake?

    You can store this cake in the refrigerator for up to three days. Just wrap it tightly in plastic wrap or keep it in an airtight container to maintain its freshness.

    Can I freeze the roll cake?

    Absolutely! Just wrap the entire roll cake in plastic wrap and then in aluminum foil. It can be frozen for about a month. Thaw in the fridge overnight before serving.

    What if I have leftovers?

    Leftover slices can be a delightful treat for breakfast, paired with your morning coffee or a scoop of ice cream for dessert. No one will mind that easy indulgence!

    Can I make this M&M’s Ferrero Oreo Roll Cake in advance?

    Yes! You can make the roll cake a day ahead. Just assemble it, refrigerate, and wait to add the ganache and M&M’s until you’re ready to serve. It’ll save you time and keep it fresh!

    Final Thoughts

    The M&M’s Ferrero Oreo Roll Cake isn’t just a dessert; it’s a sweet experience that brings joy to your kitchen. From the moment you start mixing the ingredients to the delightful moment when you slice the cake, every step is a celebration of flavor. It’s perfect for special occasions or as a delightful surprise for loved ones. Each bite combines creamy, crunchy, and chocolaty goodness, leaving everyone craving more. So, gather your favorite people, share a slice, and let the compliments roll in! This cake is sure to create lasting memories and smiles all around.


    Print

    clock clock iconcutlery cutlery iconflag flag iconfolder folder iconinstagram instagram iconpinterest pinterest iconfacebook facebook iconprint print iconsquares squares iconheart heart iconheart solid heart solid icon

    Description

    Hey there, fellow dessert lovers! If you’re anything like me, you know how vital it is to have a delicious, quick solution for those bustling days. Enter the M&M’s Ferrero Oreo Roll Cake—a showstopper that’s easier to whip up than you’d think! This indulgent roll cake is perfect for impressing guests or enjoying a sweet treat after dinner with the family. With a rich chocolate base and delightful fillings, it’s truly a cake made for every occasion. Let’s dive into this delightful recipe and make some sweet memories!


    • 1 cup all-purpose flour
    • ½ cup cocoa powder
    • ¾ cup sugar
    • 4 large eggs
    • 1 tsp baking powder
    • ½ cup milk
    • ¼ cup melted butter
    • 1 tsp vanilla extract
    • 1 cup heavy cream
    • ½ cup crushed Oreo cookies
    • 6 Ferrero Rocher chocolates, chopped
    • ½ cup M&M’s for garnish
    • ½ cup chocolate ganache

    1. Preheat your oven to 350°F (175°C). Grease a 9×13-inch baking sheet and line it with parchment paper. In a medium bowl, sift together the flour, cocoa powder, and baking powder.
    2. In a separate large bowl, whisk the eggs and sugar until light and fluffy. Gradually fold in the dry ingredients, followed by milk, melted butter, and vanilla extract. Mix until smooth.
    3. Pour the batter into the prepared baking sheet and spread it evenly. Bake for 10-12 minutes until the cake springs back when touched.
    4. Once baked, remove the cake from the oven and immediately roll it up with a clean kitchen towel while it’s still warm. Let it cool completely in this rolled-up shape to prevent cracking.
    5. While the cake cools, whip the heavy cream until stiff peaks form. Gently fold in the crushed Oreos and chopped Ferrero Rocher chocolates.
    6. Once the cake has cooled, carefully unroll it. Spread the filling evenly over the cake, leaving a small border. Re-roll the cake gently, being careful not to tear it. Wrap it in plastic wrap and refrigerate for at least one hour to let it set.
    7. After chilling, remove the cake from the fridge and drizzle chocolate ganache over the top. Sprinkle with M&M’s for added texture and color. Slice the cake and serve.

    Notes

    • Ensure the cake is completely cool before unrolling to prevent cracks.
    • You can use a hand mixer or stand mixer for whipping the cream.
    • For a richer flavor, use dark chocolate ganache.
    • Prep Time: 30 minutes
    • Cook Time: 12 minutes
    • Category: Dessert
    • Method: Baking
    • Cuisine: American

    Nutrition

    • Serving Size: 1 slice
    • Calories: 300
    • Sugar: 20g
    • Sodium: 150mg
    • Fat: 18g
    • Saturated Fat: 10g
    • Unsaturated Fat: 8g
    • Trans Fat: 0g
    • Carbohydrates: 30g
    • Fiber: 2g
    • Protein: 4g
    • Cholesterol: 90mg

    Sharing is caring!

  • Steak and Cheese Garlic Toast

    Steak and Cheese Garlic Toast


    Introduction to Steak and Cheese Garlic Toast

    As a busy mom and passionate home cook, I know how challenging it can be to whip up something satisfying after a long day. That’s why I love making Steak and Cheese Garlic Toast. This delightful dish gives you all the heartiness of a steak dinner, but with the comforting twist of crispy garlic toast. It’s perfect for those nights when you want to impress your family without spending hours in the kitchen. Plus, who can resist the aroma of garlic and melting cheese wafting through the house? Trust me, your loved ones will be begging for more!

    Why You’ll Love This Steak and Cheese Garlic Toast

    This Steak and Cheese Garlic Toast is a game-changer. It’s quick to prepare, making it ideal for busy weeknights when you need a hearty meal in a flash. The combination of juicy steak, rich cheese, and savory garlic offers a flavor explosion that will leave everyone at the table satisfied. Plus, it’s customizable, so you can tweak it to suit any picky eaters in your household. You simply can’t go wrong!

    Ingredients for Steak and Cheese Garlic Toast

    Gathering the right ingredients is half the fun! Here’s what you’ll need for this mouthwatering recipe:

    • Thick-cut bread: French bread or Texas toast works beautifully, giving you that perfect base.
    • Unsalted butter: Softened butter is essential for the garlic spread. It adds richness without added saltiness.
    • Garlic: Freshly minced garlic brings an aromatic kick. You can also add garlic powder if you want an extra burst of flavor.
    • Parsley: Finely chopped parsley not only adds color but also a fresh taste that complements the garlic.
    • Steak: I recommend ribeye, sirloin, or flank steak for their tenderness and flavor. Choose your favorite cut for a satisfying protein punch.
    • Olive oil: A dash of olive oil helps cook the steak to perfection while keeping it juicy.
    • Worcestershire sauce: This optional ingredient adds a delightful umami flavor to your steak. Worth the splash!
    • Salt and black pepper: Simple seasonings that elevate the dish; adjust based on your taste preferences.
    • Cheese: A combination of shredded mozzarella and cheddar (or provolone) gives melty goodness. Feel free to mix it up!
    • Onion and bell pepper: Optional sautéed veggies lend sweetness and depth to the dish.
    • Fresh parsley for garnish: Always a nice touch for presentation!
    • Red pepper flakes: Add a kick with these fiery flakes if you crave a bit of heat.

    For exact quantities, you can find those at the bottom of the article, ready for printing!

    How to Make Steak and Cheese Garlic Toast

    Making Steak and Cheese Garlic Toast is simple and straightforward. With just a few easy steps, you’ll create a delicious meal that’s sure to impress. Let’s dive right in!

    Step 1: Preheat the Oven

    Start by preheating your oven to 400°F (200°C). Preheating is crucial because it ensures even cooking and gives your garlic toast that golden-brown crispiness we all love. Just a few minutes of waiting for the oven will yield tasty rewards!

    Step 2: Prepare the Garlic Butter

    In a small mixing bowl, combine the softened butter, minced garlic, and chopped parsley. Use a fork to mix it all together until it’s well blended. This garlic butter will be the flavorful foundation for your toast!

    Step 3: Spread the Garlic Butter on Bread

    Take your thick-cut bread slices and spread a generous layer of the garlic butter mixture on one side of each slice. Make sure to cover the entire surface evenly, as this will ensure every bite is flavorful and toasty!

    Step 4: Bake the Bread

    Place the buttered bread on a baking sheet, buttered side up, and pop it in the oven. Bake for about 6–8 minutes or until the edges are golden and crispy. Keep an eye on them so they don’t burn—nobody likes burnt toast!

    Step 5: Season the Steak

    While the bread is baking, season your steak generously with salt and black pepper on both sides. Seasoning adds depth of flavor that brings out the steak’s natural juiciness.

    Step 6: Cook the Steak

    Heat a skillet over medium-high heat and add olive oil and butter. Once sizzling, add your seasoned steak. Cook for about 3–4 minutes on each side for medium-rare, or adjust the time according to your desired doneness. Don’t forget to pour a splash of Worcestershire sauce for that extra punch if you like!

    Step 7: Allow Steak to Rest

    After cooking, remove the steak from the skillet and let it rest for about 5 minutes. Resting is key! It allows the juices to redistribute, keeping your steak moist and delicious when you slice it.

    Step 8: Sauté the Vegetables

    If you’re using onions and bell peppers, now is the time to sauté them in the same skillet. Cook for 3–4 minutes until they’re soft and slightly caramelized. This adds a lovely sweetness and extra flavor to your dish.

    Step 9: Assemble the Toast

    Once the bread is perfectly baked, layer the slices with thinly sliced steak. Pile on the shredded mozzarella and cheddar cheese. If you sautéed veggies, sprinkle them on top of the cheese for an added touch!

    Step 10: Broil the Toast

    Place your assembled toasts back in the oven and switch to the broiler setting. Broil for about 2–3 minutes, keeping a close watch to prevent burning. You want that cheese to be bubbly and golden brown—absolute perfection!

    Tips for Success

    • Make sure your steak is at room temperature before seasoning for even cooking.
    • Don’t rush the broiling step; keep a close eye on it to achieve that perfect cheesy melt.
    • Feel free to experiment with different types of bread for unique flavors and textures.
    • For added punch, consider seasoning your veggies with a pinch of salt or garlic powder while sautéing.
    • Assemble all your ingredients before starting to streamline the cooking process!

    Equipment Needed

    • Baking sheet: A good-quality sheet ensures even baking.
    • Skillet: A non-stick pan is great for cooking steak and sautéing veggies.
    • Mixing bowl: Any size will do for mixing your garlic butter.
    • Knife and cutting board: Essential for slicing the steak and prepping veggies.
    • Fork: Perfect for spreading the garlic butter evenly!

    Variations

    • Vegetarian option: Substitute the steak with sautéed mushrooms or a mix of your favorite veggies like zucchini and spinach for a satisfying meat-free dish.
    • Spicy twist: Add jalapeños or a drizzle of hot sauce to the toast before broiling for an extra kick.
    • Cheese variations: Experiment with different cheeses, such as pepper jack for heat, or gouda for an additional smokiness.
    • Gluten-free option: Use gluten-free bread to make this delicious recipe accessible for those with dietary restrictions.
    • Herb enhancements: Mix in dried Italian herbs like oregano or basil to the garlic butter for added flavor depth.

    Serving Suggestions

    • Serve with a fresh green salad for a balanced meal that complements the hearty toast.
    • A side of crispy potato wedges or fries adds a delightful crunch.
    • Pair with a chilled glass of red wine or a sparkling soda to elevate your dining experience.
    • For presentation, sprinkle some extra chopped parsley on top before serving for a pop of color!

    FAQs about Steak and Cheese Garlic Toast

    Can I use a different type of steak for this recipe?
    Absolutely! You can use any cut of steak you prefer, like ribeye, sirloin, or flank steak. Each will bring its own unique flavor and texture to your Steak and Cheese Garlic Toast.

    What can I pair with Steak and Cheese Garlic Toast?
    This dish pairs wonderfully with a fresh salad or crispy potato wedges. You might also enjoy it with a glass of red wine or sparkling soda for a delightful meal experience.

    How can I make the toast vegetarian-friendly?
    For a vegetarian option, simply substitute the steak with sautéed mushrooms, zucchini, or your favorite vegetables. They’ll complement the garlic toast beautifully!

    Can I freeze leftovers?
    Yes, you can freeze the garlic toast without toppings for later use. Just reheat in the oven when you’re ready for a quick meal. However, I’d recommend fresh toppings for the best flavor.

    What if my bread isn’t very thick?
    If you’re using thinner bread, keep an eye on it while baking. You may want to reduce the baking time so that it doesn’t burn, ensuring the edges remain crispy while keeping the center soft.

    Final Thoughts

    There’s something truly special about gathering around the table to enjoy a plate of Steak and Cheese Garlic Toast. This dish has a way of turning an ordinary night into a delightful culinary adventure. The sizzling steak, gooey cheese, and aromatic garlic create a symphony of flavors that delights the senses. Plus, the ease of preparation means more time for laughter and stories with loved ones. Whether it’s a quick weeknight meal or a fun weekend treat, this recipe brings joy and togetherness right into your home. Dive in and savor every delicious bite!


    Print

    clock clock iconcutlery cutlery iconflag flag iconfolder folder iconinstagram instagram iconpinterest pinterest iconfacebook facebook iconprint print iconsquares squares iconheart heart iconheart solid heart solid icon

    Description

    As a busy mom and passionate home cook, I know how challenging it can be to whip up something satisfying after a long day. That’s why I love making Steak and Cheese Garlic Toast. This delightful dish gives you all the heartiness of a steak dinner, but with the comforting twist of crispy garlic toast. It’s perfect for those nights when you want to impress your family without spending hours in the kitchen. Plus, who can resist the aroma of garlic and melting cheese wafting through the house? Trust me, your loved ones will be begging for more!


    • 4 slices of thick-cut bread (French bread or Texas toast)
    • 4 tablespoons unsalted butter, softened
    • 2 cloves garlic, minced
    • 1 tablespoon parsley, finely chopped
    • 1/2 teaspoon garlic powder (optional)
    • 300 g (1012 oz) ribeye, sirloin, or flank steak
    • 1 tablespoon olive oil
    • 1 tablespoon butter
    • 1 teaspoon Worcestershire sauce (optional)
    • Salt and black pepper, to taste
    • 1 cup (100 g) shredded mozzarella cheese
    • 1/2 cup (50 g) shredded cheddar cheese (or provolone)
    • 1/2 onion, thinly sliced (optional)
    • 1/2 green bell pepper, thinly sliced (optional)
    • Fresh parsley, chopped (for garnish)
    • Red pepper flakes (for garnish)

    1. Preheat your oven to 400°F (200°C).
    2. In a small bowl, combine the softened butter, minced garlic, garlic powder, and chopped parsley.
    3. Spread the garlic butter evenly over one side of each bread slice. Place the bread on a baking sheet, buttered side up.
    4. Bake for 6–8 minutes or until the edges are golden and crispy. Set aside.
    5. Season the steak generously with salt and black pepper on both sides.
    6. Heat a skillet over medium-high heat. Add the olive oil and butter.
    7. Once hot, add the steak and cook for 3–4 minutes per side for medium-rare or until your desired doneness. Add Worcestershire sauce in the last minute for extra flavor.
    8. Remove the steak from the skillet, let it rest for 5 minutes, then slice it thinly against the grain.
    9. In the same skillet, sauté the onions and green bell pepper for 3–4 minutes until soft and slightly caramelized (optional).
    10. Top each slice of garlic toast with a layer of the sliced steak.
    11. Add a mixture of mozzarella and cheddar cheese on top of the steak. If using sautéed onions and peppers, layer them over the cheese.
    12. Place the assembled toasts back in the oven and broil on high for 2–3 minutes or until the cheese is melted, bubbly, and golden brown. Watch carefully to avoid burning.
    13. Remove from the oven and garnish with freshly chopped parsley and a sprinkle of red pepper flakes if desired.
    14. Serve hot and enjoy!

    Notes

    • Ensure the steak is at room temperature before cooking for more even cooking.
    • Adjust the amount of garlic and cheese according to your preference.
    • This recipe can be easily doubled for larger gatherings.
    • Prep Time: 15 minutes
    • Cook Time: 15 minutes
    • Category: Appetizer
    • Method: Baking and Sautéing
    • Cuisine: American

    Nutrition

    • Serving Size: 1 slice
    • Calories: 450
    • Sugar: 2g
    • Sodium: 800mg
    • Fat: 30g
    • Saturated Fat: 15g
    • Unsaturated Fat: 10g
    • Trans Fat: 0g
    • Carbohydrates: 35g
    • Fiber: 2g
    • Protein: 20g
    • Cholesterol: 70mg

    Sharing is caring!

  • Sweet Bread Sourdough

    Sweet Bread Sourdough


    Introduction to Sweet Bread Sourdough

    Hey there, fellow kitchen adventurers! If you’re looking for a delightful way to elevate your baking game, I’ve got just the thing for you—Sweet Bread Sourdough. Imagine the warm, inviting aroma wafting through your home as this sweet twist on traditional sourdough fills your kitchen with joy. This recipe is not just about bread; it’s about creating cherished moments with your loved ones over a loaf that’s bursting with flavor. Whether it’s a busy morning or a weekend gathering, this Sweet Bread Sourdough is the perfect treat to impress everyone at your table.

    Why You’ll Love This Sweet Bread Sourdough

    This Sweet Bread Sourdough checks all the boxes for busy moms and professionals alike! It’s not only easy to make but also incredibly flavorful. The combination of cream cheese, honey, and blueberries transforms ordinary sourdough into a mouthwatering treat. Plus, it’s perfect for breakfast, brunch, or a cozy dessert. Trust me, baking this will be a stress-reliever, turning your kitchen into a haven of warmth and deliciousness.

    Ingredients Sweet Bread Sourdough

    Let’s dive into our delicious ingredient lineup for this Sweet Bread Sourdough! Each element plays a unique role in crafting this memorable loaf.

    • Room-temp water: This is the magical liquid that activates your sourdough starter. Use filtered water for the best results!
    • Flour for bread: The backbone of our bread! Look for high-protein bread flour for good structure and rise.
    • Salt: Just a pinch of salt enhances flavors and controls yeast activity for a perfectly balanced dough.
    • Sourdough starter: The heart of the sourdough experience! Make sure it’s bubbly and active for optimal fermentation.
    • Softer cream cheese: This creamy delight adds richness and moisture. For a lighter options, consider using Greek yogurt!
    • Fresh lemon juice: A splash of zesty lemon juice brightens flavors and complements the sweetness of blueberries.
    • Ripe blueberries: These juicy gems bring sweetness and vibrant color. Feel free to adjust the amount based on your personal preference.
    • Grated lemon zest: This tiny addition offers an aromatic punch, enhancing the lemon flavor in the bread.
    • Honey: A natural sweetener, honey adds a touch of warmth and pairs beautifully with the cream cheese.
    • Regular white sugar: A bit of granulated sugar helps in balancing the flavors and enhances browning for a beautiful crust.

    For precise measurements, check the bottom of the article where you can find everything in a handy printable format!

    How to Make Sweet Bread Sourdough

    Now that we have our ingredients ready, let’s roll up our sleeves and dive into making this heavenly Sweet Bread Sourdough! The process is simple yet rewarding. With just a few steps, you’ll have a loaf that’s not just beautiful but delicious.

    Step 1: Prepare the Dough

    Start by mixing your room-temperature water, sourdough starter, and flour together in a large bowl. Stir until it’s a shaggy mass. Let this mixture sit for about 30 minutes. This is called the autolyse phase, and it helps develop gluten. Imagine the flour absorbing the water like a sponge—it’s a lovely sight!

    Step 2: Knead and Rest

    After half an hour, sprinkle the salt on top of your dough. Now, it’s time to knead! Fold the dough over itself and pinch it together. Do this for about 5–10 minutes until it’s less sticky and feels smooth. Then cover it with a damp cloth or plastic wrap. Let it rest for 4 to 6 hours, stretching and folding it every thirty minutes. This helps build structure and makes your bread rise beautifully!

    Step 3: Create the Cream Cheese Mixture

    While your dough is resting, let’s whip up that luscious cream cheese mixture! In a medium bowl, blend the softened cream cheese, sugar, and grated lemon zest until smooth. The mixture should be creamy, like frosting just waiting to be devoured. Set it aside, dreaming of all the flavors it will bring.

    Step 4: Incorporate the Blueberries

    When your dough is ready, gently stretch it out for the final fold. This is where the magic happens! Sprinkle the fresh blueberries on top of the dough and fold it over, tucking them in gently. The blueberries will intermingle with your dough, creating bursts of flavor with every slice. Talk about a showstopper!

    Step 5: Shape and Chill the Dough

    Now it’s time to shape your dough into a rectangle. Spread the cream cheese mixture on top, then roll the dough up tightly like a giant cinnamon roll. Pinch the edges to seal in that creamy goodness. Place the dough seam-side up in a floured banneton, cover it, and pop it in the refrigerator for 8 to 12 hours. This slow chilling will enhance the flavor and texture even more—trust me!

    Step 6: Bake the Sourdough

    The moment we’ve been waiting for is here! Preheat your Dutch oven to 250°C (482°F). Carefully remove the dough from the fridge. Bake it with the lid on for 20 minutes, then lower the temperature to 220°C (428°F) and bake for another 20-25 minutes with the lid off. Your home will fill with the scent of happiness! When it’s golden and beautiful, let it cool slightly, then brush the top with a mix of honey and lemon juice for that extra shine. Enjoy every tender bite of your Sweet Bread Sourdough!

    Tips for Success

    • Keep your sourdough starter active for best results—feed it the night before baking.
    • Use room temperature ingredients for a more cohesive dough.
    • Don’t skip the autolyse phase; it significantly improves dough texture.
    • Keep a light hand when incorporating blueberries to avoid bursting them.
    • Patience is key; allow the dough to rest adequately for better flavor.

    Equipment Needed

    • Large mixing bowl: For combining ingredients. A clean plastic bowl works beautifully!
    • Measuring cups and spoons: Accurate measurements are key. Use a kitchen scale if you have one!
    • Dutch oven: Perfect for baking. You can also use a baking stone or covered casserole dish.
    • Banneton basket: Ideal for proofing dough. A regular bowl lined with a clean kitchen towel works too!
    • Dough scraper: Handy for shaping and transferring the dough. A spatula will do just fine in a pinch!

    Variations

    • Fruit Variations: Swap in different fruits like strawberries or raspberries for a delightful twist.
    • Nutty Addition: Add a handful of chopped nuts like walnuts or pecans to bring a crunchy texture.
    • Spice It Up: Incorporate cinnamon or nutmeg for a warm, cozy flavor profile.
    • Vegan Option: Replace cream cheese with a vegan alternative and use maple syrup instead of honey for a plant-based treat.
    • Gluten-Free Version: Use a gluten-free flour blend for those avoiding gluten. Just ensure you add xanthan gum for better structure.

    Serving Suggestions

    • Fresh Fruit Salad: Pair your Sweet Bread Sourdough with a vibrant mix of seasonal fruits for a refreshing side.
    • Coffee or Herbal Tea: Serve with a steaming cup of coffee or your favorite herbal tea for a cozy brunch.
    • Elegant Presentation: Dust the top with powdered sugar or serve with a dollop of whipped cream for a beautiful finish.
    • Cheese Board: Create a cheese board with soft cheeses for a delightful contrast to the sweetness.
    • Yogurt Parfait: Slice the bread and layer it in a yogurt parfait for a delightful breakfast treat.

    FAQs about Sweet Bread Sourdough

    I’ve gathered some common questions about Sweet Bread Sourdough that you might be curious about. Let’s dive right in!

    Can I use frozen blueberries in the Sweet Bread Sourdough?

    Absolutely! Frozen blueberries work just fine. However, be aware they might release more juice into the dough. This can create lovely blue swirls but may also alter the texture slightly. I usually recommend gently mixing them in right before baking.

    How long will my Sweet Bread Sourdough stay fresh?

    Your loaf will stay fresh for about 3-5 days if stored in an airtight container. For longer storage, consider slicing it and freezing the slices. This way, you can enjoy it fresh whenever the craving strikes!

    Why did my dough not rise properly?

    There are a few possible culprits. First, make sure your sourdough starter is active and bubbly. Also, temperature plays a key role; if your kitchen is too cold, it may slow down the fermentation. Lastly, ensure to follow the resting times closely. Patience is key to rising dough!

    Can I use a different sweetener instead of honey?

    Of course! You can substitute honey with agave syrup, maple syrup, or even regular sugar. Each will impart a slightly different flavor, so feel free to experiment to find your favorite! Just remember that liquid sweeteners might require a small adjustment in the amount of liquid you use.

    Can I make Sweet Bread Sourdough without a banneton?

    Yes, you can! If you don’t have a banneton, simply use a regular bowl lined with a well-floured kitchen towel. The key is to ensure the dough has enough support while it proves. Just be gentle when transferring it to the baking vessel.

    Final Thoughts

    Baking Sweet Bread Sourdough is more than just a recipe; it’s a delightful experience that brings joy to the kitchen. The process unfolds like a warm hug, embracing your senses with the blending of sweet cream cheese, juicy blueberries, and hints of lemon. Sharing this bread with loved ones creates lasting memories and brings smiles to their faces. Whether it’s a cozy breakfast or an afternoon treat, each slice offers a moment of comfort. Trust me, this sweet twist will leave you savoring every crumb and eager to bake it again. Happy baking!


    Print

    clock clock iconcutlery cutlery iconflag flag iconfolder folder iconinstagram instagram iconpinterest pinterest iconfacebook facebook iconprint print iconsquares squares iconheart heart iconheart solid heart solid icon

    Description

    Hey there, fellow kitchen adventurers! If you’re looking for a delightful way to elevate your baking game, I’ve got just the thing for you—Sweet Bread Sourdough. Imagine the warm, inviting aroma wafting through your home as this sweet twist on traditional sourdough fills your kitchen with joy. This recipe is not just about bread; it’s about creating cherished moments with your loved ones over a loaf that’s bursting with flavor. Whether it’s a busy morning or a weekend gathering, this Sweet Bread Sourdough is the perfect treat to impress everyone at your table.


    • 350ml room-temp water
    • 500g flour for bread
    • 10g of salt
    • 100g sourdough starter
    • 1/3 cup softened cream cheese
    • Juice from a fresh lemon (about 1 tablespoon)
    • 1 cup ripe blueberries
    • Grated lemon zest from one lemon
    • 2 tablespoons honey
    • 2 tablespoons regular white sugar

    1. Stir together starter, water, and flour. Let it sit for half an hour.
    2. Sprinkle in the salt, then knead the dough.
    3. Cover the dough and let it rest for 4-6 hours, stretching and folding every thirty minutes.
    4. Blend the sugar, lemon peel, and cream cheese until smooth and creamy.
    5. During the final stretch and fold, gently press the blueberries into the dough.
    6. Flatten the dough into a rectangle, smear the cream cheese mixture on top, roll it into a ball, and seal the filling inside.
    7. Lay the dough seam-side up in a floured banneton, cover it, and refrigerate for 8-12 hours.
    8. Preheat your Dutch oven and bake the dough at 250°C for 20 minutes with the lid, then lower to 220°C for 20-25 minutes with the lid off.
    9. Brush the warm bread with the mix of honey and lemon juice.

    Notes

    • Ensure the sourdough starter is active for best results.
    • Adjust the amount of blueberries based on your preference.
    • Cover the dough tightly while resting to prevent drying out.
    • Prep Time: 30 minutes
    • Cook Time: 40-45 minutes
    • Category: Bread
    • Method: Baking
    • Cuisine: American

    Nutrition

    • Serving Size: 1 slice
    • Calories: 180
    • Sugar: 6g
    • Sodium: 300mg
    • Fat: 5g
    • Saturated Fat: 3g
    • Unsaturated Fat: 2g
    • Trans Fat: 0g
    • Carbohydrates: 30g
    • Fiber: 2g
    • Protein: 4g
    • Cholesterol: 15mg

    Sharing is caring!

  • Pistachio & Blackberry Cheesecake Towers

    Pistachio & Blackberry Cheesecake Towers


    Introduction to Pistachio & Blackberry Cheesecake Towers

    As a busy mom, I know how challenging it can be to find time for baking, especially something as delightful as Pistachio & Blackberry Cheesecake Towers. But trust me, these little beauties are worth every moment! Not only are they simple to whip up, but they also look stunning on any dessert table. The creamy cheesecake, crunchy pistachio crust, and luscious blackberry compote come together in a way that feels like a special occasion treat. So, whether you’re celebrating a birthday or just need a sweet escape, these towers will bring joy to your day!

    Why You’ll Love This Pistachio & Blackberry Cheesecake Towers

    You’ll adore these Pistachio & Blackberry Cheesecake Towers for so many reasons! First, they’re incredibly easy to make, which is a mom’s dream. Plus, they use ingredients you probably already have in your pantry! The flavors of creamy cheesecake, crunchy pistachios, and bright blackberries create a delightful harmony that dazzles every taste bud. Best of all, they’re perfect for impressing your family and friends without spending hours in the kitchen!

    Ingredients for Pistachio & Blackberry Cheesecake Towers

    This delightful dessert requires a handful of simple yet glorious ingredients. Let’s dive into what you’ll need to create these enchanting towers of happiness.

    • Graham cracker crumbs: These little bits form the base of your cheesecake. They’re sweet and provide a great crunch. You can use crushed oats or nuts for a gluten-free option.
    • Shelled pistachios: Finely chopped for both the crust and the cheesecake filling. They add a beautiful nutty flavor and stunning color. Feel free to swap them with almonds or walnuts if you prefer.
    • Granulated sugar: This sweet magic enhances the flavors of your dessert. You can use coconut sugar for a healthier twist.
    • Unsalted butter: Melted butter brings everything together in that crust. If you want a dairy-free version, coconut oil works as a lovely substitute.
    • Cream cheese: The star of the show! It provides that rich, creamy texture that everyone loves. Make sure it’s softened so it mixes well.
    • Sour cream: This adds an extra layer of creaminess and a slight tang. Greek yogurt can be used as a healthier alternative.
    • Large eggs: They help set that lovely cheesecake filling. If you’re looking for an eggless option, you can try using flaxseed meal as a bind.
    • Vanilla extract: A splash of vanilla sweetens the deal and adds depth to the flavors. Always choose pure vanilla for the best taste.
    • Fresh blackberries: The crown jewel of this dessert! juicy and sweet, they create a luscious compote. Swap them for raspberries or blueberries if they’re out of season.
    • Lemon juice: Just a dash enhances the berry flavor in your compote, brightening up the taste!
    • Cornstarch: This thickens the blackberry compote. If you don’t have it on hand, arrowroot powder works too.
    • Whipped cream: For that beautiful finishing touch! You can use store-bought or homemade for an extra special treat.
    • Garnishes: Extra blackberries and chopped pistachios not only add flavor, but they also make your cheesecake towers look absolutely gorgeous.

    For exact measurements, check the bottom of this article where I’ve made it super easy for you to print!

    How to Make Pistachio & Blackberry Cheesecake Towers

    Creating these beautiful Pistachio & Blackberry Cheesecake Towers is a breeze! Follow these simple steps, and soon you’ll have a stunning dessert that will impress your loved ones. Trust me; your kitchen will smell heavenly and your heart will be full!

    Step 1: Prepare the Crust

    First things first—let’s get that crust ready! Preheat your oven to 325°F (165°C). In a bowl, combine the graham cracker crumbs, finely chopped pistachios, sugar, and melted butter. Give it a good stir until everything is mixed. Now, take this mixture and press it firmly into the bottom of a greased muffin tin. You want this crust to hold up under the weight of the cheesecake!

    Bake the crust for about 5 minutes until it’s just starting to set. This quick bake helps create a sturdy base for our cheesecake towers. Once done, take them out and let them cool while you prep the filling. Simple, right?

    Step 2: Make the Cheesecake Filling

    Now for the best part—the cheesecake filling! In a large mixing bowl, beat the softened cream cheese and sugar together until it’s super smooth and creamy. This step is crucial; nobody wants a lumpy cheesecake! Add in the sour cream, eggs, and vanilla extract. Mix well until it’s all combined.

    Then, gently fold in the remaining chopped pistachios into the mixture. This gives your cheesecake a delightful crunch. Carefully spoon the creamy cheesecake mixture over your cooled crust in the muffin tin, filling each cup almost to the top. It’s going to be divine!

    Step 3: Bake the Cheesecake Towers

    It’s time to give these cheesecake towers a proper bake! Place the muffin tin in the oven and let them bake for about 20 to 25 minutes. The centers should be set but still slightly jiggly. Remember, no one likes overbaked cheesecake!

    Once baked, take them out and let them cool completely in the tin. After they’re cool, pop them into the refrigerator and chill for at least 2 hours. This gives the flavors time to meld and the texture to firm up nicely.

    Step 4: Prepare the Blackberry Compote

    While those beauties are chilling, let’s whip up the blackberry compote! In a saucepan, combine fresh blackberries, sugar, and lemon juice. Cook this mixture over medium heat, stirring gently as the blackberries start to break down. The aroma will be delightful!

    Once the berries are soft, stir in the cornstarch mixture. Keep cooking until the compote thickens nicely, stirring occasionally. Once it’s bubbly and thick, take it off the heat. Allow it to cool completely before using it to top your cheesecake towers.

    Step 5: Assemble Your Cheesecake Towers

    Now we get to the fun part—putting it all together! Carefully remove the cheesecake towers from the muffin tin. They should pop out with a little nudge. Next, spoon the luscious blackberry compote generously over each cheesecake, letting it drizzle down those beautiful sides.

    To finish it off, add a dollop of whipped cream, a few fresh blackberries, and a sprinkle of chopped pistachios on top. Voila! Your Pistachio & Blackberry Cheesecake Towers are ready to be savored!

    Tips for Success

    • Make sure your cream cheese is at room temperature for easy mixing.
    • Don’t overbake the cheesecake towers; they should be slightly jiggly in the center.
    • Allow the cheesecakes to cool completely in the tin for best results.
    • Prepare the blackberry compote ahead of time and store it in the fridge to save time.
    • For a colorful touch, consider adding layers of different berries in the compote.

    Equipment Needed

    • Muffin tin: Any standard muffin tin works, but a silicone muffin pan makes removing the towers easier.
    • Hand mixer: A hand mixer speeds up the cream cheese mixing process; a whisk also does the job!
    • Saucepan: You’ll need it for that delicious blackberry compote.
    • Measuring cups and spoons: Accurate measurements ensure your dessert turns out perfectly.

    Variations

    • Swap Nuts: For a different flavor, use walnuts or almonds instead of pistachios.
    • Fruit Alternatives: Substitute blackberries with fresh raspberries or strawberries for a twist on the compote.
    • Dairy-Free Option: Use vegan cream cheese and coconut yogurt to make this dish dairy-free.
    • Gluten-Free Version: Opt for gluten-free graham cracker crumbs or crushed nuts for the crust.
    • Less Sweet: Reduce the sugar in both the cheesecake filling and the compote for a more tart dessert.

    Serving Suggestions for Pistachio & Blackberry Cheesecake Towers

    • Pair these delightful cheesecake towers with a cup of rich espresso or iced coffee for a perfect contrast.
    • Add a light, citrusy salad on the side to balance the sweetness.
    • Garnish each plate with mint leaves for a fresh touch.
    • Serve with a drizzle of honey or chocolate sauce for extra indulgence.
    • Display on a beautiful cake stand for a stunning presentation at your next gathering!

    FAQs about Pistachio & Blackberry Cheesecake Towers

    Can I make Pistachio & Blackberry Cheesecake Towers ahead of time?
    Absolutely! These cheesecake towers are perfect for make-ahead treats. Prepare them a day in advance, refrigerate, and they’ll be ready for your gathering. Just add the blackberry compote and garnishes before serving.

    What can I substitute for blackberries in the compote?
    If blackberries aren’t available, feel free to swap them for fresh raspberries, blueberries, or even strawberries. Each fruit brings its own unique flavor, making your dessert a fun surprise!

    How long do the cheesecake towers last in the refrigerator?
    These sweet towers will stay fresh for about 3 to 4 days when stored in an airtight container in the fridge. However, they’re most delightful within the first couple of days.

    Can I freeze Pistachio & Blackberry Cheesecake Towers?
    Yes, you can freeze them! Just make sure they’re well-wrapped in plastic wrap and then in foil before placing them in the freezer. Thaw them in the refrigerator before serving, but note that the texture may change slightly.

    Are Pistachio & Blackberry Cheesecake Towers suitable for a gluten-free diet?
    Yes, just use gluten-free graham cracker crumbs or crushed nuts for the crust, and you’ll have a delicious gluten-free dessert that everyone can enjoy!

    Final Thoughts

    Creating these Pistachio & Blackberry Cheesecake Towers has been a journey filled with joy, delicious smells, and a sprinkle of love. With each bite, there’s a celebration of flavors—crunchy pistachios, creamy cheesecake, and tangy blackberry compote that dances on your taste buds. They’re not just a dessert; they’re a heartfelt way to connect with family and friends. Whether it’s a cozy weeknight surprise or a show-stopping center piece for a special occasion, these towers are bound to bring smiles and satisfied sighs. I hope you find as much joy in making them as I do!


    Print

    clock clock iconcutlery cutlery iconflag flag iconfolder folder iconinstagram instagram iconpinterest pinterest iconfacebook facebook iconprint print iconsquares squares iconheart heart iconheart solid heart solid icon

    Description

    As a busy mom, I know how challenging it can be to find time for baking, especially something as delightful as Pistachio & Blackberry Cheesecake Towers. But trust me, these little beauties are worth every moment! Not only are they simple to whip up, but they also look stunning on any dessert table. The creamy cheesecake, crunchy pistachio crust, and luscious blackberry compote come together in a way that feels like a special occasion treat. So, whether you’re celebrating a birthday or just need a sweet escape, these towers will bring joy to your day!


    • 1 cup graham cracker crumbs
    • 1/2 cup shelled pistachios, finely chopped
    • 1/4 cup granulated sugar
    • 1/4 cup unsalted butter, melted
    • 16 oz cream cheese, softened
    • 1/2 cup granulated sugar
    • 1/2 cup sour cream
    • 2 large eggs
    • 1 teaspoon vanilla extract
    • 1/2 cup shelled pistachios, finely chopped
    • 2 cups fresh blackberries
    • 1/4 cup granulated sugar
    • 1 tablespoon lemon juice
    • 1 tablespoon cornstarch mixed with 2 tablespoons water
    • Whipped cream for garnish
    • Fresh blackberries for garnish
    • Chopped pistachios for garnish

    1. Preheat your oven to 325°F (165°C). In a bowl, combine the graham cracker crumbs, chopped pistachios, sugar, and melted butter. Press the mixture into the bottom of a greased muffin tin, creating a base for your cheesecake towers. Bake for 5 minutes and set aside to cool.
    2. Prepare the cheesecake filling. In a large bowl, beat the cream cheese and sugar until smooth. Add the sour cream, eggs, and vanilla extract, mixing well until combined. Fold in the chopped pistachios. Spoon the cheesecake mixture over the cooled crust in the muffin tin, filling each cup almost to the top.
    3. Bake the cheesecakes for 20-25 minutes, or until the centers are set. Allow them to cool completely in the tin, then refrigerate for at least 2 hours.
    4. While the cheesecakes are chilling, prepare the blackberry compote. In a saucepan, combine the blackberries, sugar, and lemon juice. Cook over medium heat until the berries begin to break down. Stir in the cornstarch mixture and cook until the compote thickens. Allow it to cool completely.
    5. To assemble the towers, carefully remove the cheesecakes from the muffin tin. Spoon the blackberry compote over each cheesecake, allowing it to drip down the sides. Top with a dollop of whipped cream, fresh blackberries, and chopped pistachios.

    Notes

    • Ensure the cream cheese is at room temperature for easier mixing.
    • Do not overbake the cheesecakes; they should remain slightly jiggly in the center.
    • Blackberry compote can be made ahead of time and stored in the refrigerator.
    • Can substitute graham cracker crumbs with crushed nuts for a gluten-free option.
    • Prep Time: 30 minutes
    • Cook Time: 30 minutes
    • Category: Dessert
    • Method: Bake
    • Cuisine: American

    Nutrition

    • Serving Size: 1 cheesecake tower
    • Calories: 350
    • Sugar: 20g
    • Sodium: 180mg
    • Fat: 25g
    • Saturated Fat: 10g
    • Unsaturated Fat: 5g
    • Trans Fat: 0g
    • Carbohydrates: 30g
    • Fiber: 2g
    • Protein: 5g
    • Cholesterol: 95mg

    Sharing is caring!

  • Pistachio Cheesecake Brownies

    Pistachio Cheesecake Brownies


    Introduction to Pistachio Cheesecake Brownies

    Welcome to the world of indulgent sweets! If you’re anything like me, life gets busy, and finding time to whip up something special can feel impossible. But let me introduce you to my Pistachio Cheesecake Brownies. These delightful treats bring together the rich flavors of chocolate, creamy cheesecake, and a hint of nutty pistachio in every bite.

    They’re perfect for those moments when you want to impress loved ones or simply treat yourself after a long day. Trust me, these brownies will become your go-to solution for dessert cravings!

    Why You’ll Love This Pistachio Cheesecake Brownies

    Let’s be honest; life can be hectic, especially for busy moms and professionals. These Pistachio Cheesecake Brownies are not only quick to make but also incredibly delicious. With their rich, fudgy texture and creamy cheesecake layer, they’re the absolute perfect treat for dessert lovers! Plus, they are so easy to put together that you’ll have more time to enjoy them with your family.

    Ingredients for Pistachio Cheesecake Brownies

    Gathering the right ingredients is the first step to creating these decadent Pistachio Cheesecake Brownies. Here’s what you’ll need:

    • Brownies: The base layer that holds it all together! Rich, chocolatey, and oh-so-fudgy.
    • Unsalted Butter: Adds richness and a lovely texture. Unsalted helps control the overall saltiness.
    • Dark Chocolate: Look for chocolate with 50-60% cocoa for a perfect balance of sweetness and bitterness.
    • All-Purpose Flour: Gives structure to the brownies, keeping them chewy and satisfying.
    • Cocoa Powder: To intensify the chocolate flavor and give the brownies that deep, dark color.
    • Eggs: Vital for binding the ingredients together, creating that perfect fudgy texture.
    • Granulated Sugar: Sweetness factor! It helps balance the dark chocolate and adds to the lovely chewy texture.
    • Light Brown Sugar: Adds a hint of molasses flavor, making the brownies extra moist.
    • Vanilla Extract: A splash brings warmth and depth to the overall flavor of the brownies.
    • Salt: Enhances all the flavors, making the sweetness of the brownies pop!
    • Dark Chocolate Chunks: For an extra chocolatey surprise on top! Optional, but highly recommended!

    Now, let’s talk about the other layers that make these brownies so special:

    • Full-Fat Cream Cheese: Essential for that creamy cheesecake layer. Full-fat keeps it rich and comforting.
    • Granulated Sugar (for Cheesecake Filling): Sweetens the cheesecake and balances out the tanginess.
    • Egg (for Cheesecake Filling): Helps set the cheesecake layer, providing a creamy, smooth texture.
    • Vanilla Extract (for Cheesecake Filling): Again, it adds that lovely warmth to the cheesecake.
    • All-Purpose Flour (for Cheesecake Filling): Just a bit to help stabilize that luscious filling.
    • Pistachio Spread: Creates that dreamy layer of flavor and adds a unique twist to these brownies!

    All these ingredients combine to create a dessert that’s indulgent yet simple. You can find the exact measurements at the end of the article for easy printing. Happy baking!

    How to Make Pistachio Cheesecake Brownies

    Step 1: Prepare the Cheesecake Filling

    First things first, grab your cream cheese and beat it until it’s smooth and creamy. A hand mixer works wonders here, but a whisk will do if you’re feeling strong! Next, mix in the granulated sugar, egg, vanilla extract, and flour. Stir these together gently until just combined; you don’t want to overmix it. That’s the secret to keeping it fluffy and delicious! Once everything is blended, pop your cheesecake filling in the fridge while you tackle the brownie batter. This little trick keeps it firm and easier to layer later.

    Step 2: Melt the Chocolate and Butter

    Now, let’s melt the butter and dark chocolate together. Use a heatproof bowl over simmering water or simply microwave in short bursts. If you go the microwave route, stir every 20 seconds to avoid burning the chocolate! It should be smooth and glossy, blending perfectly with the melted butter. Once that’s ready, set it aside to cool just a tad, as mixing it while too hot can scramble the eggs later on. You want that silky texture without any surprises!

    Step 3: Make the Brownie Batter

    In a separate mixing bowl, whisk together the eggs, granulated sugar, and brown sugar until it’s creamy and a bit fluffy—about three minutes of mixing should do the trick! Now, gradually pour in the cooled chocolate and butter mixture; fold it gently to combine. Next, sift in the all-purpose flour, cocoa powder, and salt. Fold everything together with care, combining just until you see no dry streaks. Remember, the less you mix, the fudgier your brownies will be. This is where the magic happens, and it’s so exciting to see it all come together!

    Step 4: Layer the Ingredients

    Now comes the fun part! Take about half of your brownie batter and spread it evenly into the prepared baking pan. Then, using a spoon, drop dollops of the cheesecake mixture and pistachio spread randomly across the surface. It’s like a little art project! Finally, gently cover it all with the remaining brownie batter. Make sure it’s all evenly distributed, but don’t worry about perfection. Sprinkle those dark chocolate chunks on top for that extra touch of indulgence.

    Step 5: Bake the Brownies

    Time to bake! Slide your pan into a preheated oven at 340°F. Bake for about 27 minutes if you prefer fudgy brownies or around 30-35 minutes for a firmer texture. Here’s a tip: the center should have a slight wobble; that’s the mark of a perfectly baked brownie. When done, let them cool in the pan, and you’ll have beautiful layers waiting to be sliced. Trust me, the aroma will have everyone flocking to the kitchen!

    Tips for Success

    • Use high-quality dark chocolate for richer, more intense flavor.
    • Let your brownies cool in the pan before slicing for cleaner edges.
    • For softer brownies, check them a bit earlier; ovens can vary.
    • Feel free to add chopped nuts for extra crunch in your brownies.
    • Store any leftovers in an airtight container in the fridge to keep them fresh.

    Equipment Needed

    • Mixing Bowls: A set of mixing bowls will do, but a large bowl for the brownie batter is key.
    • Hand Mixer or Whisk: A hand mixer makes beating cheesecake a breeze, but a whisk works too!
    • Measuring Cups and Spoons: Essential for accurate ingredient measurements. The old-school kind works great!
    • Baking Pan: An 8×8 inch baking pan is crucial; alternatively, use a similar sized dish.
    • Parchment Paper: Lining the pan keeps your brownies from sticking; foil works in a pinch!

    Variations for Pistachio Cheesecake Brownies

    • Nutty Delight: Add chopped walnuts or pecans to the brownie batter for an extra nutty crunch.
    • Gluten-Free Option: Substitute all-purpose flour with a gluten-free flour blend for a delicious gluten-free treat.
    • Chocolate Lover’s Dream: Replace half of the dark chocolate with white chocolate for a sweet twist.
    • Fruit Fusion: Top with sliced strawberries or raspberries after baking for a fresh, fruity contrast.
    • Vegan Version: Use an egg substitute like flaxseed meal and replace cream cheese with a vegan alternative.

    Serving Suggestions

    • Pair with Coffee: Serve these brownies with a rich cup of coffee for a delightful afternoon pick-me-up.
    • Iced Tea: A refreshing glass of iced tea makes a perfect complement to the fudgy goodness.
    • Presentation: Dust with powdered sugar and add a few crushed pistachios on top for a pretty finish.
    • Ice Cream: A scoop of vanilla ice cream on the side will elevate these brownies to divine status!

    FAQs about Pistachio Cheesecake Brownies

    Can I use a different nut spread instead of pistachio?

    Absolutely! Almond or hazelnut spread can be a great alternative, adding a unique flavor twist to your brownies. Just keep in mind that the taste will change accordingly!

    How do I store leftovers?

    To keep your Pistachio Cheesecake Brownies fresh, store any leftovers in an airtight container in the refrigerator. They’ll stay delicious for about a week. Just reheat them briefly in the microwave for gooey goodness!

    Can I freeze these brownies?

    Yes, you can! Wrap them tightly in plastic wrap or foil and place them in a freezer-safe bag. They can be frozen for up to 3 months. Thaw in the fridge overnight before enjoying!

    What can I serve with these brownies?

    These delicious brownies pair wonderfully with whipped cream, vanilla ice cream, or a drizzle of chocolate sauce. A cup of coffee or sweet iced tea also complements their flavors beautifully!

    Are these brownies suitable for vegetarians?

    Yes, indeed! The Pistachio Cheesecake Brownies are perfectly vegetarian-friendly. Just ensure the chocolate you use is also vegetarian-approved if that’s a concern!

    Final Thoughts

    There’s something truly magical about Pistachio Cheesecake Brownies. Each bite offers a delightful blend of rich chocolate, creamy cheesecake, and that signature nutty flavor. They’re not just a dessert; they’re a slice of joy that brings people together.

    Perfect for busy days or special gatherings, these brownies will be a hit with everyone. As you savor these treats, remember that you’re creating sweet memories in the kitchen. So, roll up your sleeves, embrace the mess, and enjoy every moment. Baking should be fun, after all! Happy baking!


    Print

    clock clock iconcutlery cutlery iconflag flag iconfolder folder iconinstagram instagram iconpinterest pinterest iconfacebook facebook iconprint print iconsquares squares iconheart heart iconheart solid heart solid icon

    Description

    Welcome to the world of indulgent sweets! If you’re anything like me, life gets busy, and finding time to whip up something special can feel impossible. But let me introduce you to my Pistachio Cheesecake Brownies. These delightful treats bring together the rich flavors of chocolate, creamy cheesecake, and a hint of nutty pistachio in every bite.


    • Brownies
    • 3/4 cup unsalted butter
    • 6 oz dark chocolate (50-60% cocoa)
    • 1 1/4 cups all-purpose flour
    • 1/2 cup cocoa powder
    • 3 medium eggs
    • 1 cup granulated sugar
    • 1/3 cup light brown sugar
    • 1 tablespoon vanilla extract
    • 1/4 teaspoon salt
    • 2 oz dark chocolate for topping
    • Cheesecake Filling
    • 8 oz full-fat cream cheese
    • 1/3 cup granulated sugar
    • 1 small/medium egg
    • 1 teaspoon vanilla extract
    • 1 heaped tablespoon all-purpose flour
    • Pistachio Layer
    • 10 tablespoons pistachio spread

    1. Grab your cream cheese and beat it until it’s nice and smooth. Mix in the sugar, egg, vanilla, and flour just until everything’s combined – don’t overdo it. Pop it in the fridge while you work on the brownies.
    2. Line an 8×8 inch baking pan with parchment paper. In a heatproof bowl, melt the butter and dark chocolate together (either microwave in short bursts or over simmering water).
    3. In a separate bowl, mix the eggs, both sugars, and vanilla for about 3 minutes until you get a creamy, slightly fluffy mixture.
    4. Pour that melted chocolate mixture into your egg mixture and fold it in gently. Sift in the flour, cocoa powder, and salt, then fold everything together until just combined. Don’t overmix!
    5. Spread about half the brownie batter into your prepared pan. Drop spoonfuls of the cheesecake mixture and pistachio spread randomly across the surface. Then cover everything with the remaining brownie batter, spreading it out gently.
    6. Sprinkle those chunks of dark chocolate across the top. Slide the pan into a 340°F oven and bake for about 27 minutes if you want them fudgy, or 30-35 minutes if you prefer them more set. The middle should still have a slight wobble when done.

    Notes

    • For a richer flavor, use high-quality dark chocolate.
    • Allow brownies to cool in the pan before slicing for cleaner edges.
    • Store leftovers in an airtight container in the refrigerator.
    • Prep Time: 20 minutes
    • Cook Time: 30 minutes
    • Category: Dessert
    • Method: Baking
    • Cuisine: American

    Nutrition

    • Serving Size: 1 brownie
    • Calories: 350
    • Sugar: 25g
    • Sodium: 150mg
    • Fat: 22g
    • Saturated Fat: 11g
    • Unsaturated Fat: 8g
    • Trans Fat: 0g
    • Carbohydrates: 36g
    • Fiber: 2g
    • Protein: 5g
    • Cholesterol: 75mg

    Sharing is caring!

  • Sweet Potato Casserole with Marshmallows

    Sweet Potato Casserole with Marshmallows


    Introduction to Sweet Potato Casserole with Marshmallows

    Is there anything more comforting than a warm dish of Sweet Potato Casserole with Marshmallows? This delightful recipe is a true crowd-pleaser, often gracing holiday tables and family gatherings. I know how hectic life can get, especially for busy moms like us. This casserole is not just easy to whip up, but it’s also a dish that impresses your loved ones with its creamy sweetness and toasted marshmallow top. As the aroma fills your home, you’ll feel the stress melt away, making it an instant favorite during the festive season—or anytime you need a warming treat!

    Why You’ll Love This Sweet Potato Casserole with Marshmallows

    This Sweet Potato Casserole with Marshmallows is a delightful blend of flavors and textures that everyone will adore. It’s quick to prepare, making it a perfect choice for busy weeknights or holiday feasts. The combination of creamy sweet potatoes, crunchy pecans, and fluffy marshmallows creates a comforting dish that feels like a warm hug. Plus, it’s an easy make-ahead option, so you can focus on enjoying time with your loved ones!

    Ingredients for Sweet Potato Casserole with Marshmallows

    Gathering the right ingredients is key to creating the most delicious Sweet Potato Casserole with Marshmallows. Here’s what you’ll need:

    • Sweet potatoes: The star of the show! Their natural sweetness pairs perfectly with the toppings.
    • Unsalted butter: Adds creaminess to the sweet potato filling and richness to the pecan topping.
    • Brown sugar: Enhances the sweetness of the sweet potatoes and contributes a lovely caramel-like flavor.
    • Salt: A pinch is essential to balance the sweetness and elevate the flavors.
    • Cinnamon: This warm spice adds a cozy aroma and a hint of fall to your dish.
    • Vanilla extract: Brings depth and a gentle sweetness to the filling.
    • Nutmeg: Just a dash of this spice can elevate the flavor profile beautifully.
    • Pecan pieces: For that crunchy topping that contrasts beautifully with the creamy filling.
    • All-purpose flour: Helps bind the pecan topping, giving it that delightful texture.
    • Mini marshmallows: These fluffy treats top the casserole to give it a sweet and gooey finish.

    Feel free to experiment! If you prefer less sugar, try using a touch of maple syrup instead of brown sugar for the sweet potato filling. If you have nut allergies, you can skip the pecans or replace them with a crunchy topping made from crushed graham crackers. Remember, exact quantities for these ingredients are listed at the bottom of the article, just waiting for you to print and take to your kitchen!

    How to Make Sweet Potato Casserole with Marshmallows

    Preparing the Sweet Potatoes

    First, we need to prepare our sweet potatoes, the stars of the show! Start by peeling them with a sharp vegetable peeler, being careful to remove all the skin. Once peeled, chop the sweet potatoes into large chunks. Aim for similar sizes to ensure they cook evenly. Place the chunks into a large saucepan and cover them with water. Turn on the heat and bring the pot to a gentle boil. Keep an eye on the pot! You’ll want to cook the sweet potatoes until they are fork-tender. This usually takes about 15 to 20 minutes. You should be able to pierce them easily, and they should fall apart when gently poked.

    Making the Sweet Potato Filling

    After draining the sweet potatoes, return them to the saucepan. Here comes the fun part! Grab a potato masher and mash the sweet potatoes until they’re smooth and creamy, just like a cozy sweater on a chilly day. Slowly mix in the melted unsalted butter, brown sugar, salt, cinnamon, vanilla extract, and nutmeg. Each ingredient adds its own layer of flavor, creating a delightful filling. Keep mixing until everything is well incorporated. You want it to be sweet and fragrant, so give it a taste! Adjust your spices if needed because every palate is different. Your filling is ready to mix with toppings.

    Preparing the Pecan Topping

    Now, let’s sprinkle some crunchy goodness on top! In a separate bowl, combine the melted butter, brown sugar, all-purpose flour, and salt. Stir it all together until it’s well mixed. Then, fold in those finely chopped pecans, bringing that nutty crunch into the spotlight. This pecan topping is where the magic happens; it adds delightful texture to our casserole. Don’t be shy—mix it well until everything is coated.

    Assembling the Casserole

    With everything ready, let’s bring this Sweet Potato Casserole to life. Start by greasing a 9 by 13-inch baking dish with a bit of cooking spray. Spread the creamy sweet potato filling evenly across the bottom of the dish. Next, take your prepared pecan topping and sprinkle it generously over the sweet potatoes. Finally, don’t forget the mini marshmallows! Cover the top with an even layer of those fluffy treats, creating a sweet blanket that will melt beautifully in the oven.

    Baking the Casserole

    Preheat your oven to 350 degrees Fahrenheit, creating the perfect cozy environment for our casserole to bake. Place the casserole in the oven and let it bake for about 25-35 minutes. Keep an eye on those marshmallows! You’re looking for a bubbly filling and a golden-brown topping, which will make your heart sing. When they’re just right, take it out of the oven, and let it cool for a few minutes before serving. The aroma wafting through your home will have everyone eagerly awaiting that first bite!

    Tips for Success

    • Always taste the filling before baking to adjust sweetness and spices.
    • If possible, roast the sweet potatoes for deeper flavor.
    • Watch the marshmallows closely in the oven to avoid burning.
    • Make it ahead of time; it tastes even better the next day!
    • Use a thick layer of mini marshmallows for that gooey texture.

    Equipment Needed

    • Large saucepan: Essential for boiling sweet potatoes. A Dutch oven works well too.
    • Potato masher: For mashing sweet potatoes. A fork can also do the trick if needed.
    • Mixing bowls: Used for combining toppings; a large salad bowl is perfect.
    • Baking dish: A 9 by 13-inch dish is ideal; an alternative is a glass or ceramic dish.
    • Cooking spray: For greasing the baking dish; oil can serve as a substitute.

    Variations for Sweet Potato Casserole with Marshmallows

    • Maple Pecan Twist: Add a splash of maple syrup to the sweet potato filling for an autumnal flavor boost!
    • Spiced Up: Incorporate additional spices like ginger or allspice for a cozy, warm twist that tickles your taste buds.
    • Fruit Fusion: Mix in chopped cranberries or diced apples into the sweet potato layer for a tart contrast to the sweet marshmallows.
    • Dairy-Free Delight: Substitute coconut milk for butter and use vegan marshmallows for a delicious dairy-free version.
    • Chocolate Chip Surprise: Add mini chocolate chips into the sweet potato filling for a decadent twist on this classic holiday dish.

    Serving Suggestions

    • Pair with roasted turkey: This casserole is a perfect side for your holiday feast, complementing juicy turkey.
    • Serve with cranberry sauce: A spoonful of tart cranberry sauce balances the sweetness beautifully.
    • Enjoy with apple cider: Sip some warm apple cider to enhance those cozy flavors.
    • Garnish with fresh herbs: A sprinkle of chopped pecans or fresh mint adds a festive touch.
    • Presentation: Serve in a beautiful ceramic dish for a warm, inviting look.

    FAQs about Sweet Potato Casserole with Marshmallows

    Can I make Sweet Potato Casserole with Marshmallows ahead of time?
    Absolutely! This casserole is a fantastic make-ahead dish. You can prepare the sweet potato filling and the pecan topping, then store them separately in the refrigerator. Just assemble them on the day you plan to serve, and bake as instructed. Trust me, it tastes even better the next day!

    Can I use canned sweet potatoes instead of fresh ones?
    Yes, you can! Canned sweet potatoes save time, but be sure to drain them well. They’ll be softer and quicker to mash, but the fresh ones add a whole new level of flavor and texture. Either way, the Sweet Potato Casserole with Marshmallows will still be delicious!

    What should I do if I can’t find mini marshmallows?
    If mini marshmallows are unavailable, you can use regular-sized marshmallows cut in half. They might take a bit longer to brown, but they’ll still create that delightful gooey topping we all love.

    Can I make this casserole gluten-free?
    Yes! To make a gluten-free Sweet Potato Casserole with Marshmallows, simply replace the all-purpose flour in the pecan topping with a gluten-free flour blend or finely ground nuts. It’ll still come together beautifully!

    Is Sweet Potato Casserole with Marshmallows healthy?
    While it’s certainly a treat, this casserole does offer nutritional benefits! Sweet potatoes are packed with vitamins and fiber. To make it healthier, consider reducing the sugar or trying natural sweeteners. Enjoying it in moderation is key!

    Final Thoughts

    Making this Sweet Potato Casserole with Marshmallows is not just about preparing a dish; it’s about creating cherished memories with your loved ones. Every time I make it, I can almost hear the laughter around the table and see the smiles as they take that first bite. The way the texture contrasts, from the creamy sweet potato to the crunchy pecan topping and fluffy marshmallows, is simply magical. This casserole is more than food; it’s a warm hug that evokes the cherished moments we all hold dear. Let it be a part of your holiday traditions or cozy family dinners!


    Print

    clock clock iconcutlery cutlery iconflag flag iconfolder folder iconinstagram instagram iconpinterest pinterest iconfacebook facebook iconprint print iconsquares squares iconheart heart iconheart solid heart solid icon

    Description

    Is there anything more comforting than a warm dish of Sweet Potato Casserole with Marshmallows? This delightful recipe is a true crowd-pleaser, often gracing holiday tables and family gatherings. I know how hectic life can get, especially for busy moms like us. This casserole is not just easy to whip up, but it’s also a dish that impresses your loved ones with its creamy sweetness and toasted marshmallow top. As the aroma fills your home, you’ll feel the stress melt away, making it an instant favorite during the festive season—or anytime you need a warming treat!


    • 4 large sweet potatoes, peeled and chopped into large chunks (around 9 cups worth)
    • ½ cup unsalted butter, melted
    • 1 cup brown sugar
    • ½ teaspoon salt
    • ½ teaspoon cinnamon
    • 1 teaspoon vanilla extract
    • ¼ teaspoon nutmeg
    • 4 tablespoons unsalted butter, melted (for pecan topping)
    • ⅓ cup brown sugar (for pecan topping)
    • 2 tablespoons all purpose flour (for pecan topping)
    • ½ teaspoon salt (for pecan topping)
    • 1 ¼ cups finely chopped pecan pieces (for pecan topping)
    • 10 oz mini marshmallows

    1. Peel and cut the sweet potatoes into large chunks and place them into a large saucepan. Cover them with water and bring it to a boil.
    2. Boil the sweet potatoes until they are fork tender and easily pierced with a fork. They should fall apart easily.
    3. Drain the sweet potatoes and add them back to the saucepan. Mash them with a potato masher. Add the rest of the sweet potato filling ingredients: butter, brown sugar, salt, cinnamon, vanilla extract, and nutmeg, and mix until well combined.
    4. In a separate bowl, make the pecan topping. Stir together the melted butter, brown sugar, all-purpose flour, salt, and pecan pieces until combined.
    5. Grease a 9 by 13 baking dish with cooking spray.
    6. Add the sweet potato filling and spread it out evenly.
    7. Spread the pecan topping evenly over the top of the sweet potatoes.
    8. Add the mini marshmallows over the top in an even layer.
    9. Bake the sweet potato casserole at 350 degrees for 25-35 minutes, or until bubbly and the marshmallows are golden brown on top. Watch closely towards the end to get the perfect golden brown without burning.

    Notes

    • For a more flavorful dish, consider roasting the sweet potatoes instead of boiling.
    • Optional: Add a touch of maple syrup to the sweet potato filling for added sweetness.
    • Store leftovers in an airtight container in the refrigerator for up to 3 days.
    • Prep Time: 20 minutes
    • Cook Time: 35 minutes
    • Category: Side Dish
    • Method: Baking
    • Cuisine: American

    Nutrition

    • Serving Size: 1 serving
    • Calories: 300
    • Sugar: 20g
    • Sodium: 180mg
    • Fat: 12g
    • Saturated Fat: 6g
    • Unsaturated Fat: 4g
    • Trans Fat: 0g
    • Carbohydrates: 45g
    • Fiber: 4g
    • Protein: 4g
    • Cholesterol: 15mg

    Sharing is caring!

  • Turkey Sweet Potato Bake

    Turkey Sweet Potato Bake


    Introduction to Turkey Sweet Potato Bake

    As a busy mom, I’ve had my fair share of hectic evenings where dinner feels like a daunting task. That’s where my Turkey Sweet Potato Bake swoops in like a culinary superhero! This hearty dish is more than just comfort food; it’s a warm hug in a baking dish. Perfect for those nights when you crave something nourishing yet simple, it combines tender turkey with sweet potatoes and vibrant veggies. Plus, it’s a great way to impress your family without spending hours in the kitchen. Let’s gather around the table and dig into this delicious meal together!

    Why You’ll Love This Turkey Sweet Potato Bake

    What’s not to love about a dish that’s both comforting and nutritious? This Turkey Sweet Potato Bake is your ultimate ally for busy nights. It’s quick to prepare, allowing you to spend less time in the kitchen and more time with your family. The wonderful medley of flavors, from the sweetness of the potatoes to the savory turkey, makes every bite memorable. You won’t just be cooking; you’ll be creating happy memories!

    Ingredients for Turkey Sweet Potato Bake

    Gathering the right ingredients is the first exciting step toward whipping up this Turkey Sweet Potato Bake. Here’s what you’ll need:

    • Cooked turkey, shredded: Use leftover turkey for a quick meal, or roast a turkey breast for fresh flavor.
    • Sweet potatoes, peeled and diced: These add natural sweetness and a lovely texture. You can also use butternut squash as a creative twist.
    • Green beans, trimmed and chopped: Fresh or frozen, these beans bring a crunchy touch. They’re great for adding color too!
    • Corn: Frozen or canned, corn gives a pop of sweetness that complements the dish well.
    • Chicken broth: This enhances flavor and moisture. For a lighter option, you can use vegetable broth.
    • Garlic powder: This provides a nice depth of flavor without the hassle of chopping fresh garlic.
    • Onion powder: Similar to garlic powder, it adds a savory undertone that lifts the dish.
    • Dried thyme: Perfect for a warm, aromatic touch that pairs beautifully with sweet potatoes.
    • Paprika: Adds a subtle smokiness along with a lovely color. Feel free to experiment with smoked paprika for extra flavor!
    • Salt and pepper: Essential for seasoning, so don’t skip these! They enhance all the wonderful flavors.
    • Shredded cheddar cheese: For that gooey, melty goodness on top. Swap it out with mozzarella or a dairy-free alternative if needed.
    • Breadcrumbs (optional): For extra crunch, mix them with olive oil. This is optional, but oh-so-delicious!
    • Olive oil: A touch of this helps in crisping the toppings. Feel free to use melted butter if that’s what you have on hand.

    Exact measurements for these ingredients are available at the bottom of the article, making it easy for you to print this out and get cooking!

    How to Make Turkey Sweet Potato Bake

    Now that we’ve gathered our ingredients, let’s dive into the delightful process of making this Turkey Sweet Potato Bake. Get ready to enjoy a dish that not only fills your tummy but warms your heart!

    Preheat the Oven

    First things first, let’s set the stage for our Turkey Sweet Potato Bake. Preheat your oven to 375°F (190°C). This helps to ensure an even cooking environment, making your sweet potatoes tender and cheese nicely bubbly. While the oven warms up, you can start prepping the rest of the dish.

    Combine Ingredients

    In a large mixing bowl, combine the shredded turkey, diced sweet potatoes, chopped green beans, and corn. This vibrant combination not only looks appealing but brings various textures. Pour in the chicken broth and sprinkle in the garlic powder, onion powder, dried thyme, paprika, salt, and pepper. Stir gently until everything is mixed together like a happy family reunion!

    Transfer to Baking Dish

    Next, grab a greased 9×13-inch baking dish and transfer your turkey mixture into it. Spread it evenly, ensuring that those colorful veggies and tender turkey are well-distributed throughout. This way, each serving will be a delightful blend of flavors and textures.

    Add Cheese and Breadcrumbs

    Now for the fun part! Sprinkle the shredded cheddar cheese evenly over the top of your mixture. Cheese makes everything better, don’t you agree? If you opted for breadcrumbs, mix them with olive oil in a small bowl and sprinkle over the cheese. This adds an irresistible crunch to your Turkey Sweet Potato Bake.

    Bake Covered

    Cover the baking dish with aluminum foil and pop it in the preheated oven. Bake for about 30 minutes. This step allows the sweet potatoes to steam and become tender, while the flavors mingle and deepen. While you wait, take a moment to enjoy the lovely aroma filling your kitchen!

    Bake Uncovered

    After 30 minutes, it’s time for the great reveal! Remove the foil and return the dish to the oven. Bake uncovered for an additional 15-20 minutes. You want the sweet potatoes to be tender, and the cheese should be bubbly and golden brown. This will create a beautiful topping that’s almost too pretty to eat—almost!

    Tips for Success

    • Prep ingredients ahead of time to save those precious minutes during busy evenings.
    • Use leftover turkey to give this dish a quick boost in flavor and minimize waste.
    • Don’t skip the resting time; letting the bake cool slightly allows flavors to meld.
    • Mix in your family’s favorite veggies to customize the dish to their taste.
    • Consider meal prepping this dish to enjoy later in the week!

    Equipment Needed

    • Baking dish: A 9×13-inch dish is ideal, but any similar size will work.
    • Large mixing bowl: You can use a regular bowl; just make sure it’s big enough to hold all the ingredients.
    • Aluminum foil: Essential for covering the dish while it bakes.
    • Spatula or wooden spoon: Great for mixing ingredients and serving.

    Variations

    • Vegetarian Option: Swap the turkey for cooked lentils or chickpeas for a hearty, plant-based version.
    • Spice it Up: Add diced jalapeños or a sprinkle of cayenne pepper for a zesty kick if your family enjoys some heat.
    • Herb Alternatives: Try using fresh herbs like rosemary or parsley instead of dried thyme for a burst of freshness.
    • Low-Carb Twist: Replace sweet potatoes with cauliflower for a lighter bake that still maintains its comfort food vibe.
    • Cheese Variety: Experiment with different cheeses such as Monterey Jack or feta for unique flavor profiles.

    Serving Suggestions

    • Fresh Salad: Pair this bake with a crisp green salad tossed with vinaigrette for a refreshing contrast.
    • Herbed Bread: Serve with warm, crusty bread or garlic bread for dipping and savoring every bite.
    • Cozy Drink: Enjoy with a glass of light white wine or sparkling water with lemon for a refreshing touch.
    • Presentation: Garnish the bake with fresh herbs like parsley or cilantro for a colorful finish.

    FAQs about Turkey Sweet Potato Bake

    Can I make this Turkey Sweet Potato Bake ahead of time? Absolutely! You can prepare it the night before and store it in the refrigerator. Just cover it tightly with foil. When you’re ready to bake, add a few extra minutes to the cooking time.

    What if I don’t have leftover turkey? No problem! You can use ground turkey or even store-bought rotisserie chicken for a savory alternative. Both options will give you that delicious flavor we’re after!

    Can I freeze the Turkey Sweet Potato Bake? Yes, this dish freezes beautifully. After baking, let it cool completely. Then, wrap it tightly in plastic wrap and aluminum foil. When you’re ready to enjoy it again, simply thaw overnight in the fridge and reheat in the oven.

    How do I store leftovers? Keep any leftovers in an airtight container in the refrigerator. They should last about 3-4 days. Reheat in the oven for a delicious, comforting meal all over again!

    What are some good side dishes to serve with this bake? This Turkey Sweet Potato Bake pairs wonderfully with a light salad or roasted vegetables. You could also serve it with a slice of warm, crusty bread for that extra comfort!

    Final Thoughts

    Bringing this Turkey Sweet Potato Bake to your table means more than just a meal; it’s a chance to share love and laughter with your family. The delightful aroma wafting through your kitchen will remind you of cozy nights spent together, nourishing not just bodies but bonds. With each bite, you’ll experience the joy of homemade comfort food, crafted with care in a fraction of the time. So, whether it’s a busy weekday or a special gathering, this dish is here to help you create beautiful memories. Let’s embrace the deliciousness and savor every moment together!


    Print

    clock clock iconcutlery cutlery iconflag flag iconfolder folder iconinstagram instagram iconpinterest pinterest iconfacebook facebook iconprint print iconsquares squares iconheart heart iconheart solid heart solid icon

    Description

    As a busy mom, I’ve had my fair share of hectic evenings where dinner feels like a daunting task. That’s where my Turkey Sweet Potato Bake swoops in like a culinary superhero! This hearty dish is more than just comfort food; it’s a warm hug in a baking dish. Perfect for those nights when you crave something nourishing yet simple, it combines tender turkey with sweet potatoes and vibrant veggies. Plus, it’s a great way to impress your family without spending hours in the kitchen. Let’s gather around the table and dig into this delicious meal together!


    • 2 cups cooked turkey, shredded
    • 2 cups sweet potatoes, peeled and diced
    • 1 cup green beans, trimmed and chopped
    • 1 cup corn, frozen or canned
    • 1 cup chicken broth
    • 1 teaspoon garlic powder
    • 1 teaspoon onion powder
    • 1 teaspoon dried thyme
    • 1 teaspoon paprika
    • Salt and pepper to taste
    • 1 cup shredded cheddar cheese
    • 1/2 cup breadcrumbs (optional)
    • 2 tablespoons olive oil

    1. Preheat the oven to 375°F (190°C).
    2. In a large mixing bowl, combine the cooked turkey, sweet potatoes, green beans, corn, and chicken broth.
    3. Add garlic powder, onion powder, dried thyme, paprika, salt, and pepper to the mixture. Stir until well combined.
    4. Transfer the mixture to a greased 9×13-inch baking dish.
    5. Sprinkle the shredded cheddar cheese evenly over the top. If using breadcrumbs, mix them with olive oil and sprinkle over the cheese for added crunch.
    6. Cover the baking dish with aluminum foil and bake for 30 minutes.
    7. Remove the foil and bake for an additional 15-20 minutes, or until the sweet potatoes are tender and the cheese is bubbly and golden.
    8. Let it cool for a few minutes before serving.

    Notes

    • You can substitute ground turkey for the shredded turkey if preferred.
    • This dish can be made ahead of time and stored in the refrigerator before baking.
    • Feel free to add other vegetables based on your preference.
    • Prep Time: 15 minutes
    • Cook Time: 50 minutes
    • Category: Main Course
    • Method: Baking
    • Cuisine: American

    Nutrition

    • Serving Size: 1 portion
    • Calories: 350
    • Sugar: 4g
    • Sodium: 600mg
    • Fat: 16g
    • Saturated Fat: 7g
    • Unsaturated Fat: 9g
    • Trans Fat: 0g
    • Carbohydrates: 38g
    • Fiber: 5g
    • Protein: 25g
    • Cholesterol: 80mg

    Sharing is caring!