Author: IHAAL Team

  • Pepperoni Pizza Quesadilla

    Pepperoni Pizza Quesadilla


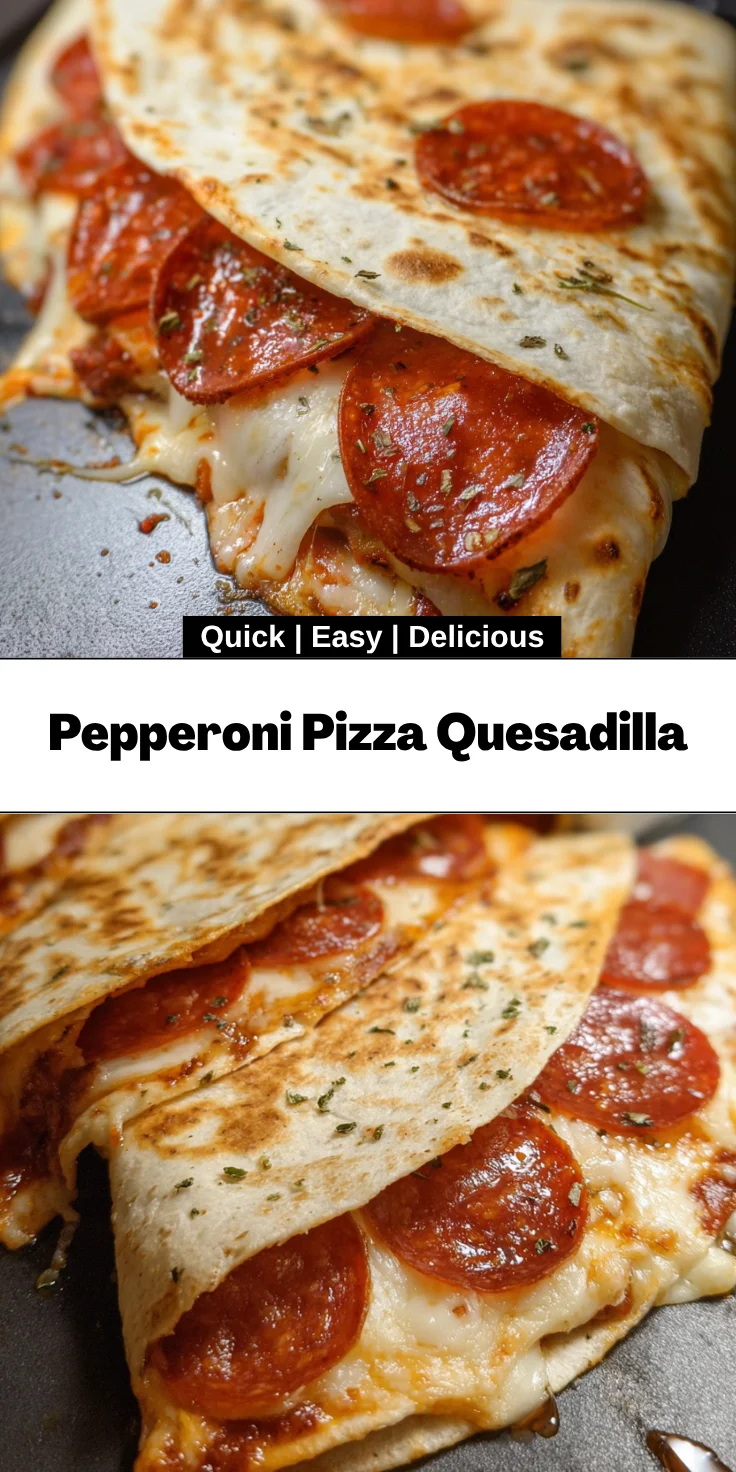
    Introduction to Pepperoni Pizza Quesadilla

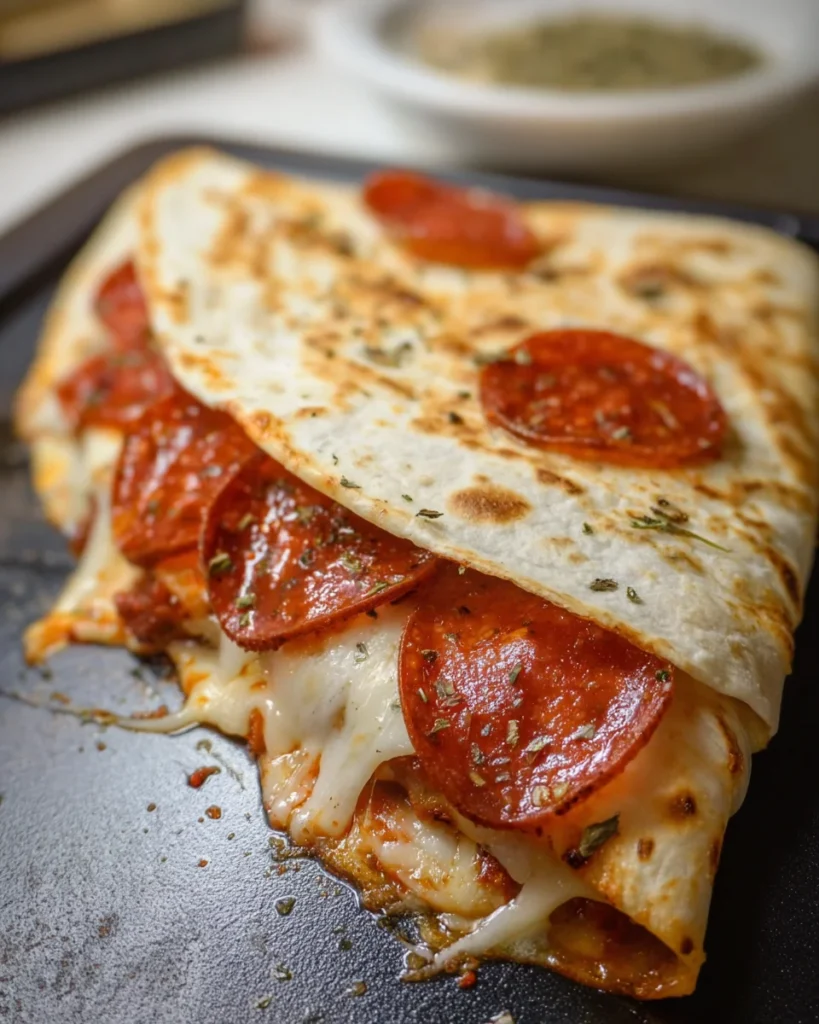
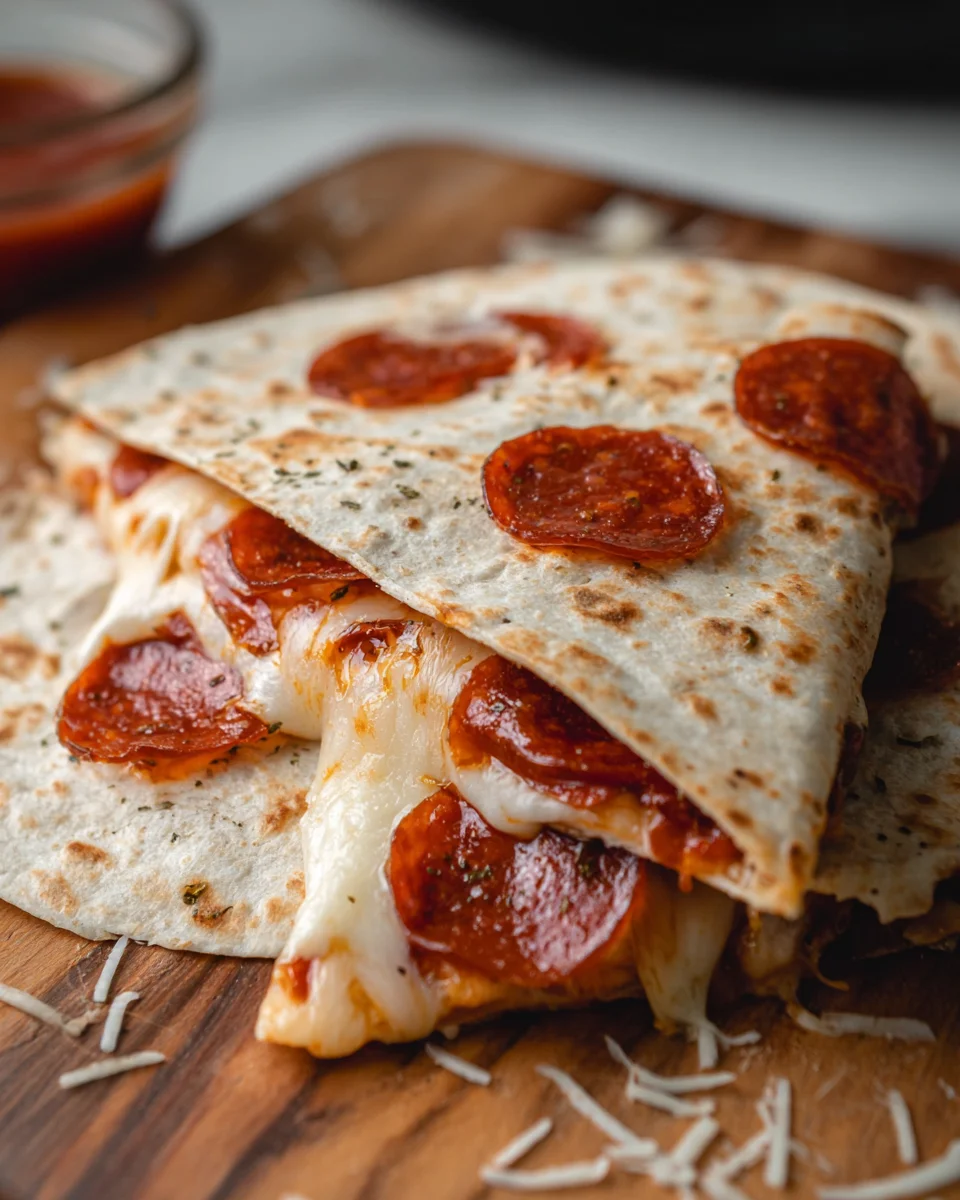
    Hey there, fellow busy bees! If you’re like me, finding time to whip up a meal can feel like a juggling act. Enter the Pepperoni Pizza Quesadilla—your new best friend in the kitchen! This quick and delicious recipe is not only perfect for snack time, but it also doubles as a meal that pleases the whole family. Imagine biting into warm, cheesy goodness, smothered in pizza flavor, all while knowing you didn’t just spend hours in the kitchen. Trust me, this is the ideal solution for a hectic day or a cozy weekend treat!

    Why You’ll Love This Pepperoni Pizza Quesadilla

    This Pepperoni Pizza Quesadilla blends all the mouthwatering flavors of your favorite pizza into a fun, easily portable dish. It’s quick to make, taking just ten minutes from prep to plate, which is a total lifesaver for busy days. Plus, the melty cheese and zesty pepperoni create a comfort food experience that’s sure to impress, even with picky eaters! It’s a win-win for everyone at the table!

    Ingredients for Pepperoni Pizza Quesadilla

    Ready to gather what you’ll need? Let’s make sure we have everything for this flavorful Pepperoni Pizza Quesadilla. Here’s the lineup:

    • Large flour tortilla: This is the foundation of our quesadilla, soft and pliable, perfect for folding.
    • Pizza sauce: A generous spread adds that classic pizza flavor, bringing everything together. Feel free to use store-bought or homemade.
    • Shredded mozzarella cheese: The gooey, melt-in-your-mouth cheese that pulls everything together. You can swap it for cheddar for a sharper taste!
    • Turkey or beef pepperoni: These slices add zest and protein. If you’d like something lighter, turkey pepperoni is a great choice, while traditional beef has that authentic flavor.
    • Dried oregano or Italian seasoning: Optional, but they sprinkle on a hint of herbal magic that elevates the taste.
    • Crushed red pepper flakes: If you crave some heat, these flakes will spice things up wonderfully. Adjust to your taste!

    You’ll find the exact quantities of these ingredients at the bottom of the article, along with a convenient printable version. Happy cooking!

    How to Make Pepperoni Pizza Quesadilla

    Now that we have our ingredients ready, let’s dive into the fun part—making this Pepperoni Pizza Quesadilla! It’s simple and quick, so you’ll have a delicious meal in no time. Let’s get started!

    Step 1: Heat the Skillet

    First things first, grab your nonstick skillet and heat it over medium heat. This step is crucial for achieving that perfect crispy quesadilla. You want your skillet nice and hot to ensure the tortilla crisps up beautifully.

    Step 2: Prepare the Tortilla

    Next, place your large flour tortilla flat on a clean surface. Spread 2 to 3 tablespoons of pizza sauce over half of the tortilla. Make sure to cover it well; this sauce is what makes our quesadilla burst with that inviting pizza flavor!

    Step 3: Layer the Ingredients

    Now for the fun part! Sprinkle about 1/3 cup of shredded mozzarella cheese evenly over the sauce. I love making sure every bite has gooey cheese! Then, layer on your turkey or beef pepperoni slices. If you’re feeling adventurous, don’t forget to add a pinch of dried oregano or crushed red pepper flakes for an extra kick.

    Step 4: Fold and Cook

    It’s time to fold! Carefully fold the tortilla over, enclosing all those tasty layers. Place it gently in your hot skillet. Cook for about 1 to 2 minutes on each side until it’s golden brown. Keep an eye on it; we don’t want any burnt edges!

    Step 5: Slice and Serve

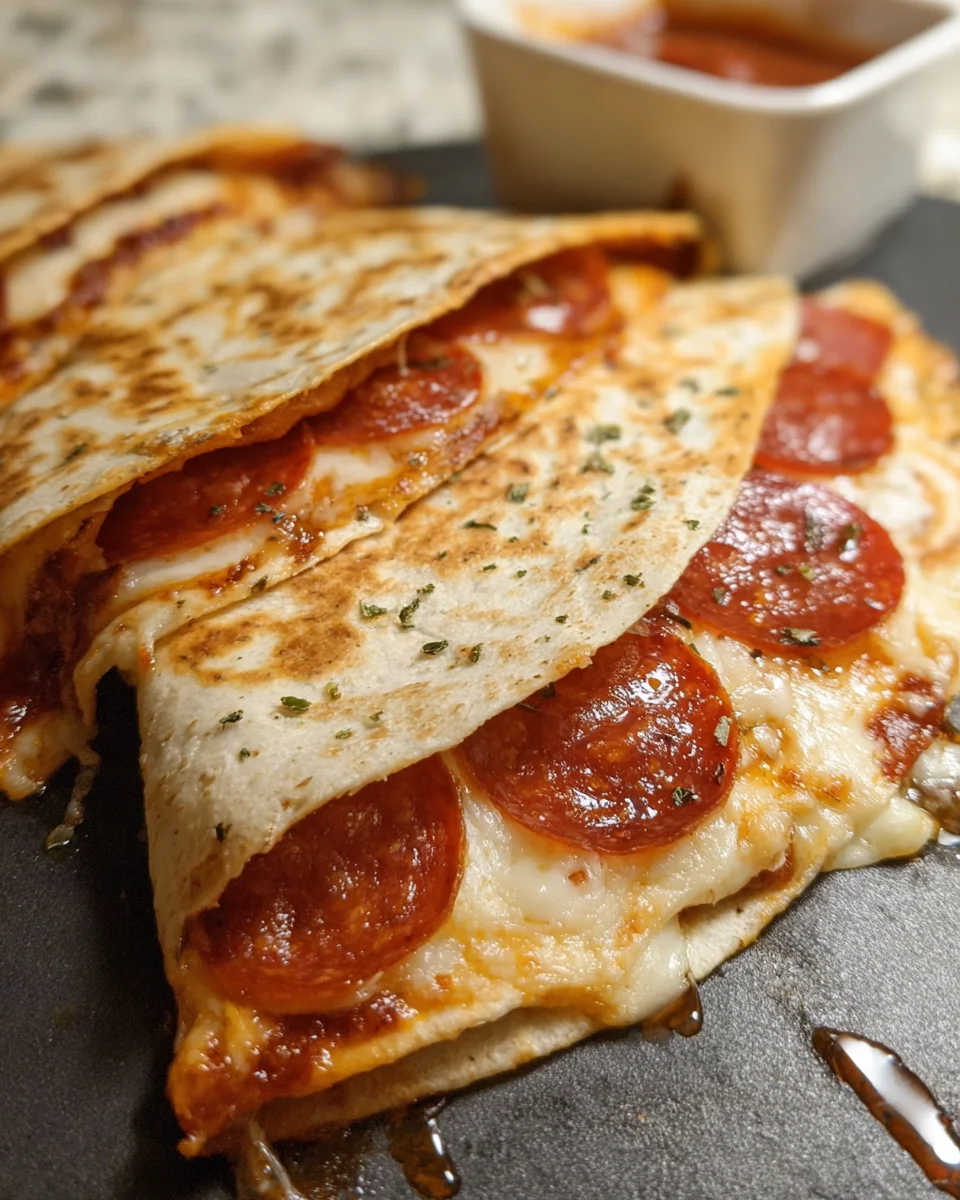
    Once it’s cooked to perfection, transfer your quesadilla to a cutting board. Let it sit for a minute, then slice it into wedges. Serve hot, and enjoy the savory flavors that are sure to make your taste buds dance!

    And there you have it—a delicious Pepperoni Pizza Quesadilla ready to be devoured! Feel free to make extra for leftovers, as they reheat beautifully!

    Tips for Success

    • Ensure your skillet is preheated for a crispy crust.
    • Don’t overload the quesadilla with too many toppings, or it may become soggy.
    • For an even melt, use grated cheese instead of slices.
    • Experiment with herbs; fresh basil adds a delightful twist!
    • If you like a cheesy border, sprinkle cheese on the edges before folding.

    Equipment Needed

    • Nonstick skillet: A must-have for cooking your quesadilla without sticking. If you don’t have one, a well-seasoned cast iron skillet works, too!
    • Spatula: Use it to flip your quesadilla easily and avoid any spills.
    • Cutting board: Perfect for slicing up your quesadilla before serving.

    Variations for Pepperoni Pizza Quesadilla

    • Veggie Delight: Add sliced bell peppers, onions, or olives for a colorful twist and added nutrition.
    • Cheesy Zing: Mix in some pepper jack cheese for a delightful kick to your classic quesadilla.
    • Herb-infused: Use fresh herbs like basil or cilantro instead of dried for a vibrant, fresh taste.
    • Gluten-Free Option: Swap the flour tortilla for a gluten-free variety to accommodate dietary needs.
    • Meat Lovers: Include crumbled Italian sausage or bacon for an even heartier, flavor-packed quesadilla.
    • Breakfast Style: Use scrambled eggs and a sprinkle of cheddar instead of pizza toppings for a brunch twist!

    Serving Suggestions for Pepperoni Pizza Quesadilla

    • Side Salad: Pair your quesadilla with a crisp garden salad to balance the richness.
    • Dipping Sauce: Serve with extra pizza sauce or marinara for that authentic pizza experience.
    • Fresh Herbs: Garnish with fresh basil or parsley for a pop of color.
    • Refreshing Drink: Enjoy with a chilled soda or sparkling water with lemon.
    • Cheesy Upgrade: Top with a sprinkle of extra cheese before serving for an irresistible finish.

    FAQs about Pepperoni Pizza Quesadilla

    Can I make this Pepperoni Pizza Quesadilla ahead of time?

    Absolutely! You can prepare the quesadilla and store it in the fridge for up to a day. Just remember to reheat it in a skillet or microwave for a quick snack!

    What can I substitute for pizza sauce?

    If you don’t have pizza sauce on hand, marinara or any tomato-based sauce works perfectly. You could even use pesto for a unique flavor twist!

    Is this recipe kid-friendly?

    Yes! Kids love the cheesy goodness and the familiar taste of pepperoni. Plus, they’re super easy to hold and dip!

    Can I freeze leftovers?

    Yes, you can freeze your cooked Pepperoni Pizza Quesadilla! Just wrap it well in plastic wrap and foil. When you’re ready to eat, thaw it in the fridge, then reheat in the skillet for the best texture.

    What are some good side dishes?

    Pair your quesadilla with a light salad, fresh fruit, or a side of vegetable sticks. Anything fresh will complement the richness of the quesadilla beautifully!

    Final Thoughts

    This Pepperoni Pizza Quesadilla has a way of turning an ordinary day into a delightful culinary experience. With its simplicity and speed, it’s the perfect companion for busy moms and professionals alike. It’s that comforting hug of cheese and pepperoni we sometimes need, but in a fun, quick format. Sharing it with family or friends adds to the joy, as everyone can customize their own with different toppings. I hope your kitchen becomes a hub of laughter and deliciousness with this recipe. Now, go on and make your taste buds dance!


    Print

    clock clock iconcutlery cutlery iconflag flag iconfolder folder iconinstagram instagram iconpinterest pinterest iconfacebook facebook iconprint print iconsquares squares iconheart heart iconheart solid heart solid icon

    Description

    A quick and delicious recipe for a flavorful Pepperoni Pizza Quesadilla, perfect for a snack or meal.


    • 1 large flour tortilla
    • 23 tablespoons pizza sauce
    • 1/3 cup shredded mozzarella cheese
    • 68 slices turkey pepperoni or beef pepperoni
    • Optional: dried oregano or Italian seasoning
    • Optional: crushed red pepper flakes

    1. Heat a nonstick skillet over medium heat.
    2. Place tortilla flat and spread sauce over half.
    3. Sprinkle cheese evenly, then layer pepperoni on top.
    4. Add a pinch of oregano or red pepper flakes if using.
    5. Fold tortilla in half and place in hot skillet.
    6. Cook 1–2 minutes per side until golden brown and cheese is melted.
    7. Slice and serve hot.

    Notes

    • For a crispy quesadilla, ensure the skillet is hot before adding the tortilla.
    • Experiment with other toppings like vegetables or different cheeses.
    • Prep Time: 5 minutes
    • Cook Time: 5 minutes
    • Category: Snack
    • Method: Pan-frying
    • Cuisine: American

    Nutrition

    • Serving Size: 1 quesadilla
    • Calories: 350
    • Sugar: 2g
    • Sodium: 790mg
    • Fat: 18g
    • Saturated Fat: 6g
    • Unsaturated Fat: 10g
    • Trans Fat: 0g
    • Carbohydrates: 35g
    • Fiber: 2g
    • Protein: 15g
    • Cholesterol: 30mg

    Sharing is caring!

  • Garlic Butter Honey BBQ Beef Tacos

    Garlic Butter Honey BBQ Beef Tacos


    Introduction to Garlic Butter Honey BBQ Beef Tacos

    Hey there, fellow food lovers! If you’re anything like me, you know that weeknight dinners can sometimes feel like a race against the clock. That’s where my Garlic Butter Honey BBQ Beef Tacos come into play. They’re a delightful mix of sweet, savory, and just enough zing to make your taste buds dance. Plus, they’re easy to whip up, making them the perfect solution for busy days. Whether it’s a quick dinner after school or a lively gathering, these tacos will surely impress both your family and friends!

    Why You’ll Love This Garlic Butter Honey BBQ Beef Tacos

    Let’s face it—who doesn’t love a meal that’s easy, quick, and absolutely delicious? These Garlic Butter Honey BBQ Beef Tacos tick all the boxes! The tender beef practically melts in your mouth, bathed in a rich sauce that is a perfect balance of sweet and savory. Plus, you can make a big batch in the slow cooker, reducing stress and letting you spend more time with your loved ones. It’s truly a win-win!

    Ingredients for Garlic Butter Honey BBQ Beef Tacos

    Gathering your ingredients is the first step toward taco perfection! Here’s what you’ll need for these flavorful Garlic Butter Honey BBQ Beef Tacos:

    • Beef Chuck Roast: The star of the show! This cut is perfect for slow cooking, turning tender and juicy while absorbing all that delicious flavor.
    • Unsalted Butter: This little gem adds richness and a smooth mouthfeel to the dish. It also helps to sauté your garlic to golden perfection.
    • Fresh Garlic: Packed with robust flavor, minced garlic infuses your beef with irresistible warmth. Fresh garlic will always win over powdered in this recipe.
    • Pure Honey: The secret ingredient that brings a touch of sweetness to your tacos. Honey results in a luscious glaze that complements the BBQ sauce beautifully.
    • BBQ Sauce: Choose your favorite thick BBQ sauce as it lends a smoky depth and flavor to the dish that ties everything together.
    • Tortillas: Soft corn or flour tortillas serve as the perfect vessel for your savory filling. They provide a wonderful base for your delicious toppings!
    • Diced Avocado: Creamy and cool avocado adds a lovely contrast to the rich beef. It’s a topping I never skip!
    • Fresh Cilantro: This herb brightens up the tacos with a fresh hint of citrus, balancing the overall richness.

    For those adventurous souls, feel free to customize your ingredients! You could add cheese for a gooey texture, jalapeños for a spicy kick, or even salsa for an extra flavor boost. Remember, you’ll find the exact measurements at the end of the article, ready for printing!

    How to Make Garlic Butter Honey BBQ Beef Tacos

    Now that you have gathered everything you need, let’s dive into the step-by-step process of making these scrumptious Garlic Butter Honey BBQ Beef Tacos!

    Prepare Your Ingredients

    First things first—let’s get organized! Finely chop your garlic using a sharp knife. Aim for a fine mince, which will help release that aromatic goodness. Measure out your honey and BBQ sauce so it’s all ready to go. This preparation makes the cooking flow smoother and keeps you from scrambling later. Trust me, it’s worth the effort!

    Sear the Beef

    Heat a large skillet over medium-high heat and add a tablespoon of unsalted butter. Once it’s melted and bubbly, carefully place your beef chuck roast in the skillet. Sear it for about 4-5 minutes on each side until it’s richly browned. This step locks in the juices and develops a beautiful flavor. Your kitchen will smell divine as the meat gets that gorgeous color!

    Combine and Simmer

    Now, lower the heat to medium-low. Add the minced garlic, pure honey, BBQ sauce, and the remaining butter into the pan. Stir everything together until the beef is well-coated. Cover the skillet and let it simmer for about 3 hours. This slow cooking transforms that beef into fork-tender goodness, perfect for your tacos. It’s like a cozy, comforting hug in a dish!

    Shred the Beef

    Once your meat is fork-tender, take it off the heat. Using two forks, shred the beef. Don’t be shy; let those flavors mix and mingle as you return the shredded meat to the skillet with the sauce. This is where the magic happens! The beef soaks up all that delicious sauce, ensuring each bite is packed with flavor.

    Warm the Tortillas

    Last but not least, warm your tortillas in another skillet for just a minute or two. You want them soft and pliable for easy wrapping! Now, fill each tortilla with the luscious shredded beef and your favorite toppings. Avocado and fresh cilantro are my go-tos! Serve them up, and get ready to savor every bite of your delicious Garlic Butter Honey BBQ Beef Tacos.

    Tips for Success

    • Prep all ingredients beforehand to make cooking a breeze!
    • Don’t rush the searing process; it boosts flavor.
    • For extra flavor, let the beef marinate in the sauce overnight.
    • Use a meat thermometer for perfectly cooked beef—aim for 190°F for shredding.
    • Feel free to adjust seasonings to suit your taste buds. Enjoy the adventure!

    Equipment Needed for Garlic Butter Honey BBQ Beef Tacos

    • Skillet: A large skillet is perfect for searing your beef; a Dutch oven can work too.
    • Knife and Cutting Board: Essential for chopping garlic and prepping ingredients.
    • Tongs: Handy for flipping your beef during searing.
    • Slow Cooker: Optional, but great for effortless cooking!
    • Two Forks: Perfect for shredding that tender beef.

    Variations of Garlic Butter Honey BBQ Beef Tacos

    • Spicy Version: Add sliced jalapeños or a splash of hot sauce for a fiery kick!
    • Vegetarian Option: Swap the beef for jackfruit or lentils, using the same sauce for a delightful twist.
    • Gluten-Free Tacos: Use corn tortillas to keep these tacos gluten-free without sacrificing flavor.
    • Cheesy Delight: Sprinkle shredded cheese inside the tortillas before adding the beef for a gooey, melted surprise.
    • BBQ Chicken Tacos: Substitute shredded chicken for beef, keeping the same luscious Garlic Butter Honey BBQ sauce.

    Serving Suggestions for Garlic Butter Honey BBQ Beef Tacos

    • Pair your tacos with a refreshing watermelon salad for a summer vibe!
    • Serve alongside crispy sweet potato fries for a delightful crunch.
    • Complement with a zesty lime-infused drink to balance the flavors.
    • Garnish with extra cilantro and lime wedges for a vibrant presentation.
    • Consider a side of tangy coleslaw to add a crunchy contrast!

    FAQs about Garlic Butter Honey BBQ Beef Tacos

    It’s always great to clear up any questions you might have about these delicious Garlic Butter Honey BBQ Beef Tacos! Here are some common queries I’ve come across:

    Can I use a different cut of beef? Absolutely! While chuck roast is ideal, you can also opt for brisket or round roast. Just keep in mind that cooking times may vary!

    How can I store leftovers? Leftover beef can be stored in an airtight container in the refrigerator for up to three days. Reheat it gently on the stove or microwave for a quick meal!

    What if I don’t have BBQ sauce? If BBQ sauce is unavailable, you can create a simple sauce using ketchup, a bit of vinegar, and some spices. It won’t be exactly the same, but it’ll still be tasty!

    How spicy are these tacos? They balance sweet and savory flavors, but if you’d like some heat, add jalapeños or spicy BBQ sauce. Adjust according to your taste!

    Can I make this recipe in a slow cooker? Yes! Just sear the beef as directed. Then, transfer everything into a slow cooker and set it on low for 6-8 hours. Your beef will still be tender and flavorful!

    Final Thoughts

    Cooking is more than just preparing a meal; it’s about creating memories and sharing joy with those we love. My Garlic Butter Honey BBQ Beef Tacos embody that spirit. The delightful blend of flavors makes every bite feel like a warm hug. Whether it’s a cozy family dinner or a festive gathering with friends, these tacos will surely become a cherished favorite. I hope you experience the same joy I feel when I serve them. So gather your loved ones around the table and indulge in these delicious tacos—because great food deserves to be shared!


    Print

    clock clock iconcutlery cutlery iconflag flag iconfolder folder iconinstagram instagram iconpinterest pinterest iconfacebook facebook iconprint print iconsquares squares iconheart heart iconheart solid heart solid icon

    Description

    Delicious tacos filled with tender beef, infused with garlic butter and a sweet BBQ sauce.


    • 2 lbs beef chuck roast
    • 4 tbsp unsalted butter
    • 6 cloves fresh garlic, minced
    • 1/4 cup pure honey
    • 1/2 cup BBQ sauce (thick)
    • 8 soft corn or flour tortillas
    • diced avocado
    • fresh cilantro

    1. Prep your ingredients by finely chopping the garlic and measuring out spices.
    2. Sear the beef in a skillet over medium-high heat with 1 tablespoon of butter until browned on both sides (4-5 minutes).
    3. Lower the heat and add minced garlic, honey, BBQ sauce, and remaining butter; stir to combine.
    4. Cover and simmer on low for about 3 hours until the meat is fork-tender.
    5. Shred the beef with two forks, return it to the skillet, and mix well with the sauce.
    6. Warm tortillas briefly in another pan, then fill them with shredded beef and desired toppings.

    Notes

    • Substitute with chicken or pork if desired.
    • Can add cheese or sour cream as additional toppings.
    • Adjust the amount of honey for sweetness preference.
    • Prep Time: 15 minutes
    • Cook Time: 3 hours
    • Category: Main Dish
    • Method: Slow Cooking
    • Cuisine: Mexican

    Nutrition

    • Serving Size: 1 taco
    • Calories: 300
    • Sugar: 5g
    • Sodium: 600mg
    • Fat: 15g
    • Saturated Fat: 7g
    • Unsaturated Fat: 6g
    • Trans Fat: 0g
    • Carbohydrates: 30g
    • Fiber: 3g
    • Protein: 20g
    • Cholesterol: 70mg

    Sharing is caring!

  • Unicorn Cookies

    Unicorn Cookies


    Introduction to Unicorn Cookies

    There’s something truly magical about baking, especially when it comes to creating enchanting treats like Unicorn Cookies. As a busy mom, I know how precious our time can be, which is why this colorful cookie recipe is a perfect quick solution for those hectic days. Whether you’re looking to impress your loved ones or simply wanting to add a splash of joy to an ordinary afternoon, these delightful cookies are sure to brighten any moment. With vibrant colors and an irresistible taste, Unicorn Cookies bring a little whimsy to your kitchen and a lot of happiness to your table.

    Why You’ll Love This Unicorn Cookies

    Unicorn Cookies are not just visually stunning; they’re also incredibly simple to whip up! With a prep time of just 20 minutes, they fit perfectly into my busy schedule. The delightful mix of flavors and colors makes them a hit for any occasion. Plus, these cookies can easily turn an ordinary day into a mini celebration, spreading happiness with each vibrant bite. Who doesn’t need a little magic like that in their life?

    Ingredients for Unicorn Cookies

    To create these colorful Unicorn Cookies, you’ll gather a few essential ingredients that come together to form the base of this delightful treat. Here’s a quick overview of what you’ll need:

    • Unsalted butter: This adds richness and flavor, making the cookies tender. Room temperature butter is ideal for easier mixing.
    • Granulated sugar: Sweetness is key, and sugar not only adds flavor but also contributes to the cookie’s texture.
    • Eggs: They bind the ingredients and help create that lovely soft texture. Using eggs at room temperature helps them mix better.
    • Pure vanilla extract: This is my secret ingredient for depth of flavor. It gives the cookies a warm, inviting aroma.
    • All-purpose flour: The backbone of any cookie, flour lends structure and helps achieve that perfect chewy texture.
    • Baking soda: This helps our cookies rise, giving them that soft, fluffy feel we all love.
    • Cream of tartar: A must for balanced leavening, it adds a slight tang and keeps the cookies tender.
    • Salt: Don’t skip this! A pinch of salt enhances the overall flavor of the cookies.
    • Sprinkles: Rainbow sprinkles make these cookies even more magical, providing that fun pop of color!
    • Gel colors (Pink, Royal Blue, and Violet): These vibrant hues will transform your dough into a whimsical masterpiece. Feel free to choose any shades you love!

    For the exact quantities of each ingredient, you can check the bottom of this article where a printable version awaits!

    How to Make Unicorn Cookies

    Preheat and Prepare

    To kick off this magical adventure, preheat your oven to 350° F. This step is crucial, as a properly heated oven ensures even baking. While it warms up, grab a large cookie sheet and line it with parchment paper or a trusty silicone baking mat. This not only helps prevent sticking but also makes cleanup a breeze, which is something every busy mom can appreciate. Trust me, you’ll want to have this ready for those wondrous Unicorn Cookies!

    Creaming Butter and Sugar

    Next up, let’s cream the unsalted butter and granulated sugar together. In a mixing bowl, beat them on medium speed until the mixture looks light and fluffy. This process is essential for cookie texture, as it incorporates air into the mix. I always think of this step as the moment when the magic begins! The air bubbles created will help your cookies rise beautifully, giving them that perfect softness we all adore.

    Mixing Dry Ingredients

    Now it’s time to tackle the dry ingredients. In a separate bowl, whisk together the all-purpose flour, baking soda, cream of tartar, and salt. This step helps ensure that your dry ingredients are well distributed, which results in evenly baked cookies. Don’t rush this part; mixing these elements properly leads to that delightful, chewy texture. Once combined, we’re ready to introduce these dry goodies to our wet mixture.

    Coloring the Dough

    After your dry ingredients are ready, it’s time to add some color! Divide your dough into four equal balls. Leave one uncolored and add your gel colors to the other three. I find it fun to use my hands, but a spatula works too. Get in there and work the color into the dough until it’s bright and cheerful! Once colored, place all four dough balls into a large bowl and gently mix them together for that beautiful tie-dye effect. Remember, less is more—don’t overmix!

    Portioning the Dough

    Now let’s get to the fun part: portioning the dough! Take a medium or large cookie scoop to form balls of dough. Rolling them in sugar or adding extra sprinkles creates a delightful crunch that contrasts beautifully with the soft cookie. Line your cookie balls about 2 inches apart on the baking sheet. Each small ball is like a tiny treasure waiting to become an enchanting Unicorn Cookie. It’s always exciting to see how they turn out!

    Baking the Cookies

    Finally, let’s bake these joyful treats! Pop your cookie sheet into the preheated oven and set your timer for 10 to 12 minutes. Keep a close eye on them—when the edges start to look golden, you know they’re ready. The center may look slightly underbaked, but don’t worry! They’ll continue cooking on the sheet as they cool. Once baked, allow them to cool for a few minutes before transferring them to a wire rack. Isn’t the anticipation delightful?

    Tips for Success

    • Ensure all ingredients are at room temperature for easier mixing.
    • Don’t overmix the dough while creating the tie-dye effect—keep those colors vibrant!
    • Use a cookie scoop for uniform-sized cookies that bake evenly.
    • Experiment with sprinkles; try adding themed colors for holidays or special events.
    • Let the cookies cool completely for the best texture before storing.

    Equipment Needed

    • Mixing bowls: Use any size you have; a large bowl is great for dough.
    • Electric mixer: If you don’t have one, a good old-fashioned whisk will work too!
    • Cookie scoop: No scoop? Use a tablespoon for measuring dough balls.
    • Baking sheet: A sturdy, rimmed baking tray is ideal to prevent spills.
    • Parchment paper or silicone mat: These make for easy cookie removal and cleanup.

    Variations of Unicorn Cookies

    • Gluten-free: Swap out regular flour for a gluten-free blend to make these Unicorn Cookies suitable for gluten-sensitive individuals.
    • Dairy-free: Use coconut oil or a dairy-free butter substitute to keep these treats creamy without the dairy.
    • Flavor twist: Add a teaspoon of almond extract instead of vanilla for a unique flavor that complements the sweetness.
    • Nutty addition: Mix in some chopped nuts such as almonds or pecans for a delightful crunch and extra flavor.
    • Chocolate Lovers: Incorporate mini chocolate chips into the dough for a rich chocolate surprise in every cookie.

    Serving Suggestions

    • Pair these colorful Unicorn Cookies with a tall glass of milk for a classic treat.
    • Serve them with a scoop of vanilla ice cream for a magical dessert experience.
    • For a festive presentation, arrange cookies on a rainbow-themed platter.
    • Include a sprinkle of edible glitter to elevate their enchanting appearance, perfect for celebrations.

    FAQs about Unicorn Cookies

    What makes Unicorn Cookies different from regular cookies?
    Unicorn Cookies are all about the vibrant colors and playful presentation! Their unique tie-dye effect and fun toppings make them special for celebrations, while still delivering that buttery, sweet cookie flavor we all love.

    Can I use other colors for the gel dye?
    Absolutely! Feel free to get creative with gel colors. Using shades that match a theme can make your Unicorn Cookies even more delightful, be it a party or just an ordinary day turned magical!

    How should I store my Unicorn Cookies?
    To keep your Unicorn Cookies fresh, store them in an airtight container. They’ll last for about a week—though I bet they won’t last that long because they’re so delicious!

    Can I freeze the cookie dough?
    Yes! You can freeze the cookie dough before baking. Just scoop the dough balls and place them on a baking sheet to freeze individually. Once frozen, transfer them to a zip-top bag. They can be baked straight from the freezer; just add a minute or two to the baking time.

    Are Unicorn Cookies suitable for kids to make?
    Definitely! Making Unicorn Cookies can be a fun activity for kids. Just supervise them with the oven and let them handle the coloring and mixing—what a magical way to bond in the kitchen!

    Final Thoughts

    Baking Unicorn Cookies is more than just a recipe; it’s an experience filled with laughter, creativity, and joy. As I watch my kids’ faces light up at the mere sight of these colorful treats, I’m reminded of the magic that simple pleasures can bring to our busy lives. The act of mixing, coloring, and baking together creates memories that linger far longer than the cookies themselves. Whether for a birthday party, family gathering, or just because, these vibrant delights spread happiness with every bite. Let’s embrace the whimsy of Unicorn Cookies and infuse our homes with a little extra magic!


    Print

    clock clock iconcutlery cutlery iconflag flag iconfolder folder iconinstagram instagram iconpinterest pinterest iconfacebook facebook iconprint print iconsquares squares iconheart heart iconheart solid heart solid icon

    Description

    A magical recipe for colorful Unicorn Cookies that are fun and perfect for any celebration.


    • 1 cup (226g) unsalted butter, at room temperature
    • 1 1/2 cups (285g) granulated sugar
    • 2 large eggs, at room temperature
    • 1 teaspoon (5ml) pure vanilla extract
    • 3 ½ cups (420g) all-purpose flour
    • ½ teaspoon (2g) baking soda
    • ½ teaspoon (2g) cream of tartar
    • ¼ teaspoon (1.2g) salt
    • ½ cup sprinkles
    • Gel colors (Pink, Royal Blue, and Violet)

    1. Preheat the oven to 350° F. Line a large cookie sheet with parchment or a silicone baking mat.
    2. Combine the butter with the sugar and beat on medium speed until well creamed together. Add the eggs and vanilla extract. Mix until the eggs are well beaten.
    3. In a separate bowl, combine the remaining dry ingredients. Slowly add into the batter and beat on medium-low speed until well combined and the dough starts to form. Then add the sprinkles and finish mixing to incorporate.
    4. Divide the dough into 4 equal-sized balls. Leave one uncolored and dye the remaining 3 using colors of your choice. Work the color into the dough with a spatula or by hand.
    5. Place all four doughs into a large bowl and lightly mix with a spoon or by hand to create a tie-dye effect. Avoid overmixing to prevent blending the colors into new colors.
    6. Use a medium or large cookie scoop to portion the dough. Roll each ball of dough in granulated sugar or add additional sprinkles and place each one about 2 inches apart on the baking sheet.
    7. Bake at 350° F for 10-12 minutes. Allow the cookies to cool on the baking sheet for several minutes before transferring to a wire rack to cool completely.

    Notes

    • For best results, make sure all ingredients are at room temperature.
    • Experiment with different gel colors for a unique twist.
    • Store cookies in an airtight container to maintain freshness.
    • Prep Time: 20 minutes
    • Cook Time: 12 minutes
    • Category: Dessert
    • Method: Baking
    • Cuisine: American

    Nutrition

    • Serving Size: 1 cookie
    • Calories: 150
    • Sugar: 15g
    • Sodium: 60mg
    • Fat: 7g
    • Saturated Fat: 4g
    • Unsaturated Fat: 2g
    • Trans Fat: 0g
    • Carbohydrates: 22g
    • Fiber: 0g
    • Protein: 2g
    • Cholesterol: 30mg

    Sharing is caring!

  • Tuna & Cottage Cheese Summer Salad

    Tuna & Cottage Cheese Summer Salad


    Introduction to Tuna & Cottage Cheese Summer Salad

    As summer rolls in, I find myself craving something light and refreshing. That’s where my Tuna & Cottage Cheese Summer Salad shines! This dish isn’t just delicious; it’s a quick solution for busy days when cooking feels like a chore. It’s packed with nutrients and bursting with flavor, making it perfect for lunch or a light dinner. Whether you’re juggling meetings or trying to impress your loved ones at a gathering, this salad will leave everyone smiling. Trust me, you’ll want to make this your go-to summer meal!

    Why You’ll Love This Tuna & Cottage Cheese Summer Salad

    This Tuna & Cottage Cheese Summer Salad is a game changer for busy moms and professionals alike. It’s incredibly easy to whip up, taking only 10 minutes from start to finish. Plus, it’s packed with protein, keeping you energized without weighing you down. The combination of fresh veggies and creamy cottage cheese makes each bite a delightful explosion of flavor. You’ll love how it brightens your plate and your mood!

    Ingredients for Tuna & Cottage Cheese Summer Salad

    Gathering fresh ingredients is the heart of this Tuna & Cottage Cheese Summer Salad. Here’s what you’ll need:

    • Cottage Cheese: This creamy base offers protein and a slightly tangy flavor. You can choose between full-fat or low-fat, depending on your preference.
    • Tuna: Canned tuna is a fantastic source of lean protein. Pot for tuna packed in water for a healthier choice.
    • Cherry Tomatoes: Sweet and juicy, these brighten the dish with color and flavor. Feel free to substitute with diced regular tomatoes if that’s what you have on hand.
    • Cucumber: Crunchy and refreshing, cucumber adds a lightness to the salad. Other varieties like zucchini can work too if you’re feeling adventurous.
    • Red Onion: Finely chopped, this ingredient adds a sharp bite that elevates the taste. If you’re sensitive to raw onion, consider using green onions instead.
    • Avocado: A creamy addition, it’s optional but highly recommended for those rich flavors. If you’re watching calories, you can skip this.
    • Fresh Lemon Juice: This brightens up the salad immensely, adding acidity that balances the creaminess. Fresh is best, but bottled lemon juice will do in a pinch.
    • Extra Virgin Olive Oil: A drizzle enhances flavors and adds healthy fats. You can use any neutral oil if you’re out.
    • Salt and Black Pepper: Essential for seasoning, they bring all the salad components together. Be sure to adjust to your taste.
    • Fresh Dill or Parsley: These herbs add a lovely aroma and freshness. If you don’t have either, dried herbs like thyme can work too.
    • Red Pepper Flakes: For those who enjoy a bit of heat, these are optional. Use sparingly to avoid overwhelming the salad.

    For those looking for exact measurements, don’t worry—they’re listed at the bottom of this article and are available for printing. Enjoy the process of preparing this delightful dish!

    How to Make Tuna & Cottage Cheese Summer Salad

    Step 1: Prepare the Ingredients

    Before diving in, gather all your ingredients. It might seem like a small step, but trust me, it makes a world of difference! Wash your vegetables and chop everything into bite-sized pieces. I prefer to have my red onion finely chopped; this way, it blends seamlessly into the salad. This preparation means you won’t feel rushed or overwhelmed when you start mixing. Plus, everything will be ready to go like a well-organized kitchen symphony! Take a moment to admire your colorful spread. It’s like you’re painting a delicious masterpiece!

    Step 2: Mix the Base

    Grab a large mixing bowl and combine your cottage cheese with the drained tuna. This is where the magic begins! The creamy cottage cheese and flaky tuna blend together beautifully, creating a rich texture that’s oh-so satisfying. I love how they dance harmoniously, creating a base that’s both light and filling. Use a fork to gently flake the tuna and fold it into the cottage cheese. This careful mixing ensures that every bite has that perfect balance of flavor. If you want even more creaminess, think about adding that avocado now, too!

    Step 3: Add Fresh Vegetables

    Now, let’s brighten things up by tossing in the cherry tomatoes, cucumber, and red onion. The fresh veggies bring color and a crunchy texture that will elevate your salad to new heights. As the tomatoes burst with their juicy sweetness, you’ll feel like summer has arrived on your plate. If you opted for avocado, now’s the time to rejoice as you mix everything together. This step is about harmony—making sure each ingredient complements the others. The crisp vegetables combined with creamy tuna create a mouthwatering blend sure to wow anyone!

    Step 4: Drizzle with Dressing

    Your salad is almost there! Now, let’s add the star of the show: the dressing. Drizzle fresh lemon juice and extra virgin olive oil over your mixture. This would awaken the flavors and tie everything together. The acidity of the lemon brightens each component, while the olive oil adds richness. I like to season it up with salt, black pepper, and red pepper flakes. Don’t skip this crucial step; it takes your dish from basic to spectacular! Use your taste buds here—adjust the seasoning to suit your cravings!

    Step 5: Garnish and Serve

    Time to make this salad shine! Sprinkle fresh dill or parsley on top to create a beautiful presentation. This simple garnish adds a pop of color and a delightful fragrance that elevates your Tuna & Cottage Cheese Summer Salad to a new level. Presentation matters, especially when you’re enjoying a meal with loved ones! Serve it up right away, or let it chill for just a bit to let the flavors meld beautifully. Either way, you’re in for a treat that screams summer, freshness, and healthy eating!

    Tips for Success

    • Always taste as you go! Adjust seasonings to your personal preference for maximum flavor.
    • Substitute any veggies you love or have on hand—this salad is versatile!
    • Chill the salad for 15 minutes before serving to enhance the flavors.
    • Use freshly squeezed lemon juice for a brighter, more vibrant taste.
    • Experiment with herbs like basil or cilantro for a different twist.

    Equipment Needed

    • Mixing Bowl: A large bowl to combine all ingredients. Any deep dish can work!
    • Fork: Great for mixing and flaking the tuna. A spoon works too!
    • Chopping Board: Essential for preparing veggies. A plate can also do the trick in a pinch.
    • Knife: To chop your ingredients. Just make sure it’s sharp for easy cutting!

    Variations of Tuna & Cottage Cheese Summer Salad

    • Greek Twist: Add kalamata olives and feta cheese for a Mediterranean flavor explosion. This combination pairs beautifully with the cottage cheese!
    • Spicy Kick: Mix in diced jalapeños or a splash of hot sauce to turn the heat up. It’ll add an exciting punch to every bite.
    • Southwestern Flair: Incorporate black beans, corn, and a sprinkle of cumin for a zesty twist that will transport you to sunny Mexico.
    • Low-Carb Option: Swap out the tuna for shredded chicken or chickpeas; they work great while keeping the salad nutritious and filling.
    • Fruit Fusion: Toss in diced mango or pineapple for a sweet surprise! The fruity flavor will balance the savory ingredients nicely.

    Serving Suggestions for Tuna & Cottage Cheese Summer Salad

    • Pair with whole-grain crackers for a crunchy side that complements the creamy salad.
    • Serve alongside a light, refreshing fruit salad to bring out the salad’s freshness.
    • A chilled glass of white wine or sparkling water adds a special touch.
    • Present on a bed of mixed greens for an elegant, enticing plate.
    • Add slices of toasted baguette for an extra culinary touch.

    FAQs about Tuna & Cottage Cheese Summer Salad

    Can I use different types of tuna for my salad?

    Absolutely! You can use canned tuna in oil or water depending on your preference. Just make sure it’s drained well. You’ll enjoy the flavors and textures regardless of the kind you choose!

    Is this Tuna & Cottage Cheese Summer Salad healthy?

    Yes! This salad is not only light and refreshing; it’s also packed with protein and vitamins. The combination of cottage cheese and veggies offers a nutritious meal perfect for summer days.

    How do I store leftovers?

    If you have any leftovers, store them in an airtight container in the fridge. Enjoy within a day or two for the best freshness. However, be mindful as the veggies may lose some crunch over time.

    Can I make this salad ahead of time?

    You certainly can! Prep it in advance for a quick lunch or dinner. Just remember to add the fresh herbs and a little lemon juice right before serving for maximum flavor.

    What can I serve with Tuna & Cottage Cheese Summer Salad?

    This salad pairs beautifully with whole-grain crackers, a light fruit salad, or even a chilled glass of white wine. It’s also great on a bed of mixed greens for a complete meal!

    Final Thoughts

    Making this Tuna & Cottage Cheese Summer Salad brings a burst of joy to my kitchen. It’s more than just a recipe; it’s a celebration of fresh ingredients that transform simple moments into delightful culinary experiences. Each bite is a refreshing reminder that healthy eating can be quick and enjoyable. Whether I serve it for a family lunch or a casual gathering, it always earns smiles. Plus, I love how this salad invites creativity—there’s so much room to personalize! I hope it brings you as much happiness and fulfillment as it has brought me!


    Print

    clock clock iconcutlery cutlery iconflag flag iconfolder folder iconinstagram instagram iconpinterest pinterest iconfacebook facebook iconprint print iconsquares squares iconheart heart iconheart solid heart solid icon

    Description

    A refreshing and nutritious salad perfect for summer, combining tuna and cottage cheese with fresh vegetables.


    • 1 cup cottage cheese (full-fat or low-fat)
    • 1 (5 oz) can tuna, drained
    • ½ cup cherry tomatoes, halved
    • ½ cup cucumber, diced
    • ¼ cup red onion, finely chopped
    • ¼ cup avocado, diced (optional, for extra creaminess)
    • 1 tbsp fresh lemon juice
    • 1 tbsp extra virgin olive oil
    • ½ tsp salt
    • ¼ tsp black pepper
    • 1 tbsp fresh dill or parsley, chopped
    • ¼ tsp red pepper flakes (optional, for a little kick)

    1. In a large mixing bowl, combine cottage cheese, tuna, cherry tomatoes, cucumber, red onion, and avocado (if using).
    2. Drizzle with lemon juice and olive oil. Season with salt, black pepper, and red pepper flakes (if using).
    3. Gently toss everything together until well combined.
    4. Garnish with fresh dill or parsley for an herby finish.
    5. Serve immediately, or chill for 15 minutes for even better flavor.

    Notes

    • Optional ingredients can be adjusted based on personal preference.
    • Chilling the salad enhances the flavors.
    • Prep Time: 10 minutes
    • Cook Time: 0 minutes
    • Category: Salad
    • Method: Mixing
    • Cuisine: American

    Nutrition

    • Serving Size: 1 serving
    • Calories: 250
    • Sugar: 3g
    • Sodium: 500mg
    • Fat: 10g
    • Saturated Fat: 2g
    • Unsaturated Fat: 8g
    • Trans Fat: 0g
    • Carbohydrates: 15g
    • Fiber: 3g
    • Protein: 30g
    • Cholesterol: 40mg

    Sharing is caring!

  • Slow Cooker Taco Casserole

    Slow Cooker Taco Casserole


    Introduction to Slow Cooker Taco Casserole

    As a busy mom, I know how chaotic dinnertimes can get. Between work, school, and everything in between, finding a satisfying meal can feel like a juggling act. Enter my beloved Slow Cooker Taco Casserole! This dish is the superhero of weeknight dinners, combining delicious layers of flavors with minimal effort. Picture savory ground beef, zesty tomatoes, and gooey cheese all melting together. It’s not just a meal; it’s a warm hug in a bowl that brings my family together. Trust me, this taco casserole will become your go-to when life gets hectic!

    Why You’ll Love This Slow Cooker Taco Casserole

    This Slow Cooker Taco Casserole is a game-changer! It’s incredibly easy to whip together, meaning less time in the kitchen and more time with your loved ones. The flavors meld beautifully, creating a comforting dish that satisfies everyone. Plus, it’s versatile! You can customize it to fit your family’s taste, making it a true crowd-pleaser. It’s my secret weapon for busy nights, and I bet it will be yours too!

    Ingredients for Slow Cooker Taco Casserole

    Gathering the right ingredients can make or break your cooking experience. For this Slow Cooker Taco Casserole, you’ll need a fabulous lineup:

    • Ground beef: This is the heart of the dish, providing that rich, meaty base. Feel free to substitute with turkey or plant-based alternatives for a lighter or vegetarian option.
    • Onion: Diced onions add a sweet and savory depth of flavor. You can switch to shallots for a milder taste, or even use onion powder if you’re short on time.
    • Garlic: Fresh minced garlic brings a wonderful aroma and taste. However, pre-minced garlic can save you some extra steps.
    • Taco seasoning mix: This magical blend of spices adds zing to our casserole. If you’re feeling adventurous, why not make your own mix using cumin, paprika, and chili powder?
    • Diced tomatoes with green chilies: These provide both moisture and a kick! Canned tomatoes are so convenient—consider getting the fire-roasted variety for extra flavor!
    • Black beans: Rinsed and drained, they add protein and fiber. Feel free to substitute pinto beans if that’s what you have on hand.
    • Corn: Sweet corn adds a pop of color and sweetness. You can use frozen corn; just toss it in without thawing.
    • Salsa: Use your favorite salsa for added flavor. The spicier, the better, if you like it hot!
    • Shredded Mexican cheese blend: It melts beautifully over the casserole. You can opt for cheddar or Monterey Jack if you prefer.
    • Tortillas: Cut into strips, these create layers. Use corn or flour, or try swapping them for gluten-free wraps.
    • Fresh cilantro: Chopped for garnish, it brings brightness. You can leave it out if cilantro isn’t your thing.
    • Sour cream: A dollop adds creaminess when serving. Greek yogurt is a great substitute if you’re watching calories.
    • Optional toppings: Sliced jalapeños and diced avocado elevate the dish with extra flavor and fun!

    All the exact quantities you’ll need for the perfect Slow Cooker Taco Casserole are listed at the bottom of this article, ready for you to print out!

    How to Make Slow Cooker Taco Casserole

    Now that we have our ingredients lined up, it’s time to dive into the heart of the cooking experience! Making this Slow Cooker Taco Casserole is like building a flavorful tower of happiness. Follow these simple steps to create a dish that will have your family asking for seconds!

    Step 1: Prepare the Ground Beef

    Start by heating a large skillet over medium-high heat. Add in the ground beef and cook until it’s nicely browned. This usually takes about 5-7 minutes.

    When it’s done, remember to drain any excess fat! Leaving too much fat can make your casserole greasy. If you’re using a lean variety, this step might not be necessary.

    Step 2: Sauté the Onions and Garlic

    Next up, toss in the diced onions to the skillet with the cooked beef. Sauté them together until they soften, which takes about 3-4 minutes.

    Then, throw in the minced garlic and stir for an additional minute. Oh, that smell! It’s the aroma of deliciousness taking over your kitchen, and it’s just a prelude to what’s coming!

    Step 3: Mix in the Taco Seasoning and Tomatoes

    Now it’s time to amp up the flavor. Stir in the taco seasoning mix and cook for about a minute.

    Then, add the canned diced tomatoes with their juices. Mix everything well in the skillet before removing it from the heat. This combination will create a mouthwatering base for your casserole.

    Step 4: Layer the Ingredients in the Slow Cooker

    Take your trusty slow cooker and spray the inside with a bit of non-stick cooking spray. Start assembling your masterpiece!

    Spread a thin layer of salsa at the bottom. Next, place a layer of tortilla strips over it. Here’s the fun part: spread half of the beef mixture over the tortillas, followed by half of the black beans and corn.

    Repeat the layers with the remaining ingredients. Finish with another layer of tortilla strips and pour over the leftover salsa. It’s starting to look scrumptious!

    Step 5: Cook to Perfection

    Cover your slow cooker and set it on low for 4-5 hours or high for 2-3 hours. This slow cooking allows all those flavors to meld beautifully.

    As it cooks, your house will fill with the intoxicating scent of savory goodness. It’s like a warm embrace as you go about your day!

    Step 6: Add the Cheese Before Serving

    About 15 minutes before serving, sprinkle that glorious shredded Mexican cheese blend generously over the top.

    Cover again to let the cheese melt into a gooey, delicious layer. Your Slow Cooker Taco Casserole will be complete and ready to delight your taste buds!

    Tips for Success

    • Pre-chop your veggies and set aside for easy assembly.
    • Use lean ground beef for a healthier option, or swap it for turkey or plant-based meat.
    • Layering is key! Make sure to spread everything evenly for the best texture.
    • If you’re short on time, use leftover chicken or rotisserie chicken instead.
    • Don’t rush the slow cooking; let those flavors develop for a comforting meal!

    Equipment Needed

    • Slow Cooker: Your trusty slow cooker will be the star of this dish. A Dutch oven can work too if you prefer stovetop cooking!
    • Skillet: A non-stick or stainless steel skillet is perfect for browning the beef.
    • Spatula: This will help in mixing, flipping, and serving with ease.
    • Can Opener: A handy tool for those canned ingredients!
    • Cutting Board and Knife: Essential for chopping veggies.

    Variations

    • Vegetarian Delight: Omit the ground beef and double up on beans. Use black, pinto, or kidney beans for a hearty option.
    • Spicy Twist: Add diced jalapeños or a splash of hot sauce to the beef mixture for a kick of heat!
    • Cheesy Add-Ons: Mix in some cream cheese or a different cheese variety (like pepper jack) for extra creaminess.
    • Low-Carb Option: Replace tortillas with thinly sliced zucchini or cauliflower rice for a lighter casserole.
    • Southwestern Flair: Toss in diced bell peppers and corn for a fresh burst of flavor in every bite!

    Serving Suggestions

    • Pair your Slow Cooker Taco Casserole with a fresh garden salad for a crunchy contrast.
    • Serve alongside tortilla chips for some extra crunch and fun!
    • A splash of lime juice over the casserole enhances the flavors wonderfully.
    • For drinks, consider a chilled margarita or a fruity mocktail.
    • Presentation is key! Garnish with extra cilantro and a dollop of sour cream for that restaurant feel.

    FAQs about Slow Cooker Taco Casserole

    Can I make Slow Cooker Taco Casserole ahead of time?

    Absolutely! You can prepare the layers the night before and store them in the fridge. Just assemble everything in the slow cooker the next day and let it cook. It’s a great time-saver!

    Can I freeze leftovers of this casserole?

    Yes, freezing is a fantastic idea! Once cooled, store your Slow Cooker Taco Casserole in airtight containers. It can last up to three months in the freezer. Just reheat when you’re ready to enjoy again!

    Is this casserole gluten-free?

    Yes, as long as you use gluten-free tortillas and taco seasoning. Double-check the labels to ensure everything fits your dietary needs. It’s easily customizable for those with gluten sensitivities!

    What can I substitute for ground beef?

    If you’re looking for alternatives, ground turkey works wonders. You can also try lentils or mushrooms for a vegetarian option. The flavors will still shine, making every bite delightful!

    How do I know when my casserole is done cooking?

    The casserole is ready when it’s hot throughout and the edges are bubbly. The cheese should be melted nicely. A quick taste test will tell you if all those flavors have mingled perfectly!

    Final Thoughts

    There’s something truly magical about gathering around a warm plate of Slow Cooker Taco Casserole at the end of a bustling day. This dish is more than just a meal; it’s a moment of connection, laughter, and comfort for my family. The way the savory ingredients meld together makes each bite a delightful experience. Plus, knowing that I can set it and forget it frees me up for more quality time with my loved ones! Whether it’s a busy weekday or a cozy weekend, this casserole will quickly become your favorite family tradition. Trust me; it’s pure joy on a plate!


    Print

    clock clock iconcutlery cutlery iconflag flag iconfolder folder iconinstagram instagram iconpinterest pinterest iconfacebook facebook iconprint print iconsquares squares iconheart heart iconheart solid heart solid icon

    Description

    A delicious and hearty Slow Cooker Taco Casserole that combines ground beef, beans, corn, and cheese for a satisfying meal.


    • 1 lb (450g) ground beef
    • 1 small onion, diced
    • 2 cloves garlic, minced
    • 1 packet (1 oz) taco seasoning mix
    • 1 can (14.5 oz) diced tomatoes with green chilies (Rotel)
    • 1 can (15 oz) black beans, drained and rinsed
    • 1 can (15 oz) corn, drained
    • 1 cup salsa
    • 1 cup shredded Mexican cheese blend
    • 6 small flour or corn tortillas, cut into strips
    • Fresh cilantro, chopped (for garnish)
    • Sour cream for serving
    • Sliced jalapeños (optional, for serving)
    • Diced avocado (optional, for serving)

    1. In a large skillet over medium-high heat, cook the ground beef until browned. Drain any excess fat.
    2. Add the diced onion to the skillet with the beef and cook until softened, about 3-4 minutes.
    3. Add the minced garlic and cook for an additional 1 minute until fragrant.
    4. Stir in the taco seasoning mix and cook for 1 minute.
    5. Add the diced tomatoes with green chilies (including the juice) and stir to combine. Remove from heat.
    6. Spray the inside of your slow cooker with non-stick cooking spray.
    7. Spread a thin layer of salsa on the bottom of the slow cooker.
    8. Place a layer of tortilla strips over the salsa.
    9. Spread half of the beef mixture over the tortillas.
    10. Add half of the black beans and half of the corn.
    11. Add another layer of tortilla strips, followed by the remaining beef mixture, black beans, and corn.
    12. Top with the remaining tortilla strips and pour the remaining salsa over the top.
    13. Cover and cook on low for 4-5 hours or on high for 2-3 hours.
    14. About 15 minutes before serving, sprinkle the shredded Mexican cheese blend over the top of the casserole. Cover and let the cheese melt.
    15. Garnish with chopped fresh cilantro and serve with sour cream, sliced jalapeños, and diced avocado, if desired.

    Notes

    • Feel free to customize the toppings based on your preferences.
    • This dish can also be made vegetarian by omitting the ground beef and using additional beans or vegetables.
    • Prep Time: 15 minutes
    • Cook Time: 4-5 hours on low or 2-3 hours on high
    • Category: Main Dish
    • Method: Slow Cooker
    • Cuisine: Mexican

    Nutrition

    • Serving Size: 1/6 of casserole
    • Calories: 350
    • Sugar: 3g
    • Sodium: 750mg
    • Fat: 20g
    • Saturated Fat: 10g
    • Unsaturated Fat: 6g
    • Trans Fat: 0g
    • Carbohydrates: 30g
    • Fiber: 6g
    • Protein: 20g
    • Cholesterol: 60mg

    Sharing is caring!

  • Cannoli Cupcakes

    Cannoli Cupcakes


    Introduction to Cannoli Cupcakes

    Ah, Cannoli Cupcakes! They’re like a cozy hug from a beloved Italian grandmother, mixing tradition with a sweet twist. As a busy mom, I know how precious time can be, yet we all crave something special to brighten our days. These delightful cupcakes bring the classic flavors of cannoli into a soft, moist treat that’s perfect for any occasion. Whether it’s a birthday, an afternoon pick-me-up, or a last-minute potluck, these cupcakes will impress everyone—leaving you with a smile and a well-deserved moment of indulgence.

    Why You’ll Love This Cannoli Cupcakes

    These Cannoli Cupcakes capture the rich, creamy essence of the classic dessert, but with a much simpler and quicker approach. They bake up beautifully moist and fluffy, and the combination of flavors will make your taste buds dance with joy. Plus, making these treats can be a fun family activity, allowing your kids to join in the kitchen chaos while creating mouthwatering memories together. It’s the perfect blend of ease, speed, and deliciousness!

    Ingredients for Cannoli Cupcakes

    Gathering the right ingredients is crucial for making these Cannoli Cupcakes truly special. Each one plays a key role in delivering that classic taste. Here’s what you’ll need:

    • All-purpose flour: The base of our cupcakes, giving them structure and a soft crumb.
    • Baking powder: This little miracle worker helps the cupcakes rise, making them light and fluffy.
    • Salt: Just a pinch enhances all the flavors, creating that delicious balance we crave.
    • Unsalted butter: Softened to room temperature, it adds richness and moisture, creating a tender bite.
    • Granulated sugar: Sweetness, of course! It helps to create that lovely golden crust and adds flavor.
    • Large eggs: These bind everything together and contribute to the overall texture.
    • Vanilla extract: A splash of this fragrant essence elevates the flavor profile, making it more irresistible.
    • Whole milk: Adding moisture and richness, it keeps the cupcakes nice and tender.
    • Sour cream: This creamy ingredient brings a slight tang, enhancing the cupcake’s flavor and texture.
    • Ricotta cheese: The star ingredient! It gives a creamy filling that captures the essence of classic cannoli.
    • Powdered sugar: Used in the filling, this sweetener blends perfectly, creating a smooth texture.
    • Mini chocolate chips: Little bursts of chocolate in each bite that harmonize wonderfully with the ricotta.
    • Chopped pistachios (optional): For a delightful crunch and a touch of color, these can be added to the filling.
    • Heavy cream: This luscious cream is whipped to a cloud-like topping that complements the cupcakes perfectly.
    • More powdered sugar for whipped cream: This adds sweetness, balancing the rich flavors of the cupcakes.
    • More vanilla extract for topping: A little extra vanilla in the whipped cream ties all the flavors together.
    • Mini chocolate chips and chopped pistachios (for garnish): These toppings not only look appealing, but they also intensify the flavor.

    Make sure to check the bottom of the article for specific quantities of each ingredient, which you can print out for easy reference.

    How to Make Cannoli Cupcakes

    Step 1: Preheat and Prepare

    To kick things off, preheat your oven to 350°F (175°C). While it warms up, grab a 12-cup muffin tin and line it with cupcake liners. These lovely little liners not only make the cupcakes easy to remove, but they also add a dash of color to your presentation. I always pick bright colors to brighten up the dessert table. With the oven ready and the tin lined, you’re well on your way to creating these delightful Cannoli Cupcakes!

    Step 2: Mix Dry Ingredients

    In a medium bowl, whisk together the all-purpose flour, baking powder, and salt. This mixture is your dry ingredient base, so take a moment to mix them thoroughly. It’s important to incorporate air into the flour, ensuring that the cupcakes rise beautifully. I often think of this step as giving your cupcakes a little extra love, setting them up for success. Set this bowl aside while you work on the next steps.

    Step 3: Cream Butter and Sugar

    Now comes the fun part! In a large mixing bowl, cream together your softened unsalted butter and granulated sugar. Use a hand mixer or stand mixer on medium speed until the mixture is light and fluffy—about 2 to 3 minutes. You want it to look pale and dreamy! This step is crucial for achieving that moist texture. Just like whipping up a sweet dream, pretend you’re whisking all your worries away. Add eggs one at a time, mixing well to combine before moving on.

    Step 4: Combine Ingredients

    Next up, it’s time to bring life to the batter. Gradually add in your dry ingredients, alternating with the whole milk and sour cream. I recommend starting and ending with the dry mixture. Mix until everything is just combined. Trust me, it’s better to leave some lumps than to overmix! Overmixing can lead to dense cupcakes, and nobody wants that. Picture those fluffy, airy bites—it’s worth the patience!

    Step 5: Bake the Cupcakes

    It’s time to bake! Divide the lovely batter evenly between your cupcake liners—fill them about two-thirds full. Pop the muffin tin in your preheated oven and bake for 18 to 20 minutes. Stick a toothpick in the center of a cupcake; if it comes out clean, they’re done! Once baked, let the cupcakes cool in the tin for about 5 minutes before transferring them to a wire rack. Allow them to cool completely; patience pays off in flavor and texture!

    Step 6: Prepare the Filling

    While the cupcakes are cooling, whip up the creamy filling. In a medium bowl, combine the drained ricotta cheese, powdered sugar, and vanilla extract. Mix until it’s smooth and creamy. You want a luscious filling that’s reminiscent of traditional cannoli! For extra flavor, fold in mini chocolate chips and chopped pistachios if you’re feeling adventurous. This filling is the magic layer that makes these Cannoli Cupcakes shine!

    Step 7: Make Whipped Cream Topping

    Now let’s create that heavenly whipped cream topping! In a separate bowl, beat the heavy cream along with the extra powdered sugar and vanilla extract at medium-high speed until soft peaks form. This means when you lift the beaters, the peaks of cream gently droop down—that’s how you know it’s ready. This fluffy cloud of sweetness will complement the rich flavors of your cupcakes beautifully.

    Step 8: Fill and Decorate

    Once your cupcakes are cool, it’s time to fill them with that delightful ricotta filling. Use a small knife or a cupcake corer to remove a little plug from the center of each cupcake. Don’t worry—a bit of a “cupcake excavation” can be quite satisfying! Fill each one generously with the creamy mixture, then pipe or spoon that whipped cream on top like a fluffy cloud. Finally, don’t forget to garnish! Sprinkle extra mini chocolate chips and chopped pistachios for that decorative touch—your Cannoli Cupcakes deserve it!

    Tips for Success

    • Always drain the ricotta cheese well to avoid a watery filling.
    • Keep your butter at room temperature for easier creaming.
    • Measure flour by spooning it into your measuring cup to avoid packing it down.
    • Let the cupcakes cool completely before filling for the best results.
    • Have fun decorating—get the kids involved for extra giggles!

    Equipment Needed for Cannoli Cupcakes

    • 12-cup muffin tin (or a silicone muffin pan for easy removal)
    • Cupcake liners (paper or silicone for a fun flair)
    • Mixing bowls (both medium and large sizes)
    • Whisk (or an electric mixer for less elbow grease)
    • Knife or cupcake corer (to create filling space)
    • Spatula (for scraping the sides of the bowls)

    Variations on Cannoli Cupcakes

    • Gluten-Free Option: Substitute all-purpose flour with a gluten-free blend for a delicious gluten-free Cannoli Cupcake.
    • Vegan Variation: Use vegan butter, flax eggs (1 tablespoon ground flaxseed mixed with 2.5 tablespoons water per egg), and dairy-free milk to create a vegan-friendly treat.
    • Chocolate Cannoli Cupcakes: Incorporate cocoa powder into the batter for a chocolate twist, and use chocolate ricotta for the filling.
    • Fruit-Infused Fillings: Add fresh berries or citrus zest to the ricotta mixture for a fruity flavor explosion.
    • Different Nut Toppings: Swap pistachios for chopped almonds or hazelnuts to switch up the texture and taste.

    Serving Suggestions for Cannoli Cupcakes

    • Pair with a strong espresso or a creamy cappuccino for a delightful coffee break.
    • Serve alongside fresh berries for a burst of color and flavor.
    • Present on a colorful cake stand to elevate your dessert table.
    • Dust with a sprinkle of powdered sugar for an elegant touch.
    • Enjoy them with a scoop of vanilla gelato for an indulgent treat.

    FAQs about Cannoli Cupcakes

    Can I make Cannoli Cupcakes ahead of time?
    Absolutely! You can bake the cupcakes a day in advance and store them in an airtight container. Just hold off on filling and frosting them until you’re ready to serve. This ensures they stay fresh and delicious.

    What can I use instead of ricotta cheese?
    If you’re in a pinch, cream cheese can be a great substitute for ricotta. Just soften it, then mix in some powdered sugar and a splash of vanilla to mimic that creamy texture and flavor.

    How do I store leftover Cannoli Cupcakes?
    Store any uneaten cupcakes in an airtight container in the refrigerator for up to three days. To keep the whipped cream topping fresh longer, you might want to store it separately until serving.

    Can I freeze Cannoli Cupcakes?
    Yes, you can freeze the cupcakes before frosting them. Just wrap each one tightly in plastic wrap and then place them in a freezer-safe bag. They’ll stay good for about a month. Thaw them in the fridge overnight before frosting and serving!

    What’s the secret to making these cupcakes extra fluffy?
    The key to fluffy Cannoli Cupcakes is not to overmix your batter and to incorporate enough air when creaming the butter and sugar. Each step is a dance, preparing your cupcakes to rise and shine!

    Final Thoughts

    Baking these Cannoli Cupcakes isn’t just about satisfying a sweet tooth; it’s a celebration of creativity and togetherness in the kitchen. Every step—from mixing the batter to piping the fluffy cream—allows us to create something delicious with our hands and hearts. As I watch my family indulge in these delightful treats, I’m reminded of the joy simple things can bring. The happiness of sharing a cupcake, filled with love and laughter, transforms any day into a special occasion. I hope you find as much joy in making these sweet bites as I have in sharing them.


    Print

    clock clock iconcutlery cutlery iconflag flag iconfolder folder iconinstagram instagram iconpinterest pinterest iconfacebook facebook iconprint print iconsquares squares iconheart heart iconheart solid heart solid icon

    Description

    Cannoli Cupcakes are a delightful twist on the traditional Italian dessert, combining the flavors of cannoli in a soft and moist cupcake form.


    • 1 ½ cups all-purpose flour
    • 1 ½ tsp baking powder
    • ¼ tsp salt
    • ½ cup unsalted butter, softened
    • 1 cup granulated sugar
    • 2 large eggs
    • 1 tsp vanilla extract
    • ½ cup whole milk
    • ¼ cup sour cream
    • 1 cup ricotta cheese, drained
    • ½ cup powdered sugar
    • 1 tsp vanilla extract
    • ¼ cup mini chocolate chips
    • 2 tbsp chopped pistachios (optional)
    • 1 cup heavy cream
    • 2 tbsp powdered sugar
    • 1 tsp vanilla extract
    • Mini chocolate chips (for garnish)
    • Chopped pistachios (optional, for garnish)

    1. Preheat your oven to 350°F (175°C). Line a 12-cup muffin tin with cupcake liners.
    2. In a medium bowl, whisk together the flour, baking powder, and salt. In a separate large bowl, cream together the softened butter and sugar until light and fluffy. Add the eggs one at a time, mixing well after each addition. Stir in the vanilla extract.
    3. Gradually add the dry ingredients to the wet mixture, alternating with the milk and sour cream. Begin and end with the dry ingredients. Mix until just combined. Be careful not to overmix.
    4. Divide the batter evenly among the cupcake liners, filling each about 2/3 of the way full. Bake for 18-20 minutes, or until a toothpick inserted into the center comes out clean. Let the cupcakes cool in the tin for a few minutes, then transfer to a wire rack to cool completely.
    5. While the cupcakes are cooling, make the filling. In a medium bowl, combine the ricotta cheese, powdered sugar, and vanilla extract. Mix until smooth and creamy. Fold in the mini chocolate chips and chopped pistachios (if using).
    6. In a separate bowl, beat the heavy cream, powdered sugar, and vanilla extract on medium-high speed until soft peaks form.
    7. Once the cupcakes have cooled, use a small knife or a cupcake corer to remove a small portion from the center of each cupcake. Fill each cupcake with the cannoli filling, then pipe or spoon whipped cream on top of each one.
    8. Garnish with more mini chocolate chips and chopped pistachios if desired. Serve and enjoy the delicious cannoli-inspired treat!

    Notes

    • Make sure to drain the ricotta cheese well before using it to avoid a watery filling.
    • You can make the cupcakes ahead of time and assemble them just before serving for the best texture.
    • Prep Time: 20 minutes
    • Cook Time: 20 minutes
    • Category: Dessert
    • Method: Baking
    • Cuisine: Italian

    Nutrition

    • Serving Size: 1 cupcake
    • Calories: 320
    • Sugar: 22g
    • Sodium: 150mg
    • Fat: 18g
    • Saturated Fat: 10g
    • Unsaturated Fat: 4g
    • Trans Fat: 0g
    • Carbohydrates: 38g
    • Fiber: 1g
    • Protein: 4g
    • Cholesterol: 55mg

    Sharing is caring!

  • Chicken Scampi With Garlic Parmesan Rice

    Chicken Scampi With Garlic Parmesan Rice


    Introduction to Chicken Scampi With Garlic Parmesan Rice

    Hey there, busy moms and fabulous professionals! I know how hectic life can get, and that’s why I’m excited to share my Chicken Scampi With Garlic Parmesan Rice recipe. It’s a delightful dish that comes together in just 45 minutes. Perfect for those weeknights when you want something satisfying but don’t have hours to spend in the kitchen. Imagine garlic-infused chicken, paired with creamy, cheesy rice, all served in one scrumptious bowl. This dish isn’t just a meal; it’s a way to bring joy and comfort to your family dinner table!

    Why You’ll Love This Chicken Scampi With Garlic Parmesan Rice

    This Chicken Scampi With Garlic Parmesan Rice is truly a lifesaver. You can whip it up in just 45 minutes, making it ideal for those busy evenings when the clock is ticking. The vibrant flavors of garlic and lemon make every bite a delight. Plus, the creamy parmesan rice serves as a comforting side that complements the main dish beautifully. Trust me, your family will be asking for seconds!

    Ingredients for Chicken Scampi With Garlic Parmesan Rice

    Gathering the right ingredients is essential for creating a memorable Chicken Scampi With Garlic Parmesan Rice. Here’s what you’ll need:

    • Boneless, skinless chicken breasts: The star of our dish! Tender and juicy strips are perfect for quick cooking.
    • Salt and pepper: Simple seasonings that enhance all the beautiful flavors. Season generously for the best taste.
    • Olive oil: A heart-healthy fat that will give the chicken a golden, crispy crust as it sautés.
    • Garlic: Freshly minced garlic infuses the dish with an aromatic kick. It truly elevates the scampi sauce!
    • Chicken broth: Adds depth and moisture. Use low-sodium for a healthier option.
    • Lemon juice: This brightens up the dish, adding a refreshing zing that balances the richness of the sauce.
    • White wine (optional): For those who enjoy a splash of sophistication. It adds a complex layer of flavor, but you can skip it if you prefer.
    • Unsalted butter: Creamy and rich, butter helps to bring all the elements together in the sauce.
    • Fresh parsley: Chopped for garnish! It adds a pop of color and a fresh flavor to round out the dish.
    • Long-grain white rice: The base of our creamy garlic parmesan setup, providing the perfect complement to the chicken.
    • Grated Parmesan cheese: This is where the creaminess comes from! It melts beautifully into the rice for a cheesy treat.
    • Chopped fresh parsley (for garnish): A final touch for a beautiful presentation that lights up the plate.

    For exact measurements and more detailed information, be sure to check the bottom of the article where you can find everything listed for easy printing!

    How to Make Chicken Scampi With Garlic Parmesan Rice

    Let’s make this delicious Chicken Scampi With Garlic Parmesan Rice together! Each step is straightforward and packed with flavor. Ready? Let’s jump right in!

    Step 1: Season the Chicken

    Start by seasoning those chicken strips with salt and pepper. Don’t be shy; this little step packs a big punch. Proper seasoning enhances the natural flavors, making every bite of chicken taste divine. Just a sprinkle here and there will do wonders for the overall dish!

    Step 2: Sautéing the Chicken

    Now, heat up your skillet and add olive oil over medium-high heat. Once hot, toss in the seasoned chicken strips. Let them cook without crowding the pan. Each side should take about 3–4 minutes until they’re golden brown and cooked through. This process locks in juiciness, giving you that perfect texture. Trust me, golden is just better!

    Step 3: Making the Sauce

    Once the chicken is perfectly sautéed, remove it from the skillet and set it aside. Now it’s time to create the sauce! In the same skillet, add minced garlic. Sauté it for just about a minute until fragrant. Then, pour in chicken broth and lemon juice, scraping all those tasty bits stuck to the pan. Let this simmer for about 3–4 minutes. This reduces the liquid slightly, intensifying those beautiful flavors and creating your scrumptious scampi sauce!

    Step 4: Cooking the Garlic Parmesan Rice

    While the sauce is simmering, grab a medium saucepan. Combine rice, chicken broth, and the leftover minced garlic. Bring it all to a boil over high heat, then lower the heat and cover. Let it simmer for 15–20 minutes or until the rice is tender and absorbed all that yummy broth. When it’s done, stir in the grated Parmesan cheese. That creamy goodness is what turns simple rice into a cheesy delight!

    Step 5: Combining and Serving

    Now, let’s bring everything together! Return the cooked chicken to the skillet, tossing it in that delicious garlic sauce to coat. This blend of flavors is what Chicken Scampi With Garlic Parmesan Rice is all about! To serve, divide that creamy garlic parmesan rice among your plates and top each with the chicken. Drizzle some of that rich sauce over the top and garnish with fresh parsley for a touch of color. Your family won’t just eat this; they’ll love it!

    Tips for Success

    • Always taste as you go. Adjust seasoning if necessary for extra flavor.
    • For a quicker prep, use pre-sliced chicken breast and pre-minced garlic.
    • Don’t rush the sautéing process; letting the chicken brown properly adds depth to the flavor.
    • If you love garlic, feel free to add more to the sauce or rice!
    • Reheat leftovers gently to keep the chicken tender and the rice creamy.

    Equipment Needed

    • Large skillet: A wide, heavy-bottom pan works best for even cooking.
    • Medium saucepan: If you don’t have one, a pot will do just fine for cooking rice.
    • Knife and cutting board: Essential for slicing the chicken and mincing garlic.
    • Measuring cups and spoons: Useful for precise ingredient measurements.
    • Spatula: A great tool for flipping chicken and mixing the sauce.

    Variations for Chicken Scampi With Garlic Parmesan Rice

    • Spinach or Kale: Add fresh spinach or kale to the scampi during the last few minutes of cooking for a nutritious boost and vibrant color.
    • Shrimp Swap: Feel like mixing it up? Substitute chicken with shrimp for a delightful seafood twist. Adjust cooking time as shrimp cooks faster!
    • Whole Grain Rice: Switch to brown rice or quinoa for a healthier, fiber-packed base. Just allow extra cooking time for these grains.
    • Dairy-Free Option: Use coconut or almond milk in place of butter and cheese for a creamy texture without the dairy.
    • Spicy Kick: Add red pepper flakes for a bold flavor kick if you love some heat in your dish!

    Serving Suggestions for Chicken Scampi With Garlic Parmesan Rice

    • Steamed Vegetables: A mix of green beans or broccoli adds crunch and freshness to your meal.
    • Garlic Bread: Serve alongside buttery garlic bread for that extra touch of comfort.
    • Refreshing Salad: A light Caesar or mixed greens salad balances the richness.
    • White Wine: Pair with a crisp white wine like Pinot Grigio to complement the dish.
    • Presentation: Use a colorful plate and sprinkle extra parsley for a vibrant finish!

    FAQs about Chicken Scampi With Garlic Parmesan Rice

    As with any delightful dish, you may have some burning questions. Let’s tackle a few of the most frequently asked ones about this Chicken Scampi With Garlic Parmesan Rice!

    Can I make Chicken Scampi ahead of time?

    Yes! You can prep the chicken and sauce in advance and store them separately in the fridge. Just reheat and cook the rice when you’re ready to serve. This way, a delicious meal is only minutes away!

    What can I substitute for white wine?

    If you’re not fond of wine, simply use more chicken broth or a splash of extra lemon juice. This will keep the flavors bright without sacrificing the taste!

    Can I freeze leftovers?

    Absolutely! Just make sure to let everything cool completely first. Store in airtight containers, and it will keep in your freezer for up to three months. Reheat gently when ready to eat!

    What’s the best way to store Garlic Parmesan Rice?

    Store the rice in an airtight container in the fridge for up to three days. Reheat with a splash of chicken broth to get it creamy again!

    Can I use brown rice instead?

    Definitely! Brown rice is a nutritious alternative. Just remember to adjust the cooking time; it usually takes about 40-45 minutes to become tender.

    Final Thoughts

    Cooking Chicken Scampi With Garlic Parmesan Rice is more than just a culinary adventure; it’s about creating cherished family memories. As that delightful aroma fills your kitchen, you can’t help but smile, knowing a comforting meal is on the way. This recipe is your ally on those busy nights, providing both speed and satisfaction. It brings your loved ones together around the table, sharing laughter and stories over mouthwatering bites. With each savory forkful, you’ll find joy not only in the dish but in the moments it creates. I hope you enjoy making this as much as I do!


    Print

    clock clock iconcutlery cutlery iconflag flag iconfolder folder iconinstagram instagram iconpinterest pinterest iconfacebook facebook iconprint print iconsquares squares iconheart heart iconheart solid heart solid icon

    Description

    Chicken Scampi served with creamy Garlic Parmesan Rice.


    • 1 pound boneless, skinless chicken breasts, sliced into thin strips
    • Salt and pepper, to taste
    • 2 tablespoons olive oil
    • 4 cloves garlic, minced
    • 1/2 cup chicken broth
    • Juice of 1 lemon
    • 1/4 cup white wine (optional)
    • 2 tablespoons unsalted butter
    • 2 tablespoons chopped fresh parsley
    • 1 cup long-grain white rice
    • 2 cups chicken broth
    • 2 cloves garlic, minced
    • 1/4 cup grated Parmesan cheese
    • Chopped fresh parsley, for garnish

    1. Season the chicken strips with salt and pepper.
    2. In a large skillet, heat olive oil over medium-high heat. Add the seasoned chicken strips to the skillet and cook for 3-4 minutes per side until golden brown and cooked through.
    3. Remove the chicken from the skillet and set aside.
    4. In the same skillet, add minced garlic and cook for 1 minute until fragrant.
    5. Pour in chicken broth, lemon juice, and white wine (if using), scraping up any browned bits from the bottom of the skillet.
    6. Simmer for 3-4 minutes to reduce the liquid slightly.
    7. Stir in butter until melted and well combined.
    8. Return the cooked chicken to the skillet, tossing to coat in the sauce.
    9. Sprinkle chopped parsley over the chicken just before serving.
    10. In a medium saucepan, combine rice, chicken broth, and minced garlic. Bring to a boil over high heat, then reduce the heat to low.
    11. Cover and simmer for 15-20 minutes or until the rice is tender and the liquid is absorbed.
    12. Remove from heat and stir in grated Parmesan cheese.
    13. Season with salt and pepper to taste.
    14. Divide the garlic Parmesan rice among plates or bowls. Top with chicken scampi and spoon some of the sauce over the chicken and rice. Garnish with chopped fresh parsley. Serve immediately and enjoy!

    Notes

    • For added flavor, marinate the chicken in lemon juice and garlic before cooking.
    • Serve with a side of steamed vegetables for a balanced meal.
    • Leftovers can be stored in the refrigerator for up to 3 days.
    • Prep Time: 15 minutes
    • Cook Time: 30 minutes
    • Category: Main Course
    • Method: Stovetop
    • Cuisine: Italian-American

    Nutrition

    • Serving Size: 1 serving
    • Calories: 600
    • Sugar: 2g
    • Sodium: 800mg
    • Fat: 20g
    • Saturated Fat: 5g
    • Unsaturated Fat: 15g
    • Trans Fat: 0g
    • Carbohydrates: 75g
    • Fiber: 2g
    • Protein: 40g
    • Cholesterol: 90mg

    Sharing is caring!

  • Steak Bites and Shrimp in Butter Soy Glaze

    Steak Bites and Shrimp in Butter Soy Glaze


    Introduction to Steak Bites and Shrimp in Butter Soy Glaze

    As a busy home cook, I know how important it is to whip up quick yet delicious meals that can impress family and friends. That’s where my Steak Bites and Shrimp in Butter Soy Glaze comes in. This savory dish combines tender steak bites and juicy shrimp, all drenched in a rich, mouthwatering glaze. It’s an ideal solution for those hectic weeknights or special occasions when you’re determined to serve something extraordinary. With minimal prep time and maximum flavor, this recipe is bound to become your new go-to for satisfying cravings and delighting your loved ones.

    Why You’ll Love This Steak Bites and Shrimp in Butter Soy Glaze

    This delightful dish is not only quick to make, but it also bursts with flavor that will have everyone asking for seconds. In just 30 minutes, you can serve up a gorgeous plate that feels gourmet. Plus, the combination of tender steak and succulent shrimp in a rich butter soy glaze makes every bite an absolute treat. Perfect for busy evenings or special gatherings, it’s a real crowd-pleaser!

    Ingredients for Steak Bites and Shrimp in Butter Soy Glaze

    When it comes to flavor-packed dishes, having quality ingredients is essential. For my Steak Bites and Shrimp in Butter Soy Glaze, you’ll need the following:

    • Butter: Adds a luscious richness and a velvety texture to the glaze.
    • Soy Sauce: This salty-sweet condiment is a must for that umami punch.
    • Garlic: Minced garlic brings out a warm aroma and fabulous flavor in the glaze.
    • Black Pepper: A simple seasoning that elevates the beef and shrimp beautifully.
    • Beef Steak: Tender pieces of steak are the star here, providing hearty bites.
    • Shrimp: Sweet, succulent shrimp complement the steak and soak up that glaze.
    • Red Pepper Flakes: Optional, but they add a kick of heat if you’re feeling adventurous!
    • Olive Oil: Essential for searing the steak to perfection without sticking.
    • Honey: Adds a hint of sweetness that balances the saltiness of the soy sauce.
    • Lemon Juice: A splash of freshness that brightens up the dish at the end.
    • Green Onions: Chopped as a garnish, they add a crisp and colorful finish to your plate.
    • Sesame Seeds: Another optional garnish that brings a nutty flavor and a lovely crunch.

    For exact measurements, check the end of the article where you can find a handy print option. You can also feel free to substitute any of these ingredients based on your pantry stock or personal tastes. Enjoy getting creative!

    How to Make Steak Bites and Shrimp in Butter Soy Glaze

    Prep the Ingredients

    Before diving into cooking, a little prep work goes a long way. Start by cutting your steak into bite-sized pieces. Pat them dry with paper towels; this helps achieve that delicious caramelization. Next, peel and devein the shrimp for a clean taste. While you’re at it, don’t forget to mince the garlic and chop those green onions. All these steps ensure your Steak Bites and Shrimp in Butter Soy Glaze come together smoothly and cook evenly. Trust me, a well-prepared kitchen makes cooking much more enjoyable!

    Cook the Steak

    Now it’s time for the fun part! Heat a skillet over medium-high heat and add some olive oil. When it’s shimmering, toss in the steak bites. Sear them for about 2-3 minutes on each side. You want that beautiful golden-brown crust, but I totally get the fear of overcooking. Keep an eye on them; when they’re looking colorfully confident, remove them from the skillet and set aside. Remember, they’ll continue cooking a little even after you take them off the heat.

    Cook the Shrimp

    Shrimp are incredibly quick to cook, which is both a blessing and a curse. After removing the steak, add a splash more olive oil if your skillet needs it. Cook the shrimp for just 1-2 minutes on each side. You’re aiming for that perfect pink and opaque look. Overcooked shrimp can be rubbery, and nobody wants that! Once done, let them rest alongside the steak. This dish doesn’t take long, but precision is key.

    Make the Butter Soy Glaze

    Now for the element that ties everything together: the glaze! Lower your skillet heat to medium and add the butter. Let it melt beautifully and infuse the pan with flavor. Next, toss in minced garlic and sauté for about 30 seconds until fragrant. Stir in soy sauce, honey, black pepper, and red pepper flakes. This harmonious blend is what makes the Steak Bites and Shrimp shine with flavor. Stir well, letting all those aromas dance together!

    Combine Everything

    It’s time for the big finish! Return both the steak and shrimp to the skillet, gently tossing them in the glorious butter soy glaze. The goal is to coat every piece evenly, ensuring that every bite bursts with flavor. Drizzle a bit of lemon juice over everything as you toss, adding a lovely brightness. Give it another minute on the heat, just to meld those flavors. It’s like a flavorful hug, bringing it all together.

    Garnish and Serve

    The last step is all about presentation. Plate your Steak Bites and Shrimp in Butter Soy Glaze with flair! Sprinkle chopped green onions on top for a fresh pop of color, and toss on some sesame seeds for an optional crunchy finish. Serve it hot over a bed of rice or noodles, or alongside fresh veggies. A visually appealing dish makes every meal feel special, and it entices everyone to dig in!

    Tips for Success

    • Prep all ingredients before cooking for a smoother workflow.
    • Use a hot skillet to achieve that coveted sear on the steak.
    • Don’t overcrowd the pan; cook in batches if necessary.
    • Keep a close eye on shrimp; they cook quickly!
    • Adjust the glaze ingredients to suit your taste preferences.
    • Serve immediately for the best texture and flavor.

    Equipment Needed

    • Skillet: A non-stick or cast-iron skillet works best for searing.
    • Spatula: A heat-resistant spatula helps with flipping the steak and shrimp without damaging them.
    • Knife: A sharp knife for cutting steak and peeling shrimp.
    • Cutting Board: A sturdy surface for food prep.
    • Measuring Spoons: For accurately measuring sauce ingredients.

    Variations of Steak Bites and Shrimp in Butter Soy Glaze

    • Spicy Version: Add more red pepper flakes or a splash of Sriracha for an extra kick.
    • Vegetarian Delight: Substitute steak with firm tofu and add a mix of seasonal vegetables like bell peppers and snap peas.
    • Honey Garlic Twist: Replace the soy sauce with a honey garlic marinade for a sweeter flavor profile.
    • Citrus Zing: Add fresh orange juice and zest to the glaze for a bright, citrusy twist.
    • Herb Infusion: Incorporate fresh herbs like basil or cilantro for a fresh, aromatic lift in flavor.
    • Gluten-Free Adaptation: Choose a gluten-free soy sauce alternative for those with dietary restrictions.

    Serving Suggestions for Steak Bites and Shrimp in Butter Soy Glaze

    • Serve with fluffy steamed rice to soak up the delicious glaze.
    • Pile on egg noodles for a comforting, hearty meal.
    • Pair with a crisp green salad to balance the rich flavors.
    • Enjoy with a chilled white wine like Sauvignon Blanc.
    • Garnish with additional green onions for vibrant color.

    FAQs about Steak Bites and Shrimp in Butter Soy Glaze

    Can I make this Steak Bites and Shrimp in Butter Soy Glaze ahead of time?
    Yes! You can prep the ingredients and make the glaze in advance. Simply store these in the fridge and combine them when you’re ready to cook for a quick meal.

    What can I substitute for steak in this recipe?
    If you’re looking for a different protein, chicken or firm tofu are great alternatives. Just keep in mind that cooking times may vary based on the protein used.

    How can I adjust the spice level?
    You can easily control the heat by adding or reducing the amount of red pepper flakes. For a milder version, you might skip them entirely, or for spicier, try a splash of hot sauce!

    What should I serve with Steak Bites and Shrimp in Butter Soy Glaze?
    This dish pairs beautifully with steamed rice or noodles. A light salad on the side adds a fresh contrast to the flavors!

    Can I use frozen shrimp for this recipe?
    Absolutely! Just thaw them completely before cooking, ensuring they cook evenly and soak up that luscious glaze.

    Final Thoughts

    Creating my Steak Bites and Shrimp in Butter Soy Glaze is always a delightful experience. The blend of tender steak and succulent shrimp paired with that spectacular glaze never fails to impress. It’s a dish that brings warmth to the dinner table and offers a sense of accomplishment. Plus, it’s simple enough for a busy weeknight but elegant enough for a special gathering. Sharing this meal with family or friends creates memories that are just as savory as the dish itself. I hope you enjoy this culinary adventure as much as I do!


    Print

    clock clock iconcutlery cutlery iconflag flag iconfolder folder iconinstagram instagram iconpinterest pinterest iconfacebook facebook iconprint print iconsquares squares iconheart heart iconheart solid heart solid icon

    Description

    A savory dish featuring tender steak bites and succulent shrimp coated in a rich butter soy glaze.


    • 3 tbsp butter
    • 2 tbsp soy sauce
    • 3 cloves garlic, minced
    • 1 tsp black pepper
    • 1 lb beef steak, cut into bite-sized pieces
    • ½ lb shrimp, peeled and deveined
    • ½ tsp red pepper flakes (optional)
    • 1 tbsp olive oil
    • 1 tbsp honey
    • 1 tsp lemon juice
    • 2 green onions, chopped (for garnish)
    • Sesame seeds (optional, for garnish)

    1. Prep the Ingredients: Cut the steak into bite-sized pieces and pat them dry. Peel and devein the shrimp. Mince the garlic and chop the green onions.
    2. Cook the Steak: Heat olive oil in a skillet over medium-high heat. Sear the steak for 2-3 minutes per side until browned. Remove from heat and set aside.
    3. Cook the Shrimp: Add more olive oil if needed. Cook shrimp for 1-2 minutes per side until pink and opaque. Remove and set aside.
    4. Make the Butter Soy Glaze: Lower heat to medium and melt butter. Add garlic and sauté for 30 seconds. Stir in soy sauce, honey, black pepper, and red pepper flakes.
    5. Combine Everything: Return steak and shrimp to the pan. Toss everything together to coat evenly. Drizzle with lemon juice and cook for another minute.
    6. Garnish and Serve: Sprinkle with green onions and sesame seeds. Serve hot with rice, noodles, or vegetables.

    Notes

    • Adjust the level of spice by modifying the amount of red pepper flakes.
    • This dish pairs well with steamed rice, noodles, or a side of vegetables.
    • Prep Time: 15 minutes
    • Cook Time: 15 minutes
    • Category: Main Course
    • Method: Stovetop
    • Cuisine: Asian

    Nutrition

    • Serving Size: 1 serving
    • Calories: 350
    • Sugar: 2g
    • Sodium: 800mg
    • Fat: 20g
    • Saturated Fat: 10g
    • Unsaturated Fat: 8g
    • Trans Fat: 0g
    • Carbohydrates: 10g
    • Fiber: 0g
    • Protein: 30g
    • Cholesterol: 150mg

    Sharing is caring!

  • BLT Cauliflower Salad

    BLT Cauliflower Salad


    Introduction to BLT Cauliflower Salad

    Hi there, fellow food lovers! If you’re anything like me, you love a good classic, but sometimes crave something a little different. Enter the BLT Cauliflower Salad! This gem takes that beloved bacon, lettuce, and tomato combo and gives it a refreshing twist. Don’t worry, it still carries that delightful familiarity you love. With juicy roasted tomatoes, crispy turkey bacon, and the crunch of cauliflower, it’s perfect for busy weeknights or backyard barbecues. Trust me; this salad is not just a side dish; it can steal the spotlight at your dinner table!

    Why You’ll Love This BLT Cauliflower Salad

    This BLT Cauliflower Salad is a breeze to whip up, making it ideal for those hectic evenings when time feels like a luxury. The combination of flavors is simply mouthwatering. You get savory turkey bacon, sweet roasted tomatoes, and crunchy cauliflower all mingling together. Plus, it’s an excellent way to sneak in some veggies without the kids even noticing! What’s not to love about this delicious, guilt-free salad?

    Ingredients for BLT Cauliflower Salad

    When it comes to making this BLT Cauliflower Salad, gathering the right fresh ingredients is key. Here’s what you’ll need:

    • Cauliflower: The star of the show! This vegetable adds crunch and bulk, making it a hearty base for the salad.
    • Turkey Bacon: A healthier twist on traditional bacon, it brings that smoky flavor without the extra grease. You can also use regular bacon, if you prefer.
    • Grape Tomatoes: Sweet and juicy, these little gems are perfect for roasting. They elevate the flavor profile to new heights!
    • Olive Oil: Essential for roasting and sautéing, it adds a rich depth to the salad while promoting a healthy diet.
    • Leeks: Mild and flavorful, leeks offer a unique onion-like taste that enhances the dish. If leeks aren’t available, green onions work beautifully as a substitute.
    • Dill Pickle Relish: This adds a tangy zest that perfectly contrasts the flavors of the other ingredients. Don’t skip this crucial component!
    • Keto-Friendly Mayonnaise: The creamy dressing binds everything together. You can also use Greek yogurt for a lighter option.
    • Apple Cider Vinegar: A splash of tanginess that brightens the flavors and balances the richness of the mayo.
    • Garlic Powder: For an extra burst of flavor without the chunkiness of fresh garlic, garlic powder is just right.
    • Salt and Pepper: Essential seasonings that bring all the flavors to life. Adjust to your taste!
    • Fresh Parsley or Chives (Optional): A sprinkle of fresh herbs adds color and a fresh note to the presentation.

    For the exact measurements of each ingredient, you can find them at the bottom of this article, which you can also print for easy reference.

    How to Make BLT Cauliflower Salad

    Prepare and Roast Tomatoes

    To begin, preheat your oven to 400°F (200°C). Taking those halved grape tomatoes, toss them with a drizzle of olive oil. Sprinkle with a pinch of salt and pepper to season. This simple step helps intensify their natural sweetness. Spread the tomatoes on a baking sheet, ensuring they are in a single layer. Roast them for about 15–20 minutes until they are soft and slightly caramelized. The aroma will fill your kitchen, making your mouth water in anticipation!

    Boil and Cool Cauliflower

    While the tomatoes roast, it’s time to prep the cauliflower! Bring a pot of water to a boil and add salt. Carefully add your cauliflower florets, cooking them for around 5–7 minutes until they are fork-tender. You want them soft but not mushy—don’t overdo it! Drain the cauliflower and let it cool. A little tip: Spread the florets on a towel to speed up the cooling process. This will prevent your salad from getting soggy.

    Cook Turkey Bacon

    Next, let’s make that turkey bacon crispy! In a skillet over medium heat, cook the turkey bacon until it’s golden brown and crunchy—about 5–7 minutes usually does the trick. Remember to turn them so they’re evenly cooked. Once done, transfer the bacon to a plate lined with paper towels to soak up any excess grease. When it’s cooled off, crumble the bacon into bite-sized pieces. If you prefer a vegetarian twist, feel free to swap in a plant-based bacon alternative!

    Sauté Leeks

    Now onto the leeks! Heat a tablespoon of olive oil in a skillet over medium heat, and add your sliced leeks. Cook them for about 5 minutes, stirring often, until they’re soft and golden. Their mild flavor will start to shine through! Once beautifully sautéed, set them aside to cool. This step adds a wonderful depth to our BLT Cauliflower Salad, making it taste gourmet.

    Make the Dressing

    It’s time to create your creamy dressing! In a mixing bowl, whisk together your keto-friendly mayonnaise, apple cider vinegar, garlic powder, salt, and pepper until it’s smooth. If you want to kick things up a notch, feel free to add a dash of hot sauce or a sprinkle of paprika for a little heat! Taste your mixture to ensure it’s just right for you. This dressing is the heart of the salad, so make it yours!

    Combine Ingredients

    Finally, let’s bring it all together! In a large bowl, gently combine the cooled cauliflower, roasted tomatoes, crisp bacon, and sautéed leeks. Pour in the creamy dressing, folding everything together until the veggies are well coated. It’s crucial to chill the salad for at least 30 minutes before serving. This resting period allows all the flavors to meld beautifully. When you’re ready, feel free to garnish with fresh parsley or chives for that pop of color!

    Tips for Success

    • Don’t skip cooling the ingredients; it helps keep your salad crisp.
    • Taste as you go! Adjust the seasoning to suit your family’s preferences.
    • For an added crunch, try adding chopped nuts or seeds.
    • Make it a day ahead; the flavors deepen and the salad tastes even better.
    • Experiment with different toppings like croutons or avocado for variety.

    Equipment Needed

    • Cutting Board: A sturdy surface for chopping. A flexible one works great for easy transfer.
    • Sharp Knife: Essential for cutting veggies, but a serrated knife is handy for tomatoes.
    • Skillet: For cooking bacon and sautéing leeks; a non-stick option makes cleanup easy.
    • Baking Sheet: A must for roasting tomatoes; use aluminum foil for effortless cleanup.
    • Mixing Bowl: Perfect for tossing everything together; a large one helps with mixing.

    Variations

    • Vegetarian Delight: Swap out turkey bacon for a plant-based bacon or smoked tempeh for a hearty crunch.
    • Herb Infusion: Experiment with fresh herbs like dill or basil for a fragrant twist that elevates the flavor.
    • Cheesy Goodness: Add crumbled feta or shredded cheddar cheese for a creamy, savory bite.
    • Spicy Kick: Toss in some diced jalapeños or a dash of cayenne pepper for a zesty heat.
    • Seasonal Variants: During summer, consider throwing in some grilled corn or cucumber for extra freshness!

    Serving Suggestions

    • Pair this BLT Cauliflower Salad with grilled chicken or fish for a well-rounded meal.
    • Serve it alongside crusty whole-grain bread for a filling lunch option.
    • For drinks, try a refreshing iced tea or sparkling water with lemon.
    • Garnish with additional herbs to enhance presentation.

    FAQs about BLT Cauliflower Salad

    Can I prepare the BLT Cauliflower Salad in advance?

    Absolutely! This salad tastes even better when made a day ahead. Just remember to keep it chilled until you’re ready to serve, allowing all those flavors to deepen beautifully.

    Is this salad suitable for a low-carb diet?

    Yes! This BLT Cauliflower Salad is a perfect low-carb recipe. With cauliflower as the base and turkey bacon, it fits wonderfully into a keto-friendly meal plan.

    Can I use regular bacon instead of turkey bacon?

    Definitely! Using regular bacon will add a richer flavor, but it may increase the fat content. If you aren’t worried about that, go for it!

    What can I substitute for the mayonnaise?

    If you’re looking for a lighter option, Greek yogurt is a great substitute for mayo. It still gives that creamy texture and tangy flavor without the calories!

    Can I add other vegetables to this salad?

    Final Thoughts

    Making this BLT Cauliflower Salad brings me so much joy! Each bite is a delightful explosion of flavors and textures that just feels good. It’s not just a meal; it’s a moment of connection with my family at the dinner table. I can already hear the laughter and see the smiles as we enjoy this nutritious dish together. Best of all, it’s simple, quick, and adaptable, perfect for busy nights and casual gatherings alike. I hope you create your own beautiful memories while savoring this meal. Cheers to delicious adventures in the kitchen!


    Print

    clock clock iconcutlery cutlery iconflag flag iconfolder folder iconinstagram instagram iconpinterest pinterest iconfacebook facebook iconprint print iconsquares squares iconheart heart iconheart solid heart solid icon

    Description

    A refreshing twist on the classic BLT, this salad features roasted tomatoes, cauliflower, turkey bacon, and a creamy dressing.


    • 1 medium head cauliflower, cut into florets
    • 8 slices turkey bacon, cooked and crumbled
    • 1 cup grape tomatoes, halved
    • 1 tbsp olive oil (for roasting tomatoes)
    • 1 large leek, sliced (or 3 green onions)
    • 1 tbsp olive oil (for sautéing leeks)
    • 1/4 cup dill pickle relish, drained
    • 3/4 cup keto-friendly mayonnaise
    • 1 tbsp apple cider vinegar
    • 1/2 tsp garlic powder
    • Salt and pepper, to taste
    • Optional garnish: fresh parsley or chives

    1. Preheat oven to 400°F. Toss halved tomatoes with olive oil, season, and roast for 15–20 minutes. Let cool.
    2. Boil cauliflower florets in salted water for 5–7 minutes until fork-tender. Drain and cool.
    3. Cook turkey bacon until crisp, then crumble.
    4. Sauté sliced leeks in olive oil until golden and soft. Let cool.
    5. In a bowl, whisk mayo, vinegar, garlic powder, salt, and pepper. Stir in pickle relish.
    6. Combine cauliflower, tomatoes, bacon, leeks, and dressing. Toss gently until coated.
    7. Chill for at least 30 minutes before serving. Garnish as desired.

    Notes

    • Adjust seasoning to taste.
    • For a vegetarian option, substitute bacon with a plant-based alternative.
    • Prep Time: 15 minutes
    • Cook Time: 30 minutes
    • Category: Salad
    • Method: Roasting, Boiling, Sautéing
    • Cuisine: American

    Nutrition

    • Serving Size: 1 cup
    • Calories: 150
    • Sugar: 2g
    • Sodium: 350mg
    • Fat: 12g
    • Saturated Fat: 2g
    • Unsaturated Fat: 9g
    • Trans Fat: 0g
    • Carbohydrates: 8g
    • Fiber: 3g
    • Protein: 5g
    • Cholesterol: 20mg

    Sharing is caring!

  • Winter Harvest Dinner Bowl

    Winter Harvest Dinner Bowl


    Introduction to Winter Harvest Dinner Bowl

    As the cold winds of winter sweep in, I crave comforting meals that warm both body and soul. That’s where my Winter Harvest Dinner Bowl comes into play. This dish is a delightful blend of seasonal roasted vegetables, wholesome barley, and tangy feta, all drizzled with balsamic goodness. It’s not just a recipe; it’s a quick solution for busy evenings when you want to nourish your family without sacrificing flavor. Gather around the table and enjoy a comforting bowl that brings warmth and joy to chilly nights!

    Why You’ll Love This Winter Harvest Dinner Bowl

    There’s something truly magical about a meal that’s not only delicious but also easy to whip up. This Winter Harvest Dinner Bowl is all about simplicity without skimping on taste. In just 40 minutes, you can create a hearty, nutritious dish that your whole family will love. Plus, the vibrant colors and rich flavors will make it feel special, turning an ordinary weeknight into a delightful culinary adventure!

    Ingredients for Winter Harvest Dinner Bowl

    Gathering fresh ingredients is half the fun of cooking, and this Winter Harvest Dinner Bowl is no exception! Here’s what you’ll need:

    • Cooked Barley: This hearty grain provides a nutty flavor and chewy texture. It’s packed with fiber and makes a great base!
    • Roasted Mixed Vegetables: Imagine sweet carrots, earthy beets, and tender parsnips, all caramelized to perfection. These beauties bring seasonal flavor and nutrients to your bowl.
    • Feta Cheese: Crumbled feta adds a salty creaminess that elevates the dish. If you’re feeling adventurous, try goat cheese for a tangy twist!
    • Pumpkin Seeds: These crunchy seeds lend a delightful texture and a touch of healthy fat. They’re also a great source of protein!
    • Balsamic Vinegar: A drizzle of balsamic gives the bowl a sweet and tangy finish. You can substitute with lemon juice for a different zing!
    • Olive Oil, Salt, and Pepper: Essentials for roasting the vegetables! Use extra virgin olive oil for added richness.

    Feel free to swap out vegetables based on what’s in season or your family’s favorites. Want to boost protein? Toss in some grilled chicken or chickpeas for extra heartiness! Exact measurements are at the bottom of the article for your convenience and are available for printing.

    How to Make Winter Harvest Dinner Bowl

    Creating your Winter Harvest Dinner Bowl is a delightful process, and I promise it’s easier than it sounds! Let’s break it down step by step. Each part of this recipe is designed to be simple, yet it leads to a dish bursting with flavor and comfort.

    Step 1: Prepare the Vegetables

    Start by washing and peeling your mixed vegetables. Cut them into bite-sized pieces. I usually go for a mix of carrots, beets, and parsnips, but you can use whatever seasonal veggies you have on hand. Think of it as a blank canvas for your creative flair! Just remember, colorful veggies not only taste delightful but look stunning in the bowl.

    Step 2: Roast the Mixed Vegetables

    Next comes the magic of roasting! Preheat your oven to 400°F (200°C). Toss the chopped vegetables in a bowl with olive oil, salt, and pepper. A drizzle of olive oil helps them caramelize nicely, creating a sweet, roasted flavor that can’t be beat. Spread them on a baking sheet in a single layer and roast for 30 minutes. Trust me, the aroma filling your kitchen will be divine!

    Step 3: Combine Ingredients in a Bowl

    Once your veggies are beautifully roasted, let’s assemble the bowl. In a large mixing bowl, combine the cooked barley and the roasted vegetables. Add in the crumbled feta cheese and pumpkin seeds. Oh, the textures here are just lovely—the chewy barley, crunchy seeds, and creamy feta create a delightful contrast. Now, drizzle your balsamic vinegar over everything and gently toss it all together. Every bite should be a blend of flavors!

    Step 4: Serve and Enjoy

    Your Winter Harvest Dinner Bowl is ready to shine! You can serve it warm for a cozy feel or allow it to cool for a refreshing twist. I love garnishing mine with a sprinkle of fresh herbs like parsley or basil for that added pop of flavor. Dig in and enjoy a bowl that’s as nourishing as it is comforting!

    Tips for Success

    • Prep your veggies ahead of time to save precious moments on busy days.
    • Don’t overcrowd the baking sheet; give your veggies space to caramelize beautifully.
    • For a flavor boost, consider marinating the vegetables in balsamic vinegar prior to roasting.
    • Experiment with herbs and spices; a sprinkle of garlic powder or rosemary can elevate the dish.
    • Let leftovers inspire new meals; toss the bowl with greens for a refreshing salad!

    Equipment Needed

    • Cutting Board: A sturdy board is essential for chopping veggies. Any sturdy surface will do!
    • Sharp Knife: A good knife is key for easy slicing. If you don’t have one, a kitchen scissors works too!
    • Baking Sheet: A flat sheet for roasting. A roasting pan can also work in a pinch.
    • Mixing Bowl: A large bowl for combining ingredients. Use any bowl you have on hand!
    • Measuring Cups: For accurate ingredient portions. Guessing works too, if you’re confident!

    Variations for Winter Harvest Dinner Bowl

    • Grain Alternatives: Swap out barley for quinoa, farro, or even brown rice for a different texture and flavor.
    • Vegetable Swap: Use whatever seasonal veggies you love! Try sweet potatoes, Brussels sprouts, or even zucchini for a new twist.
    • Vegan Option: Omit the feta cheese or replace it with a vegan cheese alternative for a plant-based delight.
    • Protein Add-ins: Add grilled chicken, chickpeas, or tofu for a protein boost that keeps you energized.
    • Spice it Up: Experiment with your favorite spices like cumin, chili powder, or smoked paprika to elevate the flavor profile even more.

    Serving Suggestions

    • Pair your Winter Harvest Dinner Bowl with a crisp side salad for added crunch.
    • A warm, crusty bread on the side complements the bowl beautifully.
    • Enjoy with a glass of red wine for a cozy evening.
    • For a festive touch, serve in colorful bowls to brighten your table!

    FAQs about Winter Harvest Dinner Bowl

    Can I make the Winter Harvest Dinner Bowl ahead of time?

    Absolutely! You can prepare the roasted vegetables and cooked barley in advance. Just store them separately in the fridge. When you’re ready to eat, combine everything and drizzle with balsamic vinegar right before serving.

    What vegetables work best in this recipe?

    You can use any seasonal veggies you enjoy! Carrots, beets, and parsnips are classic choices, but feel free to mix in sweet potatoes, Brussels sprouts, or even broccoli. It’s all about your personal preferences!

    Is the Winter Harvest Dinner Bowl gluten-free?

    To make it gluten-free, simply swap out barley with quinoa or rice. Both options will still maintain the hearty feel of this delightful dish while keeping it suitable for gluten-sensitive friends and family.

    How can I add more protein to my Winter Harvest Dinner Bowl?

    If you’re looking to boost your protein content, consider adding grilled chicken, chickpeas, or even diced tofu. These additions make this bowl more filling while keeping it nutritious and satisfying!

    Can I serve the bowl cold?

    Yes, indeed! This Winter Harvest Dinner Bowl can be enjoyed warm or cold. It makes a fantastic dish for meal prep or potlucks, and the flavors meld beautifully when chilled!

    Final Thoughts

    Cooking the Winter Harvest Dinner Bowl is more than just preparing a meal; it’s crafting a warm embrace on a chilly evening. Each bite invites you on a seasonal journey, celebrating the flavors of winter in a colorful bowl. Whether you’re gathering around the table with family or enjoying a quiet moment to yourself, this dish promises comfort and nourishment. So go ahead, get your hands a little messy in the kitchen and create something truly delightful. You’ll not only fill your belly but also your heart, bringing joy and warmth to the winter days ahead!


    Print

    clock clock iconcutlery cutlery iconflag flag iconfolder folder iconinstagram instagram iconpinterest pinterest iconfacebook facebook iconprint print iconsquares squares iconheart heart iconheart solid heart solid icon

    Description

    A hearty and nutritious bowl featuring seasonal roasted vegetables, barley, feta cheese, and pumpkin seeds, all drizzled with balsamic vinegar.


    • 1 cup cooked barley
    • 2 cups roasted mixed vegetables (carrots, beets, parsnips)
    • 1/2 cup feta cheese, crumbled
    • 1/4 cup pumpkin seeds
    • 2 tbsp balsamic vinegar
    • Olive oil, salt, and pepper to taste

    1. Toss the mixed vegetables with olive oil, salt, and pepper, and roast at 400°F (200°C) for 30 minutes.
    2. In a large bowl, combine cooked barley, roasted veggies, feta, and pumpkin seeds. Drizzle with balsamic vinegar and toss to combine.

    Notes

    • This bowl can be served warm or cold.
    • Feel free to substitute the vegetables based on seasonal availability.
    • Add grilled chicken or chickpeas for extra protein if desired.
    • Prep Time: 10 minutes
    • Cook Time: 30 minutes
    • Category: Main Course
    • Method: Roasting
    • Cuisine: American

    Nutrition

    • Serving Size: 1 bowl
    • Calories: 320
    • Sugar: 6g
    • Sodium: 350mg
    • Fat: 18g
    • Saturated Fat: 5g
    • Unsaturated Fat: 12g
    • Trans Fat: 0g
    • Carbohydrates: 32g
    • Fiber: 7g
    • Protein: 10g
    • Cholesterol: 20mg

    Sharing is caring!