Author: IHAAL Team

  • Chinese Chicken Cabbage Stir-Fry: A Quick Delight for Dinner!

    Chinese Chicken Cabbage Stir-Fry: A Quick Delight for Dinner!


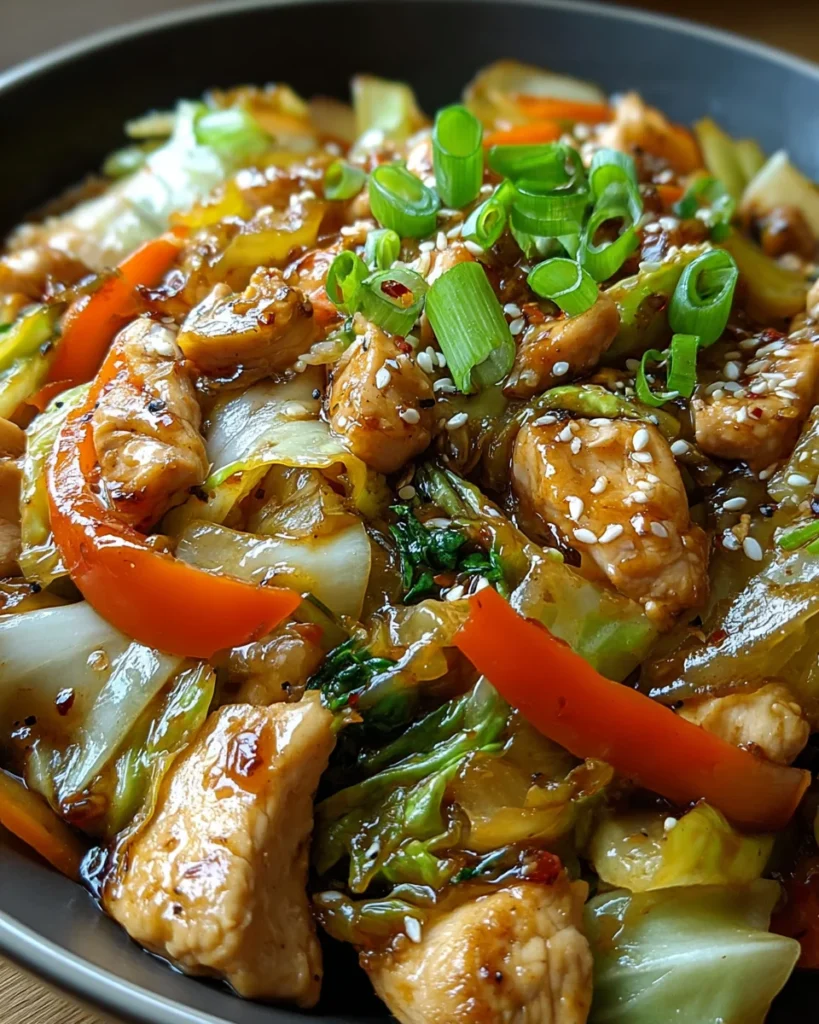
    Introduction to Chinese Chicken Cabbage Stir-Fry

    Hey there, fellow food lovers! If you’re anything like me, you know that weekday dinners can sometimes feel like a race against the clock. That’s why I’m excited to share my go-to recipe for Chinese Chicken Cabbage Stir-Fry. It’s a quick and delicious dish that doesn’t just satisfy your taste buds but also saves you precious time in the kitchen. Picture this: tender chicken, vibrant veggies, and a flavor-packed sauce—all whipped together in about 30 minutes! It’s the perfect way to impress your family without burning out. Let’s dive into this culinary adventure!

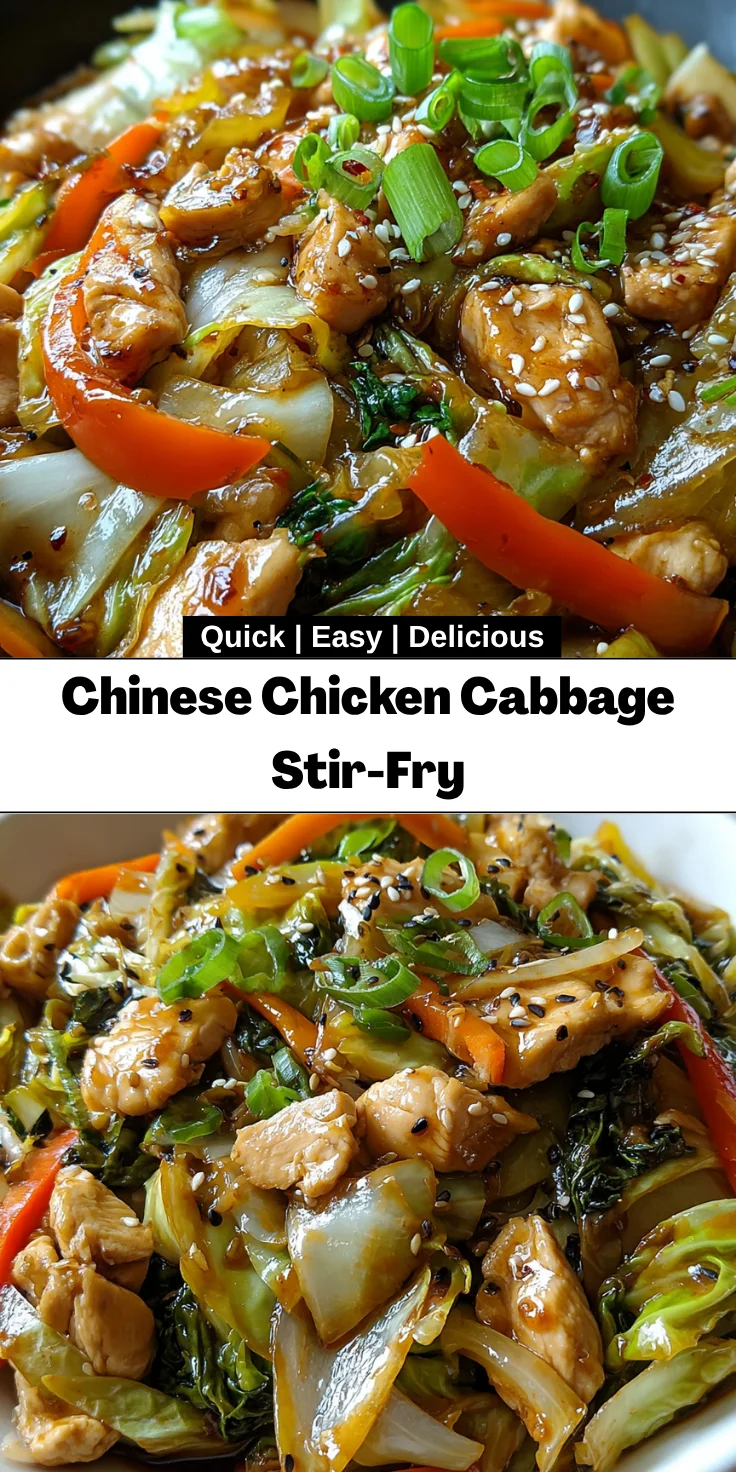
    Why You’ll Love This Chinese Chicken Cabbage Stir-Fry

    This Chinese Chicken Cabbage Stir-Fry is everything you could want in a weeknight meal! It’s quick to whip up, taking just around 35 minutes from start to finish. The flavors dance together beautifully, making each bite a treat. Plus, it’s packed with nutrients from fresh veggies, ensuring a healthy dinner that even picky eaters will love. Trust me, this recipe will become your new dinner-time hero!

    Ingredients for Chinese Chicken Cabbage Stir-Fry

    Let’s gather our ingredients for this tasty feast! This recipe uses a colorful mix that not only makes your dish pop but also adds loads of flavor. Here’s what you’ll need:

    • Unsalted Butter: Offers a rich base for sautéing, enhancing the overall flavor of the stir-fry.
    • Yellow Onion: Adds sweetness and depth; it becomes translucent and aromatic as it cooks.
    • Garlic: A must-have for its bold and punchy flavor. Freshly minced is best for maximum aroma!
    • Boneless Skinless Chicken Breast: This lean protein is not only quick to cook but also absorbs the savory sauces well.
    • Green Cabbage: Offers crunch and a mild flavor, making it a staple in stir-fry dishes.
    • Bell Pepper: Adds vibrant color and a sweet crunch to balance the dish’s savory elements.
    • Carrot: Sweet and slightly crispy, it brings a lovely texture and bright color.
    • Soy Sauce: This salty and umami-packed sauce is the backbone of our flavor profile.
    • Oyster Sauce: Adds richness and complexity; it’s like the “secret sauce” of many Asian dishes!
    • Toasted Sesame Oil: Just a splash lends a warm, nutty aroma that elevates the stir-fry.
    • Ground Black Pepper: A simple way to add a little kick to your meal!
    • Crushed Red Pepper Flakes: Adjust the heat level according to your liking; it’s great for spice lovers.
    • Cornstarch mixed with water: This mixture thickens the sauce for a perfect coating that clings to all those delightful ingredients.

    For those who might want to get creative, consider substituting other proteins like shrimp or tofu. You can also switch up the veggies; broccoli or snap peas work beautifully! If you’re looking for exact quantities, don’t worry, they’re listed at the end of the article for easy printing!

    How to Make Chinese Chicken Cabbage Stir-Fry

    Prepare the Vegetables

    First, let’s get the veggies ready! Slice the yellow onion and bell pepper thinly. Julienning the carrot adds a lovely crunch, so be sure to cut it into long, thin strips. Then, chop the green cabbage into bite-sized pieces. Lastly, finely mince the garlic. Having everything prepped helps the stir-fry come together smoothly. Trust me, it’s much easier when everything’s ready to go!

    Cook the Chicken

    Now, let’s move on to the chicken! Melt the unsalted butter in a large skillet or wok over medium-high heat. Once it’s sizzling, add in the diced chicken breast. Sauté this for about 5 to 7 minutes. You want that chicken to be golden and cooked through. Stir occasionally to ensure even cooking. Once done, transfer the chicken to a bowl and set it aside. How easy was that?

    Sauté the Aromatics

    Using the same skillet, toss in the sliced onion and minced garlic. Stir-fry these for 1 to 2 minutes until they become fragrant and the onion is slightly translucent. This step is where the magic begins! The aroma fills your kitchen, promising something delicious is on the way.

    Add the Vegetables

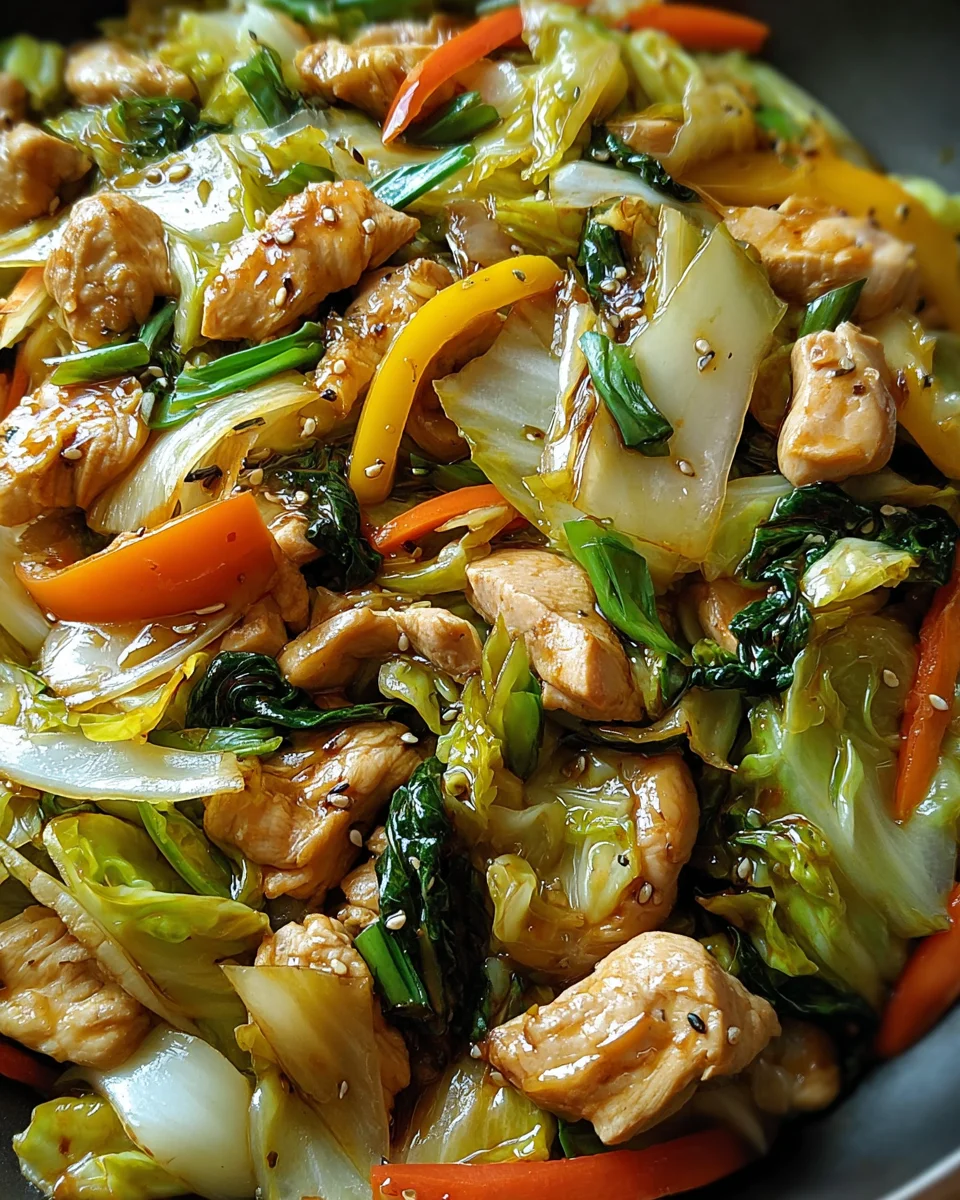
    Next, it’s vegetable time! Add the chopped cabbage, sliced bell pepper, and julienned carrot to the pan. Stir everything together and cook for about 5 minutes. You want the veggies to be crisp-tender, holding onto some of that crunch. Keep stirring—they’ll cook quickly, and you wouldn’t want them mushy!

    Combine Everything

    Return the reserved chicken to the pan. Pour in the soy sauce and oyster sauce, along with the toasted sesame oil, ground black pepper, and red pepper flakes. Stir thoroughly to coat all the ingredients. The colors in your pan will make your mouth water, and the flavors will start to meld beautifully.

    Thicken the Sauce

    If you prefer a nice, thick sauce, here’s where the magic happens! Add the cornstarch-water mixture to the pan. Cook everything for another minute until the sauce thickens, binding all those wonderful flavors together. This gives your stir-fry the perfect coating that clings to the chicken and veggies.
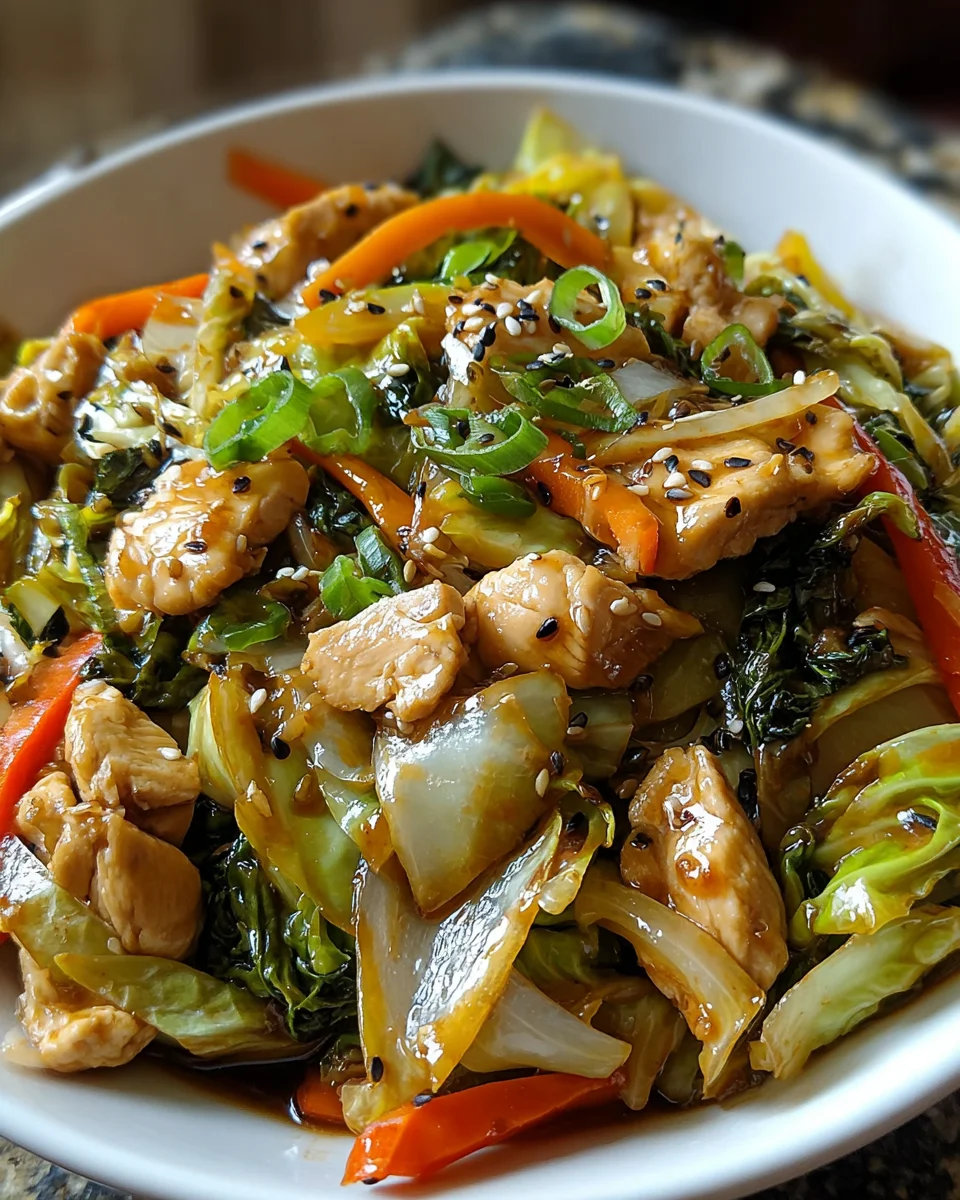
    Serve Hot

    Your Chinese Chicken Cabbage Stir-Fry is ready! Serve it hot, maybe over a bed of steamed rice or your favorite noodles. Garnish with sesame seeds or green onions if you have them handy. Trust me; you’ll want to dig in immediately as the aromas are simply irresistible!

    Tips for Success

    • Prep all your ingredients before you start cooking to streamline the process.
    • For even cooking, cut the chicken and veggies into uniform sizes.
    • Don’t overcrowd the pan; cook in batches if necessary to maintain that perfect stir-fry texture.
    • Adjust seasoning to your taste—don’t be afraid to experiment!
    • Serve immediately for the best flavor and texture; reheating can make veggies soggy.

    Equipment Needed

    • Large Skillet or Wok: Essential for stir-frying, a non-stick skillet can work too if you don’t have a wok.
    • Sharp Knife: For chopping and slicing your ingredients with ease; a good chef’s knife is a worthy investment.
    • Cutting Board: A sturdy surface to prep your veggies and chicken safely.
    • Measuring Cups and Spoons: Helpful for precise ingredient measurement, especially the sauces.
    • Spatula or Wooden Spoon: Ideal for stirring everything together and ensuring even cooking.

    Variations

    • Protein Swaps: Try using shrimp or tofu instead of chicken for a delightful twist. Both pair wonderfully with the stir-fry sauce.
    • Vegetable Medley: Feel free to add broccoli, snap peas, or zucchini. Each brings its own unique flavor and nutrition to the dish.
    • Spice It Up: Add some fresh ginger or a dash of chili oil for an extra kick that’s sure to awaken your taste buds.
    • Gluten-Free Option: Make sure to use gluten-free soy sauce, as standard soy sauce contains gluten.
    • Low-Carb Friendly: Substitute the rice with cauliflower rice or zoodles (zucchini noodles) for a healthy, low-carb alternative.

    Serving Suggestions

    • Steamed Rice: Serve your stir-fry over fluffy white or brown rice to soak up all that savory sauce.
    • Noodles: Try it with lo main or rice noodles for a twist!
    • Sesame Seeds: Sprinkle toasted sesame seeds on top for an appealing crunch.
    • Drink Pairing: A light, crisp white wine or iced green tea complements the dish beautifully.
    • Garnish: Fresh cilantro or green onions elevate the final presentation while adding flavor.

    FAQs about Chinese Chicken Cabbage Stir-Fry

    Can I make Chinese Chicken Cabbage Stir-Fry in advance?
    Yes! You can prep all your vegetables and chicken ahead of time. Just store them in the fridge until you’re ready to stir-fry. The dish is best enjoyed fresh but can be kept in the fridge for a day or two.

    What can I use instead of chicken?
    Feel free to swap chicken for shrimp, tofu, or even a mix of vegetables if you want a vegetarian option. Each protein pairs well with the bold flavors of the stir-fry.

    How can I adjust the spice level?
    To make it milder, simply reduce or omit the crushed red pepper flakes. For those who love heat, consider adding sliced fresh chili or a touch of chili paste.

    Can I freeze leftovers of this stir-fry?
    Absolutely! Just let it cool and then transfer to an airtight container. It will keep well in the freezer for about 2-3 months. Thaw in the fridge overnight before reheating.

    What’s a good side dish to serve with Chinese Chicken Cabbage Stir-Fry?
    Complement it with steamed jasmine rice or a fresh cucumber salad for a refreshing crunch. Both pair beautifully, making your meal even more delightful!

    Final Thoughts

    Cooking should be joyful and effortless, and my Chinese Chicken Cabbage Stir-Fry embodies just that. It’s a dish that allows me to whip together a nutritious meal without breaking a sweat while also letting me explore vibrant flavors. Every bite fills the table with warmth and smiles, making busy evenings a little more delightful. I hope this recipe brings you as much joy as it has brought to my family! So grab your ingredients, unleash your inner chef, and let the delicious aromas guide you. Happy cooking, my friends!


    Print

    clock clock iconcutlery cutlery iconflag flag iconfolder folder iconinstagram instagram iconpinterest pinterest iconfacebook facebook iconprint print iconsquares squares iconheart heart iconheart solid heart solid icon

    Description

    A quick and delicious stir-fry featuring chicken and fresh vegetables, perfect for a weekday dinner.


    • 15 grams unsalted butter
    • 1 medium yellow onion, thinly sliced
    • 2 cloves garlic, finely minced
    • 450 grams boneless skinless chicken breast, diced
    • 300 grams green cabbage, chopped
    • 1 medium bell pepper, thinly sliced
    • 1 medium carrot, julienned
    • 30 millilitres soy sauce
    • 15 millilitres oyster sauce
    • 5 millilitres toasted sesame oil
    • 2 grams ground black pepper
    • 0.5 grams crushed red pepper flakes
    • 3 grams cornstarch mixed with 30 millilitres water

    1. Prepare the vegetables: slice the onion and bell pepper, julienne the carrot, mince the garlic, chop the green cabbage, and dice the chicken breast into uniform, bite-size pieces.
    2. Melt butter in a large skillet or wok over medium-high heat. Add diced chicken and sauté for 5 to 7 minutes, turning occasionally, until browned and cooked through. Transfer the chicken to a separate bowl and set aside.
    3. Add onion and garlic to the same pan. Stir-fry for 1 to 2 minutes until fragrant.
    4. Add chopped cabbage, sliced bell pepper, and julienned carrot. Cook for about 5 minutes until vegetables are crisp-tender.
    5. Return the reserved chicken to the pan. Pour in soy sauce, oyster sauce, toasted sesame oil, ground black pepper, and red pepper flakes. Stir thoroughly to coat the ingredients.
    6. For a thicker sauce, add the cornstarch-water mixture and cook for 1 minute until the sauce thickens.
    7. Serve hot, accompanied by steamed rice or noodles if desired.

    Notes

    • Adjust the spice level by increasing or decreasing the amount of red pepper flakes.
    • This dish can be made with other proteins such as tofu or shrimp.
    • For extra flavor, add ginger or different vegetables according to your taste.
    • Prep Time: 15 minutes
    • Cook Time: 20 minutes
    • Category: Main Dish
    • Method: Stir-Fry
    • Cuisine: Chinese

    Nutrition

    • Serving Size: 1 serving
    • Calories: 350
    • Sugar: 5 grams
    • Sodium: 600 milligrams
    • Fat: 10 grams
    • Saturated Fat: 3 grams
    • Unsaturated Fat: 7 grams
    • Trans Fat: 0 grams
    • Carbohydrates: 30 grams
    • Fiber: 4 grams
    • Protein: 32 grams
    • Cholesterol: 80 milligrams

    Sharing is caring!

  • White Chocolate Cranberry Pecan Clusters: Irresistibly Easy!

    White Chocolate Cranberry Pecan Clusters: Irresistibly Easy!


    Introduction to White Chocolate Cranberry Pecan Clusters

    There’s something so comforting about a sweet homemade treat, isn’t there? As a busy mom, I often find myself looking for quick yet delightful snacks that my family will love. That’s where these

    White Chocolate Cranberry Pecan Clusters

    come in.

    Not only are they a breeze to whip up, but they’re also a crowd-pleaser for any occasion. Just imagine the kids diving into these creamy, crunchy clusters after school, or serving them at your next holiday gathering. They embody the warmth and joy of home, making it easy to bring a little sweetness into a hectic day.

    Why You’ll Love This White Chocolate Cranberry Pecan Clusters

    These White Chocolate Cranberry Pecan Clusters are a revelation for any busy mom! With just a handful of ingredients and minimal effort, you’ll have a delightful treat ready in no time. Their delightful sweetness paired with the crunch of pecans makes them an impressive gift. Plus, they’re a guilt-free snack that’ll satisfy your cravings without the fuss. Trust me, you’ll want to keep a stash on hand!

    Ingredients for White Chocolate Cranberry Pecan Clusters

    To create these irresistible White Chocolate Cranberry Pecan Clusters, you need just a few simple ingredients that work beautifully together. The star, of course, is the white chocolate, which lends a creamy sweetness that’s hard to resist.

    Dried cranberries add a pop of tangy flavor and vibrant color, while chopped pecans provide a delightful crunch.

    Don’t hesitate to switch things up! You can use different nuts like almonds or walnuts, or try adding other dried fruits like raisins or apricots.

    For the specific quantities, check out the details at the bottom of the article.

    How to Make White Chocolate Cranberry Pecan Clusters

    Making these White Chocolate Cranberry Pecan Clusters is an adventure that begins in your kitchen! Follow these easy steps to whip up a batch of these delightful bites. You’ll find that the process is straightforward, making your life just a little sweeter.

    Step 1: Prepare Your Baking Sheet

    Start by grabbing a baking sheet and lining it with parchment paper.

    This simple step ensures that your clusters won’t stick, and it makes for a hassle-free cleanup. It’s a small effort that pays off big-time!

    Step 2: Melt the Chocolate

    Next, it’s time to melt the white chocolate chips!

    Place them in a microwave-safe bowl and heat in 30-second intervals. Give it a good stir between each interval.

    Be gentle as you melt, as we don’t want to scorch our sweet treasure.

    Step 3: Mix in Flavorings

    Once that chocolate is smooth and velvety, stir in a teaspoon of vanilla extract and a pinch of sea salt.

    These additions elevate the flavors beautifully, creating a heavenly taste that you’ll love.

    Step 4: Combine Ingredients

    Now, it’s time for the fun part!

    Add the dried cranberries and chopped pecans to the melted chocolate.

    Make sure everything is well coated; this ensures each bite is packed with texture and flavor.

    Step 5: Create Clusters

    Using a spoon or a cookie scoop, drop clusters of the mixture onto the prepared baking sheet.

    Leave about 2 inches of space between each dollop.

    This gives them room to spread out a bit as they set.

    Step 6: Chill and Set

    Pop the baking sheet into the refrigerator to chill for about 30 minutes.

    This cooling time is crucial for the chocolate to firm up, giving your clusters that perfect, bite-sized shape.

    Step 7: Store Safely

    Once your clusters are set, carefully remove them from the parchment paper.

    Store them in an airtight container to keep them fresh.

    They’ll last for about a week at room temperature, or up to two weeks in the fridge—if they last that long!

    Tips for Success

    • Be patient when melting chocolate; stirring frequently prevents burning.
    • Chop your nuts evenly for consistent texture in every cluster.
    • Consider toasting pecans for added flavor; just watch them closely!
    • Experiment with different dried fruits or spices like cinnamon for unique flavors.
    • Ensure your mixing bowl is dry; any moisture can make the chocolate seize up.

    Equipment Needed

    To whip up these delicious White Chocolate Cranberry Pecan Clusters, you’ll need a few essential tools:

    • A baking sheet, preferably one with a rim.
    • Parchment paper for easy cleanup.
    • A microwave-safe bowl for melting chocolate.
    • A spoon or cookie scoop for forming clusters.
    • A spatula for mixing, though a fork works in a pinch!

    Variations

    There are so many ways to get creative with these White Chocolate Cranberry Pecan Clusters! Here are some tasty variations you can try:

    • Substitute dark chocolate for a richer flavor and a hint of bitterness.
    • Use different nuts like almonds, walnuts, or even pistachios for a twist.
    • Add spices like cinnamon or nutmeg for extra warmth.
    • Try dried cherries or apricots instead of cranberries for a fruity flair.
    • Make them vegan by using dairy-free white chocolate chips.

    Serving Suggestions

    These White Chocolate Cranberry Pecan Clusters are wonderfully versatile and can elevate any occasion. Here are some delightful serving ideas:

    • Pair with a cup of hot cocoa or coffee for a cozy afternoon treat.
    • Serve on a decorative platter at your next gathering for an enticing display.
    • Wrap clusters in clear bags as sweet party favors.
    • Enjoy them alongside fresh fruit for a balanced snack.

    FAQs about White Chocolate Cranberry Pecan Clusters

    I often get questions about these delightful White Chocolate Cranberry Pecan Clusters, and I’m here to help! Here are some of the most common inquiries:

    How do I store these clusters?

    You can keep them fresh in an airtight container at room temperature for up to a week. If you want them to last longer, store them in the fridge for up to two weeks.

    Can I substitute white chocolate?

    Absolutely! You can use dark chocolate or even a dairy-free version if you’re looking for a different flavor or have dietary restrictions.

    What if I don’t have pecans?

    No worries! You can use any nuts you like, such as almonds or walnuts, or even leave them out altogether for a nut-free version.

    Can I add more dried fruit?

    Yes, feel free to mix in additional dried fruits like raisins or apricots for extra sweetness and variety!

    If you have more questions, don’t hesitate to ask. Happy cooking!

    Final Thoughts

    As I put the finishing touches on these delightful White Chocolate Cranberry Pecan Clusters, I feel a wave of satisfaction wash over me.

    There’s something magical about creating a treat that brings smiles to my family’s faces.

    These clusters aren’t just a sweet snack; they’re a way to bring everyone together, sharing laughter and moments of joy.

    Whether for holidays or cozy evenings at home, I know they’ll turn any gathering into a warm celebration.

    So go ahead, whip up a batch, and enjoy the simple pleasure of sharing love through food!


    Print

    clock clock iconcutlery cutlery iconflag flag iconfolder folder iconinstagram instagram iconpinterest pinterest iconfacebook facebook iconprint print iconsquares squares iconheart heart iconheart solid heart solid icon

    Description

    Delicious clusters made with white chocolate, cranberries, and pecans.


    • 2 cups white chocolate chips
    • 1 cup dried cranberries
    • 1 cup pecans, chopped
    • 1 teaspoon vanilla extract
    • 1/4 teaspoon sea salt

    1. Begin by lining a baking sheet with parchment paper to prevent sticking.
    2. In a microwave-safe bowl, melt the white chocolate chips in 30-second intervals, stirring in between until smooth and fully melted.
    3. Once melted, stir in the vanilla extract and sea salt to enhance the flavor.
    4. Add the dried cranberries and chopped pecans to the melted chocolate, mixing until everything is well coated.
    5. Using a spoon or a cookie scoop, drop clusters of the mixture onto the prepared baking sheet, spacing them about 2 inches apart.
    6. Refrigerate the clusters for about 30 minutes, or until the chocolate has set completely.
    7. Once set, remove the clusters from the parchment paper and store them in an airtight container at room temperature or in the refrigerator.

    Notes

    • Ensure the white chocolate is melted gently to avoid burning.
    • Feel free to substitute other nuts or dried fruits based on your preference.
    • Prep Time: 10 minutes
    • Cook Time: 5 minutes
    • Category: Dessert
    • Method: No-Bake
    • Cuisine: American

    Nutrition

    • Serving Size: 1 cluster
    • Calories: 150
    • Sugar: 12g
    • Sodium: 50mg
    • Fat: 8g
    • Saturated Fat: 4g
    • Unsaturated Fat: 3g
    • Trans Fat: 0g
    • Carbohydrates: 18g
    • Fiber: 1g
    • Protein: 2g
    • Cholesterol: 0mg

    Sharing is caring!

  • Creamy Cajun Chicken Stuffed Shells

    Creamy Cajun Chicken Stuffed Shells


    Introduction to Creamy Cajun Chicken Stuffed Shells

    Hey there, fellow home cooks! If you’re like me, your days are a whirlwind of activities, whether it’s juggling work, kids, or life’s unexpected surprises. That’s why I’m excited to share my recipe for Creamy Cajun Chicken Stuffed Shells—a comforting dish that’s packed with flavor and love. Imagine trays of pasta shells overflowing with a rich, creamy filling, all drizzled in a zesty sauce. It’s a perfect solution for a busy weeknight or a way to impress your loved ones during a cozy dinner. Let’s dive into this delightful culinary adventure!

    Why You’ll Love This Creamy Cajun Chicken Stuffed Shells

    These Creamy Cajun Chicken Stuffed Shells are a game-changer for busy evenings. They come together quickly, making dinner a breeze. The cozy, creamy filling kissed with Cajun spice is a flavor explosion that will have your family coming back for seconds. Plus, with their cheesy goodness, fussy eaters won’t even know there’s chicken in there! A hearty meal that’s as satisfying to make as it is to eat.

    Ingredients for Creamy Cajun Chicken Stuffed Shells

    Let’s gather all the delicious building blocks for our Creamy Cajun Chicken Stuffed Shells. Having everything prepped and ready to go not only saves time but ensures a fun cooking experience!

    • Cooked Chicken: Shredded rotisserie chicken works perfectly here, saving you precious time in the kitchen.
    • Cream Cheese: This creamy cornerstone adds richness and smoothness to the filling.
    • Shredded Mozzarella Cheese: Ooey-gooey goodness that brings melt-in-your-mouth delight to every bite.
    • Grated Parmesan Cheese: This cheese adds a touch of nuttiness, complementing the other flavors beautifully.
    • Cajun Seasoning: The spice hero of this dish! Adjust the amount to match your craving for heat.
    • Salt and Pepper: Simple seasonings that enhance flavors without stealing the spotlight.
    • Pasta Shells: The perfect vessel for our scrumptious filling! Opt for large shells to hold lots of that delightful mixture.
    • Chicken Broth: A splash of liquid gold, adding depth and moisture to our zesty sauce.
    • Vegetable Oil or Butter: For sautéing and flavor, depending on your preference or what you have on hand.
    • Fresh Parsley: A vibrant touch for garnishing, adding color and fresh flavor to finish the dish.

    For those of you who enjoy a veggie boost, feel free to toss in some spinach or bell peppers to the filling. And remember, measurements are detailed at the bottom of the article, ready for your printing needs!

    How to Make Creamy Cajun Chicken Stuffed Shells

    Now that we have everything ready, it’s time to bring our Creamy Cajun Chicken Stuffed Shells to life! Follow these simple steps to create a dish that will have everyone asking for seconds.

    Step 1: Cook the Pasta Shells

    Start by boiling a big pot of salted water. This is crucial for flavor! Once boiling, add your large pasta shells. Cook them until they’re al dente—don’t overdo it, or they’ll be too soft to stuff. When they’re just right, drain and rinse them under cold water. This stops the cooking process and ensures they’re manageable for filling.

    Step 2: Make the Filling

    In a large mixing bowl, combine your shredded chicken and softened cream cheese. Add the mozzarella and half of the grated Parmesan for extra cheesiness. Now, sprinkle in that Cajun seasoning—this is where the magic happens! Give it a good stir until everything is well combined. Taste your filling; if it needs a little more kick, don’t hesitate to add more seasoning. Get ready for a flavor explosion!

    Step 3: Stuff the Shells

    Grab a spoon and start filling those pasta shells! Be generous—it’s all about those luscious, creamy bites. Place each stuffed shell in a lightly greased baking dish, making sure they’re snug but not squished. Keep doing this until all your shells are filled. The filling should go a long way, so don’t worry if it looks like there’s plenty!

    Step 4: Prepare the Sauce

    In a small saucepan, melt some butter or heat vegetable oil over medium heat. Once it’s hot, whisk in the remaining Cajun seasoning and watch it sizzle! Pour in the chicken broth and let it simmer for 2 to 3 minutes. This will combine those zesty flavors, creating a sauce that perfectly complements the stuffed shells. It’s a simple step that makes a huge difference!

    Step 5: Assemble & Bake

    Now it’s time to bring everything together! Pour the zesty sauce evenly over your stuffed shells. Sprinkle the remaining Parmesan on top for that delightful bubbly crust. Cover your baking dish with foil, then pop it in the oven at 375°F (190°C) for 20 minutes. After that, remove the foil and let it bake an additional 10–15 minutes until it’s all bubbly and golden.

    Step 6: Garnish & Serve

    Once baked, let your masterpiece cool for about 5 minutes. This allows the flavors to settle. Finally, garnish with fresh parsley for a dash of color and flavor. Serve warm, and watch as your family digs in with delight!

    Tips for Success

    • Don’t overcook the pasta shells; they should be al dente for easy stuffing.
    • Let the cream cheese soften at room temperature for easier mixing.
    • Taste your filling before stuffing to ensure it’s seasoned just right.
    • Prepare the dish ahead of time and refrigerate; just bake when you’re ready!
    • Experiment with different cheese combinations for unique flavors.

    Equipment Needed

    • Large Pot: For boiling pasta; any big enough to hold plenty of water will do.
    • Baking Dish: Use a 9×13 inch dish, or a Dutch oven if you have one available.
    • Mixing Bowl: Any large bowl works; stainless steel or glass is perfect for mixing.
    • Saucepan: A medium-sized saucepan for the sauce; a skillet works, too!
    • Spoon & Spatula: For mixing and stuffing; a rubber spatula is ideal to scrape down sides.

    Variations

    • Vegetable Lovers: Add sautéed spinach, bell peppers, or mushrooms to the filling for extra nutrition and flavor.
    • Spicy Twist: Mix in some diced jalapeños or a dash of hot sauce to kick up the heat in your filling.
    • Cheesy Delight: Swap the mozzarella for pepper jack cheese to introduce a zesty twist.
    • Rice Option: Incorporate cooked rice into the filling for a heartier stuffing that stretches the dish further.
    • Gluten-Free: Use gluten-free pasta shells to accommodate dietary needs without sacrificing taste.

    Serving Suggestions

    • Side Salad: Pair with a crisp green salad drizzled with vinaigrette for a refreshing contrast.
    • Garlic Bread: Serve alongside warm garlic bread to soak up the delicious sauce.
    • Wine Pairing: A chilled Chardonnay complements the creamy flavors beautifully.
    • Presentation Tip: Serve in a rustic baking dish for a homestyle touch; sprinkle extra parsley on top for color.

    FAQs about Creamy Cajun Chicken Stuffed Shells

    Got questions? Don’t worry, I’ve got you covered with some of the most common ones about Creamy Cajun Chicken Stuffed Shells. Grab a cup of coffee, and let’s clear up any cooking curiosities!

    Can I make these Creamy Cajun Chicken Stuffed Shells in advance?

    Absolutely! You can prepare them ahead of time and store them in the refrigerator before baking. Just cover them tightly with foil or cling wrap to keep them fresh. When you’re ready, bake them straight from the fridge, but add a few extra minutes to the cooking time.

    What can I substitute for the Cajun seasoning?

    If Cajun seasoning isn’t your thing, you can use a mix of paprika, garlic powder, and a pinch of cayenne pepper to achieve a similar flavor profile. Alternatively, Italian seasoning can work if you’re aiming for a milder, herby taste.

    Can I freeze the stuffed shells?

    You sure can! These Creamy Cajun Chicken Stuffed Shells freeze really well. Just assemble them in a freezer-safe dish without baking. Wrap tightly with foil and freeze for up to three months. Thaw in the fridge overnight before baking.

    Are there any dietary options for these stuffed shells?

    Yes, for a gluten-free option, simply use gluten-free pasta shells. You can also switch to dairy-free cheese alternatives if you’re looking to make them dairy-free. Just be sure to check that your Cajun seasoning is gluten-free.

    How spicy are these shells?

    The spice level really depends on your choice of Cajun seasoning. If you’re concerned about heat, start with a smaller amount and increase it gradually. You can always add more, but it’s hard to take it away!

    Final Thoughts

    Creating Creamy Cajun Chicken Stuffed Shells is like inviting a warm hug into your kitchen. The combination of creamy, cheesy goodness with a zesty kick transforms an ordinary weeknight into something special. Whether it’s a hectic day or a cozy gathering, this dish brings joy and satisfaction to every table. Seeing my family enjoy each bite fills my heart with happiness. I hope these shells become a beloved staple in your home, just like they are in mine. Cooking is so much more than just making food; it’s about sharing love and creating delicious memories together.


    Print

    clock clock iconcutlery cutlery iconflag flag iconfolder folder iconinstagram instagram iconpinterest pinterest iconfacebook facebook iconprint print iconsquares squares iconheart heart iconheart solid heart solid icon

    Description

    Creamy Cajun Chicken Stuffed Shells are a delicious and flavorful dish filled with a creamy chicken mixture, topped with a zesty Cajun sauce and baked to perfection.


    • 2 cups cooked chicken, shredded
    • 1 cup cream cheese, softened
    • 1 cup shredded mozzarella cheese
    • 1/2 cup grated Parmesan cheese
    • 1/4 cup Cajun seasoning
    • Salt and pepper to taste
    • 12 large pasta shells
    • 1 cup non-alcoholic chicken broth
    • 1 tablespoon vegetable oil or butter
    • 1/4 cup Cajun seasoning (for sauce)
    • Fresh parsley for garnish

    1. Cook the Pasta Shells: Bring a large pot of salted water to a boil. Cook pasta shells until al dente according to package instructions. Drain and set aside to cool slightly.
    2. Make the Filling: In a large bowl, combine shredded chicken, cream cheese, mozzarella, half the Parmesan, 1/4 cup Cajun seasoning, salt, and pepper. Mix until well combined.
    3. Stuff the Shells: Fill each pasta shell generously with the creamy chicken mixture. Place them in a lightly greased baking dish in a single layer.
    4. Prepare the Sauce: In a small saucepan, melt butter or heat oil over medium heat. Add the remaining Cajun seasoning and stir in the chicken broth. Simmer for 2–3 minutes to blend the flavors.
    5. Assemble & Bake: Pour the sauce evenly over the stuffed shells. Sprinkle with remaining Parmesan. Cover with foil and bake at 375°F (190°C) for 20 minutes. Remove foil and bake an additional 10–15 minutes until bubbly and golden.
    6. Garnish & Serve: Remove from oven and let cool for 5 minutes. Garnish with chopped fresh parsley and serve warm.

    Notes

    • This dish can be prepared in advance and stored in the refrigerator before baking.
    • Feel free to adjust the amount of Cajun seasoning to your taste.
    • Try adding vegetables like spinach or bell peppers for extra nutrition.
    • Prep Time: 20 minutes
    • Cook Time: 35 minutes
    • Category: Main Course
    • Method: Baking
    • Cuisine: Cajun

    Nutrition

    • Serving Size: 1 stuffed shell
    • Calories: 310
    • Sugar: 2g
    • Sodium: 800mg
    • Fat: 18g
    • Saturated Fat: 10g
    • Unsaturated Fat: 5g
    • Trans Fat: 0g
    • Carbohydrates: 20g
    • Fiber: 1g
    • Protein: 22g
    • Cholesterol: 75mg

    Sharing is caring!

  • Garlic Parmesan Stuffed Spaghetti Squash with Chicken

    Garlic Parmesan Stuffed Spaghetti Squash with Chicken


    Introduction to Garlic Parmesan Stuffed Spaghetti Squash with Chicken and Spinach

    As a busy mom, I know how challenging it can be to juggle meals during the week. That’s why I love this Garlic Parmesan Stuffed Spaghetti Squash with Chicken and Spinach. It’s not only a delightful blend of flavors but also a quick solution for those hectic evenings. Picture this: tender spaghetti squash filled to the brim with a creamy chicken and spinach mixture, all topped off with savory garlic and parmesan. This dish impresses loved ones while sneaking in some healthy ingredients that even picky eaters will love.

    Why You’ll Love This Garlic Parmesan Stuffed Spaghetti Squash with Chicken and Spinach

    This Garlic Parmesan Stuffed Spaghetti Squash with Chicken and Spinach is a winner all around! It’s easy to prepare, perfect for busy days, and packed with flavor that will satisfy the whole family. In just over an hour, you can serve a nourishing, gluten-free meal that feels indulgent but is surprisingly healthy. Plus, cleanup is a breeze since most of the work happens in one dish!

    Ingredients for Garlic Parmesan Stuffed Spaghetti Squash with Chicken and Spinach

    Gathering the right ingredients is half the fun! Here’s what you’ll need to create this delicious Garlic Parmesan Stuffed Spaghetti Squash with Chicken and Spinach:

    • Spaghetti squash: These golden beauties are the star of the show, providing a nutritious and low-carb base.
    • Olive oil: A drizzle helps bring out the flavors and keeps the squash tender.
    • Salt and black pepper: Essential seasonings that enhance the dish’s natural flavors.
    • Garlic powder: A hint of garlic adds depth without being overpowering.
    • Boneless, skinless chicken breasts: Perfectly cubed for a protein-packed filling. Feel free to swap for turkey or tofu for variety!
    • Butter: Adds richness to the filling and helps sauté the onions and garlic.
    • Fresh garlic: Because you can never have too much garlic! It infuses the dish with wonderful aroma and taste.
    • Onion: Finely diced for a subtle sweetness and texture.
    • Fresh spinach: Packed full of nutrients, it’s the healthy green we’ll sneak in for extra goodness.
    • Chicken broth: Use low-sodium for a lighter touch. It keeps the filling moist and flavorful.
    • Cream cheese: This adds creaminess and flavor that binds everything together beautifully.
    • Plain Greek yogurt: It adds a tangy twist and keeps the filling light yet decadent.
    • Parmesan cheese: Freshly grated for that rich, nutty flavor, plus extra for topping.
    • Dried thyme: This herb adds a lovely earthiness to the dish.
    • Red pepper flakes: Add a bit of heat, if you dare! Perfect for those who like a kick.
    • Fresh parsley: Bright and fresh, it adds a pop of color and flavor.

    You can find exact measurements at the bottom of the article, along with options for printing. Each ingredient plays a role in creating a dish that’s not only satisfying but also comforting.

    How to Make Garlic Parmesan Stuffed Spaghetti Squash with Chicken and Spinach

    Preparing the Spaghetti Squash

    First things first, let’s tackle that spaghetti squash! Preheat your oven to 400°F (200°C).

    Next, cut each spaghetti squash in half lengthwise. Get ready for some fun—scoop out the seeds with a spoon. It’s like emptying a tiny pumpkin!

    Once that’s done, brush the cut sides with olive oil. Sprinkle salt, pepper, and garlic powder generously for flavor.

    Now, place the squash halves cut-side down on a baking sheet. Slide them into the oven and bake for about 30-35 minutes until they’re tender. The aroma will have you eagerly awaiting the next steps!

    Cooking the Chicken

    While the squash is baking, let’s get that chicken sizzling. Heat one tablespoon of butter in a large skillet over medium heat.

    Add the cubed boneless, skinless chicken to the pan. Sear it until golden brown, about 5-7 minutes. Don’t rush this step; you want a nice color!

    Once the chicken is perfectly cooked, set it aside in a bowl. Don’t worry; it’ll go back into the skillet soon!

    Making the Creamy Spinach Mixture

    Now, in the same skillet, add the remaining butter. Toss in the finely diced onion and cook until it turns translucent, about 3-4 minutes.

    Next, bring in the minced garlic. Sauté for about 30 seconds, letting that fragrant aroma take over your kitchen.

    It’s time for the stars of this creamy filling—add the fresh spinach. Toss it in until it wilts down. This should take just a couple of minutes.

    Pour in the chicken broth, bringing the mixture to a gentle simmer. Now, add cream cheese, Greek yogurt, parmesan, thyme, and a pinch of red pepper flakes (if you like some heat!).

    Return the golden chicken to the skillet; stir everything together until it’s well mixed. Add half of the chopped parsley, letting it infuse flavor into your creamy filling. Simmer for 2-3 minutes and take a moment to savor your culinary creation.

    Assembling the Dish

    Once the spaghetti squash is ready, let’s create those spaghetti-like strands! Use a fork to scrape the insides gently, separating them into strands for that classic spaghetti look.

    Mix some of the creamy chicken mixture with the squash strands. This adds flavor to the base and keeps it all deliciously cohesive!

    Now, fill each squash half with the remaining creamy chicken mixture. Press it down gently to pack it in—fresh out of the oven, they’ll be warm and inviting.

    Baking to Perfection

    Sprinkle additional parmesan cheese over the stuffed squash for that gooey, cheesy goodness.

    Return the stuffed squash to the oven and bake for another 10-15 minutes. You’ll know they’re done when the cheese is melted and golden brown.

    Lastly, let your beautiful Garlic Parmesan Stuffed Spaghetti Squash cool for about 5 minutes. A sprinkle of fresh parsley as a garnish adds a lovely touch before serving. Enjoy your delicious masterpiece!

    Tips for Success

    • Make sure not to overcook the spaghetti squash; you want it tender but not mushy!
    • For extra flavor, roast the garlic in the oven alongside the squash.
    • Mix in different vegetables like bell peppers or mushrooms for added nutrition.
    • Feel free to double the creamy filling and enjoy leftovers for lunch.
    • Keep an eye on the cheese while baking to avoid burning it.

    Equipment Needed

    • Large baking sheet: A half-sheet pan works perfectly for roasting the squash.
    • Sharp knife: Essential for cutting the spaghetti squash with ease.
    • Skillet: A non-stick skillet is great for cooking the chicken and veggies.
    • Medium mixing bowl: Use it to hold the cooked chicken mixture.
    • Fork: Needed for scraping out those delicious spaghetti strands!

    Variations for Garlic Parmesan Stuffed Spaghetti Squash with Chicken and Spinach

    • Protein swaps: Replace chicken with ground turkey, shredded rotisserie chicken, or even chickpeas for a vegetarian twist.
    • Cheese alternatives: Try swapping cream cheese with ricotta or goat cheese for a different flavor profile.
    • Vegetable loading: Add diced bell peppers, zucchini, or even artichoke hearts for extra texture and nutrition.
    • Herb variations: Exchange thyme for fresh basil or oregano to give a slightly different herbal note to the dish.
    • Spicy kick: Drizzle your stuffed squash with hot sauce or sprinkle in some jalapeños if your family enjoys a fiery bite!

    Serving Suggestions for Garlic Parmesan Stuffed Spaghetti Squash with Chicken and Spinach

    • Side Salad: Pair with a crisp green salad drizzled with a light vinaigrette for a refreshing contrast.
    • Bread: Serve with crusty garlic bread to scoop up any remaining creamy filling.
    • Wine: Enjoy with a chilled glass of white wine, like Sauvignon Blanc, to enhance the flavors.
    • Presentation: Garnish with extra parsley and a sprinkle of parmesan for an appealing finish.

    FAQs about Garlic Parmesan Stuffed Spaghetti Squash with Chicken and Spinach

    Can I make Garlic Parmesan Stuffed Spaghetti Squash with Chicken and Spinach ahead of time?

    Absolutely! You can prepare the filling in advance and store it in the refrigerator. Just stuff the squash and bake before serving for a warm, fresh meal.

    Is this dish suitable for meal prep?

    Yes! This recipe is perfect for meal prep. Divide the stuffed squash into containers and refrigerate up to three days, providing quick and healthy lunches during the week.

    What can I substitute for chicken in this recipe?

    You can swap chicken for ground turkey, tofu, or even chickpeas for a vegetarian option. Each alternative brings unique flavors to your Garlic Parmesan Stuffed Spaghetti Squash with Chicken and Spinach.

    Can I freeze the leftovers?

    Yes, you can freeze the stuffed squash. Wrap each half tightly in plastic wrap and store in an airtight container. They’ll be good up to three months. Reheat in the oven when ready to enjoy!

    Is this recipe gluten-free?

    Yes, this Garlic Parmesan Stuffed Spaghetti Squash is naturally gluten-free, making it a great option for anyone with gluten sensitivities. Enjoy your healthy meal worry-free!

    Final Thoughts on Garlic Parmesan Stuffed Spaghetti Squash with Chicken and Spinach

    Cooking this Garlic Parmesan Stuffed Spaghetti Squash with Chicken and Spinach truly brings joy to my kitchen. It’s a satisfying, wholesome meal that combines heartiness and health—a wonderful balance for feeding a busy family. Each bite is a delightful explosion of flavors, making it hard to believe you’re indulging guilt-free. With the simplicity of prep and clean-up, I find myself returning to this recipe time and again. Whether impressing guests or treating my family, this dish never fails to elicit smiles. I hope it brings as much warmth and comfort to your dinner table as it does to mine!


    Print

    clock clock iconcutlery cutlery iconflag flag iconfolder folder iconinstagram instagram iconpinterest pinterest iconfacebook facebook iconprint print iconsquares squares iconheart heart iconheart solid heart solid icon

    Description

    A delicious and healthy dish featuring spaghetti squash stuffed with a creamy chicken and spinach mixture, topped with garlic and parmesan.


    • 2 medium spaghetti squash (about 3 pounds each)
    • 2 tablespoons olive oil
    • 1 teaspoon salt
    • 1/2 teaspoon black pepper
    • 1/2 teaspoon garlic powder
    • 1 pound boneless, skinless chicken breasts, cut into small cubes
    • 3 tablespoons butter
    • 6 cloves garlic, minced (about 2 tablespoons)
    • 1 small onion, finely diced
    • 8 ounces fresh spinach
    • 1 cup chicken broth (low-sodium preferred)
    • 4 ounces cream cheese, softened
    • 1/2 cup plain Greek yogurt
    • 1 cup freshly grated parmesan cheese, plus extra for topping
    • 1/2 teaspoon dried thyme
    • 1/4 teaspoon red pepper flakes (optional)
    • 1/4 cup chopped fresh parsley, divided

    1. Preheat oven to 400°F (200°C).
    2. Cut spaghetti squash in half lengthwise and remove seeds.
    3. Brush cut sides with olive oil and season with salt, pepper, and garlic powder.
    4. Bake squash cut-side down for 30-35 minutes until tender.
    5. While squash bakes, cook chicken pieces in 1 tablespoon butter until golden brown.
    6. Set chicken aside and cook onion in remaining butter until translucent.
    7. Add garlic and cook 30 seconds until fragrant.
    8. Add spinach and cook until wilted.
    9. Pour in chicken broth and bring to a simmer.
    10. Add cream cheese, Greek yogurt, parmesan, thyme, and red pepper flakes.
    11. Return chicken to the skillet and mix well.
    12. Add half the parsley and simmer 2-3 minutes.
    13. Once squash is cooked, use a fork to create spaghetti-like strands within each half.
    14. Mix some of the creamy mixture with the squash strands.
    15. Fill each squash half with the remaining chicken mixture.
    16. Top with additional parmesan cheese.
    17. Bake for 10-15 minutes more until cheese is melted and golden.
    18. Let cool for 5 minutes, then garnish with remaining parsley before serving.

    Notes

    • Adjust the spices according to taste.
    • Can substitute chicken with turkey or tofu for a different protein option.
    • Store leftovers in the refrigerator for up to 3 days.
    • Prep Time: 15 minutes
    • Cook Time: 1 hour
    • Category: Main Course
    • Method: Baking
    • Cuisine: American

    Nutrition

    • Serving Size: 1 stuffed squash half
    • Calories: 450
    • Sugar: 3g
    • Sodium: 600mg
    • Fat: 22g
    • Saturated Fat: 10g
    • Unsaturated Fat: 8g
    • Trans Fat: 0g
    • Carbohydrates: 34g
    • Fiber: 7g
    • Protein: 30g
    • Cholesterol: 90mg

    Sharing is caring!

  • Meat Lovers Pizza Tacos

    Meat Lovers Pizza Tacos


    Introduction to Meat Lovers Pizza Tacos

    If you’re a busy mom or a professional juggling a million things, I totally understand how challenging mealtime can be. That’s why I’m excited to share my latest culinary delight: Meat Lovers Pizza Tacos! Imagine biting into a flavorful taco, only to discover it’s filled with all your favorite pizza toppings. It’s a dish that combines the heartiness of pizza with the ease of tacos, sure to please picky eaters and adventurous palates alike. Whether it’s a weeknight dinner or a fun gathering, this recipe is the perfect solution for satisfying cravings without the fuss!

    Why You’ll Love This Meat Lovers Pizza Tacos

    These Meat Lovers Pizza Tacos are an absolute lifesaver! With just 30 minutes from start to finish, they’re perfect for busy weeknights when time is tight. Each bite offers a delightful fusion of savory flavors, satisfying even the hungriest family members. Plus, they’re endlessly customizable, meaning you can let everyone add their favorite toppings. Trust me, these tacos will quickly become a go-to in your kitchen!

    Ingredients for Meat Lovers Pizza Tacos

    Gathering the right ingredients is key to creating these mouth-watering Meat Lovers Pizza Tacos! Here’s what you’ll need:

    • Ground Beef: The star of your taco filling, providing that rich flavor and hearty texture many love.
    • Italian Sausage: Adds a savory depth that complements the beef beautifully. Feel free to use turkey or chicken sausage for a lighter twist.
    • Pepperoni Slices: Because you can’t have pizza without pepperoni! Their spicy kick offers a familiar comfort.
    • Sliced Black Olives: These lend a briny flavor that pairs perfectly with the meats and cheeses.
    • Shredded Mozzarella and Cheddar Cheese: Combining these two cheeses provides that gooey, melty topping you crave.
    • Pizza Sauce: The base flavor that ties everything together; go for homemade or store-bought, whichever suits your schedule.
    • Flour Tortillas: The vessel for all those delicious toppings! Choose small-sized for easy handling.
    • Dried Oregano & Garlic Powder: These herbs add a hint of Italian flavor to your dish, enhancing the overall taste.
    • Salt and Pepper: Simple seasonings that highlight all the flavors beautifully.
    • Fresh Basil Leaves: For garnish, these add a pop of color and a fragrant touch.
    • Grated Parmesan Cheese: A sprinkle on top adds a touch of elegance and additional flavor.
    • Red Pepper Flakes (optional): For those who enjoy a spicy kick, these make an excellent optional garnish.

    You can find exact measurements for each ingredient listed at the bottom of the article, ready for printing. Enjoy the vibrant colors and enticing aromas as your taco toppings harmonize in a delightful culinary celebration!

    How to Make Meat Lovers Pizza Tacos

    Now that you have all your ingredients gathered, let’s get cooking! This easy recipe for Meat Lovers Pizza Tacos will take just about 30 minutes. Ready? Let’s dive in!

    Step 1: Cook the Meats

    Start by heating a large skillet over medium heat. I usually add a splash of olive oil for extra flavor and to prevent sticking. Next, toss in the ground beef and crumbled Italian sausage. Cook until they are fully browned, which should take about 7 to 10 minutes. Remember to drain any excess fat; we want the focus on flavor, not grease! To spice things up, add in the dried oregano, garlic powder, salt, and pepper. Stir everything together, then set the skillet aside. The savory aroma will have your mouth watering!

    Step 2: Prepare the Tortillas

    While the meat mixture cools a bit, preheat your oven to 375°F (190°C). Grab your small flour tortillas and lay them flat on a clean surface. Spread a thin layer of pizza sauce on each tortilla, making sure to cover the entire surface. This sauce is where the magic begins! It gives that pizza flavor we all love. Don’t skimp on this step, as it really ties everything together beautifully.

    Step 3: Assemble the Tacos

    Now, it’s time to assemble your tacos! Take the prepared tortillas and evenly distribute the cooked meat mixture over them. Next, pile on the pepperoni slices and sprinkle the sliced black olives. Don’t forget the cheese! Generously add the shredded mozzarella and cheddar, layering them to create that gooey goodness. It’s hard to resist as you build, and I often sneak a piece of cheese for myself—who can blame me?

    Step 4: Bake to Perfection

    Once your tacos are assembled, place them on a baking sheet, making sure they’re not overlapping. Pop the sheet into your preheated oven. Bake for about 10 to 12 minutes, or until the cheese is melted and bubbly, and the edges of the tortillas are crispy. The crispy texture adds just the right contrast to the soft, cheesy filling. Keep an eye on them; no one wants burnt tacos, right?

    Step 5: Garnish and Serve

    After baking, remove the tacos from the oven and let them cool for a couple of minutes. It’s hard to resist the temptation to dig in immediately, but trust me! It’s worth the wait. Garnish with chopped fresh basil, a sprinkle of grated Parmesan cheese, and a dash of red pepper flakes if you’re daring. Cut each taco into wedges for easy serving, and get ready for everyone to rave about this delicious twist on pizza!

    Tips for Success

    • Use high-quality meat for the best flavor; lean ground beef is my go-to.
    • For extra convenience, prepare the meat mixture ahead of time and store it in the fridge.
    • Don’t skip the pizza sauce—it keeps the tortillas moist and flavorful.
    • Switch up the cheeses to suit your family’s taste; a blend can work wonders!
    • If making for a crowd, double the recipe for more Meat Lovers Pizza Tacos!

    Equipment Needed for Meat Lovers Pizza Tacos

    • Large Skillet: Essential for cooking the meats. A non-stick pan works great too!
    • Baking Sheet: Necessary for baking the tacos. Line it with parchment for easier cleanup.
    • Spatula: Perfect for flipping and serving. A slotted spatula can help reduce excess grease.
    • Cutting Board: Useful for prepping your tortillas and toppings.
    • Knife: A sharp knife for slicing ingredients and cutting the tacos into wedges.

    Variations on Meat Lovers Pizza Tacos

    • Spicy Version: Add sliced jalapeños or a pinch of cayenne pepper for an extra kick.
    • Vegetarian Twist: Substitute ground meat with a mix of mushrooms, bell peppers, and zucchini for a hearty veggie option.
    • BBQ Style: Swap out the pizza sauce for BBQ sauce, and include grilled chicken or pulled pork for a smoky flavor.
    • Gluten-Free Option: Use corn tortillas or gluten-free tortillas to accommodate dietary needs.
    • Cheesy Delight: Pile on extra cheese or use a cheese-filled crust to bring out even more flavor!

    Serving Suggestions for Meat Lovers Pizza Tacos

    • Pair with a crisp green salad tossed in a light vinaigrette for a refreshing contrast.
    • Serve with a side of homemade garlic breadsticks for that ultimate pizza experience.
    • Offer cold drinks like iced tea or sparkling lemonade to balance the rich flavors.
    • For presentation, arrange the tacos on a colorful platter and garnish with extra basil leaves.

    FAQs about Meat Lovers Pizza Tacos

    Can I make Meat Lovers Pizza Tacos ahead of time?

    Absolutely! You can prepare the meat mixture and assemble the tacos ahead of time. Store them in the fridge for a few hours before baking. Just remember to add a bit more baking time to ensure they’re heated through.

    What if I don’t have all the ingredients on hand?

    No problem! These Meat Lovers Pizza Tacos are super flexible. Feel free to substitute ingredients like using turkey instead of beef or even omitting the olives if they’re not your favorite. Customize them to fit what you have!

    How do I store leftovers?

    If you have any leftovers (which is rare!), simply place them in an airtight container and store them in the fridge for up to three days. To reheat, pop them back in the oven for a few minutes or microwave until warmed through.

    Can I freeze the assembled tacos?

    Yes! You can freeze the assembled tacos before baking. Just wrap them tightly in plastic wrap and foil. When ready to bake, there’s no need to thaw; just put them in the oven, and add a few extra minutes to the cooking time.

    What sides work well with Meat Lovers Pizza Tacos?

    Great question! A fresh salad or roasted vegetables pair wonderfully with these tacos. You can also consider some crunchy tortilla chips and salsa for that extra crunch we all love!

    Final Thoughts on Meat Lovers Pizza Tacos

    Making Meat Lovers Pizza Tacos is like crafting a cozy hug for your taste buds. The ease of preparation and customizable nature means everyone can have their perfect taco experience. With each bite, you’ll experience that joyful blend of pizza and taco goodness that warms the heart. Whether you’re sharing with family or hosting friends, this delightful recipe is sure to spark laughter and satisfying smiles. I hope it brings as much joy to your table as it does to mine, making busy mealtimes feel like a flavorful celebration!


    Print

    clock clock iconcutlery cutlery iconflag flag iconfolder folder iconinstagram instagram iconpinterest pinterest iconfacebook facebook iconprint print iconsquares squares iconheart heart iconheart solid heart solid icon

    Description

    A delicious twist on traditional pizza, these Meat Lovers Pizza Tacos combine the flavors of pizza with the convenience of tacos.


    • 1 lb ground beef
    • 1/2 lb Italian sausage, crumbled
    • 1/2 lb pepperoni slices
    • 1/2 cup sliced black olives
    • 1 cup shredded mozzarella cheese
    • 1 cup shredded cheddar cheese
    • 1 cup pizza sauce
    • 8 small flour tortillas
    • 1 teaspoon dried oregano
    • 1 teaspoon garlic powder
    • Salt and pepper, to taste
    • Fresh basil leaves, chopped (for garnish)
    • Grated Parmesan cheese (for garnish)
    • Red pepper flakes (optional, for garnish)

    1. In a large skillet over medium heat, cook the ground beef and Italian sausage until fully browned. Drain any excess fat. Add the dried oregano, garlic powder, salt, and pepper. Stir to combine and set aside.
    2. Preheat your oven to 375°F (190°C). Spread a thin layer of pizza sauce on each tortilla. Evenly distribute the cooked meat mixture over the tortillas. Top with pepperoni slices, black olives, shredded mozzarella, and cheddar cheese.
    3. Place the prepared tortillas on a baking sheet and bake in the preheated oven for 10-12 minutes, or until the cheese is melted and bubbly, and the edges of the tortillas are crispy.
    4. Remove the tacos from the oven and let them cool slightly. Garnish with chopped basil, grated Parmesan, and red pepper flakes, if desired. Cut each pizza taco into wedges and serve warm.

    Notes

    • Feel free to customize the toppings based on your preferences.
    • These tacos can be made ahead of time and reheated before serving.
    • For a spicier kick, add jalapeños to the top before baking.
    • Prep Time: 15 minutes
    • Cook Time: 15 minutes
    • Category: Main Dish
    • Method: Baking
    • Cuisine: Italian

    Nutrition

    • Serving Size: 1 taco
    • Calories: 320
    • Sugar: 2g
    • Sodium: 800mg
    • Fat: 20g
    • Saturated Fat: 8g
    • Unsaturated Fat: 8g
    • Trans Fat: 0g
    • Carbohydrates: 25g
    • Fiber: 2g
    • Protein: 15g
    • Cholesterol: 50mg

    Sharing is caring!

  • Watermelon Fruit Salad with Cherries

    Watermelon Fruit Salad with Cherries


    Introduction to Watermelon Fruit Salad with Cherries

    Summer is simply not summer without a refreshing treat. That’s where my Watermelon Fruit Salad with Cherries comes in! This delightful salad is a burst of sweetness that’s as easy to prepare as it is to enjoy. Perfect for those bustling days when you’re juggling family, work, and everything in between. You won’t believe how quickly you can whip up this vibrant dish. It’s a wonderful way to impress your loved ones, and trust me, they’ll thank you for it. So, let’s dive in and create something deliciously fresh together!

    Why You’ll Love This Watermelon Fruit Salad with Cherries

    This Watermelon Fruit Salad with Cherries is all about simplicity and flavor. It takes just 15 minutes to throw together, making it perfect for busy moms and professionals alike. The juicy watermelon and tart cherries blend together to create a refreshing treat that’s ideal for summer. Plus, it’s a crowd-pleaser—great for family gatherings, picnics, or a light dessert. You’ll find yourself making this recipe again and again!

    Ingredients for Watermelon Fruit Salad with Cherries

    Let’s gather our colorful ingredients for this Watermelon Fruit Salad with Cherries! Freshness is key, so I always recommend choosing ripe fruits from your local farmer’s market when possible. Below are the essential components:

    • Seedless watermelon: Sweet, juicy, and hydrating, watermelon serves as the star of this dish.
    • Fresh cherries: These add a lovely tartness and texture contrast. Opt for dark, plump cherries for the best flavor!
    • Lime juice: A splash of lime enhances the fruit’s natural sweetness. You can swap it with lemon juice if that’s what you have on hand.
    • Maple syrup: This is optional, depending on how naturally sweet your fruits are. A drizzle can make this salad pop.
    • Sea salt: Just a pinch helps balance the sweetness and brings everything together beautifully.
    • Fresh mint: For garnish, this adds a refreshing hint. If you don’t have fresh mint, a sprinkle of dried mint works in a pinch.

    Ready to mix it all together? If you’re looking for precise amounts, don’t worry! Details on this are at the bottom of the article and available for printing. Let’s make something perfectly delicious!

    How to Make Watermelon Fruit Salad with Cherries

    Creating your Watermelon Fruit Salad with Cherries is as simple as it is rewarding. I love how each step allows the fresh ingredients to shine. Let’s break it down into easy-to-follow steps!

    Prepare the Fruit

    Start by selecting a ripe seedless watermelon. It’s the big, heavy ones that will usually give the sweetest flavor. Cut it in half, then into quarters. With a sharp knife, carefully slice the flesh into cubes about an inch in size. Be sure to remove any seeds if you spot them!

    Now, onto those lovely cherries. Use a cherry pitter for the best results. If you don’t have one, fear not! A simple knife will work—just make a slice down the side, twist, and pop out the pit. Halve each cherry, revealing that gorgeous inner fruit. Utilizing fresh, ripe ingredients not only makes the salad visually appealing but enhances the flavor so much!

    Make the Dressing

    In a small mixing bowl, whisk together the lime juice, optional maple syrup, and a pinch of sea salt. The acidity of lime juice creates a beautiful balance with the sweetness of watermelon and cherries, pulling the flavors together. If you’ve chosen to use the maple syrup, it’s like adding a sweet hug to the dish. Just remember, taste it as you go to find your perfect blend!

    Toss and Mix

    Now for the fun part—combining everything! Pour the dressing over your bowl of cubed watermelon and halved cherries. Using a spatula or wooden spoon, gently toss the fruits until they are evenly coated in that zesty dressing. Be careful not to smash the fruits, as we want them to remain intact and pretty!

    Garnish and Serve

    Before serving, sprinkle the fresh mint over your creation for a pop of color and a hint of freshness. If you’re opting for a chilled salad, let it sit in the fridge for about 15-20 minutes. This allows the flavors to meld and gives the watermelon a slightly cooler, more refreshing bite. Whether served immediately or after chilling, I guarantee this salad will bring a smile to everyone’s face!

    Tips for Success

    • Always choose ripe watermelon and cherries for the best flavor.
    • Chill the salad before serving for a refreshing burst on hot days.
    • Adjust maple syrup to taste depending on the sweetness of your fruit.
    • Experiment with adding other fruits like blueberries or strawberries for variety.
    • Keep it simple; fewer ingredients allow each flavor to shine!

    Equipment Needed

    • Cutting knife: A sharp kitchen knife for cutting fruits. A simple paring knife will do!
    • Mixing bowl: A large bowl to combine ingredients. Any bowl you have will work just fine.
    • Whisk: For mixing the dressing. A fork can also do the trick!
    • Spatula or wooden spoon: Perfect for gently tossing the salad without smashing the fruit.
    • Cherry pitter: If you have one, great! If not, a knife works perfectly for pitting cherries.

    Variations on Watermelon Fruit Salad with Cherries

    • Add Berries: Toss in some blueberries or strawberries for an extra berry burst!
    • Include Citrus: For a zesty twist, add segments of orange or grapefruit to enhance the freshness.
    • Nuts and Seeds: Add a handful of toasted almonds or sunflower seeds for a crunch that complements the soft fruits.
    • Feta or Goat Cheese: Crumbled cheese can give this salad a savory kick. Just sprinkle some on top before serving.
    • Herbal Infusions: Experiment with other herbs like basil or cilantro for a unique finishing touch.

    Serving Suggestions for Watermelon Fruit Salad with Cherries

    • Perfect Pairing: Serve with grilled chicken or fish for a refreshing counterbalance to savory dishes.
    • Refreshing Drinks: Enjoy alongside chilled lemonade or iced tea to enhance the summer vibe.
    • Elegant Presentation: Serve in a hollowed-out watermelon for an eye-catching centerpiece at gatherings.
    • Top it off: Drizzle additional lime juice or a splash of coconut water just before serving for extra zing!

    FAQs about Watermelon Fruit Salad with Cherries

    Can I make this Watermelon Fruit Salad with Cherries ahead of time?

    Absolutely! You can prepare the salad a few hours in advance. Just hold off on adding the fresh mint until right before serving to keep it vibrant. I often chill it for a refreshing touch!

    What other fruits can I add to this salad?

    The beauty of this recipe is its flexibility! Feel free to mix in berries, peaches, or even kiwi. Each fruit adds its own special flavor and texture, making it your own!

    How should I store leftovers?

    If you have any leftovers (which is rare with this salad!), store them in an airtight container in the fridge. Enjoy them within a day or two for the best freshness. Just be aware; the watermelon may release some juice!

    Is this salad suitable for a vegan diet?

    Yes, indeed! This Watermelon Fruit Salad with Cherries is not only vegan but also guilt-free. It’s a fantastic option for anyone looking for a light, delicious dessert!

    Can I use frozen fruit for this salad?

    While fresh is best for this Watermelon Fruit Salad with Cherries, you can use frozen fruit if that’s what you have. Just make sure to thaw and drain any excess water from the fruit before mixing. Fresh flavors still matter!

    Final Thoughts

    Embracing the joy of preparing and sharing a Watermelon Fruit Salad with Cherries is one of my summer highlights. This recipe captures the essence of sunny days, bringing people together over a refreshing dish. Whether it’s a backyard barbecue, a cozy family dinner, or a picnic in the park, the burst of flavors and colors in this salad always elicits smiles. Quick to prepare, nourishing, and pleasing to the palate, this salad is a celebration of summer’s bounty. So grab your fruits, make some memories, and enjoy this simple pleasure with your loved ones!


    Print

    clock clock iconcutlery cutlery iconflag flag iconfolder folder iconinstagram instagram iconpinterest pinterest iconfacebook facebook iconprint print iconsquares squares iconheart heart iconheart solid heart solid icon

    Description

    A refreshing watermelon fruit salad featuring cherries, perfect for summer.


    • 3 cups seedless watermelon, cubed
    • 1 ½ cups fresh cherries, pitted and halved
    • 1 tbsp lime juice (or lemon juice)
    • 1 tsp maple syrup (optional, depending on sweetness)
    • Pinch of sea salt
    • 1 tbsp fresh mint, chopped (optional, for garnish)

    1. Prepare the Fruit: Cut the watermelon into bite-sized cubes and pit/halve the cherries. Add both to a large mixing bowl.
    2. Make the Dressing: In a small bowl, whisk together lime juice, maple syrup (if using), and a pinch of salt.
    3. Toss and Mix: Pour the dressing over the fruit and gently toss until evenly coated.
    4. Garnish and Serve: Sprinkle with fresh mint just before serving. Enjoy immediately or chill for 15–20 minutes.

    Notes

    • Chilling the salad enhances the flavors.
    • Adjust the sweetness by adding more or less maple syrup.
    • Prep Time: 15 minutes
    • Cook Time: 0 minutes
    • Category: Salad
    • Method: Mixing
    • Cuisine: American

    Nutrition

    • Serving Size: 1 cup
    • Calories: 80
    • Sugar: 14g
    • Sodium: 2mg
    • Fat: 0g
    • Saturated Fat: 0g
    • Unsaturated Fat: 0g
    • Trans Fat: 0g
    • Carbohydrates: 21g
    • Fiber: 1g
    • Protein: 1g
    • Cholesterol: 0mg

    Sharing is caring!

  • Blueberry Cinnamon Rolls

    Blueberry Cinnamon Rolls


    Introduction to Blueberry Cinnamon Rolls

    As the sun peeks through the kitchen window, there’s something magical about the smell of fresh-baked goods. These Blueberry Cinnamon Rolls are not only a morning treat but a delightful hug for your tastebuds. I know how hectic mornings can be, especially when juggling family and work. The fluffy, sweet dough meets juicy blueberries, creating a flavor combo that’s simply irresistible. Whether it’s breakfast or dessert, these rolls will brighten your day and bring smiles all around. Trust me, once you try them, you’ll wonder how you ever lived without this delightful recipe!

    Why You’ll Love This Blueberry Cinnamon Rolls

    Life is busy, and I get it. As a mom who juggles dinner parties, work meetings, and family schedules, coming up with delicious recipes that don’t take ages is essential. These Blueberry Cinnamon Rolls are a lifesaver! They’re not just easy to make, but they also pack a flavor punch that will make your family swoon. Each bite is like a little piece of joy in your hectic day, giving you and yours a reason to smile.

    Ingredients for Blueberry Cinnamon Rolls

    Before diving into the magic of making these Blueberry Cinnamon Rolls, let’s gather our ingredients. Each one plays a crucial role in creating the fluffy rolls and tasty filling. You’ll want to have these on hand:

    • Active dry yeast: This little powerhouse brings our dough to life, making it rise and become fluffy.
    • Warm milk: Ensures the yeast is activated, helping to create that perfect dough texture.
    • Granulated sugar: Adds sweetness to the dough, fueling our yeast to work its magic.
    • Large eggs: These enrich the dough and give it that beautiful golden color.
    • Unsalted butter: Contributes to the rich flavor and tender crumb of the rolls. You’ll need some for both the dough and the filling!
    • All-purpose flour: The backbone of the rolls, it gives structure and stability.
    • Salt: Enhances the flavor and balances the sweetness of the rolls.
    • Vanilla extract: A splash of this adds warmth and depth to the dough.
    • Brown sugar: For the filling, it brings a caramel-like richness that pairs beautifully with cinnamon and blueberries.
    • Ground cinnamon: This spice provides that cozy, classic flavor we associate with cinnamon rolls.
    • Fresh blueberries: They’re the star of the show, bursting with flavor and juice in every bite.
    • Cream cheese: Essential for our luscious glaze that takes these rolls over the top.
    • Powdered sugar: Used in the glaze for that sweet, creamy finish.
    • More milk: You’ll need this to adjust the glaze’s consistency to your liking.

    For those with dietary preferences, feel free to swap in dairy-free butter or a plant-based milk substitute. For direct measurements and to print the recipe, check the bottom of the article!

    How to Make Blueberry Cinnamon Rolls

    Now that we’ve gathered our ingredients, let’s roll up our sleeves and get cooking! Making these Blueberry Cinnamon Rolls is a joyous, almost therapeutic process. I promise, with each step, the warm aroma of cinnamon and blueberries will fill your home. Let’s dive in!

    Step 1: Prepare the Yeast Mixture

    Start by combining warm milk, granulated sugar, and yeast in a small bowl. Stir gently, and let it sit for about 5-10 minutes. Soon, you’ll see it become frothy and bubbly, letting you know that the yeast is alive and ready to work its magic in our dough!

    Step 2: Mix the Dough

    In a large bowl, mix together the all-purpose flour, salt, eggs, softened butter, and the foamy yeast mixture. Use a sturdy spoon or spatula to combine until a rough dough forms. This is the base for our Blueberry Cinnamon Rolls, so don’t rush – get it well combined!

    Step 3: Knead the Dough

    Lightly flour your countertop and turn out the dough. Knead the dough for about 5-7 minutes until it becomes smooth and elastic. Picture it like massaging the dough; it’ll become soft and silky. This step is crucial for developing those beautiful gluten strands!

    Step 4: Allow the Dough to Rise

    Place the kneaded dough in a greased bowl. Cover it with a damp cloth and let it rise in a warm spot for around 1 hour, or until it’s doubled in size. This is where the dough gets its fluffy texture, so be patient—it will be worth it!

    Step 5: Prepare the Cinnamon Filling

    In a small bowl, mix together softened butter, brown sugar, and ground cinnamon. Stir until it’s smooth and creamy. This sweet, spiced filling will be essential for flavor, giving your rolls that comforting cinnamon goodness.

    Step 6: Fold in Fresh Blueberries

    Carefully fold the fresh blueberries into the cinnamon mixture. Do this gently, so you don’t mash them. These tiny bursts of flavor are the heart of our Blueberry Cinnamon Rolls and shouldn’t be treated roughly!

    Step 7: Roll Out the Dough

    After the dough has risen, punch it down to release the air. Roll it out on a floured surface into a large rectangle, about 16×12 inches. Aim for an even thickness so every bite is just as delightful as the last.

    Step 8: Assemble the Rolls

    Spread the cinnamon filling evenly over the rolled-out dough, leaving a small border at the edges. Starting from the longer side, roll the dough into a tight log. Slice this log into 12 equal pieces. Each slice will become a beautiful roll, ready for baking!

    Step 9: Second Rise

    Arrange the sliced rolls in a greased 9×13-inch baking dish. Cover them with a cloth again, and let them rise for about 30 minutes. They should look puffy and a bit squished together. This final rise ensures the rolls will be light and airy!

    Step 10: Bake the Rolls

    Preheat your oven to 350°F (175°C). Once it’s ready, bake the rolls for 20-25 minutes, or until golden brown on top. The anticipation will build as you watch the rolls transform in the oven, filling your kitchen with a sweet aroma!

    Step 11: Make the Glaze

    For the glaze, beat the cream cheese until it’s smooth. Add powdered sugar, vanilla extract, and 2 tablespoons of milk. Mix until it’s just right—pourable but not too runny. Feel free to add a splash more milk if needed to get that perfect consistency!

    Step 12: Serve the Rolls

    Once the rolls have cooled in the pan for about 10 minutes, drizzle the cream cheese glaze over them while they’re still warm. Serve these heavenly Blueberry Cinnamon Rolls fresh from the oven, and watch your family smile with delight. Enjoy every gooey, sweet bite!

    Tips for Success

    • Make sure your milk is warm, not hot, to activate the yeast properly.
    • For fluffier rolls, don’t skip the second rise!
    • Use fresh blueberries to enhance the flavor and avoid mushiness.
    • If you’re short on time, consider preparing the dough the night before.
    • Adjust the glaze consistency to your preference with milk; it’s all about balance!

    Equipment Needed

    • Mixing bowls: Use glass or stainless steel for easy cleanup.
    • Measuring cups and spoons: Essential to ensure accuracy in your ingredients.
    • Rolling pin: A sturdy alternative could be a wine bottle if needed.
    • Baking dish: A 9×13-inch glass or metal dish works perfectly.
    • Kitchen towel: To cover the dough while it rises—any clean towel will do!

    Variations

    • For a citrus twist, add the zest of one lemon or orange to the dough for a refreshing flavor.
    • Consider swapping out blueberries for raspberries or chopped strawberries for a seasonal change.
    • If you’re looking for a healthier option, use whole wheat flour instead of all-purpose flour.
    • For a plant-based version, substitute the butter and cream cheese with vegan alternatives.
    • Add chopped nuts, like walnuts or pecans, to the filling for a delightful crunch and texture.

    Serving Suggestions

    • Pair your Blueberry Cinnamon Rolls with a side of crispy bacon for a savory touch.
    • A fresh fruit salad adds a refreshing balance and vibrant colors to your brunch spread.
    • Serve warm with a steaming cup of coffee or herbal tea to enhance the cozy experience.
    • For a beautiful presentation, dust with a sprinkle of powdered sugar before serving.

    FAQs about Blueberry Cinnamon Rolls

    Can I make Blueberry Cinnamon Rolls ahead of time?

    Yes! You can prepare the dough the night before and place it in the refrigerator. Just make sure to let it come to room temperature before rolling out in the morning.

    What kind of blueberries should I use?

    Fresh blueberries are the best option, as they burst with flavor and hold their shape nicely during baking. If fresh aren’t available, frozen can work, but be sure to thaw and drain them first!

    How do I store leftover rolls?

    Once cooled, store these Blueberry Cinnamon Rolls in an airtight container at room temperature for up to 3 days. You can warm them in the microwave for a few seconds to enjoy them again!

    Can I make these rolls gluten-free?

    Absolutely! Substitute all-purpose flour with a gluten-free all-purpose blend. Make sure it contains xanthan gum for the best texture in your rolls!

    How can I adjust the sweetness of the glaze?

    If you prefer a less sweet glaze, simply reduce the amount of powdered sugar. You can start with half the amount and adjust to your taste, adding more as needed!

    Final Thoughts

    There’s something truly special about baking Blueberry Cinnamon Rolls. The delightful aroma fills your home, wrapping everyone in a warm embrace. As you take that first bite, the sweetness of the blueberries combined with the warm, spiced dough creates a moment of pure bliss. It’s an experience that brings family together, whether it’s a weekend brunch or a cozy night in. I hope this recipe inspires you to create joyful memories in your kitchen, reminding you that delicious treats can be made with love and a sprinkle of fun. Enjoy every gooey, sweet moment!


    Print

    clock clock iconcutlery cutlery iconflag flag iconfolder folder iconinstagram instagram iconpinterest pinterest iconfacebook facebook iconprint print iconsquares squares iconheart heart iconheart solid heart solid icon

    Description

    Delicious and fluffy blueberry cinnamon rolls topped with a creamy glaze, perfect for breakfast or dessert.


    • 2 ¼ teaspoons active dry yeast (1 packet)
    • ½ cup warm milk (110°F)
    • ¼ cup granulated sugar
    • 2 large eggs
    • ½ cup unsalted butter, softened
    • 4 cups all-purpose flour
    • 1 teaspoon salt
    • ½ teaspoon vanilla extract
    • ½ cup unsalted butter, softened (for filling)
    • ¾ cup brown sugar, packed
    • 2 tablespoons ground cinnamon
    • 1 cup fresh blueberries
    • 4 oz cream cheese, softened
    • 1 cup powdered sugar
    • 1 teaspoon vanilla extract (for glaze)
    • 23 tablespoons milk (to adjust consistency)

    1. In a small bowl, combine warm milk, granulated sugar, and yeast. Stir to dissolve and let sit for 5-10 minutes until foamy.
    2. In a large bowl, combine flour, salt, eggs, softened butter, and vanilla extract. Pour in the yeast mixture and stir to combine.
    3. Turn the dough onto a floured surface and knead for 5-7 minutes, until smooth and elastic.
    4. Place the dough in a greased bowl, cover with a damp cloth, and let it rise in a warm spot for 1 hour, or until doubled in size.
    5. Mix together softened butter, brown sugar, and ground cinnamon in a small bowl until smooth and well combined for the filling.
    6. Gently fold in fresh blueberries into the cinnamon-sugar mixture.
    7. After the dough has risen, punch it down and roll it out into a large rectangle, about 16×12 inches.
    8. Evenly spread the cinnamon filling over the rolled-out dough, leaving a small border on the edges.
    9. Starting from the longer side, roll the dough into a tight log and slice it into 12 equal pieces.
    10. Place the sliced rolls into a greased 9×13-inch baking dish, cover with a cloth, and let them rise for 30 minutes, or until puffy and slightly touching.
    11. Preheat the oven to 350°F (175°C).
    12. Bake the rolls for 20-25 minutes, or until golden brown on top.
    13. Let the rolls cool in the pan for 10 minutes before glazing.
    14. In a medium bowl, beat cream cheese until smooth. Add powdered sugar, vanilla extract, and 2 tablespoons of milk, and mix until smooth and pourable. Add more milk if needed to reach desired consistency.
    15. Drizzle the cream cheese glaze over the warm rolls and serve while warm.

    Notes

    • Use fresh blueberries for best results.
    • Ensure the milk is warm but not hot to properly activate the yeast.
    • Adjust the consistency of the glaze by adding more or less milk.
    • Prep Time: 30 minutes
    • Cook Time: 25 minutes
    • Category: Breakfast/Dessert
    • Method: Baking
    • Cuisine: American

    Nutrition

    • Serving Size: 1 roll
    • Calories: 250
    • Sugar: 15g
    • Sodium: 200mg
    • Fat: 10g
    • Saturated Fat: 6g
    • Unsaturated Fat: 2g
    • Trans Fat: 0g
    • Carbohydrates: 38g
    • Fiber: 1g
    • Protein: 4g
    • Cholesterol: 50mg

    Sharing is caring!

  • Cheesy garlic butter rollups

    Cheesy garlic butter rollups


    Introduction to Cheesy Garlic Butter Rollups

    Life gets busy, doesn’t it? Between juggling work, kids, and everything in between, I know how challenging it can be to whip up something tasty. That’s where these cheesy garlic butter rollups come in! They’re a delightful, easy snack or appetizer that can impress anyone without demanding hours of your time. Just imagine the warm, gooey cheese, enveloped in buttery garlic goodness, melting in your mouth. They’re great for a quick family snack or a party pleaser. Trust me; your loved ones will rave about them!

    Why You’ll Love This Cheesy Garlic Butter Rollups

    These cheesy garlic butter rollups are the ultimate crowd-pleaser. They’re quick to prepare and surprisingly simple, making them perfect for those busy weeknights or impromptu gatherings. The warm, melted cheese paired with a rich garlic butter blend creates a flavor explosion that’s hard to resist. Plus, kids adore them, and let’s face it – any parent will love a meal that brings joy to the table!

    Ingredients for Cheesy Garlic Butter Rollups

    Gathering the right ingredients is half the fun! Here’s what you’ll need to whip up these delicious cheesy garlic butter rollups:

    • White or whole wheat sandwich bread: Choose your favorite type for rolling. Removing the crusts helps achieve that tidy, tender bite.
    • Shredded mozzarella cheese: This creamy cheese melts beautifully and adds that ooey-gooey texture we all love.
    • Shredded cheddar cheese: Pot for sharp for an extra flavor kick, or mild for a subtle taste that blends well.
    • Grated Parmesan cheese (optional): A sprinkle of this adds a nutty note for a gourmet twist.
    • Unsalted butter: Melted and infused with garlic, this is the magic glue that brings everything together.
    • Minced garlic: Fresh garlic works wonders for flavor depth, adding savory notes that make these rollups irresistible.
    • Garlic powder: A boost of garlicky goodness that complements the fresh garlic perfectly.
    • Chopped fresh parsley or dried parsley: Adding a hint of freshness and color, it makes these rollups pop!
    • Salt: Just a pinch to enhance all the cheesy flavors.
    • Optional dipping sauces: Marinara sauce, garlic herb sauce, ranch dressing, or spicy ketchup are all delicious choices for dunking!

    For exact measurements, don’t forget to check the bottom of the article where you can print them out. Happy cooking!

    How to Make Cheesy Garlic Butter Rollups

    Prepare Your Oven and Baking Sheet

    Preheat and prepare

    First things first, preheat your oven to 375°F. This step ensures that your cheesy garlic butter rollups bake evenly. While that’s heating up, line a baking sheet with parchment paper or a silicone baking mat. This simple preparation makes cleanup a breeze!

    Flatten the Bread

    Roll for optimal texture

    Next, grab your rolling pin. Gently flatten each slice of bread until it’s thin and even. This is a crucial step for achieving that tender, crispy texture when baking. Plus, it helps with rolling, giving you a beautifully compact rollup!

    Add the Cheddar and Mozzarella

    Fill and roll carefully

    Now, let’s get cheesy! Distribute the mozzarella and cheddar cheese evenly along the lower third of each slice. Starting from the cheese-covered edge, roll each slice up tightly, creating a compact log. If you notice any openings at the edges, seal them with a smear of melted butter. This ensures those cheesy dreams stay wrapped up tightly!

    Create the Garlic Butter Mixture

    Blend for flavor

    In a small bowl, it’s time to whip up your garlic butter mixture. Combine melted butter, minced garlic, garlic powder, parsley, and a pinch of salt. Make sure to mix it well so that the garlic flavors the butter thoroughly. This aromatic blend is what makes these rollups irresistible, filling your kitchen with heavenly scents!

    Brush the Rollups

    Apply generously

    Time for the flavorful coating! Place the rollups seam-side down on your prepared baking sheet. Generously brush each rollup with the aromatic garlic butter mixture. You want every bit of that flavor to soak into the rolls, bringing them to life with rich, buttery goodness.

    Bake to Perfection

    Cooking time and temperature

    Now, pop those tasty rollups into the oven! Bake for 12 to 15 minutes or until they’re golden brown and crisp. If you prefer using an air fryer, set it to 360°F and cook for 8 to 10 minutes, turning halfway. Either way, you’ll be rewarded with bubbling cheese and a crispy exterior.

    Serve Warm

    Dipping options

    Finally, let the rollups cool for just a minute before serving. Trust me, you don’t want to burn your tongue on that molten cheese! Pair them with your favorite dipping sauces—marinara, garlic herb sauce, ranch dressing, or spicy ketchup are all fantastic options. Enjoy your cheesy garlic butter rollups warm and watch them disappear!

    Tips for Success

    • Roll the bread tightly to avoid gaps while baking.
    • Experiment with various cheeses for unique flavors.
    • If your garlic isn’t strong enough, add more minced garlic!
    • Brush the rollups with extra melted butter for a richer taste.
    • Let them cool slightly before serving to enjoy the cheesy goodness without scorching your palate!

    Equipment Needed

    • Baking sheet: A regular sheet works, but parchment makes cleanup easy.
    • Rolling pin: No rolling pin? A sturdy glass will do the trick!
    • Small bowl: Use any bowl for mixing the garlic butter.
    • Brush: A pastry brush is ideal, but you can use a spoon too.
    • Oven or air fryer: Either gadget will yield deliciously crispy rollups!

    Variations on Cheesy Garlic Butter Rollups

    • Spicy Kick: Add some crushed red pepper flakes to the garlic butter mixture for a zesty punch.
    • Herbed Delight: Mix in dried Italian herbs like oregano and basil for an aromatic twist.
    • Veggie Loaded: Incorporate finely chopped spinach, sundried tomatoes, or bell peppers inside for extra nutrients.
    • Cheesy Jalapeño: Add diced jalapeños to the cheese mixture for a spicy flare that cheese lovers will adore.
    • Gluten-Free Option: Use gluten-free bread for those needing a dietary alternative, ensuring everyone can enjoy!
    • Different Cheeses: Experiment with pepper jack, gouda, or feta for diverse cheese profiles!

    Serving Suggestions for Cheesy Garlic Butter Rollups

    • Serve your rollups alongside a fresh garden salad for a balanced meal.
    • Pair with a chilled glass of lemonade or iced tea for a refreshing touch.
    • Present them on a rustic wooden platter for an eye-catching display.
    • Add a sprinkle of fresh parsley or a drizzle of olive oil for extra flair.
    • Offer an assortment of dipping sauces to enhance flavors and choices.

    FAQs about Cheesy Garlic Butter Rollups

    Can I use different types of bread for rollups?
    Absolutely! While I love using white or whole wheat sandwich bread, you can experiment with sourdough, ciabatta, or even gluten-free bread for a delightful twist. Just remember to flatten the bread well for optimal rolling.

    What’s the best way to store leftovers?
    If you have any cheesy garlic butter rollups left, store them in an airtight container in the fridge for up to 2 days. To reheat, pop them back in the oven or air fryer for a few minutes to regain that crispiness.

    Can I make these rollups in advance?
    Yes, you can! Prepare the rollups up to the baking stage, then cover and refrigerate them for a few hours. When you’re ready, just brush with the garlic butter and bake. It’s a fantastic time-saver!

    What are some good dipping sauces for this recipe?
    You really can’t go wrong with dipping sauces! Marinara sauce, garlic herb sauce, ranch dressing, or even spicy ketchup make fantastic partners for these rollups. Try different sauces to elevate your snacking experience!

    How can I make this recipe vegan?
    To create a vegan version, simply swap the cheeses for plant-based options and use vegan butter. You’ll still get that delightful garlic flavor, and your vegan friends will thank you!

    Final Thoughts

    Making these cheesy garlic butter rollups feels like a small culinary adventure. From the moment you flatten the bread to the minute you pop them in the oven, your kitchen transforms into a paradise of garlic and cheese aromas. When you finally serve them warm, it’s pure joy seeing your family’s faces light up. They’re not just appetizers; they’re little bites of happiness that unite everyone at the table. So, embrace this delightful recipe, gather your loved ones, and enjoy the cheesy goodness together. Every rollup is a celebration—let’s dig in!


    Print

    clock clock iconcutlery cutlery iconflag flag iconfolder folder iconinstagram instagram iconpinterest pinterest iconfacebook facebook iconprint print iconsquares squares iconheart heart iconheart solid heart solid icon

    Description

    Delicious cheesy garlic butter rollups that are perfect as an appetizer or snack.


    • 8 slices white or whole wheat sandwich bread, crusts removed
    • 1 cup shredded mozzarella cheese
    • 1/2 cup shredded cheddar cheese
    • 2 tablespoons grated Parmesan cheese, optional
    • 4 tablespoons unsalted butter, melted
    • 2 cloves garlic, minced
    • 1/2 teaspoon garlic powder
    • 1 tablespoon chopped fresh parsley or 1 teaspoon dried parsley
    • 1/4 teaspoon salt
    • Marinara sauce (optional)
    • Garlic herb sauce (optional)
    • Ranch dressing (optional)
    • Spicy ketchup (optional)

    1. Preheat oven to 375°F. Line a baking sheet with parchment paper or a silicone baking mat and set aside.
    2. Gently flatten each bread slice using a rolling pin until thin and even for optimal rolling and crispiness.
    3. Distribute mozzarella and cheddar cheese evenly along the lower third of each bread slice. Starting at the cheese-covered edge, roll up each slice tightly to form a compact log. Seal the edges with a small amount of melted butter if needed.
    4. In a small bowl, mix melted butter, minced garlic, garlic powder, parsley, and salt, ensuring the butter is thoroughly infused with aromatics.
    5. Set rollups seam-side down on the prepared baking sheet. Generously brush each rollup with garlic butter mixture.
    6. Bake for 12 to 15 minutes or until rollups are golden brown and crisp. For air fryer preparation, cook at 360°F for 8 to 10 minutes, turning halfway through.
    7. Let rollups cool briefly before serving. Accompany with a selection of dipping sauces for enhanced flavor.

    Notes

    • Make sure to roll the bread tightly to prevent opening during baking.
    • Experiment with different cheeses for varying flavors.
    • Adjust garlic amount based on personal preference.
    • Prep Time: 15 minutes
    • Cook Time: 15 minutes
    • Category: Appetizer
    • Method: Baking
    • Cuisine: American

    Nutrition

    • Serving Size: 1 rollup
    • Calories: 150
    • Sugar: 1g
    • Sodium: 200mg
    • Fat: 9g
    • Saturated Fat: 5g
    • Unsaturated Fat: 3g
    • Trans Fat: 0g
    • Carbohydrates: 14g
    • Fiber: 1g
    • Protein: 6g
    • Cholesterol: 25mg

    Sharing is caring!

  • Brussels Sprouts Ground Turkey Skillet

    Brussels Sprouts Ground Turkey Skillet


    Introduction to Brussels Sprouts Ground Turkey Skillet

    Hi there! If you’re like me, balancing family, work, and a million little details can often feel like a juggling act. That’s why I’m excited to share my Brussels Sprouts Ground Turkey Skillet with you. This dish is the perfect quick solution for busy days—whipping up in just 25 minutes!

    Not only is it simple and time-efficient, but it also brings a delightful mix of flavors to your table. Imagine impressing your loved ones with a nutritious and delicious meal that keeps everyone satisfied. Let’s dive in and get cooking!

    Why You’ll Love This Brussels Sprouts Ground Turkey Skillet

    You’ll adore this Brussels Sprouts Ground Turkey Skillet because it checks all the boxes for a busy lifestyle. In just 25 minutes, you can whip up a hearty meal that’s bursting with flavors and nutrients. It’s easy to customize—perfect for picky eaters or those seeking something a bit different. Plus, you get the satisfaction of serving a dish that not only pleases the palate but also supports a healthy diet!

    Ingredients for Brussels Sprouts Ground Turkey Skillet

    Let’s talk about the magic ingredients in this Brussels Sprouts Ground Turkey Skillet. Each one plays a special role in creating a flavor-packed dish that’s super satisfying!

    • Ground Turkey: Lean and versatile, ground turkey adds protein and keeps the dish hearty without excess fat.
    • Brussels Sprouts: These little green gems are not just adorable; they’re packed with vitamins and add a lovely crunch when cooked.
    • Olive Oil: A staple in cooking, it brings richness and helps sauté the veggies perfectly.
    • Onion: Diced onions provide a sweet aroma and enhance the overall flavor profile when sautéed.
    • Garlic: A few cloves of minced garlic elevate any dish with their irresistible, fragrant goodness.
    • Salt and Black Pepper: Essential seasoning that brings all the flavors together. Adjust to your taste!
    • Red Pepper Flakes (optional): For those who like a kick, adding red pepper flakes will give the dish an exciting heat.
    • Chicken Broth: This adds moisture and depth, ensuring that the Brussels sprouts cook beautifully and soak up flavor.
    • Lemon Juice: A splash at the end brightens everything up and adds a zesty finish!

    You’ll find the exact quantities for each ingredient at the bottom of the article, where you can easily print the recipe. Feel free to substitute or add your favorite veggies to make this skillet dish uniquely yours!

    How to Make Brussels Sprouts Ground Turkey Skillet

    Ready to dive into the deliciousness? Making this Brussels Sprouts Ground Turkey Skillet is a breeze! Just follow these simple steps and enjoy the heartwarming goodness that fills your kitchen.

    Step 1: Heat the Olive Oil

    Start by placing a large skillet over medium heat. Pour in the olive oil and let it warm up. You’ll know it’s ready when it shimmers like a sunny day! This base will give your vegetables and turkey a lovely flavor.

    Step 2: Sauté the Onion and Garlic

    Once the oil is hot, toss in the diced onion. Sauté it for about 3-4 minutes until it becomes soft and translucent, which is a fancy way of saying it turns clear. Then, add the minced garlic. The aroma will instantly make your kitchen smell divine!

    Step 3: Brown the Ground Turkey

    It’s time to add the star of the show! Plop in the ground turkey and break it apart with your spatula. Cook it for about 5 minutes, or until it’s golden brown. Stir occasionally to ensure it cooks evenly. You want it to lose that pink color completely!

    Step 4: Add the Brussels Sprouts and Seasonings

    Next, introduce the halved Brussels sprouts to the skillet. Sprinkle the salt, black pepper, and red pepper flakes (if you’re feeling spicy). Give everything a good stir, combining the flavors that will meld beautifully.

    Step 5: Cook with Chicken Broth

    Now, pour in the chicken broth and give it another stir. Cover the skillet with a lid and let it steam for 5-7 minutes. Your Brussels sprouts will soften and soak up all those delicious flavors. Just check them occasionally to ensure they’re not overcooking!

    Step 6: Finish with Lemon Juice

    Finally, squeeze in that zesty lemon juice. This brightens the entire dish and lifts the flavors. Give it one last stir to combine, and you’re ready to serve this incredible Brussels Sprouts Ground Turkey Skillet to your family!

    Tips for Success

    • Prep your ingredients before cooking to streamline the process.
    • Don’t be shy with seasoning; taste and adjust as you go!
    • Add a splash of balsamic vinegar for extra depth.
    • If you have leftover veggies, toss them in for added nutrition.
    • For meal prep, make a larger batch and enjoy leftovers the next day!

    Equipment Needed

    • Large Skillet: Essential for even cooking. A non-stick skillet works wonders too!
    • Wooden Spoon or Spatula: Perfect for stirring and breaking up the turkey.
    • Lid for the Skillet: Any lid will do for steaming those Brussels sprouts!
    • Knife and Cutting Board: Handy for chopping veggies with ease.

    Variations

    • Swap the Protein: Try using ground chicken or beef instead of turkey for a different flavor profile.
    • Vegan Option: Substitute ground turkey with crumbled tempeh or a plant-based meat alternative to create a delicious vegan skillet.
    • Different Greens: If Brussels sprouts aren’t your thing, feel free to use broccoli, spinach, or kale for a fresh twist.
    • Add Nuts: Toss in some toasted walnuts or pine nuts for a crunchy texture and healthy fats.
    • Spice it Up: Experiment with different spices like cumin, paprika, or curry powder to customize the flavor.

    Serving Suggestions

    • Pair your Brussels Sprouts Ground Turkey Skillet with a side of brown rice or quinoa for added fiber.
    • A crisp green salad with a light vinaigrette complements the dish beautifully.
    • For a refreshing drink, serve iced lemon water or a light white wine.
    • Garnish with fresh parsley or a sprinkle of parmesan cheese for a touch of elegance!

    FAQs about Brussels Sprouts Ground Turkey Skillet

    Can I make this dish ahead of time?
    Absolutely! You can prepare the Brussels Sprouts Ground Turkey Skillet in advance. Just store it in an airtight container in the fridge for up to three days. Reheat it on the stove over low heat for the best flavor!

    How do I store leftovers?
    Leftovers can be refrigerated in a sealed container for up to three days. Reheating in a skillet with a splash of broth keeps the dish moist and flavorful!

    Can I use frozen Brussels sprouts?
    Yes, you can use frozen Brussels sprouts! Just remember to adjust the cooking time slightly, as they may release more moisture when they thaw.

    What can I serve this skillet with?
    This Brussels Sprouts Ground Turkey Skillet is fantastic with brown rice, quinoa, or even a warm piece of crusty bread. It’s versatile and fits wonderfully into many meal options!

    Is this recipe suitable for meal prepping?
    Definitely! This skillet dish holds up well in meal prep. It’s hearty and nutritious—perfect for busy weekdays when you need quick, healthy meals at the ready.

    Final Thoughts

    Cooking this Brussels Sprouts Ground Turkey Skillet is more than just a meal; it’s an experience that warms the heart. With every sizzle and stir, you’ll create memories in the kitchen that you can share with your loved ones. The delightful blend of flavors and textures transforms a simple weeknight dinner into a comforting family feast. Plus, knowing you’ve served a nutritious dish that even picky eaters might love adds an extra layer of joy. So, grab your skillet and let’s bring some delicious moments to the table together!


    Print

    clock clock iconcutlery cutlery iconflag flag iconfolder folder iconinstagram instagram iconpinterest pinterest iconfacebook facebook iconprint print iconsquares squares iconheart heart iconheart solid heart solid icon

    Description

    A quick and delicious skillet dish made with ground turkey and fresh Brussels sprouts.


    • 1 lb ground turkey
    • 2 cups Brussels sprouts, halved
    • 1 tablespoon olive oil
    • 1 onion, diced
    • 2 cloves garlic, minced
    • 1 teaspoon salt
    • 1/2 teaspoon black pepper
    • 1/2 teaspoon red pepper flakes (optional)
    • 1/4 cup chicken broth
    • 1 tablespoon lemon juice

    1. Heat olive oil in a large skillet over medium heat.
    2. Add diced onion and minced garlic, sauté until translucent.
    3. Add ground turkey, cook until browned.
    4. Stir in halved Brussels sprouts, salt, pepper, and red pepper flakes.
    5. Add chicken broth, cover, and cook for 5-7 minutes until Brussels sprouts are tender.
    6. Stir in lemon juice before serving.

    Notes

    • Adjust seasoning to taste.
    • Can add more vegetables if desired.
    • Prep Time: 10 minutes
    • Cook Time: 15 minutes
    • Category: Dinner
    • Method: Skillet
    • Cuisine: American

    Nutrition

    • Serving Size: 1 serving
    • Calories: 320
    • Sugar: 2g
    • Sodium: 600mg
    • Fat: 15g
    • Saturated Fat: 3g
    • Unsaturated Fat: 10g
    • Trans Fat: 0g
    • Carbohydrates: 18g
    • Fiber: 5g
    • Protein: 30g
    • Cholesterol: 100mg

    Sharing is caring!

  • Garlic Parmesan Mushrooms

    Garlic Parmesan Mushrooms


    Introduction to Garlic Parmesan Mushrooms

    Welcome, fellow food lovers! Today, I’m thrilled to share one of my absolute favorite recipes: Garlic Parmesan Mushrooms. This dish is a creamy delight that can transform any ordinary meal into something spectacular. As a busy mom myself, I know the struggle of juggling countless tasks while trying to whip up something delicious. These Garlic Parmesan Mushrooms are not only quick to prepare, but they also impress anyone at your dinner table. Trust me, whether it’s a weeknight dinner or a special gathering, this recipe is your secret weapon for culinary success!

    Why You’ll Love This Garlic Parmesan Mushrooms

    You’re going to love Garlic Parmesan Mushrooms for so many reasons! First off, they’re incredibly easy to whip up, making them perfect for those hectic weeknights. In just 25 minutes, you can savor tender mushrooms enveloped in a creamy, cheesy sauce that dances on your taste buds. Plus, they’re versatile—whether as a side dish or over pasta, they elevate any meal and leave everyone asking for seconds!

    Ingredients for Garlic Parmesan Mushrooms

    To create your own heavenly Garlic Parmesan Mushrooms, you’ll need a handful of simple yet flavorful ingredients. Each one plays a vital role in bringing this dish to life. Here’s what you’ll need:

    • Unsalted butter: It adds richness and a nice golden sear. You can also use salted butter, but keep in mind it may alter the final flavor.
    • Olive oil: This heart-healthy oil helps to sauté the mushrooms perfectly, giving them a beautiful color and flavor. Feel free to substitute it with any vegetable oil if needed.
    • Minced garlic: Fresh garlic is a must! It gives the dish its aromatic punch. Garlic powder can be a quick alternative in a pinch.
    • Whole white mushrooms: These are the stars of the dish! Make sure they’re washed and dried thoroughly. Baby bell mushrooms also work wonderfully for a richer flavor.
    • Cream cheese: This creamy component adds lusciousness to the sauce. If you’re looking for a lighter option, you might consider using a low-fat cream cheese.
    • Parmesan cheese: The nutty, salty essence of Parmesan elevates the dish. For those who prefer a dairy-free option, nutritional yeast can be a delightful substitute.
    • Heavy cream: It gives the sauce its creamy consistency. For a lightened version, you can swap it with half-and-half, though the flavor will be slightly different.
    • Italian seasoning: A blend of dried herbs that adds a Mediterranean flair. If you don’t have it, a mix of dried basil, oregano, and thyme can suffice.
    • Dry ground oregano: This herb complements the mushrooms beautifully. Feel free to use fresh if you have it—it packs a more vibrant punch!
    • Salt and ground black pepper: These basic seasonings bring everything together. Adjust according to your taste preference.
    • Fresh chopped parsley: A sprinkle at the end adds a pop of color and freshness. If you’re out of fresh herbs, dried parsley can do the trick, but fresh is always better!

    For exact measurements and a printable format, please refer to the bottom of the article!

    How to Make Garlic Parmesan Mushrooms

    Making Garlic Parmesan Mushrooms is simple, and the process is just as delightful as the final dish. Let’s break it down step by step. With each step, remember to enjoy the aromas and the journey of flavors that’ll soon grace your table!

    Step 1: Sauté the Base Ingredients

    Start by heating a large 12-inch frying pan over medium-high heat. Add the unsalted butter and olive oil, letting them melt together. The combination of these fats creates a deliciously rich base. Then, toss in the minced garlic and whole white mushrooms. As they cook, keep stirring! You want your mushrooms to become tender and lightly browned, which should take about five minutes. This step is key; it’s where the magic begins!

    Step 2: Incorporate Cream Cheese

    Next, lower the heat to medium. It’s time for the cream cheese! Add the small cubes into the pan, stirring gently to combine. As it melts, it’ll create a luscious, creamy layer that envelops everything. This is what gives your Garlic Parmesan Mushrooms that irresistible texture. Just be patient and allow it to blend beautifully into the mixture.

    Step 3: Build the Flavor

    Now, it’s time to elevate those flavors! Reduce the heat to medium-low. Add in the Parmesan cheese, heavy cream, Italian seasoning, ground oregano, salt, and pepper. Mixing everything well will enhance that creamy goodness with a complex taste. Allow the mixture to simmer for about five minutes, ensuring that you stir it often. This step is crucial for letting all those flavors meld together—the richness of the cheese paired with the earthy notes of the mushrooms is simply divine!

    Step 4: Simmer and Serve

    Finally, once everything has simmered nicely, remove the pan from the heat. This is where you add those final touches! Sprinkle the fresh chopped parsley on top, bringing a burst of color and freshness to your dish. Don’t be shy—serve these Garlic Parmesan Mushrooms warm, either as a side or over pasta. Just imagine the smiles as everyone digs in. Enjoy every creamy bite!

    Tips for Success

    • Always wash and dry the mushrooms thoroughly to prevent excess moisture.
    • Adjust the seasoning to your taste; don’t be afraid to experiment!
    • For a lighter dish, use low-fat cream cheese and reduce the heavy cream.
    • Make sure your garlic is fresh for maximum flavor.
    • Garnish with parsley right before serving for that fresh pop of color.

    Equipment Needed

    • 12-inch frying pan: A wide skillet helps cook the mushrooms evenly. If you don’t have one, a regular sauté pan will do.
    • Spatula: A sturdy spatula is essential for stirring. Use a wooden or silicone one to prevent scratching.
    • Measuring cups: Handy for precise measurements if needed. You can eyeball it for a more relaxed cooking experience!

    Variations of Garlic Parmesan Mushrooms

    • Spinach Addition: Stir in fresh spinach once you’ve added the cream cheese. It wilts beautifully and adds a nutritional boost!
    • Spicy Kick: For those who love a bit of heat, add a dash of red pepper flakes while sautéing the garlic. It brings delightful warmth to the dish!
    • Mushroom Medley: Combine different types of mushrooms, like shiitake or cremini, for a more complex flavor profile. Each variety adds its own unique taste.
    • Vegan Option: Substitute cream cheese and Parmesan with cashew cream and nutritional yeast. You’ll still savor that creaminess while keeping it plant-based.
    • Herb Variations: Experiment with fresh herbs like thyme or rosemary instead of parsley. They’ll add gorgeous aromas and elevate the overall taste.

    Serving Suggestions for Garlic Parmesan Mushrooms

    • Pasta: Serve over your favorite pasta for a hearty meal. The creamy sauce clings beautifully to noodles.
    • Green Salad: Pair with a fresh green salad for a light yet satisfying dinner.
    • Wine: Enjoy with a glass of white wine, like Pinot Grigio, to enhance the flavors.
    • Presentation: Garnish with additional parsley for a pop of vibrant color on your plate.
    • Crusty Bread: Serve with crusty bread for perfect dipping into the creamy goodness!

    FAQs about Garlic Parmesan Mushrooms

    As you embark on your culinary adventure with Garlic Parmesan Mushrooms, you may have some questions. Here are a few common inquiries that might pop up, along with my insights to guide you through this cheesy delight!

    Can I use frozen mushrooms for this recipe?

    While fresh mushrooms offer the best flavor and texture, you can use frozen ones in a pinch. Just be sure to thaw and drain them well before cooking, as frozen mushrooms can release extra moisture.

    Is this dish suitable for meal prep?

    Absolutely! Garlic Parmesan Mushrooms actually taste even better the next day. Prepare them in advance and store in an airtight container in the refrigerator. Reheat on the stove over low heat, adding a splash of cream if needed to restore creaminess.

    Can I make this dish dairy-free?

    Yes! For a dairy-free version, substitute cream cheese and Parmesan cheese with cashew cream and nutritional yeast. It still offers that satisfying creaminess, minus the dairy!

    What can I pair with Garlic Parmesan Mushrooms?

    This dish is incredibly versatile. Pair it with grilled chicken, steak, or roasted vegetables for a delightful meal. It also shines as a side dish to almost any main course!

    Can I double the recipe?

    Of course! This recipe is easily doubled. Just ensure you have a larger pan to accommodate the mushrooms and adjust cooking times slightly as needed. Enjoy this creamy goodness in larger portions!

    Final Thoughts

    Cooking Garlic Parmesan Mushrooms is more than just preparing a dish; it’s an experience filled with warmth and joy. As the rich flavors meld together, you’ll find yourself enveloped in comfort—both in the kitchen and at the dinner table. This recipe is a trusty companion for busy evenings and elegant gatherings alike. With each creamy bite, you’ll be reminded of the simple pleasures in life. Sharing this dish with family and friends creates memories worth savoring. So, roll up your sleeves, embrace the joy of cooking, and let these mushrooms transport you to a delightful culinary adventure!


    Print

    clock clock iconcutlery cutlery iconflag flag iconfolder folder iconinstagram instagram iconpinterest pinterest iconfacebook facebook iconprint print iconsquares squares iconheart heart iconheart solid heart solid icon

    Description

    A creamy and savory dish featuring tender mushrooms sautéed in garlic and rich parmesan cheese.


    • 2 tbsp unsalted butter
    • 1 tbsp olive oil
    • 2 tsp garlic minced
    • 1 ¾ cups whole white mushrooms washed and dried
    • ¼ cup cream cheese cut into small cubes
    • ½ cup Parmesan cheese
    • ½ cup heavy cream
    • 1 tbsp Italian seasoning
    • ½ tsp dry ground oregano
    • ½ tsp salt
    • ½ tsp ground black pepper
    • ½ tbsp fresh chipped parsley

    1. In a large 12 inch frying pan, cook together butter, olive oil, garlic, and mushrooms over medium-high heat until mushrooms are tender, about five minutes.
    2. Reduce heat to medium and add in cream cheese, cooking until it has melted.
    3. Lower the heat to medium-low and add in Parmesan cheese, heavy cream, Italian seasoning, oregano, salt, and pepper.
    4. Simmer for five minutes, stirring often. Remove from heat and sprinkle with parsley before serving.

    Notes

    • Make sure to wash and dry the mushrooms thoroughly to avoid excess water in the dish.
    • Adjust seasoning according to taste preference.
    • Serve warm as a side or over pasta for a complete meal.
    • Prep Time: 10 minutes
    • Cook Time: 15 minutes
    • Category: Side Dish
    • Method: Sauté
    • Cuisine: Italian

    Nutrition

    • Serving Size: 1 serving
    • Calories: 250
    • Sugar: 2g
    • Sodium: 450mg
    • Fat: 20g
    • Saturated Fat: 10g
    • Unsaturated Fat: 8g
    • Trans Fat: 0g
    • Carbohydrates: 8g
    • Fiber: 1g
    • Protein: 8g
    • Cholesterol: 40mg

    Sharing is caring!