Author: IHAAL Team

  • Beef and Broccoli Ramen Stir Fry

    Beef and Broccoli Ramen Stir Fry


    Introduction to Beef and Broccoli Ramen Stir Fry

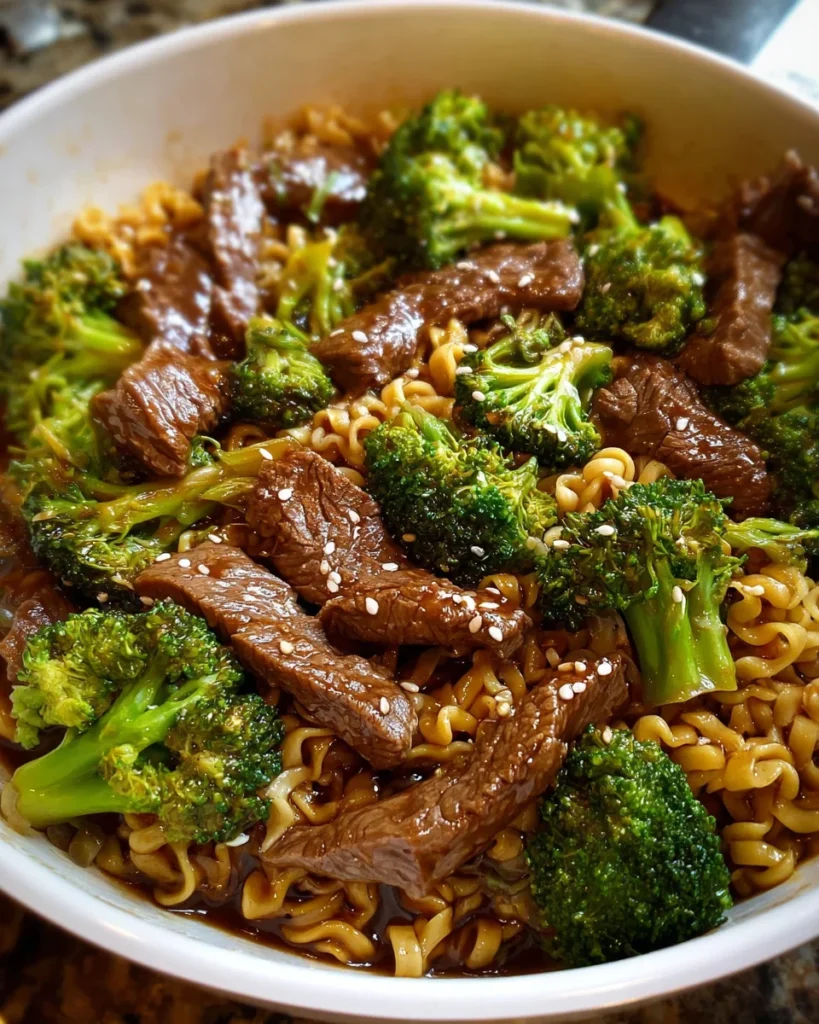
    As a busy mom myself, I know how precious every minute can be in the kitchen. That’s why I’m excited to share this Beef and Broccoli Ramen Stir Fry! It’s not just a meal; it’s your quick solution for a hectic day. Imagine tender beef, vibrant broccoli, and cozy ramen noodles all combined in one bowl. Whether you’re trying to impress guests or just feeding your family, this dish is as delicious as it is easy. With simple ingredients and quick steps, you can whip up something that feels special without breaking a sweat!

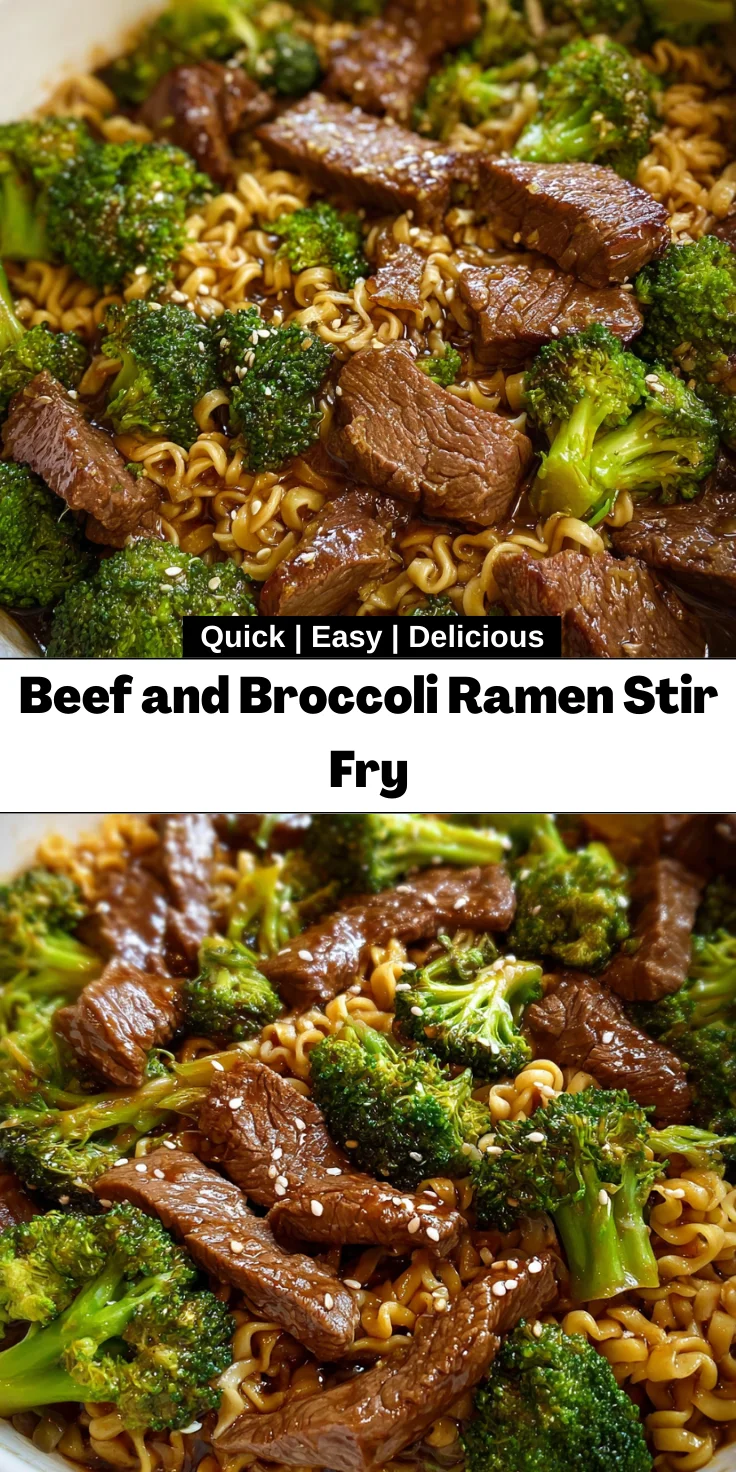
    Why You’ll Love This Beef and Broccoli Ramen Stir Fry

    This Beef and Broccoli Ramen Stir Fry is the perfect blend of ease and flavor. In just 25 minutes, you can serve up a hearty meal that tastes like it’s straight from a restaurant. It brings together tender beef, crunchy broccoli, and delicious noodles in a savory sauce that your family will adore. Plus, it’s a customizable dish, making it ideal for picky eaters!

    Ingredients for Beef and Broccoli Ramen Stir Fry

    Gathering the right ingredients is the first step to your culinary adventure! Here’s what you’ll need for this delicious Beef and Broccoli Ramen Stir Fry:

    • Low-Sodium Soy Sauce: This gives your dish a savory depth without being overly salty, perfect for balancing flavors.
    • Sirloin Steak: I love sirloin for its tenderness. It cooks quickly, making it ideal for stir fry. You can also opt for chicken or tofu if you prefer.
    • Fresh Broccoli Florets: These little green trees add not just color but crunch! Plus, they’re packed with nutrients, making them a great choice.
    • Ramen Noodles: These quick-cooking noodles are your base. They soak up the sauce beautifully, delivering every last bit of flavor to your plate.
    • Hoisin Sauce: This sweet and savory sauce adds a unique twist, reminiscent of your favorite takeout. A must-have for that authentic flavor!
    • Honey: Adds just the right amount of sweetness. You can adjust the amount based on your preference, making it as sweet or savory as you like.
    • Sesame Oil: A few drops of this fragrant oil add a delightful aroma and nutty flavor that brings everything together.

    Remember, ingredients with exact quantities can be found at the bottom of the article for your convenience. Feel free to get creative and substitute ingredients based on what you have on hand! This recipe is meant to be flexible and fun.

    How to Make Beef and Broccoli Ramen Stir Fry

    Now that you have all the ingredients laid out, it’s time to dive into the cooking process! Follow these simple steps, and you’ll soon be enjoying your homemade Beef and Broccoli Ramen Stir Fry.

    Step 1: Prepare the Sauce

    Start by whisking together the low-sodium soy sauce and cornstarch in a medium bowl. This combination is key to creating a thick, luscious sauce.

    Next, add the beef broth, honey, hoisin sauce, rice vinegar, minced garlic, finely grated ginger, and a sprinkle of red pepper flakes.

    Mix everything well and set the sauce aside. Letting it sit for a minute allows the flavors to meld perfectly!

    Step 2: Cook the Ramen Noodles

    Bring a large pot of water to a boil, and drop in the ramen noodles. Cook them for just 2 to 3 minutes—the goal is to keep them slightly firm since they’ll cook more later.

    Once done, drain and toss the noodles with sesame oil. This adds flavor while preventing them from sticking together. Trust me; it makes a difference!

    Step 3: Sear the Beef

    Heat a nonstick skillet over medium-high heat, then add your seasoned sirloin steak strips. Allow them to sizzle for about 5 minutes until they turn a beautiful brown.

    This step is crucial for developing flavor. If you like a little pink in the middle, take the beef off the heat as soon as it’s browned!

    Step 4: Steam the Broccoli

    In the same skillet, add a splash of olive oil and a couple of tablespoons of water to steam the fresh broccoli. Cover and steam for about 2 minutes.

    You want them bright green and crisp—not overly mushy. Letting them retain that crunch really elevates your Beef and Broccoli Ramen Stir Fry!

    Step 5: Combine All Ingredients

    Now it’s time for the fun part! Return the seared beef to the skillet along with those deliciously cooked ramen noodles.

    Pour in your prepared sauce, ensuring everything is coated evenly. Stir for another minute until everything is heated through. It’s like a flavor dance in your skillet!

    Step 6: Serve and Garnish

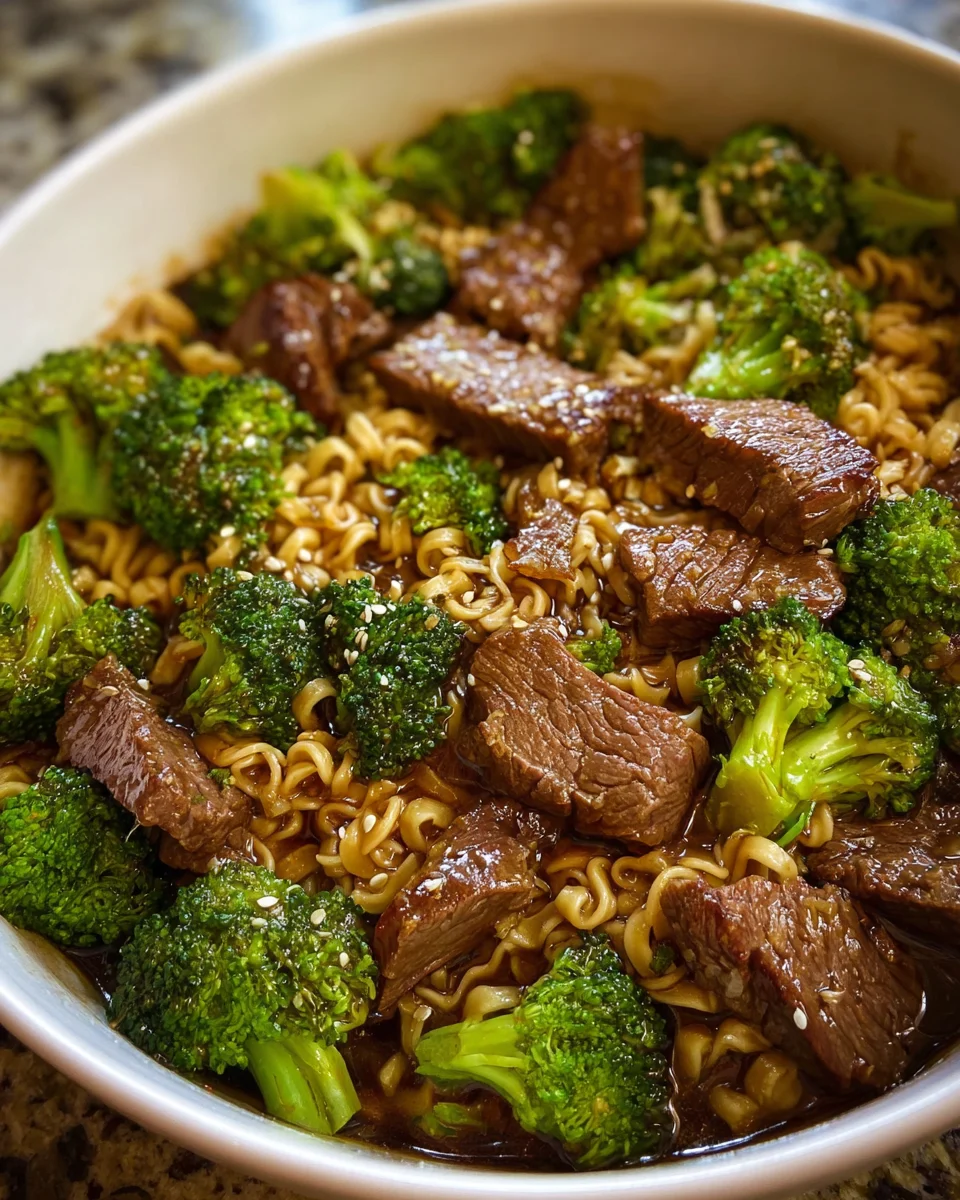
    Time to plate your masterpiece! Serve the Beef and Broccoli Ramen Stir Fry hot, garnished with sesame seeds for that extra pop of flavor.

    Consider adding some green onions as a garnish too. A sprinkle of freshness can take this dish to the next level!

    Tips for Success

    • Slice the beef thinly against the grain for maximum tenderness.
    • Prep all your ingredients before starting to cook; it saves time and stress!
    • Keep an eye on the broccoli while steaming. You want it bright green and crunchy.
    • If you like extra heat, adjust the red pepper flakes to your taste.
    • Make it a balanced meal by serving with a side of steamed rice.

    Equipment Needed

    • Nonstick Skillet: Perfect for stir-frying without sticking. If you don’t have one, a regular skillet will work too.
    • Medium Bowl: You’ll need this for mixing your sauce. A large mixing bowl will also do fine!
    • Pot: For boiling the ramen noodles, any medium-sized pot will suffice.
    • Whisk: Ideal for blending your sauce. A fork works as a great alternative!

    Variations on Beef and Broccoli Ramen Stir Fry

    • Chicken or Turkey: Swap out the sirloin for chicken or turkey for a lighter option. Both cook quickly and can soak up the sauce beautifully!
    • Tofu Twist: For a plant-based version, use firm tofu instead of beef. Just make sure to press the tofu well to remove excess moisture. It adds great texture!
    • Veggie Boost: Add more vegetables like bell peppers, snap peas, or carrots for extra color and nutrition. It makes your dish even more vibrant and satisfying.
    • Spicy Kick: If you’re craving heat, include sliced jalapeños or a dash of Sriracha. Spice it up based on your personal preference!
    • Gluten-Free Version: Use gluten-free ramen noodles or substitute with rice noodles for a gluten-free meal. It keeps the flavor intact while accommodating dietary needs.

    Serving Suggestions for Beef and Broccoli Ramen Stir Fry

    • Pair with steamed jasmine rice or cauliflower rice for a low-carb option.
    • A light Asian salad with sesame dressing complements this dish deliciously.
    • Serve with a chilled glass of green tea or a fruity mocktail.
    • Add a sprinkle of sliced green onions or cilantro for a fresh touch.
    • For a garnish, consider a few sesame seeds or toasted nuts for crunch!

    FAQs about Beef and Broccoli Ramen Stir Fry

    Can I make Beef and Broccoli Ramen Stir Fry ahead of time? Absolutely! You can prep the ingredients and store them in the fridge for up to a day. Just follow the cooking steps when you’re ready to enjoy this quick meal!

    What can I substitute for the sirloin steak? If you prefer, chicken or tofu is a great alternative. Both options provide delicious flavors while keeping the cooking time similar!

    Is this recipe suitable for gluten-free diets? Yes! Use gluten-free ramen noodles or rice noodles instead, and you’ll have a delightful gluten-free Beef and Broccoli Ramen Stir Fry!

    Can I add more vegetables to this dish? Of course! Feel free to toss in extra veggies like bell peppers or snap peas. It’ll enhance flavor and nutrition.

    How can I adjust the spice level? If you like it spicy, simply add more red pepper flakes or a dash of Sriracha while cooking. Tailor it to your preference!

    Final Thoughts on Beef and Broccoli Ramen Stir Fry

    This Beef and Broccoli Ramen Stir Fry isn’t just a meal; it’s a heartwarming hug in a bowl! Simple to prepare yet wonderfully flavorful, it brings families together over delicious food. The blend of tender beef, fresh broccoli, and flavorful sauce works magic, transforming an ordinary dinner into a memorable occasion. Each bite is a reminder that cooking doesn’t have to be complex to be special. So, the next time you find yourself in a dinner dilemma, remember this recipe. Whip it up, savor the smiles, and enjoy every delicious moment together!


    Print

    clock clock iconcutlery cutlery iconflag flag iconfolder folder iconinstagram instagram iconpinterest pinterest iconfacebook facebook iconprint print iconsquares squares iconheart heart iconheart solid heart solid icon

    Description

    A quick and delicious stir fry recipe featuring tender beef, fresh broccoli, and ramen noodles tossed in a flavorful sauce.


    • 1/4 cup low-sodium soy sauce
    • 1 pound sirloin steak, sliced
    • 3 cups fresh broccoli florets
    • 2 (3 ounce) packages ramen noodles
    • 2 tablespoons hoisin sauce
    • 2 tablespoons honey
    • 1 tablespoon sesame oil

    1. Prepare the sauce by whisking together soy sauce and cornstarch in a medium bowl. Add beef broth, honey, hoisin, rice vinegar, garlic, ginger, and red pepper flakes; set aside.
    2. Boil water in a pot and cook ramen noodles for 2–3 minutes; drain and toss with sesame oil.
    3. In a nonstick skillet over medium-high heat, cook seasoned steak for about 5 minutes until browned; remove from skillet.
    4. Steam broccoli with olive oil and water in the same skillet for 2 minutes.
    5. Return steak to the skillet along with cooked noodles; pour in the sauce and mix well for another minute until heated through.
    6. Serve hot garnished with sesame seeds.

    Notes

    • For added spice, include more red pepper flakes.
    • Feel free to substitute chicken or tofu for the beef.
    • Adjust the amount of honey depending on your sweetness preference.
    • Prep Time: 10 minutes
    • Cook Time: 15 minutes
    • Category: Main Course
    • Method: Stir Fry
    • Cuisine: Asian

    Nutrition

    • Serving Size: 1 serving
    • Calories: 450
    • Sugar: 8g
    • Sodium: 800mg
    • Fat: 12g
    • Saturated Fat: 3g
    • Unsaturated Fat: 9g
    • Trans Fat: 0g
    • Carbohydrates: 60g
    • Fiber: 3g
    • Protein: 30g
    • Cholesterol: 70mg

    Sharing is caring!

  • Peanut Butter Baked Donuts

    Peanut Butter Baked Donuts


    Introduction to Peanut Butter Baked Donuts

    Hey there, fellow food lovers! If you’re anything like me, life gets busy and finding time to whip up something delicious can feel like a juggling act. That’s where these Peanut Butter Baked Donuts come in—a sweet solution that caters to both cravings and time constraints. Perfect for welcoming the day or as an afternoon treat, these baked goodies are easy to make and oh-so-satisfying. Imagine biting into a soft, peanut buttery delight topped with a rich chocolate glaze. Trust me, your family will be raving about them, and you’ll love how quick they come together!

    Why You’ll Love This Peanut Butter Baked Donuts

    Let’s face it—life is hectic, and we all need a little pick-me-up now and then. These Peanut Butter Baked Donuts offer a delightful escape without the fuss. They’re quick to prepare, taking just 15 minutes of prep time. With their light, fluffy texture and irresistible chocolate glaze, every bite feels like a treat. Plus, they’re baked, making them a slightly healthier alternative to traditional fried donuts. Yum!

    Ingredients for Peanut Butter Baked Donuts

    Let’s gather what we need to create these delightful Peanut Butter Baked Donuts! Here’s a simple list of ingredients you’ll want to have on hand:

    • Chocolate chips: A must for the rich glaze, they add a sweet, indulgent finish.
    • Heavy whipping cream: This turns your chocolate chips into a silky glaze. You can substitute it with half-and-half if you’re in a pinch!
    • Peanut butter: The star of the show! Creamy or crunchy, it adds flavor and moisture. Opt for natural peanut butter-free from added sugars for a healthier twist.
    • Granulated sugar: Just a touch to sweeten, balancing the nutty flavors beautifully.
    • Milk: This brings everything together to create a smooth batter. Any milk will do, but almond or oat milk offers lovely alternatives!
    • Vanilla: A dash of extract elevates the flavor. It whispers sweet notes of nostalgia into the mix.
    • Oil: I use vegetable oil for the best texture but feel free to use melted coconut oil for a hint of tropical vibe.
    • Egg: It helps bind everything together, giving the donuts a nice rise.
    • Baking powder: This is your secret leavening agent, ensuring the donuts turn out soft and fluffy.
    • Salt: Just a pinch enhances all the flavors, making your treat even better.
    • All-purpose flour: The base for your donuts, it provides structure. If you need to gluten-free, use almond flour or a gluten-free blend.
    • Chocolate sprinkles or chopped peanuts: These are optional but make for charming garnishes, adding extra crunch and visual appeal!

    For exact measurements, you can refer to the footer of the article where it’s all neatly printed for you!

    How to Make Peanut Butter Baked Donuts

    Get ready to dive into the delicious world of Peanut Butter Baked Donuts! With every step, I’ll guide you through the process to ensure they turn out perfect every time. Let’s roll up our sleeves and get started!

    Step 1: Preheat the Oven and Prepare Your Pan

    First things first—preheat your oven to 350°F. This step is crucial. An already hot oven helps your donuts rise beautifully! While that’s heating up, grab your donut pan. Spray it generously with nonstick cooking spray; this will prevent your donuts from sticking. If you don’t have a donut pan, muffin pans work just as well. Just make sure to adjust your baking time accordingly!

    Step 2: Make the Chocolate Glaze

    Now, let’s create that dreamy chocolate glaze! In a small saucepan, heat the heavy whipping cream over medium until it’s just about to boil. You want a gentle simmer, not a full boil. Once you see bubbles forming, take it off the heat. Pour the hot cream over your chocolate chips and let it sit for a minute. This will melt the chips. Then, whisk it all together until it’s smooth and glossy. Set this luscious glaze aside for later; wintery chocolate dreams await!

    Step 3: Mix the Donut Batter

    In a large mixing bowl, combine peanut butter, granulated sugar, milk, vanilla extract, oil, and the egg. Mix these together until smooth. Once you’ve got a creamy base, sprinkle in the baking powder and salt. Stir those in before gradually adding the all-purpose flour, mixing until just combined. Be careful not to overmix; we want fluffy donuts, not dense ones. The batter should be thick and homogeneous—perfect for piping!

    Step 4: Pipe the Batter into the Pan

    Let’s get that batter into the pan! Transfer your donut batter into a large gallon-sized zip-top bag. Cut off a small tip of one corner. This makes piping super easy and less messy! Carefully squeeze the batter into your grease-pan, filling each mold about halfway. This allows room for rising. Close your bag tightly to prevent any sneaky spills.

    Step 5: Bake the Donuts

    Time to bake! Place your filled donut pan in the oven and set your timer for 8-12 minutes. You’ll know they’re ready when a toothpick inserted into the center comes out clean. Keep an eye on them! The donuts should look lightly golden. Once they are done, let them cool in the pan for about 10 minutes before transferring them to a wire rack.

    Step 6: Glaze and Garnish

    Your patience will pay off! Once your donuts are completely cool, it’s time for the fun part. Dip each donut upside down into the chocolate glaze, giving it a gentle twist to coat well. Let the excess glaze drip off before placing them back on the rack. If you want to add some sprinkles or chopped peanuts, now’s the time! They add a delightful crunch and extra charm. Allow them to set at room temperature for a bit, and voila—your gorgeous Peanut Butter Baked Donuts are ready to devour!

    Tips for Success

    • Use room temperature ingredients for better mixing—eggs and milk blend smoother!
    • Don’t overmix the batter; it’s okay if there are a few lumps.
    • If using different pan sizes, watch the baking time closely. Mini donuts bake faster!
    • Let the glaze sit a few minutes before dipping. It’ll thicken slightly, creating a delicious coat.
    • For an easy clean-up, pipe the batter directly into the pan for mess-free servings.

    Equipment Needed

    • Donut pan: This is ideal for perfect shapes. A muffin pan works too!
    • Mixing bowls: A medium bowl for wet and a large bowl for dry ingredients.
    • Whisk: A balloon whisk helps achieve a smooth mixture.
    • Zip-top bag: Great for piping the batter. Alternately, use a piping bag if you have one!
    • Wire rack: Perfect for cooling your donuts evenly after baking.

    Variations

    • For a chocolate lover’s dream, add cocoa powder to the batter for chocolate peanut butter baked donuts!
    • Try using almond butter or cashew butter instead of peanut butter for a different nutty flavor.
    • Add mini chocolate chips into the batter for extra little bursts of chocolate in every bite!
    • If you’re vegan, substitute the egg with a flaxseed meal or an applesauce for binding.
    • For a gluten-free option, use almond flour or a certified gluten-free flour blend.
    • Mix in some spices, like cinnamon or nutmeg, for a warm, cozy twist on flavor.
    • Top with crushed pretzels instead of sprinkles for a sweet and salty combination!

    Serving Suggestions

    • Pair your Peanut Butter Baked Donuts with a strong cup of coffee or a creamy latte for a delightful breakfast experience.
    • Serve them warm with a dollop of whipped cream or a scoop of ice cream for an indulgent dessert.
    • For a fun presentation, arrange donuts on a colorful platter and sprinkle with extra peanuts or sprinkles for visual flair!
    • Consider sharing a batch with friends; they make great goodies for gatherings!
    • Enhance your serving by drizzling extra chocolate or peanut butter glaze over the top.

    FAQs about Peanut Butter Baked Donuts

    Curious about these Peanut Butter Baked Donuts? Here are some common questions I’ve gathered, along with answers to help you create the best batch possible!

    Can I make Peanut Butter Baked Donuts ahead of time?

    Absolutely! These donuts can be baked a day in advance. Simply store them in an airtight container at room temperature. Add the glaze just before serving for that fresh-out-of-the-oven taste.

    How should I store the Peanut Butter Baked Donuts?

    Keep your donuts in an airtight container for up to 3 days. If you have leftovers, they freeze beautifully! Just thaw them when you’re ready to enjoy.

    What can I substitute for peanut butter?

    If you or someone at your table has a nut allergy, try using sunflower seed butter or even a seed-based alternative. Both can provide a similar creamy texture without the nuts!

    Can I use a different type of glaze?

    Of course! While chocolate glaze is rich and decadent, feel free to experiment with maple or vanilla glaze. Each will offer a different but delightful flavor profile!

    Are these donuts kid-friendly?

    These Peanut Butter Baked Donuts are definitely kid-approved! They’re sweet and fun, making them an excellent treat for lunchboxes or after-school snacks. Enjoy together!

    Final Thoughts

    There’s something truly heartwarming about whipping up a batch of Peanut Butter Baked Donuts in your own kitchen. The laughter that fills the air while pouring, mixing, and glazing creates memories that linger long after the last crumb is gone. Each bite satisfies not just your craving but also brings smiles to your loved ones’ faces. Whether you’re making these for breakfast, an afternoon pick-me-up, or a sweet surprise after dinner, know that you’re adding a touch of joy to the day. Embrace the warmth of homemade treats and savor every delicious moment with these delightful donuts!


    Print

    clock clock iconcutlery cutlery iconflag flag iconfolder folder iconinstagram instagram iconpinterest pinterest iconfacebook facebook iconprint print iconsquares squares iconheart heart iconheart solid heart solid icon

    Description

    Delicious peanut butter baked donuts topped with a rich chocolate glaze, perfect for a sweet treat.


    • ½ cup (85g) chocolate chips
    • ⅓ cup (79ml) heavy whipping cream
    • ¼ cup (67g) peanut butter
    • ¼ cup (50g) granulated sugar
    • ⅓ cup + 1 tablespoon milk
    • ½ teaspoon vanilla
    • 1 tablespoon oil
    • 1 large egg
    • 1 teaspoon baking powder
    • ¼ teaspoon salt
    • 1 cup (124g) all purpose flour
    • Chocolate sprinkles or chopped peanuts for garnish

    1. Preheat oven to 350°F. Spray a donut pan with nonstick cooking spray. Alternatively, spray mini or regular sized muffin pans with nonstick cooking spray.
    2. Make the glaze first: heat heavy whipping cream to almost boiling (don’t let it fully boil, once you notice a slight simmer it’s done) on the stove or in the microwave. Pour over chocolate chips and let sit one minute, then whisk until smooth. Set aside until ready to use.
    3. Stir together peanut butter, sugar, milk, vanilla, oil, and egg until smooth. Stir in baking powder and salt, then stir in flour.
    4. Place batter in a large gallon size ziploc bag and cut off one tip. Pipe into donut pan.
    5. Bake for 8-12 minutes or until a toothpick comes out clean. Cool 10 minutes in pan then remove. Glaze once cooled.
    6. To glaze: dip donuts upside down in glaze. Sprinkle with nuts or sprinkles. Let set at room temperature.
    7. Store in an airtight container for up to 3 days.

    Notes

    • For a lighter version, use low-fat peanut butter.
    • The donuts can be frozen for longer storage.
    • Prep Time: 15 minutes
    • Cook Time: 12 minutes
    • Category: Dessert
    • Method: Baking
    • Cuisine: American

    Nutrition

    • Serving Size: 1 donut
    • Calories: 190
    • Sugar: 10g
    • Sodium: 150mg
    • Fat: 9g
    • Saturated Fat: 3.5g
    • Unsaturated Fat: 4.5g
    • Trans Fat: 0g
    • Carbohydrates: 25g
    • Fiber: 1g
    • Protein: 4g
    • Cholesterol: 30mg

    Sharing is caring!

  • Ground Turkey Zucchini Chickpea Skillet

    Ground Turkey Zucchini Chickpea Skillet


    Introduction to Ground Turkey Zucchini Chickpea Skillet

    Welcome to my kitchen, where delicious meals can magically come together in a flash! If you’re like me, juggling work, family, and everything in between, dinnertime can often feel overwhelming. That’s why I’m thrilled to share my Ground Turkey Zucchini Chickpea Skillet with you. This delightful dish effortlessly blends flavors and nutrition, making it the perfect quick solution for a busy day. Plus, it’s one of those meals that leaves everyone asking for seconds! Let’s dive into this savory adventure together and transform your dinner routine.

    Why You’ll Love This Ground Turkey Zucchini Chickpea Skillet

    This Ground Turkey Zucchini Chickpea Skillet is a game-changer for busy nights. It’s not only quick to prepare but packs a punch of vibrant flavors. The shredded mozzarella on top melds perfectly with the veggies and chickpeas, creating a satisfying comfort dish. Plus, it’s healthy! With protein from turkey and fiber from chickpeas, you can enjoy every bite knowing you’re nourishing your family. What’s not to love?

    Ingredients for Ground Turkey Zucchini Chickpea Skillet

    To whip up this delicious Ground Turkey Zucchini Chickpea Skillet, you’ll need a few simple ingredients that you might already have on hand. Here’s what you’ll need:

    • Olive Oil – This lovely oil not only adds flavor but also healthy fats. You can substitute with vegetable oil if that’s what you have.
    • Ground Turkey – Lean and versatile, this protein is perfect for quick dinners. If you prefer, ground chicken or beef can work just as well.
    • Chopped Onion – It adds sweetness and depth to the dish. Yellow onions are typically the go-to, but feel free to use what you have.
    • Minced Garlic – For that aromatic punch! Fresh garlic is best, but jarred minced garlic can save you time.
    • Chopped Zucchini – This veggie gives your skillet a fresh pop. It’s easy to chop and cooks quickly, making it ideal for busy nights.
    • Chickpeas – These canned gems provide protein and fiber. You can also use cooked dried chickpeas if you have them.
    • Canned Diced Tomatoes – They add moisture and acidity. Go for low-sodium varieties if you’re watching your salt intake.
    • Canned or Frozen Peas – These little green gems bring sweetness and color to your dish. They’re quick to add and cook!
    • Tomato Paste – It thickens the mixture and intensifies the tomato flavor. A little goes a long way!
    • Onion Powder, Garlic Powder, Chili Powder, Paprika – These spices elevate the dish with layers of flavor. Adjust them to your liking.
    • Salt and Ground Black Pepper – Essential for balancing all the flavors. Feel free to tweak to your taste.
    • Shredded Mozzarella Cheese – This is the creamy finishing touch. You can swap it for cheddar or a dairy-free option if you’d prefer.

    Don’t worry; if you need exact measurements, they’re at the bottom of the article, ready for you to print and keep handy!

    How to Make Ground Turkey Zucchini Chickpea Skillet

    Ready to dive into the cooking? Let’s transform those fresh ingredients into a hearty meal with my step-by-step guide. Grab your skillet, and let’s bring this Ground Turkey Zucchini Chickpea Skillet to life!

    Step 1: Cook the Ground Turkey

    Start by heating 1 tablespoon of olive oil in your skillet over medium-high heat. Once hot, add 1 pound of ground turkey. Break it apart with a spatula as it cooks. You want it browned, not gray, so give it around 5-7 minutes. If you find it getting too dry, don’t hesitate to add a splash more oil. The goal here is juicy turkey that’ll soak up all those delightful flavors!

    Step 2: Sauté the Onions and Garlic

    Move the cooked turkey to one side of the skillet, creating some space for the onions and garlic. Add another tablespoon of olive oil, followed by 1 cup of chopped onion and 3 minced garlic cloves. Sauté this aromatic duo for about 1-2 minutes until the onion turns translucent. Remember to stir it around so everything gets that lovely golden touch!

    Step 3: Add Vegetables and Spices

    Now, it’s time to bring in the stars of the show! Toss in 1½ cups of chopped zucchini, 1 cup of chickpeas, 1 cup of canned diced tomatoes (with juices), and ¾ cup of peas. Add ¼ cup of tomato paste and sprinkle in 1 teaspoon of onion powder, 1 teaspoon of garlic powder, ½ teaspoon chili powder, ½ teaspoon paprika, ½ teaspoon salt, and ¼ teaspoon ground black pepper. Each ingredient plays a role in boosting flavor while providing rich nutrients for a balanced meal!

    Step 4: Blend and Simmer

    Give everything a good stir until combined, then lower the heat. Let it simmer on low for about 2-4 minutes. This magic moment allows the zucchini to soften just right and the spices meld together. You’ll know it’s ready when the veggies are crisp-tender and oh-so-wonderful!

    Step 5: Melt the Cheese

    To finish off this delicious skillet, remove it from heat and sprinkle 1 cup of shredded mozzarella cheese over the top. Cover it with a lid or a plate for 1-2 minutes, allowing the cheese to melt beautifully without overcooking it. This gooey topping is the crowning glory of your dish. Just wait until you see how it stretches when serving!

    Tips for Success

    • Make sure your skillet is hot before adding the turkey to get a nice sear.
    • Chop veggies uniformly for even cooking and presentation.
    • Don’t skip the simmering step; it melds those flavors beautifully.
    • Experiment with spices! Add more if you like extra heat.
    • Save leftovers for lunch the next day; it reheats like a dream!

    Equipment Needed

    • Skillet – A non-stick or cast iron skillet works beautifully for even cooking.
    • Spatula – A wooden or silicone spatula helps prevent scratching your skillet.
    • Measuring Cups – Essential for those precise ingredient measurements.
    • Cutting Board and Knife – For chopping vegetables quickly and safely.

    Variations

    • Add a splash of lemon juice for a zesty kick that brightens up the flavors.
    • Replace the zucchini with bell peppers or spinach for a colorful twist.
    • For a spicy version, toss in some diced jalapeños or a pinch of cayenne pepper.
    • For a vegetarian option, skip the turkey and substitute with more chickpeas or lentils.
    • Try adding cooked quinoa or rice to the skillet for extra heartiness and texture.

    Serving Suggestions

    • Serve with a side of crusty whole-grain bread for a satisfying bite.
    • A fresh green salad pairs wonderfully, adding crunch and color.
    • For drinks, try a chilled glass of sparkling water infused with lemon.
    • Garnish with fresh basil or parsley for a pop of color.

    FAQs about Ground Turkey Zucchini Chickpea Skillet

    Here are some common questions about my Ground Turkey Zucchini Chickpea Skillet. I hope these tips help you make this dish even more enjoyable!

    Can I use other ground meats in this recipe?

    Absolutely! While I love using ground turkey for its lean quality, you can substitute it with ground chicken or even beef. Each option brings its unique flavor, so don’t hesitate to experiment!

    How do I store leftovers effectively?

    Store any leftovers in an airtight container in the refrigerator for up to 3 days. When you’re ready to enjoy them, simply reheat in the microwave or on the stovetop until warmed through. It maintains flavor fabulously!

    Can this skillet be made vegetarian?

    You can easily make this Ground Turkey Zucchini Chickpea Skillet vegetarian by omitting the turkey and adding more chickpeas or some lentils. It’ll still be hearty and delicious!

    How can I adjust the spice levels in this dish?

    If you like it spicy, feel free to increase the chili powder or add diced jalapeños. For a milder flavor, reduce the spices slightly. Tailoring it to your family’s taste is the best part!

    What can I serve with the Ground Turkey Zucchini Chickpea Skillet?

    This dish pairs beautifully with a fresh salad, crusty bread, or even some rice or quinoa if you want a more substantial meal. The choices are endless!

    Final Thoughts

    Cooking can sometimes feel like just another chore, but my Ground Turkey Zucchini Chickpea Skillet transforms dinner into a joyous occasion. This dish invites family together, filling the room with delightful aromas and flavors. Watching smiles light up as everyone tips their forks for seconds warms my heart. Best of all, it’s a wholesome meal that fits into our busy lives. With just one skillet, you create a colorful centerpiece that’s as nourishing as it is comforting. So, let’s embrace the joy of cooking and enjoy every bite together!


    Print

    clock clock iconcutlery cutlery iconflag flag iconfolder folder iconinstagram instagram iconpinterest pinterest iconfacebook facebook iconprint print iconsquares squares iconheart heart iconheart solid heart solid icon

    Description

    A delicious and easy skillet recipe featuring ground turkey, zucchini, and chickpeas, perfect for dinner.


    • 2 Tbsp olive oil – or vegetable oil
    • 1 lb ground turkey
    • 1 cup chopped onion
    • 3 garlic cloves – minced
    • 1 ½ cups chopped zucchini – about 1 medium zucchini
    • 1 cup chickpeas – drained and rinsed
    • 1 cup canned diced tomatoes – with juices
    • ¾ cup peas – canned or frozen
    • ¼ cup tomato paste
    • 1 tsp onion powder
    • 1 tsp garlic powder
    • ½ tsp chili powder
    • ½ tsp paprika
    • ½ tsp salt
    • ¼ tsp ground black pepper
    • 1 cup shredded mozzarella cheese

    1. Cook the 1 lb ground turkey with 1 Tbsp olive oil over medium-high heat, breaking it apart as you go.
    2. Move the ground turkey to the side and add 1 Tbsp olive oil, 3 minced garlic cloves and 1 cup chopped onion. Cook until onion turns translucent, about 1-2 minutes. Stir everything together.
    3. Now add in 1 ½ cups chopped zucchini, 1 cup chickpeas, 1 cup diced tomatoes (with juice), ¾ cup peas, ¼ cup tomato paste and all spices (1 tsp onion powder, 1 tsp garlic powder, ½ tsp chili powder, ½ tsp paprika, ½ tsp salt and ¼ tsp ground black pepper).
    4. Mix everything together and cook on low for 2-4 minutes, or until zucchini is crisp tender when poked with a fork.
    5. Remove from heat and sprinkle 1 cup shredded mozzarella cheese on top. Cover with a lid or a plate for 1-2 minutes to help the cheese melt. Dish on to plates and enjoy!

    Notes

    • Feel free to substitute ground turkey with ground chicken or beef if preferred.
    • This recipe can be made ahead and reheats well.
    • Adjust the spices according to your taste.
    • Prep Time: 10 minutes
    • Cook Time: 15 minutes
    • Category: Dinner
    • Method: Skillet
    • Cuisine: American

    Nutrition

    • Serving Size: 1 serving
    • Calories: 400
    • Sugar: 5g
    • Sodium: 700mg
    • Fat: 15g
    • Saturated Fat: 4g
    • Unsaturated Fat: 8g
    • Trans Fat: 0g
    • Carbohydrates: 40g
    • Fiber: 10g
    • Protein: 30g
    • Cholesterol: 70mg

    Sharing is caring!

  • Classic Chicken Pot Pie

    Classic Chicken Pot Pie


    Introduction to Classic Chicken Pot Pie

    There’s something magical about coming home to the rich aroma of a Classic Chicken Pot Pie fresh out of the oven. It’s like a warm hug on a cold day. This recipe, with its flaky crust and creamy filling, is a true crowd-pleaser. Whether you’re juggling work, kids, or just life in general, this pot pie is a quick solution for those busy evenings. It’s not just a meal—it’s a way to show your loved ones that you care. So, let’s get cooking and turn your kitchen into a haven of comfort food!

    Why You’ll Love This Classic Chicken Pot Pie

    This Classic Chicken Pot Pie is not just delicious, it’s also incredibly easy to prepare. The creamy filling bursts with flavor, and the flaky crust is simply irresistible. What’s more, you can whip it up even on the busiest days! It’s a comforting dish that brings families together, creating moments of joy and laughter around the dinner table. Trust me, once you try it, this recipe will become a staple in your home!

    Ingredients for Classic Chicken Pot Pie

    Gathering the right ingredients makes all the difference in your Classic Chicken Pot Pie. Here’s what you’ll need to create this comforting dish:

    • All-purpose flour: The base for your flaky crust, giving it structure.
    • Granulated sugar: Just a hint is needed to balance the flavors in the crust.
    • Salt: Enhances overall taste, bringing out the best in every bite.
    • Cold unsalted butter: Essential for a rich, flaky crust; keep it cold for the best texture.
    • Buttermilk: Adds moisture and a slight tang, making your crust tender.
    • Cold water: Helps bind the dough together; use sparingly as needed.
    • Egg: For an egg wash, it gives the top crust a beautiful golden hue.
    • Unsalted butter (for filling): Provides a buttery flavor and richness in the filling.
    • Diced onion: Adds depth to the filling with its savory sweetness.
    • Sliced carrots: These bring color and sweetness—who can resist veggies in a pie?
    • Sliced celery: Offers a subtle crunch and enhances the savory profile.
    • Minced garlic: A little goes a long way in amplifying flavor in the filling.
    • All-purpose flour (for thickening): Ensures a creamy filling that hugs every ingredient perfectly.
    • Fresh thyme: A delightful herb that adds a touch of warmth to the dish.
    • Fresh Italian parsley: It brightens up the filling with its fresh flavor.
    • Ground black pepper: For a bit of kick to balance the creaminess.
    • Chicken broth: The base for your creamy sauce—opt for low sodium for better control.
    • Heavy cream: This makes the filling luxuriously rich and creamy.
    • Shredded cooked chicken or turkey: The heart of your pot pie; feel free to use leftovers!
    • Frozen peas: They add a lovely pop of color and sweetness without any prep work!

    For the exact quantities, you can find them at the bottom of the article, and they’re also available for printing. Feel free to get creative with your ingredients or substitute to suit your tastes!

    How to Make Classic Chicken Pot Pie

    Creating a Classic Chicken Pot Pie is a joyful journey that fills your kitchen with warmth and tantalizing aromas. Let’s dive into the steps, from making that flaky crust to tasting the final masterpiece!

    Preparing the Crust

    Start by mixing the all-purpose flour, granulated sugar, and salt in a large bowl. This blend becomes the backbone of your crust. Now, take the cold cubed butter and toss it into the flour mixture. Use a rolling pin or your fingers to work the butter into the flour until it resembles coarse crumbs. Chilling the dough is crucial—transfer it to the freezer for about 15 minutes. This step ensures that your pie crust will be light and flaky.

    Once chilled, bring the mixture out. Add the cold buttermilk and stir it gently with a spoon. Get your hands in there and combine it all until it forms a ball. If the dough feels too dry, sprinkle in a tablespoon of cold water as needed. Divide the dough into two disks, wrap each in plastic, and refrigerate while you prepare the filling. Trust me; this crust will make your Classic Chicken Pot Pie shine!

    Making the Filling

    Now, let’s move on to the star of the show—the filling. In a large skillet, melt the unsalted butter over medium-high heat. Start adding the diced onion, sliced carrots, sliced celery, and minced garlic. Sauté these until they’re tender, stirring occasionally. The smell will make you smile!

    Next, whisk in the all-purpose flour, salt, black pepper, fresh thyme, and Italian parsley. Slowly pour in the chicken broth and heavy cream, stirring continuously. Let this mixture simmer over medium-low heat for about 10 minutes until it thickens beautifully. Don’t forget to taste as you go; seasoning is essential. Stir in your shredded chicken or turkey along with the frozen peas. This filling is where comfort lives, and the flavors need to shine!

    Assembling the Pot Pie

    Preheat your oven to 400°F (204°C). On a lightly floured surface, roll one disk of dough into a 12-inch circle, about 1/4 inch thick. Gently transfer this circle to a 9-inch pie pan. It should hug the sides and create a beautiful base for your filling. Pour the delicious mixture into the crust, ensuring it’s evenly spread.

    Roll out the second disk of dough in the same manner. Place it over your filled pie and pinch the edges to seal. Crimp them for a decorative touch! Don’t forget to cut small slits in the top crust, allowing steam to escape. Brush the entire crust with the beaten egg wash for that stunning golden color.

    Baking to Perfection

    Carefully place your assembled pot pie in the preheated oven. Bake it for about 45 minutes, or until the crust is golden brown and glorious. A pie crust shield can be helpful if the edges brown too quickly. The key is to keep an eye on it during those last minutes. When it’s done, let it cool for about 10 minutes before slicing. This rest gives the filling a chance to set, making serving easier!

    And just like that, you’re ready to serve up a slice of happiness with your Classic Chicken Pot Pie.

    Tips for Success

    • Always keep your butter cold for a flaky crust.
    • Don’t overwork the dough; mix just until combined.
    • Use a mix of leftover chicken and rotisserie for more flavor.
    • Season your filling generously to enhance the taste.
    • Let the pot pie cool before slicing for cleaner pieces.
    • Rest the crust on the counter before rolling to avoid cracking.

    Equipment Needed

    • Mixing bowl: A large one for the dough and filling.
    • Rolling pin: To roll out the crust; a wine bottle works too!
    • Pie pan: A 9-inch pan, or use a casserole dish in a pinch.
    • Knife: For cutting the dough and filling.
    • Skillet: A large one for cooking the filling.

    Variations of Classic Chicken Pot Pie

    • Vegetable Pot Pie: Substitute chicken with a mix of your favorite vegetables, such as mushrooms, bell peppers, or zucchini, and use vegetable broth for a hearty vegetarian delight.
    • Curried Chicken Pot Pie: Add curry powder to the filling for a warm, spicy twist that excites the palate.
    • Pot Pie with Biscuits: Instead of a top crust, place flaky biscuit dough on top for a delightful textural contrast and extra comfort.
    • Gluten-Free Option: Use a gluten-free flour blend for the crust and ensure your broth and fillings are gluten-free for a deliciously inclusive version.
    • Cheesy Chicken Pot Pie: Incorporate shredded cheese like cheddar or Gruyère into the filling for a creamy and savory upgrade.

    Serving Suggestions for Classic Chicken Pot Pie

    • Pair with a crisp green salad for a fresh contrast—try a simple vinaigrette.
    • Serve with crusty bread to soak up any delicious leftover sauce.
    • Add a glass of chilled white wine, like Chardonnay, for a lovely dinner pairing.
    • Garnish with fresh herbs for a pop of color on your table.

    FAQs about Classic Chicken Pot Pie

    Can I make Classic Chicken Pot Pie ahead of time?

    Absolutely! You can prepare the filling and crust separately and keep them in the refrigerator. Assemble the pie just before baking for the best results.

    What can I substitute for chicken in the recipe?

    If you have vegetarian eaters in the family, feel free to swap chicken for mushrooms, tofu, or a flavorful mix of seasonal vegetables. They make a hearty filling!

    How should I store leftovers?

    Be sure to cool the pot pie completely before refrigerating. Store it wrapped in plastic wrap or an airtight container. It will stay fresh for 3–4 days.

    Can I use store-bought pie crust?

    Definitely! For a quicker option, store-bought pie crust works perfectly. Just roll it out, fill, and bake. No one will judge your time-saving hacks!

    Is this dish freezer-friendly?

    Yes! You can freeze unbaked pot pie. Wrap it well and pop it in the freezer. When you’re ready, bake it straight from frozen, adding a few extra minutes to the cooking time.

    Final Thoughts

    Creating a Classic Chicken Pot Pie is more than just cooking; it’s about sharing love and warmth in every bite. The comforting aroma filling your kitchen and the joy on your loved ones’ faces as they dive into this delicious pie makes all the effort worthwhile. It’s a delightful dish that fosters connection around the dinner table and fills you with nostalgia. When life gets hectic, this pot pie stands as a reminder that simple, comforting meals can bring everyone together. So, grab your ingredients and let’s create some beautiful memories with this timeless recipe!


    Print

    clock clock iconcutlery cutlery iconflag flag iconfolder folder iconinstagram instagram iconpinterest pinterest iconfacebook facebook iconprint print iconsquares squares iconheart heart iconheart solid heart solid icon

    Description

    A classic comfort food pie filled with tender chicken, creamy sauce, and a flaky crust.


    • 2 1/2 cups all-purpose flour
    • 1 tablespoon granulated sugar
    • 1 teaspoon salt
    • 1 cup cold unsalted butter, cubed
    • 1/2 cup cold buttermilk
    • 12 tablespoons cold water
    • 1 large egg, beaten (for egg wash)
    • 1/4 cup unsalted butter
    • 1/3 cup diced onion
    • 2 medium carrots, sliced (about 1 cup)
    • 1 stalk celery, sliced (about 1/2 cup)
    • 2 cloves garlic, minced
    • 1/3 cup all-purpose flour
    • 1 1/2 teaspoons minced fresh thyme
    • 1 tablespoon minced fresh Italian parsley
    • 1 teaspoon salt
    • 1/2 teaspoon ground black pepper
    • 1 3/4 cups chicken broth
    • 1/2 cup heavy cream
    • 3 cups shredded cooked chicken or turkey
    • 1 cup frozen peas

    1. Combine flour, sugar, and salt in a large bowl. Add cold cubed butter and toss to coat. Transfer to a clean surface and roll the butter into the flour using a rolling pin, scraping and gathering the dough repeatedly with a bench scraper until incorporated and flaky. Chill mixture in freezer for 15 minutes.
    2. Remove chilled mixture from freezer. Add cold buttermilk and stir with a spoon, then with hands, until dough forms a ball. Add cold water by tablespoon if too dry. Divide dough into two disks, wrap in plastic, and refrigerate while preparing filling.
    3. Melt butter in large skillet over medium-high heat. Add onion, carrots, celery, and garlic; cook until tender, stirring occasionally. Whisk in flour, salt, black pepper, thyme, parsley, chicken broth, and heavy cream. Simmer over medium-low heat for 10 minutes until thickened. Stir in shredded chicken and peas then remove from heat.
    4. Set oven to 400°F (204°C).
    5. On lightly floured surface, roll one dough disk into a 12-inch circle approximately 1/4 inch thick. Transfer to a 9-inch pie pan and smooth with fingers. Trim excess dough and discard.
    6. Pour filling into crust-lined pan. Roll out second dough disk similarly and cover pie. Trim and seal edges by crimping. Cut small slits on top crust. Brush entire crust with beaten egg wash.
    7. Bake pie for 45 minutes or until crust is golden brown. Use a pie crust shield if needed to protect edges. Cool for 10 minutes before slicing and serving.

    Notes

    • For a vegetarian option, substitute chicken with mushrooms or tofu.
    • You can use store-bought pie crust to save time.
    • Cool completely before refrigerating leftovers
    • Prep Time: 30 minutes
    • Cook Time: 1 hour
    • Category: Main Course
    • Method: Baking
    • Cuisine: American

    Nutrition

    • Serving Size: 1 slice
    • Calories: 450
    • Sugar: 3g
    • Sodium: 700mg
    • Fat: 25g
    • Saturated Fat: 15g
    • Unsaturated Fat: 7g
    • Trans Fat: 0g
    • Carbohydrates: 40g
    • Fiber: 2g
    • Protein: 15g
    • Cholesterol: 100mg

    Sharing is caring!

  • Halloween Whoopie Pies Treat

    Halloween Whoopie Pies Treat


    Introduction to Halloween Whoopie Pies Treat

    As the leaves turn and the air gets crisper, it’s the perfect time to indulge in festive treats. These Halloween Whoopie Pies Treat are a delightful way to celebrate the season and impress your family and friends! With their vibrant orange icing and playful spider decorations, they’re not just a dessert—they’re a conversation starter. Plus, they’re quick and easy to whip up, making this recipe a lifesaver for busy days. Whether you’re gearing up for a party or just want to bring some spooky fun into your kitchen, these whoopie pies are the perfect choice!

    Why You’ll Love This Halloween Whoopie Pies Treat

    You’re going to love these Halloween Whoopie Pies Treat for so many reasons! First, they come together in just 30 minutes, making them an ideal solution for those hectic days. Their rich chocolate flavor combined with the sweet, vibrant orange icing? Pure bliss! Plus, you can let your creativity shine with fun decorations. Whether for a gathering or a sweet treat at home, they bring smiles all around!

    Ingredients Halloween Whoopie Pies Treat

    Gathering the right ingredients is key to making these Halloween Whoopie Pies Treat a success! Here’s what you’ll need:

    • Devil’s Food cake mix – This chocolatey mix brings rich, decadent flavor to the whoopie pies.
    • Cold water – This helps achieve the perfect batter consistency. Cold is essential to give the cakes that delightful texture!
    • Vegetable oil – Adds moisture and richness, ensuring your whoopie pies are soft and tender.
    • Large eggs – They bind the ingredients together, creating that fluffy cake we’ve all come to love.
    • Instant chocolate pudding mix – This secret ingredient enhances the chocolate flavor and adds an extra layer of creaminess.
    • Vanilla cake icing – This will be transformed with a pop of color for our spooky touch, making it fun and festive.
    • Orange gel food coloring – A little goes a long way to give your icing that eye-catching Halloween hue.
    • Black edible sprinkles or black sugar sparkles – These add a dash of magic and can transform your whoopie pies into spooky treats!
    • Optional: black rope licorice pieces – These can be used for creating spider legs, offering a fun Halloween twist.
    • Optional: candy eyes – The finishing touch for your spider decorations, adding personality to your creations!

    The ingredient measurements and specifics can be found at the bottom of the article for your convenience and ready for printing!

    How to Make Halloween Whoopie Pies Treat

    Step 1: Preheat and Prepare

    To kick off this delicious journey, preheat your oven to 350°F. I like to set a timer so I don’t forget this crucial step. Meanwhile, prepare your baking sheets by lining them with either Silpat or parchment paper. This prevents sticking, ensuring your whoopie pies come out seamlessly. Trust me, it’s a joy to peel them off without a fight! Gathering all your ingredients beforehand will make the whole process smoother and trouble-free. A tip from my kitchen: it helps to have everything in one spot.

    Step 2: Mix the Batter

    Now for the fun part! In a large bowl, combine the Devil’s Food cake mix, cold water, vegetable oil, and eggs. Make sure to add the instant chocolate pudding mix to elevate the flavor. I recommend using an electric mixer at medium speed to blend everything until it’s fully combined and thickened. You want to see those bubbles forming! Don’t rush things. This batter is rich and creamy, and it’s going to transform into something special. If you see lumps, don’t panic; just keep mixing until smooth. You’ll want to savor each bite of these Halloween Whoopie Pies Treat!

    Step 3: Shape the Cookies

    Grab your trusted cookie scoop and start dropping batter onto the prepared baking sheets. I usually drop 18 evenly sized scoops, about 2 tablespoons each. Space them apart so they have room to spread. If you’re feeling mini, you can opt for 36 smaller scoops, or pipe the batter for uniform circles. This makes your whoopie pies look elegant and professional! If you find yourself with extra batter, consider making a few bonus pies to satisfy any unexpected cravings. Who could resist?

    Step 4: Bake to Perfection

    Slide those baking sheets into the preheated oven. Bake for 7 to 10 minutes until they feel spongy and cooked through. The aroma wafting through your kitchen will be irresistible! Be sure to keep an eye on them, as every oven behaves differently. Once they’re baked to perfection, take them out and let them cool completely on a wire rack. Patience is key here; we don’t want any melting icing disaster!

    Step 5: Color the Icing

    While the cakes are cooling, it’s time to jazz up that vanilla cake icing! In a small bowl, mix your vanilla icing with a few drops of orange gel food coloring. Stir until you achieve a vibrant, uniform color that screams Halloween! This step adds a festive touch, turning ordinary icing into a spooky delight. Remember, a little gel goes a long way, so add it gradually until you reach your desired shade.

    Step 6: Assemble the Whoopie Pies

    It’s assembly time! Once the cakes are completely cool, spread or pipe a generous amount of your bright orange icing onto the flat side of one cake. Then, gently press the flat side of another cake on top. Be careful not to squish them too much; nobody wants an icing explosion! This is where the magic happens. The pairing of rich chocolate and sweet orange icing will have everyone begging for the recipe!

    Step 7: Decorate Creatively

    Now for some creative fun! Sprinkle black edible sprinkles or sugar sparkles over the icing for that spooky charm. If you want to take it a step further, use black rope licorice pieces to create spider legs on the icing, and don’t forget those candy eyes! Position them carefully, bringing your little creatures to life. This adds not only a decorative twist but also makes your Halloween Whoopie Pies Treat a great talking point at your party!

    Tips for Success

    • Always let your cakes cool completely before assembling. This prevents the icing from melting.
    • Adjust the amount of orange gel food coloring to match your desired Halloween vibe.
    • Use an ice cream scoop for evenly sized cookies; it makes dropping batter a breeze.
    • Get creative with your decorations—switch things up to impress!
    • Store assembled whoopie pies in an airtight container to keep them fresh.

    Equipment Needed

    • Mixing bowl – A large bowl is essential; a glass or stainless steel one works great.
    • Electric mixer – If you don’t have one, a whisk and some elbow grease will do the trick!
    • Baking sheets – You can use regular baking sheets or silicone mats.
    • Cookie scoop – A tablespoon works just as well for portioning batter.
    • Wire rack – You can also use the back of another baking sheet for cooling.

    Variations

    • Add a touch of mint by incorporating mint extract into the batter for a refreshing twist.
    • Try a gluten-free version with a gluten-free cake mix and ensure all other ingredients are gluten-free.
    • For a pumpkin spice flavor, swap out the Devil’s Food cake mix for a spice cake mix.
    • Use cream cheese frosting instead of vanilla icing for a tangy contrast.
    • Incorporate colorful sprinkles or edible glitter for an extra festive touch.

    Serving Suggestions

    • Pair these Halloween Whoopie Pies Treat with a cup of hot apple cider for a cozy autumn experience.
    • Serve alongside spooky-themed snacks like ghost-shaped cheese or veggie platters.
    • For a festive presentation, arrange them on a decorative platter with Halloween decorations.
    • Garnish the serving plate with fake spider webs for an eerie touch!

    FAQs about Halloween Whoopie Pies Treat

    If you’re wondering about these delicious Halloween Whoopie Pies Treat, you’re not alone! Here are some frequently asked questions to help you out:

    Can I make these whoopie pies ahead of time?
    Absolutely! You can prepare the cakes a day in advance. Store them in an airtight container until you’re ready to assemble.

    How should I store leftovers?
    Keep your assembled whoopie pies in the refrigerator in an airtight container. They remain fresh for 2 to 3 days—if they last that long!

    Can I make variations of this recipe?
    Yes! Feel free to experiment with flavors or decorations. For instance, swap the chocolate mix for a vanilla or spice cake mix for a fun twist.

    Are these Halloween Whoopie Pies Treat suitable for vegetarians?
    Yes! This recipe is vegetarian-friendly, making them a delightful treat for everyone.

    Final Thoughts

    Creating these Halloween Whoopie Pies Treat is more than just baking; it’s an enchanting journey filled with laughter and creativity. The thrill of mixing vibrant icing, the aroma of chocolate filling the air, and the joy of decorating each pie brings warmth to any home. Whether you’re celebrating with family or sharing them with friends, these delightful treats spark joy and create lasting memories. So, roll up your sleeves, embrace the fun, and let these tasty creations add a sprinkle of magic to your Halloween festivities!


    Print

    clock clock iconcutlery cutlery iconflag flag iconfolder folder iconinstagram instagram iconpinterest pinterest iconfacebook facebook iconprint print iconsquares squares iconheart heart iconheart solid heart solid icon

    Description

    Delicious Halloween-themed Whoopie Pies filled with vibrant orange icing and decorated with spider-like features.


    • 1 (18.25 oz) Devil’s Food cake mix
    • 1 cup cold water
    • 1/3 cup vegetable oil
    • 2 large eggs
    • 1 (3.4 oz) instant chocolate pudding mix
    • 16 oz vanilla cake icing
    • Orange gel food coloring, to desired shade
    • Black edible sprinkles or black sugar sparkles, for garnish
    • Optional: black rope licorice pieces and candy eyes for spider decoration

    1. Preheat the oven to 350°F and line baking sheets with Silpat or parchment paper. Gather all ingredients and necessary equipment.
    2. In a large bowl, combine Devil’s Food cake mix, cold water, vegetable oil, eggs, and chocolate pudding mix. Beat on medium speed until fully blended and thickened.
    3. For larger whoopie pies, drop 18 evenly sized scoops (about 2 tablespoons each) of batter onto prepared sheets, spacing them apart. For smaller pies, use 36 scoops of half that size or pipe batter with a large tip for uniform circles.
    4. Bake for 7 to 10 minutes until the cakes are spongy and cooked through. Remove from oven and let cool completely on a wire rack.
    5. In a small bowl, mix vanilla cake icing with orange gel food coloring until a vibrant, uniform color is achieved.
    6. Spread or pipe the orange-colored icing onto the flat side of one cooled cake. Top gently with a second cake, avoiding too much pressure to prevent icing from squeezing out.
    7. Sprinkle black edible sprinkles or sugar sparkles over the icing. For spider variations, position four pieces of black rope licorice as legs on the icing before topping with the second cake and attach candy eyes with a small amount of extra icing.
    8. Store assembled whoopie pies in an airtight container in the refrigerator. Consume within 2 to 3 days for best freshness.

    Notes

    • Ensure cakes are completely cooled before assembling to avoid melting the icing.
    • Experiment with the amount of orange gel food coloring to achieve your desired shade.
    • The optional spider decorations add a fun touch for Halloween!
    • Prep Time: 20 minutes
    • Cook Time: 10 minutes
    • Category: Dessert
    • Method: Baking
    • Cuisine: American

    Nutrition

    • Serving Size: 1 whoopie pie
    • Calories: 250
    • Sugar: 20g
    • Sodium: 200mg
    • Fat: 10g
    • Saturated Fat: 2g
    • Unsaturated Fat: 8g
    • Trans Fat: 0g
    • Carbohydrates: 36g
    • Fiber: 1g
    • Protein: 2g
    • Cholesterol: 30mg

    Sharing is caring!

  • Blue Monster Cookie Treats

    Blue Monster Cookie Treats


    Introduction to Blue Monster Cookie Treats

    Hey there, fellow home cooks! If you’re on the hunt for a delightful treat that brings smiles and a dash of fun to your kitchen, you’ve landed in the right spot. Let me introduce you to my all-time favorite, Blue Monster Cookie Treats! These delicious bites aren’t just packed with flavor; they’re also a feast for the eyes with their vibrant blue hue. Perfect for parties, special occasions, or simply to make a weeknight extraordinary, this recipe is easy and guarantees happy bellies around the table. Trust me, these cookies are sure to become a household favorite!

    Why You’ll Love This Blue Monster Cookie Treats

    What’s not to adore about Blue Monster Cookie Treats? They’re incredibly easy to whip up, even on your busiest days. Plus, the taste is out of this world—with a playful combination of chocolate and cookies, it’s a symphony of flavors! These cookies also provide a great opportunity for family fun, engaging kids in the kitchen. If you’re short on time, this recipe is a delightful shortcut to impress anyone.

    Ingredients for Blue Monster Cookie Treats

    Gathering the right ingredients is the first step toward cookie greatness! Here’s what you’ll need for these show-stopping Blue Monster Cookie Treats:

    • Unsalted butter: A must for that rich and creamy texture. Remember to let it soften at room temperature for best results!
    • Brown sugar: This gives your cookies a chewy texture and adds a touch of caramel flavor. It’s like a warm hug in every bite.
    • Granulated sugar: This balances sweetness and helps your cookies spread just right. A perfect partnership with brown sugar!
    • Large eggs: For binding and moisture. Make sure they’re at room temperature to blend easily.
    • Vanilla extract: The magic ingredient that adds warmth and depth. A must in any cookie recipe!
    • Royal blue gel food coloring: This is what makes these cookies truly eye-catching. Just a little goes a long way!
    • Bread flour: Pot for this for a chewy cookie texture. It contains more protein, giving the cookie the perfect structure.
    • Baking powder and baking soda: Essential leavening agents that help your cookies rise and get that lovely soft texture. Don’t forget them!
    • Salt: Just a pinch enhances all the sweet flavors, bringing balance to the cookie dough.
    • Crushed Oreo cookies: These little chocolate wonders add crunch and flavor. Feel free to sneak a few pieces before they make it into the dough!
    • Crushed Chips Ahoy cookies: For additional crunch and a burst of cookie goodness, they add an extra layer of delight.
    • White chocolate chips: Creamy and sweet, these little gems provide a lovely contrast to the darker cookie flavors.
    • Semi-sweet chocolate chips: For those chocolate lovers out there, this adds just the right amount of richness.
    • Whole Oreo cookies: These will be nestled right inside the cookie, creating a delicious surprise with every bite!
    • Milk chocolate bars (optional): If you’re extra adventurous, stuffing in these bars will take your cookies over the top!
    • Candy eyeballs: The finishing touch that brings these cookies to life! They add a playful and whimsical touch.

    All the precise measurements are listed at the bottom of the article if you’re ready to dive into baking. Happy cooking!

    How to Make Blue Monster Cookie Treats

    Now, let’s roll up our sleeves and get baking! Making Blue Monster Cookie Treats is a fun and thrilling journey, especially with those vibrant colors and delicious flavors. Follow these steps to create your own cookie masterpieces!

    Step 1: Creaming the Butter and Sugars

    Start by grabbing a large mixing bowl. Add the softened unsalted butter, brown sugar, and granulated sugar. Using an electric mixer, beat them together until you achieve a creamy and smooth consistency. This is important! The fluffier your butter and sugar mixture, the lighter your cookies will be!

    Step 2: Adding Eggs and Food Coloring

    Next, add in the large eggs, one at a time. Make sure to mix fully after each addition so they blend in perfectly. Then, it’s time for the fun part! Pour in the royal blue gel food coloring. Mix until the dough turns a beautiful, uniform blue color that makes you feel playful. It’s like waving a magic wand in your kitchen.

    Step 3: Combining Dry Ingredients

    Now, grab another bowl and sift together the bread flour, baking powder, baking soda, and salt. Sifting helps to aerate the flour, ensuring your cookies are light. Gradually add this dry mixture to your buttery concoction. Mix on low speed until everything is just combined—don’t overdo it. We want soft, chewy cookies, not tough ones!

    Step 4: Folding in Mix-Ins

    Here comes the delicious part! Using a rubber spatula, carefully fold in the crushed Oreo cookies, crushed Chips Ahoy cookies, white chocolate chips, and semi-sweet chocolate chips. Be gentle; we want those delicious bits to stay intact, lending flavor and texture without losing their crunch.

    Step 5: Shaping the Cookies

    Grab a #30 cookie scoop—this is about two tablespoons worth of dough. Scoop out the dough and form 12 dough balls. Slightly flatten each ball and place either a whole Oreo cookie or a square of a milk chocolate bar right in the center. Cover it with more dough, pinching the edges to seal the surprise inside. Your delicious filling is hidden away now!

    Step 6: Chilling the Dough

    Once shaped, it’s crucial to chill the dough! Place the cookie dough balls on a baking sheet and pop them into the refrigerator for at least three hours. Chilling firms up the dough, preventing the cookies from spreading too much while they bake. Plus, it makes your treat even tastier!

    Step 7: Prepping for Baking

    When the dough is chilled and firm, preheat your oven to 350°F. Line your baking sheets with parchment paper—this helps prevent sticking. Space the chilled cookie dough balls apart on the sheets; this gives them room to spread while baking. And trust me, they will spread and grow into the most tempting cookies!

    Step 8: Baking the Cookies

    Pop those trays into the oven and bake for 15 to 18 minutes. You want the edges to set, while the tops look ever-so-slightly cracked. This is the sweet spot for that perfect chewy texture! Once they’re ready, let the cookies cool on the baking sheet for about 10 minutes. Then, transfer them to a wire rack to cool completely. Enjoy this wait; the aroma is divine!

    Tips for Success

    • Always use softened butter for easy mixing and a better texture.
    • Chill the dough for at least three hours. This prevents spreading and enhances flavor.
    • Feel free to swap out mix-ins based on your family’s favorites—get creative!
    • Use a kitchen scale for precise measurements if you have one; it can help!
    • Don’t skip the parchment paper; it’s the secret to perfect cookie release!

    Equipment Needed

    • Large mixing bowl: You can also use a stand mixer if you have one for easy mixing.
    • Electric mixer: A hand mixer works just fine if you don’t have a stand mixer.
    • Rubber spatula: This is great for folding in ingredients, but a wooden spoon works too.
    • Cookie scoop: A tablespoon can be a handy alternative for portioning cookie dough.
    • Baking sheets: Use any flat, oven-safe sheet; just remember to line them with parchment paper!

    Variations

    • Nut Allergies: Swap in sunflower seed butter for a nut-free option that still delivers a delicious taste.
    • Gluten-Free: Use a 1-to-1 gluten-free baking blend in place of bread flour to make these treats gluten-free.
    • Low Sugar: Reduce the granulated and brown sugars by half or try using a sugar substitute to cut calories.
    • Vegan Option: Replace eggs with flaxseed meal or chia seeds and use vegan butter for a plant-based twist.
    • Flavor Twists: Add a hint of almond or peppermint extract for a delightful twist on the classic vanilla flavor.

    Serving Suggestions

    • Pairing drinks: Serve these cookies with a glass of cold milk or a warm cup of coffee for a delightful contrast.
    • Presentation: Arrange them on a colorful platter to show off their vibrant blue hue; it makes a lovely centerpiece!
    • Special occasions: These treats are perfect for birthday parties or family gatherings—everyone will want seconds!
    • Snack time: Pack them in lunchboxes for a fun twist that kids will love!

    FAQs about Blue Monster Cookie Treats

    Got questions about these delightful Blue Monster Cookie Treats? Don’t worry, I’ve got you covered! Here are some answers to common queries that might pop up as you embark on your cookie-baking adventure.

    Can I use different food coloring?

    Absolutely! If blue isn’t your favorite, feel free to swap it for another color. Just keep in mind that food coloring can impact the final look, so choose a color that excites you!

    How should I store the cookies?

    To maintain their freshness, store the cookies in an airtight container at room temperature. If you want them to last longer, you can freeze them for up to three months!

    Can I make the dough ahead of time?

    You bet! You can prepare the cookie dough and chill it for up to a day before baking. Just make sure to cover it well to prevent drying out. It’s a real time-saver for busy weeks!

    Are these cookies suitable for children with allergies?

    Check the ingredients carefully! While these Blue Monster Cookie Treats are vegetarian, they do contain eggs and wheat. However, you can make allergy-friendly variations by using substitutes, like gluten-free flour or egg replacements.

    What’s the best way to serve these cookies?

    These cookies shine at parties or gatherings! Pair them with ice cream or a fun dip, and watch your guests’ eyes widen in delight. They’re not just cookies; they’re a playful experience!

    Final Thoughts

    Creating Blue Monster Cookie Treats is more than just baking; it’s an adventure filled with color, creativity, and a sprinkle of joy! The vibrant blue, combined with the delightful crunch from the cookie bits, makes these treats a hit, not just for kids but for adults too. The smiles around the table as everyone digs in are truly priceless. And let’s not forget the joy of sharing these cookies with family or friends! So, roll up your sleeves, unleash your inner baker, and whip up a batch of happiness. You won’t regret it, I promise!


    Print

    clock clock iconcutlery cutlery iconflag flag iconfolder folder iconinstagram instagram iconpinterest pinterest iconfacebook facebook iconprint print iconsquares squares iconheart heart iconheart solid heart solid icon

    Description

    Delicious and fun Blue Monster Cookie Treats, perfect for parties or special occasions.


    • 1 cup unsalted butter, softened
    • 1 cup packed brown sugar
    • 1/2 cup granulated sugar
    • 2 large eggs, room temperature
    • 2 teaspoons vanilla extract
    • 1 tablespoon royal blue gel food coloring
    • 3 cups bread flour
    • 1 teaspoon baking powder
    • 1/2 teaspoon baking soda
    • 1/2 teaspoon salt
    • 1 cup crushed Oreo cookies
    • 1 cup crushed Chips Ahoy cookies
    • 1 cup white chocolate chips
    • 1 cup semi-sweet chocolate chips
    • 12 whole Oreo cookies (for stuffing)
    • 12 squares milk chocolate bars (optional stuffing)
    • 24 candy eyeballs

    1. Beat softened butter, brown sugar, granulated sugar, and vanilla extract in a large bowl with an electric mixer until creamy and smooth.
    2. Add eggs one at a time, incorporating each fully, then mix in royal blue gel food coloring until dough has uniform blue color.
    3. Sift bread flour, baking powder, baking soda, and salt directly into the wet ingredients and mix on low speed until just combined.
    4. Using a rubber spatula, fold crushed Oreo cookies, crushed Chips Ahoy cookies, white chocolate chips, and semi-sweet chocolate chips evenly into the dough.
    5. Using a #30 cookie scoop (about 2 tablespoons), form 12 dough balls. Flatten each slightly, place a whole Oreo cookie or a square of milk chocolate in the center, then cover with more dough and pinch edges to seal tightly.
    6. Press two candy eyeballs and extra cookie pieces on top of each cookie dough ball. Refrigerate for at least 3 hours to firm the dough.
    7. Preheat oven to 350°F. Line baking sheets with parchment paper and arrange chilled cookie dough balls spaced apart. Bake for 15 to 18 minutes until edges are set and tops appear slightly cracked.
    8. Let cookies cool on the baking sheet for 10 minutes before transferring to a wire rack to cool completely.

    Notes

    • Ensure the butter is softened for better mixing.
    • Chilling the dough is crucial for preventing the cookies from spreading too much while baking.
    • Feel free to customize the mix-ins as desired.
    • Prep Time: 30 minutes
    • Cook Time: 15-18 minutes
    • Category: Dessert
    • Method: Baking
    • Cuisine: American

    Nutrition

    • Serving Size: 1 cookie
    • Calories: 300
    • Sugar: 35g
    • Sodium: 200mg
    • Fat: 15g
    • Saturated Fat: 8g
    • Unsaturated Fat: 5g
    • Trans Fat: 0g
    • Carbohydrates: 40g
    • Fiber: 2g
    • Protein: 3g
    • Cholesterol: 30mg

    Sharing is caring!

  • Apple Scones with Maple Glaze

    Apple Scones with Maple Glaze


    Introduction to Apple Scones with Maple Glaze

    When life gets busy, it’s comforting to have a warm, delightful treat waiting for you. That’s where these Apple Scones with Maple Glaze come in! Perfectly fragrant and delicious, they’re an easy solution for breakfast or an afternoon snack that will make your taste buds sing.

    Whether you’re a busy mom juggling schedules or a professional racing to meetings, these scones offer a quick and rewarding escape. Plus, they’re an impressive way to share love and warmth with friends and family. So, let’s dive into this simple yet satisfying culinary adventure together!

    Why You’ll Love This Apple Scones with Maple Glaze

    These Apple Scones with Maple Glaze will quickly become your go-to recipe. They’re a breeze to whip up, making them perfect for hurried mornings or cozy afternoons. Each bite bursts with warm, spiced apple flavor, topped with a sweet maple glaze that adds a special touch. Plus, they’re versatile enough to satisfy even the pickiest eaters in your family. Trust me, once you try these, you’ll be coming back for more!

    Ingredients for Apple Scones with Maple Glaze

    Gathering the right ingredients is the first step towards baking those heavenly Apple Scones with Maple Glaze. Here’s a peek at what you’ll need:

    • All-purpose flour: This is the base of your scones, providing structure. You can substitute some with whole wheat flour for a nuttier flavor.
    • Baking powder: The magic leavening agent that helps your scones rise to fluffy perfection. Make sure it’s fresh for the best results.
    • Granulated sugar: Adds sweetness and balances the spices. Alternatively, try brown sugar for a deeper, caramel-like flavor.
    • Ground cinnamon: A warm spice that pairs beautifully with apples. Feel free to add more if you’re a cinnamon lover!
    • Salt: Just a pinch enhances the flavors of the other ingredients. Don’t skip it!
    • Ground nutmeg: This spice adds a hint of warmth and complexity. It’s optional but recommended for that cozy touch!
    • Ground all-spice: Just a whisper of spice that complements the apple flavor. Substituting with pumpkin pie spice works perfectly too.
    • Unsalted butter: Cold and cubed, this is your key to a flaky texture. Keep it chilled until you’re ready to use it.
    • Unsweetened applesauce: Adds moisture and natural sweetness. You can swap it with mashed bananas for a different twist.
    • Heavy cream: Rich and creamy, it gives the scones a tender crumb. Milk or a dairy-free alternative can be used, just keep the fat content in mind.
    • Large eggs: Cold eggs help bind the mixture together, giving it structure.
    • Pure vanilla extract: A splash of this elevates the flavors, bringing the scones to another level. You can even use almond extract for a unique taste.
    • Granny Smith apples: Tart apples bring a perfect balance of flavor. Feel free to try other apple varieties if you prefer sweet apples.

    For exact measurements, check the bottom of the article where all the details are laid out for printing!

    How to Make Apple Scones with Maple Glaze

    Now that you have your ingredients ready, it’s time to bring them together to create those scrumptious Apple Scones with Maple Glaze! Follow these easy steps, and you’ll have a delightful treat on your hands in no time.

    Step 1: Preheat the Oven and Prepare Baking Sheet

    First things first, let’s get that oven preheating to 425°F (218°C). This ensures your scones bake evenly and turn out perfectly fluffy. While the oven warms up, line a large baking sheet with parchment paper. This will prevent any sticking and make cleanup a breeze.

    Step 2: Mix Dry Ingredients

    In a large bowl, combine your flour, baking powder, granulated sugar, ground cinnamon, salt, nutmeg, and ground all-spice. Use a whisk to blend everything evenly. This not only combines the dry ingredients, but it also aerates the flour for a lighter texture. Just imagine the warm aromas that will fill your kitchen soon!

    Step 3: Incorporate the Butter

    Now comes the fun part! Take your cold, cubed butter and add it to the flour mixture. Using a pastry cutter or your fingers, work the butter into the dry ingredients until it resembles coarse meal. You want little chunks of butter, about the size of peas. This is what creates those flaky layers we all love in scones!

    Step 4: Prepare the Wet Mixture

    In a glass measuring cup, whisk together the unsweetened applesauce, heavy cream, cold egg, and pure vanilla extract. This is where all that lovely moisture comes from. Make sure it’s well mixed; you want everything to blend flawlessly before it joins the dry ingredients.

    Step 5: Combine Wet and Dry Mixtures

    Pour the wet mixture into the center of your dry ingredients. Then, gently fold in the chopped Granny Smith apples. Use a spatula to stir everything together until just moistened. The dough may look shaggy, but that’s completely normal! Don’t overmix it; we want tender scones.

    Step 6: Knead and Shape Dough

    Sprinkle a little flour on a clean surface, then empty your shaggy dough onto it. Gently knead the dough a few times until it comes together. Be careful not to overdo it! Shape the dough into an 8-inch disc; it doesn’t have to be perfect. Think of it more as a rustic charm!

    Step 7: Cut into Wedges and Chill

    Using a sharp knife, cut your disc into 8 even wedges. Carefully transfer these wedges to your prepared baking sheet, placing them about 2 inches apart. For this part, you can place the tray in the refrigerator for about 20 minutes. This chilling step helps your scones hold their shape while baking.

    Step 8: Brush with Egg Wash and Bake

    After they’ve chilled, brush each scone lightly with egg wash. This will give them that beautiful golden color. Don’t be shy with the cinnamon sparkling sugar either—sprinkle generously on top! Now, pop them into the preheated oven and bake for 20 to 22 minutes, or until they’re golden brown and your kitchen smells heavenly.

    Step 9: Drizzle with Maple Glaze and Serve

    Once they’re done baking, let the scones cool on the baking sheet for about 10 minutes. After cooling, drizzle them with your maple glaze. Serve those scones warm and watch everyone’s eyes light up. You’ve just created a piece of cozy, baked happiness!

    Tips for Success

    • Always use cold butter for flaky scones; the colder, the better!
    • Don’t overmix the dough; it should be slightly shaggy for a tender texture.
    • Chilling the scones helps them maintain their shape while baking.
    • Feel free to experiment with different apple varieties for varied flavors.
    • For extra sweetness, drizzle a little more maple glaze on top!

    Equipment Needed

    • Baking sheet: A regular sheet will do, but an insulated one keeps your scones from over-browning.
    • Parchment paper: Helps with easy cleanup. If you don’t have it, grease the baking sheet.
    • Pastry cutter: A fork works too if you don’t have one!
    • Mixing bowls: One large for dry ingredients and a smaller one for wet mixtures.
    • Whisk: A fork can be used for mixing ingredients, too!

    Variations on Apple Scones with Maple Glaze

    • Change the Apples: Swap Granny Smith apples for sweet varieties like Honeycrisp or Fuji for a milder flavor.
    • Add Nuts: Toss in some chopped walnuts or pecans for a delightful crunch that pairs beautifully with the soft scones.
    • Spice it Up: Experiment with spices! Try a pinch of cardamom for a unique twist on the classic flavor.
    • Make it Vegan: Substitute the cream with coconut milk, use a flax egg in place of the regular egg, and replace butter with vegan margarine.
    • Fruit Medley: Incorporate other fruits like cranberries or blueberries for a burst of color and flavor.

    Serving Suggestions for Apple Scones with Maple Glaze

    • Pair your scones with a hot cup of coffee or spiced chai for the perfect morning treat.
    • Serve alongside a fresh fruit salad to add a pop of color and nutrition.
    • For a cozy afternoon, enjoy them with a scoop of whipped cream.
    • Presentation tip: Arrange the scones on a beautiful platter, drizzled with extra glaze for a lovely touch.
    • Add a sprinkle of powdered sugar on top just before serving for an elegant finish!

    FAQs about Apple Scones with Maple Glaze

    Can I use other types of apples for this recipe?

    Absolutely! While Granny Smith apples give a nice tart balance, you can use sweet apples like Fuji or Honeycrisp. Each variety will bring its unique flavor to your scones.

    How do I store leftover scones?

    If you have any leftover scones (which is rare!), store them in an airtight container at room temperature for up to three days. For longer storage, freeze them, and just reheat when you’re ready to enjoy a delightful treat!

    Can I make the dough ahead of time?

    Yes! You can prepare the dough and cut it into wedges in advance. Just wrap the shaped dough in plastic wrap and refrigerate it for up to 24 hours. When you’re ready to bake, follow the same instructions as you normally would!

    What’s the best way to glaze the scones?

    The easiest way to glaze your scones is to place them on a cooling rack set over a baking sheet. Drizzle the maple glaze over the scones and let it set for a few minutes. This way, the glaze won’t make a mess.

    How can I customize the glaze for different flavors?

    You can easily adapt the glaze. Add a pinch of cinnamon or a drop of almond extract to the maple glaze for a unique twist. Citrus zest can also brighten the flavor beautifully!

    Final Thoughts on Apple Scones with Maple Glaze

    Every bite of these Apple Scones with Maple Glaze is a warm embrace, bringing comfort during busy days. The delightful combination of spiced apple and silky glaze makes them a real crowd-pleaser. They’re not just a treat; they create memories shared over breakfast or an afternoon tea. Whether you’re serving these at a family gathering or enjoying them solo, there’s a certain joy in baking that connects us to our roots. So, gather your loved ones, whip up a batch, and let these scones become a cherished part of your culinary adventures!


    Print

    clock clock iconcutlery cutlery iconflag flag iconfolder folder iconinstagram instagram iconpinterest pinterest iconfacebook facebook iconprint print iconsquares squares iconheart heart iconheart solid heart solid icon

    Description

    Delicious and fragrant apple scones topped with a sweet maple glaze, perfect for a cozy breakfast or snack.


    • 3 cups (360g) all-purpose flour
    • 1 Tablespoon (14g) baking powder
    • 2/3 cup (133g) granulated sugar
    • 1 teaspoon ground cinnamon
    • 1/2 teaspoon salt
    • 1/4 teaspoon ground nutmeg
    • 1/4 teaspoon ground all-spice
    • 10 Tablespoons (141g) unsalted butter, cold and cut into 1/2-inch cubes
    • 1/2 cup (130g) unsweetened applesauce
    • 1/4 cup (57ml) heavy cream
    • 1 large egg, cold
    • 2 teaspoons pure vanilla extract
    • 1 and 1/2 cups (200g) granny smith apples, peeled or unpeeled

    1. Preheat the oven to 425°F (218°C). Line a large baking sheet with parchment paper and set aside.
    2. In a large bowl, combine flour, baking powder, granulated sugar, cinnamon, salt, nutmeg, and all-spice, mix well to combine.
    3. Cut the butter into small cubes, then, using a pastry cutter, work the butter into the dough until it resembles a coarse meal. The chunks of butter should be about the size of peas.
    4. In a glass measuring cup, whisk together the applesauce, heavy cream, egg, and vanilla.
    5. Pour the liquid mixture into the center of the flour mixture. Then add in the chopped apples. Use a spatula to stir everything together until just moistened. Don’t worry if the dough looks dry/shaggy!
    6. Empty the loose dough out onto a clean, lightly floured work surface. Knead the dough until it comes together, then shape it into an 8-inch disc.
    7. Cut the disc into 8 even wedges and carefully transfer them to the prepared sheet, placing them 2-inches apart. Place in the refrigerator for 20 minutes.
    8. Remove the tray from the refrigerator and lightly brush each scone with egg wash.
    9. Sprinkle generously with the cinnamon sparkling sugar. Bake for 20 to 22 minutes, or until golden brown.
    10. Allow scones to cool for 10 minutes on the baking sheet, then drizzle with the glaze and serve warm!

    Notes

    • For best results, keep the butter cold.
    • Feel free to substitute other types of apples if you prefer.
    • Prep Time: 30 minutes
    • Cook Time: 22 minutes
    • Category: Bakery
    • Method: Baking
    • Cuisine: American

    Nutrition

    • Serving Size: 1 scone
    • Calories: 250
    • Sugar: 10g
    • Sodium: 180mg
    • Fat: 10g
    • Saturated Fat: 6g
    • Unsaturated Fat: 3g
    • Trans Fat: 0g
    • Carbohydrates: 38g
    • Fiber: 1g
    • Protein: 3g
    • Cholesterol: 50mg

    Sharing is caring!

  • Pumpkin Chocolate Muffins

    Pumpkin Chocolate Muffins


    Introduction to Pumpkin Chocolate Muffins

    As the leaves begin to change and the crisp air fills the atmosphere, there’s something utterly delightful about baking. For me, the aroma of pumpkin chocolate muffins wafting through the kitchen is a cozy reminder of fall. These muffins are not just a treat; they’re a warm hug for your taste buds! Perfect for busy mornings or unexpected guests, they bring the comforting flavors of pumpkin and chocolate together in a scrumptious bite. Trust me, once you make these, they’ll become a go-to recipe that your family will ask for again and again!

    Why You’ll Love This Pumpkin Chocolate Muffins

    These pumpkin chocolate muffins are not only easy to whip up, but they are also incredibly satisfying. In just around 40 minutes, you can enjoy warm, moist muffins that blend the unique flavors of pumpkin and chocolate perfectly. They make breakfast a breeze and are delightful snacks for your kids after school. Plus, they freeze well! Imagine having delicious treats ready to go whenever you need a little sweetness in your day.

    Ingredients for Pumpkin Chocolate Muffins

    To create these delightful pumpkin chocolate muffins, you’ll need a few simple ingredients that work beautifully together. Here’s what you’ll gather:

    • All-purpose flour: The base of our muffins, providing structure and softness.
    • Pumpkin puree: This adds moisture and that lovely pumpkin flavor. Fresh or canned works like a charm!
    • Chocolate chips: These little gems bring sweetness and a rich chocolatey taste. Dark, semi-sweet, or even milk chocolate can be used!
    • Eggs: They help bind everything together, providing richness.
    • Vegetable oil: For moisture. You can substitute with melted coconut oil if you prefer.
    • Brown sugar: This adds a hint of caramel flavor and sweetness. Feel free to experiment with honey or maple syrup for a lighter option!
    • Baking powder: This will help our muffins rise and be fluffy.
    • Ground cinnamon: A warm spice that brings fall into every bite.
    • Ground nutmeg: Just a pinch adds depth to the flavor profile.
    • Salt: A pinch helps enhance all the flavors.

    You’ll find specific measurements for each ingredient at the bottom of this article, perfect for printing out! Happy baking!

    How to Make Pumpkin Chocolate Muffins

    Preheat the Oven and Prepare the Muffin Tin

    The first step to crafting perfect pumpkin chocolate muffins is preheating your oven to 375°F (190°C). This ensures your muffins bake evenly and rise nicely. While the oven heats up, take a 12-cup muffin tin and line it with paper liners or give it a good greasing with butter. This step is crucial since it prevents the muffins from sticking, allowing them to pop out effortlessly once they are baked. Trust me, the last thing you want is a muffin stuck in the pan!

    Combine the Dry Ingredients

    In a large bowl, gather and whisk together your dry ingredients: flour, baking powder, cinnamon, nutmeg, and salt. Each one plays a vital role in our muffins. The flour provides structure while the baking powder gives them that wonderful lift. Cinnamon and nutmeg tie in cozy fall flavors, wrapping our muffins in warmth. The salt might seem subtle, but it enhances all the flavors, letting the sweetness of the pumpkin and chocolate really shine. Whisk until combined, and you’re ready for the next step!

    Mix the Wet Ingredients

    In a separate bowl, whisk together the wet ingredients: pumpkin puree, eggs, vegetable oil, and brown sugar. The pumpkin puree is what brings that signature flavor and moisture, helping the muffins stay soft and fluffy. Eggs bind everything together while also adding richness. The vegetable oil ensures our muffins are moist, while the brown sugar introduces a lovely caramel sweetness. Whisk until smooth, creating a beautiful mixture that feels like fall in a bowl!

    Combine Wet and Dry Ingredients

    Now, it’s time to gently fold the wet mixture into the dry ingredients. Pour the bowl of wet ingredients into the bowl of dry ingredients, and with a spatula or wooden spoon, carefully combine them. Remember, folding is key! Overmixing can lead to dense muffins, and nobody wants that. Just blend until you see a few streaks of flour; it’s totally okay if the batter isn’t completely smooth. That little bit of character makes for fluffy, tender muffins!

    Add Chocolate Chips

    Next, it’s time for the star of the show: chocolate chips! Gently fold them into your batter, allowing the sweet morsels to distribute evenly. Reserve a small handful to sprinkle on top of each muffin before baking. This not only enhances the visual appeal but also gives that extra bit of chocolatey goodness when you take a bite. It’s an invitation just waiting to happen!

    Fill Muffin Cups and Bake

    Now, let’s fill our muffin cups. Using a spoon or an ice cream scoop, distribute the batter evenly among the muffin tin, filling each cup about two-thirds full. This space allows them to rise beautifully. After filling them, sprinkle the reserved chocolate chips on top for that decadent finish. Place the muffin tin in your preheated oven and bake for 20-25 minutes. When done, a toothpick inserted into the center should come out clean, and your kitchen will smell heavenly!

    Tips for Success

    • Make sure your ingredients are at room temperature for better mixing and texture.
    • Keep an eye on the muffins as they bake; every oven is different!
    • Use an ice cream scoop to fill the muffin tin for even sizes.
    • Don’t skip the chocolate chip topping; it makes them extra special!
    • Let muffins cool in the pan for a few minutes before transferring to a wire rack.

    Equipment Needed

    • Muffin tin: A standard 12-cup muffin tin works best, but you can also use a silicone mold.
    • Mixing bowls: Have at least two bowls; a large one for dry ingredients and a medium one for wet ingredients.
    • Whisk and spatula: Essential for mixing and folding ingredients together smoothly.
    • Paper liners or cooking spray: Prevents sticking and makes cleanup a breeze!

    Variations on Pumpkin Chocolate Muffins

    • Gluten-Free Option: Substitute all-purpose flour with a gluten-free blend. Just ensure it includes xanthan gum for structure!
    • Nutty Additions: Fold in a handful of chopped nuts like walnuts or pecans for a delightful crunch and extra flavor.
    • Spicy Twist: Add a dash of ground ginger or allspice for an extra layer of warmth and spice that complements the pumpkin beautifully.
    • Vegan Friendly: Replace eggs with flaxseed meal mixed with water and use a plant-based oil instead of vegetable oil.
    • Sugar-Free Version: Swap brown sugar for a sugar substitute like erythritol or monk fruit sweetener to lower sugar content while keeping them sweet!

    Serving Suggestions for Pumpkin Chocolate Muffins

    • Pair muffins with a steaming cup of coffee or spiced chai for a cozy breakfast.
    • Serve warm with a dollop of cream cheese frosting for a sweeter dessert option.
    • Offer alongside fresh fruit like sliced apples or pears to add a refreshing contrast.
    • Drizzle with a light chocolate glaze for an elegant touch at parties.

    FAQs about Pumpkin Chocolate Muffins

    I often get a few common questions when it comes to these delightful pumpkin chocolate muffins. Let’s dive into some of the most frequently asked questions to help you on your baking journey!

    Can I use fresh pumpkin instead of canned? Absolutely! Fresh pumpkin can add a wonderful flavor, but make sure it’s well-pureed and drained of excess moisture. Otherwise, your muffins might turn out too wet!

    How do I store leftover muffins? Keep your muffins in an airtight container at room temperature for up to three days. If you want to save them for longer, pop them in the freezer! They freeze beautifully and are perfect for quick snacks later.

    Can I make these muffins ahead of time? Yes! You can prepare the batter the night before and store it in the fridge. Just give it a gentle mix before pouring it into the muffin tin the next day. Freshly baked muffins for breakfast? Yes, please!

    What variations can I try with this recipe? There’s so much room for creativity! Try adding nuts, swapping chocolate chips for peanut butter chips or using different spices to create your own version. That’s the beauty of baking at home!

    Are these muffins suitable for kids? Definitely! Kids love the combo of pumpkin and chocolate, and they can be a great snack or quick breakfast option. They’re not too sweet and pack in good flavors!

    Final Thoughts

    Baking these pumpkin chocolate muffins is more than just following a recipe; it’s about creating memories. With each muffin, you’re bringing warmth and joy into your home. Whether they’re for a busy breakfast or a sweet afternoon treat, they’re bound to spark happiness. The rich pumpkin flavor paired with indulgent chocolate creates a delightful harmony that’ll have your family reaching for seconds. So, roll up your sleeves, embrace the autumn vibes, and let the deliciousness unfold as you savor every bite together. Trust me, these muffins will become a cherished tradition in your kitchen!


    Print

    clock clock iconcutlery cutlery iconflag flag iconfolder folder iconinstagram instagram iconpinterest pinterest iconfacebook facebook iconprint print iconsquares squares iconheart heart iconheart solid heart solid icon

    Description

    Delicious and moist pumpkin chocolate muffins that perfectly combine the flavors of pumpkin and chocolate.


    • 1 3/4 cups all-purpose flour
    • 1 cup pumpkin puree
    • 1 cup chocolate chips
    • 2 large eggs
    • 1/2 cup vegetable oil
    • 3/4 cup brown sugar
    • 2 teaspoons baking powder
    • 1 teaspoon ground cinnamon
    • 1/2 teaspoon ground nutmeg
    • 1/2 teaspoon salt

    1. Preheat your oven to 375°F (190°C) and line a 12-cup muffin tin with paper liners or grease with butter.
    2. In a large bowl, whisk together flour, baking powder, cinnamon, nutmeg, and salt until well combined.
    3. In another bowl, whisk together pumpkin puree, eggs, vegetable oil, and brown sugar until smooth and well combined.
    4. Pour the wet ingredients into the dry ingredients and gently fold together until just combined. Don’t overmix.
    5. Gently fold in the chocolate chips, reserving a few to sprinkle on top of each muffin.
    6. Divide batter evenly among muffin cups, filling each about 2/3 full. Sprinkle remaining chocolate chips on top and bake for 20-25 minutes until a toothpick inserted in center comes out clean.

    Notes

    • Do not overmix the batter to ensure fluffy muffins.
    • Store leftover muffins in an airtight container for up to three days.
    • Prep Time: 15 minutes
    • Cook Time: 25 minutes
    • Category: Dessert
    • Method: Baking
    • Cuisine: American

    Nutrition

    • Serving Size: 1 muffin
    • Calories: 180
    • Sugar: 12g
    • Sodium: 150mg
    • Fat: 8g
    • Saturated Fat: 1g
    • Unsaturated Fat: 4g
    • Trans Fat: 0g
    • Carbohydrates: 24g
    • Fiber: 1g
    • Protein: 3g
    • Cholesterol: 30mg

    Sharing is caring!

  • Chocolate Chip Pumpkin Bread

    Chocolate Chip Pumpkin Bread


    Introduction to Chocolate Chip Pumpkin Bread

    As the leaves start to turn and the scent of cinnamon fills the air, I can’t help but think of one of my favorite comfort foods: Chocolate Chip Pumpkin Bread. It’s a delightful blend of rich pumpkin and sweet chocolate that warms your heart and home. Perfect for a quick breakfast or a sweet afternoon treat, this recipe will soon become your go-to solution for busy days. Just imagine surprising your loved ones with this cozy loaf, bringing smiles and a hint of nostalgia as they savor every slice. Trust me, once you try it, you’ll be hooked!

    Why You’ll Love This Chocolate Chip Pumpkin Bread

    This Chocolate Chip Pumpkin Bread is a true lifesaver. It’s easy to whip up, taking just about an hour from start to finish. Not only does it fill your kitchen with an irresistible aroma, but every bite is a perfect blend of warm spices and rich chocolate. Plus, it makes an excellent snack for kids and adults alike, offering a tasty way to enjoy pumpkin whenever you crave comfort. It’s a win-win!

    Ingredients for Chocolate Chip Pumpkin Bread

    Gathering the right ingredients is essential for an outstanding Chocolate Chip Pumpkin Bread. Here’s what you’ll need:

    • All-purpose flour: The base of our bread, creating a wonderful structure. Opt for whole wheat for a healthier version.
    • Baking powder & baking soda: These are your leavening agents, ensuring the bread rises beautifully.
    • Salt: Don’t skip this! A pinch enhances flavors, balancing the sweetness.
    • Ground spices: Cinnamon, cloves, and nutmeg work together to warm your bread with fall flavors. Feel free to adjust the amounts to suit your palate.
    • Cooking oil: Gives the bread a moist texture. You can substitute with unsweetened applesauce for a lighter option.
    • Eggs: They provide richness and help bind the ingredients. If you’re vegan, flax eggs are a great substitute.
    • Sugar: This sweetener not only sweetens but also contributes to the moistness. Brown sugar adds a deeper flavor; feel free to use less for a healthier approach.
    • Vanilla extract: A must for depth of flavor. You can use almond extract for a unique twist.
    • Pumpkin puree: The star of the show! This provides moisture and flavor. Canned pumpkin is a time-saver, but homemade works too.
    • Chocolate chips: These little gems will melt in your mouth. Choose semi-sweet for a classic taste, or go for dark chocolate to elevate the luxury.
    • Oil spray: Ensuring your bread doesn’t stick to the pan—this is a baking must-have!

    You can find the exact quantities of each ingredient at the bottom of this article, making it convenient for printing and follow-along!

    How to Make Chocolate Chip Pumpkin Bread

    Now comes the fun part! Making Chocolate Chip Pumpkin Bread is a delightful journey that’s oh-so-simple. I’ll walk you through each step, so you can make this cozy treat with ease and confidence.

    Step 1: Preheat the Oven

    First things first, let’s set the stage for baking perfection. Preheat your oven to 350°F. This is crucial because a well-preheated oven ensures that your bread will rise beautifully and bake evenly. While the oven warms up, you can gather the rest of your ingredients—it’s multitasking made easy!

    Step 2: Prepare the Dry Ingredients

    In a medium-sized bowl, mix together your dry ingredients: flour, baking powder, baking soda, salt, and those aromatic spices—cinnamon, cloves, and nutmeg. Make sure to whisk them well. This step is vital to ensure the spices and leavening agents are evenly distributed, which enhances the flavor of your Chocolate Chip Pumpkin Bread.

    Step 3: Mix the Wet Ingredients

    In a large mixing bowl, combine the cooking oil, eggs, sugar, vanilla extract, and pumpkin puree. Whisk everything together until it’s nice and creamy. This blending not only combines the flavors but also ensures a rich texture that makes each bite of your bread scrumptious. Just imagine that creaminess transforming into a loaf full of comforting goodness!

    Step 4: Combine the Mixtures

    Time to unite our dry and wet ingredients! Gradually add the dry mix to the wet mix, stirring gently until just combined. Be careful not to overmix; a few lumps are perfectly fine. Overmixing can lead to a denser bread, and we want that light, fluffy texture that sings with each bite of chocolate and pumpkin flavors.

    Step 5: Prepare the Pan

    Before you pour in that lovely batter, let’s get our loaf pan ready. Spray the sides and bottom of an 8” x 4” x 3” loaf pan with oil spray. This prevents sticking, which is crucial because nobody wants to be wrestling with their fresh bread when it comes time to slice. A well-greased pan leads to a beautiful presentation!

    Step 6: Bake to Perfection

    Pour your glorious batter into the prepared pan, spreading it evenly. To level up the indulgence, sprinkle the last 1/4 cup of chocolate chips on top. Slide the pan into the oven and bake for 50-60 minutes. Here’s a handy tip: insert a toothpick into the center. If it comes out clean, your bread is ready to shine out of the oven. The warm aroma filling your kitchen will have everyone eagerly waiting for a slice!

    Tips for Success

    • Always use room temperature ingredients for better mixing and texture.
    • Don’t skip the toothpick test! It’s the best way to check for doneness.
    • Let the bread cool in the pan for 10 minutes before transferring it to a wire rack.
    • For extra moisture, wrap the bread in plastic wrap while it’s still slightly warm.
    • Store in an airtight container to keep it fresh and tasty for days!

    Equipment Needed

    • Loaf pan: An 8” x 4” x 3” pan is ideal; a standard bread pan works too.
    • Mixing bowls: Use one large and one medium for wet and dry ingredients.
    • Whisk: A simple whisk works wonders; a fork can serve in a pinch.
    • Spatula: For smoothly combining ingredients and scraping the bowl.
    • Toothpick: Essential for testing doneness; you can also use a cake tester.

    Variations for Chocolate Chip Pumpkin Bread

    • Nutty Twist: Add a cup of chopped walnuts or pecans for a satisfying crunch and a boost of healthy fats.
    • Spiced Up: Experiment with additional spices like ginger or allspice to give your bread a new flavor profile.
    • Gluten-Free Option: Substitute all-purpose flour with a 1:1 gluten-free baking blend for a delicious gluten-free treat.
    • Lower Sugar Version: Replace some or all of the sugar with a natural sweetener like honey or maple syrup for a healthier twist.
    • Chocolate Lovers: For a richer indulgence, incorporate a mix of milk, dark, and white chocolate chips.
    • Pumpkin Spice Latte Bread: Enhance flavor by adding a tablespoon of espresso powder to the batter for that café vibe.

    Serving Suggestions for Chocolate Chip Pumpkin Bread

    • Pair it with a hot cup of coffee or tea for a cozy afternoon boost.
    • Serve warm, topped with a light smear of cream cheese for extra decadence.
    • Dust with powdered sugar for a beautiful, elegant presentation at gatherings.
    • Enjoy slices with a scoop of vanilla ice cream for an indulgent dessert treat.
    • Garnish with chopped nuts for added texture and flavor.

    FAQs about Chocolate Chip Pumpkin Bread

    As I’ve baked my fair share of Chocolate Chip Pumpkin Bread, I know that questions pop up often. Here are some common inquiries as well as my best answers!

    Can I use fresh pumpkin instead of canned?

    Absolutely! If you have fresh pumpkin, cook and puree it for a homemade touch. Just ensure it’s well-drained to avoid excess moisture in your bread.

    How can I make my Chocolate Chip Pumpkin Bread healthier?

    There are plenty of ways! You can reduce sugar, swap out white flour for whole wheat, or even use applesauce in place of some oil. Every little change can make a big difference!

    What should I do if my bread is too moist?

    If your bread ends up too moist, try reducing the amount of pumpkin puree next time. You can also make sure to measure accurately and not overmix the batter for a fluffier result.

    Can I freeze Chocolate Chip Pumpkin Bread?

    You sure can! Wrap it tightly in plastic wrap and place it in a freezer bag. It keeps well for up to three months, perfect for enjoying later!

    What can I add to customize my pumpkin bread?

    Feel free to get creative! Nuts, dried fruits, or even a sprinkle of your favorite seeds can make your Chocolate Chip Pumpkin Bread uniquely yours. Enjoy experimenting!

    Final Thoughts

    Making Chocolate Chip Pumpkin Bread is more than just baking; it’s about creating joy, comfort, and memories in your kitchen. The warm spices and gooey chocolate chips blend together, wrapping you in a cozy embrace with every bite. It’s the perfect way to embrace the flavors of fall or to sweeten up an ordinary day. Whether you serve it to family, share it with friends, or enjoy it all by yourself, this bread brings smiles and satisfaction all around. So roll up your sleeves and dive into this delightful recipe—you won’t regret it!


    Print

    clock clock iconcutlery cutlery iconflag flag iconfolder folder iconinstagram instagram iconpinterest pinterest iconfacebook facebook iconprint print iconsquares squares iconheart heart iconheart solid heart solid icon

    Description

    Chocolate Chip Pumpkin Bread is a deliciously moist bread filled with warm spices and chocolate chips, perfect for fall or any time of year.


    • 1 1/4 cups all purpose flour
    • 1/2 tsp baking powder
    • 1/2 tsp baking soda
    • 1/4 tsp salt
    • 1 tsp ground cinnamon
    • 1/2 tsp ground cloves
    • 1/2 tsp ground nutmeg
    • 3 oz cooking oil
    • 2 large eggs
    • 1 cup sugar
    • 1 tsp vanilla
    • 1 cup pumpkin puree
    • 1 1/4 cup chocolate chips divided
    • oil spray

    1. Preheat oven to 350F.
    2. In a medium sized bowl, add flour, baking powder, baking soda, salt, cinnamon, cloves, and nutmeg. Set aside.
    3. In a large mixing bowl, add oil, eggs, sugar, vanilla, and pumpkin puree. Mix well. Add 1 cup of chocolate chips.
    4. Add the dry ingredients to the wet ingredients and mix until well blended, scraping the bottom and sides of the bowl with a spatula.
    5. Oil spray the sides and bottom of an 8″ x 4″ x 3″ loaf pan. Pour the batter into the loaf pan and spread evenly. Top with 1/4 cup of chocolate chips.
    6. Bake at 350F for 50-60 minutes. Insert a toothpick in the middle of the loaf; if it comes out clean, it’s done.

    Notes

    • Ensure all ingredients are at room temperature for better mixing.
    • Store leftovers in an airtight container to keep moist.
    • This bread can also be frozen for later enjoyment.
    • Prep Time: 15 minutes
    • Cook Time: 50-60 minutes
    • Category: Baking
    • Method: Baking
    • Cuisine: American

    Nutrition

    • Serving Size: 1 slice
    • Calories: 210
    • Sugar: 14g
    • Sodium: 150mg
    • Fat: 8g
    • Saturated Fat: 1g
    • Unsaturated Fat: 6g
    • Trans Fat: 0g
    • Carbohydrates: 33g
    • Fiber: 1g
    • Protein: 3g
    • Cholesterol: 40mg

    Sharing is caring!

  • Lemon Zucchini Scones

    Lemon Zucchini Scones


    Introduction to Lemon Zucchini Scones

    Hey there, fellow food lovers! If you’re like me, life can sometimes feel like a juggling act. Between work, family, and everything else on our plates, I often crave something easy yet wonderful. That’s where these Lemon Zucchini Scones come in. They’re not just any ordinary scone; they’re a delightful fusion of tangy lemon and moist zucchini that can brighten any morning. Whether you need a quick solution for breakfast or want to impress guests, these scones deliver on all fronts. Trust me; you’ll be reaching for seconds!

    Why You’ll Love This Lemon Zucchini Scones

    These Lemon Zucchini Scones are a game-changer for busy mornings! They bake up quickly, taking just 18 minutes in the oven, so you can savor a warm treat without the fuss. The combination of tangy lemon and tender zucchini makes them a taste sensation. Plus, they freeze beautifully, ensuring you’ve got a delicious snack ready whenever life gets hectic. Say goodbye to boring breakfasts and hello to your new favorite scone!

    Ingredients for Lemon Zucchini Scones

    Gathering the right ingredients is the first step to success with these delightful Lemon Zucchini Scones. Here’s what you’ll need:

    • Zucchini: One medium zucchini adds moisture and a subtle earthiness to the scones. Don’t forget to squeeze out excess moisture!
    • All-purpose flour: This provides structure and a light texture. It’s the base for our scone recipe.
    • Whole wheat flour: For added nutrition and a nutty flavor, whole wheat adds a lovely depth to your scones.
    • Baking powder: The key leavening agent that helps the scones rise, making them fluffy and light.
    • Baking soda: Works in tandem with baking powder to give your scones that perfect lift.
    • Salt: Just a touch enhances the flavors and balances the sweetness.
    • Sugar: A bit of sweetness is essential, but feel free to adjust the amount to your taste.
    • Lemon zest: This vibrant ingredient infuses the scones with zesty fragrance and flavor. Use fresh lemons for the best taste!
    • Cold unsalted butter: Cubed butter gives the scones a tender crumb. Cold butter is crucial for achieving the right texture.
    • Buttermilk: It adds moisture and a slight tang. If you don’t have it, regular milk with a splash of lemon juice works too!
    • Egg: Just one large egg binds everything together and provides richness.
    • Vanilla extract: A dash of vanilla enhances the sweetness and complements the lemon beautifully.
    • Lemon glaze: A simple mix of powdered sugar and lemon juice takes these scones to the next level, making every bite irresistible!

    For exact quantities, look towards the bottom of the article where you’ll find all the measurements available for printing.

    How to Make Lemon Zucchini Scones

    Preheat and Prepare

    First things first, let’s get that oven fired up! Preheat your oven to 400°F (200°C). While it’s warming, line a baking sheet with parchment paper. This little step ensures that your Lemon Zucchini Scones won’t stick. Trust me, a smooth release means no broken scone drama. I like to have my workspace clear too; it helps to keep everything organized, making the whole process feel seamless and less frantic.

    Combine Dry Ingredients

    In a large mixing bowl, it’s time for those dry ingredients to shine! Mix together the all-purpose flour, whole wheat flour, baking powder, baking soda, salt, and sugar. Don’t forget to add the lemon zest, as it unleashes a beautiful fragrance. Stir until everything is evenly combined. I always take a moment to enjoy that fresh lemon aroma; it’s so uplifting and sets the right mood for baking!

    Work in the Butter

    Now, let’s add in our cold cubes of butter! Toss them into the dry mix and use a pastry cutter or your fingertips to work the butter until the mixture resembles coarse crumbs. It should feel like sandy texture in your fingers. This step is crucial for tender scones, so don’t rush it! You want those little chunks of butter to create lovely flaky layers in your scones. Embrace the mess; it’s all part of the fun!

    Mix Wet Ingredients

    In a separate bowl, whisk together the buttermilk, egg, and vanilla extract until they’re well mixed. This step might seem simple, but trust me, it’s vital. The buttermilk creates a nice, moist environment in the scone. An egg adds richness and helps bind everything together. Once you see those ingredients married together well, you’re ready to combine the wet and dry mixtures. Exciting, right?

    Combine Wet and Dry Mixtures

    Now, let’s bring those two mixtures together! Pour the wet ingredients into the bowl of dry ingredients. But here’s the trick: stir gently until everything is just combined. The dough should be a little lumpy; over-mixing will lead to tough scones, and nobody wants that. Just a few gentle folds until you can’t see any dry flour is perfect. Can you feel the anticipation building?

    Shape the Dough

    Next up is shaping our scone dough! Turn it out onto a lightly floured surface. Gently knead the dough a couple of times—just enough to bring it together. You want it smooth, but don’t overdo it! Then, form the dough into a circle about 1 inch thick. This is where creativity shines; the circle doesn’t need to be perfect. Remember, we’re baking with love here!

    Cut and Place on Baking Sheet

    Now it’s time to cut! You can use a sharp knife to slice the circle into wedges (like a pizza), or if you prefer, grab a biscuit cutter for round scones. Arrange them on your prepared baking sheet, leaving a little space between each piece for their stunning rise in the oven. At this point, I like to admire my handiwork and get excited about the warm aroma soon to fill my kitchen!

    Bake the Scones

    Transfer your baking sheet to the oven and let those beauties bake for 15-18 minutes. Keep an eye on them! When the tops turn golden brown, you’ll know they’re ready. A toothpick inserted into the center should come out clean. The anticipation is thrilling, and the fragrance wafting through your home will have everyone asking, “What’s cooking?”

    Finish with Lemon Glaze

    Once baked, allow the scones to cool for just a few minutes. Then drizzle them with your luscious lemon glaze—just a simple mix of powdered sugar and lemon juice. This adds a beautiful glazed finish that’s both eye-catching and delicious. I love seeing the glaze set on the warm scones, giving them that irresistible shine! Let the kids help with this part; it’s a messy but joyful moment!

    Tips for Success

    • Always squeeze out excess moisture from the grated zucchini to avoid soggy scones.
    • Chill your mixing bowl or tools if you’re working in a warm kitchen; it helps the butter stay cold.
    • For an extra lemony flavor, feel free to add more lemon zest to your mixture.
    • Don’t skip the glaze! It adds a delightful sweetness that ties everything together.
    • Experiment with different flours for unique flavor profiles.

    Equipment Needed

    • Mixing Bowls: Use a standard mixing bowl; a large one helps with the dough.
    • Measuring Cups and Spoons: Essential for accurate ingredient measurements. If unavailable, visual estimation can work in a pinch.
    • Pastry Cutter: For blending butter; a fork can also do the job!
    • Baking Sheet: A standard baking sheet lined with parchment paper ensures easy clean-up.
    • Sharp Knife or Biscuit Cutter: Important for cutting the dough into your desired shape.

    Variations

    • Gluten-Free: Substitute the all-purpose and whole wheat flours with a gluten-free flour blend for a delicious gluten-free option.
    • Add Fruits: Toss in some blueberries or cranberries for a fruity twist that pairs wonderfully with lemon.
    • Herbs: Try adding fresh herbs like thyme or rosemary for an unexpected savory flavor that complements the sweetness of lemon.
    • Cheese: Incorporate sharp cheddar or feta for a savory scone that’s perfect for brunch.
    • Sweeteners: Experiment with honey or maple syrup instead of sugar for a natural sweetness!

    Serving Suggestions

    • Enjoy your Lemon Zucchini Scones with a dollop of clotted cream for a rich touch.
    • A cup of chamomile tea complements the scones perfectly, creating a soothing afternoon treat.
    • Serve alongside fresh fruit or a vibrant salad for a delightful brunch spread.
    • For a bright presentation, arrange the scones on a colorful platter and garnish with extra lemon slices.

    FAQs about Lemon Zucchini Scones

    Let’s dive into some common questions I often hear about these delightful Lemon Zucchini Scones. I hope my answers help clear up any doubts you may have!

    Can I make these scones ahead of time?

    Absolutely! You can prepare the dough and refrigerate it for up to 24 hours before baking. Just shape the scones and cover them tightly with plastic wrap. When ready to bake, simply pop them into the oven straight from the fridge!

    How do I store leftover scones?

    Store any leftover Lemon Zucchini Scones in an airtight container at room temperature for about 2-3 days. If you want to keep them longer, freeze them in a freezer-safe bag. They’re perfect for busy mornings!

    Can I use frozen zucchini?

    While fresh zucchini is best for moisture control, you can use frozen zucchini too! Just make sure to thaw and drain it well before adding it to your dough, as excess moisture can lead to soggy scones.

    What can I use instead of buttermilk?

    If you don’t have buttermilk on hand, you can make a quick substitute! Just mix one cup of milk with a tablespoon of lemon juice or vinegar and let it sit for about 5-10 minutes. This will give you a similar tangy flavor!

    Can I make these scones dairy-free?

    Yes! Substitute cold unsalted butter with a dairy-free alternative like coconut oil or vegan butter. Use a dairy-free milk in place of buttermilk, and you’ll have a fantastic dairy-free version of these scrumptious scones!

    Final Thoughts

    Baking these Lemon Zucchini Scones is more than just following a recipe; it’s about creating joyful moments in the kitchen. The delightful aroma of lemon mingling with fresh zucchini fills your home with warmth and comfort. Each bite offers a burst of flavor, which is perfect for breakfast or a sweet afternoon treat. As you watch your loved ones savor these scones, you’ll feel a sense of accomplishment and connection. So, roll up your sleeves and get baking! I promise these scones will become a cherished family favorite that keeps everyone coming back for more.


    Print

    clock clock iconcutlery cutlery iconflag flag iconfolder folder iconinstagram instagram iconpinterest pinterest iconfacebook facebook iconprint print iconsquares squares iconheart heart iconheart solid heart solid icon

    Description

    Lemon Zucchini Scones are a delightful treat that combines the refreshing taste of lemon with moist zucchini in a perfectly baked scone.


    • 1 medium zucchini, grated and excess moisture squeezed out
    • 1 cup all-purpose flour
    • 1 cup whole wheat flour
    • 2 tablespoons baking powder
    • 1/2 teaspoon baking soda
    • 1/4 teaspoon salt
    • 1/3 cup sugar
    • Zest of 1 lemon
    • 1/2 cup cold unsalted butter, cubed
    • 1/2 cup buttermilk (or milk with a splash of lemon juice)
    • 1 large egg
    • 1 teaspoon vanilla extract
    • 1/2 cup lemon glaze (powdered sugar mixed with lemon juice for drizzling)

    1. Preheat your oven to 400°F (200°C) and line a baking sheet with parchment paper.
    2. In a large mixing bowl, combine the grated zucchini, all-purpose flour, whole wheat flour, baking powder, baking soda, salt, sugar, and lemon zest. Mix until evenly combined.
    3. Add the cold cubed butter to the flour mixture. Using a pastry cutter or your fingers, work the butter into the dry ingredients until the mixture resembles coarse crumbs.
    4. In a separate bowl, whisk together the buttermilk, egg, and vanilla extract until well combined.
    5. Pour the wet ingredients into the dry mixture, stirring gently until just combined. Be careful not to over-mix.
    6. Turn the dough out onto a floured surface and gently knead it a couple of times to bring it together. Form the dough into a circle about 1 inch thick.
    7. Cut the circle into wedges (like a pizza) or use a biscuit cutter for round scones and place them on the prepared baking sheet.
    8. Bake for 15-18 minutes, or until the scones are golden brown on top and a toothpick comes out clean.
    9. Allow the scones to cool slightly before drizzling them with the lemon glaze.

    Notes

    • Ensure to squeeze out as much moisture from the zucchini as possible to avoid soggy scones.
    • You can adjust the level of sweetness by modifying the sugar quantity.
    • For an extra lemony flavor, add more lemon zest to the dough.
    • Prep Time: 15 minutes
    • Cook Time: 18 minutes
    • Category: Breakfast
    • Method: Baking
    • Cuisine: American

    Nutrition

    • Serving Size: 1 scone
    • Calories: 190
    • Sugar: 8g
    • Sodium: 200mg
    • Fat: 10g
    • Saturated Fat: 6g
    • Unsaturated Fat: 4g
    • Trans Fat: 0g
    • Carbohydrates: 24g
    • Fiber: 2g
    • Protein: 3g
    • Cholesterol: 30mg

    Sharing is caring!