Author: IHAAL Team

  • Parmesan Cabbage Steaks

    Parmesan Cabbage Steaks


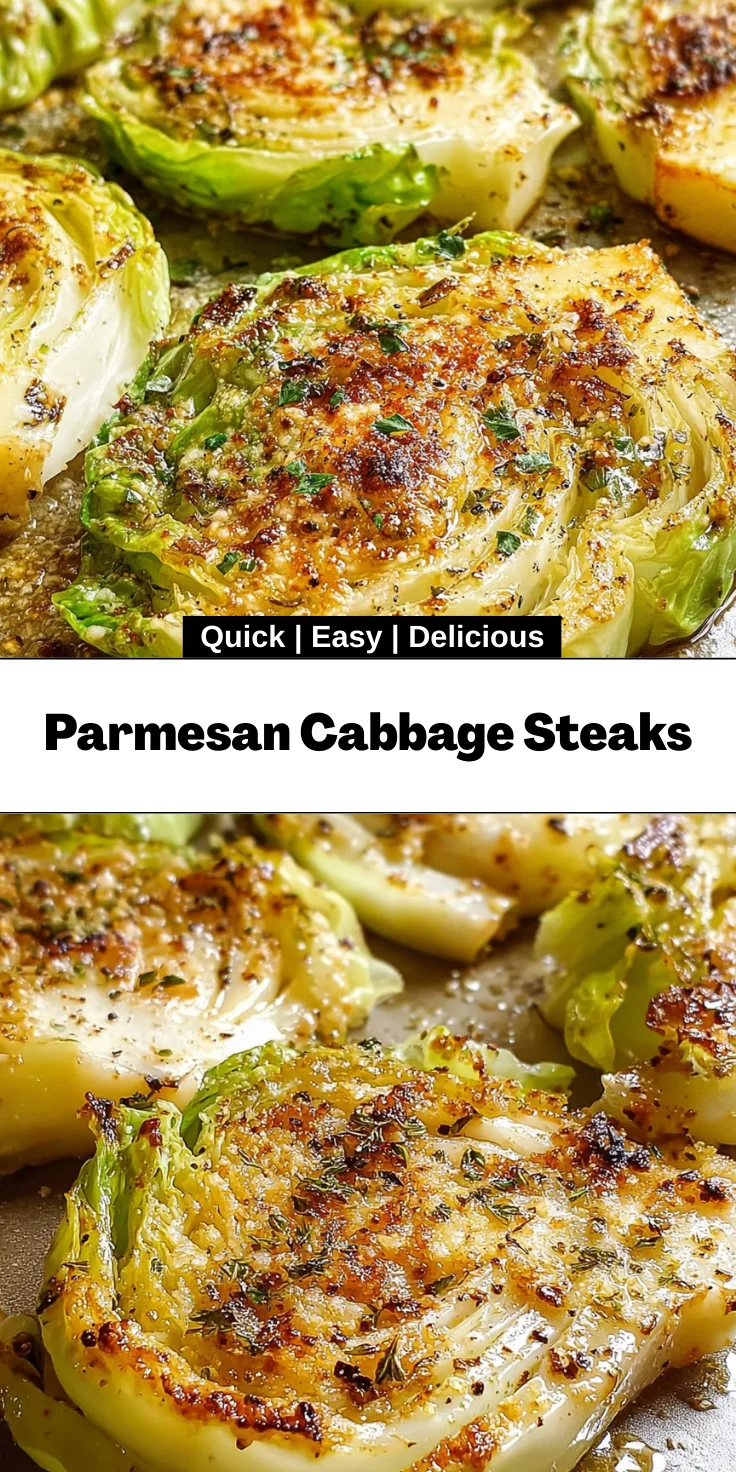
    Introduction to Parmesan Cabbage Steaks

    Welcome to a delightful culinary adventure! If you’re juggling a busy schedule, yet want to impress your loved ones, these Parmesan Cabbage Steaks are your secret weapon. Picture this: a simple yet classy dish that brings the wonderful flavors of crisp, roasted cabbage right to your table. Not only are they a quick solution for a hectic weeknight dinner, but they also add a touch of gourmet flair to any meal. I’ve crafted this recipe to not only be easy, but also fabulously tasty. Trust me, your taste buds will thank you!

    Why You’ll Love This Parmesan Cabbage Steaks

    These Parmesan Cabbage Steaks are a game-changer for busy nights. They’re incredibly easy to whip up, taking just 40 minutes from start to finish. The crispy, cheesy goodness is hard to resist! Plus, they’re healthy and packed with flavor, making them a perfect side dish for any meal. You won’t have to worry about picky eaters—everyone will be clamoring for seconds!

    Ingredients for Parmesan Cabbage Steaks

    Gathering the right ingredients is essential for crafting delicious Parmesan Cabbage Steaks. Here’s what you’ll need:

    • Medium head of green cabbage: Look for a firm head with tightly packed leaves. Cabbage is the star here, offering a hearty texture.
    • Extra virgin olive oil: This adds richness and helps achieve that crispy finish. You can also use avocado oil for a nutty twist!
    • Freshly grated Parmesan cheese: Pot for real Parmesan for the best flavor. It melts beautifully, bringing that savory, cheesy goodness.
    • Garlic powder: A sprinkle brings a warm aroma and enhances the flavor profile. Feel free to use fresh minced garlic if preferred!
    • Salt and pepper: These staples boost the overall taste, so season according to your preference.

    Looking to jazz things up? Consider adding paprika for a hint of smokiness, or Italian herbs for a fragrant kick. Can’t find Parmesan? Pecorino Romano makes a fabulous substitute. Remember, exact measurements and additional details are available at the bottom of the article for printing!

    How to Make Parmesan Cabbage Steaks

    Now that you have all the ingredients ready, it’s time to dive into the making of your Parmesan Cabbage Steaks. Follow these simple steps, and you’ll be amazed at how easy and delicious they turn out!

    Step 1: Preheat the Oven

    First things first, preheat your oven to 400°F (200°C). This step is crucial for achieving that perfect crispy texture. An adequately heated oven helps the cabbage steaks roast evenly and develop a beautiful golden color.

    Step 2: Prepare the Cabbage

    Next, remove any damaged outer leaves from the cabbage. Start slicing it into ¾-inch thick “steaks.” This thickness is key for ensuring they cook thoroughly and get that delightful crunch. Don’t worry if they aren’t perfect; every steak will still have its unique character!

    Step 3: Season the Steak

    Now comes the fun part—seasoning! Place the cabbage steaks on a lined baking sheet, then drizzle a bit of extra virgin olive oil over each one. Season generously with salt and pepper. The oil not only adds flavor but also helps the steaks crisp up beautifully.

    Step 4: Add the Cheese

    In a small bowl, mix the freshly grated Parmesan cheese with garlic powder. This combination adds an irresistible flavor. Now, sprinkle the cheesy mixture generously over each cabbage steak. Imagine the delightful aroma filling your kitchen at this point—mouthwatering, right?

    Step 5: Roast to Perfection

    Finally, pop the baking sheet into the oven and roast those cabbage steaks for 25-30 minutes. Don’t forget to flip them halfway through. This ensures even cooking and maximum crispiness. Keep an eye on them; you want them golden brown and delicious!

    Your Parmesan Cabbage Steaks will soon be ready to wow your dinner guests!

    Tips for Success

    • Make sure to cut the cabbage steaks evenly for consistent cooking.
    • Try using parchment paper on the baking sheet for easy cleanup.
    • For extra flavor, consider marinating the cabbage in olive oil and seasonings for 15 minutes before roasting.
    • Don’t overcrowd the baking sheet; give each steak room to crisp up!
    • Experiment with different cheeses, like feta or mozzarella, for unique flavors.

    Equipment Needed

    • Baking sheet: A standard baking sheet works wonders for roasting. A cast-iron skillet can add a nice sear, too!
    • Sharp knife: A good kitchen knife is essential for slicing those cabbage steaks with ease.
    • Cutting board: Use a sturdy cutting board to keep your workspace organized while you prep.
    • Spatula: A solid spatula helps with flipping the cabbage steaks without losing that crispy goodness.

    Variations

    • Spicy Parmesan Cabbage Steaks: Add a pinch of red pepper flakes to the cheese mixture for a delightful kick.
    • Herb-Infused Steaks: Mix in fresh herbs like rosemary or thyme into the cheese blend for an aromatic twist.
    • Vegan Option: Substitute the Parmesan with nutritional yeast for a cheesy flavor without the dairy.
    • Asian-Inspired: Drizzle sesame oil over the steaks and sprinkle with sesame seeds after roasting for a unique flavor.
    • Cheesy Blend: Combine Parmesan with cheddar or Gruyere for a richer, cheesier experience.

    Serving Suggestions

    • Complementary Sides: Pair your Parmesan Cabbage Steaks with roasted carrots or a fresh garden salad for a vibrant plate.
    • Perfect Drink: A crisp white wine, like Sauvignon Blanc, enhances the savory flavors beautifully.
    • Presentation Tip: Arrange on a colorful platter, adding a sprinkle of fresh herbs for a pop of color and freshness.

    FAQs about Parmesan Cabbage Steaks

    Can I make Parmesan Cabbage Steaks ahead of time? Yes! You can prep the cabbage steaks and season them. Keep them in the fridge for up to 24 hours before roasting. Just pop them in the oven when you’re ready!

    How do I store leftovers? Store any leftover Parmesan Cabbage Steaks in an airtight container in the fridge. They’re best enjoyed within a couple of days. You can reheat them in the oven to retain their crispiness.

    What can I pair with Parmesan Cabbage Steaks? These steaks are versatile! Try pairing them with grilled chicken or salmon to create a balanced meal. They also shine as part of a vegetarian spread.

    Can I use a different type of cheese? Absolutely! Feel free to experiment with other cheeses like sharp cheddar or mozzarella. Each will give a different twist to your Parmesan Cabbage Steaks.

    Are these cabbage steaks suitable for meal prep? Yes! These roasted cabbage steaks are a fantastic option for meal prep. Their robust flavor holds up well, making them a yummy side dish throughout the week.

    Final Thoughts

    Creating these Parmesan Cabbage Steaks has been a delightful journey for me, and I hope you find joy in it too. There’s something magical about transforming humble cabbage into a crispy, cheesy delight that can brighten any meal. It’s more than just food—it’s a chance to gather around the table and share special moments with loved ones. Whether you’re a busy mom needing quick solutions, or a professional looking to impress, these steaks are your answer. So, embrace the culinary adventure, dig in, and let your taste buds dance in delight with each bite!


    Print

    clock clock iconcutlery cutlery iconflag flag iconfolder folder iconinstagram instagram iconpinterest pinterest iconfacebook facebook iconprint print iconsquares squares iconheart heart iconheart solid heart solid icon

    Description

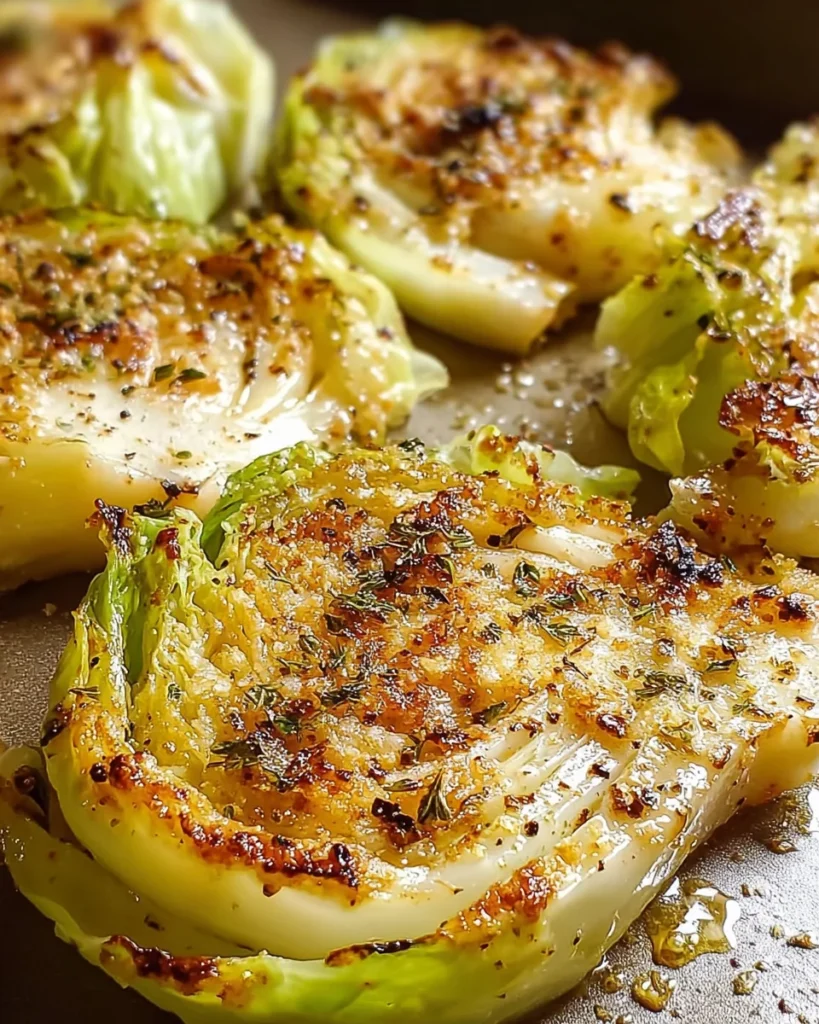
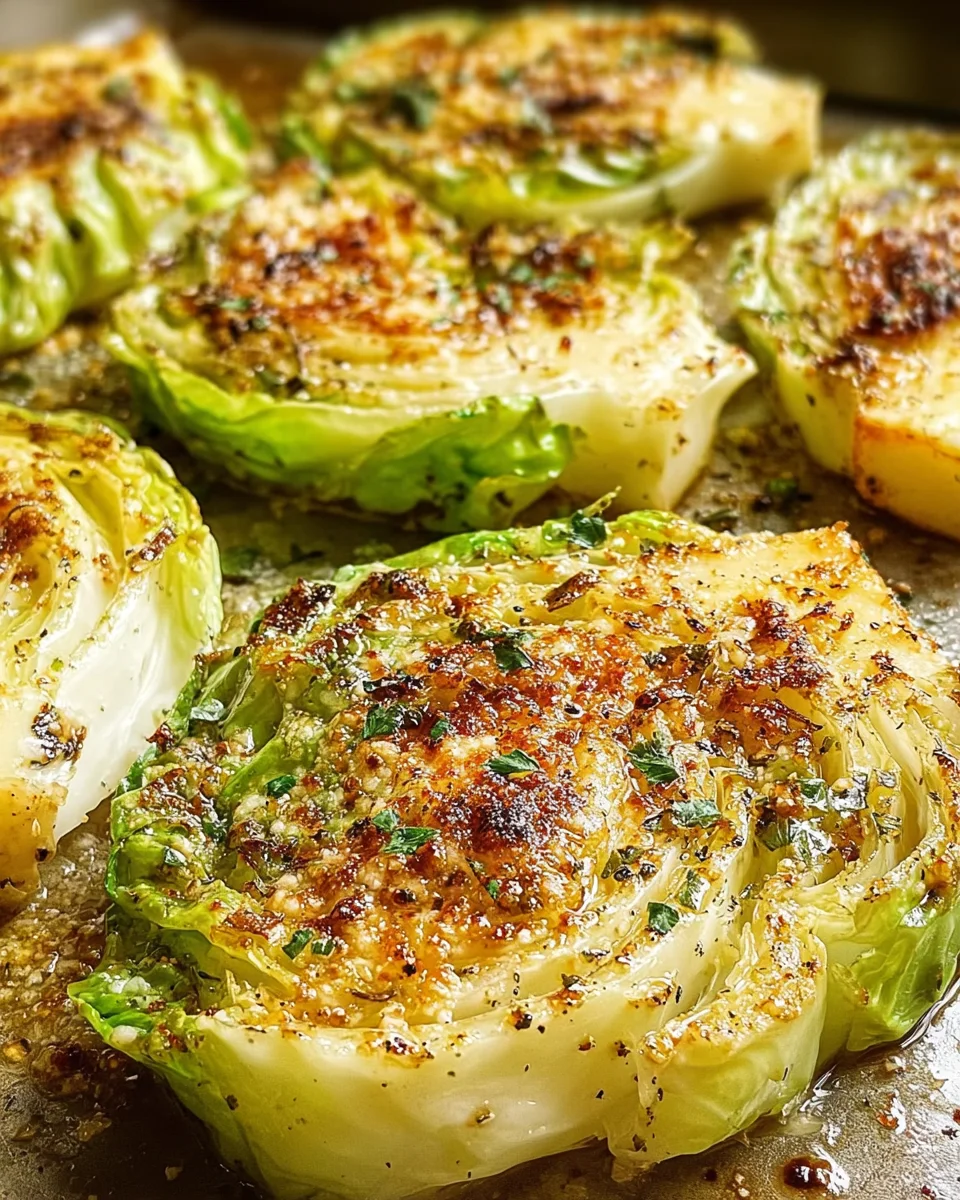
    Delicious roasted Parmesan cabbage steaks that are crispy and packed with flavor.


    • 1 medium head of green cabbage (23 pounds)
    • 2 tablespoons extra virgin olive oil
    • ½ cup freshly grated Parmesan cheese
    • 1 teaspoon garlic powder
    • Salt and pepper to taste

    1. Preheat your oven to 400°F (200°C).
    2. Remove any damaged leaves from the cabbage, then slice it into ¾-inch thick “steaks.”
    3. On a lined baking sheet, drizzle olive oil over each steak and season with salt and pepper.
    4. Mix Parmesan cheese with garlic powder and sprinkle generously over the cabbage steaks.
    5. Roast for 25-30 minutes, flipping halfway through, until golden brown and crispy.

    Notes

    • Ensure the cabbage steaks are cut evenly for consistent cooking.
    • Feel free to add other seasonings like paprika or Italian herbs for additional flavor.
    • Prep Time: 10 minutes
    • Cook Time: 30 minutes
    • Category: Vegetable Side Dish
    • Method: Roasting
    • Cuisine: American

    Nutrition

    • Serving Size: 1 steak
    • Calories: 160
    • Sugar: 2g
    • Sodium: 250mg
    • Fat: 10g
    • Saturated Fat: 2g
    • Unsaturated Fat: 8g
    • Trans Fat: 0g
    • Carbohydrates: 8g
    • Fiber: 3g
    • Protein: 6g
    • Cholesterol: 5mg

    Sharing is caring!

  • BBQ Chicken Pineapple Grilled Cheese

    BBQ Chicken Pineapple Grilled Cheese


    Introduction to BBQ Chicken Pineapple Grilled Cheese

    Have you ever craved a sandwich that’s more than just a quick bite? I totally get that! The BBQ Chicken Pineapple Grilled Cheese is here to rescue you from mundane meals. Imagine biting into warm, gooey cheddar cheese, savory BBQ chicken, and sweet pineapple, all snugly wrapped in crispy sourdough bread. It’s not just a sandwich; it’s a comfort food adventure that can brighten even the busiest day. With this recipe, you can whip up a delightful meal in no time, making it perfect for busy moms or professionals looking for a burst of flavor in their life!

    Why You’ll Love This BBQ Chicken Pineapple Grilled Cheese

    This BBQ Chicken Pineapple Grilled Cheese is a winner for so many reasons! First, it’s incredibly easy to make, so you can spend less time in the kitchen and more time with your loved ones. The combination of sweet and smoky flavors is simply irresistible, and it always pleases even the pickiest eaters. Plus, it’s a great way to use up leftover chicken while creating a gourmet feeling with minimal effort. Talk about a delicious win!

    Ingredients for BBQ Chicken Pineapple Grilled Cheese

    Gathering ingredients for the BBQ Chicken Pineapple Grilled Cheese is like preparing for a culinary getaway! Each bite bursts with flavor, and here’s what you’ll need:

    • Sourdough Bread: Thick slices of this tangy, chewy bread create the perfect base, holding all that delicious goodness inside.
    • Unsalted Butter: Softened butter provides that golden, crispy crust when grilled. You can substitute with olive oil if butter isn’t your thing.
    • Cooked Chicken Breast: Shredded chicken adds protein and heartiness. Leftover rotisserie chicken works wonderfully to save time.
    • Barbecue Sauce: This sweet and smoky condiment is key for flavor. Use your favorite store-bought brand or whip up a quick homemade version for a personal touch!
    • Fresh Pineapple: Adding rings of fresh pineapple imparts a bright sweetness to contrast the savory chicken. Canned pineapple is a great alternative if fresh isn’t available; just be sure to drain it well.
    • Sharp Cheddar Cheese: Freshly grated cheese lends a bold flavor and melty texture that brings everything together melt-in-your-mouth style.
    • Non-stick Cooking Spray: A quick spray on the skillet prevents sticking and ensures a crispy finish. You can also use a little more butter if that’s what you prefer!

    For exact quantities of each ingredient, check the bottom of the article where they’re neatly listed and available for printing. Happy cooking!

    How to Make BBQ Chicken Pineapple Grilled Cheese

    Crafting the BBQ Chicken Pineapple Grilled Cheese is like creating a little masterpiece in your kitchen! Let’s break it down step by step, so it’s super easy to follow along. Trust me; you’ll want to enjoy every bit of this flavor explosion!

    Step 1: Prepare the Chicken

    Start by preheating your oven to 350°F (175°C).
    Place your cooked chicken breasts in a baking dish, then coat them with half of the barbecue sauce.
    Pop them into the oven and bake for about 20 minutes until the chicken is heated through and tender.
    Once it’s cooled slightly, shred the chicken using two forks. Toss that tasty chicken with the remaining barbecue sauce for an extra flavor kick!

    Step 2: Butter the Bread

    Grab your sourdough bread and softened butter. Spread the butter evenly on one side of each slice.
    This buttered side will give the sandwich that deliciously crispy texture we crave when grilled.
    Lay the slices buttered side down on your work surface, creating a sturdy base for your sandwich creations.

    Step 3: Assemble the Sandwich

    On four of those slices, sprinkle some grated cheddar cheese—about a quarter cup per slice.
    Now, it’s time for the star ingredients! Top that cheesy layer with a generous portion of the sauced chicken and a couple of pineapple rings.
    Then, add another layer of cheddar cheese. Finish off by placing the remaining bread slices on top, making sure the buttered side is facing up.
    Don’t worry; this is going to make all the difference when you grill!

    Step 4: Grill to Perfection

    Now we get to the sizzling part! Preheat a large non-stick skillet over medium heat.
    Spray it lightly with your non-stick cooking spray or add a touch of butter for added flavor.
    Carefully place two sandwiches in the skillet. Cook each side for about 3–4 minutes, or until beautifully golden brown.
    When you flip them, make sure you do it gently to keep everything inside. Cook for another 1–2 minutes until the cheese is melted and gooey. Your kitchen will smell incredible!

    Step 5: Serve Hot and Enjoy

    Once grilled to perfection, take the sandwiches out and let them rest for a minute.
    Slice each one diagonally for an inviting presentation that showcases the oozy goodness inside.
    Serve hot, and grab a napkin because things might get messy—in a delicious way! Enjoy every bite of your BBQ Chicken Pineapple Grilled Cheese!

    Tips for Success

    • Use day-old sourdough for better toasting; it holds up nicely.
    • Feel free to experiment with different cheeses for unique flavors!
    • Grill on medium-low heat to ensure the cheese melts perfectly without burning the bread.
    • Double the recipe for family gatherings; they’ll love it!
    • Keep extra barbecue sauce handy for dipping – it adds an extra layer of flavor.

    Equipment Needed

    • Large Non-Stick Skillet: A must-have for grilling. A cast-iron skillet works well too!
    • Baking Dish: For oven preparation of the chicken. Any oven-safe dish will do!
    • Spatula: Essential for flipping your sandwiches without losing any fillings.
    • Mixing Bowls: Useful for tossing the chicken with barbecue sauce.

    Variations on BBQ Chicken Pineapple Grilled Cheese

    • Spicy Kick: Add jalapeño slices or a drizzle of hot sauce to give your sandwich a spicy edge. It’s perfect for those who love a bit of heat!
    • Veggie Delight: Toss in some grilled bell peppers or red onions for an extra veggie boost, adding both flavor and nutrition.
    • Swap the Cheese: Experiment with gouda or pepper jack cheese for a different spin. Each cheese brings its unique taste, making it your own!
    • Make it Gluten-Free: Use gluten-free bread to accommodate dietary needs without sacrificing flavor. Plenty of tasty options are available nowadays!
    • Fruit Fusion: Try adding slices of avocado for creaminess, or substitute the pineapple with mango for a tropical twist!

    Serving Suggestions for BBQ Chicken Pineapple Grilled Cheese

    • Fresh Salad: Pair your sandwich with a bright, crunchy coleslaw or mixed greens salad to complement the richness.
    • Sweet Potato Fries: Serve on the side for a delightful contrast; their natural sweetness is a perfect match!
    • Cold Beverage: Enjoy with iced tea or a light soda; they balance the flavors nicely.
    • Presentation: Cut the sandwiches in halves or quarters and arrange them on a colorful platter for an inviting display.

    FAQs about BBQ Chicken Pineapple Grilled Cheese

    Can I use different types of chicken for this recipe?

    Absolutely! While shredded cooked chicken breast works best, you can also use leftover rotisserie chicken, or even grilled chicken thighs if you prefer a richer flavor. No matter what you choose, the barbecue sauce will tie it all together!

    How do I store leftovers?

    If you happen to have leftovers (which is unlikely, given how delicious these are!), store them in an airtight container in the fridge for up to three days. Reheat in a skillet on low heat to keep the bread crispy!

    Can I make this sandwich ahead of time?

    Yes! You can prepare the chicken and assemble the sandwiches in advance. Just keep them refrigerated undrilled, and grill them right before serving for that perfect hot, gooey experience.

    What kind of barbecue sauce works best?

    Choose your favorite brand of barbecue sauce! Whether you love sweet, smoky, or tangy, the choice is yours. A homemade BBQ sauce can also add a delightful personal touch to this BBQ Chicken Pineapple Grilled Cheese.

    Is this recipe suitable for kids?

    Definitely! This sandwich is a hit with kids because of its fun flavors and gooey cheese. Plus, it’s a great way to sneak in some protein and fruit. You might just create a new family favorite!

    Final Thoughts

    Creating the BBQ Chicken Pineapple Grilled Cheese is more than just whipping up a meal; it’s about the joy it brings during those busy days. There’s something incredibly comforting about biting into a hot, gooey sandwich that combines savory and sweet flavors. This recipe not only satisfies cravings but also creates cherished moments around the table with family. Whether you’re hosting a casual gathering or enjoying a quiet night in, sharing this sandwich is bound to spark joy and a little laughter. Trust me; you’ll be making this gem again and again—it’s just that good!


    Print

    clock clock iconcutlery cutlery iconflag flag iconfolder folder iconinstagram instagram iconpinterest pinterest iconfacebook facebook iconprint print iconsquares squares iconheart heart iconheart solid heart solid icon

    Description

    BBQ Chicken Pineapple Grilled Cheese is a delicious and unique sandwich featuring grilled chicken, fresh pineapple, and sharp cheddar cheese, all encased in perfectly toasted sourdough bread.


    • 8 thick slices sourdough bread
    • 60 grams unsalted butter, softened
    • 320 grams cooked chicken breast, shredded
    • 120 millilitres barbecue sauce, divided
    • 8 thin rings fresh pineapple (or well-drained canned pineapple)
    • 200 grams sharp cheddar cheese, freshly grated
    • Non-stick cooking spray, as needed

    1. Preheat oven to 175°C. Place chicken breasts in a baking dish, coat with half of the barbecue sauce, and bake for 20 minutes until fully cooked. Allow to cool slightly, then shred with two forks and toss with remaining barbecue sauce.
    2. Spread softened butter evenly over one side of each bread slice. Arrange the slices buttered side down on your work surface.
    3. Sprinkle 25 grams grated cheddar over four bread slices. Top each with a quarter of the sauced chicken and two pineapple rings. Add another 25 grams cheddar, then finish with remaining bread slices, buttered side up.
    4. Heat a large non-stick skillet over medium heat and coat lightly with cooking spray. Cook two sandwiches at a time for 3–4 minutes on the first side until golden brown. Flip gently and grill 1–2 minutes more until crisp and cheese melts.
    5. Remove sandwiches to a cutting board, slice each in half diagonally, and serve immediately while hot and gooey.

    Notes

    • Feel free to use canned pineapple if fresh is not available, ensuring it’s well-drained.
    • Adjust the amount of barbecue sauce to your preference for sweetness and smokiness.
    • This recipe can be easily doubled for larger gatherings.
    • Prep Time: 10 minutes
    • Cook Time: 30 minutes
    • Category: Sandwich
    • Method: Grilling
    • Cuisine: American

    Nutrition

    • Serving Size: 1 Sandwich
    • Calories: 560
    • Sugar: 10g
    • Sodium: 800mg
    • Fat: 30g
    • Saturated Fat: 15g
    • Unsaturated Fat: 10g
    • Trans Fat: 0g
    • Carbohydrates: 40g
    • Fiber: 2g
    • Protein: 38g
    • Cholesterol: 85mg

    Sharing is caring!

  • Cajun Shrimp & Salmon with Garlic Cream

    Cajun Shrimp & Salmon with Garlic Cream


    Introduction to Cajun Shrimp & Salmon with Garlic Cream

    Welcome, fellow food lovers! If you’re searching for a delightful dish to impress your loved ones or simply crave some comfort on a busy day, look no further than Cajun Shrimp & Salmon with Garlic Cream. This recipe brims with flavor and is perfectly simple to whip up, making it an excellent choice for your family’s dinner table. With tender shrimp and flaky salmon basking in a rich garlic cream sauce, it’s sure to become a favorite in your household. Trust me, it’ll take just 30 minutes to bring a taste of Cajun delight to your home!

    Why You’ll Love This Cajun Shrimp & Salmon with Garlic Cream

    This Cajun Shrimp & Salmon with Garlic Cream is a true gem for busy cooks. Within just 30 minutes, you can serve up a dish that feels gourmet without the fuss. The bold flavors of Cajun seasoning combined with the creamy sauce create an explosion of taste that your family will rave about. Plus, it’s versatile enough to please picky eaters, making dinner both quick and enjoyable!

    Ingredients for Cajun Shrimp & Salmon with Garlic Cream

    Gathering the right ingredients is the first step to crafting this luscious Cajun Shrimp & Salmon with Garlic Cream. Here’s what you’ll need:

    • Shrimp: Look for fresh or frozen, peeled and deveined shrimp. They cook quickly and absorb flavors beautifully.
    • Salmon: Choose fillets with vibrant color and minimal white lines. They add richness and pair perfectly with the cream sauce.
    • Cajun Seasoning: A blend of spices like paprika, cayenne, and garlic. It’s packed with flavor and adds that signature Cajun kick!
    • Garlic: Freshly minced is best; it brings warmth and depth to the sauce. I always say, the more garlic, the better!
    • Heavy Cream: This is the magic ingredient that will make your sauce creamy and luxurious. Pot for full-fat for the best texture.
    • Olive Oil: A great choice for sautéing, it adds a smooth flavor and helps cook the seafood to perfection.
    • Butter: A dollop of butter adds richness to the sauce, elevating the flavor even more.
    • Lemon Juice: Adds a zesty brightness to cut through the richness, balancing the dish beautifully.
    • Salt and Pepper: Essential seasonings that enhance the natural flavors of the seafood.
    • Fresh Parsley: A garnish that adds a pop of color and freshness right before serving.

    These ingredients come together to create a delicious harmony of flavors, delighting every bite! You can find the exact measurements at the bottom of this article, which are also available for printing. Happy cooking!

    How to Make Cajun Shrimp & Salmon with Garlic Cream

    Now that we have all our ingredients ready, let’s dive into the delicious process of making Cajun Shrimp & Salmon with Garlic Cream. I’ll walk you through each step. Get ready for a flavor explosion!

    Preparing the Seafood

    Start by seasoning your shrimp and salmon. In a mixing bowl, sprinkle the peeled shrimp and salmon fillets with Cajun seasoning, salt, and pepper.

    Toss everything gently to ensure each piece is evenly coated with those vibrant spices. This simple step adds big flavor and will excite your taste buds!

    Cooking the Shrimp

    Heat a tablespoon of olive oil in a large skillet over medium-high heat. Once the oil is shimmering, it’s time for the shrimp! Carefully place them into the skillet, cooking for about 2-3 minutes on each side.

    Watch for that delightful pink color; when they turn pink and opaque, they’re done. This visual cue is a surefire way to ensure you don’t overcook them—time flies when you’re having fun cooking!

    Cooking the Salmon

    Remove the shrimp from the skillet and set them aside. Next, place the salmon fillets in the same skillet, skin-side down. Cook them for 4-5 minutes on each side.

    You’ll know they’re ready when you can easily flake the flesh with a fork. Don’t forget to keep the heat at medium; this lets the salmon cook evenly and stay juicy!

    Making the Garlic Cream Sauce

    Once the seafood is cooked and resting, it’s sauce time! Reduce the heat to medium and add a tablespoon of butter to the leftover juices in the skillet. As it melts, toss in the minced garlic.

    Let the garlic sauté for about 1 minute, allowing its aroma to fill your kitchen. Then pour in the heavy cream and a splash of lemon juice, stirring gently.

    Allow the sauce to simmer for about 3-4 minutes until it thickens slightly. The creaminess mixed with the caramelized garlic will have you daydreaming about this dish!

    Combining All Ingredients

    Finally, return the shrimp and salmon back to the skillet with your luscious garlic cream sauce. Gently mix everything together; you want the seafood to be lovingly enveloped in that creamy goodness.

    Let it cook together for another 2 minutes just to warm through. At this point, all those flavors will meld into a delicious harmony. Oh, the taste is worth the wait!

    Tips for Success

    • Don’t rush the seasoning—let flavors soak into the seafood for at least 15 minutes.
    • Use a meat thermometer to ensure shrimp and salmon are cooked perfectly; shrimp should reach 120°F, and salmon 145°F.
    • For extra creaminess, whisk the heavy cream before pouring it in the skillet.
    • Feel free to customize the spice level by adding more or less Cajun seasoning based on your preference.
    • Utilize leftover sauce for pasta or drizzling over veggies for added flavor!

    Equipment Needed

    • Large Skillet: A non-stick skillet works best, but any heavy pan will do.
    • Mixing Bowl: Perfect for seasoning the seafood—any bowl will suffice.
    • Spatula: A sturdy spatula helps flip the shrimp and salmon with ease.
    • Meat Thermometer: Optional, but great for checking doneness!

    Variations on Cajun Shrimp & Salmon with Garlic Cream

    • Spicy Kick: If you like some heat, add diced jalapeños or a few dashes of hot sauce to the garlic cream sauce.
    • Veggie Delight: Toss in vegetables like bell peppers or asparagus during cooking for a colorful and nutritious boost.
    • Coconut Cream Version: For a tropical twist, substitute heavy cream with coconut cream for a dairy-free version.
    • Herb Infusion: Experiment with adding fresh herbs like thyme or dill for an aromatic layer of flavor.
    • Grain-Free Option: Serve on a bed of sautéed spinach or cauliflower rice instead of traditional rice for a low-carb alternative.

    Serving Suggestions for Cajun Shrimp & Salmon with Garlic Cream

    • Pair with fluffy white rice to soak up that delicious garlic cream sauce.
    • Serve with crusty bread or garlic knots for a satisfying crunch.
    • Complement with a chilled glass of white wine, like Pinot Grigio.
    • Garnish with fresh parsley for an elegant presentation.

    FAQs about Cajun Shrimp & Salmon with Garlic Cream

    Can I use frozen shrimp for this Cajun Shrimp & Salmon with Garlic Cream?

    Absolutely! Just make sure to thaw the shrimp thoroughly before cooking to ensure even cooking. This easy recipe caters well to frozen shrimp, making meal prep a breeze!

    How can I make Cajun Shrimp & Salmon with Garlic Cream spicier?

    If you love heat, consider adding more Cajun seasoning or a few dashes of hot sauce during the cooking process. You can also toss in some sliced jalapeños for an extra kick!

    Can I make this dish ahead of time?

    You can prepare the garlic cream sauce in advance, but I recommend cooking the shrimp and salmon just before serving. This way, they stay fresh and don’t lose their lovely texture!

    What’s a good side dish to pair with this meal?

    This Cajun Shrimp & Salmon pairs beautifully with fluffy rice or buttery garlic bread. For a fresh touch, a green salad drizzled with a light vinaigrette works wonders!

    Is this Cajun Shrimp & Salmon recipe gluten-free?

    Yes, you’re in luck! All the ingredients are gluten-free, making it a great option for those with gluten sensitivities. Enjoy every bite without worry!

    Final Thoughts on Cajun Shrimp & Salmon with Garlic Cream

    This Cajun Shrimp & Salmon with Garlic Cream is more than just a meal; it’s a delightful culinary experience that brings joy and flavor to your dinner table. Imagine the smiles as your family savors each creamy bite, filled with zesty Cajun spice. This dish transforms an ordinary evening into something truly special. Whether you’re a busy mom or a professional, this recipe proves that you can create something delicious without spending hours in the kitchen. So, gather your loved ones, whip up this feast, and enjoy a taste of happiness in every forkful!


    Print

    clock clock iconcutlery cutlery iconflag flag iconfolder folder iconinstagram instagram iconpinterest pinterest iconfacebook facebook iconprint print iconsquares squares iconheart heart iconheart solid heart solid icon

    Description

    A delicious Cajun shrimp and salmon dish in a rich garlic cream sauce.


    • 1 pound shrimp, peeled and deveined
    • 2 salmon fillets (about 6 ounces each)
    • 2 tablespoons Cajun seasoning
    • 4 cloves garlic, minced
    • 1 cup heavy cream
    • 2 tablespoons olive oil
    • 1 tablespoon butter
    • 1 teaspoon lemon juice
    • Salt and pepper to taste
    • Fresh parsley, chopped (for garnish)

    1. In a mixing bowl, sprinkle shrimp and salmon fillets with Cajun seasoning, salt, and pepper. Toss to coat evenly.
    2. Heat olive oil in a large skillet over medium-high heat. Add shrimp to the skillet and cook for 2-3 minutes on each side until they are pink and opaque. Remove the shrimp from the skillet and set aside.
    3. In the same skillet, add the salmon fillets skin-side down. Cook for about 4-5 minutes on each side until cooked through and flaking easily. Remove and set aside with the shrimp.
    4. In the same skillet, reduce the heat to medium and add butter. Once melted, add minced garlic and sauté for about 1 minute until fragrant.
    5. Pour in the heavy cream and lemon juice, stirring constantly. Allow the sauce to simmer for 3-4 minutes until it thickens slightly. Season with additional salt and pepper if needed.
    6. Return the shrimp and salmon to the skillet, gently mixing them in the garlic cream sauce. Let cook together for an additional 2 minutes to warm through and infuse flavors.
    7. Remove from heat and transfer the seafood to a serving platter, drizzling with more garlic cream sauce.

    Notes

    • Serve immediately for the best flavor and texture.
    • Garnish with additional chopped parsley before serving.
    • This dish pairs well with rice or crusty bread.
    • Prep Time: 10 minutes
    • Cook Time: 20 minutes
    • Category: Main Course
    • Method: Pan-seared
    • Cuisine: Cajun

    Nutrition

    • Serving Size: 1 serving
    • Calories: 480
    • Sugar: 1g
    • Sodium: 600mg
    • Fat: 34g
    • Saturated Fat: 15g
    • Unsaturated Fat: 8g
    • Trans Fat: 0g
    • Carbohydrates: 6g
    • Fiber: 0g
    • Protein: 35g
    • Cholesterol: 120mg

    Sharing is caring!

  • Burnt Basque Cheesecake Loaf

    Burnt Basque Cheesecake Loaf


    Introduction to Burnt Basque Cheesecake Loaf

    As a home cook who thrives on whipping up delightful treats, I recently encountered a game-changer: the Burnt Basque Cheesecake Loaf. Imagine a dessert that’s not only visually stunning but also incredibly rich and creamy! Life is busy, and more often than not, we find ourselves in need of a quick solution for dessert that can impress family and friends alike. With this loaf, you’ll bring a slice of Spanish indulgence right to your kitchen. Trust me, this cheesecake loaf is destined to become a beloved favorite—even with the pickiest of eaters!

    Why You’ll Love This Burnt Basque Cheesecake Loaf

    This Burnt Basque Cheesecake Loaf is the perfect blend of simplicity and decadence. It comes together quickly, requiring just one bowl and minimal effort, which is a blessing for busy moms like us! The rich flavor and velvety texture will have your taste buds dancing. Plus, its stunning golden top makes it a show-stopper at any gathering. You’ll find yourself wanting to make it time and again!

    Ingredients for Burnt Basque Cheesecake Loaf

    Gathering the right ingredients is where the magic begins! Here’s what you’ll need to create your luscious Burnt Basque Cheesecake Loaf.

    • Cream cheese: This is the star of the show! Choose full-fat for that creamy indulgence we crave.
    • Granulated sugar: It brings sweetness to offset the cheesecake’s richness. You can even use alternatives like coconut sugar.
    • Large eggs: These bind the ingredients and provide that desired fluffiness. Room temperature eggs work best for smooth mixing.
    • Heavy cream: This adds lusciousness and a silky mouthfeel, making your cheesecake feel like a cloud of bliss.
    • Vanilla extract: A splash of this aromatic essence enriches the flavor, taking your dessert to the next level.
    • Salt: Just a pinch acts like a flavor enhancer, bringing out the best in your cheesecake.
    • All-purpose flour: It lends structure to the loaf while keeping it light. If you’re gluten-free, consider using an alternative like almond flour.

    For exact quantities, including some handy tips on ingredient sourcing, check the bottom of this article where you can print the recipe!

    How to Make Burnt Basque Cheesecake Loaf

    Creating this Burnt Basque Cheesecake Loaf is as easy as pie! Follow my step-by-step guide, and you’ll have a scrumptious dessert that will impress everyone. Just remember to take it slow and savor the process!

    Step 1: Preheat the Oven and Prepare the Pan

    First things first, preheat your oven to 200°C. This is key to achieving that characteristic burnished top we adore. While the oven warms up, grab your loaf pan. Line it with parchment paper, allowing some overhang. This makes it a breeze to lift out the loaf later! Trust me, this prep step pays off big time.

    Step 2: Mix Cream Cheese and Sugar

    Next, in a large mixing bowl, beat the softened cream cheese and granulated sugar together. Aim for a smooth and fluffy consistency. I like to use an electric mixer for this—it’s quick and easy! Scrape down the sides to ensure there are no lumps. We want a silky base for our cheesecake!

    Step 3: Add Eggs One at a Time

    One by one, add the large eggs into the mix. Make sure to mix thoroughly after each addition. This is crucial for a light texture! If you rush this step, your cheesecake may end up dense, and nobody wants that. Be patient, and enjoy the process!

    Step 4: Incorporate Cream, Vanilla, and Salt

    Now, it’s time for the heavy cream, vanilla extract, and a pinch of salt. Pour them into your bowl, and mix until fully combined. The mixture should become smooth and glossy, resembling a dreamy cloud of deliciousness. This combination elevates the flavors beautifully!

    Step 5: Add Flour

    Gently sift in the all-purpose flour. Be careful not to overmix! Fold the flour into the batter until just combined. Overworking can lead to a dry texture, which we definitely want to avoid. So, keep it gentle!

    Step 6: Bake

    Pour the batter into your prepared loaf pan. Give it a gentle tap on the counter to release any pesky air bubbles trapped inside. Bake your cheesecake for about 40–45 minutes. Watch closely as the top turns a beautiful golden brown while the center retains its jiggle. That’s the sweet spot!

    Step 7: Cool and Chill

    Once baked, allow the cheesecake to cool completely at room temperature. This step is vital—cutting too early can lead to a gooey mess! After it cools down, cover it and refrigerate for at least 4 hours, ideally overnight. Patience truly pays off in achieving that creamy texture we’re all after!

    Tips for Success

    • Always use room temperature ingredients for a smoother blend.
    • Don’t skip the parchment paper; it ensures easy removal.
    • Check your oven’s temperature with a thermometer for accuracy.
    • Test the doneness with a gentle shake; the center should jiggle slightly.
    • Plan ahead and allow chilling time for the best flavor.

    Equipment Needed

    • Loaf pan: A standard-sized one works, but a silicone mold is an easy alternative.
    • Electric mixer: A hand mixer or even a wooden spoon will do the trick if you prefer a workout!
    • Mixing bowls: A large bowl for mixing and a smaller one for sifting flour.
    • Parchment paper: Use wax paper if you’re out—it’ll still help with the removal!

    Variations on Burnt Basque Cheesecake Loaf

    • Chocolate Delight: Add 100g of melted dark chocolate to the batter for a rich, chocolatey twist.
    • Citrus Zest: Incorporate a teaspoon of lemon or orange zest for a refreshing, zesty flavor.
    • Berry Bliss: Swirl in 1/2 cup of pureed fresh berries like raspberry or strawberry for a fruity kick.
    • Nutty Crunch: Fold in 1/2 cup of finely chopped nuts—like almonds or hazelnuts—for added texture.
    • Dairy-Free Option: Substitute cream cheese and heavy cream with cashew cream and coconut yogurt for a creamy vegan version.

    Serving Suggestions for Burnt Basque Cheesecake Loaf

    • Pair a slice with fresh berries for a pop of color and flavor.
    • Drizzle with honey or caramel sauce for extra sweetness.
    • Serve alongside a dollop of whipped cream for added richness.
    • Accompany with a cup of coffee or a bold red wine for a delightful contrast.
    • Garnish with mint leaves for a refreshing touch!

    FAQs about Burnt Basque Cheesecake Loaf

    As you embark on your baking journey with this Burnt Basque Cheesecake Loaf, you might have a few questions. Here are some common queries I often hear, along with helpful answers!

    Can I use low-fat cream cheese? Yes, you can, but it may affect the creaminess and richness that makes this cheesecake loaf special. Full-fat cream cheese is recommended for the best texture!

    How do I store the cheesecake loaf? Store your Burnt Basque Cheesecake Loaf in an airtight container in the fridge. It stays fresh for up to 5 days—a perfect treat for late-night cravings!

    Can I freeze the cheesecake loaf? Absolutely! Wrap individual slices tightly in plastic wrap, then place them in an airtight container. They can be frozen for up to 3 months. Just thaw overnight in the fridge before serving!

    Why does the cheesecake jiggle in the center? A slight jiggle is normal. This is what keeps it creamy and velvety. If it’s too firm, it might have overbaked!

    Can I add flavors to the batter? Yes! Feel free to experiment with lemon zest, chocolate, or vanilla. Variations can elevate the flavor profile and make it uniquely yours!

    Final Thoughts on Burnt Basque Cheesecake Loaf

    Baking this Burnt Basque Cheesecake Loaf has been a delightful journey filled with flavor, richness, and a sprinkle of joy. Each slice offers a comforting embrace, a sweet reminder that even amidst our busy lives, we can create something truly special. The golden top and creamy interior are bound to spark smiles around the table. Whether it’s for a quick family treat or a gathered celebration, this loaf is your new secret weapon. So, roll up your sleeves, gather your loved ones, and enjoy the sweet moments that come from sharing this incredible dessert together!


    Print

    clock clock iconcutlery cutlery iconflag flag iconfolder folder iconinstagram instagram iconpinterest pinterest iconfacebook facebook iconprint print iconsquares squares iconheart heart iconheart solid heart solid icon

    Description

    A rich and creamy burnt Basque cheesecake loaf with a deep golden top and a silky interior, perfect for dessert lovers.


    • 340g cream cheese, softened (full-fat)
    • 100g granulated sugar
    • 2 large eggs, room temperature
    • 180ml heavy cream
    • 1/2 teaspoon vanilla extract
    • 1/8 teaspoon salt
    • 1 tablespoon all-purpose flour

    1. Preheat oven to 200°C. Line a loaf pan with parchment paper, ensuring some overhang for easy removal later.
    2. In a large mixing bowl, beat the cream cheese and sugar until smooth and fluffy, ensuring no lumps remain.
    3. Incorporate eggs one at a time, mixing thoroughly after each addition to maintain a silky consistency.
    4. Pour in the heavy cream, vanilla extract, and salt. Beat until fully incorporated and the mixture appears silky and homogeneous.
    5. Sift the flour into the mixture and fold gently until just combined, being careful not to overmix.
    6. Pour the batter into the prepared loaf pan. Gently tap the pan on the counter to release any trapped air bubbles.
    7. Bake for 40–45 minutes, or until the top develops a deep golden color while the center maintains a slight jiggle.
    8. Allow the cheesecake to cool completely to room temperature, then refrigerate for at least 4 hours (preferably overnight) before slicing and serving.

    Notes

    • For best results, use high-quality cream cheese.
    • Make sure all ingredients are at room temperature before mixing.
    • Overmixing can affect the texture of the cheesecake.
    • Prep Time: 20 minutes
    • Cook Time: 45 minutes
    • Category: Dessert
    • Method: Baking
    • Cuisine: Spanish

    Nutrition

    • Serving Size: 1 slice
    • Calories: 350
    • Sugar: 20g
    • Sodium: 200mg
    • Fat: 26g
    • Saturated Fat: 15g
    • Unsaturated Fat: 8g
    • Trans Fat: 0g
    • Carbohydrates: 25g
    • Fiber: 0g
    • Protein: 5g
    • Cholesterol: 90mg

    Sharing is caring!

  • Marshmallow Caramel Corn Delight

    Marshmallow Caramel Corn Delight


    Introduction to Marshmallow Caramel Corn Delight

    As a busy mom, I know how challenging it can be to find time for a delightful treat. That’s why I adore my Marshmallow Caramel Corn Delight. It’s the perfect solution for those hectic days when you crave a little sweetness without spending hours in the kitchen. Picture this: fluffy popcorn coated in a luscious caramel and marshmallow blend, all ready to impress your family or friends. Whether it’s movie night or just a simple afternoon snack, this recipe is sure to light up everyone’s day with joy and satisfaction.

    Why You’ll Love This Marshmallow Caramel Corn Delight

    This Marshmallow Caramel Corn Delight brings you a whirlwind of joy with its sweet, crunchy, and fluffy goodness. It’s incredibly easy to whip up, making it a lifesaver for busy days. You can create this gourmet snack in just 45 minutes, leaving you with plenty of time to relax. Plus, the combination of caramel and marshmallows creates a flavor explosion that is delightful with every bite. Trust me; your taste buds will thank you!

    Ingredients for Marshmallow Caramel Corn Delight

    To make this scrumptious Marshmallow Caramel Corn Delight, you’ll need a few key ingredients. Here’s a quick rundown:

    • Freshly popped popcorn: Start with about 12 cups—it’s the foundation of this sweet treat. You can pop it using an air popper, stovetop, or microwave. Freshly popped popcorn gives the best texture and flavor.
    • Unsalted butter: Just a half cup will provide that rich, creamy base for our caramel. Unsalted lets you control the flavor perfectly.
    • Light brown sugar: This adds sweetness and depth, creating a delightful caramel flavor. Packed tight, it lends the right amount of moisture.
    • Light corn syrup: A couple of tablespoons helps to bind everything together, preventing your caramel from crystallizing. It’s a sticky solution to achieving that perfect goo!
    • Large marshmallows: You’ll need a whole package of about 10 ounces. Marshmallows add that marshmallowy sweetness that makes this treat shine.
    • Pure vanilla extract: Just a teaspoon enhances all the flavors, making everything taste a bit more special.

    Feel free to get creative with additional ingredients! You could mix in some nuts for crunch or sprinkle in chocolate chips for an indulgent twist. If you’re on a gluten-free diet, popcorn is naturally gluten-free, so you’re in luck! The quantities of each ingredient are listed at the bottom of the article, making it easy for you to print and follow along.

    How to Make Marshmallow Caramel Corn Delight

    Now, let’s dive into creating this heavenly Marshmallow Caramel Corn Delight. It might sound intricate, but trust me, the steps are simple and enjoyable. Each phase brings you closer to a delicious treat that’ll make everyone swoon. Ready? Here we go!

    Step 1: Pop the Popcorn

    Freshly popped popcorn is the star of our show. Start with about 12 cups of popcorn, which equates to roughly ½ cup of unpopped kernels. You can use an air popper, stovetop, or microwave for popping. If using a stovetop, just heat a drizzle of oil in a pan, add the kernels, and cover it. It’s all about that satisfying pop! Fresh popcorn adds that light, airy crunch we crave.

    Step 2: Prepare the Caramel Mixture

    For the dreamy caramel sauce, melt ½ cup of unsalted butter in a medium saucepan over medium heat. Stir in 1 cup of packed light brown sugar and 2 tablespoons of light corn syrup. Keep stirring. This is essential! Let it come to a gentle simmer and cook for about 5 minutes. Look for a smooth, combined mixture. You want all the sugars to dissolve beautifully into the butter. Avoid burning by keeping an eye on it!

    Step 3: Melt the Marshmallows

    Now comes the fun part: adding marshmallows! Toss in the entire package of about 10 ounces of large marshmallows into your caramel mixture. Stir continuously until the marshmallows are fully melted. The sauce should turn beautifully creamy and uniform. You’re creating the sweet gooey goodness that will coat every piece of popcorn. Enjoy the sweet aroma wafting through your kitchen—that’s the smell of happiness!

    Step 4: Combine with Popcorn

    Time to merge our two stars! Gently pour the warm caramel-marshmallow concoction over your popped popcorn. Using a spatula, carefully toss everything together. Keep mixing until every piece of popcorn is evenly coated. You want to ensure that no popcorn is left naked—every morsel deserves that sweet love! This careful mixing makes all the difference in flavor.

    Step 5: Bake the Mixture

    Next, arrange your coated popcorn in a single layer on a baking sheet lined with parchment paper. Bake it in a preheated oven at 250°F. Let it bake for about 30 minutes, stirring every 10 minutes. This baking process enhances flavors, making the caramel slightly crunchy and the marshmallow chewy. Plus, it gives that satisfying texture that everyone loves!

    Step 6: Cool and Serve

    Once baked, let your creation cool completely on the baking sheet. When cool, break it into clusters for serving. Present it in a big, beautiful bowl to show off its irresistible charm! You might even want to package some up as gifts, but trust me, it’ll be tough to share. Your Marshmallow Caramel Corn Delight is now ready to devour!

    Tips for Success

    • Keep stirring your caramel mixture constantly to avoid burning.
    • Let the popcorn cool before breaking it into clusters for neat servings.
    • Use a large mixing bowl for tossing to avoid popcorn flying all over the kitchen.
    • Customize with nuts or chocolate chips, if desired, for added flavor.
    • Store leftovers in an airtight container to maintain freshness for longer.

    Equipment Needed

    • Large mixing bowl: Essential for tossing everything together. A pot can work in a pinch!
    • Medium saucepan: Needed for melting the butter and making the caramel. A heavy-bottomed skillet can be a good alternative.
    • Baking sheet: For baking the mixture. Parchment-lined trays are best, but foil works too!
    • Spatula: Perfect for mixing and layering. A wooden spoon also does the trick!

    Variations for Marshmallow Caramel Corn Delight

    • Nutty Delight: Add chopped nuts like almonds or pecans for a delightful crunch. They add a beautiful contrast to the sweetness!
    • Chocolate Drizzle: Melt some dark or milk chocolate and drizzle it over the cooled treat. This chocolatey layer takes it to the next level!
    • Coconut Twist: Sprinkle shredded coconut into the mixture for a tropical vibe. The coconut pairs wonderfully with the marshmallow flavor.
    • Halloween Fun: Add candy corn or Halloween-themed sprinkles for a festive touch during fall. Perfect for parties or get-togethers!
    • Gluten-Free Option: Stick with naturally gluten-free popcorn and check your caramel ingredients to ensure they comply with your dietary needs. Everyone can enjoy this treat!

    Serving Suggestions

    • Movie Night: Pair your Marshmallow Caramel Corn Delight with a classic family film for the ultimate cozy experience.
    • Festive Bowls: Serve in colorful bowls to add a fun touch to parties or gatherings.
    • Complementary Drinks: Offer alongside hot cocoa or a scoop of vanilla ice cream for delightful contrasts.
    • Bake Sale Treat: Package in clear bags tied with ribbons for an eye-catching bake sale item!

    FAQs about Marshmallow Caramel Corn Delight

    Can I use microwave popcorn for this recipe?

    Absolutely! Microwave popcorn can save you time, but I recommend a plain, unsalted variety. This allows the flavors of the caramel and marshmallow to shine through without any interference.

    How should I store leftover Marshmallow Caramel Corn Delight?

    Store any leftovers in an airtight container at room temperature. This will help maintain its delightful crunch. Just be sure to keep it away from moisture!

    Can I make this treat ahead of time?

    Yes! You can prepare your Marshmallow Caramel Corn Delight a day in advance. Just make sure to store it properly, so it stays fresh. It also makes a great snack for busy days or impromptu gatherings.

    How can I make this treat more festive?

    Consider adding seasonal sprinkles, colored chocolate drizzle, or even festive candies like candy corn. It’s an easy way to elevate your treat for holidays or celebrations!

    Is this recipe suitable for a gluten-free diet?

    Yes, popcorn is naturally gluten-free! Just be sure to check that the caramel ingredients also comply with gluten-free standards. Everyone can indulge in this sweet treat!

    Final Thoughts

    Creating Marshmallow Caramel Corn Delight is more than just whipping up a snack; it’s a chance to indulge in sweet, crispy nostalgia. Each bite transports you back to simpler times, be it at a family gathering or cozy movie night. The joy this treat brings is contagious, sparking smiles all around the table. When you share this delightful creation with loved ones, it becomes a treasured memory, made even sweeter by laughter and good company. So grab your ingredients and celebrate those little moments of happiness—because this recipe is sure to delight everyone, and you deserve a special treat!


    Print

    clock clock iconcutlery cutlery iconflag flag iconfolder folder iconinstagram instagram iconpinterest pinterest iconfacebook facebook iconprint print iconsquares squares iconheart heart iconheart solid heart solid icon

    Description

    A delightful treat combining marshmallows and caramel with popcorn for a sweet snack.


    • 12 cups freshly popped popcorn (from approximately 1/2 cup unpopped kernels)
    • 1/2 cup unsalted butter
    • 1 cup packed light brown sugar
    • 2 tablespoons light corn syrup
    • 1 package (10 ounces) large marshmallows, about 35 pieces
    • 1 teaspoon pure vanilla extract

    1. Pop the popcorn using an air popper, stovetop, or microwave, and transfer to a large mixing bowl, discarding any unpopped kernels.
    2. In a medium saucepan over medium heat, melt the butter. Add brown sugar and corn syrup, stirring constantly, and bring to a gentle simmer. Continue cooking for 5 minutes until the mixture is fully combined and smooth.
    3. Add marshmallows to the saucepan and stir continuously until completely melted and the sauce becomes uniform.
    4. Pour the warm caramel-marshmallow mixture over the popcorn. Gently toss with a spatula until all popcorn is evenly coated.
    5. Arrange the coated popcorn in a single layer on a baking sheet lined with parchment paper. Bake in a 250°F oven for 30 minutes, stirring every 10 minutes for consistent coating.
    6. Remove the tray from the oven and let the popcorn cool completely. Break into clusters before serving.

    Notes

    • Make sure to keep an eye on the caramel mixture as it can burn easily.
    • Store leftover popcorn in an airtight container to maintain freshness.
    • This treat can be customized with nuts or chocolate chips if desired.
    • Prep Time: 15 minutes
    • Cook Time: 30 minutes
    • Category: Dessert
    • Method: Baking
    • Cuisine: American

    Nutrition

    • Serving Size: 1 cup
    • Calories: 150
    • Sugar: 10g
    • Sodium: 80mg
    • Fat: 6g
    • Saturated Fat: 4g
    • Unsaturated Fat: 2g
    • Trans Fat: 0g
    • Carbohydrates: 22g
    • Fiber: 1g
    • Protein: 1g
    • Cholesterol: 15mg

    Sharing is caring!

  • Monster Truffles

    Monster Truffles


    Introduction to Monster Truffles

    Halloween is creeping up faster than I can say “trick or treat,” and let’s face it—who has the time for complicated desserts? That’s where these delightful Monster Truffles come in! They’re not just easy to whip together; they are vibrant, fun, and sure to impress your family and friends. As a busy mom, I love recipes that make my life simpler while still being a hit at gatherings. With just a handful of ingredients and no baking required, you can quickly create these spooky sweets that taste as good as they look. Let’s dive into this colorful creation!

    Why You’ll Love This Monster Truffles

    These Monster Truffles are the ultimate solution for busy bees like us! They come together in a flash, so perfect when you need a quick treat for unexpected visitors or school parties. With no baking involved, you can skip the oven heat and dive directly into the fun part—decorating! Plus, these truffles are a hit with kids and adults alike, ensuring smiles all around. What’s not to love?

    Ingredients for Monster Truffles

    When it comes to making these Monster Truffles, you’ll be pleasantly surprised by the simplicity of the ingredients. Here’s what you need:

    • Golden Oreos: These sweet, golden cookies serve as the base, turning into a delicious crumbly mixture when crushed.
    • Cream Cheese: This adds the perfect creamy texture, blending beautifully with the Oreos for that rich flavor. Make sure it’s softened for easy mixing!
    • Colored Candy Melts: Bright orange, purple, and green candy melts give our truffles their vibrant monster look. Choose any colors to match your theme.
    • Candy Eyeballs: These little guys are the finishing touch. They add a quirky and adorable element that kids love!
    • Colored Themed Sprinkles: Sprinkle some fun on top for added flair. You can use Halloween-themed sprinkles to elevate the spooky factor.

    If you’re in a pinch, you can substitute the cream cheese with a dairy-free option or use different types of cookies! I often swap regular Oreos for gluten-free ones. For ingredient measurements and tips, scroll down to the bottom of the article. They’re all there for easy printing!

    How to Make Monster Truffles

    Creating these adorable Monster Truffles is simpler than you might think! Just follow these straightforward steps, and you’ll have a batch that’s sure to make everyone squeal with joy. Let’s get into the fun, shall we?

    Crush the Oreos

    First things first, grab your Golden Oreos and place them in a food processor. If you don’t have one, a gallon-sized zip bag and a rolling pin work just as well. Crush those cookies until they’re finely ground, almost like sand. This will create the delicious base for our truffles. You want it fine for maximum flavor. Trust me; your efforts will pay off!

    Combine with Cream Cheese

    Next, in that same processor, add in the softened cream cheese. Pulse the mixture until it’s beautifully combined. You want the cookies and cream cheese to meld into a rich, smooth mixture. Don’t worry if it looks a little thick at first; keep blending until it achieves a uniform consistency. This step is vital for the creamy center of your truffles!

    Shape the Truffles

    Now comes the fun part! Use a medium cookie scoop, which is about 1.5 tablespoons, to scoop out the Oreo truffle mixture. Roll each scoop into a tight ball in your palms, making sure they’re firm and well-shaped. Place these delightful little spheres onto a baking sheet lined with parchment paper. As you shape them, I recommend keeping an eye on your kids—they’ll want to help!

    Chill the Truffles

    Once you’ve shaped all the truffles, pop the baking sheet into the fridge. Let them chill for at least 30 minutes, or up to an hour. This helps them set properly, making it easier to dip them later. Think of it as their time to relax! Also, if you’re using a smaller scoop, you may end up with more truffles—bonus treat!

    Melt the Candy Coating

    While those little guys are chilling, it’s time to prepare your candy melts. Place them in a microwave-safe bowl. Heat in 30-second intervals, stirring well after each interval until the candy melts are smooth and not clumpy. You want it flowing like a smooth river! This melted candy will be the colorful coat on your truffles. You can mix colors to get a fun marbled effect too!

    Dip and Decorate the Truffles

    Once the truffles are chilled and your candy melts are smooth, it’s dipping time! Take a truffle, dip it into the melted candy, and let the excess drip off. This is where the magic happens! Place the dipped truffle back onto your parchment-lined baking sheet. Quickly press a candy eyeball onto each one before the coating hardens. And don’t forget to sprinkle some Halloween-themed sprinkles on top for that monster flair!

    Final Chill and Serve

    Let your wonderfully decorated truffles set in the fridge for another 30 minutes or at room temperature for up to an hour. Once set, they’re good to go! Grab your sweet little creations, and get ready for the compliments to roll in! These Monster Truffles are not only a feast for the stomach, but their vibrant colors also bring joy to the eyes.

    Tips for Success

    • Ensure your cream cheese is at room temperature for easy mixing.
    • Chill the truffles long enough for them to hold their shape when dipped.
    • Experiment with different colored candy melts to match your Halloween theme.
    • Keep a small bowl of warm water nearby for your hands if the mixture gets sticky.
    • Get creative with your sprinkles! Let your kids join in on the fun.

    Equipment Needed

    • Food processor: This makes crushing the Oreos a breeze. A rolling pin and a zip bag work too!
    • Baking sheet: A must for setting your truffles. Line it with parchment paper for easy cleanup.
    • Medium cookie scoop: This helps portion the truffles perfectly. If you don’t have one, use a tablespoon!
    • Microwave-safe bowl: Essential for melting your candy melts without making a mess.

    Variations

    • Nut Butter Monster Truffles: Substitute cream cheese with your favorite nut butter for a delightful twist. This adds a nutty flavor that’s simply irresistible.
    • Gluten-Free Option: Swap Golden Oreos for gluten-free cookies to cater to dietary needs while keeping the great taste intact.
    • Festive Flavor Variations: Mix in a dash of pumpkin spice or peppermint extract for a seasonal twist that takes these truffles to the next level.
    • Vegan Version: Use vegan cream cheese and dairy-free candy melts to create a dessert that’s even accessible for those following a plant-based diet.
    • Chocolate Coating: Instead of colorful candy melts, dip in melted dark or milk chocolate for a classic finish that’s just as enchanting.

    Serving Suggestions

    • Pair your Monster Truffles with a spooky-themed punch or warm apple cider to enhance the Halloween vibes.
    • Serve them on a decorative platter with autumn leaves for a seasonal touch that will wow your guests.
    • For a fun twist, display them in Halloween-themed cupcake liners.
    • Add a few gummy worms or Halloween candies around the truffles for extra flair and fun.

    FAQs about Monster Truffles

    Making Monster Truffles is a delightful adventure, but you might have a few questions. Here are some of the most common ones that might pop up:

    1. Can I make Monster Truffles ahead of time?
    Absolutely! These truffles can be made a day in advance. Just store them in the fridge in an airtight container. This makes them perfect for stress-free gatherings!

    2. What can I use instead of cream cheese?
    If cream cheese isn’t your thing, try using Greek yogurt or any nut butter for a different flavor profile. Just ensure that the texture remains creamy for rollability!

    3. How should I store the Monster Truffles?
    Store your truffles in the refrigerator in an airtight container. They’ll last up to a week, but I doubt they’ll stick around that long!

    4. Can I freeze these truffles?
    Yes, you can! Place them in a single layer in a freezer-safe container, and they’ll last for up to three months. Just let them thaw in the fridge before serving.

    5. How do I keep my candy melts from hardening too quickly?
    To keep your candy melts workable while dipping, place the bowl over a pot of warm water to maintain their smooth consistency. This will help prevent them from cooling too fast!

    Final Thoughts

    There’s something magical about making Monster Truffles that brings out the child in all of us. The joy of creating these vibrant, spooky treats is not just about the dessert itself but the smiles they spark. Whether you’re hosting a Halloween party or just bringing a little festive flair to your family dinner, they’re sure to be a favorite. Plus, they’re a fantastic way to get the whole family involved in the kitchen. Embrace the creativity, let the kids sprinkle their favorite toppings, and enjoy every delicious bite. Happy Halloween baking!


    Print

    clock clock iconcutlery cutlery iconflag flag iconfolder folder iconinstagram instagram iconpinterest pinterest iconfacebook facebook iconprint print iconsquares squares iconheart heart iconheart solid heart solid icon

    Description

    Monster Truffles are fun and colorful treats perfect for Halloween celebrations, made using Golden Oreos and decorated with candy melts and candy eyeballs.


    • 1 package (19.1 oz) family-size Golden Oreos
    • 6 ounces cream cheese, softened
    • 1 bag (12 oz) colored candy melts (bright orange, purple, bright green)
    • 24 large or small candy eyeballs
    • Halloween colored themed sprinkles

    1. Place the Golden Oreos into a food processor and process until well crushed and in fine crumbs.
    2. Add in the cream cheese and pulse until well combined.
    3. Use a medium cookie scoop, 1.5 tablespoons, to scoop out the Oreo truffle dough and roll it into a tight ball. Place the truffles onto a baking sheet lined with parchment paper.
    4. Place the truffles inside the fridge for at least 30 minutes, or up to 1 hour, to set.
    5. When ready to decorate the truffles, place the candy melts inside a microwave-safe mixing bowl and heat in 30-second increments, stirring well after each heating, until smooth and melted.
    6. Working one at a time, dip the truffle inside the melted chocolate and let the excess drip off. Place the dipped truffle back onto the baking sheet lined with parchment paper. Immediately press a large eyeball onto the top of each truffle and add some sprinkles on top.
    7. Repeat the process until all the truffles are dipped and decorated.
    8. Allow the truffles to set inside the fridge for 30 minutes or at room temperature for up to 1 hour.
    9. Enjoy your little monsters!

    Notes

    • Make sure the cream cheese is softened for easy mixing.
    • Customize the colors of candy melts to match your Halloween theme.
    • Prep Time: 20 minutes
    • Cook Time: 0 minutes
    • Category: Dessert
    • Method: No-bake
    • Cuisine: American

    Nutrition

    • Serving Size: 1 truffle
    • Calories: 120
    • Sugar: 10g
    • Sodium: 50mg
    • Fat: 6g
    • Saturated Fat: 3g
    • Unsaturated Fat: 2g
    • Trans Fat: 0g
    • Carbohydrates: 15g
    • Fiber: 0g
    • Protein: 1g
    • Cholesterol: 10mg

    Sharing is caring!

  • Marbled Pumpkin Cheesecake Bread Bars

    Marbled Pumpkin Cheesecake Bread Bars


    Introduction to Marbled Pumpkin Cheesecake Bread Bars

    Are you ready to swoon over these Marbled Pumpkin Cheesecake Bread Bars? Picture this: the crisp air of fall, the sun dipping below the horizon, and the smell of spiced pumpkins wafting through your home. I know how busy life can get, but this delightful treat is here to rescue you from the routine. They’re not just bars; they’re a hug in dessert form, perfect for sharing with friends or family, or simply indulging after a long day. Trust me; this recipe is a quick solution that’ll wow your taste buds and lift your spirits.

    Why You’ll Love This Marbled Pumpkin Cheesecake Bread Bars

    Let’s talk about why these Marbled Pumpkin Cheesecake Bread Bars are a total game-changer. They’re incredibly simple to whip up, even on your busiest days. The combination of pumpkin spice and creamy cheesecake creates a mouthwatering symphony of flavors. Plus, they’re perfect for fall gatherings or cozy nights in. You can easily impress your loved ones without breaking a sweat, all while enjoying a little slice of heaven.

    Ingredients for Marbled Pumpkin Cheesecake Bread Bars

    Let’s gather our ingredients for these heavenly Marbled Pumpkin Cheesecake Bread Bars. Each component plays a crucial role in creating that irresistible flavor blend you’ll adore. Here’s what you’ll need:

    • Pumpkin puree: The star of the show, this adds moisture and that classic pumpkin flavor. You can use homemade or canned, just make sure it’s pure pumpkin!
    • Brown sugar: This brings a lovely depth of flavor and a bit of caramel sweetness to the bars.
    • White sugar: Perfectly balances out the brown sugar, giving your bars just the right amount of sweetness.
    • Butter: Softened butter is essential for that rich, creamy texture. Don’t skip it!
    • All-purpose flour: This serves as the base for your bars and gives them structure. Gluten-free flour can be used as a substitute for a gluten-free version.
    • Baking soda and baking powder: These are your leavening agents, making your bars rise and keeping them light.
    • Salt: Just a pinch enhances all the flavors. It’s a crucial player in any sweet dish!
    • Ground cinnamon, ginger, nutmeg, and cloves: The warm spices that scream fall! Each contributes to that cozy flavor profile, enveloping you in spice bliss.
    • Whole milk: Adds moisture to the batter, ensuring a soft and tender crumb.
    • Egg: Binds everything together and provides structure. The recipe calls for two eggs—one for the pumpkin mixture and the other for the cheesecake layer.
    • Cream cheese: This is the key to the creamy cheesecake layer. Be sure it’s at room temperature for easy mixing!
    • Granulated sugar: A bit more for the cheesecake layer to enhance its sweetness and flavor.
    • Vanilla extract: Just a splash adds a delightful aromatic note to your bars.

    These ingredients are listed with exact quantities at the bottom of the article for your convenience, along with a printable option. Happy baking!

    How to Make Marbled Pumpkin Cheesecake Bread Bars

    Prepare Your Oven and Baking Dish

    First things first—let’s get that oven ready! Preheat it to 350 degrees Fahrenheit. This step is vital because a hot oven ensures even baking for our Marbled Pumpkin Cheesecake Bread Bars.

    Next, grab a 9″x13″ baking dish and line it with parchment paper. This makes transferring the bars a breeze later on. Plus, it helps to prevent any sticking disasters. Trust me, you’ll appreciate this small effort when it’s time to slice and serve!

    Mix the Dry Ingredients

    Now, let’s move on to the dry ingredients. In a large bowl, combine all-purpose flour, baking soda, baking powder, salt, cinnamon, ginger, nutmeg, and cloves. This blend of spices is the secret weapon in our bars!

    Each spice brings its charisma to the table, creating that warm, cozy flavor reminiscent of fall. Mix well until everything is evenly distributed. The right balance of spices not only enhances the taste but also creates an aromatic environment that’ll make your kitchen feel like a warm embrace.

    Combine Wet Ingredients

    It’s time to move to the wet ingredients! In the bowl of your stand mixer, cream together the softened butter and both sugars until it’s light and fluffy. This process is key to achieving that rich, creamy texture.

    Next, add in the pumpkin puree and one egg, mixing until everything is well combined. The pumpkin doesn’t just add flavor; it keeps the bars moist and luscious. Trust me; this creamy fill will make a world of difference!

    Combine Dry and Wet Mixtures

    Now comes the fun part, blending the dry and wet mixtures! Gradually add the flour mixture to the pumpkin mixture in your stand mixer. Beat until everything is smooth and well incorporated.

    Your batter should be thick and delectably gooey. This texture is crucial for creating the diverse layers of flavor. You’ll want to scrape down the sides of the bowl to ensure nothing is left behind, which ensures a consistent taste in every bite.

    Prepare the Cheesecake Layer

    Next up is crafting the cheesecake layer! In a separate bowl, use your mixer to beat the cream cheese until it’s completely smooth. Make sure it’s at room temperature to avoid any lumps, as they’re unwelcome guests in your bars!

    Add in the granulated sugar, one egg, and vanilla extract, mixing until it’s creamy and delightful. This step is essential for creating a rich, velvety texture that will beautifully complement your pumpkin layer. Oh, the possibilities this layer brings!

    Layer and Swirl the Mixtures

    Let’s build those layers! Start by pouring three-quarters of the pumpkin mixture into your lined baking dish, spreading it into an even layer.

    Next, gently pour the cheesecake mixture on top. Now take the remaining pumpkin mixture and drop it by spoonfuls over the cheesecake. Here’s where the magic happens—using a butter knife, swirl the two mixtures together gently!

    A beautiful marbled effect is what we’re aiming for. Be careful not to mix them too much; we want distinct layers that marry well together, creating a delightful look and taste in each bite.

    Bake and Cool

    It’s baking time! Place your creation in the preheated oven and let it bake for 30 to 35 minutes. You’ll know it’s ready when the top is set and a knife inserted comes out clean.

    Once the bars are done baking, let them cool completely in the pan. After they’ve cooled, place them in the fridge for about an hour to chill. This step is crucial for setting the bars perfectly, so resist the urge to dive right in. You’ll get the best texture if you wait!

    Tips for Success

    • Make sure your cream cheese is at room temperature for a smooth cheesecake layer.
    • Don’t skip the parchment paper—it helps with easy lifting and cleanup!
    • Allow the bars to cool completely before refrigerating for the best texture.
    • Feel free to adjust spices to match your taste; a little extra cinnamon can be heavenly!
    • Store leftovers in an airtight container to keep them fresh.

    Equipment Needed

    • 9″x13″ baking dish (Use any standard baking dish if you don’t have this size)
    • Parchment paper (Aluminum foil can substitute, but parchment is preferred)
    • Stand mixer or hand mixer (A whisk can also work, but it’ll take more effort)
    • Mixing bowls (Any size will do)
    • Baking spatula (A regular spatula will work in a pinch)

    Variations

    • Gluten-Free: Substitute all-purpose flour with a gluten-free flour blend to make this recipe suitable for gluten-sensitive friends.
    • Nutty Twist: Add some chopped pecans or walnuts to the pumpkin layer for added texture and a delightful crunch.
    • Spiced Up: Enhance the warmth with a touch of cardamom or allspice; these spices pair beautifully with the pumpkin flavor.
    • Vegan Option: Replace the eggs with flaxseeds or chia seeds and use a plant-based butter and cream cheese for a vegan twist.
    • Chocolate Lovers: Swirl in some melted chocolate or chocolate chips into the cheesecake layer for a decadent chocolate-pumpkin fusion.

    Serving Suggestions for Marbled Pumpkin Cheesecake Bread Bars

    • Pair with a hot cup of spiced chai or apple cider for a cozy autumn treat.
    • Serve with a dollop of whipped cream or a scoop of vanilla ice cream on top.
    • For presentation, dust with powdered sugar or drizzle with caramel sauce for an elegant touch.
    • Garnish with a sprinkle of cinnamon for that perfect finishing flair.

    FAQs about Marbled Pumpkin Cheesecake Bread Bars

    Can I use fresh pumpkin instead of canned? Absolutely! Just ensure that you puree it well and remove any excess moisture. Fresh pumpkin can add a lovely, vibrant taste to your Marbled Pumpkin Cheesecake Bread Bars.

    How do I store leftovers? These bars store well in an airtight container in the fridge for up to a week. Just make sure they’re fully cooled so they maintain their delicious texture.

    Can I freeze these bars? Yes, you can freeze Marbled Pumpkin Cheesecake Bread Bars! Just wrap them tightly in plastic wrap and then place them in a freezer bag. They’ll keep for up to three months. Thaw in the fridge before enjoying.

    How do I know when the bars are done baking? Keep an eye on the baking time! The bars are done when the top is set and doesn’t jiggle. You can also insert a knife into the center; if it comes out clean, they’re ready!

    What can I substitute for cream cheese? If you’re looking for a dairy-free option, consider using cashew cream or a non-dairy cream cheese alternative. Both can create a similar creamy cheesecake layer.

    Final Thoughts

    As you savor each bite of these Marbled Pumpkin Cheesecake Bread Bars, I want you to remember the joy of creating something truly special. The delightful blend of creamy cheesecake and spiced pumpkin is like a warm embrace on a chilly day, beautifully illustrating the essence of comfort food. Whether you share these bars at a gathering or indulge quietly at home, they’re bound to spark smiles and heartwarming conversations. So, roll up your sleeves, put on your apron, and enjoy the sweet journey of baking. You’ll be glad you did, and your taste buds will thank you too!


    Print

    clock clock iconcutlery cutlery iconflag flag iconfolder folder iconinstagram instagram iconpinterest pinterest iconfacebook facebook iconprint print iconsquares squares iconheart heart iconheart solid heart solid icon

    Description

    Delicious marbled pumpkin cheesecake bread bars that combine the flavors of pumpkin bread and creamy cheesecake in a delightful treat.


    • ¾ cup pumpkin puree
    • ½ cup brown sugar
    • ¼ cup white sugar
    • ½ cup butter softened
    • 1¼ cup all purpose flour
    • ¾ teaspoon baking soda
    • ¼ tsp baking powder
    • ¾ tsp salt
    • 1 teaspoon ground cinnamon
    • 1 tsp ground ginger
    • ½ tsp ground nutmeg
    • ¼ teaspoon ground cloves
    • 2 tablespoon whole milk
    • 1 egg
    • 8 oz cream cheese brick
    • ¼ cup granulated sugar
    • ½ teaspoon vanilla extract
    • 1 egg

    1. Preheat oven to 350 degrees.
    2. In a large bowl; mix flour, cinnamon, cloves, ginger, nutmeg, salt, baking soda and baking powder.
    3. In the bowl of your stand mixer, blend butter and sugars until smooth. Beat in egg, pumpkin puree and milk.
    4. Add the flour mixture to your stand mixer and beat until smooth. Set aside.
    5. Beat cream cheese, sugar, egg and vanilla until smooth and creamy.
    6. Line a 9″x13″ baking dish with parchment paper.
    7. Pour ¾ of pumpkin bread mixture in an even layer on the bottom of the baking dish leaving about ¼ for the marbled topping.
    8. Evenly pour the cheesecake mixture directly on top of the pumpkin bread layer.
    9. Drop spoonfuls of the pumpkin bread mixture on top of the cheesecake layer like a checkerboard. Using a butter knife, swirl the cheesecake and bread spoonfuls together for a marbled look, being careful not to swirl the bottom bread layer into the cheesecake.
    10. Place bars in the oven and bake for 30-35 minutes until the top is no longer jiggly and a butter knife runs through and comes out clean.
    11. Remove bars from oven and let cool completely before placing in the fridge for about 1 hour to chill. Slice into 16 bars.

    Notes

    • Ensure to cool the bars completely before chilling for the best texture.
    • Prep Time: 20 minutes
    • Cook Time: 35 minutes
    • Category: Dessert
    • Method: Baking
    • Cuisine: American

    Nutrition

    • Serving Size: 1 bar
    • Calories: 210
    • Sugar: 12g
    • Sodium: 150mg
    • Fat: 10g
    • Saturated Fat: 5g
    • Unsaturated Fat: 3g
    • Trans Fat: 0g
    • Carbohydrates: 29g
    • Fiber: 1g
    • Protein: 3g
    • Cholesterol: 40mg

    Sharing is caring!

  • Chocolate Peanut Butter Pretzel Macarons

    Chocolate Peanut Butter Pretzel Macarons


    Introduction to Chocolate Peanut Butter Pretzel Macarons

    If you’ve ever craved something truly indulgent yet surprisingly easy to make, let me introduce you to these Chocolate Peanut Butter Pretzel Macarons. Picture this: a delicate macaron shell filled with creamy peanut butter frosting, topped with rich chocolate and crunchy pretzels. It’s a sweet little treat that can elevate any occasion! With just a handful of ingredients and steps, this recipe is perfect for busy evenings or when you want to impress family and friends. Who says you can’t have gourmet desserts in a flash? Let’s dive into this delightful adventure together!

    Why You’ll Love This Chocolate Peanut Butter Pretzel Macarons

    Let’s face it: life can get hectic, and the last thing we need is a complicated recipe that takes hours to execute. These Chocolate Peanut Butter Pretzel Macarons are not only quick to whip up but also incredibly tasty. The rich combination of chocolate and peanut butter, paired with a delightful crunch, creates a flavor bomb that’s sure to impress. Plus, they’re a fun treat that brightens up any busy day!

    Ingredients for Chocolate Peanut Butter Pretzel Macarons

    Let’s take a quick look at the delicious elements that come together to create these Chocolate Peanut Butter Pretzel Macarons. Each ingredient plays a vital role, and you’ll see how they come together in harmony. Don’t worry; if you want to know the exact measurements, they’re right at the bottom of this article for your convenience.

    • Egg Whites: The backbone of the macarons, they whip up into a fluffy meringue that provides that signature delicate texture.
    • Granulated Sugar: This sweetens the meringue and helps stabilize it. Plus, it adds that beautiful shine to your macaron shells.
    • Powdered Sugar: A key player in achieving that light, airy texture while balancing sweetness without graininess.
    • Almond Flour: Gives the macarons their structure and that lovely nutty taste; it’s crucial for authentic French macarons.
    • Cocoa Powder: It adds a deep chocolatey flavor, turning these macarons into every chocolate lover’s dream.

    Now, let’s talk about the luscious peanut butter frosting.

    • Unsalted Butter: Softened for easy mixing, it’s the creaminess in your frosting that binds all the flavors together.
    • Heavy Cream: Helps to achieve that silky, smooth consistency in the frosting—don’t skimp on it!
    • Creamy Peanut Butter: The star of the show! It adds that unforgettable nutty flavor and richness to the frosting.

    Finally, for the delightful garnish:

    • Dark Chocolate: I recommend 70% cacao—you’ll drizzle this on top to give a luxurious finish. It’s the perfect complement to peanut butter.
    • Crushed Pretzels: These little morsels add crunch and saltiness, bringing balance to the sweetness and elevating your macarons.

    By mixing and matching flavors, you can make these macarons entirely your own. Enjoy the creativity, and don’t hesitate to experiment! Now, let’s get cooking!

    How to Make Chocolate Peanut Butter Pretzel Macarons

    Now that we’ve gathered all our ingredients, it’s time to embark on our macaron-making adventure! Follow these simple steps to create your delicious Chocolate Peanut Butter Pretzel Macarons. Don’t worry—I’ll guide you through it! Let’s start by preparing the very foundation of these delightful treats.

    Prepare the Macaron Shells

    First things first, we need to sift together our dry ingredients. In a medium bowl, combine the almond flour, powdered sugar, and cocoa powder. Sifting these ingredients isn’t just for fun; it breaks up clumps and gives your macarons that gorgeous, smooth texture. Once sifted, set this mixture aside and momentarily put it out of your mind. It’s like giving the flour a little timeout before the big performance!

    Whip the Egg Whites

    Next, let’s whip those egg whites into a light and fluffy meringue. In the bowl of a stand mixer fitted with the whisk attachment, beat the egg whites on medium speed until they start to look foamy. This should take a few minutes. Once you see those bubbles forming, crank up the speed to high. We want those peaks, my friend! You’ll know you’re there when the whisk leaves visible trails in the meringue. Be patient—this is the moment that makes or breaks your macarons!

    Combine Meringue with Dry Ingredients

    With your perfectly whipped meringue in hand, it’s time to marry it with your dry ingredients. Gently fold the sifted mixture into the meringue using a rubber spatula. This is key—be gentle! We want to incorporate the ingredients without deflating that lovely airiness you just achieved. The batter should reach a smooth, lava-like consistency, falling in ribbons off your spatula. If it’s too thick, fold a bit more; if it flows like molten chocolate, you’re golden!

    Pipe the Macaron Batter

    Now comes the fun part—piping the batter! Grab a pastry bag fitted with a medium round tip. Carefully fill the bag with your macaron batter, pushing it down to remove any air pockets. On a baking sheet lined with parchment paper, pipe out 1.5-inch rounds, leaving some space between each for spreading. If you want perfectly uniform sizes, a macaron template can work wonders. Just slide it under the parchment paper, and there you go!

    Bake the Macarons

    Preheat your oven to 300˚F; it’s time to let these beauties bake! Place the filled baking sheets into the oven and bake the macarons for 18-20 minutes. Keep a close eye on them—every oven is slightly different. When they’re done, they’ll have that lovely ‘foot’ at the bottom and should be dry to the touch on top. Let them cool on the baking sheet for about 10 minutes before carefully transferring them to a wire rack. Patience is a virtue, especially when waiting for these scrumptious treats!

    Make the Peanut Butter Frosting

    While your macarons are cooling, let’s whip up that rich, creamy peanut butter frosting. In a mixing bowl, beat together the softened butter, powdered sugar, heavy cream, and creamy peanut butter. Start on low speed to avoid a sugar cloud, then gradually increase to high. You want a smooth and velvety consistency that will take your macarons to the next level of indulgence!

    Assemble and Garnish the Macarons

    Now for the pièce de résistance—assembly time! Take two macaron shells and pair them. Pipe a generous dollop of your peanut butter frosting onto one shell, then sandwich it with the other. To make them even more irresistible, drizzle that melted dark chocolate on top and sprinkle with crushed pretzels. It’s the delightful crunch that makes each bite a little celebration in your mouth! Don’t forget to let them sit for a few minutes to meld all those wonderful flavors.

    And there you have it—your very own Chocolate Peanut Butter Pretzel Macarons! Each bite is a heavenly mix of creamy, crunchy, and chocolatey goodness. Enjoy your creation and watch your loved ones indulge with glee!

    Tips for Success

    • Ensure egg whites are at room temperature for better whipping.
    • Don’t over-whip the egg whites, or they’ll lose moisture.
    • Let the piped macarons rest until they form a skin for the best texture.
    • Use a kitchen scale for precision—macarons are finicky!
    • Keep your workspace clean and organized to simplify the process.

    Equipment Needed

    • Stand Mixer: If you don’t have one, a hand mixer works too!
    • Mixing Bowls: Use medium and large bowls for convenience.
    • Rubber Spatula: A must for folding mixtures without deflating.
    • Pastry Bag: You can create one using a sturdy zip-top bag.
    • Parchment Paper: A silicone baking mat also works great!

    Variations on Chocolate Peanut Butter Pretzel Macarons

    • White Chocolate Drizzle: Swap dark chocolate for white chocolate to change up the flavor profile while still keeping that sweet touch.
    • Nut-Free Option: Replace almond flour with sunflower seed flour if you need a nut-free alternative. Just be prepared for a slightly different texture.
    • Spicy Twist: Add a pinch of cayenne pepper or cinnamon to the peanut butter frosting for a warm, spicy kick that pairs nicely with chocolate.
    • Flavored Macarons: Try adding a few drops of vanilla or almond extract to the macaron batter for an extra layer of flavor.
    • Vegan Version: Use aquafaba (the liquid from canned chickpeas) in place of egg whites, and opt for vegan butter and dairy-free chocolate for a plant-based treat.

    Serving Suggestions

    • Presentation: Arrange macarons on a decorative platter for an elegant display.
    • Pairing: Serve with a glass of cold milk or a rich coffee for a delightful contrast.
    • Occasions: Perfect for birthday parties, tea time, or casual get-togethers.
    • Garnish: Add fresh berries or mint leaves for an extra touch.

    FAQs about Chocolate Peanut Butter Pretzel Macarons

    As you embark on your macaron-making journey, you might have a few questions rattling around in your mind. Not to worry! Here are some common queries about Chocolate Peanut Butter Pretzel Macarons, along with my best tips to guide you.

    Can I make macarons ahead of time?

    Definitely! These delicious treats can be stored in an airtight container in the fridge for up to five days. Just let them come to room temperature before serving to enjoy the full flavor.

    Why is my macaron batter runny?

    If your batter is too runny, it may not have been folded correctly or you might have added too much moisture. Remember to fold gently until it reaches a lava-like consistency. Check the ‘figure 8 test’ for the right texture!

    Can I freeze my Chocolate Peanut Butter Pretzel Macarons?

    Absolutely! You can freeze the unfilled macaron shells. Just ensure they are well-sealed in an airtight container. When you’re ready to enjoy, fill them fresh with peanut butter frosting!

    Are these macarons gluten-free?

    Yes, the ingredients in these macarons are naturally gluten-free, making this recipe a great choice for those avoiding gluten. Just ensure that all your packaged ingredients are labeled gluten-free for peace of mind.

    Can I use different fillings instead of peanut butter frosting?

    Of course! This recipe is versatile, and you can fill the macarons with various flavors like chocolate ganache, raspberry jam, or even lemon curd for a refreshing twist. Let your creativity flow!

    Final Thoughts

    Making your own Chocolate Peanut Butter Pretzel Macarons is not just about the finished treat; it’s a delightful journey! Each step connects you to the joy of baking, where patience and creativity intertwine. The moment you take that first bite, you’re greeted with a symphony of flavors—rich chocolate, creamy peanut butter, and a satisfying crunch. Sharing these macarons with loved ones will surely spark smiles and create lasting memories. So, don your apron and dive into this delicious adventure—because you deserve a little indulgence in your busy life!


    Print

    clock clock iconcutlery cutlery iconflag flag iconfolder folder iconinstagram instagram iconpinterest pinterest iconfacebook facebook iconprint print iconsquares squares iconheart heart iconheart solid heart solid icon

    Description

    Delicious Chocolate Peanut Butter Pretzel Macarons with a creamy frosting and a crunchy pretzel garnish.


    • 120 grams egg whites (approx. 4 large eggs)
    • 120 grams granulated sugar
    • 200 grams powdered sugar
    • 130 grams almond flour
    • 15 grams cocoa powder
    • For the Peanut Butter Frosting:
    • 55 g unsalted butter, softened
    • 180 g powdered sugar
    • 45 g heavy cream
    • 65 g creamy peanut butter
    • For the Garnish:
    • 85 g dark chocolate (70% cacao), melted
    • 20 g crushed pretzels

    1. In a medium bowl, sift together the almond flour, powdered sugar, and cocoa powder and set aside.
    2. In the bowl of a stand mixer fitted with the whisk attachment, whip the egg whites on medium speed until foamy.
    3. Continue to beat until your whisk begins leaving visible trails in the foamy egg whites.
    4. Once you see trails, gradually add the granulated sugar, increase mixer speed, and whip on high until the meringue forms stiff peaks.
    5. Add the dry ingredients to the meringue and fold with a rubber spatula until the batter reaches a lava-like consistency.
    6. Transfer the batter into a pastry bag with a medium-sized round tip.
    7. Pipe out the batter into 1.5-inch rounds on a baking sheet lined with parchment paper.
    8. Bake the macarons on a preheated sheet pan at 300˚F for 18-20 minutes.
    9. Cool on the sheet pan for 10 minutes before peeling off the parchment and transferring to a wire rack.
    10. Make the peanut butter frosting by beating the butter, powdered sugar, heavy cream, and peanut butter until smooth.
    11. Pair the macaron shells, fill them with frosting, drizzle with melted chocolate, and sprinkle with crushed pretzels.
    12. Store in an airtight container in the fridge for up to 5 days.

    Notes

    • Do not over-whip the egg whites to avoid drying them out.
    • The ‘figure 8 test’ helps check the batter consistency.
    • Allow macarons to dry until a skin forms before baking.
    • Optionally, use a macaron template for uniform size.
    • Let filled macarons come to room temperature before serving.
    • Prep Time: 30 minutes
    • Cook Time: 20 minutes
    • Category: Dessert
    • Method: Baking
    • Cuisine: French

    Nutrition

    • Serving Size: 1 macaron
    • Calories: 150
    • Sugar: 9g
    • Sodium: 50mg
    • Fat: 7g
    • Saturated Fat: 4g
    • Unsaturated Fat: 2g
    • Trans Fat: 0g
    • Carbohydrates: 19g
    • Fiber: 1g
    • Protein: 3g
    • Cholesterol: 20mg

    Sharing is caring!

  • Fiesta Lime Chicken with Avocado Salsa

    Fiesta Lime Chicken with Avocado Salsa


    Introduction to Fiesta Lime Chicken with Avocado Salsa

    Hey there, fellow home cooks! If you’re like me and sometimes struggle to balance life, work, and dinner, then you’re in for a treat with this Fiesta Lime Chicken with Avocado Salsa. This dish is not just a meal; it’s a flavor explosion that’s sure to impress your loved ones. Perfect for those busy weeknights, it takes around 30 minutes from start to finish. Plus, the bright, zesty notes of lime paired with creamy avocado make it a feast for your taste buds. Trust me, you’ll want to bookmark this one!

    Why You’ll Love This Fiesta Lime Chicken with Avocado Salsa

    This Fiesta Lime Chicken with Avocado Salsa is a lifesaver for busy evenings. It’s quick to prepare and bursting with flavor, making it a crowd-pleaser at the dinner table. The freshness of the avocado salsa adds a delightful crunch that complements the juicy chicken perfectly. Whether you’re cooking for the family or having friends over, this dish is sure to delight and impress without spending hours in the kitchen!

    Ingredients for Fiesta Lime Chicken with Avocado Salsa

    Gathering the right ingredients is the first step to creating this delightful Fiesta Lime Chicken with Avocado Salsa. Each component plays a crucial role in building that vibrant flavor base. Here’s what you’ll need:

    • Chicken breasts: I love using boneless, skinless chicken breasts for their tenderness and quick cooking time. Don’t forget to pound them to ensure even cooking!
    • Fiesta Lime Rub:
      • Olive oil: A must-have for healthy cooking, it helps our rub stick and adds richness.
      • Lime juice: Freshly squeezed is ideal for that perfect zesty kick.
      • Lime zest: This little gem intensifies the lime flavor and accentuates the freshness.
      • Chili powder and brown sugar: Together, they create a beautiful balance of heat and sweetness.
      • Salt: Essential for enhancing all the flavors.
      • Cumin, smoked paprika, onion powder, and garlic powder: A flavorful blend that adds depth to our chicken.
      • Chipotle chili powder (optional): Adding this gives an extra smoky kick if you’re feeling adventurous!
      • Pepper: Just a pinch to round out the flavors.
    • Avocado Salsa:
      • Ripe avocados: They bring creaminess and healthy fats. Choose firm ones that yield slightly when pressed.
      • Cherry or Roma tomatoes: Adds sweetness and juiciness. I prefer cherry tomatoes for their burst of flavor!
      • Fresh corn: The sweet crunch of fresh corn is simply irresistible in this salsa.
      • Red onion: For that distinct sharpness, finely chopped to balance the creamy avocados.
      • Red bell pepper: Adds a pop of color and sweetness to the salsa.
      • Jalapeno pepper: For those who love a little heat, and remember, you can control the spice by omitting the seeds!
      • Cilantro: Fresh cilantro elevates the salsa with its unique flavor.
      • Garlic: A touch adds just the right amount of kick to our mix.
      • More lime juice, cumin, salt, and pepper: To taste—always adjust these to suit your preference.

    As you may have noticed, each ingredient plays its part in creating this stunning dish. If you’re looking for exact measurements, don’t worry! They’re available for printing at the end of the article.

    How to Make Fiesta Lime Chicken with Avocado Salsa

    Getting to the heart of this delicious Fiesta Lime Chicken with Avocado Salsa is the real fun! Dive into each step with me as we craft this vibrant dish together. I promise it’s a journey you’ll enjoy, complete with flavor and kitchen confidence!

    Step 1: Prepare the Chicken Rub

    First things first, let’s whip up that fabulous chicken rub. In a small bowl, combine olive oil, lime juice, lime zest, chili powder, brown sugar, salt, cumin, smoked paprika, onion powder, garlic powder, chipotle chili powder, and pepper. Mix well until everything is cohesive and aromatic. This rub is where the magic begins, infusing the chicken with incredible flavors!

    Once mixed, coat your chicken breasts generously with the rub, ensuring even coverage. Here’s a tip: let the chicken sit for at least 30 minutes at room temperature or refrigerate it for up to 8 hours. This resting period allows the spices to truly mingle and boosts the flavor, making each bite a taste sensation!

    Step 2: Cook the Chicken

    Now that our chicken is beautifully seasoned, it’s time to cook! If using a stove, heat a grill pan or skillet over medium-high heat and oil it lightly. Once hot, carefully add the chicken breasts. Don’t move them for 3-5 minutes; let them brown perfectly!

    When it’s time to flip, cover the pan and reduce the heat to medium. Cook for another 5-7 minutes until the chicken is cooked through—an internal temperature of 165°F is key. Alternatively, if you’re using a grill, preheat it to medium heat and place the chicken directly on the grates. Remember to keep it undisturbed for 5-7 minutes per side for that perfect char and juiciness!

    Step 3: Make the Avocado Salsa

    While the chicken is cooking, let’s focus on that refreshing Avocado Salsa. Grab a large bowl and toss together the chopped avocados, quartered cherry tomatoes (or diced Roma tomatoes), fresh corn, red onion, red bell pepper, diced jalapeno, chopped cilantro, and minced garlic. Look at those colors! They’re as vibrant as they are delicious.

    Next, add lime juice, ground cumin, salt, and pepper according to your taste. Stir gently, taking care not to mash the avocados. This salsa thrives on its fresh texture! For optimal flavor, cover it with plastic wrap and let it chill in the refrigerator while your chicken finishes cooking.

    Step 4: Combine and Serve

    Once your chicken has rested for a few minutes, it’s time to serve up! Slice the chicken and arrange it on plates, then generously spoon that gorgeous Avocado Salsa on top. The combination of juicy chicken and refreshing salsa is simply a match made in heaven.

    For an extra pop, drizzle with fresh lime juice. This dish is perfect for weeknight dinners or gatherings with friends. Enjoy every delicious bite!

    Tips for Success

    • Prep the chicken rub the night before for deeper flavors.
    • Ensure your chicken breasts are pounded to an even thickness for uniform cooking.
    • Use a meat thermometer to check for doneness at 165°F.
    • Feel free to customize the spice level in your Avocado Salsa with more or less jalapeno.
    • Chill your salsa ahead of time for the freshest taste and best texture.

    Equipment Needed for Fiesta Lime Chicken with Avocado Salsa

    • Grill Pan or Skillet: A good non-stick option works wonders if you don’t have a grill.
    • Meat Thermometer: Essential for checking chicken doneness; a simple knife can also do if you cut into it.
    • Mixing Bowl: Any size will do for our fabulous salsa—use what you have!
    • Whisk: Handy for mixing the rub; a fork can work in a pinch!
    • Chopping Board and Knife: For all your chopping needs; having a sharp knife makes it easier!

    Variations of Fiesta Lime Chicken with Avocado Salsa

    • Spicy Fiesta Lime Chicken: Add more chipotle chili powder or finely chopped jalapenos to the chicken rub for an extra kick.
    • Grilled Shrimp Variation: Swap out the chicken for shrimp marinated in the same Fiesta Lime rub for a delightful seafood twist.
    • Vegan Option: Use grilled portobello mushrooms or tofu instead of chicken. Marinate as you would the chicken for that zingy flavor.
    • Low-Carb Version: Serve the chicken on a bed of greens instead of rice or tortillas for a refreshing salad option.
    • Herb-Infused Salsa: Add fresh basil or mint to your Avocado Salsa for a unique aromatic twist on flavors!

    Serving Suggestions for Fiesta Lime Chicken with Avocado Salsa

    • Serve with Rice: Pair your chicken with cilantro-lime rice for a delightful contrast.
    • Fresh Greens: A simple salad topped with vinaigrette complements the richness of the dish.
    • Chilled Beverages: Serve with iced tea or a light margarita for a festive touch.
    • Presentation: Garnish with lime wedges and fresh cilantro for a vibrant look.

    FAQs about Fiesta Lime Chicken with Avocado Salsa

    Can I make Fiesta Lime Chicken with Avocado Salsa ahead of time?

    Absolutely! You can prepare the chicken rub and marinate the chicken ahead of time. Just remember to let it come to room temperature before cooking. The Avocado Salsa is also perfect to make in advance, but fold in the avocados right before serving to keep them fresh and vibrant!

    What can I serve with Fiesta Lime Chicken?

    Great question! This dish pairs beautifully with cilantro-lime rice, fresh greens, or even tortilla chips. You could also serve it with a side of grilled veggies for a colorful meal!

    How do I adjust the spiciness of the Avocado Salsa?

    To control the heat in your Avocado Salsa, simply adjust the quantity of jalapeno used. Removing the seeds makes it milder, while adding more will definitely kick up the spice! You can also skip the chipotle chili powder in the chicken rub if you prefer less heat.

    Can I use other proteins besides chicken?

    Yes! This recipe works beautifully with shrimp or fish, just adjust the cooking times accordingly. For a delicious twist, even grilled portobello mushrooms or tofu can capture all those fantastic Fiesta Lime flavors!

    How do I store leftovers?

    Store leftover Fiesta Lime Chicken in an airtight container in the refrigerator for up to three days. The Avocado Salsa is best consumed fresh but can be stored for a day or two if tightly covered. Just be sure to give it a gentle stir before serving.

    Final Thoughts on Fiesta Lime Chicken with Avocado Salsa

    This Fiesta Lime Chicken with Avocado Salsa is more than just a meal; it’s a celebration of flavors! Each bite offers a delightful contrast of zesty lime and creamy avocado that dances on your taste buds. It’s the perfect way to gather friends or family around the table, sharing stories and laughter over a dish that truly shines. Whether it’s for a weeknight dinner or a special occasion, this recipe brings joy and ease into your kitchen. Trust me; you’ll find yourself making this vibrant dish again and again!


    Print

    clock clock iconcutlery cutlery iconflag flag iconfolder folder iconinstagram instagram iconpinterest pinterest iconfacebook facebook iconprint print iconsquares squares iconheart heart iconheart solid heart solid icon

    Description

    Fiesta Lime Chicken topped with fresh Avocado Salsa is a deliciously vibrant dish that bursts with flavor.


    • 1 pound chicken breasts pounded to an even thickness
    • FIESTA LIME RUB
    • 2 tablespoons olive oil
    • 2 tablespoons lime juice (about 1 lime)
    • Lime zest from 1 lime
    • 1 tsp EACH chili powder, brown sugar
    • 3/4 teaspoon salt
    • 1/2 tsp EACH ground cumin, smoked paprika, onion powder, garlic powder
    • 1/41/2 teaspoon chipotle chili powder (optional for more heat)
    • 1/4 teaspoon pepper
    • AVOCADO SALSA
    • 2 medium avocados ripe but firm, chopped
    • 1 cup cherry tomatoes, quartered OR 2 Roma tomatoes, seeded and chopped
    • Fresh corn from 1 ear of sweet corn
    • 1/3 cup finely chopped red onion
    • 1/2 red bell pepper, chopped
    • 1 jalapeno pepper, diced, seeds separated
    • 2 tablespoons finely chopped cilantro
    • 1 garlic clove, minced or ¼ tsp garlic powder
    • 2 tablespoons lime juice
    • 1/4 tsp EACH ground cumin, salt
    • 1/8 tsp pepper or more to taste

    1. In a small bowl, whisk chicken rub ingredients together and rub evenly all over chicken breasts. Allow chicken to sit for 30 minutes at room temperature or refrigerate up to 8 hours, then bring to room temperature before cooking. Prepare Avocado Salsa during this time.
    2. If chicken has been refrigerated, let it sit at room temperature for 15-30 minutes.
    3. For stovetop directions, grease and heat an indoor grill pan or skillet over medium-high heat. Once very hot, add chicken and cook, undisturbed for 3-5 minutes, or until nicely browned on one side.
    4. Turn chicken over, cover, and reduce heat to medium. Cook for approximately 5-7 more minutes, or until chicken is cooked through. Remove to a cutting board and let rest 5 minutes before slicing. Garnish with extra fresh lime juice if desired.
    5. For grilling directions, grease and preheat the grill to medium heat, 375-450°F. Grill chicken undisturbed for 5-7 minutes per side, or until chicken is cooked through (an inserted thermometer should read 165 degrees F). Remove chicken from grill and let rest 5 minutes before slicing.
    6. For Avocado Salsa, toss all of the ingredients except for the avocados in a large bowl. Cover with plastic wrap and chill for 30 minutes to 24 hours.
    7. When ready to serve, gently fold in the avocados. Taste and add additional salt, pepper, and desired amount of jalapeno seeds for more heat (optional).

    Notes

    • Prep the chicken rub in advance for deeper flavor.
    • Adjust the spice level by changing the amount of jalapeno seeds and chipotle chili powder.
    • Avocado Salsa can be made ahead of time, just fold in the avocados right before serving to keep them fresh.
    • Prep Time: 15 minutes
    • Cook Time: 15-20 minutes
    • Category: Main Course
    • Method: Grilling or Stovetop
    • Cuisine: Mexican

    Nutrition

    • Serving Size: 1 chicken breast with salsa
    • Calories: 450
    • Sugar: 2g
    • Sodium: 800mg
    • Fat: 23g
    • Saturated Fat: 3g
    • Unsaturated Fat: 20g
    • Trans Fat: 0g
    • Carbohydrates: 20g
    • Fiber: 8g
    • Protein: 38g
    • Cholesterol: 90mg

    Sharing is caring!

  • Strawberry Kiss Cookies

    Strawberry Kiss Cookies


    Introduction to Strawberry Kiss Cookies

    As a busy mom, I know how challenging it can be to whip up something sweet that truly delights the family. That’s why I’m excited to share my recipe for Strawberry Kiss Cookies. These little gems not only boast the vibrant taste of strawberries but also offer the comforting richness of chocolate. They’re simple to make, and the combination of flavors is sure to kick up your dessert game! Whether it’s a quick snack after school or a crowd-pleaser for your next gathering, these cookies will put a smile on everyone’s faces.

    Why You’ll Love This Strawberry Kiss Cookies

    You’ll adore these Strawberry Kiss Cookies for their delightful flavor and easy preparation. In just a little over an hour, you can bake a batch of cookies that seamlessly combine sweet strawberry and rich chocolate. Plus, your kids will love helping out in the kitchen, making it a fun activity for busy weekends. These treats are perfect for satisfying those sweet cravings without taking up all your time!

    Ingredients for Strawberry Kiss Cookies

    Gathering the right ingredients is key to making these delightful Strawberry Kiss Cookies. Here’s what you’ll need:

    • Unsalted butter: This adds richness and helps create a soft, buttery texture.
    • Granulated sugar: You’ll need this for sweetness; it helps the cookies brown and crisp a bit.
    • Egg: It binds everything together, giving the cookies their lovely structure.
    • Vanilla extract: This enhances the flavor profile, making the cookies even more delicious.
    • Almond extract (optional): For those who love a hint of nuttiness, this is a tasty addition.
    • All-purpose flour: The base of the cookie dough, giving it the right texture.
    • Baking powder: Leavening agent that helps the cookies puff up beautifully.
    • Salt: A pinch elevates the sweetness and balances the flavor.
    • Strawberry-flavored gelatin mix: This is the superstar ingredient, adding a burst of delicious strawberry flavor and that pretty pink color.
    • Powdered sugar: For dusting, it gives a lovely finishing touch that looks beautiful.
    • Chocolate kiss candies: The perfect chocolatey center that melts in your mouth!

    You can find most of these ingredients right in your pantry, and they are widely available at your local grocery store. If you’re curious about more specific quantities for each item, don’t worry! Just check the bottom of the article for a handy print-friendly version.

    How to Make Strawberry Kiss Cookies

    Prepare the Dough

    Let’s roll up our sleeves and dive into making these delightful Strawberry Kiss Cookies. Start by placing softened unsalted butter and granulated sugar in a large mixing bowl. Beat them together until the mixture is light and fluffy; this should take about 2-3 minutes. Next, add in your egg, vanilla extract, and if you’re feeling adventurous, a dash of almond extract. Beat until everything is well-combined. Now for the star of the show! Carefully mix in the strawberry-flavored gelatin until it’s fully incorporated. You’ll love the vibrant pink color that emerges. This step sets the delicious strawberry flavor foundation for your cookies. Trust me; it’s worth taking the time to ensure everything is combined perfectly!

    Shape & Chill the Cookies

    Now it’s time to bring your dough to life! Scoop about one tablespoon of the pink dough and roll it between your palms to form a smooth ball. It’s like creating little strawberry orbs of happiness! Place the balls on a lined baking sheet, ensuring they have enough space. After that, it’s crucial to chill the dough in the refrigerator for at least one hour. This step prevents excess spreading during baking, helping ensure that your cookies maintain their lovely shape. If you’re not baking right away, you can chill them overnight for even better results!

    Bake

    Once your dough is chilled, it’s time to bake these beauties. Preheat your oven to 350°F (175°C). Arrange the chilled dough balls on a parchment-lined baking sheet, giving them about 2 inches of space apart. Do NOT press down on the balls, as this will cause them to spread too much. Bake them for about 11-13 minutes, or until the edges look set and slightly firm. The centers may seem soft, but don’t worry—they’ll firm up as they cool. Keep an eye on them; those edges are a telltale sign of a perfect cookie!

    Add the Chocolate Kisses

    The moment has arrived! When the cookies come out of the oven, let them sit for about 2 minutes. This short wait prevents burns and allows the cookie structure to settle. While still warm, gently press a chocolate kiss into the center of each cookie. The warmth will help the chocolate stick perfectly, creating that mouthwatering combination of strawberry and chocolate goodness.

    Cool Completely

    Once your chocolates are nestled in, it’s important to let the cookies cool completely on a wire rack. This cooling period allows the cookies to set up beautifully, ensuring the texture is just right. Trust me; letting them cool will not only deepen the flavors but will also ensure the chocolate kisses maintain their shape, making your cookies wonderfully inviting. You can already imagine how scrumptious they’ll be once they’re ready!

    Dust with Powdered Sugar

    To add that finishing touch, it’s time to dust with powdered sugar. It’s best to do this after the cookies are cool. If you dust before adding the chocolate kisses, the sugar might get on the chocolate, and we want those kisses to shine! Grab a fine mesh sieve and lightly sprinkle the powdered sugar over the cookies for that beautiful, snowy finish. It’s a simple step that elevates your Strawberry Kiss Cookies to a whole new level!

    Tips for Success

    • Make sure your butter is at room temperature for easy mixing.
    • Chill the dough to avoid spreading and achieve perfect shapes.
    • If the dough feels too soft, add an extra tablespoon of flour.
    • Use parchment paper for easy cleanup and to prevent sticking.
    • Store cookies in an airtight container to keep them fresh longer.
    • Experiment with flavors by adding different extracts or using white chocolate kisses!

    Equipment Needed

    • Mixing bowl: A large bowl works best; just grab any size you have handy.
    • Electric mixer: If you don’t have one, a sturdy whisk and some elbow grease will do!
    • Baking sheet: A standard cookie sheet or any flat surface will work.
    • Parchment paper: Use aluminum foil if that’s what you’ve got; it helps prevent sticking.
    • Wire rack: A cooling rack is ideal, but you can use a plate if necessary.

    Variations of Strawberry Kiss Cookies

    • Gluten-Free Version: Substitute all-purpose flour with a 1:1 gluten-free flour blend for a delicious gluten-free option.
    • Vegan Twist: Replace butter with coconut oil and use a flax egg (1 tablespoon ground flaxseed mixed with 2.5 tablespoons water) instead of the egg for a plant-based treat.
    • Use Different Flavor Gelatin: Experiment with other flavors like raspberry or cherry gelatin to create a variety of colorful cookies.
    • Stuffed Cookies: Add a small dollop of strawberry jam before placing the chocolate kiss for an extra burst of flavor.
    • Nutty Surprise: Mix in chopped nuts like almonds or walnuts to give your cookies a crunchy twist.

    Serving Suggestions

    • Pair with a tall glass of cold milk for the perfect classic combo.
    • Serve alongside a scoop of vanilla ice cream for a delightful dessert experience.
    • Arrange cookies on a colorful platter for an eye-catching presentation at gatherings.
    • Add fresh strawberries as a garnish for a pop of color and flavor.
    • Enjoy with a warm cup of tea or coffee for a cozy afternoon treat.

    FAQs about Strawberry Kiss Cookies

    Can I use fresh strawberries instead of gelatin?
    While fresh strawberries can add a lovely flavor, they can affect the texture of the cookie. Gelatin provides a concentrated strawberry flavor and helps maintain the structure, so I recommend sticking with the strawberry-flavored gelatin for this recipe.

    How should I store Strawberry Kiss Cookies?
    To keep your Strawberry Kiss Cookies fresh, store them in an airtight container at room temperature for up to a week. If you want to enjoy them longer, you can freeze them for up to three months!

    Can I make the dough ahead of time?
    Absolutely! You can make the dough a day in advance and chill it in the refrigerator. Just remember to let it sit at room temperature for a few minutes before rolling it into balls for baking.

    What can I use instead of chocolate kisses?
    If you’re looking for a fun twist, you can use white chocolate chips or even flavored chocolate melts! These alternatives create a unique flavor that complements the strawberry beautifully.

    Is it possible to turn these into a larger cookie?
    Sure! You can form larger cookie dough balls and increase the baking time by a couple of minutes. Just make sure to check for doneness, so they’re perfectly baked through!

    Final Thoughts on Strawberry Kiss Cookies

    There’s something truly magical about baking Strawberry Kiss Cookies. The joy they bring, from the vibrant pink dough to the melty chocolate on top, is unparalleled. Each bite captures the delightful essence of strawberry and chocolate, creating a flavor explosion that will make your taste buds dance!

    Sharing these cookies with the family not only satisfies sweet cravings but also creates warm moments together in the kitchen. So, roll up your sleeves, and let’s make memories! Trust me, these cookies are not just treats; they’re a little slice of happiness that will brighten anyone’s day.


    Print

    clock clock iconcutlery cutlery iconflag flag iconfolder folder iconinstagram instagram iconpinterest pinterest iconfacebook facebook iconprint print iconsquares squares iconheart heart iconheart solid heart solid icon

    Description

    Strawberry Kiss Cookies are a delightful and sweet cookie treat that combines the flavors of strawberry and chocolate, perfect for any occasion.


    • 1 cup (226g) unsalted butter, softened
    • 1 cup (200g) granulated sugar
    • 1 large egg, at room temperature
    • 1 tsp vanilla extract
    • 1/2 tsp almond extract (optional)
    • 2 cups + 2 tbsp (280g) all-purpose flour
    • 1 tsp baking powder
    • 1/4 tsp salt
    • 1 package (3 oz) strawberry-flavored gelatin mix
    • 1/4 cup powdered sugar, for dusting
    • 2430 chocolate kiss candies, unwrapped

    1. PREPARE THE DOUGH: In a large mixing bowl, beat the softened butter and granulated sugar until light and fluffy, about 2-3 minutes. Add the egg, vanilla extract, and almond extract (if using), beating until well combined. Mix in the strawberry-flavored gelatin powder until fully incorporated.
    2. In a separate bowl, whisk together the flour, baking powder, and salt. Gradually add the dry ingredients to the wet mixture, mixing on low speed until a soft, pink dough forms. If the dough feels too soft or sticky, add 1-2 extra tablespoons of flour.
    3. SHAPE & CHILL THE COOKIES: Scoop about 1 tablespoon of dough and roll it between your palms to form a smooth ball. Place the dough balls on a lined baking sheet and chill in the refrigerator for at least 1 hour (or up to overnight for best results). This step is essential for preventing spreading.
    4. BAKE: Preheat the oven to 350°F (175°C). Arrange the chilled dough balls on a parchment-lined baking sheet, spaced about 2 inches apart. Do NOT press an indentation into the dough before baking—this will cause excess spreading. Bake for 11-13 minutes, or until the edges look set and slightly firm. The cookies may look soft in the center, but they will continue to firm up as they cool.
    5. ADD THE CHOCOLATE KISSES: Remove the cookies from the oven and let them sit on the baking sheet for 2 minutes before adding the kisses. While still warm, gently press a chocolate kiss into the center of each cookie. The residual heat will help the chocolate stick without melting too much.
    6. COOL COMPLETELY: Transfer the cookies to a wire rack and let them cool completely, allowing the chocolate to set.
    7. DUST WITH POWDERED SUGAR: To avoid getting powdered sugar on the chocolate, dust the cookies FIRST, then press in the kisses.

    Notes

    • Chilling the dough is crucial for achieving the desired texture.
    • For a more intense strawberry flavor, consider using pure strawberry extract.
    • Store cookies in an airtight container for up to a week.
    • Prep Time: 20 minutes
    • Cook Time: 13 minutes
    • Category: Dessert
    • Method: Baking
    • Cuisine: American

    Nutrition

    • Serving Size: 1 cookie
    • Calories: 120
    • Sugar: 10g
    • Sodium: 50mg
    • Fat: 7g
    • Saturated Fat: 4g
    • Unsaturated Fat: 3g
    • Trans Fat: 0g
    • Carbohydrates: 14g
    • Fiber: 0g
    • Protein: 1g
    • Cholesterol: 25mg

    Sharing is caring!