Author: IHAAL Team

  • Cheesy Dorito Taco Casserole

    Cheesy Dorito Taco Casserole


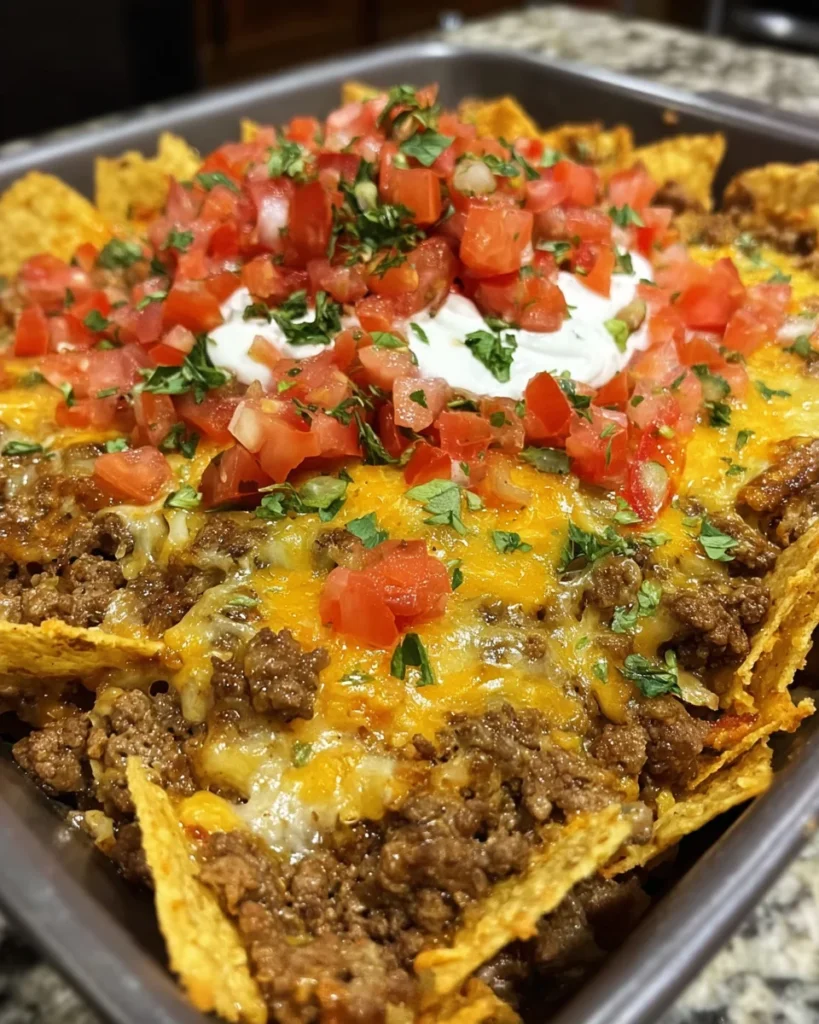
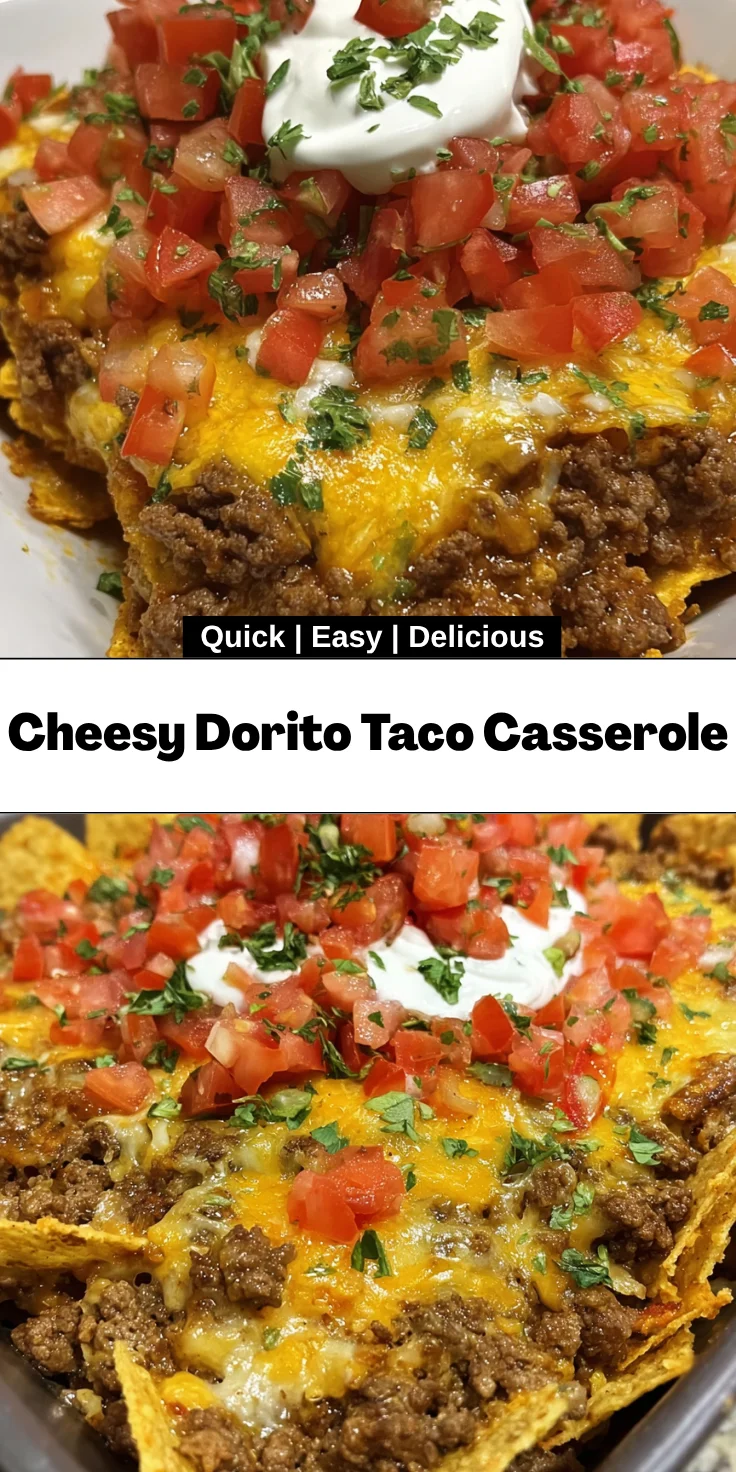
    Introduction to Cheesy Dorito Taco Casserole

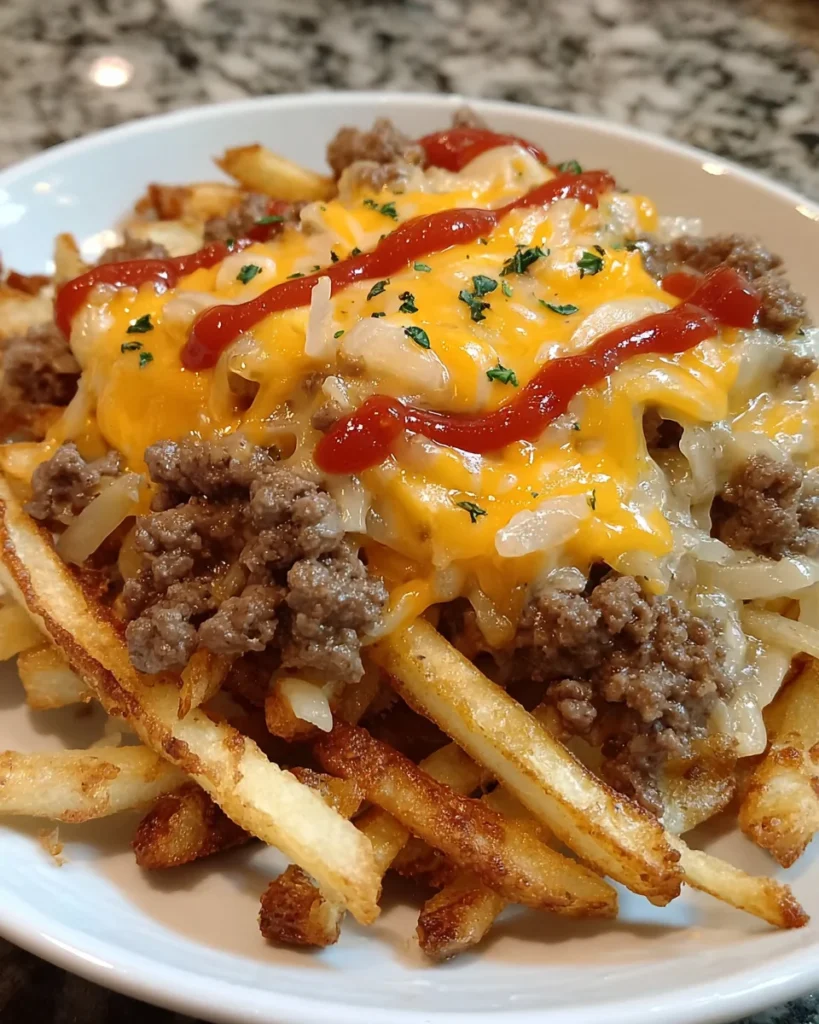
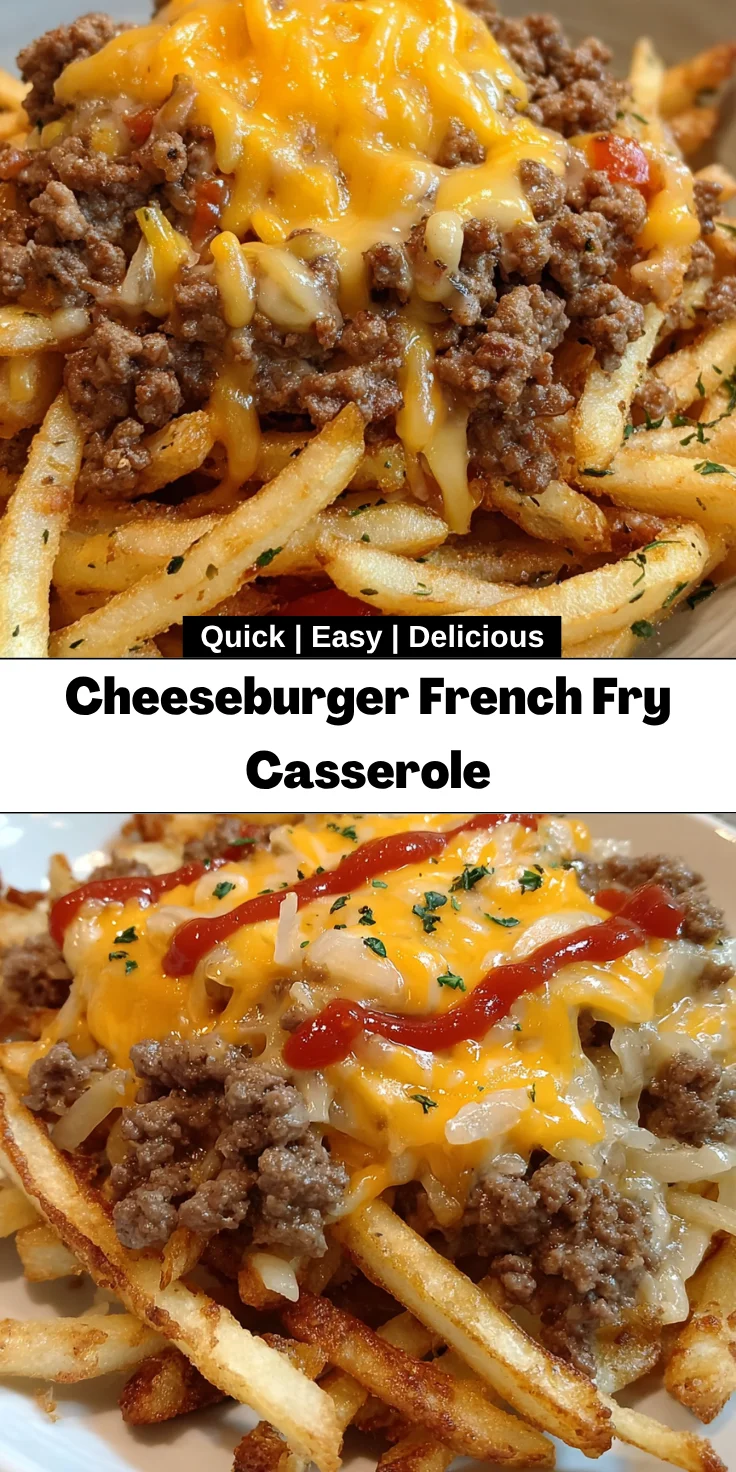
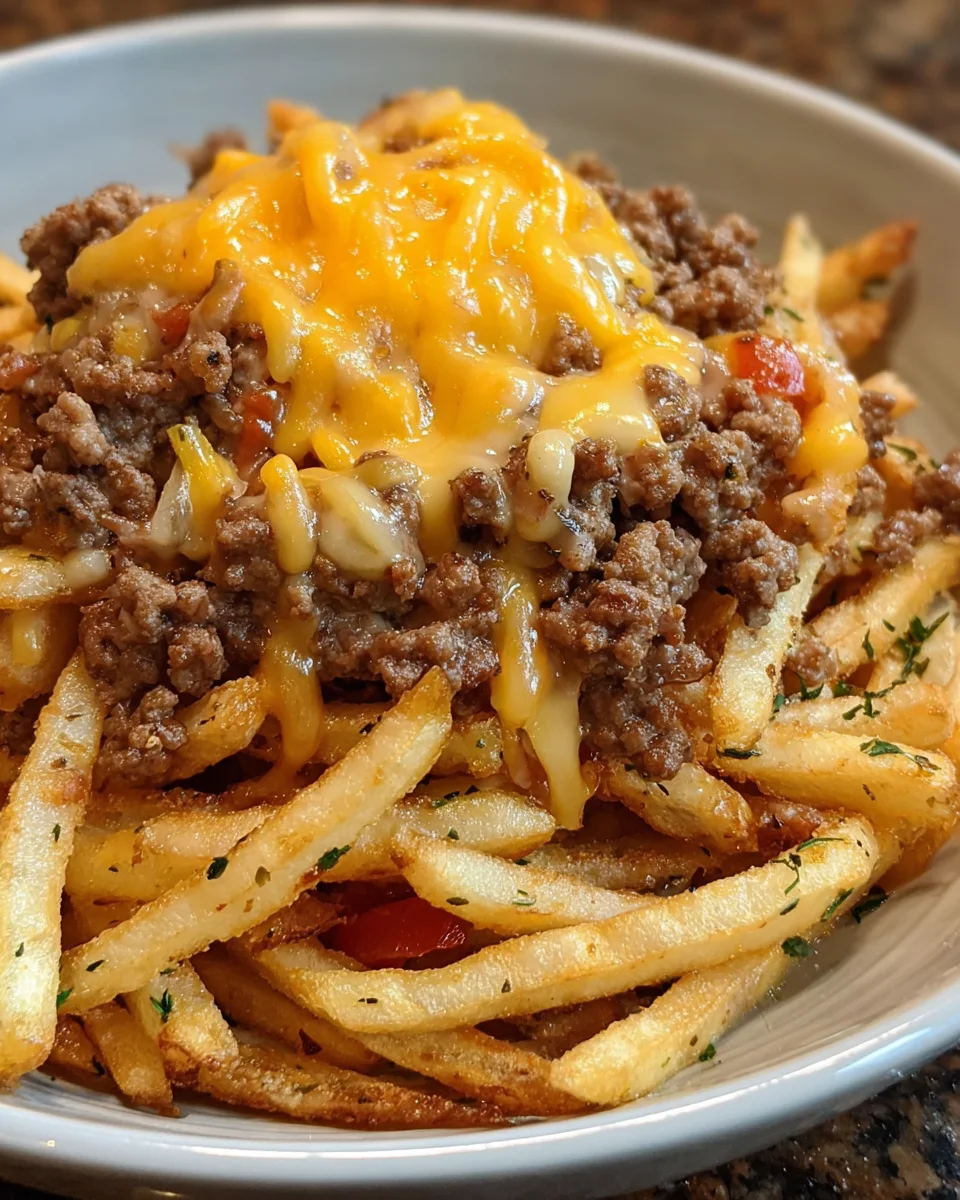
    Hey there, fellow food lovers! If you’re looking for a dish that can turn a hectic weeknight into a cozy family dinner, let me introduce you to my all-time favorite: Cheesy Dorito Taco Casserole. This dish is a delightful mix of savory ground beef, gooey cheese, and, of course, crunchy Doritos that add that extra pizzazz. It’s simple to whip up, making it a fantastic go-to for busy moms like you and me. Trust me; it’s the kind of meal that brings everyone together, satisfying those hungry bellies and warm hearts!

    Why You’ll Love This Cheesy Dorito Taco Casserole

    This Cheesy Dorito Taco Casserole is a lifesaver for busy nights! It’s quick to make, taking just about 35 minutes from start to finish. The combination of flavors—spicy, cheesy, and crunchy—makes it a hit with kids and adults alike. Plus, it’s a one-dish wonder, minimizing cleanup. Who doesn’t love that? With this recipe, you can create lasting family memories around the dinner table without the stress!

    Ingredients for Cheesy Dorito Taco Casserole

    Gathering the right ingredients is half the fun of cooking. For this Cheesy Dorito Taco Casserole, you’ll need a mix of hearty staples and zesty flavors!

    • Ground beef: The star of the show! It provides a rich base and hearty protein. You can swap it out for turkey or a meat alternative for a lighter version.
    • Yellow onion: Diced to add depth and sweetness. Onions are like the backbone of savory dishes, bringing flavor to life.
    • Minced garlic: A must-have for a fragrant kick! It’ll elevate your casserole from good to absolutely drool-worthy.
    • Taco seasoning: This blend of spices creates that classic taco flavor. Feel free to use store-bought or make your own at home for a personal touch!
    • Rotel: This delightful canned tomatoes mix adds a splash of zest and warmth to satisfy your tastebuds.
    • Mexicorn: A mix of corn and peppers that brings a touch of sweetness and texture. It’s a delicious way to jazz up the casserole.
    • Taco blend cheese: The gooey goodness that brings everything together! Use your favorite cheese blend or try something bold like pepper jack.
    • Nacho Cheese Doritos: The secret crunchy layer! They add a satisfying crunch and a cheesy flavor that you just can’t resist.
    • Optional: Sour cream: A cool complement to the spicy flavors. It adds a creamy touch that makes each bite heavenly.
    • Optional: Pico de Gallo: A fresh topping that brightens up the dish. The tomatoes, onions, and jalapeños create a burst of flavor that you won’t want to miss!

    You’ll find the exact quantities of these ingredients for your Cheesy Dorito Taco Casserole at the bottom of the article, ready for printing. Happy cooking!

    How to Make Cheesy Dorito Taco Casserole

    Now that you’ve gathered your ingredients, let’s dive into the cooking process! Follow these simple steps to create a Cheesy Dorito Taco Casserole that will impress everyone at the dinner table.

    Step 1: Preheat and Cook the Beef

    First things first, preheat your oven to 350°F (175°C). While it warms up, grab a large skillet and place it over medium-high heat. Add the ground beef along with the diced yellow onion. Cook this mixture until the beef is browned, which usually takes around 5 to 7 minutes.

    As the beef sizzles, the onions will become translucent and sweeten up, filling your kitchen with mouthwatering aromas. Don’t forget to add minced garlic for the last 30 to 45 seconds of cooking. Stir it around to unleash its delicious fragrance, and then drain any excess grease. This first step sets a solid flavor foundation for your Cheesy Dorito Taco Casserole!

    Step 2: Mix in Seasonings

    Once you have perfectly cooked beef, it’s time to infuse it with flavor! Sprinkle in the taco seasoning and stir thoroughly, allowing each bit of meat to coat evenly. Next, add the can of Rotel along with the drained Mexicorn. 

    Mix everything together until well combined. The vibrant colors from the tomatoes and corn will make your dish look even more appealing. This blend of ingredients not only amps up the flavor but also adds a delightful texture to your casserole.

    Step 3: Layer the Casserole

    Let’s get creative now! Grab your 7×11-inch casserole dish and start building layers. First, spread half of the meat mixture evenly on the bottom. Next, sprinkle a generous layer of your shredded taco blend cheese. This gooey goodness is what dreams are made of!

    Now comes the magic touch—add a layer of crushed Nacho Cheese Doritos on top. It’s like a party for your taste buds right there! Repeat with the remaining meat mixture, cheese, and another layer of Doritos. The layering is not just practical; it creates a feast of flavors and textures in every bite.

    Step 4: Bake to Perfection

    Now that your casserole is beautifully layered, pop it into the preheated oven. Bake for about 15 to 20 minutes, or until the cheese is perfectly melted and bubbling. Keep an eye on it; you’ll know it’s done when the edges are sizzling and the cheese has that golden color. Just imagine how amazing it will smell as it bakes!

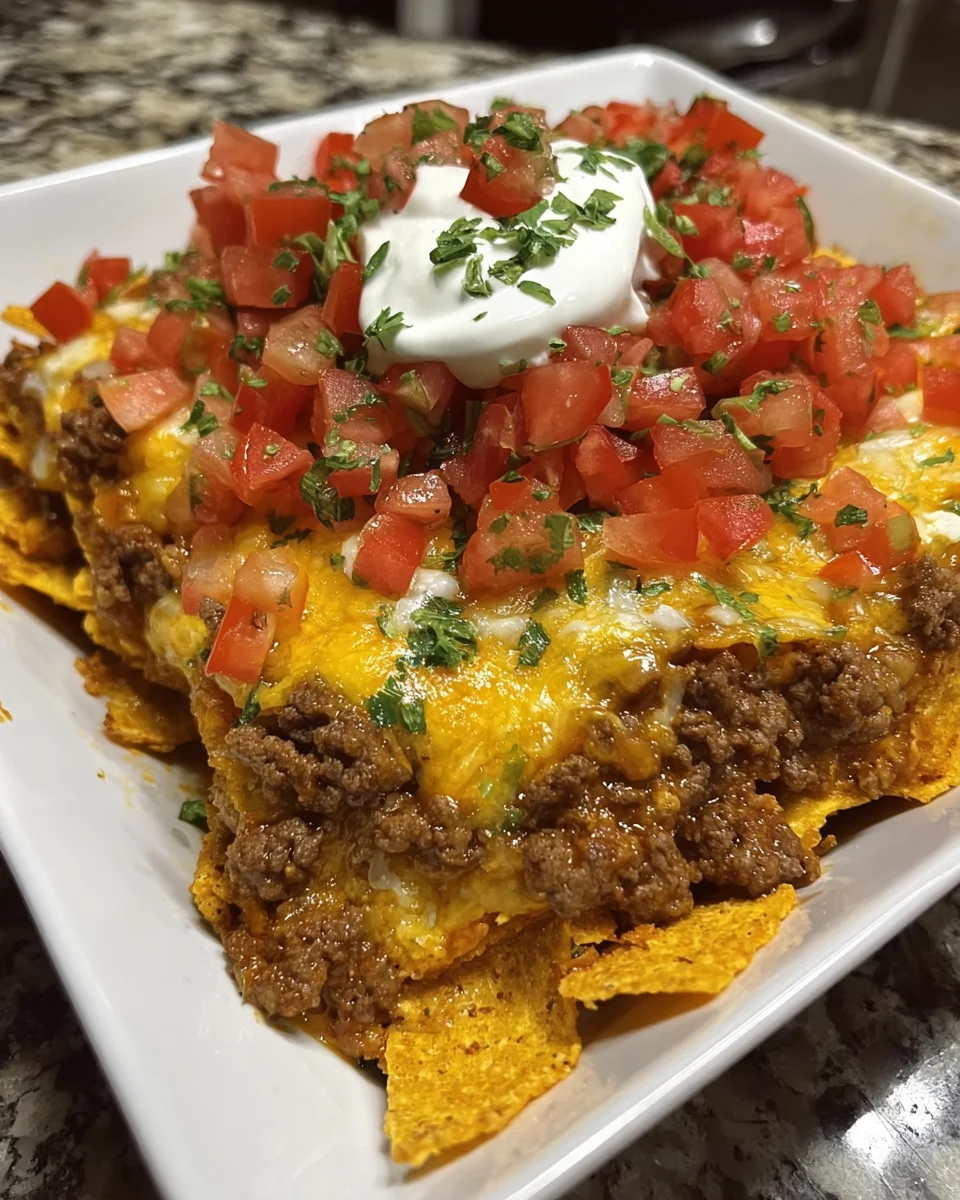
    Step 5: Serve with Toppings

    Take your masterpiece out of the oven and allow it to cool slightly. It’s time to garnish! Serve your Cheesy Dorito Taco Casserole hot, and don’t forget the toppings. A dollop of cool sour cream is always a winner, and a sprinkle of fresh Pico de Gallo can brighten up the dish beautifully. These toppings add that extra flair and flavor contrast that everyone loves. Enjoy every cheesy, crunchy bite!

    Tips for Success

    • Prepping ingredients ahead of time can save you precious minutes on busy nights.
    • Don’t hesitate to customize your spices if you like it extra spicy—add jalapeños or hot sauce!
    • To avoid burning edges, cover the casserole with aluminum foil for the first half of baking.
    • Let the casserole sit for a few minutes before serving; it makes slicing easier.
    • Sneak in some veggies like bell peppers or black beans for added nutrition!

    Equipment Needed

    • Large skillet: A non-stick skillet works best, but any large frying pan will do.
    • Casserole dish: A 7×11-inch dish is ideal; you can also use an 8×8-inch dish if needed.
    • Measuring cups: For those exact ingredient amounts later—essential for accuracy!
    • Spatula or wooden spoon: Perfect for stirring and mixing your delicious ingredients together.

    Variations of Cheesy Dorito Taco Casserole

    • Vegetarian Delight: Swap ground beef for black beans or lentils. It’s packed with protein and flavor!
    • Southwestern Twist: Add diced bell peppers and corn for a fresh crunch. You can also toss in some diced green chilies for extra heat.
    • Gluten-Free Version: Use gluten-free taco seasoning and corn tortilla chips instead of Doritos. Just as tasty without the gluten!
    • Spicy Kick: Incorporate jalapeños or a splash of hot sauce into the meat mixture. Perfect for those who love the heat!
    • Cheesy Overload: Experiment with different cheese blends like pepper jack or Monterey Jack for a zesty change!

    Serving Suggestions for Cheesy Dorito Taco Casserole

    • Side Salad: A fresh garden salad with a light vinaigrette pairs perfectly, adding a refreshing balance.
    • Rice or Beans: Serve with Spanish rice or refried beans for a filling, hearty meal.
    • Margaritas: A classic margarita or a refreshing lemonade can elevate your dinner experience.
    • Presentation: Garnish the casserole with cilantro and sliced avocados for a vibrant touch.

    FAQs about Cheesy Dorito Taco Casserole

    Can I make Cheesy Dorito Taco Casserole ahead of time?

    Absolutely! This casserole can be prepared ahead of time and stored in the fridge. Just assemble it, cover tightly, and bake when you’re ready to serve. It’s a lifesaver for a busy weeknight!

    What can I use instead of ground beef?

    If you’re looking for a healthier option or a vegetarian twist, try using ground turkey, chicken, or even black beans. They’ll still provide that hearty element we love in this dish!

    Can I freeze the casserole?

    Yes! If you have leftovers or want to make it for later, let it cool completely, then wrap tightly and freeze. Just remember to thaw it overnight in the fridge before baking.

    How spicy is this casserole?

    The spice level depends on the taco seasoning and any additional ingredients you add, like jalapeños. For a milder dish, choose a mild seasoning or skip the hot stuff!

    What toppings should I use?

    Pico de Gallo and sour cream are fabulous choices! Other great options include sliced avocados, jalapeños, or fresh cilantro. They all add a burst of freshness to this cheesy delight!

    Final Thoughts

    Cooking is more than just preparing a meal; it’s about cherishing moments with loved ones. My Cheesy Dorito Taco Casserole embodies that spirit. Each layer bursts with flavors that invite everyone to come together and share laughter. Whether it’s a bustling weeknight or a cozy gathering, this dish is your trusty sidekick. Believe me, the joy of seeing your family dive into a warm, cheesy casserole filled with their favorites is priceless. So grab those ingredients, turn up the oven, and let’s create some delicious memories together. Happy cooking!


    Print

    clock clock iconcutlery cutlery iconflag flag iconfolder folder iconinstagram instagram iconpinterest pinterest iconfacebook facebook iconprint print iconsquares squares iconheart heart iconheart solid heart solid icon

    Description

    Cheesy Dorito Taco Casserole is a flavorful and hearty dish that combines ground beef, cheese, and crunchy Doritos, perfect for family dinners.


    • 2 pounds ground beef
    • ½ yellow onion, diced
    • 1 tablespoon minced garlic
    • 1 packet taco seasoning
    • 1 10-ounce can Rotel, undrained
    • 1 11-ounce can Mexicorn, drained
    • 2 cups shredded taco blend cheese
    • 1 9.25-ounce bag Nacho Cheese Doritos, crushed
    • Optional: Sour cream
    • Optional: Pico de Gallo

    1. Preheat the oven to 350°F (175°C). In a large skillet over medium-high heat, cook the ground beef and onions until the beef is browned and no pink remains. Add the minced garlic and cook for 30-45 seconds. Drain any excess grease.
    2. Season the cooked beef with the taco seasoning, then mix in the can of Rotel and drained Mexicorn. Stir until evenly combined.
    3. In a 7×11-inch casserole dish, layer half of the meat mixture on the bottom, followed by a layer of shredded cheese and a layer of crushed Doritos. Repeat the layers once more to complete the casserole.
    4. Bake in the preheated oven for 15-20 minutes, or until the cheese is fully melted.
    5. Serve the casserole hot, topped with fresh Pico de Gallo and sour cream, if desired. Enjoy!

    Notes

    • For a vegetarian option, substitute the ground beef with a meat alternative.
    • This casserole can be prepared ahead of time and baked when ready to serve.
    • Feel free to add other toppings like avocado or jalapeños for extra flavor.
    • Prep Time: 15 minutes
    • Cook Time: 20 minutes
    • Category: Main Dish
    • Method: Baking
    • Cuisine: Mexican-American

    Nutrition

    • Serving Size: 1/8 of casserole
    • Calories: 450
    • Sugar: 2g
    • Sodium: 700mg
    • Fat: 30g
    • Saturated Fat: 12g
    • Unsaturated Fat: 15g
    • Trans Fat: 0g
    • Carbohydrates: 30g
    • Fiber: 3g
    • Protein: 25g
    • Cholesterol: 75mg

    Sharing is caring!

  • Cheeseburger French Fry Casserole

    Cheeseburger French Fry Casserole


    Introduction to Cheeseburger French Fry Casserole

    As a busy mom, I know how challenging it can be to whip up a meal that everyone will love, especially after a long day. That’s where my Cheeseburger French Fry Casserole swoops in like a culinary superhero! This dish combines all the comforting flavors of a classic cheeseburger with the crispy goodness of French fries, making it perfect for my family’s dinner table. It’s a satisfying blend of savory cheeseburgers and crispy fries layered under melted cheese that’ll have everyone asking for seconds. Plus, it’s quick to prepare—what more could we busy cooks ask for?

    Why You’ll Love This Cheeseburger French Fry Casserole

    This Cheeseburger French Fry Casserole is your ticket to an effortless dinner that’s heaps of fun and flavor. It’s quick to prepare, taking just about 50 minutes from start to finish, which leaves you more time to relax with your family. The best part? It’s packed with comforting tastes that’ll remind you of backyard barbecues. Trust me, your loved ones will thank you for this delightful twist on a classic!

    Ingredients for Cheeseburger French Fry Casserole

    This Cheeseburger French Fry Casserole calls for a variety of ingredients that come together to create a hearty dish. Gather these essentials:

    • Ground beef: The star of this casserole, providing protein and that beloved cheeseburger flavor. You can also use ground turkey for a lighter twist!
    • Shoestring French fries: Crispy and golden, these fries give the dish its satisfying crunch. Feel free to swap them for homemade fries or tater tots for extra fun.
    • Cream of mushroom soup: This adds creaminess and moisture. If you’re not a mushroom lover, look for cream of chicken as a delicious substitute.
    • Cheddar cheese soup: Rich and cheesy, it enhances the casserole’s flavor profile. You could use a different cheese soup if you prefer, like nacho cheese!
    • Yellow onion: Diced for sweetness and aromatic depth. You might use shallots or green onions if you wish for a milder taste.
    • Minced garlic: A tiny powerhouse of flavor, giving a savory punch. Fresh garlic or garlic powder can also work wonders.
    • Shredded cheddar cheese: Sprinkled on top for that melty goodness. Mix in some mozzarella or pepper jack for a fun flavor kick.
    • Seasonings: Garlic powder, onion powder, salt, and black pepper enhance all the flavors. Season to taste and feel free to experiment with your favorites!
    • Condiments: Mayonnaise, ketchup, mustard, and pickle juice form the zesty burger sauce that finishes the dish. You can adjust the amounts based on your family’s preferences.
    • Dehydrated onions: For extra flavor without the chop. Fresh onions are perfectly fine here, too!

    Don’t worry about the specifics just yet; I’ve got you covered with measurements at the end of the article, which are also printable for your convenience.

    How to Make Cheeseburger French Fry Casserole

    Now that we have our ingredients prepped, it’s time to turn up the heat and put this delicious Cheeseburger French Fry Casserole together!

    Step 1: Prepare the French Fries

    First, let’s get those French fries sizzling! Preheat your air fryer according to the package instructions. Once hot, add the shoestring fries. Cook them until golden brown and crispy. Trust me, this will set the foundation for a fantastic casserole!

    Step 2: Cook the Ground Beef

    While the fries are cooking away, grab a large skillet. Over medium-high heat, add the ground beef and diced onions. Cook until the beef is browned and no pink remains, about 5–7 minutes. Stir it regularly! Let those onions soften and add a wonderful aroma.

    Step 3: Add Seasonings and Soups

    Once your meat is cooked, add the minced garlic. Stir it in and cook for another 30-45 seconds; the fragrance will sweep through your kitchen. Sprinkle in the garlic powder, onion powder, salt, and black pepper. Then, pour in both the cream of mushroom and cheddar cheese soups, stirring until everything is beautifully blended and creamy.

    Step 4: Assemble the Casserole

    Now comes the fun part! Grab your 7×11 casserole dish and transfer the beef mixture into it. Spread it out evenly. On top, arrange the crispy French fries in a mouthwatering layer. Finish it off with a generous sprinkle of shredded cheese. Pop it in the oven at 350 degrees for 10–15 minutes, or until the cheese is all melty and bubbly.

    Step 5: Make the Burger Sauce

    While the casserole is baking to perfection, let’s whip up that zesty burger sauce! In a small bowl, combine mayonnaise, ketchup, mustard, pickle juice, and dehydrated onions. Add black pepper to taste. Give it a good stir until everything is nicely mixed.

    Step 6: Serve Your Casserole

    Once the casserole is fresh from the oven, drizzle that delicious burger sauce over the top. It adds a burst of flavor that’s simply irresistible! Serve warm, and watch your loved ones dive into this comforting dish. Enjoy every bite!

    Tips for Success

    • Prep your ingredients ahead of time to save those precious minutes during cooking.
    • Don’t rush the browning of the beef; it adds flavor and texture.
    • Feel free to mix in your family’s favorite veggies for added nutrition.
    • Store any leftovers in an airtight container for quick meals later in the week.
    • To spice things up, add some jalapeños or hot sauce to the burger sauce!

    Equipment Needed

    • Large skillet: A non-stick option is fantastic for easy cleanup.
    • Casserole dish (7×11): Any oven-safe dish can work.
    • Air fryer: Alternatively, you can use an oven to bake the fries.
    • Mixing bowl: Essential for blending that delicious burger sauce.
    • Wooden spoon or spatula: Perfect for stirring and serving!

    Variations

    • Add diced bell peppers or mushrooms for an extra veggie boost.
    • Substitute ground beef with ground chicken or turkey for a leaner option.
    • Use sweet potato fries instead of traditional fries for a healthier twist.
    • Try different cheeses like Gouda or pepper jack for added flavor.
    • Make it gluten-free by using gluten-free soup options and fries.

    Serving Suggestions

    • Pair your casserole with a crisp side salad to balance the richness.
    • Serve with pickles or coleslaw for that classic burger joint feel.
    • A cold root beer or lemonade complements this dish beautifully.
    • For a fun presentation, sprinkle fresh herbs on top before serving!

    FAQs about Cheeseburger French Fry Casserole

    Curious about how to make this fabulous Cheeseburger French Fry Casserole even better? Here are some frequently asked questions that can guide you further!

    Can I make this casserole in advance?

    Absolutely! This Cheeseburger French Fry Casserole can be prepared ahead of time. Assemble everything in the casserole dish and cover it tightly. Just bake it right before serving, and you’ll have a hot meal ready in no time!

    How do I store leftovers?

    Leftovers are a breeze! Store them in an airtight container in the refrigerator for up to three days. Reheat in the oven or microwave until piping hot. This way, you can enjoy the cheesy goodness again!

    Can I use different types of meat?

    You bet! Feel free to swap out ground beef for ground turkey, chicken, or even plant-based meat alternatives. Each option offers a unique flavor while keeping the casserole wonderfully comforting.

    What sides go well with this casserole?

    This comfort food pairs nicely with a simple green salad or some steamed veggies. You could also serve it with coleslaw for that delicious crunch that complements the creamy casserole.

    How can I make this dish healthier?

    To lighten it up, consider using lean ground beef or turkey. You can also swap traditional French fries for sweet potato fries. Adding fresh vegetables will boost the nutrition without sacrificing flavor!

    Final Thoughts

    Creating this Cheeseburger French Fry Casserole is more than just cooking; it’s about sharing joy and comfort with my loved ones. The delightful blend of cheesy goodness and crispy fries brings a sense of warmth that wraps around you like a cozy blanket.

    As you gather around the dinner table, the smiles and satisfied sighs will remind you of why you love to cook. This dish transforms busy nights into cherished family moments, making meal preparation – and sharing – an adventure worth celebrating. I can’t wait for you to experience the happiness this casserole brings to your family!


    Print

    clock clock iconcutlery cutlery iconflag flag iconfolder folder iconinstagram instagram iconpinterest pinterest iconfacebook facebook iconprint print iconsquares squares iconheart heart iconheart solid heart solid icon

    Description

    A delicious and hearty casserole combining cheeseburgers and French fries, topped with a special burger sauce.


    • 2 pounds ground beef
    • 28-ounce bag of shoestring French fries
    • 10.5-ounce can of cream of mushroom soup
    • 10.5-ounce can of cheddar cheese soup
    • ½ yellow onion, diced
    • 1 tablespoon minced garlic
    • ½ cup cheddar cheese, shredded
    • 1 teaspoon garlic powder
    • 1 teaspoon onion powder
    • Salt and black pepper to taste
    • ½ cup mayonnaise
    • ¼ cup ketchup
    • 1 tablespoon mustard
    • 1 teaspoon pickle juice
    • ½ teaspoon dehydrated onions
    • Black pepper to taste

    1. Preheat the air fryer and cook the French fries per the package instructions.
    2. Preheat the oven to 350 degrees. In a large skillet over medium-high heat, add the ground beef and diced onions. Brown the meat until no pink remains.
    3. Add the minced garlic, combine with the meat, and cook for 30-45 seconds. Season with onion powder, garlic powder, salt, and pepper. Drain off any excess grease.
    4. Stir in the cheddar cheese soup and cream of mushroom soup until combined.
    5. Transfer the meat mixture to a 7×11 casserole dish. Top with the cooked French fries, sprinkle shredded cheese on top, and bake at 350 degrees for 10-15 minutes or until the cheese is melted.
    6. In a small bowl, add the mayonnaise, ketchup, mustard, pickle juice, dehydrated onions, and black pepper. Stir to combine.
    7. Drizzle the burger sauce on top of the casserole. Serve and enjoy!

    Notes

    • This casserole can be prepared ahead of time and baked just before serving.
    • You can customize the toppings by adding additional vegetables or different types of cheese.
    • Leftovers can be stored in the refrigerator for up to 3 days.
    • Prep Time: 20 minutes
    • Cook Time: 30 minutes
    • Category: Casserole
    • Method: Baking
    • Cuisine: American

    Nutrition

    • Serving Size: 1/8 of casserole
    • Calories: 450
    • Sugar: 3g
    • Sodium: 900mg
    • Fat: 25g
    • Saturated Fat: 10g
    • Unsaturated Fat: 12g
    • Trans Fat: 1g
    • Carbohydrates: 36g
    • Fiber: 2g
    • Protein: 25g
    • Cholesterol: 70mg

    Sharing is caring!

  • Stuffed Sweet Potato Avocado Black Beans

    Stuffed Sweet Potato Avocado Black Beans


    Introduction to Stuffed Sweet Potato Avocado Black Beans

    There’s something incredibly comforting about a warm meal, especially when life gets busy. That’s why I love making Stuffed Sweet Potato Avocado Black Beans. This dish wraps together wholesome ingredients into a delightful explosion of flavor, making it a perfect opportunity to impress your family or friends. Whether you’re racing against time or simply craving a nutritious bite, these stuffed sweet potatoes will soon become a go-to in your kitchen. It’s not just a meal; it’s an experience that fills your home with warmth and love.

    Why You’ll Love This Stuffed Sweet Potato Avocado Black Beans

    Let me tell you why this recipe truly stands out. It’s fast, easy, and absolutely delicious! In just over an hour, you can create a meal that feels gourmet and looks impressive. The blend of sweet potatoes, creamy avocado, and zesty black beans gives you a satisfying dish that’s packed with nutrients. Plus, it’s vegetarian-friendly, so you can share it with everyone at the table, no matter their diet!

    Ingredients for Stuffed Sweet Potato Avocado Black Beans

    Gathering the right ingredients makes this recipe as enjoyable to prepare as it is to eat. Here’s what you’ll need:

    • Sweet Potatoes: These are the stars of the show! Packed with vitamins, they offer a sweet and hearty base.
    • Black Beans: Canned or cooked, these legumes are rich in protein and fiber, adding a satisfying texture to your dish.
    • Avocado: Ripe and creamy, the avocado brings a lovely richness. It also adds healthy fats to keep you full longer.
    • Corn: Sweet corn contributes a delightful crunch and brightens up the filling. Fresh, frozen, or canned will work just fine.
    • Cherry Tomatoes: Their juicy bursts of flavor elevate the dish. Halved, these little gems give a fresh touch.
    • Red Onion: A bit of finely chopped red onion adds sharpness and color, enriching the overall taste experience.
    • Cilantro: This herb lends a fresh, vibrant note. If you’re not a fan, feel free to skip it or substitute with parsley.
    • Greek Yogurt: A dollop creates the creamy cilantro lime crema; use a dairy-free version if preferred!
    • Lime Juice: This adds zesty brightness that complements the other ingredients beautifully.
    • Salt and Pepper: Don’t forget to season! These basic ingredients enhance all the flavors.

    For ingredient proportions and easy printing, check the bottom of this article. Feel free to adapt this list based on your taste preferences or what you have on hand. Cooking should be fun and flexible!

    How to Make Stuffed Sweet Potato Avocado Black Beans

    Making Stuffed Sweet Potato Avocado Black Beans is a breeze! Follow these simple, clear steps for a delicious meal that’s sure to impress.

    Prepare the Sweet Potatoes

    Bake until Tender

    Start by preheating your oven to 400°F (200°C).

    Then, pierce each sweet potato several times with a fork. This helps steam escape while baking.

    Place the sweet potatoes on a baking sheet, spread them out a bit, and let them roast for 45-60 minutes.

    You’ll know they’re done when a fork slides in easily.

    Once baked, let them cool slightly before slicing each potato in half lengthwise.

    Scoop out just a bit of the flesh to make room for your filling.

    Be careful not to scoop out too much; you still want a sturdy base!

    Mix the Filling

    Combine Black Beans and Vegetables

    In a large mixing bowl, combine the rinsed and drained black beans with the diced avocado.

    Add in the corn, halved cherry tomatoes, chopped red onion, and cilantro.

    Now, sprinkle salt and pepper to taste.

    Mix everything gently to avoid smashing the avocado; you want those lovely green chunks!

    This filling is packed with flavor and texture, giving you a satisfying and nutritious bite.

    Create the Cilantro Lime Crema

    Whisk Together Ingredients

    In a smaller bowl, whisk together the Greek yogurt (or your dairy-free alternative), lime juice, and chopped cilantro.

    Add a pinch of salt for extra flavor.

    Keep whisking until everything is nice and smooth.

    This crema brings a zesty touch that perfectly elevates your sweet potatoes!

    Assemble the Dish

    Fill the Sweet Potatoes

    Now, it’s time to bring it all together!

    Take your sweet potato halves and spoon the black bean filling generously into each half.

    Drizzle the cilantro lime crema right over the top.

    For an extra pop of color and flavor, you can garnish with some additional cilantro, if you like.

    Serve these warm and watch as everyone digs in with delight!

    Tips for Success

    • Soak the sweet potatoes in water for 30 minutes before baking for a softer skin.
    • Use a potato masher to lightly mash the black beans for better texture.
    • Try roasting your corn for a sweeter flavor.
    • Adjust seasonings to your taste; don’t be afraid to get creative!
    • Make extra crema; it’s delicious on salads and wraps, too!

    Equipment Needed

    • Baking Sheet: A sturdy sheet to roast your sweet potatoes. If you don’t have one, a large oven-safe dish works well.
    • Mixing Bowls: You’ll need two bowls—one large for the filling and one small for the crema. Any size will do!
    • Fork: Essential for piercing the sweet potatoes and mixing ingredients. A potato masher can substitute for mashing beans.

    Variations for Stuffed Sweet Potato Avocado Black Beans

    • Cheesy Delight: Add shredded cheese like Monterey Jack or cheddar into the filling for a melty twist. You can also top the sweet potatoes with cheese before placing them back in the oven for a few minutes.
    • Spice it Up: If you love heat, sprinkle in some chili powder or diced jalapeños to the black bean mixture. This adds a zesty kick that many will enjoy!
    • Meaty Option: For those craving protein, add cooked ground turkey or beef to the filling. This makes for a heartier meal your family will love.

    • Mexican Flair: Swap out the cilantro for fresh mint, and add a dollop of salsa or guacamole on top before serving. This gives your dish a fun, fresh flavor profile!
    • Vegan Version: Simply replace Greek yogurt with a nut-based yogurt or tahini to achieve a creamy texture without dairy. It’ll still be delicious!

    Serving Suggestions

    • Pair your stuffed sweet potatoes with a crisp side salad for a refreshing crunch.
    • Serve with homemade guacamole or a fresh salsa for a festive touch.
    • Consider a light white wine or sparkling water with a splash of lime for a perfect drink.
    • Present on a colorful platter garnished with extra cilantro for visual appeal.

    FAQs about Stuffed Sweet Potato Avocado Black Beans

    Can I make Stuffed Sweet Potato Avocado Black Beans ahead of time?

    Absolutely! You can prepare the sweet potatoes and filling in advance. Just store them separately in the fridge. When you’re ready to eat, reheat the sweet potatoes in the oven, fill them, and drizzle with the crema. Easy peasy!

    What can I substitute for black beans?

    If you’re not a fan of black beans, no worries! Try using pinto beans, chickpeas, or even quinoa for an extra protein boost. Each substitute will bring a slightly different flavor and texture but will still be delicious!

    Are these stuffed sweet potatoes gluten-free?

    Yes! Stuffed Sweet Potato Avocado Black Beans are naturally gluten-free. Perfect for those with dietary restrictions. You can enjoy this satisfying dish without any worries!

    How can I make the dish spicier?

    If you crave a little heat, try adding diced jalapeños or a sprinkle of cayenne pepper to the black bean filling. You can also serve with a spicy salsa on the side for an extra kick!

    Can I freeze leftover stuffed sweet potatoes?

    Yes! After baking, let the stuffed sweet potatoes cool completely. Wrap them tightly in foil or plastic wrap and store them in the freezer. When you’re ready to eat, simply reheat them in the oven.

    Final Thoughts

    Every bite of Stuffed Sweet Potato Avocado Black Beans feels like a warm hug on a busy day.

    This recipe combines comfort food with nutritious ingredients, creating an experience that both nourishes and satisfies.

    Gathering around the table to enjoy these delightful stuffed potatoes can turn a simple dinner into a special occasion.

    Whether it’s a weeknight meal or a casual gathering, you’ll savor each moment spent sharing this dish with loved ones.

    It’s not just about the food; it’s about the joy and connection that a delicious home-cooked meal brings into our lives.


    Print

    clock clock iconcutlery cutlery iconflag flag iconfolder folder iconinstagram instagram iconpinterest pinterest iconfacebook facebook iconprint print iconsquares squares iconheart heart iconheart solid heart solid icon

    Description

    A nutritious and satisfying meal featuring sweet potatoes stuffed with black beans, avocado, and topped with a cilantro lime crema.


    • 2 medium sweet potatoes
    • 1 can (15 oz) black beans, rinsed and drained
    • 1 ripe avocado, diced
    • 1 cup corn (fresh, frozen, or canned)
    • ½ cup cherry tomatoes, halved
    • ¼ cup red onion, finely chopped
    • ¼ cup fresh cilantro, chopped
    • Salt and pepper, to taste
    • ½ cup Greek yogurt or dairy-free alternative
    • 1 tablespoon lime juice
    • ¼ cup fresh cilantro, chopped
    • Salt, to taste

    1. Preheat oven to 400°F (200°C). Pierce sweet potatoes with a fork and place them on a baking sheet. Bake for 45-60 minutes, or until fork-tender. Let cool slightly, then slice in half lengthwise. Scoop out a small portion of the flesh to create space for the filling.
    2. In a bowl, combine black beans, diced avocado, corn, cherry tomatoes, red onion, and chopped cilantro. Season with salt and pepper and mix gently.
    3. In a small bowl, whisk together Greek yogurt, lime juice, chopped cilantro, and salt. Stir until smooth and creamy.
    4. Spoon the black bean and avocado mixture into each sweet potato half. Drizzle with cilantro lime crema. Garnish with extra cilantro, if desired.
    5. Serve warm and enjoy this nutritious, delicious, and satisfying meal!

    Notes

    • Feel free to adjust the ingredients based on your preference.
    • This recipe can be made vegan by using a dairy-free yogurt alternative.
    • Prep Time: 15 minutes
    • Cook Time: 60 minutes
    • Category: Main Course
    • Method: Baking
    • Cuisine: American

    Nutrition

    • Serving Size: 1 stuffed sweet potato half
    • Calories: 300
    • Sugar: 3g
    • Sodium: 450mg
    • Fat: 10g
    • Saturated Fat: 2g
    • Unsaturated Fat: 7g
    • Trans Fat: 0g
    • Carbohydrates: 48g
    • Fiber: 12g
    • Protein: 10g
    • Cholesterol: 5mg

    Sharing is caring!

  • Cream Cheese Strawberry Cookies

    Cream Cheese Strawberry Cookies


    Introduction to Cream Cheese Strawberry Cookies

    Life can get hectic, can’t it? Between balancing work, family, and the little moments that pop up, I often find myself searching for quick, rewarding treats. That’s where these delightful Cream Cheese Strawberry Cookies come in! Combining rich cream cheese and sweet strawberries, they’re perfect for satisfying your sweet tooth without the fuss. Whether you’re whipping up a batch for a family gathering or simply indulging yourself after a long day, this cookie recipe is like a warm hug in baked form. Let’s get those ovens preheated and bring some joy into your kitchen!

    Why You’ll Love This Cream Cheese Strawberry Cookies

    These Cream Cheese Strawberry Cookies are not just delightful—they’re incredibly easy to make, which is a lifesaver for busy moms like us! With simple ingredients and straightforward steps, you’ll have a batch ready in no time. Plus, the blend of rich creaminess and fresh strawberry sweetness makes them irresistible. They’re sure to impress your family and friends while bringing a bit of joy to your day!

    Ingredients for Cream Cheese Strawberry Cookies

    Gathering the right ingredients is the first step toward baking these scrumptious Cream Cheese Strawberry Cookies, and you might already have most of them in your pantry! Here’s what you’ll need:

    • Unsalted Butter: This adds richness and moisture. Make sure it’s softened for easy mixing.
    • Cream Cheese: The star of the show! It provides a creamy texture and tangy flavor that balances beautifully with strawberries.
    • Granulated Sugar: Sweetness is key, and this sugar helps create the perfect cookie texture. You can always substitute with brown sugar for a deeper flavor.
    • Large Egg: This helps bind everything together. If you’re looking for an egg substitute, consider using a flaxseed egg or applesauce.
    • Vanilla Extract: A splash of vanilla adds warmth and enhances all the flavors. Avoid imitation vanilla for the best results.
    • All-Purpose Flour: This is the foundation of your cookies. For a gluten-free version, try using a 1:1 gluten-free flour blend.
    • Diced Fresh Strawberries: Of course, the fresh strawberries bring a burst of flavor and color. Frozen ones can work in a pinch, just make sure to thaw and drain them first.

    For exact quantities, check the bottom of the article where I’ve provided a convenient print-friendly version!

    How to Make Cream Cheese Strawberry Cookies

    Ready to bake some mouthwatering Cream Cheese Strawberry Cookies? I promise it’s easier than you think. Let’s dive into the steps and create something absolutely delightful!

    Step 1: Cream the Butter and Cream Cheese

    Start by grabbing a large bowl. With a hand mixer, cream the softened unsalted butter and cream cheese together until they’re light and fluffy. This combo sets the base for your cookies and builds that luscious texture. Don’t rush this step; a little whipping goes a long way in creaminess!

    Step 2: Add Egg and Vanilla

    Next, crack that large egg into your fluffy mixture and pour in the vanilla extract. Mix it on medium speed until everything is smooth. As the egg binds the cookie dough, it enhances the overall taste! A good tip? Choose pure vanilla to really elevate those flavors.

    Step 3: Mix in the Flour

    Now, it’s time to incorporate the all-purpose flour. Slowly add it into the mixture while the mixer is on low. This gentle blending prevents the dough from becoming too tough. It’s important to mix until just incorporated. Trust me—no one wants tough cookies!

    Step 4: Fold in the Strawberries

    With your dough ready, gently fold in the diced fresh strawberries. This is where the magic happens! Use a spatula to distribute the berry goodness evenly without mashing them too much. Each bite should burst with that sweet flavor—it’s what makes these cookies so special!

    Step 5: Spoon onto Baking Sheet

    Grab a parchment-lined baking sheet and spoon generous portions of dough onto it. Space each mound at least 2 inches apart to give your cookies room to spread. A cookie scoop works wonders here if you have one—uniformity is key for even baking!

    Step 6: Bake Until Golden

    Preheat your oven to 350°F and pop in your baking sheet. Bake the cookies for 30 to 45 minutes, watching for the edges to turn a light golden color while the centers remain set. It’s like waiting for a ray of sunshine to peek through on a cloudy day!

    Step 7: Cool and Serve

    Once they’re beautifully baked, let the cookies cool on the baking sheet for about 3 to 5 minutes. After that, gently transfer them to a wire rack to cool completely. This step is crucial! You don’t want to end up with a gooey mess. Now it’s time to enjoy your delicious Cream Cheese Strawberry Cookies!

    Tips for Success

    • Make sure the butter and cream cheese are at room temperature for easy blending.
    • Don’t over-mix the dough; it leads to tough cookies.
    • For uniform cookies, use a cookie scoop for portioning the dough.
    • Keep an eye on them while baking; every oven is a bit different!
    • Allow cookies to cool completely on a wire rack for the best texture.

    Equipment Needed

    • Mixing Bowl: A large bowl for creaming ingredients. Any size will do, but I prefer glass for easy mixing!
    • Hand Mixer: Essential for a smooth, fluffy texture. A whisk works too, just be ready for a workout!
    • Baking Sheet: A flat surface for baking. Line it with parchment for easy cleanup.
    • Spatula: Great for folding strawberries and scooping dough. It’s a must-have in my kitchen!
    • Wire Rack: Perfect for cooling cookies. If you don’t have one, use a plate!

    Variations

    • Chocolate Chip Addition: Mix in some dark or white chocolate chips for a sweet twist that pairs beautifully with strawberries.
    • Lemon Zest: Add a teaspoon of lemon zest to the dough for a refreshing citrus kick that brightens the flavor profile.
    • Nuts Optional: Consider folding in some chopped nuts, like pecans or walnuts, for an extra crunch and flavor contrast.
    • Gluten-Free Option: Substitute all-purpose flour with a gluten-free blend to accommodate dietary needs without sacrificing taste.
    • Berry Mix: Don’t limit yourself to just strawberries! Use a combination of berries like blueberries or raspberries for a mixed berry delight.

    Serving Suggestions

    • Pair with Tea or Coffee: Enjoy these cookies with a warm cup of tea or coffee for a delightful afternoon break.
    • Ice Cream Delight: Serve alongside a scoop of vanilla ice cream for a heavenly dessert.
    • Presentation: Arrange cookies on a colorful plate and garnish with fresh strawberries for a vibrant display.
    • Sandwich Cookies: Make them into delightful sandwich cookies by adding icing or whipped cream between two cookies.

    FAQs about Cream Cheese Strawberry Cookies

    You might have a few questions swirling in your mind about these delightful Cream Cheese Strawberry Cookies. Don’t worry; I’ve got you covered! Here are some common queries and my answers to help you on your baking adventure.

    Can I use frozen strawberries instead of fresh?

    Yes, you can! Just make sure to thaw and drain them before adding to your cookie dough. Fresh strawberries often provide a more vibrant flavor, but frozen strawberries are a convenient alternative.

    How should I store the cookies?

    For the best results, store your Cream Cheese Strawberry Cookies in an airtight container at room temperature. They’ll stay fresh for up to a week—if they last that long!

    Can I freeze the cookie dough for later use?

    Absolutely! You can scoop the dough into balls and freeze them on a baking sheet. Once frozen, transfer them to a zip-top bag. Just bake them directly from the freezer when you’re in the mood for cookies.

    What can I substitute for cream cheese?

    If you’re not a fan of cream cheese, you can try using mascarpone or a simple mixture of yogurt and butter. However, remember that it may slightly change the flavor and texture of your cookies.

    How can I make the cookies less sweet?

    If you prefer less sweetness in your Cream Cheese Strawberry Cookies, reduce the sugar by up to half. The fresh strawberries will still provide some natural sweetness!

    Final Thoughts

    Baking these Cream Cheese Strawberry Cookies is more than just creating a treat; it’s about capturing the joy of home. The sweet aroma that fills your kitchen, the excitement of sharing warm cookies with loved ones, and the delightful combination of flavors all contribute to making memories. Whether it’s a snack for an afternoon or a dessert for a special occasion, these cookies have a special way of bringing smiles. So gather your ingredients, embrace the mess, and bake some happiness into your day. Trust me, these cookies will become a cherished part of your baking repertoire!


    Print

    clock clock iconcutlery cutlery iconflag flag iconfolder folder iconinstagram instagram iconpinterest pinterest iconfacebook facebook iconprint print iconsquares squares iconheart heart iconheart solid heart solid icon

    Description

    Cream Cheese Strawberry Cookies are a delightful treat that combines the rich flavors of cream cheese with the sweetness of fresh strawberries, perfect for satisfying your sweet tooth.


    • 1/2 cup unsalted butter, softened
    • 8 ounces cream cheese, softened
    • 1 cup granulated sugar
    • 1 large egg
    • 1 teaspoon vanilla extract
    • 2 cups all-purpose flour
    • 1 to 1 1/2 cups diced fresh strawberries

    1. In a large bowl, beat softened butter, cream cheese, and granulated sugar together using a hand mixer on medium speed, until the mixture is light and fluffy.
    2. Add the egg and vanilla extract to the creamed mixture, blending until smooth and fully combined.
    3. Gradually mix in the all-purpose flour until just incorporated; avoid over-mixing the dough.
    4. Gently fold diced strawberries into the dough, distributing them evenly without crushing.
    5. Spoon generous portions of dough onto a parchment-lined baking sheet, spacing each mound at least 2 inches apart.
    6. Bake in a preheated oven at 350°F for 30 to 45 minutes, or until edges turn lightly golden and the centers are set.
    7. Allow cookies to cool on the baking sheet for 3 to 5 minutes before transferring them to a wire rack to cool completely.

    Notes

    • Ensure the butter and cream cheese are at room temperature for easy mixing.
    • Store cookies in an airtight container for up to a week.
    • For best results, use fresh strawberries.
    • Prep Time: 15 minutes
    • Cook Time: 30 to 45 minutes
    • Category: Dessert
    • Method: Baking
    • Cuisine: American

    Nutrition

    • Serving Size: 1 cookie
    • Calories: 150
    • Sugar: 8g
    • Sodium: 90mg
    • Fat: 7g
    • Saturated Fat: 4g
    • Unsaturated Fat: 2g
    • Trans Fat: 0g
    • Carbohydrates: 20g
    • Fiber: 1g
    • Protein: 2g
    • Cholesterol: 30mg

    Sharing is caring!

  • Fruity Pebbles Rice Krispie Treats

    Fruity Pebbles Rice Krispie Treats


    Introduction to Fruity Pebbles Rice Krispie Treats

    There’s something utterly delightful about Fruity Pebbles Rice Krispie Treats, don’t you think? These colorful, crispy squares not only satisfy your sweet tooth but also bring a splash of joy to any gathering. As a busy mom, I know how tricky it can be to juggle family and hobbies while still wanting to whip up something special in the kitchen. That’s where these treats come in! They’re simple, fun to make, and guaranteed to bring smiles all around. Trust me, once you make them, they’ll become a beloved staple in your dessert rotation.

    Why You’ll Love This Fruity Pebbles Rice Krispie Treats

    Fruity Pebbles Rice Krispie Treats are a whirlwind of color and flavor, perfect for those times when you need a quick dessert! They come together in a flash, making them ideal for busy evenings or unexpected guests. Plus, these treats have a delightful chewiness and that irresistible fruity crunch. It’s hard to stop at just one! They’re a sweet treat that will brighten any day.

    Ingredients for Fruity Pebbles Rice Krispie Treats

    Gathering your ingredients is the first step to creating these delightful Fruity Pebbles Rice Krispie Treats!

    • Fruity Pebble Cereal: This vibrant cereal is the star of the show. It adds cheer and that iconic fruity flavor.
    • Salted Butter: A little butter adds richness and helps the marshmallows melt smoothly. You could try unsalted butter if you prefer, just add a pinch of salt.
    • Mini Marshmallows: These are what gives the treats their signature gooey texture. If you can’t find mini ones, regular marshmallows work too—just chop them up a bit!

    For a dash of extra flavor, consider adding a splash of vanilla extract to the melted marshmallows. It takes the treats to another level! Don’t forget, for a full list of exact measurements, you can find them at the bottom of the article, available for printing.

    How to Make Fruity Pebbles Rice Krispie Treats

    Making Fruity Pebbles Rice Krispie Treats is a breeze! Follow these simple steps, and you’ll have a colorful, chewy dessert ready to be enjoyed. Let’s dive right in!

    Step 1: Prepare Your Ingredients

    Start by gathering all your ingredients. This step makes the process smoother.

    Set out your Fruity Pebble cereal, salted butter, and mini marshmallows near your work area.

    Also, grab an 8×8-inch pan and grease it with either nonstick spray or butter. The greasing prevents sticking and ensures easy removal later.

    Step 2: Melt the Butter

    Now, let’s melt that buttery goodness!

    In a medium saucepan, place 1/4 cup of salted butter over low heat.

    Keep an eye on it and stir occasionally until it’s fully melted. This should only take a minute or two.

    Stirring helps ensure it melts evenly and prevents burning.

    Step 3: Incorporate the Mini Marshmallows

    Once the butter is melted, it’s time to add the stars of the show!

    Dump in 4 cups of mini marshmallows into the saucepan.

    Stir constantly over low heat until the marshmallows are completely melted and the mixture looks smooth and creamy, about 3-5 minutes.

    If you want a little added flavor, you can toss in some vanilla extract at this stage!

    Step 4: Combine with Cereal

    With your marshmallows melted, it’s time for the colorful cereal!

    Pour the 5 cups of Fruity Pebble cereal into the melted marshmallow mixture.

    Gently fold the cereal in until each piece is evenly coated. Use a rubber spatula for better mixing.

    Take your time! You want that cereal to soak up the goodness without turning into mush.

    Step 5: Press the Mixture into the Pan

    Now, transfer that vibrant mixture into your prepared pan.

    Using a piece of wax or parchment paper, press the mixture evenly into the pan.

    Be careful not to squish it too hard; you want it to stay light and chewy.

    A light pressing will ensure that they hold together without being rock-hard.

    Step 6: Cool and Serve

    Time for the hard part—waiting!

    Let the treats cool completely at room temperature for about 20-30 minutes.

    If you’re in a hurry, pop the pan in the refrigerator for about 5 minutes for faster cooling.

    Once cooled, cut into 9 squares, and voila! Your Fruity Pebbles Rice Krispie Treats are ready to be devoured.

    Tips for Success

    • Measure your ingredients accurately for the best texture.
    • Use a rubber spatula for gentle folding; it helps prevent cereal breakage.
    • Lightly grease your hands when pressing the mixture into the pan to avoid stickiness.
    • For extra flavor, mix in some sprinkles or mini chocolate chips before pressing.
    • Store leftovers in an airtight container for freshness—if they last that long!

    Equipment Needed

    • Medium Saucepan: You can use a large pot if you’re doubling the recipe.
    • Rubber Spatula: A sturdy spoon or wooden spatula works too for mixing.
    • 8×8-inch Pan: A similar-sized dish will work, even a baking sheet for thinner treats.
    • Wax or Parchment Paper: You can also use your greased hands if you don’t have these.

    Variations of Fruity Pebbles Rice Krispie Treats

    • Chocolate Drizzle: Melt some chocolate and drizzle it over the cooled treats for a decadent twist!
    • Nut Butter Addition: Swirl in some peanut butter or almond butter during the marshmallow melting stage for extra creaminess and protein.
    • Mix in Dried Fruits: Toss in some dried cranberries or banana chips for a chewy texture and a fruity burst.
    • Rainbow Sprinkles: Add colorful sprinkles into the final mixture for an extra fun flair that kids will love!
    • Rice Krispies Combination: Mix half Fruity Pebbles with half classic Rice Krispies for a subtle flavor balance.
    • Gluten-Free Version: Substitute with gluten-free crispy rice cereal to make them suitable for gluten-sensitive friends.

    Serving Suggestions

    • Pair with Milk: Serve these treats alongside a tall glass of cold milk for a nostalgic treat!
    • Presentation: Arrange them on a colorful platter for parties or gatherings to showcase their vibrant colors.
    • Great with Ice Cream: Top a scoop of vanilla or strawberry ice cream with a crumbled treat for a delightful dessert experience.
    • Fun Party Favors: Wrap individual squares in cellophane and gift them at birthday parties or family gatherings.

    FAQs about Fruity Pebbles Rice Krispie Treats

    Got questions? Don’t worry; I’ve got answers! Here are a few commonly asked questions about these delightful Fruity Pebbles Rice Krispie Treats, along with some tips to get the best results.

    Can I use regular Rice Krispies instead of Fruity Pebbles?

    Sure! While the fruity flavor makes Fruity Pebbles Rice Krispie Treats unique, you can absolutely substitute regular Rice Krispies. The texture will still be amazing, just a bit less vibrant in flavor!

    How should I store my Rice Krispie Treats?

    To keep your treats fresh, store them in an airtight container at room temperature. They’ll stay soft and chewy for several days—if they last that long!

    Can I make these treats ahead of time?

    You can definitely make them a day in advance! Just store them properly to maintain that luscious texture. They are perfect for prepping for parties or gatherings!

    How can I make these treats more festive?

    Add seasonal sprinkles or colored marshmallows for a holiday touch! These cheerful additions will make your Fruity Pebbles Rice Krispie Treats stand out even more.

    Are these treats suitable for kids and allergies?

    Fruity Pebbles Rice Krispie Treats are generally kid-friendly. However, be mindful of any allergies. Always check the labels for dietary restrictions! You can switch ingredients to meet specific needs if necessary.

    Final Thoughts

    In the end, Fruity Pebbles Rice Krispie Treats are not just a dessert; they’re a cherished way to create delightful memories with family and friends. Each colorful square holds the promise of joyful moments, laughter, and, of course, a bit of nostalgia. As I watch my kids devour these treats, I’m reminded of the joys of simpler times—when sweets meant smiles and creativity in the kitchen. So, whether you’re whipping these up for a party or just because, let the vibrant colors and delightful flavors spark joy in your home, one chewy bite at a time!


    Print

    clock clock iconcutlery cutlery iconflag flag iconfolder folder iconinstagram instagram iconpinterest pinterest iconfacebook facebook iconprint print iconsquares squares iconheart heart iconheart solid heart solid icon

    Description

    Fruity Pebbles Rice Krispie Treats are a fun and colorful dessert that’s easy to make and perfect for sharing!


    • 5 cups fruity pebble cereal
    • 1/4 cup salted butter
    • 4 cups mini marshmallows

    1. Pour 5 cups fruity pebble cereal into a large mixing bowl. Set aside. Lightly grease an 8×8-inch pan with nonstick spray or butter.
    2. In a medium saucepan over low heat, melt 1/4 cup salted butter. Once melted, add 4 cups mini marshmallows. Stir constantly until the marshmallows are fully melted and the mixture is smooth, about 3–5 minutes.
    3. Immediately pour the melted marshmallow mixture over the cereal. Stir with a rubber spatula until the cereal is evenly coated.
    4. Transfer the mixture to the prepared 8×8-inch pan. Using a piece of wax or parchment paper, press the mixture evenly into the pan. Be careful not to press too hard to keep the treats light and chewy.
    5. Allow the treats to cool completely at room temperature, about 20–30 minutes. For faster cooling, place the pan in the refrigerator for about 5 minutes.
    6. Once cooled, cut into 9 squares and serve.

    Notes

    • For added flavor, consider adding vanilla extract to the melted marshmallow mixture.
    • Store leftovers in an airtight container to maintain freshness.
    • Prep Time: 10 minutes
    • Cook Time: 5 minutes
    • Category: Dessert
    • Method: No-Bake
    • Cuisine: American

    Nutrition

    • Serving Size: 1 square
    • Calories: 150
    • Sugar: 10g
    • Sodium: 80mg
    • Fat: 6g
    • Saturated Fat: 4g
    • Unsaturated Fat: 2g
    • Trans Fat: 0g
    • Carbohydrates: 22g
    • Fiber: 0g
    • Protein: 1g
    • Cholesterol: 15mg

    Sharing is caring!

  • Cajun Steak Cheesy Rigatoni Parmesan

    Cajun Steak Cheesy Rigatoni Parmesan


    Introduction to Cajun Steak Cheesy Rigatoni Parmesan

    Life can feel like a whirlwind, especially when you’re a busy mom or professional. Between juggling work, family, and everything in between, who has the time to cook? That’s where my Cajun Steak Cheesy Rigatoni Parmesan comes in! This dish is not just a meal; it’s a comforting hug on a plate. With its rich flavors and creamy textures, it’s perfect for impressing loved ones or simply treating yourself after a long day. Plus, it comes together quickly, making it a fantastic option for those hectic evenings when you want something both easy and indulgent.

    Why You’ll Love This Cajun Steak Cheesy Rigatoni Parmesan

    This dish marries speed with flavor in the most delightful way. In just under an hour, you can create a meal that’s both hearty and luxurious. The combination of tender Cajun steak tips and cheesy rigatoni makes for a crowd-pleaser your family will rave about. It’s not just easy; it’s a hearty indulgence that brings a taste of New Orleans right into your kitchen. Perfect for any night of the week!

    Ingredients for Cajun Steak Cheesy Rigatoni Parmesan

    Gathering the right ingredients is the first step to bringing this flavorful dish to life. Below, you’ll find everything you need to whip up this Cajun Steak Cheesy Rigatoni Parmesan. Don’t worry, the exact measurements are listed at the bottom of the article for easy printing!

    • Sirloin or ribeye steak tips: I love using tender cuts for juicy bursts of flavor.
    • Freshly ground black pepper: A must for seasoning; it enhances every bite.
    • Salt: Basic but essential for bringing out the flavors in your dish.
    • Smoked paprika: This spice adds a warm, smoky depth that elevates the steak.
    • Garlic powder: Convenient and flavorful, it brings a punch of garlicky goodness.
    • Cajun seasoning: This spice blend adds that signature kick, perfect for a spicy southern flair.
    • Unsalted butter: Adding richness and creaminess to both our steak and sauce.
    • Olive oil: Great for searing the steak; it can also add a hint of fruitiness.
    • Fresh parsley: A pop of color and freshness to garnish your dish.
    • Shredded mozzarella cheese: Melts beautifully for a cheesy texture that stretches with each bite.
    • Freshly grated Parmesan cheese: Adds a nuttiness; the fresher, the better!
    • Cream cheese: Provides creaminess to the sauce for that smooth and velvety texture.
    • Whole milk: Balances the richness of the cream and adds a little extra creaminess.
    • Heavy cream: This is where the indulgent creaminess comes from; feel free to substitute with a lighter cream if desired.
    • Garlic cloves: Fresh is key here! It infuses flavor in the sauce.
    • Rigatoni pasta: The ridges of this pasta capture the sauce, making every bite a delight.

    Feel free to make adjustments to suit your taste or dietary needs. Each ingredient plays a role in making this a hearty and flavorful dish that everyone will love!

    How to Make Cajun Steak Cheesy Rigatoni Parmesan

    Boil the Rigatoni

    Start your culinary journey by boiling a large pot of salted water. The salt is key; it infuses flavor into the pasta. When the water is rolling, add the rigatoni. Cook it until just tender, following the package instructions. Trust me, it’s best to keep that slightly chewy texture. Reserve a cup of the pasta water before you drain it. This liquid is gold, perfect for adjusting your sauce!

    Sear the Steak

    Warm up a large skillet over medium-high heat and splash in some olive oil. While it heats up, season your steak tips with Cajun seasoning, garlic powder, smoked paprika, salt, and black pepper. This blend is aromatic and brings the entire dish to life. Once the skillet shimmers, add the seasoned steak. Sear those glorious bites until they’re dark golden all over. Remember to add the butter midway and baste the steak for extra flavor. After a few minutes, take the steak out and let it rest!

    Prepare the Sauce

    In the same skillet, add another two tablespoons of butter. It’s time to melt it over medium heat. Next, toss in minced garlic, stirring until it becomes fragrant. Now, let’s get creamy! Pour in the heavy cream, whole milk, and softened cream cheese, whisking until the mixture is smooth and melting together. This sauce is going to be luscious and rich, just the way we like it!

    Combine and Heat

    Slowly introduce the shredded mozzarella and Parmesan cheese into your sauce. Don’t rush this; whisk thoroughly to create that cheesy goodness we crave. Add a splash of the reserved pasta water if the sauce feels too thick. Finally, toss in the cooked rigatoni and the steak tips and mix gently. Let everything heat through on low for a few minutes. It’s a beautiful medley of flavors coming together!

    Plate and Garnish

    Now comes the best part! Serve your Cajun Steak Cheesy Rigatoni Parmesan on warm plates. A sprinkle of fresh parsley adds a lovely touch and brightens up those rich colors. This dish is not just a feast for the stomach but also for the eyes. Dig in and enjoy every creamy, cheesy bite!

    Tips for Success

    • Always reserve extra pasta water—it’s a lifesaver for adjusting sauce consistency.
    • Let your steak rest before cutting; this keeps it juicy and tender.
    • Feel free to sneak in veggies like spinach or bell peppers for added nutrition.
    • Taste as you go! Adjust seasoning based on your family’s preference.
    • Using freshly grated cheese makes a world of difference in flavor!

    Equipment Needed

    • Large pot: For boiling pasta; a Dutch oven works too!
    • Skillet: A non-stick skillet is great for easy cleanup.
    • Whisk: Essential for stirring sauces; a wooden spoon can also work.
    • Measuring cups: Useful for precise liquid measurements; use regular cups if in a pinch.
    • Colander: To drain the pasta; a slotted spoon can work in emergencies!

    Variations of Cajun Steak Cheesy Rigatoni Parmesan

    • Switch the Protein: Try shrimp or chicken instead of steak for a change. Both pair wonderfully with Cajun seasoning.
    • Vegetarian Version: Replace the steak with sautéed mushrooms or zucchini for a delicious plant-based option that’s just as hearty.
    • Spicy Upgrade: For an extra kick, add diced jalapeños or a splash of hot sauce to the sauce.
    • Low-Carb Twist: Substitute rigatoni with zucchini noodles or spaghetti squash for a lighter, gluten-free meal.
    • Cheese Lovers Delight: Mix in different types of cheese like Gouda or fontina for a unique cheesy flavor profile.

    Serving Suggestions for Cajun Steak Cheesy Rigatoni Parmesan

    • Side Salad: A crisp Caesar or mixed greens salad pairs beautifully with this rich dish.
    • Crusty Bread: Serve with warm, crusty garlic bread to soak up the decadent sauce.
    • Wine Pairing: A bold red wine, like Cabernet Sauvignon, complements the meal perfectly.
    • Presentation: For a pop of color, garnish with extra parsley and serve on colorful plates!

    FAQs about Cajun Steak Cheesy Rigatoni Parmesan

    Can I make Cajun Steak Cheesy Rigatoni Parmesan ahead of time?
    Absolutely! You can prepare the dish and store it in the refrigerator. Just reheat it gently on the stovetop, adding a splash of pasta water to revive the creamy sauce.

    What if my family doesn’t like spicy food?
    No worries! You can adjust the Cajun seasoning to your taste. Start with a smaller amount for the steak and sauce, and add more as needed to find that sweet spot of flavor without the heat.

    Can I use a different type of pasta?
    Certainly! While rigatoni is perfect for holding that cheesy sauce, you can substitute it with penne or fusilli for a different texture. Just ensure it’s a pasta that cooks well!

    How can I store leftovers?
    Store any leftovers in an airtight container in the fridge for up to three days. For best results, reheat gently on the stovetop to keep it creamy.

    Is this dish gluten-free?
    Yes! If you use gluten-free rigatoni, your Cajun Steak Cheesy Rigatoni Parmesan can easily be made gluten-free, making it suitable for those with gluten sensitivities. Enjoy!

    Final Thoughts

    Creating Cajun Steak Cheesy Rigatoni Parmesan is more than just preparing a delicious meal; it’s about embracing the joy of cooking and the comfort of sharing hearty dishes with loved ones. I can still remember the smiles at my table when this dish makes an appearance. The rich, creamy flavors mingle with the tender steak, and the laughter and conversation flow. Whether it’s a busy weeknight or a special gathering, this recipe guarantees satisfaction. So roll up your sleeves, indulge in the experience, and watch as this dish transforms your dinner into a delightful feast!


    Print

    clock clock iconcutlery cutlery iconflag flag iconfolder folder iconinstagram instagram iconpinterest pinterest iconfacebook facebook iconprint print iconsquares squares iconheart heart iconheart solid heart solid icon

    Description

    Cajun Steak Cheesy Rigatoni Parmesan is a must-try dish that blends flavorful Cajun steak tips with cheesy rigatoni pasta, creating a rich and indulgent meal.


    • 680 g sirloin or ribeye steak tips, cut into bite-sized pieces
    • Freshly ground black pepper, to taste
    • Salt, to taste
    • 0.5 teaspoon smoked paprika
    • 1 teaspoon garlic powder
    • 1.5 teaspoons Cajun seasoning
    • 1 tablespoon unsalted butter
    • 2 tablespoons olive oil
    • Fresh parsley, chopped (for garnish)
    • 0.5 teaspoon Cajun seasoning
    • 110 g shredded mozzarella cheese
    • 100 g freshly grated Parmesan cheese
    • 115 g cream cheese, softened
    • 120 ml whole milk
    • 360 ml heavy cream
    • 4 garlic cloves, minced
    • 2 tablespoons unsalted butter
    • 340 g rigatoni pasta

    1. Start by boiling a large pot of salted water. Cook the rigatoni until just tender according to package instructions. Reserve 1 cup of pasta water, drain, and set the pasta aside.
    2. Pour olive oil into a large skillet and heat over medium-high. Mix steak tips with Cajun seasoning, garlic powder, paprika, salt, and black pepper. Add the steak to the skillet and sear until dark golden on all sides and cooked to your liking. Add butter midway and baste over the steak. Remove from the pan and let rest.
    3. In the same skillet, melt 2 tablespoons of butter over medium heat. Add minced garlic and sauté until fragrant. Stir in heavy cream, milk, and softened cream cheese. Whisk until smooth and melted.
    4. Slowly add shredded mozzarella, Parmesan cheese, and Cajun seasoning to the sauce. Whisk thoroughly. Taste and adjust salt and pepper. If the sauce thickens too much, thin with the reserved pasta water.
    5. Toss the cooked rigatoni into the skillet with the sauce. Gently mix in the cooked steak tips. Let everything heat together on low for a few minutes.
    6. Plate the rigatoni and steak. Garnish with fresh parsley and serve hot.

    Notes

    • Feel free to adjust the level of Cajun seasoning based on your spice preference.
    • Make sure to reserve the pasta water; it helps in achieving the desired sauce consistency.
    • This dish can be made ahead of time and reheated before serving.
    • Prep Time: 20 minutes
    • Cook Time: 30 minutes
    • Category: Main Course
    • Method: Stovetop
    • Cuisine: American

    Nutrition

    • Serving Size: 1 plate
    • Calories: 850
    • Sugar: 4g
    • Sodium: 900mg
    • Fat: 53g
    • Saturated Fat: 30g
    • Unsaturated Fat: 12g
    • Trans Fat: 0g
    • Carbohydrates: 58g
    • Fiber: 3g
    • Protein: 35g
    • Cholesterol: 120mg

    Sharing is caring!

  • Salted Apple Pie Cookies

    Salted Apple Pie Cookies


    Introduction to Salted Apple Pie Cookies

    There’s something about the aroma of freshly baked cookies that brings warmth to my kitchen and joy to my heart. That’s why I’m excited to share my recipe for Salted Apple Pie Cookies. These delightful treats offer a twist on classic apple pie, easily brightening up a busy day. Perfect for a comforting family dessert or an impressive treat for guests, these cookies come together quickly and effortlessly. Imagine biting into a soft, tender cookie filled with sweet apple goodness! Trust me, your loved ones will remember this delicious moment long after the last crumb has vanished.

    Why You’ll Love This Salted Apple Pie Cookies

    These Salted Apple Pie Cookies are a game changer for busy moms and professionals alike. They’re simple to whip up, yet the taste is nothing short of spectacular. With that rich, buttery flavor and the sweet apple filling, you get the essence of traditional apple pie in a fraction of the time. Plus, they’re perfect for any occasion, bringing smiles to your family and friends with every bite. You’ll adore how easy they are to make and the joy they bring!

    Ingredients for Salted Apple Pie Cookies

    Gathering the right ingredients is crucial for making these delightful Salted Apple Pie Cookies. Here’s what you’ll need:

    • Salted butter – This lends the cookies a rich, nutty flavor when browned.
    • Granulated sugar – Sweetens the dough and balances flavors perfectly.
    • Brown sugar – Adds a delicious hint of caramel, giving the cookies a soft texture.
    • Large eggs – Provide moisture and help bind the ingredients together.
    • Vanilla extract – Brings warmth and enhances the sweetness of the cookies.
    • All-purpose flour – The base of the cookies, giving them structure.
    • Cornstarch – Helps to achieve that tender, melt-in-your-mouth consistency.
    • Baking soda – Assists in leavening, making the cookies light and airy.
    • Baking powder – Works in tandem with baking soda for even fluffier cookies.
    • Apple pie filling – The star ingredient! Pot for high-quality filling for the best taste.

    For those with specific dietary preferences or ingredients on hand, consider substitutions like using unsalted butter or a gluten-free flour blend. For exact quantities, check the bottom of the article where you can find everything ready for printing.

    How to Make Salted Apple Pie Cookies

    Making these Salted Apple Pie Cookies is a straightforward and rewarding process. Follow these simple steps, and you’ll have a delightful dessert that will impress anyone!

    Step 1: Brown the Butter

    Start by melting your salted butter in a medium skillet over medium heat. As you stir continuously, it will foam, then turn a beautiful amber color. This is when the nutty aroma begins to fill your kitchen!

    Once browning is complete, carefully transfer the butter to a large mixing bowl. Let it cool for about 20 minutes. If you’re pressed for time, pop it in the fridge for about 10 minutes to speed things up.

    Step 2: Combine Dry Ingredients

    While the butter cools, grab a separate bowl. Whisk together your flour, cornstarch, baking soda, and baking powder. This helps to ensure even distribution when you mix everything later. Set it aside for now; we’ll come back to it soon!

    Step 3: Mix Wet Ingredients

    Now that your butter is cool, add the granulated sugar and brown sugar. Mix until you have a smooth mixture. Then, one by one, add in the eggs, stirring well after each addition. Finally, stir in the vanilla extract to add that warm, comforting flavor.

    Step 4: Combine Mixtures

    Time to blend! Gradually fold the dry ingredients into the wet mixture. Be gentle here; we want tender cookies, not tough ones. Mix until just combined, ensuring not to overdo it!

    Step 5: Chill the Dough

    To improve the cookies’ flavor and maintain their thickness, wrap the dough in plastic wrap and chill it in the fridge for at least one hour. I like to prep this step in advance. It saves time later and makes your life easier!

    Step 6: Bake the Cookies

    Preheat your oven to 350°F (175°C). Line a baking sheet with parchment paper. Scoop out about 3 oz of dough for each cookie and place them two inches apart on the sheet. Bake them for around 12 minutes, or until the edges are golden and the centers are still soft.

    Step 7: Fill with Apple Pie Filling

    Once the cookies cool slightly, take a small glass and press the center of each cookie to make a well. Now, here comes the fun part: add about 1 tablespoon of diced apple pie filling into each well. Allow the cookies to cool completely on a wire rack before serving.

    Your Salted Apple Pie Cookies are now ready to enjoy! Serve them warm for an extra cozy experience.

    Tips for Success

    • Use high-quality apple pie filling for the best flavor.
    • Don’t skip chilling the dough; it keeps the cookies from spreading too much.
    • Experiment with different flavored extracts, like almond, for a twist.
    • Check your oven’s temperature; an oven thermometer can make a difference.
    • For softer cookies, underbake by a minute or two!

    Equipment Needed

    • Baking sheet – A standard sheet works, but a silicone mat can make cleanup easier.
    • Parchment paper – Optional, but it prevents sticking and maintains cookie shape.
    • Mixing bowls – Any size is fine; just make sure they’re sturdy.
    • Whisk – A fork can serve in a pinch if you don’t have one.
    • Spoon or cookie scoop – For evenly sized dough balls, but your hands work, too!

    Variations

    • For a decadent twist, try adding chopped pecans or walnuts to the dough for added crunch and flavor.
    • Make them gluten-free by substituting all-purpose flour with a gluten-free blend that measures cup-for-cup.
    • Add a pinch of cinnamon or nutmeg to the dough for a warm, spicy kick reminiscent of traditional apple pie.
    • For a dairy-free option, replace salted butter with a plant-based alternative, like coconut oil or vegan butter.
    • Swap the apple pie filling for other fruits, such as cherry or peach, for a deliciously different flavor experience.

    Serving Suggestions

    • Pair these cookies with a chilled glass of milk for a classic treat.
    • Serve with hot tea or coffee for a cozy afternoon snack.
    • Presentation tip: Dust with powdered sugar for an elegant touch.
    • Serve warm, so the apple filling remains gooey and delightful.
    • Add a scoop of vanilla ice cream on the side for extra indulgence!

    FAQs about Salted Apple Pie Cookies

    Can I use homemade apple pie filling?
    Absolutely! If you have a favorite homemade apple pie filling recipe, feel free to use it. Just ensure it’s diced finely for easy filling.

    How do I store leftover cookies?
    To keep your Salted Apple Pie Cookies fresh, store them in an airtight container at room temperature. They should last about 3-5 days.

    Can I freeze the dough?
    Yes! You can freeze the dough for up to 3 months. Just wrap it tightly in plastic wrap and place it in a freezer-safe bag. Thaw before baking.

    What can I substitute for cornstarch?
    If you don’t have cornstarch, you can use an equal amount of all-purpose flour. The texture might be slightly different, but they’ll still be delicious!

    Are these cookies suitable for a vegan diet?
    For a vegan adaptation, swap eggs for a flaxseed or chia seed mixture and use a plant-based butter. The flavor will still shine through!

    Final Thoughts

    Creating these Salted Apple Pie Cookies is more than just baking; it’s about capturing cherished moments. The delightful combination of browned butter and sweet apple filling brings warmth to any table. Each cookie is a bite-sized reminder of family gatherings and cozy afternoons spent with loved ones. Whether you’re rewarding yourself after a long day or surprising friends with a thoughtful treat, these cookies will undoubtedly spread smiles and joy. I hope you enjoy making them as much as I do! Let the aroma fill your home, inviting everyone to share in this delicious, comforting experience.


    Print

    clock clock iconcutlery cutlery iconflag flag iconfolder folder iconinstagram instagram iconpinterest pinterest iconfacebook facebook iconprint print iconsquares squares iconheart heart iconheart solid heart solid icon

    Description

    Salted Apple Pie Cookies are a delightful twist on traditional apple pie, combining the rich flavor of browned butter and sweet apple filling into soft, tender cookies.


    • 1 cup salted butter, browned
    • ½ cup granulated sugar
    • ½ cup packed brown sugar
    • 2 large eggs
    • 2 teaspoons vanilla extract
    • 2 ½ cups all-purpose flour
    • 1 tablespoon cornstarch
    • ½ teaspoon baking soda
    • ½ teaspoon baking powder
    • 1 cup apple pie filling, diced

    1. Melt salted butter in a medium skillet over medium heat, stirring continuously. Allow to foam, turn amber, and develop brown bits. Transfer to a large mixing bowl to cool for 20 minutes. If still warm, refrigerate for 10 minutes.
    2. In a separate bowl, whisk together the flour, cornstarch, baking soda, and baking powder. Set aside.
    3. Add granulated sugar and brown sugar to the cooled brown butter, mixing until smooth. Add eggs one at a time, stirring well after each. Mix in the vanilla extract.
    4. Gradually add the dry ingredients to the wet mixture, folding gently until just combined. Avoid overmixing to ensure tender cookies.
    5. Wrap the dough in plastic wrap and refrigerate for at least 1 hour to meld flavors and maintain thickness.
    6. Preheat oven to 175°C (350°F). Line a baking sheet with parchment paper. Scoop 3 oz dough balls and place 2 inches apart. Bake for 12 minutes, until edges are golden and centers remain soft.
    7. Let the cookies cool slightly. Press the center of each cookie with a small glass to create a well. Fill each well with 1 tablespoon of diced apple filling. Cool on a wire rack.
    8. Serve the cookies warm for the ultimate flavor experience. Pair with milk or tea for extra comfort.

    Notes

    • For best results, use high-quality apple pie filling.
    • Store cookies in an airtight container to maintain freshness.
    • Adjust baking time for desired cookie softness.
    • Prep Time: 20 minutes
    • Cook Time: 12 minutes
    • Category: Dessert
    • Method: Baking
    • Cuisine: American

    Nutrition

    • Serving Size: 1 cookie
    • Calories: 200
    • Sugar: 14g
    • Sodium: 150mg
    • Fat: 10g
    • Saturated Fat: 6g
    • Unsaturated Fat: 2g
    • Trans Fat: 0g
    • Carbohydrates: 28g
    • Fiber: 1g
    • Protein: 2g
    • Cholesterol: 40mg

    Sharing is caring!

  • Lemon Raspberry Cookies Soft Batch

    Lemon Raspberry Cookies Soft Batch


    Introduction to Lemon Raspberry Cookies Soft Batch

    Ah, the joy of baking! There’s something magical about filling your kitchen with the sweet aroma of fresh cookies. If you’re looking for a delightful treat that combines the zing of citrus with the burst of juicy berries, you’ve found it! These Lemon Raspberry Cookies Soft Batch are not just easy to whip up, but they also make for a charming dessert to brighten any day. As a busy mom, I appreciate recipes that bring joy without consuming my entire afternoon. Trust me, your family will cherish these little morsels just as much as you do!

    Why You’ll Love This Lemon Raspberry Cookies Soft Batch

    First off, these cookies are a breeze to make. With just a handful of ingredients, you can have a batch ready in no time. Their soft, chewy texture will make your taste buds dance with joy! Plus, the zesty lemon and sweet raspberry combination is a flavor celebration. Whether you need a quick dessert for dinner or a treat to impress your guests, these cookies are the answer!

    Ingredients for Lemon Raspberry Cookies Soft Batch

    Gathering the right ingredients makes all the difference when baking these Lemon Raspberry Cookies Soft Batch. Here’s what you’ll need:

    • Granulated Sugar: This sweet base not only sweetens your cookies but also contributes to their delightful texture.
    • Unsalted Butter: Room temperature butter ensures a smooth mixture. It’s the key to that melt-in-your-mouth experience.
    • Large Egg: This brings everything together while adding richness and moisture.
    • Freshly Squeezed Lemon Juice: A splash of citrus tang! Fresh juice elevates the flavor compared to bottled varieties.
    • Vanilla Extract: This enhances the sweetness, bridging the flavors beautifully.
    • All-Purpose Flour: The foundation for our cookies. It creates structure and softness.
    • Lemon Zest: The aromatic zest packs a punch of flavor that makes these cookies truly special.
    • Baking Powder: This leavening agent helps your cookies rise and become fluffy.
    • Baking Soda: Another ally in achieving that perfect soft texture!
    • Frozen Raspberries: They add bursts of sweet-tart flavor. I love using frozen ones for convenience, but fresh works too if you have them!

    For exact quantities, check out the bottom of the article where they are available for printing. Happy baking!

    How to Make Lemon Raspberry Cookies Soft Batch

    Let’s dive into the delightful process of creating these Lemon Raspberry Cookies Soft Batch. I promise each step is straightforward and rewarding!

    Step 1 – Preheat and Prepare

    Start by preheating your oven to 350°F. This ensures a perfectly baked cookie. Line two large baking sheets with parchment paper. This simple step makes cleanup a breeze and keeps the cookies from sticking. Trust me, parchment paper is your best friend in the kitchen!

    Step 2 – Cream Butter and Sugar

    In a large bowl, add the unsalted butter and granulated sugar. Using a handheld mixer, beat them together on medium speed until it’s light and fluffy. You want a beautiful creaminess—this creates that soft texture we all love!

    Step 3 – Add Wet Ingredients

    Next, add in that large egg, freshly squeezed lemon juice, and vanilla extract. Mix until everything is smooth. The aroma filling your kitchen is just the beginning of this flavor adventure!

    Step 4 – Mix in Dry Ingredients

    Now it’s time to introduce the all-purpose flour, lemon zest, baking powder, and baking soda. Gently mix on low speed until it’s all combined. When the dough pulls together, you know you’re close to cookie heaven!

    Step 5 – Fold In Raspberries

    Here comes the fun part! Gently fold in the chopped frozen raspberries. Try to be careful and not smash them. We want those lovely bursts of color and flavor as they bake!

    Step 6 – Chill the Dough

    Cover the dough and pop it in the refrigerator for 10 minutes. This little chill helps the cookies maintain their shape and texture. Plus, it makes the dough easier to scoop!

    Step 7 – Scoop and Bake

    Once chilled, grab a 2-tablespoon cookie scoop. Drop the dough onto the lined baking sheets, leaving about 2 inches of space between each scoop. This helps them spread out nicely. Bake them for 12-13 minutes, until you see a lovely hint of golden brown on the edges.

    Step 8 – Cool and Serve

    After baking, let your cookies cool for 5-10 minutes on the sheets. Then, carefully transfer them to a cooling rack to cool completely. The waiting might be the hardest part, but trust me, it’s worth it!

    Tips for Success

    • Always ensure your butter is truly at room temperature for the best mixing.
    • Don’t skip chilling the dough; it helps in shaping the cookies.
    • Measure ingredients accurately for consistent results every time.
    • If your dough seems too sticky, add a sprinkle of flour.
    • Store the cookies in an airtight container to keep them fresh longer.

    Equipment Needed

    • Mixing Bowl: A large, sturdy bowl is essential, but any bowl you have will work.
    • Handheld Mixer: This speeds up the creaming process, though you can use a whisk if you prefer a workout!
    • Cookie Scoop: A 2-tablespoon scoop helps make uniform cookies, but a spoon works too.
    • Baking Sheets: Essential for baking, just line them with parchment paper for easy no-stick baking.
    • Cooling Rack: A rack keeps cookies from getting soggy; a plate will do in a pinch!

    Variations of Lemon Raspberry Cookies Soft Batch

    • Chocolate Chip Twist: Add semi-sweet chocolate chips to the dough for a delicious twist on the classic lemon raspberry combo.
    • Gluten-Free Option: Substitute all-purpose flour with a gluten-free blend for those avoiding gluten, ensuring a similar texture.

    • Vegan Delight: Use a flax egg (1 tablespoon flaxseed meal + 2.5 tablespoons water) instead of the egg, and replace butter with coconut oil or vegan butter.
    • Berry Mix: Twist it up by using a mix of frozen berries like blueberries or blackberries for a vibrant, fruity explosion.
    • Nutty Addition: Stir in chopped pistachios or walnuts for a crunchy contrast to the soft cookie texture.

    Serving Suggestions for Lemon Raspberry Cookies Soft Batch

    • Pair these cookies with a refreshing glass of iced tea or lemonade for a perfect afternoon treat.
    • Serve them alongside a scoop of vanilla ice cream for an indulgent dessert.
    • For a delightful presentation, dust with powdered sugar before serving.
    • Enjoy with a hot cup of coffee to balance the sweetness!

    FAQs about Lemon Raspberry Cookies Soft Batch

    Can I use fresh raspberries instead of frozen?
    Yes, fresh raspberries can be used! Just be gentle while folding them in to avoid smashing.

    How should I store the cookies?
    Store your Lemon Raspberry Cookies Soft Batch in an airtight container at room temperature. They remain fresh for several days!

    Can I freeze the cookie dough?
    Absolutely! You can freeze the dough for up to three months. Just allow it to thaw in the fridge before baking.

    What can I substitute for lemon juice?
    If you don’t have lemon juice, orange juice can be a good substitute for a different but delightful citrus flavor.

    How can I make these cookies less sweet?
    Consider reducing the sugar slightly. You can also try using less sweet mix-ins, like unsweetened coconut flakes.

    Final Thoughts

    Baking these Lemon Raspberry Cookies Soft Batch fills my heart with warmth and joy. Each time I pull a tray out of the oven, I’m reminded of the sweet memories created in our kitchen. The tangy citrus mingling with juicy raspberry bursts brings a smile to everyone who tries them. Perfect for busy days or when a little indulgence is needed, these cookies are a comforting hug in dessert form. I hope they become a favorite in your home, sparking the same joy they bring to mine. So, gather your family, bake up a storm, and savor each delicious bite!


    Print

    clock clock iconcutlery cutlery iconflag flag iconfolder folder iconinstagram instagram iconpinterest pinterest iconfacebook facebook iconprint print iconsquares squares iconheart heart iconheart solid heart solid icon

    Description

    These Lemon Raspberry Cookies Soft Batch are a delightful treat with a perfect blend of citrus and berry flavors, resulting in a soft and chewy cookie.


    • 200 g granulated sugar
    • 113 g unsalted butter, room temperature
    • 1 large egg, room temperature
    • 1 tablespoon freshly squeezed lemon juice
    • 1 teaspoon vanilla extract
    • 187.5 g all-purpose flour
    • 2 tablespoons lemon zest, about 1 large lemon
    • ½ teaspoon baking powder
    • ¼ teaspoon baking soda
    • 167 g frozen raspberries, roughly chopped

    1. Preheat oven to 350°F. Line 2 large baking sheets with parchment paper. Set aside.
    2. To a large bowl, add sugar and butter. Using a handheld mixer on medium speed, beat the sugar and butter together until light and fluffy.
    3. Add egg, lemon juice, and vanilla. Beat until smooth.
    4. Add flour, lemon zest, baking powder, and baking soda. Mix on low until well combined. Fold in raspberries.
    5. Chill dough in the refrigerator for 10 minutes.
    6. After chilling, using a 2-tablespoon cookie scoop, drop the dough onto the lined baking sheets, leaving about 2 inches of space between each cookie.
    7. Bake for 12-13 minutes, or until they are lightly brown on the edges.
    8. Allow cookies to cool for 5-10 minutes before carefully moving to a cooling rack to completely cool. Serve.

    Notes

    • Make sure the butter is at room temperature for easier mixing.
    • For best results, use fresh lemon juice and zest.
    • These cookies are best served fresh but can be stored in an airtight container for a few days.
    • Prep Time: 20 minutes
    • Cook Time: 13 minutes
    • Category: Dessert
    • Method: Baking
    • Cuisine: American

    Nutrition

    • Serving Size: 1 cookie
    • Calories: 150
    • Sugar: 10g
    • Sodium: 50mg
    • Fat: 7g
    • Saturated Fat: 4g
    • Unsaturated Fat: 2g
    • Trans Fat: 0g
    • Carbohydrates: 20g
    • Fiber: 1g
    • Protein: 2g
    • Cholesterol: 30mg

    Sharing is caring!

  • Maple Bacon Pancake Muffins

    Maple Bacon Pancake Muffins


    Introduction to Maple Bacon Pancake Muffins

    Have you ever craved the comfort of pancakes, but wished for something faster and more fun? Enter Maple Bacon Pancake Muffins! These delightful treats marry the timeless flavors of pancakes and crispy bacon, all packed into a convenient muffin form. Perfect for busy mornings, these muffins offer a quick solution without sacrificing indulgence.

    Whether you’re rushing to work or looking for a breakfast that impresses family and friends, these little wonders will surely hit the spot. With every bite, you’ll savor the sweet aroma of maple intertwined with that irresistible savory crunch of bacon. What’s not to love?

    Why You’ll Love This Maple Bacon Pancake Muffins

    These Maple Bacon Pancake Muffins are a true game-changer for anyone juggling a busy lifestyle.

    They’re quick to whip up, taking just 15 minutes to prep and 18 minutes to bake.

    Imagine biting into a fluffy muffin bursting with flavors that remind you of a cozy breakfast, yet it’s ready in no time!

    They appeal to both sweet and savory lovers, satisfying every palate with minimal effort. What’s not to adore?

    Ingredients for Maple Bacon Pancake Muffins

    To whip up these delightful Maple Bacon Pancake Muffins, you’ll need a variety of ingredients that work together to create flavor magic. Here’s what you’ll be gathering:

    • All-purpose flour: The foundation of your muffins, providing structure. For a gluten-free option, consider using almond or coconut flour.
    • Granulated sugar: Just a hint of sweetness to complement the flavors. Brown sugar can add a deeper flavor if you prefer.
    • Baking powder: A vital ingredient for that fluffy rise. Make sure it’s fresh for best results.
    • Baking soda: Working alongside baking powder, it helps enhance the texture of the muffins.
    • Salt: A pinch goes a long way to balance flavors. Avoid overdoing it to keep the sweetness intact.
    • Large egg: Adds moisture and richness. For an egg-free option, you can use unsweetened applesauce or a flax egg.
    • Buttermilk: This brings a tangy flavor and keeps your muffins moist. You can make a quick substitute with milk and vinegar or lemon juice.
    • Maple syrup: The star of the show! It adds that iconic sweetness. Maple extract can also be used for a bolder flavor.
    • Melted unsalted butter: Helps create a tender texture. Olive oil or melted coconut oil work as substitutes for a dairy-free version.
    • Cooked and crumbled bacon: This is what elevates your muffins, bringing that delicious savory punch that everyone craves. Feel free to use turkey bacon or even a plant-based alternative for a twist.

    For detailed measurements, you can scroll down to the bottom of the article where everything is printed for your convenience. Happy cooking!

    How to Make Maple Bacon Pancake Muffins

    Step 1: Preheat the Oven

    Start by preheating your oven to 375°F (190°C). This crucial step ensures that your Maple Bacon Pancake Muffins bake evenly, giving you that perfect golden-brown finish. An adequately heated oven also helps the muffins rise beautifully, creating that fluffy texture we all love. So don’t skip this part!

    Step 2: Mix the Dry Ingredients

    In a large bowl, whisk together your all-purpose flour, granulated sugar, baking powder, baking soda, and salt. Taking the time to mix these dry ingredients thoroughly is vital for evenly distributing the flavors throughout the batter. It prevents any pockets of flour and baking powder, ensuring you get that delightful flavor in every bite. It’s a small step that makes a huge difference!

    Step 3: Prepare the Wet Mixture

    In a separate medium bowl, whisk together the egg, buttermilk, maple syrup, and melted unsalted butter. This combination creates a smooth, creamy mixture that gives life to your batter. The key here is to blend them until they’re well combined, but don’t stress about getting rid of every single lump. A tiny bit of lumps is perfectly fine—it’s the secret to soft muffins!

    Step 4: Combine Wet and Dry Ingredients

    Pour your wet mixture into the dry ingredients. Using a spoon or spatula, gently stir until everything is just combined. It’s essential to avoid overmixing here! Overmixing can lead to tough muffins, and nobody wants that. Just a few folds will do to keep them fluffy and tender. Trust me, your taste buds will thank you!

    Step 5: Add Bacon

    Now comes the fun part! Fold in the crumbled bacon with cheerful abandon. The savory, crispy bits add a delightful contrast to the sweet muffin base. It’s like a warm hug from breakfast itself! Just imagine the intoxicating aroma filling your kitchen. You’ll be counting down the minutes until tasting time.

    Step 6: Portion the Batter

    Use a spoon or ice cream scoop to portion the batter into your prepared muffin cups. Aim to fill each cup about two-thirds full; this ensures they have room to rise without spilling over. It’s a bit of a balancing act, but it’s all part of the fun. Plus, you want each muffin to be a perfect little bundle of joy!

    Step 7: Bake

    Place the muffin tin in your preheated oven and bake for 15-18 minutes. Keep an eye on them! You’ll know they’re ready when they turn golden brown, and a toothpick inserted into the center comes out clean. Those little clouds of goodness should bounce back when gently touched. Perfectly baked muffins are a sight to behold!

    Step 8: Cooling and Serving

    Once baked, remove the muffins from the tin and let them cool on a wire rack for a few minutes. This is the perfect time to get your maple syrup ready! Serve them warm with a generous drizzle or dip of syrup. This step elevates the entire experience, turning these cupcakes into a true celebration of flavors.

    Tips for Success

    • Choose fresh ingredients: Always check your baking powder and flour for freshness. It makes a difference!
    • Don’t overmix: Just mix until combined to ensure fluffy muffins.
    • Bacon magic: Let your crumbled bacon cool slightly before adding it to the batter for better distribution.
    • Perfect baking time: Keep an eye on the muffins; every oven is different.
    • Enjoy warm: These are best served warm, with syrup or toppings!

    Equipment Needed

    • Muffin tin: A standard 12-cup muffin tin is perfect. You can also use silicone muffin molds for easy removal.
    • Mixing bowls: You’ll need a large bowl for dry ingredients and a medium bowl for wet ingredients. Any bowls will do!
    • Whisk: A whisk is ideal for mixing; a fork can work in a pinch.
    • Spoon or spatula: Use these for gentle stirring and portioning the batter.
    • Cooling rack: A wire rack helps cool the muffins evenly. If you don’t have one, a plate will suffice!

    Variations on Maple Bacon Pancake Muffins

    • Cheddar and Jalapeño: Add shredded cheddar cheese and diced jalapeños for a spicy twist. The cheese melts beautifully, adding richness.
    • Blueberry Bliss: Swap out the bacon for fresh or frozen blueberries for a fruity, sweet version. Blueberries provide a burst of flavor with every bite.
    • Banana Nut: Incorporate mashed bananas and chopped nuts, like walnuts or pecans, for a hearty breakfast muffin that’s perfect for on-the-go.
    • Vegan Option: Use plant-based substitutes like almond milk, flax eggs, and coconut oil to create delicious vegan Maple Bacon Pancake Muffins.
    • Maple Pecan: Replace the bacon with toasted pecans for a nutty flavor. A sprinkle of cinnamon can add even more warmth to this version.

    Serving Suggestions

    • Fresh fruit: Serve with a side of sliced strawberries or blueberries for a refreshing contrast.
    • Yogurt: Add a dollop of Greek yogurt on the side for creaminess and extra protein.
    • Drinks: Pair with a hot cup of coffee or a chilled glass of fresh orange juice.
    • Presentation: Stack the muffins on a cute plate, dust with powdered sugar, or drizzle with extra maple syrup for an eye-catching display.

    FAQs about Maple Bacon Pancake Muffins

    Can I make Maple Bacon Pancake Muffins ahead of time? Absolutely! You can prepare the batter a day in advance, storing it in the fridge. Just give it a gentle stir before baking. You can also bake them ahead of time and reheat in the microwave or oven when ready to serve.

    How can I store the muffins? Keep your Maple Bacon Pancake Muffins in an airtight container at room temperature for up to three days. For longer storage, you can freeze them. Just pop them in a freezer bag and thaw as needed.

    Can I use turkey bacon instead of regular bacon? Definitely! Turkey bacon works wonderfully in this recipe. It offers a healthier alternative with a similar savory flavor. Feel free to mix and match as per your dietary preferences.

    What’s the best way to reheat leftover muffins? To reheat, use the microwave for about 10-15 seconds or wrap them in foil and warm them in a low oven for a few minutes. You want them warm and cozy again, ready to dive back into that maple goodness!

    Are these muffins suitable for a gluten-free diet? Yes! Just swap the all-purpose flour with gluten-free flour. Make sure to check your baking powder and other ingredients for gluten-free certifications. It’s a delightful treat for everyone!

    Final Thoughts

    These Maple Bacon Pancake Muffins are more than just a recipe; they’re a joyous celebration of flavor that brings warmth to any morning. The delightful combination of sweet maple syrup and savory bacon creates a unique treat that’s perfect for busy families.

    I can’t tell you how many smiles I’ve seen when serving these at brunch or on a hectic weekday.

    They offer convenience without compromising flavor, making breakfast feel like a special occasion.

    Give yourself the gift of indulgence with these muffins, and I promise they’ll become a beloved staple in your kitchen!


    Print

    clock clock iconcutlery cutlery iconflag flag iconfolder folder iconinstagram instagram iconpinterest pinterest iconfacebook facebook iconprint print iconsquares squares iconheart heart iconheart solid heart solid icon

    Description

    Maple Bacon Pancake Muffins are a deliciously unique treat that combines the flavors of pancakes and bacon in a convenient muffin form.


    • 1 ½ cups all-purpose flour
    • 2 tablespoons granulated sugar
    • 2 teaspoons baking powder
    • ½ teaspoon baking soda
    • ¼ teaspoon salt
    • 1 large egg
    • 1 cup buttermilk
    • ¼ cup maple syrup, plus more for serving
    • 2 tablespoons melted unsalted butter
    • ½ cup cooked and crumbled bacon

    1. Preheat your oven to 375°F (190°C). Grease a 12-cup muffin tin or line with paper liners.
    2. In a large bowl, whisk together the flour, sugar, baking powder, baking soda, and salt.
    3. In a separate medium bowl, whisk the egg, buttermilk, maple syrup, and melted butter until well combined.
    4. Pour the wet ingredients into the dry ingredients. Stir gently with a spoon or spatula until just combined. Do not overmix; a few lumps are fine.
    5. Fold in the cooked and crumbled bacon.
    6. Divide the batter evenly among the 12 muffin cups, filling each about two-thirds full.
    7. Bake for 15-18 minutes, or until golden brown and a toothpick inserted into the center of a muffin comes out clean.
    8. Remove the muffins from the tin and let them cool on a wire rack for a few minutes.
    9. Serve warm with extra maple syrup for dipping or drizzling.

    Notes

    • Ensure the bacon is cooked and crumbled before adding it to the batter.
    • For added sweetness, drizzle extra maple syrup over the muffins before serving.
    • These muffins can be stored in an airtight container for up to 3 days.
    • Prep Time: 15 minutes
    • Cook Time: 18 minutes
    • Category: Breakfast
    • Method: Baking
    • Cuisine: American

    Nutrition

    • Serving Size: 1 muffin
    • Calories: 180
    • Sugar: 7g
    • Sodium: 320mg
    • Fat: 8g
    • Saturated Fat: 3g
    • Unsaturated Fat: 4g
    • Trans Fat: 0g
    • Carbohydrates: 22g
    • Fiber: 1g
    • Protein: 4g
    • Cholesterol: 30mg

    Sharing is caring!

  • Jalapeño Curry Turkey Burgers

    Jalapeño Curry Turkey Burgers


    Introduction to Jalapeño Curry Turkey Burgers

    Welcome to the world of flavors with my Jalapeño Curry Turkey Burgers! If you’re like me, busy days can leave little time for cooking. These scrumptious burgers are not only easy to whip up but also pack a punch of excitement that’ll impress your family without making you sweat in the kitchen!

    Imagine biting into a juicy turkey patty infused with spicy jalapeño and aromatic curry. It’s the perfect dish to elevate your weeknight dinner or to wow friends at your next gathering. Trust me, once you try these, you won’t want to go back to plain burgers again!

    Why You’ll Love This Jalapeño Curry Turkey Burgers

    These Jalapeño Curry Turkey Burgers are a revelation for busy moms and professionals like us. They come together swiftly, with a prep time of just 20 minutes, making them a perfect weeknight meal. Plus, the delightful fusion of flavors means your taste buds will dance with joy, while the healthy ingredients keep your family nourished. Ultimately, it’s a unique meal that everyone will rave about, making dinner both fun and satisfying!

    Ingredients for Jalapeño Curry Turkey Burgers

    Gathering the right ingredients is half the fun! For these Jalapeño Curry Turkey Burgers, you’ll need a vibrant selection that blends deliciously together.

    • Ground turkey: I prefer 94% lean for a juicy burger without too much grease. It’s a lighter option packed with protein.
    • Jalapeño: This fresh pepper adds a spicy kick. If you’re sensitive to heat, consider using less or deseeding it.
    • Cilantro: Bright and fresh, chopped cilantro brings a burst of flavor that truly enhances the dish.
    • Coconut sugar: A touch of sweetness to balance the spices. You can swap it for brown sugar if that’s what you have.
    • Spices: Ground turmeric, cumin, and yellow curry powder are the flavor powerhouse. These spices create a warm, aromatic hug for your taste buds.
    • Salt & pepper: These everyday seasonings are essential for bringing out the flavors of the ingredients.
    • Tahini: Used for the creamy curry tahini sauce, it’s a fantastic source of healthy fats. If you can’t find tahini, peanut butter can work, though it will change the flavor twist.
    • Fresh lemon juice: This brightens the tahini sauce and adds zest. You could also use lime juice in a pinch.
    • Garlic: Minced finely, it adds a pungent depth to the sauce that’s simply irresistible.
    • Maple syrup: Just a hint goes a long way in rounding out the flavors of the tahini sauce.
    • Fresh ginger: Grated ginger imparts a warming spice and healing qualities to the sauce, complementing the curry beautifully.
    • Cayenne pepper: For a bit more heat, add this to the sauce. Feel free to adjust based on your heat preference.
    • Shredded carrots & cabbage: The slaw adds crunch and freshness, perfectly balancing the rich burgers. Choose red or green cabbage for some color.
    • Green onions: Sliced and sprinkled in adds a mild onion flavor that’s delightful.
    • Apple cider vinegar: A tangy component for the slaw that cuts through the richness.
    • Toasted sesame oil: This adds nutty depth to the slaw, enhancing its flavor profile.
    • Maple syrup (for slaw): A bit of sweetness in the slaw ties it all together beautifully.
    • Burger buns: Use your favorite type; gluten-free works well if necessary.

    For exact measurements, check out the end of the article where I’ve got everything ready for you to print out!

    How to Make Jalapeño Curry Turkey Burgers

    Creating these Jalapeño Curry Turkey Burgers is a rewarding process that takes only about 35-40 minutes from start to finish. Let’s dive into the steps and unleash those flavors!

    Combine the Ingredients

    In a large mixing bowl, combine the ground turkey with the diced jalapeño, chopped cilantro, coconut sugar, turmeric, cumin, curry powder, salt, and pepper. I love using my hands for this. It feels more personal! Mix until everything is well incorporated. The blend of flavors will already start to excite your senses.

    Form the Patties

    Once the mixture is combined, shape it into four equally sized patties. I usually press them slightly in the middle to ensure they cook evenly. It helps them keep their shape on the grill or skillet!

    Cook the Patties

    Heat up your grill or skillet over medium-high heat. If you’re using a skillet, drizzle a dash of olive oil to prevent sticking. Cook the patties for about 4-5 minutes on each side, or until they reach an internal temperature of 165°F. The aroma will fill your kitchen, trust me!

    Prepare the Slaw

    In a separate bowl, toss together the shredded carrots, cabbage, sliced green onions, apple cider vinegar, toasted sesame oil, and maple syrup. Season with salt and pepper to your liking. This slaw adds a nice crunch and freshness that balances the juicy, spiced burgers beautifully.

    Make the Curry Tahini Sauce

    In a mixing bowl, whisk together the tahini, fresh lemon juice, minced garlic, maple syrup, curry powder, grated ginger, turmeric, cayenne, and salt and pepper. The consistency should be smooth and creamy. This sauce brings a delightful richness to the dish!

    Assemble the Burgers

    Now it’s time to bring everything together! Take your burger buns and start layering. Place a cooked turkey patty on the bun, then top it with a generous spoonful of slaw and drizzle on that luscious curry tahini sauce. You can also go for lettuce wraps if you want a low-carb option. Enjoy every bite of these vibrant flavors!

    Tips for Success

    • For an extra kick, experiment with different levels of jalapeño based on your family’s heat tolerance.
    • If you have leftovers, try adding them to salads or wraps for a fun twist the next day.
    • Always check the internal temperature of the patties with a meat thermometer for perfect cooking.
    • Make the slaw and sauce ahead of time to save more time on busy nights.
    • Don’t skip the apple cider vinegar in the slaw; it brightens everything wonderfully!

    Equipment Needed

    • Mixing Bowl: A large bowl for combining ingredients. A smaller bowl works too for the sauce!
    • Grill or Skillet: Use an outdoor grill for a smoky flavor or a non-stick skillet for easy cooking.
    • Spatula: Handy for flipping the patties gently as they cook.
    • Meat Thermometer: Essential for ensuring your patties reach the perfect doneness.
    • Whisk: For smooth mixing of the curry tahini sauce.

    Variations

    • Vegetarian Option: Substitute the ground turkey with a plant-based meat alternative like lentils or chickpeas for a delicious vegetarian burger.
    • Spicy Twist: Add diced serrano peppers or a splash of hot sauce for those who crave extra heat!
    • Herb Exchange: Swap cilantro with parsley or basil for a unique flavor profile that still sings!
    • Asian-Inspired: Incorporate soy sauce and sesame seeds into the patties for an Asian twist and serve with an Asian slaw.
    • Whole Grain Buns: Use whole grain or sprouted buns to boost the fiber content and nutritional value of your meal.

    Serving Suggestions

    • Sides: Pair your burgers with sweet potato fries or a simple mixed greens salad for a delightful crunch.
    • Drinks: A crisp ginger ale or refreshing iced tea complements the spiced flavors beautifully.
    • Presentation: Serve the burgers with extra slaw on the side and garnish with lime wedges for a vibrant touch!

    FAQs about Jalapeño Curry Turkey Burgers

    Let’s tackle some common questions you might have about my Jalapeño Curry Turkey Burgers. I know cooking new recipes can come with some uncertainties, so I’m here to help!

    Can I use ground chicken instead of turkey?

    Absolutely! Ground chicken can be a great alternative. It will provide a similar texture and flavor, and it’s just as versatile. Just keep an eye on cooking times, as it may vary slightly.

    How can I make these burgers less spicy?

    If you’re looking to tone down the heat, simply reduce the jalapeño or remove the seeds and membranes. You can also use a milder pepper or skip the cayenne pepper in the tahini sauce.

    What should I do with leftover patties?

    Leftover patties store wonderfully! Simply refrigerate them and reheat on the grill or stovetop. They’re also fantastic on salads or in wraps, making a quick lunch full of flavor!

    Can I freeze the turkey burger patties?

    Yes! You can freeze the uncooked patties. Just place them in a single layer on a baking sheet until firm, then wrap them in foil or plastic wrap. Thaw in the refrigerator before cooking.

    What can I substitute for tahini in the sauce?

    If you’re in a pinch, peanut butter can be a reasonable substitute, though it will add a different flavor. Additionally, Greek yogurt mixed with a bit of olive oil can provide a creamy alternative if you prefer.

    Final Thoughts

    Creating these Jalapeño Curry Turkey Burgers has been nothing short of a culinary adventure for me. Each bite offers a symphony of flavors that dances on your palate, bringing joy to both the cook and the eater. These burgers are more than just a meal; they embody the love and creativity we pour into our kitchens. Whether it’s a busy weeknight or a backyard gathering, this recipe is your ticket to deliciousness. So roll up your sleeves, gather your family, and dive into this delightful culinary experience—you won’t regret it!


    Print

    clock clock iconcutlery cutlery iconflag flag iconfolder folder iconinstagram instagram iconpinterest pinterest iconfacebook facebook iconprint print iconsquares squares iconheart heart iconheart solid heart solid icon

    Description

    Jalapeño Curry Turkey Burgers are a delicious twist on traditional turkey burgers, infused with spicy jalapeño and aromatic curry flavors, served with a refreshing slaw and creamy curry tahini sauce.


    • 1 lb ground turkey (preferably 94% lean)
    • 1 diced jalapeño
    • ¼ cup chopped cilantro
    • 1 tablespoon coconut sugar
    • 1 teaspoon ground turmeric
    • 1 teaspoon ground cumin
    • 1 tablespoon yellow curry powder
    • Salt & pepper to taste
    • ½ cup tahini (for Curry Tahini Sauce)
    • 2 tablespoons fresh lemon juice
    • 2 garlic cloves, minced
    • 1 tablespoon pure maple syrup
    • 1 tablespoon yellow curry powder (for Curry Tahini Sauce)
    • 1 teaspoon fresh grated ginger
    • ½ teaspoon turmeric (for Curry Tahini Sauce)
    • ¼ teaspoon cayenne pepper
    • Salt & pepper to taste (for Curry Tahini Sauce)
    • 1 cup shredded carrots (for Slaw)
    • 1 cup shredded cabbage (red or green)
    • 2 green onions, sliced
    • 1 tablespoon apple cider vinegar
    • 1 tablespoon toasted sesame oil
    • 1 tablespoon maple syrup (for Slaw)
    • Salt & pepper to taste (for Slaw)
    • Burger buns (gluten-free if needed)

    1. In a large bowl, combine ground turkey with diced jalapeño, cilantro, coconut sugar, turmeric, cumin, curry powder, salt, and pepper. Mix until well combined. Form the mixture into 4 patties.
    2. Grill the patties over medium-high heat for 4-5 minutes per side, or cook in a skillet with a little oil until the internal temperature reaches 165°F. Set aside.
    3. In a separate bowl, combine shredded carrots, cabbage, green onions, apple cider vinegar, sesame oil, and maple syrup. Season with salt and pepper, and toss to combine.
    4. Whisk together tahini, lemon juice, garlic, maple syrup, curry powder, ginger, turmeric, cayenne, and salt and pepper until smooth.
    5. Serve the turkey patties on buns (or lettuce wraps for gluten-free), topping them with slaw and curry tahini sauce. Enjoy!

    Notes

    • Adjust the level of spiciness by adding more or less jalapeño.
    • For a vegetarian option, substitute turkey with a plant-based meat alternative.
    • Leftover patties can be stored in the fridge and reheated on the grill or stovetop.
    • Prep Time: 20 minutes
    • Cook Time: 10-15 minutes
    • Category: Main Course
    • Method: Grilling or Skillet Cooking
    • Cuisine: Fusion

    Nutrition

    • Serving Size: 1 burger with toppings
    • Calories: 350
    • Sugar: 6g
    • Sodium: 450mg
    • Fat: 20g
    • Saturated Fat: 3g
    • Unsaturated Fat: 15g
    • Trans Fat: 0g
    • Carbohydrates: 24g
    • Fiber: 4g
    • Protein: 24g
    • Cholesterol: 90mg

    Sharing is caring!