Author: IHAAL Team

  • Cinnamon Apple Muffins

    Cinnamon Apple Muffins


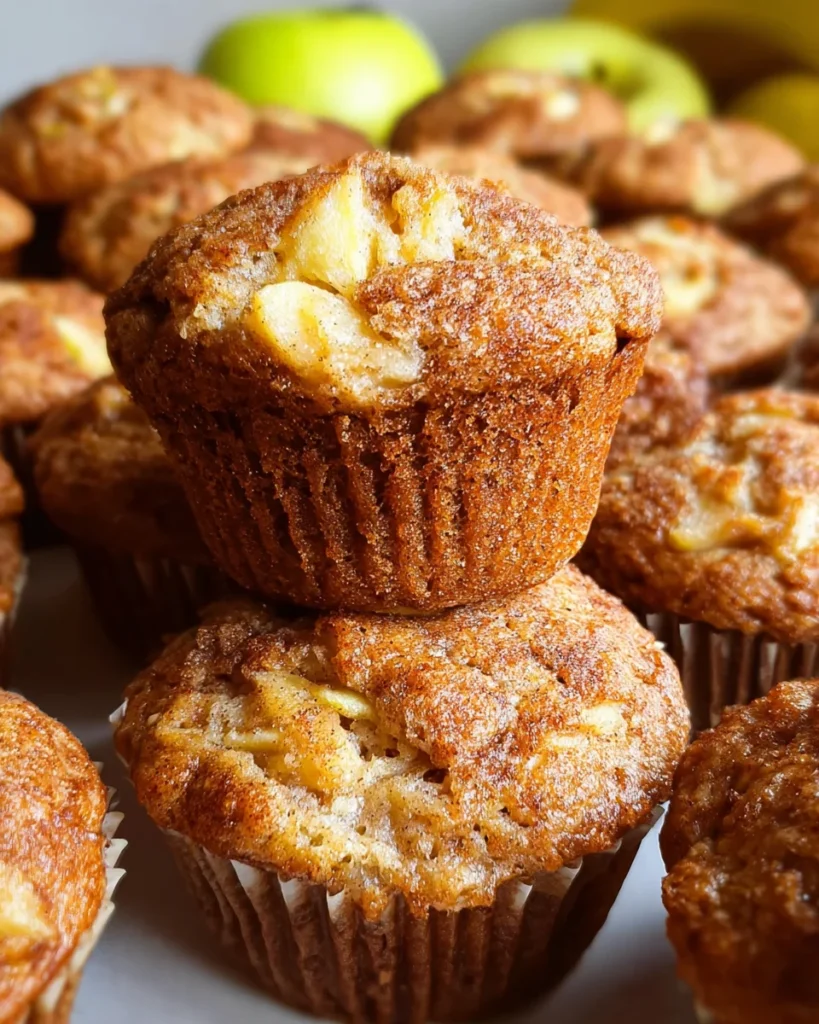
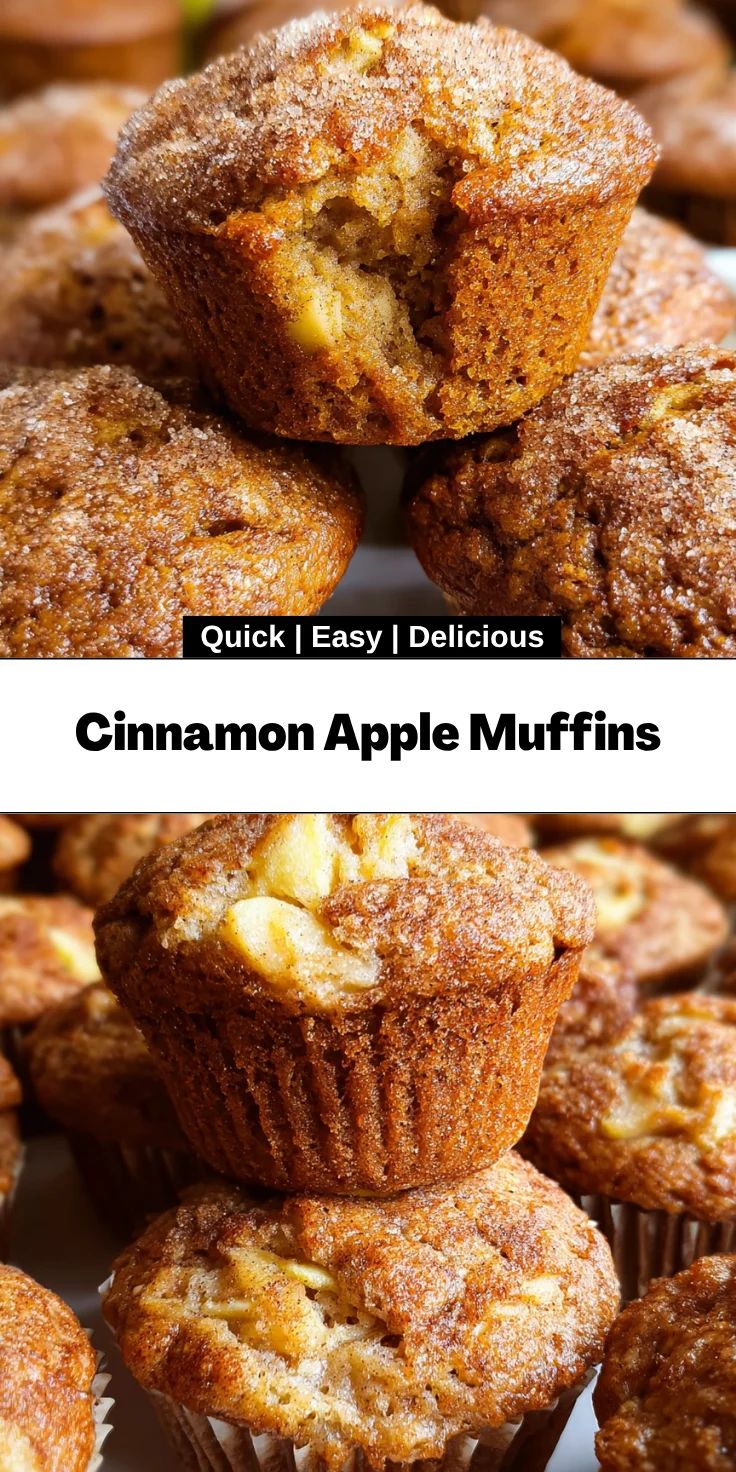
    Introduction to Cinnamon Apple Muffins

    I know those precious early morning minutes as a busy mom. That’s why I treasure my recipe for Cinnamon Apple Muffins; not just any muffins, but moist and very flavored ones, concocted from wholesome ingredients I can feel good about serving to my family. That time you require something convenient to get the kids off to school or grab a quick snack on-the-go and get you through the rest of your day, these muffins really come up so handy and satisfying, not to mention, the scents comfort your senses. Isn’t it time for some tasty therapy?

    Why You’ll Love This Cinnamon Apple Muffins

    These Cinnamon Apple Muffins are an absolute game changer for busy lives! They come together quickly, making them perfect for a delightful breakfast or snack on the go. The combination of Greek yogurt and whole wheat flour lends an irresistible moistness and a wholesome flavor that will satisfy even the pickiest eaters. Plus, the hint of cinnamon reminds me of cozy autumn days, making each bite feel like a warm embrace!

    Ingredients for Cinnamon Apple Muffins

    Gathering the right ingredients for my Cinnamon Apple Muffins always gets me excited. Each component adds a unique touch, making these muffins a wholesome delight.

    • Plain Greek yogurt: This creamy ingredient adds moisture and protein, perfect for a satisfying breakfast.
    • Unsweetened applesauce: It acts as a natural sweetener and keeps the muffins wonderfully moist without excess fat.
    • Large eggs: They provide structure to the muffins and help them rise while adding richness.
    • Milk or buttermilk: Either option enhances the muffin’s tenderness; buttermilk adds a bit of tang.
    • Vanilla extract: It infuses a lovely warmth and sweetness, enhancing all the other flavors.
    • Melted butter: A little bit adds richness and helps achieve that golden-brown color.
    • Brown sugar: This brings a cozy caramel flavor that perfectly complements the apples and cinnamon.
    • Baking powder and baking soda: These two leavening agents work together to make the muffins rise beautifully.
    • Ground cinnamon: The star of the show! It fills the muffins with a warm, aromatic kick.
    • Salt: Just a pinch elevates the flavors and balances the sweetness.
    • Whole wheat flour: A nutritious base that adds fiber and a nutty flavor to the muffins.
    • Granulated sugar: Just a sprinkle on top before baking gives a delightful sweetness and slight crunch.
    • Granny Smith or baking apples: Either option brings a lovely tartness, providing balance to the sweet elements.

    For exact quantities and a printable version, check the end of the article. I love having these ingredients handy for quick baking sessions!

    How to Make Cinnamon Apple Muffins

    Making these Cinnamon Apple Muffins is like crafting a warm hug for your taste buds. With simple steps, you’ll soon have a batch of delicious muffins that your family will adore. Here’s how I do it, step by tasty step!

    Preheat the Oven and Prepare Baking Tray

    First things first: preheat your oven to 175°C (350°F). This ensures your muffins bake evenly.

    While the oven warms, prepare your muffin tin. You can lightly grease it or, for easier cleanup, line each cup with paper liners. This way, the muffins pop out perfectly baked!

    Combine the Wet Ingredients

    Now, let’s whip up the wet ingredients! In a large mixing bowl, combine the Greek yogurt, applesauce, eggs, milk or buttermilk, vanilla extract, and brown sugar.

    Grab a whisk and mix until everything is smooth and creamy. The aroma will start to tickle your senses, getting you excited for what’s to come!

    Incorporate the Dry Ingredients

    Next, gently fold the dry ingredients into your wet mixture. Sprinkle in the baking powder, baking soda, ground cinnamon, and salt, whisking until combined.

    Don’t overwork it—just mix until you can’t see any dry flour. We want those muffins moist, not tough!

    Fold in Flour and Apples

    This is where the magic happens. Take your whole wheat flour and chopped apples, adding them to the batter.

    Using a spatula, fold everything together gently until the flour is moistened. It’s like tucking in a cozy blanket of goodness around those apple chunks!

    Fill the Muffin Tin

    Time to fill those muffin cups! Scoop or pour your batter into each greased or lined cup, filling them to the brim. Don’t be shy—these muffins love to rise!

    Bake and Cool the Muffins

    Pop the muffin tin into the preheated oven and let them bake for 20 to 25 minutes.

    You’ll know they’re done when a toothpick inserted into the center comes out clean or with just a few moist crumbs attached. Once baked, let them cool in the pan for about 5 to 10 minutes before transferring to a wire rack.

    Let those little beauties cool completely and then enjoy the sweet reward of your hard work!

    Tips for Success

    • Always measure your ingredients accurately for the best results.
    • Use room temperature eggs and milk for a smoother batter.
    • Don’t skip the toothpick test; it guarantees perfect muffins!
    • Allow muffins to cool completely to enhance their texture and flavor.
    • Feel free to experiment with different apple varieties for unique tastes.

    Equipment Needed

    • Muffin tin: A standard one works, but silicone tins are great for easy removal.
    • Mixing bowl: A large bowl is best; a stand mixer can save time, too.
    • Whisk: Essential for mixing wet ingredients; a fork can work in a pinch.
    • Measuring cups and spoons: Accurate measurements are crucial for yumminess!
    • Rubber spatula: Perfect for folding and scraping down the sides of the bowl.

    Variations

    • Nutty Delight: Add a half cup of chopped walnuts or pecans for a delightful crunch in each bite.
    • Spiced Up: Boost the flavor by including a pinch of nutmeg or ginger along with the cinnamon.
    • Healthier Option: Substitute half of the brown sugar with honey or maple syrup for a more natural sweetener.
    • Vegan Twist: Replace the eggs with flaxseed meal mixed with water and use plant-based yogurt and milk.
    • Fruit Fusion: Experiment with different fruits like blueberries or cranberries for a fruity twist!

    Serving Suggestions

    • Pair your Cinnamon Apple Muffins with a hot cup of coffee or tea for a cozy breakfast.
    • For an afternoon snack, enjoy them with a smear of almond butter or cream cheese.
    • Arrange muffins on a beautiful platter, dusted with powdered sugar for an inviting presentation.
    • Add sliced fresh apples on the side for a refreshing crunch.

    FAQs about Cinnamon Apple Muffins

    Can I substitute whole wheat flour with all-purpose flour?

    Yes! All-purpose flour can be used instead of whole wheat flour. Just be aware that the muffins may be slightly less dense and won’t have that nutty flavor.

    How can I make these muffins gluten-free?

    To make Cinnamon Apple Muffins gluten-free, you can substitute the whole wheat flour with a gluten-free all-purpose blend. Just ensure it has xanthan gum included for proper texture.

    Can I use different types of apples?

    Absolutely! While Granny Smith are tart and flavorful, feel free to experiment with Fuji, Honeycrisp, or even a mix of apples for a sweet surprise!

    How do I store leftover muffins?

    Store your muffins in an airtight container at room temperature for up to three days. For longer storage, they freeze beautifully for up to three months!

    What can I add to make these muffins even more special?

    Try adding a handful of raisins or chocolate chips for a delicious twist! Just remember to adjust the sweetness if you add extra sweet ingredients. Enjoy your baking adventure!

    Final Thoughts

    As you sink your teeth into these Cinnamon Apple Muffins, I hope you feel the love and warmth that goes into every bite. This recipe isn’t just about muffins; it’s about creating moments and memories with your loved ones. Whether shared during a rushed breakfast or a leisurely weekend brunch, these muffins bring everybody together. Plus, they’re a delightful way to sneak in some wholesome ingredients without anyone noticing! So, grab your mixing bowl, unleash your inner baker, and spread the joy of homemade goodness. Happy baking!


    Print

    clock clock iconcutlery cutlery iconflag flag iconfolder folder iconinstagram instagram iconpinterest pinterest iconfacebook facebook iconprint print iconsquares squares iconheart heart iconheart solid heart solid icon

    Description

    Delicious and moist Cinnamon Apple Muffins made with Greek yogurt and whole wheat flour, perfect for breakfast or a snack.


    • 250 grams 0% plain Greek yogurt
    • 115 grams unsweetened applesauce
    • 2 large eggs
    • 60 milliliters milk or buttermilk
    • 2 teaspoons vanilla extract
    • 2 tablespoons melted butter
    • 210 grams brown sugar
    • 2 teaspoons baking powder
    • 1 teaspoon baking soda
    • 2 teaspoons ground cinnamon
    • ½ teaspoon salt
    • 325 grams whole wheat flour
    • 3 tablespoons granulated sugar
    • 315 grams Granny Smith or baking apples

    1. Set the oven temperature to 175°C.
    2. In a large mixing bowl, whisk together Greek yogurt, applesauce, eggs, milk, vanilla extract, and brown sugar until the mixture is smooth and homogeneous.
    3. Incorporate baking powder, baking soda, cinnamon, and salt into the wet mixture, whisking until fully combined.
    4. Gently fold in whole wheat flour and chopped apples with a spatula just until all flour is moistened; avoid overmixing.
    5. Lightly grease a non-stick muffin tin or line with paper liners, then fill each cup to the brim with batter.
    6. Place the muffin tin in the oven and bake for 20 to 25 minutes, until a toothpick inserted into the center emerges clean or with moist crumbs.
    7. Allow muffins to cool in the pan for 5 to 10 minutes before transferring to a wire rack to cool completely.

    Notes

    • For extra moisture, use full-fat Greek yogurt instead of 0% if preferred.
    • These muffins can be stored in an airtight container for up to 3 days.
    • They freeze well for up to 3 months; just reheat in the microwave before serving.
    • Prep Time: 15 minutes
    • Cook Time: 25 minutes
    • Category: Breakfast
    • Method: Baking
    • Cuisine: American

    Nutrition

    • Serving Size: 1 muffin
    • Calories: 175
    • Sugar: 10g
    • Sodium: 150mg
    • Fat: 5g
    • Saturated Fat: 2g
    • Unsaturated Fat: 3g
    • Trans Fat: 0g
    • Carbohydrates: 30g
    • Fiber: 3g
    • Protein: 4g
    • Cholesterol: 40mg

    Sharing is caring!

  • Steakhouse Potato Salad Loaded

    Steakhouse Potato Salad Loaded


    Introduction to Steakhouse Potato Salad Loaded

    Finding the perfect side as a busy mom always seems overwhelming. But, friends…Steakhouse Potato Salad Loaded. Changes everything! This creamy delight is quick to whip up, and packs plenty of those kinds of flavors your family will cheer for more of. Imagined crunchy bacon meeting up with sharp cheddar, and fresh herbs, in soft potatoes. Yeah. Your mouth will love you for this. Hosting a get-together or just needing something reliable for dinner – life and this potato salad just became that much easier and better.

    Why You’ll Love This Steakhouse Potato Salad Loaded

    This Steakhouse Potato Salad Loaded is the ultimate combo of ease and flavor. It’s a quick recipe that doesn’t skimp on satisfaction. Imagine a creamy, flavorful dish that pairs perfectly with just about anything—or stands alone as a crowd-pleaser! Plus, it’s incredibly easy to prepare, making it ideal for busy days or last-minute gatherings. Trust me, once you try it, you’ll want to keep it on repeat!

    Ingredients for Steakhouse Potato Salad Loaded

    Before diving into this delightful creation, let’s gather the essentials you’ll need for your Steakhouse Potato Salad Loaded. Each ingredient contributes to the glorious symphony of flavors, and here’s what you’ll require:

    • Red potatoes: These small beauties hold their shape beautifully while adding creaminess.
    • Mayonnaise: The heart of the dressing! It brings a rich creaminess that binds everything together.
    • Sour cream: Adds a tangy twist, balancing the richness of the mayonnaise.
    • Apple cider vinegar: Just a splash elevates the flavors, adding a little zest.
    • Dijon mustard: This secret ingredient packs a punch of flavor that enhances the overall taste.
    • Red onion: Finely chopped, they bring a fresh crunch and mild sweetness.
    • Crispy bacon: Because who can resist bacon? It delivers a satisfying crunch and a smoky richness.
    • Shredded cheddar cheese: Choose your favorite variety—mild, medium, or sharp—for that cheesy goodness.
    • Fresh parsley: A sprinkle of green brightens the dish and adds freshness.
    • Dill pickles: Their tangy flavor adds depth! You can always swap them for relish if you prefer.
    • Salt and black pepper: Essential for seasoning; adjust to your taste for the perfect balance.
    • Chives or green onions: Optional, but they add a lovely pop of color and flavor as a garnish.

    Remember, the ingredient quantities are specified at the end of the article for your convenience if you’d like to print them out!

    How to Make Steakhouse Potato Salad Loaded

    Now that you have all your ingredients ready, it’s time to bring your Steakhouse Potato Salad Loaded to life! Follow these simple steps, and you’ll have a creamy, flavorful dish that will impress everyone.

    Preparing the Potatoes

    Boil the Potatoes

    Start by washing and cubing your red potatoes. Place them in a large pot and fill it with cold water until the potatoes are covered. Bring the pot to a boil over medium-high heat. Once it’s bubbling, lower the heat slightly and allow them to cook between 10 to 15 minutes. You want them fork-tender but not mushy. Test one by piercing it gently with a fork. If it glides through easily, they’re ready. Drain the potatoes in a colander and set them aside to cool. You can decide to leave the skin on for extra flavor and texture, or peel them if you prefer.

    Making the Dressing

    Combine Ingredients

    In a large mixing bowl, add your mayonnaise, sour cream, dijon mustard, and apple cider vinegar. Use a whisk or a spoon to mix them together until you achieve a smooth and creamy texture. This dressing is the heart of your salad, so make sure it’s well blended. A little taste test here doesn’t hurt; adjust any elements to suit your palate. Perhaps a tad more vinegar for zing or an extra dollop of mayo for creaminess!

    Mixing It All Together

    Combine Potatoes and Bacon

    Now it’s time to unite all the delicious components! Add the cooled potatoes into the dressing mixture along with the chopped red onion, crumbled bacon, shredded cheddar cheese, fresh parsley, and dill pickles. With a gentle hand, stir everything together until all the potatoes are coated in that luscious dressing. Be careful not to mash the potatoes; we want them intact and proud!

    Chill and Enhance Flavors

    Refrigerate the Salad

    Cover your masterpiece with plastic wrap or a lid and pop it in the fridge. Chill for at least an hour. This is crucial because allowing the flavors to meld creates a more delicious salad. Just a tip—don’t let it sit for more than four hours, as the potatoes might absorb too much dressing. If it seems dry before serving, simply add a splash of extra mayonnaise to moisten up that creamy goodness!

    Tips for Success

    • Always start with cold water when boiling the potatoes to ensure even cooking.
    • Chill your Steakhouse Potato Salad Loaded longer for enhanced flavors.
    • Taste the dressing before adding the potatoes; adjust seasoning to your liking.
    • Use leftover baked potatoes to save time in the kitchen.
    • Experiment with herbs like dill or basil for a unique twist!

    Equipment Needed

    • Large pot: A sturdy one for boiling potatoes. An Instant Pot works too!
    • Colander: For draining the potatoes. A slotted spoon can be a quick substitute.
    • Mixing bowl: Use any large bowl for combining ingredients. A deep dish works in a pinch.
    • Whisk or spoon: For mixing the dressing; a fork would do just fine!

    Variations

    • Loaded with Veggies: Add diced bell peppers, celery, or corn for a fresh crunch.
    • Spicy Twist: Incorporate jalapeños or a dash of hot sauce for a kick.
    • Vegan Version: Substitute mayo and sour cream with vegan alternatives. Swap bacon for crispy chickpeas.
    • Herb-Infused: Experiment with fresh dill or chive additions for a delightful herbal flavor.
    • Smoky Flavor: Use smoked paprika in the dressing for a unique taste profile.

    Serving Suggestions for Steakhouse Potato Salad Loaded

    • Pair it with grilled steak or burgers for a classic summer cookout feel.
    • Serve alongside roasted chicken or fish for a balanced meal.
    • Complement with a crisp green salad or coleslaw for extra crunch.
    • For drinks, a chilled lemonade or iced tea enhances the flavors perfectly.
    • Present in a colorful bowl garnished with fresh chives for a pop of color!

    FAQs about Steakhouse Potato Salad Loaded

    As you embark on this culinary adventure with your Steakhouse Potato Salad Loaded, you might have a few questions in mind. No worries, I’ve got you covered! Let’s dive into some common queries to ensure you make the most out of this creamy delight.

    Can I make this potato salad ahead of time?
    Absolutely! You can prepare the salad a day in advance. Just be sure to store it in the refrigerator. However, I recommend adding a little more mayonnaise just before serving if it seems dry.

    How long can I store leftover potato salad?
    Your Steakhouse Potato Salad Loaded can be kept in the fridge for up to four days. Just make sure it’s stored in an airtight container to keep it fresh!

    Is this salad gluten-free?
    Yes! This salad is naturally gluten-free, making it a perfect side dish for various dietary preferences.

    Can I substitute the bacon for something else?
    Definitely! If you’re looking for a lighter option, you can use turkey bacon, or skip it entirely for a vegetarian version. Some people even love adding smoked tofu for a kick!

    What’s the best way to serve this salad?
    Serve it chilled for the best flavor. You can also let it warm up a bit—just don’t leave it out for too long. Pair it with your favorite grilled meats, and you’ve got a winning combo!

    Final Thoughts

    Creating this Steakhouse Potato Salad Loaded has been a delightful journey! With its creamy texture and bold flavors, it not only serves as a fantastic side dish but also brings everyone to the table. I cherish the moments spent with family and friends, sharing stories and laughter over a bowl of this satisfying salad. Whether it’s a backyard BBQ or a cozy family dinner, this recipe always feels like home. So, grab those potatoes and let the culinary fun begin. Your loved ones will thank you for making their meal unforgettable!


    Print

    clock clock iconcutlery cutlery iconflag flag iconfolder folder iconinstagram instagram iconpinterest pinterest iconfacebook facebook iconprint print iconsquares squares iconheart heart iconheart solid heart solid icon

    Description

    A creamy and flavorful potato salad loaded with ingredients like bacon, cheese, and fresh herbs, perfect for any gathering.


    • 2 pounds red potatoes (washed and cubed)
    • 1/2 cup mayonnaise
    • 1/4 cup sour cream
    • 2 tablespoons apple cider vinegar
    • 2 tablespoons dijon mustard
    • 1 small red onion, finely chopped
    • 5 crispy cooked bacon strips, crumbled
    • 1 cup shredded cheddar cheese (mild, medium, or sharp)
    • 1/4 cup chopped fresh parsley
    • 1/4 cup chopped dill pickles
    • Salt and black pepper, to taste
    • Chopped chives or sliced green onions (optional garnish)

    1. Place potatoes into a large pot and cover with cold water. Bring to a boil over medium-high heat, then cook for 10-15 minutes or until fork-tender. Drain in a colander and let cool to room temperature. Peel or leave the skin on based on preference.
    2. In a large bowl, mix mayonnaise, sour cream, dijon mustard, and apple cider vinegar until combined and creamy.
    3. Add cooled potatoes, red onion, bacon, cheese, parsley, and dill pickles to the dressing. Stir gently until well combined. Season with salt and pepper as needed.
    4. Cover the bowl with plastic wrap or a lid and refrigerate for at least 1 hour to allow flavors to blend. Garnish with chopped chives or green onions before serving.
    5. Do not refrigerate for longer than 1-4 hours before serving as the potatoes will absorb the dressing. Add more mayonnaise to moisten, if necessary, before serving.

    Notes

    • Feel free to adjust the amount of bacon and cheese according to your taste.
    • This salad is best served chilled but can be brought to room temperature before serving for better flavor.
    • Prep Time: 15 minutes
    • Cook Time: 15 minutes
    • Category: Salad
    • Method: Boiling and Mixing
    • Cuisine: American

    Nutrition

    • Serving Size: 1 cup
    • Calories: 320
    • Sugar: 2g
    • Sodium: 600mg
    • Fat: 22g
    • Saturated Fat: 6g
    • Unsaturated Fat: 14g
    • Trans Fat: 0g
    • Carbohydrates: 30g
    • Fiber: 3g
    • Protein: 6g
    • Cholesterol: 30mg

    Sharing is caring!

  • Cajun Garlic Chicken Wings

    Cajun Garlic Chicken Wings


    Introduction to Cajun Garlic Chicken Wings

    Life can feel like a whirlwind, can’t it? Work, family, and everything in between can be quite a juggle, so finding time to cook can be challenging. That’s why I’m excited to share my recipe for
    Cajun Garlic Chicken Wings. These nuggets of crispy, seasoned, and fried delight are a perfect snack on any day. Whether you’re having visitors over or just would like to surprise the kids on a rather hectic weeknight, this is a quick fix that never fails: they’re so good, you’ll be asked for seconds, and maybe thirds!

    Why You’ll Love This Cajun Garlic Chicken Wings

    These Cajun Garlic Chicken Wings are the perfect blend of ease and irresistible taste. They come together quickly, making them ideal for busy nights. With a simple mix of spices, you’ll elevate your game day snack or dinner party dish in no time. The crispy texture and robust flavor will have your family raving, ensuring this dish becomes a staple in your kitchen!

    Ingredients for Cajun Garlic Chicken Wings

    Gathering the right ingredients makes all the difference, doesn’t it? For these
    Cajun Garlic Chicken Wings, you’ll need a few essentials, most of which you might already have in your pantry. Let’s take a closer look:

    • Chicken wings: The star of the show! Juicy and meaty, they are perfect for absorbing all those delicious flavors.
    • Olive oil: Helps in crisping up those wings and ensuring the seasoning sticks well. Plus, it adds a rich flavor.
    • Cajun seasoning: This spice blend brings the heat and a hint of smokiness. Feel free to use store-bought or whip up your own if you’re feeling adventurous!
    • Smoked paprika: Adds a subtle depth and a beautiful color to your wings. It’s a must for that Southern flair.
    • Garlic powder & onion powder: These dried spices pack in lots of flavors without any chopping fuss. Together, they elevate the taste profile.
    • Salt and freshly ground black pepper: The essentials that enhance every dish! Adjust to your taste preferences.
    • Cayenne pepper (optional): For those who like it spicy! Add a bit more if you dare for a fiery kick.
    • Garlic cloves: Freshly minced garlic adds a robust flavor to the garlic butter that coats the wings after roasting.
    • Unsalted butter: It’s the magic ingredient that binds everything together in a luxurious garlic bath.
    • Chopped fresh parsley (optional): A lovely garnish that adds a pop of color and freshness. Plus, it’s beautiful on the plate!

    For exact quantities of each ingredient, just scroll down to the bottom of the article. They’re all listed there and are available for printing.

    How to Make Cajun Garlic Chicken Wings

    Now that we have our ingredients ready, let’s dive into making
    Cajun Garlic Chicken Wings. This recipe is so straightforward, even on a hectic day, you’ll love the process! Each step will guide you toward crispy, flavorful wings.

    Step 1: Preheat Your Oven

    Start by preheating your oven to 220°C (425°F). This hot temperature is essential for achieving that perfect crispy skin. A well-heated oven helps to render the fat from the wings and lock in those delicious juices.

    Step 2: Prepare the Chicken Wings

    Next, pat your chicken wings dry with paper towels. Drying them thoroughly is key to achieving that crispy texture we all crave. If the wings are wet, they’ll steam instead of roast, and nobody wants soggy wings!

    Step 3: Mix the Seasoning

    In a large bowl, combine the olive oil, Cajun seasoning, smoked paprika, garlic powder, onion powder, salt, black pepper, and cayenne pepper (if you’re feeling spicy). Add your dried chicken wings to the bowl and toss until everything is coated evenly. Make sure every wing gets that flavor boost!

    Step 4: Arrange the Wings

    Now it’s time to arrange the wings on your prepared baking sheet. Place them in a single layer, making sure they aren’t touching. Giving each wing room is important for ensuring they cook evenly and get crispy on all sides.

    Step 5: Roast the Wings

    Pop those wings in the oven and roast for 35–40 minutes. Don’t forget to flip them halfway through! This flipping action helps them brown and crisp up beautifully. You want them to be golden and cooked all the way through.

    Step 6: Make the Garlic Butter

    While the wings are roasting, let’s whip up the garlic butter. In a small pan over low heat, melt the unsalted butter and toss in the finely minced garlic. Cook this mixture gently for 1–2 minutes. You just want to warm it enough to release that garlicky aroma—be careful not to let it brown, as burnt garlic has a bitter flavor!

    Step 7: Toss and Garnish

    Once your wings are done roasting, transfer them to a large bowl. Pour the garlic butter over the hot wings. Toss everything together until the wings are evenly coated in that buttery, garlicky goodness. If you’re feeling fancy, sprinkle some chopped parsley over the top for both color and a hint of freshness before serving. Enjoy!

    Tips for Success

    • Always ensure your chicken wings are completely dry for maximum crispiness.
    • Use a wire rack if possible while roasting; it allows air circulation for even cooking.
    • Don’t overcrowd the baking sheet; give the wings space to breathe.
    • Experiment with your spice levels to find that perfect balance of heat.
    • For added flavor, marinate the wings in the seasoning for a few hours before cooking.

    Equipment Needed

    • Baking sheet: A simple alternative is using a roasting pan.
    • Parchment paper or foil: Helps with easy cleanup—skip if you’re using a non-stick baking sheet.
    • Wire rack (optional): A regular oven-safe cooling rack works just as well.
    • Large mixing bowl: Any large bowl will do for combining ingredients.
    • Small pan: A saucepan serves perfectly for melting the butter.

    Variations for Cajun Garlic Chicken Wings

    • Honey BBQ Cajun Wings: Add a splash of honey and your favorite BBQ sauce to the seasoning mix for a sweet and tangy twist.
    • Buffalo Style: Toss the wings in buffalo sauce after roasting for a zesty, fiery flavor that’s a hit at any gathering.
    • Lemon Pepper: Substitute Cajun seasoning with lemon pepper seasoning for a fresh citrusy kick that brightens the dish.
    • Herb-Infused: Mix in dried oregano and thyme to the seasoning for an herbaceous flavor that complements the garlic beautifully.
    • Gluten-Free Option: Ensure your Cajun seasoning is gluten-free as this recipe is already naturally gluten-free!

    Serving Suggestions for Cajun Garlic Chicken Wings

    • Cooling Dip: Serve with ranch or blue cheese dressing for cooling contrast.
    • Crunchy Side: Pair with celery and carrot sticks for a fresh, crisp bite.
    • Drink Pairing: A cold beer or sweet iced tea complements the spicy wings perfectly.
    • Presentation: Arrange on a colorful platter garnished with parsley for an attractive table display.

    FAQs about Cajun Garlic Chicken Wings

    I know you may have some burning questions about these delightful Cajun Garlic Chicken Wings. So, let’s dive into the most commonly asked questions!

    Can I use frozen chicken wings?

    Absolutely! Just be sure to thaw them completely before cooking. It’ll ensure even cooking and that perfect crispiness we all love.

    What if I don’t have Cajun seasoning?

    No worries! You can create a simple homemade blend using paprika, garlic powder, cayenne, and some dried herbs. It’ll give you that same warm, flavorful kick.

    How can I make these wings extra crispy?

    Dry the wings thoroughly before seasoning them and consider using a wire rack. This allows air to circulate around the wings while they cook, maximizing crispiness.

    Can I grill these wings instead?

    Yes! You can grill your Cajun Garlic Chicken Wings for a smoky flavor. Just adjust cooking times as necessary, flipping them regularly for even cooking.

    How do I store leftovers?

    Keep any leftover wings in an airtight container in the fridge for up to 3 days. To reheat, pop them back in the oven for that crispy texture all over again!

    Final Thoughts

    Cooking these Cajun Garlic Chicken Wings is like an adventure that brings friends and family together. The blend of spices dances on your tongue, igniting moments of laughter and connection. Whether it’s a game day or a cozy weeknight dinner, these wings fit right in. Plus, the ease of preparation means you’ll spend less time in the kitchen and more time enjoying the company of loved ones. Trust me, once you try this recipe, it’ll hold a special place in your culinary repertoire. So, roll up your sleeves and let the flavor journey begin!


    Print

    clock clock iconcutlery cutlery iconflag flag iconfolder folder iconinstagram instagram iconpinterest pinterest iconfacebook facebook iconprint print iconsquares squares iconheart heart iconheart solid heart solid icon

    Description

    Cajun Garlic Chicken Wings that are crispy, flavorful, and perfect for any occasion.


    • 1.2 kg chicken wings, separated at joints, tips removed
    • 2 tbsp olive oil
    • 1 tbsp Cajun seasoning (store-bought or homemade)
    • 1 tsp smoked paprika
    • 1 tsp garlic powder
    • 1 tsp onion powder
    • 1/2 tsp salt
    • 1/2 tsp freshly ground black pepper
    • 1/4 tsp cayenne pepper (optional)
    • 4 large garlic cloves, finely minced
    • 2 tbsp unsalted butter, melted
    • 2 tbsp chopped fresh parsley (optional, for garnish)

    1. Preheat your oven to 220°C (425°F). Line a large baking sheet with parchment paper or foil, and set a wire rack on top if available.
    2. Pat the chicken wings dry with paper towels to ensure crispiness.
    3. In a large bowl, combine olive oil, Cajun seasoning, smoked paprika, garlic powder, onion powder, salt, black pepper, and cayenne pepper (if using). Add the wings and toss thoroughly to coat.
    4. Arrange the wings in a single layer on the prepared rack or baking sheet, ensuring ample space between each wing.
    5. Roast for 35–40 minutes, flipping halfway through, until the wings are golden, crispy, and cooked through.
    6. Meanwhile, in a small pan over low heat, melt the butter. Add the minced garlic and gently cook for 1–2 minutes until fragrant (do not brown).
    7. Transfer the hot wings to a large bowl. Pour the garlic butter over and toss to coat evenly.
    8. Garnish with chopped parsley if desired. Serve immediately.

    Notes

    • For extra spice, increase the amount of cayenne pepper.
    • Make sure wings are well-spaced on the baking sheet for even cooking.
    • Feel free to adjust the seasoning to suit your taste.
    • Prep Time: 15 minutes
    • Cook Time: 40 minutes
    • Category: Appetizer
    • Method: Oven roasting
    • Cuisine: Southern

    Nutrition

    • Serving Size: 4 wings
    • Calories: 420
    • Sugar: 0 g
    • Sodium: 750 mg
    • Fat: 30 g
    • Saturated Fat: 10 g
    • Unsaturated Fat: 18 g
    • Trans Fat: 0 g
    • Carbohydrates: 3 g
    • Fiber: 0 g
    • Protein: 36 g
    • Cholesterol: 130 mg

    Sharing is caring!

  • Air Fryer Oreo Egg Rolls

    Air Fryer Oreo Egg Rolls


    Introduction to Air Fryer Oreo Egg Rolls

    Being a mom who’s at times busy, I know how at times you need something sweet to brighten your day. These Air Fryer Oreo Egg Rolls are that sweet treat that’s perfect! Super yummy with cream cheese mixed with crunchy Oreos, these come together hassle-free in your reliable air fryer. If you wish to make your loved ones yummy dessert post meals or blow your friends by your culinary skills at a get-together, these egg rolls will do the trick. Oh, and they’re nice and crunchy and just divine!

    Why You’ll Love This Air Fryer Oreo Egg Rolls

    One of the best parts about these Air Fryer Oreo Egg Rolls is their incredible ease. In just under 30 minutes, you can have a warm, indulgent dessert that will make everyone feel like a star! They’re not only quick but also incredibly tasty—think crispy on the outside and creamy on the inside. Plus, they’re a hit with kids and adults alike, making them a perfect choice for family fun nights!

    Ingredients for Air Fryer Oreo Egg Rolls

    Let’s dive into what you’ll need for these delightful Air Fryer Oreo Egg Rolls. Each ingredient plays a special role in creating this creamy, crunchy masterpiece. To get started, gather the following:

    • Sweetened Condensed Milk: This creamy base gives a lovely sweetness and smooth texture to the filling.
    • Cream Cheese: Soften it for the perfect creamy texture. It pairs beautifully with the Oreos.
    • Powdered Sugar: This sweetens the creamy mixture, making it irresistibly dessert-like.
    • Oreos: The star of the show! Crushed Oreos add that classic cookie flavor. Feel free to use any flavor you love!
    • Egg Roll Wrappers: These are essential for wrapping up the filling. You can usually find them in the refrigerated section of your grocery store.
    • Egg: A little beaten egg helps seal your egg rolls, ensuring that the delicious filling stays tucked inside.

    For additional flair, you might consider adding flavored extracts to your cream cheese mixture. Vanilla or almond extract could provide an extra layer of flavor.

    If you’re in a hurry, you can also substitute with ready-made cheesecake mixtures, though I highly recommend the homemade touch for that personal flavor boost. You can find the exact measurements for each ingredient further down this article, so don’t worry about jotting it all down just yet!

    How to Make Air Fryer Oreo Egg Rolls

    Now, let’s get to the fun part: making these delicious Air Fryer Oreo Egg Rolls! Follow these simple steps, and you’ll have a sweet treat ready in no time.

    Preparing the Filling

    First up, it’s time to get those Oreos crushed! You can either use a food processor or grab a sturdy Ziplock bag. If you opt for the bag, place the Oreos inside and roll over them with a rolling pin. It’s a little workout and loads of fun!

    Once your Oreos are crumbs, it’s time to mix everything together. In a large mixing bowl, combine the sweetened condensed milk, cream cheese, and powdered sugar.

    Use a hand mixer or a spatula to blend it until smooth. The mixture should be creamy and luscious, like cheesecake in a bowl. Now, add in those crushed Oreos and gently fold them in. This will give your filling that signature cookie crunch.

    Assembling the Egg Rolls

    Next, grab your egg roll wrappers. Lay one down on a clean surface, with a corner pointing towards you, making a diamond shape. Place a generous spoonful of the creamy cheesecake mixture in the center. Now comes the fun part—add a sprinkle of crushed Oreos on top of the filling.

    To seal the egg roll, brush the edges with your beaten egg. This helps everything stick together.

    Fold the bottom corner over the filling, tuck in the sides, and roll it up tightly. Imagine you’re wrapping a cozy blanket around the filling!

    Make sure to seal the top corner with more beaten egg. For uniform filling, use about the same amount per egg roll; you want them all to cook evenly.

    Air Frying the Egg Rolls

    Let’s get cooking! Preheat your air fryer to 350 degrees F (175°C) for about 2-3 minutes. I can’t stress enough how important this step is for that perfect crisp.

    While it’s preheating, lightly spray the air fryer basket with non-stick cooking spray. This prevents sticking and makes cleanup a breeze. Place the assembled egg rolls in a single layer, ensuring they don’t touch.

    This way, they’ll cook evenly and get nice and golden brown. Lightly spray the tops with non-stick spray too; this helps them crisp up beautifully.

    Set your timer for 6-8 minutes, and don’t forget to flip them halfway through. You want all sides to bask in that warm, toasty air. When they’re done, they’ll be crispy, golden, and ready for drizzling!

    Tips for Success

    • Ensure your cream cheese is softened to avoid lumps in the filling.
    • Don’t overcrowd the air fryer; giving each egg roll space ensures they crisp up nicely.
    • Experiment with different flavored Oreos for a fun twist.
    • Use a pastry brush for even egg wash application; it helps seal tightly.
    • Store leftover egg rolls in an airtight container to keep them fresh longer.

    Equipment Needed

    • Air Fryer: This is essential for achieving that perfect crisp. If you don’t have one, an oven can work too, but you’ll miss that crunch.
    • Mixing Bowl: A large bowl for combining your ingredients; any size will do!
    • Rolling Pin: Great for crushing Oreos; a heavy jar works just as well.
    • Pastry Brush: Handy for applying the egg wash; your fingers can work too in a pinch!

    Variations

    • Chocolate Lovers: Substitute half the crushed Oreos with chocolate chips for an extra indulgent treat.
    • Nutty Delight: Add a tablespoon of peanut butter to the filling for a creamy, nutty flavor that pairs wonderfully with Oreos.
    • Minty Fresh: Use mint-flavored Oreos and a splash of peppermint extract in the filling for a refreshing twist.
    • Fruit Fusion: Incorporate a few tablespoons of chopped strawberries or raspberries into the filling for a fruity surprise.
    • Gluten-Free Option: Swap out the egg roll wrappers for gluten-free alternatives, ensuring everyone can enjoy these delicious treats.

    Serving Suggestions for Air Fryer Oreo Egg Rolls

    • Drizzle with chocolate or caramel sauce for an extra touch of sweetness.
    • Serve alongside a scoop of vanilla ice cream to contrast the crispy texture.
    • Top with whipped cream and a sprinkle of crushed Oreos for a festive look.
    • Pair with a cup of coffee or milk for a delightful afternoon snack.

    FAQs about Air Fryer Oreo Egg Rolls

    Can I make these Air Fryer Oreo Egg Rolls ahead of time?
    Absolutely! You can assemble the egg rolls and store them in the fridge for a few hours before cooking. Just make sure to wrap them tightly in plastic wrap to prevent them from drying out.

    What’s the best way to store leftover egg rolls?
    Leftover egg rolls can be stored in an airtight container in the fridge for up to 3 days. To reheat, simply pop them back in the air fryer for a few minutes to regain that crispy texture.

    Can I use different cookies instead of Oreos?
    Definitely! Any similar cookies work well. Try using chocolate chip cookies, peanut butter cookies, or even ginger snaps for a delicious twist on the classic recipe.

    How do I know when the egg rolls are done cooking?
    Look for that golden brown color and crispy appearance. They usually take 6-8 minutes, but keeping an eye on them during cooking helps ensure perfect results!

    Can I freeze the egg rolls?
    Yes, you can freeze the assembled but uncooked egg rolls! Just lay them flat between parchment paper, then place them in a freezer-safe bag. When ready to cook, no need to thaw—just cook them for a couple of extra minutes straight from the freezer!

    Final Thoughts

    Creating these Air Fryer Oreo Egg Rolls has been more than just a cooking adventure; it’s a delightful journey filled with sweetness and smiles. The joy on my family’s faces when they take that first crispy bite is priceless. I adore how easily they come together, making them perfect for busy days or spontaneous gatherings. Whether enjoyed as an after-dinner treat or a fun snack, these egg rolls bring a little magic into everyday moments. So gather your loved ones, whip up a batch, and savor every crispy, creamy bite together!


    Print

    clock clock iconcutlery cutlery iconflag flag iconfolder folder iconinstagram instagram iconpinterest pinterest iconfacebook facebook iconprint print iconsquares squares iconheart heart iconheart solid heart solid icon

    Description

    A delightful dessert combining the flavors of creamy cheesecake and crunchy Oreos, all wrapped up in crispy egg rolls and cooked to perfection in an air fryer.


    • ½ cup Sweetened Condensed milk
    • 8 ounces Cream cheese, softened
    • 1 cup powdered sugar
    • 1 cup Oreos, crushed
    • 15 Egg Roll Wrappers
    • 1 large Egg

    1. Crush Oreo cookies into fine crumbs using a food processor or by placing them in a Ziplock bag and crushing them with a rolling pin.
    2. In a large mixing bowl, combine the sweetened condensed milk, powdered sugar, and cream cheese together until smooth.
    3. Lay an egg roll wrapper on a clean, flat surface with one corner pointing towards you (like a diamond).
    4. Place a spoonful of the cheesecake mixture in the center of the wrapper. Drizzle with crushed Oreos.
    5. Beat the egg in a small bowl. Brush the edges of the egg roll wrapper with the beaten egg to help seal. Fold the bottom corner over the filling, then fold in the sides, and roll up tightly, sealing the top corner with a bit more beaten egg. Repeat with remaining wrappers and filling.
    6. Preheat your air fryer to 350 degrees F (175°C) for 2-3 minutes.
    7. Lightly spray the air fryer basket with non-stick cooking spray to prevent sticking, or line the air fryer basket or air fryer tray with parchment paper, after preheating. Place the egg rolls in a single layer in the air fryer basket, making sure they don’t touch each other. Lightly spray the tops of the egg rolls with non-stick cooking spray to help them crisp up.
    8. Set cook time for 6-8 minutes, flipping halfway through, until they are golden brown and crispy.
    9. Drizzle with chocolate sauce, crushed Oreos, whipped cream, or powdered sugar.

    Notes

    • For a different flavor, try adding flavored extracts to the cream cheese mixture.
    • Ensure that the air fryer is properly preheated for best results.
    • Prep Time: 15 minutes
    • Cook Time: 8 minutes
    • Category: Dessert
    • Method: Air frying
    • Cuisine: American

    Nutrition

    • Serving Size: 1 egg roll
    • Calories: 150
    • Sugar: 9g
    • Sodium: 90mg
    • Fat: 7g
    • Saturated Fat: 3g
    • Unsaturated Fat: 2g
    • Trans Fat: 0g
    • Carbohydrates: 20g
    • Fiber: 1g
    • Protein: 2g
    • Cholesterol: 20mg

    Sharing is caring!

  • Cream Cheese Jam Pancakes

    Cream Cheese Jam Pancakes


    Introduction to Cream Cheese Jam Pancakes

    At my home breakfast has always been something special and with these Cream Cheese Jam Pancakes, the celebration reaches to some other level. Like when you think of biting into warm, fluffy pancakes with each layer having that creamy fruitiness- it just makes so much sense. Useful as a mom always rushing through mornings, I can tell you, this is a recipe that can very much be a lifesaver. Simple and speedy and very much mouthwatering, that’\s the best way to kick start absolute delight with smile and a filled tummy. Your family will love the delightful breakfast experience as much as I do. Believe me.

    Why You’ll Love This Cream Cheese Jam Pancakes

    If you’re juggling a busy schedule, these Cream Cheese Jam Pancakes are a dreamy solution. They’re incredibly easy to whip up, taking just 25 minutes from start to finish. The combination of the smooth cream cheese and the fruity jam tantalizes your taste buds, transforming a simple breakfast into a gourmet experience. Plus, kids love them! This dish is the perfect way to satisfy everyone’s cravings, without stress.

    Ingredients for Cream Cheese Jam Pancakes

    Creating Cream Cheese Jam Pancakes is straightforward. Here’s what you’ll need to whip up this delightful breakfast:

    • Pancake Batter: You can use premade, store-bought batters for convenience. But if you have time, homemade batter brings that extra love to the table!
    • Cream Cheese: This is where the magic happens! Cream cheese adds a rich, velvety layer that balances perfectly with the jam. Make sure it’s at room temperature for easy spreading.
    • Fruit Jam: Use your favorite fruit jam, whether it’s blueberry, strawberry, or even a zesty orange marmalade. A variety will keep things exciting and vibrant!

    Feel free to explore different flavors or even mix jams for a unique twist. For exact measurements and tips on making the best pancakes, scroll down to the bottom of the article for a printable version!

    How to Make Cream Cheese Jam Pancakes

    Prepare Your Pancake Batter

    To kick off this yummy adventure, you’ll need to choose your pancake batter wisely. You can go homemade for that personal touch or pick a store-bought mix if you’re short on time. If you opt for the DIY route, keep it simple! Just gather flour, baking powder, eggs, milk, and a touch of sugar. Mix them until just combined; lumps are perfectly okay! If you’re using a store-bought option, follow the directions on the box. Using a batter you enjoy will lay the foundation for these delightful Cream Cheese Jam Pancakes.

    Cook the Pancakes

    Once your batter is ready, heat a nonstick pan over medium heat. A good way to test if the pan is hot enough is the water droplet test—just flick a drop of water into the pan and see if it dances! Pour the pancake batter onto the pan in your desired size. Cook until bubbles form on top, then flip it over when golden brown, about 2-3 minutes per side. Cooking in batches keeps everything warm and fluffy; refreshing your pan with a little butter can add extra flavor and richness!

    Add Cream Cheese

    Now comes the fun part—spreading that luscious cream cheese! Use a knife or a spatula to take about one tablespoon of room-temperature cream cheese. As you spread it across the warm pancake, let it melt slightly, enhancing that creamy texture. Be gentle, but aim for an even layer. This rich foundation is crucial for that perfect balance between sweet and savory in your Cream Cheese Jam Pancakes.

    Top with Jam

    After spreading the cream cheese, it’s time for the jam! You can choose a single flavor or mix a couple together for a fancy look. Simply spoon one tablespoon of fruit jam onto the cream cheese layer. Let it drip slightly over the sides for a delightful, mouth-watering presentation. Think of the flavor explosion as you combine these sweet toppings; it’s sheer joy on a plate!

    Stack and Serve

    Now that your pancakes are dressed to impress, it’s time to stack! Layer them up as you like, creating a tall, delicious tower. Serve immediately while they’re still warm for the best experience. A light dusting of powdered sugar on top can add a beautiful touch. Enjoy them with a side of fresh fruit, or drizzle some maple syrup for an extra sweet kick!

    Tips for Success

    • Always preheat your nonstick pan for even cooking.
    • Keep your cream cheese at room temperature to make spreading easier.
    • Vary your fruit jams to explore new flavor combinations.
    • Make extra pancakes and freeze them for busy mornings.
    • Use a small cookie cutter to make fun shapes that kids will love!

    Equipment Needed

    • Nonstick Pan: A griddle works too for making multiple pancakes at once.
    • Spatula: A sturdy spatula helps flip pancakes easily; consider a silicone one to avoid scratching your pan.
    • Mixing Bowl: Any large bowl will do for mixing your batter.
    • Whisk: A simple fork can blend the ingredients if you don’t have a whisk.

    Variations

    • Gluten-Free: Substitute the flour with a gluten-free pancake mix or almond flour for a gluten-free option.
    • Whole Wheat: Use whole wheat flour instead of all-purpose flour for a healthier twist that adds fiber.
    • Flavored Cream Cheese: Try mixing in a bit of vanilla extract or cinnamon into the cream cheese for an extra flavor boost.
    • Fruit Toppings: Top with fresh fruits like bananas or berries for added texture and nutrition along with your jam.
    • Nut Butter: Spread almond or peanut butter under the cream cheese for a protein-packed variation that offers rich, nutty flavors.

    Serving Suggestions

    • Pair your pancakes with crispy bacon or sausage links for a savory touch.
    • Serve with a side of fresh fruit salad for a refreshing contrast.
    • Accompany with a warm cup of coffee or a fruity smoothie to complement the flavors.
    • Garnish with mint leaves for a pop of color and a hint of freshness.
    • Use colorful plates or fun napkins to enhance the breakfast presentation!

    FAQs about Cream Cheese Jam Pancakes

    Can I make the batter ahead of time?
    Absolutely! You can mix the pancake batter a day ahead and store it in the fridge. Just give it a quick stir before cooking. That way, your morning can be a bit smoother!

    What type of jam works best?
    The beauty of Cream Cheese Jam Pancakes is in their versatility! Berry jams like strawberry, raspberry, or blueberry complement the cream cheese perfectly. But don’t hesitate to try peach or even fig for a fun twist!

    Can I use low-fat cream cheese?
    Sure! Low-fat cream cheese is a great substitute if you’re watching calories. It still offers that luscious creaminess without compromising flavor, making it a delicious option for your pancakes.

    How do I store leftover pancakes?
    To keep leftovers fresh, let the pancakes cool completely, then stack them between sheets of parchment paper. Store in an airtight container in the fridge for up to 3 days or freeze them for longer-lasting enjoyment!

    Can I make these pancakes vegan?
    Yes! You can create a vegan version by using plant-based milk and vegan cream cheese and replacing eggs with a flaxseed or chia seed mixture to bind your pancake batter. Enjoy a delightful, cruelty-free breakfast!

    Final Thoughts

    Making Cream Cheese Jam Pancakes feels like giving your family a warm hug at breakfast. It’s not just about the delicious taste; it’s about creating cherished moments together. The joy of watching my kids’ faces light up as they dig into these fluffy treats is priceless. Plus, with just a little time and effort, you can elevate an ordinary morning into a fabulous feast! I invite you to try this delightful recipe and make it your own. After all, it’s the little things, like starting your day with a smile and a tasty bite, that make life truly delicious!


    Print

    clock clock iconcutlery cutlery iconflag flag iconfolder folder iconinstagram instagram iconpinterest pinterest iconfacebook facebook iconprint print iconsquares squares iconheart heart iconheart solid heart solid icon

    Description

    Delicious pancakes topped with cream cheese and fruit jam for a delightful breakfast experience.


    • 1 batch pancake batter (homemade or store-bought)
    • 4 tablespoons cream cheese
    • 4 tablespoons fruit jam

    1. Cook pancakes in a nonstick pan over medium heat according to batter instructions, turning once until golden on both sides.
    2. Spread one tablespoon of cream cheese evenly over the surface of each warm pancake.
    3. Top the cream cheese layer with one tablespoon of jam on each pancake.
    4. Stack pancakes as desired and serve immediately while warm.

    Notes

    • For best results, use a variety of fruit jams to enhance flavors.
    • Ensure the cream cheese is at room temperature for easier spreading.
    • Prep Time: 10 minutes
    • Cook Time: 15 minutes
    • Category: Breakfast
    • Method: Stovetop
    • Cuisine: American

    Nutrition

    • Serving Size: 2 pancakes
    • Calories: 350
    • Sugar: 12g
    • Sodium: 400mg
    • Fat: 15g
    • Saturated Fat: 8g
    • Unsaturated Fat: 5g
    • Trans Fat: 0g
    • Carbohydrates: 45g
    • Fiber: 2g
    • Protein: 6g
    • Cholesterol: 35mg

    Sharing is caring!

  • Moose Farts Chocolate Coconut

    Moose Farts Chocolate Coconut


    Introduction to Moose Farts Chocolate Coconut

    Welcome back to the small portion of my kitchen, where we make really great things – Moose Farts Chocolate Coconut! Well, before you wrinkle your nose at the name, rest assurred it’s all in good fun, and delicious. Well, this no bake treat comes in handy for those busy days when you are craving something sweet, and have the entire day to spare. Seriously, your loved ones will believe you to be a magician with these lovely chocolate coconut balls. And after all how else can you brighten someone’s day other than giggling together over a sweet treat? Ready for some sugar with a use?

    Why You’ll Love This Moose Farts Chocolate Coconut

    This Moose Farts Chocolate Coconut recipe is a game-changer for busy days. In just 15 minutes of prep, you can create a sweet treat that’s sure to please even the pickiest eaters. These no-bake delights are not only quick to whip up but also incredibly satisfying, combining rich chocolate with the tropical flair of coconut. They’re perfect for after-school snacks or last-minute dessert needs, making life a tad sweeter!

    Ingredients for Moose Farts Chocolate Coconut

    Let’s gather the star players for our Moose Farts Chocolate Coconut! You’ll find them both simple and enticing, perfect for a family-friendly treat that won’t break the bank. Here’s what you need:

    • Sweetened condensed milk: This creamy base adds richness and sweetness, infusing that delightful buttery flavor.
    • Unsalted butter: Melting this into our mix helps bind everything together and adds a depth of flavor without overwhelming the sweetness.
    • Pure vanilla extract: A touch of vanilla enhances that lovely aroma and flavor profile, making everything taste just a bit more special.
    • Dried shredded coconut: This is where the tropical vibes kick in! Coconut gives a delightful texture and a hint of chewy goodness.
    • Graham cracker crumbs: These crumbs provide the foundation, adding crunch and a hint of honeyed sweetness to our mixture.
    • Semisweet chocolate chips: Rich, melty, and utterly indulgent, these chips are perfect for that chocolatey kick. You can swap in dark chocolate for a richer taste or even use white chocolate for a different twist!

    If you have vanilla bean or coconut extract on hand, feel free to use them to amp up the flavors. The full list of measurements is at the bottom of the article and is ready for printing, so you can dive right into this fun kitchen adventure!

    How to Make Moose Farts Chocolate Coconut

    Ready to dive into the delightful world of Moose Farts Chocolate Coconut? This no-bake treat is straightforward and fun to make! Follow these simple steps, and you’ll have a batch of delicious chocolate coconut balls in no time.

    Combine the Wet Ingredients

    Start by taking a large mixing bowl. Add the melted butter, sweetened condensed milk, and vanilla extract to the bowl. Mix everything together with a spatula until it’s smooth and creamy. This is where the magic begins! The warm butter and sweet condensed milk meld beautifully, creating a luscious base for your treat.

    Mix for a Smooth Consistency

    Make sure there are no lumps and your mixture is luxuriously smooth. This step sets the stage for a uniform chocolate coconut ball, so don’t rush it! A few extra seconds might make a world of difference in texture.

    Add Dry Ingredients and Combine

    Now it’s time to add our dry ingredients. Toss in the graham cracker crumbs, shredded coconut, and semisweet chocolate chips. Grab that trusty spatula again and mix everything together until the chocolate and coconut are evenly spread throughout. This is the fun part—watching those ingredients come together!

    Ensure Uniform Distribution

    Take your time to ensure that every bite gets a taste of chocolate and coconut. You want that beautiful blend in every ball. Give it a good stir, working from the edges to incorporate everything. The coconut will start to shine, and the texture will become delightfully rich.

    Chill the Mixture

    Cover the bowl with plastic wrap or a lid and pop it into the refrigerator for about an hour. This chilling step is essential; it allows the mixture to firm up, making it easier to roll into balls.

    Importance of Firming Up

    Firming up the mixture is crucial. If you skip this step, you may end up with sticky hands and awkwardly shaped balls! A little patience goes a long way here. When you’re ready, you’ll know it’s time—your mixture will be thick enough to hold its shape!

    Roll into Balls and Coat

    Once chilled, it’s time to roll! Using a small scoop or just a tablespoon, take portions of the mixture and roll them into 1¼-inch balls. Don’t stress about making them perfect; a bit of rustic charm is part of the fun!

    Tips for Uniform Size

    For consistency, try using a cookie scoop. It helps make each ball similar in size, ensuring even delight in every bite. After rolling, coat each ball in extra graham cracker crumbs for that finishing touch of crunch.

    Chill Again for Firmness

    Arrange your coated balls on a baking sheet. Chill them again in the refrigerator for another 30 to 60 minutes. This guarantees they hold their shape beautifully when served. By now, you’ll be imagining how scrumptious these will taste!

    Storage and Serving Tips

    Once firm, serve these cold for the best flavor. Store any leftovers in an airtight container in the fridge for up to a week. If you want to keep your Moose Farts Chocolate Coconut for longer, just freeze them! They’ll make a perfect treat for unexpected guests or a sweet surprise for yourself on a busy day.

    Tips for Success

    • Make sure to mix well for even distribution of flavors.
    • Use room temperature ingredients to blend smoothly.
    • Feel free to experiment with different chocolate types for unique flavors.
    • Don’t rush the chilling process; it’s key for firmness.
    • Try adding a pinch of salt to enhance sweetness and flavor.

    Equipment Needed

    • Mixing bowl: A large bowl works best. A medium bowl can be used if that’s all you have.
    • Spatula or wooden spoon: Either will do for mixing ingredients smoothly.
    • Cookie scoop: This is handy for rolling uniform balls. A tablespoon works fine too!
    • Baking sheet: Any flat surface will do for chilling the balls.
    • Plastic wrap or lid: Essential for covering the bowl while the mixture chills.

    Variations

    • Nutty Delight: Add 1/2 cup of chopped nuts like walnuts or pecans for an extra crunch and a dose of healthy fats.
    • Fruit Fusion: Toss in some dried fruit such as raisins, cranberries, or chopped apricots to give your Moose Farts an unexpected burst of flavor.
    • Chocolate Lover’s Dream: Substitute half the semisweet chocolate chips with dark or milk chocolate chips to customize the sweetness level.
    • Minty Fresh: Incorporate 1 teaspoon of peppermint extract for a refreshing mint chocolate coconut twist—perfect during the holiday season!
    • Gluten-Free Option: Use gluten-free graham cracker crumbs to make this treat suitable for those with gluten sensitivities.

    Serving Suggestions

    • Pair with a cup of coffee or a chilled glass of milk for a delightful afternoon snack.
    • Serve on a colorful dessert platter, garnished with fresh mint leaves for a pop of color.
    • Wrap them individually in colorful paper for a fun treat at parties or gatherings.
    • For an elegant touch, present Moose Farts Chocolate Coconut in decorative dessert cups.
    • Try them alongside a scoop of vanilla ice cream for a decadent dessert experience!

    FAQs about Moose Farts Chocolate Coconut

    Can I make Moose Farts Chocolate Coconut ahead of time?

    Absolutely! These treats can be made in advance and stored in an airtight container in the refrigerator for up to a week. Just remember to roll them in the additional graham cracker crumbs before serving for that fresh touch!

    How should I store Moose Farts Chocolate Coconut?

    Keep them in an airtight container in the fridge to maintain freshness. If you want to store them for longer, pop them in the freezer! They’ll still taste fantastic after thawing.

    Can I use different types of chocolate?

    Yes! Feel free to experiment with dark, milk, or even white chocolate chips. Each variation brings a unique flavor twist to your Moose Farts Chocolate Coconut.

    Are Moose Farts Chocolate Coconut suitable for kids?

    Definitely! With their fun name and delightful sweetness, kids will love them. Plus, they are no-bake, making them super easy for children to help with in the kitchen!

    What can I serve with Moose Farts Chocolate Coconut?

    These treats are versatile! Serve them with a rich cup of coffee, a glass of milk, or present them on a dessert platter alongside fruit for a delightful dessert experience.

    Final Thoughts

    Indulging in Moose Farts Chocolate Coconut is more than just enjoying a treat; it’s about creating joyful moments in the kitchen. The combination of rich chocolate and chewy coconut brings smiles, laughter, and a sense of delight to every bite. As a busy mom myself, I cherish recipes that are quick, simple, and delicious. Moose Farts Chocolate Coconut checks all those boxes while adding an element of fun! So, gather your loved ones, roll up your sleeves, and let this delightful creation bring a little sweetness to your day. Enjoy the delightful flavors and the laughter they inspire!


    Print

    clock clock iconcutlery cutlery iconflag flag iconfolder folder iconinstagram instagram iconpinterest pinterest iconfacebook facebook iconprint print iconsquares squares iconheart heart iconheart solid heart solid icon

    Description

    Moose Farts Chocolate Coconut is a delightful treat made with coconut, chocolate, and a sweet condensed milk base, perfect for satisfying your sweet tooth.


    • 14-ounce can sweetened condensed milk
    • 1/4 cup unsalted butter, melted
    • 1 teaspoon pure vanilla extract
    • 1 1/2 cups dried shredded coconut
    • 1 1/2 cups graham cracker crumbs, plus extra for rolling
    • 1 1/2 cups semisweet chocolate chips

    1. In a large mixing bowl, combine the melted butter, sweetened condensed milk, and vanilla extract. Stir until the mixture is uniformly smooth.
    2. Add the graham cracker crumbs, shredded coconut, and chocolate chips to the bowl. Mix thoroughly with a spatula or wooden spoon until evenly distributed and well combined.
    3. Cover the bowl and refrigerate the mixture for 1 hour to allow it to firm up.
    4. Using a small scoop or tablespoon, portion and roll the chilled mixture into 1¼-inch balls. Roll each ball in additional graham cracker crumbs to coat completely.
    5. Arrange coated balls on a baking sheet. Chill until thoroughly firm, approximately 30 to 60 minutes.
    6. Serve cold. Store in an airtight container in the refrigerator for up to one week or freeze for longer preservation.

    Notes

    • Ensure the mixture is mixed thoroughly for even distribution of ingredients.
    • Experiment with different types of chocolate for varied flavors.
    • For a fun presentation, use colorful dessert paper cups for serving.
    • Prep Time: 15 minutes
    • Cook Time: 0 minutes
    • Category: Dessert
    • Method: No-Bake
    • Cuisine: American

    Nutrition

    • Serving Size: 1 ball
    • Calories: 150
    • Sugar: 10g
    • Sodium: 50mg
    • Fat: 7g
    • Saturated Fat: 4g
    • Unsaturated Fat: 2g
    • Trans Fat: 0g
    • Carbohydrates: 20g
    • Fiber: 1g
    • Protein: 2g
    • Cholesterol: 10mg

    Sharing is caring!

  • Lobster-Stuffed Garlic Bread Boats

    Lobster-Stuffed Garlic Bread Boats


    Introduction to Lobster-Stuffed Garlic Bread Boats

    As any home cook with a passion for cooking will tell you sometimes that dish should just be luxurious and convenient – enter Lobster-Stuffed Garlic Bread Boats. Imagine – a busy evening, perhaps the children are fussy, and you want to surprise your loved one without spending the whole night in the kitchen. These little boats right here do just that! They’re rich; they are buttery and so very flavor-packed appearing in that crunchy bread shell. Believe me, they will end up elevating any dinner into something special while keeping the stress of cooking at bay.

    Why You’ll Love This Lobster-Stuffed Garlic Bread Boats

    You’re going to adore these Lobster-Stuffed Garlic Bread Boats for so many reasons! They’re quick to prepare, making them a perfect choice for busy weeknights. Plus, who can resist the combination of tender lobster and garlic-infused butter? This dish not only pleases the palate but also makes for stunning presentation, impressing even the toughest food critics, aka your family. Trust me; they won’t forget this dish anytime soon!

    Ingredients for Lobster-Stuffed Garlic Bread Boats

    Before you embark on this delightful culinary adventure, let’s gather up the star players for your Lobster-Stuffed Garlic Bread Boats. Here’s what you’ll need:

    • French or Italian Bread: A sturdy loaf that can hold all that delicious filling.
    • Cooked Lobster Meat: Fresh, sweet lobster is ideal, but pre-cooked works in a pinch.
    • Unsalted Butter: Softened butter adds richness and flavor without the extra salt.
    • Garlic: Minced fresh garlic gives this dish that aromatic punch. I recommend using fresh garlic for the best taste!
    • Fresh Parsley: Chopped parsley not only adds color but also a burst of freshness to balance the richness.
    • Shredded Mozzarella Cheese: This melty topping holds everything together. You could try cheddar for a twist!
    • Red Pepper Flakes: A pinch adds a hint of spice. Totally optional but recommended for a little kick.
    • Salt and Black Pepper: Essential for seasoning! Adjust to taste as you mix.

    For detailed measurements, you’ll find them at the end of the article. Just print or jot them down before you head to the kitchen!

    How to Make Lobster-Stuffed Garlic Bread Boats

    Now that you’ve gathered all your ingredients, let’s dive into making these flavorful Lobster-Stuffed Garlic Bread Boats. Follow these steps for a delicious experience that could easily become a family favorite!

    Step 1: Preheat Oven and Prepare Bread

    Start by preheating your oven to 190°C (375°F). This will ensure it’s hot and ready when the time comes. While that’s warming up, slice your loaf of French or Italian bread lengthwise right down the center. Spoon out some of the insides to create a cozy little boat for the filling. When you do this, remember—don’t go too deep! You want enough bread for support but some hollow space for the delectable toppings.

    Step 2: Make Garlic Butter Mixture

    In a mixing bowl, take your softened unsalted butter and add the minced garlic. Use a fork to blend them together until they’re beautifully combined. Don’t forget to sprinkle in salt and black pepper to taste! This garlic butter is magical, bringing a heavenly flavor to your lobster stuffing.

    Step 3: Combine Lobster Filling

    Next up, let’s create the lobster filling that will make your taste buds dance! In a separate bowl, mix the chopped lobster meat with the garlic butter blend you just made. Toss in the chopped fresh parsley and the optional red pepper flakes for a little extra zing. Stir everything together until the lobster is coated and bursting with flavor.

    Step 4: Fill the Bread and Add Cheese

    Now comes the fun part—filling your bread! Spoon the lobster mixture generously into the hollowed-out halves of the bread. Don’t be shy here! Next, shower the filled bread with the shredded mozzarella cheese. You want that melty goodness across the top—trust me, it adds to the comfort factor of this dish!

    Step 5: Bake and Garnish

    Arrange your magnificent lobster-stuffed creation on a baking sheet. Slide it into your preheated oven for about 20 minutes. You’ll know it’s ready when the cheese is bubbling and turning golden brown. Once it’s out, let it cool for just a minute, then garnish with a sprinkle of extra parsley for a vibrant touch. Slice it into portions and serve warm—your guests will be swooning!

    Tips for Success

    • Use fresh lobster for the best flavor, but pre-cooked lobster works just fine!
    • If you’re short on time, prep the garlic butter and filling ahead of time.
    • Feel free to experiment with different cheeses for unique flavor profiles.
    • Don’t skip the cooling step; it helps the filling set just a bit.
    • Adjust the spice level by adding more or less red pepper flakes.

    Equipment Needed

    • Baking sheet: A standard sheet will do, but a cast-iron skillet offers a unique crisp!
    • Mixing bowls: Use any size; just make sure they’re large enough for easy mixing.
    • Fork: Perfect for blending your garlic butter; a whisk works too.
    • Knife: A sharp knife is essential for slicing the bread.
    • Spoon: Use it for hollowing out the bread and for filling.

    Variations

    • Cheese Swap: Replace mozzarella with fontina or gouda for a richer, more robust flavor.
    • Herbal Twist: Add fresh dill or chives in place of parsley for a different herbal note.
    • Spicy Delight: Mix in some diced jalapeños or a splash of hot sauce for a fiery kick.
    • Seafood Medley: Combine lobster with shrimp or crab for a mixed seafood experience.
    • Vegetarian Option: Use a hearty mushroom mixture instead of lobster for a savory, meat-free alternative.

    Serving Suggestions

    • Pair with a refreshing green salad dressed with lemon vinaigrette.
    • Serve with a side of steamed asparagus or roasted vegetables for a colorful plate.
    • Complement with a chilled glass of white wine, like Pinot Grigio.
    • Consider placing your Lobster-Stuffed Garlic Bread Boats on a rustic wooden board for a beautiful presentation.

    FAQs about Lobster-Stuffed Garlic Bread Boats

    Can I use frozen lobster for my Lobster-Stuffed Garlic Bread Boats?

    Absolutely! Just make sure to thaw it properly before using. Frozen lobster can work wonders in this recipe if fresh isn’t available.

    How can I reheat leftovers?

    The best way to reheat is in the oven. Place the leftover garlic bread boats on a baking sheet and warm them at 180°C (350°F) for about 10-15 minutes—this keeps them crispy!

    Can I make this lobster dish in advance?

    Yes! Prep the filling ahead of time, and store it in the fridge. Assemble and bake just before serving for the best taste experience.

    What if I want a lighter option?

    For a lighter version of these Lobster-Stuffed Garlic Bread Boats, try using a whole wheat or gluten-free bread. You can also cut back on butter or cheese!

    Are there any good side dishes to serve with this recipe?

    A light cucumber salad or a simple tomato and basil salad pairs beautifully. It balances the richness of the lobster and garlic!

    Final Thoughts

    Making Lobster-Stuffed Garlic Bread Boats is more than just cooking; it’s about creating memorable moments around the dining table. I can’t stress enough how these boats elevate an ordinary meal into a celebration of flavors. The combination of tender lobster, creamy cheese, and aromatic garlic butter creates a symphony that sings in every bite. Whether you’re cooking for your family after a long day or impressing friends at a gathering, this dish is bound to spark joy. So, roll up your sleeves and let the culinary magic unfold. You won’t regret it, and your taste buds will thank you!


    Print

    clock clock iconcutlery cutlery iconflag flag iconfolder folder iconinstagram instagram iconpinterest pinterest iconfacebook facebook iconprint print iconsquares squares iconheart heart iconheart solid heart solid icon

    Description

    Lobster-Stuffed Garlic Bread Boats are a delicious and indulgent dish made with fresh lobster meat and garlic butter, baked in a crispy bread shell.


    • 1 loaf French or Italian bread
    • 450 g cooked lobster meat, chopped
    • 60 g unsalted butter, softened
    • 4 cloves garlic, minced
    • 15 g fresh parsley, chopped
    • 60 g shredded mozzarella cheese
    • 0.25 teaspoon red pepper flakes (optional)
    • Salt, to taste
    • Black pepper, to taste

    1. Preheat the oven to 190°C (375°F). Slice the bread loaf lengthwise and hollow out a portion of the interior from both halves.
    2. In a bowl, blend softened butter with minced garlic, salt, and pepper until well combined.
    3. Combine the chopped lobster meat, garlic butter mixture, chopped parsley, and red pepper flakes in a mixing bowl.
    4. Fill each bread half with the lobster mixture and top evenly with shredded mozzarella cheese.
    5. Arrange the filled bread halves on a baking sheet and bake for 20 minutes until the cheese is bubbly and golden.
    6. Allow the bread to cool briefly, then slice and garnish with additional chopped parsley before serving.

    Notes

    • For a spicier kick, increase the amount of red pepper flakes.
    • Can substitute mozzarella with other cheeses like cheddar for variation.
    • Fresh lobster is recommended for the best flavor, but pre-cooked can also be used.
    • Prep Time: 15 minutes
    • Cook Time: 20 minutes
    • Category: Appetizer
    • Method: Baking
    • Cuisine: American

    Nutrition

    • Serving Size: 1 boat
    • Calories: 420
    • Sugar: 1 g
    • Sodium: 600 mg
    • Fat: 25 g
    • Saturated Fat: 10 g
    • Unsaturated Fat: 15 g
    • Trans Fat: 0 g
    • Carbohydrates: 35 g
    • Fiber: 2 g
    • Protein: 22 g
    • Cholesterol: 90 mg

    Sharing is caring!

  • BBQ Chicken Sliders Tangy Coleslaw

    BBQ Chicken Sliders Tangy Coleslaw


    Introduction to BBQ Chicken Sliders Tangy Coleslaw

    Yo, food peeps! Busy days are so messy, especially for us moms and professionals juggling a million things at once. The very time I want to eat something easy but still yummy is at dinnertime. Here’s for that! My BBQ Chicken Sliders Tangy Coleslaw to the rescue. These little sandwiches will totally blow up the dinner-at-home game or any hang with friends on a weeknight or over the weekend. Imagine tender shredded chicken drowning in sweet and smoky BBQ sauce, with a coleslaw topping for that refreshing crunch right in between. Seriously, your fam is going to beg for seconds.

    Why You’ll Love This BBQ Chicken Sliders Tangy Coleslaw

    If you’re like me, you cherish meals that come together effortlessly. With the slow cooker doing the heavy lifting, you can spend more time with your family or catching up on your favorite show. These BBQ Chicken Sliders Tangy Coleslaw are not just quick to prepare; they’re bursting with flavor that pleases even the pickiest eaters! Plus, who doesn’t love food that feels like a warm hug?

    Ingredients for BBQ Chicken Sliders Tangy Coleslaw

    To whip up these delicious BBQ Chicken Sliders Tangy Coleslaw, you’ll need a handful of tantalizing ingredients that work together beautifully.

    • Chicken thighs: Tender, juicy pieces of meat are perfect for slow cooking, ensuring a melt-in-your-mouth experience.
    • Barbecue sauce: This sweet and smoky elixir infuses flavor into the chicken, enveloping it in a delectable glaze.
    • Coleslaw mix: A crunchy blend of cabbage and carrots adds refreshing texture and a burst of color to each slider.
    • Mayonnaise: Creamy mayo elevates the coleslaw, providing richness that balances the tanginess.
    • Apple cider vinegar: A splash of acidity brightens the coleslaw, cutting through the richness of the sliders.
    • Sugar, salt, and black pepper: Simple seasonings enhance flavors, ensuring every bite is deliciously balanced.
    • Slider buns: Soft and slightly sweet, these buns cradle all the deliciousness, making each bite a delight.

    For detailed quantities of each ingredient, scroll down to the recipe at the end of the article. Get ready for a meal that will leave everyone asking for the secret to your fantastic cooking!

    How to Make BBQ Chicken Sliders Tangy Coleslaw

    Now that we’ve got our ingredients ready, it’s time to dive into the kitchen and create these mouthwatering BBQ Chicken Sliders Tangy Coleslaw. This is where the magic happens! Just follow these simple steps and you’ll have dinner sorted in no time.

    Step 1: Prepare the Chicken

    Start by placing the boneless, skinless chicken thighs into your slow cooker. Don’t be shy! Get every last piece in there because they’ll absorb all the beautiful BBQ flavors.

    Next, pour that glorious barbecue sauce all over the chicken. I like to use a mixture of sweet and smoky sauce for that perfect balance. Now, set your slow cooker to low and let it work its magic for 4 to 5 hours. If you’re in a hurry, you can set it to high for 2 to 3 hours instead.

    Step 2: Make the Coleslaw

    While the chicken is getting all tender and delicious, let’s whip up the tangy coleslaw! Grab a mixing bowl and toss in the coleslaw mix of cabbage and carrots. This adds a nice crunch that contrasts perfectly with the soft sliders.

    Add in the mayonnaise, apple cider vinegar, sugar, salt, and pepper. Give it a good stir until everything is well combined. Don’t forget to taste it! Adjust seasoning as needed. Then, cover it and pop it in the fridge until you’re ready to assemble those sliders.

    Step 3: Shred the Chicken

    After the chicken is cooked to tender perfection, it’s time for shredding! Use two forks to pull the chicken apart right in the slow cooker. Trust me, the aroma wafting through your kitchen will be divine!

    As you shred, mix the chicken in with all that tasty BBQ sauce. Make sure each piece is coated, which amps up the flavor. It’s a simple step, but oh, what a difference it makes!

    Step 4: Assemble the Sliders

    Alright, it’s assembly time! Grab those soft slider buns and fill each one with a generous portion of the BBQ chicken.

    Now it’s time for the star of the show—the tangy coleslaw. Pile it high on top of the chicken for that crunchy goodness. Don’t skimp! The combination of BBQ sauce, tender chicken, and zesty coleslaw is pure bliss.

    Serve them right away while they’re warm, and watch your family’s faces light up in delight!

    Tips for Success

    • Season your chicken well. Don’t hesitate to add a pinch more salt or pepper for depth.
    • For a quick shortcut, use rotisserie chicken instead of cooking from scratch.
    • Adjust the BBQ sauce to match your family’s taste—more sweet or tangy, it’s up to you!
    • Let the coleslaw sit for at least 30 minutes in the fridge for flavors to meld.

    Equipment Needed

    • Slow cooker: This is essential for tender, shredded chicken.
    • Mixing bowl: Perfect for combining the coleslaw ingredients.
    • Forks: You’ll need them to shred the chicken effortlessly.
    • Sharp knife: Handy for slicing the slider buns.
    • Cutting board: A must-have for prepping ingredients.

    Variations

    • Try different BBQ sauces, like a spicy chipotle or a tangy vinegar-based sauce, for unique flavors.
    • Add toppings like sliced jalapeños, pickles, or sliced avocado for an extra punch.
    • For a healthier twist, substitute Greek yogurt for mayonnaise in the coleslaw dressing.
    • Use pulled pork or turkey instead of chicken for a fun spin on this classic dish.
    • Add fresh herbs like cilantro or parsley to the coleslaw for a flavor boost!

    Serving Suggestions

    • Serve with crispy sweet potato fries for a delightful contrast of flavors.
    • Pair with a fresh garden salad for a light, nutritious complement.
    • A cold glass of iced tea or lemonade beautifully balances the richness of the sliders.
    • For a fun twist, add a side of potato chips with dip for crunch.

    FAQs about BBQ Chicken Sliders Tangy Coleslaw

    You’ve got questions, and I’ve got answers! Here are some common queries about BBQ Chicken Sliders Tangy Coleslaw to help you along your cooking journey.

    Can I make the sliders ahead of time? Absolutely! You can cook the chicken and prepare the coleslaw in advance. Just assemble the sliders when you’re ready to eat for the best flavor and texture.

    How should I store leftovers? Store any leftover BBQ chicken and coleslaw in separate airtight containers in the fridge. They’ll stay fresh for about 3 days. You can reheat the chicken, but I recommend enjoying the coleslaw cold.

    Can I adjust the spice level? Yes! If your family enjoys a kick, try adding hot sauce to the BBQ sauce or incorporating jalapeños into the coleslaw.

    What can I serve with these sliders? Great question! These BBQ Chicken Sliders pair wonderfully with sweet potato fries or a crisp garden salad.

    Final Thoughts

    Creating and sharing BBQ Chicken Sliders Tangy Coleslaw brings me pure joy! The moment I see my family’s delighted faces as they dive into these flavorful sliders, my heart swells with happiness.

    This recipe is a lifesaver for busy weeknights and perfect for gatherings. With minimal prep and the slow cooker doing its magic, I can focus on enjoying quality time with my loved ones.

    Each bite of the tender chicken paired with zesty coleslaw is a delicious reminder that quick meals can be both satisfying and comforting. Trust me, you’ll want to make these sliders over and over!


    Print

    clock clock iconcutlery cutlery iconflag flag iconfolder folder iconinstagram instagram iconpinterest pinterest iconfacebook facebook iconprint print iconsquares squares iconheart heart iconheart solid heart solid icon

    Description

    BBQ Chicken Sliders with Tangy Coleslaw are delicious sandwiches featuring tender shredded chicken smothered in BBQ sauce and topped with a refreshing coleslaw.


    • 2 pounds boneless, skinless chicken thighs
    • 1 cup barbecue sauce
    • 1 cup coleslaw mix (cabbage and carrots)
    • 1/2 cup mayonnaise
    • 2 tablespoons apple cider vinegar
    • 1 tablespoon sugar
    • Salt to taste
    • Black pepper to taste
    • 8 slider buns

    1. Place chicken thighs in a slow cooker and pour barbecue sauce over them. Cook on low for 4-5 hours or high for 2-3 hours, until the chicken is tender and easily shreds.
    2. In a mixing bowl, combine coleslaw mix, mayonnaise, apple cider vinegar, sugar, salt, and pepper. Stir thoroughly and refrigerate until needed.
    3. When cooked, use two forks to shred the chicken in the slow cooker, mixing it well with the barbecue sauce.
    4. Fill each slider bun with a generous portion of BBQ chicken and top with coleslaw. Serve immediately.

    Notes

    • Feel free to adjust the amount of barbecue sauce according to your taste.
    • This recipe can be made in advance; just assemble the sliders before serving.
    • Store leftovers in an airtight container in the refrigerator.
    • Prep Time: 15 minutes
    • Cook Time: 4-5 hours on low or 2-3 hours on high
    • Category: Main Dish
    • Method: Slow Cooker
    • Cuisine: American

    Nutrition

    • Serving Size: 1 slider
    • Calories: 350
    • Sugar: 5g
    • Sodium: 800mg
    • Fat: 15g
    • Saturated Fat: 2.5g
    • Unsaturated Fat: 8g
    • Trans Fat: 0g
    • Carbohydrates: 38g
    • Fiber: 1g
    • Protein: 20g
    • Cholesterol: 70mg

    Sharing is caring!

  • Smash Burgers with Baconnaise Sauce

    Smash Burgers with Baconnaise Sauce


    Introduction to Smash Burgers with Baconnaise Sauce

    And as an at times frantic mother myself, always running a mile a minute, I completely can appreciate the need for any easy meal solution in such situations. And so, I give you Smash Burgers with Baconnaise Sauce! Not just the average quick fix for a busy weeknight but a flavor bomb that’ll blow your loved ones’ and friends’ minds away: imagine juicy beef patties, crispy turkey bacon, and a creamy, zesty baconnaise sauce all built up for an epic burger experience. You’ll be thanking me once you’ve tried it!

    Why You’ll Love This Smash Burgers with Baconnaise Sauce

    These Smash Burgers with Baconnaise Sauce are a dream come true for anyone short on time but big on flavor. They come together quickly, making them perfect for those weeknight dinners when you want something special without the fuss. Plus, the combination of savory beef, crispy bacon, and creamy baconnaise will have everyone licking their plates! You’ll love how simple yet satisfying this meal can be.

    Ingredients for Smash Burgers with Baconnaise Sauce

    Let’s get our ingredients lined up for these sensational Smash Burgers with Baconnaise Sauce! Here’s what you’ll need to create burger magic:

    • Ground chuck: Use a blend of 80% beef and 20% fat for the juiciest patties.
    • Salt: Elevates the flavor of the beef and enhances the overall taste.
    • Black pepper: Adds a delightful kick with each bite that perfectly balances the richness.
    • Garlic powder: A simple way to infuse that savory aroma into the beef patties.
    • Avocado oil: This high smoke point oil is perfect for cooking at high heat without burning.
    • Wholegrain mustard: It gives a zesty and slightly tangy flavor that brightens up the dish.
    • White onions: Sweet yet peppery, they caramelize beautifully when cooked.
    • Pepper jack cheese: A bold, spicy kick that melts delectably over the beef.
    • Burger buns: Pot for toasted whole-grain options for added texture and nutrition.
    • Turkey bacon: A lighter alternative to regular bacon that adds crunch and smokiness.
    • Mayonnaise: The creamy base for the baconnaise sauce, bringing all the flavors together.
    • Ketchup: A classic for that sweet and tangy flavor in the sauce.
    • More wholegrain mustard: To give an extra punch to the baconnaise sauce.
    • Crispy chopped turkey bacon: Not just a topping, but a delicious component of the sauce.
    • Worcestershire sauce: A little goes a long way in adding depth to the baconnaise.
    • Apple cider vinegar: This brings a nice acidity that balances all the rich flavors.
    • All-purpose rub: A handy blend of spices to season the patties perfectly.
    • Red pepper flakes: For those who crave an added spicy kick in every bite.

    For specific measurements, don’t forget to check at the bottom of the article, where you’ll find everything ready for printing. Enjoy the cooking adventure!

    How to Make Smash Burgers with Baconnaise Sauce

    Let’s dive into the deliciousness of making Smash Burgers with Baconnaise Sauce! Follow these simple steps, and you’ll have a mouthwatering meal ready in no time. Remember, cooking should be fun and satisfying, so let’s get started!

    Step 1: Shape the Beef Balls

    First things first, grab that ground chuck. Form it into 150 g balls and place them on a tray. Make sure to handle the meat gently; you want those patties to stay tender. Refrigerate for about 30 minutes. This step helps them hold their shape while cooking!

    Step 2: Slice the Onions

    Next, let’s prep the onions. Using a mandoline slicer, slice the onions into very thin rounds. Thin slices mean they’ll caramelize beautifully! Pat them dry with a paper towel. Trust me, this extra moisture control makes a difference later on.

    Step 3: Cook the Turkey Bacon

    Now, it’s time to make the turkey bacon crispy! Heat your frying pan over medium heat. Cook the bacon until golden and crispy, about 7 minutes. Drain excess fat, then let it cool slightly. Once cool, chop it up for an awesome crunch in your burgers and sauce!

    Step 4: Make the Baconnaise Sauce

    In a mixing bowl, combine mayonnaise, ketchup, wholegrain mustard, and the chopped turkey bacon. Add Worcestershire sauce, apple cider vinegar, all-purpose rub, and red pepper flakes. Mix everything until well combined. This creamy baconnaise sauce is going to knock your socks off! Pop it in the fridge until you’re ready for assembly.

    Step 5: Preheat and Smash

    Time to turn up the heat! Preheat a griddle or a heavy frying pan over medium-high heat. Brush it with that lovely avocado oil. Once hot, place your chilled beef balls spaced apart. Now here’s the fun part: using a burger press, smash each ball down firmly into a patty. This technique gets those delicious crispy edges going. Sprinkle salt, black pepper, and garlic powder on top for flavor!

    Step 6: Cook the Burgers

    Cook those patties for about 3-4 minutes. Then, add a spoonful of wholegrain mustard on each patty. Flip them over and put a slice of pepper jack cheese on top. Cook for another 3 minutes, or until the cheese melts perfectly. It’s time for some serious burger magic!

    Step 7: Toast the Buns

    While the burgers are cooking, let’s not forget about the buns! Place them cut side down on the griddle until golden brown. This little step enhances the texture and flavor of the burger. A crispy bun is the bedrock of any great burger experience!

    Step 8: Assemble the Burger

    Now comes the moment we’ve all been waiting for! Spread a generous layer of baconnaise sauce on the bottom of each toasted bun. Stack two smash patties on top. Add another dollop of baconnaise sauce before crowning it all with the upper bun. Look at that masterpiece! Your Smash Burgers with Baconnaise Sauce are ready to devour!

    Tips for Success

    • Keep your beef balls chilled before smashing for optimal texture.
    • Use a burger press for evenly cooked patties and perfect shapes.
    • Don’t skimp on seasoning; flavor is key to mouthwatering burgers!
    • Customize the toppings based on your family’s preferences.
    • Make the baconnaise sauce ahead of time for enhanced flavor.

    Equipment Needed

    • Frying pan: A heavy skillet works well; you can also use a griddle for more cooking space.
    • Burger press: Ideal for smashing patties; if you don’t have one, use a flat spatula.
    • Mandoline slicer: For perfect onion slices; a sharp knife will do if you prefer.
    • Mixing bowl: Necessary for the baconnaise sauce; any large bowl will suffice.

    Variations on Smash Burgers with Baconnaise Sauce

    • Beef Alternatives: Try using ground turkey or chicken for a lighter twist on the traditional smash burger.
    • Vegan Option: Substitute the beef with black bean or lentil patties and use vegan mayonnaise for the baconnaise sauce.
    • Different Cheeses: Experiment with gouda, cheddar, or even feta for a unique flavor profile.
    • Spicy Kick: Add jalapeños or sriracha to the baconnaise sauce to spice things up!
    • Herbs and Spices: Mix fresh herbs like basil or cilantro into the sauce for a fresh herbal aroma.

    Serving Suggestions for Smash Burgers with Baconnaise Sauce

    • Classic Sides: Serve with crispy French fries or sweet potato fries for that perfect pairing.
    • Refreshing Salads: A light coleslaw or a green salad adds freshness to balance the richness.
    • Beverage Pairings: Enjoy with a cold root beer or a crisp IPA to complement the flavors.
    • Presentation: Serve your burgers on a wooden board; it adds a rustic flair that everyone will love!

    FAQs about Smash Burgers with Baconnaise Sauce

    Can I make the baconnaise sauce ahead of time?

    Absolutely! In fact, making it a few hours or even a day in advance allows the flavors to meld beautifully. Just store it in the fridge until you’re ready to assemble your Smash Burgers with Baconnaise Sauce.

    What makes smash burgers different from traditional burgers?

    Smash burgers are all about the technique. By smashing the beef balls onto the cooking surface, you create a thicker crust with crispy edges while keeping the inside juicy. It’s all about achieving that perfect combination of textures!

    Can I use regular bacon instead of turkey bacon?

    Of course! While turkey bacon offers a lighter alternative, regular bacon will bring in all those crispy, smoky flavors. Just keep in mind that it might add more fat and calories to your burger.

    Is this recipe gluten-free?

    Yes! By using gluten-free burger buns, you can easily make these Smash Burgers with Baconnaise Sauce safe for gluten-sensitive diners.

    How can I customize the toppings for my smash burgers?

    Feel free to get creative! Add toppings like avocado, jalapeños, or even fried eggs. Balsamic glaze, pickles, and different cheese varieties can elevate your burgers to new heights. The possibilities are endless!

    Final Thoughts

    Making Smash Burgers with Baconnaise Sauce is more than just a recipe; it’s an experience that brings joy and flavor to your table. Each bite is a beautiful blend of juicy beef, crispy turkey bacon, and that dreamy baconnaise sauce. Whether it’s a casual family dinner or a gathering with friends, this dish is sure to spark smiles and satisfaction all around. I promise, the delight you see on your loved ones’ faces when you serve these burgers will be worth every moment spent in the kitchen. So fire up that griddle and savor the magic of homemade burgers!


    Print

    clock clock iconcutlery cutlery iconflag flag iconfolder folder iconinstagram instagram iconpinterest pinterest iconfacebook facebook iconprint print iconsquares squares iconheart heart iconheart solid heart solid icon

    Description

    A delicious recipe for Smash Burgers topped with a homemade Baconnaise sauce, combining all the flavors of juicy beef patties and crispy turkey bacon.


    • 900 g ground chuck (80/20, formed into 150 g balls)
    • Salt
    • Black pepper
    • Garlic powder
    • Avocado oil (for cooking)
    • Wholegrain mustard (for cooking)
    • 2 white onions (thinly sliced)
    • 150 g pepper jack cheese (slices)
    • 4 burger buns (toasted)
    • 225 g turkey bacon (cooked until crispy and chopped)
    • 120 ml mayonnaise
    • 30 ml ketchup
    • 30 ml wholegrain mustard
    • 120 g crispy chopped turkey bacon
    • 15 ml Worcestershire sauce
    • 15 ml apple cider vinegar
    • 8 g all-purpose rub (salt, pepper, garlic powder mix)
    • 8 g red pepper flakes

    1. Shape the ground chuck into 150 g portions and roll into balls. Refrigerate the balls for 30 minutes to optimize searing and structure.
    2. Using a mandoline slicer, carefully slice the onions into very thin rounds. Remove excess moisture with a paper towel and chill until use.
    3. Cook turkey bacon in a hot frying pan until evenly crisp and golden. Drain excess fat, cool slightly, and finely chop for use in burgers and the sauce.
    4. In a mixing bowl, combine mayonnaise, ketchup, mustard, chopped crispy turkey bacon, Worcestershire sauce, apple cider vinegar, all-purpose rub, and red pepper flakes. Stir until well incorporated and refrigerate until assembly.
    5. Preheat a griddle or heavy frying pan over medium-high heat and coat with avocado oil. Space chilled beef balls apart, top each with sliced onions, and firmly smash with a burger press. Season with salt, black pepper, and garlic powder.
    6. After 3-4 minutes, spread a layer of mustard atop each patty, then flip burgers. Place a slice of pepper jack cheese on each and cook until the cheese is melted, about 3 minutes more.
    7. Place the burger buns cut side down on the griddle and toast until golden brown.
    8. Spread baconnaise sauce on the base of each toasted bun. Stack two smash patties per serving, add more baconnaise sauce on top, and crown with the upper bun.

    Notes

    • Ensure the beef is well-chilled before smashing for optimal texture.
    • Feel free to customize the toppings as you like.
    • Use a burger press for even cooking and perfect shape.
    • Prep Time: 45 minutes
    • Cook Time: 15 minutes
    • Category: Main Course
    • Method: Grilling
    • Cuisine: American

    Nutrition

    • Serving Size: 1 burger
    • Calories: 800
    • Sugar: 4 g
    • Sodium: 1200 mg
    • Fat: 50 g
    • Saturated Fat: 15 g
    • Unsaturated Fat: 20 g
    • Trans Fat: 0 g
    • Carbohydrates: 40 g
    • Fiber: 2 g
    • Protein: 40 g
    • Cholesterol: 150 mg

    Sharing is caring!

  • Crack Chicken Bacon Casserole

    Crack Chicken Bacon Casserole


    Introduction to Crack Chicken Bacon Casserole

    As a mom, life gets busy, I know. Work, kids, and a million daily tasks—trying to carve out time to cook a comforting meal can seem nearly impossible. Enter my Crack Chicken Bacon Cassole! This powerhouse of a comfort dish is jam-packed with flavor but comes together so quickly and easily. Just a few simple ingredients and you’re well on your way to serving up pure comfort in a casserole form for your family and friends to ooh and ahh over. Trust me, they’ll be begging for seconds!

    Why You’ll Love This Crack Chicken Bacon Casserole

    This Crack Chicken Bacon Casserole is the ultimate solution for busy weeknights. It’s incredibly easy to make, taking less than 40 minutes from start to finish. With creamy, cheesy goodness and the savory crunch of bacon, it’s sure to satisfy even the pickiest eaters at your table. Plus, everything can be prepared in advance, so you can sit back and enjoy quality time with your loved ones while it bakes to perfection!

    Ingredients for Crack Chicken Bacon Casserole

    Here’s a rundown of ingredients that make this Crack Chicken Bacon Casserole a crowd favorite. Each component plays a crucial role in creating that comforting texture and mouthwatering flavor.

    • Cooked Chicken: Shredded or diced chicken is the star of the show, bringing protein and heartiness to your casserole. Using rotisserie chicken cuts down on prep time!
    • Cream Cheese: This creamy base brings richness and helps bind everything together. Make sure it’s softened for easy mixing!
    • Sour Cream: Adds a lovely tang that balances out the richness from the cream cheese.
    • Milk: A splash of milk helps create a creamy consistency. Feel free to swap with almond or oat milk for a dairy-free version.
    • Ranch Seasoning Mix: This mix is packed with herbs and spices, offering that beloved ranch flavor that ties the dish together beautifully.
    • Shredded Cheddar Cheese: Who doesn’t love cheese? Adding cheddar brings the gooey, melty goodness that you crave in comfort food.
    • Cooked Bacon: Crumbled bacon provides a delightful crunch and a savory, smoky flavor that elevates the entire casserole.
    • Chopped Green Onions: While optional, these fresh onions add a pop of color and a hint of freshness, making your dish look as good as it tastes!

    You’ll find precise measurements for each ingredient at the bottom of this article, making it easy for you to print and follow. Now, let’s get cooking!

    How to Make Crack Chicken Bacon Casserole

    Making this Crack Chicken Bacon Casserole is a breeze! With these simple steps, you’ll have a delicious and comforting dish ready in no time. Let’s dive into the details of creating this crowd-pleaser!

    Step 1: Preheat the Oven

    First things first, preheat your oven to 190°C (375°F). Preheating ensures that your casserole cooks evenly. It helps the cheese melt beautifully and allows everything to come together just right. So, set that temperature, and let it warm up while you prepare the delicious filling!

    Step 2: Combine Creamy Ingredients

    In a large mixing bowl, whisk together the softened cream cheese, sour cream, milk, and ranch seasoning until smooth. Make sure the cream cheese is adequately softened to prevent lumps. A common mistake is not mixing enough, which can lead to uneven flavors. So, get in there and blend thoroughly for a silky mixture!

    Step 3: Add Chicken and Cheese

    Next, fold in the shredded chicken and half the shredded cheddar cheese. Take your time here; you want everything to be evenly distributed. Making sure each bite is filled with chicken and cheese gives that creamy deliciousness we crave. Who wouldn’t want a cheesy, savory sensation in every mouthful?

    Step 4: Prepare the Baking Dish

    Now, transfer your mixture into a 23 x 33 cm baking dish. Use a spatula to spread it evenly. This is key! An even spread ensures that every inch of the casserole gets that lovely, gooey goodness when baked. No one wants a dry corner!

    Step 5: Top with Cheese and Bacon

    Sprinkle the remaining cheddar cheese and crumbled bacon evenly over the top. Layering these ingredients not only enhances the taste but also creates a beautiful, golden crust. The melting cheese and crispy bacon will make your casserole irresistible!

    Step 6: Bake to Perfection

    Pop your dish into the preheated oven and bake for 25-30 minutes. Keep an eye on it! You want it hot, bubbling, and your cheese lightly browned. This step is essential as it melds all flavors together. Trust your nose – that appetizing aroma will let you know when it’s ready!

    Step 7: Garnish and Serve

    Once out of the oven, sprinkle chopped green onions for a fresh, colorful touch. They add not just flavor but also brightness to your dish. Serve this delightful casserole hot for a meal that’s as pleasing to the eyes as it is to the stomach!

    Tips for Success

    • For extra flavor, try using smoked bacon to enhance the savory notes of the casserole.
    • Mix all creamy ingredients until fully blended to avoid any lumps in your dish.
    • Don’t overbake; keep an eye on the cheese to prevent it from becoming too browned.
    • If you’re prepping ahead, store the casserole mixture in the fridge and bake right before serving.
    • For a twist, add vegetables like spinach or broccoli for added nutrition!

    Equipment Needed

    • Large mixing bowl: A simple mixing bowl works wonders, but a stand mixer can save time!
    • Spatula: Use any flat utensil for easy mixing and spreading. A large spoon works just fine too.
    • Baking dish: A 23 x 33 cm dish is ideal, but any oven-safe dish will do.
    • Whisk: Any whisk or even a fork will help blend those creamy ingredients perfectly.

    Variations of Crack Chicken Bacon Casserole

    • Buffalo Style: Add buffalo sauce for a spicy kick. You can also toss in some blue cheese for a unique twist!
    • Vegetarian Option: Substitute chicken with hearty veggies like mushrooms, zucchini, and bell peppers. Use plant-based cream cheese for a creamy texture.
    • Low-Carb Version: Swap out the milk for unsweetened almond milk and the flour for crushed cauliflower to reduce carbs.
    • Tex-Mex Flair: Incorporate black beans, corn, and diced tomatoes with green chilies for a zesty, Southwestern flavor.
    • Cheesy Ranch Dreams: Add more varieties of cheese like pepper jack or mozzarella for a cheesier experience!

    Serving Suggestions for Crack Chicken Bacon Casserole

    • Pair with a crisp garden salad for a refreshing contrast to the creamy casserole.
    • Serve with buttery garlic bread to soak up every last bit of that glorious sauce.
    • A glass of chilled iced tea or lemonade complements the flavors perfectly.
    • For a festive touch, garnish with fresh herbs like parsley or cilantro before serving.
    • Consider individual ramekins for a fun, personal touch when hosting!

    FAQs about Crack Chicken Bacon Casserole

    As I share this beloved recipe, I often get asked some common questions. Here are a few that might pop up in your mind as you embark on your Crack Chicken Bacon Casserole journey!

    Can I use fresh chicken instead of cooked? Absolutely! If using fresh chicken, you’ll want to cook it thoroughly before shredding it for the casserole. This ensures the flavors meld beautifully during baking.

    Can I freeze leftovers? Yes, this casserole freezes well! Just make sure to let it cool completely, then store in an airtight container. When you’re ready to enjoy it again, simply thaw in the refrigerator and reheat in the oven.

    What sides go well with this casserole? I recommend pairing it with a crisp garden salad or some garlic bread. The freshness of the salad beautifully balances the richness of the casserole.

    Can I make this dish ahead of time? You sure can! Prepare everything up to the baking point, then cover it and store it in the fridge. Bake just before serving for a delicious, time-saving meal.

    How spicy is this casserole? Can I adjust the spice level? The original recipe is mild, perfect for all ages. However, if you like it spicy, feel free to toss in jalapeños or a few dashes of hot sauce. Spice it to your heart’s content!

    Final Thoughts

    Crack Chicken Bacon Casserole is more than just a meal; it’s a comforting hug on a plate! Each bite brings a delightful blend of creamy, cheesy goodness and crispy bacon that warms the heart, making it perfect for cozy nights in with family. I cherish the moments spent around the table, laughing and sharing stories while enjoying this delicious dish. Whether it’s a busy weeknight or a gathering with friends, this casserole turns any occasion into something special. I hope this recipe brings as much joy to your home as it has to mine!


    Print

    clock clock iconcutlery cutlery iconflag flag iconfolder folder iconinstagram instagram iconpinterest pinterest iconfacebook facebook iconprint print iconsquares squares iconheart heart iconheart solid heart solid icon

    Description

    Crack Chicken Bacon Casserole is a comforting and delicious dish made with shredded chicken, creamy ingredients, and topped with bacon and cheese.


    • 480 g cooked chicken, shredded or diced
    • 225 g cream cheese, softened
    • 120 ml sour cream
    • 120 ml milk
    • 28 g ranch seasoning mix
    • 110 g shredded cheddar cheese
    • 55 g cooked bacon, crumbled
    • 25 g chopped green onions (optional, for garnish)

    1. Set the oven to 190°C and allow it to fully preheat.
    2. In a large mixing bowl, whisk together the softened cream cheese, sour cream, milk, and ranch seasoning mix until smooth and uniform.
    3. Fold the shredded cooked chicken and half the shredded cheddar cheese into the cream cheese mixture, ensuring even distribution.
    4. Spread the blended mixture evenly into a 23 x 33 cm baking dish.
    5. Sprinkle the remaining cheddar cheese and crumbled bacon over the surface.
    6. Bake in the preheated oven for 25-30 minutes until hot, bubbling, and the cheese topping is melted and lightly browned.
    7. Finish with chopped green onions before presenting, if desired.

    Notes

    • For a spicier flavor, consider adding jalapeños or hot sauce.
    • This casserole can be prepared in advance and baked just before serving.
    • Ensure the chicken is cooked thoroughly before adding it to the casserole.
    • Prep Time: 10 minutes
    • Cook Time: 30 minutes
    • Category: Main Dish
    • Method: Baking
    • Cuisine: American

    Nutrition

    • Serving Size: 1 cup
    • Calories: 400
    • Sugar: 2 g
    • Sodium: 800 mg
    • Fat: 28 g
    • Saturated Fat: 12 g
    • Unsaturated Fat: 12 g
    • Trans Fat: 0 g
    • Carbohydrates: 5 g
    • Fiber: 0 g
    • Protein: 30 g
    • Cholesterol: 120 mg

    Sharing is caring!