Author: IHAAL Team

  • Turkey Sweet Potato Chili

    Turkey Sweet Potato Chili


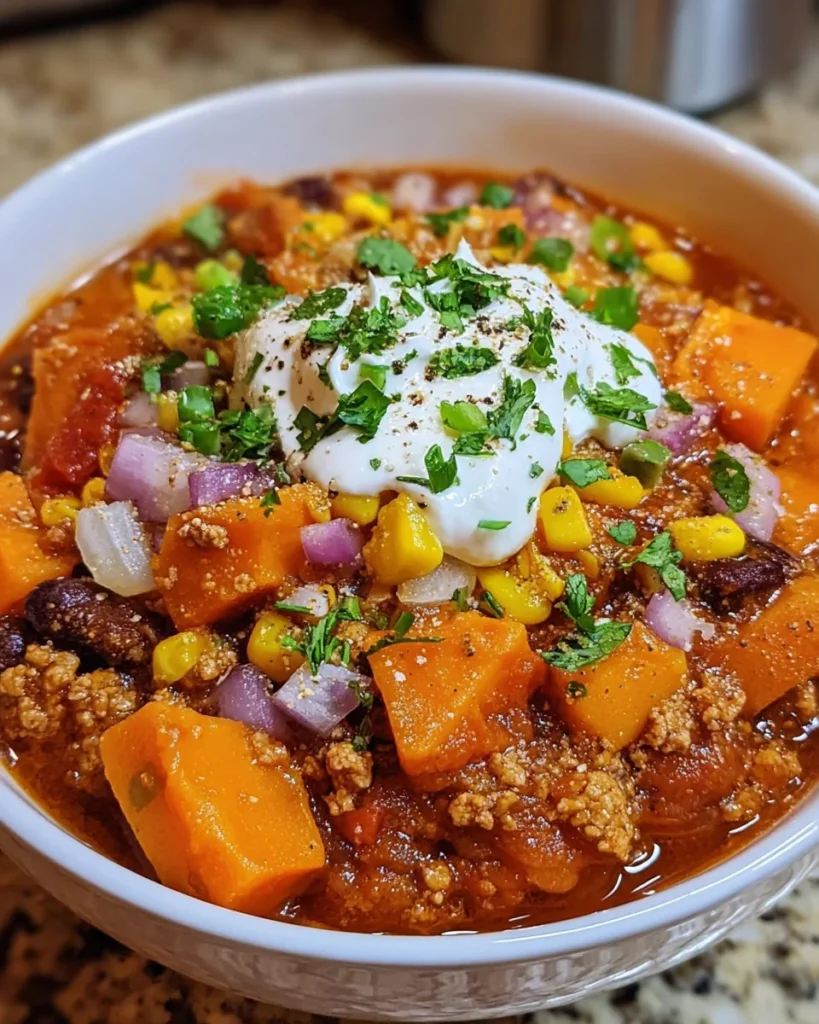
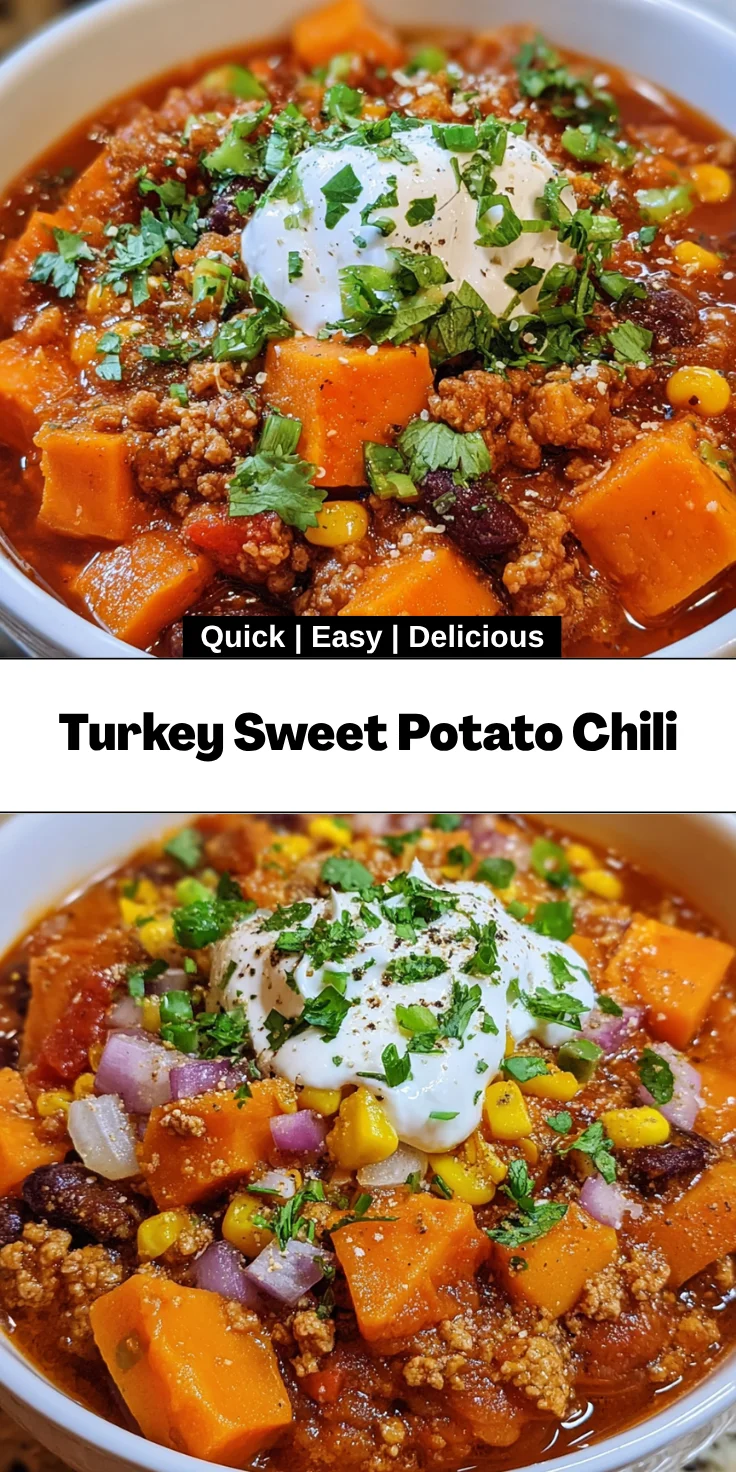
    Introduction to Turkey Sweet Potato Chili

    As a busy mom and enthusiastic home cook, I know how precious time can be. After all, between juggling work commitments, family responsibilities, and those never-ending to-do lists, finding a moment to breathe can be challenging. That’s where this Turkey Sweet Potato Chili comes in. It’s the perfect cozy dish that wraps you in warmth, making even the most hectic days feel a little lighter. With its hearty flavors and beautifully vibrant ingredients, this chili is not only a quick solution for dinner but a delightful way to connect with loved ones over a comforting bowl!

    Why You’ll Love This Turkey Sweet Potato Chili

    This Turkey Sweet Potato Chili is a game changer for busy nights. It comes together quickly, making it ideal for weeknight meals without sacrificing flavor. The sweet potatoes add a natural creaminess while providing a nutritious boost. You’ll appreciate how it satisfies cravings for something hearty yet healthy. Plus, the leftovers taste even better the next day, making it a fantastic option for meal prep!

    Ingredients for Turkey Sweet Potato Chili

    Gathering the right ingredients is essential for that soul-soothing Turkey Sweet Potato Chili. Let’s dive into each component that brings this dish to life!

    • Avocado oil: This healthy fat adds richness and prevents sticking. Olive oil works well as a substitute, too.
    • White onion: Diced for that sweet and savory base, onions add depth to the chili’s flavor.
    • Garlic: The aromatic quality of minced garlic elevates the entire dish, making it truly irresistible.
    • Ground turkey: This lean protein gives the chili its hearty heartiness without being overwhelming. Feel free to swap it for chicken or beef if that’s your preference.
    • Sweet potatoes: Mashed into the chili, they provide natural sweetness and creaminess that balances the spice beautifully.
    • Crushed tomatoes: A canned staple for depth and acidity; they create a luscious sauce for simmering the ingredients.
    • Chicken broth: Used to add moisture and flavor, you can also use vegetable broth for a vegetarian option.
    • Chili powder: This spice blend offers warmth and bold flavor, partnering perfectly with the other spices.
    • Cumin: Its earthy notes contribute a distinct aroma that brings out the best in the chili.
    • Paprika: Adding a hint of smokiness, paprika elevates the flavor profile of the dish.
    • Cinnamon: Just a pinch enhances the sweetness of the sweet potatoes, making it a delightful surprise.
    • Cayenne pepper (optional): For those who enjoy a spicy kick, cayenne adds heat without overwhelming the other flavors.
    • Salt and black pepper: Essential seasonings to balance flavors. Always taste as you go for the best results!
    • Corn: This sweet addition adds a nice contrast to the chili’s richness.
    • Black beans: A great source of fiber, they enhance both texture and nutrition.
    • Sour cream (optional): A dollop on top offers creaminess that softens spiciness.
    • Fresh cilantro (optional): For a burst of fresh flavor, chop this herb as a vibrant garnish.

    For exact measurements, check the bottom of this article where you can find everything you need for your grocery list!

    How to Make Turkey Sweet Potato Chili

    Now that we’re armed with all the delicious ingredients, let’s roll up our sleeves and dive into creating this Turkey Sweet Potato Chili. This step-by-step guide will help you navigate through with ease, ensuring a satisfying result to warm the soul!

    Step 1: Sauté Onions and Garlic

    Start by heating the avocado oil in a large Dutch oven over medium heat.

    Add the finely diced onion and let it sizzle for about 2-3 minutes until it softens.

    Then, toss in the minced garlic and stir for an additional 30 seconds until your kitchen is filled with that aromatic goodness.

    This simple step sets the stage for your flavorful base!

    Step 2: Brown the Ground Turkey

    Next, carefully push the onions and garlic to one side of the pot.

    Now, add the ground turkey to the empty space, breaking it apart with a spoon.

    Cook this for around 7-8 minutes until the turkey is no longer pink.

    This allows the meat to absorb those lovely flavors, making it the perfect foundation for the chili!

    Step 3: Add Sweet Potatoes and Tomatoes

    Once the turkey is browned, stir in those vibrant sweet potato cubes.

    Give everything a good mix and let it cook together for just 2 more minutes.

    Now, pour in the crushed tomatoes and chicken broth.

    Sprinkle in the chili powder, cumin, paprika, cinnamon, cayenne pepper (if using), salt, and pepper.

    Stir well to combine; it should start looking like a comforting bowl of goodness!

    Step 4: Simmer the Chili

    Increase the heat to high until the mixture comes to a bubbling boil.

    Once it’s boiling, reduce the heat to medium-low, covering the pot.

    Let it simmer for 30 minutes, stirring occasionally to prevent sticking.

    This is where the magic happens, allowing all the flavors to meld beautifully!

    Step 5: Stir in Corn and Black Beans

    After half an hour, it’s time to stir in the drained corn and rinsed black beans.

    Give it all a gentle stir and cover the pot again.

    Let it continue simmering for another 10-15 minutes until the sweet potatoes are fork-tender.

    If you prefer a thicker chili, mash some of the sweet potatoes against the pot’s side with a spoon!

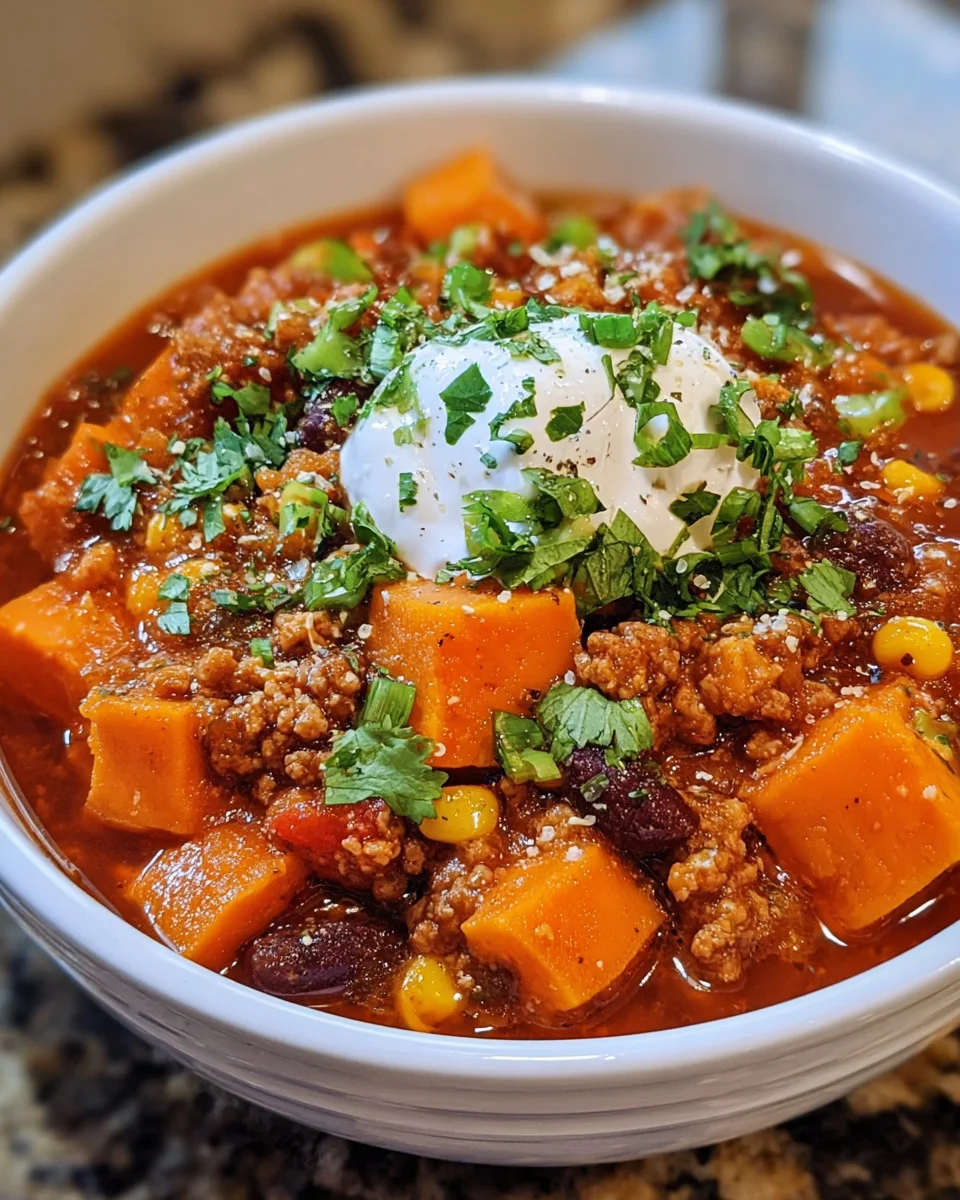
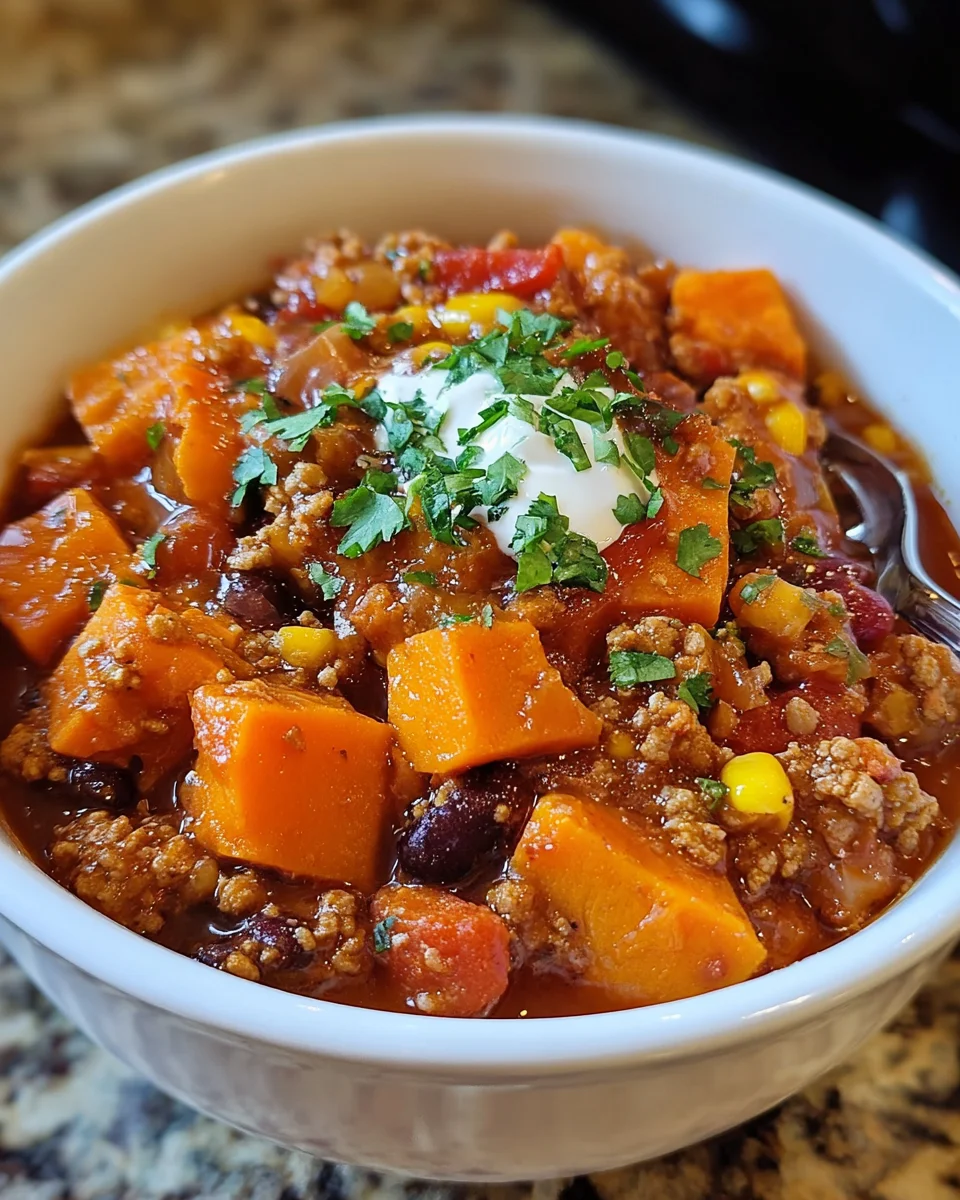
    Step 6: Serve and Garnish

    Now the moment has arrived!

    Ladle the hot chili into bowls, and if you want to add a lovely touch, top each serving with a dollop of sour cream and a sprinkle of fresh chopped cilantro.

    Your Turkey Sweet Potato Chili is ready to be enjoyed!

    Gather your loved ones and relish the comforting delight that you’ve just crafted!

    Tips for Success

    • Prep all ingredients beforehand to streamline your cooking process.
    • Feel free to adjust spices to suit your family’s taste buds; less for the kiddos, more for adventurous eaters!
    • Using a nice, heavy pot helps distribute heat evenly, preventing sticking.
    • For creaminess, mash a few sweet potato cubes during cooking.
    • This chili is even tastier the next day, so don’t hesitate to make extra!

    Equipment Needed

    • Large Dutch oven: Ideal for even cooking; a heavy pot works too.
    • Cutting board: Essential for chopping veggies safely.
    • Sharp knife: A good knife makes prep much easier.
    • Wooden spoon: Perfect for stirring without scratching your pot.
    • Measuring cups: Helpful for precision if you prefer exact amounts.

    Variations

    • Vegetarian Option: Replace ground turkey with lentils or crumbled tofu for a delicious plant-based version.
    • Spicy Twist: Amp up the heat by adding jalapeños or using hotter chili powder for feisty flavors.
    • Herb-Infused Chili: Experiment with fresh herbs like oregano or thyme for an aromatic herbal kick.
    • Loaded Chili: Top with shredded cheese, sliced avocado, or diced green onions for extra layers of flavor.
    • Sweet Potato Variations: Swap sweet potatoes for regular potatoes, but keep an eye on cooking time for tenderness.

    Serving Suggestions

    • Crispy Cornbread: Serve with warm, buttery cornbread for a delightful crunch.
    • Green Salad: A light salad with greens and a citrus dressing complements the chili beautifully.
    • Refreshing Beverage: Pair with a chilled glass of lemonade or iced tea for a refreshing contrast.
    • Personal Touch: Use colorful bowls and garnish with extra cilantro for a vibrant presentation!

    FAQs about Turkey Sweet Potato Chili

    Here are some common questions I get about this delicious Turkey Sweet Potato Chili. Hopefully, these FAQs will clarify any doubts you may have!

    Can I cook Turkey Sweet Potato Chili in a slow cooker?

    Absolutely! If you prefer a hands-off approach, this chili works beautifully in a slow cooker. Just sauté the onions and garlic, then add everything to your slow cooker. Cook on low for 6-8 hours or high for 3-4 hours.

    How can I make Turkey Sweet Potato Chili spicier?

    If you’re looking for a heat punch, consider increasing the cayenne pepper or tossing in some diced jalapeños. You can also use a spicier chili powder for extra warmth!

    Is Turkey Sweet Potato Chili healthy?

    Yes! This chili is packed with lean protein from the turkey and fiber from sweet potatoes and black beans. It’s a nutritious option that’s both filling and satisfying. Perfect for family meals!

    Can I freeze leftovers of Turkey Sweet Potato Chili?

    Definitely! This chili freezes well, making it a fantastic meal prep option. Just allow it to cool, then transfer to freezer-safe containers, and store for up to three months. Reheat when you’re ready to enjoy!

    What can I serve with Turkey Sweet Potato Chili?

    For a comforting meal, pair the chili with crispy cornbread or a fresh green salad. You could also add a side of tortilla chips for some crunch. Each option beautifully complements the chili’s heartiness!

    Final Thoughts

    This Turkey Sweet Potato Chili is more than just a meal; it’s a warm embrace on a chilly day, a simple solution on busy nights, and a chance to bring the family together over hearty bowls filled with love. Each spoonful tells a story of comfort and nourishment that’s perfect for any time of year. Whether you’re enjoying leftovers for lunch or sharing a fresh pot with friends, this recipe is bound to become a beloved staple in your home. Trust me, the smiles and satisfaction at mealtime are absolutely worth every minute spent cooking!


    Print

    clock clock iconcutlery cutlery iconflag flag iconfolder folder iconinstagram instagram iconpinterest pinterest iconfacebook facebook iconprint print iconsquares squares iconheart heart iconheart solid heart solid icon

    Description

    This Turkey Sweet Potato Chili is a delightful blend of flavors, perfect for a comforting meal all year round.


    • 2 tablespoons avocado oil
    • 1 small white onion, finely diced
    • 3 garlic cloves, finely minced
    • 1 pound ground turkey
    • 1 pound sweet potatoes, peeled and cut into ½-inch cubes
    • 2 (15-ounce) cans crushed tomatoes
    • 1 cup chicken broth
    • 2 tablespoons chili powder
    • 2 teaspoons cumin
    • 1 teaspoon paprika
    • ⅛ teaspoon cinnamon
    • ⅛ teaspoon cayenne pepper (optional)
    • 2 teaspoons salt
    • ¾ teaspoon black pepper
    • 1 (15.25-ounce) can corn, drained
    • 1 (15.5-ounce) can black beans, drained and rinsed
    • Sour cream (optional, for serving)
    • Fresh cilantro, finely chopped (optional, for serving)

    1. Heat avocado oil in a large Dutch oven over medium heat. Add diced onions and cook for 2-3 minutes until tender. Add minced garlic and cook for another 30 seconds until fragrant.
    2. Push onions and garlic to the side and add ground turkey to the pot. Cook for 7-8 minutes, breaking it apart with a spoon, until no longer pink. Add sweet potato cubes, stir everything together, and cook for 2 more minutes.
    3. Pour in crushed tomatoes and chicken broth. Add all seasonings: chili powder, cumin, paprika, cinnamon, cayenne (if using), salt, and black pepper. Stir well to combine. Increase heat to high until the mixture begins to boil.
    4. Once boiling, reduce heat to medium-low, cover the pot, and simmer for 30 minutes, stirring occasionally to prevent sticking.
    5. Stir in drained corn and black beans. Cover and continue simmering for 10-15 more minutes, until sweet potatoes are fork-tender. For a thicker consistency, mash some of the sweet potatoes against the side of the pot with a spoon.
    6. Ladle hot chili into bowls and top with a dollop of sour cream and sprinkle of fresh chopped cilantro if desired.

    Notes

    • This chili can be made ahead of time and stored in the refrigerator for up to 3 days.
    • It freezes well, so you can enjoy it later. Just reheat before serving.
    • Adjust the spices according to your heat preference.
    • Prep Time: 15 minutes
    • Cook Time: 50 minutes
    • Category: Main Dish
    • Method: Stovetop
    • Cuisine: American

    Nutrition

    • Serving Size: 1 cup
    • Calories: 320
    • Sugar: 6g
    • Sodium: 800mg
    • Fat: 10g
    • Saturated Fat: 2g
    • Unsaturated Fat: 8g
    • Trans Fat: 0g
    • Carbohydrates: 38g
    • Fiber: 8g
    • Protein: 24g
    • Cholesterol: 70mg

    Sharing is caring!

  • Spicy Sweet Strawberry Jalapeño Salsa

    Spicy Sweet Strawberry Jalapeño Salsa


    Introduction to Spicy Sweet Strawberry Jalapeño Salsa

    Welcome to a delightful culinary adventure! Today, I’m thrilled to share my recipe for Spicy Sweet Strawberry Jalapeño Salsa. This vibrant salsa is the perfect blend of sweet strawberries and zesty jalapeños, making it an impeccable choice for busy moms or professionals like you, who want to whip up something quick yet impressive. Whether you’re hosting a gathering or just looking for a simple dip for movie night, this salsa adds a burst of flavor that will tantalize everyone’s taste buds. Let’s dive into this refreshing bite of summer!

    Why You’ll Love This Spicy Sweet Strawberry Jalapeño Salsa

    This Spicy Sweet Strawberry Jalapeño Salsa is truly a game-changer in my kitchen. It’s quick to make, taking just 10 minutes of your time! The balance of sweet and spicy makes it incredibly versatile, cheering up any meal or snack. Plus, it’s packed with fresh ingredients that elevate your dishes while keeping you healthy. It’s the perfect solution when you’re in a rush but still want something delicious and satisfying!

    Ingredients for Spicy Sweet Strawberry Jalapeño Salsa

    Gather the following fresh ingredients to create this delightful Spicy Sweet Strawberry Jalapeño Salsa. You’ll find that each component plays a significant role in crafting the perfect balance of sweet and spicy flavors!

    • Fresh strawberries: These are the star of the show! Sweet and juicy, strawberries bring a refreshing taste that balances the heat.
    • Jalapeño: This fiery addition adds the perfect kick to the salsa. Feel free to adjust the amount based on your heat preference.
    • Red onion: Finely chopped, red onion contributes a mild crunch and a touch of sharpness, enhancing the overall flavor.
    • Fresh cilantro: This herb brings a burst of freshness. It’s great for those who love bright, herby notes in their dishes.
    • Lime juice: A squeeze of lime adds a zesty tanginess that ties all the flavors together beautifully.
    • Honey or agave syrup: This optional sweetener brings a delightful contrast to the spice. Use it based on your desired sweetness.
    • Salt and freshly cracked black pepper: Essential for seasoning. These elevate the taste, allowing the flavors to shine!

    For precise measurements, you can find the exact quantities at the bottom of the article, available for printing. Enjoy the process of mixing these vibrant ingredients to create a tasty salsa that’s sure to impress!

    How to Make Spicy Sweet Strawberry Jalapeño Salsa

    Now comes the fun part! Making this Spicy Sweet Strawberry Jalapeño Salsa is simple and quick, perfect for any culinary novice or seasoned chef. Let’s embark on this flavorful creation step by step!

    Step 1: Combine the Ingredients

    In a large mixing bowl, toss together the hulled and diced strawberries, finely chopped jalapeño, minced red onion, and chopped cilantro. As you combine these vibrant ingredients, imagine the lovely colors harmonizing into a salsa that will delight everyone. The fresh strawberries provide a sweet base, while the jalapeño adds its kick of heat.

    Step 2: Squeeze in the Lime Juice

    Next, grab a fresh lime and squeeze its juice all over the mixture. Lime juice not only brightens every bite but helps prevent the strawberries from browning. Trust me; it’s like sunshine dancing in your bowl! Make sure to stir everything well, ensuring the limey goodness coats all the ingredients.

    Step 3: Add Sweetness

    If you have a sweet tooth, drizzle in a tablespoon of honey or agave syrup to enhance the flavor. This is entirely up to your taste! The sweetness of the strawberries combined with the syrup creates a lovely balance against the spiciness of the jalapeño. Mix thoroughly, and don’t be shy about tasting it for yourself—I’ve been caught sneaking a spoonful more than once!

    Step 4: Season to Taste

    Now, it’s time to sprinkle in some salt and freshly cracked black pepper. A pinch of salt can elevate the flavors to new heights, and the black pepper adds a subtle warmth. Give it another gentle stir and take a moment to adjust the seasoning to your liking. Remember, the goal is a flavor explosion in each bite!

    Step 5: Chill the Salsa

    Grab some plastic wrap, or transfer your masterpiece to an airtight container. Let your salsa hang out in the refrigerator for at least 30 minutes. This chilling time allows the flavors to meld together, inviting a party of tastes that’s sure to impress when you serve it. I often set a timer and sneak in a few delicious bites while I wait!

    Step 6: Serve and Enjoy

    Finally, it’s time to serve your Spicy Sweet Strawberry Jalapeño Salsa! Pair it with crispy tortilla chips, grilled chicken, or fish for a delightful combination. You can even spoon it over tacos for that sweet and spicy kick that transforms any meal into a fiesta. Enjoy every vibrant bite, knowing you’ve made something truly special!

    Tips for Success

    • Always use ripe strawberries for the sweetest flavor.
    • Adjust the jalapeño to your heat tolerance—cutting out the seeds can help tone down the spice.
    • Let the salsa chill longer for enhanced flavor melding; a couple of hours is even better!
    • Experiment by adding other ingredients like diced mango or peach for a fruity twist.
    • Always taste as you go—don’t be afraid to personalize the seasoning!

    Equipment Needed

    • Mixing bowl: A large bowl to combine ingredients; a smaller bowl works too for small batches.
    • Knife: For hulking and dicing strawberries and chopping jalapeños; a cutting board is essential.
    • Measuring spoons: Handy for accurate seasoning and sweetener; you can eyeball it if you prefer.
    • Spoon: For mixing and tasting, the trusty spoon is your best friend!

    Variations of Spicy Sweet Strawberry Jalapeño Salsa

    • Mango Twist: Substitute half of the strawberries with diced mango for a tropical flair that’s equally sweet and zesty.
    • Pineapple Salsa: Add diced fresh pineapple for an extra burst of juicy sweetness and a hint of tartness.
    • Herb Medley: Experiment with other herbs like mint or basil for a refreshing change in flavor—perfect for summer gatherings!
    • Avocado Addition: Fold in diced avocado for a creamy texture that complements the salsa beautifully.
    • Smoky Heat: For a smoky taste, add a sprinkle of smoked paprika or diced chipotle in adobo sauce for a deeper flavor profile.

    Serving Suggestions for Spicy Sweet Strawberry Jalapeño Salsa

    • Serve with crispy tortilla chips for a crunchy, refreshing snack that fits any occasion.
    • Pair it with grilled chicken or fish for a flavorful twist that elevates your main dish.
    • Use it as a topping for tacos to add a sweet and spicy kick!
    • For a fun presentation, serve in a hollowed-out pineapple or bell pepper.
    • Compliment with chilled white wine or a fruity cocktail for a delightful pairing.

    FAQs about Spicy Sweet Strawberry Jalapeño Salsa

    Can I adjust the heat level in my Spicy Sweet Strawberry Jalapeño Salsa?

    Absolutely! If you prefer a milder flavor, reduce the amount of jalapeño or remove the seeds altogether. Gradually add jalapeño until it reaches your desired spice level.

    How long can I store the salsa?

    Your delicious salsa can be stored in the refrigerator for up to 2 days. However, it’s best enjoyed fresh to preserve the vibrant flavors and textures.

    Can I use frozen strawberries instead?

    While fresh strawberries are ideal for this salsa, you can use frozen ones in a pinch. Just be sure to thaw them completely and drain excess liquid before mixing.

    What dishes can I serve with this salsa?

    This Spicy Sweet Strawberry Jalapeño Salsa pairs wonderfully with grilled meats, fish, and tacos. It also makes a delightful dip for tortilla chips or fresh veggies!

    Is this salsa suitable for a vegan diet?

    Yes! All the ingredients in Spicy Sweet Strawberry Jalapeño Salsa are plant-based, making it a perfect addition to any vegan menu.

    Final Thoughts

    Creating this Spicy Sweet Strawberry Jalapeño Salsa is like painting with flavors. You mix sweetness with heat, and it turns into a vibrant masterpiece that no one can resist. Life can get hectic, but this simple recipe brings joy and excitement to the dinner table. Whether you’re dipping chips during a family movie night or topping off a grilled chicken dish, each bite is a celebration. I hope this salsa adds a dash of spice and sweetness to your meals, bringing smiles and happy bellies to all who gather around your table!


    Print

    clock clock iconcutlery cutlery iconflag flag iconfolder folder iconinstagram instagram iconpinterest pinterest iconfacebook facebook iconprint print iconsquares squares iconheart heart iconheart solid heart solid icon

    Description

    A refreshing and zesty salsa that combines the sweetness of strawberries with the heat of jalapeños, perfect for dipping or as a topping.


    • 2 cups fresh strawberries, hulled and diced
    • 1 medium jalapeño, seeds removed and finely chopped (adjust to taste)
    • 1/4 cup red onion, finely chopped
    • 1/4 cup fresh cilantro, chopped
    • Juice of 1 lime
    • 1 tablespoon honey or agave syrup (optional for added sweetness)
    • Salt to taste
    • Freshly cracked black pepper to taste

    1. In a large mixing bowl, combine the diced strawberries, finely chopped jalapeño, minced red onion, and chopped cilantro.
    2. Squeeze the juice of one lime over the mixture, ensuring all the ingredients are well coated.
    3. If you prefer a touch of sweetness, drizzle in the honey or agave syrup and mix thoroughly.
    4. Season the salsa with salt and freshly cracked black pepper to taste. Adjust the seasoning and sweetness according to your preference.
    5. Cover the salsa with plastic wrap or transfer it to an airtight container. Let it chill in the refrigerator for at least 30 minutes to allow the flavors to meld together.
    6. Serve the strawberry jalapeño salsa with tortilla chips, grilled chicken, or fish, or use it as a topping for tacos for a sweet and spicy kick!

    Notes

    • Adjust the amount of jalapeño according to your heat preference.
    • Best served fresh but can be stored in the refrigerator for up to 2 days.
    • Prep Time: 10 minutes
    • Cook Time: 0 minutes
    • Category: Appetizer
    • Method: Mixing
    • Cuisine: Mexican

    Nutrition

    • Serving Size: 1/4 cup
    • Calories: 50
    • Sugar: 8g
    • Sodium: 5mg
    • Fat: 0g
    • Saturated Fat: 0g
    • Unsaturated Fat: 0g
    • Trans Fat: 0g
    • Carbohydrates: 13g
    • Fiber: 1g
    • Protein: 1g
    • Cholesterol: 0mg

    Sharing is caring!

  • Strawberry Cheesecake Protein Balls

    Strawberry Cheesecake Protein Balls


    Introduction to Strawberry Cheesecake Protein Balls

    As a busy mom myself, finding time to whip up healthy snacks can feel like searching for a needle in a haystack. That’s where these Strawberry Cheesecake Protein Balls come into play! They’re a delightful mix of sweet and creamy goodness, wrapped in a nutritious package. It’s the perfect quick solution for those hectic days when you’re juggling work, kids, and everything in between. Plus, they make a great treat for sharing. Who wouldn’t want a quick pick-me-up that tastes like dessert but fuels your day? Let’s dive into this delicious recipe!

    Why You’ll Love This Strawberry Cheesecake Protein Balls

    You’re going to adore these Strawberry Cheesecake Protein Balls for so many reasons! First, they’re as quick to make as they are delightful to eat. In just ten minutes of prep, you’ll have a snack that’s not only delicious but also nutritious. They’re packed with protein and can satisfy even the sweetest cravings. Plus, they’re no-bake, which means no mess, no fuss—just pure joy!

    Ingredients for Strawberry Cheesecake Protein Balls

    Gathering the right ingredients is half the fun! Here’s what you’ll need to create your scrumptious Strawberry Cheesecake Protein Balls:

    • Rolled oats: These serve as a base, adding texture and wholesome carbs to keep you energized.
    • Almond flour: A great gluten-free alternative, almond flour brings a nutty flavor and healthy fats to the mix.
    • Vanilla protein powder: This adds a protein punch, satisfying your hunger while enhancing the sweet flavor.
    • Cream cheese: Softened to blend smoothly, it contributes a rich, creamy texture, mimicking the cheesecake experience.
    • Freeze-dried strawberries: These little gems give our protein balls that strawberry sweetness and a vibrant color, making them extra appealing.
    • Honey or maple syrup: Use these natural sweeteners to add just the right touch of sweetness. Maple syrup is a fantastic vegan option!
    • Vanilla extract: A splash enhances the flavors, giving a lovely aromatic quality to your protein balls.
    • Milk: You can use any kind—dairy or non-dairy. It helps adjust the consistency if the mixture is too dry.

    Feel free to get creative! You can find the exact quantities at the bottom of this article, where they’re available for printing. Let’s get rolling on this delightful treat!

    How to Make Strawberry Cheesecake Protein Balls

    Ready to whip up some Strawberry Cheesecake Protein Balls? Follow these simple steps to create a delicious and nutritious treat in no time. Trust me; you won’t believe how easy and satisfying this is!

    Step 1: Combine Dry Ingredients

    Start by grabbing a large bowl. Add the rolled oats, almond flour, and vanilla protein powder. Whisk them together until they’re well combined. This is the foundation of your protein balls. It’s essential for adding texture and flavor!

    Step 2: Add Creamy Ingredients

    Next, it’s time for the creamy goodness! Add in your softened cream cheese, crushed freeze-dried strawberries, honey or maple syrup, and vanilla extract. Mix everything together until the luscious cream cheese is fully incorporated. Don’t be shy—this is where the rich flavors come to life!

    Step 3: Adjust Consistency

    If your mixture feels a bit dry, don’t fret! Slowly add 1-2 tablespoons of milk, stirring after each addition. Keep going until you reach a moldable consistency. You want a sticky texture that holds together—almost like playdough! This will ensure that your protein balls are perfectly shaped.

    Step 4: Form the Balls

    Now for the fun part! Using your hands, take small amounts of the mixture and roll them into 1-inch balls. Place them on a parchment-lined plate. I find that wetting my hands slightly helps to keep things from sticking. Your lovely little treats should be popping up in no time!

    Step 5: Chill and Enjoy

    Once shaped, it’s time to chill out! Refrigerate your protein balls for at least 30 minutes. This helps them firm up, making them easier to grab and enjoy life on the go. Afterward, you can snack immediately or store them in an airtight container in the fridge. Perfect for a busy week ahead!

    Tips for Success

    • Use softened cream cheese for easy mixing; no one enjoys a workout in the kitchen!
    • Adjust sweetness to your liking—taste as you go for the perfect balance.
    • Mix in some chocolate chips or nut butter for an extra indulgent twist.
    • Store in an airtight container for freshness; they’re great for a quick snack!
    • Try rolling in shredded coconut or nuts for added crunch and flavor.

    Equipment Needed

    • Large bowl: A mixing bowl is crucial. You can use any deep bowl you have on hand.
    • Whisk or spoon: Any mixing tool works! A spoon can get the job done if you don’t have a whisk.
    • Parchment paper: Line your plate with parchment. If you’re out, a silicone mat works too.
    • Measuring cups and spoons: Essential for accuracy, but eyeballing can be fun in a pinch!

    Variations

    • Peanut Butter Delight: Swap out half the cream cheese for peanut butter for a rich, nutty flavor.
    • Chocolate Lover: Mix in some cocoa powder or chocolate protein powder for a chocolatey twist that satisfies your sweet tooth.
    • Protein Power: Substituting chocolate protein powder instead of vanilla can create a delightful contrast with the strawberries.
    • Nut-Free Option: Omit almond flour and use sunflower seed flour to avoid nuts while still keeping it delicious!
    • Fruit Fusion: Experiment with other freeze-dried fruits like raspberries or blueberries to switch up the flavor profile!

    Serving Suggestions

    • Enjoy these Strawberry Cheesecake Protein Balls with a dollop of Greek yogurt for extra creaminess.
    • Pair them with a refreshing fruit smoothie for a complete snack.
    • Arrange on a beautiful plate and garnish with fresh strawberries for an eye-catching presentation.
    • Try them alongside a cup of green tea to boost your energy levels.
    • They also make a perfect topping for your morning oatmeal or yogurt parfait!

    FAQs about Strawberry Cheesecake Protein Balls

    Have questions about these scrumptious Strawberry Cheesecake Protein Balls? I’ve got you covered! Here are some common queries to help you enjoy this delightful treat even more!

    Can I make these protein balls vegan?

    Absolutely! Simply swap out the honey for maple syrup and use a dairy-free cream cheese alternative. You can still enjoy the same delicious flavors!

    How long do they last in the fridge?

    When stored in an airtight container, these protein balls can last up to a week in the fridge. Perfect for meal prep!

    Can I freeze them for later?

    You sure can! Just freeze them in a single layer on a baking sheet, then transfer to an airtight container. They’ll keep well for up to three months. Easy snack options await!

    What can I use instead of almond flour?

    If you’re looking for an alternative, oat flour or ground sunflower seeds also work great. It’s all about what fits your dietary needs!

    How can I adjust the sweetness in the recipe?

    Taste the mixture before forming the balls! If you want it sweeter, just add more honey or maple syrup to get the perfect flavor. It’s all about your sweet tooth!

    Final Thoughts

    Creating these Strawberry Cheesecake Protein Balls has been a delightful journey for me, filled with sweet aromas and a sprinkle of joy. Every bite reminds me of sunny picnics and family gatherings, making healthy snacking so much more enjoyable. I love knowing that I can whip these up in no time and keep them on hand for those busy days.

    These little treats not only satisfy your sweet cravings but also give you that necessary boost throughout your day. I can’t recommend them enough. Dive in, and let the delightful flavor bring a smile to your face!


    Print

    clock clock iconcutlery cutlery iconflag flag iconfolder folder iconinstagram instagram iconpinterest pinterest iconfacebook facebook iconprint print iconsquares squares iconheart heart iconheart solid heart solid icon

    Description

    Strawberry Cheesecake Protein Balls are a delicious and healthy treat packed with protein, perfect for a snack or dessert.


    • ½ cup rolled oats
    • 1 cup almond flour
    • 2 scoops vanilla protein powder
    • ¼ cup cream cheese (softened)
    • ¼ cup freeze-dried strawberries (crushed)
    • 2 tbsp honey or maple syrup
    • 1 tsp vanilla extract
    • 12 tbsp milk (any kind, as needed)

    1. In a large bowl, mix rolled oats, almond flour, and vanilla protein powder.
    2. Add softened cream cheese, crushed freeze-dried strawberries, honey, and vanilla extract. Stir until combined.
    3. If the dough is too dry, add 1-2 tbsp milk, one at a time, until a moldable consistency forms.
    4. Roll the mixture into 1-inch balls and place on a parchment-lined plate.
    5. Refrigerate for at least 30 minutes to set.
    6. Enjoy immediately or store in an airtight container in the fridge for up to a week.

    Notes

    • Feel free to substitute honey with maple syrup for a vegan option.
    • These protein balls can be rolled in shredded coconut or chopped nuts for added texture.
    • Prep Time: 10 minutes
    • Cook Time: 0 minutes
    • Category: Snack
    • Method: No-bake
    • Cuisine: American

    Nutrition

    • Serving Size: 2 balls
    • Calories: 150
    • Sugar: 5g
    • Sodium: 50mg
    • Fat: 7g
    • Saturated Fat: 2g
    • Unsaturated Fat: 5g
    • Trans Fat: 0g
    • Carbohydrates: 18g
    • Fiber: 2g
    • Protein: 6g
    • Cholesterol: 15mg

    Sharing is caring!

  • Greek Chicken Cottage Cheese Bowl

    Greek Chicken Cottage Cheese Bowl


    Introduction to Greek Chicken Cottage Cheese Bowl

    As a busy mom, I know how challenging it can be to whip up a quick, healthy meal after a long day. That’s where my delightful Greek Chicken Cottage Cheese Bowl comes into play! This dish is not just a feast for the eyes, but it also packs a flavorful punch that the entire family will love. Imagine a bowl brimming with juicy grilled chicken, fresh veggies, and creamy cottage cheese—perfect for a satisfying lunch or dinner. Plus, it only takes ten minutes to prepare, so you can enjoy a nutritious meal without the fuss!

    Why You’ll Love This Greek Chicken Cottage Cheese Bowl

    This Greek Chicken Cottage Cheese Bowl is a lifesaver! It’s not just quick; it’s packed with protein and bursting with flavor. You’ll adore how everything comes together without any cooking! Just toss fresh ingredients into a bowl, and voilà—a delicious meal is ready. It’s perfect for busy evenings when you crave something satisfying yet healthy. Your family will think you spent hours in the kitchen!

    Ingredients for Greek Chicken Cottage Cheese Bowl

    Creating the perfect Greek Chicken Cottage Cheese Bowl starts with selecting the right ingredients. Here’s what you’ll need:

    • Grilled chicken breast: Juicy and full of protein, this is the heart of the dish. You can use leftover grilled chicken or even rotisserie chicken to save time!
    • Cottage cheese: Creamy and rich in protein, it adds a delightful texture. You can switch to Greek yogurt for a tangier twist!
    • Cucumber: Fresh and crunchy, diced or sliced. It adds hydration and a refreshing bite to your bowl.
    • Cherry tomatoes: Sweet and juicy, halved for a burst of flavor. You can swap them for regular tomatoes if you prefer.
    • Kalamata olives: These bring a briny depth that screams Mediterranean flair. If you’re not an olive fan, feel free to leave them out!
    • Red onion: Thinly sliced for a sharp bite. To mellow the flavor, soak it in cold water for a few minutes before adding it.
    • Feta cheese: Crumbled on top, it adds a salty creaminess that ties all the flavors together.
    • Greek dressing: A drizzle of this zesty dressing brings everything to life. You can use store-bought or make your own with olive oil, lemon juice, and herbs!

    All these ingredients come together to create a vibrant, nutritious meal. For exact quantities, scroll down to the bottom of the article, where you’ll find everything printed out for your convenience!

    How to Make Greek Chicken Cottage Cheese Bowl

    Making a Greek Chicken Cottage Cheese Bowl is as joyful as it sounds. This no-cook dish allows you to embrace the freshness of ingredients while delivering a punch of flavor. Let’s walk through it together, step by step!

    Step 1: Combine Ingredients

    Your first task is to bring together all those vibrant ingredients. Start by placing your sliced grilled chicken breast in a large mixing bowl.

    Add the creamy cottage cheese—think of it as the glue holding everything together!

    Next, gently toss in the diced cucumber, halved cherry tomatoes, sliced kalamata olives, and red onion. Each adds a pop of color and texture, transforming your bowl into a beautiful centerpiece.

    Remember to use fresh ingredients whenever possible! Freshness makes all the difference.

    Step 2: Dress the Bowl

    Now, it’s time to add that zing! Drizzle the Greek dressing over your assembled ingredients, being mindful of the amount. Start with a smaller drizzle; you can always add more if needed.

    Here’s a little tip: Let the flavors mingle before you serve. A few minutes resting allows the dressing to soak into everything, amplifying the taste.

    Step 3: Toss and Serve

    With all your ingredients combined and dressed, it’s time to toss! Gently mix everything together using a spatula or large spoon.

    Be careful here—too much stirring can break down the delicate veggies. You want each element to retain its unique texture!

    Serve immediately, but don’t hesitate to get creative. How about presenting it in individual bowls for an appealing dinner? You can pair it with pita bread or a light salad for a complete meal.

    Tips for Success

    • Always use fresh vegetables for the best taste and crunch. They’re the stars of your Greek Chicken Cottage Cheese Bowl!
    • Prepare your chicken ahead of time. Leftovers from another meal can save you precious minutes.
    • For extra flavor, try marinating your chicken in lemon juice and herbs before grilling.
    • Adjust the dressing according to your taste. Some prefer a light drizzle, while others like it bold.
    • Don’t hesitate to experiment with seasonal veggies to keep things exciting!

    Equipment Needed

    • Mixing bowl: A large bowl is essential for combining all your ingredients. A smaller one works for individual servings.
    • Spatula or large spoon: Great for gently tossing your ingredients. You can use tongs if you prefer!
    • Knife and cutting board: Necessary for slicing your vegetables and chicken.

    Variations

    • Add grains: Boost heartiness by mixing in cooked quinoa or farro for extra fiber and texture.
    • Swap proteins: Try shrimp or canned tuna instead of chicken for a different protein punch.
    • Make it vegan: Substitute the chicken with chickpeas and the cottage cheese with a plant-based yogurt for a fully plant-powered bowl.
    • Spice it up: Incorporate some diced jalapeños or sprinkle on red pepper flakes for a kick of heat.
    • Change up the cheese: Use mozzarella or goat cheese if you want to explore different flavors!

    Serving Suggestions

    • Pair your Greek Chicken Cottage Cheese Bowl with warm pita bread for a delicious dipping experience.
    • Consider adding a light side salad with mixed greens and a vinaigrette for extra freshness.
    • Serve with a refreshing glass of lemon-infused water or iced herbal tea.
    • For presentation, use colorful bowls to showcase the vibrant ingredients.

    FAQs about Greek Chicken Cottage Cheese Bowl

    Can I meal prep the Greek Chicken Cottage Cheese Bowl? Yes! This bowl is perfect for meal prep. You can assemble all the ingredients without the dressing, store them in the fridge, and add the dressing just before serving. This way, you’ll enjoy fresh, ready-to-eat meals throughout the week.

    Is this dish suitable for those with gluten sensitivities? Absolutely! The Greek Chicken Cottage Cheese Bowl is gluten-free. Just ensure that any extra ingredients, like dressings or toppings, are labeled gluten-free to stay safe.

    What can I use instead of cottage cheese? If you’re not a fan of cottage cheese, you can easily swap it for Greek yogurt. It adds a similar creamy texture with a lovely tang that complements the other flavors beautifully.

    How can I add more flavor to this dish? You can enhance the flavor profile by marinating your chicken with herbs and spices before grilling. Adding fresh herbs like parsley or dill at the end also elevates the bowl!

    Can kids enjoy the Greek Chicken Cottage Cheese Bowl? Definitely! It’s a fun, colorful meal that kids can help prepare. Just adjust the ingredients. Omit olives or tomatoes if they’re not their favorites, and let them get creative with their own toppings!

    Final Thoughts

    Creating a Greek Chicken Cottage Cheese Bowl isn’t just about nourishment; it’s about joy and connection. This simple, protein-packed dish has become my go-to for busy nights and family gatherings alike. Watching my loved ones dive into a bowl full of fresh, vibrant ingredients warms my heart. The laughter around the table as we savor each bite makes all the meal prep worth it. So, give this recipe a try! Whether you’re accommodating picky eaters or racing against the clock, this delicious bowl is sure to become a beloved staple in your home. Happy cooking!


    Print

    clock clock iconcutlery cutlery iconflag flag iconfolder folder iconinstagram instagram iconpinterest pinterest iconfacebook facebook iconprint print iconsquares squares iconheart heart iconheart solid heart solid icon

    Description

    A healthy and delicious Greek Chicken Cottage Cheese Bowl, packed with protein and fresh vegetables.


    • 1 cup grilled chicken breast, sliced
    • 1/2 cup cottage cheese
    • 1/2 cucumber, diced or sliced
    • 1/2 cup cherry tomatoes, halved
    • 1/4 cup kalamata olives, sliced
    • 1/4 red onion, thinly sliced
    • 1/4 cup crumbled feta cheese
    • 2 tablespoons Greek dressing

    1. In a bowl, combine grilled chicken, cottage cheese, cucumber, cherry tomatoes, olives, and red onion.
    2. Drizzle with Greek dressing and sprinkle with feta cheese.
    3. Toss gently to combine and serve immediately.

    Notes

    • This dish can be served cold or at room temperature.
    • Feel free to add more vegetables or adjust the ingredients according to your taste.
    • Prep Time: 10 minutes
    • Cook Time: 0 minutes
    • Category: Salad
    • Method: No-Cook
    • Cuisine: Greek

    Nutrition

    • Serving Size: 1 bowl
    • Calories: 400
    • Sugar: 5g
    • Sodium: 600mg
    • Fat: 18g
    • Saturated Fat: 6g
    • Unsaturated Fat: 10g
    • Trans Fat: 0g
    • Carbohydrates: 25g
    • Fiber: 4g
    • Protein: 40g
    • Cholesterol: 100mg

    Sharing is caring!

  • Keto Cilantro Lime Shrimp Stuffed Poblano

    Keto Cilantro Lime Shrimp Stuffed Poblano


    Introduction to Keto Cilantro Lime Shrimp Stuffed Poblano

    Welcome, my fellow kitchen adventurers! Today, I’m thrilled to share a delightful recipe that’s sure to brighten up any hectic day—the Keto Cilantro Lime Shrimp Stuffed Poblano. If you’re a busy mom or professional like me, you know how precious time is. This vibrant dish is not only quick to prepare but also bursting with flavor. Imagine tender shrimp mingling with zesty lime and fresh cilantro, all nestled in a hearty poblano pepper. Perfect for impressing your loved ones or enjoying a cozy dinner, this recipe is simply irresistible!

    Why You’ll Love This Keto Cilantro Lime Shrimp Stuffed Poblano

    This Keto Cilantro Lime Shrimp Stuffed Poblano is a real game changer for busy weeknights. It takes just 45 minutes from start to finish, allowing you to whip up a delicious meal without breaking a sweat. The combination of creamy shrimp filling with spicy-sweet peppers ignites your taste buds. Plus, it’s a healthy option that fits perfectly into a keto lifestyle, making it a dish your whole family can enjoy!

    Ingredients for Keto Cilantro Lime Shrimp Stuffed Poblano

    Gathering the right ingredients is a breeze for this Keto Cilantro Lime Shrimp Stuffed Poblano. Here’s what you’ll need to create this colorful, flavorful dish:

    • Poblano peppers: These mild peppers serve as the perfect vessel for our shrimp filling. They’re slightly sweet and add a lovely color.
    • Shrimp: Fresh, peeled and deveined shrimp is the star of this dish. It cooks quickly and absorbs all the zesty flavors beautifully.
    • Olive oil: This healthy fat helps sauté the shrimp and adds richness to the filling. You can also use avocado oil if you prefer.
    • Garlic: Fresh garlic adds a pop of flavor that elevates the dish. You can also use garlic powder in a pinch.
    • Lime: The juice and zest of lime bring that bright, tangy flavor that dances on your palate. Don’t skip this; it’s key!
    • Cilantro: Fresh cilantro gives the dish a fresh and vibrant touch. If you’re not a fan, parsley can be a milder substitute.
    • Cumin: This warm spice adds depth and earthiness to the shrimp mixture. A necessary component for that taco feel!
    • Chili powder: It offers a hint of spice; adjust the amount to suit your taste preferences. For more heat, try cayenne.
    • Salt and pepper: These basic seasonings are essential for enhancing flavors. Season to your liking!
    • Cream cheese: This creamy delight ensures the shrimp mixture is rich and luscious. You can also use a non-dairy cream cheese if you prefer.
    • Shredded cheese: Monterey Jack or cheddar cheese can be sprinkled on top for an extra layer of melty goodness. It’s optional, but why not?

    For exact quantities and more details, check the end of the article where everything is listed for easy printing. Let’s get cooking!

    How to Make Keto Cilantro Lime Shrimp Stuffed Poblano

    Preheat and Prepare the Poblano Peppers

    Let’s kick things off by preheating your oven to 400°F (200°C). It’s like giving your kitchen a warm hug before we start cooking!

    While that’s warming up, grab those lovely poblano peppers. Carefully slice each one in half lengthwise, just like opening a treasure chest filled with flavor. Take a moment to remove the seeds and membranes inside; this keeps the heat at bay and ensures a delightful bite.

    Next, brush the insides of the peppers with 1 tablespoon of olive oil, seasoning them with salt and pepper. This little touch adds depth and flavor. Place them cut-side up on a baking sheet and give them a quick pre-roast for about 10-15 minutes. This step helps soften the peppers and intensifies their natural sweetness. Your kitchen will start to smell amazing!

    Sauté the Shrimp Mixture

    Now onto the star of the show—our shrimp! In a pan, drizzle the remaining tablespoon of olive oil and heat it over medium heat. Toss in the minced garlic and let it sizzle for a minute. The aroma is simply irresistible.

    Next, add your shrimp to the pan. Chop them into bite-sized pieces if they’re large. Season them with cumin, chili powder, salt, and pepper, and sauté until they turn a beautiful pink, which should take about 3-4 minutes. This is where the magic happens, so keep an eye on them!

    Once your shrimp are cooked, stir in the lime juice, lime zest, and fresh cilantro. The zesty brightness will make your taste buds sing. Then, add the softened cream cheese, mixing until it’s creamy and fully incorporated. If you love a little extra cheese, sprinkle in half of your shredded Monterey Jack or cheddar cheese, letting it melt into the mixture. Now, that’s what I call a flavor fiesta!

    Stuff and Bake the Peppers

    Time to stuff those piquant poblano halves with your luscious shrimp mixture. Use a spoon to fill each pepper generously, packing it in like it’s a cozy little blanket of flavor. Don’t be shy—better to overstuff than to under!

    Once they’re stuffed, sprinkle the remaining shredded cheese on top of each pepper. It adds a gooey, melt-in-your-mouth finish. Now, pop the stuffed peppers back in the oven and bake them for about 15-20 minutes. You’ll know they’re done when the cheese is bubbly and golden brown. Seconds before serving, garnish your Keto Cilantro Lime Shrimp Stuffed Poblano with fresh cilantro and lime wedges. Now it’s time to dig in!

    Tips for Success

    • Prep your ingredients in advance to save time during cooking.
    • Make sure shrimp is fresh for the best flavor and texture.
    • Experiment with different cheeses; pepper jack adds a spicy kick!
    • Keep an eye on the peppers while roasting to avoid overcooking.
    • Feel free to add other veggies like zucchini or corn for more variety.

    Equipment Needed

    • Baking sheet: A good-quality sheet pan is essential. You can also use a cast-iron skillet for added flavor.
    • Knife: A sharp knife makes slicing the poblanos quick and easy.
    • Pan: A non-stick skillet is great for sautéing the shrimp, but any frying pan will do.
    • Mixing spoon: A sturdy spoon helps combine those delicious flavors.
    • Measuring spoons: Use these for precise ingredient measurements; estimating works too!

    Variations for Keto Cilantro Lime Shrimp Stuffed Poblano

    • Vegetarian Option: Swap the shrimp for a medley of sautéed vegetables like bell peppers, zucchini, and mushrooms for a hearty vegetarian filling.
    • Spicy Kick: Add chopped jalapeños or a dash of sriracha to the shrimp mixture for an extra layer of heat.
    • Cheesy Delight: Mix in crumbled feta or goat cheese for a tangy twist that pairs beautifully with the flavors.
    • Low-FODMAP: If garlic is a concern, use garlic-infused oil for sautéing and substitute garlic with a dash of asafoetida powder for flavor.
    • Herb Variations: Experiment with other fresh herbs like dill or basil in place of cilantro for a unique taste.

    Serving Suggestions

    • Side Salad: A crisp green salad with avocado and lime vinaigrette complements the richness of the stuffed peppers.
    • Refreshing Drink: Serve with chilled sparkling water or a light margarita for a festive touch.
    • Presentation: Arrange on a colorful platter and garnish with lime wedges and cilantro for a beautiful table display.

    FAQs about Keto Cilantro Lime Shrimp Stuffed Poblano

    Can I make Keto Cilantro Lime Shrimp Stuffed Poblano ahead of time?

    Absolutely! You can prepare the stuffed poblano peppers a day in advance, simply cover and refrigerate them. When you’re ready to enjoy, bake them straight from the fridge. Just add a few extra minutes to the baking time to ensure they’re heated through.

    What can I substitute for shrimp in this recipe?

    If shrimp isn’t your thing, you can swap it for cooked chicken, turkey, or even canned tuna. Just keep in mind that cooking times may vary depending on the protein you choose. It’s all about using what you have on hand!

    Is this dish suitable for meal prep?

    Yes! Keto Cilantro Lime Shrimp Stuffed Poblano is fantastic for meal prep. Each stuffed pepper can be stored in an airtight container in the fridge for up to three days. You can reheat them in the microwave or oven for a quick lunch or dinner.

    Can I add other vegetables to the stuffing?

    Definitely! This recipe is versatile. Feel free to mix in vegetables like corn, zucchini, or even black beans to the shrimp filling. It adds nutrition and color, making it even more exciting!

    How spicy is the Keto Cilantro Lime Shrimp Stuffed Poblano?

    The spice level can be easily adjusted based on your preferences. With the chili powder and optional jalapeños, it starts off mild. If you crave a fiery kick, try boosting the spice as needed. Continuous testing is the secret to mastering your heat level!

    Final Thoughts

    Cooking this Keto Cilantro Lime Shrimp Stuffed Poblano isn’t just about enjoying a delicious meal; it’s an experience filled with joy, bonding, and vibrant flavors. Each bite transports you to a sun-soaked Mexican fiesta, where freshness and zest unite. As a busy mom or professional, I understand the need for quick, delightful dinners that still bring everyone together. This dish is not only satisfying but also versatile for those picky eaters in our lives. So gather your loved ones, share the laughter, and enjoy the simple pleasures of homemade cooking. Bon appétit!


    Print

    clock clock iconcutlery cutlery iconflag flag iconfolder folder iconinstagram instagram iconpinterest pinterest iconfacebook facebook iconprint print iconsquares squares iconheart heart iconheart solid heart solid icon

    Description

    Keto Cilantro Lime Shrimp Stuffed Poblano is a delicious and healthy dish, packed with flavors of cilantro and lime, and loaded with shrimp.


    • 4 large poblano peppers
    • 1 lb shrimp, peeled and deveined
    • 2 tbsp olive oil, divided
    • 2 cloves garlic, minced
    • Juice and zest of 1 lime
    • 1/4 cup fresh cilantro, chopped
    • 1/2 tsp cumin
    • 1/2 tsp chili powder
    • Salt and pepper, to taste
    • 1/2 cup cream cheese, softened
    • 1/2 cup shredded Monterey Jack or cheddar cheese (optional)

    1. Preheat oven to 400°F (200°C).
    2. Slice poblanos in half lengthwise; remove seeds and membranes.
    3. Brush with 1 tbsp olive oil, season with salt and pepper. Pre-roast for 10-15 minutes.
    4. Chop shrimp and sauté with garlic, remaining oil, cumin, chili powder, salt, and pepper until pink (3-4 min).
    5. Stir in lime juice, zest, cilantro, cream cheese, and half the shredded cheese.
    6. Fill peppers with shrimp mixture, top with remaining cheese.
    7. Bake 15-20 minutes until cheese is melted and bubbly.
    8. Garnish with fresh cilantro and lime wedges. Serve warm.

    Notes

    • For extra heat, add more chili powder.
    • Customize by adding other vegetables to the filling.
    • Can be made ahead and reheated before serving.
    • Prep Time: 15 minutes
    • Cook Time: 30 minutes
    • Category: Main Dish
    • Method: Baking
    • Cuisine: Mexican

    Nutrition

    • Serving Size: 1 stuffed poblano
    • Calories: 350
    • Sugar: 1g
    • Sodium: 600mg
    • Fat: 24g
    • Saturated Fat: 12g
    • Unsaturated Fat: 8g
    • Trans Fat: 0g
    • Carbohydrates: 10g
    • Fiber: 4g
    • Protein: 25g
    • Cholesterol: 200mg

    Sharing is caring!

  • Greek Chicken and Lemon Rice

    Greek Chicken and Lemon Rice


    Introduction to Greek Chicken and Lemon Rice

    If you’re anything like me, weekdays can feel like a whirlwind of responsibilities. Between work, family commitments, and a sprinkle of life’s surprises, dinner can sometimes become an afterthought. That’s where my Greek Chicken and Lemon Rice comes in! This dish is not just a meal; it’s a delightful escape to the Mediterranean, all while being quick and simple to prepare. With tender chicken thighs infused with zesty lemon and fragrant spices, served alongside fluffy rice, it’s perfect for impressing your loved ones or satisfying your own cravings. Let’s dive into this culinary adventure!

    Why You’ll Love This Greek Chicken and Lemon Rice

    This Greek Chicken and Lemon Rice is the perfect solution for busy nights when you crave something tasty yet uncomplicated. It’s ready in just 40 minutes, making mealtime stress-free. The combination of savory chicken, vibrant veggies, and lemony rice is nothing short of a flavor explosion. Plus, the Mediterranean twist on a classic dish makes it a family favorite that even picky eaters will love! You can’t go wrong with this delightful recipe.

    Ingredients for Greek Chicken and Lemon Rice

    Gathering the right ingredients is essential for creating this vibrant dish. Here’s what you’ll need to make your kitchen feel like a Greek taverna:

    • Boneless, skinless chicken thighs: These are juicy and flavorful, perfect for searing and soaking up all the wonderful seasonings.
    • Dried oregano: An aromatic herb that brings a classic Mediterranean flavor, it’s essential for seasoning the chicken.
    • Paprika: This mild spice adds a subtle warmth and beautiful color to your dish. Go for smoked paprika for an added depth.
    • Salt: A staple in every kitchen, it enhances all the other flavors in your recipe.
    • Red pepper flakes: For a hint of heat, just a sprinkle can elevate the dish and excite your palate.
    • Olive oil: The heart of Mediterranean cooking, it adds richness and helps in sautéing.
    • Grape tomatoes: Sweet and juicy, their freshness brightens the dish.
    • Garlic: An essential ingredient that adds a robust flavor; I can’t help but love the aroma of garlic browning in the pan!
    • Fresh spinach: This leafy green brings a nutritious boost and vibrant color to your plate.
    • Freshly squeezed lemon juice: It infuses a tangy kick that perfectly complements the chicken and rice.
    • Jasmine rice: Fluffy and fragrant, it serves as the perfect base for soaking up all those delicious flavors.
    • Chickpeas: Canned for convenience, they add a creamy texture and protein boost.
    • Feta cheese: This crumbly cheese offers a salty contrast that enhances the dish’s overall flavor.
    • Extra virgin olive oil: A drizzle at the end adds a luxurious touch and depth to the feta dressing.
    • Fresh oregano (optional): For an extra pop of flavor and garnish, fresh herbs shine in this recipe.
    • Fresh oregano for garnish: A sprinkle at the end brightens the presentation with its lovely green color.

    For exact measurements, feel free to check the bottom of the article, where all ingredients are available for printing. With all these vibrant ingredients, you’re just a step away from creating something truly special!

    How to Make Greek Chicken and Lemon Rice

    Now that we have all our ingredients prepped, let’s dive into creating this delicious Greek Chicken and Lemon Rice! Each step is simple, yet it builds a wonderfully flavorful dish. Trust me; your kitchen will smell divine!

    Step 1: Prepare the Chicken

    Start by seasoning the chicken thighs with dried oregano, paprika, salt, and red pepper flakes. This adds depth and flavor right from the get-go. In a skillet, heat two tablespoons of olive oil over medium heat. Place the chicken in the skillet and cook for about five minutes on each side, until they’re golden brown and the internal temperature hits 165°F (74°C). This ensures your chicken is juicy and fully cooked. Once it’s done, remove the chicken and let it rest while you work on the veggies.

    Step 2: Sauté the Vegetables

    Using the same skillet is key; you’ll want those delicious leftover flavors! Add the halved grape tomatoes and minced garlic to the skillet. Cook them until they soften and the aroma fills your kitchen. This usually takes about three to four minutes. Then, throw in the chopped spinach, allowing it to wilt down. This step really locks in the flavors, making your dish vibrant and colorful!

    Step 3: Combine the Rice and Chickpeas

    Next, add your cooked jasmine rice and the drained chickpeas to the skillet. Give everything a good stir—this is where all those Mediterranean flavors mingle. The rice absorbs the juicy goodness while the chickpeas provide a hearty texture. Keep stirring until everything is heated through, about three minutes, ensuring every bite is laced with those wonderful tastes.

    Step 4: Mix the Feta Dressing

    In a separate bowl, combine the diced feta cheese, one tablespoon of extra virgin olive oil, lemon juice, and a sprinkle of dried oregano. This creamy dressing will take your Greek Chicken and Lemon Rice to the next level! Feel free to toss in some fresh oregano if you have it. It adds an extra burst of flavor that I absolutely can’t resist.

    Step 5: Final Assembly

    Now it’s time for the grand finale! Mix half of the feta dressing into the skillet with the rice mixture, and then add the sliced cooked chicken back in. Warm everything through for another two minutes. Finally, top off with the remaining feta dressing and a sprinkle of fresh oregano. For presentation, serve this delicious dish in shallow bowls, and don’t forget to drizzle a bit of olive oil for that extra glisten. Trust me; it’ll look as good as it tastes!

    Tips for Success

    • Always let the chicken rest after cooking; this keeps it juicy.
    • Using fresh herbs, like oregano, elevates the flavor significantly.
    • Adjust the red pepper flakes to suit your heat preference.
    • Make sure your skillet is hot enough to get a nice sear on the chicken.
    • Prep your ingredients beforehand to streamline your cooking process.

    Equipment Needed

    • Skillet: A non-stick skillet works wonders, but any heavy-bottomed pan will do the trick.
    • Chef’s Knife: A sharp knife makes chopping chicken and vegetables a breeze.
    • Cutting Board: A sturdy board for safe and easy prep.
    • Mixing Bowl: Any bowl will suffice to mix your feta dressing.

    Variations of Greek Chicken and Lemon Rice

    • Swap the Chicken: Try using boneless pork chops or grilled shrimp for a different protein option.
    • Vegetarian Delight: Replace chicken with a hearty mix of roasted vegetables, such as zucchini and bell peppers, for a meat-free version.
    • Quinoa Substitute: Use quinoa instead of jasmine rice for a protein-packed, gluten-free alternative that still maintains a lovely texture.
    • Herb Overload: Experiment with other herbs like dill or thyme to bring new flavors to your dish.
    • Exotic Spices: Add a pinch of cumin or coriander for an unexpected twist that still complements the traditional Greek flavors.

    Serving Suggestions for Greek Chicken and Lemon Rice

    • Pair this dish with a refreshing Greek salad tossed with olives and cucumbers.
    • A chilled glass of white wine, like Sauvignon Blanc, complements the flavors beautifully.
    • For added flair, serve with warm pita bread and a dollop of tzatziki.
    • Garnish with extra lemon wedges for a vibrant touch!

    FAQs about Greek Chicken and Lemon Rice

    Many readers have questions when it comes to making this delightful Greek Chicken and Lemon Rice. Here are some common inquiries:

    What can I substitute for chicken thighs?

    You can try chicken breast, which is leaner, or even boneless pork chops. If you’re aiming for a vegetarian option, roasted vegetables or chickpeas make fantastic substitutes!

    Can I use brown rice instead of jasmine rice?

    Absolutely! Brown rice adds extra fiber and a nutty flavor, although you’ll need to adjust the cooking time. Just ensure it’s fully cooked before combining with the other ingredients.

    Is it possible to make this dish ahead of time?

    Yes, you can prep the ingredients in advance. Just store them separately in the fridge and combine them when you’re ready to cook. It’s a great way to simplify your meal prep!

    How do I store leftovers?

    Leftovers can be kept in an airtight container in the refrigerator for up to three days. Reheat gently on the stove or microwave to enjoy the flavors again!

    Can I add more vegetables to this recipe?

    Definitely! Feel free to toss in bell peppers, zucchini, or even asparagus. More veggies only enhance the nutrients and flavors in your Greek Chicken and Lemon Rice!

    Final Thoughts

    Cooking and enjoying Greek Chicken and Lemon Rice feels like a warm embrace from the Mediterranean. This dish combines vibrant flavors that transport you to sunny shores, making every bite a celebration. I love how simple and quick it is to prepare, perfect for my busy days yet special enough for family gatherings. It brings everyone together, turning a weekday dinner into a delightful feast. The laughter, the shared moments, and the satisfaction of a delicious meal—it all makes my heart full. I hope you enjoy this culinary journey as much as I do!


    Print

    clock clock iconcutlery cutlery iconflag flag iconfolder folder iconinstagram instagram iconpinterest pinterest iconfacebook facebook iconprint print iconsquares squares iconheart heart iconheart solid heart solid icon

    Description

    A delicious Greek-inspired chicken dish served with lemon-infused rice and feta cheese.


    • 1.5 pounds boneless, skinless chicken thighs
    • 1 teaspoon dried oregano
    • 1 teaspoon paprika
    • 1/4 teaspoon salt
    • 1/4 teaspoon red pepper flakes
    • 2 tablespoons olive oil
    • 1 tablespoon olive oil
    • 8 ounces grape tomatoes, halved
    • 5 cloves garlic, minced
    • 1 teaspoon dried oregano
    • 1/4 teaspoon salt
    • 5 ounces fresh spinach, chopped
    • 3 tablespoons freshly squeezed lemon juice
    • 2 cups cooked jasmine rice
    • 1 (15-ounce) can chickpeas, drained
    • 6 ounces feta cheese, diced into small cubes
    • 1 tablespoon extra virgin olive oil
    • 1 tablespoon freshly squeezed lemon juice
    • 1/4 teaspoon dried oregano
    • 2 tablespoons chopped fresh oregano (optional)
    • Fresh oregano, for garnish

    1. Season chicken thighs with oregano, paprika, salt, and red pepper flakes. Heat olive oil in a skillet over medium heat. Add chicken and cook for 5 minutes per side, or until cooked through (165°F/74°C). Remove chicken from skillet.
    2. In the same skillet, sauté half of the tomatoes, garlic, oregano, and salt with olive oil until softened. Stir in spinach until wilted. Add cooked rice, chickpeas, lemon juice, and remaining tomatoes. Reheat, stirring to combine.
    3. In a bowl, combine feta cheese, olive oil, lemon juice, dried oregano, and fresh oregano (if using).
    4. Mix half of the feta mixture into the skillet with lemon rice. Add sliced cooked chicken and reheat. Top with remaining feta mixture and fresh oregano. Season with salt and pepper to taste.

    Notes

    • For a spicier version, add more red pepper flakes.
    • Make sure the chicken is cooked through by checking its internal temperature.
    • This dish can be served warm or at room temperature.
    • Prep Time: 15 minutes
    • Cook Time: 25 minutes
    • Category: Main Course
    • Method: Skillet
    • Cuisine: Greek

    Nutrition

    • Serving Size: 1 serving
    • Calories: 550
    • Sugar: 3g
    • Sodium: 600mg
    • Fat: 25g
    • Saturated Fat: 6g
    • Unsaturated Fat: 16g
    • Trans Fat: 0g
    • Carbohydrates: 60g
    • Fiber: 5g
    • Protein: 30g
    • Cholesterol: 100mg

    Sharing is caring!

  • Buffalo Chickpea Pasta Salad

    Buffalo Chickpea Pasta Salad


    Introduction to Buffalo Chickpea Pasta Salad

    Hey there, fellow home cooks! If you’re juggling work, family, and a million other things, listen up. I’ve got the perfect recipe for you: Buffalo Chickpea Pasta Salad. This vibrant dish offers a delightful blend of flavor and texture, making it an ideal quick solution for busy days. Whether you’re hosting a gathering or just need a meal that’s both tasty and satisfying, this salad will impress your loved ones and leave them asking for seconds. Plus, it’s simple to whip up in no time, leaving you more moments to enjoy the company of family and friends.

    Why You’ll Love This Buffalo Chickpea Pasta Salad

    This Buffalo Chickpea Pasta Salad isn’t just a feast for the eyes; it’s a game-changer for your weeknight meals. It comes together in just about 40 minutes, making it a real time-saver. The bold flavors of buffalo sauce mixed with the hearty chickpeas and fresh veggies pack a punch that will delight your taste buds. Plus, it’s vegan-friendly, so everyone can enjoy it—no more worrying about dietary restrictions at your table!

    Ingredients for Buffalo Chickpea Pasta Salad

    Gathering fresh and tasty ingredients is the first step to creating my beloved Buffalo Chickpea Pasta Salad. Here’s what you’ll need:

    • Elbow pasta (or your pasta of choice): This classic shape holds onto the dressing beautifully, but any pasta works great.
    • Chickpeas: The heart of the salad, these protein-packed gems make it filling and nutritious.
    • Cherry tomatoes: Their sweetness adds a burst of freshness, balancing the spicy buffalo sauce.
    • Red onion: A finely chopped addition that gives a zesty crunch while adding color.
    • Celery: Crisp and refreshing, celery brings that satisfying crunch to each bite.
    • Shredded carrots: They add a subtle sweetness and lovely color contrast in the mix.
    • Fresh parsley: This herb brightens the dish, making it so appealing and vibrant.
    • Buffalo sauce: This fiery flavor is what makes the salad special! Adjust the amount for heat preference.
    • Ranch dressing: Provides a creamy element that complements the spicy buffalo sauce perfectly. Aim for a plant-based option if you’re keeping it vegan.
    • Salt and pepper: Essential seasonings that enhance all the flavors in the salad.
    • Optional: Crumbled feta cheese or a dairy-free cheese alternative can be added for a rich creaminess.

    You’ll find detailed measurements for each ingredient at the bottom of the article, ready for printing to make your cooking experience even easier!

    How to Make Buffalo Chickpea Pasta Salad

    Step 1: Cook the Pasta

    Start by boiling a large pot of salted water. Once the water is bubbling like a hot spring, add the elbow pasta. Cook according to the package instructions until it’s al dente, which means it should have a slight bite. After draining the pasta in a colander, rinse it with cold water. This helps stop the cooking process and prevents it from getting mushy. Drape the cooled pasta aside, because it will soon join the flavor party!

    Step 2: Prepare the Chickpeas

    While the pasta cools, it’s time to bring out those sturdy chickpeas. In a large bowl, combine the drained chickpeas with a few tablespoons of buffalo sauce. Stir gently until each chickpea wears a fiery coat of sauce. Allow them to marinate for about 10 minutes—it’s like letting a fine wine breathe! This step intensifies the flavor and ensures each bite is packed with that spicy goodness.

    Step 3: Combine the Ingredients

    Now, let’s bring the whole salad together! In a large mixing bowl, combine your cooled pasta, marinated chickpeas, chopped cherry tomatoes, red onion, diced celery, shredded carrots, and fresh parsley. Stir everything gently, taking care not to mash the chickpeas. Instead, think of it as a dance; let each ingredient get to know one another without losing its identity. This is the key step to keeping a delightful texture!

    Step 4: Dress the Salad

    For the dressing, whisk together the remaining buffalo sauce and the ranch dressing in a smaller bowl. This creamy mix is the secret that marries all the flavors. Pour the dressing over the pasta mixture and toss gently again to ensure every bit is coated evenly. Season with salt and pepper to taste, giving just the right touch of balance to those bold flavors!

    Step 5: Chill

    Cover your delicious creation and pop it in the fridge for at least 30 minutes. This chilling time is important and allows the flavors to develop beautifully. It’s like letting the salad rest after a long day of preparation, enhancing all the deliciousness that awaits. Just imagine how the acidity from the veggies infuses into each bite!

    Step 6: Serve

    When you’re ready to serve, give the salad a gentle stir. If you fancy a little extra creaminess, sprinkle some crumbled feta cheese on top. It adds a lovely touch that compliments the zingy flavors perfectly. Now, scoop generous servings onto plates and watch your family and friends dig in, marveling at the delightful Buffalo Chickpea Pasta Salad!

    Tips for Success

    • Make sure to season the pasta water generously; it adds flavor from the get-go.
    • For added texture, you can roast your chickpeas before marinating them.
    • Chill the salad for longer when possible; it’s even tastier as flavors mingle.
    • For meal prep, store the dressing separately until ready to serve to keep it fresh.
    • Experiment with fresh herbs like cilantro or basil for a unique twist!

    Equipment Needed

    • Large pot: For boiling pasta; a big saucepan works too.
    • Colander: To drain pasta; you can also use a slotted spoon if needed.
    • Mixing bowls: A large one for the salad and a small one for the dressing. Any bowls will do!
    • Whisk: For mixing the dressing; a fork can substitute just fine.

    Variations

    • Spicy Kick: Add diced jalapeños or a dash of cayenne pepper for an extra layer of heat!
    • Protein Boost: Incorporate grilled tofu or roasted chickpeas for an even heartier meal.
    • Veggie Delight: Feel free to toss in any veggies you have on hand, like bell peppers or spinach, for added nutrition.
    • Pasta Swap: Try whole grain or gluten-free pasta for a different texture and dietary needs.
    • Different Dressings: Switch out ranch for blue cheese dressing or a tangy vinaigrette to change the flavor profile entirely.

    Serving Suggestions

    • Pair with Fresh Bread: Serve with warm, crusty baguette or garlic bread to complement the salad’s flavors.
    • Enhance with Drinks: Match with a chilled sparkling water or a light white wine for a delightful meal.
    • Garnish with Extra Herbs: Add a sprinkle of fresh parsley or green onion on top for an eye-catching touch.
    • Perfect Potluck Dish: This salad travels well—bring it to gatherings for a tasty crowd-pleaser!

    FAQs about Buffalo Chickpea Pasta Salad

    Can I make Buffalo Chickpea Pasta Salad ahead of time?

    Absolutely! In fact, making it a day in advance enhances the flavors even more. Just keep the salad covered in the fridge, and it’s good to go when you are!

    Is this salad gluten-free?

    If you swap out traditional pasta for a gluten-free variety, then yes! Using gluten-free pasta ensures everyone can dig in worry-free.

    How spicy is the Buffalo sauce?

    The spice level largely depends on the amount of buffalo sauce you use. Feel free to adjust it to your taste. You can even go for a milder sauce if that’s what your family prefers.

    Can I add other vegetables to the salad?

    Definitely! Toss in any veggies you love or happen to have in the fridge. Bell peppers, spinach, or even corn can add a delightful twist to your Buffalo Chickpea Pasta Salad.

    Is this Buffalo Chickpea Pasta Salad suitable for meal prep?

    Yes! This salad is perfect for meal prep. Just keep the dressing separate until you’re ready to serve to maintain optimal freshness. It’s a great grab-and-go lunch option!

    Final Thoughts

    Every time I make this Buffalo Chickpea Pasta Salad, it brings a smile to my face. The colors, the flavors, and the ease of preparation make it a joy to create. Whether it’s a casual family dinner or a fun gathering with friends, this salad always steals the show. It’s heartwarming to see everyone enjoy a meal that combines healthiness without sacrificing taste. Plus, the compliments keep coming! So why not whip up a batch and watch your loved ones dig in? You’ll find joy in each bite, and that’s what cooking is all about!


    Print

    clock clock iconcutlery cutlery iconflag flag iconfolder folder iconinstagram instagram iconpinterest pinterest iconfacebook facebook iconprint print iconsquares squares iconheart heart iconheart solid heart solid icon

    Description

    A flavorful and refreshing Buffalo Chickpea Pasta Salad that’s easy to prepare and perfect for gatherings.


    • 8 oz elbow pasta (or your pasta of choice)
    • 1 can (15 oz) chickpeas, drained and rinsed
    • 1 cup cherry tomatoes, halved
    • 1/2 cup red onion, finely chopped
    • 1 cup celery, diced
    • 1/2 cup shredded carrots
    • 1/4 cup fresh parsley, chopped
    • 1/2 cup buffalo sauce (adjust to taste)
    • 1/4 cup ranch dressing (or a plant-based alternative)
    • Salt and pepper to taste
    • Optional: 1/4 cup crumbled feta cheese or dairy-free cheese alternative

    1. Cook the Pasta: Bring a large pot of salted water to a boil. Add the elbow pasta and cook according to package instructions until al dente. Drain the pasta and rinse with cold water to cool it down. Set aside.
    2. Prepare the Chickpeas: In a large bowl, combine the drained chickpeas with a few tablespoons of buffalo sauce. Stir until evenly coated. Let it marinate for about 10 minutes for the flavors to meld.
    3. Combine the Ingredients: In a large mixing bowl, add the cooled pasta, chickpeas, cherry tomatoes, red onion, celery, shredded carrots, and fresh parsley. Stir gently to mix everything together without mashing the chickpeas.
    4. Dress the Salad: In a smaller bowl, whisk together the remaining buffalo sauce and ranch dressing. Pour this dressing over the pasta mixture and toss gently to coat all the ingredients evenly. Season with salt and pepper to taste.
    5. Chill: Cover the salad and refrigerate for at least 30 minutes to allow the flavors to develop, or longer if possible.
    6. Serve: Before serving, give the salad a gentle stir. If desired, sprinkle crumbled feta cheese on top for added creaminess and flavor. Enjoy your delicious Buffalo Chickpea Pasta Salad!

    Notes

    • Adjust the buffalo sauce to your heat preference.
    • For a vegan option, make sure to use a plant-based ranch dressing.
    • This salad can be made a day in advance for even better flavor.
    • Prep Time: 20 minutes
    • Cook Time: 10 minutes
    • Category: Salad
    • Method: Mixing and Chilling
    • Cuisine: American

    Nutrition

    • Serving Size: 1 cup
    • Calories: 350
    • Sugar: 4g
    • Sodium: 650mg
    • Fat: 9g
    • Saturated Fat: 1g
    • Unsaturated Fat: 7g
    • Trans Fat: 0g
    • Carbohydrates: 55g
    • Fiber: 10g
    • Protein: 15g
    • Cholesterol: 0mg

    Sharing is caring!

  • Pineapple Salad

    Pineapple Salad


    Introduction to Pineapple Salad

    As a busy mom, I know how precious time can be, especially when it comes to meal prep. That’s why I love introducing my family to this delightful Pineapple Salad. It’s refreshing, vibrant, and so easy to whip up! This salad perfectly balances sweet pineapple with crunchy veggies, making it an ideal side dish or light lunch. Plus, it’s a real crowd-pleaser, sure to impress your loved ones. Whether you’re looking for a quick solution for a hectic day or something special for a family gathering, this pineapple salad is just what you need!

    Why You’ll Love This Pineapple Salad

    This Pineapple Salad is a fantastic dish that ticks all the boxes! It’s incredibly easy to make, taking just 15 minutes of your time. You can effortlessly layer flavors without any cooking. Plus, its sweet and savory taste is utterly irresistible! Packed with vibrant colors, it’s not only good for your taste buds but also visually appetizing. Trust me, once you try it, it will quickly become a staple in your home!

    Ingredients for Pineapple Salad

    Gathering the right ingredients is the first step to creating your flavorful Pineapple Salad. Here’s what you’ll need:

    • Pineapple: The star of our dish! Choose a ripe, sweet medium-sized pineapple for the best flavor.
    • Cucumber: A large cucumber adds a crisp texture to balance the sweet pineapple. Opt for English cucumbers for a milder taste.
    • Bell pepper: Any color will work! They bring an extra crunch and vibrant color to your salad.
    • Red onion: Just a bit of finely chopped red onion adds a delightful bite that brightens the overall flavor.
    • Fresh parsley: Chopped fresh parsley uplifts the dish with a touch of herbaceous freshness. Use cilantro if you prefer.
    • Olive oil: A key ingredient for the dressing, it adds a smooth richness. Extra virgin olive oil provides the best flavor.
    • Lemon juice: The acidity of lemon juice brightens every component, making the salad refreshing. Lime juice is a great alternative too.
    • Salt and pepper: Essential seasonings to enhance the flavors of the salad. Adjust to your taste!

    Feel free to throw in some nuts or seeds if you’re looking for added texture. And remember, the ingredient amounts are listed at the bottom of the article for your convenience, along with options for print!

    How to Make Pineapple Salad

    Now let’s dive into the fun part—making the Pineapple Salad! This process is straightforward and enjoyable. Follow these steps, and you’ll be on your way to creating a delicious dish that everyone will love!

    Step 1: Gather All Ingredients

    Before we start, let’s make sure you have everything at hand. You will need:

    • Pineapple
    • Cucumber
    • Bell pepper
    • Red onion
    • Fresh parsley
    • Olive oil
    • Lemon juice
    • Salt and pepper

    Having these ingredients ready will make the process smoother and quicker. Plus, you’ll feel like a pro!

    Step 2: Prepare the Pineapple

    First up, the star of our show—pineapple! Start by peeling the pineapple. Use a sharp knife to cut away the outer skin, removing any of those pesky eyes, too.

    Next, slice the pineapple into even quarters. Then, chop them into small, uniform cubes. This ensures a consistent taste in every bite. Trust me, no one wants a massive chunk of pineapple to distract from the rest of the salad!

    Step 3: Prep the Vegetables

    Now, let’s get those veggies ready. Begin by washing your cucumber and bell pepper thoroughly. For the cucumber, you can peel it if you prefer but keeping the skin adds extra crunch!

    Chop the cucumber and bell pepper into bite-sized pieces. For the red onion, use a sharp knife to finely chop it. The smaller the pieces, the less overpowering the onion will be in your salad. Just imagine that perfect blend of flavors!

    Step 4: Combine Ingredients

    With everything prepped, it’s time to bring it all together! In a large mixing bowl, gently toss the diced pineapple, cucumber, bell pepper, and red onion. Mix carefully so you don’t squish the pineapple. Even distribution is key here!

    Step 5: Make the Dressing

    Let’s whip up our simple dressing to elevate the salad. In a separate small bowl, combine olive oil and lemon juice. Add a pinch of salt and pepper. If you have a whisk, use it! If not, a fork does the job just fine.

    Mix until it’s well combined and you can see those droplets of lemon juice dancing with the oil. This dressing will perfectly coat our salad and enhance its flavors!

    Step 6: Toss and Chill

    Now for the fun part! Pour the dressing over the pineapple and veggie mixture. Toss everything together gently to ensure the dressing coats every piece without breaking it apart.

    Cover your salad with plastic wrap and let it chill in the fridge for at least 30 minutes. This gives the flavors time to meld together. It’s like giving your salad a refreshing sunbath!

    Step 7: Serve and Enjoy

    Once chilled, it’s time to serve your beautiful Pineapple Salad. You can present it in a large bowl for sharing or in individual portions for a more elegant touch.

    For a little extra flair, consider serving it on a bed of greens. A sprinkle of nuts or seeds on top will add texture, too. Enjoy every crunchy, aromatic bite, and watch how quickly the bowls empty!

    Tips for Success

    • Always choose a ripe pineapple for the sweetest taste. A firm yet slightly soft feel is perfect!
    • Chill your salad longer if you have time; it enhances the flavors even more.
    • Experiment with different herbs like mint or cilantro for a twist!
    • For meal prep, this salad keeps well in the fridge for up to 2 days.
    • Feel free to customize it—add your favorite nuts or fruits for variety!

    Equipment Needed for Pineapple Salad

    • Cutting board: A sturdy surface for chopping. Any flat surface works in a pinch.
    • Sharp knife: Essential for cutting pineapple and vegetables. A butter knife can suffice for soft ingredients.
    • Mixing bowl: A large bowl for combining ingredients. Use any bowl you have at home.
    • Whisk or fork: For mixing the dressing. A spoon can do the job too!
    • Measuring spoons: Handy for dressing ingredients. If you don’t have any, just estimate!

    Variations of Pineapple Salad

    • Spicy Kick: Add jalapeño slices or a sprinkle of cayenne pepper for a zesty twist that packs a punch.
    • Fruit Fiesta: Toss in diced mango or strawberries for a colorful mix of flavors that enhances the sweetness.
    • Nutty Delight: Incorporate chopped walnuts or sunflower seeds for an added crunch and healthy fats.
    • Creamy Addition: Mix in a dollop of Greek yogurt or avocado for a creamy texture that’s satisfying and rich.
    • Grilled Goodness: Fire up the grill! Grilled pineapple chunks add a smoky flavor that pairs beautifully with the fresh ingredients.
    • Herb Infusion: Try basil or mint instead of parsley for a refreshing change that brightens up the salad.

    Serving Suggestions for Pineapple Salad

    • Pair with grilled chicken or shrimp for a delightful main course.
    • Serve alongside corn on the cob for a summer BBQ feast.
    • Complement with a light white wine or sparkling water for a refreshing drink.
    • Garnish with lime wedges for an extra zesty touch.
    • Consider presentation in mason jars for picnics or gatherings.

    FAQs about Pineapple Salad

    Can I make Pineapple Salad ahead of time?
    Absolutely! You can prepare it a day in advance. Just ensure to cover it well and let it chill in the fridge. This will actually enhance the flavors as they meld overnight!

    How do I choose a ripe pineapple?
    Look for a pineapple with a sweet aroma at the base. The skin should be golden and slightly soft to the touch. Avoid ones with dark spots or overly firm skin.

    Can I customize the dressing for the salad?
    Definitely! Feel free to experiment with different dressings. A sweet poppy seed dressing or a zesty vinaigrette can enhance the flavors beautifully!

    Is this Pineapple Salad suitable for a vegan diet?
    Yes! This recipe is 100% vegan, making it a perfect choice for anyone looking for a refreshing, plant-based dish!

    What can I serve with Pineapple Salad?
    This salad pairs well with grilled meats, fish, or even as a side to a hearty vegetable dish. It’s also lovely with a glass of sparkling water or a fruity mocktail on the side!

    Final Thoughts

    Creating this Pineapple Salad has been a delightful journey, blending colors and flavors that dance on your palate. I can’t express how satisfying it is to share such a refreshing dish with family and friends. It’s not just a salad; it’s a celebration of summer evenings, laughter, and connection. Plus, knowing how quick and easy it is to whip up brings me peace of mind on busy days. So as you enjoy your homemade Pineapple Salad, take a moment to relish those crunchy bites and vibrant tastes. It’s more than a recipe; it’s a little gift of joy on your plate!


    Print

    clock clock iconcutlery cutlery iconflag flag iconfolder folder iconinstagram instagram iconpinterest pinterest iconfacebook facebook iconprint print iconsquares squares iconheart heart iconheart solid heart solid icon

    Description

    A refreshing salad combining sweet pineapple with crunchy vegetables and a light dressing.


    • Pineapple: 1 medium-sized, peeled and diced
    • Cucumber: 1 large, diced
    • Bell pepper: 1, diced (any color)
    • Red onion: 1 small, finely chopped
    • Fresh parsley: 1/4 cup, chopped
    • Olive oil: 3 tablespoons
    • Lemon juice: 2 tablespoons
    • Salt: to taste
    • Pepper: to taste

    1. Gather all the necessary ingredients for the salad, including pineapple, vegetables, and any additional items you want to add.
    2. Peel and chop the pineapple into small cubes. Ensure the pieces are uniform for even distribution in the salad.
    3. Prepare your choice of vegetables by washing, peeling, and chopping them into small, bite-sized pieces.
    4. In a large mixing bowl, combine the diced pineapple and chopped vegetables. Mix gently to ensure even distribution.
    5. In a separate bowl, mix the ingredients for the dressing. This could include oil, vinegar, and spices, adjusted to your taste.
    6. Pour the dressing over the pineapple and vegetable mixture. Toss everything together gently to coat all the ingredients evenly.
    7. Cover the bowl with plastic wrap or a lid and let the salad chill in the refrigerator for at least 30 minutes to allow the flavors to meld.
    8. Once chilled, serve the salad in a large bowl or individual portions. Enjoy your refreshing pineapple salad!

    Notes

    • For added texture, consider including nuts or seeds.
    • Feel free to experiment with different dressings based on your preference.
    • Serving on a bed of greens adds additional nutrients.
    • Prep Time: 15 minutes
    • Cook Time: 0 minutes
    • Category: Salad
    • Method: Mixing
    • Cuisine: International

    Nutrition

    • Serving Size: 1 serving
    • Calories: 150
    • Sugar: 10g
    • Sodium: 50mg
    • Fat: 10g
    • Saturated Fat: 1g
    • Unsaturated Fat: 9g
    • Trans Fat: 0g
    • Carbohydrates: 15g
    • Fiber: 2g
    • Protein: 2g
    • Cholesterol: 0mg

    Sharing is caring!

  • Baked Salmon Meatballs with Creamy Avocado Sauce

    Baked Salmon Meatballs with Creamy Avocado Sauce


    Introduction to Baked Salmon Meatballs with Creamy Avocado Sauce

    Hey there, fellow home cooks! If you’re anything like me, juggling family, work, and everything in between can feel like a never-ending juggling act. That’s why I’m excited to share my Baked Salmon Meatballs with Creamy Avocado Sauce recipe. It’s not just dinner; it’s a little moment of joy amidst the chaos. These delightful meatballs come together quickly and are packed with flavor, making them the perfect solution for a busy weeknight meal or a cozy gathering with loved ones. Let’s dive into a dish that’s as easy to make as it is comforting!

    Why You’ll Love This Baked Salmon Meatballs with Creamy Avocado Sauce

    These Baked Salmon Meatballs with Creamy Avocado Sauce are a true game-changer for busy households! They’re not only easy to whip up but also incredibly delicious. With just a few simple ingredients, you can create a healthy, flavorful meal that the whole family will adore. Plus, the creamy avocado sauce adds a touch of luxury while keeping things wholesome. It’s a win-win for your taste buds and your schedule!

    Ingredients for Baked Salmon Meatballs with Creamy Avocado Sauce

    Gathering the right ingredients is half the fun, right? Here’s what you’ll need for these flavorful Baked Salmon Meatballs with Creamy Avocado Sauce.

    • Fresh salmon: The star of the show! Use skinless salmon fillets for a tender and flaky texture.
    • Breadcrumbs: These give the meatballs a nice structure. You can use regular or whole wheat, depending on your health goals.
    • Parmesan cheese: A sprinkle of this adds a savory, cheesy flavor that complements the salmon beautifully.
    • Egg: Acts as a binding agent, helping the meatballs hold their shape during baking.
    • Fresh parsley: Adds a splash of color and a burst of freshness. Feel free to swap it out for basil or dill if you prefer.
    • Garlic: Who doesn’t love garlic? It brings depth and warmth to the dish. I usually use fresh, but garlic powder works in a pinch!
    • Lemon juice: A little zing for flavor balance. Lime juice can be a great substitute if you like a twist.
    • Salt and pepper: Essential seasonings that elevate every bite. Adjust them to your taste!
    • Ripe avocado: This creamy delight makes the sauce silky and rich. Choose one that gives slightly when you press it.
    • Greek yogurt: A healthier alternative to sour cream, adding creaminess with a nice tang. You can use regular yogurt if you don’t have Greek on hand.
    • Water: For thinning the sauce to your desired consistency. Always add it gradually to avoid making it too runny.

    For exact measurements and a printable version of this recipe, check at the bottom of the article!

    How to Make Baked Salmon Meatballs with Creamy Avocado Sauce

    Let’s jump into the kitchen and create some magic! Making these Baked Salmon Meatballs with Creamy Avocado Sauce is a breeze. Follow these simple steps for a delightful culinary experience.

    Step 1: Preheat the Oven

    Start by preheating your oven to 400°F (200°C). This is crucial because a hot oven helps the meatballs cook evenly, developing a lovely golden color. Also, line a baking sheet with parchment paper. This will make clean-up easy and prevent sticking.

    Step 2: Prepare the Salmon Mixture

    In a large mixing bowl, combine the finely chopped salmon with breadcrumbs, Parmesan cheese, egg, parsley, minced garlic, lemon juice, salt, and pepper. Use your hands or a spoon to mix everything until it’s well combined. Make sure not to overmix; you want a cohesive mixture that retains a bit of texture.

    Step 3: Forming the Meatballs

    Now comes the fun part! Scoop out small amounts of the salmon mixture and gently roll them into meatballs. Aim for the size of a golf ball—this ensures they cook evenly. If your hands get sticky, a little water helps! Place them on your prepared baking sheet, leaving space between each one for even cooking.

    Step 4: Baking Time

    Pop the baking sheet into the preheated oven. Bake the meatballs for about 15-18 minutes, or until they are cooked through and slightly golden. A good tip is to check for a firm texture and a faint golden hue. Trust me, the aroma filling your kitchen will be irresistible!

    Step 5: Making the Creamy Avocado Sauce

    While the meatballs are baking, it’s time to whip up your creamy avocado sauce. In a blender or food processor, add the ripe avocado, Greek yogurt, lime juice, and minced garlic. Blend until it’s smooth and creamy. If the sauce seems too thick, add a splash of water until it reaches your desired consistency. Taste and adjust the seasoning if needed!

    Step 6: Serve and Enjoy

    Once the salmon meatballs are perfect, take them out of the oven and let them cool slightly. Serve them warm alongside the creamy avocado sauce for dipping. Presentation matters—consider arranging the meatballs on a colorful platter garnished with fresh herbs. Your family will not only be delighted by the flavors but also by the beautiful presentation!

    Tips for Success

    • Use a sharp knife for chopping salmon to ensure even pieces.
    • Chill the mixture for 10 minutes before forming meatballs to help them hold shape.
    • Don’t skip preheating the oven; it’s essential for that golden finish.
    • Feel free to mix in other herbs like dill or cilantro for a flavor twist.
    • Adjust seasoning as you go; every palate is unique!

    Equipment Needed

    • Mixing Bowl: Any size works, but a large bowl helps mix everything easily.
    • Baking Sheet: A standard baking sheet will do. Use a cast-iron skillet for a fun twist!
    • Parchment Paper: Handy for easy clean-up. Aluminum foil can be used in a pinch.
    • Blender or Food Processor: Essential for a smooth avocado sauce; a hand mixer could work too.
    • Cookie Scoop: For uniform meatballs, but your hands are just as effective!

    Variations of Baked Salmon Meatballs with Creamy Avocado Sauce

    • Spicy Kick: Add diced jalapeños or a few dashes of hot sauce to the salmon mixture for some heat!
    • Herb Swap: Try different herbs like fresh dill or cilantro in place of parsley for a unique flavor.
    • Cheesy Option: Mix in crumbled feta cheese along with the Parmesan for a tangy twist.
    • Veggie Boost: Incorporate finely chopped spinach or zucchini into the salmon mixture for added nutrition.
    • Gluten-Free: Use gluten-free breadcrumbs or almond flour to accommodate dietary preferences.
    • Asian Flair: Add soy sauce and sesame oil to the meatball mixture for a delightful Asian-inspired flavor.

    Serving Suggestions

    • Fresh Salad: Pair the meatballs with a light arugula or spinach salad, dressed with lemon vinaigrette.
    • Steamed Vegetables: Broccoli, asparagus, or green beans add vibrant color and crunch to your meal.
    • Quinoa or Brown Rice: Serve with a side of quinoa or brown rice for a wholesome touch.
    • Light White Wine: A crisp Sauvignon Blanc enhances the flavors beautifully.
    • Garnish: Sprinkle chopped parsley or lime zest over the dish for a pop of color!

    FAQs about Baked Salmon Meatballs with Creamy Avocado Sauce

    Can I use canned salmon instead of fresh salmon?

    Absolutely! Canned salmon can work in a pinch. Just make sure to drain it well before mixing. The texture may differ slightly, but it will still taste delicious in these Baked Salmon Meatballs with Creamy Avocado Sauce.

    How can I store leftovers?

    Leftover meatballs can be placed in an airtight container and stored in the fridge for up to 3 days. Reheat them in the oven or microwave before enjoying again!

    Can I freeze the meatballs?

    Yes! These meatballs freeze great. Just make sure they’re cooled completely before placing them in a freezer-safe container. They can last up to 3 months. Thaw in the fridge overnight before reheating.

    How can I make these meatballs spicier?

    Add diced jalapeños or hot sauce to the salmon mixture for some extra heat. You can also sprinkle red pepper flakes into the avocado sauce for a nice kick!

    What can I serve with the creamy avocado sauce?

    The avocado sauce pairs beautifully with various dishes. Use it as a dip for fresh veggies, spread on sandwiches, or even drizzle over a salad. It’s a versatile sauce that brightens up any meal!

    Final Thoughts

    In a world where time is precious, my Baked Salmon Meatballs with Creamy Avocado Sauce shine like a beacon of deliciousness and ease. They bring warmth to the kitchen and smiles to the table, creating moments of joy with every bite. Each step, from forming the meatballs to blending that dreamy sauce, reminds me that cooking can be both simple and gratifying. I hope this recipe brings you the same happiness it has brought to my humdrum weeknights. So, gather your loved ones, serve up these little bites of love, and savor the delightful flavors together!


    Print

    clock clock iconcutlery cutlery iconflag flag iconfolder folder iconinstagram instagram iconpinterest pinterest iconfacebook facebook iconprint print iconsquares squares iconheart heart iconheart solid heart solid icon

    Description

    Deliciously baked salmon meatballs served with a creamy avocado sauce that is perfect for dipping.


    • 1 lb fresh salmon, skin removed and finely chopped
    • 1/2 cup breadcrumbs
    • 1/4 cup grated Parmesan cheese
    • 1 egg
    • 2 tablespoons fresh parsley, chopped
    • 2 cloves garlic, minced
    • 1 tablespoon lemon juice
    • Salt and pepper to taste
    • 1 ripe avocado, peeled and pitted
    • 1/4 cup Greek yogurt
    • 1 tablespoon lime juice
    • 1 garlic clove, minced
    • Water to thin, if needed

    1. Preheat oven to 400°F (200°C). Line a baking sheet with parchment paper.
    2. In a large bowl, combine chopped salmon, breadcrumbs, Parmesan cheese, egg, parsley, garlic, lemon juice, salt, and pepper. Mix until well combined.
    3. Form the mixture into small meatballs and place them on the prepared baking sheet.
    4. Bake the salmon meatballs for 15-18 minutes, or until cooked through and slightly golden.
    5. While the meatballs bake, prepare the avocado sauce. In a blender or food processor, combine avocado, Greek yogurt, lime juice, garlic, salt, and pepper. Blend until smooth, adding water to reach desired consistency.
    6. Serve the baked salmon meatballs with the creamy avocado sauce on the side for dipping.

    Notes

    • For a spicier sauce, consider adding some jalapeño or hot sauce.
    • Leftover meatballs can be stored in an airtight container in the fridge for up to 3 days.
    • This dish pairs well with a fresh salad or steamed vegetables.
    • Prep Time: 15 minutes
    • Cook Time: 18 minutes
    • Category: Main Course
    • Method: Baking
    • Cuisine: American

    Nutrition

    • Serving Size: 4 meatballs with sauce
    • Calories: 320
    • Sugar: 2g
    • Sodium: 350mg
    • Fat: 20g
    • Saturated Fat: 4g
    • Unsaturated Fat: 16g
    • Trans Fat: 0g
    • Carbohydrates: 12g
    • Fiber: 4g
    • Protein: 22g
    • Cholesterol: 70mg

    Sharing is caring!

  • Millionaire Peach Salad

    Millionaire Peach Salad


    Introduction to Millionaire Peach Salad

    As the sun blazes down on those warm summer days, I often crave something light and refreshing, like my delightful Millionaire Peach Salad. It’s more than just a salad; it’s a celebration of summer, bringing the sweet taste of ripe peaches and creamy mozzarella together in perfect harmony. If you’re a busy mom or professional like me, this recipe is a quick solution for a satisfying meal that doesn’t skimp on flavor. Trust me, it’s the perfect dish to impress your loved ones or just enjoy on your own. Let’s dive into this culinary adventure!

    Why You’ll Love This Millionaire Peach Salad

    This Millionaire Peach Salad is as easy to make as it is delicious! With just 15 minutes of prep time, it fits perfectly into my busy schedule. The vibrant flavors blend beautifully, creating a taste that brightens any meal. Plus, it’s incredibly versatile! Whether you’re serving it at a family gathering or enjoying it solo, this salad never fails to impress. It’s simply a summer must-try!

    Ingredients for Millionaire Peach Salad

    Let’s gather all the vibrant ingredients to create this blissful Millionaire Peach Salad. Each element sings in harmony, bursting with fresh flavors!

    • Ripe peaches: Sweet and juicy, they’re the star of the show! Look for ones that yield slightly to pressure for the best flavor.
    • Fresh mozzarella balls: Creamy and delicate, they add a wonderful contrast to the peaches’ sweetness. Use bocconcini for a twist.
    • Arugula or mixed greens: The peppery arugula gives a delightful zing. If you prefer, baby spinach or spring mix works just as well!
    • Walnuts: Toasted and crunchy, they bring nutty flavor and texture. Pecans or almonds are great substitutes if you’re craving something different.
    • Feta cheese: Salty and crumbly, it enhances the salad with a burst of flavor. Feel free to swap it with goat cheese for a tangy touch!
    • Fresh basil leaves: Aromatic and fresh, they elevate the salad with an irresistible scent. You can also use mint if you desire a refreshing twist.
    • Balsamic glaze: A drizzle of this elegantly sweet reduction ties the salad together. If you don’t have it, a simple balsamic vinegar will do.
    • Salt and pepper: Always essential! Just season to your taste—these little touches can make all the difference.

    For exact quantities, feel free to check the recipe at the bottom of this article. Now, let’s get ready to toss this delightful dish together!

    How to Make Millionaire Peach Salad

    Let’s embark on this culinary journey together! Making Millionaire Peach Salad is a simple process that yields such vibrant results. Follow these steps to whip up this gorgeous summer salad in no time!

    Step 1: Prepare the Peaches

    Start by washing the peaches thoroughly under cool running water. Then, simply cut them in half and remove the pits.

    Slice the juicy peaches into wedges, letting their sweet aroma fill your kitchen. This step sets the stage for the star of the show!

    Step 2: Combine Salad Ingredients

    In a large salad bowl, carefully combine those perfectly sliced peaches with the halved fresh mozzarella balls and the peppery arugula or mixed greens.

    This creates a colorful base that screams summer joy. Don’t rush through this step; take a moment to admire the beautiful colors and textures.

    Step 3: Add Toppings

    Now, it’s time for the delightful toppings! Sprinkle the toasted walnuts, crumbled feta cheese, and torn fresh basil leaves over the salad.

    The walnuts add a satisfying crunch, while the feta offers a creamy tang. With each addition, the salad gains texture and flavor, like a symphony coming together.

    Step 4: Drizzle with Balsamic

    Next, drizzle that luscious balsamic glaze over the mixture. This elegant touch enhances the salad, infusing it with sweetness and depth.

    If you’re feeling adventurous, try experimenting with flavored balsamic for an extra kick!

    Step 5: Toss Gently

    As tempting as it is to dive right in, gently toss the salad to combine all the ingredients. Be careful not to mash the peaches or mozzarella; we want each component to hold its own in this vibrant dish.

    Think of it as a dance, where every element waltzes together gracefully.

    Step 6: Chill Before Serving

    Chill the salad in the refrigerator for about 10-15 minutes. This little break allows the flavors to meld beautifully.

    The anticipation makes it taste even better—like a surprise waiting to happen!

    Step 7: Serve and Enjoy

    Finally, serve the Millionaire Peach Salad on individual plates or directly from the bowl. This dish is as visually appealing as it is delicious!

    I promise it will be a hit at your table, whether it’s a family meal or a gathering with friends. Enjoy every refreshing, fruity bite!

    Tips for Success

    • Select ripe peaches for the best flavor—look for ones that yield slightly when pressed.
    • Toast walnuts in a dry pan over medium heat for a few minutes to enhance their nuttiness.
    • Use fresh mozzarella that’s packed in water for maximum creaminess.
    • Don’t skip the chilling step; it makes a world of difference in taste.
    • Experiment with different greens for a unique twist each time.

    Equipment Needed

    • Large salad bowl: Any mixing bowl will work if you don’t have a dedicated salad bowl.
    • Cutting board: A sturdy surface for slicing those delicious peaches.
    • Sharp knife: Essential for easy peach slicing and basil tearing.
    • Measuring cups: Handy for portioning ingredients, though not strictly necessary.
    • Serving utensils: For elegantly tossing and serving your beautiful salad.

    Variations of Millionaire Peach Salad

    • Grilled Peach Version: For a smoky twist, grill the peach slices before adding them to the salad. This brings out an intensified sweetness.
    • Berry Bliss: Toss in a handful of fresh berries like strawberries or blueberries for a vibrant burst of flavor and color.
    • Protein Boost: Add grilled chicken or shrimp to transform this salad into a complete meal, making it even more satisfying.
    • Vegan Delight: Omit the mozzarella and feta, and consider adding avocado for creaminess instead. It’s just as delicious!
    • Nut-Free Option: Replace walnuts with sunflower seeds or pumpkin seeds to keep that crunch without the nuts.

    Serving Suggestions

    • Pair with grilled chicken or fish for a heartier meal that highlights the salad’s brightness.
    • Serve alongside crusty bread or pita chips for a delightful crunch.
    • For drinks, a chilled white wine or sparkling lemonade complements the salad perfectly.
    • Garnish with extra basil leaves for an elegant presentation that pops!

    FAQs about Millionaire Peach Salad

    Can I use frozen peaches for the Millionaire Peach Salad?

    While fresh peaches are ideal for this salad, you can use frozen peaches if necessary. Just ensure they are thawed and drained well before adding them to the mix to avoid excess moisture.

    How can I make this salad gluten-free?

    This Millionaire Peach Salad is naturally gluten-free! Just keep an eye on any additional toppings that may have gluten, like certain brands of balsamic glaze. Most should be safe, but it’s always good to check labels.

    Can I make the Millionaire Peach Salad ahead of time?

    Yes, you can prep the ingredients a day ahead. Store the cut peaches, greens, and toppings separately. Toss everything together just before serving to keep the peaches fresh and prevent any sogginess.

    What can I substitute for arugula?

    If you’re not a fan of arugula, you can substitute it with mixed greens, baby spinach, or even kale. Each adds its unique flavor and texture, creating a personalized touch.

    Is Millionaire Peach Salad suitable for meal prep?

    Absolutely! Just keep the components separate until you’re ready to serve. This way, you can enjoy the salad fresh all week long while maintaining its delightful crunch.

    Final Thoughts

    As summer graces us with its warmth, my heart feels light at the thought of sharing my Millionaire Peach Salad with family and friends. This dish is not just a salad; it’s a memory in the making, filled with laughter and sunshine. Each bite brings a delightful blend of flavors that cannot help but lift your spirits. Plus, the stunning colors make it a feast for the eyes! Whether you savor it casually or serve it at a gathering, this recipe brings joy to the table, making every meal feel like a special occasion. Enjoy every refreshing moment!


    Print

    clock clock iconcutlery cutlery iconflag flag iconfolder folder iconinstagram instagram iconpinterest pinterest iconfacebook facebook iconprint print iconsquares squares iconheart heart iconheart solid heart solid icon

    Description

    A refreshing summer salad featuring ripe peaches, fresh mozzarella, and a hint of peppery arugula, topped with walnuts and feta cheese.


    • 4 pieces Ripe peaches, pitted and sliced
    • 1 cup Fresh mozzarella balls, halved
    • 1 cup Arugula or mixed greens
    • 1/2 cup Walnuts, toasted and chopped
    • 1/4 cup Feta cheese, crumbled
    • 1/4 cup Fresh basil leaves, torn
    • 1/4 cup Balsamic glaze, for drizzling
    • to taste Salt
    • to taste Pepper

    1. Wash the peaches thoroughly under cool running water, then cut them in half and remove the pits. Slice them into wedges.
    2. In a large salad bowl, combine the sliced peaches, halved mozzarella balls, and arugula or mixed greens.
    3. Add the toasted walnuts, crumbled feta cheese, and torn basil leaves to the bowl.
    4. Drizzle the balsamic glaze over the salad mixture and season with salt and pepper to taste.
    5. Gently toss the salad to combine all ingredients without mashing the peaches or mozzarella.
    6. Chill the salad in the refrigerator for about 10-15 minutes before serving to allow flavors to meld.
    7. Serve the salad on individual plates or directly from the bowl.

    Notes

    • For added flavor, consider using heirloom peaches if available.
    • Feel free to substitute walnuts with pecans or almonds based on preference.
    • For a vegan version, omit the mozzarella and feta cheese.
    • Prep Time: 15 minutes
    • Cook Time: 0 minutes
    • Category: Salad
    • Method: No-cook
    • Cuisine: American

    Nutrition

    • Serving Size: 1 serving
    • Calories: 250
    • Sugar: 8g
    • Sodium: 200mg
    • Fat: 15g
    • Saturated Fat: 3g
    • Unsaturated Fat: 10g
    • Trans Fat: 0g
    • Carbohydrates: 20g
    • Fiber: 3g
    • Protein: 8g
    • Cholesterol: 10mg

    Sharing is caring!