Author: IHAAL Team

  • Loaded Cheese Fries Beef

    Loaded Cheese Fries Beef


    Introduction to Loaded Cheese Fries Beef

    Hey there, fellow food lovers! If you’re like me, some days call for a comforting indulgence, especially after a long, hectic day. That’s where Loaded Cheese Fries Beef swoops in to save the day! This dish is not just a quick solution; it’s a flavor celebration that your family will adore. Imagine crispy fries piled high with savory seasoned beef and ooey-gooey cheese. It’s the ultimate crowd-pleaser! Perfect for impressing friends or just enjoying a cozy night in, this loaded cheese fries recipe is bound to become a favorite in your home.

    Why You’ll Love This Loaded Cheese Fries Beef

    This Loaded Cheese Fries Beef is a total game changer in the world of comfort food! It’s incredibly easy to whip up, making it perfect for those busy weeknights when time is tight. Plus, the combination of crispy fries, flavorful ground beef, and melted cheese creates a mouthwatering experience that’s hard to resist. Trust me, one bite of this indulgence will have your taste buds dancing with joy, and you’ll be hooked!

    Ingredients for Loaded Cheese Fries Beef

    Gathering the right ingredients is the first step to creating this delicious Loaded Cheese Fries Beef. Here’s what you’ll need to bring this savory delight to life:

    • Frozen French fries or russet potatoes: Opt for frozen for convenience or make fresh fries for a homemade touch.
    • Ground beef: I typically use lean beef to keep it healthier, but you can also try ground turkey or chicken for a lighter option.
    • Paprika: This spice adds a subtle smokiness and a beautiful color to the beef. It’s a must-have!
    • Garlic powder: A sprinkle of garlic powder infuses the dish with flavor, bringing everything together with its warm aroma.
    • Salt and black pepper: Basic seasonings that elevate the dish—adjust according to your taste preferences.
    • Shredded cheddar cheese: There’s nothing like melted cheese! You can mix it up with mozzarella or pepper jack for a kick.
    • Sour cream: This creamy topping adds a cool contrast to the warm, cheesy fries, making each bite delightful.
    • Red onion: Diced red onion provides a lovely crunch and a bit of sharpness to balance the richness of the cheese and beef.
    • Chopped tomatoes: Fresh tomatoes add a juicy sweetness and a pop of color to your loaded fries.
    • Parsley or green onions: These garnishes add freshness and a lovely green touch, enhancing the overall presentation.

    Feel free to customize the toppings based on your family’s taste! For those who enjoy a spicier kick, consider adding jalapeños or a drizzle of your favorite hot sauce. The exact quantities of these ingredients are listed at the bottom of the article, ready for your kitchen adventures!

    How to Make Loaded Cheese Fries Beef

    Creating Loaded Cheese Fries Beef is a breeze. With just a few simple steps, you’ll have a mouthwatering dish that everyone will love. Let’s get started!

    Preheat the Oven

    Your oven is about to become your best friend. Preheat it to 425°F. This temperature will help those fries turn crispy and golden, giving you that desired crunch. Trust me, that perfect fry texture makes all the difference!

    Bake the Fries

    Now, grab a sheet pan and lay the frozen fries in a single layer. Allow them some room to breathe; this helps them crisp up. Bake for 20 to 25 minutes. Remember to flip them halfway through for even cooking. You’ll know they’re ready when they’re beautifully golden and crispy!

    Cook the Ground Beef

    While the fries are baking, heat a skillet over medium heat. Add your ground beef and cook it, breaking it apart with a spoon. Season it with paprika, garlic powder, salt, and black pepper. The aroma will surely get your taste buds tingling! Stir until it’s fully cooked and browned. If there’s any excess fat, be sure to drain it off.

    Assemble the Loaded Cheese Fries Beef

    Once your fries are perfectly baked, transfer them to an oven-safe dish. Now, it’s time for the fun part! Evenly scatter the shredded cheddar cheese over the fries. Next, pile that seasoned ground beef on top. This layering creates a feast for both the eyes and taste buds!

    Melt the Cheese

    Put the dish back in the oven for about 5 minutes. Keep an eye on it—this is when the cheese melts into a gooey, glorious blanket over the fries and beef. It’s a sight to behold and a smell to savor!

    Add Toppings

    Once out of the oven, it’s time for your loaded cheese fries to shine! Drizzle some cool sour cream over the hot dish. Then sprinkle diced red onion, chopped tomatoes, and your choice of parsley or green onions. This final touch not only adds color but freshness that ties everything together!

    Tips for Success

    • Use parchment paper on your sheet pan for easy cleanup.
    • Don’t rush the beef cooking process; browning adds flavor.
    • For crispier fries, avoid overcrowding the pan.
    • Experiment with different cheeses for unique flavor twists.
    • For an extra layer of flavor, sprinkle herbs and spices on fries pre-baking.

    Equipment Needed

    • Sheet pan: A standard baking sheet works well; use a cast iron skillet for a fun twist.
    • Skillet: A non-stick skillet is ideal; if you don’t have one, any pan will do!
    • Oven-safe dish: A baking dish holds everything together; make sure it’s oven-safe for melting cheese.
    • Spatula: Use it for flipping fries and stirring the beef; a wooden spoon works too.

    Variations

    • Vegetarian Version: Swap out the ground beef for black beans or lentils. Top with extra cheese and your favorite veggies for a hearty dish.
    • Loaded Tex-Mex Fries: Add taco seasoning to the ground beef and top with guacamole and salsa for a zesty twist.
    • Bacon Lovers: Cook some crispy bacon bits to sprinkle over the cheese before serving. It adds a delightful crunch!
    • Low-Carb Option: Use cauliflower fries in place of conventional fries to enjoy a lighter, keto-friendly variation.
    • Cheese Variety: Experiment with pepper jack or gouda cheese for a bit of kick or a richer flavor.

    Serving Suggestions

    • Pair with a Salad: A fresh green salad adds a light contrast to the richness of the fries.
    • Serve with Dipping Sauces: Try ranch, barbecue, or even a spicy aioli for extra flavor.
    • Drink Pairings: A cold soda or a crisp light beer complements the bold flavors beautifully.
    • Presentation: Serve in a large bowl, topped with extra fresh herbs for a pop of color.

    FAQs about Loaded Cheese Fries Beef

    Can I make Loaded Cheese Fries Beef ahead of time?

    Absolutely! You can prepare the ground beef and bake the fries in advance. Just assemble the dish when you’re ready to serve. This makes for a quick dinner solution on busy nights!

    What can I use instead of ground beef?

    If beef isn’t your thing, try ground turkey, chicken, or even plant-based crumbles for a tasty alternative. The seasoning will elevate any option you choose!

    How can I make these fries spicier?

    For a fiery kick, add sliced jalapeños or cayenne pepper to the ground beef mixture. You can also drizzle on some hot sauce right before serving!

    Are these Loaded Cheese Fries Beef suitable for kids?

    Definitely! Kids love the cheesy, crispy goodness. You can customize toppings to suit their tastes—maybe skip the onions or swap out for their favorite veggies.

    Can I freeze Loaded Cheese Fries Beef?

    Freezing is an option! Assemble the dish before baking, then freeze for later. Just remember to bake it from frozen, adding a few extra minutes to the cooking time.

    Final Thoughts

    Loaded Cheese Fries Beef isn’t just a meal; it’s an experience filled with warmth and togetherness. Whether you’re indulging on a cozy Friday night or hosting friends for game day, this dish brings everyone to the table. The joy of cheesy, crispy fries smothered in flavorful beef creates moments worth savoring. Plus, it’s a breeze to whip up, so even the busiest of moms can enjoy a delightful treat without spending all afternoon in the kitchen. So go ahead, give this recipe a whirl—it’s bound to become a cherished favorite in your home!


    Print

    clock clock iconcutlery cutlery iconflag flag iconfolder folder iconinstagram instagram iconpinterest pinterest iconfacebook facebook iconprint print iconsquares squares iconheart heart iconheart solid heart solid icon

    Description

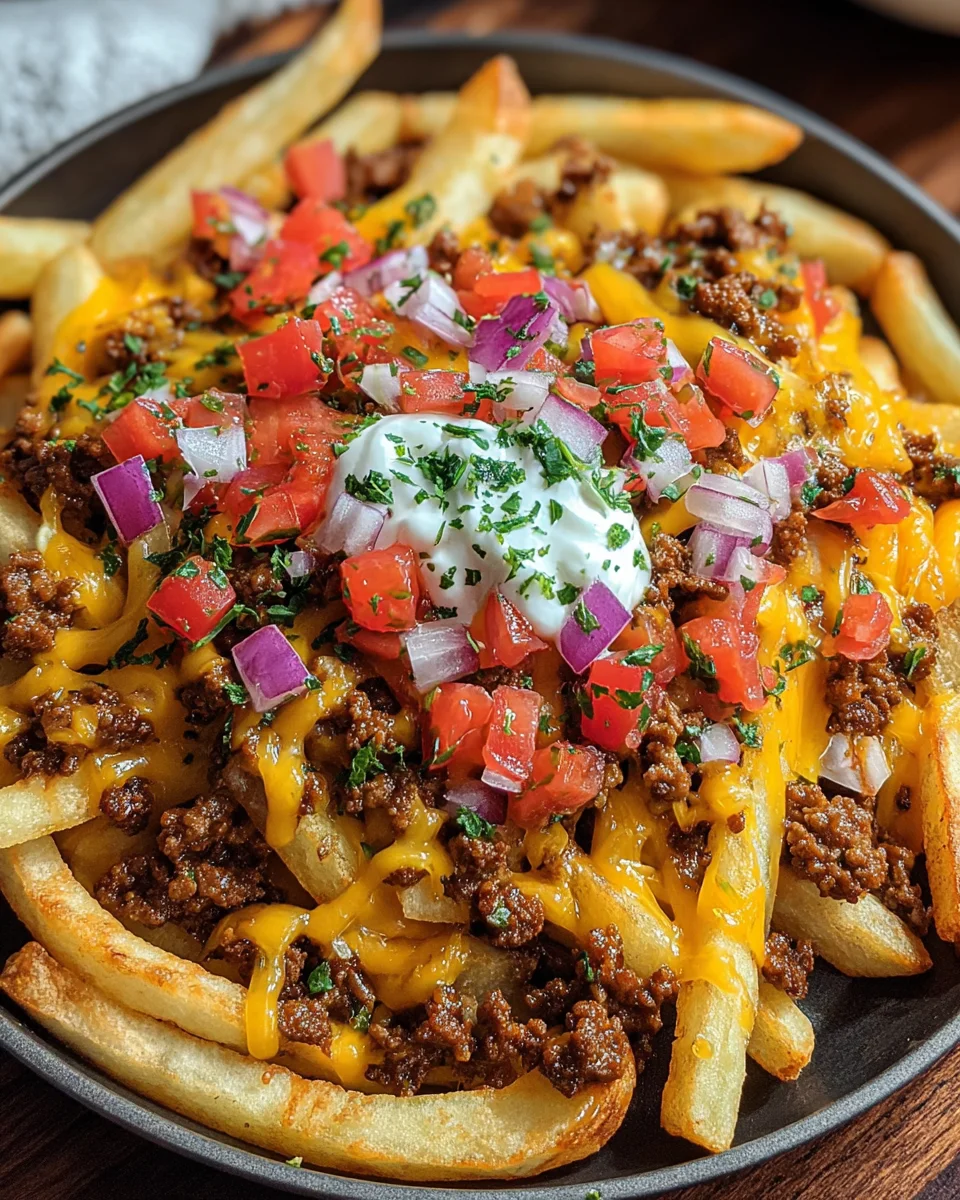
    Loaded Cheese Fries Beef is a deliciously indulgent dish featuring crispy fries topped with seasoned ground beef, melted cheddar cheese, and fresh toppings.


    • 1 bag frozen French fries or 4 large russet potatoes, cut into fries
    • 1/2 pound ground beef
    • 1 teaspoon paprika
    • 1/2 teaspoon garlic powder
    • Salt, to taste
    • Black pepper, to taste
    • 1 1/2 cups shredded cheddar cheese
    • 1/2 cup sour cream
    • 1/4 cup diced red onion
    • 1/4 cup chopped tomatoes
    • 2 tablespoons chopped parsley or green onions

    1. Set oven to 425°F to ensure an even, hot temperature for crisping the fries.
    2. Arrange the French fries in a single layer on a sheet pan. Bake for 20 to 25 minutes, flipping halfway, until golden brown and crisp.
    3. Heat a skillet over medium heat. Add ground beef and cook, breaking up with a spoon, until browned. Sprinkle with paprika, garlic powder, salt, and black pepper. Continue cooking, stirring frequently, until beef is fully cooked. Drain any excess fat.
    4. Transfer baked fries to an oven-safe dish. Evenly scatter shredded cheddar cheese over fries, then distribute the cooked beef mixture on top.
    5. Return the dish to the oven and bake for 5 minutes or until the cheese is fully melted.
    6. Drizzle sour cream over the hot loaded fries. Sprinkle diced red onion, chopped tomatoes, and parsley or green onions over the top.
    7. Present loaded cheese fries promptly while hot for best flavor and texture.

    Notes

    • For a spicier kick, add jalapeños or hot sauce.
    • Feel free to customize the toppings based on your preferences.
    • Ensure to check the fries frequently to prevent burning.
    • Prep Time: 10 minutes
    • Cook Time: 30 minutes
    • Category: Appetizer
    • Method: Baking
    • Cuisine: American

    Nutrition

    • Serving Size: 1 serving
    • Calories: 450
    • Sugar: 2g
    • Sodium: 800mg
    • Fat: 25g
    • Saturated Fat: 12g
    • Unsaturated Fat: 8g
    • Trans Fat: 0g
    • Carbohydrates: 30g
    • Fiber: 3g
    • Protein: 22g
    • Cholesterol: 70mg

    Sharing is caring!

  • White Cheddar Spinach Chicken Burgers

    White Cheddar Spinach Chicken Burgers


    Introduction to White Cheddar Spinach Chicken Burgers

    Hey there, fellow home cooks! If you’re looking for a dish that’ll make your taste buds dance while still fitting into your busy schedule, then let me introduce you to my White Cheddar Spinach Chicken Burgers. These burgers are not only scrumptious but also super easy to whip up. Perfect for those evenings when time is tight, they are packed with flavor and nutrition. Plus, they’re sure to impress your family and friends, turning any ordinary dinner into a delightful culinary experience! Let’s dive into this wonderful dish together.

    Why You’ll Love This White Cheddar Spinach Chicken Burgers

    Let me tell you, these White Cheddar Spinach Chicken Burgers are an absolute game changer in my kitchen. They come together in just 27 minutes, making them a quick solution for busy weeknights. The combination of tender ground chicken, vibrant spinach, and creamy cheddar is simply delicious. Plus, you can easily customize them to satisfy picky eaters. Trust me, once you try them, they’ll become a family favorite!

    Ingredients for White Cheddar Spinach Chicken Burgers

    Gathering the right ingredients can make all the difference! For these White Cheddar Spinach Chicken Burgers, you’ll need a blend of fresh and flavorful items that come together beautifully. Here’s what you’ll need:

    • Ground chicken: This is the star of the show, offering a lean protein base that’s juicy and satisfying.
    • Fresh spinach: Packed with nutrients, this leafy green adds a pop of color and a dose of vitamins.
    • Shredded white cheddar cheese: Rich and creamy, it melts beautifully and takes the flavor to the next level.
    • Breadcrumbs: These help bind the patties together while adding a touch of crunch.
    • Finely chopped onion: A aromatic sweetness that complements the other ingredients perfectly.
    • Garlic cloves: Minced garlic brings a robust flavor, elevating the burgers like nothing else.
    • Dijon mustard: Just a splash adds a tangy kick, balancing the richness of the cheese.
    • Worcestershire sauce: This secret ingredient enhances the umami flavor, ensuring each bite is packed with taste.
    • Salt and black pepper: Simple, but essential for seasoning and bringing all the flavors together.
    • Olive oil: A drizzle for cooking, giving the burgers a crisp, golden finish.
    • Burger buns: Choose your favorite! Whole grain, brioche, or gluten-free—your pick!
    • Optional toppings: Consider lettuce, thick tomato slices, or even more cheese to make your burgers your own!

    For exact quantities, check the bottom of the article where you can also find a printable version. Happy cooking!

    How to Make White Cheddar Spinach Chicken Burgers

    Making your own White Cheddar Spinach Chicken Burgers at home is a joy! It’s easy, and I promise, each step will have your kitchen smelling divine. So, let’s roll up our sleeves and get cooking!

    Step 1: Mix the Ingredients

    Start by grabbing a large mixing bowl. Combine the ground chicken, chopped spinach, shredded white cheddar, breadcrumbs, onion, minced garlic, Dijon mustard, and Worcestershire sauce. Sprinkle in some salt and black pepper to taste. Mix gently with your hands or a spatula until everything is evenly combined. Don’t overmix; you just want a beautiful blend of flavors!

    Step 2: Shape the Patties

    Once your mixture is ready, divide it into four equal portions. Using your hands, shape each portion into a patty about ¾ inch thick. Aim for uniformity to ensure even cooking. You can make them wider for large buns or thinner if you prefer a lighter bite. Place the patties on a plate while you heat up your skillet.

    Step 3: Cook the Patties

    Heat a skillet over medium heat and drizzle in a bit of olive oil to prevent sticking. Once hot, gently place the patties in the skillet. Cook them for 5-6 minutes on each side. You’ll know they’re done when they reach an internal temperature of 165°F (75°C). This also creates a lovely golden crust, which makes my mouth water just thinking about it!

    Step 4: Rest the Patties

    When the cooking is complete, transfer the patties to a plate and let them rest for a few minutes. This step is crucial as it allows the juices to redistribute, making every bite succulent. Take a moment to appreciate your handiwork while dreaming up those toppings!

    Step 5: Assemble Your Burgers

    Now comes the fun part! Grab your favorite burger buns and place each patty on a bun. Add your desired toppings, like crisp lettuce or juicy tomato slices. Feel free to melt extra cheddar on top for that indulgent touch. Serve these beauties hot and watch your family dive in with delight!

    Tips for Success

    • Always use fresh ingredients for the best flavor and texture.
    • Don’t skip the resting step; it keeps your patties juicy!
    • You can prepare the mixture a day ahead for easy meal prep.
    • For a fun twist, experiment with different cheeses or herbs.
    • Keep the heat moderate to avoid overcooking the patties.

    Equipment Needed

    • Mixing bowl: Any large bowl will do—plastic or glass works just fine.
    • Skillet: A non-stick skillet makes cooking a breeze. A cast-iron pan is great too!
    • Spatula: For flipping your patties with care.
    • Meat thermometer: Helps ensure your chicken is cooked perfectly.

    Variations on White Cheddar Spinach Chicken Burgers

    • Herbed Delight: Add fresh herbs like basil, oregano, or dill to infuse your burgers with an aromatic twist.
    • Spicy Kick: Mix in some chopped jalapeños or a splash of hot sauce for those who like a little heat in their burgers.
    • Cheesy Surprise: Substitute the white cheddar with pepper jack or mozzarella for a different flavor profile.
    • Veggie Boost: Blend in finely chopped bell peppers or mushrooms to enhance the veggie content.
    • Gluten-Free Option: Use gluten-free breadcrumbs or ground oats to keep these burgers suitable for gluten-sensitive eaters.

    Serving Suggestions for White Cheddar Spinach Chicken Burgers

    • Serve with sweet potato fries for a nutritious twist that complements the flavors.
    • Pair with a crisp garden salad drizzled with balsamic vinaigrette.
    • An ice-cold lemonade or sparkling water is perfect for quenching your thirst.
    • For presentation, stack burgers high with vibrant toppings for a colorful plate.

    FAQs about White Cheddar Spinach Chicken Burgers

    Let’s tackle some common questions I often hear about my White Cheddar Spinach Chicken Burgers. These little nuggets of knowledge can help you in the kitchen and on your dinner table!

    Can I use frozen spinach instead of fresh?

    Absolutely! Just make sure to thaw and drain it well before mixing. Frozen spinach can be a lifesaver when you’re short on time!

    How do I know when the chicken burgers are done?

    The best way is to use a meat thermometer. You’re aiming for an internal temperature of 165°F (75°C). This ensures safety while keeping the burgers juicy!

    Can I make these burgers ahead of time?

    Yes! You can prepare the patties and refrigerate them for up to a day before cooking. They are perfect for meal prep and quick dinners!

    What can I serve with my White Cheddar Spinach Chicken Burgers?

    Pair them with sweet potato fries, mixed greens, or even a refreshing coleslaw. They go wonderfully with so many sides!

    Can I freeze leftover patties?

    Absolutely! Cooked patties can be frozen in an airtight container for up to three months. Just reheat them in the oven or microwave when you’re ready to eat!

    Final Thoughts

    Making White Cheddar Spinach Chicken Burgers has been a delightful journey for me, and I hope it becomes a cherished recipe for you, too! They bring joy not just from their flavors but also from the memories created around the dinner table. These burgers turn a busy weeknight into a special occasion with just a little effort. Watching my family savor each bite reminds me of the simple pleasures of home cooking. I encourage you to experiment, share them with loved ones, and enjoy the smiles they bring!


    Print

    clock clock iconcutlery cutlery iconflag flag iconfolder folder iconinstagram instagram iconpinterest pinterest iconfacebook facebook iconprint print iconsquares squares iconheart heart iconheart solid heart solid icon

    Description

    Delicious homemade burgers made with ground chicken, spinach, and white cheddar cheese that are sure to impress.


    • 1 lb ground chicken
    • 1 cup fresh spinach, finely chopped
    • 1/2 cup shredded white cheddar cheese
    • 1/4 cup breadcrumbs
    • 1/4 cup finely chopped onion
    • 2 garlic cloves, minced
    • 1 tbsp Dijon mustard
    • 1 tsp Worcestershire sauce
    • Salt and black pepper, to taste
    • Olive oil, for cooking
    • 4 burger buns
    • Optional toppings: lettuce, tomato slices, or extra cheese

    1. In a large mixing bowl, combine ground chicken, spinach, cheddar cheese, breadcrumbs, onion, garlic, Dijon mustard, Worcestershire sauce, salt, and black pepper. Mix gently until evenly combined.
    2. Divide the mixture into 4 portions and shape them into patties.
    3. Heat a skillet over medium heat, drizzle with olive oil, and cook the patties for 5-6 minutes per side, or until they reach an internal temperature of 165°F (75°C).
    4. Transfer cooked patties to a plate and let them rest for a few minutes.
    5. Assemble the burgers by placing the patties on buns with your favorite toppings. Serve and enjoy!

    Notes

    • Ensure the chicken is cooked thoroughly to avoid any foodborne illnesses.
    • Feel free to customize toppings based on personal preference.
    • Leftover patties can be stored in the refrigerator for up to 3 days.
    • Prep Time: 15 minutes
    • Cook Time: 12 minutes
    • Category: Main Dish
    • Method: Pan frying
    • Cuisine: American

    Nutrition

    • Serving Size: 1 burger with optional toppings
    • Calories: 320
    • Sugar: 2g
    • Sodium: 450mg
    • Fat: 15g
    • Saturated Fat: 6g
    • Unsaturated Fat: 8g
    • Trans Fat: 0g
    • Carbohydrates: 20g
    • Fiber: 2g
    • Protein: 30g
    • Cholesterol: 75mg

    Sharing is caring!

  • Philly Cheese Steak Sliders

    Philly Cheese Steak Sliders


    Introduction to Philly Cheese Steak Sliders

    Let me share a little secret: there’s something wonderfully comforting about Philly Cheese Steak Sliders. Imagine cozying up with your loved ones, indulging in these delicious bites that burst with flavor. As a busy mom, I understand the need for quick, mouthwatering meals that impress without the fuss. These sliders blend tender roast beef, sautéed peppers, and gooey cheese, cradled in soft dinner rolls, making them the perfect solution for a hectic weeknight dinner or game day feast. Trust me, you’ll want to have this recipe in your back pocket!

    Why You’ll Love This Philly Cheese Steak Sliders

    These Philly Cheese Steak Sliders are not just a treat; they’re a lifesaver in the kitchen! They come together in about 35 minutes, making them perfect for busy nights. The blend of savory roast beef, melted cheese, and sautéed veggies is nothing short of heavenly. Plus, they’re flexible enough to customize for picky eaters. Whether you’re feeding a crowd or enjoying a quiet night in, these sliders are sure to delight!

    Ingredients for Philly Cheese Steak Sliders

    Gathering your ingredients is the first step to whipping up these irresistible Philly Cheese Steak Sliders! Below, I’ve listed everything you’ll need, along with a little insight into each component. Trust me; these flavors work in perfect harmony!

    • Diced Green Peppers: These bring a pop of color and a sweet crunch to your sliders. I like using bell peppers, but you can mix it up with others!
    • Diced Yellow Onions: A must for that aromatic base. They caramelize beautifully, adding richness and depth of flavor to your dish.
    • Deli Sliced Roast Beef: The star of the show! Freshly sliced beef from the deli yields the best taste. You could also opt for different cuts like flank steak.
    • Water: This will help create a luscious sauce when combined with the gravy mix.
    • Brown Gravy Mix: A quick and effortless way to add that unmistakable umami flavor. Feel free to make your own if you’re feeling ambitious!
    • Pepper: Just a sprinkle adds a nice touch of heat. You can always adjust according to your sensitivity!
    • Dinner Rolls: Soft rolls are the perfect vessel for this savory filling. Pot for slider-sized rolls or use homemade rolls for an extra special touch.
    • Mayo: This adds creaminess, balancing the flavors. You can experiment with flavored mayo for a twist!
    • Shredded Mozzarella and Cheddar Cheese Blend: This creamy combo melts beautifully and enhances that ooey-gooey factor. Swap it for provolone or pepper jack for more zing!
    • Melted Butter: Adds a finishing touch of richness when brushed on top, making your sliders visually appealing and extra delicious.
    • Garlic Powder: A little goes a long way to infuse that irresistible aroma. Fresh minced garlic could work as well!
    • Onion Powder: Enhances the overall flavor without overwhelming the dish. Another way to sneak in more taste!

    For exact measurements, check the bottom of the article where they’re neatly laid out for you, all ready for printing. Happy cooking!

    How to Make Philly Cheese Steak Sliders

    Now that we have our ingredients ready, let’s dive into the exciting part: making these delightful Philly Cheese Steak Sliders! I promise, the steps are simple and satisfying. Follow along, and soon you’ll have a dish that’ll leave everyone craving more!

    Step 1: Preheat Your Oven

    First things first, preheat your oven to 350°F. This makes sure your sliders bake evenly and come out golden and delicious. Trust me, your kitchen will smell divine as they cook!

    Step 2: Sauté the Vegetables

    Next, let’s add some color and flavor! In a large sauté pan over medium-high heat, toss in the diced green peppers and yellow onions. Stir them together, letting them cook until they soften and start turning golden brown. This little step enhances their sweetness, creating a beautiful base for our sliders.

    Step 3: Prepare the Roast Beef

    While the veggies are cooking, chop your deli-sliced roast beef into small squares. I find this ideal for even distribution in the sliders. It also allows every bite to have a delicious mix of beef and greens. Remember, we want all those flavors working together in harmony!

    Step 4: Combine Ingredients

    Now that everything’s prepped, it’s time to unite the ingredients! Add the chopped roast beef to your pan with the veggies. Pour in the water, sprinkle the brown gravy mix, and add a dash of pepper. Stir everything together and cook until the liquid reduces. You want it nice and thick to avoid soggy sliders—no one likes that!

    Step 5: Assemble the Sliders

    Grab those soft dinner rolls we prepared earlier! Place the bottoms of the rolls on a non-stick baking sheet. Slather on 2 tablespoons of mayo on each bottom roll. This creaminess adds a wonderful flavor and helps keep everything in place. Now spoon the savory roast beef mixture evenly over the mayo-coated rolls. Just imagine how wonderful this will taste!

    Step 6: Add the Cheese

    It’s time for the star ingredient! Generously sprinkle the shredded mozzarella and cheddar cheese blend over the beef mixture. Don’t hold back! This cheesy goodness is what makes the sliders scrumptious. Finally, place the tops of the rolls back on, sealing all that flavor in.

    Step 7: Bake

    Cover your baking sheet with aluminum foil and slide it into the oven. Bake for about 12 minutes, allowing flavors to meld perfectly. After that, remove the foil and let these masterpieces bake for an additional 8-10 minutes until the tops are beautifully browned. Isn’t it exciting to watch them transform in the oven?

    Step 8: Finish and Serve

    As they come out of the oven, stir together the melted butter with garlic powder and onion powder. Brush this heavenly mixture over the tops of the buns. Let your sliders cool for a couple of minutes before diving in. This simple touch elevates your sliders to a whole new level of tasty, making them even more irresistible!

    Tips for Success

    • Chop vegetables evenly for consistent cooking. This way, they’ll soften perfectly!
    • Don’t rush the sautéing process; let those onions caramelize!
    • Experiment with different cheeses for unique flavors. Pepper jack adds a nice kick!
    • Make the beef mixture ahead of time and store it in the fridge. That way, dinner comes together quickly!
    • Use a pizza cutter to slice sliders easily. It’s a game-changer!

    Equipment Needed

    • Large Sauté Pan: A non-stick option works wonders, but any frying pan will do!
    • Non-Stick Baking Sheet: Perfect for easy cleanup; consider using parchment paper for an even easier experience.
    • Aluminum Foil: Essential for covering sliders while they bake.
    • Knife and Cutting Board: For chopping veggies and meat. A simple set will do!
    • Brush: For spreading the butter mixture on top for that finishing touch.

    Variations

    • Vegetarian Option: Substitute roast beef with sautéed mushrooms and spinach for a hearty, meatless twist!
    • Spicy Sliders: Add jalapeños or use pepper jack cheese for a kick that spice lovers will adore.
    • Gluten-Free Rolls: Pot for gluten-free slider rolls to accommodate dietary restrictions while still enjoying these delicious morsels.
    • Italian Style: Incorporate Italian seasoning and swap the cheese for provolone to create an Italian-inspired flavor.
    • BBQ Twist: Mix in some barbecue sauce with the beef mixture for a tangy, smoky flavor that pairs perfectly with the cheese.

    Serving Suggestions for Philly Cheese Steak Sliders

    • Side Salads: Pair the sliders with a fresh garden salad or coleslaw for a crunchy balance.
    • Chips: Serve with crispy potato chips or sweet potato fries for the ultimate snack platter.
    • Drinks: Complement with iced tea, lemonade, or a light lager for a refreshing combo.
    • Presentation: Arrange on a rustic wooden platter or a fun themed board for a festive touch.

    FAQs about Philly Cheese Steak Sliders

    Can I make Philly Cheese Steak Sliders ahead of time?

    Absolutely! You can prepare the beef mixture and store it in the fridge for a day or two. When you’re ready, just assemble and bake the sliders for a quick meal!

    What can I use instead of roast beef?

    If you’re looking for alternatives, consider using turkey, chicken, or even sautéed mushrooms for a delicious vegetarian option. Each will bring a unique flavor profile!

    How do I store leftovers?

    Store any leftover Philly Cheese Steak Sliders in an airtight container in the fridge for up to three days. Just reheat them in the oven or microwave before enjoying them again!

    Can I freeze the sliders?

    Yes! Assemble the sliders without baking them, wrap tightly, and freeze for up to three months. When you’re ready to eat, bake directly from the freezer, adding a few extra minutes to the cooking time.

    What other cheeses work well in these sliders?

    There are plenty of tasty cheese options! Provolone, gouda, or even blue cheese can add a wonderful twist to your sliders. Get creative!

    Final Thoughts

    Making Philly Cheese Steak Sliders has become a cherished tradition in my home. Every time I pull them out of the oven, I’m reminded of the happiness they bring to my family. The warm smell of melting cheese and sautéed veggies scents the air, creating an inviting atmosphere. They’re perfect for cozy family dinners or casual gatherings with friends. Plus, the joy of seeing my loved ones savor each bite is what cooking is all about! I hope this recipe becomes a favorite in your kitchen, spreading smiles and delicious memories for years to come.


    Print

    clock clock iconcutlery cutlery iconflag flag iconfolder folder iconinstagram instagram iconpinterest pinterest iconfacebook facebook iconprint print iconsquares squares iconheart heart iconheart solid heart solid icon

    Description

    Philly Cheese Steak Sliders are a mouthwatering snack, featuring a delicious blend of roast beef, sautéed peppers, onions, and gooey cheese, all tucked inside soft dinner rolls.


    • 1 cup diced green peppers
    • 1 cup diced yellow onions
    • 10 oz deli sliced roast beef
    • ⅓ cup water
    • 0.87 oz brown gravy mix
    • ¼ teaspoon pepper
    • 12 dinner rolls
    • 4 tablespoons mayo
    • 1 ½ cups shredded mozzarella and cheddar cheese blend
    • 2 tablespoons butter, melted
    • ½ teaspoon garlic powder
    • ½ teaspoon onion powder

    1. Preheat oven to 350F.
    2. Dump diced green peppers and yellow onions into a large saute pan over medium-high heat.
    3. Stir the green peppers and onions together well and leave them to cook.
    4. Chop the sliced roast beef into small squares.
    5. Once the onions are starting to brown, add the chopped roast beef to the pan and stir well.
    6. Add the water, gravy mix, and pepper to the pan.
    7. Stir well and cook until no liquid remains in the pan.
    8. Remove the pan from the heat.
    9. Slice the dinner rolls in half.
    10. Place the bottoms of the rolls on a non-stick baking sheet.
    11. Spread 2 tablespoons of mayo on the bottom rolls.
    12. Then spread the remaining 2 tablespoons of mayo on the cut side of the tops of the rolls.
    13. Spoon the roast beef mixture evenly over the bottom rolls.
    14. Sprinkle the shredded cheese on top of the roast beef mixture.
    15. Place the tops of the rolls over the cheese.
    16. Cover the sliders with aluminum foil and place the baking sheet in the oven.
    17. Bake the sliders, covered for 12 minutes.
    18. While they are in the oven, stir together the melted butter, garlic powder, and onion powder.
    19. After 12 minutes, remove the sliders from the oven, take off the foil and brush the tops of the buns with the seasoned melted butter.
    20. Return the sliders to the oven to continue baking uncovered, until nicely browned on top (8-10 minutes).
    21. Remove the sliders from the oven and allow them to cool for a couple of minutes.
    22. Serve and enjoy!

    Notes

    • Feel free to add more spices to the beef mixture for extra flavor.
    • These sliders can be made ahead of time and reheated before serving.
    • Switch up the cheese for different flavors, such as pepper jack for a spicy kick.
    • Prep Time: 15 minutes
    • Cook Time: 20 minutes
    • Category: Appetizer
    • Method: Baking
    • Cuisine: American

    Nutrition

    • Serving Size: 1 slider
    • Calories: 250
    • Sugar: 2g
    • Sodium: 500mg
    • Fat: 12g
    • Saturated Fat: 6g
    • Unsaturated Fat: 6g
    • Trans Fat: 0g
    • Carbohydrates: 23g
    • Fiber: 1g
    • Protein: 13g
    • Cholesterol: 35mg

    Sharing is caring!

  • Lemon Rice Krispie Treats

    Lemon Rice Krispie Treats


    Introduction to Lemon Rice Krispie Treats

    There’s something magical about watching the sun shine brightly on a warm summer day. It makes me crave refreshing treats that bring joy to my family. Enter Lemon Rice Krispie Treats! These delightful squares are a zesty twist on the classic dessert, and they’re perfect for those bustling summer gatherings or as a quick snack during hectic weeks. Easy to whip up, they sprinkle a little sunshine into any moment. Let’s face it, who doesn’t love a sweet and tangy pick-me-up that feels like a mini celebration? Dive into this simple recipe and enjoy a taste of summer!

    Why You’ll Love This Lemon Rice Krispie Treats

    Let’s be honest: life gets busy, and we all crave quick, delicious desserts that don’t require a lot of effort. These Lemon Rice Krispie Treats are just that! Their zesty flavor is like a refreshing breeze on a hot day, standing out among typical sweet offerings. Plus, they’re a guaranteed hit at parties or family gatherings, making you the kitchen hero in no time. Who doesn’t love that?

    Ingredients for Lemon Rice Krispie Treats

    To create these zesty delights, you’ll need some essential ingredients that each play a vital role in crafting delicious treats. Start with mini marshmallows, the star of the show, bringing that gooey sweetness. Next, salted butter adds richness, while fresh lemon juice zings up the flavor profile. Honey provides a natural sweetness, and vanilla extract enhances the overall taste. The Rice Krispies cereal is what gives these treats their signature crunch. For an added burst of lemon flavor, toss in some lemon zest. You can also customize with candy melts for a colorful drizzle. Exact quantities can be found at the bottom of the article.

    How to Make Lemon Rice Krispie Treats

    Prepare Your Baking Pan

    First things first, let’s set the stage for our Lemon Rice Krispie Treats. Grab your 9×13 inch baking pan. Spray it lightly with cooking spray or line it with parchment paper. This will prevent those scrumptious treats from sticking. Trust me, you want to make your life easier when it’s time to slice and serve!

    Melt the Butter and Marshmallows

    In a large saucepan, toss in your salted butter over medium-low heat. Keep an eye on it! Stirring frequently ensures it melts evenly and doesn’t burn. Once melted, take 1 cup of mini marshmallows and set it aside. Add the remaining marshmallows to the butter, stirring constantly until you have a delightfully smooth mixture. The melted marshmallows should coat the butter like a cozy blanket!

    Combine Lemon Juice and Other Ingredients

    Remove the saucepan from the heat and pour in the fresh lemon juice, honey, and vanilla extract. Stir them all together until fully combined. The aroma will be heavenly, hinting at the tangy goodness to come! For those lemon lovers, you might want to add some lemon extract too. This will really kick up that zesty flavor!

    Mix in Rice Krispies and Marshmallows

    Next, it’s time to mix in that wonderful Rice Krispies cereal. Sprinkle in the cereal along with the reserved marshmallows. Stir gently until everything is well combined. Picture that perfect blend of chewy and crunchy in every bite! Once mixed, transfer the mixture to the prepared baking pan and press it down gently. You want an even surface, but don’t squish it too hard—leave it a bit airy!

    Drizzle with Candy Melts

    Time for a bit of fun! In a microwave-safe bowl, combine the candy melts and your choice of shortening or coconut oil. Microwave them in 15-second intervals, stirring after each interval until fully melted. Once melted, drizzle this sweet frosting over your pressed Rice Krispie treats. You can use a fork, or if you’re feeling fancy, grab a piping bag for a professional look. Don’t forget to add extra lemon zest on top for that stunning finish!

    Cool and Serve

    Let those gorgeous treats cool in the refrigerator for about 1 hour. It’s worth the wait, I promise! Once they’re set, slice them into squares. Serve them and watch the smiles light up the room as your family enjoys these zesty Lemon Rice Krispie Treats. It’s like sunshine on a plate!

    Tips for Success

    Here are some handy tips to ensure your Lemon Rice Krispie Treats turn out perfectly every time:

    • Keep the heat low when melting the butter to avoid burning.
    • For a fluffier texture, don’t press down too hard when spreading the mixture in the pan.
    • Use fresh lemon juice for the brightest flavor.
    • If using candy melts, make sure they’re smooth for easy drizzling.
    • Let the treats cool completely before slicing to avoid mushiness.

    Equipment Needed

    Here’s what you’ll need to whip up those delightful Lemon Rice Krispie Treats:

    • 9×13 inch baking pan or any similar-sized pan
    • Large saucepan for melting butter and marshmallows
    • Mixing spoon or spatula for stirring
    • Measuring cups and spoons
    • Microwave-safe bowl for melting candy

    Variations

    If you’re looking to give your Lemon Rice Krispie Treats a unique spin or cater to specific dietary needs, here are some delightful variations to consider:

    • For a gluten-free option, use gluten-free rice cereal.
    • Try agave syrup instead of honey for a vegan-friendly treat.
    • Add colorful sprinkles for a festive touch!
    • Incorporate shredded coconut for added texture and flavor.
    • Substitute lemon with other citrus juices like lime or orange for a different zesty twist.

    Serving Suggestions

    These Lemon Rice Krispie Treats can shine even brighter with the right pairings and presentation!

    • Serve them alongside a refreshing glass of iced lemonade for a citrusy delight.
    • Pair with herbal tea, like chamomile or mint, for a cozy afternoon treat.
    • For a pop of color, display them on a vibrant, fun cake stand.
    • Garnish with a sprig of mint for an added touch of elegance.

    FAQs about Lemon Rice Krispie Treats

    Do you have questions about making Lemon Rice Krispie Treats? You’re not alone! Many wonder how to store them. For best results, keep these treats in an airtight container at room temperature for up to a week. If you want to make them ahead, they freeze beautifully! Thaw in the fridge before serving. Not a fan of lemon? Feel free to switch it up with other citrus flavors! Need a gluten-free option? Just use gluten-free Rice Krispies, and enjoy the same delightful crunch. The possibilities are endless with these treats!

    Final Thoughts

    There’s something truly joyful about sharing Lemon Rice Krispie Treats with friends and family. These delightful squares capture the essence of summer celebrations and lighthearted moments. Remember, this recipe is not just simple; it’s a way to create lasting memories in your kitchen. The laughter, the smiles, and the yummy bites all make life sweeter. So, gather your loved ones, whip up a batch, and savor the happiness these treats bring. Trust me, every zesty bite will remind you that dessert is so much more than just a sweet ending—it’s a celebration of togetherness!


    Print

    clock clock iconcutlery cutlery iconflag flag iconfolder folder iconinstagram instagram iconpinterest pinterest iconfacebook facebook iconprint print iconsquares squares iconheart heart iconheart solid heart solid icon

    Description

    Lemon Rice Krispie Treats are a zesty twist on the classic dessert, offering a delightful combination of sweet and tangy flavors.


    • 16 ounces mini marshmallows divided
    • 6 tablespoons salted butter
    • 2 tablespoons lemon juice (~1 lemon)
    • 1 tablespoon honey
    • 1 teaspoon vanilla extract
    • 6 cups Rice Krispies cereal
    • 1 teaspoon lemon zest (optional)
    • ½ cup unmelted white or yellow candy melts (this makes about ⅓ cup melted candy melts)
    • 1 tablespoon shortening or coconut oil or vegetable oil

    1. Prepare a 9×13 baking pan by spraying it with cooking spray or lining it with parchment paper. Set aside.
    2. In a large saucepan, melt the butter over medium-low heat, stirring frequently.
    3. Measure out 1 cup of mini marshmallows and set aside. Add the rest of the marshmallows in with the butter and stir frequently until melted.
    4. Once melted, take off heat and add in the lemon juice, honey, and vanilla extract (and/or lemon extract) and stir to combine.
    5. Stir in the remaining 1 cup of marshmallows and cereal. Once all combined, transfer it to the 9×13 inch baking pan and press down gently to create an even surface.
    6. In a microwave-safe bowl, microwave the candy melts and shortening or oil for 15 seconds. Remove and stir. Continue to melt in increments of 15 seconds until fully melted.
    7. Drizzle over the rice krispie treats using a fork or piping bag. Sprinkle with additional lemon zest if desired.
    8. Let your rice krispies treats cool down in the refrigerator for 1 hour or until set. Slice and serve.

    Notes

    • For a stronger lemon flavor, add more lemon zest.
    • Ensure the butter doesn’t burn while melting, keep the heat low.
    • You can use different types of candy melts for decoration.
    • Prep Time: 15 minutes
    • Cook Time: 10 minutes
    • Category: Dessert
    • Method: No-Bake
    • Cuisine: American

    Nutrition

    • Serving Size: 1 treat
    • Calories: 150
    • Sugar: 12g
    • Sodium: 120mg
    • Fat: 5g
    • Saturated Fat: 3g
    • Unsaturated Fat: 2g
    • Trans Fat: 0g
    • Carbohydrates: 24g
    • Fiber: 0g
    • Protein: 1g
    • Cholesterol: 15mg

    Sharing is caring!

  • Baked Chocolate Donuts with Raspberries

    Baked Chocolate Donuts with Raspberries


    Introduction to Baked Chocolate Donuts with Raspberries

    There are days when you need a little sweetness in your life, right? That’s exactly where these Baked Chocolate Donuts with Raspberries come in! Picture this: a warm, chocolate treat that’s not only delicious but also super easy to whip up. Whether you’re a busy mom or a professional juggling a million tasks, this recipe is your quick solution for that late-night craving or an impressive treat for brunch with friends. Trust me, nothing sparks joy quite like warm chocolate donuts topped with fresh raspberries. Let’s dive into this delightful baking adventure!

    Why You’ll Love This Baked Chocolate Donuts with Raspberries

    These Baked Chocolate Donuts with Raspberries are a true game-changer! They come together in just about 27 minutes, making them perfect for a quick breakfast or a delightful afternoon snack. With their rich chocolate flavor and bursts of fresh raspberries, you’ll savor each bite. Plus, baking instead of frying keeps them lighter, so you can indulge without the guilt. Trust me, your taste buds will thank you!

    Ingredients for Baked Chocolate Donuts with Raspberries

    Gathering the right ingredients is half the fun of baking these delectable Baked Chocolate Donuts with Raspberries! Here’s what you’ll need:

    • All-purpose flour: The backbone of our donuts, giving them structure and lightness. You can also substitute with gluten-free flour if needed.
    • Unsweetened cocoa powder: This adds a rich chocolate flavor, making each bite feel like a piece of heaven.
    • Baking powder: A leavening agent that helps the donuts rise, ensuring they are fluffy and airy!
    • Baking soda: Works alongside baking powder for that perfect lift and texture.
    • Salt: A pinch will enhance the sweetness and balance the flavors.
    • Granulated sugar: Provides sweetness while allowing you to enjoy the deep chocolate notes. Brown sugar adds a touch of caramel flavor!
    • Brown sugar: For added moisture and a hint of richness. You can swap this with coconut sugar for a healthier alternative.
    • Whole milk: Keeps the batter moist and tender. Buttermilk is a splendid choice too, giving a tangy flavor and extra richness.
    • Unsalted butter: Adds that creamy goodness to the donuts. Don’t forget to melt it first!
    • Large egg: Acts as a binder, bringing everything together perfectly.
    • Vanilla extract: A touch of vanilla is a must, boosting the flavor profile beautifully.
    • Fresh raspberries: The real stars! They add a fresh pop of flavor and a gorgeous look. If you can’t find fresh ones, frozen will work too—just ensure they’re well-drained.
    • Semi-sweet chocolate chips (optional for glaze): If you want a chocolatey shine on your donuts, these are your go-to. Dark chocolate chips can add richness!
    • Heavy cream (optional for glaze): This transforms your melted chocolate chips into a luxurious glaze.

    For exact quantities, check the bottom of the article! It’s all there, ready for your convenience when you’re ready to bake.

    How to Make Baked Chocolate Donuts with Raspberries

    Making these delightful Baked Chocolate Donuts with Raspberries is not just easy; it’s enjoyable! So grab your apron, and let’s roll up our sleeves for this simple yet satisfying adventure! Follow these step-by-step instructions, and you’ll see how effortless it is to bring joy to your kitchen.

    Step 1: Preheat the Oven

    First things first: preheat your oven to 350°F (175°C). This is crucial for ensuring your donuts bake evenly, rising to fluffy perfection. Grab your donut pan and generously grease it with butter or a non-stick spray. This way, your donuts will pop out easily once they’re done baking!

    Step 2: Mix Dry Ingredients

    In a medium bowl, whisk together your all-purpose flour, unsweetened cocoa powder, baking powder, baking soda, and salt. This is where the magic of chocolate begins! Make sure it’s well mixed to avoid any dry lumps in your batter; we want every bite to be perfectly chocolatey!

    Step 3: Combine Wet Ingredients

    Now, in a larger bowl, whisk together granulated sugar, brown sugar, whole milk, melted butter, the egg, and vanilla extract. Keep mixing until it’s smooth and inviting. The smell of these ingredients coming together is heavenly! This mixture is what gives our donuts that moist texture.

    Step 4: Combine Wet and Dry Mixtures

    Next, gently add your dry ingredients to the wet mixture. This is critical: stir just until combined. Overmixing could lead to dense donuts, and we want fluffy rings of chocolate joy. If you happen to see a few flour streaks, that’s perfectly okay!

    Step 5: Incorporate Raspberries

    Here comes the fun part – gently fold in the fresh raspberries! Be careful, so they don’t get squished. If you’re using frozen raspberries, make sure they’ve been thawed and drained thoroughly. Trust me; the pops of raspberry flavor bursting through each donut will be worth it!

    Step 6: Fill the Donut Pan

    Now it’s time to fill the donut pan! Spoon the batter into each cavity, filling them about 2/3 full. For a cleaner look, you might consider using a piping bag. This method makes it quick and easy to fill those holes just right!

    Step 7: Bake the Donuts

    Pop the donut pan in your preheated oven and bake for 10-12 minutes. Want to know if they’re ready? Insert a toothpick in the center of a donut; it should come out clean. If there’s batter on it, give them a minute or two more. Once done, let them cool in the pan for a bit before transferring to a wire rack.

    Step 8: Prepare the Chocolate Glaze

    While the donuts cool, let’s whip up a simple chocolate glaze! In a microwave-safe bowl, combine chocolate chips and heavy cream. Heat this mixture in 30-second intervals, stirring well each time, until it’s smooth and heavenly. You’re going to want to taste-test this, but try to resist – the donuts need you!

    Step 9: Glaze and Serve

    Once the donuts are completely cool, dip the tops into your chocolate glaze, letting the excess drip off before placing them back on the wire rack. Allow the glaze to set for a few minutes. Now, get ready to serve these beauties! They’re fantastic warm or at room temperature, paired with a cup of coffee or tea!

    Tips for Success

    • Always preheat your oven to ensure even baking.
    • Adding a pinch of espresso powder to your cocoa enhances the chocolate flavor.
    • Gently folding raspberries preserves their lovely shape and burst of flavor.
    • Use a piping bag for neat filling and minimal mess.
    • For extra richness, consider using buttermilk instead of regular milk.

    Equipment Needed for Baked Chocolate Donuts with Raspberries

    • Donut pan: Essential for shaping your donuts. If you don’t have one, a muffin tin works too!
    • Mixing bowls: You’ll need at least two—one for dry ingredients and one for wet.
    • Whisk: Perfect for blending your ingredients smoothly. A fork can work in a pinch!
    • Measuring cups and spoons: Accurate measurements make all the difference in baking success.
    • Spatula: Ideal for folding in those delicate raspberries and transferring the batter.

    Variations of Baked Chocolate Donuts with Raspberries

    • Chocolate Mint: Add 1/2 teaspoon of peppermint extract to the wet ingredients for a refreshing twist.
    • Nutty Chocolate: Fold in 1/4 cup of chopped walnuts or almonds for added crunch and flavor.
    • Gluten-Free: Substitute all-purpose flour with a 1:1 gluten-free blend to get the same soft texture.
    • Fruit Medley: Swap raspberries for blueberries or diced strawberries for a fruity variation.
    • Reduced Sugar: Use a sugar substitute like stevia for a lower-sugar option without sacrificing sweetness.

    Serving Suggestions for Baked Chocolate Donuts with Raspberries

    • Pair with a dollop of whipped cream for an extra treat.
    • Serve alongside fresh fruit salad to add a refreshing touch.
    • Complement with a rich cup of coffee or herbal tea.
    • Drizzle with extra chocolate sauce for a decadent finish.
    • Present on a beautiful platter, garnished with mint leaves for an elegant touch.

    FAQs about Baked Chocolate Donuts with Raspberries

    Can I use frozen raspberries instead of fresh for the donuts?
    Absolutely! Frozen raspberries will work fine, just make sure to thaw and drain them well before folding into the batter. They’ll still provide that delightful burst of flavor!

    How should I store leftover baked chocolate donuts?
    To keep your lovely donuts fresh, store them in an airtight container at room temperature for up to two days. If you want to keep them longer, refrigerate them for about a week or freeze them for up to a month.

    Can I substitute the cocoa powder with another ingredient?
    While cocoa powder is key for that chocolate flavor, you could try using carob powder for a different taste, but keep in mind that it won’t have the same chocolate profile.

    How can I make these donuts dairy-free?
    Easy! Just swap the whole milk with a plant-based alternative like almond or oat milk, and use coconut oil instead of butter. They’ll still be delicious!

    What can I serve with these donuts?
    These Baked Chocolate Donuts with Raspberries are lovely on their own! But pairing them with a scoop of vanilla ice cream, a dollop of whipped cream, or even a fresh fruit salad can elevate your dessert experience!

    Final Thoughts

    Every bite of these Baked Chocolate Donuts with Raspberries conjures a moment of pure happiness. They are not just delicious; they represent the joy of creating something special for yourself or loved ones. The sweet aroma wafting through your kitchen as they bake? It’s like a warm hug on a busy day. Plus, making these treats is an adventure filled with laughter and love! Whether for a cozy weekend brunch or a quick indulgence after a long day, these donuts are bound to bring smiles and make memories. So go ahead, treat yourself and share the joy!


    Print

    clock clock iconcutlery cutlery iconflag flag iconfolder folder iconinstagram instagram iconpinterest pinterest iconfacebook facebook iconprint print iconsquares squares iconheart heart iconheart solid heart solid icon

    Description

    Delicious baked chocolate donuts topped with fresh raspberries and optional chocolate glaze, perfect for a sweet treat.


    • 1 cup all-purpose flour
    • 1/2 cup unsweetened cocoa powder
    • 1 tsp baking powder
    • 1/4 tsp baking soda
    • 1/4 tsp salt
    • 1/2 cup granulated sugar
    • 1/4 cup brown sugar, packed
    • 1/2 cup whole milk (or buttermilk for extra richness)
    • 1/4 cup unsalted butter, melted
    • 1 large egg
    • 1 tsp vanilla extract
    • 1/2 cup fresh raspberries (or frozen, thawed and drained)
    • 1/2 cup semi-sweet chocolate chips (optional for glaze)
    • 2 tbsp heavy cream (optional for glaze)

    1. Preheat your oven to 350°F (175°C). Grease a donut pan or spray it with non-stick spray.
    2. In a medium bowl, whisk together the flour, cocoa powder, baking powder, baking soda, and salt. Set aside.
    3. In a large bowl, whisk together the granulated sugar, brown sugar, milk, melted butter, egg, and vanilla extract until smooth and combined.
    4. Gradually add the dry ingredients to the wet ingredients, stirring until just combined. Be careful not to overmix the batter.
    5. Gently fold the fresh raspberries into the batter, being careful not to crush them. If using frozen raspberries, ensure they are well-drained and folded in gently.
    6. Spoon the batter into the donut pan, filling each cavity about 2/3 full. You can also use a piping bag for a cleaner fill.
    7. Bake for 10-12 minutes, or until a toothpick inserted into the center of a donut comes out clean. Allow the donuts to cool in the pan for a few minutes before transferring them to a wire rack to cool completely.
    8. While the donuts are cooling, make the glaze by melting the chocolate chips and heavy cream together in a microwave-safe bowl. Heat in 30-second intervals, stirring after each, until the chocolate is fully melted and smooth.
    9. Once the donuts are completely cooled, dip the top of each donut into the chocolate glaze, then return them to the wire rack to allow the glaze to set.
    10. Serve these delicious baked chocolate donuts with fresh raspberries on the side, or enjoy them on their own with a cup of coffee or tea!

    Notes

    • For a richer flavor, consider using buttermilk instead of whole milk.
    • Ensure raspberries are not crushed when folded into the batter to maintain their shape.
    • Store leftovers in an airtight container for up to 2 days.
    • Prep Time: 15 minutes
    • Cook Time: 12 minutes
    • Category: Dessert
    • Method: Baking
    • Cuisine: American

    Nutrition

    • Serving Size: 1 donut
    • Calories: 180
    • Sugar: 12g
    • Sodium: 75mg
    • Fat: 7g
    • Saturated Fat: 4g
    • Unsaturated Fat: 2g
    • Trans Fat: 0g
    • Carbohydrates: 25g
    • Fiber: 2g
    • Protein: 3g
    • Cholesterol: 30mg

    Sharing is caring!

  • Deep-Fried S’mores

    Deep-Fried S’mores


    Introduction to Deep-Fried S’mores

    There’s something magical about the combination of gooey marshmallows, rich chocolate, and crunchy graham crackers, right? That’s why I’m excited to share my Deep-Fried S’mores recipe with you! If you’re a busy mom or a professional on the go, this is a fabulous solution for a sweet craving that doesn’t require hours in the kitchen. It’s perfect for impressing your loved ones or simply enjoying after a long day. Trust me, once you take that first delightful bite, you’ll find it hard to resist making this delicious treat over and over again!

    Why You’ll Love This Deep-Fried S’mores

    Imagine a dessert that takes just 25 minutes from start to finish. That’s what Deep-Fried S’mores offer! They’re not just quick to prepare; every bite is an explosion of flavors and textures. The crispy outside contrasts perfectly with the gooey marshmallows and melted chocolate inside. Plus, it’s a fun activity you can enjoy with your kids or friends, making sweet memories in the kitchen with this delightful treat!

    Ingredients for Deep-Fried S’mores

    Let’s gather everything we need to create our delicious Deep-Fried S’mores!

    • Graham cracker sheets: These add the signature crunch and sweetness to our treat. I prefer using the honey-flavored ones for extra flavor.
    • Large marshmallows: They’re essential for that gooey, melty interior. You can opt for flavored marshmallows if you’re feeling adventurous!
    • Milk chocolate: Classic choice for melting bliss. However, dark chocolate works beautifully too, offering a richer taste.
    • All-purpose flour: This is the base for our batter, providing the perfect coating for a crispy finish.
    • Granulated sugar: Just a touch sweetens the batter slightly, enhancing that delightful crunch.
    • Baking powder: Don’t skip this! It gives our batter a little lift, making it light and airy.
    • Salt: A pinch brings out all the flavors and balances the sweetness.
    • Egg: This helps bind our batter together, providing that perfect texture.
    • Milk: It thins the batter to just the right consistency for coating. Almond or oat milk can be used for a dairy-free option.
    • Vanilla extract: Just a splash adds warmth and depth to the batter—it’s like a hug in flavor!
    • Vegetable oil: Essential for frying, it creates that crispy exterior. You can use canola or peanut oil as alternatives.
    • Powdered sugar: This is for dusting! It adds a lovely, sweet finish and makes the treat visually appealing.

    For precise quantities of each ingredient, check the bottom of the article for a handy printable version!

    How to Make Deep-Fried S’mores

    Now that we’ve gathered all the tasty ingredients, it’s time to dive into the fun part: making those irresistible Deep-Fried S’mores! Don’t worry—this process is simple and quick, perfect for a busy lifestyle. So, roll up your sleeves and let’s get started!

    Assemble the S’mores

    First, let’s create our delicious little sandwiches! Take a graham cracker half and place a piece of chocolate on it. Then, add a large marshmallow on top of the chocolate, giving it that signature gooey feel. Finally, cover with another graham cracker half to lock in all that goodness. Repeat this for all six pieces. It’s like building sweet little towers!

    Prepare the Batter

    In a bowl, combine the all-purpose flour, granulated sugar, baking powder, and pinch of salt. Next, whisk in the egg and milk until the mixture is smooth. Don’t forget the splash of vanilla extract! This adds a comforting flavor that will elevate our Deep-Fried S’mores. Make sure there are no lumps—smooth batter equals crispy coating.

    Heat the Oil

    Now, it’s time to heat up that oil! Pour vegetable oil into a deep fryer or large pot, enough for frying, and heat it to 350°F (175°C). A cooking thermometer is useful here; it ensures the oil is at the right temperature. If it’s too cold, your S’mores can turn soggy; too hot, and they might burn. Aim for that sweet spot!

    Coat the S’mores

    Once the oil is hot and shimmering, dip each assembled S’more into the batter. Make sure it’s fully coated. This crispy outer layer will form the delicious protective shell that makes these treats so addictive. I like to let the excess batter drip off before frying, so they don’t get too heavy.

    Fry the S’mores

    Carefully drop the battered S’mores into the hot oil, a few at a time. Fry each for about 2-3 minutes, or until golden brown and crispy. The sight of them bubbling and turning golden is truly mouthwatering! Use a slotted spoon to carefully remove them from the oil and place them on paper towels to absorb any excess oil. It’s a mini spa treatment for your S’mores!

    Serve

    Finally, dust the warm Deep-Fried S’mores with powdered sugar for an extra touch of sweetness. Serve them warm with some chocolate syrup or raspberry sauce on the side for dipping. Gather your loved ones around and relish every gooey, crispy bite!

    Tips for Success

    • Ensure your oil is at the right temperature for crispy S’mores.
    • Use a slotted spoon to gently remove fried S’mores for less mess.
    • For extra crunch, let the battered S’mores sit for a minute before frying.
    • Experiment with flavored chocolates or marshmallows for a unique twist.
    • Store any leftovers in an airtight container but enjoy them fresh for the best texture!

    Equipment Needed

    • Deep fryer: Ideal for even frying; a large pot works in a pinch.
    • Cooking thermometer: Ensures oil is at the perfect temperature; a simple bread test can also work.
    • Slotted spoon: For easy removal of fried S’mores; tongs can also be effective.
    • Bowl: Essential for mixing batter; any large mixing bowl will do.
    • Paper towels: Great for draining excess oil; use a cooling rack for a crispy finish.

    Variations of Deep-Fried S’mores

    • Peanut Butter S’Mores: Add a layer of creamy or crunchy peanut butter between the chocolate and marshmallow for a nutty twist.
    • Stuffed S’Mores: Try adding slices of banana or strawberries with the marshmallow for a fruity flavor explosion.
    • Cookie Dough S’Mores: Substitute the graham crackers with chocolate chip cookie dough for a decadent, cookie-inspired treat.
    • Nut-Free Alternative: Swap out chocolate for a dairy-free chocolate option if you want to cater to nut allergies.
    • Gluten-Free S’Mores: Use gluten-free graham crackers and ensure your chocolate and batter ingredients are certified gluten-free.

    Serving Suggestions for Deep-Fried S’mores

    • Pair with a scoop of vanilla ice cream for the ultimate indulgence.
    • Serve with fresh berries, like strawberries or raspberries, for a fruity contrast.
    • Drizzle chocolate syrup or caramel sauce over the top for extra sweetness.
    • Garnish with a sprig of mint for a pop of color and freshness.
    • Serve on a fun, colorful plate to create a festive atmosphere.

    FAQs about Deep-Fried S’mores

    Can I make Deep-Fried S’mores ahead of time?
    While these treats are best enjoyed fresh, you can prepare the S’mores and batter in advance. Just coat and fry them before serving for that crispy, delicious texture!

    What type of oil is best for frying?
    I recommend using vegetable oil, but canola or peanut oil works too. These oils have a high smoke point, making them ideal for deep frying.

    Can I bake Deep-Fried S’mores instead?
    Baking isn’t quite the same, but you can try placing assembled S’mores in the oven at 350°F for about 10 minutes. They’ll be warm and melty, but won’t have the crispy batter.

    How do I store leftovers?
    If you have any leftover Deep-Fried S’mores, place them in an airtight container and store them at room temperature. While they’re best fresh, you can reheat them briefly in the microwave.

    What are some tasty dips for Deep-Fried S’mores?
    I love serving these treats with chocolate syrup or marshmallow fluff. Raspberry sauce or a drizzle of caramel also enhances the flavor and adds a fun touch!

    Final Thoughts on Deep-Fried S’mores

    Indulging in Deep-Fried S’mores feels like wrapping yourself in a cozy blanket on a chilly evening. The warm, gooey center of marshmallows and chocolate, combined with the crispy outer layer, is pure bliss! Imagine sharing these delightful treats with your family or friends after a long week. Each bite transports you back to those carefree summer nights around the campfire. So, whether to satisfy a sweet tooth or create special memories, this recipe is a wonderful way to bring joy to your kitchen. Trust me, these Deep-Fried S’mores will quickly become a favorite!


    Print

    clock clock iconcutlery cutlery iconflag flag iconfolder folder iconinstagram instagram iconpinterest pinterest iconfacebook facebook iconprint print iconsquares squares iconheart heart iconheart solid heart solid icon

    Description

    Deep-Fried S’mores are a delightful twist on the classic campfire treat, featuring gooey marshmallows, chocolate, and crunchy graham crackers, all enveloped in a crispy batter.


    • 6 graham cracker sheets, broken into halves
    • 6 large marshmallows
    • 6 small pieces of milk chocolate (or chocolate bars, broken into small pieces)
    • 1 cup all-purpose flour
    • 1 tablespoon granulated sugar
    • 1 teaspoon baking powder
    • 1 pinch of salt
    • 1 egg
    • ¾ cup milk
    • ½ teaspoon vanilla extract
    • Vegetable oil, for frying
    • Powdered sugar, for dusting

    1. Assemble the S’mores: Place a piece of chocolate on a half graham cracker sheet, top with a marshmallow, and cover with another graham cracker sheet to create a s’more sandwich. Repeat for all 6 pieces.
    2. Prepare the Batter: In a bowl, whisk together flour, sugar, baking powder, salt, egg, milk, and vanilla extract until smooth.
    3. Heat the Oil: Heat vegetable oil in a deep fryer or large pot to 350°F (175°C).
    4. Coat the S’mores: Dip each assembled s’more into the batter, ensuring it is fully coated.
    5. Fry the S’mores: Carefully drop the battered s’mores into the hot oil and fry for about 2-3 minutes, or until golden brown and crispy. Remove from oil and place on paper towels to drain excess oil.
    6. Serve: Dust with powdered sugar and serve warm.

    Notes

    • For a richer flavor, consider using dark chocolate instead of milk chocolate.
    • Ensure the oil is hot enough before frying to prevent sogginess.
    • Can be served with chocolate syrup or raspberry sauce for added flavor.
    • Prep Time: 15 minutes
    • Cook Time: 10 minutes
    • Category: Dessert
    • Method: Deep Frying
    • Cuisine: American

    Nutrition

    • Serving Size: 1 S’more
    • Calories: 320
    • Sugar: 20g
    • Sodium: 180mg
    • Fat: 18g
    • Saturated Fat: 5g
    • Unsaturated Fat: 12g
    • Trans Fat: 0g
    • Carbohydrates: 36g
    • Fiber: 1g
    • Protein: 4g
    • Cholesterol: 30mg

    Sharing is caring!

  • Loaded Cheesy Pocket Tacos

    Loaded Cheesy Pocket Tacos


    Introduction to Loaded Cheesy Pocket Tacos

    Hey there, fellow busy moms and amazing professionals! If you’re looking for a fun and tasty dish that’s sure to bring smiles, let me introduce you to Loaded Cheesy Pocket Tacos. Picture a crispy tortilla pocket, packed with a creamy beef filling that’s as comforting as a warm hug after a long day.

    This recipe is a lifesaver for those hectic weeknights or gatherings with friends. Whip it up in no time, and trust me—your loved ones will be impressed! Let’s dive into this delightful culinary adventure together!

    Why You’ll Love This Loaded Cheesy Pocket Tacos

    These Loaded Cheesy Pocket Tacos are the answer to all your dinner dilemmas! They’re quick to make, with a preparation time that doesn’t exceed twenty minutes. Plus, they offer an explosion of flavor in every bite. The blend of creamy cheese and seasoned beef creates a delightful taste sensation. Whether you’re feeding picky eaters or hosting a get-together, these tasty pockets will be the highlight on the dinner table!

    Ingredients for Loaded Cheesy Pocket Tacos

    Gathering the right ingredients is the first step to success with these Loaded Cheesy Pocket Tacos. Each ingredient plays a vital role in creating that unbeatable taste. Here’s what you’ll need:

    • Ground Beef: A pound of ground beef (ideally 80/20 for flavor) is the star of this dish, providing hearty, savory goodness.
    • Taco Seasoning: A packet of taco seasoning adds the perfect punch of flavor. Feel free to choose a mild or spicy blend based on your preference.
    • Water: This will help dissolve the taco seasoning and infuse the meat with flavor. It usually calls for about two-thirds of a cup.
    • Cream Cheese: Softened cream cheese brings a luscious creaminess that contrasts beautifully with the beef. It’s a secret weapon for richness!
    • Salsa: Whether you prefer mild, medium, or hot salsa, this ingredient adds brightness and a kick. Get creative with your choice!
    • Flour Tortillas: Pot for 6-inch flour tortillas; they’re perfect for folding and make for easy handling when eating.
    • Shredded Cheddar Cheese: A cup of shredded cheddar cheese melts perfectly inside the tacos for that gooey, comforting texture.
    • Butter: Brushing the tacos with melted butter before baking gives them that enticing golden color and crispy exterior.
    • Optional Toppings: Amplify the flavor with toppings like sour cream, additional salsa, guacamole, shredded lettuce, or diced tomatoes. These add freshness and extra layers of deliciousness.

    For exact measurements, check the bottom of the article where you can also find a print-friendly version! Now, let’s get cooking and have some fun!

    How to Make Loaded Cheesy Pocket Tacos

    Now that we have all our ingredients ready, let’s jump into making these Loaded Cheesy Pocket Tacos. Follow along with these easy steps, and I promise your kitchen will soon be filled with delicious aromas!

    Preheat the Oven

    First things first—preheat your oven to 350°F (175°C). A hot oven makes for crispy tacos, just like taco night should be! While the oven heats up, you can multitask by getting your beef cooked and everything else prepped.

    Cook the Ground Beef

    Grab a large skillet and place it over medium-high heat. Add your pound of ground beef, breaking it up with a wooden spoon. Cook until no pink remains, about 5 to 7 minutes. Don’t forget to drain off any excess fat for a leaner bite!

    Next, add in your taco seasoning and the specified amount of water from the seasoning packet. Stir until everything is mixed well and bring it to a simmer. Let it cook for about 3-4 minutes. The aroma is already making my mouth water!

    Beat the Cream Cheese Mixture

    While the beef is simmering, grab a medium bowl. Beat that softened cream cheese until it’s nice and smooth. Then, mix in your chosen salsa until it’s thoroughly combined. This creamy mixture is what makes these tacos heavenly!

    Prepare the Tortillas

    Now it’s tortilla time! Warm your tortillas briefly to make them easier to fold. You can pop them in the microwave wrapped in damp paper towels for about 30 seconds, or heat them in a dry skillet for a minute or so. This step will prevent them from cracking when you fold them!

    Assemble the Tacos

    Here comes the fun part—assembling your tacos! Take a tortilla and spread about 1 tablespoon of the creamy salsa mixture right down the center. Next, add about 2 tablespoons of your seasoned beef and sprinkle with 1 tablespoon of cheddar cheese. Easy peas!

    To form a pocket, fold the bottom edge of the tortilla over the filling. Next, fold in both sides and roll it upward to completely seal it. Place each pocket seam-side down on your prepared baking sheet.

    Bake the Tacos

    Brush the tops and sides of your taco pockets lightly with melted butter. This will give them that golden, crispy finish that everyone loves. Pop them into the oven and bake for 15-18 minutes, until they’re golden brown. Trust me, they will smell amazing!

    Serve and Enjoy

    Once they’re done, let your Loaded Cheesy Pocket Tacos cool for a couple of minutes. Then, serve them up with your favorite optional toppings—sour cream, extra salsa, guacamole, or fresh veggies. Get ready for a flavorful taco experience like no other!

    Tips for Success

    • Don’t rush the beef cooking time; a good sear adds flavor.
    • Make sure your cream cheese is softened; it blends better!
    • Warm the tortillas just enough to make them pliable—avoid cracking.
    • Experiment with different salsas to find your favorite flavor combo.
    • Brush with butter for that perfect crispy finish!

    Equipment Needed

    • Large Skillet: For browning the beef—any non-stick skillet works great!
    • Medium Bowl: Essential for mixing the cream cheese and salsa; a mixing bowl is perfect.
    • Baking Sheet: Use a large one for all taco pockets; a casserole dish can work too.
    • Wooden Spoon: Perfect for breaking up the meat while cooking; a spatula is a good alternative.

    Variations

    • Meat Swaps: Use ground turkey or chicken for a lighter taco. Vegetarian? Try black beans or lentils!
    • Cheese Choices: Experiment with different cheeses, like pepper jack for a spicy kick, or a blend of Monterey Jack and cheddar.
    • Spice It Up: Add diced jalapeños or a sprinkle of cayenne pepper to the beef for extra heat.
    • Low-Carb Option: Swap flour tortillas for lettuce wraps to create a fresh, low-carb version of these tacos.
    • Flavor Boost: Mix in other ingredients like corn, diced bell peppers, or olives into the beef mixture for added flavor and texture.

    Serving Suggestions

    • Sides: Pair your Loaded Cheesy Pocket Tacos with a zesty Mexican corn salad or crispy tortilla chips for that classic crunch.
    • Drinks: Serve with refreshing drinks like iced tea or a fruity ague fresca to balance the flavors.
    • Presentation: Arrange tacos on a colorful platter, topped with fresh ingredients, for an inviting look that’s sure to impress!

    FAQs about Loaded Cheesy Pocket Tacos

    Can I make Loaded Cheesy Pocket Tacos in advance?

    Absolutely! You can prepare the filling a day ahead and assemble the tacos just before baking. This is a great time-saver on busy nights!

    How can I make these tacos healthier?

    Consider using ground turkey or chicken instead of beef for a leaner option. You can also load up on fresh veggies as toppings for added nutrients without sacrificing flavor.

    Are Loaded Cheesy Pocket Tacos freezer-friendly?

    Yes, they are! Once baked, let them cool and place them in an airtight container. They’ll stay fresh in the freezer for up to a month. Just reheat in the oven or microwave when you’re ready to enjoy!

    Can I customize the filling?

    You bet! Feel free to get creative with your filling. Add in some cooked beans, corn, or diced bell peppers for an exciting twist that suits your family’s tastes.

    What should I serve with Loaded Cheesy Pocket Tacos?

    These tacos pair wonderfully with a fresh side salad or some seasoned rice. Don’t forget the salsa and guacamole for a complete Mexican feast!

    Final Thoughts

    Making these Loaded Cheesy Pocket Tacos has been a delightful journey from start to finish. They’re not just a meal; they’re a culinary hug that brings the family together around the dinner table. Each bite is a symphony of flavors, combining creamy cheese with savory beef that makes everyone smile.

    Whether you’re serving them for a quick dinner or a weekend gathering, these tacos are sure to impress. You may even find yourself making them on repeat! So grab your ingredients, roll up your sleeves, and let the happiness flow from the kitchen to your hearts!


    Print

    clock clock iconcutlery cutlery iconflag flag iconfolder folder iconinstagram instagram iconpinterest pinterest iconfacebook facebook iconprint print iconsquares squares iconheart heart iconheart solid heart solid icon

    Description

    Loaded Cheesy Pocket Tacos are a delicious twist on traditional tacos, featuring a creamy beef filling in a crispy tortilla pocket.


    • 1 pound ground beef (80/20 recommended for flavor)
    • 1 packet taco seasoning (11.25 oz)
    • Water as called for on taco seasoning packet (typically 2/3 cup)
    • 8 ounces cream cheese, softened to room temperature
    • 1/2 cup salsa (mild, medium, or hot based on preference)
    • 12 flour tortillas (6-inch size)
    • 1 cup shredded cheddar cheese
    • 2 tablespoons butter, melted
    • Optional: Sour cream
    • Optional: Additional salsa
    • Optional: Guacamole
    • Optional: Shredded lettuce
    • Optional: Diced tomatoes

    1. Preheat your oven to 350°F (175°C). Lightly grease a large baking sheet with cooking spray or line it with parchment paper for easier cleanup.
    2. In a large skillet over medium-high heat, cook the ground beef, breaking it up with a wooden spoon until no pink remains, about 5-7 minutes. Drain off excess fat.
    3. Add the taco seasoning and the specified amount of water. Stir well to combine. Bring the mixture to a simmer and cook for 3-4 minutes.
    4. In a medium bowl, beat the softened cream cheese until smooth. Add the salsa and mix until well combined.
    5. Warm the tortillas briefly to make them easier to fold. You can microwave them wrapped in damp paper towels or heat them in a dry skillet.
    6. Spread about 1 tablespoon of the cream cheese mixture across the center of each tortilla. Top with 2 tablespoons of the seasoned beef and sprinkle with 1 tablespoon of shredded cheddar cheese.
    7. To form a pocket, fold the bottom edge of the tortilla up over the filling, then fold in both sides, and roll upward to seal. Place seam-side down on the baking sheet.
    8. Brush the tops and sides of the pockets lightly with melted butter for a golden color.
    9. Bake in the preheated oven for 15-18 minutes, until golden brown and crispy.
    10. Remove from the oven and let cool for 2-3 minutes before serving. Serve with optional toppings.

    Notes

    • Ground beef can be substituted with ground turkey or chicken for a leaner option.
    • Adjust the spice level by choosing different salsa or adding hot sauce.
    • Store leftovers in an airtight container in the refrigerator for up to 3 days.
    • Prep Time: 20 minutes
    • Cook Time: 20 minutes
    • Category: Main Dish
    • Method: Baking
    • Cuisine: Mexican

    Nutrition

    • Serving Size: 1 taco
    • Calories: 250
    • Sugar: 2g
    • Sodium: 600mg
    • Fat: 15g
    • Saturated Fat: 7g
    • Unsaturated Fat: 4g
    • Trans Fat: 0g
    • Carbohydrates: 20g
    • Fiber: 1g
    • Protein: 12g
    • Cholesterol: 45mg

    Sharing is caring!

  • 4th of July Brownies

    4th of July Brownies


    Introduction to 4th of July Brownies

    As the 4th of July approaches, I find myself reminiscing about the gatherings filled with laughter and sparkles. It’s that time of year when I whip up my famous 4th of July Brownies to impress friends and family. These delightful treats aren’t just delicious; they’re a quick solution for busy days when you want to create something special without spending hours in the kitchen. With vibrant colors and a rich chocolatey flavor, these brownies are bound to become a crowd favorite and a new tradition at your celebrations.

    Why You’ll Love This 4th of July Brownies

    These 4th of July Brownies are truly a game-changer for those busy summer days. They combine ease and speed without compromising on taste. The rich chocolate and festive colors make them visually stunning, ensuring they grab attention at your gatherings. Plus, the kids can help with the colorful cookie fillings, turning baking into a delightful family activity. What’s not to love about that?

    Ingredients for 4th of July Brownies

    Gathering the right ingredients is half the fun of making these festive brownies! Here’s what you’ll need for your delicious creation:

    • All-purpose flour: This is the backbone of your brownies, providing the right structure. You can use gluten-free flour if needed.
    • Baking cocoa powder: For that rich chocolate flavor! Opt for high-quality cocoa for the best taste.
    • Baking powder and salt: These elevate your brownies and enhance the flavor, making them rise perfectly.
    • Espresso powder: A secret weapon that intensifies chocolate flavor. Don’t worry; it won’t make them taste like coffee!
    • Butter-flavored vegetable shortening: This adds a creaminess to your brownies. If you prefer, you can swap it for unsalted butter.
    • Granulated white sugar: Sweetness is key here! You can use coconut sugar if you’re looking for a slightly healthier alternative.
    • Large eggs: They bind everything together and help achieve that fudgy texture we all love.
    • Mini chocolate chips: Adding these gives you delightful pockets of melted chocolate in each bite.
    • Chocolate sandwich cookies: Newman’s Own or Oreos work beautifully here for the color and crunch! Feel free to use any brand you love.
    • Food coloring gel: Americolor Sky Blue and True Red are perfect for those festive hues. You can opt for natural colors if preferred.
    • Decorative sugar or sprinkles: These are optional but add a fun and celebratory touch to your brownies.

    For exact quantities, check the end of the article where I have provided a printable version of the recipe. Now, let’s get our hands dirty and start baking!

    How to Make 4th of July Brownies

    Prepare the Cookie Fillings

    Let’s kick things off with those colorful cookie fillings that add a festive flair! First, twist apart the chocolate sandwich cookies, being careful not to break them. Carefully scrape the creamy white filling into three small bowls. One bowl will stay white, while you’ll tint the others with a drop of red and blue food coloring gel. Using the back of a spoon, mash the fillings until they’re smooth and vibrant. This not only adds color but also purity to our 4th of July Brownies. Once colored, transfer each filling into a separate small sandwich bag, and you’re ready for the fun part!

    Combine the Brownie Mix

    Now, it’s time to create that luscious brownie batter. Start by preheating your oven to 350°F. In a medium-sized bowl, whisk together all-purpose flour, cocoa powder, baking powder, salt, and espresso powder. Set this dry mixture aside. In the bowl of an electric mixer, combine the butter-flavored shortening, granulated sugar, and large eggs. Beat this mixture for about three minutes until it’s light and fluffy, achieving a lovely pale color that will set the stage for a delightful brownie. Gradually add the dry ingredients into the wet mix, stirring gently until just combined. Fold in mini chocolate chips for those glorious pockets of melty chocolate. Now that everything comes together, you’ll have a thick and rich batter that’s simply irresistible!

    Assemble the Brownies

    Let’s bring the magic together! Take about two tablespoons of brownie batter and scoop it into each individual brownie cup—trust me, they’ll be filled with joy. Smooth it out for an even base. Next, gently press one of your colorful sandwich cookies into the center of the batter. Careful now; we want the batter to hug that cookie, not overpower it! Spoon another tablespoon of brownie batter over the cookie, smoothing it out until the cookie is completely covered. The cups should be almost full, so don’t be afraid to get a little messy! Alternatively, if you’re using a 9″x 13″ pan, spread half the batter evenly, press in the cookies, then top with the remaining batter. The anticipation is real!

    Bake to Perfection

    It’s showtime! Place your brownie pan in the preheated oven and bake. If you’re using the brownie bar pan, aim for 12-15 minutes. For the 9″x 13″ pan, plan on baking for about 20-25 minutes. For the ultimate test of doneness, watch for a firm top. The edges might start to pull away slightly from the sides, which is a great sign! If you’re confused, a toothpick inserted in the center should come out with a few moist crumbs—perfect! Once baked, remove the brownies from the oven, and allow them to cool completely in the pan on a wire rack. This is the hardest part—trust me, the wait is worth it for those rich, fudgy bites!

    Tips for Success

    • Measure your ingredients precisely for consistent results.
    • Don’t overmix the batter; stir until just combined, or your brownies may turn out cake-like.
    • Let the brownies cool completely in the pan to achieve that fudgy texture.
    • Use high-quality cocoa powder for the best flavor.
    • Experiment with different cookie brands for varying textures!

    Equipment Needed for 4th of July Brownies

    • Mixing bowls: Any medium-sized bowl will do—glass or plastic works great!
    • Electric mixer: A hand mixer is perfect, but a whisk can work if you’re feeling strong!
    • Brownie pan or 9″x 13″ baking dish: A cupcake pan is ideal for individual servings.
    • Spatula: A rubber spatula is your best friend for scraping batter.
    • Wire rack: A cooling rack helps your brownies set perfectly.

    Variations of 4th of July Brownies

    • Nutty Delight: Add chopped walnuts or pecans for a crunchy surprise in each bite.
    • Vegetarian Delight: Swap eggs with mashed bananas or unsweetened applesauce for a plant-based treat.
    • Gluten-Free Option: Use a gluten-free all-purpose flour blend to make these brownies suitable for everyone.
    • Minty Fresh: Add a few drops of peppermint extract to the batter for a refreshing twist.
    • Fruit Fusion: Toss in some fresh raspberries or strawberries for a fruity burst that complements the chocolate.

    Serving Suggestions for 4th of July Brownies

    • Serve with a scoop of vanilla ice cream for indulgence.
    • Pair with fresh berries like strawberries or blueberries for a burst of freshness.
    • Drizzle with chocolate sauce for an extra decadent touch.
    • Display on a festive platter, garnished with sprinkles for visual appeal.

    FAQs about 4th of July Brownies

    Can I make 4th of July Brownies ahead of time?
    Absolutely! You can bake the brownies a day in advance. Just store them in an airtight container at room temperature. This way, you’ll have one less thing to worry about on the holiday!

    What if I can’t find the colorful cookies?
    No worries! If you can’t find Newman’s Own or Oreos, you can use any chocolate sandwich cookies you like. Just make sure they’re filled for that vibrant flair!

    How do I know when the brownies are done baking?
    To test for doneness, look for a firm top and edges starting to pull away from the pan. A toothpick inserted in the center should come out with a bit of chocolate crumb on it. This ensures fudgy perfection!

    Can I use different types of chocolate chips?
    Definitely! Feel free to mix it up with semisweet, milk chocolate, or even dark chocolate chips for a deeper flavor. You could even toss in some white chocolate for extra sweetness!

    What’s the best way to store leftovers?
    Store any leftover brownies in an airtight container or zip lock bag at room temperature for up to two weeks. If they last that long, you’ll be pleasantly surprised!

    Final Thoughts

    There’s something truly magical about baking together, especially when it comes to my 4th of July Brownies. These delicious treats bring smiles, laughter, and a splash of color to any holiday gathering. As we dive into each fudgy piece, it’s not just about the flavors; it’s about creating memories with loved ones, sharing stories, and celebrating our freedom. Whether you’re enjoying them at a backyard barbecue or a family picnic, these brownies are bound to steal the show. So grab your apron, gather the family, and let the festivities begin! After all, nothing says “celebration” like brownies!


    Print

    clock clock iconcutlery cutlery iconflag flag iconfolder folder iconinstagram instagram iconpinterest pinterest iconfacebook facebook iconprint print iconsquares squares iconheart heart iconheart solid heart solid icon

    Description

    Delicious 4th of July Brownies featuring cookie-filled centers and festive colors.


    • 1 ½ cups all-purpose flour
    • 1 cup baking cocoa powder
    • ½ teaspoon baking powder
    • ½ teaspoon salt
    • 1 teaspoon espresso powder
    • ⅔ cup butter-flavored vegetable shortening
    • 2 cups granulated white sugar
    • 4 large eggs
    • 1 cup mini chocolate chips
    • 27 chocolate sandwich cookies (Newman’s Own or Oreos)
    • Food coloring gel (Americolor Sky Blue and True Red)
    • Decorative sugar or sprinkles

    1. Twist apart the cookies and scrape the filling into three small bowls.
    2. Mash the white filling with the back of a spoon until smooth. Add a drop of red or blue food coloring gel to the other filling bowls and mix until smooth and evenly colored.
    3. Transfer each filling into the corner of a separate small sandwich bag.
    4. Snip a small piece of the corner off each bag, then pipe alternating colors of rows of frosting back onto a cookie half.
    5. Top with the other half of the cookie to form a sandwich, pressing gently to adhere.
    6. Preheat the oven to 350° F. Coat a 12-cup pan (or 9″x 13″ pan) with non-stick cooking spray.
    7. In a medium bowl, whisk together the flour, cocoa, baking powder, salt and espresso powder. Set aside.
    8. In the bowl of an electric mixer, combine the shortening, sugar, and eggs. Beat until light in color and fluffy (about 3 minutes).
    9. Gradually add in the flour mixture, until combined.
    10. Stir in the mini chocolate chips.
    11. Scoop about 2 tablespoons of batter into each individual brownie cup. Gently press a sandwich cookie into the center of each cup so that the batter comes up around the edges of the cookie.
    12. Top each cookie with a tablespoon of batter and smooth to cover the Oreo completely. The cup will be almost, but not quite, full.
    13. FOR A 9” x13” PAN: Spread half of the batter evenly into the prepared pan. Gently press the sandwich cookies into the batter. Top with the remaining batter. Use a spatula or spoon to smooth the surface.
    14. Bake the brownie bar pan for 12-15 minutes or the 9″ x 13″ pan for 20-25 minutes. The toothpick test doesn’t work very well because of the cookie center. If the top is firm, the brownies are done.
    15. Remove from the oven and cool completely in the pan on a wire rack.
    16. Store brownies at room temperature in an airtight container or zip lock bag for up to 2 weeks.

    Notes

    • Use gel food coloring for vibrant hues.
    • Ensure brownies are cooled completely before storing.
    • Prep Time: 30 minutes
    • Cook Time: 25 minutes
    • Category: Dessert
    • Method: Baking
    • Cuisine: American

    Nutrition

    • Serving Size: 1 brownie
    • Calories: 250
    • Sugar: 18g
    • Sodium: 150mg
    • Fat: 12g
    • Saturated Fat: 3g
    • Unsaturated Fat: 8g
    • Trans Fat: 0g
    • Carbohydrates: 35g
    • Fiber: 2g
    • Protein: 3g
    • Cholesterol: 45mg

    Sharing is caring!

  • Key Lime Coconut Donuts

    Key Lime Coconut Donuts


    Introduction to Key Lime Coconut Donuts

    As a busy mom juggling work and family, I know how precious that little moment of indulgence can be. That’s why I’m excited to share my delightful Key Lime Coconut Donuts. Imagine a light, fluffy donut, bursting with zesty lime and creamy coconut. They’re not just a treat; they’re a tropical escape in every bite. Perfect for breakfast or an afternoon snack, these donuts are easy to whip up and guaranteed to bring smiles to your loved ones’ faces. So roll up your sleeves and let’s dive into this sweet adventure together!

    Why You’ll Love This Key Lime Coconut Donuts

    These Key Lime Coconut Donuts are a delightful blend of flavors that make baking a breeze. They come together in just under half an hour, perfect for busy mornings or spontaneous treat cravings. The zesty lime paired with creamy coconut creates an explosion of tropical taste, and let’s be honest—the sweet glaze makes everything better! Your family will be asking for seconds, and you might just keep a few for yourself.

    Ingredients for Key Lime Coconut Donuts

    Gathering the right ingredients is like assembling your toolbox for a creative project—everything plays a vital role. For these Key Lime Coconut Donuts, you’ll need:

    • All-purpose flour: The backbone of your donut, providing structure and fluffiness.
    • Baking powder: This trusty leavener ensures your donuts rise beautifully for that perfect fluffy texture.
    • Salt: Just a pinch enhances the sweet and tangy flavors, balancing the overall taste.
    • Granulated sugar: This sweetener brings out the tropical flavors—pure yum!
    • Fresh lime zest: A crucial ingredient, the zest adds bright, zesty notes that transport you to a sunny beach.
    • Coconut oil: This heavenly oil adds richness and a hint of coconut flavor without overwhelming the taste.
    • Egg: A must for binding the ingredients together and enriching the texture.
    • Coconut milk: This adds creaminess and a bit of tropical flair to the batter.
    • Confectioners’ sugar: Ideal for the glaze, it gives your donuts that sweet finish we all crave.
    • Key lime juice: This acidity is the star of the glaze, infusing it with that iconic key lime flavor.
    • More lime zest: For enhancing the glaze, just a bit more zest deepens the lime experience.
    • Shredded coconut (optional decoration): Toasted coconut adds an extra crunch on top that’s simply divine!
    • Extra lime zest (optional decoration): A sprinkling of zest elevates the visual appeal and flavor.

    Remember, if you want to mix things up, you can experiment with different types of flour or even alternative sweeteners! For the exact quantities and printing options, check out the bottom of the article.

    How to Make Key Lime Coconut Donuts

    Preheat and Prepare

    Let’s get started on our baking adventure! First, preheat your oven to 350 degrees Fahrenheit. This step is crucial for achieving that lovely golden color. While it’s heating up, grab your doughnut pan and generously grease each mold. This helps us achieve donuts that effortlessly pop out, making cleanup a breeze. Trust me, you’ll thank yourself later! Once the oven is ready, you’re all set to whip up some tropical magic!

    Mix Dry Ingredients

    Now, it’s time to tackle the dry ingredients. In a small bowl, whisk together the all-purpose flour, baking powder, and salt. Just a few quick swirls with your whisk will do. This simple step ensures that everything blends well later on. Remember, the baking powder is your little secret for those fluffy donuts that everyone loves! Set the bowl aside; we’ll be back to it shortly.

    Combine Wet Ingredients

    Let’s move on to the wet ingredients—this is where the fun begins! In a large mixing bowl, combine the granulated sugar and lime zest. Using your fingers, mix them together until you can smell that refreshing lime aroma wafting up. Next, add the melted coconut oil, and beat in the egg. Stir in the creamy coconut milk until everything is well combined. This mixture will bring moisture and flavor, making our donuts irresistible!

    Combine Dry and Wet Mixtures

    It’s time to bring our mixtures together! Carefully fold the dry mixture into the wet mixture using a rubber spatula. Take your time with this step; you don’t want to overmix. Just gently stir until everything is evenly blended. It’s okay if a few lumps remain; they’ll work themselves out during baking. The key here is to keep that fluffy texture we all adore!

    Fill and Bake

    Now, let’s fill our doughnut pan and get them baking! Divide the thick batter evenly among the molds, filling each one about two-thirds full. This allows room for our delightful donuts to rise. Pop the pan into your preheated oven and bake for 10-11 minutes. Keep an eye on them! They should be firm to the touch and lightly golden on top. Your kitchen will soon smell like a tropical paradise!

    Cool and Glaze

    Once your donuts are baked to perfection, remove the pan from the oven. Let them cool in the tray for at least 10 minutes. This helps them firm up without crumbling. Afterward, transfer those tropical beauties to a cooling rack. While they finish cooling, let’s prepare the sweet Key Lime glaze. In a shallow dish, mix together the key lime juice and confectioners’ sugar. Adjust the consistency as needed before dipping your donuts. After glazing, wait about 5 minutes before diving in for that desired bliss!

    Tips for Success

    • Measure your ingredients accurately for the best results. A scale can help!
    • Ensure your coconut oil is melted but not hot, as it can cook the egg.
    • Don’t overmix the batter—just stir until combined to keep your donuts light and fluffy.
    • Experiment with different toppings, like chocolate drizzle or crushed nuts!
    • Store any leftovers in an airtight container to maintain freshness for a day or two.

    Equipment Needed

    • Doughnut pan: If you don’t have one, a muffin tin works well too!
    • Mixing bowls: A large and a small bowl will get the job done.
    • Whisk: Any whisk will work, though a rubber spatula is perfect for folding.
    • Measuring cups and spoons: Essential for precise ingredient amounts.
    • Cooling rack: A plate can suffice if you don’t have one handy.

    Variations

    • Gluten-free option: Swap all-purpose flour for a gluten-free blend to make these Key Lime Coconut Donuts suitable for gluten-sensitive friends.
    • Vegan twist: Substitute the egg with a flax egg (1 tablespoon ground flaxseed mixed with 2.5 tablespoons water) and use almond or soy milk in place of coconut milk.
    • Chocolate lovers: Add chocolate chips to the batter for a divine coconut and chocolate combination that will have everyone swooning!
    • Spice it up: Incorporate a pinch of cinnamon or nutmeg into the batter for a warm, aromatic twist that complements the coconut beautifully.
    • Fruit enhancements: Mix in crushed pineapple to the batter for added moisture and a tropical burst of flavor!

    Serving Suggestions

    • Serve your Key Lime Coconut Donuts with a side of fresh fruit salad for a refreshing touch.
    • Pair them with a tropical smoothie made with banana and spinach for a nutritious drink.
    • For an elegant presentation, dust the donuts with extra lime zest right before serving.
    • Consider drizzling with a simple coconut cream for an extra indulgent experience!
    • These donuts also shine during brunch gatherings—great for sharing with friends!

    FAQs about Key Lime Coconut Donuts

    As with any delicious recipe, questions are bound to pop up! I’ve gathered some common queries about these Key Lime Coconut Donuts to help you out.

    Can I use bottled key lime juice instead of fresh squeezer?

    Absolutely! While fresh juice offers the brightest flavor, bottled key lime juice works perfectly in a pinch. Just double-check it’s 100% juice for the best taste.

    How can I store leftover donuts?

    Keep any remaining donuts in an airtight container at room temperature. They’ll stay fresh for 1-2 days. If they last that long, that is!

    Can I freeze these donuts?

    Sure! Let them cool completely, then freeze in a single layer before transferring to a freezer-safe container. They’ll keep for up to a month! Just thaw them overnight in the fridge before enjoying.

    What if I don’t have a donut pan?

    No worries! A muffin tin can serve as a great alternative. Just adjust the baking time slightly, and you’ll have delightful key lime coconut muffins!

    Can I add more coconut flavor?

    You bet! Consider adding extra shredded coconut to the batter or using coconut extract in the glaze for that extra punch of tropical flavor.

    Final Thoughts

    Indulging in these Key Lime Coconut Donuts feels like a mini-vacation right in your kitchen. Each bite offers a delightful blend of zesty lime and creamy coconut, reminding me of sun-soaked days on a tropical beach. They’re quick to make, perfect for a busy mom’s schedule, and sure to brighten anyone’s day. Whether enjoyed with your family or shared at brunch, these donuts bring joy and laughter to the table. So, roll up your sleeves and let the tropical flavors transport you to paradise, one delicious donut at a time!


    Print

    clock clock iconcutlery cutlery iconflag flag iconfolder folder iconinstagram instagram iconpinterest pinterest iconfacebook facebook iconprint print iconsquares squares iconheart heart iconheart solid heart solid icon

    Description

    These Key Lime Coconut Donuts are a deliciously tropical treat, featuring a light and fluffy donut infused with zesty lime and creamy coconut, topped with a sweet Key Lime glaze.


    • 1 and 1/4 cups all purpose flour
    • 1 teaspoon baking powder
    • 1/2 teaspoon salt
    • 1/2 cup granulated sugar
    • 2 teaspoons fresh lime zest
    • 2 1/2 tablespoons coconut oil, melted
    • 1 large egg, at room temperature
    • 1/2 cup coconut milk
    • 1 cup confectioners’ sugar (for glaze)
    • 1 and 1/2 tablespoons key lime juice (for glaze)
    • 1 teaspoon lime zest (for glaze)
    • 1/8 teaspoon salt (for glaze)
    • 1/2 cup shredded coconut, toasted (optional decoration)
    • 2 teaspoons lime zest (optional decoration)

    1. Preheat oven to 350 degrees (F). Generously grease a doughnut pan; set aside.
    2. In a small bowl whisk together flour, baking powder and salt; set aside.
    3. In a large bowl combine the granulated sugar and lime zest; mix together with your fingers until zest is evenly distributed in the sugar.
    4. Add in the melted coconut oil and, using a whisk, mix until combined. Beat in the egg, then stir in coconut milk.
    5. Add in the dry ingredients and gently fold the mixture together using a rubber spatula, stirring only until mixture is evenly combined.
    6. Divide the thick batter evenly among the molds of your prepared pan, filling each mold up 2/3 of the way. Bake for 10-11 minutes, or until firm and lightly golden on the tops.
    7. Remove pan from oven and allow doughnuts to cool for at least 10 minutes in the tray before transferring to a cooling rack to cool completely.
    8. Once cool, dip each doughnut in glaze and serve! The glaze does take a few minutes to set, so you may want to wait about 5 minutes after glazing to dig in.
    9. For the Key Lime Glaze: In a wide, shallow dish combine juice and sugar, and whisk to combine. Adjust the consistency as needed.
    10. Carefully dip cooled doughnuts in the glaze and let rest for 5 minutes before serving. Top with toasted coconut and extra lime zest if desired.

    Notes

    • The doughnuts are best enjoyed fresh but can be stored in an airtight container at room temperature for 1-2 days.
    • Feel free to adjust the sweetness of the glaze to your liking by altering the amount of lime juice and confectioners’ sugar.
    • Prep Time: 15 minutes
    • Cook Time: 11 minutes
    • Category: Dessert
    • Method: Baking
    • Cuisine: American

    Nutrition

    • Serving Size: 1 donut
    • Calories: 180
    • Sugar: 10g
    • Sodium: 100mg
    • Fat: 7g
    • Saturated Fat: 6g
    • Unsaturated Fat: 1g
    • Trans Fat: 0g
    • Carbohydrates: 25g
    • Fiber: 1g
    • Protein: 2g
    • Cholesterol: 20mg

    Sharing is caring!

  • Ultimate Weight Loss Salad

    Ultimate Weight Loss Salad


    Introduction to Ultimate Weight Loss Salad

    Hey there, fellow food lovers! If you’re looking for a scrumptious, nutritious solution to your busy day, the Ultimate Weight Loss Salad is your answer. I know how hectic life can be, especially for busy moms and professionals like us. This vibrant salad not only satisfies your taste buds but also helps keep those pesky cravings at bay. It’s fresh, easy to whip up, and perfect for impressing your loved ones at the dinner table. So, grab your cutting board and let’s dive into this delightful dish that promotes health without sacrificing taste!

    Why You’ll Love This Ultimate Weight Loss Salad

    This Ultimate Weight Loss Salad is not just a pretty plate. It’s a quick and easy meal that’s perfect for our busy lives. In just 15 minutes, you can enjoy a tasty and wholesome dish packed with crunchy vegetables and protein. Plus, the flavors dance together beautifully, making each bite a delightful experience. It’s a fantastic, guilt-free option that leaves you feeling energized and satisfied!

    Ingredients for Ultimate Weight Loss Salad

    Ready to create your Ultimate Weight Loss Salad? Here’s what you’ll need:

    • Mixed Leafy Greens: A blend of vibrant options like spinach, kale, and arugula adds crunch and nutrients.
    • Cucumber: Refreshing and crisp, cucumbers provide a cool bite that brightens the salad.
    • Cherry Tomatoes: These juicy gems bring sweetness and a pop of color, making each mouthful delightful.
    • Red Onion: A thin slice of red onion offers a hint of sharpness that balances the flavors beautifully.
    • Avocado: Creamy and rich, avocado introduces healthy fats that keep you feeling full and satisfied.
    • Shredded Carrots: With a beautiful orange hue, carrots not only add crunch but also a dose of sweetness.
    • Roasted Chickpeas: These little powerhouses are crunchy and provide a hearty boost of fiber and protein.
    • Cooked Quinoa or Grilled Chicken: Opt for quinoa for a vegetarian option or chicken for a protein punch, catering to your dietary preference.
    • Olive Oil: A drizzle of this healthy fat enhances flavors and keeps the salad dressing smooth.
    • Apple Cider Vinegar: This tangy wonder adds brightness and a touch of acidity that takes the dressing up a notch.
    • Dijon Mustard: Mixing in Dijon gives the dressing a zesty kick that people adore.
    • Lemon Juice: Freshly squeezed lemon juice adds a refreshing tartness that uplifts the salad.
    • Salt and Pepper: A pinch of these classics enhances all the flavors, making your salad sing.
    • Fresh Herbs: Optional additions like cilantro or parsley can elevate the aroma and flavor profile of your salad.

    Don’t worry about the exact measurements; those are at the bottom of the article and ready for printing. The beauty of this Ultimate Weight Loss Salad is its flexibility, so feel free to get creative with your ingredients!

    How to Make Ultimate Weight Loss Salad

    Step 1: Combine the Vegetables

    (Tip: focus on vibrant color and freshness)

    Start by grabbing a large bowl. Toss in your mixed leafy greens — all those gorgeous colors will make your salad pop!

    Next, add in the thinly sliced cucumber, halved cherry tomatoes, and red onion. These vegetables bring delightful crunch and sweetness.

    Don’t forget your avocado and shredded carrots! They’ll add that creamy texture and vibrant orange hue. Trust me; your salad will look like a rainbow!

    Step 2: Add the Protein

    (Tip: Include optional sources, from quinoa to chicken)

    Now it’s time to add some protein to your salad. You can choose cooked quinoa for a plant-based option or grilled chicken if you’re in the mood for meat.

    Whichever you choose, it’s going to make the Ultimate Weight Loss Salad filling and satisfying. Just imagine that delicious bite filled with protein goodness!

    Step 3: Prepare the Dressing

    (Tip: Suggest whisking for a creamy texture)

    In a small bowl, whisk together the olive oil, apple cider vinegar, Dijon mustard, and lemon juice.

    Make sure to add salt and pepper too! This dressing will tie all the flavors together beautifully. You want it smooth and creamy, so whisk like you mean it!

    Step 4: Toss Everything Together

    (Tip: Avoid over-mixing for presentation)

    Grab that gorgeous bowl of veggies and pour the dressing over the top. Now, gently toss everything together.

    Be careful not to over-mix. We want those lovely colors and textures to stay visible. You want each ingredient to shine on its own!

    Step 5: Garnish and Serve

    (Tip: Fresh herbs add flavor and aroma)

    Time to make your salad look even prettier! Sprinkle on your roasted chickpeas for crunch and add fresh herbs like cilantro or parsley for a burst of flavor.

    Dish it out immediately and enjoy the vibrant taste of your Ultimate Weight Loss Salad. Share it with loved ones, or keep it all to yourself — I won’t tell!

    Tips for Success

    • Prep ingredients in advance for a quick meal during busy weekdays.
    • Mix different greens for varied texture and nutrients — don’t be afraid to experiment!
    • Try adding nuts or seeds for a delightful crunch and extra healthy fats.
    • Customize your dressing with spices to match your mood!
    • Use seasonal veggies for the freshest flavors and the best price.

    Equipment Needed

    • Large mixing bowl: Any size will do; even a salad spinner can work!
    • Small mixing bowl: For whisking the dressing; a mason jar is a great alternative.
    • Whisk: Use a fork if you don’t have one handy.
    • Chopping board and knife: Essential for prepping your veggies.
    • Serving plates: Get creative; any dish will showcase your salad beautifully!

    Variations of Ultimate Weight Loss Salad

    • Giardiniera Twist: Toss in some chopped pickled vegetables for a tangy zing that brightens each bite.
    • Asian Flair: Swap the dressing for a sesame-ginger vinaigrette and add edamame or mandarin oranges for a unique twist.
    • Southwestern Style: Incorporate corn, black beans, and diced bell peppers, and top with a zesty lime dressing for a fiesta in your bowl.
    • Fruit Fusion: Mix in fruits like apple slices, strawberries, or orange segments for a sweet contrast to the savory ingredients.
    • Protein Packed: Use tuna or a hard-boiled egg instead of chicken or quinoa for a different source of protein that’s just as filling.
    • Vegan Delight: Opt for additional roasted chickpeas and skip the chicken or quinoa for a completely plant-based option that’s still hearty.

    Serving Suggestions for Ultimate Weight Loss Salad

    • Pair your salad with whole-grain bread or wraps for a complete meal.
    • Enjoy it alongside a light soup for a comforting, healthful duo.
    • Serve with sparkling water infused with lemon or mint for a refreshing sip.
    • For an elevated presentation, serve in clear bowls to showcase the beautiful colors.
    • Top it with grilled shrimp or salmon for an extra burst of flavor and protein.

    FAQs about Ultimate Weight Loss Salad

    Can I make the Ultimate Weight Loss Salad in advance?

    Absolutely! You can prep the salad ingredients ahead of time. Just remember to add the dressing right before serving. This keeps the veggies fresh and crisp!

    How many calories are in one serving?

    Each serving of the Ultimate Weight Loss Salad contains approximately 350 calories, giving you a satisfying and nutritious meal without excessive calories. Perfect for maintaining your weight loss journey!

    What can I substitute for roasted chickpeas?

    If roasted chickpeas aren’t your thing, you can use other legumes like black beans or kidney beans. Nuts and seeds also add crunch and protein; just choose your favorites!

    Is this salad suitable for a low-carb diet?

    The Ultimate Weight Loss Salad has a moderate carbohydrate content. For a lower carb option, you could skip the quinoa and use extra protein like more chicken or chopped nuts.

    Can I add fruits to my salad?

    Of course! Fruits like strawberries, apples, or mandarin oranges can add a unique flavor contrast and sweetness, making your Ultimate Weight Loss Salad even more delightful!

    Final Thoughts

    As a passionate home cook, there’s nothing quite like the joy of sharing a delicious meal that supports your health goals. The Ultimate Weight Loss Salad encapsulates the delight of fresh, vibrant ingredients all tossed together with love. It’s not just a meal; it’s a celebration of flavors, colors, and well-being!

    By investing just a few minutes, you can enjoy a satisfying dish that nourishes both body and spirit. So, whether you’re whipping it up for yourself or sharing it with family, this salad is sure to inspire healthy habits and reignite your culinary passion. Enjoy!


    Print

    clock clock iconcutlery cutlery iconflag flag iconfolder folder iconinstagram instagram iconpinterest pinterest iconfacebook facebook iconprint print iconsquares squares iconheart heart iconheart solid heart solid icon

    Description

    A nutritious and satisfying salad perfect for weight loss, packed with fresh vegetables, protein, and healthy fats.


    • 2 cups mixed leafy greens (spinach, kale, arugula, etc.)
    • 1/2 cup cucumber, thinly sliced
    • 1/2 cup cherry tomatoes, halved
    • 1/4 cup red onion, thinly sliced
    • 1/2 avocado, sliced
    • 1/2 cup shredded carrots
    • 1/4 cup roasted chickpeas (or any other preferred legume)
    • 1/2 cup cooked quinoa or grilled chicken breast (for extra protein)
    • 1 tbsp olive oil
    • 1 tbsp apple cider vinegar
    • 1 tsp Dijon mustard
    • 1 tsp lemon juice
    • Salt and pepper to taste
    • Fresh herbs (optional: cilantro, parsley)

    1. In a large bowl, combine the mixed greens, cucumber, cherry tomatoes, red onion, avocado, and shredded carrots.
    2. Top the salad with cooked quinoa or grilled chicken breast (your choice for extra protein).
    3. In a small bowl, whisk together the olive oil, apple cider vinegar, Dijon mustard, lemon juice, salt, and pepper until well combined.
    4. Drizzle the dressing over the salad and toss gently to coat all the ingredients.
    5. Add roasted chickpeas or your choice of legume for an extra crunch and boost of fiber.
    6. Garnish with fresh herbs (if desired) and enjoy immediately!

    Notes

    • This salad can be made ahead of time; just add the dressing right before serving.
    • Feel free to substitute the protein with your favorite options.
    • Customize the vegetables based on your preferences for added variety.
    • Prep Time: 15 minutes
    • Cook Time: 0 minutes
    • Category: Salad
    • Method: Tossing
    • Cuisine: Healthy

    Nutrition

    • Serving Size: 1 serving
    • Calories: 350
    • Sugar: 5g
    • Sodium: 200mg
    • Fat: 20g
    • Saturated Fat: 3g
    • Unsaturated Fat: 15g
    • Trans Fat: 0g
    • Carbohydrates: 30g
    • Fiber: 10g
    • Protein: 10g
    • Cholesterol: 0mg

    Sharing is caring!