Author: IHAAL Team

  • Pumpkin Spice Pretzel

    Pumpkin Spice Pretzel


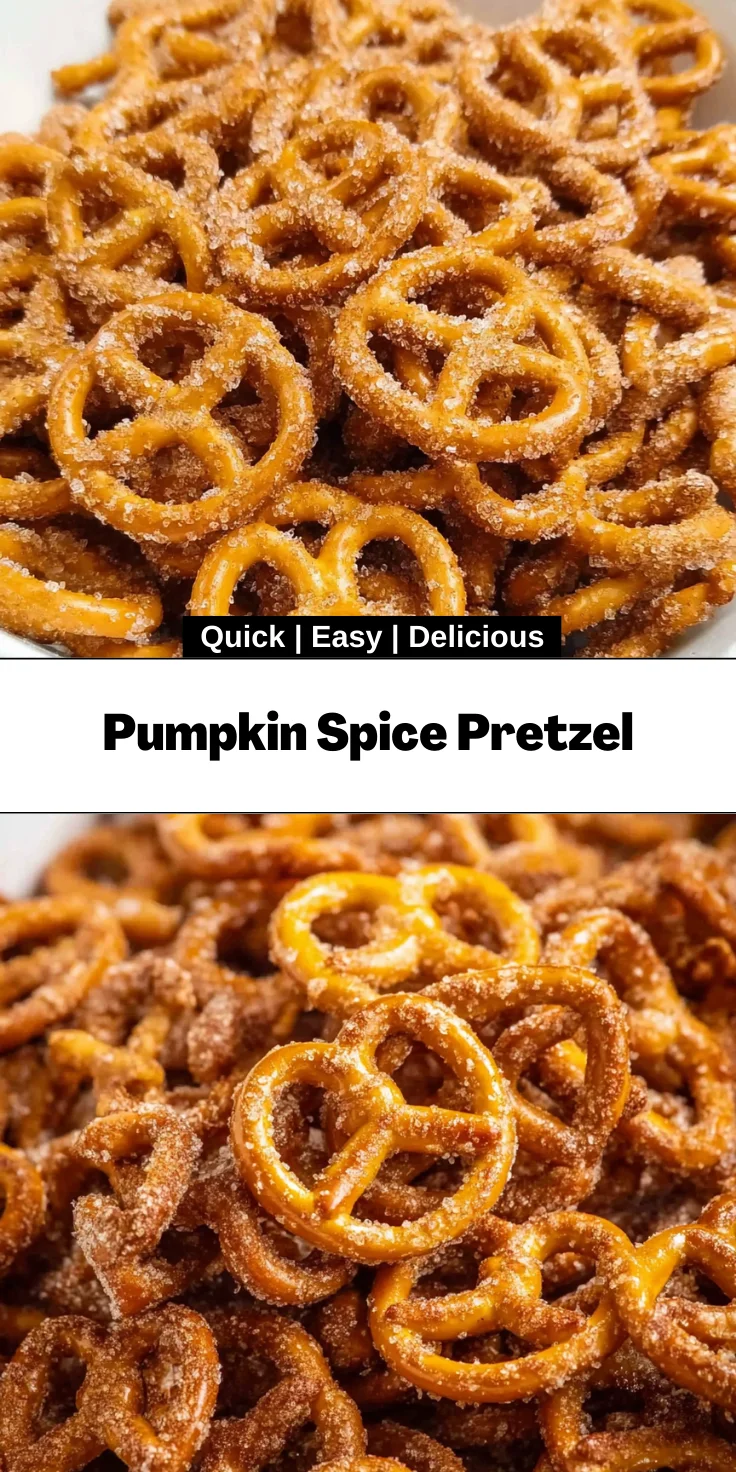
    Introduction to Pumpkin Spice Pretzel

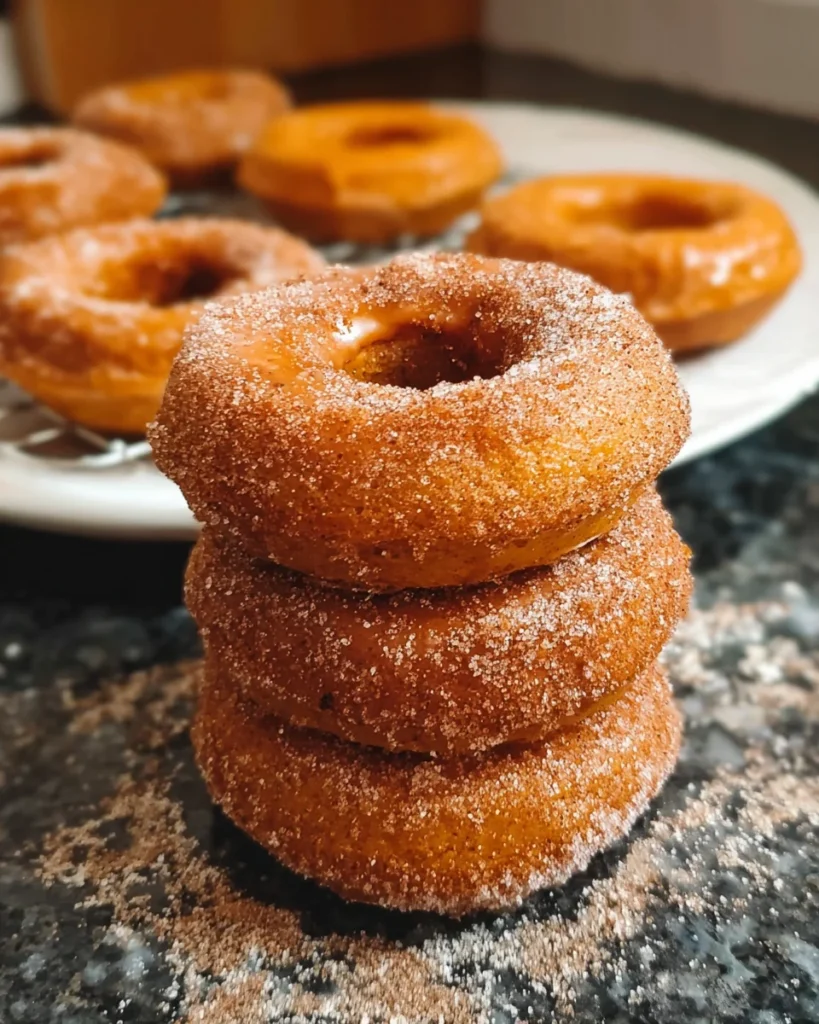
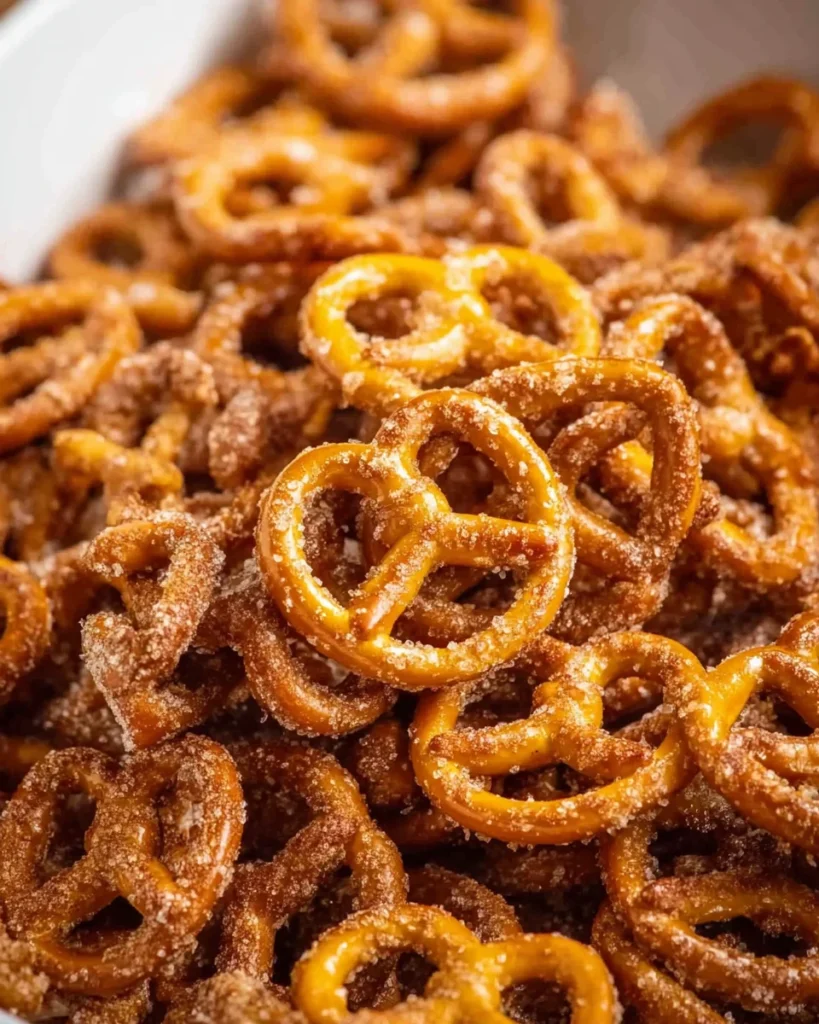
    Ah, fall—the season of cozy sweaters, warm drinks, and, of course, delightful treats like the Pumpkin Spice Pretzel. As a busy mom, I know how challenging it can be to whip up something both delicious and quick. This warm, sweet pretzel recipe is here to save the day! It fills your kitchen with that irresistible pumpkin spice aroma, creating an inviting atmosphere that makes everyone feel at home. Whether you’re treating yourself after a long week or impressing your loved ones with a sweet snack, these pretzels are just perfect for any occasion.

    Why You’ll Love This Pumpkin Spice Pretzel

    This Pumpkin Spice Pretzel is a game-changer for busy weeks! With just 10 minutes of prep, you’ll have a warm, cozy treat ready in no time. The delightful combination of pumpkin spice and sweet sugar creates a flavor explosion that will make your heart sing. Plus, they’re incredibly versatile—you can serve them at parties or keep them as an afternoon snack. Trust me, once you taste these, you’ll be hooked!

    Ingredients for Pumpkin Spice Pretzel

    Gathering your ingredients is half the fun of cooking! For these delightful Pumpkin Spice Pretzels, you’ll need a few simple staples, all of which are easy to find. Here’s what you’ll need to create this warm and inviting treat:

    • Sugar: Adds sweetness and balances the spice; you can use granulated or brown sugar for a deeper flavor.
    • Pumpkin Spice: The magical blend of cinnamon, nutmeg, and ginger that gives this pretzel its cozy fall flavor. If you don’t have pumpkin spice, a mix of these spices works as a substitute!
    • Coconut Oil: Provides a delicious richness and helps the sugar adhere beautifully to the pretzels. You can swap it with melted butter if you prefer a buttery taste.
    • Pretzels: The base of the recipe! Use your favorite pretzel style. Traditional soft pretzels work fantastic, or even crunchy ones if that’s what you have on hand.

    For exact quantities of these ingredients, feel free to check towards the bottom of the article where everything is detailed for printing. Happy cooking!

    How to Make Pumpkin Spice Pretzel

    Making these Pumpkin Spice Pretzels is as enjoyable as eating them! Follow my simple steps for a cozy kitchen adventure that won’t take up too much of your precious time. Let’s get started!

    Step 1: Prepare the Coating

    First up, grab a large bowl. In it, mix together the sugar, pumpkin spice, and melted coconut oil. I find it easier to use a whisk here; it helps combine everything smoothly. You want that lovely spice aroma to waft through your kitchen. Take a moment to inhale that fall goodness!

    Step 2: Toss the Pretzels

    Next, add your pretzels into the bowl with the coating. Give them a gentle toss, ensuring all the pretzels get a good dusting of that sweet pumpkin spice mixture. Don’t be shy—this is where the fun happens! Make sure every pretzel is evenly coated because we want maximum flavor with each bite.

    Step 3: Bake the Pretzels

    Now, preheat your oven to 350°F. Line a 9×13 sheet pan with parchment paper for easy cleanup. Spread the coated pretzels evenly on the pan and pop them into the oven. Bake for about 6–10 minutes. Keep an eye on them! You’ll see the sugar start to crystallize, creating a delightful crunch. We don’t want them burnt—just perfectly caramelized.

    Step 4: Cool and Enjoy

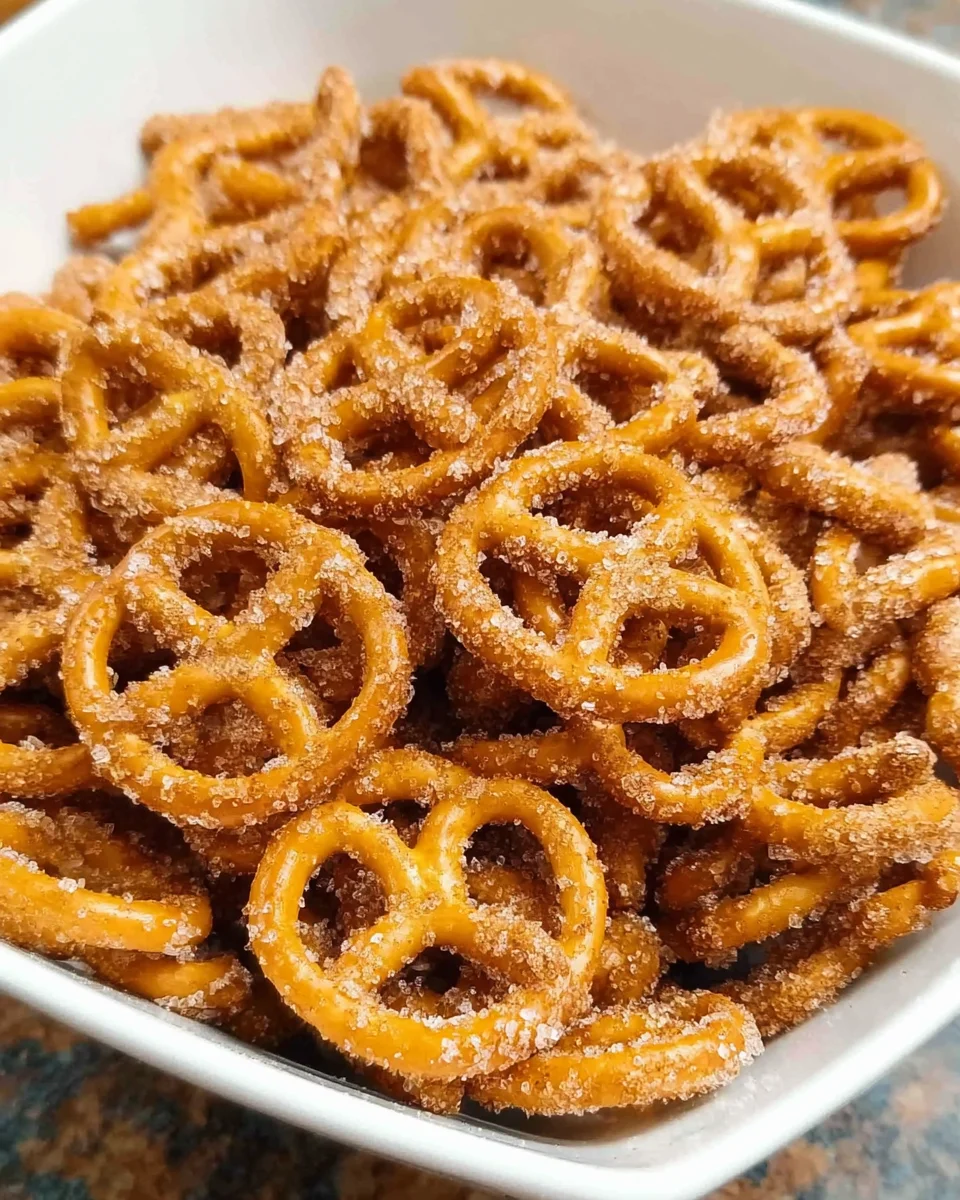
    Once the pretzels are done, take them out and let them cool on the sheet pan. They may be a bit sticky at first, but as they cool, they’ll become irresistibly crunchy. Once cooled, serve them warm as a snack or dessert. Your family will love this sweet, spiced treat that captures the essence of fall!

    Tips for Success

    • Ensure pretzels are evenly coated for the best flavor and sweetness.
    • Use a whisk for combined ingredients; it really enhances mixing!
    • Keep an eye on the baking time to prevent burning; every oven varies.
    • For a twist, try adding chocolate chips after baking for a delightful mix!
    • Store leftovers in an airtight container to maintain crunch.

    Equipment Needed

    • Large Bowl: For mixing your ingredients. A mixing bowl works just as well!
    • Whisk: To combine the coating, but a fork will do in a pinch.
    • Baking Sheet: A 9×13 pan is ideal; any flat baking dish will suffice.
    • Parchment Paper: For easy cleanup—aluminum foil can be a substitute.

    Variations of Pumpkin Spice Pretzel

    • Chocolate Drizzle: After baking, melt some chocolate and drizzle it over the pretzels for a decadent twist.
    • Nutty Delight: Mix in chopped pecans or walnuts with the pretzels for some extra crunch and flavor.
    • Dairy-Free Option: Substitute coconut oil with a vegetable oil for a dairy-free treat that’s equally delicious.
    • Spicy Kick: Add a pinch of cayenne or chili powder to the coating for a surprising spicy twist.
    • Gluten-Free Pretzels: Use gluten-free pretzels to make this recipe suitable for those with gluten sensitivities.

    Serving Suggestions for Pumpkin Spice Pretzel

    • Ideal with Coffee: Pair these pretzels with a warm, spiced latte for a perfect fall afternoon treat.
    • Presentation: Serve on a rustic wooden board, sprinkled with a bit of extra pumpkin spice for flair.
    • Dipping Sauce: Consider a cream cheese dip or caramel sauce for an indulgent twist.
    • Perfect Snack: Great for holiday gatherings or cozy movie nights with the family!

    FAQs about Pumpkin Spice Pretzel

    I know you might have a few questions about these delightful Pumpkin Spice Pretzels. Let’s dive into some frequently asked queries to help you enjoy this cozy treat even more!

    Can I use store-bought pumpkin spice?
    Absolutely! Store-bought pumpkin spice works perfectly and saves time. Just ensure it’s fresh for the best flavor.

    How should I store leftover pretzels?
    Store your Pumpkin Spice Pretzels in an airtight container at room temperature. They’ll stay delicious for a couple of days if you want to snack sweetly later on.

    Can I make these pretzels ahead of time?
    Yes! You can prepare the coated pretzels and bake them just before serving. They taste best when fresh, but you can also prep them a few hours in advance.

    What can I serve with the Pumpkin Spice Pretzel?
    These pretzels pair wonderfully with coffee, hot chocolate, or even as a sweet snack during game nights. A little caramel dip can make them even more indulgent!

    Are there gluten-free options for this recipe?
    Absolutely! Just swap regular pretzels with gluten-free pretzels, and you’re all set for a delicious gluten-free treat!

    Final Thoughts

    As the aroma of Pumpkin Spice Pretzels wafts through your kitchen, you can almost feel the warmth of fall wrapping around you like a cozy blanket. This recipe isn’t just about the delightful taste; it’s about creating memories with your loved ones over a shared treat. Whether you’re snuggled on the couch with a warm mug in hand or hosting a gathering filled with laughter, these pretzels hit the spot. I hope this quick and easy recipe brings joy to your kitchen and a sprinkle of autumn magic to your home. Happy baking!


    Print

    clock clock iconcutlery cutlery iconflag flag iconfolder folder iconinstagram instagram iconpinterest pinterest iconfacebook facebook iconprint print iconsquares squares iconheart heart iconheart solid heart solid icon

    Description

    A delicious fall treat featuring soft pretzels coated in a sweet pumpkin spice mixture.


    • 1 C Sugar
    • 3 TBSP Pumpkin Spice
    • 1 C Coconut Oil
    • 1 Bag Pretzels

    1. In a large bowl mix together sugar, pumpkin spice and coconut oil until combined.
    2. Place pretzels in bowl and toss together.
    3. In a preheated 350° oven, place on a 9×13 sheet pan & bake for 6-10 minutes, until sugar has almost dried.
    4. Toss on sheet pan and allow to cool.
    5. Enjoy!

    Notes

    • Ensure the pretzels are evenly coated for the best flavor.
    • Watch closely while baking to prevent burning.
    • These pretzels can be served as a snack or dessert.
    • Prep Time: 10 minutes
    • Cook Time: 10 minutes
    • Category: Snack
    • Method: Baking
    • Cuisine: American

    Nutrition

    • Serving Size: 1 pretzel
    • Calories: 150
    • Sugar: 8g
    • Sodium: 150mg
    • Fat: 7g
    • Saturated Fat: 5g
    • Unsaturated Fat: 2g
    • Trans Fat: 0g
    • Carbohydrates: 20g
    • Fiber: 1g
    • Protein: 1g
    • Cholesterol: 0mg

    Sharing is caring!

  • Pumpkin Spice Frosted Donuts

    Pumpkin Spice Frosted Donuts


    Introduction to Pumpkin Spice Frosted Donuts

    Ah, the crisp air of fall! As the leaves turn golden and the days get shorter, it’s the perfect time to indulge in something sweet and spiced. That’s where my favorite recipe for Pumpkin Spice Frosted Donuts comes in. These donuts are an absolute delight—soft, fluffy, and bursting with seasonal flavors. If you’re a busy mom or a professional juggling a hundred tasks, this recipe is your golden ticket to a quick yet impressive treat. Trust me, your loved ones will flock to the kitchen, and you’ll be basking in the warm glow of happy faces!

    Why You’ll Love This Pumpkin Spice Frosted Donuts

    These Pumpkin Spice Frosted Donuts are the ultimate treat, combining ease and incredible flavor. In just thirty minutes, you’ll create a batch that rivals any bakery. The warm spices wrap around your senses, transforming a regular day into a cozy fall celebration. Plus, the cinnamon-sugar coating brings a delightful crunch that makes each bite irresistible. Perfect for busy mornings or an afternoon snack, you’ll want to make these year after year!

    Ingredients for Pumpkin Spice Frosted Donuts

    When it comes to making these Pumpkin Spice Frosted Donuts, the right ingredients make all the difference. Each element plays a role in creating those warm, autumn flavors that we all crave. Here’s what you’ll need:

    • All-purpose flour: This serves as the foundation of your donuts, providing the structure needed for that lovely, fluffy texture.
    • Baking powder: A must-have leavening agent, it helps the donuts rise beautifully, giving them that light and airy quality.
    • Baking soda: Often used alongside baking powder, it adds a little extra lift and balances acidity in baked goods.
    • Salt: Just a pinch enhances all the flavors, especially the sweetness of the sugars and the warmth of the spices.
    • Ground cinnamon: This is the star of the show, infusing that classic pumpkin spice flavor that wraps you in a cozy hug.
    • Ground nutmeg: Adds depth and warmth, enhancing the spiced flavors that we associate with fall.
    • Ground cloves: A little goes a long way; cloves bring a delightful aromatic quality to the mix.
    • Ground ginger: Offers a warming spice that complements the other flavors and adds complexity.
    • Granulated sugar: This sweetener helps to balance the spices and provides moisture for a tender donut.
    • Brown sugar: Adds a deeper sweetness and a hint of molasses flavor that makes these donuts extra rich.
    • Pumpkin puree: The heart of our recipe; not only does it give the donuts their signature flavor, but it also keeps them moist.
    • Large eggs: Essential for binding the ingredients and contributing to the structure and richness of the donuts.
    • Vegetable oil: Ensures the donuts remain moist and tender, preventing them from drying out.
    • Milk: Adds moisture and richness, creating a perfect consistency for the batter.
    • Vanilla extract: A splash of vanilla boosts the flavor, adding a touch of sweetness to the overall profile.

    For the delicious cinnamon-sugar coating:

    • Granulated sugar: Provides a sweet, crunchy exterior that’s simply irresistible.
    • Ground cinnamon: Enhances the flavors, making each bite a celebration of fall!

    For exact measurements, you can check the end of the article. Enjoy the process of gathering these ingredients; I promise they’ll sing together beautifully in your kitchen!

    How to Make Pumpkin Spice Frosted Donuts

    Now that we have our ingredients ready, let’s jump into the delightful process of making these Pumpkin Spice Frosted Donuts. Each step is simple, making it a great project for those days when you want to create something special without spending hours in the kitchen.

    Step 1: Preheat the Oven

    First things first—preheat your oven to 350°F (175°C). This step is crucial because it ensures your Pumpkin Spice Frosted Donuts rise perfectly from the get-go. While the oven warms up, grease your donut pan thoroughly with non-stick spray or butter. This will help your donuts slide out effortlessly once they’re baked. Trust me; nobody wants a donut that sticks to the pan!

    Step 2: Whisk Dry Ingredients Together

    In a large bowl, whisk together your dry ingredients: flour, baking powder, baking soda, salt, ground cinnamon, nutmeg, cloves, and ginger. Measure carefully for the best results! Each spice plays a significant role in blending the warm flavors we cherish in fall. The smell will inspire your kitchen, whisking you away into a world of cozy autumn vibes.

    Step 3: Combine Wet Ingredients

    In another bowl, it’s time to mix your wet ingredients. Combine the granulated sugar, brown sugar, pumpkin puree, eggs, vegetable oil, milk, and vanilla extract. Whisk everything until smooth. This step is essential; a well-mixed batter leads to a fluffy donut. Nothing beats the silky texture you achieve with a little love in the mixing bowl!

    Step 4: Mix Wet and Dry Ingredients

    Now, gradually add your wet mixture to the dry ingredients. Gently fold everything together until just combined. Avoid overmixing, as this can lead to dense donuts. We want them light and fluffy, so be tender in your approach. Picture the ideal donut—soft, airy, and full of deliciousness!

    Step 5: Pipe the Batter

    Next, it’s time to fill the donut pan. Transfer the batter into a piping bag, or use a ziplock bag with the corner snipped off for easier pouring. Pipe the batter into each cavity, filling them about 3/4 full. This method ensures uniform shaping and perfect size for each donut. Your excitement will grow as you see them taking shape!

    Step 6: Bake the Donuts

    Once your pan is filled, place it in the preheated oven. Bake for 12-15 minutes, and don’t forget to check doneness with a toothpick. It should come out clean when the donuts are ready! Keep an eye on them, as overbaking can lead to dry donuts, and we want that perfect moist texture.

    Step 7: Coat in Cinnamon-Sugar

    Finally, while the donuts are still warm, it’s time for the sweet finishing touch. In a shallow bowl, mix together the granulated sugar and ground cinnamon. Roll each warm donut in this mixture until fully coated. This step is where the magic happens—the cinnamon-sugar creates a delightful crunch that pairs beautifully with the soft, spiced donut!

    Tips for Success

    • Measure your ingredients accurately for the best results—it’s the key to success!
    • Don’t overmix your batter; less is more for that fluffy texture you crave.
    • Use a piping bag or ziplock for easy filling of the donut pan.
    • Let the donuts cool slightly before rolling in cinnamon-sugar for an even coating.
    • Experiment with flavors—add a pinch of nutmeg or a splash of maple syrup!

    Equipment Needed

    • Donut pan: Essential for shaping your donuts. If you don’t have one, a muffin tin works in a pinch!
    • Whisk: A must-have for mixing ingredients smoothly. A fork can do the job too!
    • Baking sheet: Useful for cooling your donuts on a wire rack after baking.
    • Piping bag or ziplock bag: Makes filling the donut pan easy, but a spoon can work as well.

    Variations for Pumpkin Spice Frosted Donuts

    • Gluten-free version: Substitute all-purpose flour with a gluten-free blend to make these donuts suitable for gluten-sensitive friends.
    • Healthier swap: Use applesauce in place of half the oil for a healthier donut without sacrificing moisture!
    • Add chocolate: Mix in a handful of chocolate chips or swirl melted chocolate into the batter for a decadent twist.
    • Nuts galore: Fold in chopped walnuts or pecans to add crunch and nutty flavor that complements the spices beautifully.
    • Maple glaze: Drizzle with a maple glaze instead of cinnamon-sugar for a sweetly sticky finish.
    • Vegan option: Replace eggs with flax eggs and coconut milk for a delightful plant-based alternative.

    Serving Suggestions for Pumpkin Spice Frosted Donuts

    • Pair with coffee: Enjoy these delightful donuts with a warm cup of coffee or chai tea for a cozy experience.
    • Ideal for brunch: Serve alongside a seasonal fruit salad for a charming fall brunch spread.
    • Presentation: Dust with powdered sugar or drizzle a chocolate glaze for an elegant touch at gatherings.

    FAQs about Pumpkin Spice Frosted Donuts

    Can I make these pumpkin spice donuts ahead of time?

    Absolutely! You can bake the Pumpkin Spice Frosted Donuts a day in advance. Simply store them in an airtight container at room temperature. When ready to serve, re-roll them in the cinnamon-sugar mixture for that fresh taste!

    What can I substitute for pumpkin puree?

    If you don’t have pumpkin puree, you can use mashed sweet potatoes or butternut squash. Both will give a similar texture and flavor, making them great substitutes!

    Can I freeze the donuts?

    You sure can! After baking, let the donuts cool completely. Freeze them in a single layer on a baking sheet, then store in an airtight container. They can last up to 2 months. Just thaw and coat with cinnamon-sugar when you’re ready to enjoy!

    How should I store leftover donuts?

    Store any leftover Pumpkin Spice Frosted Donuts in an airtight container at room temperature. They’ll stay delicious for about 2 days. After that, they might start to lose their delightful softness!

    Can I use a different type of sugar for the coating?

    Sure! While granulated sugar is traditional, you can experiment with brown sugar or even coconut sugar for a different flavor. Just remember, the texture might be a bit different. It’s all about finding what suits your palate!

    Final Thoughts

    Baking these Pumpkin Spice Frosted Donuts brings a sense of tranquility and joy that is hard to replicate. The warm spices and cozy flavors wrap around you like a favorite sweater. Knowing that you can whip these up in just thirty minutes makes them the perfect addition to busy days or special moments. Picture enjoying them over coffee with your loved ones, sharing laughter and stories. Each bite is a celebration of fall, reminding us to slow down and savor life’s simplest pleasures. So, gather your ingredients, and let the delightful aroma of autumn fill your home!


    Print

    clock clock iconcutlery cutlery iconflag flag iconfolder folder iconinstagram instagram iconpinterest pinterest iconfacebook facebook iconprint print iconsquares squares iconheart heart iconheart solid heart solid icon

    Description

    Delicious pumpkin spice donuts frosted with cinnamon-sugar, perfect for fall.


    • 1 3/4 cups all-purpose flour
    • 1 teaspoon baking powder
    • 1/2 teaspoon baking soda
    • 1/2 teaspoon salt
    • 1 teaspoon ground cinnamon
    • 1/2 teaspoon ground nutmeg
    • 1/4 teaspoon ground cloves
    • 1/4 teaspoon ground ginger
    • 1/2 cup granulated sugar
    • 1/2 cup brown sugar, packed
    • 1 cup pumpkin puree
    • 2 large eggs
    • 1/2 cup vegetable oil
    • 1/4 cup milk
    • 1 teaspoon vanilla extract
    • For the Cinnamon-Sugar Coating: 1/2 cup granulated sugar
    • 1 tablespoon ground cinnamon

    1. Preheat your oven to 350°F (175°C). Grease a donut pan thoroughly with non-stick spray or butter.
    2. In a large bowl, whisk together flour, baking powder, baking soda, salt, cinnamon, nutmeg, cloves, and ginger.
    3. In another bowl, whisk together granulated sugar, brown sugar, pumpkin puree, eggs, vegetable oil, milk, and vanilla extract until smooth.
    4. Gradually add the wet ingredients to the dry ingredients, mixing until just combined. Avoid overmixing to keep the donuts light and fluffy.
    5. Transfer the batter to a piping bag or a ziplock bag with the corner cut off. Pipe the batter into the prepared donut pan, filling each cavity about 3/4 full.
    6. Bake for 12-15 minutes, or until a toothpick inserted into the donuts comes out clean. Allow the donuts to cool in the pan for a few minutes before transferring to a wire rack.
    7. In a shallow bowl, mix together granulated sugar and ground cinnamon.
    8. While the donuts are still warm, roll them in the cinnamon-sugar mixture until fully coated.

    Notes

    • Store any leftover donuts in an airtight container at room temperature for up to 2 days.
    • For an extra treat, drizzle with a simple glaze made of powdered sugar and milk.
    • Prep Time: 15 minutes
    • Cook Time: 15 minutes
    • Category: Dessert
    • Method: Baking
    • Cuisine: American

    Nutrition

    • Serving Size: 1 donut
    • Calories: 210
    • Sugar: 12g
    • Sodium: 150mg
    • Fat: 8g
    • Saturated Fat: 1g
    • Unsaturated Fat: 7g
    • Trans Fat: 0g
    • Carbohydrates: 30g
    • Fiber: 1g
    • Protein: 3g
    • Cholesterol: 30mg

    Sharing is caring!

  • Oreo Layered Halloween Brownies

    Oreo Layered Halloween Brownies


    Introduction to Oreo Layered Halloween Brownies

    As a busy mom, I know all too well the hustle of juggling work, kids, and life’s little surprises. That’s why I can’t wait to share my recipe for Oreo Layered Halloween Brownies. These brownies are not just a treat; they’re a decadent addition to your holiday gatherings!

    Combining rich chocolate and festive Oreo cookies with orange filling, this recipe is a quick solution for a busy day. It’s perfect for impressing friends or sweetening family moments. Trust me; once you serve these, they’ll disappear faster than you can say, “Boo!”

    Why You’ll Love This Oreo Layered Halloween Brownies

    These Oreo Layered Halloween Brownies come together in a flash, making them an enjoyable project even on the busiest days. They’re deliciously indulgent, with rich brownie layers and creamy frostings that are simply irresistible. Plus, the vibrant orange from the Oreo cookies adds a festive flair that everyone will adore. Whether for a family gathering or a quick treat, these brownies are sure to please both kids and adults alike!

    Ingredients for Oreo Layered Halloween Brownies

    Let’s dive into the tasty components of these Oreo Layered Halloween Brownies! Each ingredient plays a crucial role in creating that decadent treat. Here’s what you’ll need:

    • Brownie mix: The base for your brownies. It brings chocolatey goodness with minimal effort.
    • Large eggs: Eggs help bind everything together, giving the brownies that perfect fudgy texture.
    • Vegetable oil: This adds moisture and richness to the brownie mix. Feel free to use melted butter for a richer flavor!
    • Whole milk: Enhances moisture and ensures a soft, chewy bite. You can substitute with almond or oat milk if preferred.
    • Oreo cookies with orange filling: The star of the show! Their festive flavor and crunch create layers of fun. Regular Oreos can work in a pinch.
    • Milk chocolate frosting: Adds a creamy and sweet layer that complements the brownies. You can DIY chocolate frosting for a homemade touch.
    • White or vanilla frosting: This frosting makes the lovely orange layer pop, adding sweetness and vibrancy.
    • Orange food coloring gel: Makes your frosting festive and spooky. Gel food coloring gives you rich color without altering the consistency.

    For exact measurements, you can find them at the bottom of the article, which are also available for printing. Let’s get cooking and bring these vibrant brownies to life!

    How to Make Oreo Layered Halloween Brownies

    Preheat and Prepare

    First things first, let’s preheat that oven to 350°F. This step is crucial. Preheating ensures that your brownies bake evenly. While it warms up, grab a 9×9-inch baking pan and line it with parchment paper. If you don’t have parchment, just spray the pan with non-stick cooking spray. Trust me; this will save you a lot of hassle when it comes to serving. You’ll want those brownies to slide right out without a fight!

    Making the Brownie Batter

    Now, let’s whip up that brownie batter. In a large bowl, combine the brownie mix, eggs, vegetable oil, and whole milk. I like to use a whisk; it’s simple and gets the job done. Mix until everything is smooth and well combined. You want to avoid any lumps. If you’re feeling adventurous, a stand mixer can be a great help here. Just make sure to scrape the sides to catch any rogue dry mix! Once your batter is ready, it should have a luscious consistency—a bit thick but pourable. It’s going to be delicious!

    Baking the Brownies

    Next up is baking! Pour your brownie batter into the prepared pan, spreading it evenly. Don’t forget the fun part—pressing those Oreo cookies with orange filling right into the surface. This is what turns an ordinary brownie into a themed treat! Bake for 25 to 30 minutes. To check if they’re done, insert a toothpick in the center. If it comes out clean or with just a few moist crumbs, you’re golden. After baking, let them cool completely before frosting.

    Frosting the Brownies

    Once your brownies are cool, it’s time to frost! Start by mixing the white or vanilla frosting with the orange centers of about 10 Oreo cookies. Add a teaspoon of orange food coloring gel and blend until smooth and vibrant. Spread this orange frosting evenly over your cooled brownies. Let it set in the refrigerator for about 30 minutes to solidify. After that, slather on the milk chocolate frosting for that extra layer of decadence, and sprinkle crumbled Oreos on top for added crunch and decoration. These layered beauties are coming together!

    Serving Suggestions

    When it comes to cutting and serving your Oreo Layered Halloween Brownies, aim for 3×2-inch squares. They’re easier to handle and perfect for sharing! I suggest serving them chilled for a firmer texture or at room temperature for a softer, gooier bite. Either way, these brownies are bound to impress! Pair them with a glass of cold milk or a scoop of vanilla ice cream for an unforgettable treat. Happy sharing!

    Tips for Success

    • Ensure your eggs are at room temperature for better mixing.
    • Don’t overmix the brownie batter; a few lumps are okay.
    • For cleaner cuts, use a hot knife to slice the brownies.
    • Experiment with different Oreo flavors for a unique twist.
    • Allow brownies to cool completely to prevent frosting from melting.

    Equipment Needed

    • 9×9-inch baking pan: Line with parchment paper or use a non-stick spray.
    • Mixing bowl: A large bowl is essential for combining ingredients easily.
    • Whisk or stand mixer: Use a whisk for simple mixing, or a stand mixer for ease.
    • Spatula: Helpful for spreading frosting evenly.
    • Toothpick: Perfect for checking brownie doneness.

    Variations

    • For a gluten-free option, use a gluten-free brownie mix and ensure your Oreo cookies are gluten-free.
    • Substitute half the vegetable oil with applesauce for a lighter brownie with added moisture.
    • Add crushed candy corn or spooky sprinkles into the frosting for extra festive flair.
    • Experiment with different Oreo flavors such as mint or pumpkin spice to switch up the taste.
    • Try layering in a cream cheese frosting in addition to the chocolate for a rich twist.

    Serving Suggestions

    • Pair your Oreo Layered Halloween Brownies with a glass of cold milk for the ultimate indulgence.
    • Serve alongside a scoop of vanilla ice cream to create a delightful contrast of flavors.
    • Garnish with festive sprinkles for an eye-catching presentation at your Halloween gatherings.
    • Arrange on a colorful platter for a spooky dessert table centerpiece.

    FAQs about Oreo Layered Halloween Brownies

    Can I make these brownies ahead of time?

    Absolutely! You can prepare the brownies a day in advance. Just make sure to store them in an airtight container to keep them fresh. Frost them right before serving for the best taste and texture.

    What can I use if I can’t find orange Oreos?

    No worries! If you can’t find those festive orange-filled Oreos, regular Oreos will do just fine. You can also use any Halloween-themed cookies to capture that spooky essence!

    How can I make the frosting less sweet?

    If you want a less sweet frosting, mix the milk chocolate frosting with some cream cheese frosting. This combo adds a tangy flavor that balances the sweetness perfectly!

    What else can I add for texture?

    For extra crunch, sprinkle in some chopped nuts or use crushed pretzels before pouring the brownie batter into the pan. They add a delightful layer of flavor!

    Are these brownies suitable for different dietary needs?

    Yes! You can easily modify the recipe for gluten-free and vegan diets. Just use a gluten-free brownie mix and replace the eggs with applesauce or flaxseed meal. Enjoying these delightful treats is possible for everyone!

    Final Thoughts

    These Oreo Layered Halloween Brownies are more than just a dessert; they’re a celebration of the festive spirit! The joy of creating these delightful treats in your kitchen brings warmth to any gathering, transforming ordinary moments into sweet memories. Whether you’re cooking for your family or mingling with friends, these brownies will surely be a hit. Let the vibrant colors and delicious layers inspire laughter and delight, reminding you that baking can be a fun, shared experience. So roll up your sleeves, get your ingredients out, and let the magic of these brownies unfold!


    Print

    clock clock iconcutlery cutlery iconflag flag iconfolder folder iconinstagram instagram iconpinterest pinterest iconfacebook facebook iconprint print iconsquares squares iconheart heart iconheart solid heart solid icon

    Description

    These Oreo Layered Halloween Brownies are a decadent treat combining rich chocolate brownies, creamy frostings, and festive Oreo cookies.


    • 1 package brownie mix
    • 2 large eggs
    • 1/3 cup vegetable oil
    • 1/3 cup whole milk
    • 1 package Oreo cookies with orange filling
    • 1 can milk chocolate frosting
    • 1 can white or vanilla frosting
    • 1 teaspoon orange food coloring gel

    1. Preheat oven to 350°F and line a 9×9-inch baking pan with parchment paper.
    2. In a large bowl, combine brownie mix, eggs, vegetable oil, and milk. Mix thoroughly until smooth using a whisk or stand mixer.
    3. Pour batter into prepared pan and spread evenly. Press Oreo cookies with orange filling gently into the surface to cover.
    4. Bake for 25-30 minutes, or until a toothpick inserted in the center comes out clean. Remove from oven and let cool completely before frosting.
    5. Mix white or vanilla frosting with the orange centers of about 10 Oreo cookies and orange food coloring gel until vibrant and smooth.
    6. Spread orange frosting evenly over cooled brownies. Refrigerate for 30 minutes to allow frosting to set.
    7. Spread milk chocolate frosting over set orange frosting. Top with crumbled remaining Oreos for garnish.
    8. Cut into 3×2-inch squares and serve chilled or at room temperature for softer texture.

    Notes

    • For a more intense orange color, add additional food coloring as needed.
    • Store any leftovers in an airtight container.
    • Prep Time: 20 minutes
    • Cook Time: 30 minutes
    • Category: Dessert
    • Method: Baking
    • Cuisine: American

    Nutrition

    • Serving Size: 1 brownie
    • Calories: 250
    • Sugar: 20g
    • Sodium: 180mg
    • Fat: 12g
    • Saturated Fat: 5g
    • Unsaturated Fat: 7g
    • Trans Fat: 0g
    • Carbohydrates: 35g
    • Fiber: 2g
    • Protein: 3g
    • Cholesterol: 30mg

    Sharing is caring!

  • Caramel Apple Cups

    Caramel Apple Cups


    Introduction to Caramel Apple Cups

    Hey there, fellow dessert lovers! If you’re anything like me, balancing a busy schedule and satisfying sweet cravings can be quite the challenge. That’s where these delightful Caramel Apple Cups come into play—a quick, no-bake solution that’s perfect for impressing friends or just treating yourself after a long day. Picture fresh cinnamon-spiced apples nestled beneath a fluffy caramel mousse, all snuggled up in a crunchy crust. It’s a sweet slice of autumn bliss that’s both delightful and simple to whip up. Let’s dive into this treat that promises to warm your heart!

    Why You’ll Love This Caramel Apple Cups

    These Caramel Apple Cups are a game changer for busy moms and professionals alike. They’re quick to whip up, taking only 40 minutes from start to finish. Plus, each cup offers that warm, comforting flavor of fall in every bite! It’s the perfect dessert for any occasion, whether it’s a family gathering or a simple weeknight treat. Trust me, your loved ones will be begging for more!

    Ingredients for Caramel Apple Cups

    Gathering the right ingredients is just one of the joys of cooking! For these scrumptious Caramel Apple Cups, you’ll need a few delightful components to create the flavors that will embrace your senses like a warm hug.

    • Cinnamon Powder: This spice adds warmth and a hint of autumn flavor, making the apples sing.
    • Apples: Juicy and sweet or tart—choose your favorite! Peeled and diced, they form the heart of the dessert.
    • Light Brown Sugar: It gives a rich sweetness and a subtle molasses flavor, perfect for caramelizing the apples.
    • Heavy Cream: A must for that luscious mousse texture, it whips up beautifully to create fluffy layers.
    • Instant Vanilla Pudding Powder: This will help thicken the mousse while adding a creamy vanilla flavor.
    • Vanilla Wafers: These provide the crunch you’re going to love, creating a perfect base for the cups.
    • Cold Milk: Essential for mixing into the pudding; it helps achieve a smooth and creamy texture.
    • Salted Caramel Sauce: Whether homemade or store-bought, it elevates the flavor and adds decadence to the mousse.
    • Butter: It can be salted or unsalted. This gem helps bind the cookie base and enriches the overall taste.
    • Extra Caramel Sauce: We can’t resist drizzling a bit more on top for an extra touch of indulgence!

    For those looking to take a creative leap, feel free to tweak the ingredients! Nuts paired with the mousse or chocolate chips tucked in can add delightful surprise elements. The ingredient amounts are detailed at the bottom of the article for easy access and printing. Let’s make the magic happen!

    How to Make Caramel Apple Cups

    Now, let’s get to the fun part! Making these Caramel Apple Cups is like bringing a bit of fall into your kitchen and filling it with delightful aromas. I’ll guide you step-by-step, ensuring you create a dessert that’s as pleasing to look at as it is to eat.

    Step 1: Prepare the Cinnamon Apples

    Start by heating a medium pot over a low flame. Toss the peeled, diced apples with light brown sugar and cinnamon powder, letting the mixture mingle. As it begins to simmer, you’ll start to notice the comforting aroma wafting through your home. Stir occasionally until the apples soften and become syrupy, creating a sweet, sticky sauce. Once they’re tender and fragrant, let them cool for a bit. Trust me, this step sets the stage for a cozy dessert.

    Step 2: Create the Base

    While the apples are cooling, let’s whip up the delicious base! In a bowl, combine melted butter with finely crushed vanilla wafers. Mix everything together until it’s nicely combined—this mixture should feel a tad sandy yet buttery. Now, divide it into 28 small clear cups, pressing firmly to create an even, crunchy base. It’s this delightful crunch that will perfectly complement the smoothness of the mousse later on.

    Step 3: Make the Caramel Mousse

    For the decadently fluffy mousse, whisk together the instant vanilla pudding powder with cold milk in a mixing bowl. Keep whisking until you achieve a smooth, creamy consistency. This step will take just a few minutes. Now, gently fold in the salted caramel sauce—this is where the magic happens! The combination of flavors creates a luscious caramel mousse that everyone will adore.

    Step 4: Whip the Cream

    In another bowl, take that chilled heavy cream and whip it until you can see firm peaks forming. It’s like watching clouds turn into whipped wonders! This fluffy cream will be folded into the mousse mixture, adding an airiness that feels heavenly. Make sure not to overwhip; the goal is to achieve a thick yet creamy texture.

    Step 5: Assemble the Cups

    Now comes the fun part—assembly! Scoop the caramel mousse into a piping bag and pipe a generous layer over the crumb base in each cup, smoothing it out for an elegant finish. Next, add a heaping spoonful of your cinnamon apples on top of the mousse. If you’re feeling adventurous, drizzle some extra caramel sauce over the apples for an indulgent touch! Secure the lids on your cups and chill them in the fridge. You can enjoy them right away, but if they sit for a bit, the flavors get even better. Enjoy every delightful bite!

    Tips for Success

    • Use fresh, juicy apples for maximum flavor. Honeycrisp or Granny Smith work wonderfully!
    • Chill your mixing bowl and beaters before whipping the cream for an easier process.
    • For a fancier presentation, top each cup with a sprinkle of cinnamon or a few chopped nuts.
    • Feel free to make these treats a day ahead—flavors meld beautifully overnight!
    • Don’t rush the chilling time; patience is key for the best texture!

    Equipment Needed

    • Medium Pot: For simmering the cinnamon apples—any sturdy pot will do!
    • Mixing Bowls: A couple of bowls for mixing ingredients; feel free to use plastic or glass.
    • Hand Mixer: This is perfect for whipping cream; a whisk works too, just takes a bit longer.
    • Piping Bag: To pipe the mousse easily; a zip-top bag with the corner cut off is a great alternative!
    • Clear Cups: Small clear cups for serving; any dessert cups or even small glass jars will work beautifully!

    Variations for Caramel Apple Cups

    • Nuts: Add some chopped pecans or walnuts to the mousse for a delightful crunch and enhanced flavor.
    • Chocolate Drizzle: Drizzle melted chocolate over the top for an extra layer of decadence—talk about a sweet upgrade!
    • Gluten-Free Option: Swap vanilla wafers with gluten-free cookies or crushed gluten-free graham crackers.
    • Dairy-Free Version: Use coconut cream instead of heavy cream, and plant-based milk for a delicious non-dairy twist.
    • Spiced Apples: Mix in a pinch of nutmeg or ginger with the cinnamon for a flavorful kick!

    Serving Suggestions

    • Pair your Caramel Apple Cups with a scoop of vanilla ice cream for a classic dessert combo.
    • Enjoy them alongside a steaming cup of spiced chai or hot apple cider to elevate the autumn vibes.
    • For presentation, garnish each cup with a sprinkle of cinnamon or a few thin apple slices!

    FAQs about Caramel Apple Cups

    Got questions about these irresistible Caramel Apple Cups? No worries, I’ve got you covered! Here are some common queries that might pop up while making or enjoying this delightful dessert.

    Can I make these cups ahead of time? Yes! You can prepare Caramel Apple Cups up to three days in advance. Just keep them chilled in the fridge until you’re ready to serve.

    How should I store leftovers? Store any leftovers in an airtight container in the refrigerator. They will stay fresh and delicious for a couple of days, but let’s be honest—you probably won’t have any left!

    Can I substitute the apples? Absolutely! While the classic combo is delicious, you can try pears or even diced peaches if you’d like a different fruity twist in your cups.

    What if I don’t have a hand mixer? No problem at all! You can whisk by hand; it may take longer, but it’s a great workout and still yields fantastic results. Just be sure to whip until you get those lovely peaks!

    Is this dessert suitable for kids? Definitely! Kids will love the combination of flavors, and it’s a fun dessert to serve at parties or family gatherings. Just watch out for the caramel—it can be sticky!

    Final Thoughts

    Creating these Caramel Apple Cups is more than just whipping up a dessert; it’s about bringing joy to your home. The comforting aroma of cinnamon apples fills the air, while the smooth, velvety caramel mousse invites everyone to dig in. Whether you’re enjoying quiet moments after a hectic day or dazzling friends at a gathering, these sweet cups are sure to delight. Plus, the possibility of customizing them to fit your taste makes this dessert even more enjoyable. So gather your loved ones, savor each bite, and create wonderful memories with this delightful treat!


    Print

    clock clock iconcutlery cutlery iconflag flag iconfolder folder iconinstagram instagram iconpinterest pinterest iconfacebook facebook iconprint print iconsquares squares iconheart heart iconheart solid heart solid icon

    Description

    Indulge in these delicious Caramel Apple Cups, combining the flavors of cinnamon apples and a smooth caramel mousse in a delightful dessert.


    • 2 g of cinnamon powder
    • 500 g apples, peeled, diced into chunks
    • 110 g of light brown sugar
    • 357 g of chilled heavy cream
    • 96 g of instant vanilla pudding powder mix
    • 220 g finely crushed vanilla wafers
    • 244 g milk, cold
    • 75 g ready-made or DIY salted caramel sauce
    • 57 g of butter, melted (can be salted or unsalted)
    • Extra caramel sauce to drizzle on top

    1. Heat a medium pot over a low flame. Toss apples, brown sugar, and cinnamon together. Stir occasionally and let it all simmer till the apples soften and the mix gets syrupy. Leave it to cool.
    2. Blend melted butter with the crumbled wafers in a bowl until they combine nicely. Split this mix across 28 small 2-ounce clear cups and press into a base layer.
    3. Whisk instant pudding powder with cold milk for a smooth consistency. Let it chill in the fridge for 5 minutes.
    4. Stir the salted caramel sauce into the pudding mix. Use a hand mixer set to medium to make it silky.
    5. Whip heavy cream into the caramel-pudding base for 3 to 5 minutes until it becomes thick and fluffy.
    6. Scoop the caramel mousse into a piping bag. Pipe a layer of mousse over the crumb base in each cup.
    7. Spoon the cinnamon apples onto the mousse layer. If you want, drizzle a bit more caramel sauce on top. Secure lids to the cups and chill in the fridge.
    8. You can keep these chilled for up to 3 days or dig in right away!

    Notes

    • You can use either salted or unsalted butter based on your preference.
    • For a twist, add nuts or chocolate chips to the mousse layer.
    • These cups can be made in advance and stored in the fridge for up to 3 days.
    • Prep Time: 30 minutes
    • Cook Time: 10 minutes
    • Category: Dessert
    • Method: No-Bake
    • Cuisine: American

    Nutrition

    • Serving Size: 1 cup
    • Calories: 250
    • Sugar: 18 g
    • Sodium: 150 mg
    • Fat: 10 g
    • Saturated Fat: 6 g
    • Unsaturated Fat: 3 g
    • Trans Fat: 0 g
    • Carbohydrates: 37 g
    • Fiber: 2 g
    • Protein: 2 g
    • Cholesterol: 30 mg

    Sharing is caring!

  • Orange Chocolate Chip Muffins

    Orange Chocolate Chip Muffins


    Introduction to Orange Chocolate Chip Muffins

    Ah, the magic of baking! There’s something about the scent of fresh muffins wafting through the house that feels like a warm hug. Today, I’m excited to share my delightful recipe for Orange Chocolate Chip Muffins. This zesty treat perfectly combines the bright flavors of orange with the rich sweetness of chocolate chips. Imagine hard-working moms needing a quick pick-me-up or professionals wanting something sweet after a long day—this recipe is just what you need! With just 40 minutes, you can whip up a batch that will surely impress your loved ones and satisfy your sweet tooth.

    Why You’ll Love This Orange Chocolate Chip Muffins

    These Orange Chocolate Chip Muffins are a dream come true for busy lives! They come together in a flash, perfect for quick breakfasts or afternoon snacks. Each bite bursts with zesty flavor and gooey chocolate, making them an instant hit, even with picky eaters. Plus, the vibrant orange adds a fresh twist that turns a simple muffin into a delightful, mood-boosting treat. What’s not to love?

    Ingredients for Orange Chocolate Chip Muffins

    To create these scrumptious Orange Chocolate Chip Muffins, you’ll need a few simple ingredients. Here’s a rundown:

    • All-purpose flour: The foundation for our muffins, providing the perfect tender texture.
    • Baking powder: This handy leavening agent gives the muffins that delightful rise.
    • Salt: A pinch enhances the flavors, balancing the sweetness.
    • Egg: Acts as a binder, helping our muffins stay moist and fluffy.
    • Granulated sugar: A touch of sweetness is essential for that comforting bite.
    • Milk: It adds moisture to the batter, ensuring a rich flavor.
    • Melted unsalted butter: The key to a rich, buttery taste in every morsel.
    • Oranges: Fresh oranges bring citrusy brightness; you’ll need them for both juice and chunks.
    • Semi-sweet chocolate chips: The star of the show, adding decadent sweetness and melting bliss.

    For the freshest flavor, always opt for ripe oranges. You can also swap out the semi-sweet chocolate chips for dark or milk chocolate, depending on your preference. Want to make it even healthier? Consider using whole wheat flour or a sugar substitute for a guilt-free indulgence. Exciting flavors await you, with ingredient details available at the bottom for printing!

    How to Make Orange Chocolate Chip Muffins

    Let’s dive into the delightful process of making these Orange Chocolate Chip Muffins! Each step is straightforward, ensuring you feel confident in the kitchen. Don’t worry if you’ve never baked muffins before; I promise it’s easier than you think!

    Step 1: Preheat the Oven

    The first step is to preheat your oven to 380°F. This is crucial for even baking, giving your muffins that perfect rise. While your oven warms up, you can move on to the next steps. Keep your baking sheets ready!

    Step 2: Prepare Dry Ingredients

    Grab a bowl and sift together the all-purpose flour, baking powder, and salt. This step is vital for a light and airy texture in your Orange Chocolate Chip Muffins. Sifting helps eliminate lumps and evenly distributes the baking powder. Set your dry mix aside while we tackle the wet ingredients.

    Step 3: Juice and Chop the Oranges

    Now, let’s get zesty! Cut one orange in half and squeeze it to extract the juice. Make sure to reserve that fragrant juice for later. Next, take your second orange, peel it, and slice it into bite-sized chunks. These fresh orange pieces will add lovely bursts of flavor to each muffin.

    Step 4: Mix Wet Ingredients

    In a separate bowl, combine the egg, granulated sugar, milk, orange chunks, and melted unsalted butter. Use a hand mixer or a whisk to blend this mixture until it’s smooth and well combined. The vibrant colors and aromas at this stage are simply irresistible!

    Step 5: Combine Wet and Dry Mixtures

    Now it’s time to unite the two mixtures! Pour your wet ingredients over the dry ones. This is a moment to be gentle—mix just until everything is moistened. Don’t worry about lumps; a few are perfectly fine. Overmixing can lead to tough muffins, and we want them tender and fluffy.

    Step 6: Add Chocolate Chips

    Here comes the best part! Fold in those semi-sweet chocolate chips gently. Each bite will be a symphony of chocolatey goodness against the zesty backdrop of orange. Make sure the chocolate chips are evenly distributed. You can almost taste the joy already!

    Step 7: Bake the Muffins

    Spoon the batter into your muffin pans, either lined with paper or silicone. Fill them about two-thirds full for perfect domes. Now, pop them in the oven and bake for about 25 minutes. Your kitchen will soon fill with a heavenly aroma, coaxing everyone to gather around!

    Tips for Success

    • Use room temperature ingredients for a smoother batter.
    • Don’t skip sifting the dry ingredients; it helps with fluffiness.
    • Check for doneness by inserting a toothpick; it should come out clean.
    • Let the muffins cool for a few minutes before removing them from the pan.
    • For an extra zesty kick, add a bit of orange zest to the batter!

    Equipment Needed

    • Muffin pan: You can use a standard or silicone muffin pan; silicone makes for easy release.
    • Mixing bowls: A large bowl for wet ingredients and a smaller one for dry.
    • Whisk or hand mixer: Both work wonders for blending ingredients smoothly.
    • Measuring cups and spoons: Ensure accuracy for perfect muffins every time!

    Variations

    • Whole Wheat Option: Substitute half or all of the all-purpose flour with whole wheat flour for a heartier muffin.
    • Gluten-Free: Use a gluten-free flour blend to make these muffins suitable for those with gluten sensitivities.
    • Nuts Galore: Add chopped walnuts or pecans for a delightful crunch and nutty flavor.
    • Fruit Mix: Incorporate mixed berries or diced apples alongside the oranges for a fruity twist.
    • Spiced Up: Enhance flavor by adding cinnamon or nutmeg for a cozy, spiced version of the muffins.

    Serving Suggestions

    • Fresh Coffee: Enjoy these muffins with a steaming cup of coffee for a delightful breakfast.
    • Fruit Platter: Serve alongside a vibrant fruit platter for a refreshing contrast to the rich muffins.
    • Yogurt Dip: A side of Greek yogurt adds creaminess and tang, balancing the sweetness of the muffins.
    • Pretty Display: Arrange muffins on a colorful plate with an orange garnish for an eye-catching presentation.

    FAQs about Orange Chocolate Chip Muffins

    As a fellow muffin aficionado, I know that questions tend to bubble up when it comes to baking. Here are some common queries I’ve encountered about these delightful Orange Chocolate Chip Muffins:

    Can I use other types of chocolate for these muffins?

    Absolutely! While semi-sweet chocolate chips steal the show, you can easily swap them for dark or white chocolate chips. Each option brings its own delicious twist to the muffins.

    How do I store leftover muffins?

    These muffins can be stored in an airtight container, where they’ll stay fresh for up to three days. For longer storage, consider freezing them! Just pop them in a freezer-safe bag, and they’ll be ready for an afternoon treat later.

    Can I make these muffins ahead of time?

    You can definitely prepare the batter in advance. Just store it in the refrigerator for up to 24 hours. When you’re ready to bake, let it sit at room temperature for about 30 minutes before scooping into your muffin pans.

    What can I add to make these muffins more nutritious?

    If you’d like to amp up the nutrition, try adding rolled oats or substitute part of the flour with whole wheat flour. You could also mix in some ground flaxseed or chia seeds—both are great for adding fiber!

    Can these muffins be made vegan?

    Sure thing! To achieve that, replace the egg with a flaxseed egg (1 tablespoon of ground flaxseed mixed with 2.5 tablespoons of water) and use plant-based milk and butter. They’ll still be scrumptious, I promise!

    Final Thoughts

    Baking these Orange Chocolate Chip Muffins is more than just a cooking task; it’s a delightful experience that brings joy to your kitchen! The bright, zesty flavor of oranges paired with rich chocolate creates a harmony that fills your home with warmth and happiness. Each bite offers a loving reminder that even on the busiest days, little moments of sweetness can brighten your spirit. So whether you’re enjoying them with coffee, sharing with family, or savoring a lovely snack, these muffins will definitely put a smile on your face. Happy baking, my friends!


    Print

    clock clock iconcutlery cutlery iconflag flag iconfolder folder iconinstagram instagram iconpinterest pinterest iconfacebook facebook iconprint print iconsquares squares iconheart heart iconheart solid heart solid icon

    Description

    Delicious and zesty muffins infused with orange flavor and semi-sweet chocolate chips.


    • 1 ¾ cups all-purpose flour
    • 1 teaspoon baking powder
    • ¾ teaspoon salt
    • 1 egg
    • ½ cup granulated sugar
    • ½ cup milk
    • ⅓ cup melted unsalted butter
    • 2 whole oranges for juice and pieces
    • 1 cup semi sweet chocolate chips

    1. Preheat oven to 380°F.
    2. Sift flour, baking powder, and salt into a bowl. Set aside.
    3. Cut one orange in half, press out juice, and reserve.
    4. Peel the second orange and slice it into chunks.
    5. In another bowl, add the egg, sugar, milk, orange pieces, juice, and butter.
    6. Mix with a hand mixer or whisk until combined.
    7. Pour the liquid mixture over the dry ingredients.
    8. Mix minimally to create a moist batter.
    9. Fold in the chocolate chips gently.
    10. Spoon batter into silicone or paper-lined muffin pans and bake for 25 minutes.

    Notes

    • For best results, use fresh oranges.
    • Let the muffins cool for a few minutes before serving.
    • These muffins can be stored in an airtight container for up to 3 days.
    • Prep Time: 15 minutes
    • Cook Time: 25 minutes
    • Category: Dessert
    • Method: Baking
    • Cuisine: American

    Nutrition

    • Serving Size: 1 muffin
    • Calories: 180
    • Sugar: 10g
    • Sodium: 150mg
    • Fat: 7g
    • Saturated Fat: 4g
    • Unsaturated Fat: 2g
    • Trans Fat: 0g
    • Carbohydrates: 24g
    • Fiber: 1g
    • Protein: 3g
    • Cholesterol: 30mg

    Sharing is caring!

  • Pizza Boats With Pepperoni

    Pizza Boats With Pepperoni


    Introduction to Pizza Boats With Pepperoni

    Hey there, fellow busy cooks! If you’re anything like me, juggling family, work, and a social life leaves little time for elaborate meals. That’s where these Pizza Boats With Pepperoni come to the rescue! Not only are they a fun twist on the classic pizza we all love, but they’re also quick and easy to whip together—perfect for those hectic evenings. Imagine sinking your teeth into warm, cheesy deliciousness after a long day, and you’ll understand why this recipe will become a family favorite. Let’s dive in and make mealtime fun again!

    Why You’ll Love This Pizza Boats With Pepperoni

    These Pizza Boats With Pepperoni are the epitome of convenience wrapped in cheesy goodness. In just 27 minutes, you can serve a dish that not only satisfies kids’ cravings but also makes adults reminisce about their favorite pizza joints. Plus, with simple ingredients and a quick assembly, you’ll have more time to unwind after dinner. It’s a win-win that brings joy to every busy household!

    Ingredients for Pizza Boats With Pepperoni

    Gathering your ingredients for these delightful Pizza Boats With Pepperoni is part of the fun! Here’s what you’ll need to create this mouthwatering dish:

    • Sea salt: A pinch enhances flavor and complements the savory ingredients.
    • Pepperoni: These classic slices bring that signature pizza taste. Feel free to swap them for turkey pepperoni for a healthier twist.
    • Shredded cheese: Opt for a blend like mozzarella or Italian cheese. It’s gooey, melty perfection!
    • Marinara or spaghetti sauce: Your chosen jar is a quick way to add rich flavor, but homemade is a wonderful alternative if you have time.
    • Lean ground turkey: A low-fat protein option. For vegetarians, consider replacing it with a plant-based ground meat alternative or sautéed mushrooms.
    • Rustic Italian bread: The sturdy base for your boats. Boule or French bread works just as well if that’s what you have on hand.
    • Dried Italian herbs: This mix brings warmth and authenticity. Adding fresh basil or oregano can elevate the flavor even further.

    For those looking to customize, there are endless options! Add bell peppers or olives for crunch and color. Or, crank up the heat with spicy pepperoni or chili flakes. The best part? You can find all the exact measurements for these ingredients at the bottom of the article, ready for printing!

    How to Make Pizza Boats With Pepperoni

    Now that you have your ingredients ready, let’s transform them into delightful Pizza Boats With Pepperoni. Follow these simple steps, and you’ll soon have a meal that both kids and adults will adore!

    Step 1: Preheat the Oven

    First, let’s get that oven going! Preheat it to 450°F. While the oven is warming up, line a baking tray with parchment paper. This little trick not only prevents sticking but also makes cleanup a breeze. It’s the little things that help, right?

    Step 2: Prepare the Bread

    Grab your rustic Italian bread and slice it open lengthwise, like a hot dog bun. Carefully scoop out a bit of the soft middle, creating a shallow well. This helps hold all those tasty toppings. If you can’t find Italian bread, a sturdy baguette or even French bread works just as well!

    Step 3: Cook the Turkey

    Next, it’s time to make that lean ground turkey delicious! Heat a tablespoon of olive oil in a nonstick skillet over medium-high heat. Add your turkey and break it up into crumbles as it cooks. Sprinkle in some sea salt and dried Italian herbs for amazing flavor. If you prefer a vegetarian option, sauté some mushrooms or use plant-based ground meat instead!

    Step 4: Mix in the Sauce

    Once your turkey is cooked through, stir in the marinara sauce. Let it heat for a couple of minutes. This combination not only infuses the turkey with rich flavor but also creates a hearty sauce that complements the cheesy goodness on top!

    Step 5: Assemble the Pizza Boats

    Now for the fun part! Grab your prepared bread, and spread about a cup of the meat sauce over each piece. Then, sprinkle a generous amount of shredded cheese on top. Finish with those pepperoni slices, or add any of your favorite toppings. Get creative—this is your pizza boat!

    Step 6: Bake and Serve

    Carefully place your assembled pizza boats on the baking tray and pop them into the oven. Bake for about 10 to 12 minutes. Keep an eye on them until the cheese is gooey and bubbling. Once baked, cut them into pieces and serve with extra sauce on the side for dipping. Enjoy every cheesy bite!

    Tips for Success

    • Use stale bread for sturdier boats that hold up better with toppings.
    • Prep all your ingredients before starting to keep things organized.
    • Bake in small batches to avoid overcrowding, ensuring even cooking.
    • Experiment with toppings—everyone loves a personalized pizza boat!
    • Make a double batch and freeze extras for last-minute meals.

    Equipment Needed

    • Baking tray: A large one will do, but a cookie sheet works too.
    • Parchment paper: For easy cleanup; aluminum foil is a good substitute.
    • Nonstick skillet: Essential for cooking the turkey; use a regular skillet with a bit more oil if needed.
    • Sharp knife: For slicing the bread effortlessly.

    Variations for Pizza Boats With Pepperoni

    • Vegetarian Delight: Swap the turkey for sautéed zucchini and mushrooms for a veggie-packed twist.
    • Spicy Kick: Use spicy pepperoni or add jalapeños for that fiery flavor boost!
    • Cheesy Overload: Mix in different cheese varieties like gouda or cheddar for a unique taste.
    • Flatbread Variation: Use whole wheat flatbread instead of Italian bread for a lighter option.
    • BBQ Twist: Replace marinara with barbecue sauce and add grilled chicken for a smoky flavor.

    Serving Suggestions for Pizza Boats

    • Crunchy Side Salad: Pair with a fresh garden salad drizzled with vinaigrette for a refreshing contrast.
    • Garlic Bread Sticks: Serve with warm garlic bread sticks for that extra indulgence!
    • Fun Dipping Sauces: Offer marinara, ranch, or spicy aioli for added flavor.
    • Bubbly Drinks: A sparkling water or fruity soda complements the meal perfectly.
    • Creative Plating: Arrange the boats on a colorful platter for a festive presentation.

    FAQs about Pizza Boats With Pepperoni

    Can I make Pizza Boats With Pepperoni in advance?
    Absolutely! You can prepare the filling and assemble the boats a day ahead. Just store them in the fridge and bake them fresh before serving. It’s a great time-saver for busy weeknights!

    What type of bread works best for pizza boats?
    While I love rustic Italian bread, a sturdy baguette or even French bread also works wonderfully. The key is to ensure it can hold up under toppings without getting soggy.

    Can I make these Pizza Boats With Pepperoni gluten-free?
    Definitely! Use gluten-free bread as a base. There are plenty of flavorful options available that hold up just as well.

    How do I store leftovers of Pizza Boats With Pepperoni?
    Store any leftovers in an airtight container in the refrigerator for up to three days. Reheat them in the oven for a few minutes to restore that melty goodness!

    What are some other topping ideas for pizza boats?
    Get adventurous! Try adding bell peppers, olives, or even different proteins like cooked sausage or grilled chicken. The options are endless to customize your pizza boats!

    Final Thoughts

    Cooking these Pizza Boats With Pepperoni isn’t just about feeding your family; it’s about creating joyful moments together. The taste of warm, melted cheese and savory pepperoni can transport you back to pizza nights with friends or family gatherings filled with laughter. Plus, the ease of preparation means you can balance your busy life without sacrificing delicious meals. Whether it’s a simple weeknight dinner or a fun snack for movie night, these pizza boats offer both flavor and efficiency. So, roll up your sleeves, and let the good times roll in your kitchen! Your family will thank you!


    Print

    clock clock iconcutlery cutlery iconflag flag iconfolder folder iconinstagram instagram iconpinterest pinterest iconfacebook facebook iconprint print iconsquares squares iconheart heart iconheart solid heart solid icon

    Description

    Delicious pizza boats topped with pepperoni and melted cheese, perfect for a fun meal or snack.


    • 1/2 tsp sea salt
    • 18 slices of pepperoni
    • 8 oz bag of shredded cheese for pizzas
    • 24 oz jar of marinara or spaghetti sauce
    • 16 oz package of lean ground turkey (99% fat-free)
    • 16 oz loaf of rustic Italian bread
    • 1 tsp dried Italian herbs

    1. Set your oven to 450°F. Place some parchment paper on a baking tray.
    2. Slice the Italian bread open along its length. Remove a bit of the softer middle part, then press down to make a shallow well and leave a border.
    3. Heat a tablespoon of olive oil in a nonstick skillet on medium-high. Break up the turkey into crumbles as you cook it. Add salt and the Italian seasoning to flavor it.
    4. Stir the marinara sauce into the pan with the turkey. Let everything heat through for a couple of minutes.
    5. Spread about a cup of meat sauce over each piece of bread. Sprinkle about a cup of shredded cheese on top, and evenly scatter the pepperoni slices.
    6. Bake for roughly 10 to 12 minutes until the cheese is gooey and melted. Cut into pieces and serve with extra sauce on the side for dipping.

    Notes

    • Feel free to customize with additional toppings like bell peppers or olives.
    • For a spicier version, use spicy pepperoni or add chili flakes.
    • These can be made ahead of time and baked just before serving.
    • Prep Time: 15 minutes
    • Cook Time: 12 minutes
    • Category: Appetizer
    • Method: Baking
    • Cuisine: Italian

    Nutrition

    • Serving Size: 1 pizza boat
    • Calories: 350
    • Sugar: 4g
    • Sodium: 800mg
    • Fat: 14g
    • Saturated Fat: 6g
    • Unsaturated Fat: 6g
    • Trans Fat: 0g
    • Carbohydrates: 35g
    • Fiber: 2g
    • Protein: 20g
    • Cholesterol: 70mg

    Sharing is caring!

  • Blueberry Lemon Creme Cake

    Blueberry Lemon Creme Cake


    Introduction to Blueberry Lemon Creme Cake

    If you’re anything like me, the kitchen is my sanctuary, where I can escape the whirlwind of life.
    The Blueberry Lemon Creme Cake embraces that essence perfectly! This delightful treat intertwines the zesty brightness of lemon with the sweet burst of blueberries, creating a cake so luscious it will steal the show.
    Whether you’re celebrating a special occasion or just need a quick pick-me-up after a busy day, this recipe is your perfect partner.
    It’s easy, refreshing, and, best of all, sure to impress everyone at the table!

    Why You’ll Love This Blueberry Lemon Creme Cake

    This Blueberry Lemon Creme Cake is a game-changer for busy parents and professionals alike.
    It’s simple to whip up, taking just around 55 minutes from start to finish.
    The cake bursts with flavor, balancing the tartness of lemon and the sweetness of fresh blueberries.
    Plus, it’s versatile enough for any occasion, making it a go-to dessert that will have everyone asking for seconds!

    Ingredients for Blueberry Lemon Creme Cake

    When it comes to creating the perfect Blueberry Lemon Creme Cake, the ingredients play a pivotal role in crafting that delicious balance of flavors. Here’s what you’ll need to gather from your pantry or your favorite store.

    • All-purpose flour: Provides structure and ensures your cake rises beautifully.
    • Baking powder: A leavening agent that helps the cake become light and fluffy.
    • Baking soda: Works in tandem with baking powder to further boost the rise.
    • Salt: Enhances flavor and balances the sweetness from the sugar.
    • Unsalted butter: Adds richness and moisture; make sure it’s softened for easy mixing.
    • Granulated sugar: Sweetens the cake perfectly, giving it that delightful taste.
    • Eggs: They act as a binder and contribute to the cake’s texture and richness.
    • Lemon zest: This adds vibrant citrus notes, essential for making it a lemon cake.
    • Freshly squeezed lemon juice: Infuses the cake with tanginess, enhancing the overall flavor.
    • Vanilla extract: A burst of warmth and flavor that complements the lemon and blueberry.
    • Sour cream: Keeps the cake moist and adds a slight tang to balance the sweetness.
    • Fresh blueberries: The stars of the show! They provide juiciness and lovely pops of flavor.
    • Heavy cream: For that luscious lemon cream topping that’s not to be missed.
    • Additional granulated sugar for topping: Sweetens the whipped cream topping to enhance flavor.
    • Lemon juice and zest for topping: Boosts the lemony zing in the topping, making it irresistible!

    For those who might have dietary preferences or availability issues, feel free to swap out the all-purpose flour for a gluten-free blend or use dairy-free butter substitutes.
    The quantities and specifics for these ingredients can be found at the bottom of this article, making it easy to print for your next baking adventure!

    How to Make Blueberry Lemon Creme Cake

    Now that we have gathered our ingredients, let’s dive into the delightful process of making this Blueberry Lemon Creme Cake.
    Follow these straightforward steps to ensure success, and don’t forget to enjoy every moment in your kitchen!

    Step 1: Preheat the Oven and Prepare the Pan

    Start by preheating your oven to 175°C. This ensures our cake bakes evenly.
    Grease and flour a 23×23 centimetre baking pan (or similar size) to prevent sticking.
    Trust me, nothing is worse than a cake that refuses to come out of the pan!

    Step 2: Mix Dry Ingredients

    In a medium bowl, whisk together the all-purpose flour, baking powder, baking soda, and salt.
    This vital step creates the foundation for a well-structured cake.
    Properly mixing dry ingredients distributes the leavening agents evenly, resulting in that glorious rise we all cherish!

    Step 3: Cream the Butter and Sugar

    In a large mixing bowl, beat the softened butter and granulated sugar together until the mixture becomes light and fluffy.
    This is crucial for creating a tender cake texture.
    Incorporating air into the batter here gives the cake a delightful lift and bounce, making every bite a joy!

    Step 4: Incorporate Eggs and Flavorings

    Add the eggs one at a time, beating well after each addition.
    Eggs are the backbone of this cake, adding moisture and richness to the mix.
    Next, blend in the lemon zest, lemon juice, and vanilla extract for that delicious flavor explosion!
    Trust me, your taste buds will dance with delight!

    Step 5: Combine Dry Ingredients and Sour Cream

    Now, it’s time to alternate adding the dry ingredient mixture and sour cream to the wet ingredients, starting and ending with the dry mix.
    This technique prevents the batter from becoming too dense by maintaining the right texture.
    Mix just until combined — over-mixing could lead to a tough cake!

    Step 6: Fold in the Blueberries

    Gently fold the fresh blueberries into the batter.
    This technique is key for maintaining the berries’ integrity, ensuring they stay whole rather than becoming mushy.
    Those luscious little gems will bring bursts of flavor throughout the cake, so treat them gently!

    Step 7: Bake the Cake

    Spread the batter evenly into your prepared pan and pop it into the oven.
    Bake for 30 to 35 minutes. To check for doneness, insert a skewer in the center; it should come out clean or with a few crumbs.
    Keep an eye on the cake as it approaches the baking time; each oven can be a bit unpredictable!

    Step 8: Cool and Prepare the Topping

    Once the cake is done baking, allow it to cool in the pan for several minutes before transferring it to a wire rack.
    Let it cool completely. Meanwhile, whip the heavy cream until it begins to thicken, then gradually mix in sugar and lemon juice with zest.
    This luscious lemon cream will be the cherry on top of your stunning cake!

    Tips for Success

    • Always use room temperature ingredients for a smoother batter.
    • Measure flour correctly; spoon it into the measuring cup instead of scooping to avoid packing.
    • For fluffier whipped cream, start with cold heavy cream and a chilled bowl.
    • Let the cake sit for a few hours before serving to enhance the flavors.
    • Don’t skip cooling completely before frosting; it helps maintain the topping’s texture!

    Equipment Needed

    • Mixing bowls: Use glass or stainless steel; they handle mixing beautifully.
    • Electric mixer: A hand mixer works just as well if you’re short on space.
    • Measuring cups and spoons: Essential for accuracy in baking.
    • Baking pan: A 23×23 cm cake pan; feel free to use a similar size!
    • Wire rack: Necessary for proper cooling; any heat-safe surface will do.

    Variations

    • Gluten-free: Substitute all-purpose flour with a gluten-free blend for a delicious gluten-free Blueberry Lemon Creme Cake.
    • Different fruits: Swap blueberries with raspberries, strawberries, or even peaches for a twist on flavors.
    • Reduced sugar: Use a sugar substitute like stevia or monk fruit for a lower-sugar option that still satisfies your sweet tooth.
    • Dairy-free: Replace butter with coconut oil or a dairy-free substitute and use almond or coconut milk in place of sour cream.
    • Add-ins: Mix in nuts like walnuts or pecans for added texture and flavor.

    Serving Suggestions for Blueberry Lemon Creme Cake

    • Serve with a dollop of vanilla ice cream to complement the zingy flavors.
    • Pair it with a refreshing glass of iced tea or sparkling lemonade.
    • Garnish with fresh mint leaves for a lovely pop of color.
    • Drizzle a little lemon glaze on top for an extra zing.
    • Present on a beautiful cake stand for an impressive display!

    FAQs about Blueberry Lemon Creme Cake

    I know you might have some questions swirling around in your mind about this Blueberry Lemon Creme Cake.
    So, let’s dive into some frequently asked questions to clear things up!

    Can I use frozen blueberries instead of fresh?
    Absolutely! Just make sure to thaw and drain them to prevent excess moisture in your batter.
    Frozen blueberries will still provide that delightful burst of flavor!

    How do I store leftover cake?
    Keep any leftovers in an airtight container in the refrigerator.
    It should stay fresh for up to three days. Just gently reheat if desired.

    What can I substitute for sour cream?
    You can use Greek yogurt or buttermilk as excellent alternatives.
    They’ll maintain the cake’s moisture while adding a nice tang.

    Can I make this cake ahead of time?
    Yes! This Blueberry Lemon Creme Cake is great for making ahead.
    Let it cool completely, then wrap it tightly and store it in the fridge for up to two days.

    Can I add a glaze to this cake?
    Certainly! A simple lemon glaze made with powdered sugar and lemon juice would add an extra sweet-tart punch.
    Drizzle it on right before serving for a beautiful presentation!

    Final Thoughts

    Baking this Blueberry Lemon Creme Cake is more than just creating a delicious dessert; it’s an experience filled with warmth and joy.
    The bright, tart flavor of lemon combined with sweet blueberries evoke memories of summer days, family gatherings, and a sense of togetherness.
    Each slice brings a delightful surprise with its creamy topping and fluffy texture.
    Whether you’re enjoying it quietly with a cup of tea or sharing it at a celebration, this cake serves as a reminder that simple pleasures can create the most wonderful moments.
    I hope it brings you as much joy as it has brought me!


    Print

    clock clock iconcutlery cutlery iconflag flag iconfolder folder iconinstagram instagram iconpinterest pinterest iconfacebook facebook iconprint print iconsquares squares iconheart heart iconheart solid heart solid icon

    Description

    A delightful Blueberry Lemon Creme Cake that combines the tanginess of lemon with the sweetness of blueberries, perfect for any occasion.


    • 190 grams all-purpose flour
    • 1.5 teaspoons baking powder
    • 0.5 teaspoon baking soda
    • 0.25 teaspoon salt
    • 115 grams unsalted butter, softened
    • 200 grams granulated sugar
    • 2 large eggs
    • 1 tablespoon finely grated lemon zest
    • 2 tablespoons freshly squeezed lemon juice
    • 1 teaspoon vanilla extract
    • 240 grams sour cream
    • 220 grams fresh blueberries, or thawed and drained if frozen
    • 240 millilitres heavy cream
    • 67 grams granulated sugar (for topping)
    • 2 tablespoons freshly squeezed lemon juice (for topping)
    • 1 tablespoon finely grated lemon zest (for topping)

    1. Preheat the oven to 175°C and grease and flour a 23×23 centimetre baking pan or equivalent sized pan.
    2. In a medium bowl, whisk together the flour, baking powder, baking soda, and salt. Set this mixture aside.
    3. In a large mixing bowl, beat the softened butter and granulated sugar together until the mixture is light and fluffy.
    4. Add the eggs one at a time, beating well after each addition. Mix in the lemon zest, lemon juice, and vanilla extract.
    5. Alternately add the dry ingredient mixture and sour cream to the wet ingredients, beginning and ending with the dry mixture. Mix only until just combined.
    6. Gently fold the blueberries into the batter, taking care not to crush them.
    7. Spread the batter evenly into the prepared pan.
    8. Bake for 30 to 35 minutes or until a skewer inserted into the centre comes out clean.
    9. Remove the cake from the oven and let it cool in the pan for several minutes. Transfer to a wire rack and allow to cool completely.
    10. While the cake cools, whip the heavy cream with an electric mixer until it begins to thicken. Gradually add the sugar, lemon juice, and lemon zest, then whip until soft peaks form.
    11. Once the cake has cooled completely, spread the Lemon Creme Topping over the top. Slice and serve.

    Notes

    • Ensure all ingredients are at room temperature for best results.
    • For a richer flavor, let the cake sit for a few hours before serving to allow the flavors to meld.
    • Store leftover cake in an airtight container in the refrigerator.
    • Prep Time: 20 minutes
    • Cook Time: 35 minutes
    • Category: Dessert
    • Method: Baking
    • Cuisine: American

    Nutrition

    • Serving Size: 1 slice
    • Calories: 320
    • Sugar: 20g
    • Sodium: 150mg
    • Fat: 18g
    • Saturated Fat: 10g
    • Unsaturated Fat: 5g
    • Trans Fat: 0g
    • Carbohydrates: 36g
    • Fiber: 1g
    • Protein: 3g
    • Cholesterol: 70mg

    Sharing is caring!

  • Garlic Butter Chicken Broccoli

    Garlic Butter Chicken Broccoli


    Introduction to Garlic Butter Chicken Broccoli

    Hey there, fellow busy moms and professionals! If you’re anything like me, you know the struggle of whipping up a delicious dinner after a long day. Enter Garlic Butter Chicken Broccoli, a dish that promises not only flavor but also health in every bite. This recipe is a lifesaver, combining tender chicken and vibrant broccoli all enveloped in a rich, savory garlic butter sauce. It’s quick, it’s easy, and most importantly—it’s a meal the whole family will love. So, grab your skillet and let’s transform dinner into a delightful experience!

    Why You’ll Love This Garlic Butter Chicken Broccoli

    This Garlic Butter Chicken Broccoli is a true gem for busy nights. With just 25 minutes from start to finish, it’s an absolute time-saver. The rich, buttery garlic sauce elevates simple chicken and broccoli into something extraordinary. Plus, it’s packed with protein and nutrients without skimping on flavor. You’ll feel good serving this dish, and chances are, your family will be asking for seconds!

    Ingredients for Garlic Butter Chicken Broccoli

    Let’s dive into the vibrant ingredients that make this Garlic Butter Chicken Broccoli a standout dish. Each component not only contributes to the flavor but also adds a touch of nutrition to our meal.

    • Boneless skinless chicken breasts: Lean protein that cooks quickly and stays juicy, making it perfect for busy evenings.
    • Fresh broccoli florets: Rich in vitamins and minerals, broccoli gives a vibrant green crunch and packs a nutrient punch.
    • Unsalted butter: The base for our rich garlic sauce. Unsalted keeps flavor balanced, allowing us to control the sodium.
    • Olive oil: Adds healthy fats and helps to sauté the chicken until golden. You could use another oil if you prefer.
    • Garlic: Freshly minced garlic is the heart of the dish, providing that irresistible aroma and flavor.
    • Soy sauce: A splash of umami goodness that ties the flavors together. Low-sodium options can be used for a lighter touch.
    • Lemon juice: A zesty addition that brightens up the sauce and balances the richness of the butter.
    • Red pepper flakes: Optional, but if you like a bit of heat, these will add that perfect kick to the dish.
    • Salt and black pepper: Essential seasonings that enhance the flavors of all ingredients. Always season to taste!
    • Sesame seeds: A lovely garnish to add a touch of elegance (and crunch) if you wish.
    • Chopped fresh parsley: Brightens the plate and adds a fresh flavor, suitable for garnishing.
    • Water: Just a little is needed for steaming the broccoli to keep it vibrant and crisp.

    For exact measurements of these ingredients, be sure to check the end of the article. You’ll find a handy printout available for you!

    How to Make Garlic Butter Chicken Broccoli

    Ready to bring this delicious Garlic Butter Chicken Broccoli to life? Follow these simple steps, and you’ll be amazed at how quickly this flavorful dish comes together. Let’s get started!

    Step 1: Prepare the Chicken

    First things first, grab a large skillet and heat up some olive oil over medium-high heat. Once the oil is hot, toss in those bite-sized pieces of boneless, skinless chicken. Season them with salt and black pepper to your liking. Sauté the chicken for about 5-6 minutes, turning occasionally, until they’re golden brown and cooked through. A little patience here pays off big time! Once done, transfer the chicken to a plate and set aside.

    Step 2: Steam the Broccoli

    In the same skillet that held your chicken, add just 60 ml of water and your fresh broccoli florets. Cover the skillet and let the broccoli steam for 2-3 minutes. This quick steaming will help the broccoli stay crisp and vibrant while infusing it with flavors. After a couple of minutes, drain any excess water—nobody wants a soggy mess!

    Step 3: Make the Garlic Butter Sauce

    Now for the magic! Reduce the heat to medium-low and add the unsalted butter directly to the skillet. Let it melt, then add the minced garlic. Cook for about 30 seconds until the garlic becomes fragrant. Oh, that smell is pure goodness! Next, stir in the soy sauce, lemon juice, and red pepper flakes if you choose to use them. Mix everything thoroughly—you’ll want every bit of chicken and broccoli to bask in that luscious garlic butter sauce!

    Step 4: Combine Ingredients

    It’s time to bring it all together! Return your cooked chicken to the skillet and toss it in the garlic butter sauce. Stir gently for 1-2 minutes, making sure that every piece is coated evenly. Then, add the steamed broccoli back to the mix. Gently stir to combine everything, and just like that, your Garlic Butter Chicken Broccoli is looking fabulous.

    Step 5: Final Touches

    Before serving, it’s time for those finishing touches. If you’d like, sprinkle some sesame seeds and chopped fresh parsley on top for an added pop of color and crunch. This Garlic Butter Chicken Broccoli can be enjoyed on its own or served over rice, pasta, or cauliflower rice. The choices are endless! Serve it hot and watch your family dig in.

    Tips for Success

    • Prep ingredients ahead of time to save precious minutes when cooking.
    • Don’t overcrowd the skillet; cook chicken in batches if needed for a perfect sear.
    • Choose vibrant broccoli to ensure it’s fresh and crunchy in your dish.
    • Adjust the garlic and spice levels based on your family’s preference.
    • Keep a close eye on the garlic; it can burn quickly!

    Equipment Needed

    • Large skillet: A non-stick skillet works great for easy cooking and cleanup.
    • Spatula: A wooden or silicone spatula is perfect for stirring without scratching your skillet.
    • Measuring spoons: Essential for accurately measuring out ingredients.
    • Cutting board and knife: For chopping chicken and broccoli with ease.
    • Steamer basket (optional): If you have one, it can help steam the broccoli perfectly.

    Variations of Garlic Butter Chicken Broccoli

    • Make it spicy: Add more red pepper flakes or a dash of sriracha for a fiery kick.
    • Go vegetarian: Substitute chicken with firm tofu or chickpeas for a plant-based protein option.
    • Change the veggies: Incorporate other favorites like bell peppers, snap peas, or zucchini for added color and variety.
    • Low-carb option: Serve it over cauliflower rice instead of traditional rice or pasta for a lighter meal.
    • Herb-infused: Add herbs like thyme, dill, or basil to the garlic butter for an extra layer of flavor.

    Serving Suggestions

    • Pair with fluffy white rice or quinoa to soak up that delicious garlic butter sauce.
    • Serve alongside a crisp green salad for a refreshing contrast.
    • Pour a glass of chilled white wine or sparkling water for a simple touch of elegance.
    • Garnish plates with lemon wedges to add a zesty flair.
    • Try a sprinkle of chili flakes for those who want a bit of extra heat.

    FAQs about Garlic Butter Chicken Broccoli

    Got questions about this tasty Garlic Butter Chicken Broccoli? No problem! Let’s tackle some common inquiries that might pop up as you whip up this delightful dish.

    Can I use frozen broccoli instead of fresh?

    Absolutely! Frozen broccoli works well in this recipe. Just steam it according to package instructions before adding it to your garlic butter sauce.

    What can I use instead of chicken?

    If you’re looking for alternatives, firm tofu or cooked chickpeas are excellent substitutes. Both provide protein and will absorb the delicious garlic butter flavor.

    How can I adjust the spiciness?

    If you’re not a fan of heat, skip the red pepper flakes or use just a pinch. For those who love a kick, feel free to add more or even drizzle some hot sauce on top when serving!

    What sides go well with this dish?

    This Garlic Butter Chicken Broccoli can be served with steamed rice, quinoa, or noodles. A side salad can also complement it beautifully!

    How do I store leftovers?

    Store any leftovers in an airtight container in the fridge for up to 3 days. Just reheat in the microwave or on the stovetop until warmed through—so easy!

    Final Thoughts

    This Garlic Butter Chicken Broccoli brings joy not only to the dinner table but also to the hearts of my family. The way the rich buttery sauce envelops the chicken and broccoli is enough to turn a simple weeknight meal into a cozy family gathering.

    I love how quick it is to prepare, leaving us with more time to share stories and laughter at the end of the day. It’s a delightful reminder that nutritious meals can also be flavorful, and with each bite, you’ll savor the love and care put into cooking at home. Enjoy every delicious moment!


    Print

    clock clock iconcutlery cutlery iconflag flag iconfolder folder iconinstagram instagram iconpinterest pinterest iconfacebook facebook iconprint print iconsquares squares iconheart heart iconheart solid heart solid icon

    Description

    A flavorful and healthy dish combining chicken, broccoli, and a savory garlic butter sauce.


    • 2 boneless, skinless chicken breasts, cut into bite-sized pieces
    • 2 cups fresh broccoli florets
    • 3 tablespoons unsalted butter
    • 1 tablespoon olive oil
    • 4 cloves garlic, minced
    • 1 tablespoon soy sauce
    • 1 teaspoon lemon juice
    • 1/2 teaspoon red pepper flakes (optional)
    • Salt, to taste
    • Black pepper, to taste
    • 1/4 teaspoon sesame seeds (optional, for garnish)
    • 1 tablespoon chopped fresh parsley (optional, for garnish)
    • 60 ml water (for steaming broccoli)

    1. Heat olive oil in a large skillet over medium-high heat. Add chicken pieces, season with salt and black pepper, and sauté for 5-6 minutes, turning occasionally, until golden and cooked through. Transfer chicken to a plate and set aside.
    2. In the same skillet, add 60 ml water and broccoli florets. Cover and steam for 2-3 minutes until broccoli is slightly tender but crisp. Drain off any excess water.
    3. Reduce heat to medium-low. Melt butter in the skillet. Add minced garlic and cook for 30 seconds until aromatic.
    4. Stir in soy sauce, lemon juice, and red pepper flakes (if using) to the garlic butter. Mix thoroughly.
    5. Return cooked chicken to the skillet. Toss in the garlic butter sauce for 1-2 minutes to evenly coat.
    6. Add steamed broccoli to the skillet and stir to combine all components.
    7. Remove from heat. Garnish with sesame seeds and chopped fresh parsley if desired. Serve hot on its own or with rice, pasta, or cauliflower rice.

    Notes

    • Adjust the level of red pepper flakes according to your preference for spiciness.
    • This dish can be served with rice or pasta for a more filling meal.
    • For extra flavor, you can add other vegetables to the mix.
    • Prep Time: 10 minutes
    • Cook Time: 15 minutes
    • Category: Main Dish
    • Method: Sautéing & Steaming
    • Cuisine: American

    Nutrition

    • Serving Size: 1 serving
    • Calories: 300
    • Sugar: 2g
    • Sodium: 600mg
    • Fat: 18g
    • Saturated Fat: 7g
    • Unsaturated Fat: 8g
    • Trans Fat: 0g
    • Carbohydrates: 8g
    • Fiber: 3g
    • Protein: 24g
    • Cholesterol: 75mg

    Sharing is caring!

  • Pumpkin Pie Tacos

    Pumpkin Pie Tacos


    Introduction to Pumpkin Pie Tacos

    As a busy mom, I know how challenging it can be to whip up something special yet simple. That’s where these delightful Pumpkin Pie Tacos come into play! This recipe takes the classic comfort of pumpkin pie and turns it into a playful, handheld treat. Perfect for impressive desserts at gatherings or just a cozy family night at home, these tacos will have everyone smiling. Plus, who doesn’t love combining the best of both tacos and dessert? It’s a fun twist that’s not just quick to prepare, but also a real crowd-pleaser!

    Why You’ll Love This Pumpkin Pie Tacos

    These Pumpkin Pie Tacos are not just easy to make; they’re a delicious way to celebrate fall flavors with a creative twist. In just 30 minutes, you can prepare these delightful treats, making them perfect for busy nights when you want something special. Their fun shape and combination of creamy pumpkin filling and sweet whipped cream will have kids and adults alike clamoring for seconds. Honestly, who can resist?

    Ingredients for Pumpkin Pie Tacos

    Gathering the right ingredients is the first step in crafting your delightful Pumpkin Pie Tacos. Each element plays a key role in achieving that perfect blend of flavors. Here’s what you’ll need:

    • Tortillas: Look for 8-inch tortillas, which form the base for our taco shells. You can use flour or corn, depending on your preference.
    • Granulated Sugar: This sweetener adds a touch of sweetness to our cinnamon sugar coating, making every bite delightful.
    • Ground Cinnamon: A must-have spice that infuses warmth and familiarity, capturing the essence of fall in each taco.
    • Butter: Melted butter gives the tortillas a golden brown, crispy finish. You can use unsalted if you’re watching sodium levels.
    • Cream Cheese: Softened cream cheese serves as the creamy base for our filling. It offers richness and helps bind the flavors together.
    • Powdered Sugar: This finisher adds sweetness and helps create a silky texture in the cream cheese mixture.
    • Canned Pumpkin Puree: The star ingredient! It brings that earthy pumpkin flavor and vibrant color that makes these tacos special.
    • Pure Vanilla Extract: A splash of vanilla enhances all the flavors, infusing the filling with a lovely aroma.
    • Pumpkin Pie Spice: This magical blend of nutmeg, ginger, and cloves is essential for that classic pumpkin pie taste.
    • Heavy Whipping Cream: It’s whipped into fluffy perfection for a light and airy topping that completes our tacos.
    • Chopped Pecans: Optional but delightful! These add a crunchy texture and nutty flavor, making your tacos even more tempting.

    For exact quantities and printing, make sure to check the bottom of the article. Now, let’s get ready to transform these ingredients into something truly scrumptious!

    How to Make Pumpkin Pie Tacos

    Let the fun begin! Making Pumpkin Pie Tacos is a delightful adventure. Each step is straightforward, and before you know it, you’ll have a batch of scrumptious treats. Let’s dive right into the process.

    Step 1: Preheat and Prepare the Tortilla Shells

    Start by preheating your oven to 400°F. This will ensure our taco shells bake perfectly crispy!

    Next, grab those tortillas! I like to use a cookie cutter to cut rounds out of each tortilla, making about 3-4 rounds per tortilla. This means you’ll end up with around 20 lovely taco shells.

    Step 2: Create the Cinnamon Sugar Coating

    Now it’s time to add a sweet touch! In a small bowl, mix together granulated sugar and ground cinnamon. This simple combination makes the tortillas irresistible!

    To prep the tortillas, gently stab each round 4-5 times with a fork. This little trick helps prevent bubbles from forming during baking. Then brush melted butter on both sides of the tortilla rounds, coating them generously.

    Finally, roll the coated tortillas in the cinnamon-sugar mixture until they’re fully covered. Sweet and fragrant—just like fall!

    Step 3: Bake the Tortilla Shells

    Here’s where the magic happens. Flip a muffin tin upside down, and place your tortilla rounds in between the muffin cups. This helps them maintain their taco shape!

    Bake in the oven for about 10 minutes, or until they’re just golden brown. Don’t forget to let them cool completely in the pan. This keeps them from getting soggy, ensuring that perfect crunchy bite.

    Step 4: Make the Whipped Cream

    Now, let’s whip up some delicious cream to top these tacos! In a medium bowl, combine heavy whipping cream, powdered sugar, and vanilla extract.

    Beat with a mixer until you reach stiff peaks. This means your whipped cream is light and airy, ready to add that touch of sweetness to your tacos. Set it aside once it’s perfect!

    Step 5: Prepare the Pumpkin Filling

    In a large mixing bowl, it’s time for the pumpkin magic! Beat the softened cream cheese and powdered sugar together until smooth and creamy. There’s something incredibly satisfying about this step!

    Next, mix in the canned pumpkin puree, vanilla extract, and pumpkin pie spice. Stir until everything is incorporated, creating a rich filling bursting with flavor. It smells so good, you may want to taste it—go ahead, I won’t tell!

    Step 6: Assemble Your Pumpkin Pie Tacos

    The moment we’ve all been waiting for: assembly time! Take your cooled taco shells and evenly pipe or spoon that luscious pumpkin filling into each one.

    Top them off with the dreamy whipped cream, and sprinkle a bit of cinnamon or chopped pecans for extra flair. You’ll want to serve these delightful Pumpkin Pie Tacos immediately. Trust me, they’re too delicious to stay around for long!

    Tips for Success

    • Let your taco shells cool completely before filling to keep them crispy.
    • Feel free to adjust the sweetness of your filling based on personal taste.
    • If you don’t have a cookie cutter, use a glass to cut the tortilla rounds.
    • Whip your cream only until stiff peaks form—overbeaten cream can become grainy.
    • For a fun twist, experiment with flavored whipped cream—cinnamon, anyone?

    Equipment Needed

    • Oven: Essential for baking your taco shells to crispy perfection.
    • Muffin Tin: An upside-down muffin tin creates those delightful taco shapes. No muffin tin? A baking sheet will do in a pinch.
    • Cookie Cutter or Glass: For cutting perfect rounds from tortillas.
    • Mixing Bowls: You’ll need a few to combine various ingredients.
    • Hand Mixer: Makes whipping cream and mixing filling a breeze!

    Variations

    • Gluten-Free: Use corn tortillas instead of flour for a gluten-free option.
    • Dairy-Free: Swap out cream cheese with a dairy-free alternative like cashew cream and use coconut cream for the whipped topping.
    • Spice It Up: Add a dash of cayenne or chili powder to the pumpkin filling for a unique kick.
    • Chocolate Lovers: Drizzle melted chocolate over the whipped cream for an extra indulgent treat.
    • Fruit Toppings: Top with cranberries or pomegranate seeds for a fresh burst of flavor and color.

    Serving Suggestions

    • Pair your Pumpkin Pie Tacos with a steaming cup of spiced chai or hot chocolate for a cozy fall treat.
    • Serve alongside a simple mixed green salad for a refreshing contrast.
    • For a festive presentation, arrange tacos on a colorful platter and garnish with extra pecans and a sprinkle of cinnamon.

    FAQs about Pumpkin Pie Tacos

    Got questions about these fun Pumpkin Pie Tacos? Don’t worry, I’ve got you covered! Here are some commonly asked queries that might pop up as you embark on this tasty journey.

    Can I make Pumpkin Pie Tacos ahead of time?

    Absolutely! You can prepare the taco shells in advance and store them in an airtight container. Just make sure to fill them with the pumpkin mixture and whipped cream just before serving to keep everything fresh and crispy.

    What can I substitute for canned pumpkin puree?

    If you can’t find canned pumpkin puree, you can use homemade pumpkin puree. Simply roast fresh pumpkin until tender and blend until smooth. Just be cautious of any extra moisture it may contain!

    Are these Pumpkin Pie Tacos suitable for vegetarians?

    Yes! These delightful tacos are entirely vegetarian, making them a great choice for anyone looking to enjoy a delicious dessert without animal products. Just double-check any substitute ingredients you choose!

    Can I freeze leftover Pumpkin Pie Tacos?

    It’s best to freeze the taco shells separately from the filling to maintain their texture. You can freeze the taco shells for up to two months. When you’re ready to enjoy, just thaw and fill!

    How can I adjust the sweetness in the pumpkin filling?

    If you like a sweeter taste, feel free to add more powdered sugar to the filling. Alternatively, if you prefer it less sweet, just cut back on the sugar. It’s all about what makes your taste buds dance!

    Final Thoughts

    Creating these Pumpkin Pie Tacos brings such joy to my kitchen. The blend of warm spices and creamy pumpkin fills each bite with nostalgia and comfort. Watching the smiles on my family’s faces as they enjoy this fun twist on a classic dessert is simply priceless.

    It’s an exciting, easy recipe that turns a busy day into something special. These tacos are not just treats, but a chance to share laughter, conversation, and happiness with loved ones. So roll up your sleeves, gather your ingredients, and let’s make some delicious memories together!


    Print

    clock clock iconcutlery cutlery iconflag flag iconfolder folder iconinstagram instagram iconpinterest pinterest iconfacebook facebook iconprint print iconsquares squares iconheart heart iconheart solid heart solid icon

    Description

    A creative twist on a classic dessert, these Pumpkin Pie Tacos combine the flavors of pumpkin pie with the fun of tacos.


    • 6 8 inch Tortillas (makes about 1824 rounds)
    • 1/2 cup Granulated Sugar
    • 1 tsp Ground Cinnamon
    • 1/3 cup Butter (melted)
    • 4 oz Cream Cheese (softened)
    • 1/4 cup Powdered Sugar
    • 3/4 cup Canned Pumpkin Puree
    • 1/2 tsp Pure Vanilla Extract
    • 1 1/2 tsp Pumpkin Pie Spice
    • 1/2 cup Heavy Whipping Cream
    • 2 Tablespoons Powdered Sugar
    • 1/2 teaspoon Vanilla Extract
    • Pecans (chopped for garnish)

    1. Pre-heat oven to 400F. Cut 3-4 rounds out of each tortilla shell with a cookie cutter (4-4.5 inch) to get about 20 shells.
    2. Stir together the sugar and cinnamon on a plate. Gently stab the tortillas with a fork 4-5 times to help prevent air bubbles.
    3. Brush both sides of the tortillas with the melted butter, and coat the tortillas in the cinnamon sugar mixture.
    4. Flip a muffin tin upside down. Place the tortilla pieces in between muffin cups. Bake for 10 minutes until just golden brown. Let cool in the pan.
    5. While the tortilla shells are cooling, make the whipped cream. Beat together all the whipped cream ingredients with a mixer until stiff peaks form.
    6. In a large bowl, with an electric mixer, beat the cream cheese and powdered sugar on medium-high speed until smooth and creamy. Add in pumpkin puree, vanilla, and pumpkin pie spice and mix until fully incorporated.
    7. Evenly pipe or spoon the pumpkin filling into the cooled taco shells. Then top with the whipped cream. Sprinkle with cinnamon and/or chopped pecans. Serve immediately and enjoy!

    Notes

    • Make sure to let the taco shells cool completely before filling them to prevent sogginess.
    • You can adjust the sweetness of the pumpkin filling according to your taste preference.
    • Prep Time: 20 minutes
    • Cook Time: 10 minutes
    • Category: Dessert
    • Method: Baking
    • Cuisine: American

    Nutrition

    • Serving Size: 1 taco
    • Calories: 150
    • Sugar: 6g
    • Sodium: 50mg
    • Fat: 10g
    • Saturated Fat: 5g
    • Unsaturated Fat: 3g
    • Trans Fat: 0g
    • Carbohydrates: 15g
    • Fiber: 1g
    • Protein: 2g
    • Cholesterol: 20mg

    Sharing is caring!

  • One-Pan Taco Zucchini Skillet

    One-Pan Taco Zucchini Skillet


    Introduction to One-Pan Taco Zucchini Skillet

    As a busy mom myself, I completely understand the struggle of finding time to cook a delicious dinner during hectic weeknights. That’s where my One-Pan Taco Zucchini Skillet comes to the rescue! This recipe is not only quick and easy to whip up, but it also packs a punch of flavor that will surely impress your loved ones.

    Imagine savory ground beef mingling with colorful veggies and melting cheese, all in one pan. It’s like a fiesta in your kitchen! It’s the perfect solution for when you’re juggling a million things and still want to serve something special.

    Why You’ll Love This One-Pan Taco Zucchini Skillet

    This One-Pan Taco Zucchini Skillet is a lifesaver for anyone with a busy schedule. In just 25 minutes, you can create a hearty meal that’s bursting with flavor and nutrition. It requires minimal cleanup since everything cooks in one pan, leaving you more time to relax. Plus, it’s customizable, allowing you to cater to picky eaters or dietary preferences without breaking a sweat!

    Ingredients for One-Pan Taco Zucchini Skillet

    Let’s gather our ingredients for this flavorful One-Pan Taco Zucchini Skillet! Here’s what you’ll need:

    • Olive oil cooking spray: This helps prevent sticking and keeps cleanup easy.
    • Lean grass-fed ground beef: A great source of protein that creates a hearty base for our dish. You can also use ground turkey or chicken for a leaner option.
    • Chopped onion: Adds sweetness and depth of flavor to your skillet.
    • Diced bell peppers: These add a pop of color and crunch. Feel free to mix colors for a vibrant look!
    • Diced zucchini: A fantastic low-calorie vegetable packed with nutrients. It soaks up the taco flavors beautifully.
    • Chili powder: This spice packs a punch of heat and lends that classic taco taste. Customize it based on your spice tolerance.
    • Diced tomatoes: You can use plain or ones with green chilis for extra zing. This adds moisture and flavor to the dish.
    • Water: A little splash helps steam the vegetables to perfection.
    • Salt and pepper: Essential to enhance all those robust flavors.
    • Shredded cheddar or Monterey Jack cheese: To top off the dish with gooey goodness! You can substitute with a dairy-free option if needed.
    • Optional taco toppings: Avocado, cilantro, extra cheese, or even tortilla chips! Get creative and personalize it to your taste.

    Detailed measurements for each ingredient are at the bottom of this article and are available for printing!

    How to Make One-Pan Taco Zucchini Skillet

    Now that we’ve gathered our ingredients, it’s time to dive into the steps to make this delicious One-Pan Taco Zucchini Skillet! Trust me, the aroma that fills your kitchen as it cooks is worth every minute. Let’s get started!

    Step 1: Brown the Ground Beef

    Begin by spraying a large skillet with olive oil cooking spray. Turn the heat to medium-high and add the ground beef to the hot skillet.

    You’ll want to cook it until it’s browned and cooked through, which usually takes about 5-7 minutes. Don’t forget to break it up into small pieces with a spatula.

    If you prefer a leaner option, ground turkey or chicken works beautifully as well!

    Step 2: Sauté the Vegetables

    Once the beef is cooked, it’s time to add in the flavor! Toss in the chopped onions and diced bell peppers along with a sprinkle of salt.

    Sauté these veggies for about 2-3 minutes until they soften up. The colors of the peppers will brighten your skillet, making it look just as fabulous as it tastes!

    Step 3: Combine Ingredients

    Next, it’s time to get our taco flavors going. Mix in the chili powder, diced zucchini, and canned tomatoes.

    This is where the magic happens! Stir everything together and let it cook for another 3-5 minutes, until the zucchini is tender.

    If it looks too dry, add in a splash of water to keep everything from sticking. Believe me, you want that perfect blend of flavors!

    Step 4: Melt the Cheese

    Once your meat and veggies are perfectly blended, it’s time for the cheesy finale. Sprinkle the shredded cheddar or Monterey Jack cheese over the top of your skillet.

    Cover it up for a minute or two to let that cheese melt into gooey perfection. This is the moment of transformation where your dish turns into a cheesy delight!

    Step 5: Serve with Toppings

    Finally, it’s time to dig in! Serve your One-Pan Taco Zucchini Skillet hot, topped with your favorite taco enhancements.

    I love to add diced avocado, fresh cilantro, or extra cheese. You can even sprinkle some tortilla chips on top for a satisfying crunch!

    Each bite is a fiesta of flavors!

    Tips for Success

    • Prep your ingredients ahead of time to save even more minutes during cooking.
    • Use a non-stick skillet for easier cooking and cleanup.
    • Adjust the spice level by adding more chili powder or incorporating jalapeños.
    • Don’t overcook the zucchini; it should be tender, yet still have a little crunch.
    • Experiment with your favorite taco toppings for a personal touch!

    Equipment Needed

    • Large skillet: A non-stick skillet works wonders, but any large pan will do.
    • Spatula: Essential for breaking up the meat and stirring the ingredients.
    • Measuring cups: Handy for any measurements, though you can eyeball most ingredients.
    • Knife and cutting board: For chopping veggies efficiently!

    Variations

    • Swap the Protein: Try using ground turkey or chicken for a leaner version, or substitute with black beans for a vegetarian option.
    • Change the Veggies: Mix it up with other vegetables like corn, spinach, or mushrooms for added flavor and nutrition.
    • Spice it Up: Add diced jalapeños or a dash of cayenne pepper for those who love a little heat in their meals.
    • Different Cheeses: Experiment with different types of cheese such as pepper jack for a spicier kick or a vegan cheese for a plant-based option.
    • Low-Carb Twist: Serve over a bed of cauliflower rice instead of with tortillas to keep it low-carb.

    Serving Suggestions

    • Pair with a side of tortilla chips for that extra crunch.
    • Serve alongside a fresh garden salad dressed with lime vinaigrette.
    • Enjoy with your favorite beverage like a crisp, cold soda or a refreshing iced tea.
    • For presentation, add a sprinkle of fresh cilantro on top before serving!

    FAQs about One-Pan Taco Zucchini Skillet

    I’m sure you have some questions about this scrumptious One-Pan Taco Zucchini Skillet! Let me help you out with some common queries I often hear.

    Can I meal prep this One-Pan Taco Zucchini Skillet?

    Absolutely! This dish is perfect for meal prep. Just cook it as directed, then divide it into airtight containers. It keeps well in the refrigerator for up to three days. Reheat portions in the microwave for a quick lunch or dinner!

    How can I make this meal vegetarian-friendly?

    Simple! Substitute the ground beef with black beans or lentils. You can sauté them with the same spices for a hearty vegetarian option that’s just as delicious.

    What should I serve with the One-Pan Taco Zucchini Skillet?

    This dish shines on its own, but you can serve it with tortilla chips, fresh guacamole, or a zesty salad. Each pairing adds a different flair and complements those rich taco flavors!

    How do I store leftovers?

    Store any leftovers in an airtight container in the fridge. It will stay fresh for up to three days. Just make sure to reheat thoroughly when you’re ready to enjoy it again!

    Can this recipe be made in advance and frozen?

    Yes, you can freeze it! After cooking, let it cool completely, then portion it into freezer-safe containers. It can last up to three months in the freezer. Just thaw and reheat for a speedy meal later!

    Final Thoughts

    In a whirlwind of busy days, the One-Pan Taco Zucchini Skillet has become my secret weapon. It brings joy not just through its vibrant flavors, but also by making cooking feel effortless amidst the chaos. The big, bold flavors and gooey cheese melt perfectly together, creating a dish that’s satisfying and nourishing. Each bite feels like a warm hug, making it a favorite for my family. So, whether it’s a regular Tuesday or a special occasion, this recipe promises to be a delicious adventure that brings everyone around the table—all in under 30 minutes!


    Print

    clock clock iconcutlery cutlery iconflag flag iconfolder folder iconinstagram instagram iconpinterest pinterest iconfacebook facebook iconprint print iconsquares squares iconheart heart iconheart solid heart solid icon

    Description

    A quick and delicious one-pan meal featuring ground beef, vegetables, and cheese, perfect for a weeknight dinner.


    • Olive oil cooking spray
    • 1 1/2 pounds lean grass-fed ground beef
    • 1/2 onion chopped
    • 2 bell peppers diced
    • 2 cups zucchini diced
    • 2 teaspoons chili powder
    • 14.5 oz diced tomatoes (or 10 oz can diced tomatoes with green chilis)
    • 1/4 cup water
    • Sprinkle of salt and pepper
    • 2/3 cup shredded cheddar or Monterey Jack cheese
    • Optional taco toppings: Avocado, cilantro, extra cheese, etc.

    1. Spray a large skillet with olive oil cooking spray and place it over medium-high heat. Add ground beef to the hot skillet and brown until cooked through.
    2. Add onions, bell pepper, and salt to the cooked meat. Sauté for 2-3 minutes, then add in taco seasoning, zucchini, and canned tomatoes.
    3. Cook the meat and veggie mixture for 3-5 minutes or until the zucchini is tender. Add 1/4 cup water, if necessary, to keep the mixture from sticking to the bottom of the skillet. Top with cheese.
    4. Cover the skillet until the cheese melts.
    5. Serve with your favorite taco toppings – we love topping with avocado, cilantro, and sometimes tortilla chips.

    Notes

    • This dish can be customized with various toppings based on personal preference.
    • Use ground turkey or chicken for a leaner option.
    • Leftovers can be stored in an airtight container in the refrigerator for up to 3 days.
    • Prep Time: 10 minutes
    • Cook Time: 15 minutes
    • Category: Main Dish
    • Method: Skillet
    • Cuisine: Mexican

    Nutrition

    • Serving Size: 1/4 of the recipe
    • Calories: 350
    • Sugar: 5g
    • Sodium: 600mg
    • Fat: 20g
    • Saturated Fat: 8g
    • Unsaturated Fat: 10g
    • Trans Fat: 0g
    • Carbohydrates: 15g
    • Fiber: 3g
    • Protein: 30g
    • Cholesterol: 90mg

    Sharing is caring!