Author: IHAAL Team

  • Reese’s Peanut Butter Captain Crunch Bars

    Reese’s Peanut Butter Captain Crunch Bars


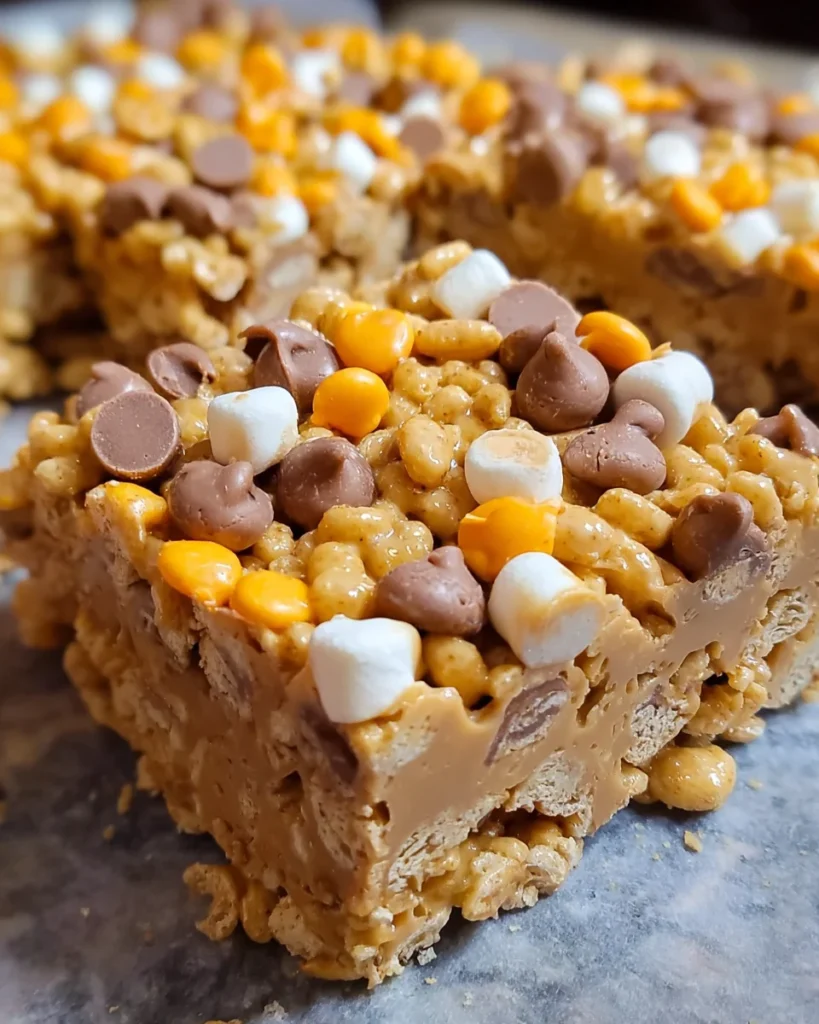
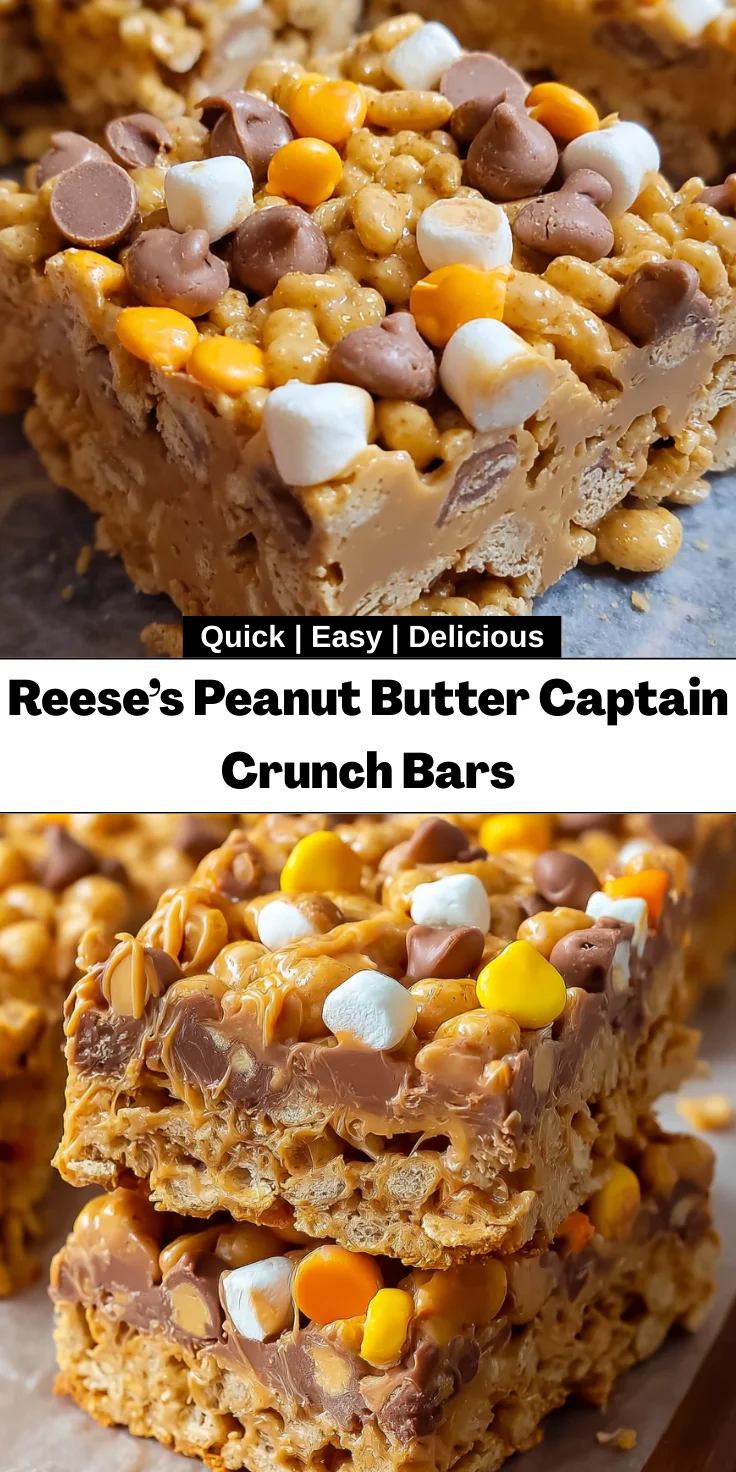
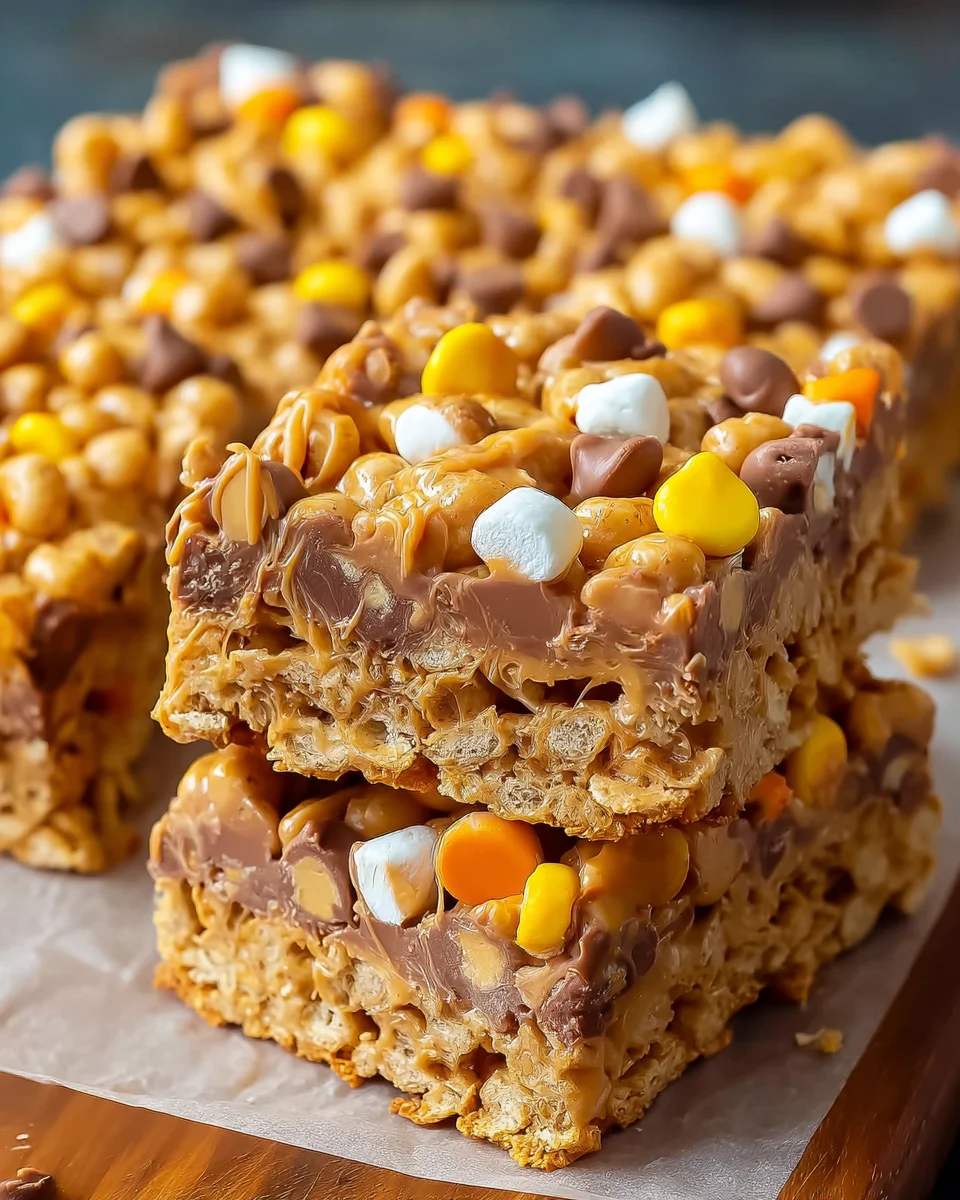
    Introduction to Reese’s Peanut Butter Captain Crunch Bars

    As a busy mom myself, I know how chaotic life can get. Between juggling careers, kids, and everything in between, finding time to whip up something sweet can feel like a luxury. That’s where these Reese’s Peanut Butter Captain Crunch Bars come into play. They’re not just quick to make; they’re a delicious way to bring smiles to everyone’s faces! With just a handful of simple ingredients, you can create a delightful treat that’s perfect for lunchboxes, after-school snacks, or even special gatherings. Trust me; these bars are a surefire hit!

    Why You’ll Love This Reese’s Peanut Butter Captain Crunch Bars

    If you’re looking for a treat that’s as easy to make as it is tasty, these Reese’s Peanut Butter Captain Crunch Bars are the answer. They come together in just 20 minutes, without any baking involved! The delightful crunch of Captain Crunch paired with creamy peanut butter and chocolate makes each bite pure bliss. Plus, they make a perfect sweet gift for friends or a quick snack for your family!

    Ingredients for Reese’s Peanut Butter Captain Crunch Bars

    Let’s dive into what makes these Reese’s Peanut Butter Captain Crunch Bars so delectable! Here’s what you’ll need:

    • Captain Crunch cereal: The star of the show! This cereal provides that delightful crunch you’ll love.
    • Mini marshmallows: They add sweetness and a chewy texture, making the bars even more enjoyable.
    • Creamy peanut butter: The heart and soul of these bars. It gives richness and depth to every bite.
    • Light corn syrup: This key ingredient binds everything together, keeping your bars soft and gooey.
    • Unsalted butter: Adds a lovely buttery flavor and helps in blending the ingredients smoothly.
    • Reese’s Peanut Butter Chips: For that extra punch of peanut butter delight! They’ll melt beautifully on top.
    • Semi-sweet chocolate chips: Rich chocolate that complements the peanut butter perfectly; it’s like a match made in heaven.
    • Optional vanilla extract: A hint of this adds a warm, aromatic essence that elevates the flavor.
    • A pinch of salt: Just a dash enhances the sweetness and balances the flavors.

    If you’re interested in the exact measurements for these ingredients, make sure to check out the bottom of the article where they’re available for printing!

    How to Make Reese’s Peanut Butter Captain Crunch Bars

    Now that you have all the ingredients ready, it’s time to embark on this sweet journey! Making these Reese’s Peanut Butter Captain Crunch Bars is as fun as it is simple. Let’s roll up our sleeves and dive in!

    Prepare Your Pan

    Start by preparing your baking pan. I like to use an 8×8-inch or 9×9-inch square pan, but any will work. Simply line the pan with parchment paper, or give it a light greasing using butter or cooking spray. This way, your bars won’t stick, making it easy to lift them out later.

    Melt the Base

    Next, grab a medium saucepan and place it over medium heat. Add the unsalted butter and let it melt gently. As it melts, stir in the light corn syrup and creamy peanut butter. Mix until everything is smooth and creamy. Now, add those adorable mini marshmallows! Keep stirring until they melt down completely. Oh, the smell is divine! If you want that little extra flavor boost, toss in the vanilla extract now.

    Mix with Cereal

    In a large mixing bowl, add the Captain Crunch cereal. Carefully pour your melted peanut butter mixture over the cereal. Using a spatula or your hands (greased up a bit to avoid sticky fingers), fold the mixture together until every piece of cereal is coated with that gooey goodness. It’s like a warm, peanut buttery hug for your cereal!

    Press and Top

    Transfer your glorious mixture into the prepared pan. Now, use that spatula—or your hands, if you’re brave—to press it down evenly and firmly. This helps the bars hold their shape later. Make sure it’s packed tight; we want these treats to be robust like a superhero!

    Melt Chocolate and Reese’s Chips

    Time to make it extra special! In a microwave-safe bowl, combine the semi-sweet chocolate chips and Reese’s peanut butter chips. Heat them in the microwave in 20-second increments, stirring between each session until fully melted. The chocolate should be silky and smooth, making it the perfect finishing touch for your bars.

    Finish and Chill

    Pour that luscious melted chocolate-peanut butter blend over the pressed cereal mixture. Spread it out evenly, letting it cover every inch of those crispy, chewy goodness. Now, let your bars cool at room temperature for a little while, or pop them in the fridge for about 1-2 hours until they set completely. Trust me, the wait will be worth it!

    Slice and Serve

    Once your bars have set, it’s time to slice them into squares. The excitement is real, my friends! Using a sharp knife, cut them into whatever size you’d like. Serve them up and watch smiles light up around your home!

    Tips for Success

    • Prep your pan well to prevent sticking—trust me, you’ll thank yourself later!
    • Use a spatula sprayed with cooking spray when pressing down the mixture for an easier cleanup.
    • Let the bars fully set before cutting to achieve clean, beautiful squares.
    • Feel free to adjust sweetness by adding a bit more peanut butter or chocolate.
    • Check the consistency; if it feels too crumbly, add a touch more corn syrup.

    Equipment Needed

    • Medium saucepan: A trusty pot is perfect, but you can also use a microwave-safe bowl for melting.
    • Large mixing bowl: Any large bowl will do; just make sure it can hold all the ingredients!
    • Spatula: A silicone spatula works great, or you could use a wooden spoon.
    • 8×8-inch or 9×9-inch baking pan: If you don’t have a square pan, an 11×7-inch rectangular one works too.
    • Microwave-safe bowl: You’ll need this for melting chocolate; any heatproof bowl will do!

    Variations

    • Nutty Additions: Throw in some chopped nuts like peanuts or almonds for extra crunch and nutrition.
    • Flavored Cereal: Swap Captain Crunch for a different flavor, like Cinnamon Toast Crunch, to put a fun twist on the bars.
    • Nut Butter Swap: Use almond or cashew butter instead of peanut butter for a change in flavor.
    • Dried Fruits: Add dried cranberries, cherries, or apricots for a fruity surprise that pairs well with the sweetness.
    • Vegan Option: Use maple syrup instead of corn syrup and vegan chocolate chips for a plant-based treat.

    Serving Suggestions

    • Pair these Reese’s Peanut Butter Captain Crunch Bars with a cold glass of milk for a classic combo.
    • Serve alongside fresh fruit like strawberries or bananas to balance the sweetness.
    • Wrap them in colorful packaging for a fun gift or treat for friends.
    • Try a scoop of vanilla ice cream on the side for an indulgent dessert.
    • Present them on a decorative platter for a lovely party treat that’s sure to impress!

    FAQs about Reese’s Peanut Butter Captain Crunch Bars

    Can I make these Reese’s Peanut Butter Captain Crunch Bars gluten-free?

    You can easily make these bars gluten-free by using gluten-free Captain Crunch cereal. Always check the labels to be sure!

    How should I store the leftover bars?

    Store any leftover Reese’s Peanut Butter Captain Crunch Bars in an airtight container at room temperature for up to a week. They can be refrigerated as well; just let them sit out for a few minutes before serving for the best texture.

    Can I freeze these bars?

    Absolutely! You can freeze them for up to three months. Just wrap them tightly in plastic wrap and then in aluminum foil. Whenever a craving strikes, you’ll have a sweet treat ready to go!

    What can I substitute if I don’t have peanut butter?

    If you’re looking for a nut-free option, sun butter or soy nut butter can be excellent substitutes for creamy peanut butter in this recipe. Your bars will still be delicious!

    Are these bars suitable for kids?

    Yes! These Reese’s Peanut Butter Captain Crunch Bars are perfect for kids and a fun snack to include in their lunchboxes. Just be mindful of any peanut allergies among your little ones!

    Final Thoughts

    These Reese’s Peanut Butter Captain Crunch Bars are more than just a dessert; they’re a delightful experience to share with family and friends. I cherish the moments spent in the kitchen, creating these bars while the kids can hardly wait to dig in. The sweet crunch, creamy peanut butter, and chocolate notes spark joy in every bite!

    Whether it’s a busy weekday or a special celebration, these treats bring a smile to everyone’s face. So, grab your ingredients, and let’s make memories one bar at a time. You won’t be disappointed!


    Print

    clock clock iconcutlery cutlery iconflag flag iconfolder folder iconinstagram instagram iconpinterest pinterest iconfacebook facebook iconprint print iconsquares squares iconheart heart iconheart solid heart solid icon

    Description

    A delicious combination of Captain Crunch cereal, creamy peanut butter, and chocolate for the perfect sweet treat.


    • 5 cups Captain Crunch cereal
    • 1 ½ cups mini marshmallows
    • ¾ cup creamy peanut butter
    • ½ cup light corn syrup
    • ¼ cup unsalted butter
    • ½ cup Reese’s Peanut Butter Chips
    • ½ cup semi-sweet chocolate chips
    • Optional: ½ teaspoon vanilla extract or a pinch of salt

    1. Prepare Your Pan: Line an 8×8-inch or 9×9-inch square baking pan with parchment paper or lightly grease with butter or cooking spray.
    2. Melt the Base: In a medium saucepan, melt the butter over medium heat. Stir in the corn syrup and peanut butter, mixing until smooth and fully combined. Add the mini marshmallows and stir constantly until melted and creamy. Remove from heat and stir in the vanilla extract, if using.
    3. Mix with Cereal: Place the Captain Crunch cereal in a large bowl. Pour the melted peanut butter mixture over the cereal and stir until fully coated.
    4. Press and Top: Transfer the mixture into your prepared pan. Use a spatula or your hands (lightly greased) to press it down evenly and firmly.
    5. Melt Chocolate and Reese’s Chips: In a microwave-safe bowl, melt the semi-sweet chocolate chips and Reese’s peanut butter chips together in 20-second intervals, stirring between each, until smooth.
    6. Finish and Chill: Pour the melted chocolate-peanut butter mixture over the bars, spreading evenly. Let the bars cool at room temperature or refrigerate for 1–2 hours until set.
    7. Slice and Serve: Cut into squares and enjoy!

    Notes

    • Store leftover bars in an airtight container for up to a week.
    • Feel free to add other mix-ins like nuts or dried fruit if desired.
    • Prep Time: 10 minutes
    • Cook Time: 10 minutes
    • Category: Dessert
    • Method: No-bake
    • Cuisine: American

    Nutrition

    • Serving Size: 1 bar
    • Calories: 180
    • Sugar: 12g
    • Sodium: 80mg
    • Fat: 8g
    • Saturated Fat: 3g
    • Unsaturated Fat: 5g
    • Trans Fat: 0g
    • Carbohydrates: 24g
    • Fiber: 1g
    • Protein: 3g
    • Cholesterol: 10mg

    Sharing is caring!

  • Pomegranate Cream Cheese Tartlets

    Pomegranate Cream Cheese Tartlets


    Introduction to Pomegranate Cream Cheese Tartlets

    Welcome to a world of flavor with Pomegranate Cream Cheese Tartlets! As a busy mom, I know how important it is to whip up delightful treats without the fuss. These tartlets are perfect for impressing friends and family or treating yourself after a long day. With a creamy filling and the exciting burst of pomegranate, they’re a quick solution for any occasion. Imagine the joy on your loved ones’ faces as they savor each bite. This recipe is not just about taste; it’s about creating moments that bring us together.

    Why You’ll Love This Pomegranate Cream Cheese Tartlets

    These Pomegranate Cream Cheese Tartlets are a game-changer for any busy kitchen! They’re not just easy to make; they come together in under thirty minutes. Imagine serving a dessert that’s both beautiful and delicious at your next gathering. The creamy filling perfectly balances the tartness of the pomegranate, making each bite a mini flavor explosion. Trust me, you’ll impress everyone with minimal effort.

    Ingredients for Pomegranate Cream Cheese Tartlets

    Let’s gather our stars for these delightful Pomegranate Cream Cheese Tartlets! Each ingredient plays an important role in creating that creamy, fruity goodness.

    • Mini tart shells: These are your pastry base, crunchy and perfect for holding the luscious filling. You can find them at your local grocery store or bake your own if you’re feeling adventurous!
    • Cream cheese: The essence of creaminess! Use softened cream cheese for easy blending. It provides a rich texture that melds beautifully with other flavors.
    • Granulated sugar: A touch of sweetness to balance the tang of cream cheese. It’s essential for that delightful flavor!
    • Vanilla extract: Adds a warm, inviting scent. It elevates the overall taste, making each bite even more enjoyable.
    • Pomegranate seeds: These little jewels not only provide a burst of color but also a refreshing crunch. They’re packed with antioxidants and give that lovely tartness to the dessert.

    Feel free to explore substitutes! If pomegranates aren’t your jam, you can swap in other fruits such as blueberries or raspberries for a similar effect. Ready for the exact measurements? You’ll find them at the bottom of this article, along with a printable version for your convenience!

    How to Make Pomegranate Cream Cheese Tartlets

    Now, let’s dive into the fun part—making these delicious Pomegranate Cream Cheese Tartlets! Follow these simple steps, and soon you’ll have a batch of delightful treats that will wow everyone.

    Bake the Tart Shells

    First, arrange your mini tart shells on a baking sheet. I recommend following the package directions for baking, which usually takes about ten minutes. Keep an eye on them; you want them to turn lightly golden but not too dark. Once baked, let them cool completely. Patience is key! Filling warm shells can lead to a messy situation.

    Prepare the Cream Cheese Mixture

    While those shells are cooling, let’s whip up the cream cheese filling. In a mixing bowl, combine the softened cream cheese, granulated sugar, and vanilla extract. Use a hand mixer for about two minutes until the mixture is smooth and fluffy. I find that starting at a low speed helps to avoid any sugary explosions! If you have a spatula, keep one handy to scrape down the sides and ensure everything is mixed evenly.

    Fill the Tart Shells

    With your tart shells cooled and the cream cheese mixture ready, it’s time to fill those delightful bases! Spoon the creamy mixture into each tart shell, filling them generously but not overflowing—trust me, nobody likes a messy tart! I usually use a small spatula to smooth the tops, making them look neat and inviting.

    Top with Pomegranate Seeds

    Finally, it’s time for the star of the show: the pomegranate seeds! Gently scatter a handful of fresh seeds on top of each filled tartlet. The vibrant red seeds not only look gorgeous but also bring a refreshing crunch to each bite. You can be artistic here—don’t hesitate to arrange them into little patterns if you’re feeling creative!

    Tips for Success

    • Make sure your cream cheese is at room temperature for easy mixing.
    • Don’t skip the cooling time for the tart shells; it avoids a soggy filling.
    • For extra flair, top with mint leaves or a drizzle of chocolate.
    • Serve on a pretty platter for added visual appeal.
    • These tartlets can be made a day ahead—just hold off on adding the pomegranate seeds until serving!

    Equipment Needed

    • Baking sheet: A standard one works great. You can use a cast iron skillet if you’re feeling adventurous!
    • Mixing bowl: Any size will do; just make sure it’s large enough for whipping the cream cheese.
    • Hand mixer: A whisk will do, but it requires more effort and time.
    • Small spatula: This helps with smoothing the filling and is handy for cleanup.
    • Spoon: A regular spoon will work just fine for filling the tart shells.

    Variations of Pomegranate Cream Cheese Tartlets

    • Berry Delight: Swap out pomegranate seeds for a mix of your favorite berries—strawberries, blueberries, and raspberries all work wonderfully!
    • Chocolate Drizzle: Melt some dark chocolate and drizzle it over the filled tartlets for an elegant touch. Chocolate and cream cheese are a match made in heaven!
    • Nutty Crunch: Add a sprinkle of crushed nuts, such as pistachios or almonds, atop the pomegranate seeds for added texture and flavor.
    • Spiced Cream Cheese: Mix in a pinch of cinnamon or nutmeg into the cream cheese filling for a warm, cozy flavor that’s perfect for fall.
    • Dairy-Free Option: Use a dairy-free cream cheese alternative to make these tartlets suitable for a vegan lifestyle or those with dairy restrictions.

    Serving Suggestions for Pomegranate Cream Cheese Tartlets

    • Pair these tartlets with a light herbal tea or coffee for a delightful afternoon treat.
    • Serve on a colorful platter to enhance their visual appeal—presentation matters!
    • Add a dollop of whipped cream on the side for an extra creamy experience.
    • Garnish with fresh mint leaves to elevate the flavor and presentation.
    • These tartlets are perfect for holiday gatherings or casual family dinners!

    FAQs about Pomegranate Cream Cheese Tartlets

    As you venture into making these Pomegranate Cream Cheese Tartlets, you might have some questions in mind. Let’s clear up a few common queries!

    Can I make the tartlets ahead of time?

    Absolutely! You can prepare the tart shells and filling in advance. Just fill them the day you plan to serve, adding the pomegranate seeds right before eating to ensure freshness.

    What other fruits can I use besides pomegranate?

    Feel free to get creative! Berries such as raspberries, strawberries, or blueberries work great too. Take your pick based on what’s in season or your family’s favorites.

    How should I store the leftover tartlets?

    Store them in an airtight container in the refrigerator. They should be enjoyed within two days for optimal freshness.

    Can I make these tartlets gluten-free?

    Yes! Look for gluten-free tart shells at the store or make your own using gluten-free flour. It’s easy and delicious!

    What can I serve with these tartlets?

    These tartlets pair wonderfully with a light tea or coffee. Consider serving them with a side of whipped cream or a scoop of vanilla ice cream for extra indulgence!

    Final Thoughts

    Making Pomegranate Cream Cheese Tartlets is more than just preparing a dessert; it’s about creating delightful moments. Whether you’re celebrating a special occasion or treating yourself after a long day, these tartlets bring joy with every bite. The combination of creamy filling and the bright crunch of pomegranate seeds creates an experience that feels both upscale and comforting. Plus, they are incredibly easy to whip up, making them accessible for any busy mom or professional. I hope you savor each bite just as much as I do, finding happiness in both the flavors and the memories they inspire.


    Print

    clock clock iconcutlery cutlery iconflag flag iconfolder folder iconinstagram instagram iconpinterest pinterest iconfacebook facebook iconprint print iconsquares squares iconheart heart iconheart solid heart solid icon

    Description

    Pomegranate Cream Cheese Tartlets are a delightful treat that combines a creamy filling with a refreshing burst of pomegranate seeds.


    • 6 mini tart shells
    • 1/2 cup cream cheese, softened
    • 2 tablespoons granulated sugar
    • 1/2 teaspoon vanilla extract
    • 1/4 cup pomegranate seeds

    1. Arrange mini tart shells on a baking sheet. Bake in a preheated oven according to package directions until lightly golden. Let cool completely.
    2. In a mixing bowl, beat together cream cheese, sugar, and vanilla extract until smooth and fluffy.
    3. Spoon the cream cheese mixture evenly into each cooled tart shell. Smooth the tops with the back of a spoon or small spatula.
    4. Scatter fresh pomegranate seeds on top of each filled tartlet.

    Notes

    • For best results, use room temperature cream cheese for easier mixing.
    • You can substitute pomegranate seeds with other fruits if desired.
    • Prep Time: 15 minutes
    • Cook Time: 10 minutes
    • Category: Dessert
    • Method: Baking
    • Cuisine: American

    Nutrition

    • Serving Size: 1 tartlet
    • Calories: 120
    • Sugar: 5g
    • Sodium: 80mg
    • Fat: 6g
    • Saturated Fat: 3g
    • Unsaturated Fat: 2g
    • Trans Fat: 0g
    • Carbohydrates: 15g
    • Fiber: 1g
    • Protein: 2g
    • Cholesterol: 15mg

    Sharing is caring!

  • Spicy Buffalo Chicken Sliders

    Spicy Buffalo Chicken Sliders


    Introduction to Spicy Buffalo Chicken Sliders

    Hey there, fellow home cooks! If you’re like me, juggling a busy life with kids, careers, and social obligations, finding time to whip up a delightful meal can be a challenge. That’s where my Spicy Buffalo Chicken Sliders come to the rescue! These adorable little bites pack a flavorful punch, making them the perfect solution for a hectic weeknight dinner or an impressive dish for your next gathering. They are incredibly simple to make, allowing you to pull together something delicious without breaking a sweat. Let’s dive into crafting this crowd-pleaser together!

    Why You’ll Love This Spicy Buffalo Chicken Sliders

    What’s not to love about these Spicy Buffalo Chicken Sliders? They are quick and easy, taking just about 35 minutes from start to finish. Life is busy, and sometimes you need something that satisfies without feeling like another chore. Plus, the zesty flavor becomes a surefire hit at any gathering. Picture your family or friends raving about them—now that’s the kind of joy I want to share!

    Ingredients Spicy Buffalo Chicken Sliders

    To create these scrumptious Spicy Buffalo Chicken Sliders, you’ll need a handful of simple ingredients that bring big flavor. Here’s a quick rundown:

    • Slider buns: These little wonders provide the perfect vessel for all that spicy goodness. Consider whole wheat or gluten-free options if preferred.
    • Shredded chicken: A tender, juicy filling. You can use rotisserie chicken for a quick route, or boil and shred your own for a fresh touch.
    • Franks hot sauce: The heart of the spice! Feel free to adjust the heat by choosing your favorite hot sauce brand.
    • Ranch dressing: Adds a creamy, cool contrast to the spicy chicken. You could also use blue cheese dressing for a bolder flavor.
    • Salt and pepper: Basic seasonings that enhance every component of the dish. Always be generous but taste as you go!
    • Garlic powder: Provides an underlying warmth that complements the spiciness wonderfully.
    • Paprika: This brings a subtle smoky flavor. If you’re feeling adventurous, try smoked paprika for a deeper taste.
    • Shredded cheese: Melting cheese on top adds delicious gooeyness that makes each slider irresistible. Cheddar or mozzarella works beautifully.
    • Garlic butter: A blend of melted butter and garlic that’s brushed on top of the buns, adding richness. You can use olive oil instead for a lighter version or even herbed butter for extra flavor.
    • Italian seasoning: This mix brings in some holistic herbal goodness. It pairs perfectly with the garlic for that extra layer of flavor.

    For precise quantities, check the bottom of the article for easy printing options!

    How to Make Spicy Buffalo Chicken Sliders

    Step 1: Preheat and Prep

    First things first, let’s get that oven fired up! Preheat it to 350°F (175°C). Meanwhile, line a 9×9 baking sheet or casserole dish with parchment paper. This little magic paper makes clean-up a breeze and keeps those sliders from sticking. Trust me, you’ll thank yourself later! Just imagine the crispy edges of those sliders waiting for you—let’s aim for that grilled perfection!

    Step 2: Prepare the Chicken Mixture

    In a large mixing bowl, combine your shredded chicken, the spicy Franks buffalo hot sauce, ranch dressing, and your favorite seasonings—salt, pepper, garlic powder, and paprika. This mixture is the life of the party, bursting with flavor! With a fork or spoon, stir everything together until it’s well incorporated. The spicy, creamy fill becomes the heart of our sliders. Don’t be surprised if you’re tempted to munch on it right now; it smells heavenly!

    Step 3: Assemble the Sliders

    Grab your bottom slider buns and place them in your prepared baking dish. This is where the magic begins! Evenly distribute that warm chicken mixture over each bun, creating a colorful and tasty layer. Next, sprinkle shredded cheese generously on top of the chicken. Don’t be shy! Finally, pop the tops of the slider buns back on, completing our delightful little sandwiches. It’s like tucking them into bed, ready for a cozy bake!

    Step 4: Butter Topping

    Now, for the finishing touch! In a small bowl, melt your butter and mix in garlic powder and Italian seasoning. This garlic butter is going to elevate your sliders! Using a pastry brush, generously brush this glorious mixture over the tops of each bun. The aroma alone will make your family swoon. This step not only enhances flavor but also gives a beautiful golden hue as they bake, promising a real treat for the eyes and taste buds!

    Step 5: Bake to Perfection

    Cover the baking sheet tightly with foil and place it in the preheated oven. Let it bake for 15 minutes; this allows the sliders to warm thoroughly. After that, remove the foil, allowing the tops to get that desired golden crisp. Bake for an additional 5-10 minutes, keeping a close eye on them. You’ll know they’re ready when the cheese is perfectly melted and bubbly—now that’s what I call slider bliss!

    Tips for Success

    • Prep your ingredients before you start to save time and avoid stress.
    • Feel free to mix up the sauces—add a touch of BBQ or a splash of honey for sweetness.
    • Let the sliders rest for a few minutes after baking. This gives the cheese a chance to set, making them easier to handle.
    • For extra crunch, include pickles or jalapeños in the filling!

    Equipment Needed

    • Baking sheet: A 9×9 dish works well, but any oven-safe dish will do.
    • Parchment paper: If you don’t have this, lightly greasing the dish will suffice.
    • Mixing bowl: A medium-sized bowl is perfect for combining ingredients.
    • Pastry brush: Use a spoon if you don’t have one for applying the butter.

    Variations

    • Spicy BBQ Chicken Sliders: Swap out the buffalo sauce for your favorite BBQ sauce. This gives a sweeter, smoky flavor that pairs perfectly with shredded chicken for those who prefer a milder spice.
    • Buffalo Cauliflower Sliders: For a vegetarian twist, replace the chicken with roasted cauliflower florets tossed in buffalo sauce. This makes a fantastic, healthy option that even meat lovers might enjoy!
    • Creamy Blue Cheese Sliders: Add crumbled blue cheese to the chicken mixture for an intense flavor kick. This adds a beautiful creaminess that balances the heat of the buffalo sauce perfectly!

    Serving Suggestions

    • Pair your sliders with crispy celery sticks for a refreshing crunch.
    • Serve with a side of tangy ranch or blue cheese dressing for dipping.
    • A chilled glass of iced tea or lemonade balances the spice beautifully.
    • For a fun presentation, serve sliders on a wooden board with colorful garnishes!

    FAQs about Spicy Buffalo Chicken Sliders

    Can I make Spicy Buffalo Chicken Sliders ahead of time?

    Absolutely! You can prepare the chicken mixture in advance and store it in the fridge for a day. Assemble the sliders right before baking for optimal freshness. This way, you’ll have a quick meal ready to pop in the oven when you’re pressed for time!

    How do I store leftovers of Spicy Buffalo Chicken Sliders?

    If you happen to have leftovers (though I doubt it!), you can keep them in an airtight container in the fridge for up to three days. Reheat them in the oven to maintain that delightful cheesiness. You’ll need about 10-15 minutes at 350°F to get them nice and warm!

    Can I change the spice level in the sliders?

    What side dishes go well with Spicy Buffalo Chicken Sliders?

    These sliders pair beautifully with a fresh side salad, crispy fries, or even some classic buffalo chicken dip. Mix and match to create a fantastic spread! You can even serve them with cheese-stuffed jalapeños for a truly festive atmosphere!

    Are Spicy Buffalo Chicken Sliders gluten-free?

    Yes, they can easily be made gluten-free! Just ensure you use gluten-free slider buns, and you’re all set for a tasty, allergy-friendly treat everyone can enjoy!

    Final Thoughts

    There’s something incredibly rewarding about serving up a tray of Spicy Buffalo Chicken Sliders. You gather everyone around, and suddenly the laughter floats through the air, transforming the meal into a celebration. Whether it’s game day or a casual weeknight dinner, these sliders create moments that linger long after the last bite. The perfect blend of spice and comfort, along with the ease of preparation, makes them a go-to in my kitchen. So, gather your loved ones, whip up a batch, and enjoy the delicious memories that are just waiting to be made!


    Print

    clock clock iconcutlery cutlery iconflag flag iconfolder folder iconinstagram instagram iconpinterest pinterest iconfacebook facebook iconprint print iconsquares squares iconheart heart iconheart solid heart solid icon

    Description

    Spicy Buffalo Chicken Sliders are a delicious and easy-to-make recipe featuring tender shredded chicken tossed in spicy buffalo sauce, topped with cheese, and baked in slider buns.


    • 9 pack slider buns
    • 1 1/2 cups shredded chicken
    • 1/2 cup Franks buffalo hot sauce
    • 2 Tbsp ranch dressing
    • ½ tsp salt
    • ¼ tsp ground black pepper
    • ½ tsp garlic powder
    • ¼ tsp paprika
    • 1 cup shredded cheese
    • Garlic butter:
    • 2 Tbsp butter
    • ½ tsp garlic powder
    • ¼ tsp Italian seasoning

    1. Preheat the oven to 350°F and line a 9×9 baking sheet or casserole dish with parchment paper.
    2. In a bowl, mix the shredded chicken, hot sauce, ranch, salt, pepper, garlic, and paprika.
    3. Add the bottom of the slider buns to the lined baking sheet.
    4. Divide the chicken filling between all the buns. Top with cheese and close with the top buns.
    5. In a small bowl, combine the melted butter, garlic, and Italian seasoning. Brush the tops of the buns with a pastry brush.
    6. Cover baking sheet with foil and bake at 350°F for 15 minutes. Remove the foil and bake for an additional 5-10 minutes or until lightly golden and the cheese has melted.
    7. Cut and serve with desired sides immediately while still hot.

    Notes

    • Feel free to adjust the spice level by adding more or less hot sauce.
    • These sliders can be served with celery sticks and extra ranch dressing on the side.
    • Great for parties or game day!
    • Prep Time: 10 minutes
    • Cook Time: 25 minutes
    • Category: Appetizer
    • Method: Baking
    • Cuisine: American

    Nutrition

    • Serving Size: 1 slider
    • Calories: 250
    • Sugar: 1g
    • Sodium: 600mg
    • Fat: 10g
    • Saturated Fat: 5g
    • Unsaturated Fat: 4g
    • Trans Fat: 0g
    • Carbohydrates: 28g
    • Fiber: 1g
    • Protein: 15g
    • Cholesterol: 40mg

    Sharing is caring!

  • Acorn Squash Casserole

    Acorn Squash Casserole


    Introduction to Acorn Squash Casserole

    As the leaves begin to turn and the air gets a little crisper, my thoughts drift to comforting meals filled with warmth and flavor. One dish that always makes a comeback in my kitchen is the delightful Acorn Squash Casserole. This casserole embraces the perfect harmony of savory and sweet that I adore. It’s not just a side; it’s a hug on a plate, ideal for busy moms and professionals seeking a wholesome, delicious addition to their table. Whether it’s for family gatherings or cozy dinner nights, this dish is sure to impress and satisfy!

    Why You’ll Love This Acorn Squash Casserole

    This Acorn Squash Casserole is a lifesaver in the kitchen! It’s simple enough for even the busiest of nights, yet impressive enough for holiday gatherings. The combination of roasted acorn squash and a luscious brown butter pecan topping creates a mouthwatering flavor explosion that your family will love. Plus, it’s a great way to sneak in some veggies, making it a win-win for everyone at the table!

    Ingredients for Acorn Squash Casserole

    To create a delightful Acorn Squash Casserole, you’ll need some key ingredients that bring texture and flavor to the dish. Here’s what you’ll gather:

    • Acorn Squash: The star of the show! Sweet and nutty in flavor, it’s the perfect base for our casserole. You’ll split it and roast it to perfection.
    • Olive Oil: A simple brush of this helps enhance the squash’s natural sweetness and ensures it roasts beautifully.
    • Kosher Salt: Just a pinch will do! It lifts up the flavors, balancing the sweetness of the dish.
    • Light Brown Sugar: We use this to add that caramel-like sweetness. It complements the squash perfectly.
    • All-Purpose Flour: This helps bind everything together. For those going gluten-free, substitute with your preferred gluten-free flour.
    • Unsalted Butter: A rich ingredient, it adds a creamy, luxurious touch, especially when browned. The nutty flavor of brown butter is to die for!
    • Eggs: They act as a binder, giving the casserole that lovely custardy texture.
    • Cinnamon: A sprinkle of this warm spice brings a cozy note to the dish, making it feel like fall.
    • Vanilla Extract: Adds a layer of warmth and sweetness, elevating the dish’s flavor profile.
    • Pecans: Roughly chopped for the topping, these nuts provide a wonderful crunch and enhance the casserole’s nutty notes.

    For precise measurements, you’ll find them listed at the bottom of the article, ready for printing!

    How to Make Acorn Squash Casserole

    Now that we’ve gathered our ingredients, let’s jump into the fun part—making this luscious Acorn Squash Casserole. I find cooking to be a bit like magic, where careful steps lead to delicious results. So, let’s get started!

    Step 1: Prepare the Acorn Squash

    First thing’s first! Preheat your oven to a sizzling 425°F. Slice your acorn squash in half and scoop out the seeds. I love using a sturdy spoon for this—just like carving a little pumpkin!

    Brush the insides of each half with olive oil and sprinkle them with kosher salt. Lay the squash skin-side up on a baking sheet. Pop it in the oven and roast for about 40 to 45 minutes. Keep an eye on them—you want them tender, not mushy.

    Step 2: Make the Brown Butter

    While your squash is roasting, it’s time to channel your inner chef with some brown butter magic! In a small saucepan, melt your unsalted butter over medium heat. Stir it gently, and watch as it transforms from bubbly to a beautiful golden brown—this takes about 4-5 minutes.

    The nutty aroma? Oh, it’s heavenly! Remove it from heat as soon as you see those delightful brown bits form. This will be the secret ingredient that elevates your casserole!

    Step 3: Prepare the Pecan Topping

    Now, let’s get our topping ready. In a medium bowl, combine the light brown sugar, flour, chopped pecans, and kosher salt. Once blended, pour in that gorgeous brown butter you just made.

    Mix everything together until you have a crumbly texture—it should look so enticing, you might be tempted to sneak a taste!

    Step 4: Mash the Squash

    Once your acorn squash has cooled for about 10-15 minutes, it’s time to get hands-on! Scoop out the flesh and mash it in a bowl. It’s like crafting your very own creamy squash puree!

    Add in the brown sugar, flour, melted butter, beaten eggs, cinnamon, and vanilla extract. Stir it all together until the mixture is well-combined. If it feels a tad too sweet, taste it and adjust the salt as needed. Trust me, the flavor balance makes a huge difference!

    Step 5: Combine and Bake

    Lower the oven temperature to 350°F to prepare for baking. Transfer your acorn squash mixture into a 9×13-inch baking dish, spreading it evenly. Now, sprinkle that delightful pecan topping all over the top—this is where the magic really happens!

    Slide your baking dish into the oven and bake for 35-40 minutes. If the topping starts browning too quickly, feel free to cover it with foil. Once it’s golden and bubbly, pull it out and let everyone indulge in the mouthwatering aroma!

    Tips for Success

    • For even cooking, choose acorn squash that feels heavy for its size.
    • Keep an eye on the pecan topping—cover it with foil if it browns too fast.
    • Make it ahead! This casserole tastes even better the next day.
    • Experiment with spices! A pinch of nutmeg or allspice can add a unique twist.
    • Don’t underestimate the power of letting it rest before serving; it helps flavors meld.

    Equipment Needed for Acorn Squash Casserole

    • Baking Sheet: A must for roasting the squash; any flat, sturdy tray will work.
    • 9×13-inch Baking Dish: Essential for the final baking; a similar size dish is a fine substitute.
    • Medium Bowl: Perfect for mixing ingredients; a large mixing bowl can also be used.
    • Small Saucepans: Ideal for making brown butter; a frying pan will suffice too.
    • Whisk or Spoon: Great for blending; don’t forget you can use a fork in a pinch!

    Variations of Acorn Squash Casserole

    • Maple Syrup Twist: Swap out some of the brown sugar for a splash of pure maple syrup, adding a delightful depth of flavor.
    • Nutty Surprise: Add sunflower seeds or walnuts along with the pecans for a variety of textures and flavors.
    • Cheesy Delight: Mix in some shredded cheese, like sharp cheddar or feta, for a savory twist that pairs beautifully with the sweet squash.
    • Vegan Version: Use flax eggs instead of regular eggs, and opt for coconut oil or vegan butter to make this dish plant-based.
    • Spicy Kick: A dash of cayenne pepper or chili powder mixes well, providing a thrilling contrast to the sweetness.

    Serving Suggestions for Acorn Squash Casserole

    • Perfect Pairings: Serve with a fresh green salad for a balanced meal.
    • Holiday Vibes: This dish shines next to roasted turkey or glazed ham.
    • Cozy Drinks: Complement the flavors with warm apple cider or a glass of sweet white wine.
    • Presentation Tip: Garnish with extra pecans or a sprinkle of cinnamon for an eye-catching finish.

    FAQs about Acorn Squash Casserole

    Is Acorn Squash Casserole gluten-free?

    Yes! To make a gluten-free Acorn Squash Casserole, simply replace the all-purpose flour with a gluten-free flour blend. This allows everyone to enjoy this delightful dish without worry.

    Can I prepare Acorn Squash Casserole ahead of time?

    You certainly can! Prepare it the day before, cover it tightly, and refrigerate. When you’re ready to bake, just pop it in the oven. This casserole often tastes even better the next day as the flavors meld beautifully!

    What should I serve with Acorn Squash Casserole?

    This casserole pairs wonderfully with roasted meats like turkey or chicken. It can also accompany a leafy green salad for a lighter meal. And don’t forget a warm drink like apple cider to round it off!

    Can I freeze leftovers of Acorn Squash Casserole?

    Absolutely! Leftovers freeze well. Just let the casserole cool, then cover tightly in an airtight container. When you’re ready to enjoy it again, thaw it overnight in the fridge and reheat in the oven.

    Is this recipe suitable for picky eaters?

    Definitely! With its sweet and nutty flavors, most picky eaters won’t even realize they’re enjoying a veggie-packed dish. Plus, the crunchy pecan topping makes it extra appealing!

    Final Thoughts on Acorn Squash Casserole

    This Acorn Squash Casserole truly embodies the spirit of home cooking. It’s a dish that warms your heart, bringing joy to your family table. As the sweet and savory notes blend together, each bite feels like a comforting hug.

    I’ve cherished creating this casserole, sharing it with friends during gatherings, and seeing smiles light up around the table.

    It’s not just a recipe; it’s an expression of love and care for those we hold dear. So, gather your loved ones, serve this delightful dish, and soak in the happiness it brings!


    Print

    clock clock iconcutlery cutlery iconflag flag iconfolder folder iconinstagram instagram iconpinterest pinterest iconfacebook facebook iconprint print iconsquares squares iconheart heart iconheart solid heart solid icon

    Description

    A savory and sweet acorn squash casserole topped with a brown butter pecan topping, perfect as a side dish for any meal.


    • 3 large acorn squash halved and seeded (yields 910 cups roasted squash)
    • 1 tablespoon olive oil
    • Kosher salt to taste
    • 1/2 cup (100g) light brown sugar, packed
    • 1/4 cup (30g) all-purpose flour (gluten-free if needed)
    • 4 Tablespoons (56g) unsalted butter, melted
    • 2 large eggs, beaten
    • 1 teaspoon cinnamon
    • 2 teaspoons vanilla extract
    • 1/2 cup (8 Tbsp; 57g) unsalted butter, cut into cubes (for topping)
    • 1 cup (200g) light brown sugar, packed (for topping)
    • 1/2 cup (60g) all-purpose flour (gluten-free if needed, for topping)
    • 1 3/4 cups raw pecans, roughly chopped
    • 1 teaspoon kosher salt (for topping)

    1. Preheat the oven to 425°F. Slice the acorn squash in half and scoop out the seedy centers. Brush the insides with olive oil and sprinkle with salt. Place skin-side-up on a baking sheet and roast for 40-45 minutes.
    2. Melt butter in a small saucepan over medium heat, cooking for 4-5 minutes until bubbling and frothy, then remove from heat once brown bits form.
    3. In a medium bowl, combine brown sugar, flour, pecans, salt, and brown butter to make the pecan topping.
    4. Let the squash cool for 10-15 minutes, peel or scoop out the flesh, and mash in a bowl. Mix in brown sugar, flour, melted butter, eggs, cinnamon, vanilla, and adjust salt to taste.
    5. Reduce oven temperature to 350°F. Transfer the acorn squash mixture to a 9×13-inch baking dish, sprinkle the pecan topping, and bake for 35-40 minutes, covering with foil if necessary. Serve warm.

    Notes

    • For a gluten-free option, use gluten-free flour.
    • Cover the casserole with foil if the topping browns too quickly.
    • Prep Time: 25 minutes
    • Cook Time: 1 hour
    • Category: Side Dish
    • Method: Baking
    • Cuisine: American

    Nutrition

    • Serving Size: 1/8 of casserole
    • Calories: 260
    • Sugar: 15g
    • Sodium: 200mg
    • Fat: 14g
    • Saturated Fat: 7g
    • Unsaturated Fat: 5g
    • Trans Fat: 0g
    • Carbohydrates: 34g
    • Fiber: 3g
    • Protein: 3g
    • Cholesterol: 80mg

    Sharing is caring!

  • Sticky Garlic Chicken Noodles

    Sticky Garlic Chicken Noodles


    Introduction to Sticky Garlic Chicken Noodles

    As someone who juggles a busy schedule, I completely understand the struggle of getting a delicious meal on the table without a lot of fuss. That’s why I’m excited to share my Sticky Garlic Chicken Noodles recipe with you! This dish is a flavor explosion that combines tender chicken and a sweet garlic sauce, making it a hit with both kids and adults alike. It’s quick enough for weeknight dinners yet special enough to impress friends on the weekend. Trust me, once you try this, it’ll become a staple in your kitchen!

    Why You’ll Love This Sticky Garlic Chicken Noodles

    This Sticky Garlic Chicken Noodles recipe is a lifesaver for busy weeknights. It’s incredibly easy to make, taking just 30 minutes from start to finish. The taste? Oh, it’s out of this world! The combination of sweet honey and savory garlic creates a sauce that clings to the chicken and noodles, guaranteeing that every bite bursts with flavor. Plus, you can customize it with your favorite veggies – what’s not to love?

    Ingredients for Sticky Garlic Chicken Noodles

    Getting everything together for my Sticky Garlic Chicken Noodles is part of the fun! Here’s what you’ll need for this amazing dish:

    • Chicken: I prefer using breast or thigh pieces, which are juicy and cook quickly.
    • Soy Sauce: This adds a savory depth to the dish, giving that umami richness!
    • Honey: A touch of sweetness to balance the savory flavors – it truly makes the sauce sticky!
    • Garlic: Freshly minced garlic is key; it brings an aromatic kick that’s hard to resist.
    • Ginger: A bit of fresh, grated ginger creates warmth and a pleasant zing.
    • Red Chili Flakes: If you like heat, add these in for a spicy twist!
    • Cornstarch: This is your secret weapon for coating the chicken and thickening the sauce perfectly.
    • Vegetable Oil: A neutral oil is best for frying the chicken until it’s golden brown.
    • Noodles: You can go with rice noodles or egg noodles based on your preference!
    • Green Onions: These add a fresh crunch and a pop of color to your dish.
    • Sesame Seeds: Optional but these little guys offer a lovely finish and a nutty flavor!

    Don’t worry if you don’t have everything on hand; you can easily customize this recipe! For instance, swap out chicken for shrimp, or even go vegetarian with firm tofu. You can find exact measurements at the bottom of this article, along with a printable version. Cooking should be fun, and I encourage you to make it your own!

    How to Make Sticky Garlic Chicken Noodles

    Now that we have all our ingredients ready, it’s time to dive into making these Sticky Garlic Chicken Noodles! Follow these easy steps, and you’ll have a delicious meal in no time.

    Preparing the Sauce

    Start by whipping up the sauce. In a medium bowl, combine soy sauce, honey, minced garlic, grated ginger, and red chili flakes if you’re feeling adventurous. Give it a good stir until everything is blended beautifully. This sauce is what gives the dish its signature sticky and flavorful kick!

    Coating the Chicken

    Next, take your bite-sized chicken pieces and toss them in cornstarch. This simple step is key for helping the chicken achieve a crispy texture while absorbing all that tasty sauce later. Ensure each piece is well coated without clumps – nobody likes a lumpy bite!

    Cooking the Chicken

    Now it’s time to cook the chicken! Heat up your vegetable oil in a large skillet or wok over medium-high heat. Add the chicken, making sure not to overcrowd the pan. Let it sizzle away! Cook for about 6 to 8 minutes, turning occasionally, until the chicken is golden brown and cooked through. The aroma will be irresistible, trust me!

    Thickening the Sauce

    Once your chicken is looking and smelling amazing, it’s time to pour in the prepared sauce. Stir it around to make sure each piece is covered. Allow it to simmer. In about 2–3 minutes, you’ll notice the sauce thickening beautifully. This is where the sticky magic happens!

    Preparing the Noodles

    While your chicken is simmering, cook the noodles according to the package instructions. Whether you choose rice or egg noodles is entirely up to you! Once they’re cooked, drain them and set aside with a splash of oil to keep them from sticking together.

    Combining the Ingredients

    Now for the fun part! Add your cooked noodles to the skillet with the chicken and sauce. Toss everything together gently. You want to ensure each noodle is beautifully coated in that sticky, flavorful sauce. It’s like a warm hug for your taste buds!

    Final Touches

    To finish off your masterpiece, garnish the dish with chopped green onions and sesame seeds if you’re using them. This adds both color and a bit of crunch. Serve it hot, and enjoy the symphony of flavors in every single bite!

    Tips for Success

    • Prep your ingredients ahead of time. This saves you from scrambling during cooking!
    • Don’t skip the cornstarch coating! It’s essential for a crispy and flavorful chicken.
    • If your kids are picky, try adding shredded carrots or snap peas for some color and crunch.
    • Have fun experimenting with the sauce! More honey for sweetness or more chili flakes for heat!
    • Make it a family affair! Involve your kids in the cooking process for kid-friendly bonding time.

    Equipment Needed for Sticky Garlic Chicken Noodles

    • Large skillet or wok: Essential for cooking the chicken and combining everything. A non-stick skillet works great, too!
    • Mixing bowl: For prepping your sauce. Any bowl will do, just make sure it’s big enough to hold everything.
    • Cooking utensils: Get a spatula for stirring and a pair of tongs for flipping your chicken.
    • Measuring cups and spoons: To keep your ingredients precise. If you don’t have these, just eyeballing works fine sometimes!

    Variations on Sticky Garlic Chicken Noodles

    • Swap the Chicken: Use shrimp or firm tofu for a different protein option that’s just as delicious!
    • Add Veggies: Toss in bell peppers, broccoli, or snap peas for an extra crunch and a burst of color.
    • Make It Spicy: Increase the red chili flakes or add sliced fresh chilies for an extra kick!
    • Go Gluten-Free: Use gluten-free soy sauce or coconut aminos to cater to dietary restrictions.
    • Serve Over Rice: For a twist, serve the sticky garlic chicken over steamed rice instead of noodles.

    Serving Suggestions for Sticky Garlic Chicken Noodles

    • Pair with a crisp side salad drizzled with a tangy vinaigrette for a refreshing contrast.
    • Serve with steamed broccoli or snap peas for added nutrition and crunch.
    • Enjoy with a light sparkling water or iced tea for a delightful drink combination.
    • For a pretty presentation, garnish with additional green onions and a sprinkle of sesame seeds!

    FAQs about Sticky Garlic Chicken Noodles

    Can I make Sticky Garlic Chicken Noodles ahead of time?

    Yes! You can prepare the chicken and sauce in advance. Just store them separately in airtight containers. When you’re ready to eat, quickly cook the noodles and reheat the chicken with the sauce. It saves time without sacrificing flavor!

    What can I substitute for the soy sauce to make it gluten-free?

    If you’re looking for a gluten-free option, coconut aminos or tamari sauce are fantastic alternatives. They provide a similar umami taste without the gluten, making your Sticky Garlic Chicken Noodles enjoyable for everyone!

    Can I freeze leftover Sticky Garlic Chicken Noodles?

    Absolutely! Just make sure to cool the dish completely before transferring it to freezer-safe containers. When you’re ready to enjoy it again, thaw in the fridge overnight and reheat on the stovetop or microwave.

    How can I make this dish vegetarian?

    To go vegetarian, simply swap out the chicken for firm tofu or tempeh. Coat them in cornstarch and sauté until golden. The sauce will blend beautifully with either option, ensuring a delightful meal!

    What can I add for extra flavor in the sauce?

    Feel free to experiment! Adding a splash of rice vinegar or sesame oil can enhance the flavor profile of the sauce. You could also include a teaspoon of hoisin sauce for a unique twist!

    Final Thoughts

    Cooking should always be a joyful experience, and my Sticky Garlic Chicken Noodles perfectly embodies that feeling. With just a quick 30-minute preparation, you can deliver a meal that’s not only packed with flavor but also brings family members together around the table. I cherish the smiles and full bellies that come after serving this dish. Plus, you get the satisfaction of knowing you made something that’s both delicious and adaptable to your family’s tastes. So, roll up your sleeves, embrace the mess, and dive into these tender, sticky noodles – it’s happiness on a plate!


    Print

    clock clock iconcutlery cutlery iconflag flag iconfolder folder iconinstagram instagram iconpinterest pinterest iconfacebook facebook iconprint print iconsquares squares iconheart heart iconheart solid heart solid icon

    Description

    A delectably sticky and flavorful dish featuring tender chicken pieces coated in a garlic and honey sauce, served over noodles.


    • 1 lb chicken breast or thighs, cut into bite-sized pieces
    • 1/4 cup soy sauce
    • 3 tbsp honey
    • 4 garlic cloves, minced
    • 1 tsp grated ginger
    • 1/2 tsp red chili flakes (optional)
    • 2 tbsp cornstarch
    • 2 tbsp vegetable oil
    • 8 oz noodles (rice noodles or egg noodles)
    • 2 green onions, chopped
    • 1 tsp sesame seeds (optional)

    1. In a bowl, mix soy sauce, honey, garlic, ginger, and chili flakes to make the sauce.
    2. Toss the chicken pieces with cornstarch until evenly coated.
    3. Heat vegetable oil in a large skillet or wok over medium-high heat.
    4. Add chicken and cook until golden and cooked through, about 6–8 minutes.
    5. Pour the sauce over the chicken and stir to coat. Let it simmer until thickened, about 2–3 minutes.
    6. Cook noodles according to package instructions. Drain and set aside.
    7. Add cooked noodles to the skillet and toss to combine with the sauce and chicken.
    8. Garnish with chopped green onions and sesame seeds before serving.

    Notes

    • For a spicier version, increase the amount of red chili flakes.
    • Adjust the sweetness by varying the amount of honey.
    • Feel free to add vegetables like bell peppers or snap peas for extra nutrition.
    • Prep Time: 10 minutes
    • Cook Time: 20 minutes
    • Category: Main Dish
    • Method: Stovetop
    • Cuisine: Asian

    Nutrition

    • Serving Size: 1 serving
    • Calories: 450
    • Sugar: 10g
    • Sodium: 900mg
    • Fat: 12g
    • Saturated Fat: 2g
    • Unsaturated Fat: 8g
    • Trans Fat: 0g
    • Carbohydrates: 60g
    • Fiber: 2g
    • Protein: 25g
    • Cholesterol: 70mg

    Sharing is caring!

  • Pumpkin Whipped Cream Topping

    Pumpkin Whipped Cream Topping


    Introduction to Pumpkin Whipped Cream Topping

    As the crisp autumn air begins to swirl around us, I can’t help but think of the cozy delights that fall brings. One of my absolute favorites is a sumptuous Pumpkin Whipped Cream Topping. It’s creamy, dreamy, and oh-so-simple to make, transforming any dessert into a seasonal masterpiece. If you’re anything like me, balancing a busy life can often lead to dessert choices that feel a bit too ordinary. This versatile topping is not only a quick solution for a hectic day but also a delightful way to impress your family and friends with minimal effort!

    Why You’ll Love This Pumpkin Whipped Cream Topping

    Let’s be honest; life can get overwhelmingly busy. This Pumpkin Whipped Cream Topping deserves a place in your kitchen because it’s effortless and quick to whip up. In just 10 minutes, you can create a luscious, flavorful addition to your desserts that captures the essence of fall. The taste? Pure bliss! Your family will rave about it, and let’s face it—everyone deserves a touch of joy on their plate, especially when time is of the essence.

    Ingredients for Pumpkin Whipped Cream Topping

    To create your delightful Pumpkin Whipped Cream Topping, you’ll need just a few simple ingredients that come together in perfect harmony.

    • Heavy whipping cream: This is the star of your topping, giving it that rich, creamy texture. Make sure it’s well chilled for the best results.
    • Powdered sugar: A little sweetness goes a long way. This sugar dissolves easily, ensuring a smooth finish without the graininess of granulated sugar.
    • Pumpkin puree: Opt for canned pumpkin or homemade; both will add that delicious fall flavor and a lovely orange hue.
    • Ground cinnamon: A staple spice that brings warmth to your pumpkin topping. It adds that nostalgic taste of autumn with every spoonful.
    • Ground nutmeg: A pinch of nutmeg elevates the flavors. It’s fragrant and complements the pumpkin beautifully.
    • Vanilla extract: Just a dash of this rich extract enhances all the other flavors, tying the mixture together seamlessly.
    • Pinch of salt: This ingredient might seem small, but it balances the sweetness, making every bite flavorful.

    For those looking to sweeten the deal, feel free to adjust the amount of powdered sugar to your taste. And don’t shy away from experimenting with spices or even adding a splash of maple syrup for extra sweetness! You can find exact quantities at the end of the article, available for printing.

    How to Make Pumpkin Whipped Cream Topping

    Step 1: Prepare the Ingredients

    To make the best Pumpkin Whipped Cream Topping, start by gathering all your ingredients. This simple step not only saves you time but also ensures that everything is ready for action. Grab a large mixing bowl for whipping and measure out your ingredients in advance. Chill your heavy whipping cream beforehand—this makes all the difference when it comes to achieving that airy texture!

    Step 2: Combine Heavy Whipping Cream and Sugar

    In your chilled bowl, place the heavy whipping cream along with the powdered sugar. This duo is the foundation of your whipped cream topping. Using an electric mixer, start on low speed until the sugar is incorporated. Gradually crank up the speed to medium. This will create a fluffy base, preparing it for the pumpkin magic that’s about to unfold!

    Step 3: Beat to Soft Peaks

    Now comes the fun part: beating the mixture! Keep your electric mixer on medium to high speed until soft peaks form. You’ll know you’ve got it right when the mixture holds its shape but still gently falls when you lift the beaters. It’s like creating a cloud of deliciousness! This stage is essential, so keep a close eye on it—you don’t want to rush this creamy affair.

    Step 4: Add Pumpkin and Spices

    Once you have those lovely soft peaks, it’s time to invite the pumpkin and spices to the party! Gently fold in the pumpkin puree, ground cinnamon, ground nutmeg, and vanilla extract. Use a spatula to mix everything until well combined, preserving that airiness. This is where your whipped cream takes on that warm, inviting flavor that reminds you of cozy fall afternoons!

    Step 5: Beat to Stiff Peaks

    Let’s amp up the volume! Increase your mixer speed to high and beat until you achieve stiff peaks. This means the mixture should be thick and hold its shape firmly! But be careful—overbeating can lead to a grainy texture. If it begins to look too thick, stop mixing. Trust me, you want the perfect light and airy texture for your Pumpkin Whipped Cream Topping.

    Step 6: Serve or Store

    Your delightful Pumpkin Whipped Cream Topping is ready to shine! Serve it immediately atop your favorite desserts, like pies or cakes, to really elevate the flavors. If you’re preparing ahead, you can store it in the fridge. Just remember to cover it tightly. It will hold up for a day or two—but good luck keeping it around that long!

    Tips for Success

    • Always start with chilled heavy whipping cream for the best results.
    • Use an electric mixer for quick and easy whipping; it saves time and effort.
    • Keep a close eye on the peaks; soft and stiff peaks should be distinct but not overbeaten.
    • For a festive twist, experiment with pumpkin spice or a splash of bourbon.
    • Adjust sweetness to your liking; everyone’s palate is different!

    Equipment Needed

    • Large mixing bowl: Any bowl will do, but a glass or metal bowl works best for whipping.
    • Electric mixer: A hand mixer or stand mixer is ideal, but you can go old-school with a whisk if you’re feeling energetic!
    • Measuring cups and spoons: Accurate measurements ensure delicious results.
    • Spatula: Essential for folding in the pumpkin and spices with care.

    Variations of Pumpkin Whipped Cream Topping

    • Maple Pumpkin Whipped Cream: Swap some powdered sugar for maple syrup for a delightful twist and added depth of flavor.
    • Spiced Pumpkin Whipped Cream: Add a pinch of ginger or allspice to enhance the fall flavors even more.
    • Dairy-Free Version: Use coconut cream or almond milk whipped cream for a vegan-friendly alternative.
    • Chocolate Pumpkin Whipped Cream: Mix in a tablespoon of cocoa powder for a chocolatey twist that kids will love!
    • Healthier Option: Substitute powdered sugar with a sugar alternative like Stevia for a guilt-free dessert topping.

    Serving Suggestions for Pumpkin Whipped Cream Topping

    • Drizzle over warm pumpkin pie for a festive touch.
    • Top a slice of chocolate cake for a delightful contrast of flavors.
    • Pair with spiced apple cider for a cozy autumn treat.
    • Serve alongside vanilla ice cream for a heavenly dessert combo.
    • Use as a dip for fresh fruit sticks, like apples or pears.

    FAQs about Pumpkin Whipped Cream Topping

    Can I make Pumpkin Whipped Cream Topping ahead of time?
    Absolutely! You can prepare your topping in advance and store it in the refrigerator for up to two days. Just be sure to cover it tightly to maintain its airy texture. When you’re ready to serve, give it a quick stir!

    What desserts pair well with Pumpkin Whipped Cream Topping?
    This topping shines on so many desserts! It’s fantastic on pumpkin pie, cheesecake, or even a slice of chocolate cake. Don’t hesitate to experiment—your favorite desserts will thank you!

    Can I use non-dairy alternatives?
    Yes, you can make a delightful dairy-free Pumpkin Whipped Cream Topping! Use coconut cream or a non-dairy whipped topping alternative, like almond milk whipped cream, for a creamy result without the dairy.

    How can I adjust the sweetness of the topping?
    Simple! Taste your Pumpkin Whipped Cream Topping as you make it. If you prefer a sweeter topping, add extra powdered sugar until it reaches your desired level of sweetness. Always remember, it’s your dessert, so adjust to your taste!

    Is it possible to freeze Pumpkin Whipped Cream Topping?
    While it’s best fresh, you can freeze your whipped topping in an airtight container. Just know that the texture may change slightly upon thawing. Use it within a month for optimal taste!

    Final Thoughts

    Creating a luscious Pumpkin Whipped Cream Topping is more than just a recipe; it’s an experience that will warm your heart and delight your loved ones. The harmony of flavors captures the essence of fall, turning even the simplest desserts into something extraordinary. With just a few ingredients and a little time, you can add a sprinkle of joy to any gathering. Whether it’s a cozy family dinner or a festive celebration, this topping brings smiles and sweet memories to the table. So, embrace the season and whip up some happiness with this delightful treat!


    Print

    clock clock iconcutlery cutlery iconflag flag iconfolder folder iconinstagram instagram iconpinterest pinterest iconfacebook facebook iconprint print iconsquares squares iconheart heart iconheart solid heart solid icon

    Description

    A delightful and creamy pumpkin whipped cream topping that enhances the flavor of your desserts.


    • 1 cup heavy whipping cream, well chilled
    • 2 tablespoons powdered sugar
    • 1/4 cup pumpkin puree
    • 1/2 teaspoon ground cinnamon
    • 1/4 teaspoon ground nutmeg
    • 1/4 teaspoon vanilla extract
    • Pinch salt

    1. Place chilled heavy whipping cream and powdered sugar in a large mixing bowl.
    2. Beat the cream mixture with an electric mixer on medium speed until soft peaks form.
    3. Add pumpkin puree, ground cinnamon, ground nutmeg, vanilla extract, and a pinch of salt to the bowl.
    4. Continue beating the mixture on high speed until stiff peaks form and texture is light and airy.
    5. Avoid overbeating to prevent grainy texture.
    6. Serve immediately as a topping for desserts or refrigerate until needed.

    Notes

    • This topping works well with pies, cakes, and other desserts.
    • For a sweeter taste, adjust the powdered sugar to your preference.
    • Prep Time: 10 minutes
    • Cook Time: 0 minutes
    • Category: Dessert Topping
    • Method: Whipping
    • Cuisine: American

    Nutrition

    • Serving Size: 1 tablespoon
    • Calories: 30
    • Sugar: 1g
    • Sodium: 5mg
    • Fat: 2.5g
    • Saturated Fat: 1.5g
    • Unsaturated Fat: 1g
    • Trans Fat: 0g
    • Carbohydrates: 2g
    • Fiber: 0g
    • Protein: 0.3g
    • Cholesterol: 10mg

    Sharing is caring!

  • Buffalo Chicken Bacon Mozzarella Bombs

    Buffalo Chicken Bacon Mozzarella Bombs


    Introduction to Buffalo Chicken Bacon Mozzarella Bombs

    Have you ever craved a dish that’s bursting with flavor yet simple to whip up? Allow me to introduce you to Buffalo Chicken Bacon Mozzarella Bombs! These little flavor-packed wonders are perfect for a busy day, and they never fail to impress my friends and family. When life gets hectic, having a quick solution in your cooking repertoire is a lifesaver. With gooey mozzarella, spicy buffalo sauce, and crispy bacon, you’ll fall in love with these bites. So, let’s roll up our sleeves and create a dish that’s sure to bring smiles to your table!

    Why You’ll Love This Buffalo Chicken Bacon Mozzarella Bombs

    These Buffalo Chicken Bacon Mozzarella Bombs are a game changer in the kitchen! Not only are they incredibly easy to make, but they also deliver a mouthwatering taste that’ll have everyone asking for seconds. With just a handful of ingredients and minimal prep time, they’re perfect for busy nights. Plus, the combination of spicy buffalo sauce, creamy mozzarella, and crispy bacon makes them irresistible. Trust me, they’ll quickly become your new go-to appetizer!

    Ingredients for Buffalo Chicken Bacon Mozzarella Bombs

    Gathering the right ingredients is the first step toward creating these mouthwatering Buffalo Chicken Bacon Mozzarella Bombs. Here’s what you’ll need:

    • Mozzarella cheese: Cut into bite-sized cubes. This creamy core offers that irresistible gooey texture.
    • Cooked bacon: Crumbled for wrapping around the cheese. The crispy bits add crunch and a salty kick.
    • Ground chicken: The star of our dish, providing a lean protein base that soaks in all the flavors.
    • Garlic powder: A dash of this elevates the taste profile, giving it a savory punch.
    • Onion powder: Adds a mild sweetness and depth to the chicken mixture.
    • Paprika: For a hint of smokiness and a beautiful color.
    • Salt and black pepper: Essential for enhancing flavors, adjusting to your personal taste.
    • Buffalo sauce: This spicy sauce brings the classic Buffalo flavor we all crave. You can use store-bought or make your own!
    • All-purpose flour: For coating the bombs to help them get that perfect crispiness.
    • Eggs: Beaten, they help the breadcrumbs stick to the bombs, creating a nice crunchy layer.
    • Breadcrumbs: Adds that golden, crispy crust that we all love.
    • Vegetable or canola oil: For frying them to that delicious golden brown perfection.
    • Additional buffalo sauce: For tossing or drizzling over the cooked bombs, giving them an extra flavorful kick.
    • Bacon bits: Optional for garnish. Extra bacon? Yes, please!

    You can find ingredient amounts at the bottom of the article for easy printing. With these essentials, you’re on your way to making these delicious bites that will soon become a family favorite!

    How to Make Buffalo Chicken Bacon Mozzarella Bombs

    Now that you have all your ingredients ready, let’s dive into the fun part—making these Buffalo Chicken Bacon Mozzarella Bombs! It’s a step-by-step adventure filled with flavor and crunch. Let’s get started!

    Prepare the Filling

    Wrap Mozzarella and Bacon

    First, take those bite-sized cubes of mozzarella and wrap each one with a piece of crumbled bacon. Make sure the bacon is snug around the cheese, creating a cozy little package. This delicious core will ensure you get that melty, cheesy goodness with every bite.

    Season the Chicken

    Mix Ingredients

    In a large bowl, combine the ground chicken, garlic powder, onion powder, paprika, salt, pepper, and half a cup of buffalo sauce. Mix everything well with your hands or a spatula until it’s fully blended. You want those flavors to dance together and create a harmony of spiciness that’ll shine in every bite!

    Form the Bombs

    Assemble and Seal

    Now comes the fun part! Take a small portion of the seasoned chicken mixture and flatten it in your palm. Place a bacon-wrapped mozzarella cube in the center and then carefully fold the chicken around it. Seal it tightly so none of that gooey cheese escapes. You want a perfect, compact ball that holds all that flavor inside.

    Coat the Bombs

    Breading Process

    Roll each chicken ball in flour to give it a nice coat, and then dip it into the beaten eggs. Finally, roll it in breadcrumbs, ensuring it’s evenly coated on all sides. This crunchy outer layer will add that satisfying crisp we all crave when biting into the bombs!

    Cooking Method

    Frying vs Baking

    Now, it’s time to cook these scrumptious bombs! If you’re frying, heat up vegetable oil in a deep pan to 350°F. Carefully drop the bombs in and fry for 5 to 6 minutes until they’re golden brown and cooked through. For baking, preheat your oven to 400°F, arrange the bombs on a greased baking sheet, and bake for 18 to 20 minutes. Either way, you’ll end up with a deliciously crispy treat!

    Tips for Success

    • Make sure to wrap the mozzarella tightly in bacon to prevent leaks during cooking.
    • Chill the assembled bombs in the fridge for 20-30 minutes before frying or baking. This helps them hold their shape.
    • Use a thermometer to ensure the oil is at 350°F for frying—this guarantees a crisp exterior.
    • Experiment with different cheeses or spices to customize the flavor to your liking.

    Equipment Needed for Buffalo Chicken Bacon Mozzarella Bombs

    • Mixing bowl: A large one for combining the chicken and spices. Any bowl will do!
    • Frying pan or baking sheet: Use either for cooking. Choose based on your preferred method.
    • Meat thermometer: Essential for ensuring the chicken’s cooked safely.
    • Whisk: Handy for beating the eggs.

    Variations of Buffalo Chicken Bacon Mozzarella Bombs

    • Cheese Variations: Swap mozzarella for pepper jack or cheddar for an exciting flavor twist.
    • Spicy Kick: Add chopped jalapeños or cayenne pepper to the chicken mixture for an extra kick.
    • Healthier Option: Use ground turkey instead of chicken for a leaner dish while maintaining great flavor.
    • Gluten-Free: Use gluten-free breadcrumbs and flour to accommodate gluten-free dietary needs.
    • Veggie Version: Substitute the chicken with finely chopped cauliflower or shredded zucchini for a vegetarian bomb.

    Serving Suggestions for Buffalo Chicken Bacon Mozzarella Bombs

    • Dipping sauces: Serve with ranch or blue cheese dressing to complement the spicy flavors.
    • Fresh veggies: Pair with carrot and celery sticks for a refreshing crunch.
    • Beverage options: Enjoy with a cold beer, iced tea, or lemonade for a perfect combo.
    • Plating: Arrange on a vibrant platter and sprinkle with chopped parsley for a pop of color.

    FAQs about Buffalo Chicken Bacon Mozzarella Bombs

    Do you have questions about making these delightful Buffalo Chicken Bacon Mozzarella Bombs? You’re not alone! Here are some commonly asked questions that can help clarify any doubts and make your cooking experience even better.

    What kind of buffalo sauce should I use?
    You can use your favorite store-bought brand or whip up a homemade version. Just make sure it’s spicy enough to suit your taste!

    Can I freeze these buffalo chicken bombs?
    Absolutely! You can freeze them before cooking. Just wrap each bomb in plastic wrap and store in an airtight container. When you’re ready to enjoy, bake or fry them straight from the freezer, just adding a few extra minutes to the cook time.

    How do I know when they’re done cooking?
    For frying, look for that beautiful golden brown color. If you’re using a meat thermometer, the internal temperature should reach 165°F. For baking, expect about 18 to 20 minutes at 400°F.

    Can I make these buffalo chicken bombs ahead of time?
    Yes! You can prepare them, chill in the fridge, and bake or fry just before serving. This makes them a fantastic option for parties or busy weeknights.

    What if my family doesn’t like spicy food?
    Not a problem! You can reduce the amount of buffalo sauce or opt for a milder version. Just make sure to taste as you go, ensuring it hits the right flavor notes for everyone at the table.

    Final Thoughts on Buffalo Chicken Bacon Mozzarella Bombs

    Creating these Buffalo Chicken Bacon Mozzarella Bombs isn’t just about cooking; it’s about crafting delightful moments. As you serve these crispy bites, you’ll be rewarded with smiles and happy bellies. The joy of watching loved ones savor each gooey, spicy morsel makes all the effort worthwhile. These bombs are perfect for family gatherings, game days, or simply to treat yourself after a long week. Trust me, once you make them, they’ll become a cherished recipe in your kitchen. So gather your ingredients and prepare for a delicious adventure that’ll leave everyone wanting more!


    Print

    clock clock iconcutlery cutlery iconflag flag iconfolder folder iconinstagram instagram iconpinterest pinterest iconfacebook facebook iconprint print iconsquares squares iconheart heart iconheart solid heart solid icon

    Description

    Delicious and spicy Buffalo Chicken Bacon Mozzarella Bombs filled with gooey mozzarella and topped with crispy bacon.


    • 8 ounces mozzarella cheese, cut into bite-sized cubes
    • 1 cup cooked bacon, crumbled
    • 1 pound ground chicken
    • 1 teaspoon garlic powder
    • 1 teaspoon onion powder
    • 1 teaspoon paprika
    • Salt, to taste
    • Black pepper, to taste
    • 0.5 cup buffalo sauce
    • 1 cup all-purpose flour
    • 2 large eggs, beaten
    • 1 cup breadcrumbs
    • Vegetable oil or canola oil, for frying
    • 0.5 cup buffalo sauce, for tossing or drizzling
    • Additional bacon bits, optional, for garnish

    1. Cut mozzarella into cubes. Wrap each cube with crumbled cooked bacon and set aside.
    2. In a bowl, thoroughly combine ground chicken with garlic powder, onion powder, paprika, salt, pepper, and 0.5 cup buffalo sauce until evenly seasoned.
    3. Take a small portion of seasoned chicken mixture and flatten it in your palm. Place a bacon-wrapped mozzarella cube in the center, then enclose and seal the chicken entirely around the filling, forming a tight ball.
    4. Roll each chicken ball in flour to coat. Dip in beaten eggs, then evenly coat with breadcrumbs.
    5. For frying: Heat oil in a deep pan to 350°F. Fry each ball for 5 to 6 minutes until golden brown and the internal temperature reaches 165°F. For baking: Preheat oven to 400°F, arrange on a greased baking sheet, and bake for 18 to 20 minutes until thoroughly cooked.
    6. Toss or drizzle cooked balls with the remaining buffalo sauce. Garnish with extra bacon bits if desired and serve hot.

    Notes

    • Ensure the chicken is cooked to an internal temperature of 165°F
    • For extra flavor, let the balls sit for a few minutes before serving to allow the flavors to meld.
    • Can be made ahead and baked just before serving.
    • Prep Time: 20 minutes
    • Cook Time: 25 minutes
    • Category: Appetizer
    • Method: Frying or Baking
    • Cuisine: American

    Nutrition

    • Serving Size: 2 bombs
    • Calories: 400
    • Sugar: 1g
    • Sodium: 800mg
    • Fat: 24g
    • Saturated Fat: 7g
    • Unsaturated Fat: 14g
    • Trans Fat: 0g
    • Carbohydrates: 25g
    • Fiber: 1g
    • Protein: 20g
    • Cholesterol: 90mg

    Sharing is caring!

  • Pioneer Woman Pecan Pie Balls

    Pioneer Woman Pecan Pie Balls


    Introduction to Pioneer Woman Pecan Pie Balls

    There’s something undeniably charming about rustic desserts, isn’t there? They evoke cozy memories of family gatherings and heartwarming moments. These Pioneer Woman Pecan Pie Balls capture that same essence, transforming the beloved flavors of traditional pecan pie into delightful, no-bake treats. As a busy mom myself, I know how life can sweep you off your feet, leaving little time for elaborate baking. That’s why I adore these easy bites—they’re perfect for quick sweet snacks or gatherings! Just imagine popping one of these into your mouth after a long day; pure bliss!

    Why You’ll Love This Pioneer Woman Pecan Pie Balls

    Let’s face it—life can turn into a whirlwind of tasks, making dessert preparation feel overwhelming. But that’s where these Pioneer Woman Pecan Pie Balls come to the rescue! They require no baking and are super easy to whip up, which means you can have a delicious treat ready in just a fraction of the time. The rich flavors are reminiscent of a classic pecan pie, making them an instant favorite for everyone!

    Ingredients for Pioneer Woman Pecan Pie Balls

    Creating these delightful Pioneer Woman Pecan Pie Balls is all about blending simple, yet flavorful ingredients. You’ll need finely chopped pecans for that signature nutty crunch, along with graham cracker crumbs that add a sweet and crumbly texture. Powdered sugar sweetens the mixture, while corn syrup ties it all together, giving just the right amount of gooeyness.

    Don’t forget unsweetened cocoa powder for a rich depth of flavor and a hint of vanilla extract to elevate the sweetness. A pinch of salt balances everything beautifully. For an extra kick, use toasted pecans—absolutely delicious! You can find all exact quantities at the bottom of the article for your convenience.

    How to Make Pioneer Woman Pecan Pie Balls

    Ready to create some scrumptious Pioneer Woman Pecan Pie Balls? Let’s dive into the process! It’s super simple, and I promise it’s more about having fun than anything else. Follow these straightforward steps, and you’ll have treats that will delight everyone!

    Prepare the Mixture

    Start by grabbing a large mixing bowl. Combine the finely chopped pecans, graham cracker crumbs, powdered sugar, cocoa powder, and salt. Drizzle in the corn syrup and vanilla extract. Now, mix everything together using a spatula or your hands—don’t be shy! The goal is to make sure each ingredient gets blended well to create a sticky, cohesive mixture that will hold together beautifully.

    Form the Balls

    Now that your mixture is ready, it’s time to roll up your sleeves! Scoop out about one tablespoon of the mixture and roll it into a ball, roughly the size of a golf ball. Don’t stress too much about perfection; a little rustic charm adds to their appeal! Place each ball onto a parchment-lined baking sheet for easy peeking and serving once they’re set.

    Chill

    Patience is key at this stage! Pop your baking sheet into the fridge and let those little beauties chill for 30 minutes. This helps them firm up, making them easier to handle and serving a nice texture when you take a bite. While you wait, take a moment to daydream about how awesome they’ll taste!

    Coat (Optional)

    If you want to take your Pioneer Woman Pecan Pie Balls to the next level, consider dipping them in melted chocolate! Carefully coat each ball, ensuring it’s evenly covered. For a fun twist, try rolling them in sprinkles, crushed nuts, or even coconut flakes. The options are endless, and this adds a personalized touch to each tasty treat!

    Serve

    When ready to serve, pull them out of the fridge and enjoy them chilled or at room temperature—both are delicious! Trust me, it enhances the flavors just perfectly. If you have any leftovers, store them in an airtight container in the refrigerator, where they’ll stay fresh for up to a week. But honestly, they’re so good, leftovers might be the least of your worries!

    Tips for Success

    Getting those Pioneer Woman Pecan Pie Balls just right is simpler than it seems! First, make sure your pecans are finely chopped; this helps with the texture.

    Also, don’t skip the chilling step—it’s crucial! If the mixture feels too sticky, a smidgen of extra graham cracker crumbs can help.

    Finally, encourage your little ones to join in—rolling the balls can be a fun family activity!

    Equipment Needed

    Getting started on your Pioneer Woman Pecan Pie Balls is a breeze with a few essential tools in hand. You’ll need a large mixing bowl for combining ingredients, a mixing spatula or your hands, and a measuring cup for precise portions. A parchment-lined baking sheet makes for easy rolling and serving. If you don’t have a baking sheet, any flat plate will do!

    Variations

    The beauty of Pioneer Woman Pecan Pie Balls is their versatility! For a twist, try swapping pecans for walnuts or almonds; both options bring a unique flavor profile. If you need a gluten-free version, use gluten-free graham crackers, and your treats will still shine! Feeling adventurous? Add a splash of bourbon vanilla or a hint of cinnamon to the mixture for an unexpected kick. Let your creativity bloom!

    Serving Suggestions

    Elevate your Pioneer Woman Pecan Pie Balls experience by pairing them with a warm cup of coffee or a luscious hot chocolate. They also shine alongside fresh fruit for a delightful contrast. Arrange them on a beautiful platter, maybe add some colorful sprinkles to catch the eye, and watch them disappear!

    FAQs about Pioneer Woman Pecan Pie Balls

    How should I store the Pioneer Woman Pecan Pie Balls?

    Keep your Pioneer Woman Pecan Pie Balls in an airtight container in the refrigerator. They’ll stay fresh for up to a week!

    Can I use different nuts for this recipe?

    Absolutely! Feel free to swap pecans for walnuts or almonds if you prefer. The flavor will still come through beautifully.

    How long do these treats last?

    They can last about a week in the fridge, but I doubt they’ll stick around that long!

    Can I freeze these balls?

    Yes! Freeze them in an airtight container; just let them thaw in the fridge before enjoying!

    Final Thoughts

    Whipping up these Pioneer Woman Pecan Pie Balls is such a joyful experience! They bring the sweetness of pecan pie into a delightful, no-bake treat that fits perfectly into our busy lives. Whether you’re treating yourself after a long day or sharing them at family gatherings, these little bites of happiness will bring smiles all around. I encourage you to try this recipe and watch how quickly they disappear. I’d love to hear your stories and any creative twists you add to these delectable treats. Happy cooking, fellow friends!


    Print

    clock clock iconcutlery cutlery iconflag flag iconfolder folder iconinstagram instagram iconpinterest pinterest iconfacebook facebook iconprint print iconsquares squares iconheart heart iconheart solid heart solid icon

    Description

    Irresistible no-bake treats that combine the flavors of pecan pie in a bite-sized ball.


    • 1 cup finely chopped pecans
    • 1 cup graham cracker crumbs
    • 1/2 cup powdered sugar
    • 1/2 cup corn syrup
    • 1/4 cup unsweetened cocoa powder
    • 1 teaspoon vanilla extract
    • 1/4 teaspoon salt
    • Chocolate coating (optional)

    1. Prepare the Mixture: Combine pecans, graham cracker crumbs, powdered sugar, cocoa powder, salt, corn syrup, and vanilla extract in a bowl. Mix until well combined.
    2. Form the Balls: Scoop and roll the mixture into 1-inch balls and place them on a parchment-lined baking sheet.
    3. Chill: Refrigerate for 30 minutes to firm up.
    4. Coat (Optional): Dip in melted chocolate if desired, then return to the baking sheet to set.
    5. Serve: Enjoy at room temperature or chilled.

    Notes

    • For added flavor, consider using toasted pecans.
    • These can be stored in the refrigerator for up to a week.
    • Feel free to use different coatings like sprinkles or crushed nuts.
    • Prep Time: 15 minutes
    • Cook Time: 0 minutes
    • Category: Dessert
    • Method: No-Bake
    • Cuisine: American

    Nutrition

    • Serving Size: 1 ball
    • Calories: 120
    • Sugar: 9g
    • Sodium: 50mg
    • Fat: 5g
    • Saturated Fat: 1g
    • Unsaturated Fat: 4g
    • Trans Fat: 0g
    • Carbohydrates: 16g
    • Fiber: 1g
    • Protein: 1g
    • Cholesterol: 0mg

    Sharing is caring!

  • Heavenly S’mores Cupcake

    Heavenly S’mores Cupcake


    Introduction to Heavenly S’mores Cupcake

    Welcome to the delightful world of baking, where chaos can be transformed into a sweet symphony! Life can be a juggling act, especially for us busy moms and professionals, right? That’s why I’m thrilled to share my Heavenly S’mores Cupcake recipe with you. It’s not just a cupcake; it’s a quick solution for a busy day or the perfect treat to impress your loved ones after dinner. Picture biting into that rich chocolatey goodness, paired with buttery graham crackers and fluffy marshmallow frosting. Trust me; this will become your new favorite indulgence!

    Why You’ll Love This Heavenly S’mores Cupcake

    Let’s face it: we all crave a treat that feels like a warm hug, but we also want it to be easy to whip up. These Heavenly S’mores Cupcakes deliver on both fronts. With a simple process that takes just over 40 minutes, you can indulge in decadence without fuss. Each bite is a delightful journey of flavors that will satisfy any sweet tooth. Plus, who doesn’t love a beautiful dessert that makes you feel like a superstar chef?

    Ingredients for Heavenly S’mores Cupcake

    Gathering your ingredients is like gearing up for a mini adventure in the kitchen! Here’s what you’ll need to create these delightful Heavenly S’mores Cupcakes:

    • Graham cracker crumbs: Your base layer for that classic s’mores texture. You can crush store-bought graham crackers or buy pre-made crumbs for quick assembly.
    • Melted butter: This brings richness and binds the graham cracker base, creating an irresistible crust.
    • Sugar: Just a touch to enhance the sweetness of the graham cracker base, giving it that dessert vibe.
    • Devil’s food cake mix: The star of the show! It keeps things easy and ensures your cupcakes are decadently rich. You can also use a chocolate cake mix for a different twist.
    • Sour cream: It adds moisture and a lovely tang, giving your cupcake that perfect fluffy texture.
    • Large eggs: Vital for structure and binding the ingredients, providing that soft crumb we all love.
    • Warm water: Enhances the richness of the cupcake batter while activating the cake mix beautifully.
    • Instant chocolate pudding mix: This secret ingredient amplifies the chocolate flavor and keeps the cupcakes moist.
    • Vegetable oil: A key player for adding moisture to your cupcakes without being heavy.
    • Vanilla extract: Just a splash will elevate the overall flavor, making these cupcakes feel fancy.

    For those feeling adventurous, you can also add mini marshmallows to the cupcake batter for an explosion of gooeyness! Just think; surprise bites of marshmallow happiness await your family!

    You can find the exact measurements for everything at the bottom of the article, ready for printing. Happy baking!

    How to Make Heavenly S’mores Cupcake

    Step 1: Prepping Your Oven and Cupcake Pans

    The first step in your cupcake journey is to preheat your oven to a cozy 350°F. This ensures that the cupcakes rise beautifully and cook evenly. While the oven warms up, grab your cupcake pan and line it with cute paper liners. This little step makes cleanup a breeze and adds a touch of charm to your cupcakes. Trust me, these liners are worth it! It’s like the icing on the cake, or in this case, the frosting on the cupcake!

    Step 2: Make the Graham Cracker Base

    Now, let’s move on to that buttery graham cracker base, which is the foundation of your Heavenly S’mores Cupcakes. In a mixing bowl, combine the graham cracker crumbs, sugar, and melted butter. Mix until it’s all nicely blended—think beach sand, but yummier! Once combined, dive in and distribute this mixture evenly into your lined cupcake wells. Press firmly down with your fingers or the back of a spoon to create a solid crust. This step is crucial for holding everything together like the perfect hug!

    Step 3: Mix the Cupcake Batter

    Next, it’s time for the fun part—making the cupcake batter! In a separate large bowl, mix the devil’s food cake mix and instant chocolate pudding mix together. This blend is the secret for super moist cupcakes. Then, add the sour cream, vegetable oil, eggs, vanilla extract, and warm water to the dry mixture. I like to use a whisk for this part—it really brings everything together with tenderness. Whisk until smooth and creamy; we want a batter that feels light, just like a fluffy cloud! Don’t rush though; let it combine fully. If you’re feeling adventurous, fold in some mini marshmallows for extra gooey fun!

    Step 4: Fill the Liners

    Now, let’s get that heavenly mixture into the cupcake liners! Using a large cookie scoop or a measuring cup, carefully fill each liner with batter about two-thirds full. This step is like filling tiny treasure chests with chocolatey goodness! Ensure the batter is evenly distributed among the muffins to guarantee they rise beautifully. Just don’t overfill them; we want our cupcakes to have room to puff up perfectly!

    Step 5: Baking Time

    It’s time to pop those cupcakes in the oven! Bake for about 18-22 minutes, but please don’t forget about them while they’re in there! Start checking for doneness at the 18-minute mark. Press gently on the tops; they should spring back when they’re ready. If a toothpick comes out clean, you know you’re golden. Your kitchen will soon be filled with the mouthwatering aroma of chocolate and graham cracker, a true sign of heaven on earth!

    Step 6: Cooling and Frosting

    After baking, remove the cupcakes from the oven and let them cool in the pan for about 10 minutes. This step helps them firm up a bit! Once cool enough to handle, transfer them to a wire rack to cool completely. Patience is key here—frosting warm cupcakes is a recipe for disaster (and sticky fingers)! While they cool, whip up your marshmallow frosting for a fluffy, dreamy topping. This is where your creativity can shine—make it as smooth or as swirly as you like!

    Step 7: Optional Garnishes

    Your Heavenly S’mores Cupcakes are nearly complete, but let’s kick it up a notch! Consider using a kitchen torch to lightly brown the frosting for that campfire feel. It gives the cupcake a toasty look that’s hard to resist! For a final touch, place a square of melting chocolate on top, reminiscent of the classic s’mores treat. These little garnishes not only look stunning but also bring out that scrumptious s’mores vibe every single time!

    Tips for Success

    • Don’t skip the cooling time! Frosting warm cupcakes leads to a gooey mess.
    • Use a cookie scoop for even batter portions—no more overfilled or underfilled cupcakes.
    • Experiment with toppings; feel free to add crushed graham crackers or mini chocolate chips on the frosting.
    • Make your frosting ahead of time and store it in the fridge for a fluffier texture.
    • For a fun twist, try using flavored cake mixes like chocolate fudge for even richer cupcakes!

    Equipment Needed for Heavenly S’mores Cupcake

    • Oven: Your trusty companion for baking, but any kitchen appliance that reaches 350°F will do.
    • Cupcake pan: Standard or mini size works; silicone pans can be a fun, non-stick alternative!
    • Mixing bowls: Use a large bowl for batter and a smaller one for the graham cracker base.
    • Whisk: A hand whisk or electric mixer will help blend your ingredients smoothly.
    • Cookie scoop: For evenly filled cupcake liners; a measuring cup will work in a pinch.

    Variations on Heavenly S’mores Cupcake

    • For a gluten-free option, use gluten-free graham cracker crumbs and a gluten-free chocolate cake mix—deliciously inclusive!
    • Switch up the chocolate by using a white chocolate cake mix, topped with a vanilla marshmallow frosting for a fun twist.
    • Add a hint of peanut butter by mixing in some creamy peanut butter into the cupcake batter; it’s a match made in heaven!
    • For a fruity version, incorporate finely chopped strawberries or raspberries in the batter for a burst of fresh flavor.
    • Try using flavored extracts like almond or coconut in the frosting for an exciting twist on the classic marshmallow taste!

    Serving Suggestions for Heavenly S’mores Cupcake

    • Pair your Heavenly S’mores Cupcakes with a tall glass of cold milk for the ultimate childhood treat experience.
    • Serve alongside a scoop of vanilla ice cream for a delightful contrast of temperatures.
    • For a cozy touch, arrange the cupcakes on a rustic wooden platter.
    • Add fresh berries or mint leaves as a pop of color and freshness on the side.

    FAQs about Heavenly S’mores Cupcake

    Can I make these cupcakes ahead of time?

    Absolutely! These Heavenly S’mores Cupcakes can be baked in advance. Just store them in an airtight container at room temperature. Frost them on the day you plan to serve for the best results. This makes it easier to get dessert ready when you’re busy!

    How do I store leftovers?

    To keep your decadent cupcakes fresh, store them in an airtight container at room temperature for up to three days. If you can resist them that long! Keeping them sealed helps maintain their fluffy texture and flavor, waiting for your next sweet craving.

    Can I use a homemade cake mix instead of boxed?

    Of course! If you’re feeling adventurous and want to take a stroll down memory lane, a homemade cake mix can be used. Just follow a trusted chocolate cake recipe, and you’ll have delicious homemade Heavenly S’mores Cupcakes!

    What if I don’t have a kitchen torch for the frosting?

    No worries if you don’t have a kitchen torch! You can achieve a similar effect by placing the frosted cupcakes briefly under a broiler. Keep a close eye on them to avoid burning—just a minute or so will do the trick!

    Are there dietary modifications I can make?

    Absolutely! For a vegan twist, substitute eggs with applesauce and use a plant-based cake mix. You can also swap the sour cream for a non-dairy yogurt. This way, everyone can enjoy a bite of these heavenly treats!

    Final Thoughts

    Baking these Heavenly S’mores Cupcakes is more than just creating a dessert; it’s about crafting moments of joy and connection in your busy life. Each bite transports you back to campfire gatherings, bringing warmth and comfort with rich flavors and delightful textures. These cupcakes are like a little spot of sunshine on a hectic day, perfect for sharing with family or indulging in solo with a cup of coffee. By treating yourself and loved ones to this easy yet impressive treat, you’re making memories that are as sweet as the frosting on top. Enjoy the heavenly experience!


    Print

    clock clock iconcutlery cutlery iconflag flag iconfolder folder iconinstagram instagram iconpinterest pinterest iconfacebook facebook iconprint print iconsquares squares iconheart heart iconheart solid heart solid icon

    Description

    Indulge in the delightful combination of rich chocolate and buttery graham crackers with Heavenly S’mores Cupcakes, topped with fluffy marshmallow frosting.


    • For the graham cracker base:
    • 5 tbsp melted butter
    • 1 tbsp sugar
    • 1 1/2 cups graham cracker crumbs
    • For the cupcakes:
    • 1 package devil’s food cake mix
    • 3/4 cup sour cream
    • 3 large eggs
    • 1/2 cup warm water
    • 1 package instant chocolate pudding mix
    • 3/4 cup vegetable oil
    • 2 tsp vanilla extract

    1. Preheat oven to 350°F and line cupcake pans with paper liners.
    2. Combine graham cracker crumbs, butter, and sugar, then divide between liners and press firmly.
    3. Beat cake and pudding mixes, sour cream, oil, eggs, vanilla, and water until well combined.
    4. Distribute batter between cupcake wells using a large cookie scoop.
    5. Bake in preheated oven for 18-22 minutes until tops spring back when touched.
    6. Cool cupcakes in pans for 10 minutes, then transfer to wire rack to cool completely.
    7. Prepare marshmallow frosting and pipe or spread onto cooled cupcakes.
    8. Optionally, use kitchen torch to lightly brown frosting and top with milk chocolate square before serving.

    Notes

    • Ensure the cupcakes are completely cooled before frosting to avoid melting.
    • For a more authentic s’mores flavor, consider adding mini marshmallows into the batter.
    • Store cupcakes in an airtight container at room temperature for up to 3 days.
    • Prep Time: 20 minutes
    • Cook Time: 22 minutes
    • Category: Dessert
    • Method: Baking
    • Cuisine: American

    Nutrition

    • Serving Size: 1 cupcake
    • Calories: 250
    • Sugar: 20g
    • Sodium: 180mg
    • Fat: 12g
    • Saturated Fat: 3g
    • Unsaturated Fat: 8g
    • Trans Fat: 0g
    • Carbohydrates: 35g
    • Fiber: 1g
    • Protein: 3g
    • Cholesterol: 30mg

    Sharing is caring!

  • Soft Whoopie Pies with Marshmallow Filling

    Soft Whoopie Pies with Marshmallow Filling


    Introduction to Soft Whoopie Pies with Marshmallow Filling

    When life gets busy, finding a sweet escape can feel like searching for a unicorn. That’s where these Soft Whoopie Pies with Marshmallow Filling come into play! They’re not just a treat; they’re your delicious ally in creating joy amidst the chaos of daily life. Picture this: after a long day of juggling work and home, you can whip up a batch of these delightful desserts in no time. They’re perfect for satisfying your sweet tooth or impressing your loved ones, all while requiring minimal effort. Who wouldn’t want to savor that?

    Why You’ll Love This Soft Whoopie Pies with Marshmallow Filling

    These Soft Whoopie Pies have it all: they’re quick, easy, and oh-so-delicious! Each bite transports you to dessert heaven, with that perfect balance of soft cake and fluffy marshmallow filling. Whether it’s a random Thursday or a special occasion, these treats never disappoint. Plus, they make for a delightful activity to share with your kids or friends, bringing everyone together with laughter and sweetness. What’s not to love?

    Ingredients for Soft Whoopie Pies with Marshmallow Filling

    Getting ready to make these delightful Soft Whoopie Pies with Marshmallow Filling? Let’s talk ingredients! Each component plays a crucial role in creating that moist cake and luscious filling. Here’s what you’ll need:

    • All-purpose flour: The backbone of our pies! It gives them structure and a soft texture.
    • Unsweetened cocoa powder: This adds rich chocolate flavor, making every bite a delightful treat.
    • Baking soda: The magic that helps our whoopie pies rise, giving them a fluffy texture.
    • Salt: A pinch of salt enhances flavors, balancing the sweetness perfectly.
    • Unsalted butter: Cream it for lightness in the batter, plus it brings a rich, buttery flavor.
    • Sugar (granulated or brown): Sweetness galore! Brown sugar adds a hint of caramel flavor for richness.
    • Large egg: An essential moisture source, bringing everything together and binding the ingredients.
    • Vanilla extract: This aromatic addition rounds out the sweetness and adds warmth. A must-have!
    • Buttermilk: It contributes tenderness, and that slight tang gives the whoopie pies a unique flavor.
    • Marshmallow creme: For that dreamy filling! It’s what makes these pies irresistibly marshmallow and fluffy.
    • Powdered sugar: This helps sweeten the filling and create that creamy texture we love.
    • Pinch of salt: Just a little to balance the sweetness in that fluffy filling.

    All these ingredients come together in a symphony of flavor, with just the right amounts listed at the bottom of this article for your convenience. Trust me, you’ll want to keep this recipe handy for your next sweet craving!

    How to Make Soft Whoopie Pies with Marshmallow Filling

    Making these Soft Whoopie Pies with Marshmallow Filling is a delightful experience! Follow these simple steps to create your own batch of deliciousness. I promise, they’re easy enough to whip up even on those hectic weekdays. Let’s dive in!

    Step 1: Preheat Your Oven

    First things first, preheat your oven to 350°F (180°C). Preheating is essential for even baking, helping the whoopie pies rise beautifully. You want that fluffy texture, and starting with a hot oven is the way to achieve it!

    Step 2: Prepare Dry Ingredients

    Next, sift together the all-purpose flour, cocoa powder, baking soda, and salt. Sifting ensures those dry ingredients are aerated, preventing clumps. This little step is crucial for creating a batter that’s light and fluffy, resulting in perfect whoopie pies.

    Step 3: Cream Together Butter and Sugar

    In a large bowl, use an electric mixer to cream together the room-temperature butter and sugar until light and fluffy—about three minutes. This process incorporates air into the mixture, making your whoopie pies soft and airy. Don’t rush it; this step is key!

    Step 4: Add Eggs and Buttermilk

    Now, add in that large egg and vanilla extract, mixing until fully combined. Then, pour in the buttermilk. These wet ingredients add moisture to the batter, creating that deliciously soft texture we love in whoopie pies.

    Step 5: Combine Wet and Dry Mixtures

    Gradually add the sifted dry ingredients to the wet mixture, mixing just until combined. Avoid overmixing, or your batter could turn tough. A few lumps are entirely fine! We want those tender whoopie pies, not dense ones.

    Step 6: Prepare Baking Sheets

    Line two baking sheets with parchment paper. Use a cookie scoop to scoop mounds of batter—about 1.5 tablespoons each—onto the sheets. Make sure to leave about 2–3 inches between each mound. They need room to spread and rise while baking!

    Step 7: Bake the Whoopie Pies

    Bake the whoopie pies in your preheated oven for 10–12 minutes. They’re ready when the tops spring back lightly when touched. Avoid opening the oven door too soon; this can impact their rise!

    Step 8: Make the Marshmallow Filling

    While the pies cool, let’s whip up that dreamy marshmallow filling. In a large bowl, combine room-temperature butter, marshmallow creme, powdered sugar, vanilla extract, and a pinch of salt. Beat together until creamy and fluffy. If it’s too stiff, add a splash of milk or cream.

    Step 9: Assemble the Whoopie Pies

    Now, it’s time to bring it all together! Spread a generous amount of marshmallow filling on the flat side of half of the cooled whoopie pies. Top them with the remaining pie halves, pressing gently to create a delicious sandwich.

    Step 10: Chill and Serve

    Finally, cover your assembled whoopie pies and place them in the fridge for a bit. Chilling allows the filling to set, enhancing texture and flavor. Serve them at room temperature for the best experience!

    Tips for Success

    • Use room-temperature ingredients for better mixing and fluffiness.
    • Don’t skip sifting the dry ingredients; it makes a difference in texture.
    • For an extra soft filling, beat the marshmallow mixture a little longer.
    • Feel free to experiment with flavor extracts, like almond or peppermint.
    • Store whoopie pies in an airtight container to maintain freshness.

    Equipment Needed

    • Mixing bowls: Use any size you have; just make sure they’re large enough to accommodate your batter.
    • Electric mixer: A hand mixer works great if you don’t have a stand mixer.
    • Baking sheets: Regular cookie sheets or any flat baking trays will do.
    • Parchment paper: Helps prevent sticking; you can use silicone baking mats as an alternative.
    • Cookie scoop: A tablespoon works fine if you don’t have a scoop on hand!

    Variations

    • Gluten-free whoopie pies: Substitute all-purpose flour with a 1:1 gluten-free baking blend for a gluten-free version.
    • Chocolate chip filling: Mix mini chocolate chips into the marshmallow filling for an extra chocolatey bite!
    • Salted caramel filling: Drizzle some salted caramel sauce into your marshmallow filling for a sweet and salty twist.
    • Nutty version: Fold in crushed nuts like pecans or walnuts into the batter or sprinkle them on the filling.
    • Different flavors: Swap the vanilla extract for other flavors like almond or even hazelnut to change up the taste.

    Serving Suggestions

    • Pair these Soft Whoopie Pies with a cold glass of milk for a classic treat!
    • Serve them alongside fresh berries for a pop of color and added nutrition.
    • For special occasions, arrange them on a decorative platter with a dusting of powdered sugar.
    • Consider adding a scoop of vanilla ice cream for an indulgent dessert experience.
    • Top with a drizzle of chocolate sauce for an extra touch of decadence!

    FAQs about Soft Whoopie Pies with Marshmallow Filling

    Got questions about these delightful Soft Whoopie Pies with Marshmallow Filling? You’re not alone! Here are some common queries that often pop up:

    Can I use a different filling instead of marshmallow?

    Absolutely! You can get creative with your filling! Try cream cheese frosting or peanut butter buttercream for a different flavor experience.

    How do I store leftovers?

    Store your whoopie pies in an airtight container in the fridge. They stay fresh for up to a week, but you might finish them before then!

    Can these be frozen?

    Yes, you can freeze them! Just wrap each whoopie pie in plastic wrap and place them in a freezer-safe bag. They’ll keep for up to two months.

    What can I substitute for buttermilk?

    If you don’t have buttermilk on hand, mix 1 cup of milk with 1 tablespoon of vinegar or lemon juice. Let it sit for a few minutes, and voilà—homemade buttermilk!

    Why are my whoopie pies flat?

    Flat cakes can be due to insufficient leavening or overmixing the batter. Make sure your baking soda is fresh and avoid overmixing once you combine wet and dry ingredients.

    Final Thoughts

    Making these Soft Whoopie Pies with Marshmallow Filling is more than just baking; it’s about creating sweet moments with family and friends. With each fluffy bite, you’re not just satisfying a craving; you’re crafting memories that linger long after the last crumb has disappeared. Whether it’s a cherished childhood treat or a fun weekend project, these whoopie pies bring joy and connection to your kitchen. So, the next time life gets hectic, whip up a batch and let those delightful flavors take you back to simpler times. Enjoy every delicious moment!


    Print

    clock clock iconcutlery cutlery iconflag flag iconfolder folder iconinstagram instagram iconpinterest pinterest iconfacebook facebook iconprint print iconsquares squares iconheart heart iconheart solid heart solid icon

    Description

    Soft Whoopie Pies filled with creamy marshmallow filling are a delightful treat that are easy to make and perfect for any occasion.


    • 2 cups all-purpose flour
    • 2/3 cup unsweetened cocoa powder
    • 1 1/4 tsp baking soda
    • 1/2 tsp salt
    • 1/2 cup (1 stick) unsalted butter, room temperature
    • 1 cup granulated (or brown) sugar
    • 1 large egg
    • 1 tsp vanilla extract
    • 1 cup buttermilk, at room temperature
    • 1/2 cup (1 stick) unsalted butter, at room temp
    • 2 cups marshmallow creme (such as Marshmallow Fluff)
    • 1 cup powdered sugar (4 oz)
    • 1 tsp vanilla extract
    • pinch of salt

    1. Preheat your oven to 350°F (180°C).
    2. Sift together the all-purpose flour, unsweetened cocoa powder, baking soda, and salt, then set aside.
    3. Cream the room-temperature unsalted butter and granulated (or brown) sugar in an electric mixer until light and fluffy, about 3 minutes.
    4. Add the egg and vanilla extract, mixing until combined, then blend in the buttermilk.
    5. Gradually add the sifted dry ingredients and mix just until combined, avoiding overmixing.
    6. Line two baking pans with parchment paper and scoop mounds of batter (1 1/2 tablespoons each) onto the prepared pans, spacing them 2–3 inches apart.
    7. Bake in the preheated oven for 10–12 minutes or until the tops spring back when touched.
    8. Transfer the cake rounds to a wire rack to cool completely.
    9. In a large bowl, combine the room-temperature unsalted butter, marshmallow creme, powdered sugar, vanilla extract, and a pinch of salt, beating until creamy and fluffy.
    10. If filling is too stiff, mix in a tablespoon of milk or heavy cream until desired consistency is reached.
    11. Spread marshmallow filling on the flat side of half the cake rounds and top with remaining rounds, pressing gently.
    12. Assemble the whoopie pies and place in the fridge covered for up to a week.
    13. Allow to come to room temperature before serving.

    Notes

    • For extra-fluffy filling, beat for an additional minute.
    • These can be stored in the fridge for up to a week.
    • Add a little extra filling if desired for indulgence.
    • Prep Time: 20 minutes
    • Cook Time: 12 minutes
    • Category: Dessert
    • Method: Baking
    • Cuisine: American

    Nutrition

    • Serving Size: 1 whoopie pie
    • Calories: 250
    • Sugar: 20g
    • Sodium: 150mg
    • Fat: 10g
    • Saturated Fat: 6g
    • Unsaturated Fat: 2g
    • Trans Fat: 0g
    • Carbohydrates: 38g
    • Fiber: 1g
    • Protein: 3g
    • Cholesterol: 30mg

    Sharing is caring!