Author: IHAAL Team

  • Apple Pie Pancakes with Vanilla Maple Syrup

    Apple Pie Pancakes with Vanilla Maple Syrup


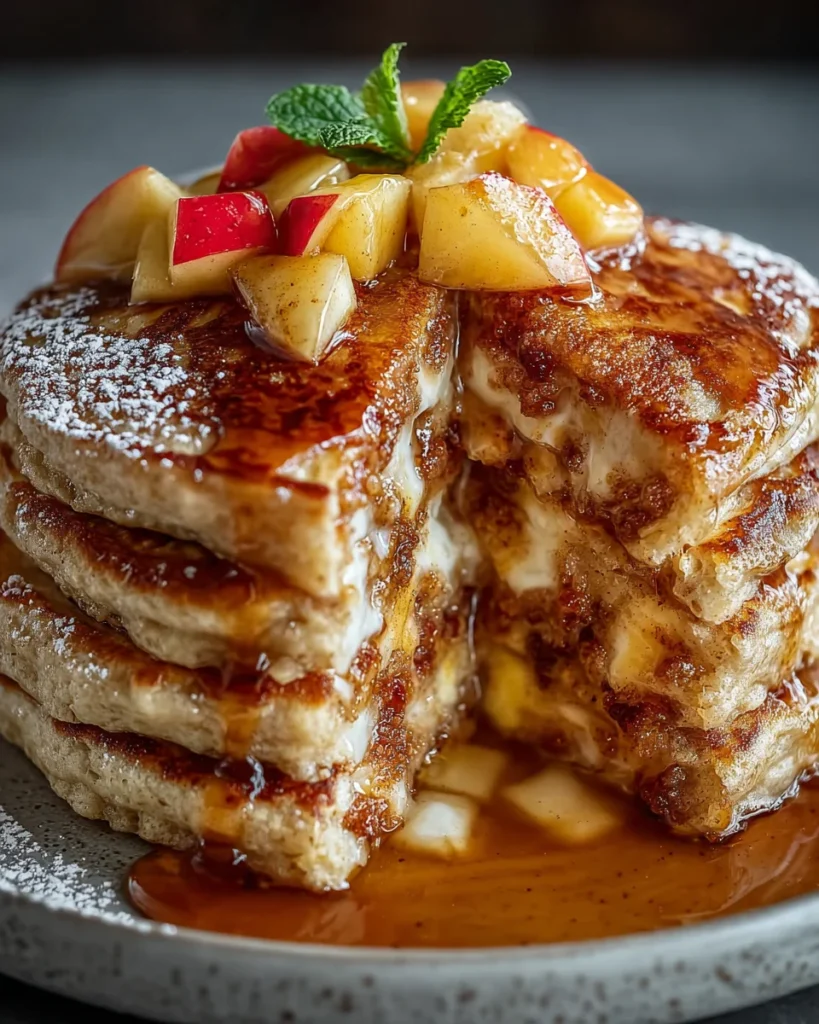
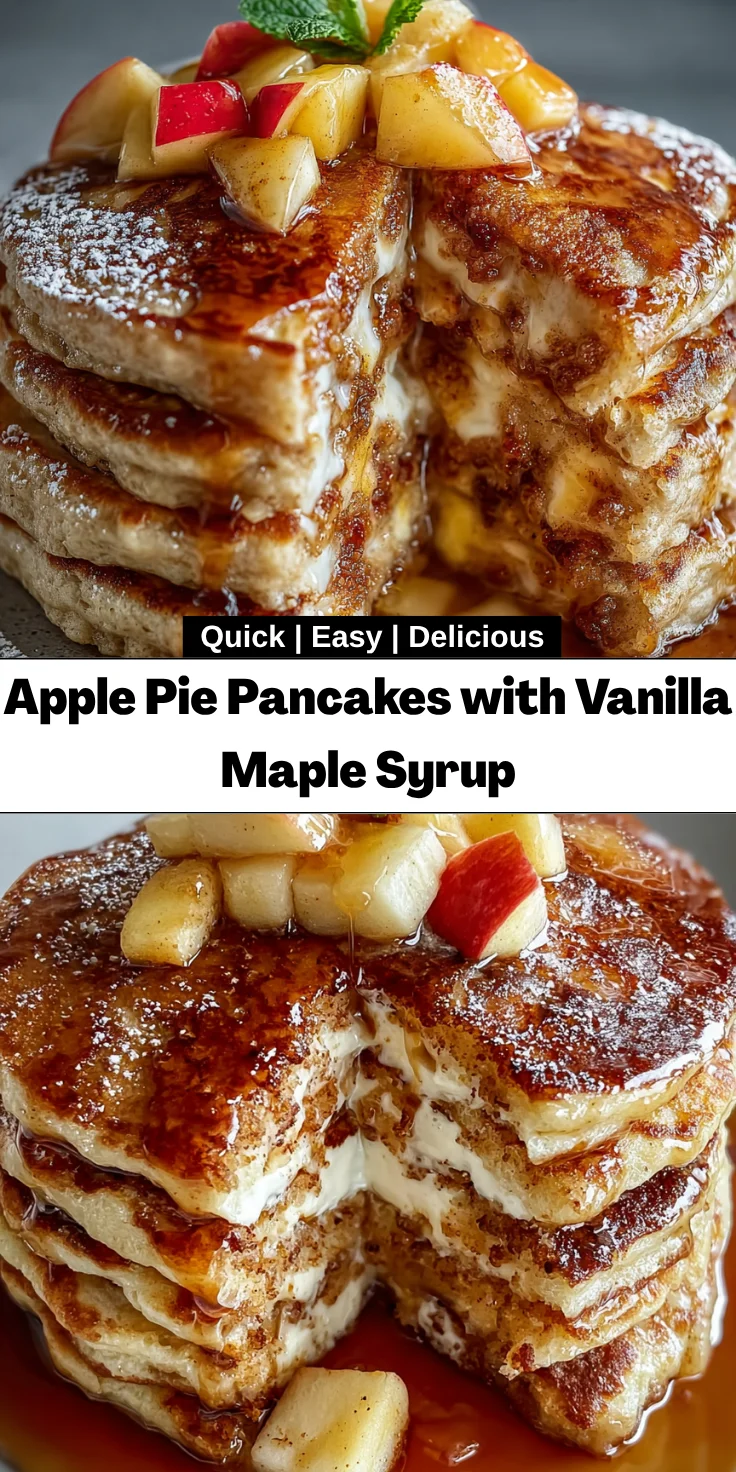
    Introduction to Apple Pie Pancakes with Vanilla Maple Syrup

    There’s something magical about waking up to the smell of warm, delicious Apple Pie Pancakes with Vanilla Maple Syrup. As a busy mom, I totally understand how hectic mornings can be, yet I believe breakfast is the most important meal! This recipe transforms the comforting flavors of traditional apple pie into an easily prepared pancake dish that will bring smiles to your family’s faces. With just a few simple ingredients and a quick cooking time, you can turn a regular breakfast into a delightful experience. Let’s dive into this cozy, flavorful adventure!

    Why You’ll Love This Apple Pie Pancakes with Vanilla Maple Syrup

    These Apple Pie Pancakes with Vanilla Maple Syrup are a delightful way to start your day, especially for busy families. They come together quickly, making them perfect for rushed mornings. The combination of fluffy pancakes and sweet, spiced apples is enough to remind you of cozy autumn days. Plus, drizzling warm syrup over the stack elevates the experience, satisfying both your taste buds and those of your loved ones!

    Ingredients for Apple Pie Pancakes with Vanilla Maple Syrup

    To create these delightful Apple Pie Pancakes with Vanilla Maple Syrup, you’ll need a mix of simple yet essential ingredients. Below, I’ll break down each component and offer a few handy tips. Don’t worry, the exact measurements are listed at the end of the article for your convenience!

    • All-purpose flour: The foundation of your pancakes. Feel free to swap in whole wheat flour for a healthier twist.
    • Sugar: A bit of sweetness goes a long way. Brown sugar adds a deeper flavor, but regular granulated sugar works fine, too!
    • Baking powder: This is what gives your pancakes their fluffy texture. Make sure it’s fresh for the best results.
    • Cinnamon: A warm spice that brings comforting flavors reminiscent of fall. It enhances the apple taste beautifully.
    • Nutmeg (optional): A hint of nutmeg can elevate the flavor profile, but if you don’t have it, you’ll still have fantastic pancakes!
    • Salt: Just a pinch helps balance the sweetness and enhances all the flavors in your pancakes.
    • Milk: Dairy or non-dairy, your choice! Almond or oat milk can make this dish suitable for various dietary needs.
    • Egg: This binds everything together and contributes to the richness of the batter.
    • Melted butter: Adds moisture and flavor. Coconut oil is also a great substitute for a dairy-free option.
    • Apples: Go for Granny Smith or Honeycrisp for a balance of tartness and sweetness. Fresh apples add a juicy crunch!
    • Lemon juice: A splash of lemon prevents apples from browning and adds a bright flavor.
    • Maple syrup: The star of the show! Use real maple syrup for an authentic taste.
    • Vanilla extract: A splash adds warmth and complements the sweetness in the syrup.

    Now, armed with this list, you’re well on your way to whipping up a breakfast that delights the entire family! Let’s get cooking, shall we?

    How to Make Apple Pie Pancakes with Vanilla Maple Syrup

    Step 1: Prepare the Apples

    Start by peeling and dicing your apples into small bite-sized pieces. I love using Granny Smith for their tart kick! Once chopped, toss them in a bowl with a splash of lemon juice. This not only adds a bit of zesty flavor but also prevents the apples from browning. Just like magic, your apples will stay fresh and vibrant until they hit the batter!

    Step 2: Mix Dry Ingredients

    In a large mixing bowl, whisk together your dry ingredients: flour, sugar, baking powder, cinnamon, nutmeg, and salt. Be sure to break up any clumps of brown sugar! This step is key for ensuring your pancakes cook evenly. Aromas of cinnamon fill the air, hinting at a delicious breakfast on the horizon. Set this bowl aside for now, the fun is just beginning!

    Step 3: Combine Wet Ingredients

    In a separate bowl, combine the wet ingredients: milk, egg, and melted butter. Whisk them together until they are well blended. I enjoy using a hand whisk for this—it’s quick and gets the job done! The melted butter adds richness, and the egg binds everything. This mixture will bring everything together in cozy harmony shortly!

    Step 4: Combine Mixtures

    Now it’s time for a little magic—merge the wet and dry ingredients! Pour the wet mixture into the bowl with dry ingredients, and mix gently. Don’t overmix! You want a few lumps for the fluffiest pancakes. Once that’s done, fold in the apple pieces. This step ensures those tasty bites of apple are evenly distributed throughout the batter!

    Step 5: Cook the Pancakes

    Heat a skillet over medium heat and lightly grease it with butter or cooking spray. When it’s hot, pour about 1/4 cup of pancake batter per pancake onto the skillet. Cook until you see bubbles forming on the surface, about 2-3 minutes. Then, flip with a spatula and cook until golden brown, about another 2 minutes. Keep an eye on the heat—adjusting is key so they don’t burn. The smell will have everyone flocking to the kitchen!

    Step 6: Prepare the Syrup

    In a small saucepan, warm your maple syrup over low heat. Add the vanilla extract and stir until well combined. Just a gentle warm-up will do—no need for boiling! This step enhances the flavors, making your syrup irresistible. Your homemade syrup will complement the pancakes perfectly!

    Step 7: Serve

    Time to stack those beautiful pancakes! On a plate, layer them high and drizzle generously with your vanilla maple syrup. For an added touch, sprinkle some extra cinnamon on top for presentation. Get ready, because this delightful breakfast will surely be the highlight of your morning!

    Tips for Success

    • Use a non-stick skillet for easier flipping and less mess.
    • Always preheat your skillet to ensure even cooking.
    • For fluffier pancakes, let the batter sit for a few minutes before cooking.
    • Don’t overcrowd the skillet—cook in batches if necessary.
    • Serve warm pancakes immediately for the best taste experience!

    Equipment Needed

    • Mixing bowls: Use one large and one small bowl. Glass or stainless steel works great.
    • Whisk: A hand whisk will do! A fork can also help mix ingredients.
    • Skillet: A non-stick skillet is best for easy flipping.
    • Spatula: A flat spatula will help flip your pancakes beautifully.

    Variations

    • Gluten-free: Use a gluten-free flour blend to cater to those with gluten sensitivities.
    • Vegan: Substitute the egg with a flax egg and replace the milk with a non-dairy alternative.
    • Add nuts: Fold in chopped walnuts or pecans for added crunch and flavor.
    • Spice it up: Try adding a pinch of ginger or clove for an extra layer of warmth.
    • Berry twist: Mix in a handful of fresh blueberries for a delightful fruity variation.

    Serving Suggestions

    • Pair your pancakes with crispy bacon or sausage for a savory contrast.
    • Serve with a side of yogurt topped with granola to add creaminess and crunch.
    • A hot cup of coffee or chai complements the sweetness beautifully.
    • Garnish pancakes with fresh apple slices or a sprinkle of powdered sugar for an appealing presentation.

    FAQs about Apple Pie Pancakes with Vanilla Maple Syrup

    Can I make Apple Pie Pancakes with Vanilla Maple Syrup ahead of time?
    Absolutely! You can make the pancakes ahead of time and store them in the fridge for up to three days. Just reheat in a microwave or skillet before serving.

    What can I use instead of apples in this recipe?
    If your family isn’t too keen on apples, feel free to replace them with mashed bananas or even berries! Each option brings its own unique flavor.

    How can I make my pancakes even fluffier?
    To achieve fluffier pancakes, try letting the batter rest for about 5 to 10 minutes before cooking. This allows the baking powder to activate fully and creates a lighter texture.

    Is it possible to freeze these pancakes?
    Yes, you can! Once cooled, stack the pancakes with parchment paper in between to prevent sticking. Then, freeze in a zip-top bag for up to two months!

    Can I substitute the maple syrup with another sweetener?
    Certainly! Honey or agave syrup can be used in place of maple syrup. Just keep in mind that they have slightly different flavor profiles!

    Final Thoughts

    Every bite of these Apple Pie Pancakes with Vanilla Maple Syrup brings a sense of warmth and nostalgia that makes breakfast feel special. I love how this simple recipe transforms ordinary mornings into cherished family moments. Whether you’re celebrating a cozy weekend or just trying to brighten a busy weekday, these pancakes deliver joy and deliciousness. Watching my kids smile as they savor each fluffy bite is priceless! So, gather your loved ones, whip up a batch, and create memories that will linger long after the plates are cleared. Breakfast doesn’t get much better than this!
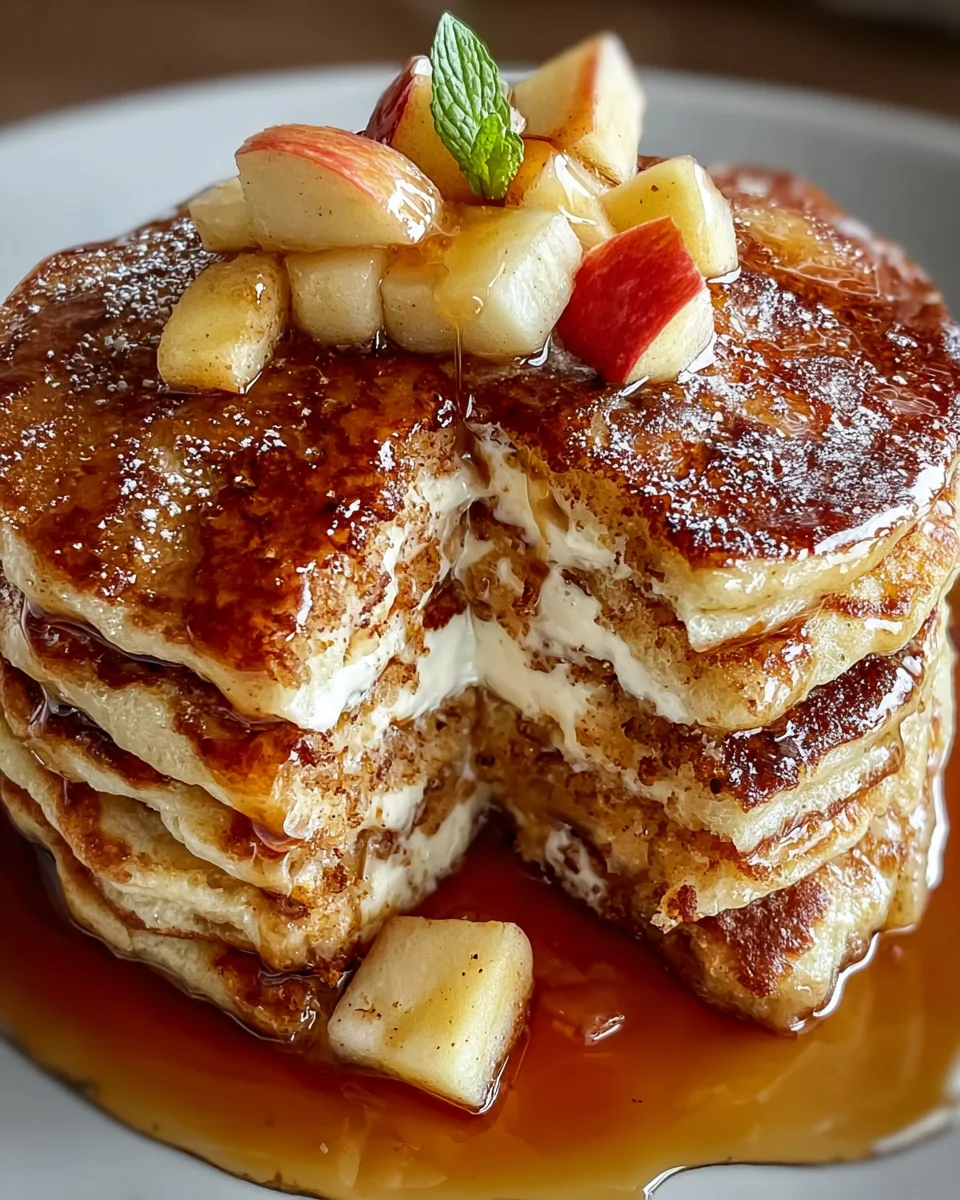

    Print

    clock clock iconcutlery cutlery iconflag flag iconfolder folder iconinstagram instagram iconpinterest pinterest iconfacebook facebook iconprint print iconsquares squares iconheart heart iconheart solid heart solid icon

    Description

    Delicious Apple Pie Pancakes topped with Vanilla Maple Syrup that delight your taste buds!


    • 1 cup all-purpose flour (or whole wheat flour)
    • 1 tablespoon sugar (brown sugar is ideal)
    • 2 teaspoons baking powder
    • 1/2 teaspoon cinnamon
    • 1/4 teaspoon nutmeg (optional)
    • 1/4 teaspoon salt
    • 1 cup milk (dairy or non-dairy)
    • 1 large egg
    • 2 tablespoons melted butter (or coconut oil)
    • 1 cup apples, peeled and diced (Granny Smith or Honeycrisp)
    • 1 teaspoon lemon juice
    • 1/2 cup maple syrup
    • 1 teaspoon vanilla extract

    1. Prepare the Apples: Peel and dice the apples, tossing them with lemon juice.
    2. Mix Dry Ingredients: In a bowl, whisk together flour, sugar, baking powder, cinnamon, nutmeg, and salt.
    3. Combine Wet Ingredients: In another bowl, mix milk, egg, and melted butter.
    4. Combine Mixtures: Pour wet ingredients into dry ingredients, mixing gently. Fold in the apples.
    5. Cook the Pancakes: Heat a skillet over medium heat, grease lightly, and pour 1/4 cup of batter for each pancake. Cook until bubbles form, then flip.
    6. Prepare the Syrup: Warm maple syrup with vanilla extract in a small saucepan.
    7. Serve: Stack pancakes, drizzle with syrup, and enjoy!

    Notes

    • For a healthier option, you can substitute with whole wheat flour.
    • Adjust the sweetness by varying the amount of sugar used.
    • Prep Time: 15 minutes
    • Cook Time: 10 minutes
    • Category: Breakfast
    • Method: Pan-frying
    • Cuisine: American

    Nutrition

    • Serving Size: 2 pancakes
    • Calories: 350
    • Sugar: 18g
    • Sodium: 320mg
    • Fat: 10g
    • Saturated Fat: 4g
    • Unsaturated Fat: 6g
    • Trans Fat: 0g
    • Carbohydrates: 55g
    • Fiber: 3g
    • Protein: 6g
    • Cholesterol: 50mg

    Sharing is caring!

  • Cheesy Enchilada Hamburger Helper

    Cheesy Enchilada Hamburger Helper


    Introduction to Cheesy Enchilada Hamburger Helper

    Life can get busy, and sometimes dinner feels like a mountain to climb, doesn’t it? That’s why I’m excited to share my Cheesy Enchilada Hamburger Helper recipe with you. This dish is not only comforting but a delightful twist that combines the best of both worlds – cheesy goodness and hearty pasta. Perfect for those whirlwind evenings, it’s a quick solution for a satisfying meal that will impress your loved ones. If you’re juggling soccer practices or late work nights, this one-pan meal is the magic wand you need in your kitchen!

    Why You’ll Love This Cheesy Enchilada Hamburger Helper

    This Cheesy Enchilada Hamburger Helper is like a warm hug on a plate. It’s incredibly easy to whip up, making weeknight dinners a breeze. With just one skillet and minimal prep, you can have a delicious meal on the table in about 30 minutes. The rich, cheesy enchilada sauce mingles beautifully with the pasta, creating a comforting taste experience that your family will beg for again and again. Who wouldn’t love that?

    Ingredients for Cheesy Enchilada Hamburger Helper

    To create this delightful dish, you’ll need some kitchen staples that blend together beautifully. Here’s what you’ll need:

    • Ground beef: This hearty base adds protein and richness. Feel free to use lean beef or even turkey for a lighter option.
    • Onion: Chopped onions bring a savory depth to the dish. Yellow or white onions work wonders here.
    • Beef broth: This enhances the flavor and makes the pasta tender. You can substitute with vegetable broth if you prefer.
    • Milk: A splash of creaminess! Use whole milk for richness or any dairy alternative that fits your diet.
    • Medium shell pasta: The pasta hugs the sauce perfectly and makes for a fun texture. You can swap it with gluten-free pasta, if needed.
    • Mild enchilada sauce: This is the star! It adds that spicy, tangy flavor that enchiladas are known for. Adjust the heat by choosing hot or medium sauce, if you like.
    • Salt and black pepper: Simple seasonings, but essential for flavor enhancement.
    • Chili powder, cumin, and dried cilantro: These spices create an amazing Mexican flair. Feel free to adjust to your taste, adding cayenne if you crave extra heat.
    • Minced garlic: This aromatic ingredient adds a punch of flavor, making everything taste better.
    • Colby Jack cheese: A melty blend that completes the dish. You can use cheddar or pepper jack for a different twist.
    • Fresh cilantro: Adds freshness and color on top. It’s optional, but I recommend it!
    • Sour cream: A dollop on top brings a lovely creaminess that balances the dish’s spices.

    Exact quantities can be found at the bottom of this article for your convenience!

    How to Make Cheesy Enchilada Hamburger Helper

    Step 1: Brown the Ground Beef

    Start by heating a large skillet over medium-high heat. Add the ground beef and chopped onion, stirring occasionally until the beef is brown and no longer pink. The onions should become fragrant and slightly translucent. This usually takes about five to seven minutes. Don’t forget to drain any excess grease to keep the dish from becoming too oily. A leaner beef works fine, but when cooked properly, the fat adds flavor to our Cheesy Enchilada Hamburger Helper.

    Step 2: Season and Combine Ingredients

    Once the beef and onions are cooked, it’s time to spice things up! Sprinkle in the salt, black pepper, chili powder, ground cumin, dried cilantro, and cayenne. Stir well to make sure everything gets evenly coated in those rich flavors. Then, pour in the beef broth, enchilada sauce, uncooked medium shell pasta, and milk. Stir again until everything is combined beautifully. The aroma will begin to fill your kitchen, making your loved ones eager for dinner!

    Step 3: Cook the Pasta

    Bring the mixture to a rolling boil, then reduce the heat to medium-low. Cover the skillet with a lid and let it simmer for about twelve minutes. Remember to stir halfway through to prevent the pasta from sticking to the bottom. You want the shells to soak up that yummy sauce while becoming tender. Keep an eye on it; it’s like watching a marvelous magic show unfold, where pasta transforms into a flavorful star of our Cheesy Enchilada Hamburger Helper.

    Step 4: Melt the Cheese

    Once the pasta is perfectly cooked, it’s time for the best part—cheese! Stir in one cup of shredded Colby Jack cheese until it’s well mixed and melted throughout the dish. Then, sprinkle the remaining cheese on top. Cover the skillet again to allow the cheese to melt into a gooey, delicious layer. This step is like hugging your dish with cheesy warmth, ensuring every bite is a comforting experience.

    Step 5: Garnish and Serve

    Now comes the moment we’ve been waiting for! Take the skillet off the heat and garnish your cheesy creation with fresh cilantro and a dollop of sour cream. This not only enhances the beauty of the dish but adds a lovely burst of freshness. Serve it warm in bowls, with maybe a crusty bread or tortilla chips on the side. Grab your forks, gather the family, and enjoy this delightful one-pan meal—your Cheesy Enchilada Hamburger Helper is ready!

    Tips for Success

    • Don’t rush the browning of the beef; it enhances flavor.
    • Stir often to avoid sticky pasta; it’s a simple trick!
    • Adjust spices according to your family’s heat preferences.
    • Let leftovers cool before storing; they taste even better the next day!
    • Customize toppings! Avocado or jalapeños can add great flair.

    Equipment Needed

    • Large skillet: A non-stick version makes cleanup easier, but any sturdy skillet works.
    • Wooden spoon or spatula: Perfect for stirring the ingredients without scratching the skillet.
    • Lid: Essential for covering the skillet while the pasta cooks.
    • Measuring cups and spoons: Handy for accurately measuring your ingredients.

    Variations

    • Vegetarian Option: Swap the ground beef for a plant-based meat alternative like lentils or black beans for a hearty vegetarian dish.
    • Salsa Twist: Incorporate a cup of your favorite salsa in place of some enchilada sauce for an extra kick and more flavor depth.
    • Cheesy Spinach: Add a couple of cups of fresh spinach or kale just before serving for a nutritious boost and vibrant color.

    • Gluten-Free: Use gluten-free pasta to make this dish friendly for those with gluten sensitivities while keeping all the delicious flavors.
    • Spicy Enchilada Hamburger Helper: Increase the cayenne pepper or add sliced jalapeños for a fiery version that heat lovers will enjoy.

    Serving Suggestions

    • Serve with warm cornbread or crispy tortilla chips for a hearty meal.
    • Pair with a fresh garden salad to add a crisp texture alongside your dish.
    • Top with sliced avocados for a creamy, rich addition that balances flavors.
    • Enjoy with a chilled glass of iced tea or a light Mexican beer.

    FAQs about Cheesy Enchilada Hamburger Helper

    Can I make Cheesy Enchilada Hamburger Helper ahead of time?
    Absolutely! This dish can be made ahead and stored in the fridge for up to three days. Just reheat on the stove or in the microwave when you’re ready to dig in!

    What should I do if my pasta becomes mushy?
    If your pasta gets too soft, it usually means it was overcooked. Next time, decrease the simmer time slightly. Keep an eye on it; you want tender shells, not mush!

    Can I use a different type of meat?
    Yes! You can easily swap out ground beef for ground turkey, chicken, or even a plant-based alternative. Each option brings a unique flavor to your Cheesy Enchilada Hamburger Helper.

    How can I adjust the spice level?
    To manage the heat, you can add less cayenne pepper or opt for a mild enchilada sauce. For those who love heat, feel free to add some diced jalapeños or hot sauce!

    Is this dish gluten-free?
    Yes, as long as you use gluten-free pasta, this Cheesy Enchilada Hamburger Helper is safe for those with gluten sensitivities. Enjoy all the cheesy goodness without worry!

    Final Thoughts

    Cooking can often feel like a daunting task, especially after a long day. But this Cheesy Enchilada Hamburger Helper has the magic to transform your evening! It combines comfort and convenience in a way that brings smiles to the dinner table. The rich flavors, cheesy goodness, and comforting texture are simply irresistible. Plus, who doesn’t love a one-pan meal that means less cleanup? I hope this recipe becomes a cherished part of your family’s meals, creating moments of joy, laughter, and satisfaction around your dinner table. Dive in and enjoy every cheesy bite!


    Print

    clock clock iconcutlery cutlery iconflag flag iconfolder folder iconinstagram instagram iconpinterest pinterest iconfacebook facebook iconprint print iconsquares squares iconheart heart iconheart solid heart solid icon

    Description

    A flavorful twist on a classic dish, Cheesy Enchilada Hamburger Helper combines ground beef, pasta, and cheesy enchilada sauce for a comforting one-pan meal.


    • 1 lb ground beef
    • 1 onion, chopped
    • 1 cup beef broth
    • 1 cup milk
    • 2 1/2 cups medium shell pasta
    • 2 cans (10 oz each) mild enchilada sauce
    • 1/2 tsp salt
    • 1/2 tsp black pepper
    • 2 tsp chili powder
    • 1 tsp ground cumin
    • 1 tsp dried cilantro
    • 1/4 tsp cayenne pepper
    • 1 tbsp minced garlic
    • 2 cups shredded Colby Jack cheese
    • Fresh cilantro, for garnish
    • Sour cream, for garnish

    1. In a large skillet over medium-high heat, brown the ground beef and cook the chopped onion. Once the beef is fully cooked, drain any excess grease.
    2. Season the cooked beef and onions with salt, pepper, chili powder, cumin, dried cilantro, and cayenne. Add minced garlic and stir to combine.
    3. Add beef broth, enchilada sauce, uncooked pasta, and milk to the skillet. Bring the mixture to a boil and then reduce the heat to medium-low.
    4. Cover the skillet with a lid and cook for about 12 minutes, stirring halfway through to prevent the noodles from sticking.
    5. Stir in 1 cup of cheese, then top the skillet with the remaining cheese. Let the dish sit until the cheese is fully melted.
    6. Top with fresh cilantro and a dollop of sour cream before serving. Enjoy!

    Notes

    • Feel free to adjust the spice level by adding more or less cayenne pepper.
    • This dish can be made ahead of time and reheated for an easy meal.
    • For a vegetarian version, substitute ground beef with a plant-based meat alternative.
    • Prep Time: 10 minutes
    • Cook Time: 20 minutes
    • Category: Dinner
    • Method: Skillet
    • Cuisine: Mexican-American

    Nutrition

    • Serving Size: 1/4 of the recipe
    • Calories: 540
    • Sugar: 5g
    • Sodium: 900mg
    • Fat: 30g
    • Saturated Fat: 15g
    • Unsaturated Fat: 10g
    • Trans Fat: 0g
    • Carbohydrates: 40g
    • Fiber: 3g
    • Protein: 35g
    • Cholesterol: 85mg

    Sharing is caring!

  • Spicy Chicken Burrito

    Spicy Chicken Burrito


    Introduction to Spicy Chicken Burrito

    If you’re like me, life’s daily hustle often leaves little time for cooking. That’s where my Spicy Chicken Burrito shines! It’s not just a meal; it’s a burst of flavor wrapped in a warm tortilla, perfect for busy evenings or weekend gatherings.

    Picture this: marinated chicken, crisp veggies, and a spicy mayo that dances on your taste buds. It’s easily customizable, so you can satisfy even the pickiest eaters in your family. Plus, it takes just 35 minutes from start to finish. Trust me, this dish will win hearts and stomachs!

    Why You’ll Love This Spicy Chicken Burrito

    This Spicy Chicken Burrito isn’t just delicious; it’s a lifesaver on hectic days! With its quick prep time, it fits perfectly into any busy schedule.

    The combination of marinated chicken and fresh vegetables creates a taste experience that’s unforgettable. You can whip it together in no time, making it a go-to for family dinners or a fun meal with friends. Everyone will be asking for seconds!

    Ingredients for the Spicy Chicken Burrito

    Gathering fresh ingredients is the first step in crafting this delightful Spicy Chicken Burrito. Here’s what you’ll need:

    • Boneless Chicken Thighs: Juicy thighs bring robust flavor and tenderness. You can also use chicken breasts if you prefer a leaner option.
    • Tortilla Wraps: A soft, chewy base for all the goodness. Flour or corn tortillas work well depending on your preference.
    • Greek Yogurt: Adds creaminess and a tangy flavor. It’s a healthier substitute for sour cream in this dish.
    • Fried Rice: A surprising yet satisfying component that adds texture and heartiness. You can use leftover rice for convenience!
    • Corn: Sweet and crunchy kernels elevate the freshness of your burrito. Fresh, frozen, or even canned corn works!
    • Onion: Diced onion adds a savory depth. Red or yellow onions complement the dish nicely.
    • Tomato: Fresh tomatoes bring juiciness and brightness. You can substitute these with diced canned tomatoes if you’re in a hurry.
    • Lettuce: A refreshing crunch that balances out the spicy flavors. Iceberg or romaine lettuce are both great choices.
    • Red Pepper: Sweet red pepper adds color and crunch. Feel free to swap it for other bell peppers or roasted peppers.
    • Olive Oil: This will be used for marinating the chicken. It adds richness and helps the spices stick.
    • Salt and Pepper: Essential seasonings that enhance all flavors. Always adjust to your taste!
    • Garlic Powder: For a quick flavor boost without the chopping hassle. It adds a savory touch that pairs perfectly with chicken.
    • Paprika Powder: A flavor revelation! This gives your chicken a beautiful color and a mild smoky taste.
    • Lemon Juice: Freshens things up and balances the all the flavors nicely.
    • Mayonnaise: Creaminess that envelopes all flavors together in the spicy mayo sauce.
    • Franks Hot Sauce: A must for that spicy kick. Adjust the amount to control the heat.
    • Fresh Parsley: For a pop of color and freshness, which complements the spicy mayo perfectly.

    For exact measurements, check out the bottom of the article, where you’ll find not just the full ingredient list but also handy printing options!

    How to Make Spicy Chicken Burrito

    Let’s dive into the making of this Spicy Chicken Burrito! Follow these easy steps to create a dish that will impress everyone at your table. Grab your ingredients, and let’s get cooking!

    Step 1: Marinate the Chicken

    Start by marinating the chicken thighs in a mixture of olive oil, garlic powder, paprika, salt, pepper, and lemon juice. This step is essential to infuse flavor into the chicken.

    If you’re in a hurry, let it marinate while you chop the veggies. Trust me, the longer it marinates, the more flavorful it becomes.

    Step 2: Cook the Chicken

    Heat a skillet over medium-low heat. Once hot, add the marinated chicken thighs, cooking them for about 8-10 minutes.

    Aim for that golden-brown color, which indicates they’re cooked through. Make sure to flip them halfway for even cooking. Your taste buds will thank you!

    Step 3: Prepare the Spicy Mayo

    In a small bowl, mix mayonnaise, Franks Hot Sauce, and chopped parsley until smooth. This spicy mayo is the magic sauce that will take your burrito to the next level!

    Don’t hesitate to adjust the hot sauce quantity for your preferred heat level. I recommend tasting it as you go!

    Step 4: Assemble the Burrito

    Lay a tortilla flat on the counter, and spread a generous layer of that spicy mayo sauce. Follow it up with fried rice and a dollop of Greek yogurt.

    Then, layer the cooked chicken and the diced vegetables evenly on top. It’s like an edible canvas just waiting for your creative touch.

    Step 5: Toast the Burrito

    Fold the burrito tightly, making sure everything stays inside. Place it seam-side down in a heated pan over low heat.

    Toast each side until they’re golden brown and crisp, about 2 minutes each. It makes for that delightful crunch when you take your first bite!

    Step 6: Slice and Serve

    Finally, slice the burrito in half and serve it immediately. The spicy, crispy flavors will beckon everyone to come to the table!

    Feel free to garnish with extra parsley or hot sauce if you like. Enjoy your delicious Spicy Chicken Burrito experience!

    Tips for Success

    • Marinating overnight gives the chicken maximum flavor.
    • Use a meat thermometer to ensure chicken reaches 165°F for safety.
    • If you prefer a milder taste, reduce the amount of hot sauce in the mayo.
    • Toast burritos on low heat for a perfectly crispy exterior.
    • Prep all ingredients ahead of time to streamline the cooking process.

    Equipment Needed

    • Non-stick skillet: A versatile tool for cooking the chicken and toasting the burrito.
    • Mixing bowl: Perfect for combining your spicy mayo ingredients.
    • Knife and cutting board: Essential for chopping veggies and slicing the burrito.
    • Tongs or spatula: Handy for flipping the chicken and handling the burrito.
    • Food storage bag: Ideal for marinating the chicken, ensuring even flavor distribution.

    Variations

    • Vegetarian Option: Substitute chicken with grilled vegetables such as zucchini, bell peppers, or mushrooms for a delicious plant-based twist.
    • Spicy Bean Burrito: Use black beans or pinto beans instead of chicken. Add spices like cumin and chili powder for extra flavor.
    • Low-Carb Alternative: Wrap all the filling in lettuce leaves instead of tortillas for a fresh, low-carb version.

    • Extra Crunch: Add crispy tortilla strips or crushed tortilla chips for a delightful crunch in every bite.
    • Cheesy Delight: Incorporate shredded cheese such as cheddar or pepper jack for an extra creamy texture that pairs beautifully with spicy flavors.

    Serving Suggestions for Spicy Chicken Burrito

    • Pair the burrito with a side of fresh guacamole or pico de gallo for that extra flavor punch.
    • Serve it alongside tortilla chips for a delightful crunch and contrast.
    • A refreshing margarita or iced tea complements the spiciness beautifully.
    • Garnish with lime wedges and extra parsley for a pop of color.

    FAQs about Spicy Chicken Burrito

    Can I make Spicy Chicken Burrito ahead of time?

    Absolutely! You can marinate the chicken and prepare the veggies a day in advance. Just assemble and cook it when you’re ready for a quick meal. This is a fantastic time-saver for busy weeknights!

    What should I serve with my Spicy Chicken Burrito?

    This burrito pairs wonderfully with sides like Mexican rice, refried beans, or even a simple garden salad. You can also serve it with some homemade salsa or guacamole for extra flavors!

    How do I adjust the spice level in the burrito?

    To make your Spicy Chicken Burrito milder, simply reduce the amount of Frank’s Hot Sauce in the spicy mayo. You can also add more yogurt to balance the heat. Customize it to suit your family’s tastes!

    What’s the best way to store leftovers?

    Store any uneaten burritos in an airtight container in the fridge for up to 2 days. To reheat, simply place the burrito in a skillet over low heat until warmed through. This keeps the tortilla crispy!

    Can I freeze the burritos?

    Yes! Wrap them tightly in plastic wrap and place them in a freezer-safe bag. They can be frozen for up to 2 months. Just thaw in the fridge overnight and reheat when you’re ready to enjoy!

    Final Thoughts

    Creating this Spicy Chicken Burrito is more than just a dinner; it’s a shared experience that brings joy to your kitchen.

    With its vibrant flavors and customizable ingredients, each bite is a mini celebration.

    I love how this dish effortlessly transforms an ordinary meal into something special, leaving everyone at the table feeling satisfied and happy.

    Plus, it’s a fun way to involve your family in the cooking process, turning busy evenings into culinary adventures.

    So, roll up your sleeves, gather around the table, and let this Spicy Chicken Burrito bring a smile to your family’s faces!


    Print

    clock clock iconcutlery cutlery iconflag flag iconfolder folder iconinstagram instagram iconpinterest pinterest iconfacebook facebook iconprint print iconsquares squares iconheart heart iconheart solid heart solid icon

    Description

    A delicious and flavorful Spicy Chicken Burrito packed with marinated chicken, fresh vegetables, and a spicy mayo sauce.


    • 500 g Boneless Chicken Thighs
    • 4 Tortilla Wraps
    • Greek Yogurt
    • Fried Rice
    • Corn
    • 1 Onion, diced
    • 1 Tomato, diced
    • Lettuce, chopped
    • 1 Red Pepper, diced
    • 2 tablespoons Olive Oil
    • Salt and Pepper, to taste
    • 1 tablespoon Garlic Powder
    • 1 tablespoon Paprika Powder
    • 1 tablespoon Lemon Juice
    • 2 tablespoons Mayonnaise
    • 1 tablespoon Franks Hot Sauce
    • 1 tablespoon Fresh Parsley, chopped

    1. Marinate the chicken thighs in a mixture of olive oil, garlic powder, paprika, salt, pepper, and lemon juice. For best results, marinate overnight. Alternatively, marinate while preparing the vegetables.
    2. Heat a skillet over medium-low heat. Cook the marinated chicken thighs for 8-10 minutes until golden and fully cooked.
    3. In a small bowl, mix mayonnaise, Franks Hot Sauce, and chopped parsley until smooth. Adjust cayenne pepper for extra heat, if desired.
    4. Lay a tortilla flat. Spread a generous layer of spicy mayo sauce, followed by fried rice and a dollop of Greek yogurt. Layer cooked chicken and the diced vegetables evenly.
    5. Fold the burrito tightly. Place it seam-side down in a heated pan over low heat. Toast each side until golden brown and crisp, approximately 2 minutes per side.
    6. Slice the burrito and serve immediately. Enjoy the spicy, crispy flavors!

    Notes

    • For a vegetarian option, substitute chicken with grilled vegetables or beans.
    • Customize spice level by adjusting the amount of hot sauce.
    • Best served immediately for optimal freshness.
    • Prep Time: 15 minutes
    • Cook Time: 20 minutes
    • Category: Main Dish
    • Method: Skillet
    • Cuisine: Mexican

    Nutrition

    • Serving Size: 1 burrito
    • Calories: 480
    • Sugar: 4g
    • Sodium: 800mg
    • Fat: 22g
    • Saturated Fat: 4g
    • Unsaturated Fat: 14g
    • Trans Fat: 0g
    • Carbohydrates: 50g
    • Fiber: 5g
    • Protein: 25g
    • Cholesterol: 85mg

    Sharing is caring!

  • Mini Pumpkin Goat Cheese Tartlets

    Mini Pumpkin Goat Cheese Tartlets


    Introduction to Mini Pumpkin Goat Cheese Tartlets

    As the leaves start to turn, the air gets that crisp bite of autumn, and I can’t help but think about one of my favorite treats: Mini Pumpkin Goat Cheese Tartlets. These delightful little bites bring together the rich, earthy flavor of pumpkin and the creamy tang of goat cheese. Perfect for busy moms and professionals, they’re not just easy to whip up but also make any gathering feel warm and inviting. Trust me, once you taste these tartlets, they’ll become a seasonal staple in your kitchen!

    Why You’ll Love This Mini Pumpkin Goat Cheese Tartlets

    Let me tell you, these Mini Pumpkin Goat Cheese Tartlets are a total game-changer! They’re quick to prepare, taking only 20 minutes of prep time. The combination of flavors? Just heavenly! You’ll impress your friends, family, or even yourself with these little wonders. Plus, they’re a breeze to make ahead of time, so you can simply pop them in the oven when your guests arrive. Trust me, they won’t last long!

    Ingredients for Mini Pumpkin Goat Cheese Tartlets

    Gathering the right ingredients for your Mini Pumpkin Goat Cheese Tartlets is half the fun! Here’s what you’ll need:

    • Puff Pastry: This flaky, buttery crust is the perfect foundation for our tartlets. You can find it in the freezer section of most grocery stores. Simply thaw before use!
    • Pumpkin Purée: Pot for unsweetened pumpkin purée, not the sweetened pumpkin pie filling. It gives a natural sweetness and a creamy texture, perfect for balancing the cheese.
    • Greek Yogurt or Cream Cheese: Both options add creaminess. Greek yogurt gives a tangy twist, while cream cheese brings extra richness. Choose based on your preference!
    • Ground Cinnamon: This warm spice ties the flavors together, enhancing the earthy notes of pumpkin. A must-have in fall recipes!
    • Ground Nutmeg: A pinch of nutmeg adds depth and that cozy holiday vibe. Just a touch is needed to make a big impact!
    • Egg: A lightly beaten egg helps seal the pastry edges and gives a lovely golden finish when baked.
    • Goat Cheese: Crumbled goat cheese adds a creamy texture and tangy flavor that perfectly complements the sweetness of pumpkin.
    • Honey: Drizzling honey atop the tartlets adds a lovely sweetness and a touch of elegance. You can swap in maple syrup for a unique flavor if you’d like!
    • Fresh Thyme Leaves: These fragrant little leaves brighten up the dish. Feel free to use other herbs like rosemary for a different twist!

    For exact measurements and additional details, you can check at the bottom of this article where I’ve included a handy print-friendly version. Happy cooking!

    How to Make Mini Pumpkin Goat Cheese Tartlets

    Alright, let’s dive into the fun part—making these scrumptious Mini Pumpkin Goat Cheese Tartlets! I promise each step is simple and rewarding. So, grab your apron, and let’s get started!

    Step 1: Preheat and Prepare

    First, preheat your oven to 400°F (200°C). This will ensure your tartlets bake perfectly. While the oven is warming up, line a baking tray with parchment paper. This simple step prevents sticking and makes cleanup a breeze!

    Step 2: Cut the Puff Pastry

    Once your puff pastry is thawed, roll it out on a clean surface. Then, cut it into 12 equal squares or circles. Place these neatly on the baking tray, leaving a little space between each one. They’re going to puff up wonderfully, so give them some room to shine!

    Step 3: Make the Pumpkin Filling

    Time to whip up that luscious pumpkin filling! In a mixing bowl, combine the pumpkin purée, Greek yogurt or cream cheese, ground cinnamon, and ground nutmeg. Stir until the mixture is smooth and creamy. This filling is the heart of your tartlets and oh-so-delicious!

    Step 4: Assemble the Tartlets

    Now for the fun part—assembling! Take a small dollop of your pumpkin mixture and place it in the center of each pastry. Don’t be shy; you want them stuffed with flavor! Next, brush the edges of the pastry lightly with beaten egg. This will give it that gorgeous golden touch when it bakes.

    Step 5: Bake to Perfection

    Pop the baking tray into the preheated oven. Bake the tartlets for 15 to 18 minutes, keeping an eye on them. You want them puffed up and golden brown—like little pillows of joy coming out of the oven! The aroma will make your kitchen smell like fall.

    Step 6: Garnish and Serve

    As soon as they’re out of the oven, sprinkle crumbled goat cheese on top of each tartlet. The heat will melt it slightly, making it even creamier! Drizzle with honey and scatter fresh thyme leaves over the tops. Now, they’re ready to steal the show at your next gathering!

    Tips for Success

    • Make sure your puff pastry is fully thawed; otherwise, it won’t puff up as beautifully.
    • For extra crunch, consider sprinkling chopped nuts on top before baking.
    • Mix the filling a few hours ahead of time to let the flavors meld together.
    • Feel free to experiment with different herbs; basil or sage works wonderfully too!
    • Serve them warm for a delightful eating experience; they’re perfect fresh out of the oven!

    Equipment Needed

    • Baking Tray: A standard sheet tray works great. You can also use a pizza stone for an even bake!
    • Parchment Paper: Essential for non-stick baking—silicone mats are a good alternative.
    • Mixing Bowl: Any size is fine. A measuring cup can double as one for smaller quantities.
    • Pastry Brush: For brushing egg wash. A clean paintbrush can substitute in a pinch!
    • Knife or Pizza Cutter: To cut the puff pastry into shapes. Scissors could work too!

    Variations

    • Cheese Swap: Try substituting goat cheese with feta or ricotta for a different flavor profile.
    • Nutty Delight: Add walnuts or pecans for an extra crunch and depth. They also bring a wonderful fall flavor.
    • Seasonal Spices: Experiment with spices like ginger or allspice along with the cinnamon and nutmeg for a spicier kick!
    • Gluten-Free Option: Use gluten-free puff pastry to make these tartlets suitable for gluten-intolerant guests.
    • Mini Quiches: Transform these tartlets into mini quiches by adding beaten eggs to the pumpkin filling for extra protein!

    Serving Suggestions

    • Pair with a salad: These tartlets go wonderfully with a simple arugula salad drizzled with balsamic vinaigrette.
    • Try a warm drink: Serve alongside warm apple cider or a spiced chai to enhance the fall flavors.
    • Presentation: Arrange the tartlets on a rustic wooden board, garnished with fresh thyme sprigs for an eye-catching display.
    • Ideal as finger food: Perfect for holiday gatherings, they invite grazing and mingling between guests!

    FAQs about Mini Pumpkin Goat Cheese Tartlets

    Can I make Mini Pumpkin Goat Cheese Tartlets ahead of time?
    Absolutely! You can prepare the filling a day in advance and store it in the fridge. Just assemble and bake when you’re ready to serve.

    What if I don’t like goat cheese?
    No problem at all! You can easily swap it for feta or ricotta cheese. Both offer a creamy texture without the tang of goat cheese.

    Are these tartlets suitable for vegetarians?
    Yes, these Mini Pumpkin Goat Cheese Tartlets are vegetarian! They contain no meat, making them a great option for veggie lovers.

    Can I freeze the tartlets?
    Sure! You can freeze unbaked tartlets. Just keep them in an airtight container, and bake them from frozen when you’re ready to enjoy!

    What can I serve with the tartlets?
    These tartlets pair beautifully with a light salad or a warm soup, balancing the rich flavors with something refreshing.

    Final Thoughts

    As you take your first bite of these Mini Pumpkin Goat Cheese Tartlets, I want you to feel that warm fuzziness that comes with fall. The delightful combination of pumpkin and creamy goat cheese is like a cozy hug from the inside out. Whether you’re hosting a gathering or simply treating yourself, this recipe brings joy and comfort to any table. Plus, the cheerful aroma wafting through your kitchen will have family and friends flocking to see what’s cooking. Embrace this culinary adventure, and let the flavors of autumn surround you with each delicious bite!


    Print

    clock clock iconcutlery cutlery iconflag flag iconfolder folder iconinstagram instagram iconpinterest pinterest iconfacebook facebook iconprint print iconsquares squares iconheart heart iconheart solid heart solid icon

    Description

    Delicious mini tartlets filled with pumpkin and goat cheese, perfect for fall gatherings.


    • 1 sheet puff pastry, thawed
    • 1 cup pumpkin purée (unsweetened, not pumpkin pie filling)
    • 2 tablespoons Greek yogurt or cream cheese
    • 0.5 teaspoon ground cinnamon
    • 0.25 teaspoon ground nutmeg
    • 1 egg, lightly beaten
    • 85 grams goat cheese, crumbled
    • 2 tablespoons honey
    • 1 teaspoon fresh thyme leaves

    1. Preheat the oven to 200°C. Line a baking tray with parchment paper.
    2. Cut puff pastry into 12 equal squares or circles and arrange them evenly on the prepared baking tray.
    3. In a mixing bowl, combine pumpkin purée, Greek yogurt or cream cheese, ground cinnamon, and ground nutmeg. Stir until the mixture is smooth and uniform.
    4. Place a small dollop of the pumpkin mixture onto the center of each pastry piece. Brush the pastry edges lightly with the beaten egg.
    5. Bake in the center of the oven for 15 to 18 minutes, or until the pastry is puffed and golden brown.
    6. Remove the tartlets from the oven. While they are still hot, top each with crumbled goat cheese. Drizzle with honey and scatter fresh thyme leaves over the tops before serving.

    Notes

    • Ensure the puff pastry is fully thawed before using.
    • For an extra flavor boost, try adding some crumbled walnuts or pecans on top.
    • These tartlets can be served warm or at room temperature.
    • Prep Time: 20 minutes
    • Cook Time: 18 minutes
    • Category: Appetizer
    • Method: Baking
    • Cuisine: American

    Nutrition

    • Serving Size: 1 tartlet
    • Calories: 150
    • Sugar: 4g
    • Sodium: 200mg
    • Fat: 8g
    • Saturated Fat: 3g
    • Unsaturated Fat: 5g
    • Trans Fat: 0g
    • Carbohydrates: 18g
    • Fiber: 1g
    • Protein: 3g
    • Cholesterol: 30mg

    Sharing is caring!

  • Pumpkin Cream Cheese Bread

    Pumpkin Cream Cheese Bread


    Introduction to Pumpkin Cream Cheese Bread

    There’s something magical about the aroma of freshly baked Pumpkin Cream Cheese Bread wafting through the kitchen. It instantly warms the heart! As a busy mom, I often seek simple yet delightful recipes that can effortlessly impress my family and friends. This bread is just that—a perfect treat for a cozy afternoon or a special gathering. Not only is it easy to whip up, but the combination of pumpkin and creamy cheese is sheer bliss. Trust me, this recipe is a brilliant way to turn any ordinary day into something extraordinary.

    Why You’ll Love This Pumpkin Cream Cheese Bread

    This Pumpkin Cream Cheese Bread is a game-changer! It comes together in just over an hour, perfect for busy days when you crave something warm and comforting. The delightful combination of pumpkin and cream cheese creates an indulgent taste without the fuss. Plus, it’s ideal for satisfying picky eaters or impressing unexpected guests. Once you make it, I guarantee you’ll find yourself baking it again and again!

    Ingredients for Pumpkin Cream Cheese Bread

    Let’s gather what we need! This list of ingredients for Pumpkin Cream Cheese Bread reflects a wonderful mix of flavors and textures. Each component plays a crucial role in creating that delicious loaf that your family will love.

    • Pumpkin puree: This is the star! Make sure to use pure pumpkin puree, not pumpkin pie filling, for that authentic pumpkin flavor.
    • Egg: A large egg adds moisture and richness, helping to bind the bread together perfectly.
    • Light brown sugar: This adds not just sweetness but a hint of caramel flavor that complements the pumpkin beautifully.
    • Oil: A splash of oil keeps the bread moist and tender. You can use vegetable oil or even coconut oil if you prefer.
    • Sour cream: This adds a delightful tanginess and boosts the bread’s moistness.
    • Vanilla extract: A teaspoon of vanilla enhances the sweetness and rounds out the flavors with a lovely aromatic note.
    • Pumpkin pie spice: A necessary ingredient that introduces hints of cinnamon, nutmeg, and ginger, bringing warmth to every bite.
    • All-purpose flour: This forms the base of the bread structure. Feel free to substitute with whole wheat flour for a nuttier taste.
    • Baking powder and baking soda: These leavening agents ensure our bread rises nicely while achieving that soft texture.
    • Salt: A pinch of salt heightens all the flavors, ensuring your bread isn’t overly sweet.
    • Cream cheese: A key player in the filling, cream cheese adds richness and a delightful creamy layer that contrasts beautifully with the pumpkin bread.
    • Granulated sugar: This sweetens the cream cheese filling, striking a perfect balance with the pumpkin bread.
    • Additional flour for cream cheese filling: This helps to firm up the filling, ensuring it doesn’t ooze out during baking.

    The precise measurements for these ingredients can be found at the bottom of this article, making it easy for you to print the recipe out for convenience!

    How to Make Pumpkin Cream Cheese Bread

    Now, let’s get baking! This Pumpkin Cream Cheese Bread comes together beautifully, and I’m here to guide you through every step. Each part of the process builds on the last, ensuring a delicious outcome that’ll have your family begging for more!

    Step 1: Preheat Your Oven

    First things first, preheat your oven to 350°F (175°C). This helps set the stage for perfect baking!

    While it warms up, take a 9×5 inch loaf pan and grease it with cooking spray. This ensures our bread doesn’t stick, making it easy to remove after baking.

    Step 2: Combine the Pumpkin Mixture

    In a large bowl, combine the pumpkin puree, the egg, light brown sugar, oil, sour cream, and vanilla extract. Mix everything together until it’s smooth, and the colors meld beautifully. Oh, the scent of pumpkin will start to fill your kitchen!

    Step 3: Add Dry Ingredients

    Now, it’s time to fold in the dry ingredients. Gently add the pumpkin pie spice, flour, baking powder, baking soda, and salt to your pumpkin mixture.

    Stir just until combined. Be careful not to over-mix, or your bread might turn out dense. We want it light and fluffy!

    Step 4: Pour 2/3 of the Batter

    Next, take 2/3 of that gorgeous pumpkin batter and pour it into your prepared loaf pan. I like to spread it evenly with a spatula because we want a consistent bake.

    Step 5: Prepare the Cream Cheese Filling

    In a medium bowl, it’s time to create the creamy goodness! Whisk together the softened cream cheese, the additional egg, granulated sugar, and the extra flour.

    Mix until it’s smooth and creamy—just like frosting. You might find yourself wanting to lick the bowl!

    Step 6: Layer the Filling

    Now, pour the cream cheese filling over the pumpkin batter in the loaf pan. Gently spread it around with a spatula so it’s evenly layered.

    This creamy layer is where the magic happens. It makes each slice decadent and moist!

    Step 7: Add Remaining Batter and Bake

    Finally, pour the remaining pumpkin batter over the cream cheese layer. Carefully spread it out to cover the filling completely.

    Now, it’s time to bake! Place your loaf pan in the preheated oven, and let it bake for 45-50 minutes.

    To check for doneness, insert a toothpick into the center. It should come out mostly clean—some crumbs are okay! Afterward, let your masterpiece cool in the pan for 15 minutes before transferring it to a wire rack. Your Pumpkin Cream Cheese Bread adventure is almost complete!

    Tips for Success

    • Use room temperature ingredients for a smoother batter.
    • Don’t skip greasing the pan; this ensures easy release.
    • Let the bread cool completely for the best texture.
    • Store leftovers in an airtight container for freshness.
    • Experiment with add-ins like walnuts or chocolate chips for extra flavor.

    Equipment Needed

    • 9×5 inch loaf pan: A standard pan works perfectly, but a silicone pan makes for easy release.
    • Mixing bowls: Use two bowls—one for the pumpkin mixture and one for the cream cheese filling.
    • Whisk: A whisk is great for mixing; a fork will do in a pinch.
    • Spatula: A rubber spatula helps ensure no batter is left behind.
    • Measuring cups and spoons: Accurate measurements are key for the best results!

    Variations of Pumpkin Cream Cheese Bread

    • Nutty Delight: Add in chopped walnuts or pecans for a delightful crunch that complements the soft texture.
    • Chocolate Swirl: Introduce a chocolate twist by swirling in some melted chocolate or chocolate chips into the cream cheese filling.
    • Spice Up: Experiment with additional spices like cloves or allspice for a more robust flavor profile.

    • Gluten-Free Option: Use a gluten-free all-purpose flour blend to accommodate gluten sensitivities without sacrificing taste.
    • Vegan Version: Substitute the eggs with flax eggs and use dairy-free cream cheese for a plant-based variation.

    Serving Suggestions

    • Enjoy a slice with a warm cup of coffee or spiced chai for a cozy afternoon treat.
    • Add a dollop of whipped cream or a sprinkle of powdered sugar for an elegant touch.
    • Pair with a fresh fruit salad or yogurt for a delightful breakfast option!
    • Slice and serve alongside a cheese platter for a charming gathering.
    • Wrap individual slices in parchment for a lovely homemade gift!

    FAQs about Pumpkin Cream Cheese Bread

    I’ve gathered some common questions about Pumpkin Cream Cheese Bread that might help you bake this delicious loaf with confidence. Whether you’re a seasoned baker or a newbie, these answers should clarify your doubts and enhance your culinary adventure!

    Can I use pumpkin pie filling instead of pumpkin puree?

    It’s best to stick with pure pumpkin puree for this recipe. Pumpkin pie filling is sweetened and spiced, which may alter the final flavor and texture of your pumpkin bread recipe. Pure pumpkin gives you more control over the sweetness and spices.

    How should I store the leftover bread?

    After your Pumpkin Cream Cheese Bread cools completely, store it in an airtight container. It’ll stay fresh for up to five days at room temperature, or you can refrigerate it for a week. You can also freeze slices for up to three months!

    Can I substitute the cream cheese?

    Absolutely! If you’re looking for a lower-fat option, you can use reduced-fat cream cheese. For a dairy-free alternative, try vegan cream cheese. Just ensure it’s creamy enough to create that lovely filling.

    Is this bread suitable for freezing?

    Yes! Pumpkin Cream Cheese Bread freezes beautifully. Slice it and wrap it tightly in plastic wrap, followed by foil. When you’re ready to enjoy it, let it thaw in the fridge overnight before serving.

    Can I add other ingredients like chocolate chips or nuts?

    For sure! Feel free to customize your bread. Chocolate chips add a delightful burst of sweetness, while nuts give it a nice crunch. Just fold them in gently during the mixing process.

    Final Thoughts

    Making Pumpkin Cream Cheese Bread is not just about baking; it’s about creating memories and savoring moments. When you slice into that warm loaf, the creamy filling peeking out, you’ll find pure joy radiating from your kitchen. The laughter of family, the aroma swirling in the air, and the pleased smiles will make every effort worthwhile. This recipe is my go-to comfort food, transforming ordinary days into cherished celebrations. Whether enjoyed alone with a cup of tea or shared with loved ones, each bite reminds us of the simple pleasures in life. Happy baking!


    Print

    clock clock iconcutlery cutlery iconflag flag iconfolder folder iconinstagram instagram iconpinterest pinterest iconfacebook facebook iconprint print iconsquares squares iconheart heart iconheart solid heart solid icon

    Description

    A delightful and easy recipe for Pumpkin Cream Cheese Bread that combines the flavors of pumpkin and cream cheese for a delicious treat.


    • 1 cup pumpkin puree, not pumpkin pie filling
    • 1 large egg
    • 3/4 cup light brown sugar
    • 1/4 cup oil
    • 1/4 cup sour cream
    • 1 teaspoon vanilla extract
    • 1/2 tablespoon pumpkin pie spice
    • 1 cup all-purpose flour
    • 1/2 teaspoon baking powder
    • 1/2 teaspoon baking soda
    • 1/4 teaspoon salt
    • 1 large egg (for cream cheese filling)
    • 4 ounces cream cheese, softened
    • 1/4 cup granulated sugar
    • 3 tablespoons all-purpose flour (for cream cheese filling)

    1. Preheat oven to 350°F (175°C). Grease a 9 x 5 inch loaf pan with cooking spray and set aside.
    2. In a large bowl, combine pumpkin puree, egg, brown sugar, oil, sour cream, and vanilla extract until smooth.
    3. Fold in pumpkin pie spice, all-purpose flour, baking powder, baking soda, and salt until just combined.
    4. Pour 2/3 of the batter into the prepared loaf pan.
    5. In a medium bowl, whisk together cream cheese, egg, granulated sugar, and flour until smooth.
    6. Pour the cream cheese filling on top of the batter and gently spread it with a spatula.
    7. Pour the remaining batter on top of the cream cheese layer and carefully spread it to cover.
    8. Bake for 45-50 minutes or until a toothpick comes out mostly clean when inserted into the center. Cool in the pan for 15 minutes before transferring to a wire rack to cool completely.

    Notes

    • Ensure to use pure pumpkin puree, not the flavored pumpkin pie filling.
    • Let the bread cool completely for the best texture and flavor.
    • Prep Time: 15 minutes
    • Cook Time: 50 minutes
    • Category: Dessert
    • Method: Baking
    • Cuisine: American

    Nutrition

    • Serving Size: 1 slice
    • Calories: 180
    • Sugar: 10g
    • Sodium: 200mg
    • Fat: 7g
    • Saturated Fat: 2g
    • Unsaturated Fat: 5g
    • Trans Fat: 0g
    • Carbohydrates: 24g
    • Fiber: 1g
    • Protein: 3g
    • Cholesterol: 35mg

    Sharing is caring!

  • Marshmallow Chocolate Poke Cake

    Marshmallow Chocolate Poke Cake


    Introduction to Marshmallow Chocolate Poke Cake

    Hey there, fellow dessert lovers! If you’re anything like me, you know that life’s hustle often leaves little time for elaborate baking. Enter the Marshmallow Chocolate Poke Cake: a delightful dessert that’s as easy to make as it is irresistible. This cake is a fluffy chocolate dream, filled with sweetened condensed milk and topped with a cloud of marshmallow fluff. It’s perfect for unexpected guests or those busy weeknights when you crave something sweet but can’t spare hours in the kitchen. Trust me, one bite, and you’ll understand why this dessert is a family favorite!

    Why You’ll Love This Marshmallow Chocolate Poke Cake

    Let me tell you, this Marshmallow Chocolate Poke Cake is a lifesaver! It’s a one-bowl wonder that comes together in no time. You’ll love how each slice bursts with rich flavors. Plus, the poke cake method ensures that every corner is oozing with sweetness. It’s like receiving a warm hug after a long day. When dessert is this simple and delicious, you’ll find reasons to make it again and again!

    Ingredients for Marshmallow Chocolate Poke Cake

    Let’s talk about the star players that come together to create this delightful Marshmallow Chocolate Poke Cake. Each ingredient plays a vital role, contributing to the fiesta of flavors that bursts from each slice.

    • Sweetened Condensed Milk: This creamy goodness is the secret to keeping the cake moist and infusing it with rich sweetness. It acts as a sponge for that decadent flavor!
    • Marshmallow Fluff: A fluffy, sweet topping that adds a delightful texture and hints of nostalgia. It’s like spreading joy on your cake—who can resist?
    • Semisweet Chocolate Chips: These little morsels melt beautifully into a silky chocolate ganache. Their balanced sweetness elevates the cake to another level.
    • Heavy Cream: The creamy foundation for your ganache, it adds lush richness and ensures a smooth pouring experience. Use fresh cream for the best results!

    You can find all the ingredients at your local grocery store. Just remember, if you want a lighter option, there’s always the temptation of substituting the heavy cream with whipping cream. Curious for exact amounts? Don’t fret! You can find them at the end of the article for printing.

    How to Make Marshmallow Chocolate Poke Cake

    Now comes the fun part! Making the Marshmallow Chocolate Poke Cake is a delightful adventure that’s easy to follow and incredibly satisfying. From poking holes to pouring luscious ganache, every step is part of the magic. Let’s get started!

    Step 1: Poke Holes in the Cake

    Start by ensuring your cake is completely cooled. This is essential; if it’s warm, it might break apart when you poke holes.

    Using the handle end of a wooden spoon or a skewer, gently poke evenly spaced holes in the cake. Aim for about 1 to 2 inches apart. Each hole is like a tiny doorway for flavor, allowing the sweetened condensed milk to seep in and make every bite a dreamy experience.

    Step 2: Pour the Sweetened Condensed Milk

    This is where the magic starts!

    Slowly pour the sweetened condensed milk over the cake, ensuring you cover all the holes. This step is crucial because it allows the cake to soak up that creamy goodness, turning it into a super moist masterpiece.

    Take your time! If you rush, the milk won’t soak in properly, and we want maximum flavor!

    Step 3: Spread the Marshmallow Fluff

    Next up is the marshmallow fluff, which adds that nostalgic sweetness we all adore.

    Use a spatula to gently spread the marshmallow fluff over the entire cake, paying special attention to filling those lovely holes.

    Aim for an even layer, creating a fluffy surface that’s as inviting as a soft cloud. Isn’t baking fun?

    Step 4: Prepare the Chocolate Ganache

    For the ganache, start by heating the heavy cream in a small saucepan just until it simmers.

    Don’t let it boil! This step is key, as the right temperature helps the chocolate melt smoothly, resulting in a beautiful glaze.

    Once simmering, pour the cream over the semisweet chocolate chips in a bowl and let it sit for one minute. This waiting time lets the chocolate soften perfectly. After that, whisk until the mixture is glossy and smooth—pure bliss!

    Step 5: Top the Cake with Ganache

    Finally, it’s time to top your creation.

    Carefully pour the warm ganache over the marshmallow layer, letting it flow down the sides of the cake. Use an offset spatula to spread it evenly if needed.

    This finishing touch turns your cake into a decadent dessert sensation! The glossy chocolate layer feels like the cherry on top of this delightful cake.

    Tips for Success

    • Let the cake cool completely before poking holes to avoid crumbling.
    • Use a toothpick for smaller holes for more absorption, if preferred.
    • Store leftovers in the refrigerator for up to 3 days—if there are any!
    • Feel free to adapt flavors with different chocolate or add toppings like crushed nuts.
    • Always measure ingredients accurately for the best results!

    Equipment Needed

    • 9×13-inch baking dish – A classic choice for poke cakes; you can use any similar-sized pan.
    • Wooden spoon or skewer – For poking holes; a toothpick also works fine.
    • Mixing bowls – Use one for mixing and another for the ganache.
    • Whisk – Essential for achieving a smooth ganache.
    • Offset spatula – Helpful for spreading the ganache evenly.

    Variations of Marshmallow Chocolate Poke Cake

    • Peanut Butter Delight: Add a layer of peanut butter between the cake and marshmallow fluff for a nutty twist.
    • Minty Fresh: Incorporate 1 teaspoon of peppermint extract into the ganache for a refreshing mint chocolate flavor.
    • Caramel Drizzle: Swirl in some caramel sauce with the marshmallow fluff for a sweet touch that complements the chocolate.
    • Fruit Fusion: Top the cake with fresh strawberries or raspberries for a fruity contrast that brightens the dessert.
    • Gluten-Free Swap: Substitute the chocolate cake mix with a gluten-free version to accommodate dietary needs.

    Serving Suggestions for Marshmallow Chocolate Poke Cake

    • Pair with a scoop of vanilla ice cream for a delightful contrast in temperature.
    • Serve with fresh berries to add a burst of color and tangy flavor.
    • Drizzle some chocolate syrup on top for extra indulgence.
    • Presentation tip: Garnish with whipped cream and a sprinkle of cocoa powder for a touch of elegance.

    FAQs about Marshmallow Chocolate Poke Cake

    As a passionate home cook, I often get questions about this delightful Marshmallow Chocolate Poke Cake. Here are some frequent inquiries that pop up, along with my tried-and-true answers!

    Can I make this cake ahead of time?

    Absolutely! In fact, making it a day in advance can enhance the flavors. Just cover it well and refrigerate.

    How should I store leftover cake?

    Store any leftover Marshmallow Chocolate Poke Cake in the refrigerator. It can last for up to three days, though it might not last that long in my house!

    Can I use a different kind of cake mix?

    Totally! While chocolate is classic, feel free to experiment with different flavors like vanilla or even red velvet. The poke method works wonders with any cake!

    What if I don’t have heavy cream for the ganache?

    If you’re out of heavy cream, you can substitute with half-and-half or whole milk. The texture may vary slightly, but it’ll still be delicious!

    Is this cake suitable for kids?

    Oh yes! This Marshmallow Chocolate Poke Cake is a hit with kids and adults alike. Just watch out for those sprinkles—little hands will go right for them!

    Final Thoughts

    Baking this Marshmallow Chocolate Poke Cake feels like a warm embrace on a busy day. It’s more than just a dessert; it’s a sweet way to create memories with family and friends. The smells wafting through your kitchen, the ooey-gooey layers inviting you to dig in—that’s pure joy! Whether it’s a celebration or a simple treat after dinner, each slice brings smiles and laughter. I hope you experience the magic of this cake in your home because every bite is a reminder of love, comfort, and the beauty of sharing something delicious with those you cherish.


    Print

    clock clock iconcutlery cutlery iconflag flag iconfolder folder iconinstagram instagram iconpinterest pinterest iconfacebook facebook iconprint print iconsquares squares iconheart heart iconheart solid heart solid icon

    Description

    A decadent and indulgent dessert featuring a chocolate cake filled with sweetened condensed milk and marshmallow fluff, topped with a rich chocolate ganache.


    • 1 can (14 ounces) sweetened condensed milk
    • 1 jar marshmallow fluff
    • 1 cup semisweet chocolate chips
    • 1/2 cup heavy cream

    1. Using the handle end of a wooden spoon or a skewer, poke evenly spaced holes (approximately 1 to 2 inches apart) throughout the cooled cake surface.
    2. Slowly pour the sweetened condensed milk over the cake, ensuring it infiltrates each hole for thorough absorption.
    3. Gently spread marshmallow fluff across the cake, focusing on filling the poked holes and achieving an even surface layer.
    4. Warm 1/2 cup heavy cream just to a simmer. Pour over the chocolate chips in a bowl, allow to stand for one minute, then whisk until completely smooth and glossy.
    5. Evenly pour the chocolate ganache over the marshmallow layer, using an offset spatula to spread if necessary.

    Notes

    • Ensure the cake is completely cooled before poking holes to prevent it from breaking.
    • You can use a toothpick instead of a skewer if preferred.
    • This cake can be stored in the refrigerator for up to 3 days.
    • Prep Time: 20 minutes
    • Cook Time: 30 minutes
    • Category: Dessert
    • Method: Baking
    • Cuisine: American

    Nutrition

    • Serving Size: 1 slice
    • Calories: 350
    • Sugar: 30g
    • Sodium: 150mg
    • Fat: 18g
    • Saturated Fat: 10g
    • Unsaturated Fat: 8g
    • Trans Fat: 0g
    • Carbohydrates: 40g
    • Fiber: 1g
    • Protein: 5g
    • Cholesterol: 50mg

    Sharing is caring!

  • Marry Me Chicken Tortellini

    Marry Me Chicken Tortellini


    Introduction to Marry Me Chicken Tortellini

    As a busy home cook, I understand the struggle of finding recipes that delight the family without stealing hours of precious time. That’s where Marry Me Chicken Tortellini swoops in like a culinary superhero! This dish is so comforting and creamy, it’s bound to become a household favorite. It combines tender chicken with cheesy tortellini and sun-dried tomatoes in a rich sauce—perfect for impressing loved ones or simply treating yourself after a long day. Trust me; this dish is a quick solution that will warm your heart and fill your belly!

    Why You’ll Love This Marry Me Chicken Tortellini

    This Marry Me Chicken Tortellini is a dream come true for busy moms and professionals alike. It’s easy to prepare, with simple steps that keep kitchen chaos at bay. In just 40 minutes, you can create a restaurant-quality meal that’s both creamy and flavorful. The blend of cheesy tortellini, tender chicken, and savory sun-dried tomatoes makes every bite feel like a warm hug, ensuring everyone leaves the table smiling!

    Ingredients for Marry Me Chicken Tortellini

    Gathering the right ingredients is key to making a scrumptious Marry Me Chicken Tortellini. Here’s what you’ll need:

    • Frozen cheese tortellini: This golden pasta filled with cheese provides that creamy goodness we all crave.
    • Olive oil: Just a splash to help sauté your chicken and add richness.
    • Boneless, skinless chicken breasts: The star of the show! Dice them up for bite-sized pieces that soak in all the flavors.
    • Freshly ground black pepper: A must-have for seasoning, bringing a touch of warmth to the dish.
    • Italian seasoning: This adds that classic Mediterranean vibe, a mix of herbs that make your taste buds sing.
    • Sweet paprika: A pinch of sweetness combined with vibrant color, enhancing both taste and visual appeal.
    • Unsalted butter: This helps create a rich, flavorful base, melting beautifully with garlic.
    • Sun-dried tomatoes: These little gems pack a punch of umami, adding depth and tang.
    • Minced garlic: Essential for that irresistible aroma and flavor boost in every bite.
    • Low-sodium chicken broth: This adds moisture and layers of flavor without overwhelming saltiness.
    • Heavy cream: The creamy essence that ties everything together, creating that dreamy texture.
    • Parmesan cheese: This cheese melts beautifully into the sauce, enhancing creaminess and richness.
    • Baby spinach: For a pop of color and nutrition, adding healthiness to each delectable spoonful.
    • Fresh parsley or basil: A sprinkle on top makes this dish look gourmet and fresh.

    You’ll find precise measurements for these ingredients at the end of the article, so feel free to check them out for easy printing!

    How to Make Marry Me Chicken Tortellini

    Step 1: Prepare the Chicken

    Start by seasoning your bite-sized pieces of chicken with black pepper, Italian seasoning, and sweet paprika. This is where the magic begins! Heat olive oil in a large skillet over medium-high heat. Once it shimmers, add the chicken. Cook for about 5–7 minutes, stirring occasionally, until your chicken turns a lovely golden brown. That golden crust is key to sealing in the juicy flavor. Once cooked through, transfer the chicken to a plate and set it aside—don’t worry, we’ll reunite it shortly!

    Step 2: Sauté Garlic and Sun-Dried Tomatoes

    In the same skillet, melt unsalted butter over medium heat. As it melts, you’ll start to notice a nutty aroma filling the air—delicious! Now, toss in the minced garlic and sauté for about one minute until it becomes fragrant. This is your opportunity to awaken the flavors! Add the sliced sun-dried tomatoes and cook for an additional two minutes, allowing the tomatoes to caramelize slightly and impart their robust flavor into the butter.

    Step 3: Create the Creamy Sauce

    Next, pour in the low-sodium chicken broth to deglaze the pan. Use a wooden spoon to scrape up any lovely browned bits stuck to the bottom—those bits are flavor gold! Once that’s done, stir in the heavy cream along with the held back Italian seasoning, black pepper, and paprika. Bring this creamy concoction to a gentle simmer, letting the flavors blend beautifully into a luscious sauce. The smell will be simply irresistible, trust me!

    Step 4: Cook the Tortellini

    Now it’s time to add your frozen cheese tortellini. Gently push them into the sauce, making sure they are fully submerged—this is key for even cooking! Cover the skillet and let them cook for about 5–7 minutes. Stir occasionally to ensure that every tortellini is coated in that dreamy sauce. Once they become tender, you’ll know it’s time for the next step. Each bite will burst with cheesy goodness!

    Step 5: Combine Chicken and Finish Sauce

    It’s time to bring everything together! Return the cooked chicken back to the skillet, along with the finely shredded Parmesan cheese. Stir until the cheese melts and the sauce thickens, wrapping everything in creamy warmth. Then, toss in the chopped baby spinach. Cook for an additional two minutes until the spinach is wilted, adding a pop of color and nutrition. Your mouthwatering Marry Me Chicken Tortellini is almost ready!

    Step 6: Garnish and Serve

    Once you’ve removed the skillet from heat, let the dish rest for a moment. This allows the sauce to settle and flavors to meld. Now, for the finishing touch—garnish with freshly chopped parsley or basil. It adds a beautiful, vibrant burst! Serve it hot, and watch as your loved ones dig in, savoring every delightful bite of this comforting dish.

    Tips for Success

    • Use fresh ingredients for the best flavor—especially garlic and spices!
    • Don’t skip the deglazing step; those browned bits add depth.
    • Keep the tortellini submerged in sauce for even cooking.
    • Let the dish rest before serving for optimal texture.
    • Experiment with seasonings; add a pinch of red pepper flakes for heat!

    Equipment Needed

    • Large skillet: A non-stick skillet is ideal for easy cleanup.
    • Wooden spoon: Perfect for stirring without scratching your skillet.
    • Measuring cups and spoons: Essential for accurate ingredient portions.
    • Knife and cutting board: For chopping chicken, garlic, and spinach.

    Variations of Marry Me Chicken Tortellini

    • Shrimp Version: Substitute chicken with shrimp for a delightful seafood twist. Simply sauté the shrimp until pink.
    • Vegetarian Option: Use tofu or more vegetables like bell peppers and mushrooms for a hearty dairy-free delight.
    • Spice it Up: Add red pepper flakes or chopped jalapeños for a spicy kick that’ll tingle your taste buds.

    • Dairy-Free Alternative: Use coconut cream instead of heavy cream and nutritional yeast instead of Parmesan for a creamy, vegan adaptation.
    • Whole Wheat Tortellini: Try whole wheat tortellini for a healthier option that adds fiber and nutrients.

    Serving Suggestions for Marry Me Chicken Tortellini

    • Pair with a simple green salad dressed in lemon vinaigrette for a refreshing contrast.
    • Serve with garlic bread to soak up that creamy sauce—it’s a must!
    • A glass of crisp white wine like Sauvignon Blanc complements the dish beautifully.
    • Top with extra Parmesan cheese and freshly cracked black pepper for added flair.

    FAQs about Marry Me Chicken Tortellini

    Can I use fresh tortellini instead of frozen? Absolutely! Just adjust the cooking time according to the package instructions. Fresh tortellini cooks faster, so keep an eye on it!

    Can I make Marry Me Chicken Tortellini ahead of time? Yes! You can prepare the dish, let it cool, and store it in the fridge. To reheat, simply warm it up on the stove with a splash of broth or cream to restore the sauce.

    Is Marry Me Chicken Tortellini suitable for gluten-free diets? Yes! By using gluten-free tortellini, you can easily enjoy this creamy delight without the gluten. It’s just as rich and satisfying!

    How can I make this dish lighter? You can swap heavy cream for half-and-half or even a plant-based cream. Using less cheese or adding more veggies will also lighten the dish while keeping it delicious.

    What should I serve with Marry Me Chicken Tortellini? A simple green salad or steamed vegetables makes a fantastic complement. Garlic bread is another favorite choice to enjoy with the creamy sauce!

    Final Thoughts

    There’s something truly magical about recipes like Marry Me Chicken Tortellini. Not only does it bring the family together around the table, but it also fosters laughter and shared memories. With each spoonful of creamy goodness, you’ll feel the love infused in every ingredient. It’s a dish that transforms busy weeknights into something special. Plus, it’s a comforting reminder that good food doesn’t have to be complicated to be delicious. So, roll up your sleeves and savor the joy of cooking this delightful meal. I promise, it’s worth every minute spent in the kitchen!


    Print

    clock clock iconcutlery cutlery iconflag flag iconfolder folder iconinstagram instagram iconpinterest pinterest iconfacebook facebook iconprint print iconsquares squares iconheart heart iconheart solid heart solid icon

    Description

    A comforting and creamy dish featuring tender chicken, cheese tortellini, and sun-dried tomatoes in a rich sauce.


    • 1 (540 g) bag frozen cheese tortellini
    • 2 tablespoons olive oil
    • 680 g boneless, skinless chicken breasts, cut into bite-sized pieces
    • ½ teaspoon freshly ground black pepper
    • ½ teaspoon Italian seasoning
    • ½ teaspoon sweet paprika
    • 2 tablespoons unsalted butter
    • 120 g sun-dried tomatoes in oil, drained and thinly sliced
    • 3 teaspoons minced garlic
    • 240 ml low-sodium chicken broth
    • 480 ml heavy cream
    • 1 teaspoon Italian seasoning
    • 1 teaspoon freshly ground black pepper
    • 1 teaspoon sweet paprika
    • 100 g finely shredded Parmesan cheese
    • 2 cups (60 g) baby spinach, chopped
    • Fresh parsley or basil, chopped, for garnish

    1. Toss chicken pieces with ½ teaspoon black pepper, ½ teaspoon Italian seasoning, and ½ teaspoon paprika. Heat olive oil in a large skillet over medium-high heat. Add chicken and cook for 5–7 minutes, stirring occasionally, until golden and cooked through. Transfer to a plate and set aside.
    2. Using the same skillet, melt the butter. Add minced garlic and sauté for 1 minute until fragrant. Stir in the sun-dried tomatoes and cook for an additional 2 minutes.
    3. Pour in chicken broth and deglaze the pan, scraping up any browned bits. Stir in heavy cream, 1 teaspoon Italian seasoning, 1 teaspoon black pepper, and 1 teaspoon paprika. Bring the sauce to a gentle simmer.
    4. Add the frozen cheese tortellini, ensuring all pieces are submerged in the sauce. Cover the skillet and cook for 5–7 minutes, stirring occasionally, until tortellini are tender.
    5. Return the cooked chicken to the skillet along with the Parmesan cheese. Stir to combine until the cheese melts and the sauce thickens. Add baby spinach and cook for 2 minutes until wilted.
    6. Remove from heat and allow to rest briefly for the sauce to settle. Garnish with freshly chopped parsley or basil before serving.

    Notes

    • This dish is perfect for a cozy family dinner.
    • Substitute chicken with shrimp or tofu for a different twist.
    • Feel free to adjust the seasonings to taste.
    • Prep Time: 15 minutes
    • Cook Time: 25 minutes
    • Category: Main Course
    • Method: Skillet
    • Cuisine: Italian

    Nutrition

    • Serving Size: 1 serving
    • Calories: 690
    • Sugar: 4g
    • Sodium: 550mg
    • Fat: 40g
    • Saturated Fat: 20g
    • Unsaturated Fat: 10g
    • Trans Fat: 0g
    • Carbohydrates: 55g
    • Fiber: 2g
    • Protein: 30g
    • Cholesterol: 160mg

    Sharing is caring!

  • Crab Stuffed Mushrooms

    Crab Stuffed Mushrooms


    Introduction to Crab Stuffed Mushrooms

    Welcome to a delightful culinary adventure with Crab Stuffed Mushrooms! If you’re like me, always on the lookout for simple yet impressive recipes, you’re in the right place. These little bites of heaven are perfect for any occasion, whether it’s a cozy family dinner or a lively weekend gathering. Imagine serving these delicious, crab-filled bites that not only taste fantastic but also make your loved ones smile. Trust me, these crab stuffed mushrooms will soon become a favorite in your household, no matter how busy life gets!

    Why You’ll Love This Crab Stuffed Mushrooms

    Crab Stuffed Mushrooms are the perfect solution for busy lives. They come together in just 35 minutes, leaving you more time to enjoy. The combination of tender mushrooms and creamy crab filling creates a taste explosion that’s hard to resist. Plus, they’re versatile enough to serve at both casual family meals and fancy gatherings, making them an all-around winner in my book. Who knew something so simple could be so delicious?

    Ingredients for Crab Stuffed Mushrooms

    To whip up these delectable Crab Stuffed Mushrooms, you’ll need a short list of quality ingredients. Most of them you might already have in your kitchen, and trust me, they play a vital role in creating that perfect flavor.

    • Large white mushrooms: These are the stars of the show! Their meaty texture provides the perfect base for the stuffing.
    • Cooked crab or lobster meat: Fresh crab brings a sweet, ocean-like flavor that’s simply irresistible. If you’re in a pinch, canned or frozen varieties work well too.
    • Panko breadcrumbs: Optional but adds a lovely crunch. If you’re keeping it low-carb, feel free to skip this ingredient.
    • Freshly grated Parmesan cheese: A must-have for that savory punch! It pairs perfectly with the creamy crab.
    • Whole egg mayonnaise: This helps bind everything together while adding richness. Substitute with Greek yogurt for a lighter option.
    • Spreadable cream cheese: Soften this to blend easily, contributing a creamy texture to the filling.
    • Green onions: Chopped green onions lend a mild onion flavor, brightening up the dish.
    • Garlic: Don’t skimp on this! Freshly minced garlic elevates the taste, adding depth that’s simply magical.
    • Fresh parsley: This herb adds freshness and a pop of color! You can swap it out for other herbs as needed.
    • Dried oregano: A sprinkle enhances the flavors beautifully. Feel free to get creative with your favorite dried herbs.
    • Kosher salt and black pepper: Essential for seasoning! Adjust according to your taste preference.
    • Olive oil: Just a bit to coat the mushrooms before baking; it helps with that gorgeous golden browning.

    For precise measurements, don’t forget to check the end of the article, where you can easily print out the full recipe!

    How to Make Crab Stuffed Mushrooms

    Now that you have all your ingredients lined up, let’s dive into the wonderful world of making Crab Stuffed Mushrooms! Trust me, this process is as enjoyable as it is simple. You’ll love turning these fresh mushrooms into the delightful appetizers your friends and family will be raving about!

    Preheat the Oven and Prepare Baking Sheet

    First things first, preheating the oven is essential! Set it to 375°F (175°C), because a hot oven makes for evenly cooked mushrooms.

    While the oven warms up, grab a large baking sheet and give it a light spray with cooking oil. This ensures nothing sticks, allowing your stuffed mushrooms to release easily when they’re done. Trust me, you’ll thank me later!

    Clean and Prepare Mushrooms

    Next, it’s time to get those mushrooms ready for their delicious stuffing. Using a damp paper towel, gently wipe each mushroom free of any dirt. Be careful not to soak them, as mushrooms are like little sponges and will absorb water.

    Once they’re clean, carefully remove the stems from each mushroom. You can save the stems to add to a sauce or soup later. Then, scoop out the dark gills using a small spoon, which makes room for the heavenly filling.

    Make the Crab Filling

    In a large mixing bowl, combine all your filling ingredients: cooked crab or lobster meat, Panko breadcrumbs, freshly grated Parmesan, mayonnaise, cream cheese, garlic, green onions, parsley, oregano, salt, and pepper. This is where flavor magic happens!

    Mix everything together gently but thoroughly. You want all those ingredients to blend well, creating a creamy and savory filling. The aroma is going to be irresistible!

    Stuff the Mushrooms

    Now for the fun part—stuffing those mushrooms! Take a generous scoop of your crab filling and pack it into each mushroom cap. Aim for about one to one-and-a-half tablespoons per cap.

    Don’t be shy; really stuff them in! This is what gives you that generous flavor explosion when you take a bite. Plus, it’s fun to see how much you can fit in each mushroom!

    Bake the Mushrooms

    Once all the mushrooms are stuffed, arrange them on your prepared baking sheet. Spray the tops lightly with olive oil. This helps achieve that golden, crispy texture we all love.

    Bake them in the preheated oven for about 18 minutes. You’re looking for the edges to turn golden and for the mushrooms themselves to be tender. The smell wafting through your kitchen is going to be sooo delicious!

    Broiling for the Finish

    Finally, let’s give those mushrooms a little finishing touch! After baking, turn on the broiler. Broil your stuffed mushrooms for an additional 2 minutes.

    This step is where the magic happens. It adds a beautifully crispy texture to the tops while enhancing the overall appearance. Just keep an eye on them—they can go from lovely to burnt in a flash!

    Tips for Success

    • Choose mushrooms that are firm and evenly sized for even cooking.
    • Don’t overstuff! A generous amount is great, but leave a little space for expansion.
    • For extra flavor, roast the mushroom stems with garlic and herbs before adding them to the filling.
    • Experiment with different seafood like shrimp or crab leg meat for a unique twist.
    • Let the mushrooms cool slightly before serving; they’ll hold their shape better!

    Equipment Needed

    • Baking sheet: A standard one works well; use a casserole dish if you prefer.
    • Parchment paper or cooking oil spray: Both prevent sticking while baking.
    • Mixing bowl: Any medium bowl will do for preparing the filling.
    • Spoon: A tablespoon is ideal for stuffing those mushrooms.
    • Small spoon: Great for scooping out gills without a hassle.

    Variations for Crab Stuffed Mushrooms

    • Spicy Kick: Add a dash of cayenne pepper or some diced jalapeños to the filling for a zesty flavor boost.
    • Cheesy Delight: Swap in different cheeses like feta or mozzarella for a unique cheesy experience.
    • Herb Infusion: Experiment with fresh herbs like dill or basil instead of parsley for a fresh twist.

    • Vegetarian Option: Substitute the crab with sautéed spinach and artichoke hearts for a delicious meatless option.
    • Low-Carb Version: Omit Panko breadcrumbs and replace cream cheese with ricotta for a lighter choice.

    Serving Suggestions for Crab Stuffed Mushrooms

    • Pair these crab stuffed mushrooms with a fresh arugula salad for a light and vibrant side.
    • Serve alongside a creamy garlic dip or zesty cocktail sauce for added flavor.
    • For drinks, a crisp white wine or sparkling water with lime complements the dish beautifully.
    • Presentation tip: Garnish with extra parsley or lemon zest for a pop of color!

    FAQs about Crab Stuffed Mushrooms

    Got questions about Crab Stuffed Mushrooms? I’ve got answers! Here are some common inquiries that I’ve encountered when sharing this delightful recipe.

    Can I make Crab Stuffed Mushrooms ahead of time?

    Absolutely! You can prepare the stuffed mushrooms in advance and keep them in the fridge for up to a day. Just pop them in the oven when you’re ready to bake!

    What can I use instead of crab meat?

    If crab isn’t your thing, you can replace it with shrimp, lobster, or even mushrooms for a vegetarian twist. Keep in mind that the flavors will change, but they’ll still be delicious!

    How can I make these crab stuffed mushrooms healthier?

    For a healthier option, omit the Panko breadcrumbs and use Greek yogurt instead of mayonnaise. You can also incorporate more veggies into the filling, like diced bell peppers or spinach.

    Can I freeze the stuffed mushrooms?

    Yes! Assemble them and freeze unbaked. When ready to enjoy, just bake them directly from frozen. They may need a few extra minutes in the oven.

    What should I serve with Crab Stuffed Mushrooms?

    These savory treats pair excellently with a vibrant salad, a refreshing drink, or even some crusty bread to soak up all those delicious flavors!

    Final Thoughts

    Cooking these Crab Stuffed Mushrooms truly feels like a heartwarming hug for your taste buds! Each bite bursts with flavor and promises to create memories around the dinner table. Whether you’re entertaining friends or treating your family on a busy night, these little delights never fail to impress. The joy of creating something so delicious, yet simple, is a gift for both you and your loved ones. I genuinely hope you find as much happiness in preparing this dish as I do. Remember, food isn’t just about sustenance; it’s about connection, laughter, and love shared over a table.


    Print

    clock clock iconcutlery cutlery iconflag flag iconfolder folder iconinstagram instagram iconpinterest pinterest iconfacebook facebook iconprint print iconsquares squares iconheart heart iconheart solid heart solid icon

    Description

    A deliciously simple recipe for crab stuffed mushrooms, perfect as an appetizer or party treat.


    • 15 large white mushrooms
    • 1 cup cooked crab or lobster meat
    • 1/2 cup Panko breadcrumbs (optional – Leave out for low carb mushrooms), divided
    • 1/3 cup parmesan cheese, freshly grated
    • 1/3 cup whole egg mayonnaise
    • 1/3 cup spreadable cream cheese, softened
    • 1/3 cup green onions, chopped (about 3 stalks – green and white parts)
    • 2 large cloves garlic, minced (or 4 small cloves)
    • 1 tablespoon fresh parsley, finely chopped
    • 1/4 teaspoon dried oregano
    • 1/4 teaspoon kosher salt
    • 1/8 teaspoon black pepper, freshly ground
    • 1/2 tablespoon olive oil

    1. Preheat the oven to 375°F (175°C). Lightly grease a large baking sheet with cooking oil spray.
    2. Wipe mushrooms clean with a damp paper towel. Remove stems and scoop out gills. Discard.
    3. Arrange mushrooms on the baking sheet. Lightly spray mushrooms with olive oil spray; set aside.
    4. In a large bowl, combine crab meat, 1/3 cup Panko crumbs, parmesan, mayo, cream cheese, garlic, green onions, herbs, salt, and pepper.
    5. Stuff each mushroom cap generously with the crab dip (about 1 – 1/2 tablespoons per mushroom).
    6. Combine oil and remaining Panko crumbs until evenly coated. Sprinkle the panko mixture over the tops of the mushrooms.
    7. Bake for 18 minutes or until edges become golden, then broil (or grill) for a further 2 minutes until golden all over with crispy tops.
    8. Serve immediately.

    Notes

    • For a low carb version, omit the Panko breadcrumbs.
    • Feel free to add more herbs to enhance the flavor.
    • Prep Time: 15 minutes
    • Cook Time: 20 minutes
    • Category: Appetizer
    • Method: Baking
    • Cuisine: American

    Nutrition

    • Serving Size: 3 mushrooms
    • Calories: 220
    • Sugar: 1g
    • Sodium: 450mg
    • Fat: 14g
    • Saturated Fat: 5g
    • Unsaturated Fat: 6g
    • Trans Fat: 0g
    • Carbohydrates: 10g
    • Fiber: 1g
    • Protein: 12g
    • Cholesterol: 60mg

    Sharing is caring!

  • One Pan Dumpling Dinner

    One Pan Dumpling Dinner


    Introduction to One Pan Dumpling Dinner

    Welcome to the comforting world of one-pan meals! Today, I want to share my favorite recipe for a delicious One Pan Dumpling Dinner. If you’re anything like me, life gets busy, and finding time to whip up dinner can feel overwhelming. This easy recipe is not just a quick solution for a hectic day; it’s also a delightful way to impress your family and friends. Trust me, with just one pan and a handful of ingredients, you’ll create a flavorful dish that warms the heart and soul. Let’s dive into this culinary adventure!

    Why You’ll Love This One Pan Dumpling Dinner

    This One Pan Dumpling Dinner is a dream come true for busy moms and professionals alike. It’s quick, taking only 25 minutes from start to finish, which means more time for you! The flavor-packed sauce makes each bite a taste sensation, while the colorful bok choy adds a nutritious twist. Plus, cleanup is a breeze since everything cooks in one pan. Your family will love it, and so will you!

    Ingredients for One Pan Dumpling Dinner

    Gathering ingredients for my One Pan Dumpling Dinner feels like collecting pieces of a delicious puzzle! Each ingredient plays a crucial role in bringing the flavors together.

    • Minced fresh garlic: This aromatic ingredient adds depth and a warm kick to the dish.
    • Minced fresh ginger: A fragrant addition that pairs beautifully with garlic, elevating the overall taste.
    • Soy sauce: This savory staple adds saltiness and a rich umami flavor—a must in Asian cuisine!
    • Rice vinegar: It brings a tangy brightness that balances out the richness of the dish.
    • Toasted sesame oil: With its nutty aroma, this oil enhances the dumplings and adds a gourmet feel.
    • Red curry paste: For a delightful hint of spice and warmth, this ingredient wakes up your taste buds.
    • Full-fat coconut milk or cream: It provides creaminess and a subtle sweetness that smoothens the bold flavors.
    • Water: Used to create the sauce, helping to combine all the flavors together.
    • Chopped bok choy: This leafy green adds nutrition, color, and a delightful crunch to the dish.
    • Frozen chicken and vegetable or pork and vegetable dumplings: The heart of this meal, offering convenience without sacrificing flavor.
    • Chopped cilantro: A fresh finish that brightens everything and adds a pop of color.
    • Thinly sliced green onion: This garnish brings a mild onion flavor and a dash of color to your plate.
    • Toasted sesame seeds: These tiny seeds not only add a nutty flavor, but also a pleasant crunch.
    • Chili crunch oil (optional): If you’re craving some heat, don’t hesitate to drizzle some on top!

    Curious about the exact measurements? Don’t worry; you can find them at the bottom of the article, ready for you to print! Ready to whip up this vibrant dish? Let’s get cooking!

    How to Make One Pan Dumpling Dinner

    Now that we’ve gathered our ingredients, it’s time to dive into the cooking process! Follow these simple steps to create your very own One Pan Dumpling Dinner. Just imagine filling your kitchen with mouthwatering aromas that make even the most exhausted cook feel like a culinary superstar!

    Step 1: Prepare the Sauce

    Begin by grabbing a medium bowl. Here, you’ll combine minced garlic, minced ginger, soy sauce, rice vinegar, toasted sesame oil, red curry paste, coconut milk, and water. Take a whisk and mix it all together until it’s smooth. This sauce is the heart of the dish, bursting with flavors that complement the dumplings beautifully!

    Step 2: Sauté the Bok Choy

    Next, heat a large nonstick pan over medium heat. Once it’s warm, toss in your chopped bok choy. Sauté for about 2 to 3 minutes. You’ll know it’s ready when the bok choy softens slightly. The vibrant green brings gorgeous color and nutrition to your One Pan Dumpling Dinner.

    Step 3: Arrange the Dumplings

    Now for the fun part! Carefully arrange the frozen dumplings in a single layer on top of the bok choy. The convenience of using frozen dumplings means you’ll have a satisfying meal ready in no time, without skimping on flavor. Just think of them as little pockets of joy waiting to be steamed!

    Step 4: Pour the Sauce

    Once your dumplings are in place, evenly pour the prepared sauce over both the dumplings and bok choy. As you drizzle, get ready for that delightful fusion of flavors to begin! The sauce will soak into the dumplings, enhancing every single bite.

    Step 5: Simmer the Dish

    Cover the pan with a lid and reduce the heat to medium-low. Let everything simmer for about 8 to 10 minutes. During this time, the dumplings will cook through, and the bok choy will soften even more. The aroma wafting through your kitchen will leave everyone curious and excited for dinner!

    Step 6: Garnish and Serve

    Finally, remove the pan from heat. Top your gorgeous dish with chopped cilantro, sliced green onion, and toasted sesame seeds. If you’re feeling adventurous, drizzle on some chili crunch oil for an extra kick. Serve immediately, and watch as your loved ones rave about this delightful One Pan Dumpling Dinner!

    Tips for Success

    • Prep all ingredients before you start to make cooking smoother and faster.
    • Use a nonstick pan to prevent dumplings from sticking while cooking.
    • Adjust the amount of red curry paste based on your spice tolerance.
    • For added crunch, sauté the bok choy a bit longer!
    • Use leftover dumplings in soups or stir-fries for a quick meal later.

    Equipment Needed

    • Large nonstick pan: A must-have for even cooking. If you don’t have one, a regular pan works too with a little extra oil.
    • Medium bowl: For mixing the sauce; any mixing bowl will do!
    • Whisk: To blend your sauce; a fork can work in a pinch!
    • Wooden spoon or spatula: For stirring and serving.

    Variations of One Pan Dumpling Dinner

    • For a vegetarian version, swap the frozen dumplings for plant-based options filled with vegetables or tofu.
    • Add extra veggies like bell peppers, snap peas, or carrots for a colorful and nutritious twist.
    • Switch the bok choy with other leafy greens like spinach or kale for different textures and flavors.
    • Experiment with different sauces by replacing red curry paste with green curry paste for a different taste profile.
    • If you want a lighter meal, reduce the amount of coconut milk or substitute it with low-fat coconut milk.

    Serving Suggestions for One Pan Dumpling Dinner

    • Pair with steamed jasmine rice for a classic combination that soaks up the delicious sauce.
    • Serve alongside a refreshing cucumber salad drizzled with rice vinegar for a crunchy contrast.
    • Compliment with a light, sparkling drink or green tea to cleanse the palate.
    • For a pop of color, garnish each plate with extra cilantro and sesame seeds.

    FAQs about One Pan Dumpling Dinner

    As I’ve shared my love for this One Pan Dumpling Dinner, I know you might have some questions. Let’s tackle those and ensure you’re fully equipped to make this delicious meal!

    Can I use fresh dumplings instead of frozen?

    Absolutely! Fresh dumplings can provide an even better texture. Just be sure they’re ready to cook and follow the same simmering instructions.

    What can I substitute for bok choy?

    If bok choy is hard to find, don’t worry! You can use other leafy greens like spinach, kale, or even napa cabbage for a similar crunch and flavor.

    How do I store leftovers from this One Pan Dumpling Dinner?

    Leftovers can be stored in an airtight container in the fridge for up to 3 days. Just reheat gently on the stove to maintain flavor and texture.

    Can I make this dish gluten-free?

    Yes! Simply replace the soy sauce with a gluten-free alternative, like tamari, and you’re all set. This makes a delightful gluten-free meal!

    What can I add for extra spice?

    If you love heat, sprinkle in some red pepper flakes or add a dash more of the chili crunch oil when serving. It’s delicious!

    Final Thoughts

    Cooking this One Pan Dumpling Dinner is like wrapping your family in a warm hug. With its vibrant colors and delightful flavors, it’s an invitation to gather around the table and share stories. Each bite transports you to a world of comfort, reminding you that delicious meals can be both easy and nourishing. Whether you’re a busy mom or a professional seeking simple solutions, this recipe is a joyful experience. So gather your loved ones, savor the moments together, and relish in the satisfaction of creating something truly special—all in just one pan!


    Print

    clock clock iconcutlery cutlery iconflag flag iconfolder folder iconinstagram instagram iconpinterest pinterest iconfacebook facebook iconprint print iconsquares squares iconheart heart iconheart solid heart solid icon

    Description

    A quick and easy one-pan dish featuring dumplings and bok choy, drenched in a flavorful sauce.


    • 2 teaspoons minced fresh garlic
    • 1 teaspoon minced fresh ginger
    • 3 tablespoons soy sauce
    • 1 tablespoon rice vinegar
    • 2 teaspoons toasted sesame oil
    • 2 tablespoons red curry paste
    • 1/2 cup full-fat coconut milk or cream
    • 1/2 cup water
    • 5 cups chopped bok choy
    • 20 frozen chicken and vegetable or pork and vegetable dumplings
    • 3 tablespoons chopped cilantro
    • 1/4 cup thinly sliced green onion
    • 2 teaspoons toasted sesame seeds
    • chili crunch oil, to taste (optional)

    1. In a medium bowl, combine minced garlic, minced ginger, soy sauce, rice vinegar, toasted sesame oil, red curry paste, coconut milk, and water. Whisk thoroughly to integrate.
    2. Warm a large nonstick pan over medium heat and add chopped bok choy. Sauté for 2 to 3 minutes, stirring occasionally, until bok choy has softened slightly.
    3. Arrange frozen dumplings in a single layer atop the bok choy.
    4. Evenly pour the prepared sauce over the dumplings and bok choy in the pan.
    5. Cover the pan and simmer over medium-low heat for 8 to 10 minutes, or until the dumplings are fully heated through and cooked per package instructions.
    6. Remove from heat. Top with chopped cilantro, sliced green onions, sesame seeds, and drizzle with chili crunch oil, if desired. Serve immediately.

    Notes

    • Adjust the amount of chili crunch oil based on your spice preference.
    • Feel free to substitute other vegetables if bok choy is not available.
    • Prep Time: 10 minutes
    • Cook Time: 15 minutes
    • Category: Dinner
    • Method: Pan Cooking
    • Cuisine: Asian

    Nutrition

    • Serving Size: 1 serving
    • Calories: 400
    • Sugar: 3g
    • Sodium: 800mg
    • Fat: 20g
    • Saturated Fat: 13g
    • Unsaturated Fat: 5g
    • Trans Fat: 0g
    • Carbohydrates: 45g
    • Fiber: 3g
    • Protein: 12g
    • Cholesterol: 30mg

    Sharing is caring!

  • Cheesecake Crescent Rolls Casserole

    Cheesecake Crescent Rolls Casserole


    Introduction to Cheesecake Crescent Rolls Casserole

    Are you ready for a dessert that will make your heart sing? The Cheesecake Crescent Rolls Casserole is just that! This delightful treat combines creamy cheesecake with flaky crescent rolls, wrapping up happiness in every bite. I know how hectic life can get, especially for busy moms like us. This recipe is a quick solution for those sweet cravings that pop up after dinner.

    It’s not just easy; it’s a dish that will impress your loved ones and leave them asking for more. Grab your apron, and let’s dive into this heavenly dessert!

    Why You’ll Love This Cheesecake Crescent Rolls Casserole

    This Cheesecake Crescent Rolls Casserole is a game changer for busy kitchens! It’s incredibly quick to whip up, taking just 45 minutes from start to finish. The flavor is out of this world, blending the richness of cheesecake and the buttery crunch of crescent rolls. Plus, the cinnamon-sugar topping gives it that extra touch of magic. Trust me; your family will fall in love with it, and you’ll love how easy it is!

    Ingredients for Cheesecake Crescent Rolls Casserole

    Gather these simple ingredients for a delightful experience! Each plays a special role in crafting our luscious Cheesecake Crescent Rolls Casserole.

    • Refrigerated crescent roll dough: This is the base that brings flaky goodness. You’ll need two cans to create the layers.
    • Cream cheese: The star of the show! Make sure it’s softened for a smooth, creamy filling that melts in your mouth.
    • Granulated sugar: Sweetness is key. This will balance out the tang of the cream cheese and enhance the overall flavor.
    • Vanilla extract: A splash adds warmth and depth, making the dessert taste even more delicious.
    • Unsalted butter: Brush this melted beauty on top for a glorious golden crust. It also enriches the flavor.
    • Ground cinnamon: This aromatic spice gives your casserole that comforting home-baked scent. It creates a lovely contrast with the sweetness.
    • Additional granulated sugar: This combines with the cinnamon for the perfect topping, ensuring every bite is amazing!

    If you’re feeling adventurous, consider adding toppings like chocolate chips or fruit preserves for a twist! For specifics, the exact quantities are available at the bottom of the article, ready for you to print and keep handy.

    How to Make Cheesecake Crescent Rolls Casserole

    Now that we have our ingredients ready, let’s transform them into a dessert masterpiece! Follow these easy steps to create a delightful Cheesecake Crescent Rolls Casserole that will wow your family.

    Step 1: Preheat the Oven

    First things first, preheat your oven to 350°F (175°C). This temperature is perfect for baking our casserole to golden perfection. Don’t forget to lightly grease a 9×13-inch baking dish with some cooking spray or a little butter. This ensures our casserole slides right out once it’s done baking!

    Step 2: Prepare the Dough Base

    Grab one can of your refrigerated crescent roll dough and unroll it. Gently press it into the bottom of the greased baking dish, spreading it out evenly. Make sure to pinch the seams together so there are no gaps. We want a solid base for all that creamy goodness on top!

    Step 3: Make the Cream Cheese Filling

    In a large mixing bowl, add your softened cream cheese, 1 cup of granulated sugar, and a splash of vanilla extract. Using an electric mixer, beat them together until the mixture is smooth and creamy. You want it to be fluffy and spreadable, resembling a delightful cloud of cheesecake filling!

    Step 4: Assemble the Casserole

    Now, evenly spread that luscious cream cheese mixture over the crescent dough in your baking dish. Use a spatula to ensure every bit of dough is covered. Next, unroll the second can of crescent roll dough and layer it over the cream cheese filling. Again, pinch those seams together for a beautiful, uniform appearance.

    Step 5: Add Butter and Cinnamon-Sugar Topping

    Take that melted butter and brush it generously over the top layer of crescent rolls. This adds flavor and helps achieve that irresistible golden color once baked. In a separate small bowl, mix the ground cinnamon with 2 tablespoons of sugar, then sprinkle this heavenly mix evenly over the buttered dough. It’s the secret to that delightful crunchy topping!

    Step 6: Bake to Perfection

    Time to bake! Place your baking dish in the preheated oven and let the casserole bake for 30 minutes. Keep an eye on it. You’ll know it’s done when the top turns a lovely golden brown and fills your kitchen with an aroma that can only be described as heavenly.

    Step 7: Cooling and Serving

    Once your casserole is baked to perfection, take it out and let it cool for at least 20 minutes. This allows it to set properly, making slicing a breeze. If you’re feeling fancy, drizzle a bit of honey over the top before serving. It adds that delightful touch that will impress everyone!

    Tips for Success

    • Ensure your cream cheese is at room temperature for easy mixing.
    • Pinching seams together well will prevent leakage during baking.
    • Let the casserole cool longer for easier slicing and better texture.
    • Experiment with toppings like fresh fruit or a drizzle of chocolate.
    • Store leftovers in an airtight container for fresh snacking later.

    Equipment Needed

    • Baking dish: A 9×13-inch dish works best. You can also use a larger one if needed.
    • Mixing bowl: Any medium-sized bowl will do for mixing your cream cheese filling.
    • Electric mixer: This makes blending your ingredients a breeze, but a whisk works too.
    • Spatula: Perfect for spreading the cream cheese and scraping down the sides of the bowl.
    • Measuring cups and spoons: Handy for accurate ingredient measurements.

    Variations of Cheesecake Crescent Rolls Casserole

    • Fruit-filled Delight: Add fresh or canned fruit, such as blueberries or strawberries, to the cream cheese filling for a burst of flavor.
    • Chocolate Lovers: Mix in chocolate chips with the cream cheese for a rich, indulgent twist that will satisfy any sweet tooth.
    • Nutty Crunch: Fold in chopped nuts, like pecans or walnuts, for an added crunch that pairs beautifully with the creamy filling.
    • Spiced Variation: Experiment with different spices like nutmeg or pumpkin pie spice to bring a seasonal flair to this dish.
    • Gluten-Free Option: Use gluten-free crescent roll dough to cater to dietary restrictions without compromising taste.
    • Low-Fat Version: Substitute low-fat cream cheese and reduced sugar for a lighter dessert that remains delightful.

    Serving Suggestions

    • Fresh Berries: Serve with a side of mixed berries for a refreshing contrast to the creamy casserole.
    • Whipped Cream: Top with a dollop of whipped cream for an indulgent touch that pairs perfectly.
    • Coffee or Tea: Enjoy with a warm cup of coffee or afternoon tea for a cozy dessert experience.
    • Presentation: Drizzle a bit of honey or chocolate sauce over the casserole for a beautiful finish.

    FAQs about Cheesecake Crescent Rolls Casserole

    Here are some of the most common questions I get about making this delightful Cheesecake Crescent Rolls Casserole. Hopefully, these answers will help you bake with confidence!

    Can I prepare this casserole in advance?
    Absolutely! You can assemble the casserole a day ahead and store it in the fridge. Just remember to bake it fresh before serving for that warm, gooey goodness.

    What if I don’t have crescent roll dough?
    You can use puff pastry instead! It gives a similar flaky texture to the casserole and will still pair wonderfully with the cheesecake filling.

    Can I freeze leftovers?
    Yes, you can freeze leftovers! Just wrap individual squares tightly in plastic wrap and store them in an airtight container. They should keep well for about a month.

    How do I know when the casserole is done baking?
    You’ll know it’s ready when the top is golden brown and feels firm to the touch. If it’s still soft, give it a few extra minutes in the oven.

    What’s the best way to serve it?
    Serve warm or at room temperature, drizzled with honey or topped with whipped cream and fresh berries. It’s a sweet delight that everyone will love!

    Final Thoughts

    This Cheesecake Crescent Rolls Casserole truly embodies the joy of home baking. It’s a recipe that marries convenience with delight, creating a dessert that feels special yet is effortlessly simple to prepare. Every slice reveals layers of creamy cheesecake goodness wrapped in flaky dough, making it a crowd-pleaser for the entire family. Whether you’re celebrating a special occasion or simply satisfying a sweet craving, this casserole brings warmth and smiles to the table. I hope you enjoy making it as much as I do. Happy baking, and savor each delicious bite!


    Print

    clock clock iconcutlery cutlery iconflag flag iconfolder folder iconinstagram instagram iconpinterest pinterest iconfacebook facebook iconprint print iconsquares squares iconheart heart iconheart solid heart solid icon

    Description

    Cheesecake Crescent Rolls Casserole is a delicious and easy-to-make dessert combining creamy cheesecake filling wrapped in crescent rolls, topped with a buttery cinnamon-sugar crust.


    • 2 cans refrigerated crescent roll dough
    • 16 ounces cream cheese, softened
    • 1 cup granulated sugar
    • 1 teaspoon vanilla extract
    • 1/4 cup unsalted butter, melted
    • 1 tablespoon ground cinnamon
    • 2 tablespoons granulated sugar

    1. Preheat oven to 350°F (175°C) and lightly grease a 9×13-inch baking dish to ensure easy release.
    2. Unroll one can of crescent roll dough and press it evenly into the bottom of the prepared baking dish, pinching seams to seal.
    3. In a large bowl, beat softened cream cheese with 1 cup granulated sugar and vanilla extract until the mixture is smooth and creamy.
    4. Evenly spread the cream cheese mixture over the crescent dough layer in the baking dish.
    5. Unroll the second can of crescent roll dough and lay it over the cream cheese layer, again pinching seams together for a uniform surface.
    6. Brush melted butter over the top crescent roll layer. In a small bowl, combine ground cinnamon with 2 tablespoons sugar, then sprinkle the mixture evenly on top.
    7. Bake in the preheated oven for 30 minutes, or until the top is golden brown and crisp.
    8. Allow casserole to cool for at least 20 minutes to set before slicing into squares. Optionally, drizzle with honey prior to serving.

    Notes

    • Ensure the cream cheese is fully softened for easy mixing.
    • Allowing the casserole to cool longer will help it set better.
    • Drizzling with honey is optional but adds a delightful touch.
    • Prep Time: 15 minutes
    • Cook Time: 30 minutes
    • Category: Dessert
    • Method: Baking
    • Cuisine: American

    Nutrition

    • Serving Size: 1 square
    • Calories: 290
    • Sugar: 17g
    • Sodium: 300mg
    • Fat: 18g
    • Saturated Fat: 10g
    • Unsaturated Fat: 5g
    • Trans Fat: 0g
    • Carbohydrates: 27g
    • Fiber: 1g
    • Protein: 4g
    • Cholesterol: 50mg

    Sharing is caring!