Author: IHAAL Team

  • Shrimp Sausage Dirty Rice

    Shrimp Sausage Dirty Rice


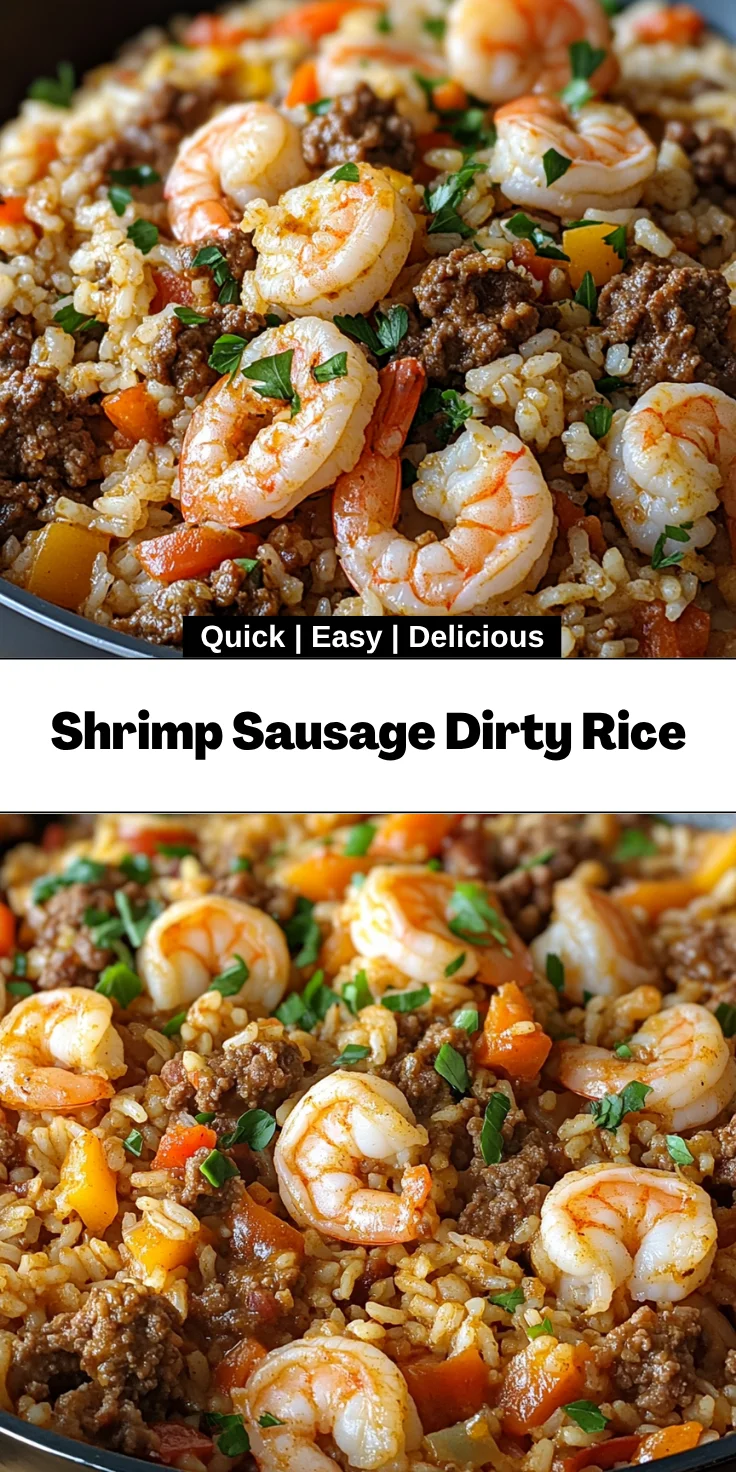
    Introduction to Shrimp Sausage Dirty Rice

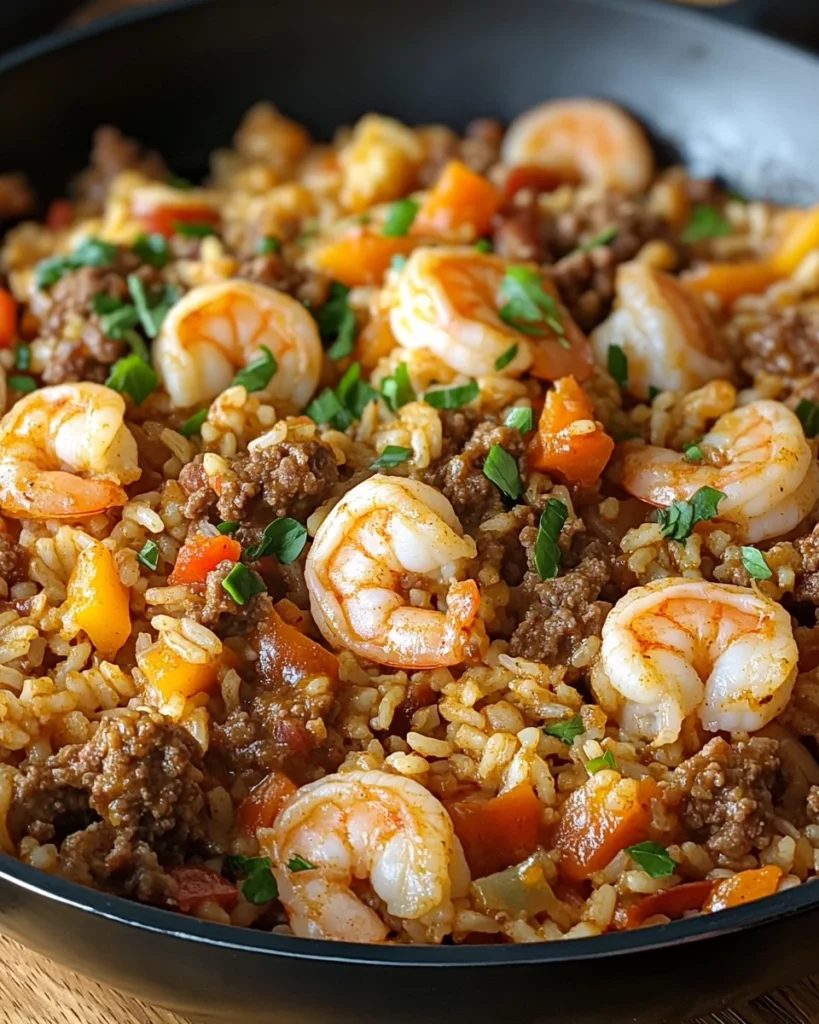
    Ah, the hectic rhythm of life! As a busy mom, finding time to whip up something delicious can feel like a daunting task. That’s why I’m thrilled to share my recipe for Shrimp Sausage Dirty Rice. It’s a vibrant dish that fuses savory shrimp with zesty sausage, ensuring that every bite bursts with flavor.

    Not only is it quick to prepare, but it also impresses everyone at the dinner table. Trust me, you’ll appreciate having this scrumptious and easy meal in your recipe arsenal for those chaotic weekdays!

    Why You’ll Love This Shrimp Sausage Dirty Rice

    This Shrimp Sausage Dirty Rice recipe is a lifesaver in my kitchen! It’s easy to prepare, taking just 45 minutes from start to finish. This makes it perfect for those busy evenings when time is tight but flavor is a priority.

    Each bite packs a punch of taste, blending bold spices that even the pickiest of eaters can’t resist. You’ll keep coming back for more, guaranteed!

    Ingredients for Shrimp Sausage Dirty Rice

    Gathering the right ingredients is like collecting paint for a masterpiece! Each one plays a unique role in creating this mouthwatering Shrimp Sausage Dirty Rice.

    • Ground beef: Adds a hearty texture and protein. Feel free to use turkey for a lighter option.
    • Ground sausage: Bursting with bold flavors, it elevates the dish’s richness. A spicy sausage can kick things up a notch!
    • Shrimp: Fresh, peeled, and deveined shrimp brings a touch of the sea. If you’re short on time, frozen shrimp work just fine.
    • Cooked rice: This serves as the base. Leftover rice or a quick microwavable option is a real time-saver!
    • Chicken broth: It infuses the rice with wonderful flavor. You can also use vegetable broth for a lighter taste.
    • Mixed onions and bell peppers: These colorful vegetables offer sweetness and depth. Feel free to mix in your favorites!
    • Vegetable oil: Necessary for cooking and sautéing without sticking. Olive oil can be a lovely substitute.
    • Seafood seasoning: A sprinkle adds an instant flavor boost! You can swap it with Cajun seasoning for an extra kick.
    • Flour: This thickens the broth beautifully. Cornstarch can be an easy gluten-free substitute.
    • Oregano: Freshness and aromatic notes. It’s a staple herb in Southern cooking.
    • Minced garlic: Infuses the dish with a delicious aroma and flavor. I can never have too much garlic!
    • Thyme: A little earthy taste goes a long way in this dish!
    • Garlic powder: It complements fresh garlic in giving that extra pop of flavor.
    • Onion powder: Balances the flavors, creating that “homemade” taste.
    • Chili powder: A bit of warmth to tantalize your taste buds. Adjust based on your heat preference!
    • Black pepper: For that subtle kick, always a good choice in any savory dish.
    • Salt: Essential for seasoning; just be cautious, especially if your broth is salted.
    • Cayenne pepper (optional): If you like heat, add a pinch for an exciting twist!

    For exact quantities of each ingredient, check the bottom of this article. There, you will find a handy list available for printing. Happy cooking!

    How to Make Shrimp Sausage Dirty Rice

    Now, let’s dive into the heart of this recipe! Making Shrimp Sausage Dirty Rice is as straightforward as a sunny day, and I promise it’ll be a delight to make and share with your family. Here’s how you can bring this vibrant dish to life!

    Step 1: Prepare the Shrimp

    Season and Cook the Shrimp

    First, let’s give those shrimp some love! Season them generously with seafood seasoning. This is where the magic starts! You want them to soak in the flavor.

    Heat 2 tablespoons of vegetable oil in a large skillet over medium heat. Add the shrimp, letting them cook for about 2-3 minutes on each side until they turn a beautiful pink. Be careful not to overcook, as shrimp can toughen up. Once done, remove them from the skillet and set aside. A quick touch of garlic doesn’t hurt if you feel fancy!

    Step 2: Brown the Meats

    Cook Ground Beef and Sausage

    Now for the hearty part! In the same skillet, add 1 tablespoon of oil if needed, and toss in your ground beef and sausage. Break them apart with a wooden spoon, ensuring they brown evenly.

    This is essential for flavor! Cooking them separately might leave some parts undercooked while others overbrown. We want a uniform brown that invites every flavor to meld together. Once browned, it’s time to invite in the veggies!

    Step 3: Sauté Vegetables

    Add Onions, Bell Peppers, and Garlic

    With the meats sizzling away, add chopped onions, bell peppers, and minced garlic to the skillet. The aroma in your kitchen will be heavenly!

    Sauté these beauties for about 5 minutes until they soften and release their sweetness. This step builds layers in flavor, making your Shrimp Sausage Dirty Rice irresistible. If we could bottle this smell, we’d be millionaires!

    Step 4: Build the Flavor

    Incorporate Seasonings

    Here comes the fun part! Now, sprinkle in the oregano, thyme, garlic powder, onion powder, chili powder, and black pepper. Give it a good stir!

    These herbs and spices create a taste explosion. Don’t forget to adjust the spices to fit your family’s preferences. This dish is your canvas; paint it as you wish!

    Step 5: Simmer and Thicken

    Create the Base with Chicken Broth

    Let’s pull it all together! Pour in the chicken broth and bring the mixture to a simmer. This is where the flavors dance and unite!

    Let it cook for 5-7 minutes so that the broth thickens just right. Keep an eye on it; you want a cozy consistency that isn’t too runny. A well-simmered broth makes every bite memorable!

    Step 6: Mix in the Rice

    Combine Everything and Absorb the Flavors

    Once that broth is singing, it’s time to add the cooked rice. Combining everything at this stage is crucial to let the rice soak up all those lovely flavors!

    Give it a good stir, and let it simmer for another 5 minutes. Imagine all those vibrant tastes merging together—now that’s what we’re talking about!

    Step 7: Final Touch with Shrimp

    Gently Fold in the Cooked Shrimp

    Finally, it’s time to reincorporate the shrimp! Gently fold them back into the skillet. Remember, we don’t want to overcook them.

    Just enough heat to warm them through, and you’re good to go! Stir it one last time, and get ready for serving. Your Shrimp Sausage Dirty Rice is ready to steal the show!

    Tips for Success

    • Prep ingredients in advance for a smoother cooking experience. Trust me; it saves time!
    • Taste as you go! Adjust spices to cater to your family’s palate.
    • Use fresh herbs for garnish; they elevate both flavor and presentation.
    • If using frozen shrimp, thaw them completely for even cooking.
    • Leftovers? This dish reheats beautifully the next day!

    Equipment Needed

    • Large skillet: A non-stick variety is great, but any skillet will do!
    • Wooden spoon: Perfect for browning meat and mixing everything together.
    • Measuring cups: For precise broth and rice measurements, though eyeballing works too.
    • Cutting board and knife: Essential for chopping veggies smoothly.
    • Serving spoon: To dish out your delicious creation with flair!

    Variations of Shrimp Sausage Dirty Rice

    • Vegetarian Option: Replace ground beef and sausage with black beans or lentils for a hearty vegetarian version.
    • Spicy Kick: Add diced jalapeños or a splash of hot sauce to the mix for an extra heat boost.
    • Coconut Rice: Use coconut milk instead of chicken broth for a tropical twist that melds beautifully with shrimp.
    • Whole Grain Boost: Substitute white rice with brown rice or quinoa for added nutrients and fiber.
    • Customized Veggies: Feel free to throw in your favorite veggies like zucchini, corn, or spinach for added texture and flavor.

    Serving Suggestions for Shrimp Sausage Dirty Rice

    • Pair with a crisp green salad, dressed lightly with vinaigrette for a refreshing contrast.
    • Serve with crusty bread or warm dinner rolls to soak up all those delicious flavors.
    • A slice of lemon on the side can add a bright zing to each bite.
    • For drinks, a chilled white wine or sparkling water complements the dish beautifully.
    • Garnish with fresh parsley or green onions for a pop of color and fresh flavor.

    FAQs about Shrimp Sausage Dirty Rice

    Curious about making Shrimp Sausage Dirty Rice? You’re not alone! Here are some frequently asked questions that can help guide you through your cooking adventure.

    Can I use frozen shrimp for this recipe?

    Yes, absolutely! Just make sure to thaw them completely before seasoning and cooking. Frozen shrimp can be a great time-saver while still delivering fantastic flavor.

    How spicy is this dish?

    The spice level can easily be adjusted! If you prefer a milder flavor, reduce or omit the chili powder and cayenne pepper. For extra heat, feel free to add more!

    What can I serve alongside Shrimp Sausage Dirty Rice?

    This dish pairs wonderfully with a light salad, crusty bread, or roasted vegetables. Each option beautifully complements the robust flavors of the rice!

    Can I make this dish ahead of time?

    Yes! You can prepare it a day ahead. Just reheat gently on the stove while adding a splash of broth or water to keep it moist and delicious.

    Is Shrimp Sausage Dirty Rice gluten-free?

    Yes, this recipe is gluten-free as it stands. Just ensure that your broth and any additional ingredients are labeled gluten-free if needed!

    Final Thoughts

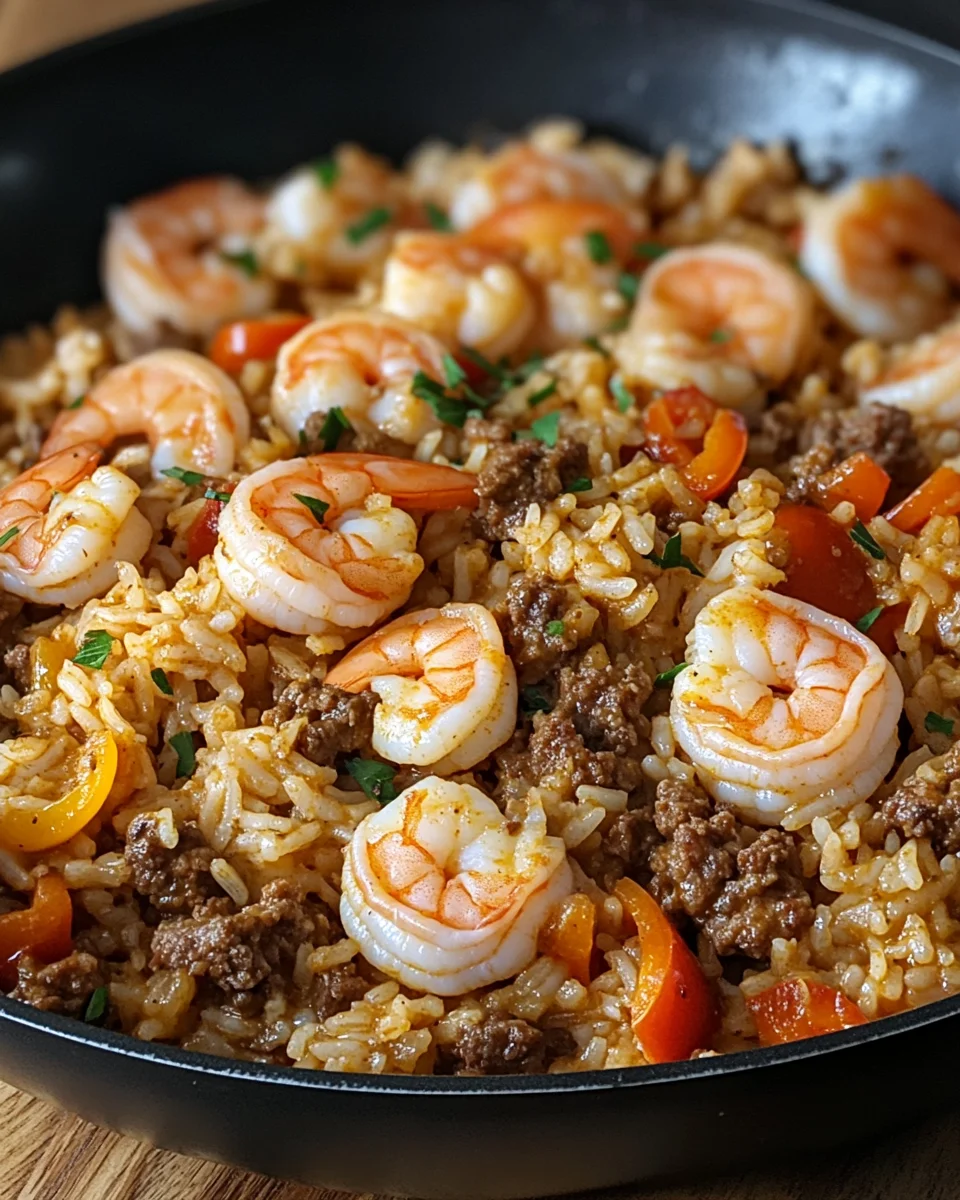
    Sharing a delicious meal can be the heart of any gathering, and Shrimp Sausage Dirty Rice is a dish that brings everyone together. The rich flavors and hearty ingredients create a comforting experience that warms the soul.

    I cherish the moments spent around the dinner table, hearing laughter while savoring every bite. This recipe is more than just food; it’s a chance to connect with loved ones, making memories infused with joy. Whether it’s a busy weeknight or a special occasion, I hope you love making this dish as much as I do!


    Print

    clock clock iconcutlery cutlery iconflag flag iconfolder folder iconinstagram instagram iconpinterest pinterest iconfacebook facebook iconprint print iconsquares squares iconheart heart iconheart solid heart solid icon

    Description

    A delicious and flavorful fusion of shrimp, sausage, and rice cooked with a mix of spices.


    • 1 lb ground beef
    • 1 lb ground sausage
    • 1012 shrimp, peeled and deveined
    • 4 cups cooked rice
    • 2 cups chicken broth
    • 1.5 cups mixed onions and bell peppers, chopped
    • 3 tablespoons vegetable oil, divided
    • 1 teaspoon seafood seasoning
    • 1/4 cup flour
    • 1 tablespoon oregano
    • 3 teaspoons minced garlic
    • 1 teaspoon thyme
    • 1 tablespoon garlic powder
    • 1 teaspoon onion powder
    • 1 teaspoon chili powder
    • 1/2 teaspoon black pepper
    • Salt, to taste
    • Pinch of cayenne pepper (optional)

    1. Season the shrimp with seafood seasoning. Heat 2 tablespoons of vegetable oil in a large skillet over medium heat. Cook the shrimp for 2–3 minutes per side until pink and cooked through, then remove and set aside.
    2. Add the remaining 1 tablespoon of oil to the same skillet and brown the ground beef and sausage over medium heat, breaking it up with a wooden spoon. Once browned, add the chopped onions, bell peppers, and minced garlic, sautéing for about 5 minutes until softened.
    3. Stir in the oregano, thyme, garlic powder, onion powder, chili powder, black pepper, and cayenne pepper (if using). Sprinkle the flour over the mixture and stir well to combine.
    4. Pour in the chicken broth and bring the mixture to a simmer. Cook for 5–7 minutes, allowing the flavors to meld and the broth to thicken slightly.
    5. Add the cooked rice to the skillet and mix well, simmering for another 5 minutes to allow the rice to absorb the flavors.
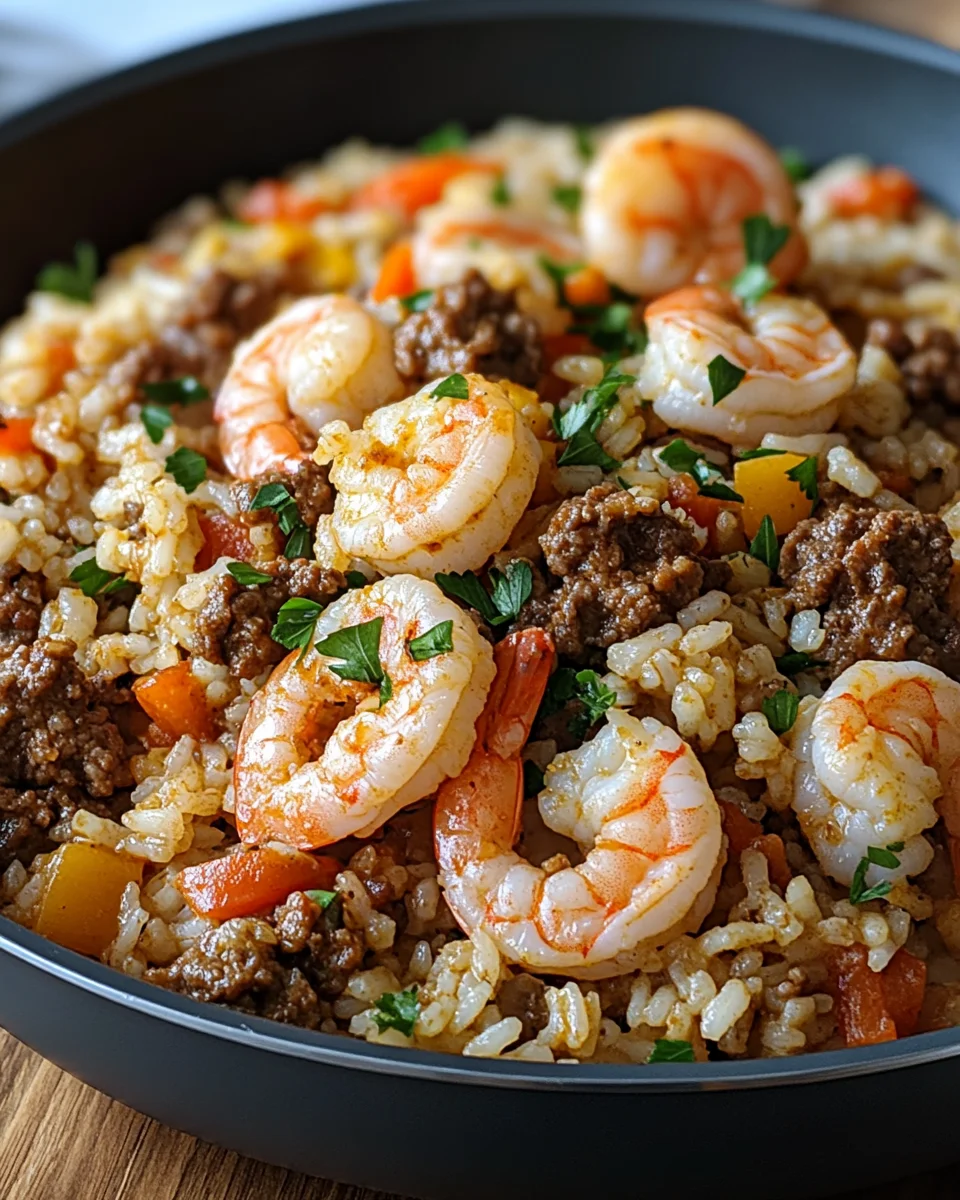
    6. Gently fold the cooked shrimp back into the skillet and give it a final stir before serving hot.

    Notes

    • Adjust the spices to your preference for more or less heat.
    • Pair with fresh herbs for garnish if desired.
    • Prep Time: 15 minutes
    • Cook Time: 30 minutes
    • Category: Main Dish
    • Method: Skillet
    • Cuisine: American

    Nutrition

    • Serving Size: 1 cup
    • Calories: 400
    • Sugar: 2g
    • Sodium: 800mg
    • Fat: 25g
    • Saturated Fat: 8g
    • Unsaturated Fat: 15g
    • Trans Fat: 0g
    • Carbohydrates: 30g
    • Fiber: 2g
    • Protein: 20g
    • Cholesterol: 150mg

    Sharing is caring!

  • Caramel Dream Brown Sugar Overnight Oats

    Caramel Dream Brown Sugar Overnight Oats


    Introduction to Caramel Dream Brown Sugar Overnight Oats

    As a busy mom and passionate home cook, I’m always on the lookout for breakfast solutions that satisfy my family without consuming precious morning minutes. That’s precisely why I adore these Caramel Dream Brown Sugar Overnight Oats. They’re like a warm hug in a bowl—creamy, sweet, and utterly delightful. Imagine waking up to a luscious, ready-to-eat breakfast that not only tastes divine but also fuels your day! This recipe is a lifesaver, allowing you to prep ahead and enjoy a nourishing meal without the fuss on hectic mornings.

    Why You’ll Love This Caramel Dream Brown Sugar Overnight Oats

    This recipe is the epitome of ease and comfort! It takes just minutes to prepare, making it perfect for busy mornings when you’re juggling kids and coffee. The delightful caramel flavor mingled with brown sugar will make this your family’s new favorite. Plus, it’s a versatile dish—load it with your favorite toppings and adapt it to suit every palate. Trust me, everyone will be asking for seconds!

    Ingredients in Caramel Dream Brown Sugar Overnight Oats

    Gathering the right ingredients is key to making these delicious Caramel Dream Brown Sugar Overnight Oats. Here’s what you’ll need:

    • Rolled oats: The base of this dish, offering fiber and heartiness.
    • Almond milk: A creamy, dairy-free option that adds a mellow flavor. Feel free to use any milk you love!
    • Brown sugar: This imparts a sweet, caramel-like flavor. Adjust it to fit your taste.
    • Vanilla extract: It enhances the sweetness with a lovely aroma.
    • Ground cinnamon: This spice brings warmth and a hint of spice to every bite.
    • Salt: Just a pinch elevates the flavors and balances sweetness.
    • Greek yogurt: Optional, but it makes the oats ultra-creamy and boosts protein.
    • Banana: Freshly sliced, it adds sweetness and texture on top.
    • Chopped walnuts or pecans: These provide a delightful crunch and healthy fats.
    • Maple syrup: Drizzle on top for a finishing touch of sweetness—totally optional!

    You can find the exact quantities of these ingredients at the bottom of the article, ready for printing. Let’s get cooking deliciousness into our busy mornings!

    How to Make Caramel Dream Brown Sugar Overnight Oats

    Creating these Caramel Dream Brown Sugar Overnight Oats is a breeze! Let me walk you through the steps. You’ll see how simple and satisfying this recipe is. With just a few minutes of prep, you’re on your way to a delightful breakfast.

    Step 1: Combine Ingredients

    In a medium-sized bowl, toss together the rolled oats, almond milk, brown sugar, vanilla extract, ground cinnamon, and salt. The brown sugar dissolves beautifully, creating a lovely sweet base. I like to give it a good stir to ensure everything is mixed well. It’s like a little dance—sway those oats and milk until they mingle!

    Step 2: Add Greek Yogurt for Creaminess

    This step is optional, but oh-so-rewarding! If you love a creamy texture, fold in the Greek yogurt. It makes the oats extra luxurious and satisfying. Plus, you add a nice protein boost. Just be gentle while mixing; you want that smooth consistency to shine through!

    Step 3: Refrigerate Overnight

    Now it’s time for the magic! Cover the bowl with plastic wrap or transfer everything to an airtight container. Refrigerate overnight—or at least four hours. During this time, the oats soak up all that delicious almond milk and sweet goodness. When morning rolls around, it’ll be like finding treasure in your fridge!

    Step 4: Stir and Adjust Consistency

    When you’re ready to enjoy, give those oats a hearty stir! Sometimes, you might find them a bit thick. Don’t worry! Just add a splash of your favorite milk to reach your desired consistency. It’s all about making it perfect for you. Feel free to taste at this stage; nothing compares to those flavors coming together!

    Step 5: Serve and Enjoy

    Now for the fun part—serving! Scoop the oats into bowls and decorate with sliced banana and chopped walnuts or pecans. If you’re feeling extra sweet, drizzle a touch of maple syrup on top. It’s like turning breakfast into a masterpiece! Just dig in and savor every bite. You deserve this treat!

    Tips for Success

    • Use old-fashioned rolled oats for best texture; quick oats may become mushy.
    • Customize sweetness by adding brown sugar slowly to taste.
    • Try different toppings like berries or coconut for variety.
    • Make a larger batch and store individual portions for busy mornings.
    • Experiment with spices like nutmeg or ginger for extra flavor kicks.

    Equipment Needed for Caramel Dream Brown Sugar Overnight Oats

    • Medium bowl: Essential for mixing ingredients. A large mixing bowl works too.
    • Spoon or whisk: For stirring and blending. You can use a fork if that’s all you have!
    • Airtight container: Perfect for overnight storage. Any jar or bowl with a lid will do.

    Variations of Caramel Dream Brown Sugar Overnight Oats

    • Nut Butter Delight: Swirl in a tablespoon of nut butter like almond or peanut for a protein boost and nutty flavor.
    • Fruit Frenzy: Switch up the banana for seasonal fruits like berries, apples, or peaches to keep it fresh and exciting.
    • Choco-Banana Bliss: Add cocoa powder for a chocolate twist that pairs perfectly with the banana on top.
    • Vegan Version: Replace Greek yogurt with coconut yogurt and use agave syrup instead of honey or maple syrup.
    • Spiced Chai: Incorporate chai spices like cardamom and ginger for a warm, fragrant twist.

    Serving Suggestions for Caramel Dream Brown Sugar Overnight Oats

    • Pair with smoothies: A fruity smoothie complements the creamy oats perfectly.
    • Offer fresh fruit: Sliced strawberries or a handful of blueberries make a vibrant side.
    • Presentation: Serve in mason jars for a cute, on-the-go breakfast idea.
    • Hot beverage: Enjoy with a warm cup of coffee or herbal tea to complete the breakfast.

    FAQs about Caramel Dream Brown Sugar Overnight Oats

    Can I make Caramel Dream Brown Sugar Overnight Oats vegan?

    Absolutely! Just omit the Greek yogurt or substitute it with a plant-based yogurt. You can also use maple syrup instead of honey for sweetness.

    How long do overnight oats last in the fridge?

    Your delicious oats can last for up to five days in the fridge. Just make sure to store them in an airtight container to keep them fresh.

    Can I use steel-cut oats instead of rolled oats?

    While steel-cut oats are heartier, I recommend sticking with rolled oats for this recipe. They soften better and create a creamier texture, perfect for overnight oats.

    What can I do if my overnight oats are too thick?

    No worries! If your Caramel Dream Brown Sugar Overnight Oats are thicker than you’d like, just add a splash of almond milk to thin them out to your preferred consistency.

    Can I prepare these oats ahead for meal prep?

    Absolutely! They make for a fantastic make-ahead breakfast. Just prepare individual servings and store them in jars for an easy grab-and-go option during busy mornings.

    Final Thoughts on Caramel Dream Brown Sugar Overnight Oats

    These Caramel Dream Brown Sugar Overnight Oats aren’t just a recipe; they’re a comforting ritual in our busy lives. Waking up to a bowl of creamy goodness that’s ready to go feels like a small victory against the morning rush. Each spoonful bursts with flavor and textures, creating a delightful start to my day. Whether you’re fueling your family or treating yourself, this breakfast will quickly become a cherished routine. So gather your ingredients, and make your mornings brighter with this sweet reminder that breakfast can be simple, nourishing, and truly delicious!


    Print

    clock clock iconcutlery cutlery iconflag flag iconfolder folder iconinstagram instagram iconpinterest pinterest iconfacebook facebook iconprint print iconsquares squares iconheart heart iconheart solid heart solid icon

    Description

    As a busy mom and passionate home cook, I’m always on the lookout for breakfast solutions that satisfy my family without consuming precious morning minutes. That’s precisely why I adore these Caramel Dream Brown Sugar Overnight Oats.


    • 1 cup rolled oats
    • 2 cups almond milk (or any milk of your choice)
    • 2 tablespoons brown sugar (adjust for sweetness)
    • 1 teaspoon vanilla extract
    • 1/2 teaspoon ground cinnamon
    • 1/4 teaspoon salt
    • 1/2 cup Greek yogurt (optional for creaminess)
    • 1/2 banana, sliced (for topping)
    • 2 tablespoons chopped walnuts or pecans (for crunch)
    • A drizzle of maple syrup (optional, for serving)

    1. In a medium bowl, combine the rolled oats, almond milk, brown sugar, vanilla extract, ground cinnamon, and salt. Stir until the brown sugar is well mixed and dissolved.
    2. If you want extra creaminess, fold in the Greek yogurt until fully incorporated.
    3. Cover the bowl with plastic wrap or transfer the mixture to an airtight container and refrigerate overnight (or at least 4 hours) to allow the oats to absorb the liquid and soften.
    4. In the morning, give the oats a good stir. If the mixture is too thick, you can add a splash of milk to reach your desired consistency.
    5. Serve the oats in bowls and top with sliced banana, chopped walnuts or pecans, and a drizzle of maple syrup if desired.

    Notes

    • Adjust sweetness according to your taste by adding more or less brown sugar.
    • For a vegan option, omit the Greek yogurt or replace it with a plant-based yogurt.
    • Can be prepared in advance for a quick breakfast.
    • Prep Time: 10 minutes
    • Cook Time: 0 minutes
    • Category: Breakfast
    • Method: No-Cook
    • Cuisine: American

    Nutrition

    • Serving Size: 1 serving
    • Calories: 350
    • Sugar: 12g
    • Sodium: 180mg
    • Fat: 10g
    • Saturated Fat: 1g
    • Unsaturated Fat: 9g
    • Trans Fat: 0g
    • Carbohydrates: 52g
    • Fiber: 7g
    • Protein: 10g
    • Cholesterol: 5mg

    Sharing is caring!

  • Crockpot Mississippi Little Smokies

    Crockpot Mississippi Little Smokies


    Introduction to Crockpot Mississippi Little Smokies

    Ah, the magic of slow cooking! Today, I’m excited to share my go-to recipe: Crockpot Mississippi Little Smokies. Life gets hectic, and delicious meal prep doesn’t have to take hours. This delightful dish delivers big flavors for a quick solution on busy days or a cozy gathering. Picture tender little sausages bathed in a zesty, savory sauce that will have your family reaching for seconds. It’s the kind of recipe that impresses guests while being super easy to whip up, keeping you in the spotlight without the stress. Trust me, you’ll love every delicious bite!

    Why You’ll Love This Crockpot Mississippi Little Smokies

    This recipe shines for its sheer simplicity and fantastic flavor. With just a few ingredients and minimal prep, you can create a crowd-pleaser! Imagine coming home to a savory aroma that wraps around you like a warm hug. Not only is it quick to cook, but it’s also versatile—perfect as an appetizer or a main dish. It’s a little slice of heaven that’s bound to impress family and friends during any occasion!

    Ingredients for Crockpot Mississippi Little Smokies

    Here’s what you’ll need to whip up these delicious Crockpot Mississippi Little Smokies. Each ingredient adds a unique flavor to the dish, making it irresistible!

    • Little Smokies Sausages: These tasty pint-sized sausages are the star of the show! They’re smoky, savory, and perfect for soaking up all the delicious sauce.
    • Peperoncini Juice: This tangy liquid adds a zesty kick. It balances the richness of the butter and enhances the flavor profile. You can also use low sodium beef broth or water if you prefer.
    • Au Jus Gravy Mix: This seasoning mix acts like magic dust, turning the sauce into a flavorful glaze full of depth. It’s a staple for many slow-cooked dishes, and it really shines here!
    • Ranch Seasoning Mix: You’re probably familiar with ranch— it brings a creamy, herby flavor that complements the smokiness beautifully.
    • Unsalted Butter: Sliced and plopped right on top, butter brings richness and smoothness to the sauce. Don’t skip this ingredient; you want that silky finish!
    • Peperoncini Peppers: These peppers add some spice and texture. Adjust based on your heat tolerance; feel free to add more or use milder peppers.
    • Fresh Parsley: For garnish! It may seem small, but fresh herbs brighten the dish and add a lovely touch to your presentation.

    You can find all the precise measurements for these ingredients at the bottom of the article, ready for your convenience when it’s time to cook!

    How to Make Crockpot Mississippi Little Smokies

    Now that you have your ingredients ready, let’s dive into the exciting part—making these delicious Crockpot Mississippi Little Smokies! Follow these simple steps, and you’ll have a feast that’s sure to impress everyone.

    Step 1: Prepare the Little Smokies

    Start by taking out your packs of little smokies. There’s something undeniably charming about these tiny sausages, right? Just toss them straight into your trusty crockpot. They don’t need any fancy prep—just make sure they’re all snug together, ready to soak up that tasty sauce that’s on the way!

    Step 2: Add Peperoncini Juice

    Next, it’s time to add the zesty kick! Pour the peperoncini juice over the little smokies. This is key for enhancing flavors. It provides tartness that cuts through the richness, creating a beautifully balanced taste. Don’t worry; it’s not overwhelming. It subtly elevates the dish, making your taste buds dance!

    Step 3: Season the Mixture

    Now for the fun part—seasoning! Sprinkle the au jus gravy mix and ranch seasoning mix over the sausages. These blends are like a culinary hug, wrapping each smokie in a warm, flavorful embrace. Give everything a good stir. You want those seasonings to cling nicely to the sausages and juices.

    Step 4: Add Butter and Peppers

    Then, take your sliced unsalted butter and scatter it over the top. This step adds depth and richness that you simply can’t miss! Lastly, toss in the pepperoncini peppers. Feel free to adjust the amount according to your heat preference. It’s all about balancing those flavors to suit your palate!

    Step 5: Cook the Mixture

    Finally, cover your crockpot with a lid and set it to cook on LOW for 2-3 hours. Trust me; this is when the magic happens! You’ll know it’s ready when the sausages are heated through, and the sauce is bubbling with enthusiasm. Remember to give it a stir halfway through cooking to ensure even goodness!

    Tips for Success

    • Feel free to adjust the spice level by varying the amount of peperoncini or using milder alternatives.
    • For a richer flavor, consider letting the mixture sit in the fridge overnight before cooking.
    • Stir halfway through cooking to ensure even heating and flavor distribution.
    • Don’t forget to replace the lid during cooking to retain moisture and heat.
    • Serve immediately for best taste, but leftovers reheat wonderfully!

    Equipment Needed

    • Crockpot: Your trusty slow cooker is essential for this dish.
    • Cooking Spoon: A sturdy spoon helps you stir and combine ingredients easily.
    • Measuring Cups: While not strictly necessary, they help for precise ingredient measurements when you need them.
    • Sharp Knife: Great for slicing butter and chopping any additional fresh herbs!

    Variations

    • Spicy Kick: Add diced jalapeños for an extra level of heat that enhances the overall flavor.
    • BBQ Twist: Swap the seasoning blends for your favorite barbecue sauce for a sweet and smoky version.
    • Healthier Option: Use turkey or chicken little smokies to reduce fat and calories without sacrificing taste.
    • Veggie Delight: Toss in sliced bell peppers or onions with the sausages for added color and nutrition.
    • Dairy-Free Version: Substitute the butter with dairy-free margarine or olive oil to make it lactose-free.

    Serving Suggestions for Crockpot Mississippi Little Smokies

    • Serve over a bed of creamy mashed potatoes for a comforting meal.
    • Pair with crusty bread to soak up all that incredible sauce!
    • Offer a vibrant green salad for a refreshing contrast.
    • For drinks, consider sweet tea or a light lager for a delightful combo.
    • Garnish with fresh parsley to add a pop of color to your presentation!

    FAQs about Crockpot Mississippi Little Smokies

    Can I use frozen little smokies in this recipe?

    Absolutely! Frozen little smokies work just fine. Just remember that they may need an extra 30 minutes to cook through, so adjust the timing accordingly.

    What can I serve with Crockpot Mississippi Little Smokies?

    These delicious little smokies are versatile. You can serve them over mashed potatoes, rice, or even in soft buns as sliders! Add a side salad for some freshness.

    Can I make Crockpot Mississippi Little Smokies ahead of time?

    You can definitely prep these ahead! Cook them and let them cool before storing them in the fridge. Reheat gently in the crockpot when you’re ready to serve.

    Are there any substitutes for the peperoncini juice?

    If you don’t have peperoncini juice on hand, feel free to use low-sodium beef broth or water. Just remember, the flavor will be milder without that zesty kick!

    How spicy are Crockpot Mississippi Little Smokies?

    The spiciness largely depends on the amount of peperoncini peppers you use. Start with a smaller amount if you’re sensitive to heat, and you can always add more!

    Final Thoughts

    Making Crockpot Mississippi Little Smokies is more than just a cooking experience; it’s a joyful journey filled with flavors that warm the heart. The ease of preparation allows you to enjoy hassle-free moments with family and friends. Imagine the smiles around the table as everyone digs in, savoring every bite. This dish transforms the everyday into something special, reminding us of the simple pleasures of home-cooked meals. So, whether you’re hosting a gathering or having a cozy night in, these little smokies are your ticket to deliciousness that everyone will love!


    Print

    clock clock iconcutlery cutlery iconflag flag iconfolder folder iconinstagram instagram iconpinterest pinterest iconfacebook facebook iconprint print iconsquares squares iconheart heart iconheart solid heart solid icon

    Description

    Ah, the magic of slow cooking! Today, I’m excited to share my go-to recipe: Crockpot Mississippi Little Smokies. Life gets hectic, and delicious meal prep doesn’t have to take hours. This delightful dish delivers big flavors for a quick solution on busy days or a cozy gathering. Picture tender little sausages bathed in a zesty, savory sauce that will have your family reaching for seconds. It’s the kind of recipe that impresses guests while being super easy to whip up, keeping you in the spotlight without the stress. Trust me, you’ll love every delicious bite!


    • 3 packs little smokies sausages (12 oz each)
    • 1/2 cup peperoncini juice, low sodium beef broth, or water
    • 1 ounce envelope au jus gravy mix
    • 1 ounce envelope ranch seasoning mix
    • 1/2 cup (1 stick) unsalted butter, sliced
    • 1 cup sliced peperoncini peppers, more or less as desired
    • Fresh parsley, for garnish (optional)

    1. Place the little smokies into the crockpot and pour the peperoncini juice on top.
    2. Sprinkle the au jus gravy mix and ranch seasoning mix over the sausages. Stir to combine.
    3. Top with the unsalted butter slices and peperoncini peppers.
    4. Cover with lid and cook on LOW for 2-3 hours, until the sauce is bubbling and the sausages are fully heated through. Stir halfway through cooking time.
    5. Garnish with fresh chopped parsley if desired. Serve as is for appetizers, or as a meal over mashed potatoes or white rice. Enjoy!

    Notes

    • Adjust the amount of peperoncini peppers based on your spice preference.
    • This dish can be served as an appetizer or a main dish.
    • Prep Time: 10 minutes
    • Cook Time: 2-3 hours
    • Category: Appetizer
    • Method: Slow Cooking
    • Cuisine: American

    Nutrition

    • Serving Size: 1 serving
    • Calories: 250
    • Sugar: 1g
    • Sodium: 1200mg
    • Fat: 20g
    • Saturated Fat: 8g
    • Unsaturated Fat: 10g
    • Trans Fat: 0g
    • Carbohydrates: 5g
    • Fiber: 0g
    • Protein: 12g
    • Cholesterol: 40mg

    Sharing is caring!

  • Slow Cooker Salisbury Steak Meatballs

    Slow Cooker Salisbury Steak Meatballs


    Introduction to Slow Cooker Salisbury Steak Meatballs

    Welcome to the cozy world of Slow Cooker Salisbury Steak Meatballs! If you’re like me, juggling a busy life, you know how precious those family meal moments can be. This dish is your ticket to deliciousness without spending hours in the kitchen. Picture this: tender meatballs simmered in a rich, savory gravy, ready to wow your loved ones after a long day. With just a handful of ingredients and a bit of patience, you can whip up a heartwarming meal that’s perfect for hectic evenings. Trust me; this recipe will make dinner feel like a special occasion.

    Why You’ll Love This Slow Cooker Salisbury Steak Meatballs

    These Slow Cooker Salisbury Steak Meatballs are a game-changer for anyone who values convenience without sacrificing flavor. In just minutes of prep, you can set dinner to cook, freeing up your time for that endless to-do list. Plus, the taste? It’s pure comfort food bliss! The tender meatballs soak up all that savory gravy, making it feel like a warm hug on a plate. Your family will thank you!

    Ingredients for Slow Cooker Salisbury Steak Meatballs

    Gathering your ingredients is the first step towards creating a delightful meal. For this recipe, you’ll be using some kitchen staples, which makes it a breeze. Here’s what you’ll need:

    • Frozen meatballs: A bag of frozen meatballs saves you time and effort. Look for those with quality beef for better flavor. You can also make your own if you’re feeling adventurous!
    • Reduced-sodium beef broth: This will form the base of your gravy, keeping it rich without being overpoweringly salty. Using reduced-sodium also allows you to control the overall saltiness.
    • Brown gravy mix: A handy shortcut for achieving that luscious flavor quickly. It’s thick and savory, perfect for this dish!
    • Onion soup mix: A burst of flavor in a convenient packet! It enhances the gravy and adds depth to the overall dish.
    • Ketchup: This brings a subtle tangy sweetness to the sauce, balancing the savory elements beautifully.
    • Worcestershire sauce: Just a splash adds that umami punch we all love, tying the flavors together effortlessly.
    • Cornstarch: This is your secret weapon for thickening the gravy. It steps in like a superhero when the sauce needs a little more body.
    • Cold water: Needed to mix with the cornstarch and create that smooth slurry for thickening.

    For exact quantities, check the bottom of the article where you can also print the recipe. Get ready to savor every bite of this comforting dish!

    How to Make Slow Cooker Salisbury Steak Meatballs

    Now that you have your ingredients ready, let’s dive into the step-by-step process of bringing these Slow Cooker Salisbury Steak Meatballs to life. The magic happens in your slow cooker, where flavors mingle and create a delicious aroma that fills your home. Trust me, this is going to be as easy as pie!

    Step 1: Prepare the Meatballs

    Start by taking your frozen meatballs out of the bag. There’s no need to thaw them; just place them directly into the slow cooker. They’ll heat up beautifully during cooking. This simple step sets the stage for your savory masterpiece.

    Step 2: Mix the Gravy Ingredients

    In a separate bowl, it’s time for some whisking fun! Combine the beef broth, brown gravy mix, onion soup mix, ketchup, and Worcestershire sauce. Mix until everything is smooth and well-blended. This flavorful gravy is what elevates your meatballs into a comforting dish.

    Step 3: Combine Everything in the Slow Cooker

    Pour that delicious gravy mixture over the meatballs in the slow cooker. Make sure to stir gently, ensuring each meatball has a nice coating of that savory goodness. Cover the slow cooker with a lid, and turn it on low. It’s a good idea to check on it now and then to get a whiff of that mouthwatering aroma!

    Step 4: Cook Until Tender

    Let the slow cooker work its magic by cooking the meatballs for 5-6 hours. The meatballs will absorb the flavors, becoming tender and full of taste. If you have the time, you might want to let them simmer a bit longer for even deeper flavor.

    Step 5: Thicken the Gravy

    About half an hour before serving, it’s time to thicken the gravy. In a small bowl, mix cornstarch with cold water, creating a slurry. Stir this mixture into your slow cooker, mixing well. This step makes the gravy velvety and perfect for spooning over mashed potatoes or rice.

    Step 6: Serve and Enjoy

    Once your gravy has thickened, it’s finally time to serve. Scoop those tender meatballs onto a plate, and ladle the rich gravy over them. You can’t go wrong pairing this dish with fluffy mashed potatoes or some rice. Enjoy every delicious bite of your homemade Slow Cooker Salisbury Steak Meatballs!

    Tips for Success

    • To enhance flavor, consider adding sautéed mushrooms or bell peppers to the slow cooker.
    • Don’t skip the whisking step; it ensures a smooth gravy without lumps.
    • For added warmth, sprinkle a dash of pepper or garlic powder in the gravy mix.
    • If your family loves spice, throw in a pinch of crushed red pepper flakes.
    • Make it a complete meal by adding steamed vegetables during the last hour of cooking.

    Equipment Needed

    • Slow Cooker: The star of the show! Any size will work, but a 4-quart is perfect for this recipe.
    • bowl: A mixing bowl for whisking your gravy ingredients.
    • whisk: Use a fork if you don’t have a whisk on hand.
    • measuring cups: Handy for accurate liquid measurements, though eyeballing is just fine too!

    Variations

    • Healthy Twist: Swap out frozen meatballs with turkey or chicken meatballs to reduce fat while still enjoying that savory flavor.
    • Vegetarian Option: Use plant-based meatballs made from lentils or tofu, ensuring a delicious meat-free experience everyone will love.
    • Gourmet Flavor: Add a splash of red wine to the gravy for an elevated taste profile that’s perfect for a fancy dinner.
    • Spicy Kick: Mix in some diced jalapeños or a dash of hot sauce to the gravy for an extra layer of heat.
    • Herb Infusion: Toss in fresh herbs like thyme or rosemary right before serving for a burst of freshness and aroma.

    Serving Suggestions

    • Mashed Potatoes: The classic side! Creamy mashed potatoes are a heavenly match for the rich gravy.
    • Rice: Serve the meatballs over fluffy white or brown rice for a satisfying meal.
    • Green Vegetables: Steamed broccoli or green beans add a nice crunch and color.
    • Wine: Pair with a bold red wine like Cabernet Sauvignon for a delightful flavor combination.
    • Presentation: Garnish with fresh parsley for a touch of elegance.

    FAQs about Slow Cooker Salisbury Steak Meatballs

    Can I use homemade meatballs for this recipe?
    Absolutely! Homemade meatballs will work wonderfully in this recipe. Just ensure they are fully cooked before adding them to the slow cooker. They’ll soak up all that delicious gravy!

    How can I make this recipe gluten-free?
    To make gluten-free Slow Cooker Salisbury Steak Meatballs, look for gluten-free gravy and onion soup mixes. Alternatively, you can make your own gravy from scratch using cornstarch and gluten-free broth.

    Can I prepare this dish in advance?
    Definitely! You can prepare the gravy mixture ahead of time and store it in the fridge. Just pour it over the frozen meatballs in the slow cooker when you’re ready to cook.

    What are some good sides to serve with Salisbury Steak Meatballs?
    Pair these savory meatballs with creamy mashed potatoes, fluffy rice, or steamed vegetables. Each side complements the rich gravy beautifully!

    How long can leftovers be stored?
    Leftovers can be stored in an airtight container in the refrigerator for up to 3 days. Just reheat thoroughly before serving them again!

    Final Thoughts

    Every time I whip up these Slow Cooker Salisbury Steak Meatballs, I’m reminded of the cozy family dinners that nourish both body and soul. The tender meatballs swimming in rich gravy evoke a sense of comfort that transcends mere food. It’s about the warmth of gathering around the table, sharing laughter, and creating memories. This recipe isn’t just a quick meal; it’s a loving gesture to those you cherish. So, whether you’re winding down after a busy day or making a weeknight special, let this savory delight bring joy and satisfaction to your evening. Enjoy every mouthwatering bite!


    Print

    clock clock iconcutlery cutlery iconflag flag iconfolder folder iconinstagram instagram iconpinterest pinterest iconfacebook facebook iconprint print iconsquares squares iconheart heart iconheart solid heart solid icon

    Description

    Welcome to the cozy world of Slow Cooker Salisbury Steak Meatballs! If you’re like me, juggling a busy life, you know how precious those family meal moments can be. This dish is your ticket to deliciousness without spending hours in the kitchen. Picture this: tender meatballs simmered in a rich, savory gravy, ready to wow your loved ones after a long day. With just a handful of ingredients and a bit of patience, you can whip up a heartwarming meal that’s perfect for hectic evenings. Trust me; this recipe will make dinner feel like a special occasion.


    • 1 bag (26 oz) frozen meatballs (about 3035 meatballs)
    • 2 cups reduced-sodium beef broth
    • 1 packet brown gravy mix
    • 1 packet onion soup mix
    • 2 tablespoons ketchup
    • 1 tablespoon Worcestershire sauce
    • 2 tablespoons cornstarch
    • 2 tablespoons cold water

    1. Place the frozen meatballs in the slow cooker.
    2. In a separate bowl, whisk together the beef broth, brown gravy mix, onion soup mix, ketchup, and Worcestershire sauce until smooth.
    3. Pour the mixture over the meatballs in the slow cooker, stirring to combine.
    4. Cover and cook on low for 5-6 hours or until the meatballs are heated through and tender.
    5. In a small bowl, mix the cornstarch and cold water to create a slurry.
    6. About 30 minutes before serving, stir the cornstarch slurry into the slow cooker to thicken the gravy.
    7. Once the sauce has thickened, serve the meatballs and gravy over mashed potatoes, rice, or your favorite side dish.

    Notes

    • Use reduced-sodium beef broth to control salt levels.
    • For a thicker gravy, alter the amount of cornstarch according to preference.
    • Prep Time: 10 minutes
    • Cook Time: 5-6 hours
    • Category: Main Dish
    • Method: Slow Cooking
    • Cuisine: American

    Nutrition

    • Serving Size: 1 serving (about 4 meatballs with gravy)
    • Calories: 320
    • Sugar: 2g
    • Sodium: 700mg
    • Fat: 8g
    • Saturated Fat: 2g
    • Unsaturated Fat: 6g
    • Trans Fat: 0g
    • Carbohydrates: 32g
    • Fiber: 1g
    • Protein: 28g
    • Cholesterol: 70mg

    Sharing is caring!

  • Spicy Buffalo Chicken Stuffed Sweet Potatoes

    Spicy Buffalo Chicken Stuffed Sweet Potatoes


    Introduction to Spicy Buffalo Chicken Stuffed Sweet Potatoes

    Hey there, fellow food lovers! If you’ve ever craved something that’s both comforting and bursting with flavor, then let me introduce you to my Spicy Buffalo Chicken Stuffed Sweet Potatoes. These delicious little gems are a cozy twist on a classic. They bring together spicy buffalo chicken and the natural sweetness of tender sweet potatoes. In just a little over an hour, you’ll be serving an impressive meal that not only satisfies but also brings the family together. Trust me, busy moms and professionals—this delightful dish is both easy to make and unforgettable!

    Why You’ll Love This Spicy Buffalo Chicken Stuffed Sweet Potatoes

    This recipe is a lifesaver for busy nights! It combines the hearty goodness of sweet potatoes with the tangy kick of buffalo chicken. Not only is it a breeze to whip up, but it’s also packed with flavor that will make everyone come back for seconds. Plus, it’s healthy, gluten-free, and totally customizable, making it a fantastic option for any family table!

    Ingredients for Spicy Buffalo Chicken Stuffed Sweet Potatoes

    Let’s gather everything we need to create these mouthwatering Spicy Buffalo Chicken Stuffed Sweet Potatoes! Here’s what’s on the shopping list:

    • Medium sweet potatoes: These beauties are the heart of the dish. Their natural sweetness balances the spicy chicken perfectly.
    • Shredded cooked chicken breast: Use leftovers, or pick up a rotisserie chicken for convenience. It adds protein and heartiness.
    • Buffalo sauce: This is where the magic happens! It brings that zesty heat and flavor that makes the dish sing.
    • Greek yogurt: A creamy, tangy addition, it also lightens the dish and adds protein. If you’re not a fan, sour cream works too!
    • Blue cheese or ranch dressing: For drizzling, these toppings add a cooling contrast to the spicy filling. Pick your favorite or mix them!
    • Green onions: Fresh and crisp, they add a pop of color and a mild onion flavor that brightens each bite.
    • Celery: Finely chopped, it gives a satisfying crunch and freshness to the filling. It’s an awesome way to sneak in some veggies!
    • Salt and pepper: Basic seasonings that enhance all the flavors—from sweet to spicy.
    • Optional ingredients: Feel free to add extra buffalo sauce for those who like it hot! A sprinkle of blue cheese crumbles on top can elevate your potatoes even more.

    All of the ingredients, with exact measurements, are listed at the bottom of the article, ready for printing. Let’s get cooking!

    How to Make Spicy Buffalo Chicken Stuffed Sweet Potatoes

    Preheat the Oven

    First things first, let’s get that oven ready! Preheat it to 400°F (200°C). This will make for the perfect environment for baking those sweet potatoes to tender perfection.

    Prepare the Sweet Potatoes

    Now, grab those medium sweet potatoes! Give them a good wash and dry them off. Using a fork, prick each potato a few times; this helps them steam while baking. Repeat after me: “No boiling them here!” Place them on a baking sheet lined with parchment paper. You want them cozy and roasted, not soggy and sad.

    Make the Buffalo Chicken Filling

    While your sweet potatoes are getting their bake on, let’s dive into that flavorful buffalo chicken filling. In a medium bowl, combine the shredded cooked chicken with the spicy buffalo sauce and Greek yogurt. Get in there and mix it until every shred of chicken is coated in that vibrant sauce. A little TLC goes a long way!

    Stuff the Sweet Potatoes

    Once your sweet potatoes are baked to fluffy perfection (about 45-60 minutes), let them cool for a few minutes. Then, carefully cut a slit lengthwise in each potato, being cautious not to cut through completely. Gently squeeze the sides to create a welcoming pocket. Here comes the fun part—fill them up with that delicious buffalo chicken mixture! Make sure to pack it in there nice and snug.

    Add the Toppings

    Alright, let’s turn up the flavor a notch! Top each stuffed sweet potato with a generous drizzle of blue cheese or ranch dressing. Don’t be shy! Then, sprinkle the chopped green onions and celery over the top for that added crunch. If you fancy a bit more heat, drizzle on some extra buffalo sauce. And for the cheese lovers, a sprinkle of blue cheese crumbles is the cherry on top!

    Serve and Enjoy

    It’s finally time to dig in! Serve those Spicy Buffalo Chicken Stuffed Sweet Potatoes while they’re warm. Trust me; everyone will flock to the table. These beauties balance spicy, savory, and sweet. Plus, each bite is filled with joy. Enjoy the compliments and the satisfied smiles around your dinner table!

    Tips for Success

    • Make sure to prick the sweet potatoes well to avoid bursting while baking.
    • For a faster prep, use leftover chicken or a rotisserie chicken.
    • Adjust the amount of buffalo sauce to achieve your desired spice level.
    • Let the sweet potatoes rest for a few minutes after baking—they’ll be easier to handle.
    • Mixing different dressings can add a unique twist to your potatoes!

    Equipment Needed

    • Oven: Essential for baking those sweet potatoes. An air fryer can also work for quicker results!
    • Baking sheet: Use one lined with parchment paper for easy cleanup. A glass dish can be a good alternative.
    • Medium bowl: Perfect for mixing your buffalo chicken filling. A larger mixing bowl works too!
    • Fork: Useful for pricking the sweet potatoes. A sharp knife can also help in cutting the slits.

    Variations

    • Swap the Protein: Try shredded turkey or even a plant-based protein like jackfruit for a vegetarian version.
    • Change the Heat: Use a milder hot sauce if buffalo sauce is too spicy for your family. Barbecue sauce can add a sweet twist!
    • Different Dressings: Experiment with ranch or vinaigrette dressings for varied flavor profiles. A chipotle dressing can add a smoky kick!
    • Cheese Lovers: Mix in different types of cheese into the filling or top with cheddar for a richer taste.
    • Add Veggies: Boost nutrition by mixing in spinach or bell peppers into the buffalo chicken filling.

    Serving Suggestions

    • Side Salad: Pair with a fresh green salad tossed with a light vinaigrette to balance the heat.
    • Vegetable Sticks: Serve with crunchy carrot and celery sticks for added texture and health benefits.
    • Refreshing Drink: Enjoy with a cold glass of lemonade or iced tea to cool down!
    • Presentation: Serve on a colorful platter and garnish with extra green onions for a pop of color.

    FAQs about Spicy Buffalo Chicken Stuffed Sweet Potatoes

    Can I prepare the Spicy Buffalo Chicken Stuffed Sweet Potatoes in advance?

    Absolutely! These tasty stuffed sweet potatoes can be made ahead of time. Just prepare the filling and stuff the potatoes, then store them in the fridge. When you’re ready to eat, pop them in the oven to warm up.

    What can I substitute for buffalo sauce?

    If buffalo sauce isn’t your thing, no worries! You can use a milder hot sauce or even barbecue sauce for a sweeter flavor. Just be sure to balance it with a creamy dressing for that perfect contrast.

    How can I make this recipe lower in calories?

    For a lighter version, use less sauce or swap Greek yogurt for a low-fat alternative. Reducing the amount of cheese or opting for a lighter dressing can help keep those calories in check while still delivering flavor.

    What could I serve with these stuffed sweet potatoes?

    They pair beautifully with a crisp salad or some colorful vegetable sticks. A cool drink like iced tea will also be refreshing alongside this spicy dish, helping to balance the heat!

    Can I freeze the stuffed sweet potatoes?

    Yes! These stuffed sweet potatoes freeze wonderfully. Just ensure they’re wrapped tightly before freezing. When you want to enjoy them, thaw and reheat in the oven or microwave until heated through.

    Final Thoughts

    Gathering around a plate of Spicy Buffalo Chicken Stuffed Sweet Potatoes is more than just mealtime—it’s a celebration of flavor and togetherness. This recipe invites everyone to dive in with eager anticipation. The warm, fluffy sweet potatoes cradle the zesty chicken, creating a delightful contrast that keeps you coming back for more. Plus, the mere act of assembling these colorful ingredients can spark joy in your kitchen. Whether it’s a weeknight or a special occasion, this dish promises smiles, satisfied bellies, and the comfort of home-cooked goodness. Enjoy every spicy bite!


    Print

    clock clock iconcutlery cutlery iconflag flag iconfolder folder iconinstagram instagram iconpinterest pinterest iconfacebook facebook iconprint print iconsquares squares iconheart heart iconheart solid heart solid icon

    Description

    Hey there, fellow food lovers! If you’ve ever craved something that’s both comforting and bursting with flavor, then let me introduce you to my Spicy Buffalo Chicken Stuffed Sweet Potatoes. These delicious little gems are a cozy twist on a classic. They bring together spicy buffalo chicken and the natural sweetness of tender sweet potatoes. In just a little over an hour, you’ll be serving an impressive meal that not only satisfies but also brings the family together. Trust me, busy moms and professionals—this delightful dish is both easy to make and unforgettable!


    • 4 medium sweet potatoes (about 68 ounces each)
    • 2 cups shredded cooked chicken breast (about 2 medium chicken breasts)
    • ½ cup buffalo sauce
    • ¼ cup Greek yogurt
    • ¼ cup blue cheese or ranch dressing
    • 2 green onions (thinly sliced)
    • 1 celery stalk (finely chopped)
    • Salt and pepper to taste
    • Optional: Extra buffalo sauce and 2 tablespoons blue cheese crumbles for topping

    1. Preheat your oven to 400°F (200°C).
    2. Wash the sweet potatoes thoroughly and pat them dry.
    3. Using a fork, prick each sweet potato several times all over.
    4. Place the sweet potatoes on a baking sheet lined with parchment paper.
    5. Bake for 45-60 minutes, or until the potatoes are tender when pierced with a fork.
    6. While the potatoes are baking, prepare the filling. In a medium bowl, combine the shredded chicken, buffalo sauce, and Greek yogurt. Mix well.
    7. Chop the green onions and celery.
    8. Once the sweet potatoes are done, remove them from the oven and let them cool for 5-10 minutes.
    9. Cut a slit lengthwise in each potato, being careful not to cut all the way through.
    10. Gently squeeze the sides of each potato to open them up and create a pocket for the filling.
    11. Divide the buffalo chicken mixture evenly among the four potatoes, stuffing it into the pockets.
    12. Top each potato with a tablespoon of blue cheese or ranch dressing.
    13. Sprinkle the chopped green onions and celery over each potato.
    14. If desired, drizzle with extra buffalo sauce and sprinkle with blue cheese crumbles.
    15. Serve immediately while still warm.

    Notes

    • Feel free to adjust the level of spice by varying the amount of buffalo sauce.
    • These can be made ahead of time and reheated.
    • Prep Time: 15 minutes
    • Cook Time: 60 minutes
    • Category: Main Course
    • Method: Baking
    • Cuisine: American

    Nutrition

    • Serving Size: 1 stuffed sweet potato
    • Calories: 400
    • Sugar: 7g
    • Sodium: 900mg
    • Fat: 12g
    • Saturated Fat: 5g
    • Unsaturated Fat: 7g
    • Trans Fat: 0g
    • Carbohydrates: 50g
    • Fiber: 7g
    • Protein: 30g
    • Cholesterol: 75mg

    Sharing is caring!

  • Ricotta Pistachio Honey Bites

    Ricotta Pistachio Honey Bites


    Introduction to Ricotta Pistachio Honey Bites

    Welcome to a delightful culinary adventure with my Ricotta Pistachio Honey Bites! If you’re a busy mom or professional like me, you know the daily hustle can sometimes leave us craving something sweet yet simple. These little gems are perfect for those days when you need a quick dessert to impress family or friends. With creamy ricotta, crunchy pistachios, and the sweet whisper of honey, they are a wonderful treat to elevate any occasion. Let’s dive in and create something that’s as enjoyable to make as it is to eat!

    Why You’ll Love This Ricotta Pistachio Honey Bites

    The beauty of Ricotta Pistachio Honey Bites lies in their simplicity and flavor. In just 35 minutes, you can whip up a delightful dessert that feels gourmet. The buttery puff pastry cradles a creamy filling that dances with sweet and nutty notes. Plus, they’re versatile! These treats can be prepared ahead of time, making them a fantastic solution for your busy schedule that will surely make your loved ones smile.

    Ingredients for Ricotta Pistachio Honey Bites

    Gathering the right ingredients is truly the heart of creating these lovely bites. Here’s what you’ll need:

    • Whole milk ricotta cheese: This creamy delight forms the base of our filling. Make sure to drain it if it’s wet for a firmer texture.
    • Chopped pistachios: These provide a delightful crunch and nutty flavor. Unsalted is best, so you can control the saltiness.
    • Honey: Nature’s sweet gift! Honey not only sweetens but also adds a beautiful shine and flavor. You’ll need some to mix in, plus a little extra for drizzling.
    • Puff pastry, crescent dough, or phyllo: Choose your favorite! Puff pastry gives a flaky texture, while crescent dough adds a little sweetness. Phyllo offers a crispy, lighter option!
    • Optional ingredients: For a flavor boost, consider adding lemon zest or a splash of vanilla extract. A sprinkle of sea salt flakes elevates the sweetness and adds complexity.

    Don’t forget, the exact measurements for each ingredient can be found at the bottom of the article for easy printing. Now, let’s get those ingredients together and start creating our delicious Ricotta Pistachio Honey Bites!

    How to Make Ricotta Pistachio Honey Bites

    Let’s embark on this cheerful cooking journey! Making Ricotta Pistachio Honey Bites is straightforward and fun. Follow these easy steps, and you’ll have delicious bites ready to impress everyone.

    Step 1: Preheat and Prepare

    First things first, let’s get that oven warming up! Preheat it to 350°F (175°C). While it heats, line a baking sheet with parchment paper. This little step helps prevent sticking and makes cleanup a breeze. Plus, it adds an extra layer of ease to our baking adventure!

    Step 2: Mix Filling Together

    Now, grab a mixing bowl and combine your key ingredients. Add the ricotta cheese and measurements of chopped pistachios along with two tablespoons of honey. Mix them well until it’s creamy and smooth. Give it a taste—are you tempted already? This filling is a delightful blend of sweetness and texture that’ll dance over your taste buds!

    Step 3: Prepare Dough

    Next, let’s cut that dough! If you’re using puff pastry, gently roll it out and slice it into small squares or rounds. Aim for about 3 inches in size for a perfect bite. If you’re using phyllo, remember, it’s delicate! Layer those thin sheets to create more structure. Take your time here; a little care goes a long way in making these bites delightful!

    Step 4: Assemble the Bites

    Now the fun begins! Take one piece of prepared dough, and scoop about a teaspoon of the delicious filling onto its center. Fold the dough over, forming a pocket, and pinch the edges tightly to seal. Make sure to secure the filling within—no one wants a runaway delight! Repeat this with all your squares and place them on the prepared baking sheet.

    Step 5: Bake to Perfection

    It’s time to bake! Slide that baking sheet into the preheated oven and let those beauties cook for 15 to 20 minutes. Keep an eye on them; look for a beautiful golden brown. The aroma wafting through your kitchen will have everyone wondering what’s cooking. Trust me; you won’t want to miss that golden perfection!

    Step 6: Drizzle Before Serving

    Once baked and slightly cooled, it’s time for the final touch. Drizzle some warm honey over these Ricotta Pistachio Honey Bites for an extra burst of sweetness. Serve them warm for the best experience. Your family will be amazed, and you’ll be the culinary hero of the day!

    Tips for Success

    • Make sure your ricotta is well-drained for a better texture in the filling.
    • If using phyllo dough, cover unused sheets with a damp cloth to keep them from drying out.
    • Don’t skimp on sealing the edges; a tight seal keeps the filling in during baking.
    • Experiment with flavors—try adding spices like cinnamon for a cozy twist!
    • Serve the bites warm for that delightful experience everyone will love.

    Equipment Needed

    • Baking sheet: A simple one will do, but a non-stick option makes cleanup even easier!
    • Parchment paper: Essential for lining your baking sheet, though aluminum foil can work in a pinch.
    • Mixing bowl: Any size will suffice, just ensure it’s big enough to mix ingredients comfortably.
    • Rolling pin: If you’re using puff pastry, a rolling pin helps to smooth it out nicely.
    • Measuring spoons: These are handy for portioning, but you can eyeball it too if you’re feeling adventurous!

    Variations on Ricotta Pistachio Honey Bites

    • Chocolate Chip Surprise: Add mini chocolate chips to the ricotta filling for a sweet twist that chocolate lovers will adore.
    • Fruitful Bliss: Toss in a handful of finely chopped fresh fruits like strawberries or blueberries for added flavor and color.
    • Nut-Free Delight: Substitute nuts with sunflower seeds or pumpkin seeds for a crunchy bite while keeping it nut-free.
    • Spiced Up: Mix in some ground cinnamon or nutmeg to the ricotta filling for a warm, cozy flavor profile.
    • Vegan Version: Swap ricotta with a cashew-based cream and use vegan puff pastry for a delightful plant-based treat.

    Serving Suggestions for Ricotta Pistachio Honey Bites

    • Pair these bites with a refreshing herbal tea or a crisp glass of white wine for a delightful contrast.
    • Serve on a beautiful platter, dusted lightly with powdered sugar for an elegant touch.
    • Accompany with fresh fruit like berries or sliced peaches to enhance the sweetness.
    • Add a scoop of vanilla ice cream on the side for an indulgent dessert experience.
    • Drizzle some chocolate sauce alongside the honey for a fun twist!

    FAQs about Ricotta Pistachio Honey Bites

    Can I make Ricotta Pistachio Honey Bites in advance?

    Absolutely! You can prepare the bites a day ahead and refrigerate them before baking. Just pop them in the oven when you’re ready! They’ll still taste fabulous.

    What can I use instead of ricotta cheese?

    If you’re looking for alternatives, you might try mascarpone for a richer flavor or even a cream cheese blend. Just remember to adjust sweetness as needed!

    How should I store leftover bites?

    Store any leftovers in an airtight container in the refrigerator. They taste best when reheated in the oven to retain their crispiness.

    Can I freeze these sweet treats?

    Yes! You can freeze them either before or after baking. If freezing raw, just place them on a baking sheet to freeze individually before transferring them to a storage bag.

    What other toppings work well with Ricotta Pistachio Honey Bites?

    Besides honey, you could try drizzling melted chocolate or adding a sprinkle of crushed pistachios for an extra crunch. Fresh fruit is also a lovely addition!

    Final Thoughts

    Creating Ricotta Pistachio Honey Bites transforms an ordinary day into a delightful culinary experience. The joy of making these sweet treats is not just in the flavors, but in the smiles they bring to your loved ones. Each bite offers a warm, creamy center wrapped in flaky perfection, reminding us of why we cherish home-cooked delights. Plus, they’re easy to whip up, making them the ideal treat for busy days or special gatherings. So gather your ingredients, bring your family into the kitchen, and enjoy this delicious journey together. You won’t regret it!


    Print

    clock clock iconcutlery cutlery iconflag flag iconfolder folder iconinstagram instagram iconpinterest pinterest iconfacebook facebook iconprint print iconsquares squares iconheart heart iconheart solid heart solid icon

    Description

    Welcome to a delightful culinary adventure with my Ricotta Pistachio Honey Bites! If you’re a busy mom or professional like me, you know the daily hustle can sometimes leave us craving something sweet yet simple. These little gems are perfect for those days when you need a quick dessert to impress family or friends. With creamy ricotta, crunchy pistachios, and the sweet whisper of honey, they are a wonderful treat to elevate any occasion. Let’s dive in and create something that’s as enjoyable to make as it is to eat!


    • 1 cup whole milk ricotta cheese, drained if wet
    • 1/4 cup chopped pistachios, unsalted
    • 1/4 cup honey, plus extra for drizzling
    • 1 sheet puff pastry or crescent dough or phyllo
    • Optional: lemon zest, vanilla extract, sea salt flakes

    1. Preheat oven to 350°F (175°C). Line a baking sheet with parchment paper.
    2. In a bowl, mix ricotta, pistachios, and 2 tbsp honey until smooth.
    3. Cut dough into small squares or rounds. Add 1 tsp of filling to each.
    4. Fold, seal edges, and place on the baking sheet.
    5. Bake for 15–20 minutes or until golden brown.
    6. Let cool slightly and drizzle with warm honey before serving.

    Notes

    • Ensure the ricotta is well-drained for better texture.
    • Feel free to customize with lemon zest or vanilla for additional flavor.
    • Serve warm for the best taste.
    • Prep Time: 15 minutes
    • Cook Time: 20 minutes
    • Category: Dessert
    • Method: Baked
    • Cuisine: Italian

    Nutrition

    • Serving Size: 1 bite
    • Calories: 120
    • Sugar: 8g
    • Sodium: 30mg
    • Fat: 5g
    • Saturated Fat: 2g
    • Unsaturated Fat: 2g
    • Trans Fat: 0g
    • Carbohydrates: 15g
    • Fiber: 1g
    • Protein: 3g
    • Cholesterol: 10mg

    Sharing is caring!

  • Cheesy Garlic Parmesan Spinach Spaghetti Squash

    Cheesy Garlic Parmesan Spinach Spaghetti Squash


    Introduction to Cheesy Garlic Parmesan Spinach Spaghetti Squash

    If you’re on the lookout for a dish that marries health and indulgence, let me introduce you to my beloved Cheesy Garlic Parmesan Spinach Spaghetti Squash. This delightful recipe is perfect for those busy days when you long for something filling yet wholesome. Imagine diving into a creamy, cheesy bowl of goodness that doesn’t skimp on flavor, while still being kind to the waistline! Whether you’re cooking for your family or wanting to impress dinner guests, this easy-to-make dish feels like a warm hug on a plate, satisfying your cravings with ease.

    Why You’ll Love This Cheesy Garlic Parmesan Spinach Spaghetti Squash

    What’s not to love about a recipe that’s both easy and bursting with flavor? This Cheesy Garlic Parmesan Spinach Spaghetti Squash comes together quickly, making it an ideal choice for busy moms or professionals. Plus, it’s a fantastic way to sneak in some veggies without the kids even noticing! The creamy, cheesy goodness is sure to satisfy everyone’s taste buds, making dinnertime a joyful occasion.

    Ingredients for Cheesy Garlic Parmesan Spinach Spaghetti Squash

    Gathering the right ingredients is essential for your Cheesy Garlic Parmesan Spinach Spaghetti Squash. Here’s what you’ll need:

    • Spaghetti Squash: The star of the dish, offering a delightful noodle-like texture that’s low in carbs and high in nutrients.
    • Minced Garlic: This adds a sweet, aromatic flavor and depth to the creamy sauce. Feel free to adjust the amount based on your garlic love!
    • Avocado Oil or Olive Oil: Both are great for sautéing and provide healthy fats. I often use avocado oil for its mild flavor.
    • Fresh Spinach: A vibrant addition that packs in nutrients without overwhelming the dish. Baby spinach wilt easily into the mix.
    • Heavy Cream: This rich, velvety ingredient makes the sauce creamy and indulgent. It’s the secret to that comforting texture.
    • Cream Cheese: Optional but a recommended ingredient for extra creaminess. It smooths out the sauce beautifully!
    • Freshly Grated Parmesan Cheese: The star of the cheese world! It provides a salty, nutty flavor that’s simply irresistible.
    • Salt and Pepper: Essential for seasoning, these will enhance all the wonderful flavors in this dish.
    • Grated or Sliced Mozzarella: For those cheesy lovers, this is perfect for topping your squash and adding that gooey finish.

    For precise measurements for each ingredient, check out the bottom of this article where they’re detailed for your convenience!

    How to Make Cheesy Garlic Parmesan Spinach Spaghetti Squash

    Now that you’ve gathered your ingredients, let’s dive into the deliciously creamy world of Cheesy Garlic Parmesan Spinach Spaghetti Squash! I’ll guide you through each step, share some handy tips, and ensure your culinary adventure is a breeze.

    Preparing the Spaghetti Squash

    First things first, you’ll need to prep the spaghetti squash. Start by slicing it in half lengthwise.

    If your squash resembles an impenetrable fortress, don’t worry! Just microwave it for 3–5 minutes after piercing a few holes in it with a knife. This little trick softens the skin, making it easier to slice.

    Once it’s halved, scoop out the seeds with a spoon. The insides should be ready to embrace all the cheesy goodness coming its way!

    Roasting the Spaghetti Squash

    Preheat your oven to 400°F (200°C). This step is crucial for achieving perfectly roasted spaghetti squash!

    Rub the cut sides lightly with olive oil. This adds flavor and helps with browning. Place the squash cut side down on a rimmed baking sheet.

    Roast it in the oven for about 40 minutes. When it’s fork-tender, you’ll know it’s ready! Larger squash may need a tad more time, so check its doneness by piercing it with a fork.

    Making the Cheesy Garlic Sauce

    While the squash roasts, let’s whip up that dreamy garlic sauce. In a medium skillet, heat a drizzle of olive oil over medium-high heat.

    Add the minced garlic and sauté just until fragrant, about 30 seconds to a minute. Watch that it doesn’t burn, or it’ll taste bitter!

    Next, toss in your fresh spinach and cook until it’s wilted. Then, pour in the heavy cream and cream cheese, if you’re using it. Trust me, it’s worth it!

    Stir in the freshly grated Parmesan cheese until everything is smooth and creamy. Season with a sprinkle of salt and pepper—taste and adjust as needed. The sauce should be rich and comforting, creating a tantalizing aroma that beckons!

    Mixing Everything Together

    Once your spaghetti squash is out of the oven and slightly cooled, it’s time for the fun part! Using a fork, fluff those tender strands into a bowl.

    Pour your luscious cheesy garlic sauce over each squash half. Mix it gently so everything is well combined, allowing the flavors to mingle and dance!

    Baking to Perfection

    Now, to make everything sing with coziness, sprinkle the top with mozzarella and extra Parmesan cheese. Who doesn’t love that mouthwatering cheese pull?

    Pop the squash back into the oven, this time at 350°F (175°C), for about 20 minutes. You want that heavenly mixture to be hot and bubbly.

    For a golden crispy topping, broil on high for an additional 1–2 minutes until lightly browned. Keep a close eye during these final moments—no one wants burnt cheese!

    Tips for Success

    • Always check the squash’s doneness with a fork. It should easily pierce through.
    • Don’t rush the roasting! A well-roasted squash adds depth to the flavor.
    • Feel free to adjust the garlic quantity to suit your taste—more garlic means more yum!
    • If you’re short on time, roast the squash ahead and store it in the fridge.
    • Garnish with fresh herbs for an extra punch of flavor and pretty presentation.

    Equipment Needed

    • Chef’s Knife: For slicing the spaghetti squash. A sturdy knife makes all the difference!
    • Cutting Board: Essential for safe and easy chopping.
    • Baking Sheet: For roasting the squash. Line it with parchment for easy cleanup.
    • Medium Skillet: To create that creamy garlic sauce—non-stick is best.
    • Fork: For fluffing the spaghetti squash strands to perfection!

    Variations

    • Swap the Greens: Try kale or Swiss chard instead of spinach for a different twist.
    • Protein Boost: Add cooked chicken, shrimp, or sautéed mushrooms for extra heartiness.
    • Herbal Notes: Sprinkle in some fresh basil or oregano to enhance the Italian flavors.
    • Nutty Flavor: Toss in some toasted pine nuts or walnuts for added crunch and richness.
    • Vegan Option: Use coconut cream instead of heavy cream and nutritional yeast for a cheese-like flavor.

    Serving Suggestions

    • Pair with a Light Salad: A crisp mixed greens salad with a tangy vinaigrette complements the dish wonderfully.
    • Beverage Match: Enjoy with a chilled glass of white wine or sparkling water infused with lemon.
    • Presentation: Serve in the roasted squash halves for a rustic and beautiful display.

    FAQs about Cheesy Garlic Parmesan Spinach Spaghetti Squash

    As I’ve navigated the kitchen with my Cheesy Garlic Parmesan Spinach Spaghetti Squash, I’ve come across a few burning questions. Let’s dive into some of the most common queries and clarify any lingering doubts you might have!

    Can I prepare the spaghetti squash ahead of time?

    Absolutely! You can roast the spaghetti squash beforehand. Just store the halves in the fridge for up to three days. When you’re ready to enjoy, simply reheat and add the sauce.

    Is this recipe suitable for meal prep?

    Yes, this dish is perfect for meal prep! The flavors deepen as it sits, making it an even tastier option for lunches or quick dinners throughout the week.

    Can I substitute the heavy cream in this dish?

    If you’re looking for a lighter option, you can use half-and-half or even unsweetened almond milk. Just keep in mind that the creaminess might vary a bit!

    What can I serve with Cheesy Garlic Parmesan Spinach Spaghetti Squash?

    Pair it with a refreshing salad or some garlic bread for a complete meal. The creamy ingredients in the dish balance well with fresh, crisp sides.

    Can I freeze leftovers?

    While I recommend enjoying it fresh, you can freeze the cheesy mixture separately. Thaw and reheat thoroughly before serving—just be mindful that the texture may change slightly!

    Final Thoughts

    Bringing my Cheesy Garlic Parmesan Spinach Spaghetti Squash into your home means inviting joy, comfort, and a touch of creativity into your kitchen. It’s more than just a recipe; it’s a delightful experience waiting to unfold. Each bite offers a creamy, cheesy embrace that soothes the soul while being kind to the waistline. I hope you’ve found inspiration here to whip up this dish for your family or friends. May it become a go-to favorite that sparks joy, laughter, and cherished memories around your dinner table!


    Print

    clock clock iconcutlery cutlery iconflag flag iconfolder folder iconinstagram instagram iconpinterest pinterest iconfacebook facebook iconprint print iconsquares squares iconheart heart iconheart solid heart solid icon

    Description

    If you’re on the lookout for a dish that marries health and indulgence, let me introduce you to my beloved Cheesy Garlic Parmesan Spinach Spaghetti Squash. This delightful recipe is perfect for those busy days when you long for something filling yet wholesome. Imagine diving into a creamy, cheesy bowl of goodness that doesn’t skimp on flavor, while still being kind to the waistline! Whether you’re cooking for your family or wanting to impress dinner guests, this easy-to-make dish feels like a warm hug on a plate, satisfying your cravings with ease.


    • 1 medium spaghetti squash (about 23 lbs)
    • 2 ½ tbsp minced garlic
    • 1 tsp avocado oil or olive oil
    • 5 oz fresh spinach, chopped
    • ½ cup heavy cream
    • 1 tbsp cream cheese (optional, but recommended for extra creaminess)
    • ½ cup freshly grated Parmesan cheese (plus extra for topping)
    • Salt and pepper, to taste
    • Grated or sliced mozzarella (for topping, as desired)

    1. Preheat oven to 400°F (200°C).
    2. Slice the spaghetti squash in half lengthwise and scoop out the seeds. (Tip: If the squash is too tough to cut, microwave it for 3–5 minutes after piercing it a few times with a knife to soften it.)
    3. Lightly rub the cut sides with olive oil and place them cut side down on a rimmed baking sheet.
    4. Roast for about 40 minutes, or until the squash is tender and easily pierced with a fork. Larger squash may need additional time.
    5. Once done, let the squash cool slightly before handling.
    6. In a medium skillet over medium-high heat, heat a drizzle of olive oil and sauté the garlic until fragrant.
    7. Add chopped spinach and cook until wilted.
    8. Stir in heavy cream, cream cheese (if using), and Parmesan cheese. Mix until smooth.
    9. Season with salt and pepper to taste, then remove from heat.
    10. Using a fork, fluff the spaghetti squash strands.
    11. Pour the creamy garlic parmesan sauce over each squash half, mixing slightly.
    12. Sprinkle with mozzarella and extra Parmesan cheese as desired.
    13. Bake at 350°F (175°C) for about 20 minutes, until hot and bubbly.
    14. For a golden, crispy topping, broil on high for 1–2 minutes until lightly browned.

    Notes

    • You can roast the squash ahead of time and store it in the fridge for a few days.
    • The cream cheese adds extra creaminess but is optional.
    • Adjust the amount of garlic based on your preference.
    • Prep Time: 15 minutes
    • Cook Time: 1 hour
    • Category: Main Dish
    • Method: Baked
    • Cuisine: Italian

    Nutrition

    • Serving Size: 1 squash half
    • Calories: 350
    • Sugar: 2g
    • Sodium: 450mg
    • Fat: 28g
    • Saturated Fat: 15g
    • Unsaturated Fat: 10g
    • Trans Fat: 0g
    • Carbohydrates: 15g
    • Fiber: 4g
    • Protein: 10g
    • Cholesterol: 70mg

    Sharing is caring!

  • Loaded Chicken Club

    Loaded Chicken Club


    Introduction to Loaded Chicken Club

    I understand how hard it is to prepare a nice meal after work, and that’s where this Loaded Chicken Club helps out. It is so mouthwatering, made with tender chicken, crispy bacon, and fresh veggies layered between toasted sourdough. But best of all, it’s quickly prepared. Whether you’re feeding a whole crowd or just determined to blow the family away, this is the dish that does it. It’s a packed flavor occasion that gathers everyone with little to-do.

    Why You’ll Love This Loaded Chicken Club

    This Loaded Chicken Club is more than just a sandwich; it’s a solution for your hectic days. It comes together in just 35 minutes, giving you time to relax with your family. The combination of juicy chicken, crispy bacon, and flavorful mayo packs a punch without overwhelming your schedule. Plus, it’s a versatile recipe that everyone will enjoy—perfect for satisfying those picky eaters!

    Ingredients for Loaded Chicken Club

    Let’s gather everything you’ll need to create this delightful Loaded Chicken Club. Each ingredient plays a crucial role in crafting a sandwich that’s bursting with flavor and texture.

    • Boneless chicken breasts: They are lean and juicy, making them the star of this sandwich.
    • Thick-cut bacon: Because who can resist perfectly crispy bacon? It adds a delicious crunch.
    • Sourdough bread: Its tangy flavor and sturdy texture elevate the whole dish, perfect for toasting.
    • Fresh lettuce: Adds a crisp bite and freshness, balancing out the richness of the bacon.
    • Ripe tomatoes: Juicy slices lend sweetness and moisture to every bite.
    • Mayonnaise: The creamy base for our herb mix, adding richness to the sandwich.
    • Fresh herbs (like parsley and chives): They bring a burst of vibrant flavor and a hint of sophistication.
    • Garlic: A must for depth, it creates an aromatic layer of flavor in the mayo.

    Along with these, you can customize your sandwich! If you’re feeling adventurous, add some sliced jalapeños for a spicy kick or swap the chicken for turkey for a lighter option. If you’re in a hurry, pre-cooked bacon and rotisserie chicken work just as well!

    For precise quantities, check out the recipe details at the bottom of the article, available for printing when you’re ready to cook.

    How to Make Loaded Chicken Club

    Preparing the Chicken

    First, let’s get started with the chicken. Season your boneless chicken breasts generously with salt, pepper, and any favorite herbs you have on hand. This adds amazing flavor right from the start. Once seasoned, let them rest for about 10 minutes. This rest period allows the chicken to absorb those lovely flavors while ensuring a tender texture. Trust me, this step makes all the difference!

    Cooking the Bacon

    Next up is the bacon. In a large skillet, cook those thick-cut bacon strips over medium heat until they’re crispy—this usually takes around 6-8 minutes. Once they’re sizzling and golden, carefully remove them and let them drain on a paper towel. But don’t throw away that delicious bacon fat! Keep about a tablespoon in the skillet; it helps to create an irresistible flavor for the chicken.

    Cooking the Chicken

    Now let’s cook the chicken. Use the skillet with the reserved bacon fat, heating it over medium heat. Add the seasoned chicken breasts and cook them for about 6-7 minutes on each side. You’re looking for a nice golden-brown color and an internal temperature of 165°F to ensure they’re thoroughly cooked. Afterward, let them rest for five minutes. Resting helps lock in the juiciness, making every bite a flavor explosion!

    Making the Herb Mayonnaise

    While the chicken rests, let’s whip up some herb mayonnaise. In a small bowl, combine about ⅓ cup of mayonnaise with minced garlic and freshly chopped herbs like parsley and chives. Mix until well blended and creamy. Don’t forget to season with a pinch of salt and pepper, too! This mayo will elevate your sandwich from good to completely scrumptious.

    Toasting the Bread

    Now it’s time to toast the bread. Take your sourdough slices and toast them until golden brown and crispy. You can use a toaster, grill pan, or even a broiler if you want that extra crunch. This step is crucial for creating layers of texture in your Loaded Chicken Club!

    Assembling the Sandwich

    All your components are ready; now let’s assemble the sandwich! Start by spreading a generous layer of herb mayonnaise on one side of each toasted slice. On the bottom slice, layer some fresh lettuce, followed by juicy tomato slices, the sliced chicken, and crispy bacon. Finally, top it off with another slice of that delicious sourdough. Now, slice it in half, and there you have the mouthwatering Loaded Chicken Club ready to devour!

    Tips for Success

    • Prep your ingredients ahead of time to save precious minutes in the kitchen.
    • Use a meat thermometer to ensure the chicken reaches 165°F for safe eating.
    • Don’t rush the toasting; crispy bread makes a huge difference!
    • Feel free to mix and match herbs in the mayo for a personalized touch.
    • Consider serving the sandwiches with a side of sweet potato fries for added flair.

    Equipment Needed

    • Large skillet: A non-stick option makes cooking and cleanup easier.
    • Meat thermometer: This ensures your chicken is perfectly cooked every time.
    • Cutting board: A sturdy surface for slicing your chicken and veggies.
    • Sharp knife: Essential for precise cutting and dicing tasks.
    • Mixing bowl: For prepping the herb mayonnaise.

    Variations

    • Spicy Loaded Chicken Club: Add sliced jalapeños or a few dashes of hot sauce to the mayonnaise for a fiery kick.
    • Turkey Club Version: Swap out chicken for lean turkey breast for a lighter option that’s just as tasty.
    • Vegetarian Delight: Replace chicken with grilled eggplant or portobello mushrooms for a satisfying meat-free alternative.
    • Greek Style: Use feta cheese, olives, and tzatziki instead of mayonnaise for a Mediterranean twist.
    • Whole Wheat Twist: Choose whole wheat bread instead of sourdough for a heartier, healthier base.

    Serving Suggestions

    • Pair your Loaded Chicken Club with crispy sweet potato fries for a delightful sweet and savory combo.
    • A fresh side salad with a tangy vinaigrette complements the richness of the sandwich.
    • Serve with a chilled sparkling lemonade for a refreshing drink option.
    • For a fun presentation, cut the sandwich into quarters and serve on a wooden board.

    FAQs about Loaded Chicken Club

    As I share my love for this Loaded Chicken Club, I often get questions from fellow busy cooks. Here are some answers to the most common inquiries.

    Can I use a different type of bread for my Loaded Chicken Club?

    Absolutely! While sourdough adds a wonderful flavor, you can switch it up with whole wheat, ciabatta, or even a gluten-free option. Just make sure it’s sturdy enough to hold all those delicious layers!

    What can I substitute for mayonnaise if I want a healthier option?

    If you’re looking to lighten things up, Greek yogurt works wonderfully as a substitute. It’s creamy, tangy, and packed with protein, making it an excellent choice for a nutritious chicken sandwich.

    How do I prevent the bread from getting soggy?

    To keep your sandwich in pristine condition, toast the bread well before assembling. Another tip? Add the herb mayo just before serving, rather than letting it sit.

    Can I make this sandwich in advance?

    While the Loaded Chicken Club is best enjoyed fresh, you can prepare the chicken and bacon ahead of time. Just assemble the sandwiches when you’re ready to eat for the best flavor and texture.

    How can I make this sandwich spicier?

    If you love a kick, add sliced jalapeños to your Club Sandwich or mix some hot sauce into the herb mayo. It’s a simple way to transform flavors.

    Final Thoughts

    The Loaded Chicken Club is truly more than just a sandwich; it’s a delightful experience that brings joy to both the kitchen and table. Every layer bursts with flavor, inviting you to savor each bite. As a busy mom, I appreciate how quickly this meal comes together, leaving me more time to enjoy with my family. Plus, the satisfaction of creating something delicious and impressive is a reward on its own. I hope you find the same joy in making and serving this sandwich to your loved ones!


    Print

    clock clock iconcutlery cutlery iconflag flag iconfolder folder iconinstagram instagram iconpinterest pinterest iconfacebook facebook iconprint print iconsquares squares iconheart heart iconheart solid heart solid icon

    Description

    A delicious and satisfying Loaded Chicken Club sandwich featuring juicy chicken, crispy bacon, fresh lettuce, and flavorful herb mayonnaise on toasted sourdough bread.


    • 2 boneless chicken breasts
    • 6 strips thick-cut bacon
    • 4 slices sourdough bread
    • 4 leaves fresh lettuce
    • 2 large ripe tomatoes
    • 1/3 cup mayonnaise
    • 2 tablespoons fresh herbs (parsley, chives)
    • 2 cloves garlic, minced

    1. Season the chicken breasts with salt, pepper, and your favorite herbs. Let them rest at room temperature for 10 minutes while you prepare the other ingredients.
    2. Cook the bacon in a large skillet over medium heat until crispy, about 6-8 minutes. Remove and drain on paper towels, reserving 1 tablespoon of the bacon fat.
    3. Heat the reserved bacon fat in the same skillet and cook the chicken breasts for 6-7 minutes per side until golden brown and cooked through (internal temperature 165°F). Let rest for 5 minutes, then slice.
    4. Mix mayonnaise with minced garlic and chopped fresh herbs in a small bowl. Season with salt and pepper to taste.
    5. Toast the sourdough bread slices until golden brown and crispy. You can use a toaster, grill pan, or broiler for this step.
    6. Spread the herb mayo on one side of each bread slice. Layer the bottom slice with lettuce, tomato slices, sliced chicken, and crispy bacon. Top with the second bread slice and serve immediately.

    Notes

    • For a spicier kick, add sliced jalapeños to the sandwich.
    • Feel free to substitute the chicken with turkey for a variation.
    • This sandwich is best served immediately after assembling to maintain the crunchiness of the bacon and toast.
    • Prep Time: 15 minutes
    • Cook Time: 20 minutes
    • Category: Sandwich
    • Method: Skillet and Toasting
    • Cuisine: American

    Nutrition

    • Serving Size: 1 sandwich
    • Calories: 550
    • Sugar: 5g
    • Sodium: 1200mg
    • Fat: 30g
    • Saturated Fat: 8g
    • Unsaturated Fat: 12g
    • Trans Fat: 0g
    • Carbohydrates: 45g
    • Fiber: 3g
    • Protein: 33g
    • Cholesterol: 90mg

    Sharing is caring!

  • Candy Apples Iconic Fall Dessert

    Candy Apples Iconic Fall Dessert


    Introduction to Candy Apples Iconic Fall Dessert

    When the leaves turn and the air becomes cool, there is magic in the season, nothing at all like autumn. Candy Apples symbolize that seasonal joy-there’s only so much one can take of sweet treats- and refresh our palettes in far more satisfactory ways. I enjoy making this delightful treat when friends and family gather; their eyes light up as they take that first crunchy bite. Such an experience is not only meant for candy lovers but those moms hustling it out there. Trust me, these gems of candy-coated apples will leave everyone smiling!

    Why You’ll Love This Candy Apples Iconic Fall Dessert

    This Candy Apples recipe is a breeze to make, taking only about 35 minutes from start to finish. The satisfying crunch of the sweet candy coating perfectly complements the tartness of Granny Smith apples. Plus, they’re a nostalgic fall treat that can transform any gathering into a festive celebration. With minimal ingredients and effort, you can wow your family and friends, making it a sweet victory for busy days!

    Ingredients for Candy Apples Iconic Fall Dessert

    To create these mouthwatering Candy Apples, you’ll need just a handful of ingredients that come together to form a delicious autumn treat. Here’s what you’ll need:

    • Granulated Sugar: This is the base for our candy coating and gives it that delightful sweetness.
    • Light Corn Syrup: This key ingredient lends a glossy finish and helps prevent the sugar from crystallizing.
    • Red Food Coloring: It adds that classic candy apple hue, making them visually stunning for any fall display.
    • Water: Just enough to dissolve the sugar and create your sweet syrup.
    • Granny Smith Apples: Their tartness perfectly balances the sugary coating. Feel free to explore other apple varieties if you prefer a sweeter flavor!
    • Cooking Spray: This is used to prepare your baking sheet, ensuring an easy release of the finished candy apples.

    All of these ingredients are readily available at your local grocery store. Don’t forget, if you’re looking for exact quantities, check out the bottom of the article where everything is neatly listed for printing!

    How to Make Candy Apples Iconic Fall Dessert

    Making Candy Apples is simpler than you might think! Follow these easy steps and enjoy the fun of creating this beloved fall dessert.

    Preparing the Baking Sheet

    First, let’s set up our workspace!

    Grease a baking sheet with cooking spray, ensuring that every corner gets coated to allow for easy removal later.

    Next, line it with parchment paper, adding another layer of goodness and lightly grease that too. Think of it as creating a cozy blanket for your candy apples!

    Preparing the Apples

    Now it’s time for the apples!

    Wash your Granny Smith apples under cool water, scrubbing off any wax residues. Dry them thoroughly—this step is essential! A dry apple means a sticky bond with the candy.

    Insert a long wooden stick into the stem end of each apple, pushing it about halfway through to secure it. This will be your handle when indulging in these artistic treats!

    Making the Candy Coating

    Let’s whip up that irresistible candy coating!

    In a heavy-bottomed medium pot, combine granulated sugar, light corn syrup, red food coloring, and water. Place the pot over medium-high heat and stir gently.

    Bring this mixture to a boil. Keep your eyes on it! You want to cook, without stirring, until the candy reaches the hard crack stage, which is about 150°C to 155°C. This should take around 15 to 20 minutes. Can you smell that sweetness already?

    Dipping the Apples

    Once your syrup reaches the right temperature, it’s showtime!

    Carefully remove the pot from the heat and let the bubbles calm down for about 30 seconds. At this point, you want to act quickly yet with caution.

    Dip each apple into the hot candy mixture, spinning it to achieve an even coat. Don’t forget to have fun with it! A good swirl can mean more crunch in every bite!

    Cooling and Serving

    Finally, let’s set these beauties up for cooling!

    Gently place your candy-coated apples onto the prepared baking sheet to harden. Allow them to sit at room temperature until the candy shell is completely cool and firm.

    Once ready, they’re perfect for sharing. Just imagine the faces of your family and friends when they take that first bite of your homemade Candy Apples. Pure joy!

    Tips for Success

    • Prep all ingredients beforehand to streamline your process.
    • Ensure apples are completely dry for the best candy adhesion.
    • Use a candy thermometer for accurate temperature readings.
    • Work quickly but carefully when dipping the apples.
    • If the candy hardens too quickly, gently reheat it on low.
    • Store any leftover candy apples in a cool, dry place.

    Equipment Needed

    • Heavy-bottomed pot: A regular saucepan works fine too if you don’t have a candy pot.
    • Candy thermometer: If you don’t have one, watch for the bubbling and color changes instead!
    • Wooden sticks: Skewers or sturdy popsicle sticks can be used in their place.
    • Baking sheet: A simple tray will do just as well!

    Variations

    • Caramel Coating: Swap the candy coating for homemade caramel sauce for a gooey twist that’s equally delightful!
    • Nutty Crunch: After dipping, roll the coated apples in chopped nuts like peanuts or almonds for added texture and flavor.
    • Chocolate Drizzle: Melt dark or white chocolate and drizzle over the hardened candy coating for a decadent finish.
    • Flavor Infusion: Add a splash of vanilla extract or a sprinkle of cinnamon to the candy mixture for an aromatic enhancement.
    • Mini Apples: For a fun bite-sized treat, use small apples to make adorable mini candy apples perfect for little hands!

    Serving Suggestions

    • Pair your Candy Apples with a warm cup of spiced apple cider for a cozy fall treat.
    • Serve alongside a simple cheese platter to balance the sweetness with savory flavors.
    • Display your candy apples on a festive tray, adding fall leaves or small pumpkins for a seasonal touch.
    • Add a scoop of vanilla ice cream for a delightful contrast with the crunchy candy.

    FAQs about Candy Apples Iconic Fall Dessert

    How do I store my Candy Apples?
    To keep your delicious Candy Apples fresh, place them in a cool, dry area. You can store them in a container separated by parchment paper to avoid sticking. Just remember that humidity can cause the candy coating to become sticky!

    Can I use other types of apples?
    Absolutely! While Granny Smith apples are perfect for their tartness, feel free to experiment with other varieties. Sweet apples like Fuji or Gala can create a sweeter treat that still satisfies your cravings for this iconic fall dessert.

    What if the candy hardens too quickly?
    If the candy coating hardens before you can dip the apples, don’t worry! Simply place the pot back on low heat and give it a gentle stir until it becomes workable again. A little patience goes a long way!

    Can I make these ahead of time for a party?
    Yes, making Candy Apples ahead of time is a great idea! Just make sure to keep them stored in a cool, dry place and serve them within a few days for the best crunch and flavor. They’ll be the highlight of any autumn gathering!

    What’s the best way to display Candy Apples?
    For a stunning presentation of your Candy Apples, consider arranging them on a decorative platter. Add some seasonal decorations like small pumpkins or autumn leaves to create a festive vibe that’s sure to impress your guests!

    Final Thoughts

    Creating Candy Apples is not just about satisfying a sweet tooth; it’s about capturing the essence of fall and sharing it with loved ones. The laughter, the sticky fingers, and the sheer joy of taking that first crunchy bite make the effort worthwhile. This iconic fall dessert brings people together, transforming ordinary moments into cherished memories. So, don your apron and embrace the warmth of the season with this delightful treat. Your family will love each candy-coated crunch, and you’ll enjoy the happiness it brings to your gatherings. Happy cooking!


    Print

    clock clock iconcutlery cutlery iconflag flag iconfolder folder iconinstagram instagram iconpinterest pinterest iconfacebook facebook iconprint print iconsquares squares iconheart heart iconheart solid heart solid icon

    Description

    Candy Apples are a classic fall dessert that combines the tartness of Granny Smith apples with a sweet, crunchy candy coating. Perfect for autumn gatherings!


    • 400 g granulated sugar
    • 120 ml light corn syrup
    • 16 drops red food coloring
    • 180 ml water
    • 6 medium Granny Smith apples
    • Cooking spray

    1. Grease a baking sheet with cooking spray, line it with parchment paper, then lightly grease the parchment as well to ensure easy removal.
    2. Wash and thoroughly dry apples. Insert a long wooden stick into the stem end of each apple, pushing it about halfway through to secure.
    3. In a heavy-bottomed medium pot equipped with a candy thermometer, combine granulated sugar, light corn syrup, red food coloring, and water. Place over medium-high heat and bring to a boil. Cook, without stirring, until the mixture reaches 150°C to 155°C (hard crack stage), about 15 to 20 minutes.
    4. Once the syrup has reached the hard crack stage, immediately remove the pot from the heat. Allow bubbles to subside for 30 seconds to 1 minute. Working quickly and carefully, dip each apple into the hot candy mixture, rotating to coat evenly.
    5. Transfer the coated apples to the prepared baking sheet and let stand at room temperature until the candy shell is completely cool and hardened before serving.

    Notes

    • Be sure to have all ingredients prepped before starting the candy coating to work efficiently.
    • Make sure the apples are completely dry before dipping to ensure better adhesion of the candy coating.
    • Prep Time: 15 minutes
    • Cook Time: 20 minutes
    • Category: Dessert
    • Method: Stovetop
    • Cuisine: American

    Nutrition

    • Serving Size: 1 candy apple
    • Calories: 250
    • Sugar: 45 g
    • Sodium: 2 mg
    • Fat: 0 g
    • Saturated Fat: 0 g
    • Unsaturated Fat: 0 g
    • Trans Fat: 0 g
    • Carbohydrates: 65 g
    • Fiber: 3 g
    • Protein: 0 g
    • Cholesterol: 0 mg

    Sharing is caring!

  • Apple Cider Braised Pork Shoulder

    Apple Cider Braised Pork Shoulder


    Introduction to Apple Cider Braised Pork Shoulder

    When the fall leaves start to drop, nothing beats having a strong meal made at home. This Apple Cider Braised Pork Shoulder has turned into my top pick for snug get-togethers or family suppers. It is a dish that easily brings together moist pork with the sweet taste of apple cider, making real cooking wonder.

    This recipe is not just tasty. It is low effort, high reward which makes it a great offering on busy weeknights or even when there is a special occasion. With very little effort in the preparation and an almost no-work cooking process, impressing your loved ones does not require you to spend the whole day in the kitchen!

    Why You’ll Love This Apple Cider Braised Pork Shoulder

    This Apple Cider Braised Pork Shoulder is a true game-changer for your dinner routine. It requires minimal hands-on time, allowing you to tackle other tasks while it cooks. The sweet, tangy apple cider pairs beautifully with savory pork, resulting in a melt-in-your-mouth dish that feels like a warm hug. Plus, it’s an impressive centerpiece sure to delight family and friends during any gathering!

    Ingredients for Apple Cider Braised Pork Shoulder

    Gathering the right ingredients is essential for making a perfect Apple Cider Braised Pork Shoulder. Each component contributes its own unique flavor, creating a symphony of tastes. Here’s what you’ll need:

    • Pork shoulder roast: This is the star of the show! Opt for boneless for easy slicing or bone-in for extra flavor. It becomes incredibly tender when braised.
    • Neutral oil: An oil like canola or sunflower is perfect for searing the meat. It allows for a nice golden crust without any strong flavors.
    • Fresh apple cider: This is the backbone of your braising liquid. Choose a good quality cider for the best flavor—this isn’t the time for vinegar!
    • Chicken stock or broth: Adding stock enhances depth. You can use homemade or store-bought; just make sure it’s low-sodium to avoid over-salting.
    • Dijon mustard: This little addition gives a subtle tang and richness to the dish, elevating the flavors to new heights.
    • Dehydrated minced onion: A sprinkle of this adds a sweet onion flavor without the need for chopping. It blends seamlessly into the braising liquid!
    • Garlic: Roasting a head of garlic brings out a sweet nuttiness that will infuse the pork with incredible flavor.
    • Fresh rosemary and thyme: These herbs add a fragrant earthiness. Together, they create the herb bouquet that complements the apple cider perfectly.
    • Red onion: Sliced thickly, it becomes wonderfully soft and sweet during the braising process, enriching the overall dish.
    • Firm apples (like Honeycrisp or Pink Lady): These apples hold their shape beautifully while adding sweetness and moisture to the dish.
    • Kosher salt and freshly cracked black pepper: Essential for seasoning and enhancing all the flavors. Use them generously, but taste as you go.

    For exact measurements, you can check the end of the article. Happy cooking!

    How to Make Apple Cider Braised Pork Shoulder

    Creating the perfect Apple Cider Braised Pork Shoulder is rewarding and simple. Here’s how to do it step by step. Follow these instructions to make a delicious and tender pork roast that your family will adore!

    Step 1: Preheat the Oven

    First things first—preheat your oven to 165°C (325°F). Preheating is essential for even cooking, ensuring that your pork shoulder braises perfectly from the start. There’s nothing worse than a roast that sits in a cold oven! Let it heat while you prepare everything else.

    Step 2: Prepare the Pork

    Next, it’s time to trim and season your pork shoulder. If there’s excess fat, trim it down a bit to prevent greasiness. For boneless cuts, you can cut the roast into four large pieces. Once it’s prepped, pat the pork dry with paper towels. Season it generously with kosher salt and freshly cracked black pepper on all sides. This step is crucial as it will enhance the overall flavor on every bite, making your braised pork truly unforgettable.

    Step 3: Sear the Pork

    Heat a tablespoon of neutral oil in a large Dutch oven over medium-high heat. Once hot, sear the pork pieces in batches, about 4–5 minutes per side, until they’re beautifully browned. The searing process locks in those savory flavors and creates a wonderful crust. You’ll know it’s ready to flip when it releases easily from the pan. If it sticks, give it a bit more time!

    Step 4: Make the Braising Liquid

    While the pork is browning, combine the fresh apple cider, chicken stock, Dijon mustard, and dehydrated onion in a bowl. Each ingredient adds a unique layer of flavor. The apple cider provides sweetness, while the chicken stock deepens the savory notes. The Dijon mustard adds a subtle tang, tying everything together beautifully. This braising liquid will become the lifeblood of your dish!

    Step 5: Braise the Pork

    Once your pork is seared, return it to the Dutch oven and pour in the prepared braising liquid. Nestle the herb bundle and head of garlic among the pork. Cover it with the lid and place it in your preheated oven. Braise the pork for about 3 hours. Keep an eye on the time. After 2.5 hours, check the doneness. You want the meat to be fork-tender but not falling apart!

    Step 6: Add Apples and Onions

    After the initial braising, pull the Dutch oven out and carefully arrange thick slices of red onion and firm apple wedges around the pork. These additions not only enhance the flavor but also keep the pork moist. The onions will caramelize, while the apples soften, blending sweetness and savory into a joyous flavor festival. Cover and return to the oven for another 30–45 minutes, until everything is tender and aromatic.

    Step 7: Rest and Serve

    When the cooking time is up, let the pork rest in the braising liquid for about 30 minutes. This resting step is crucial, as it allows the juices to redistribute, keeping the meat succulent. Squeeze the roasted garlic into the broth for an extra flavor boost. When ready to serve, slice the pork and arrange it beautifully on a platter with those luscious apples and onions. You’ll be amazed at how simple yet impressive your Apple Cider Braised Pork Shoulder turns out!

    Tips for Success

    • Don’t rush the searing! Take your time to create that delicious crust.
    • Season generously—don’t be shy with the salt and pepper for the best flavor.
    • Use a meat thermometer to check for doneness; it should reach about 93°C (200°F).
    • Let the pork rest before serving to enhance juiciness.
    • Try pairing with roasted vegetables for a complete meal!

    Equipment Needed

    • Large Dutch oven: A sturdy Dutch oven is ideal for braising, but a heavy pot with a tight-fitting lid works too.
    • Cutting board: A good board is essential for safely prepping your pork and vegetables.
    • Sharp knife: A sharp knife makes trimming and slicing a breeze.
    • Whisk: Handy for mixing the braising liquid together smoothly.
    • Meat thermometer: This tool ensures your pork reaches that perfect fork-tender stage.

    Variations of Apple Cider Braised Pork Shoulder

    • Herb Variations: Swap out rosemary and thyme for sage or marjoram for a different aromatic profile. Each offers its unique flavor that compliments the dish.
    • Spicy Kick: Add a pinch of crushed red pepper flakes or a diced jalapeño to the braising liquid for a warm spice that pairs beautifully with the sweetness of the cider.
    • Different Fruits: Experiment with other fruits like pears or even cranberries for a fun twist. They’ll add a different sweetness and flavor dimension to the plate.
    • Low-Sodium Adaptation: Use low-sodium chicken broth and opt for unsalted mustard for a heart-healthier version of this dish without sacrificing flavor.
    • Instant Pot Method: For a faster option, use an Instant Pot to braise the pork shoulder. Adjust the liquid as needed and follow the pressure cooking instructions for tender results in less time.

    Serving Suggestions

    • Side Dishes: Pair your Apple Cider Braised Pork Shoulder with creamy mashed potatoes or roasted Brussels sprouts for balance.
    • Drinks: A nice glass of crisp apple cider or a light Pinot Noir complements the flavors beautifully.
    • Presentation: Serve on a rustic wooden board, garnished with fresh herbs for an inviting touch.

    FAQs about Apple Cider Braised Pork Shoulder

    Chances are, you might have a few questions about this Apple Cider Braised Pork Shoulder. Here are some common inquiries I’ve encountered, along with helpful answers to guide you on your culinary adventure!

    Can I use apple cider vinegar instead of apple cider?

    No, it’s best to stick with fresh apple cider. Apple cider vinegar has a completely different flavor profile and acidity level. It won’t create that rich, sweet braising liquid that complements the pork shoulder perfectly!

    How do I know when the pork is done cooking?

    The pork is done when it reaches an internal temperature of about 93°C (200°F). At this point, it should be fork-tender and easy to pull apart. A meat thermometer is your best friend here!

    Can I prepare this dish ahead of time?

    Absolutely! You can braise the pork ahead of time and refrigerate it in the braising liquid. When you’re ready, simply reheat it on the stovetop and enjoy! The flavors might even deepen overnight.

    What if I don’t have a Dutch oven?

    If you don’t have a Dutch oven, don’t worry! Any heavy pot with a tight-fitting lid will do. Just ensure it’s oven-safe and large enough to hold the pork comfortably.

    What side dishes pair well with Apple Cider Braised Pork Shoulder?

    Great question! This dish goes wonderfully with creamy mashed potatoes, roasted vegetables, or even a fresh green salad. Pairing it with a crisp apple cider or a light red wine can also elevate your meal!

    Final Thoughts

    The joy of preparing this Apple Cider Braised Pork Shoulder lies in the aromas that fill your kitchen and the delightful smiles around the table. It’s more than just a meal; it’s an experience that brings family and friends together, a feast for both the belly and the heart. With its tender meat and sweet, tangy sauce, you’ll find it’s the kind of comfort food that warms not only your stomach but also your soul. I hope this recipe becomes a cherished part of your cooking repertoire, just as it has in mine!


    Print

    clock clock iconcutlery cutlery iconflag flag iconfolder folder iconinstagram instagram iconpinterest pinterest iconfacebook facebook iconprint print iconsquares squares iconheart heart iconheart solid heart solid icon

    Description

    A delicious and tender pork shoulder roast, braised in apple cider with fresh herbs, apples, and onions.


    • 22.2 kg pork shoulder roast or Boston butt roast, boneless or bone-in
    • 2 tablespoons neutral oil (such as canola or sunflower)
    • 2 cups (480 ml) fresh apple cider
    • 2 cups (480 ml) chicken stock or broth
    • 2 tablespoons Dijon mustard
    • 1 tablespoon dehydrated minced onion
    • 1 head garlic, top sliced off opposite the root
    • 3 sprigs fresh rosemary
    • 4 sprigs fresh thyme
    • 1 large red onion, sliced thickly
    • 2 firm, slightly tart apples (such as Honeycrisp or Pink Lady), peeled and cut into wedges
    • Kosher salt, to taste
    • Freshly cracked black pepper, to taste

    1. Preheat oven to 165°C.
    2. Trim excess fat from the pork shoulder if necessary. Cut into 4 large pieces if boneless, or leave whole if bone-in. Pat pork dry and season generously on all sides with kosher salt and black pepper.
    3. Heat oil in a large Dutch oven over medium-high heat. Once hot, sear pork pieces in batches if needed, about 4–5 minutes per side, until deeply browned on all sides. Transfer browned pork to a plate if working in batches.
    4. While searing pork, whisk together apple cider, chicken stock, Dijon mustard, and dehydrated onion in a bowl. Bundle rosemary and thyme sprigs together using kitchen twine.
    5. Return all pork to the Dutch oven. Pour in the braising liquid. Nestle the herb bundle and prepared garlic head among the pork. Cover with the lid and place in the oven.
    6. Braise pork for 3 hours (begin checking doneness at 2.5 hours for boneless cuts), flipping meat halfway through, until almost fork-tender.
    7. Remove the Dutch oven and arrange apple wedges and red onion slices around the pork. Cover and return to the oven for 30–45 minutes until the pork is very tender and the apples and onions are softened.
    8. Let pork rest in the braising liquid for 30 minutes after removing from the oven. Squeeze out roasted garlic cloves into the broth or onto the pork. Adjust seasoning in the braising liquid with additional salt and pepper if needed. Serve pork with braised apples, onions, and spoon over juices.

    Notes

    • Do not use apple cider vinegar as a substitute for fresh apple cider.
    • Ensure to check the pork’s doneness after 2.5 hours for boneless cuts to prevent overcooking.
    • Allowing the pork to rest in the braising liquid enhances its flavor and juiciness.
    • Prep Time: 30 minutes
    • Cook Time: 3 hours 45 minutes
    • Category: Main Course
    • Method: Braising
    • Cuisine: American

    Nutrition

    • Serving Size: 1 serving
    • Calories: 450
    • Sugar: 12g
    • Sodium: 800mg
    • Fat: 24g
    • Saturated Fat: 8g
    • Unsaturated Fat: 16g
    • Trans Fat: 0g
    • Carbohydrates: 30g
    • Fiber: 3g
    • Protein: 30g
    • Cholesterol: 120mg

    Sharing is caring!