Author: IHAAL Team

  • Italian sliders

    Italian sliders


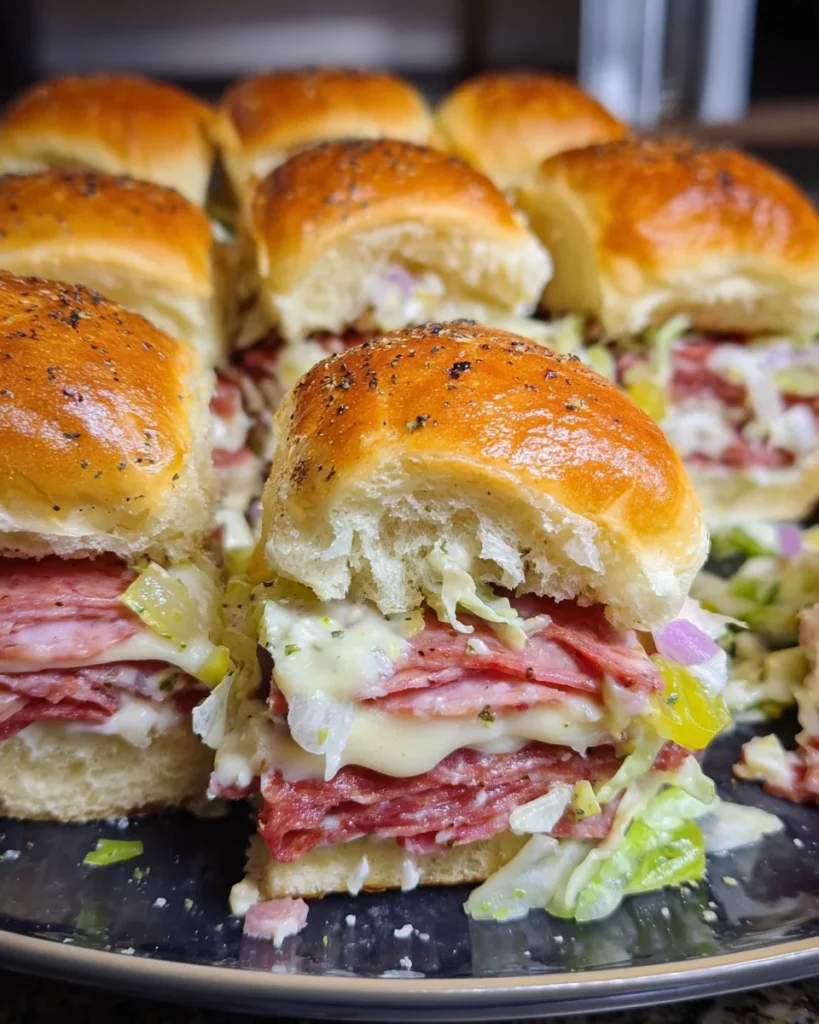
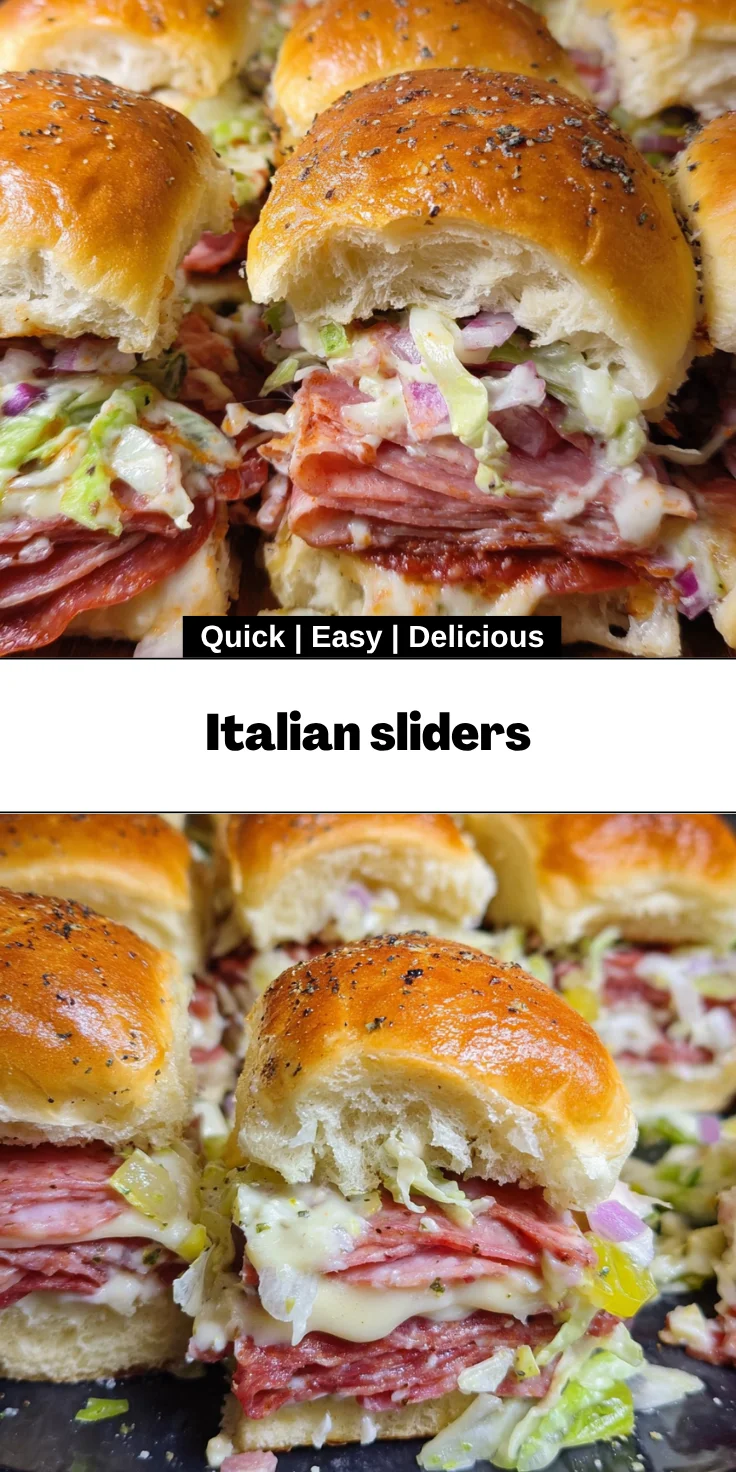
    Introduction to Italian Sliders

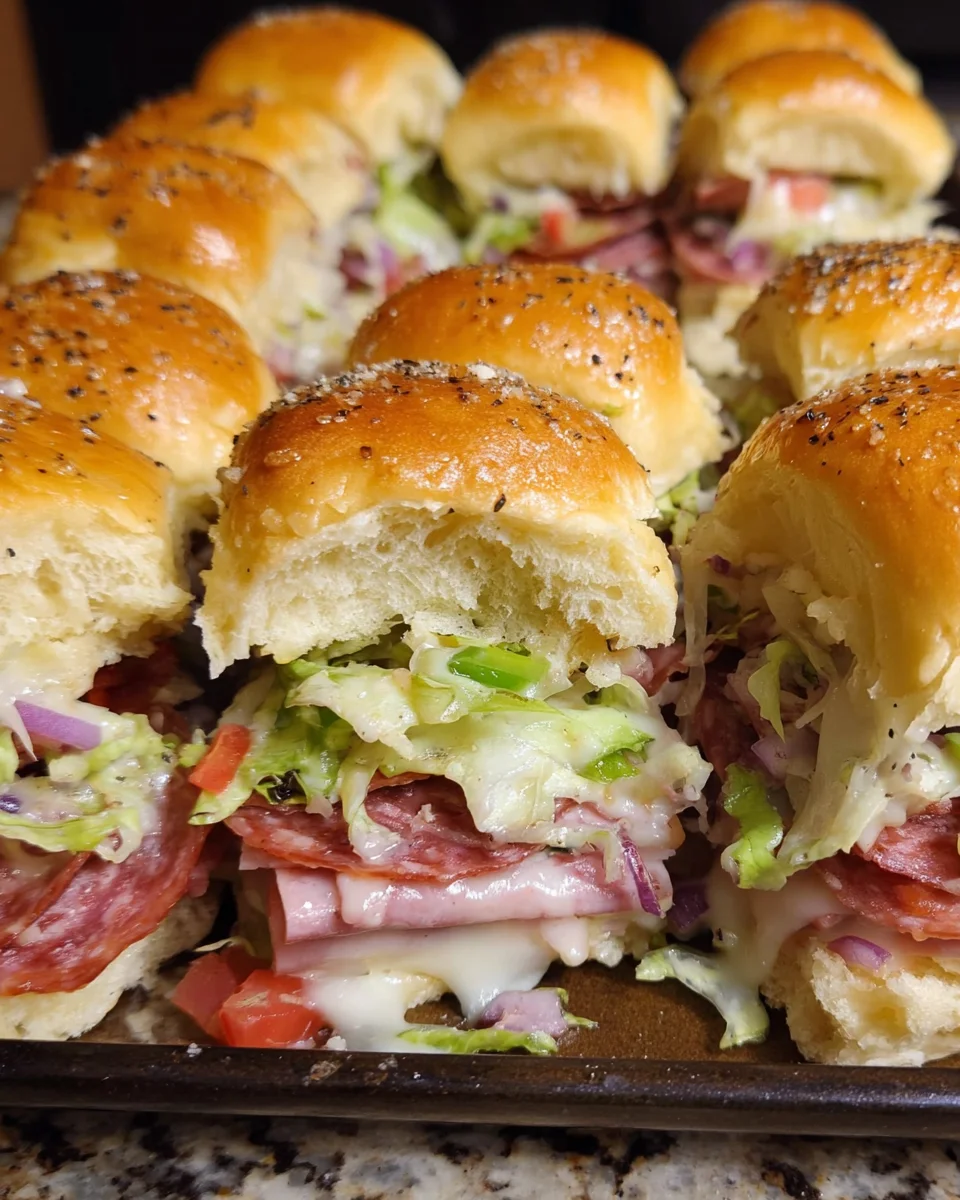
    As a busy mom, I know how challenging it can be to whip up something delicious yet quick on weeknights. That’s where these Italian sliders come in! With their delightful combination of savory meats and a zesty topping, they are perfect for impressing your family or friends without breaking a sweat. Imagine pulling these warm, cheesy sliders out of the oven—it’s like a warm hug for your taste buds! This recipe doesn’t just save time; it’s also a fun way to create lasting memories around the dinner table.

    Why You’ll Love This Italian Sliders

    These Italian sliders are a lifesaver for anyone juggling a packed schedule. With just 35 minutes from prep to plate, you can dive into a meal bursting with flavor without sacrificing precious time. They’re perfect for feeding hungry kids, unexpected guests, or simply treating yourself after a long day. Plus, their irresistible taste will have everyone coming back for seconds—and maybe even thirds!

    Ingredients for Italian Sliders

    Gathering the perfect ingredients for these Italian sliders is half the fun! Here’s what you’ll need:

    • Hawaiian rolls: These sweet and soft rolls serve as the foundation for your sliders. Their sweetness balances out the savory meats beautifully.
    • Mayonnaise: Used for spreading on the rolls, it adds creaminess and ensures each bite is moist.
    • Provolone cheese: This mild, melty cheese takes the flavor profile to the next level, offering a beautifully stretchy texture.
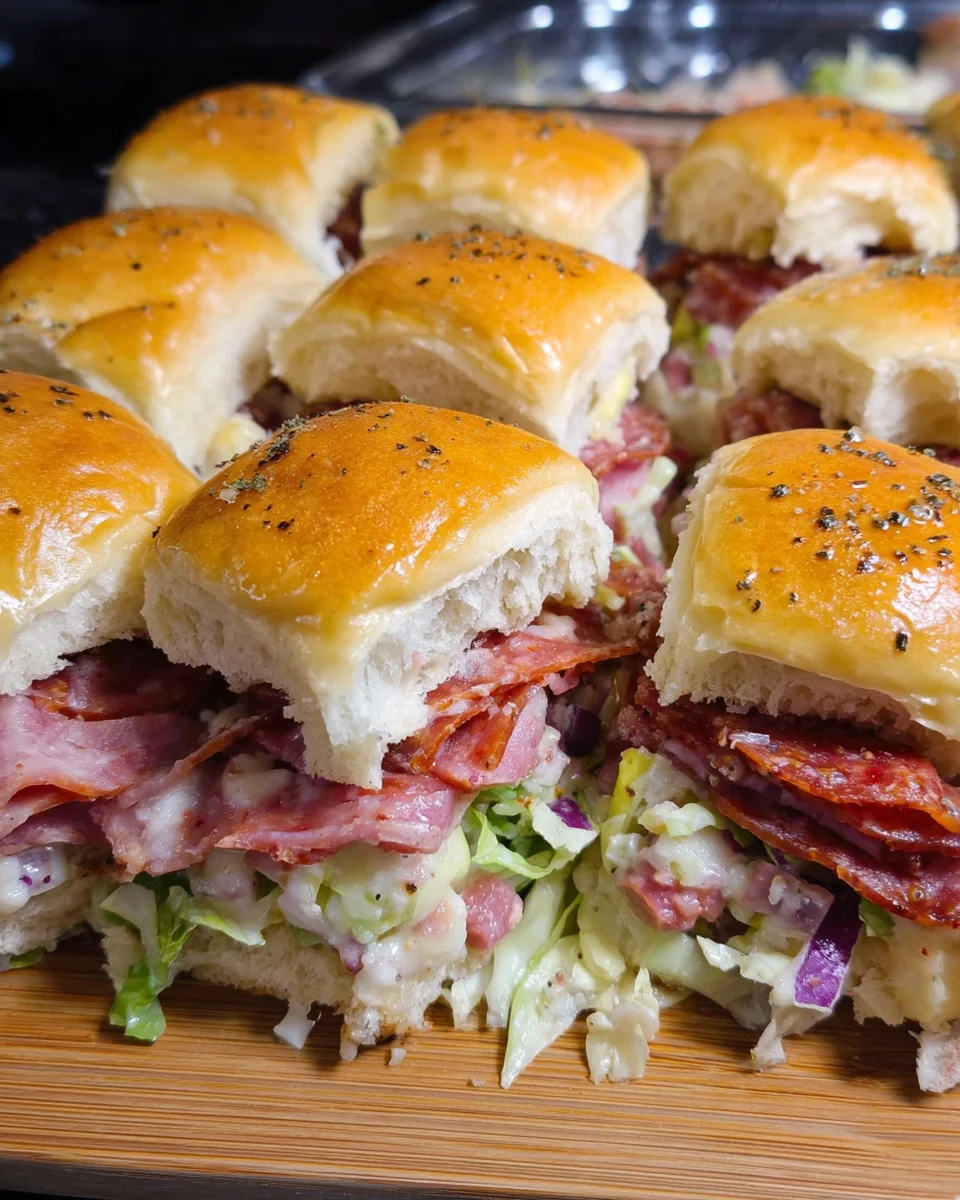
    • Hard salami, pepperoni, and ham: A trio of delectable meats. The hard salami adds a robust flavor, while the pepperoni and ham provide a lovely balance and richness.
    • Butter: Melting it with herbs gives the sliders a savory, buttery finish that’s simply irresistible.
    • Spices (garlic powder, oregano, basil): These dried herbs add depth to the taste. Feel free to switch them up to match your preferences!
    • Shredded lettuce: This fresh addition gives a delightful crunch and lightens the overall flavor of the sliders.
    • Red onion: The diced onion adds a bit of sharpness, balancing the richness of the meat and cheese perfectly.
    • Banana peppers: These tangy little gems bring a wonderful pop of flavor and a hint of heat.
    • Dill relish: For a little sweetness and crunch, this relish enhances the flavor of the lettuce mixture.
    • Italian dressing: This zesty dressing ties the toppings together, bringing everything to life with its bright flavors.

    For exact quantities of each ingredient, check towards the bottom of this article, where you’ll find everything available for printing. Remember, you can always customize the ingredients to suit your family’s tastes! Try adding some sliced tomatoes or other veggies for a personal twist!

    How to Make Italian Sliders

    Step 1: Preheat the Oven

    Preheating the oven is critical to getting those sliders just right. Set it to 400 degrees Fahrenheit. This ensures your Italian sliders bake evenly and quickly, resulting in that gooey cheese and perfectly toasted rolls every time. Trust me; it’s worth the wait!

    Step 2: Prepare the Lettuce Mixture

    While the oven warms up, grab a medium-sized bowl. Toss in the shredded lettuce, diced red onion, banana peppers, dill relish, a bit of mayonnaise, and a splash of Italian dressing. Stir it all together until well mixed. This colorful topping adds freshness and a crunch that beautifully contrasts the sliders’ rich flavors. Cover with plastic wrap and let it chill in the fridge. It’s like giving your sliders a refreshing dressing room break!

    Step 3: Cook the Meats

    In a skillet over medium heat, combine the chopped ham, pepperoni, and salami. Cook until heated through, stirring occasionally. The key here is to let the flavors meld together and create a mouthwatering aroma—it’ll have everyone wandering into the kitchen! Once the meats are heated, remove them from the heat and let them cool slightly before assembling your sliders.

    Step 4: Assemble the Sliders

    Now, let’s build those beautiful sliders! Start by placing the bottom halves of the Hawaiian rolls in a 9×13 baking dish. Spread a layer of mayonnaise on these rolls for extra creaminess. Next, stack the provolone cheese on top, followed by the meat mixture spread evenly. Finally, place the tops of the rolls over the meat. This stacking not only keeps the flavors intact but also ensures that each bite is packed with goodness!

    Step 5: Bake and Enjoy

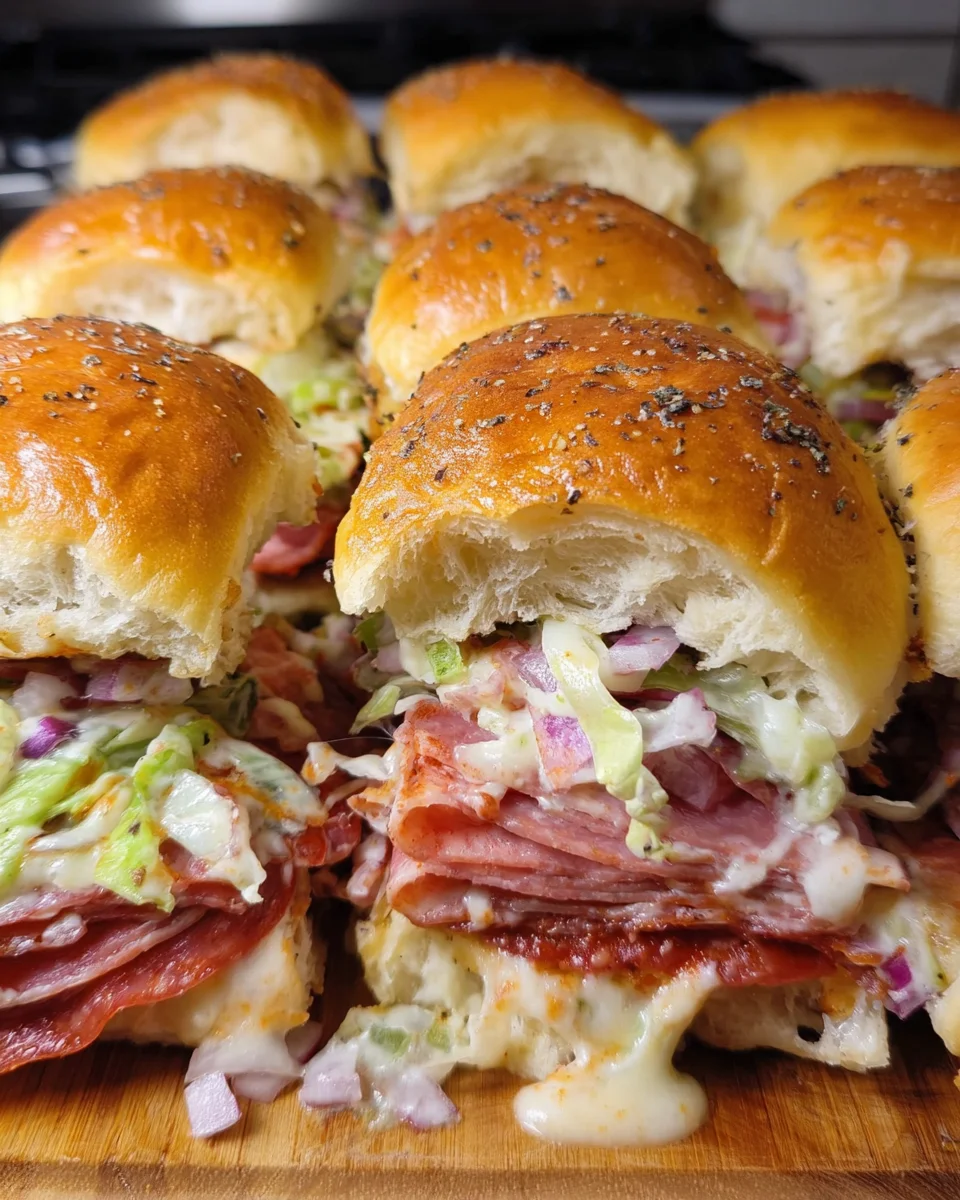
    Brush the tops of the rolls with your melted garlic herb butter mixture for that golden touch. Bake in the oven for about 5 minutes, just until the cheese is melty and the tops are golden brown. The aroma will have everyone gathering around! Remove and carefully lift off the tops. Spread the chilled lettuce mixture on the meat, replace the tops, and give an optional second brush of butter for added flavor. Slice and dig in—pure Italian slider bliss!

    Tips for Success

    • Prep the lettuce mixture ahead of time; it stays fresh in the fridge for a few hours.
    • Experiment with your favorite meats to create a slider that perfectly suits your family’s taste buds.
    • For extra crunch, consider throwing in some sliced tomatoes or cucumbers.
    • Let the sliders rest for a few minutes after baking for easier slicing.
    • Serve with a side of marinara for dipping for an extra layer of flavor!

    Equipment Needed for Italian Sliders

    • 9×13 baking dish: Essential for holding your assembled sliders. A similar-sized casserole dish works too!
    • Skillet or frying pan: Needed for cooking the meats. Any large pan will do, just ensure it has high sides.
    • Mixing bowl: For combining your lettuce mixture. A large bowl or even a salad spinner works!

    Variations of Italian Sliders

    • Vegetarian option: Swap the meats for roasted vegetables like zucchini, bell peppers, and mushrooms for a hearty, plant-based version.
    • Spicy twist: Add jalapeños or spicy Italian sausage for a fiery kick that adventurous eaters will love.
    • Gluten-free sliders: Use gluten-free rolls to ensure everyone can enjoy these sliders without worry.
    • Cheese lovers: Layer extra cheese varieties, like mozzarella or cheddar, for that melty gooey goodness.
    • Caprese-inspired: Incorporate fresh basil leaves and sliced tomatoes into the mixture for a refreshing Italian twist.

    Serving Suggestions for Italian Sliders

    • Pair with a simple green salad for a light and refreshing contrast.
    • Serve with homemade potato chips or sweet potato fries for that perfect crunch.
    • A cold Italian soda or sparkling water complements the flavors beautifully.
    • Arrange sliders on a platter with dipping sauces like marinara for added excitement.
    • Add fresh herbs or a sprinkle of grated Parmesan for a pop of color and flavor.

    FAQs about Italian Sliders

    Can I make Italian sliders ahead of time?
    Absolutely! You can assemble the sliders earlier in the day and store them covered in the fridge. Just pop them in the oven when you’re ready to serve. This makes them a fantastic option for parties or busy weeknights!

    What can I serve with Italian sliders?
    Italian sliders pair beautifully with a crisp salad, homemade fries, or even a charcuterie board. You can also serve them with marinara sauce on the side for dipping, which adds a delightful touch!

    Can I use different types of meats?
    Definitely! Feel free to mix and match your favorite deli meats. Turkey, roast beef, or even a vegetarian patty can work well in this recipe, allowing you to customize it for your taste buds.

    How do I store leftovers?
    If you have leftover Italian sliders, store them in an airtight container in the fridge. They typically stay fresh for about 3 to 4 days. You can reheat them in the oven for a few minutes to regain that warm, melty goodness!

    Are these sliders kid-friendly?
    Absolutely! Their bite-sized nature and delicious flavors make them perfect for kids. You can even let them customize their sliders with fun toppings, making mealtime an exciting adventure!

    Final Thoughts

    These Italian sliders are more than just a meal; they’re a celebration of flavors wrapped in warmth and love. Every bite takes you on a delightful journey straight to Italy, creating memories around your dinner table.

    As a busy mom, I cherish recipes that bring my family together without fuss. The blend of savory meats, gooey cheese, and that crispy lettuce topping is a symphony for your taste buds. Whether it’s a weeknight dinner or a party with friends, these sliders will always impress. Enjoy creating joy, laughter, and deliciousness—one slider at a time!


    Print

    clock clock iconcutlery cutlery iconflag flag iconfolder folder iconinstagram instagram iconpinterest pinterest iconfacebook facebook iconprint print iconsquares squares iconheart heart iconheart solid heart solid icon

    Description

    Delicious Italian sliders packed with meats and topped with a flavorful lettuce mixture.


    • 12 Hawaiian rolls, cut in half
    • ⅓ cup mayonnaise
    • 12 slices provolone cheese
    • ½ pound hard salami, coarsely chopped
    • ½ pound pepperoni, coarsely chopped
    • ½ pound ham, coarsely chopped
    • ¼ cup butter, melted
    • ½ teaspoon garlic powder
    • ½ teaspoon oregano
    • ½ teaspoon basil
    • 8 ounce bag shredded lettuce
    • ½ cup red onion, diced
    • ½ cup chopped banana peppers
    • ¼ cup mayonnaise
    • ¼ cup dill relish
    • ¼ cup Italian dressing

    1. Preheat oven to 400 degrees.
    2. In a medium bowl, mix lettuce, red onions, relish, banana peppers, mayonnaise, and dressing together until combined. Cover with plastic wrap and place in the fridge to chill.
    3. In a skillet or frying pan over medium heat, add chopped ham, pepperoni, and salami and cook until heated through.
    4. Place bottom rolls in a 9×13 baking dish. Spread mayo over the bottom rolls. Place in the oven for 8 minutes.
    5. Remove from the oven and top with provolone cheese.
    6. Next, add meat mixture on top of the cheese, and spread out evenly.
    7. Replace the top rolls.
    8. In a small bowl, mix butter, garlic powder, oregano, basil together.
    9. Brush the tops of the rolls with the melted butter mixture.
    10. Place back in the oven for 5 minutes.
    11. Remove from oven and carefully take off the top buns.
    12. Spread the lettuce mixture over the meat, replace the top rolls, brush with additional butter, if desired, and enjoy!

    Notes

    • For added flavor, let the sliders sit briefly before serving.
    • You can use your favorite types of meats for customization.
    • Optional: Add sliced tomatoes or other vegetables for extra crunch.
    • Prep Time: 20 minutes
    • Cook Time: 15 minutes
    • Category: Appetizer
    • Method: Baking
    • Cuisine: Italian

    Nutrition

    • Serving Size: 1 slider
    • Calories: 250
    • Sugar: 1g
    • Sodium: 800mg
    • Fat: 15g
    • Saturated Fat: 6g
    • Unsaturated Fat: 6g
    • Trans Fat: 0g
    • Carbohydrates: 20g
    • Fiber: 1g
    • Protein: 10g
    • Cholesterol: 40mg

    Sharing is caring!

  • Sicilian Cauliflower Salad

    Sicilian Cauliflower Salad


    Introduction to Sicilian Cauliflower Salad

    Welcome to my kitchen, where flavors come alive and busy schedules find a little breathing room! If you’re like me, juggling family, work, and everything in between, you understand how precious time is. This Sicilian Cauliflower Salad is one of those delightful finds that taste as vibrant as it looks. It’s packed with crunchy cauliflower, briny olives, and zesty dressing, making it not only a feast for the eyes but also a refreshing escape for your palate. Quick to prepare and bursting with nutrients, this salad is perfect for light dinners or side dishes. Let’s dive into this culinary gem!

    Why You’ll Love This Sicilian Cauliflower Salad

    This Sicilian Cauliflower Salad is a game-changer for those hectic days. It comes together in just 20 minutes, making it a breeze for busy moms like us. The bright, fresh flavors brighten any meal, and it’s versatile enough to serve as a main dish or a side. The crunch of the cauliflower paired with the savory olives and tangy dressing creates a satisfying bite that even picky eaters can’t resist. Who wouldn’t love that?

    Ingredients for Sicilian Cauliflower Salad

    This Sicilian Cauliflower Salad shines with a handful of fresh ingredients that bring a burst of color and flavor to your table. You’ll need a head of cauliflower, which provides that crunchy base. Don’t forget Kalamata and green olives for a briny punch. Capers add a unique touch of tang, while a finely sliced red onion brings sweetness and bite. Cherry tomatoes lend juiciness, and fresh parsley (and optional basil) contribute herbaceous brightness. For the dressing, extra virgin olive oil, red wine vinegar, lemon juice, Dijon mustard, and dried oregano come together beautifully. Specific quantities for these ingredients will be in the summary at the end for easy printing.

    How to Make Sicilian Cauliflower Salad

    Blanch the Cauliflower

    Start by bringing a large pot of salted water to a boil. This step is crucial as it helps enhance the cauliflower’s flavor and keeps it crisp. Once the water bubbles enthusiastically, add your cauliflower florets. Let them cook for 2 to 3 minutes until they become slightly tender but still have a crunch. Think of it like a quick dip in a warm spa! Drain the florets, then rinse them under cold water to stop the cooking process. Grab a paper towel or kitchen cloth to pat them dry gently. This will help the dressing stick better later on.

    Prepare the Dressing

    Now, let’s whip up that zesty dressing that’ll make your Sicilian Cauliflower Salad sing! In a small bowl or jar, combine the extra virgin olive oil, red wine vinegar, and lemon juice. Then, add a dollop of Dijon mustard, a sprinkle of dried oregano, and season generously with salt and pepper. Whisk or shake it up until everything is smooth and well combined. Tasting as you go is key! Adjust the seasoning if it needs a little more pizzazz. Remember, this dressing ties everything together, so make it your own!

    Assemble the Salad

    In a large mixing bowl, combine your blanched cauliflower, chopped Kalamata and green olives, drained capers, thinly sliced red onion, and halved cherry tomatoes. It’s like a colorful parade of ingredients, all eager to mingle. If you opted for basil, add it during this step too. This salad is versatile; feel free to toss in some radishes or cucumbers if they’re in your fridge waiting to shine. The vibrant colors are as good for the soul as they are for the stomach!

    Toss with the Dressing

    Time to unite this symphony of flavors! Pour the dressing over your salad and gently toss everything together. Make sure each piece is well coated; it’ll be mouthwatering! Let the salad sit for about 10 to 15 minutes at room temperature. This little waiting game allows the flavors to meld, creating a more delicious dish that’s worth the wait. Use this time to set the dinner table or sip on a refreshing drink.

    Serve

    Your Sicilian Cauliflower Salad is now ready to dazzle! You can serve it chilled or at room temperature—whatever fits your style. If preparing in advance, this salad can sit in the fridge for a couple of hours before serving, allowing the flavors to deepen. The beauty of this dish is its ease; it’s perfect for busy weeknights or a pleasant weekend gathering with friends. Watch as everyone enjoys every colorful bite!

    Tips for Success

    • Blanch your cauliflower ahead of time for quick assembly later.
    • Chill the salad for an hour before serving; it enhances the flavors.
    • Swap olives with your favorite pickled vegetables for a twist.
    • For extra crunch, add some toasted pine nuts or sunflower seeds.
    • Use a mason jar to store leftovers; it keeps everything fresh for days.

    Equipment Needed

    • Large pot: A 4–5 quart pot is ideal for blanching the cauliflower.
    • Colander: For draining and rinsing the cauliflower post-blanching.
    • Cutting board: Essential for slicing and chopping your ingredients.
    • Sharp knife: A good knife makes quick work of chopping.
    • Mixing bowl: A large bowl is perfect for tossing all the ingredients together.
    • Whisk or jar: Use either to blend the dressing smoothly.

    Variations

    • Add cooked quinoa or chickpeas for a protein boost, making it heartier.
    • Include roasted red peppers for a smoky flavor that complements the salad beautifully.
    • Substitute arugula for parsley for a peppery twist.
    • Incorporate avocado slices for a creamy finish.
    • Sprinkle with feta cheese for a savory touch if desired.

    Serving Suggestions

    • Pair your Sicilian Cauliflower Salad with grilled chicken or fish for a balanced meal.
    • Serve alongside crusty baguette or pita chips for added texture.
    • Accompany with a light white wine like Sauvignon Blanc to enhance the flavors.
    • Present the salad in a beautiful bowl for an inviting display.
    • Add a sprinkle of fresh herbs on top for a touch of elegance.

    FAQs about Sicilian Cauliflower Salad

    Here are some questions you might have about making this flavorful Sicilian Cauliflower Salad:

    Can I make this salad ahead of time?
    Absolutely! This salad tastes even better after the flavors meld. Prep it a few hours in advance and store it in the fridge.

    Is this salad suitable for meal prep?
    Yes! The Sicilian Cauliflower Salad is perfect for meal prep. Just store it in an airtight container, and it will stay fresh for up to two days.

    Can I add proteins to this salad?
    Definitely! Adding chickpeas or grilled chicken can turn this salad into a satisfying main dish.

    Can I substitute ingredients?
    Sure! Feel free to swap the olives or add seasonal vegetables according to your preference.

    Is this salad gluten-free?
    Yes, this vegan salad is naturally gluten-free and packed with nutrients!

    Final Thoughts

    This Sicilian Cauliflower Salad is more than just a dish; it’s an experience! With its fresh ingredients and vibrant colors, each bite provides a comforting taste of the Mediterranean—a perfect remedy for long, busy days. The versatility of this salad means it can easily adapt to your lifestyle, whether as a light meal or a vibrant side. I invite you to whip it up and make it your go-to recipe for gatherings and dinner nights alike. Trust me, once you try it, this delightful salad will quickly become a favorite in your home!


    Print

    clock clock iconcutlery cutlery iconflag flag iconfolder folder iconinstagram instagram iconpinterest pinterest iconfacebook facebook iconprint print iconsquares squares iconheart heart iconheart solid heart solid icon

    Description

    Welcome to my kitchen, where flavors come alive and busy schedules find a little breathing room! If you’re like me, juggling family, work, and everything in between, you understand how precious time is. This Sicilian Cauliflower Salad is one of those delightful finds that taste as vibrant as it looks. It’s packed with crunchy cauliflower, briny olives, and zesty dressing, making it not only a feast for the eyes but also a refreshing escape for your palate. Quick to prepare and bursting with nutrients, this salad is perfect for light dinners or side dishes. Let’s dive into this culinary gem!


    • 1 medium head of cauliflower, cut into florets
    • 1/2 cup Kalamata olives, pitted and chopped
    • 1/4 cup green olives, pitted and chopped
    • 2 tablespoons capers, drained
    • 1 small red onion, thinly sliced
    • 1 cup cherry tomatoes, halved
    • 1/4 cup fresh parsley, chopped
    • 1/4 cup fresh basil, chopped (optional)
    • 1/4 cup extra virgin olive oil
    • 3 tablespoons red wine vinegar
    • 1 tablespoon lemon juice
    • 1 teaspoon Dijon mustard
    • 1/2 teaspoon dried oregano
    • Salt and pepper, to taste

    1. Blanch the cauliflower: Bring a large pot of salted water to a boil. Add the cauliflower florets and cook for 2-3 minutes, just until slightly tender but still crisp. Drain and rinse under cold water to stop the cooking process. Pat dry with a paper towel or kitchen cloth.
    2. Prepare the dressing: In a small bowl or jar, whisk together the olive oil, red wine vinegar, lemon juice, Dijon mustard, oregano, salt, and pepper until well combined. Taste and adjust seasoning if necessary.
    3. Assemble the salad: In a large bowl, combine the blanched cauliflower, Kalamata and green olives, capers, red onion, and cherry tomatoes. Add the fresh parsley and basil, if using.
    4. Toss with the dressing: Pour the dressing over the salad and toss to coat evenly. Let the salad sit for 10-15 minutes to allow the flavors to meld together.
    5. Serve: Serve chilled or at room temperature. This salad can be made a few hours in advance to allow the flavors to develop even further.

    Notes

    • This salad can be stored in the refrigerator for up to two days.
    • Prep Time: 15 minutes
    • Cook Time: 5 minutes
    • Category: Salad
    • Method: Blanching and Mixing
    • Cuisine: Mediterranean

    Nutrition

    • Serving Size: 1 cup
    • Calories: 150
    • Sugar: 2g
    • Sodium: 300mg
    • Fat: 13g
    • Saturated Fat: 2g
    • Unsaturated Fat: 9g
    • Trans Fat: 0g
    • Carbohydrates: 10g
    • Fiber: 4g
    • Protein: 3g
    • Cholesterol: 0mg

    Sharing is caring!

  • Zucchini Orzo

    Zucchini Orzo


    Introduction to Zucchini Orzo

    Welcome to my kitchen, where culinary adventures unfold and delicious aromas fill the air! Today, let’s talk about a delightful dish that’s become a staple in my weekly rotation: Zucchini Orzo. This quick and flavorful meal brings together the best of fresh veggies and pasta, making it not just satisfying but also a great option for those busy weeknights. I love whipping this up when time is tight or when I want to impress my loved ones with something colorful and tasty. Trust me, you’re going to adore this simple yet vibrant recipe!

    Why You’ll Love This Zucchini Orzo

    This Zucchini Orzo dish is a lifesaver for busy moms and professionals like us. It’s quick to make, taking only 25 minutes from start to finish. Plus, the colorful veggies make it visually inviting. The taste? Absolutely heavenly! Each bite is a burst of flavors that dance on your palate. You can serve it warm for dinner or at room temperature for lunch—either way, it’s bound to become a family favorite!

    Ingredients for Zucchini Orzo

    Gathering the right ingredients is the first step to crafting this mouthwatering Zucchini Orzo. Here’s what you’ll need:

    • Orzo Pasta: This small pasta looks like rice and is perfect for absorbing flavors.
    • Zucchini: Fresh and diced, zucchini adds a lovely texture and a pop of green to your dish.
    • Cherry Tomatoes: Their sweetness brings a burst of color and flavor when halved.
    • Garlic: Minced garlic adds that irresistible aromatic punch, enhancing all the other ingredients.
    • Olive Oil: A little drizzle enriches the dish, making everything more luscious.
    • Parmesan Cheese: Grated, this cheese melts beautifully and adds savory depth.
    • Lemon Juice: Just a splash brightens the dish, balancing the flavors perfectly.
    • Fresh Parsley: Chopped parsley adds a fresh touch and a hint of color.
    • Italian Seasoning: A blend of herbs that brings the taste of Italy to your table.
    • Salt and Black Pepper: Essential seasonings to elevate the flavors.
    • Red Pepper Flakes (optional): For those who like a little heat, these flakes are a great addition.

    You can find exact quantities for each ingredient at the bottom of this article, ready for printing. Feel free to mix and match with whatever vegetables you have on hand—bell peppers, spinach, or even peas work nicely too!

    How to Make Zucchini Orzo

    Now, let’s dive into the fun part—making our delicious Zucchini Orzo! Follow these simple steps, and you’ll have a tasty meal on the table in no time. Grab your apron, and let’s get started!

    Step 1: Cook the Orzo

    Begin by bringing a pot of salted water to a boil. Once it’s bubbling like a hot spring, add in the orzo pasta. Cook according to the package instructions until it’s al dente. This is key for a perfect texture!

    Once done, drain the pasta, but don’t forget to reserve about half a cup of that starchy pasta water. It’ll come in handy later for silkiness!

    Step 2: Sauté the Garlic

    Next, grab a large skillet and heat some olive oil over medium heat. When it’s shimmering, toss in the minced garlic. Sauté it for about 30 seconds until fragrant—be careful not to let it burn. It’ll make your kitchen smell heavenly!

    Step 3: Cook the Zucchini

    Add the diced zucchini to the skillet and stir it well. Cook for about 4 to 5 minutes until it’s tender yet still has a bit of bite. This will give your Zucchini Orzo that beautiful texture that complements the pasta perfectly.

    Now, toss in those lovely halved cherry tomatoes and let them mingle for another 2 minutes, allowing their sweetness to infuse into the dish.

    Step 4: Combine Ingredients

    Turn the heat down a notch, and it’s time to unite all our hard work! Add the cooked orzo to the skillet. Sprinkle in the Italian seasoning, salt, black pepper, and a hearty squeeze of lemon juice.

    If it seems a bit dry, now’s the time to stir in some of that reserved pasta water. Just a splash will do to achieve that perfect consistency!

    Step 5: Finish with Parmesan and Parsley

    Remove the skillet from the heat, and it’s time to add that luscious grated parmesan. Stir it in until melted—trust me, it’ll be worth the wait!

    Finally, sprinkle the chopped parsley over the top for a touch of fresh beauty. This vibrant green really brings everything to life!

    Step 6: Serve and Enjoy

    Now for the best part: serving this colorful Zucchini Orzo! Plate it warm and don’t hold back on adding extra parmesan and a dash of red pepper flakes if you like a little kick.

    Gather your family or friends around the table, and enjoy the smiles that this dish will surely bring. Who knew something so simple could be so delightful?

    Tips for Success

    • Always reserve some pasta water—it’s your secret weapon for creaminess!
    • Don’t overcook the zucchini; it should be tender but not mushy for the best texture.
    • Experiment with herbs; fresh basil or oregano can elevate flavors even more!
    • If you have picky eaters, chop the tomatoes smaller or skip them entirely.
    • Make a double batch and enjoy leftovers for lunch—Zucchini Orzo tastes just as good the next day!

    Equipment Needed

    • Large Pot: For boiling orzo; a deep skillet can work if you’re in a pinch.
    • Skillet: A wide skillet is perfect for sautéing; a non-stick option helps with easy cleanup.
    • Wooden Spoon: Great for stirring; a spatula works too for mixing.
    • Measuring Cups: Handy for accurate ingredient portions—use your kitchen’s regular cups if needed!

    Variations of Zucchini Orzo

    • Protein Boost: Add grilled chicken, shrimp, or chickpeas for a heartier meal.
    • Vegetable Medley: Mix in bell peppers, spinach, or asparagus for extra nutrition and color.
    • Cheesy Delight: Substitute the parmesan with feta cheese or goat cheese for a different tang.
    • Herb Swap: Use fresh dill or cilantro instead of parsley for a unique flavor twist.
    • Gluten-Free Option: Substitute orzo with gluten-free pasta like quinoa or rice pasta to accommodate dietary preferences.

    Serving Suggestions for Zucchini Orzo

    • Pair with a Salad: A light mixed greens salad with a lemon vinaigrette complements the dish beautifully.
    • Serve with Crusty Bread: Warm, fresh bread is perfect for scooping up the Zucchini Orzo.
    • Garnish with Lemon Wedges: A squeeze of fresh lemon right before eating enhances the flavors.
    • Enjoy with Wine: A crisp white wine, like Pinot Grigio, elevates the meal.
    • Presentation Tip: Serve in a colorful bowl and sprinkle with extra parsley for a vibrant look!

    FAQs about Zucchini Orzo

    As I’ve shared my love for Zucchini Orzo, you might have a few questions swirling in your mind. No worries—I’ve got the answers right here!

    Can I make Zucchini Orzo ahead of time?

    Absolutely! This dish can be prepped ahead and stored in the fridge. Just reheat it gently before serving. The flavors will meld beautifully!

    Is Zucchini Orzo healthy?

    Yes, it’s a nutritious choice! Packed with fresh veggies, this dish is vegetarian and can be tailored to meet various dietary needs. Plus, it’s lower in calories compared to many creamy pasta dishes.

    What can I pair with Zucchini Orzo?

    Zucchini Orzo goes well with light proteins like grilled chicken or fish. You can also enjoy it with a fresh salad or some crusty bread on the side. It’s all about balance!

    How do I store leftovers?

    Leftovers are easy to store in an airtight container in the fridge. They’ll last for about 3 days. Simply reheat in the microwave or on the stovetop, adding a splash of water if needed.

    Can I use different vegetables in Zucchini Orzo?

    For sure! Feel free to swap in any vegetables you like. Bell peppers, spinach, or even broccoli can add delightful flavors and colors to your dish. The sky’s the limit!

    Final Thoughts

    Cooking this Zucchini Orzo is not just about feeding the family; it’s about creating memories. The joyful laughter around the table, the vibrant colors on the plates, and the delightful flavors take me back to those sun-kissed summer days filled with fresh produce. It’s a celebration in itself—a warm embrace right from my kitchen. Plus, knowing that each bite is nourishing makes it all the more rewarding. So, next time you find yourself wondering what to make, let this Zucchini Orzo be your answer. It’s not just a meal; it’s an experience waiting to happen!


    Print

    clock clock iconcutlery cutlery iconflag flag iconfolder folder iconinstagram instagram iconpinterest pinterest iconfacebook facebook iconprint print iconsquares squares iconheart heart iconheart solid heart solid icon

    Description

    A quick and flavorful zucchini orzo dish that combines pasta with fresh vegetables.


    • 1 cup orzo pasta
    • 1 medium zucchini, diced
    • 1 cup cherry tomatoes, halved
    • 2 cloves garlic, minced
    • 1 tablespoon olive oil
    • ¼ cup parmesan cheese, grated
    • 1 tablespoon lemon juice
    • 2 tablespoons fresh parsley, chopped
    • ½ teaspoon Italian seasoning
    • Salt and black pepper, to taste
    • Red pepper flakes (optional)

    1. Cook the orzo in salted boiling water according to package instructions until al dente. Drain and set aside, reserving ½ cup of pasta water.
    2. In a large skillet, heat olive oil over medium heat. Add garlic and sauté for 30 seconds until fragrant.
    3. Add diced zucchini and cook for 4–5 minutes until tender. Stir in cherry tomatoes and cook for another 2 minutes.
    4. Lower the heat and add the cooked orzo to the skillet. Stir in Italian seasoning, salt, black pepper, and lemon juice. Add reserved pasta water if needed.
    5. Remove from heat and mix in grated parmesan and chopped parsley.
    6. Serve warm with extra parmesan and red pepper flakes if desired. Enjoy!

    Notes

    • Make sure to reserve some pasta water to achieve the desired consistency.
    • This dish can be served warm or at room temperature.
    • Feel free to add other vegetables or protein for variation.
    • Prep Time: 10 minutes
    • Cook Time: 15 minutes
    • Category: Main Course
    • Method: Skillet
    • Cuisine: Italian

    Nutrition

    • Serving Size: 1 serving
    • Calories: 320
    • Sugar: 3g
    • Sodium: 250mg
    • Fat: 10g
    • Saturated Fat: 2g
    • Unsaturated Fat: 8g
    • Trans Fat: 0g
    • Carbohydrates: 45g
    • Fiber: 3g
    • Protein: 12g
    • Cholesterol: 5mg

    Sharing is caring!

  • Cucumber Sweet Pepper Salad

    Cucumber Sweet Pepper Salad


    Introduction to Cucumber Sweet Pepper Salad

    As a busy mom, I know how challenging it can be to whip up something fresh and delicious on a hectic day. That’s where my Cucumber Sweet Pepper Salad comes in! This vibrant dish is not only a feast for the eyes but also a quick solution for a light meal or a delightful side. With its crisp cucumbers and colorful sweet peppers, it’s perfect for impressing your loved ones or simply treating yourself. Plus, it takes just minutes to prepare, making it a go-to recipe for any occasion!

    Why You’ll Love This Cucumber Sweet Pepper Salad

    This Cucumber Sweet Pepper Salad is a true gem in my kitchen. It’s incredibly easy to make, taking only about 15 minutes from start to finish. The fresh, crunchy vegetables burst with flavor, making each bite a refreshing delight. Whether you’re looking for a quick lunch or a side dish for dinner, this salad fits the bill perfectly. Plus, it’s healthy and colorful, adding a vibrant touch to any meal!

    Ingredients for Cucumber Sweet Pepper Salad

    Gathering the right ingredients is key to making my Cucumber Sweet Pepper Salad shine. Here’s what you’ll need:

    • Cucumbers: Fresh, crisp cucumbers are the star of this salad. They add a refreshing crunch and hydration.
    • Red Bell Pepper: Sweet and vibrant, red bell peppers bring a pop of color and a hint of sweetness.
    • Yellow Bell Pepper: These add a sunny hue and a slightly tangy flavor, balancing the sweetness of the red pepper.
    • Orange Bell Pepper: Just like the yellow, they contribute sweetness and a cheerful color to the mix.
    • Red Onion: Thinly sliced, red onion adds a sharp bite that complements the sweetness of the peppers.
    • Fresh Dill: This herb is a game-changer! Its aromatic flavor enhances the freshness of the salad.
    • Olive Oil: A drizzle of good-quality olive oil brings richness and helps the flavors meld together.
    • Apple Cider Vinegar: This tangy vinegar adds brightness and balances the richness of the oil.
    • Lemon Juice: A splash of lemon juice brightens the salad, giving it a zesty kick.
    • Honey: Just a touch of honey adds a hint of sweetness, balancing the acidity of the vinegar.
    • Salt and Pepper: Essential for seasoning, these simple ingredients elevate the flavors of the salad.

    For those looking to mix things up, consider adding chopped nuts or seeds for extra crunch. If you don’t have dill on hand, feel free to substitute with parsley or cilantro. Remember, the exact quantities for each ingredient are listed at the bottom of the article for your convenience!

    How to Make Cucumber Sweet Pepper Salad

    Now that you have all your ingredients ready, let’s dive into making this delightful Cucumber Sweet Pepper Salad! Follow these simple steps, and you’ll have a refreshing dish in no time.

    Step 1: Prepare the Vegetables

    Start by washing your cucumbers and sweet peppers thoroughly. I love using a vegetable brush to get them extra clean. Next, slice the cucumbers into thin rounds. Aim for uniform thickness to ensure they look beautiful on the plate. For the sweet peppers, remove the seeds and slice them into thin strips. The vibrant colors of the peppers will make your salad pop!

    Step 2: Make the Dressing

    In a small bowl, whisk together the olive oil, apple cider vinegar, lemon juice, and honey. This dressing is where the magic happens! The olive oil adds richness, while the vinegar and lemon juice provide a tangy brightness. The honey ties it all together with a touch of sweetness. Make sure to whisk until everything is well combined; you want a smooth dressing that coats the veggies perfectly.

    Step 3: Combine Ingredients

    In a large bowl, combine the sliced cucumbers, red, yellow, and orange bell peppers, and red onion. Pour the dressing over the top and gently toss everything together. I like to use my hands for this part; it’s a great way to ensure every piece is evenly coated. The colors will blend beautifully, and the aroma will make your mouth water!

    Step 4: Add Fresh Herbs

    Now, it’s time to add the fresh dill. Sprinkle it over the salad and give it another gentle toss. Dill is a fantastic herb that enhances the freshness of the salad. Its aromatic flavor pairs perfectly with the crisp vegetables, making each bite a burst of flavor. If you’re not a fan of dill, feel free to swap it out for parsley or cilantro!

    Step 5: Chill and Serve

    For the final touch, cover the salad and refrigerate it for at least 15 minutes. This chilling time allows the flavors to meld together beautifully. When you’re ready to serve, take it out and give it a quick toss. Enjoy this Cucumber Sweet Pepper Salad chilled, and watch it disappear from the table!

    Tips for Success

    • Use fresh, seasonal vegetables for the best flavor and crunch.
    • Slice the cucumbers and peppers just before serving to maintain their crispness.
    • Adjust the dressing ingredients to suit your taste; add more honey for sweetness or vinegar for tang.
    • Let the salad chill longer for even better flavor melding.
    • Experiment with different herbs to find your favorite combination!

    Equipment Needed

    • Cutting Board: A sturdy surface for slicing your veggies. A plastic or wooden board works well.
    • Sharp Knife: A good chef’s knife makes slicing effortless. A paring knife can also do the trick.
    • Mixing Bowl: A large bowl for combining ingredients. Any size will do, just ensure it’s spacious.
    • Whisk: Perfect for mixing the dressing. A fork can work in a pinch!

    Variations of Cucumber Sweet Pepper Salad

    • Add Protein: Toss in some grilled chicken, shrimp, or chickpeas for a heartier meal.
    • Spice it Up: Add a pinch of red pepper flakes or diced jalapeños for a spicy kick.
    • Cheesy Delight: Crumble feta or goat cheese on top for a creamy texture and tangy flavor.
    • Fruit Fusion: Incorporate diced mango or strawberries for a sweet twist that complements the peppers.
    • Grain Boost: Mix in cooked quinoa or farro for added fiber and a satisfying crunch.

    Serving Suggestions for Cucumber Sweet Pepper Salad

    • Pair this salad with grilled chicken or fish for a balanced meal.
    • Serve it alongside crusty bread or pita for a delightful crunch.
    • For drinks, a chilled white wine or sparkling water complements the flavors beautifully.
    • Garnish with extra dill or a lemon wedge for a fresh presentation.

    FAQs about Cucumber Sweet Pepper Salad

    Can I make Cucumber Sweet Pepper Salad ahead of time?

    Absolutely! This salad can be made a few hours in advance. Just keep it covered in the fridge. The flavors will meld beautifully, making it even tastier!

    What can I substitute for fresh dill?

    If you don’t have fresh dill, don’t worry! You can use parsley or cilantro instead. Both herbs will add a fresh touch to your salad.

    Can I add other vegetables to this salad?

    Definitely! Feel free to add other crunchy veggies like carrots, radishes, or even snap peas. They’ll add extra color and texture!

    How can I make this salad more filling?

    To make your Cucumber Sweet Pepper Salad more filling, consider adding protein like grilled chicken, chickpeas, or even some cheese. It transforms into a satisfying meal!

    Final Thoughts

    Creating this Cucumber Sweet Pepper Salad is more than just a cooking task; it’s a joyful experience that brings a burst of color and flavor to my table. Each bite is a reminder of the simple pleasures in life, like fresh ingredients and shared meals with loved ones. Whether it’s a busy weeknight or a sunny weekend gathering, this salad fits seamlessly into any occasion. I hope it brings you as much joy as it does to me. So, grab your ingredients, and let’s make some delicious memories together with this refreshing delight!


    Print

    clock clock iconcutlery cutlery iconflag flag iconfolder folder iconinstagram instagram iconpinterest pinterest iconfacebook facebook iconprint print iconsquares squares iconheart heart iconheart solid heart solid icon

    Description

    As a busy mom, I know how challenging it can be to whip up something fresh and delicious on a hectic day. That’s where my Cucumber Sweet Pepper Salad comes in! This vibrant dish is not only a feast for the eyes but also a quick solution for a light meal or a delightful side. With its crisp cucumbers and colorful sweet peppers, it’s perfect for impressing your loved ones or simply treating yourself.


    • 2 large cucumbers, thinly sliced
    • 1 red bell pepper, thinly sliced
    • 1 yellow bell pepper, thinly sliced
    • 1 orange bell pepper, thinly sliced
    • ¼ cup red onion, thinly sliced
    • ¼ cup fresh dill, chopped
    • 3 tablespoons olive oil
    • 2 tablespoons apple cider vinegar
    • 1 tablespoon lemon juice
    • 1 teaspoon honey
    • Salt and pepper to taste

    1. In a large bowl, combine the sliced cucumbers, red, yellow, and orange bell peppers, and red onion.
    2. In a small bowl, whisk together olive oil, apple cider vinegar, lemon juice, and honey until well combined.
    3. Pour the dressing over the cucumber and pepper mixture.
    4. Add the chopped fresh dill and toss everything together until the vegetables are well coated with the dressing.
    5. Season with salt and pepper to taste.
    6. Refrigerate the salad for at least 15 minutes before serving to allow the flavors to meld together.
    7. Serve chilled as a refreshing side dish or a light main course.

    Notes

    • For added crunch, consider adding some chopped nuts or seeds.
    • This salad can be made a few hours in advance for convenience.
    • Feel free to substitute other herbs if dill is not available.
    • Prep Time: 10 minutes
    • Cook Time: 0 minutes
    • Category: Salad
    • Method: No-cook
    • Cuisine: American

    Nutrition

    • Serving Size: 1 cup
    • Calories: 120
    • Sugar: 4g
    • Sodium: 50mg
    • Fat: 9g
    • Saturated Fat: 1g
    • Unsaturated Fat: 8g
    • Trans Fat: 0g
    • Carbohydrates: 10g
    • Fiber: 3g
    • Protein: 2g
    • Cholesterol: 0mg

    Sharing is caring!

  • Crockpot Honey Garlic Chicken

    Crockpot Honey Garlic Chicken


    Introduction to Crockpot Honey Garlic Chicken

    There’s something magical about a meal that cooks itself while I tackle the endless to-do list of the day. That’s why I absolutely adore Crockpot Honey Garlic Chicken! It’s the perfect blend of sweet and savory, and it practically makes dinner for you. Picture this: you come home after a long day, and your home is filled with the aroma of this delicious dish. It’s an effortless solution for busy moms like us, making it easy to serve up a delightful dinner that your family will love. Trust me; they’ll be asking for seconds!

    Why You’ll Love This Crockpot Honey Garlic Chicken

    This Crockpot Honey Garlic Chicken is a true game-changer for busy evenings. Just imagine setting it up before leaving for work, then returning home to a beautifully cooked meal. It’s quick, easy, and cleans up like a dream! The combination of garlic and honey gives it a flavor that dazzles your taste buds without any fuss. Plus, it’s perfect for picky eaters, making dinner a breeze!

    Ingredients for Crockpot Honey Garlic Chicken

    Gathering the right ingredients is the first step in ensuring your Crockpot Honey Garlic Chicken turns out perfectly. Below, I’ve listed the essential players in this flavorful dish, with a few thoughts on each one.

    • Chicken thighs: Tender and juicy, chicken thighs are ideal for slow cooking. They stay moist and absorb the delicious flavors of the sauce beautifully.
    • Honey: This is where the sweetness comes from. You can adjust the amount based on your family’s preference for sweetness. Local honey can add an extra touch of flavor.
    • Soy sauce: A must-have for that savory, umami kick. Opt for low-sodium soy sauce if you’re watching your salt intake.
    • Hoisin sauce: This savory sauce adds depth and a touch of sweetness, while also giving the dish an Asian flair. If you can’t find hoisin, you can substitute with BBQ sauce.
    • Garlic: Freshly minced garlic provides an aromatic punch that elevates the dish. I always opt for fresh over powdered to enhance the flavor.
    • Cornstarch: This is the magic ingredient for thickening the sauce at the end, ensuring each bite is coated in that rich, sticky goodness.

    Don’t worry if you can’t find everything on the list; I always encourage a little creativity in the kitchen. Ingredients with exact quantities are at the bottom of this article for your convenience!


    How to Make Crockpot Honey Garlic Chicken

    Step 1: Prepare the Ingredients

    Let’s kick things off by prepping our lovely chicken thighs. First, pat them dry with a paper towel to get rid of excess moisture. This helps them sear beautifully later on if you choose to do that. Meanwhile, in a mixing bowl, combine the honey, soy sauce, hoisin sauce, and minced garlic. I love using a whisk; it really incorporates everything well. The resulting sauce will be a blend of sweet and tangy that’s just irresistible!

    Step 2: Add Ingredients to the Crockpot

    Now comes the fun part! Place the chicken thighs in the crockpot, ensuring they’re nestled comfortably. Pour your homemade honey garlic sauce over the top, covering every piece. I like to give it a gentle toss to coat the chicken evenly; it feels like a warm hug for my dinner! It’s all about giving it a good home in the crockpot because that’s where all the magic happens. Ready, set, cook!

    Step 3: Cook and Enhance Flavor

    Set the crockpot on low for about four hours. While it’s cooking, resist the urge to peek! Allow the sauce to permeate those chicken thighs, making them melt-in-your-mouth tender. To supercharge the flavor, consider adding a splash of orange juice or some fresh ginger right at the start. Your kitchen will smell amazing, making the whole wait well worth it!

    Step 4: Thicken the Sauce

    With just 30 minutes left on the clock, it’s time to thicken that glorious sauce. In a small bowl, mix the cornstarch with 1/4 cup of water until smooth. Stir this mixture into the crockpot for a velvety texture. As it thickens, it clings to the chicken just beautifully. This step makes every bite more satisfying, and you’ll be tempted to lick the spoon!

    Step 5: Serve and Enjoy

    Once that timer goes off, it’s time to dig in! I love serving this dish over fluffy rice or comforting noodles to soak up all that sauce. Top it with some chopped green onions for color and crunch. Plate it up, and watch your loved ones’ faces light up—they won’t believe how easy and delicious it is. It’s a delightful ending to your busy day!

    Tips for Success

    • For extra flavor, marinate the chicken in the sauce overnight.
    • Ensure chicken thighs are evenly spaced in the crockpot for even cooking.
    • Use a meat thermometer; chicken should reach 165°F for safety.
    • Feel free to add veggies like bell peppers or snap peas for a one-pot meal.
    • Store leftovers in an airtight container to enjoy later!

    Equipment Needed

    • Crockpot: The star of the show! Any slow cooker will work, but a 6-quart model is ideal.
    • Mixing bowl: For blending the sauce; a simple bowl or a measuring cup both do the trick.
    • Whisk: Great for mixing sauces; a fork can also do the job in a pinch.
    • Meat thermometer: While optional, it helps ensure chicken reaches a safe cooking temperature.

    Variations of Crockpot Honey Garlic Chicken

    • Spicy Kick: Add a teaspoon of red pepper flakes or sriracha to give the dish a spicy twist that’s sure to wake up your taste buds.
    • Pineapple Delight: Toss in some pineapple chunks for a sweet and tangy flavor combination that complements the other ingredients perfectly.
    • Vegetarian Option: Swap chicken for tofu or tempeh, and follow the same steps for a delightful vegetarian alternative.
    • Herb Blend: Experiment with fresh herbs like cilantro or basil for an herbal aroma that lifts the dish to new heights.
    • Sweet and Sour Variation: Mix in a splash of rice vinegar for a sweet and sour profile everyone will love.

    Serving Suggestions for Crockpot Honey Garlic Chicken

    • Serve over fluffy white or fried rice for a comforting meal.
    • Pair with steamed broccoli or snap peas for a colorful and nutritious side.
    • Add a sprinkle of sesame seeds and sliced green onions for a beautiful presentation.
    • Pour a glass of chilled white wine or iced green tea alongside for a refreshing drink.
    • For a fun twist, serve in lettuce wraps for a lighter alternative!

    FAQs about Crockpot Honey Garlic Chicken

    Can I use chicken breasts instead of thighs?
    Absolutely! Chicken breasts can be used, but keep in mind they may dry out more easily. I recommend checking for doneness a bit earlier if you make that swap.

    How can I make this recipe gluten-free?
    To make Crockpot Honey Garlic Chicken gluten-free, simply use tamari instead of soy sauce. It offers the same flavor while being safe for those with gluten sensitivities.

    Can I double the recipe?
    Yes, you can easily double the recipe! Just ensure your crockpot has enough capacity. Make sure all chicken pieces are laid down evenly for even cooking. You may need to increase the cooking time slightly.

    How long can I store leftovers?
    Leftovers can be stored in an airtight container in the refrigerator for up to three days. You can also freeze portions for future meals!

    What can I pair this dish with?
    This Crockpot Honey Garlic Chicken pairs wonderfully with rice, noodles, or even steamed vegetables. Don’t forget to garnish with green onions or sesame seeds for that extra flair!

    Final Thoughts

    Crockpot Honey Garlic Chicken isn’t just a meal; it’s a warm embrace at the end of a hectic day. The ease of tossing ingredients into the crockpot allows me to reclaim precious time while still serving up something delectable. Each bite embodies the sweet and savory magic that brings my family together. It’s one of those dishes that’ll make you feel like a culinary superstar without all the effort. Trust me, once you savor this dish, it will become a beloved staple in your home. Enjoy every flavorful moment with your loved ones—dinner just got a whole lot better!


    Print

    clock clock iconcutlery cutlery iconflag flag iconfolder folder iconinstagram instagram iconpinterest pinterest iconfacebook facebook iconprint print iconsquares squares iconheart heart iconheart solid heart solid icon

    Description

    Crockpot Honey Garlic Chicken makes dinner effortless and delicious!


    • 1 1/2 lbs chicken thighs
    • 1/4 cup honey
    • 1/4 cup soy sauce
    • 2 tbsp hoisin sauce
    • 4 garlic cloves, minced
    • 1 tbsp cornstarch

    1. Add chicken, honey, soy sauce, hoisin sauce, and garlic to the crockpot. Cook on low for 4 hours.
    2. Stir in cornstarch mixed with 1/4 cup water during the last 30 minutes.
    3. Serve with rice or noodles.

    Notes

    • This dish pairs well with steamed vegetables.
    • Prep Time: 10 minutes
    • Cook Time: 4 hours
    • Category: Main Course
    • Method: Crockpot
    • Cuisine: Asian

    Nutrition

    • Serving Size: 1 serving
    • Calories: 340
    • Sugar: 12g
    • Sodium: 800mg
    • Fat: 12g
    • Saturated Fat: 3g
    • Unsaturated Fat: 9g
    • Trans Fat: 0g
    • Carbohydrates: 22g
    • Fiber: 0g
    • Protein: 36g
    • Cholesterol: 150mg

    Sharing is caring!

  • Taco Ranch Bites: Discover This Irresistible Recipe!

    Taco Ranch Bites: Discover This Irresistible Recipe!


    Introduction to Taco Ranch Bites

    Hey there, fellow food lovers! If you’re anything like me, busy days can sometimes leave you scrambling for a delicious, stress-free appetizer. That’s where Taco Ranch Bites come into play! These little treasures combine mouthwatering flavors into one bite-size treat, allowing you to impress your family or friends without spending hours in the kitchen. Perfect for last-minute gatherings or just a cozy night in, these bites are my go-to for a quick solution. You’re going to love how easy they are, bringing a taste of Mexico right to your table!

    Why You’ll Love This Taco Ranch Bites

    These Taco Ranch Bites are a game changer for busy moms and professionals like us! They’re not only super quick to make, but each bite is bursting with savory goodness. The blend of juicy beef, zesty seasoning, and creamy ranch dressing means you won’t have to compromise on flavor. Plus, with just 30 minutes of prep and cooking time, you’ll have a fantastic appetizer ready to wow your guests!

    Ingredients for Taco Ranch Bites

    Gathering the right ingredients is the first step towards making your fabulous Taco Ranch Bites. Here’s what you’ll need for this delightful dish:

    • Lean ground beef: The star of the show! I like using lean beef for a healthier touch without sacrificing flavor.
    • Taco seasoning: This spice mix is what brings the fiesta to your bites. Opt for your favorite brand or even homemade to control salt and spice levels.
    • Diced tomatoes and green chiles: These add a juicy texture and a little kick! Canned works wonders for convenience, but fresh will amp up the flavor.
    • Shredded cheddar cheese: Who doesn’t love cheese? This melty goodness gives that creamy richness that pairs perfectly with the beef and ranch.
    • Ranch dressing: The creamy element binds all the flavors together. You can use your favorite store brand or make your own if you’re feeling adventurous.
    • Frozen phyllo tart shells: These crunchy delights are ready-made and save you a ton of time. You can find them in the freezer aisle; they make assembly a breeze!

    While these are the main ingredients, feel free to get creative. You can add optional toppings like diced onions, slices of jalapeños, or even a sprinkle of cilantro for freshness. Want something lighter? You can substitute ground turkey or chicken for the beef. For ingredient quantities and easy printing, keep reading toward the end of the article!

    How to Make Taco Ranch Bites

    Let’s dive into the fun part—making these utterly delightful Taco Ranch Bites! Each step is straightforward, so even on a chaotic day, you can whip these up with ease. Just follow along, and soon your kitchen will smell amazing!

    Step 1: Preheat Your Oven

    First things first, preheat your oven to 350°F. Preheating makes sure your Taco Ranch Bites bake perfectly, coming out golden and delicious. While that’s heating up, you can tackle the other steps without any delay!

    Step 2: Cook the Ground Beef

    Now, grab your skillet and add the lean ground beef. Cook it over medium heat until it’s no longer pink. Make sure to break it up into smaller pieces while it cooks, so it gets nice and crumbly. Once cooked, drain the fat to keep things on the healthier side. A little tip? This step packs your bites with protein while keeping them balanced!

    Step 3: Mix in Seasoning and Chiles

    Next, sprinkle in your taco seasoning, along with the can of diced tomatoes and green chiles (don’t drain them!). Stir everything together well and let it cook for another 5 minutes. The flavors will meld beautifully and fill your kitchen with that wonderful taco aroma. It’s hard not to sneak a taste at this point!

    Step 4: Prepare the Cheese and Dressing Mixture

    In a separate bowl, combine the shredded cheddar cheese and ranch dressing. This creamy mixture is what really elevates the Taco Ranch Bites! Once combined, gently fold in the cooked taco meat mixture. Your filling is ready, and trust me, it’s tempting to dive in with a spoon!

    Step 5: Fill the Phyllo Tart Shells

    It’s time to assemble your bites! Take those frozen phyllo tart shells and spoon the mixture into each shell. Be generous! The tart shells are crisp and flaky, adding the perfect crunch to the savory inside. Plus, they hold everything together so nicely. Your fingers may get a little messy, but that just means you’re having fun!

    Step 6: Bake and Serve

    Finally, pop those filled phyllo shells into your preheated oven. Bake for about 8-10 minutes or 10-13 minutes if you started with frozen shells. You’ll know they’re ready when the tops are bubbly and golden. Serve them warm, and watch everyone dive in. These Taco Ranch Bites are bound to be a hit around your table!

    Tips for Success

    • Make sure to drain the beef thoroughly to cut back on excess fat.
    • Try letting the seasoned beef cool slightly before mixing with cheese to avoid clumping.
    • Keep an eye on the baking time; phyllo can go from golden to burnt quickly!
    • Experiment with toppings to personalize your Taco Ranch Bites.
    • Serve with extra ranch dressing on the side for dipping—always a hit!

    Equipment Needed

    • Skillet: A non-stick skillet works great for cooking the beef. If you don’t have one, any regular skillet will do.
    • Mixing bowl: A medium-sized bowl is perfect for mixing the cheese and ranch. You can use a measuring cup in a pinch!
    • Spoon: Grab a large spoon for filling the phyllo shells. A small scoop makes it even easier!
    • Oven: Essential for baking those delightful bites to crispy perfection.

    Variations

    • Spicy Taco Ranch Bites: For a fiery twist, add diced jalapeños or a splash of hot sauce to the beef mixture. Spice lovers will adore these!
    • Vegetarian Delight: Swap the beef for a mixture of black beans and corn. Adding sautéed bell peppers will give it extra flavor and color!
    • Cheesy Taco Ranch Bites: Mix in a variety of cheeses like pepper jack or cream cheese for a richer filling that’s ooey-gooey!
    • Gluten-Free Option: Use gluten-free tortilla chips instead of phyllo shells. They’ll give a nice crunch while keeping it gluten-free!
    • Low-Carb Version: Replace the phyllo shells with mini bell peppers or zucchini boats for a fresh and healthy option.

    Serving Suggestions for Taco Ranch Bites

    • Pair with a fresh garden salad for a light and colorful meal.
    • Serve with extra ranch dressing or salsa on the side for dipping.
    • Complement the bites with a refreshing lemonade or sparkling water.
    • Add a sprinkle of chopped cilantro on top for a lovely garnish.
    • Use a vibrant platter to present your Taco Ranch Bites beautifully!

    FAQs about Taco Ranch Bites

    Got questions about these delicious Taco Ranch Bites? You’re in the right place! Here are some common inquiries I often hear, along with the answers that will help you master this recipe.

    Can I make Taco Ranch Bites ahead of time?

    Absolutely! You can assemble the bites and store them in the fridge for up to a day before baking. This is a great time-saver for those busy evenings or impromptu gatherings.

    How do I store leftovers?

    Leftover Taco Ranch Bites can be stored in an airtight container in the fridge for up to three days. Just reheat them in the oven to restore that great crunch!

    Can I use a different meat?

    Definitely! Ground turkey, chicken, or even plant-based crumbles are fantastic substitutes. Adjust the seasoning to suit your taste, and you’ll still have tasty bites!

    What can I serve with Taco Ranch Bites?

    These appetizers are fabulous alongside a fresh salad, chips and salsa, or even a creamy guacamole. Adding dips elevates the experience, making for a fun snack spread!

    Are Taco Ranch Bites kid-friendly?

    For sure! With their finger-food appeal and cheesy flavors, kids love them. You can scale the spice level down for younger palates, making it a hit for the entire family!

    Final Thoughts

    There’s something truly special about gathering around the table with friends and family, sharing bites of flavorful joy. Taco Ranch Bites transform any occasion into a fiesta in minutes! Each crispy, cheesy morsel invites smiles, laughter, and stories, making them a memory-building staple. Plus, they’re perfect for busy lives, allowing you to savor precious moments with loved ones without the stress of complicated cooking. So, dive into this recipe, put on your apron, and watch how these delightful bites become a beloved tradition in your home. Happy cooking, and may your kitchen always be filled with love!


    Print

    clock clock iconcutlery cutlery iconflag flag iconfolder folder iconinstagram instagram iconpinterest pinterest iconfacebook facebook iconprint print iconsquares squares iconheart heart iconheart solid heart solid icon

    Description

    Taco Ranch Bites are a delicious and easy-to-make appetizer featuring a savory mixture of ground beef, taco seasoning, and creamy ranch dressing, all baked in crispy phyllo tart shells.


    • 1 pound lean ground beef
    • 1 package (1 oz) taco seasoning
    • 1 can (10 oz) diced tomatoes and green chiles, undrained
    • 2 cups shredded cheddar cheese
    • 1 bottle (8 oz) ranch dressing
    • 5 packages (15 count each) frozen phyllo tart shells

    1. Preheat oven to 350°F.
    2. Cook ground beef in skillet until no longer pink. Drain fat.
    3. Add taco seasoning, tomatoes, and chiles to beef. Cook 5 minutes more.
    4. In a bowl, combine cheese and ranch dressing. Add cooked taco meat and mix.
    5. Spoon the mixture into frozen phyllo shells.
    6. Bake for 8-10 minutes, or 10-13 minutes if frozen.

    Notes

    • Ensure to drain the fat from the beef thoroughly for a healthier option.
    • Feel free to add additional toppings such as diced onions or cilantro before baking.
    • Serve warm for the best flavor and texture.
    • Prep Time: 15 minutes
    • Cook Time: 15 minutes
    • Category: Appetizer
    • Method: Baking
    • Cuisine: Mexican

    Nutrition

    • Serving Size: 1 Taco Ranch Bite
    • Calories: 100
    • Sugar: 1g
    • Sodium: 250mg
    • Fat: 6g
    • Saturated Fat: 3g
    • Unsaturated Fat: 2g
    • Trans Fat: 0g
    • Carbohydrates: 5g
    • Fiber: 1g
    • Protein: 7g
    • Cholesterol: 25mg

    Sharing is caring!

  • Croissant Breakfast Sandwiches: A Delicious Morning Treat!

    Croissant Breakfast Sandwiches: A Delicious Morning Treat!


    Introduction to Croissant Breakfast Sandwiches

    As the sun rises and the world begins to stir, mornings can often feel like a race against the clock. That’s where these delightful croissant breakfast sandwiches come in—a quick solution for busy days! Imagine diving into a flaky, buttery croissant filled with creamy scrambled eggs and your favorite breakfast meat. It’s a dish that not only fills your belly but also brings joy to the table. Whether you’re feeding a hungry family or treating yourself to a well-deserved morning indulgence, these sandwiches are bound to bring smiles and satisfaction. Let’s get cooking!

    Why You’ll Love This Croissant Breakfast Sandwiches

    These croissant breakfast sandwiches are a game-changer for hectic mornings. They come together in just 20 minutes, making them perfect for busy families or professionals rushing out the door. Plus, the combination of warm, flaky croissants with fluffy scrambled eggs and savory bacon or sausage is pure bliss. They’re not just delicious; they’re customizable too! It’s breakfast that caters to everyone’s taste buds while still being incredibly simple to prepare.

    Ingredients for Croissant Breakfast Sandwiches

    Let’s gather everything we need for our tasty croissant breakfast sandwiches. Each ingredient plays a key role in crafting the perfect morning delight:

    • Croissants: Buttery and flaky, they create the perfect base for your sandwich. Look for fresh, high-quality options for the best flavor.
    • Large Eggs: The star of the show! Eggs add protein and creaminess to the sandwiches. Free-range or organic eggs can enhance taste.
    • Cheddar Cheese: Melty and flavorful, cheddar is a classic choice. Try swapping in pepper jack or mozzarella for a twist!
    • Bacon or Sausage: Adding savory goodness! Use crispy bacon for crunch, or sausage patties for a heartier bite. For vegetarian options, feel free to skip the meat entirely.
    • Milk: A splash of milk in the eggs makes them fluffy. You can also use almond milk or oat milk for a dairy-free alternative.
    • Salt and Pepper: Essential for adding depth to the flavor. Season to your taste; you can also sprinkle in some garlic powder for a kick!
    • Butter: For cooking the eggs and adding richness, butter really makes a difference in taste. Try using olive oil for a healthier option.

    All the measurements and specific amounts for these ingredients can be found at the end of the article, perfect for printing or jotting down on your grocery list!

    How to Make Croissant Breakfast Sandwiches

    Let’s dive into the delicious world of croissant breakfast sandwiches! This step-by-step guide will ensure your sandwiches turn out perfect every time. Grab your apron, and let’s get started!

    Step 1: Preheat the Oven

    First things first, preheating the oven is key. Set it to 350°F (175°C). This warms up the space before you assemble your tasty sandwiches. It’s especially helpful if you plan to bake or reheat them later. This little step makes all the difference!

    Step 2: Prepare the Egg Mixture

    In a mixing bowl, whisk together your large eggs, a splash of milk, salt, and pepper. This creates a fluffy texture for your eggs. You want everything well combined, so whisk until it looks like liquid sunshine. The milk adds creaminess, and the seasoning amplifies the flavor!

    Step 3: Scramble the Eggs

    Next, it’s time for a little action! Heat butter in a skillet over medium heat. Once it’s melted, pour in your egg mixture. Stir gently and keep an eye on it! Scrambling should take about 3-5 minutes. Remember, the goal is soft and fluffy eggs, not a dry mess. So take your time!

    Step 4: Toast the Croissants

    While the eggs are cooking, slice your croissants in half. Lightly toast them in a toaster or on a skillet if you want that warm, golden touch. You could also add a smear of butter inside for extra flavor. Think of it like giving your croissant a mini spa treatment!

    Step 5: Assemble the Sandwiches

    Now for the fun part. On the bottom half of each croissant, place a slice of cheddar cheese, followed by the fluffy scrambled eggs. Add the crispy bacon or sausage on top. Finally, crown it all with the croissant’s top half. Voila! Your breakfast sandwich is ready to shine!

    Step 6: Serve or Store

    These sandwiches are a delight hot off the skillet. Serve immediately for maximum yumminess! If you have leftovers, wrap them in foil for freezing. When it’s time to dig in again, reheat them in the oven at 350°F for 10–15 minutes or pop them in the microwave for a quick 1–2 minutes. Easy peasy!

    Tips for Success

    • Always use fresh ingredients for the best flavor.
    • Don’t overcrowd the skillet while scrambling eggs; it helps with fluffiness.
    • To enhance the croissant flavor, consider brushing them with melted butter before toasting.
    • Experiment with different cheeses to find your perfect combo.
    • Keep an eye on cooking times; no one likes overcooked eggs!
    • Make a double batch for quick breakfasts on busy mornings.

    Equipment Needed

    • Skillet: A non-stick skillet works great, but any frying pan will do!
    • Whisk: For mixing the eggs, a fork can be a handy alternative.
    • Knife: To slice croissants, a sharp knife is essential.
    • Cutting Board: To provide a safe surface for slicing.
    • Baking Sheet: Useful if you’re reheating or baking the sandwiches.

    Variations

    • Cheese Swap: Try swapping cheddar for pepper jack, feta, or cream cheese for a different flavor profile.
    • Meat Options: For a twist, use turkey bacon, Canadian bacon, or spicy chorizo instead of traditional bacon or sausage.
    • Vegetarian Delight: Skip the meat entirely and fill your sandwich with sautéed spinach, mushrooms, and tomatoes for a fresh option.
    • Herb-Infused Eggs: Add fresh herbs like chives, parsley, or dill to the egg mixture for an aromatic touch.
    • Avocado Smoothness: Include sliced avocado for extra creaminess and healthy fats; it pairs beautifully with eggs.
    • Seasoning Twists: Kick up the flavor with a dash of hot sauce or a sprinkle of smoked paprika in the eggs.

    Serving Suggestions

    • Fresh Fruit: Serve with a side of mixed berries or sliced oranges for a refreshing balance.
    • Coffee or Tea: Pair your sandwich with a hot cup of coffee or herbal tea to wake up your senses.
    • Presentation Tip: Garnish with a sprig of parsley or microgreens for a cheerful look on your plate.
    • Sweet Touch: Add a drizzle of honey or maple syrup on the side for those who love a sweet contrast!


    FAQs about Croissant Breakfast Sandwiches

    Got some questions about these delightful croissant breakfast sandwiches? I’ve got you covered! Here are the answers to some common queries:

    Can I make these sandwiches ahead of time?
    Absolutely! You can assemble the breakfast sandwiches and wrap them in foil. They freeze well and can be reheated whenever you’re ready to enjoy them.

    What can I use instead of croissants?
    If you’re in a pinch or craving a twist, feel free to use bagels or even English muffins! Just make sure they are toasted to your liking.

    Can these sandwiches be made vegetarian?
    Definitely! Simply omit the bacon or sausage and add extra veggies or your favorite vegetarian protein for a flavorful option.

    What’s the best way to store leftovers?
    Wrap the sandwiches individually in foil or plastic wrap and keep them in the refrigerator for up to three days. They also freeze beautifully!

    How can I customize the flavor?
    Experiment with various cheeses, meats, or spices! You could even add avocado or hot sauce to elevate the flavors and make them your own!

    Final Thoughts

    Bringing these croissant breakfast sandwiches to your table is more than just about satisfying hunger; it’s about creating cherished moments. Whether it’s a busy weekday morning or a leisurely weekend brunch, these sandwiches can transform any occasion into something special. Their warmth, flaky texture, and customizable flavors make them perfect for everyone. I love the way they bring my family together over breakfast, sparking laughter and conversation. So grab your ingredients, unleash your inner chef, and enjoy the joy that comes with every delicious bite!


    Print

    clock clock iconcutlery cutlery iconflag flag iconfolder folder iconinstagram instagram iconpinterest pinterest iconfacebook facebook iconprint print iconsquares squares iconheart heart iconheart solid heart solid icon

    Description

    Delicious breakfast sandwiches made with flaky croissants, scrambled eggs, cheese, and your choice of bacon or sausage.


    • 4 croissants, sliced in half
    • 4 large eggs
    • 4 slices cheddar cheese
    • 4 slices cooked bacon or sausage patties
    • 2 tablespoons milk
    • Salt and pepper to taste
    • 1 tablespoon butter

    1. Preheat the oven to 350°F (175°C) if baking or reheating the assembled sandwiches.
    2. In a bowl, whisk together eggs, milk, salt, and pepper.
    3. Heat butter in a skillet over medium heat. Pour in the egg mixture and scramble until fully cooked.
    4. Slice the croissants in half and lightly toast them if desired.
    5. Assemble each sandwich: place a slice of cheese, scrambled eggs, and a slice of bacon or sausage on the bottom half of the croissant, then top with the other half.
    6. Serve immediately, or wrap individually in foil and freeze.
    7. To reheat: Bake at 350°F for 10–15 minutes or microwave for 1–2 minutes, until heated through.

    Notes

    • These sandwiches can be customized with different cheeses or meats.
    • For a vegetarian option, omit the bacon or sausage.
    • Great for meal prep, makes for an easy breakfast on busy mornings.
    • Prep Time: 10 minutes
    • Cook Time: 10 minutes
    • Category: Breakfast
    • Method: Skillet, Oven
    • Cuisine: French-American

    Nutrition

    • Serving Size: 1 sandwich
    • Calories: 450
    • Sugar: 1g
    • Sodium: 800mg
    • Fat: 30g
    • Saturated Fat: 15g
    • Unsaturated Fat: 10g
    • Trans Fat: 0g
    • Carbohydrates: 30g
    • Fiber: 2g
    • Protein: 18g
    • Cholesterol: 250mg

    Sharing is caring!

  • Taco Bell Quesarito Cheesy: A Simple Recipe to Impress!

    Taco Bell Quesarito Cheesy: A Simple Recipe to Impress!


    Introduction to Taco Bell Quesarito Cheesy

    Let’s talk about Taco Bell Quesarito Cheesy, a delightful combination of flavors that brings the fast-food experience straight into your kitchen. As busy moms or professionals, I know how hectic life can get, and cooking might not always feel like a priority. But this recipe is the perfect solution—a quick, satisfying dish that your family will love! Imagine wrapping up tender taco meat and creamy chipotle sauce in a cheesy tortilla, all while knowing you’ve created something truly special. This is more than just dinner; it’s a moment to enjoy together!

    Why You’ll Love This Taco Bell Quesarito Cheesy

    This Taco Bell Quesarito Cheesy is a game-changer for busy nights! It’s not just easy; it’s quick to make, requiring only 50 minutes from start to finish. Plus, the flavor is out of this world. The combination of savory taco meat, aromatic rice, and the creamy kick from the chipotle sauce creates a mouthwatering experience. Trust me, your family will be begging for seconds!

    Ingredients for Taco Bell Quesarito Cheesy

    Gathering the right ingredients is the first step toward crafting this delicious Taco Bell Quesarito Cheesy. Here’s a breakdown of what you’ll need:

    • Ground Beef: The base of this dish, providing rich flavor and heartiness. You can swap it for ground turkey or chicken for a lighter option.
    • Water: Helps to cook the beef and integrate the seasonings.
    • Taco Seasoning: This blend of spices gives the meat its zesty taco flavor. You can use a store-bought packet or make your own with spices like chili powder and cumin.
    • Olive Oil: A healthy fat for cooking the onion and crisping up the quesadillas. Any cooking oil will do, but olive oil adds a nice flavor.
    • Onion: Adds sweetness and depth to the dish. You can also use shallots for a milder taste.
    • White Rice: The comforting ingredient that soaks up all the delicious flavors. Feel free to use brown rice for added nutrition.
    • Chicken Broth: Uses to cook the rice and infuse it with savory goodness. Vegetable broth works well for a vegetarian option.
    • Chunky Salsa: Brings a burst of freshness and spice to the mix. Choose your favorite flavor profile for a personal touch.
    • Garlic Salt: A must-have for flavor enhancement—garlic powder or minced fresh garlic could work too!
    • Cumin: This spice has a warm, nutty flavor that pairs wonderfully with Mexican dishes. Use it generously!
    • Sour Cream: Creamy and tangy, it lightens the dish’s heartiness. Greek yogurt can be a great substitute.
    • Chipotle Sauce: Adds a smoky heat to your dish. For less spice, use mild salsa or omit this entirely.
    • Chili Powder: For a little extra kick. Adjust the quantity to match your family’s spice preferences.
    • Sugar: A pinch balances out the flavors, especially if you’re using acidic ingredients like salsa.
    • Salt: Essential for flavor; don’t overdo it, though.
    • Paprika: Adds color and subtly sweet notes. Try smoked paprika for a deeper flavor.
    • Garlic Powder: A handy seasoning that complements all the flavors beautifully.
    • Onion Powder: A convenient way to infuse onion flavor, especially in a pinch.
    • Flour Tortillas: The wrap that holds everything together. Feel free to use whole wheat or corn tortillas as an alternative.
    • Nacho Cheese Sauce: The gooey goodness that makes this dish a crowd-pleaser. You can find it in cans or jars in most grocery stores.
    • Shredded Mexican Cheese Blend: Provides additional creaminess and flavor. Use a blend for vibrant taste, or just your favorite cheese!
    • More Sour Cream: For drizzling or serving on the side, enhancing the overall experience.

    Exact quantities of these ingredients are listed at the bottom of the article, making it easy for you to print out for your next cooking adventure!

    How to Make Taco Bell Quesarito Cheesy

    Now comes the best part—creating your own Taco Bell Quesarito Cheesy! I promise it’s as exciting as it sounds. Follow these simple steps, and you’ll be wrapping up deliciousness in no time. Ready? Let’s dive in!

    Step 1: Prepare the Taco Meat

    First, grab a skillet and brown the ground beef over medium-high heat. Break it apart with a spatula as it cooks. You want it browned, with no pink remaining. Once it’s browned, sprinkle in the taco seasoning. Add water, then stir to combine. Let it simmer for a few minutes until the liquid is absorbed. This step intensifies the flavors, making it a savory delight!

    Step 2: Cook the Spanish Rice

    In another large skillet, heat some olive oil over medium heat. Toss in the chopped onion and sauté until it turns translucent—about 5 minutes. Next, add uncooked white rice and stir frequently, toasting it slightly. Then pour in chicken broth and chunky salsa, along with garlic salt and cumin. Cover and let it gently simmer for about 20 minutes until the rice is tender and the liquid is absorbed. The aroma will have you daydreaming of Taco Bell!

    Step 3: Make the Chipotle Sauce

    In a small mixing bowl, combine sour cream with chipotle sauce, chili powder, sugar, salt, cumin, paprika, garlic powder, and onion powder. Whisk it together until it’s smooth and creamy. This sauce is what sets your Quesarito Cheesy apart, so make sure to taste it. Feel free to adjust the seasoning based on your spice preference. It’s all about making it your own!

    Step 4: Warm the Tortillas

    To make your tortillas pliable, wrap them in a damp paper towel and microwave for 30 seconds. This little trick prevents them from cracking. If you’ve got a stack, you can do a few at a time. Just imagine how wonderful this Chef-approved technique is—it makes everything easier while bringing joy as you work!

    Step 5: Assemble the Quesaritos

    Now, let’s get building! Spread a layer of nacho cheese sauce over four tortillas, leaving a small border. This gooey goodness is essential for that Quesarito vibe. Next, sprinkle shredded Mexican cheese blend over the cheese sauce. Place another tortilla on top, pressing gently to seal. Now pile on the taco meat and Spanish rice. Drizzle with chipotle sauce and a little extra sour cream. Fold the sides inward and roll everything tightly into a burrito. All that cheesy goodness is about to be adventuresome!

    Step 6: Cook the Quesaritos

    Heat a bit of olive oil in your large skillet over medium-high heat. Place each burrito seam side down and cook for 2-3 minutes per side, flipping once until the tortillas are golden brown and crispy. This is where the magic happens! You’ll see them take on that beautiful, crunchy texture that everyone enjoys. Serve immediately while they’re hot and ready for savoring!

    Tips for Success

    • Prep ingredients in advance to save time; it makes cooking more enjoyable!
    • Experiment with your favorite toppings, like avocado or jalapeños, for added flavor.
    • Make a double batch and freeze extras for a quick meal later. Your future self will thank you!
    • Check the doneness of your rice by tasting; it should be tender but not mushy.
    • Adjust spice levels to suit your family’s taste; cooking is all about personalization!

    Equipment Needed

    • Skillet: A non-stick skillet makes cooking easier, but any skillet works.
    • Mixing Bowls: Use any size bowl for mixing sauces and ingredients.
    • Spatula: A sturdy spatula allows for easy meat handling and flipping.
    • Microwave: Essential for warming tortillas; a frying pan can work too!
    • Tongs: Handy for flipping burritos without losing the filling!

    Variations

    • For a vegetarian twist, replace ground beef with black beans or lentils for a hearty option.
    • Try adding grilled chicken or shrimp for a leaner protein choice that elevates the dish.
    • Experiment with different cheeses, such as pepper jack or Monterey jack, for extra flavor.
    • Add sautéed bell peppers or corn to the filling for a colorful and nutritious boost.
    • For a spicy kick, incorporate diced jalapeños or sliced green chiles into the mix.

    Serving Suggestions

    • Pair your Taco Bell Quesarito Cheesy with a side of homemade guacamole for extra creaminess.
    • Serve with crispy tortilla chips and your favorite salsa for crunch.
    • Complement the meal with a refreshing drink, like iced tea or a margarita.
    • Present on a colorful platter with fresh cilantro for a vibrant touch.
    • Offer extra sour cream and jalapeños on the side for customizable servings!

    FAQs about Taco Bell Quesarito Cheesy

    Can I make the Taco Bell Quesarito Cheesy ahead of time?

    Absolutely! You can prepare the filling and chipotle sauce in advance. Store them in airtight containers in the fridge for up to 3 days. When it’s time to eat, simply warm them up and follow the assembly steps!

    What can I use instead of ground beef?

    If you want a different protein or a vegetarian option, black beans, lentils, or shredded chicken work wonderfully. Each substitute will give your Taco Bell Quesarito Cheesy a unique twist!

    How can I adjust the spice level?

    To dial down the heat, use mild salsa and reduce the amount of chipotle sauce. You can also omit chili powder if you prefer a milder flavor. Always taste as you go to find the perfect balance for your family!

    Can I freeze the Quesaritos?

    Yes, you can freeze them! After cooking, let them cool completely, then wrap them tightly in foil or freezer bags. When you’re ready to enjoy, simply reheat in the oven until heated through. You’ll have a quick meal on hand!

    What sides pair well with Taco Bell Quesarito Cheesy?

    Consider serving it with a side of Mexican street corn, a fresh salad, or tortilla chips with guacamole. These pairings add delightful layers to your meal and create an appealing dinner experience!

    Final Thoughts

    Cooking this Taco Bell Quesarito Cheesy is like bringing a piece of happiness to your dinner table. The joy of biting into that crispy, cheesy tortilla filled with savory meat and rice is simply unmatched. It’s a recipe that not only satisfies hunger but also creates memories—whether it’s a family dinner or a fun gathering with friends. Plus, the ease of preparation means you can whip it up even on the busiest nights. Trust me, this dish will become a staple in your home. You’ll want to make it over and over again, sharing smiles and delicious flavors!


    Print

    clock clock iconcutlery cutlery iconflag flag iconfolder folder iconinstagram instagram iconpinterest pinterest iconfacebook facebook iconprint print iconsquares squares iconheart heart iconheart solid heart solid icon

    Description

    Taco Bell Quesarito Cheesy is a delicious blend of taco meat, Spanish rice, and a creamy chipotle sauce wrapped in a cheesy tortilla. This recipe brings the beloved fast-food item to your home kitchen.


    • 450 g ground beef
    • 60 ml water
    • 15 g taco seasoning
    • 30 ml olive oil
    • 40 g onion, chopped
    • 300 g uncooked white rice
    • 480 ml chicken broth
    • 240 g chunky salsa
    • 5 g garlic salt
    • 5 g ground cumin
    • 120 g sour cream
    • 10 ml chipotle sauce from adobo peppers
    • 2.5 g chili powder
    • 2.5 g sugar
    • 2.5 g salt
    • 2.5 g ground cumin
    • 2.5 g paprika
    • 1 g garlic powder
    • 1 g onion powder
    • 8 flour tortillas (burrito size, approximately 25 cm)
    • 240 ml nacho cheese sauce
    • 200 g shredded Mexican cheese blend
    • 120 g sour cream
    • 15 ml olive oil

    1. Brown ground beef in a skillet over medium-high heat, breaking apart until fully cooked with no pink remaining. Add taco seasoning and water, stirring to coat. Simmer uncovered for 3–5 minutes until liquid is absorbed and flavors intensify. Transfer to a bowl and set aside.
    2. Heat olive oil in a large skillet over medium heat. Sauté chopped onion until translucent, about 5 minutes. Stir in rice, frequently tossing until lightly toasted. Pour in chicken broth and salsa, then add garlic salt and cumin. Reduce heat, cover, and simmer gently for 20 minutes until liquid is absorbed and rice is tender. Remove from heat and keep warm.
    3. In a small mixing bowl, combine sour cream, chipotle sauce, chili powder, sugar, salt, cumin, paprika, garlic powder, and onion powder. Whisk until smooth and homogeneous. Reserve for assembly.
    4. Wrap tortillas in a damp paper towel and microwave for 30 seconds to soften. Gently heat nacho cheese sauce in the microwave until pourable.
    5. Spread a layer of nacho cheese sauce over 4 tortillas, leaving a 2.5 cm border. Evenly distribute shredded Mexican cheese blend over the cheese sauce. Top each with another tortilla, pressing lightly to seal. On the top tortilla, add a portion of prepared taco meat and Spanish rice. Drizzle chipotle sauce and sour cream on top. Fold the sides inward, then roll tightly into burritos.
    6. Heat olive oil in a skillet over medium-high heat. Place each burrito seam side down and cook for 2–3 minutes per side, turning once, until the exterior is golden brown and crisp. Serve immediately while hot.

    Notes

    • Adjust the seasoning levels to your preference for spice.
    • For a vegetarian version, substitute the beef with black beans or lentils.
    • Serve with additional salsa or guacamole for extra flavor.
    • Prep Time: 20 minutes
    • Cook Time: 30 minutes
    • Category: Main Dish
    • Method: Skillet, Microwave
    • Cuisine: Mexican

    Nutrition

    • Serving Size: 1 Quesarito
    • Calories: 650
    • Sugar: 3 g
    • Sodium: 900 mg
    • Fat: 35 g
    • Saturated Fat: 15 g
    • Unsaturated Fat: 20 g
    • Trans Fat: 0 g
    • Carbohydrates: 60 g
    • Fiber: 5 g
    • Protein: 30 g
    • Cholesterol: 80 mg

    Sharing is caring!

  • Italian White Bean Salad: A Deliciously Fresh Recipe!

    Italian White Bean Salad: A Deliciously Fresh Recipe!


    Introduction to Italian White Bean Salad

    Welcome to a culinary oasis! Life can be a whirlwind, especially for busy moms and professionals like us. That’s where this Italian White Bean Salad comes in—a delightful, refreshing dish that’s both quick to make and impressively delicious. Picture digging into a bowl of creamy cannellini beans, juicy cherry tomatoes, and vibrant herbs, all drizzled with a zesty salsa verde. It’s the kind of salad that not only satisfies but also makes anyone at your table swoon with delight. Consider this recipe your go-to for a nutritious meal or a stress-free treat for loved ones!

    Why You’ll Love This Italian White Bean Salad

    This Italian White Bean Salad checks all the boxes—it’s quick, easy, and bursting with flavor! With just 15 minutes of prep time, you can whip up a vibrant dish that’s perfect for busy weeknights or weekend gatherings. Plus, the mix of textures and the tangy salsa verde dressing will tantalize your taste buds. It’s not just food; it’s a delightful experience that brings smiles to the table!

    Ingredients for Italian White Bean Salad

    Gathering fresh ingredients is half the fun of cooking! For this vibrant Italian White Bean Salad, you’ll need:

    • Cannellini beans: These creamy white beans are the star of the show. They bring a comforting texture and lots of protein.
    • Cherry tomatoes: Sweet and juicy, they add a pop of color and freshness to the salad.
    • Nocellara del Belice or Castelvetrano olives: These vibrant olives are rich in flavor and add a briny goodness. If unavailable, any good-quality olives will do.
    • Red onion: A touch of crunch and a mild, sweet bite pair beautifully with the beans and dressing.
    • Kosher salt: Just a pinch helps enhance all the wonderful flavors in the salad.
    • Parmesan shavings: This salty, nutty cheese elevates the dish, but feel free to leave it out for a vegan option.
    • Fresh parsley and basil: These fragrant herbs create a bright and aromatic salsa verde. They’re essential for that authentic Italian taste.
    • Capers: Tiny bursts of briny flavor that contrast nicely with the creamy beans.
    • Garlic: A little chopped garlic adds depth and richness to the dressing.
    • Anchovy paste: An optional addition that gives the salsa verde extra umami; you can substitute with a bit more salt for a vegetarian version.
    • Red pepper flakes: For a hint of heat, they’re perfect if you like your salad with a slight kick.
    • Freshly ground black pepper: A finishing touch that rounds out the flavors beautifully.
    • Extra virgin olive oil: This rich oil adds a silky texture to the dressing. Don’t skimp on quality here!
    • Red wine vinegar: Tangy and vibrant, it balances the richness of the other ingredients.

    For optional extras, consider adding cucumbers or bell peppers for a crunchy twist. If you want a protein boost, canned tuna works wonders in this salad as well.

    You can find precise measurements for each ingredient at the bottom of this article, perfect for printing or saving for later!

    How to Make Italian White Bean Salad

    Creating this Italian White Bean Salad is a breeze! Let’s dive into each step, ensuring your kitchen comes alive with fresh flavors and vibrant colors.

    Step 1: Prepare the Salsa Verde

    First up, let’s make that delightful salsa verde! In a small bowl, blend together chopped parsley, basil, capers, and garlic. Don’t rush this part; stirring gently allows the herbaceous notes to shine. Then, add the anchovy paste (or more kosher salt if you prefer). Drizzle in olive oil and red wine vinegar, and sprinkle in the red pepper flakes and black pepper. Mix it all well to achieve a sweet and tangy flavor that dances on your palate.

    Step 2: Combine the Beans and Vegetables

    Now, grab a medium-sized bowl and toss in your rinsed cannellini beans, quartered cherry tomatoes, torn olives, and sliced red onion. It’s important to be gentle here to maintain the beans’ creamy texture. Sprinkle a pinch of kosher salt for extra flavor, and stir lightly—just enough to coat the ingredients but not mash them. You want each bite to celebrate that delicious combination!

    Step 3: Dress the Salad

    It’s time to add that fragrant salsa verde to your salad! Drizzle it generously over the bean and vegetable mixture. As you toss, be careful not to crush the beans. We want a light mix that helps distribute those fabulous flavors without losing the lovely form of the beans. You can already smell the Italian magic coming together!

    Step 4: Add the Finishing Touches

    For a final flourish, sprinkle parmesan shavings on top for a nutty richness—oh, it’s like a little gift of savories! If you want an extra protein boost, consider adding some canned tuna. It’s not necessary, but it does complement the salad beautifully. Serve it up with some crusty bread, and you’ve got a meal that’s both simple and satisfying!

    Tips for Success

    • Rinse the cannellini beans thoroughly to remove any canning liquid for a fresher taste.
    • Use high-quality extra virgin olive oil; its flavor will elevate the salad.
    • Chill the salad for about 30 minutes before serving for enhanced flavor melding.
    • Feel free to experiment with different herbs based on your preference.
    • Add extra veggies—like cucumbers or bell peppers—for a delightful crunch!

    Equipment Needed for Italian White Bean Salad

    • Medium-sized bowl: Any mixing bowl will work; ceramic or glass is preferred for easy cleaning.
    • Small bowl: Great for preparing your salsa verde; a measuring cup can work in a pinch.
    • Cutting board: Essential for chopping vegetables and herbs.
    • Knife: A sharp chef’s knife simplifies ingredient prep.
    • Wooden spoon or spatula: Perfect for mixing without crushing the delicate beans.

    Variations of Italian White Bean Salad

    • For a Mediterranean twist, add diced cucumbers and feta cheese for extra flavor and texture.
    • Incorporate bell peppers in various colors for added crunch and a pop of sweetness.
    • Try swapping cannellini beans with chickpeas for a heartier, protein-packed version.
    • Go vegan by omitting the parmesan and anchovy paste; add nutritional yeast for a cheesy flavor!
    • Include roasted vegetables, like zucchini or eggplant, for a smoky depth in taste.
    • Add sliced avocado for creaminess and healthy fats that enhance heartiness.

    Serving Suggestions for Italian White Bean Salad


    • Serve with crusty whole grain bread or toasted baguette slices for a satisfying crunch.
    • Pair with a light Italian white wine, like Pinot Grigio, to enhance the flavors.
    • For a beautiful presentation, serve in individual bowls topped with a sprinkle of fresh herbs.
    • Accompany with a simple arugula salad dressed in lemon vinaigrette for extra freshness.

    FAQs about Italian White Bean Salad

    As a passionate home cook, I know that questions often come up when trying new recipes. Here are some common queries about this Italian White Bean Salad:

    Can I make this salad in advance?

    Absolutely! This Italian White Bean Salad is perfect for meal prep. You can make it a few hours ahead or even the night before. Just remember to store it in the fridge to keep it fresh. The flavors will meld wonderfully over time!

    Is the Italian White Bean Salad vegan-friendly?

    You bet! Just omit the parmesan cheese and the anchovy paste. You can achieve that cheesy flavor by adding a sprinkle of nutritional yeast. It’s a simple swap that still gives you all the deliciousness.

    What can I serve with this salad?

    This salad pairs beautifully with crusty bread, grilled chicken, or fish. It’s versatile enough to complement many dishes, making it great for any meal.

    How do I store leftovers?

    Store any leftover salad in an airtight container in the fridge. It’s best enjoyed within a day for optimal freshness. Just give it a gentle stir before serving again, as the dressing may settle.

    Can I customize the ingredients?

    Definitely! Feel free to add your favorite veggies or herbs to personalize it. Whether it’s diced cucumbers, bell peppers, or even artichokes, the Italian White Bean Salad can be as dynamic as your taste preferences.

    Final Thoughts

    Creating this Italian White Bean Salad isn’t just about following a recipe; it’s about bringing joy and satisfaction to your table. With its vibrant colors and delightful textures, this dish is a celebration of fresh ingredients that nourish both the body and soul.

    Imagine gathering around with family or friends, all delighting in that first bite of creamy beans and tangy dressing. It’s more than a meal; it’s an experience. I hope this recipe becomes a go-to in your kitchen, as it has in mine. Get ready for smiles, shared moments, and a hearty appetite for deliciousness!


    Print

    clock clock iconcutlery cutlery iconflag flag iconfolder folder iconinstagram instagram iconpinterest pinterest iconfacebook facebook iconprint print iconsquares squares iconheart heart iconheart solid heart solid icon

    Description

    A refreshing Italian White Bean Salad featuring cannellini beans, cherry tomatoes, olives, and a tangy salsa verde dressing.


    • 1 can (14 oz / ~400 g) cannellini beans, drained and rinsed
    • ½ cup cherry tomatoes, quartered (about 68 tomatoes)
    • ¼ cup Nocellara del Belice or Castelvetrano olives, torn
    • ¼ cup red onion, sliced in quarter moons
    • ¼ teaspoon kosher salt
    • 2 tablespoons parmesan shavings
    • 2 tablespoons chopped fresh parsley (for salsa verde)
    • 1 tablespoon chopped fresh basil (for salsa verde)
    • 1 tablespoon chopped capers (for salsa verde)
    • 1 garlic clove, finely chopped (for salsa verde)
    • ¼ teaspoon anchovy paste (or substitute with ¼ teaspoon kosher salt for salsa verde)
    • ¼ teaspoon red pepper flakes (for salsa verde)
    • ¼ teaspoon freshly ground black pepper (for salsa verde)
    • 3 tablespoons extra virgin olive oil (for salsa verde)
    • 1 tablespoon red wine vinegar (for salsa verde)

    1. Prepare the salsa verde: In a small bowl, combine the parsley, basil, capers, garlic, anchovy paste (or salt), red pepper flakes, black pepper, olive oil, and red wine vinegar. Stir well to blend the flavors.
    2. In a medium bowl, add the cannellini beans, cherry tomatoes, torn olives, and red onion. Sprinkle with kosher salt and toss gently to combine.
    3. Drizzle the salsa verde over the salad mixture and toss carefully to avoid mashing the beans.
    4. Add the parmesan shavings and mix lightly.
    5. Top with tuna if using, and serve with crusty bread.

    Notes

    • Feel free to add other vegetables like cucumbers or bell peppers for extra crunch.
    • For a vegan option, omit the parmesan cheese.
    • This salad is best served fresh but can be stored in the fridge for a day.
    • Prep Time: 15 minutes
    • Cook Time: 0 minutes
    • Category: Salad
    • Method: No Cook
    • Cuisine: Italian

    Nutrition

    • Serving Size: 1 cup
    • Calories: 220
    • Sugar: 1g
    • Sodium: 500mg
    • Fat: 12g
    • Saturated Fat: 2g
    • Unsaturated Fat: 9g
    • Trans Fat: 0g
    • Carbohydrates: 22g
    • Fiber: 6g
    • Protein: 7g
    • Cholesterol: 5mg

    Sharing is caring!

  • Garlic Butter Chicken Bites

    Garlic Butter Chicken Bites


    Introduction to Garlic Butter Chicken Bites

    Do you ever find yourself racing against the clock, dreaming of a meal that’s both delicious and easy? That’s where my Garlic Butter Chicken Bites come in! These little gems are not only a quick solution for a busy day, but they also have the power to impress your loved ones with their rich, buttery flavor. Imagine tender chicken pieces tossed in warm garlic butter, creating a cozy hug on a plate. Whether you’re cooking for a busy weeknight dinner or hosting friends for appetizers, this recipe is your go-to for satisfying, crowd-pleasing comfort food!

    Why You’ll Love This Garlic Butter Chicken Bites

    These Garlic Butter Chicken Bites are an absolute dream for busy cooks like us! They come together in just 20 minutes, making them perfect for those hectic evenings. The taste? Oh, it’s to die for! With rich garlic and buttery goodness, each bite is a celebration of flavors. Plus, this dish is a hit with both kids and adults, ensuring your family will come back for more. Who wouldn’t love that?

    Ingredients for Garlic Butter Chicken Bites

    Let’s gather the stars of our show! Here’s what you need for these flavorful Garlic Butter Chicken Bites:

    • Chicken breast: This is the main event! Juicy and tender, it cooks quickly, making it perfect for this speedy recipe. You can also swap it for chicken thighs for deeper flavor.
    • Garlic: Minced garlic is the heart and soul of this dish. It adds that aromatic punch that makes your taste buds dance. Customize the amount to suit your love for garlic!
    • Butter: The magic ingredient! It creates that velvety garlic sauce that clings to the chicken. For a twist, try using a blend of olive oil and butter for a lighter option.
    • Fresh parsley: This bright herb is perfect for garnishing. It adds a pop of color and freshness. If you’re out, a sprinkle of dried herbs can work in a pinch.
    • Salt and pepper: Simple seasoning that enhances all the flavors. Just a pinch can go a long way, so season according to your taste!

    Don’t forget, the exact measurements for each ingredient are at the bottom of the article and available for printing. Happy cooking!

    How to Make Garlic Butter Chicken Bites

    Prepare the Chicken

    First things first, let’s prep our chicken! Take 500 grams of chicken breast and cut it into bite-sized pieces. It’s important to pat the pieces dry with paper towels. This will help them get that lovely golden color when cooking. Trust me, no one wants soggy chicken on their plate! Set the chicken aside and let’s move on to the aromatic part of this dish.

    Sauté the Garlic

    In a large skillet, it’s time to melt 100 grams of butter over medium heat. As the butter melts, it’s like a warm hug in your kitchen. Once it’s nice and bubbly, add 4 minced garlic cloves. Sauté them for just a minute or two until they turn fragrant. You want to release all those wonderful garlic aromas! Keep an eye on it, though; you don’t want burnt garlic ruining the flavor.

    Cook the Chicken

    Now, here comes the star of the show! Add the seasoned chicken pieces to the skillet. Spread them out so they get nice and golden brown, cooking for about 5 to 7 minutes. You’ll know when they’re ready when they’re fully cooked and beautifully browned. Make sure to give them a gentle stir halfway through to ensure they’re evenly cooked. Oh, and the sight of that sizzling garlic butter is simply irresistible!

    Serve and Enjoy

    When the chicken is perfectly cooked, transfer those delightful bites to a serving platter. Drizzle any remaining garlic butter from the skillet over them for an extra burst of flavor. Don’t forget to sprinkle freshly chopped parsley on top; it adds a beautiful touch and a burst of freshness! Now, grab your fork and dive into these wonderful Garlic Butter Chicken Bites. Your taste buds will thank you!

    Tips for Success

    • Pat your chicken dry for the best browning.
    • Keep an eye on the garlic; it burns quickly!
    • Use a meat thermometer to ensure chicken is fully cooked (165°F).
    • Add a squeeze of lemon juice for a zingy twist.
    • Feel free to make the garlic butter sauce ahead of time for easy meal prep!

    Equipment Needed

    • Large skillet: A frying pan works well if you don’t have one.
    • Measuring spoons: Keep these handy to measure your ingredients accurately.
    • Spatula: A simple one will do to flip and stir.
    • Knife and cutting board: Essential for prepping your chicken.
    • Serving platter: Any large plate will showcase your tasty bites beautifully!

    Variations of Garlic Butter Chicken Bites

    • Herb-Infused: Add fresh rosemary or thyme to the garlic butter for an aromatic twist.
    • Spicy Kick: Toss in red pepper flakes or cayenne pepper for some heat. You’ll love the balance of spice and garlic!
    • Mushroom Delight: Include sliced mushrooms along with the chicken for added texture and earthiness.
    • Gluten-Free Option: Use a gluten-free soy sauce or tamari for extra flavor while keeping it gluten-free.
    • Coconut Variation: Replace butter with coconut oil for a tropical, dairy-free version that still tastes amazing!

    Serving Suggestions for Garlic Butter Chicken Bites

    • Crusty Bread: Serve with a side of warm, crusty bread to soak up the delicious garlic butter.
    • Fresh Salad: Pair with a light salad for a refreshing contrast to the rich flavors.
    • Chilled Wine: A glass of chilled white wine beautifully complements these bites.
    • Garnish: Consider adding lemon wedges for a zesty touch on the plate.
    • Presentation: Serve on a rustic wooden board for an inviting look!

    FAQs about Garlic Butter Chicken Bites

    Can I make Garlic Butter Chicken Bites ahead of time? Absolutely! You can prepare the garlic butter sauce in advance and store it in the fridge. Just reheat it before tossing with freshly cooked chicken. It’s a great way to save time!

    What can I serve with Garlic Butter Chicken Bites? These delicious bites pair wonderfully with crusty bread, fresh salad, or even over a bed of rice. The garlic butter sauce is perfect for dipping, so feel free to get creative!

    Can I use frozen chicken for this recipe? Yes, you can! Just make sure to thaw the chicken completely before preparing it. Cooking frozen pieces directly might lead to uneven cooking, but thawed chicken will work just fine.

    What’s the best way to store leftovers? Store your Garlic Butter Chicken Bites in an airtight container in the refrigerator. They should stay fresh for up to three days! Reheat gently to preserve the flavor.

    Is there a low-carb alternative for this dish? Yes! You can serve these bites on a bed of sautéed zucchini noodles or cauliflower rice for a satisfying low-carb option. Enjoy the same great flavors with fewer carbs!

    Final Thoughts on Garlic Butter Chicken Bites

    These Garlic Butter Chicken Bites are more than just a recipe; they’re a celebration of flavor and ease in the kitchen. I love how quickly I can whip them up, transforming a hectic day into something special with just a few simple ingredients. The buttery garlic aroma fills my home, instantly lifting my spirits. Sharing these bites with family and friends always brings smiles and satisfied nods. Whether it’s for a casual dinner or a gathering, these little morsels make every occasion feel like a feast. Trust me, once you try them, you’ll be hooked!


    Print

    clock clock iconcutlery cutlery iconflag flag iconfolder folder iconinstagram instagram iconpinterest pinterest iconfacebook facebook iconprint print iconsquares squares iconheart heart iconheart solid heart solid icon

    Description

    Delicious Garlic Butter Chicken Bites that are easy to make and perfect for impressing your guests.


    • Chicken breast: 500 grams, cut into bite-sized pieces
    • Garlic: 4 cloves, minced
    • Butter: 100 grams
    • Fresh parsley: 2 tablespoons, chopped
    • Salt: to taste
    • Pepper: to taste

    1. Prepare the chicken by cutting it into bite-sized pieces and patting it dry with paper towels.
    2. In a large skillet, melt the butter over medium heat and add the minced garlic, sautéing until fragrant.
    3. Add the seasoned chicken pieces to the skillet and cook for about 5-7 minutes until golden brown and fully cooked.
    4. Transfer the chicken bites to a serving platter, drizzle with remaining garlic butter, and sprinkle with chopped parsley before serving.

    Notes

    • Can substitute chicken breast with thighs for added flavor.
    • Adjust garlic to your preference for potency.
    • Serve with crusty bread to soak up the garlic butter.
    • Prep Time: 10 minutes
    • Cook Time: 10 minutes
    • Category: Appetizer
    • Method: Skillet
    • Cuisine: American

    Nutrition

    • Serving Size: 1/4 of the recipe
    • Calories: 380
    • Sugar: 0g
    • Sodium: 450mg
    • Fat: 29g
    • Saturated Fat: 17g
    • Unsaturated Fat: 5g
    • Trans Fat: 0g
    • Carbohydrates: 1g
    • Fiber: 0g
    • Protein: 30g
    • Cholesterol: 110mg

    Sharing is caring!