Author: IHAAL Team

  • Snickerdoodle Pumpkin Cookies

    Snickerdoodle Pumpkin Cookies


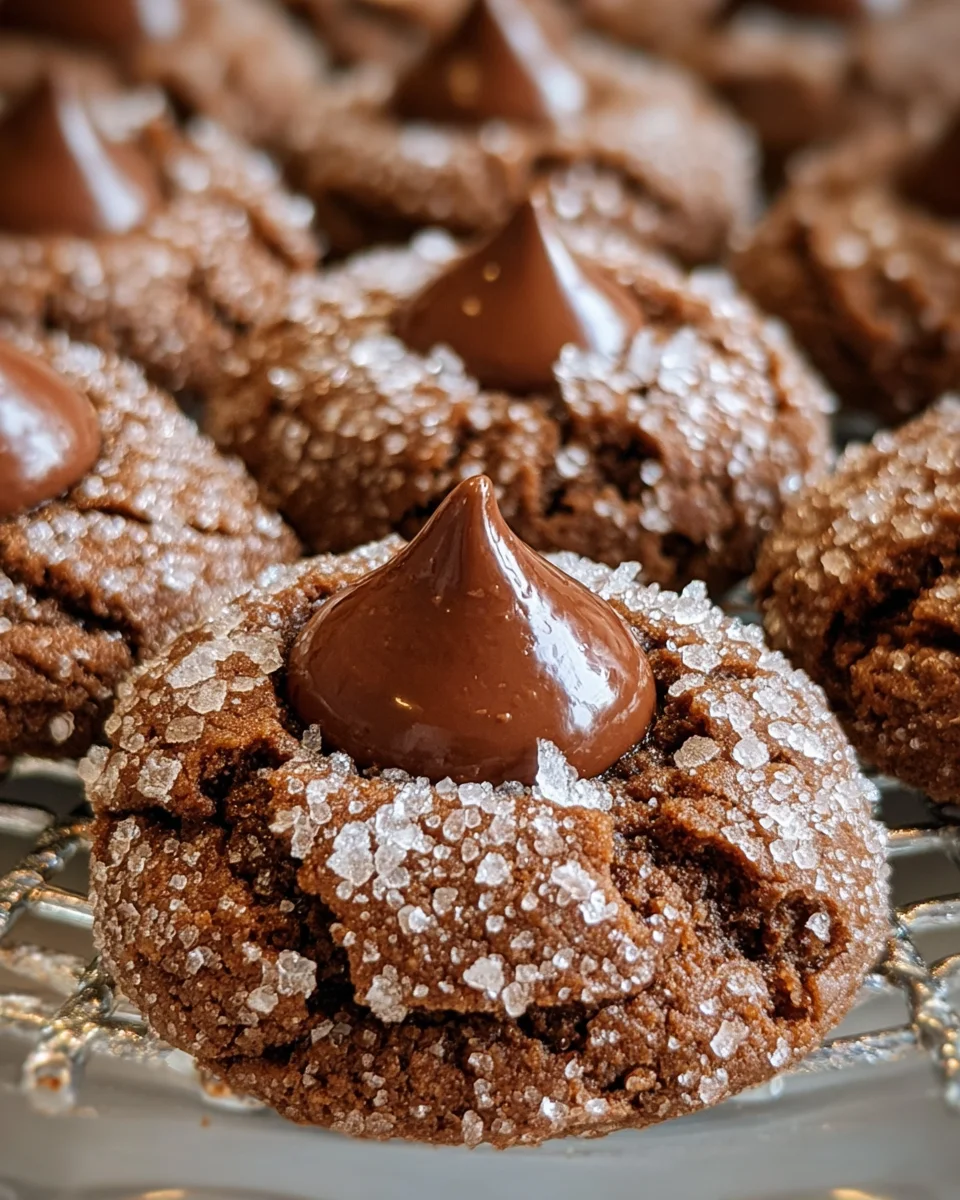
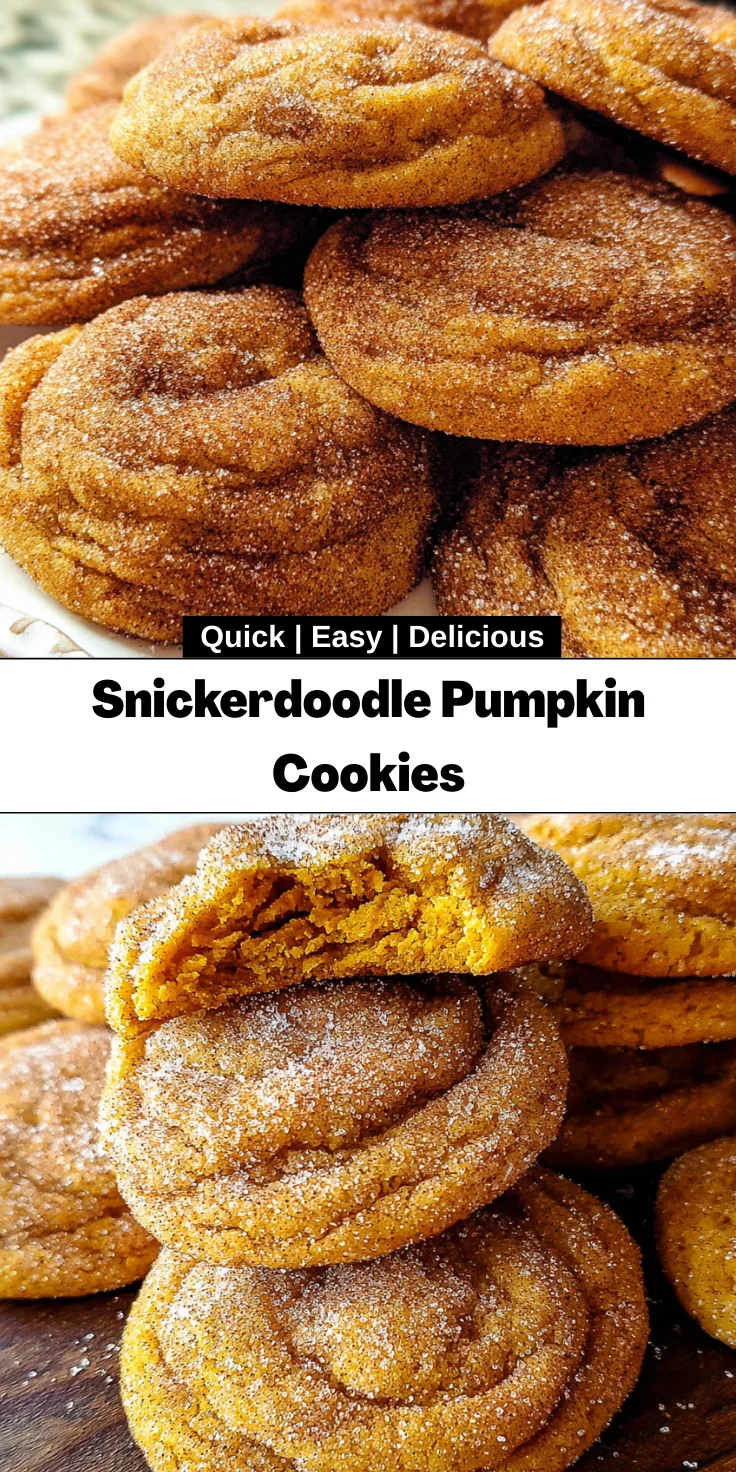
    Introduction to Snickerdoodle Pumpkin Cookies

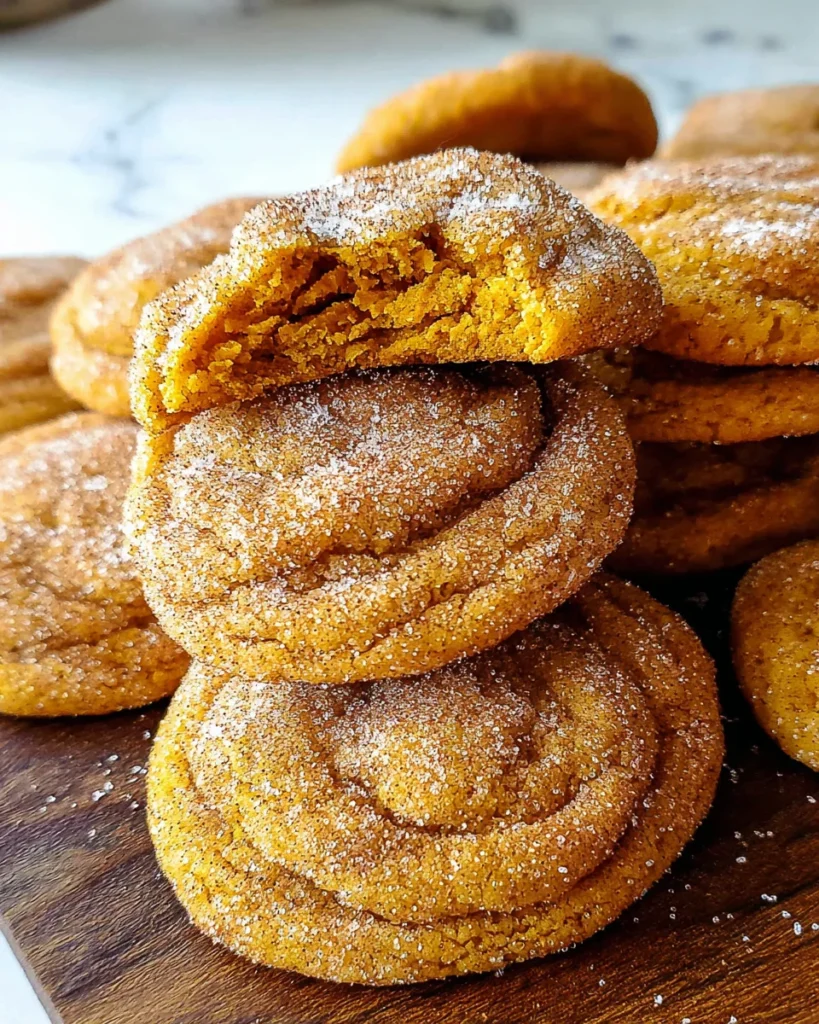
    As the leaves begin to change and the air turns crisp, there’s nothing quite like the smell of warm Snickerdoodle Pumpkin Cookies wafting through your home. These delightful little treats blend the classic comfort of snickerdoodles with the cozy flavors of pumpkin spice, making them the perfect addition to your fall baking repertoire. Whether you’re juggling a busy schedule or looking to impress family during a cozy gathering, this recipe is a simple and delicious way to celebrate the season. Trust me, you’ll want to keep these cookies within arm’s reach as you dive into autumn delights!

    Why You’ll Love This Snickerdoodle Pumpkin Cookies

    You’re going to adore these Snickerdoodle Pumpkin Cookies for so many reasons! First off, they’re incredibly easy to whip up, even on your busiest days. The soft, chewy texture combined with that warm pumpkin spice flavor will delight your taste buds. Plus, they fill your kitchen with that irresistible fall aroma, instantly creating a cozy atmosphere. Whether you enjoy them with a cup of tea or share them with friends, these cookies are sure to become a seasonal favorite!

    Ingredients for Snickerdoodle Pumpkin Cookies

    Gathering the right ingredients is the first step to cookie perfection! Here’s what you’ll need to create your Snickerdoodle Pumpkin Cookies:

    • All-purpose flour: The backbone of your cookies, providing structure and the perfect chewy texture.
    • Cornstarch: Helps keep the cookies soft and tender, making every bite melt in your mouth.
    • Cream of tartar: Gives snickerdoodles their signature tang and helps them rise beautifully.
    • Baking soda and baking powder: These two work together to leaven the cookies, making them light and airy.
    • Ground spices (cinnamon, nutmeg, ginger, cloves, allspice): This warm medley captures the essence of fall, adding that cozy feel.
    • Granulated sugar and light brown sugar: Both sugars add sweetness; brown sugar also adds moisture and depth of flavor.
    • Unsalted butter: Ensure it’s at room temperature; this helps in achieving that fluffy consistency when creaming.
    • Egg yolk: Just the yolk adds richness and binds the ingredients without making the cookies too cakey.
    • Libby’s pumpkin puree: The star of the show! It packs in the pumpkin flavor and moisture.
    • Vanilla extract: Provides a lovely aroma and flavor boost, rounding out the sweetness nicely.
    • Cinnamon sugar for rolling: This sugary mix creates a delightful crunchy coating that enhances every bite!

    If you want to get specific measurements, you can find them at the bottom of the article, where they’re available for printing. Happy baking!

    How to Make Snickerdoodle Pumpkin Cookies

    Making these Snickerdoodle Pumpkin Cookies is a breeze! Just follow these easy steps, and you’ll have a batch of cookies that brighten your autumn days.

    Prepare the Dry Ingredients

    Start by whisking together the flour, cornstarch, cream of tartar, baking soda, baking powder, and your array of warm spices in a mixing bowl. This step not only combines the ingredients but also aerates them, ensuring a light texture. Set this bowl aside for the moment.

    Cream the Butter and Sugars

    In the bowl of your electric stand mixer, cream the softened butter with granulated and light brown sugars on medium speed for about two minutes until fluffy. This mix should look pale and airy; it’s like creating a cozy cloud for your cookie dough!

    Mix in Egg and Pumpkin

    Now, switch the mixer to medium-low and add the egg yolk, followed by the delicious Libby’s pumpkin puree and vanilla extract. As you blend, the colors should meld beautifully, forming a delightful mix filled with fall vibes!

    Combine with Dry Ingredients

    Reduce the mixer speed to low and gradually incorporate your dry ingredient mixture. Mix just until you no longer see flour; overmixing can lead to tough cookies! I like to give the dough a final stir with a spatula to make sure everything’s combined properly.

    Chill the Dough

    Cover the bowl with plastic wrap and chill the dough in the refrigerator for at least three hours. Feeling a bit impatient? You can cheat and freeze it for about 45 minutes. Chilling helps the cookies maintain their shape while baking, so don’t skip this step unless you want flat cookies.

    Preheat and Prepare Baking Sheets

    Once your dough is nicely chilled, preheat your oven to 350 degrees F. Line two baking sheets with parchment paper or silicone baking mats. This way, your cookies won’t stick, and cleanup will be a snap.

    Roll the Cookie Dough

    Using a 2-tablespoon cooking scoop, scoop out portions of the cookie dough. Roll each portion into a ball, ensuring it’s nice and round. Then, roll each ball in the cinnamon-sugar mixture until fully coated. The smell of these snickerdoodle pumpkin cookies will make your heart skip a beat!

    Bake the Cookies

    Place your cookie balls on the prepared baking sheets, leaving about two inches of space between them. Bake in the preheated oven for 10 to 13 minutes, just until they begin to crack on top. Remember, they will continue to bake a bit after you take them out. If they aren’t spreading, don’t panic! Lightly bang the tray on the counter to jumpstart that beautiful spread.

    Cooling and Storing Tips

    Once baked to perfection, let the cookies cool on the baking sheet for about five minutes. This helps them firm up nicely before transferring them to a wire rack for complete cooling. Store leftover cookies in an airtight container at room temperature. If they make it that long!

    Tips for Success

    • Always measure your flour properly; use the spoon-and-level method for accuracy.
    • Chill the dough thoroughly for thick, puffy cookies that maintain their shape.
    • Consider using a cookie scoop for even-sized cookies—they’ll bake more uniformly.
    • If you want a stronger spice flavor, feel free to adjust the spices to your taste.
    • Store cookies in an airtight container with a slice of bread to keep them soft.

    Equipment Needed

    • Electric stand mixer: A handheld mixer works too if you don’t have one.
    • Mixing bowls: Any size will do, just make sure they’re easy to handle.
    • Baking sheets: You can use any flat surface that fits in your oven.
    • Parchment paper or silicone mats: They make for easy cleanup.
    • Cookie scoop: A tablespoon works well if you don’t have a scoop.

    Variations

    • Gluten-Free: Substitute all-purpose flour with a gluten-free blend to make these cookies gluten-free without losing flavor!
    • Vegan: Swap the butter for coconut oil or vegan butter and replace the egg yolk with a flaxseed meal or chia seed mixture for a plant-based delight.
    • Chocolate Chip Add-In: Toss in a handful of semi-sweet or dark chocolate chips to the dough for a delicious chocolate twist.
    • Nutty Flavor: Add chopped walnuts or pecans for an extra crunch and flavor dimension—simply delightful!
    • Spice Variation: Experiment with additional spices like cardamom or pumpkin spice blend for a unique flavor twist.

    Serving Suggestions

    • Enjoy warm Snickerdoodle Pumpkin Cookies with a steaming cup of chai or spiced cider for a cozy treat.
    • Pair them with a scoop of cinnamon ice cream for a delightful dessert experience.
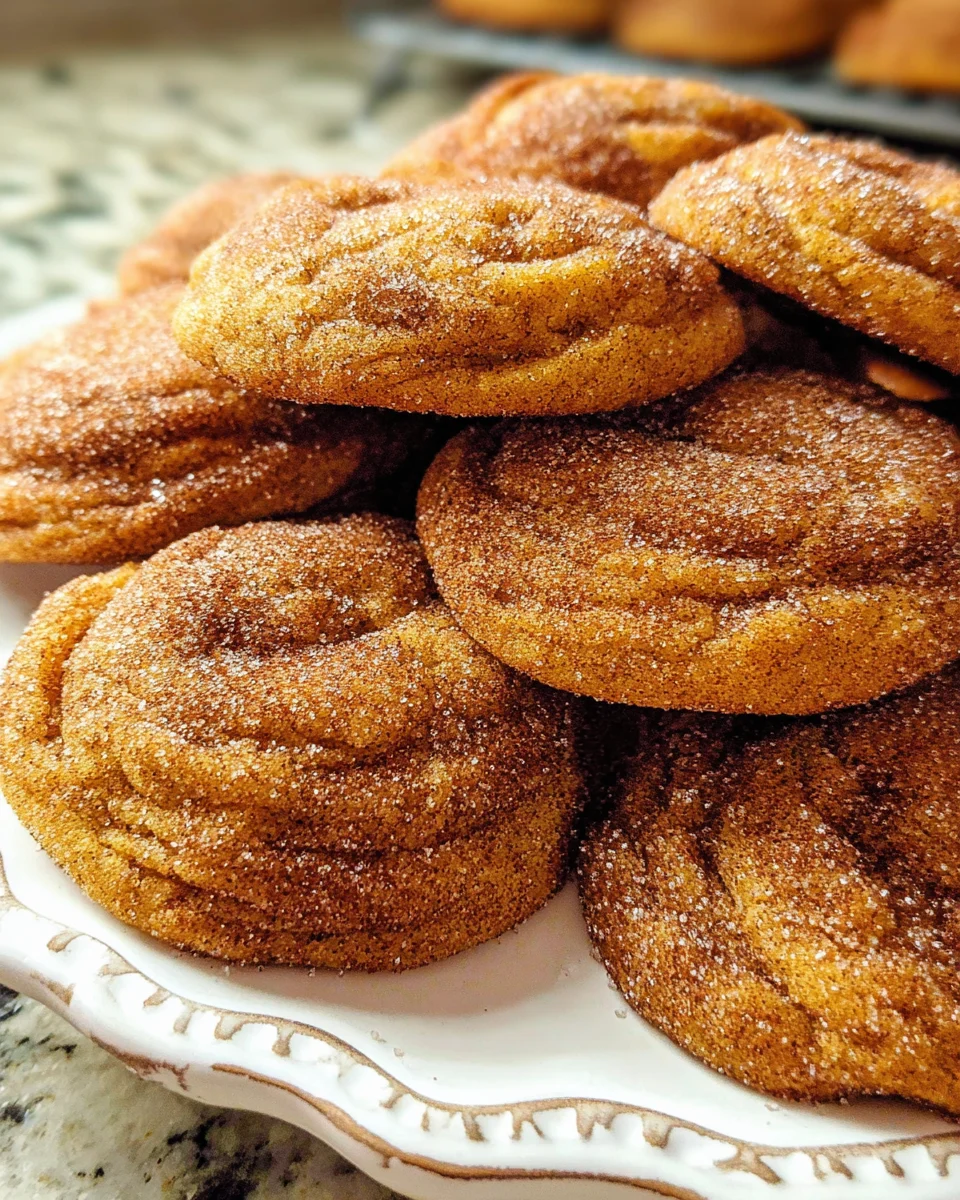
    • Serve on a decorative platter, garnished with mini pumpkins for a festive touch.
    • These cookies make perfect gifts when wrapped in cellophane with a cozy ribbon.

    FAQs about Snickerdoodle Pumpkin Cookies

    As I whipped up these Snickerdoodle Pumpkin Cookies, I found myself thinking of some common questions you might have. Let’s clear the air while we savor those cozy flavors!

    Can I use fresh pumpkin instead of canned? Absolutely! Just be sure to cook and puree the pumpkin properly. Canned Libby’s pumpkin puree is often more convenient and gives a consistent result.

    How can I keep my cookies from flattening? Chilling the dough is key! If your cookies are spread too much, try chilling them longer before baking. Cold dough helps maintain their shape.

    What’s the best way to store Snickerdoodle Pumpkin Cookies? After they cool, store them in an airtight container at room temperature. Add a slice of bread to keep them soft for longer!

    Can I freeze the cookie dough? Yes! You can scoop the dough into balls and freeze them. Just bake from frozen, adjusting the time by a couple of minutes longer.

    Are these cookies suitable for a gluten-free diet? Absolutely! Just swap the all-purpose flour with a gluten-free flour blend, and you’re all set for a delicious treat!

    Final Thoughts

    As you bake these Snickerdoodle Pumpkin Cookies, you’re not just making a delicious treat; you’re crafting warm memories that will fill your home with love and comfort. Each bite transports you to crunchy autumn leaves and cozy family gatherings. They’re a gentle reminder that even on the busiest days, a moment spent sharing sweetness matters. So, whether you’re treating friends or simply indulging yourself, enjoy every crumb. The joy of baking brings us closer together—one delicious cookie at a time. Here’s to a delightful season filled with happiness and the irresistible aroma of your kitchen!


    Print

    clock clock iconcutlery cutlery iconflag flag iconfolder folder iconinstagram instagram iconpinterest pinterest iconfacebook facebook iconprint print iconsquares squares iconheart heart iconheart solid heart solid icon

    Description

    Delicious and soft Snickerdoodle Pumpkin Cookies, perfectly spiced for fall.


    • 2 1/2 cups (300g) all-purpose flour
    • 1 tablespoon cornstarch
    • 1 teaspoon cream of tartar
    • 1 teaspoon baking soda
    • 1/4 teaspoon baking powder
    • 1 ½ teaspoons ground cinnamon
    • 1/2 teaspoon ground nutmeg
    • 1/2 teaspoon ground ginger
    • 1/4 teaspoon ground cloves
    • 1/4 teaspoon ground allspice
    • 3/4 cup granulated sugar
    • 2/3 cup packed light brown sugar
    • 12 tablespoons unsalted butter, room temperature
    • 1 large egg yolk
    • 1/2 cup Libby’s pumpkin puree
    • 1 1/2 teaspoons vanilla extract
    • 1/4 cup granulated sugar (for rolling)
    • 1 teaspoon ground cinnamon (for rolling)

    1. In a mixing bowl, whisk together the Dry Ingredients until thoroughly combined; set aside.
    2. In the bowl of an electric stand mixer fitted with the paddle attachment, cream together the butter and sugars on medium speed until fluffy, about 2 minutes.
    3. On medium-low, mix in the egg yolk, followed by the pumpkin and vanilla extract.
    4. On low, slowly mix in the Dry Ingredients just until combined. Give the dough a final stir by hand to scrape up any dough at the bottom of the bowl.
    5. Cover the dough and chill for 3 hours or freeze for 45 minutes. You may chill the dough in the fridge for up to 3 days.
    6. Preheat the oven to 350 degrees F. Line two baking sheets with parchment paper or silicon nonstick baking mats.
    7. Whisk together the ¼ cup granulated sugar with 1 teaspoon cinnamon in a small bowl; set aside.
    8. Using a 2-tablespoon cooking scoop, scoop the dough and roll it into a ball, then roll in the cinnamon sugar mixture to thoroughly coat.
    9. Transfer the balls to the baking mat, spacing cookies 2-inches apart (6 per baking sheet). Refrigerate any dough you are not using at the time, colder dough=thicker cookies!
    10. Bake at 350 degrees F just until set and the tops are starting to crack (they should look slightly underbaked; they will cook more once removed from the oven). Baking times will vary depending on how cold your dough is, plan on anywhere from 10-13 minutes.
    11. Cool on the baking sheet for 5 minutes then transfer to a wire rack to cool completely.
    12. Tip: If they aren’t really spreading by minute 9, remove them from the oven and lightly bang the baking sheet on the counter 2-3 times. This helps initiate that spread. Return to the oven to continue baking.

    Notes

    • Measure flour correctly or they will not spread.
    • Use Libby’s pumpkin puree, not pumpkin pie filling.
    • Prep Time: 15 minutes
    • Cook Time: 13 minutes
    • Category: Dessert
    • Method: Baking
    • Cuisine: American

    Nutrition

    • Serving Size: 1 cookie
    • Calories: 150
    • Sugar: 10g
    • Sodium: 150mg
    • Fat: 7g
    • Saturated Fat: 4g
    • Unsaturated Fat: 2g
    • Trans Fat: 0g
    • Carbohydrates: 20g
    • Fiber: 1g
    • Protein: 2g
    • Cholesterol: 20mg

    Sharing is caring!

  • Creamy Ground Turkey & Spinach Protein Bowl

    Creamy Ground Turkey & Spinach Protein Bowl


    Introduction to Creamy Ground Turkey & Spinach Protein Bowl

    As a busy mom, I often find myself juggling multiple tasks, from work deadlines to school activities. It’s a real challenge to get a nutritious meal on the table quickly. That’s why I adore my Creamy Ground Turkey & Spinach Protein Bowl. With just a few wholesome ingredients, this dish packs a flavorful punch while being incredibly simple to prepare. It’s versatile enough to suit the whole family, making it a go-to dinner option that everyone will love. Plus, the creaminess makes it feel indulgent, all while nourishing our bodies.

    Why You’ll Love This Creamy Ground Turkey & Spinach Protein Bowl

    Life can be a whirlwind, right? Between school drop-offs, work meetings, and evening activities, who has time to whip up a gourmet meal? This Creamy Ground Turkey & Spinach Protein Bowl makes everything easier. It’s quick to prepare, offers a delightful creamy texture, and bursts with wholesome flavors. Plus, the nutritious ingredients ensure that you and your loved ones are nourished, bringing comfort and health right to your table.

    Ingredients for Creamy Ground Turkey & Spinach Protein Bowl

    Let’s dive into the star-studded lineup of ingredients that make this dish a creamy delight.

    • Ground turkey – Lean and packed with protein, it provides a hearty base while keeping the dish healthy.
    • Hot salsa – This adds a zesty kick and vibrant flavor, infusing each bite with a delightful tang. You can opt for mild if spice isn’t your thing!
    • Cottage cheese – The secret to creaminess! This nutrient-rich ingredient gives the bowl a velvety texture while boosting protein content.
    • Fresh spinach – A nutritional powerhouse rich in vitamins A and C, it adds brightness to the dish and wilts beautifully into the mixture.
    • Diced onion – A classic flavor enhancer, it brings sweetness and depth to your creamy bowl.
    • Worcestershire sauce – A touch of umami that elevates all the flavors, creating a mouthwatering experience.

    Other seasoning stars include butter, garlic powder, and a blend of herbs that harmonize beautifully. Together, these ingredients craft a hearty meal that’s both flavorful and nutritious. For specific measurements, check the bottom of the article!

    How to Make Creamy Ground Turkey & Spinach Protein Bowl

    Let’s get cooking! Together, we’ll whip up this Creamy Ground Turkey & Spinach Protein Bowl in no time. Follow these steps, and I promise you’ll savor the joy of making a quick and delicious meal.

    Step 1: Heat the Oil and Cook the Turkey

    Start by heating a tablespoon of extra virgin olive oil in a large skillet over medium heat. This will help the ground turkey sizzle and brown evenly. Once it’s hot, add 1.5 pounds of ground turkey. Sprinkle it with salt and pepper to taste. Use a wooden spoon to break the meat apart. Cook it for about 6 to 7 minutes, until it’s nicely browned. Don’t rush this step; the browning is all about flavor!

    Step 2: Add the Onions and Seasonings

    Next up, throw in half a medium diced onion. Let those sweet flavors develop as you stir in 1 teaspoon of garlic powder, 0.5 teaspoon of dried oregano, and 0.5 teaspoon of dried basil. The aromas of these herbs will transport you to your cozy kitchen! Cook for 3 to 5 minutes or until the onion has softened. This step creates a flavor base that you’ll absolutely love.

    Step 3: Pour in the Salsa and Add Butter

    Now it’s time for the fun part! Pour in 1.5 cups of hot salsa. The vibrant colors light up the skillet. Add a tablespoon of butter—this is where the creamy magic begins! Stir everything together, letting the butter melt and mingle with the salsa. Cook this mixture for about 2 to 3 minutes, until it bubbles gently.

    Step 4: Incorporate the Spinach

    Once the salsa is bubbling, it’s time to introduce 3 cups of fresh spinach. Toss it into the skillet—watch it wilt down like a dream! It takes only about 2 to 3 minutes. This leafy green not only adds nutrition but also a gorgeous green color that makes the dish pop.

    Step 5: Mix in Cottage Cheese and Worcestershire Sauce

    Here comes the creamy part! Stir in 1.5 cups of cottage cheese and a tablespoon of Worcestershire sauce. The cottage cheese lends its delightful creaminess, while the Worcestershire adds depth. Cook this combination for another 2 to 3 minutes, stirring gently until the cottage cheese is warmed through and everything is beautifully blended.

    Step 6: Simmer and Adjust Flavors

    Reduce the heat to low, allowing the mixture to simmer for about 5 minutes. This step helps thicken the sauce and melds all those vibrant flavors together. Taste your creation and adjust the salt, pepper, or spice as needed with a dash of garlic salt and crushed red pepper flakes. This Creamy Ground Turkey & Spinach Protein Bowl is ready to be served hot!

    Tips for Success

    • To prevent the turkey from drying out, avoid overcooking it. Keep it juicy by cooking just until browned.
    • If you’re adjusting spice levels, start with half the amount of crushed red pepper flakes and add more to your taste.
    • Store any leftovers in an airtight container in the refrigerator for up to three days to enjoy later!

    Equipment Needed

    For this Creamy Ground Turkey & Spinach Protein Bowl, you’ll need just a few essential tools:

    • A large skillet to cook everything together.
    • A wooden spoon for stirring and breaking apart the turkey.
    • A cutting board and knife to dice the onions.
    • If you have a spatula, it can be handy too!

    Variations

    Looking to customize your Creamy Ground Turkey & Spinach Protein Bowl? Here are some tasty alternatives to suit different dietary preferences:

    • Swap ground turkey for ground chicken, beef, or even tofu for a vegetarian option!
    • Add extra vegetables like bell peppers, zucchini, or mushrooms for added nutrition and flavor.
    • Mix in different herbs like cilantro or thyme for a unique twist.
    • For a dairy-free version, replace cottage cheese with a plant-based alternative or blended silken tofu.

    Serving Suggestions

    Your Creamy Ground Turkey & Spinach Protein Bowl is delightful on its own, but you can take it to the next level with these serving ideas:

    • Serve it over fluffy quinoa or brown rice for a filling meal.
    • Add a side of steamed broccoli or roasted vegetables for extra vitamins.
    • A crisp green salad pairs beautifully with the creamy bowl.
    • Try it with a chilled glass of iced tea for a refreshing touch.

    FAQs about Creamy Ground Turkey & Spinach Protein Bowl

    I often get questions about my Creamy Ground Turkey & Spinach Protein Bowl, so let me share some common queries. One popular question is, “What should I do with leftovers?” You can store any extra in an airtight container in the fridge for up to three days. It’s just as delicious reheated!

    If you’re wondering how to adjust the spice level, my tip is simple. Start with half the amount of crushed red pepper flakes. You can always add more if you like a kick. Many readers also ask about the nutritional value. Each serving packs a punch with 40 grams of protein, making it a satisfying and healthy meal option. With just 370 calories, it’s perfect for those watching their waistline while still enjoying a creamy, hearty dish.

    This recipe is not just quick but also a wholesome meal that the whole family can enjoy.

    Final Thoughts

    In our bustling lives, finding a meal that’s both nourishing and quick can feel like a treasure hunt. My Creamy Ground Turkey & Spinach Protein Bowl is that gem! It offers a comforting embrace of flavors and textures while fueling our bodies. I can’t tell you how many times it has saved my dinner hour!

    I invite you to give this recipe a try. I promise it might just become a staple in your home, bringing joy and ease to mealtimes. Don’t forget to share your experiences with me—I’d love to hear how it turns out for you!


    Print

    clock clock iconcutlery cutlery iconflag flag iconfolder folder iconinstagram instagram iconpinterest pinterest iconfacebook facebook iconprint print iconsquares squares iconheart heart iconheart solid heart solid icon

    Description

    A delicious and creamy protein bowl featuring ground turkey and fresh spinach, perfect for a quick and healthy meal.


    • 1.5 lbs ground turkey
    • 1.5 cups hot salsa (use mild or medium to reduce heat if preferred)
    • 1.5 cups cottage cheese (preferably 2% or 4% fat for best texture)
    • 3 cups fresh spinach
    • 1 tbsp Worcestershire sauce
    • 0.5 medium onion (diced)
    • 1 tbsp butter
    • 1 tsp garlic powder
    • 1 tsp garlic salt
    • 1 tsp crushed red pepper flakes
    • 0.5 tsp dried oregano
    • 0.5 tsp dried basil
    • to taste salt and pepper
    • 1 tbsp extra virgin olive oil (EVOO) for cooking

    1. Heat extra virgin olive oil in a large skillet over medium heat.
    2. Add ground turkey, season with salt and pepper, and cook until browned, breaking it apart as it cooks (about 6–7 minutes).
    3. Add diced onion, garlic powder, dried oregano, and dried basil to the skillet and cook for 3–5 minutes until the onion softens.
    4. Pour in the salsa and add the butter; stir until the butter melts, then add the fresh spinach and cook until wilted (about 2–3 minutes).
    5. Stir in cottage cheese, Worcestershire sauce, garlic salt, and crushed red pepper flakes; cook for another 2–3 minutes until the cottage cheese warms and the sauce becomes creamy.
    6. Reduce heat to low and let simmer for 5 minutes to thicken and meld the flavors.
    7. Taste and adjust salt, pepper, or spice as needed; serve hot on its own or over rice, quinoa, or cauliflower rice.

    Notes

    • For a milder flavor, choose mild salsa.
    • You can substitute ground turkey with chicken or beef if preferred.
    • This dish can be stored in the refrigerator for up to three days.
    • Prep Time: 10 minutes
    • Cook Time: 25 minutes
    • Category: Main Dish
    • Method: Skillet
    • Cuisine: American

    Nutrition

    • Serving Size: 1 bowl
    • Calories: 370
    • Sugar: 4g
    • Sodium: 550mg
    • Fat: 14g
    • Saturated Fat: 7g
    • Unsaturated Fat: 5g
    • Trans Fat: 0g
    • Carbohydrates: 15g
    • Fiber: 2g
    • Protein: 40g
    • Cholesterol: 120mg

    Sharing is caring!

  • Apple Arugula Salad

    Apple Arugula Salad


    Introduction to Apple Arugula Salad

    As a busy mom, I know how challenging it can be to find time to whip up a meal that’s both delicious and nutritious. That’s why I absolutely adore this Apple Arugula Salad! It’s like savoring a burst of fresh goodness in every bite. The combination of crisp apples, peppery arugula, and creamy goat cheese creates a delightful harmony that dances on your taste buds. Plus, it comes together in just 25 minutes! Whether it’s a quick lunch or a vibrant side for dinner, this salad is a fantastic option for anyone looking to bring some brightness to the table.

    Why You’ll Love This Apple Arugula Salad

    This Apple Arugula Salad is a lifesaver for those busy days. It’s quick to prepare, taking just 25 minutes from start to finish. The refreshing flavors of crunchy apples and peppery arugula make it incredibly satisfying. Plus, it’s packed with nutrients, helping you feel great while enjoying every tasty bite. Trust me, once you taste this salad, you’ll want to make it again and again!

    Ingredients for Apple Arugula Salad

    Let’s gather our ingredients and prepare for a delightful culinary adventure! This Apple Arugula Salad calls for a vibrant lineup that brings freshness and flavor to your plate. Here’s what you’ll need:

    • Apples: Choose crisp varieties like Honeycrisp or Granny Smith for the perfect balance of sweetness and tartness.
    • Arugula: This peppery green packs a punch! It adds a zesty kick, making your salad lively and engaging.
    • Red Onion: Sliced thin for a mild flavor that gives just the right bite without overpowering the other ingredients.
    • Figs: These little gems bring natural sweetness and a chewy texture, making the salad even more interesting.
    • Goat Cheese: Creamy and tangy, this cheese complements the sweetness of the apples and figs beautifully.
    • Pecan Halves: These provide a wonderful crunch. Toss them in maple syrup for a sweet and nutty surprise.
    • Maple Syrup: Adds a warm sweetness to the pecans and the dressing. Pure maple syrup is the best choice, of course!
    • Olive Oil: A key player in the dressing, it brings richness without overpowering the fresh flavors.
    • Balsamic Vinegar: This balances the sweetness with a tangy depth, enhancing every bite of your salad.
    • Lemon Juice: Freshly squeezed lemon juice will brighten up your dressing, adding a refreshing zing.
    • Dijon Mustard: Just a hint of this mustard gives your dressing a subtle complexity.
    • Garlic: Minced garlic infuses the dressing with aromatic warmth, creating a comforting flavor profile.
    • Sea Salt: Elevates all the flavors in your salad, so use it to taste for a perfect finish.

    You can check below for the exact measurements of each ingredient! Feel free to mix and match or substitute any of these according to what you have on hand. Enjoying this fantastic Apple Arugula Salad can be as creative as you like!

    How to Make Apple Arugula Salad

    Let’s dive into the fun part—making the Apple Arugula Salad! I promise, it’s a lot easier than it sounds. Just follow these simple steps, and you’ll be on your way to enjoying a beautiful dish that’s as tasty as it is healthy.

    Step 1: Prepare the Maple Pecans

    Preheat your oven to 350°F. In a bowl, toss your pecan halves with maple syrup and a pinch of sea salt. The smell of maple and nuts together is almost irresistible!

    Spread the pecans onto a parchment-lined baking sheet. Bake for about 5-7 minutes until they are toasted and a hint darker. Keep an eye on them to prevent burning—nobody enjoys bitter nuts!

    Once done, let them cool while you move on to the next step.

    Step 2: Whisk Together the Dressing

    In a mixing bowl, combine olive oil, balsamic vinegar, maple syrup, lemon juice, Dijon mustard, minced garlic, and sea salt.

    Grab a whisk and blend until smooth. The balsamic paired with maple syrup creates a heavenly dressing.

    Taste and adjust—I usually add a little more lemon juice for zest or maple syrup for sweetness. It’s all about your preference!

    Step 3: Assemble the Salad

    Grab a large salad bowl and add your fresh arugula.

    Layer the thinly sliced apples, chopped figs, and thinly sliced red onion on top. Next, add those lovely cooled maple pecans and sprinkle the creamy goat cheese.

    Visual appeal matters! Arrange your ingredients with flair—it makes every bite even tastier.

    Step 4: Toss and Serve

    Just before serving, drizzle about half of your homemade dressing over the top of the salad.

    Gently toss everything to combine, ensuring every leaf is coated.

    Serve immediately, garnished with extra pecans or a splash more dressing if you like.

    Enjoy your vibrant, flavor-packed Apple Arugula Salad!

    Tips for Success

    • Use a mandoline slicer for perfectly thin apple slices.
    • Choose ripe but firm figs for the best texture.
    • Toast pecans in small batches to ensure even roasting.
    • Add a splash of balsamic glaze on top for extra flair.
    • Make the dressing ahead of time for quicker prep later.

    Equipment Needed

    • Oven: For toasting the pecans. A toaster oven can work in a pinch!
    • Baking Sheet: Line it with parchment paper to prevent sticking. A glass dish can be an alternative.
    • Mixing Bowls: Use one for the dressing and another for the salad. Any medium-sized bowls will do!
    • Whisk: Essential for mixing the dressing. A fork can be a great substitute!
    • Salad Bowl: To combine everything. A large pasta bowl works too!

    Variations of Apple Arugula Salad

    • Nuts: Try swapping pecans with walnuts or almonds for a different crunch and flavor.
    • Cheese: If goat cheese isn’t your thing, feta or blue cheese can add an exciting twist to the salad.
    • Fruits: Substitute apples with pears or add dried cranberries for a pop of color and sweetness.
    • Vegan Option: Omit the cheese and replace the honey with agave syrup for a fully plant-based option.
    • Extra Greens: Mix in baby spinach or kale alongside arugula for added nutrients and texture.
    • Grains: Add cooked quinoa or farro for a heartier salad that makes it a complete meal.
    • Protein: For extra energy, toss in grilled chicken or chickpeas to make it more filling.

    Serving Suggestions for Apple Arugula Salad

    • Pair the Apple Arugula Salad with grilled chicken for a satisfying meal.
    • Serve alongside crusty bread or a warm baguette to complement the textures.
    • Enjoy with a crisp white wine, like Sauvignon Blanc, for a refreshing drink.
    • For presentation, place the salad in a beautiful serving bowl topped with extra figs and pecans.

    FAQs about Apple Arugula Salad

    I often find myself answering a few common questions about this Apple Arugula Salad. Let’s address them so you feel fully equipped to make this delightful dish!

    Can I make the Apple Arugula Salad ahead of time?
    Absolutely! You can prepare the dressing and toast the pecans in advance. Just combine everything right before serving to keep the arugula fresh and crisp.

    What can I substitute for goat cheese?
    If goat cheese isn’t your favorite, feta or blue cheese can be great alternatives. They’ll still provide that lovely creaminess that pairs well with the apples and arugula.

    Is this salad suitable for meal prep?
    Definitely! This salad is perfect for meal prep if you store the components separately. Keep the pecans and dressing in airtight containers to maintain freshness throughout the week.

    Can I use different fruits in this salad?
    Sure! Feel free to try pears, peaches, or even dried cranberries. Each choice brings its own unique flavor profile and can make your salad even more exciting.

    How do I make the dressing taste even better?
    Experiment with additional herbs and spices! Fresh herbs like basil or mint can add lovely notes, while adjusting the maple syrup can enhance the sweetness to your liking.

    Final Thoughts

    Creating this Apple Arugula Salad is more than just preparing a meal; it’s a celebration of fresh, vibrant flavors that brighten any table. The combination of crisp apples, tangy goat cheese, and sweet maple pecans makes each bite a delightful explosion of taste. I’ve found that sharing this salad with family or friends sparks joy and conversation, making it a memorable experience. It’s perfect for those busy days when you crave something healthy yet satisfying. So, roll up your sleeves, grab those ingredients, and let the joy of making and enjoying this salad lift your spirits!


    Print

    clock clock iconcutlery cutlery iconflag flag iconfolder folder iconinstagram instagram iconpinterest pinterest iconfacebook facebook iconprint print iconsquares squares iconheart heart iconheart solid heart solid icon

    Description

    A fresh and tasty salad combining apples, arugula, figs, and goat cheese, topped with maple pecans and a balsamic dressing.


    • 3 apples, sliced very thin
    • 5 oz arugula
    • 1/4 c red onion, sliced thin
    • 1/2 c figs, chopped
    • 1/2 c goat cheese crumbles
    • 1 c pecan halves
    • 2 T maple syrup (for pecans)
    • pinch of sea salt (for pecans)
    • 1/2 c olive oil (for dressing)
    • 2 tsp maple syrup (for dressing)
    • 1 tsp lemon juice
    • 1 1/2 tsp Dijon mustard
    • 1/2 pepper
    • 1 garlic clove, minced
    • 3 T balsamic vinegar
    • 1/41/2 tsp sea salt (for dressing, or to taste)

    1. Preheat the oven to 350°F. Toss the pecans with the maple syrup and a pinch of sea salt. Arrange pecans on a parchment lined baking sheet and bake for about 5-7 minutes or until toasted and darkened slightly. Remove from the oven and cool.
    2. Whisk together the balsamic dressing ingredients and adjust seasoning to taste.
    3. Add the arugula to a large salad bowl. Arrange the sliced apples, figs, and other ingredients on top of the greens.
    4. Just before serving, drizzle about 1/2 of the dressing over top of the salad and toss. Serve and enjoy!

    Notes

    • Ensure pecans are not overbaked to avoid bitterness.
    • Adjust the amount of sea salt in the dressing according to preference.
    • For extra sweetness, add more maple syrup to the dressing.
    • Prep Time: 15 minutes
    • Cook Time: 10 minutes
    • Category: Salad
    • Method: Baking and tossing
    • Cuisine: American

    Nutrition

    • Serving Size: 1 serving
    • Calories: 250
    • Sugar: 10g
    • Sodium: 200mg
    • Fat: 18g
    • Saturated Fat: 4g
    • Unsaturated Fat: 12g
    • Trans Fat: 0g
    • Carbohydrates: 20g
    • Fiber: 3g
    • Protein: 5g
    • Cholesterol: 10mg

    Sharing is caring!

  • Raspberry Vanilla Tarts

    Raspberry Vanilla Tarts


    Introduction to Raspberry Vanilla Tarts

    As the sun sets and the hustle and bustle of the day fades, what better way to wrap up a busy day than with a dessert that feels like a warm hug? Raspberry Vanilla Tarts are my go-to for moments that demand a touch of sweetness—they’re simple, elegant, and bursting with flavor. Picture a buttery tart shell filled with creamy vanilla custard and crowned with fresh raspberries; it’s a delightful balance that’ll impress your loved ones without keeping you stuck in the kitchen for hours. Trust me, even the busiest of days can end on a sweet note.

    Why You’ll Love This Raspberry Vanilla Tarts

    Let’s be honest: life can sometimes feel like a never-ending marathon. That’s where these Raspberry Vanilla Tarts come in—a delightful solution for busy moms like us! They’re quick to whip up, brimming with taste, and pack a punch of refreshing flavor. Trust me, each bite will transport you to pastry heaven without the fuss. Plus, you can prepare them in advance and impress guests with minimal effort!

    Ingredients for Raspberry Vanilla Tarts

    To make these fabulous Raspberry Vanilla Tarts, you’ll need a handful of key ingredients that create magic in your kitchen. Don’t worry, I’ll break it down for you!

    • All-purpose flour: The foundation of your tart shell. It provides structure, making for a perfect crispy base.
    • Powdered sugar: This sweet ingredient adds a delicate sweetness to the tart shell without making it grainy.
    • Unsalted butter: Emphasizing the buttery flavor, this ingredient ensures your tart shell is rich and tender.
    • Egg yolk: This helps bind the ingredients together and adds a touch of richness to the tart shell.
    • Vanilla extract: A splash of this aromatic extract gives a lovely flavor boost to both the tart shell and the custard.
    • Heavy cream: For that luscious, creamy vanilla filling that melts in your mouth.
    • Milk: Balances out the richness of the cream, creating the perfect custard consistency.
    • Granulated sugar: Sweetens the vanilla filling; you can adjust it based on your sweetness preference.
    • Egg yolks (again): Yes, we need more for the custard! They contribute to the smooth texture and decadence of your filling.
    • Cornstarch: This thickening agent ensures your vanilla filling sets perfectly for those gorgeous tart slices.
    • Fresh raspberries: The star of the show, offering a burst of tangy freshness on top of the tarts.
    • Mint leaves (optional): For an aromatic garnish that adds a pop of color and a hint of freshness.

    For exact measurements of each ingredient, you’ll find everything at the bottom of this article—where you can even print it for your convenience. Now, let’s get baking!

    How to Make Raspberry Vanilla Tarts

    Ready to dive into the delicious process of creating Raspberry Vanilla Tarts? It’s easier than you think! Let’s go through the steps together. With a little patience and love, you’ll have these tarts ready to impress your family and friends.

    Step 1: Preheat the Oven

    Start by preheating your oven to 350°F (175°C). This crucial step ensures your tart shells cook evenly and achieve that golden, crispy crust we all love. Remember, a hot oven makes a happy tart!

    Step 2: Make the Tart Shell

    Now, let’s create that buttery tart shell! In a mixing bowl, combine your all-purpose flour and powdered sugar. Then, add softened butter, mixing until the texture feels crumbly. Next, stir in the egg yolk and vanilla extract. It should come together nicely. Don’t stress if it feels a little sticky; just chill it in the fridge for 10 minutes. Press the dough into your tartlet pans, pricking with a fork to avoid puffing during baking. Trust me, this step is key!

    Step 3: Bake the Shells

    Place your tart shells in the oven and bake for about 15-20 minutes, or until they’re looking golden. You’ll know they’re done when they smell heavenly and the edges are lightly browned. Once baked, let them cool completely on a wire rack. Cooling is vital; filling warm shells can lead to a soggy mess!

    Step 4: Prepare the Vanilla Filling

    Let’s move on to that dreamy vanilla filling! In a saucepan, combine your milk and heavy cream over medium heat. You want it warm but not boiling—this is important! In a separate bowl, whisk together granulated sugar, 3 egg yolks, and cornstarch until smooth. Now, carefully pour your warm cream mixture into the egg mixture, whisking constantly to avoid any scrambling. Return this mix to the saucepan over low heat and cook until it’s thick and silky. It’s pure magic!

    Step 5: Thicken the Filling

    Continue stirring the filling over low heat until it thickens, about 5-7 minutes. Stay patient and keep stirring—this is where the custard develops that beautiful creamy consistency. Once thick, pull it off the heat and mix in your vanilla extract for that burst of flavor. This is the moment your kitchen will start to smell like a bakery!

    Step 6: Fill the Tarts

    Before filling, ensure your tart shells are completely cooled. Then, pour the velvety vanilla filling into each shell, smoothing the tops with a spatula. This is where the magic happens—the tarts are almost ready to shine!

    Step 7: Top with Raspberries

    Once the filling has set, it’s time to crown your tarts with fresh raspberries. Arrange them artfully on top, either in a circle or a playful scatter. Feel free to play around with presentation; your tarts should be a feast for the eyes as well as the taste buds!

    Step 8: Garnish and Serve

    For that final touch, consider adding mint leaves as a garnish. They’ll not only enhance the looks but also add a refreshing aroma that’s irresistible. Serve your Raspberry Vanilla Tarts chilled, and watch everyone’s faces light up. Enjoy!

    Tips for Success

    • Use cold butter for flaky, tender tart shells.
    • Chill your dough for easier handling and better texture.
    • Don’t rush the filling process; low heat is your friend.
    • Let the filled tarts set in the fridge to achieve the perfect slice.
    • Experiment with other berries for different flavor combos!

    Equipment Needed

    • Mixing bowl: A large bowl works best, but you can use any deep, sturdy bowl.
    • Whisk: A regular whisk is perfect, but a fork works in a pinch for mixing the custard.
    • Tartlet pans: Mini muffin tins can be a great alternative if you don’t have tart pans.
    • Measuring cups and spoons: If you’re without these, using a scale makes baking easy too!
    • Oven: Don’t forget that essential kitchen tool for baking!

    Variations

    • Swap out raspberries for strawberries or blueberries for a fruity twist.
    • Use almond extract instead of vanilla for a nutty flavor.
    • Make it gluten-free by substituting all-purpose flour with gluten-free flour blend.
    • Add a layer of chocolate ganache beneath the vanilla filling for a decadent touch.
    • For a richer taste, use half-and-half instead of milk in the filling.

    Serving Suggestions

    • Pair your Raspberry Vanilla Tarts with a scoop of vanilla ice cream for added creaminess.
    • Serve alongside a dollop of freshly whipped cream for a delightful contrast.
    • Complement with a refreshing glass of iced tea or sparkling water to cleanse the palate.
    • For presentation, stack the tarts on a beautiful cake stand and garnish with mint leaves.
    • Consider drizzling a bit of chocolate sauce on the plate for an elegant touch.

    FAQs about Raspberry Vanilla Tarts

    Can I make Raspberry Vanilla Tarts ahead of time?

    Absolutely! You can prepare the tart shells and filling a day in advance. Just keep them separately stored, and fill the tart shells just before serving for the best texture and presentation.

    What other fruits can I use in place of raspberries?

    While raspberries are the star of these tarts, feel free to experiment with strawberries, blueberries, or even sliced peaches. Each fruit brings its own charm, making each tart a new adventure!

    How do I store leftover tarts?

    Leftover Raspberry Vanilla Tarts can be stored in the refrigerator for a couple of days. Just cover them loosely with plastic wrap to keep them fresh without making the crust soggy.

    Can I freeze Raspberry Vanilla Tarts?

    I wouldn’t recommend freezing the filled tarts, as the custard might not hold up well. However, you can freeze the tart shells for up to a month. Just thaw and fill them when you’re ready!

    How can I make these tarts dairy-free?

    For a dairy-free version, substitute the heavy cream and milk with almond milk or coconut cream. This will change the taste slightly but still deliver a delicious result!

    Final Thoughts

    What a journey this has been, crafting the perfect Raspberry Vanilla Tarts! Each step, from mixing the dough to decorating with fresh raspberries, brings so much joy. These tarts are not just a dessert; they’re a celebration of flavors that dance on your palate. Best of all, they remind us that we can create something beautiful in our busy lives. Sharing these tarts with family and friends turns an ordinary day into a sweet memory. So, roll up your sleeves, embrace your inner pastry chef, and enjoy every moment of this delightful culinary adventure!


    Print

    clock clock iconcutlery cutlery iconflag flag iconfolder folder iconinstagram instagram iconpinterest pinterest iconfacebook facebook iconprint print iconsquares squares iconheart heart iconheart solid heart solid icon

    Description

    Raspberry Vanilla Tarts are a delightful dessert featuring a buttery tart shell filled with creamy vanilla custard and topped with fresh raspberries.


    • 1 ½ cups all-purpose flour
    • ½ cup powdered sugar
    • ½ cup unsalted butter, softened
    • 1 egg yolk
    • 1 teaspoon vanilla extract
    • 1 cup heavy cream
    • 1 cup milk
    • ½ cup granulated sugar
    • 3 egg yolks
    • 1 tablespoon cornstarch
    • 2 cups fresh raspberries
    • Optional: Mint leaves for garnish

    1. Preheat the Oven: Set your oven to 350°F (175°C).
    2. Make the Tart Shell: In a mixing bowl, combine the flour and powdered sugar. Add softened butter and mix until crumbly. Stir in egg yolk and vanilla extract until the dough holds together. Press the dough into tartlet pans and prick with a fork.
    3. Bake the Shells: Bake for 15-20 minutes until golden. Remove from the oven and let them cool.
    4. Prepare the Vanilla Filling: In a saucepan, combine milk and cream. Heat, but don’t boil. In a separate bowl, whisk together sugar, egg yolks, and cornstarch. Slowly add the heated cream mixture into the egg mixture, whisking constantly.
    5. Thicken the Filling: Return the mixture to the saucepan and cook over low heat until thickened, stirring constantly. Remove from heat and stir in vanilla extract.
    6. Fill the Tarts: Pour the vanilla filling into the cooled tart shells. Refrigerate for at least 2 hours until set.
    7. Top with Raspberries: Once the filling is set, arrange fresh raspberries on top just before serving.
    8. Garnish and Serve: Optional: Garnish with mint leaves for a touch of elegance. Enjoy!

    Notes

    • Ensure the tart shells are completely cooled before filling.
    • You can substitute raspberries with other berries if desired.
    • Store any leftovers in the refrigerator for a couple of days.
    • Prep Time: 30 minutes
    • Cook Time: 20 minutes
    • Category: Dessert
    • Method: Baking
    • Cuisine: French

    Nutrition

    • Serving Size: 1 tart
    • Calories: 300
    • Sugar: 18g
    • Sodium: 150mg
    • Fat: 20g
    • Saturated Fat: 10g
    • Unsaturated Fat: 5g
    • Trans Fat: 0g
    • Carbohydrates: 28g
    • Fiber: 2g
    • Protein: 4g
    • Cholesterol: 100mg

    Sharing is caring!

  • S’mores Keto Chia Pudding

    S’mores Keto Chia Pudding


    Introduction to S’mores Keto Chia Pudding

    There’s something magical about the combination of chocolate, marshmallows, and graham crackers that takes me back to summer nights around the campfire. Today, I’m thrilled to share my recipe for S’mores Keto Chia Pudding. It’s a delightful low-carb treat that doesn’t just satisfy a sweet tooth, it also fits perfectly into a busy lifestyle. In just a few simple steps, you can whip up this tasty dessert that your loved ones will adore. Whether you need a quick pick-me-up or want to impress at a gathering, this pudding is your go-to solution!

    Why You’ll Love This S’mores Keto Chia Pudding

    This S’mores Keto Chia Pudding is a dream come true for busy moms and professionals alike. It’s quick to make, requiring just 10 minutes prep time, and it’s perfect for meal prep. The beautiful layers of chocolate and creamy goodness tantalize the taste buds. Plus, it’s a guilt-free dessert that keeps cravings at bay while making you feel like a kid again. What’s not to love?

    Ingredients for S’mores Keto Chia Pudding

    Gathering the right ingredients is key to making this delightful S’mores Keto Chia Pudding. Here’s what you’ll need:

    • Chia seeds: These tiny powerhouses soak up liquid, creating that creamy pudding texture. Plus, they’re packed with fiber!
    • Unsweetened almond milk: A low-carb base that adds creaminess without extra calories. You can use coconut milk for a richer flavor if you prefer.
    • Unsweetened cocoa powder: This is essential for that rich chocolate taste. Make sure to choose a good-quality brand for the best flavor.
    • Sweetener of choice: I love using erythritol or stevia, which keeps it low-carb but sweet. Adjust according to your preference!
    • Vanilla extract: Just a splash adds warmth and depth. It elevates the entire pudding experience.
    • Sugar-free chocolate chips: These little gems are perfect for that chocolatey crunch without the carbs. Dark chocolate chips could work too!
    • Mini marshmallows: A must for that nostalgic s’mores vibe! You can opt for sugar-free versions if you’re aiming for a lower sugar count.
    • Graham cracker crumbs: To create that classic s’mores flavor profile. Look for low-carb or sugar-free options, or you can crush some sugar-free cookies as a substitute!

    You can find the exact quantities for each ingredient at the bottom of the article, along with printing options for convenience!

    How to Make S’mores Keto Chia Pudding

    Step 1: Prepare the Chia Mixture

    Start by combining your chia seeds, unsweetened almond milk, cocoa powder, sweetener, and vanilla extract in a mixing bowl.

    It’s important to mix everything well. This ensures there are no clumps of cocoa powder hiding anywhere. A whisk works wonders for this task!

    Step 2: Let it Sit

    Now, let the mixture sit for about 5 minutes. This step is crucial! It allows the chia seeds to absorb the liquid and become gelatinous.

    You’ll see the mixture start to thicken. It’s fascinating to witness this transformation, as your simple ingredients unite into something special.

    Step 3: Refrigerate

    After letting it sit, give the mixture another stir to break up any clumps that may have formed.

    Then, place it in the refrigerator for at least 2 hours, or even overnight for the best results. The longer it chills, the creamier it will get!

    Step 4: Layering the Pudding

    Once your pudding has thickened, it’s time for the fun part: layering. Grab some cute serving cups, and start spooning in the thickened chia pudding.

    Each layer could be dotted with sugar-free chocolate chips and mini marshmallows for that delightful s’mores experience. The color contrast is beautiful!

    Step 5: Finish with Toppings

    To finish off your masterpiece, sprinkle graham cracker crumbs on top. This adds the finishing s’mores touch!

    Garnish with a few additional chocolate chips or marshmallows for presentation. Your guests will be wowed before they even taste it!

    Tips for Success

    • Use a whisk to mix the ingredients thoroughly to avoid clumps.
    • Experiment with different sweeteners to find what suits your taste best.
    • Make the pudding a day ahead for the best texture and flavor.
    • Don’t skip the graham cracker topping—it’s the magic touch!
    • For a fun twist, try adding a dash of cinnamon for extra flavor.

    Equipment Needed

    • Mixing bowl: A medium-sized bowl works perfectly. You can even use a jar if you prefer.
    • Whisk or spoon: A whisk is excellent for mixing, but a sturdy spoon will do just fine.
    • Measuring cups: Essential for getting those ingredient quantities just right!
    • Serving cups: Any cute cups or glasses will add a nice touch.
    • Refrigerator: A must for chilling your pudding to perfection.

    Variations

    • Peanut Butter Swirl: Add a drizzle of sugar-free peanut butter for a nutty twist on the classic flavor.
    • Berry Blast: Layer some fresh berries, like strawberries or raspberries, for a fruity contrast that pairs beautifully with chocolate.
    • Mint Chocolate: Incorporate a few drops of peppermint extract to give your pudding a refreshing minty flair.
    • Protein Boost: Stir in a scoop of your favorite low-carb protein powder for an extra nutritious kick.
    • Different Flavor Profiles: Swap the cocoa powder for matcha powder or pumpkin spice for a fun seasonal variation.

    Serving Suggestions

    • Pair your S’mores Keto Chia Pudding with a dollop of whipped coconut cream for added richness.
    • Serve alongside a cup of rich black coffee or a refreshing herbal tea for the perfect dessert experience.
    • For a fun presentation, use mason jars to showcase the beautiful layers!
    • Garnish plates with extra mini marshmallows or chocolate chips for a festive touch.
    • Consider adding fresh fruit on the side to balance the sweetness and offer a refreshing bite.

    FAQs about S’mores Keto Chia Pudding

    Can I make S’mores Keto Chia Pudding vegan?

    Absolutely! Just make sure to choose a plant-based sweetener and confirm that the chocolate chips and mini marshmallows are sugar-free and vegan-friendly. It’s an easy switch!

    How long does S’mores Keto Chia Pudding last in the fridge?

    This pudding can stay fresh for up to a week if sealed well in an airtight container. It’s perfect for meal prep, so you can enjoy it throughout the week!

    Can I use regular milk instead of almond milk?

    Sure! While almond milk keeps it low-carb, you can use any milk of your choice. Just be aware that it may change the overall carb count.

    Is this dessert suitable for children?

    This S’mores Keto Chia Pudding is a great treat for kids! They love the fun layers, and you can adjust the sweetness to suit their taste. It’s a delicious way to keep them happy and healthy!

    What if I don’t have graham cracker crumbs?

    No worries! You can crush sugar-free cookies as a substitute, or even use nuts for a crunchy topping. Just get creative with what you have on hand!

    Final Thoughts

    Creating S’mores Keto Chia Pudding is more than just whipping up a dessert; it’s about indulging in a moment of joy and nostalgia. This recipe brings together the flavors of childhood and transforms them into a guilt-free treat, perfect for all ages. I love how it engages the senses with its layers and textures, making each bite a delicious experience. Plus, it’s a breeze to make, fitting snugly into our busy lives. Whether I’m sharing it with friends or savoring it alone, every spoonful reminds me that healthy can be delightful and that joy is found in the little things!


    Print

    clock clock iconcutlery cutlery iconflag flag iconfolder folder iconinstagram instagram iconpinterest pinterest iconfacebook facebook iconprint print iconsquares squares iconheart heart iconheart solid heart solid icon

    Description

    A delicious low-carb treat that combines the flavors of s’mores with a healthy chia pudding.


    • 1/4 cup chia seeds
    • 1 cup unsweetened almond milk
    • 2 tablespoons unsweetened cocoa powder
    • 2 tablespoons sweetener of choice (like erythritol or stevia)
    • 1/2 teaspoon vanilla extract
    • 1/4 cup sugar-free chocolate chips
    • 1/4 cup mini marshmallows (sugar-free if desired)
    • Graham cracker crumbs (sugar-free, for topping)

    1. In a mixing bowl, combine chia seeds, almond milk, cocoa powder, sweetener, and vanilla extract.
    2. Stir well to ensure there are no clumps and let it sit for about 5 minutes.
    3. Stir again to break up any clumps and refrigerate for at least 2 hours or overnight.
    4. Once the pudding has thickened, layer it in serving cups with chocolate chips and marshmallows.
    5. Top with graham cracker crumbs before serving.

    Notes

    • For a vegan version, ensure the sweetener is plant-based.
    • Adjust the sweetness according to your preference.
    • Can be made ahead for a quick dessert or snack.
    • Prep Time: 10 minutes
    • Cook Time: 0 minutes
    • Category: Dessert
    • Method: Refrigeration
    • Cuisine: American

    Nutrition

    • Serving Size: 1 serving
    • Calories: 180
    • Sugar: 2g
    • Sodium: 250mg
    • Fat: 7g
    • Saturated Fat: 1g
    • Unsaturated Fat: 5g
    • Trans Fat: 0g
    • Carbohydrates: 25g
    • Fiber: 10g
    • Protein: 5g
    • Cholesterol: 0mg

    Sharing is caring!

  • Hershey Kiss Chocolate Cookies

    Hershey Kiss Chocolate Cookies


    Introduction to Hershey Kiss Chocolate Cookies

    There’s something magical about the aroma of freshly baked cookies wafting through the house.

    When I think of comfort, the first thing that comes to mind is a batch of Hershey Kiss Chocolate Cookies.

    These delightful treats are the perfect fusion of sweet sugar cookies and rich cocoa, topped with a melting chocolate kiss.

    Whether you’re preparing for a family gathering, a cozy night in, or just need a little pick-me-up, this recipe might just become your go-to.

    It’s quick, easy, and oh-so satisfying—ideal for busy moms and professionals like us!

    Why You’ll Love This Hershey Kiss Chocolate Cookies

    Hershey Kiss Chocolate Cookies are a sweet solution for busy days.

    They come together in a flash and are deceptively simple, making them perfect for any occasion.

    The rich chocolate flavor paired with a sugary crunch is simply irresistible.

    Plus, who doesn’t love the moment when you bite into a chocolate kiss nestled on top?

    These cookies are sure to spark joy in your kitchen and smiles around your table!


    Ingredients for Hershey Kiss Chocolate Cookies

    Gathering the ingredients for Hershey Kiss Chocolate Cookies feels like a mini adventure in your kitchen.

    Here’s what you’ll need to whip up these delightful bites of joy:

    • Refrigerated sugar cookie dough: This forms the base. It’s sweet, easy to work with, and cuts down on prep time.
    • Unsweetened cocoa powder: This adds that rich chocolate flavor. It’s essential for that deep cocoa goodness!
    • Coarse sanding sugar: This gives your cookies a lovely crunch and a sparkling finish. It elevates the cookie’s appearance and texture.
    • Hershey’s milk chocolate kisses: The pièce de resistance! These melt into chocolatey bliss on top of each cookie.

    Feel free to get creative!

    If you’re looking for an extra chocolate kick, consider folding in some chocolate chips into your dough.

    You can also swap the sugar cookie dough for your favorite homemade version if you’re feeling ambitious.

    For a unique twist, try using dark chocolate kisses instead of the classic milk chocolate!

    For exact measurements, check the bottom of the article, where you can find everything needed for baking these delightful Hershey Kiss Chocolate Cookies.

    How to Make Hershey Kiss Chocolate Cookies

    Making Hershey Kiss Chocolate Cookies is a delightful journey that fills your home with warmth and sweetness.

    Follow these simple steps, and you’ll be on your way to cookie bliss in no time!

    Step 1: Mixing the Dough

    Start by grabbing your large mixing bowl.

    With a hand mixer or standing mixer, blend the refrigerated sugar cookie dough and unsweetened cocoa powder together until smooth.

    Make sure all the cocoa is evenly dispersed for that rich chocolate flavor.

    It’s like giving your cookie dough a chocolate makeover!

    Step 2: Chilling the Dough

    Now it’s time for a little patience.

    Cover your dough with plastic wrap and chill it in the refrigerator for about one hour.

    This chilling step is vital—it helps firm up the dough.

    A firmer dough means your cookies will keep their shape while baking, ensuring a perfect cookie experience every time!

    Step 3: Prepping the Oven

    While the dough is chilling, let’s get the oven ready!

    Preheat it to 350°F.

    This step is crucial—an oven at the right temperature allows for even baking.

    It transforms your cookie creation into golden perfection!

    Step 4: Shaping the Cookies

    Once the dough is chilled, it’s time to scoop!

    Using a cookie scoop, form even balls of dough.

    Take a moment to roll each ball in your hands to create a smooth surface, ensuring they look lovely and uniform.

    Aim for about 1 inch in diameter for that classic cookie shape!

    Step 5: Coating the Cookies

    Now comes the fun part—time to make these cookies sparkle!

    Roll each cookie dough ball in the coarse sanding sugar until fully coated.

    This step adds a delightful crunch and sweetness to each bite, giving each cookie a lovely texture contrast.

    Step 6: Baking the Cookies

    Place the sugared cookie balls on a parchment-lined cookie sheet, spaced about 1 ½ inches apart.

    Press each one down gently with the palm of your hand—just a little, enough to help them spread evenly.

    Bake for 8-9 minutes.

    Keep an eye on them; you want your cookies puffy with a slight sheen—definitely avoid the dreaded overbake!

    Step 7: Adding the Hershey Kisses

    As soon as the cookies are out of the oven, it’s time for the star of the show!

    Gently press a Hershey’s milk chocolate kiss into the center of each warm cookie.

    This allows the chocolate to melt just a bit, making each bite even more heavenly.

    Let them cool on the baking sheet for a couple of minutes before transferring them to a cooling rack.

    This helps them firm up while they bask in that chocolatey goodness!

    Tips for Success

    • Always chill your dough for the best texture; it’s the secret to perfect cookies!
    • Use a cookie scoop for uniform size—this helps with even baking.
    • Double-check your baking time; every oven varies. Just remember, a little underbaked is better!
    • Store cookies in an airtight container to keep them fresh and soft.
    • Experiment with different flavors by adding nuts or spices for a fun twist!

    Equipment Needed

    • Mixing Bowl: A large mixing bowl is essential. Feel free to use any bowl you have on hand.
    • Hand or Stand Mixer: A mixer makes blending effortless, but you can mix by hand with a spatula if needed.
    • Cookie Scoop: This helps with even sizing. A tablespoon works in a pinch!
    • Parchment Paper: For lining the cookie sheet, but wax paper can substitute, although it may not be as effective.
    • Cooling Rack: Allows cookies to cool evenly. If you don’t have one, a dinner plate will do!

    Variations of Hershey Kiss Chocolate Cookies

    • Nutty Delight: Add chopped nuts like walnuts or pecans to the dough for a satisfying crunch and extra flavor.
    • Minty Twist: Substitute peppermint-flavored Hershey Kisses for a refreshing mint chocolate cookie that feels festive any time of year.
    • Gluten-Free Option: Use gluten-free sugar cookie dough and cocoa powder for a treat everyone can enjoy!
    • Dark Chocolate Indulgence: Use dark chocolate kisses instead of milk chocolate for a more robust chocolate experience.
    • Double Chocolate Heaven: Fold in chocolate chips into your dough for a fudgier version of these delicious cookies!

    Serving Suggestions

    • Milk Pairing: Serve these cookies warm alongside a tall glass of cold milk for the ultimate treat.
    • Presentation: Arrange cookies on a decorative platter, garnished with fresh mint leaves for a pop of color.
    • Festive Touch: Add a dusting of powdered sugar or drizzle melted chocolate on top for a fancy finish!

    FAQs about Hershey Kiss Chocolate Cookies

    Can I use homemade sugar cookie dough for this recipe? Absolutely! If you enjoy making things from scratch, feel free to whip up your own sugar cookie dough. Just ensure it’s chilled before mixing in the cocoa powder.

    How should I store my Hershey Kiss Chocolate Cookies? Store these delightful cookies in an airtight container at room temperature. This keeps them fresh and soft for up to a week. If they last that long—good luck with that!

    What if I don’t have coarse sanding sugar? No worries! Granulated sugar works too. Coating your cookies with it won’t add that same crunchy texture but will still taste great!

    Can I freeze the cookie dough? Definitely! You can freeze the cookie dough balls before they’re baked. Just place them in a freezer-safe bag. When you’re ready to bake, pop them straight from the freezer into the oven—just add a minute or two to the baking time.

    How can I make these cookies more chocolatey? Great question! You can add a cup of chocolate chips into the dough along with the other ingredients. This will create an extra chocolaty treat that’s simply irresistible!

    Final Thoughts

    Creating a batch of Hershey Kiss Chocolate Cookies is more than just baking; it’s about crafting sweet memories in your kitchen.

    The enchanting aroma, the laughter with loved ones as you enjoy the warm treats, and those delightful chocolate surprises in every bite all combine to elevate these cookies beyond mere dessert.

    This recipe offers comfort and joy, making it an ideal treat for busy days and special celebrations alike.

    So, embrace your inner chef, gather your family, and let the loveliness of these cookies bring smiles and happiness to your home.


    Print

    clock clock iconcutlery cutlery iconflag flag iconfolder folder iconinstagram instagram iconpinterest pinterest iconfacebook facebook iconprint print iconsquares squares iconheart heart iconheart solid heart solid icon

    Description

    Hershey Kiss Chocolate Cookies are a delightful treat that combines the sweetness of sugar cookies with rich cocoa powder and topped with a delicious Hershey’s chocolate kiss.


    • 16.5 oz refrigerated sugar cookie dough
    • ½ cup unsweetened cocoa powder
    • 1 cup coarse sanding sugar
    • 26 Hershey’s milk chocolate kisses

    1. In a large mixing bowl, use a hand mixer or standing mixer to thoroughly mix the sugar cookie dough and the cocoa powder.
    2. Cover dough with plastic wrap and chill in the refrigerator for about one hour.
    3. Preheat oven to 350°F.
    4. Use a cookie scoop to form even balls of dough. Roll the balls in the palm of your hands to form a smooth cookie.
    5. Roll each cookie dough ball in a shallow bowl filled with the coarse sugar until completely coated.
    6. Place the balls 1 ½ inches apart on a cookie sheet lined with parchment paper. Flatten the top of the cookies just a bit with the palm of your hand to help them spread evenly.
    7. Bake for 8-9 minutes or until the cookies are puffy and the dough no longer looks wet.
    8. Remove cookie sheet from the oven. Press a chocolate kiss gently into the top of each warm cookie and allow cookies to cool for a couple of minutes before carefully transferring to a cooling rack to cool the rest of the way.

    Notes

    • For a more intense chocolate flavor, consider adding chocolate chips to the dough.
    • Store cookies in an airtight container to maintain freshness.
    • Chilling the dough is essential for the right cookie texture.
    • Prep Time: 10 minutes
    • Cook Time: 9 minutes
    • Category: Dessert
    • Method: Baking
    • Cuisine: American

    Nutrition

    • Serving Size: 1 cookie
    • Calories: 120
    • Sugar: 10g
    • Sodium: 50mg
    • Fat: 5g
    • Saturated Fat: 2.5g
    • Unsaturated Fat: 2g
    • Trans Fat: 0g
    • Carbohydrates: 17g
    • Fiber: 1g
    • Protein: 1g
    • Cholesterol: 15mg

    Sharing is caring!

  • Cottage Cheese and Chickpea Salad

    Cottage Cheese and Chickpea Salad


    Introduction to Cottage Cheese and Chickpea Salad

    As a devoted home cook, I know that life can be a whirlwind. Between juggling work, family, and social commitments, finding time to prepare healthy meals can feel daunting. That’s why I’m excited to share my Cottage Cheese and Chickpea Salad with you. This delightful dish is not only quick to whip up, but it’s also packed with nutrition and flavor. It’s perfect for a busy day or when I’m entertaining friends. Trust me, this salad will impress your loved ones without keeping you tied to the kitchen for hours.

    Why You’ll Love This Cottage Cheese and Chickpea Salad

    This Cottage Cheese and Chickpea Salad is a total game changer. It’s not just quick to prepare; it’s bursting with flavor and healthy goodness. With protein-packed chickpeas and creamy cottage cheese, every bite leaves you feeling satisfied. Best of all, you can customize it based on your pantry. Whether you’re feeding the family or just trying to treat yourself, this salad fits the bill effortlessly.

    Ingredients for Cottage Cheese and Chickpea Salad

    Gathering the right ingredients is key to making a fantastic Cottage Cheese and Chickpea Salad. Let’s take a look at what you’ll need:

    • Cottage cheese: The star ingredient, it adds creaminess and a boost of protein.
    • Chickpeas: These little legumes are loaded with fiber and protein, making the salad hearty and filling.
    • Cucumber: A refreshing crunch that enhances the overall texture of your salad.
    • Cherry tomatoes: Their sweetness brings a lovely burst of flavor and color to the dish.
    • Red onion: This adds a zesty kick; just use it sparingly if you’re sensitive to raw onion.
    • Fresh parsley: A sprinkle of parsley not only brightens the dish but also packs a dose of vitamins.
    • Lemon juice: This adds a zesty brightness that lifts all the flavors.
    • Olive oil: A drizzle of good-quality olive oil enhances the richness and adds healthy fats.
    • Salt and pepper: These basics are essential for seasoning, allowing you to personalize the flavor.

    Feel free to get creative! Chopped bell peppers or creamy avocado can easily be added for extra flavor and nutrients. Remember, you can find exact quantities at the bottom of the article, perfect for printing or your next grocery list.

    How to Make Cottage Cheese and Chickpea Salad

    Making this Cottage Cheese and Chickpea Salad is as easy as pie! Follow my simple steps, and you’ll whip up a delicious meal in no time. Let’s dive into the process!

    Step 1: Combine the Cottage Cheese and Chickpeas

    Start with a large bowl. Combine the creamy cottage cheese and the protein-packed chickpeas. This duo brings a hearty base to the salad, plus they’re both filled with essential nutrients. Chickpeas are the MVPs, offering fiber and protein that keep your energy up. Trust me, this combo is simply irresistible!

    Step 2: Add Fresh Vegetables

    Next, it’s time to bring in the fresh veggies. Toss in the diced cucumber, halved cherry tomatoes, and chopped red onion. Fresh ingredients really bring this salad to life. The cucumber adds a refreshing crunch while tomatoes provide a natural sweetness. Plus, they’re full of vitamins! You’ll be amazed at how much brighter the salad looks—and tastes—with these gems.

    Step 3: Toss in Parsley

    Now, let’s brighten up our bowl with a sprinkle of fresh parsley. Not only does it enhance the flavor, but it also adds a vibrant pop of color. This little herb is packed with good stuff, like vitamins A, C, and K. It’s a small touch that makes a big difference in your Cottage Cheese and Chickpea Salad!

    Step 4: Dress the Salad

    Time for the magic! Drizzle olive oil and fresh lemon juice over the salad. This dressing ties everything together, adding richness from the oil and that zesty zing from the lemon. It’s the kind of dressing that elevates your dish from ordinary to extraordinary, all while keeping it light and healthy.

    Step 5: Season to Taste

    Now, sprinkle in salt and pepper to taste. This step is crucial! Seasoning can completely change the flavor profile. If you like a little kick, consider a dash of cayenne or a pinch of smoked paprika. Personalizing the seasoning makes the salad truly yours.

    Step 6: Chill and Serve

    Finally, let’s chill out! Place the salad in the refrigerator for 15-20 minutes. Chilling allows the flavors to meld together, making every bite even more delightful. When you’re ready to serve, simply scoop onto plates or into bowls, and enjoy your refreshing Cottage Cheese and Chickpea Salad!

    Tips for Success

    • Use fresh ingredients for the best flavor and nutrition.
    • Let the salad chill to enhance the taste; it’s worth the wait!
    • Experiment with different herbs like cilantro or dill for a twist.
    • For a creamier texture, try mixing in plain yogurt.
    • Make it ahead! This salad keeps well in the fridge for a day.

    Equipment Needed

    • Mixing bowl: A large bowl is essential for combining all the ingredients; a salad bowl works too.
    • Cutting board and knife: What’s a kitchen without these? They’ll help you chop veggies effortlessly.
    • Measuring spoons: Great for precise dressings, though eyeballing works if you’re feeling adventurous!
    • Spoon or spatula: You’ll need one for mixing everything together. A large spoon does the job just fine.

    Variations of Cottage Cheese and Chickpea Salad

    • Southwestern Twist: Add diced bell peppers, corn, and spices like cumin and chili powder for a zesty flair.
    • Mediterranean Delight: Incorporate olives, diced cucumber, and feta cheese for a tangy and salty experience.
    • Avocado Bliss: Mix in chunks of creamy avocado for an extra dose of healthy fats and a buttery texture.
    • Quinoa Boost: Toss in cooked quinoa for added protein and texture, turning the salad into a filling meal.
    • Herb Garden: Experiment with fresh herbs like mint or basil for a refreshing herbal twist.

    Serving Suggestions for Cottage Cheese and Chickpea Salad

    • Pair with warm pita bread or whole grain crackers for a delightful crunch.
    • Serve alongside grilled chicken or fish for a complete meal.
    • Top with avocado slices for extra creaminess.
    • Enjoy with a glass of iced lemon tea for a refreshing drink.
    • Garnish with additional parsley for an attractive presentation.

    FAQs about Cottage Cheese and Chickpea Salad

    As a passionate home cook, I’ve encountered a few frequently asked questions about this delicious Cottage Cheese and Chickpea Salad. Let me share the answers with you!

    Can I make this salad ahead of time?
    Absolutely! This salad keeps well in the fridge for up to a day. Just be sure to store it in an airtight container. The flavors blend beautifully when it rests, making each bite even more delightful.

    Is this salad suitable for a vegetarian diet?
    Yes, indeed! This Cottage Cheese and Chickpea Salad is totally vegetarian. Between the creamy cottage cheese and protein-packed chickpeas, you’re getting a healthy and satisfying meal.

    Can I use low-fat cottage cheese?
    Certainly! Low-fat cottage cheese works perfectly fine in this recipe. You’ll still get that creamy texture along with the nutrition benefits without the extra calories.

    What if I don’t like chickpeas?
    No worries! You can replace chickpeas with other beans such as black beans or kidney beans. Both options add proteins and make for a deliciously nutritious substitute.

    How can I make this salad more filling?
    If you’re looking for more substance, consider adding cooked quinoa or even diced grilled chicken. These options enhance the protein content, making it a complete meal.

    Final Thoughts

    As I reflect on my journey with this Cottage Cheese and Chickpea Salad, I can’t help but smile. It’s more than just a dish; it’s a simple joy that fits effortlessly into our busy lives. The vibrant colors and fresh flavors remind me of summer picnics and family gatherings. This salad is a celebration of health, convenience, and creativity in the kitchen. So, whether you’re enjoying it as a light lunch or a delightful side, I hope it brings you as much happiness as it has brought me. Happy cooking, and may your kitchen be filled with love and laughter!


    Print

    clock clock iconcutlery cutlery iconflag flag iconfolder folder iconinstagram instagram iconpinterest pinterest iconfacebook facebook iconprint print iconsquares squares iconheart heart iconheart solid heart solid icon

    Description

    A refreshing and nutritious salad combining the creaminess of cottage cheese with the protein-packed chickpeas and fresh vegetables.


    • 1 cup cottage cheese
    • 1 can chickpeas, drained and rinsed
    • 1 cucumber, diced
    • 1 cup cherry tomatoes, halved
    • ¼ cup red onion, finely chopped
    • 2 tablespoons fresh parsley, chopped
    • 2 tablespoons lemon juice
    • 1 tablespoon olive oil
    • Salt, to taste
    • Pepper, to taste

    1. In a large bowl, combine cottage cheese and chickpeas.
    2. Add diced cucumber, halved cherry tomatoes, and chopped red onion.
    3. Toss in fresh parsley.
    4. Drizzle with olive oil and lemon juice.
    5. Season with salt and pepper to taste.
    6. Gently mix all ingredients until well combined.
    7. Chill in the refrigerator for 15-20 minutes before serving.

    Notes

    • For added flavor, feel free to add chopped bell peppers or avocado.
    • This salad can be served as a side dish or a light main course.
    • Prep Time: 10 minutes
    • Cook Time: 0 minutes
    • Category: Salad
    • Method: Mixing
    • Cuisine: Mediterranean

    Nutrition

    • Serving Size: 1 cup
    • Calories: 210
    • Sugar: 3g
    • Sodium: 340mg
    • Fat: 7g
    • Saturated Fat: 1.5g
    • Unsaturated Fat: 5g
    • Trans Fat: 0g
    • Carbohydrates: 24g
    • Fiber: 6g
    • Protein: 15g
    • Cholesterol: 10mg

    Sharing is caring!

  • Garlic Cauliflower Mushroom Skillet

    Garlic Cauliflower Mushroom Skillet


    Introduction to Garlic Cauliflower Mushroom Skillet

    Hey there, fellow home cooks! If you’re anything like me, life can be a whirlwind of busy days and endless to-do lists. But let me introduce you to my go-to dish to cut through the chaos: the Garlic Cauliflower Mushroom Skillet! This simple and quick sauté has become my secret weapon for weeknight dinners that impress my family and friends. With its delightful mix of flavors and vibrant colors, it transforms mealtime into a joyful occasion, even when time isn’t on our side. Let’s dive right into this delicious recipe!

    Why You’ll Love This Garlic Cauliflower Mushroom Skillet

    This Garlic Cauliflower Mushroom Skillet is a game-changer for busy moms and professionals like us. It’s incredibly easy to whip up, taking only 25 minutes from start to finish. The dish is bursting with flavor, thanks to the garlic, smoked paprika, and a zest of lemon. Plus, it’s versatile enough to pair with anything from grilled chicken to quinoa. It’s a comfort food that fits perfectly into any hectic schedule!

    Ingredients for Garlic Cauliflower Mushroom Skillet

    Gathering the right ingredients is like finding pieces of a puzzle that come together to create a delicious masterpiece. Here’s what you’ll need for the Garlic Cauliflower Mushroom Skillet:

    • Olive oil: This liquid gold is perfect for sautéing. It adds healthy fats and a touch of flavor.
    • Butter: Adding a little butter gives the dish a rich, creamy texture that rounds out the flavors beautifully.
    • Cauliflower: Elegant and versatile, cauliflower serves as the star of the dish, providing a delightful crunch and a mild taste.
    • Mushrooms: Their umami richness enhances the overall depth. I love using fresh mushrooms for that earthy flavor.
    • Garlic: A must-have in any savory recipe! It injects bold flavor and aroma that can instantly elevate any dish.
    • Smoked paprika: This seasoning takes the dish to a whole new level with its smoky undertone, pairing perfectly with the veggies.
    • Italian seasoning: A blend of herbs that adds a touch of the Mediterranean, it’s a simple way to amp up the herbaceous vibes.
    • Salt & black pepper: Basics that enhance the natural flavors of your ingredients—so you can’t forget these!
    • Lemon juice: A splash of bright, zesty lemon brings all those flavors together and adds a freshness to the dish.
    • Parmesan cheese (optional): Grating a bit of this cheese on top gives a salty, nutty finish. But feel free to skip it for a vegan option!
    • Fresh parsley: This herb isn’t just for garnish! It adds a pop of color and a touch of fresh flavor to the completed dish.

    Exact measurements for all these ingredients are listed at the bottom of the article, making them ready for printing. Enjoy the fun of cooking, and experiment with the ingredients that excite your taste buds!

    How to Make Garlic Cauliflower Mushroom Skillet

    Now that we have our ingredients, let’s bring them together for a tasty meal! Follow along as I guide you through the simple steps to create your very own Garlic Cauliflower Mushroom Skillet.

    Step 1: Sauté the Base

    Start by grabbing a large skillet and setting it over medium heat. Add the olive oil and butter. Let them melt together, creating a lovely, sizzling mix. This is where the magic begins!

    Step 2: Add Cauliflower

    Once your skillet is ready, toss in the cauliflower florets. Spread them out in a single layer to ensure even cooking. Sauté for about 5-6 minutes until they turn slightly golden. You want that perfect crunchy texture!

    Step 3: Incorporate Mushrooms

    Now, it’s time to introduce the mushrooms to the party. Stir them in and let them cook for another 4-5 minutes. You’ll know they’re ready when they shrink down a bit and release their earthy, delicious aroma. Keep stirring occasionally for even cooking!

    Step 4: Seasoning and Flavor Boost

    Ah, here comes the heart of the dish! Add the minced garlic, smoked paprika, Italian seasoning, salt, and black pepper. Give it a good stir and let these flavors mingle for about 2 minutes. You’ll smell that amazing garlicky goodness soon enough!

    Step 5: Final Touches

    As we near the finish line, drizzle in the lemon juice for that vital zing! If you’re using Parmesan cheese, sprinkle it on now. Finish by garnishing with fresh parsley for a pop of color and herbaceous flavor. Serve your Garlic Cauliflower Mushroom Skillet hot, and watch your loved ones dig in!

    Tips for Success

    • For more depth of flavor, consider adding a splash of white wine while cooking.
    • Be careful not to overcrowd the skillet. This ensures everything cooks evenly and develops a nice golden color.
    • Experiment with different vegetables! Bell peppers or zucchini can add a fun twist.
    • If you’re short on time, prepare your ingredients in advance to streamline the cooking process.
    • Don’t skimp on the seasoning; taste as you go to find your perfect blend!

    Equipment Needed

    • Large skillet: A non-stick skillet works wonders, but any sturdy frying pan will do.
    • Spatula: A silicone spatula is great for easy stirring without scratching your pans.
    • Measuring cups and spoons: Essential for precise ingredient measurements; don’t leave home without them!
    • Kitchen knife: A sharp chef’s knife makes chopping veggies a breeze.

    Variations on Garlic Cauliflower Mushroom Skillet

    • Add Protein: For an extra boost, toss in cooked chicken, shrimp, or chickpeas for a heartier dish.
    • Spicy Kick: If you love a little heat, throw in red pepper flakes or a dash of sriracha while cooking.
    • Dairy-Free Option: Replace Parmesan with a dairy-free cheese alternative or nutritional yeast for that cheesy taste without the dairy.
    • Herb Variations: Switch out Italian seasoning for fresh herbs like basil or cilantro based on what you have on hand.
    • Grain Base: Serve the skillet over a bed of quinoa, rice, or even farro for added texture and nutrition.

    Serving Suggestions for Garlic Cauliflower Mushroom Skillet

    • Serve with Grains: Pair it with fluffy quinoa or brown rice to soak up those delicious flavors.
    • Fresh Salad: A light green salad on the side adds a refreshing crunch to your meal.
    • Perfect Wine Pairing: A crisp white wine like Sauvignon Blanc complements the dish beautifully.
    • Garnish Ideas: Top with toasted pine nuts or sesame seeds for an extra layer of texture.

    FAQs about Garlic Cauliflower Mushroom Skillet

    Can I make Garlic Cauliflower Mushroom Skillet ahead of time?
    Absolutely! You can prepare the ingredients in advance and store them in the fridge. Just sauté everything when you’re ready to eat. It makes the process even quicker on busy nights!

    Is this Garlic Cauliflower Mushroom Skillet vegan?
    Yes, it can be! Just skip the Parmesan cheese or use a dairy-free alternative to keep the dish vegan-friendly. The flavors will still shine without it!

    What can I serve with Garlic Cauliflower Mushroom Skillet?
    This tasty skillet pairs well with grilled chicken, fish, or over a grain like quinoa. You can also enjoy it on its own for a hearty vegetarian meal!

    Can I add extra vegetables to the skillet?
    Definitely! Feel free to mix in other veggies like bell peppers or spinach. They add wonderful flavors and layers of color to your dish.

    How long does the Garlic Cauliflower Mushroom Skillet last in the fridge?
    If stored properly in an airtight container, it should stay fresh for about 3-4 days. Just reheat it gently before serving!

    Final Thoughts

    Creating the Garlic Cauliflower Mushroom Skillet is like a mini celebration in my kitchen. This dish not only brightens up our dinner table, but it also brings family and friends together. The comforting aroma of garlic mingling with sautéed veggies creates an inviting atmosphere that makes every meal feel special. Plus, knowing I can whip it up in just 25 minutes makes weeknight cooking a breeze! Let this vibrant skillet dish bring joy to your dinner routine, and watch how it transforms even the most hectic evenings into deliciously memorable moments. Happy cooking, friends!


    Print

    clock clock iconcutlery cutlery iconflag flag iconfolder folder iconinstagram instagram iconpinterest pinterest iconfacebook facebook iconprint print iconsquares squares iconheart heart iconheart solid heart solid icon

    Description

    A quick and tasty sautéed dish featuring garlic, cauliflower, and mushrooms.


    • 2 tbsp olive oil
    • 2 tbsp butter
    • 1 small head cauliflower, cut into florets
    • 8 oz mushrooms, sliced
    • 4 cloves garlic, minced
    • ½ tsp smoked paprika
    • ½ tsp Italian seasoning
    • Salt & black pepper, to taste
    • 1 tbsp lemon juice
    • ¼ cup Parmesan cheese (optional)
    • Fresh parsley, for garnish

    1. In a large skillet over medium heat, add olive oil and butter.
    2. Add cauliflower and cook for 5-6 minutes until slightly golden. Add mushrooms and continue cooking for 4-5 more minutes.
    3. Stir in garlic, paprika, Italian seasoning, salt, and pepper. Cook for another 2 minutes until fragrant.
    4. Drizzle with lemon juice, sprinkle with Parmesan (if using), and garnish with fresh parsley. Serve hot!

    Notes

    • For added flavors, you can experiment with other herbs like thyme or rosemary.
    • Feel free to substitute the Parmesan cheese with a dairy-free alternative to make it vegan.
    • Prep Time: 10 minutes
    • Cook Time: 15 minutes
    • Category: Side Dish
    • Method: Sauté
    • Cuisine: American

    Nutrition

    • Serving Size: 1 cup
    • Calories: 150
    • Sugar: 3g
    • Sodium: 200mg
    • Fat: 10g
    • Saturated Fat: 4g
    • Unsaturated Fat: 5g
    • Trans Fat: 0g
    • Carbohydrates: 15g
    • Fiber: 4g
    • Protein: 5g
    • Cholesterol: 20mg

    Sharing is caring!

  • Baked Garlic Butter Scallops: A Delectable Treat Awaits

    Baked Garlic Butter Scallops: A Delectable Treat Awaits


    Introduction to Baked Garlic Butter Scallops

    Welcome to my kitchen! Today, I’m excited to share my recipe for Baked Garlic Butter Scallops. This delightful dish is not only a crowd-pleaser but also a quick solution for any busy day. As someone who loves attempting to merge delicious flavors into a feast fit for my loved ones, I find these tender scallops coated in warm garlic butter are just the ticket. Their rich taste and crispy crust will have everyone asking for seconds. Plus, they come together in a snap, making dinner prep feel like a breeze!

    Why You’ll Love This Baked Garlic Butter Scallops

    This Baked Garlic Butter Scallops recipe is a game-changer for busy nights. It’s incredibly easy to pull together, leaving you more time to relax and enjoy with your family. Imagine the aroma wafting through your home, making dinner feel special. Plus, the tender, flavorful scallops paired with a crispy topping create a gourmet experience that impresses without fuss. You’ll be the rock star of mealtime!

    Ingredients for Baked Garlic Butter Scallops

    Gathering the right ingredients is essential for making these Baked Garlic Butter Scallops come to life. Here’s what you’ll need:

    • Fresh sea scallops – Look for large, plump scallops that are sweet and tender. You’ll want them fresh, as frozen ones often lose their delicate flavor.
    • Garlic – Minced garlic will add bold aroma and depth to the dish. Feel free to adjust the amount based on your personal tastes!
    • Butter – A must-have! Use unsalted butter to control the saltiness, allowing it to melt perfectly into the scallops and enhance their richness.
    • Breadcrumbs – These provide a crispy, golden crust. Panko breadcrumbs are a great choice for extra crunch if you want to take it up a notch.
    • Parmesan cheese – This adds a salty umami flavor that complements the scallops beautifully and helps brown the topping.
    • Fresh parsley – A sprinkle of bright green parsley not only adds color but also a hint of freshness. You can substitute with dill for a different twist.
    • Salt and pepper – Basic seasonings that help accentuate the natural sweetness of the scallops. Use good quality sea salt for the best results.

    For the best experience, make sure to check the ingredients list at the end of the article. There, you’ll find exact quantities along with a printable version of the recipe!

    How to Make Baked Garlic Butter Scallops

    Preheat the Oven

    First, preheat your oven to 400°F (200°C). While it’s heating, lightly grease a small baking dish with a bit of butter or cooking spray. This small step ensures that your scallops won’t stick, making your cleanup a breeze!

    Prepare the Scallops

    Gently rinse your fresh sea scallops under cold water, then pat them dry with paper towels. Dry scallops will help them get that beautiful caramelization. Arrange the scallops in a single layer in your baking dish, spacing them evenly. This way, each one gets its fair share of that buttery goodness.

    Make the Topping

    In a small bowl, mix together your melted butter, minced garlic, breadcrumbs, grated Parmesan, and chopped parsley. Stir until it forms a cohesive mixture, but not too wet. You want it to cling to the scallops but still maintain a bit of texture for that perfect crispy topping.

    Season and Top

    Now it’s time to season your scallops. Sprinkle them with salt and pepper to taste. Then, spoon the garlic butter topping evenly over each scallop, being generous! This ensures every bite is bursting with flavor and that glorious crust on top.

    Bake Until Golden

    Place your baking dish in the preheated oven and bake the scallops for 12–15 minutes. You’ll know they’re done when they’re opaque and the topping is lightly golden. Keep an eye on them toward the end for that perfect finish!

    Serve Fresh

    Once they’re out of the oven, let them rest for a minute. Garnish with extra parsley for that pop of color. Serve these heavenly scallops warm, and watch them disappear from the table in no time!

    Tips for Success

    • Always use fresh scallops for the best flavor and texture.
    • Pat scallops dry well before baking to achieve that golden crust.
    • Don’t skip the garlic; it adds depth that makes this dish shine.
    • Feel free to customize the breadcrumbs or add your favorite herbs.
    • Serve immediately for the best taste; scallops can cool quickly!

    Equipment Needed

    • Baking Dish: A small, greased dish will do. An oven-safe skillet works as an alternative.
    • Bowl: Use a mixing bowl for combining the topping ingredients.
    • Measuring Cups and Spoons: Handy for measuring ingredients, but eyeballing works too!
    • Knife and Cutting Board: Essential for mincing garlic and chopping parsley.

    Variations

    • Herb-Infused: Add chopped fresh thyme, basil, or dill to the topping for an aromatic twist.
    • Spicy Kick: Mix in red pepper flakes or a dash of hot sauce into the butter for a fiery touch.
    • Creamy Option: Stir in a dollop of cream cheese or sour cream into the topping for a rich, creamy texture.
    • Vegetarian Alternative: Replace scallops with large portobello mushrooms, following the same steps for a delicious plant-based treat.
    • Nutty Flavor: Incorporate finely chopped nuts, such as almonds or walnuts, into the breadcrumb mixture for added crunch and flavor.

    Serving Suggestions

    • Crispy Side Salad: Pair your scallops with a light, mixed greens salad dressed in lemon vinaigrette for a refreshing crunch.
    • Wine Pairing: A chilled glass of Sauvignon Blanc complements the seafood beautifully.
    • Rustic Bread: Serve with a slice of crusty bread to soak up all that delicious garlic butter.
    • Plate Presentation: Arrange scallops on a bed of sautéed spinach for an elegant look.

    FAQs about Baked Garlic Butter Scallops

    Can I use frozen scallops for this recipe? While fresh scallops provide the best flavor and texture, you can use frozen scallops. Just make sure to thaw them completely and pat them dry before baking.

    How do I know when my scallops are done? Scallops are perfectly cooked when they turn opaque and firm to the touch. The topping should be nicely golden, adding to the overall appeal of this baked garlic butter scallops dish.

    What can I serve with baked garlic butter scallops? These savory scallops pair wonderfully with a light salad, crispy bread, or sautéed vegetables. You can also complement them with a glass of white wine for a full dining experience.

    Can I make this dish ahead of time? It’s best to bake the scallops fresh for optimal flavor and texture. However, you can prepare the topping and store it in the fridge until you’re ready to cook. Just top the scallops right before baking!

    What’s the best way to store leftovers? If you happen to have some baked garlic butter scallops left, store them in an airtight container in the fridge for up to two days. Reheat them gently in the oven to preserve their texture.

    Final Thoughts

    There’s something truly magical about serving Baked Garlic Butter Scallops to friends and family. The tender scallops, enveloped in a luscious garlic butter topping, offer a symphony of flavors that instantly elevate any meal. I love how this recipe transforms a ordinary weeknight into a special occasion with minimal effort. Plus, watching everyone savor each bite brings me immense joy. Whether it’s a cozy family dinner or a gathering with friends, this delightful dish is sure to impress. So, roll up your sleeves and let the flavors dance—your culinary adventure awaits!


    Print

    clock clock iconcutlery cutlery iconflag flag iconfolder folder iconinstagram instagram iconpinterest pinterest iconfacebook facebook iconprint print iconsquares squares iconheart heart iconheart solid heart solid icon

    Description

    A delicious and easy recipe for baked garlic butter scallops that are tender, flavorful, and topped with a crispy crust.


    • Fresh sea scallops – Sweet, tender, and delicate in flavor.
    • Garlic – Adds bold aroma and depth.
    • Butter – Melts into the scallops for rich, savory flavor.
    • Breadcrumbs – Create a crisp, golden crust.
    • Parmesan cheese – Adds salty umami and browns beautifully.
    • Fresh parsley – Brightens up the final dish.
    • Salt and pepper – Basic seasoning that lets the scallops shine.

    1. Preheat the Oven: Set your oven to 400°F (200°C) and lightly grease a small baking dish.
    2. Prepare the Scallops: Rinse the scallops gently and pat them dry with paper towels. Arrange them in a single layer in the baking dish, spacing them evenly.
    3. Make the Topping: In a small bowl, stir together melted butter, minced garlic, breadcrumbs, grated Parmesan, and chopped parsley until well combined.
    4. Season and Top: Sprinkle the scallops with salt and pepper to taste. Spoon the garlic butter topping evenly over each scallop, covering the tops generously.
    5. Bake Until Golden: Place the baking dish in the preheated oven. Bake for 12–15 minutes, or until the scallops are opaque and the topping is lightly golden.
    6. Serve Fresh: Remove from oven and garnish with extra parsley if desired.

    Notes

    • Ensure scallops are fresh for the best flavor.
    • You can adjust the amount of garlic according to your taste preference.
    • For a spicier kick, add some red pepper flakes to the topping.
    • Prep Time: 10 minutes
    • Cook Time: 15 minutes
    • Category: Appetizer
    • Method: Baking
    • Cuisine: Seafood

    Nutrition

    • Serving Size: 4 scallops
    • Calories: 250
    • Sugar: 1g
    • Sodium: 300mg
    • Fat: 16g
    • Saturated Fat: 8g
    • Unsaturated Fat: 6g
    • Trans Fat: 0g
    • Carbohydrates: 14g
    • Fiber: 1g
    • Protein: 17g
    • Cholesterol: 60mg

    Sharing is caring!

  • Creamy Seafood Mac Cheese: Indulge in This Rich Delight!

    Creamy Seafood Mac Cheese: Indulge in This Rich Delight!


    Introduction to Creamy Seafood Mac Cheese

    Hey there, fellow home cooks! Today, I’m thrilled to share with you a delightful recipe for Creamy Seafood Mac Cheese. This dish is not just comfort food—it’s a heartwarming embrace in a bowl! Perfect for busy nights when time is tight, yet your family deserves something special. Imagine creamy goodness mingling with succulent shrimp, all cozily nestled in soft macaroni. What’s not to love? Whether it’s a family meal or a gathering with friends, this recipe will definitely impress and warm hearts around your dinner table!

    Why You’ll Love This Creamy Seafood Mac Cheese

    This Creamy Seafood Mac Cheese is your ticket to a stress-free dinner! It’s quick to prepare, taking just 45 minutes from start to finish. The rich flavors of cheese combined with juicy seafood create a comforting experience that feels luxurious. Plus, it’s versatile! You can mix in different seafood, making it a dish you can customize to suit your family’s tastes. Feel the love with each delicious bite!

    Ingredients for Creamy Seafood Mac Cheese

    To whip up your own plate of Creamy Seafood Mac Cheese, gather the following delicious ingredients:

    • Elbow macaroni: The classic shape that holds the creamy sauce perfectly. You can use gluten-free versions if needed.
    • Shrimp: I love using peeled and deveined shrimp for their sweet, succulent flavor. You can swap in crab or lobster for a fancier twist!
    • Olive oil: A touch of healthy fat to cook the seafood evenly and add flavor.
    • Unsalted butter: Essential for creating a rich base for our cheese sauce.
    • All-purpose flour: Helps thicken our sauce, ensuring it’s luxuriously creamy.
    • Whole milk: Adds creaminess without being too heavy, balancing the cheese perfectly.
    • Heavy cream: This is where the magic happens, bringing richness and depth to the sauce.
    • Seasonings: Garlic powder, onion powder, and mustard powder lend flavor and depth to our creamy delight.
    • Salt and pepper: The finishing touch to enhance all the flavors.
    • Sharp cheddar cheese: Packed with bold flavor, it’s the stars of our cheese trio.
    • Mozzarella cheese: For that glorious, gooey texture we all crave!
    • Parmesan cheese: A sprinkle of this adds a nutty flavor and a lovely balance.
    • Breadcrumbs (optional): Golden and crunchy topping, perfect for a little texture contrast.
    • Chopped fresh parsley: A pop of color and freshness that elevates the dish.

    Feeling adventurous? Feel free to experiment with different seafood or cheeses! If you’re interested in exact measurements, find them at the bottom of the article for easy printing.

    How to Make Creamy Seafood Mac Cheese

    Now that we’ve gathered our ingredients, it’s time to dive into the delightful process of making Creamy Seafood Mac Cheese! This will take just a few simple steps, and each one brings us closer to creamy bliss. Let’s begin our culinary adventure!

    Prepare the Elbow Macaroni

    Start by boiling a generous pot of salted water. Once it reaches a rolling boil, add the elbow macaroni. Cook it according to the package directions until it’s al dente. Remember, we want it to be firm, as it will finish cooking in the oven. Overcooking can lead to mushy pasta, and we want to avoid that culinary faux pas!

    Cook the Seafood

    In a large skillet, heat a tablespoon of olive oil over medium heat. Once it’s shimmering, gently add the peeled and deveined shrimp. Cook them for about 2-3 minutes per side, just until they turn pink and opaque. This is key! Shrimp can become rubbery if overcooked, which we definitely want to avoid. When they’re done, remove the shrimp from the skillet and set them aside.

    Make the Cheese Sauce

    In the same skillet, melt two tablespoons of unsalted butter over medium heat. Once melted, whisk in three tablespoons of all-purpose flour. Cook this until it turns a lovely golden color. Then, gradually whisk in 2 cups of whole milk and 1 cup of heavy cream. Patience is crucial here! Add the liquids slowly and keep whisking until the sauce thickens. Then, mix in your garlic powder, onion powder, mustard powder, salt, and pepper. Finally, stir in the 1½ cups of sharp cheddar cheese, 1 cup of mozzarella, and ½ cup of Parmesan until everything is melted and smooth.

    Combine Pasta and Seafood with Sauce

    Once your cheese sauce is smooth and dreamy, it’s time to unite our ingredients. Add the cooked elbow macaroni and your beautiful shrimp back into the skillet. Gently fold everything together until each piece of pasta and seafood is luxuriously coated in that creamy cheese sauce. Don’t rush this step! You want every bite to be an explosion of flavor.

    Bake the Dish

    Preheat your oven to 350°F. Transfer your creamy mixture into a greased 9×9 baking dish. If you choose, sprinkle ½ cup of breadcrumbs on top for that delightful crunch. Bake it for about 15 minutes until it’s golden and bubbly. The wonderful aroma will fill your kitchen and make your mouth water! After baking, garnish your masterpiece with a sprinkle of fresh chopped parsley before diving in.

    Tips for Success

    • Don’t rush the cheese sauce—whisk it patiently for a silky texture.
    • For a flavor boost, add a dash of hot sauce in the cheese sauce.
    • For creamier results, consider a bit more heavy cream.
    • When using frozen shrimp, thaw them completely and pat dry before cooking.
    • Enjoy with a fresh salad or crusty bread for a complete meal!

    Equipment Needed

    • Large pot: Essential for boiling the macaroni. A stockpot works great too.
    • Skillet: A large sauté pan is perfect for cooking the seafood and making the sauce.
    • Whisk: For smooth sauce—fingers work, but it’s messy!
    • Baking dish: A 9×9 dish is ideal. Use any oven-safe dish you have.
    • Measuring cups and spoons: Helpful for precise ingredients—don’t worry, you’ll get the hang of it!

    Variations of Creamy Seafood Mac Cheese

    • Different Seafood Medley: Swap shrimp for crab, lobster, or even scallops for a luxurious twist.
    • Vegetarian Option: Leave out the seafood and add sautéed vegetables like spinach, mushrooms, or roasted red peppers.
    • Spicy Kick: Incorporate diced jalapeños or a sprinkle of cayenne pepper for a zesty flavor.
    • Cheese Lovers: Try different cheese combinations like gouda, fontina, or pepper jack for extra flavor.
    • Gluten-Free Version: Use gluten-free elbow macaroni and ensure all sauces and extras are gluten-free.

    Serving Suggestions

    • Pair with a crisp garden salad to brighten up the meal.
    • Serve with warm, crusty bread to soak up that cheesy goodness.
    • A glass of chilled white wine like Chardonnay complements the seafood beautifully.
    • Garnish with additional parsley for an appealing presentation.

    FAQs about Creamy Seafood Mac Cheese

    Can I make Creamy Seafood Mac Cheese ahead of time?
    Absolutely! You can prepare it in advance and refrigerate it. Just bake just before serving. This makes it a fantastic option for busy evenings or entertaining guests!

    What seafood works best in this recipe?
    While shrimp is a favorite, you can definitely mix in crab, lobster, or even scallops for a seafood medley! Feel free to get creative based on what you enjoy and have on hand.

    How do I store leftovers?
    Store your leftover Creamy Seafood Mac Cheese in an airtight container in the refrigerator for up to 3 days. Reheat in the oven or microwave but expect it to lose some creaminess.

    Can I make this dish gluten-free?
    Yes! Simply swap the elbow macaroni for a gluten-free version and ensure all other ingredients are gluten-free. It’s just as delicious, I promise!

    What can I serve with Creamy Seafood Mac Cheese?
    Pair it with a fresh garden salad, warm crusty bread, or even roasted vegetables for a balanced meal. A glass of white wine elevates the dining experience, too!

    Final Thoughts

    As I’ve whisked together the ingredients for this Creamy Seafood Mac Cheese, I’ve come to realize just how comforting it truly is. It’s not just a meal; it’s a moment of joy shared with loved ones around the table. The rich combination of cheeses paired with tender seafood makes every bite a delightful experience. Whether it’s a weeknight dinner or a weekend gathering, this dish brings warmth and satisfaction. So grab your apron, indulge in the process, and let the enchanting aroma fill your kitchen. Trust me, your family will be asking for seconds—and maybe thirds!


    Print

    clock clock iconcutlery cutlery iconflag flag iconfolder folder iconinstagram instagram iconpinterest pinterest iconfacebook facebook iconprint print iconsquares squares iconheart heart iconheart solid heart solid icon

    Description

    Indulge in this rich and creamy seafood macaroni and cheese, featuring a blend of shrimp, cheddar, mozzarella, and Parmesan for a deliciously decadent meal.


    • 8 oz elbow macaroni
    • 1 lb shrimp, peeled and deveined (or mix of crab and lobster)
    • 1 tablespoon olive oil
    • 2 tablespoons unsalted butter
    • 3 tablespoons all-purpose flour
    • 2 cups whole milk
    • 1 cup heavy cream
    • 1 teaspoon garlic powder
    • 1 teaspoon onion powder
    • ½ teaspoon mustard powder
    • salt and pepper to taste
    • 1½ cups grated sharp cheddar cheese
    • 1 cup grated mozzarella cheese
    • ½ cup grated Parmesan cheese
    • ½ cup breadcrumbs (optional)
    • chopped fresh parsley for garnish

    1. Boil macaroni in salted water according to package directions until al dente. Drain and set aside.
    2. Heat olive oil in large skillet over medium heat. Cook shrimp 2-3 minutes per side until pink and opaque. Remove and set aside.
    3. Melt butter, whisk in flour until golden. Gradually add milk and cream, whisking until thickened. Add seasonings and cheeses, stir until smooth.
    4. Add cooked pasta and seafood to cheese sauce, stir to combine evenly.
    5. Transfer to greased 9×9 baking dish, top with breadcrumbs. Bake at 350°F for 15 minutes until golden. Garnish with parsley and serve.

    Notes

    • For a different flavor, feel free to mix in different seafood.
    • Can be made ahead of time and baked just before serving.
    • Breadcrumbs can be omitted for a gluten-free version.
    • Prep Time: 15 minutes
    • Cook Time: 30 minutes
    • Category: Main Dish
    • Method: Baking
    • Cuisine: American

    Nutrition

    • Serving Size: 1 cup
    • Calories: 600
    • Sugar: 5g
    • Sodium: 850mg
    • Fat: 30g
    • Saturated Fat: 15g
    • Unsaturated Fat: 10g
    • Trans Fat: 0g
    • Carbohydrates: 60g
    • Fiber: 2g
    • Protein: 25g
    • Cholesterol: 150mg

    Sharing is caring!