Author: IHAAL Team

  • Creamy Paprika Steak Shells

    Creamy Paprika Steak Shells


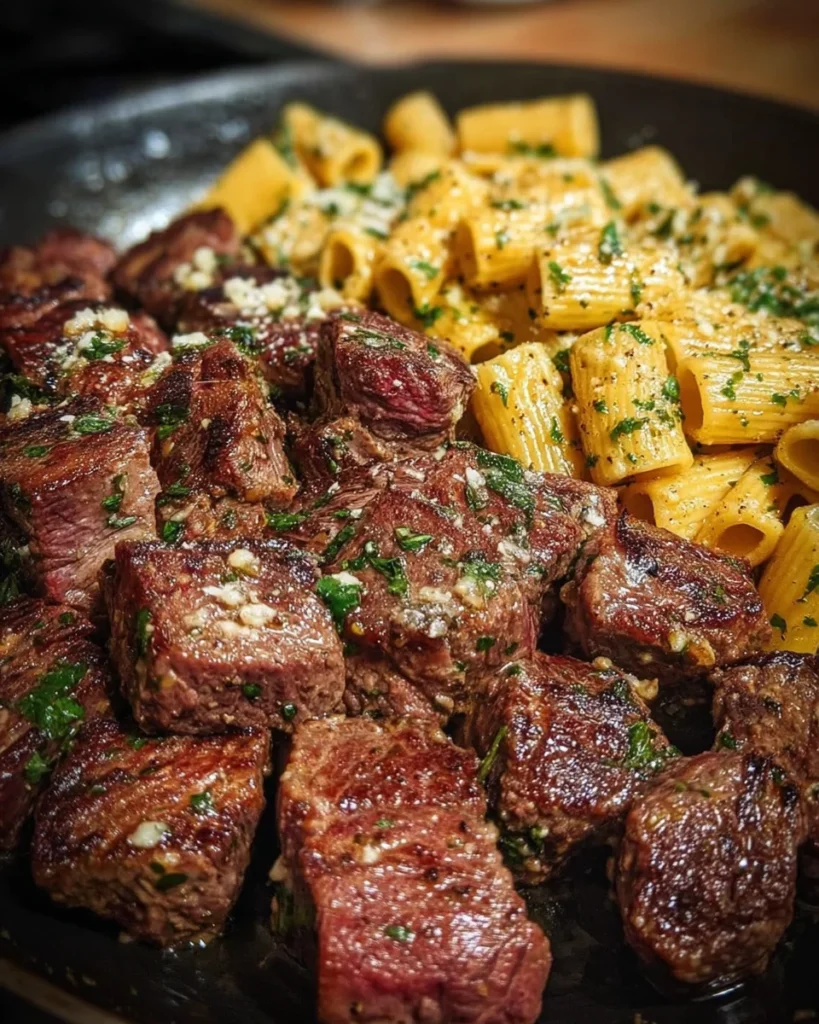
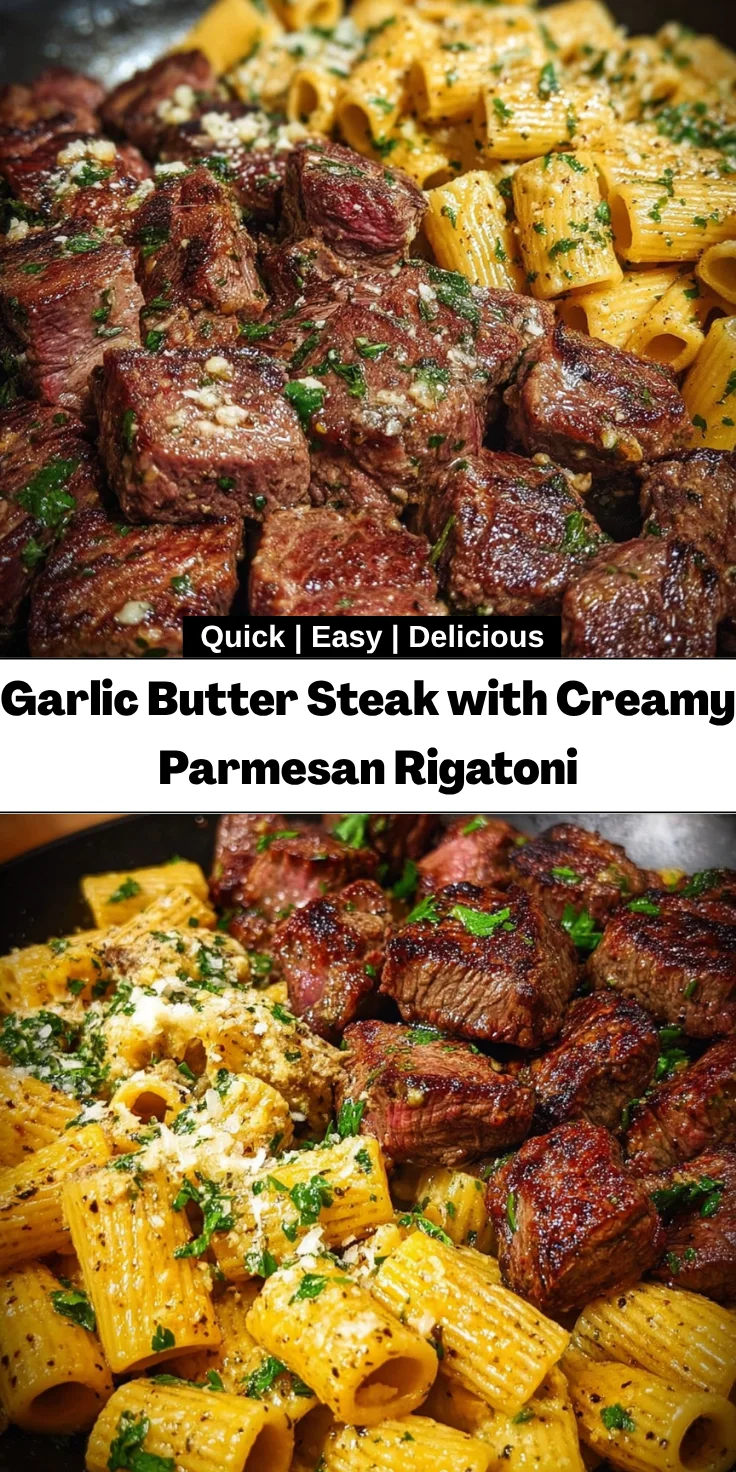
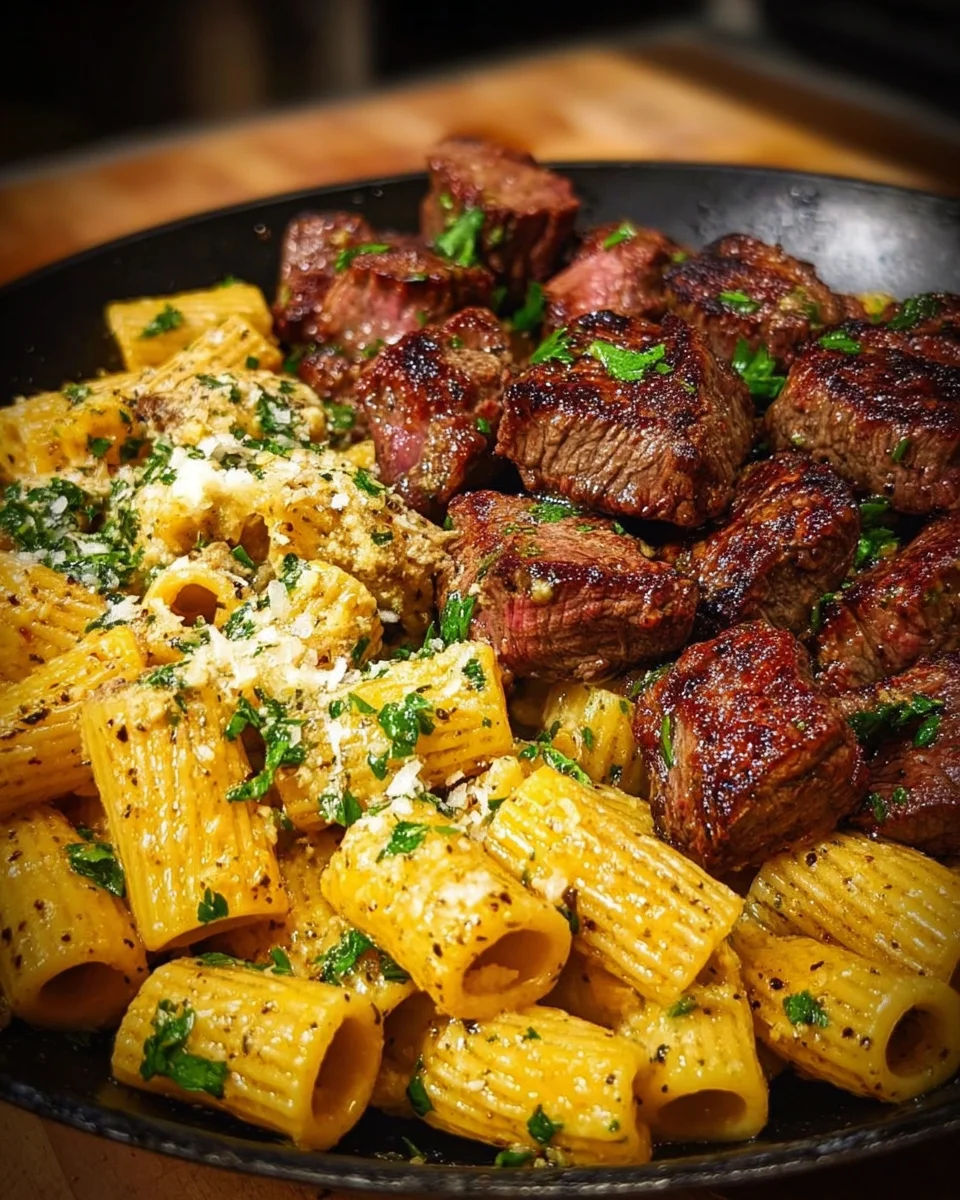
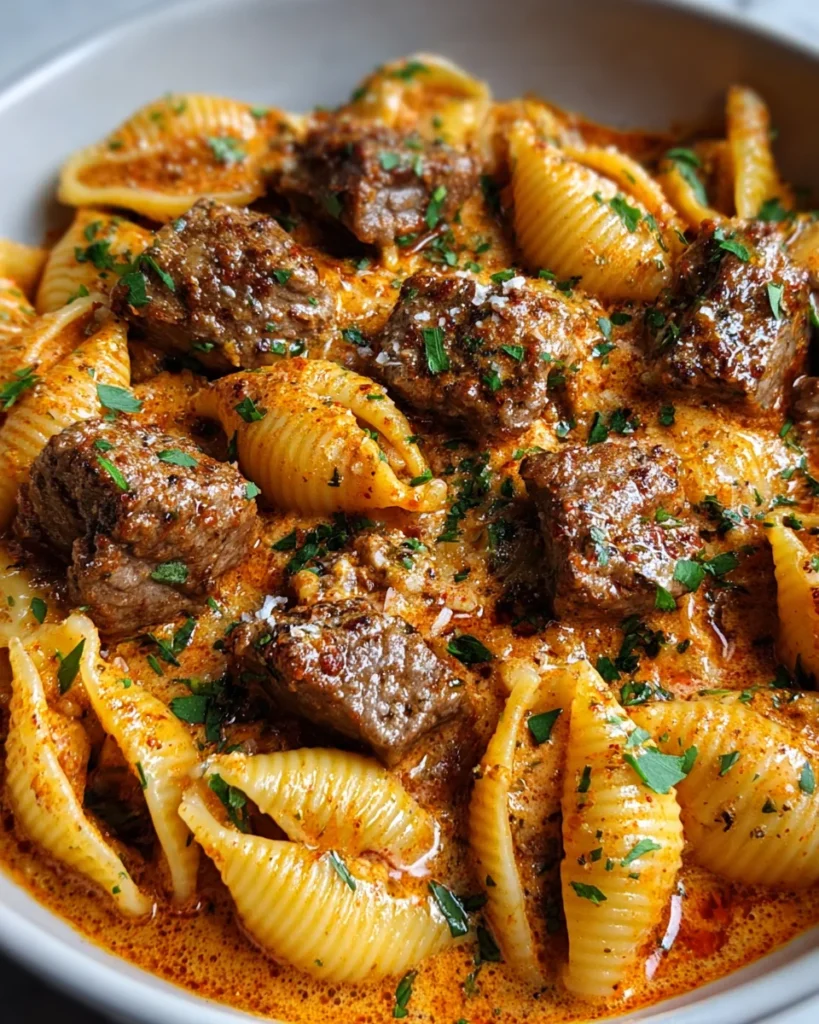
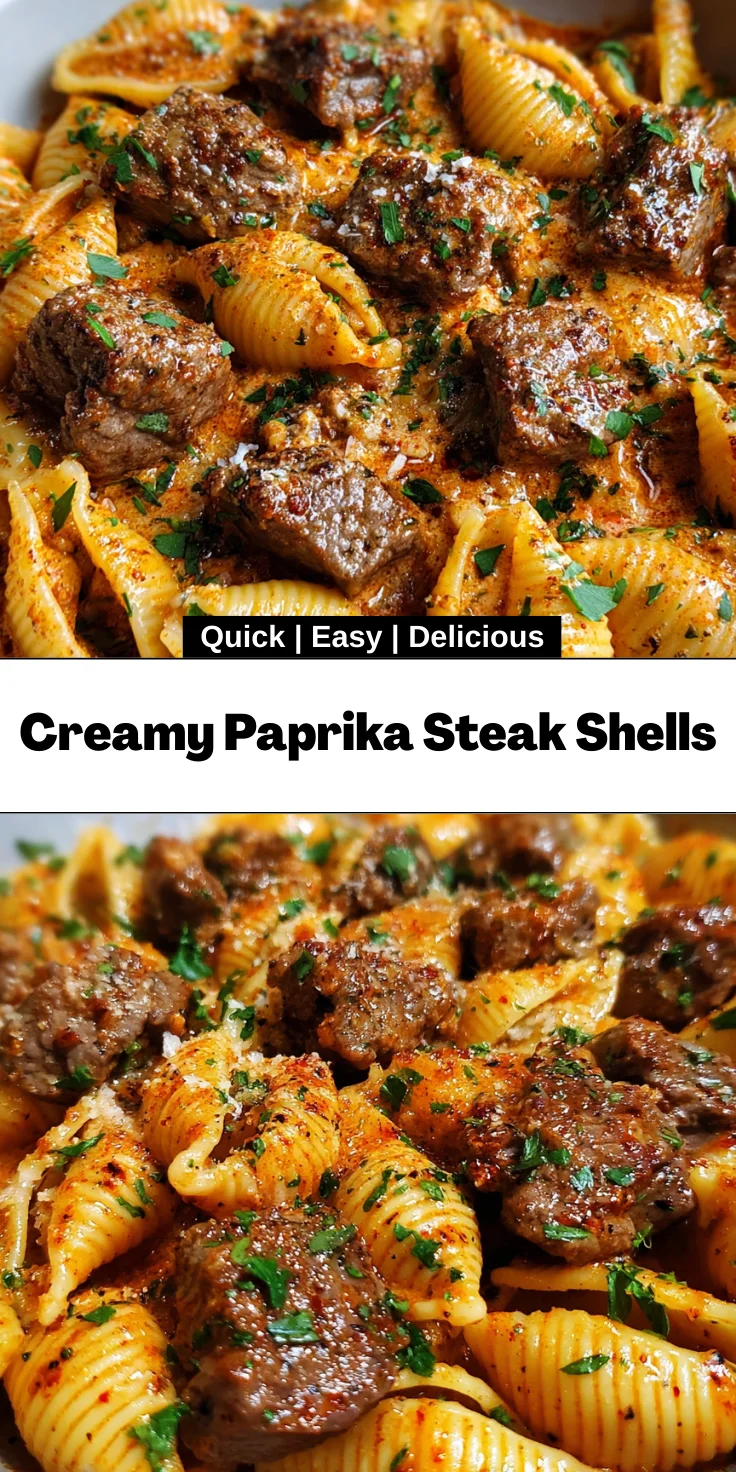
    Introduction to Creamy Paprika Steak Shells

    Welcome to a culinary journey that’ll make your weeknight dinner feel like a special occasion! Today, we’re diving into the delightful world of Creamy Paprika Steak Shells. If you’re a busy mom or a professional always on the go, let me assure you, this dish is a true lifesaver. Picture tender steak infused with rich, smoky paprika, all wrapped around comforting shell pasta in a luscious cream sauce. It’s the perfect solution for those evenings when you want to impress your loved ones without spending hours in the kitchen!

    Why You’ll Love This Creamy Paprika Steak Shells

    Your taste buds are in for a treat with Creamy Paprika Steak Shells. This dish combines speed and flavor in a winning combination. In just 35 minutes, you’ll have a luxurious meal that tastes like it’s straight from a restaurant. Plus, it’s versatile enough to adapt to your family’s preferences. Whether your crew is craving steak, chicken, or something else entirely, this recipe has you covered!

    Ingredients for Creamy Paprika Steak Shells

    Let’s gather our stars for this spectacular show, shall we? Here’s what you’ll need to create your Creamy Paprika Steak Shells.

    • Shell Pasta: This playful pasta shape captures all that creamy goodness, making every bite a delight!
    • Steak: Tender cuts like sirloin or ribeye add a hearty touch. Feel free to use chicken or shrimp for a different flair.
    • Salt and Black Pepper: Simple seasonings that bring out the natural flavors of your ingredients.
    • Smoked Paprika: This spice works magic by adding depth and a slightly smoky flavor that resonates throughout the dish.
    • Olive Oil: A must for cooking steaks; it helps achieve that perfect sear while adding healthy fats.
    • Butter: Because what’s a creamy sauce without a little richness? Butter enhances flavor and smoothness.
    • Garlic: Minced fresh, it’ll add a punch of flavor and aroma, making your kitchen smell divine!
    • Heavy Cream: The key player in this dish, it transforms your sauce into a luxurious, creamy dip for the pasta and steak.
    • Beef Broth: This ingredient enhances the sauce’s flavor, providing a savory base that complements the spices.
    • Parmesan Cheese: Grated and melted, this cheese adds a nutty richness that’s utterly irresistible.
    • Fresh Parsley: A pop of color and freshness, it’s the perfect garnish to finish off your plate.

    For exact measurements and printable ingredients, please see the end of the article. Now that we’re stocked up and ready, can you already smell the deliciousness? Let’s get cooking!

    How to Make Creamy Paprika Steak Shells

    Step 1: Prepare the Pasta

    First things first, let’s get that shell pasta cooking. Boil a large pot of salted water and add the pasta. You’ll want to cook it until it’s al dente, following the package instructions. This keeps the pasta firm and perfect for soaking up that creamy sauce. Once it’s cooked, drain it well and set it aside while we work on the steak.

    Step 2: Season the Steak

    Now, let’s talk steak! Pat those bite-sized pieces dry with paper towels. This helps to achieve that mouthwatering sear. Toss them with salt, black pepper, and smoked paprika. This seasoning combination will have your steak bursting with flavors. You can even let it marinate for about 30 minutes for an extra flavor kick!

    Step 3: Sear the Steak

    In a large skillet, heat some olive oil over medium-high heat. Once it’s hot, add your seasoned steak in a single layer. Don’t overcrowd the pan, or you’ll end up steaming instead of searing! Cook for 2 to 3 minutes on each side until it’s beautifully browned. Once done, transfer the steak to a plate and set it aside. You’ll come back to it soon!

    Step 4: Make the Creamy Sauce

    Reduce the heat to medium and toss in the butter into the same skillet. Wait for it to melt, and then add minced garlic. Sauté it for about a minute until fragrant, but be careful not to let it burn! Pour in the heavy cream and beef broth, stirring to combine everything. Let this simmer for 3 to 4 minutes. You’re aiming for a delightful creamy consistency that’ll make your taste buds dance!

    Step 5: Combine Pasta and Steak

    Now comes the fun part! Bring back the drained pasta and seared steak to the skillet. Gently toss everything together so that the pasta and steak get coated in that luscious sauce. It’s like a warm hug on a chilly day! If the sauce seems too thick, you can add a splash more broth. Don’t forget to stir in the Parmesan cheese until it melts into creamy goodness—your dish is almost ready!

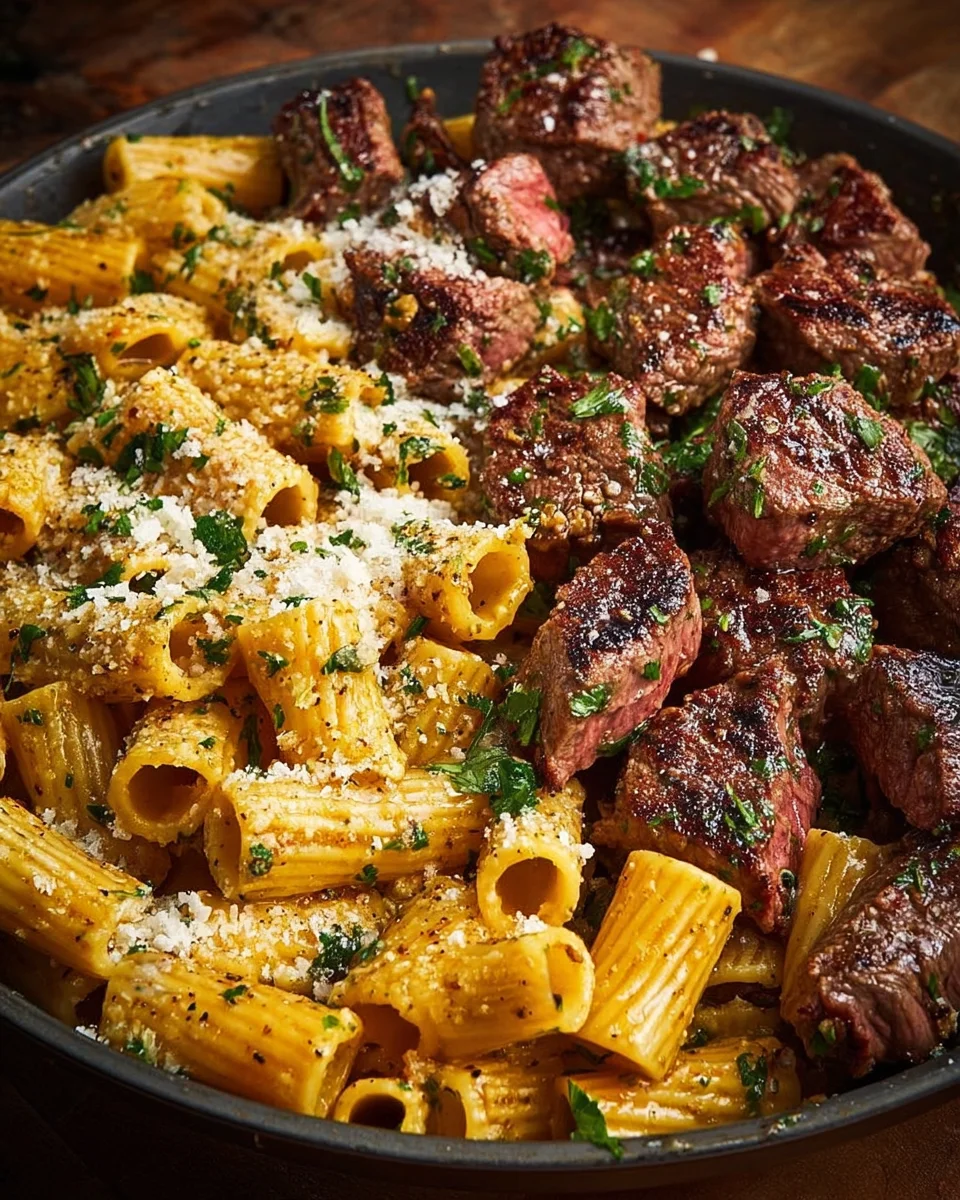
    Step 6: Serve and Enjoy

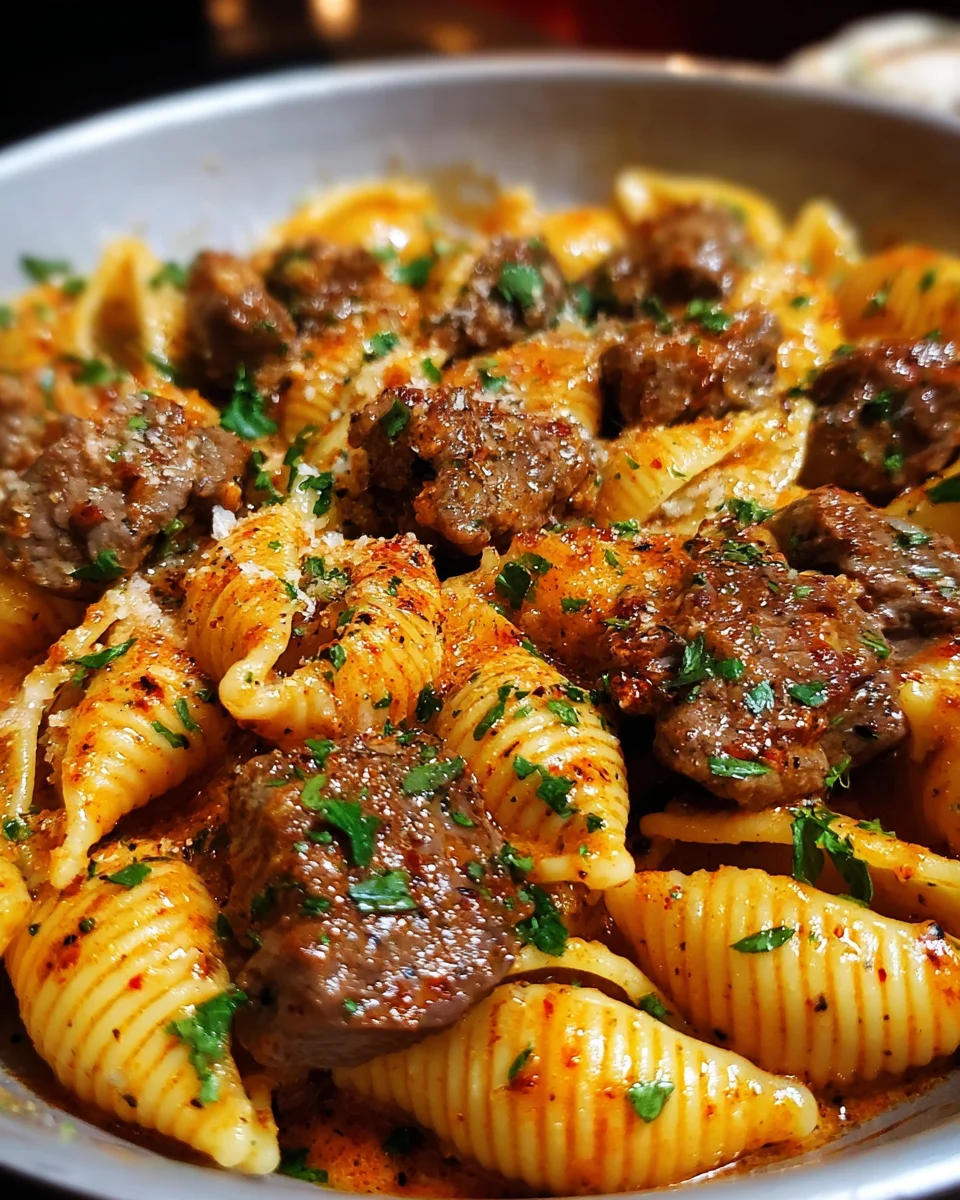
    Finally, it’s time to plate up. Remove from heat and top your Creamy Paprika Steak Shells with some fresh parsley. Not only does it add a burst of color, but it also enhances the flavors. Serve immediately while everything is hot and steaming. Trust me, your family will be begging for seconds!

    Tips for Success

    • Don’t skip the marinating step! Even 30 minutes can make a world of difference.
    • Keep your steak pieces uniform in size to ensure even cooking.
    • Taste as you go! Adjust seasoning to your liking while cooking.
    • For extra creaminess, consider adding a splash of pasta water to the sauce.
    • Got leftovers? This dish reheats beautifully in the microwave—just add a touch of cream!

    Equipment Needed

    • Large Pot: For boiling the pasta. A deep skillet can also work if that’s what you have on hand.
    • Skillet: Ideally, a large non-stick skillet for browning the steak and making the sauce.
    • Colander: For draining the cooked pasta. You can use a slotted spoon in a pinch!
    • Measuring Cups: For precise ingredient measuring; however, eyeballing works too!
    • Wooden Spoon: Handy for stirring your delicious sauce and pasta together.

    Variations

    • Vegetarian Option: Swap the steak for sautéed mushrooms or grilled zucchini for a delicious plant-based version.
    • Pasta Choices: Try using different pasta shapes like fettuccine or penne for a fun twist on texture.
    • Spice it Up: Add a pinch of cayenne pepper for a spicy kick, or toss in some red pepper flakes for extra heat!
    • Low-Fat Version: Use half-and-half instead of heavy cream and lean cuts of beef or chicken to cut calories.
    • Gluten-Free: Substitute with gluten-free pasta and check any pre-made broth for gluten-free certification.

    Serving Suggestions

    • Fresh Salad: A crisp green salad with a lemon vinaigrette complements the richness of the dish beautifully.
    • Garlic Bread: Serve with warm garlic bread for that ultimate cozy meal experience.
    • Wine Pairing: A robust red wine, like Merlot, pairs perfectly, enhancing the flavors of the steak.
    • Presentation: Serve in shallow bowls topped with additional Parmesan and a sprinkle of paprika for visual appeal.

    FAQs about Creamy Paprika Steak Shells

    Can I use a different type of meat in this recipe?
    Absolutely! While I personally adore the steak in this dish, you can easily substitute it with chicken or shrimp. Both options will complement the rich creamy sauce beautifully.

    How can I make Creamy Paprika Steak Shells ahead of time?
    If you’re short on time, you can prepare the sauce and cook the pasta ahead. Just store them separately in the fridge. When you’re ready to eat, simply reheat the sauce and toss in the pasta and steak!

    Is this dish kid-friendly?
    Definitely! Kids usually love pasta and creamy sauces. If your little ones are picky, you might consider reducing the paprika a bit or blending the sauce to a smoother texture for their liking.

    Can I freeze Creamy Paprika Steak Shells leftovers?
    Yes, you can freeze leftovers, but be aware that the sauce might thicken when reheating. It’s best to add a splash of broth or cream to restore its creamy consistency.

    What can I serve with Creamy Paprika Steak Shells?
    I recommend a fresh garden salad or warm garlic bread! They make great accompaniments, balancing the richness of the dish while keeping dinner light and enjoyable.

    Final Thoughts

    When it comes to weeknight dinners, Creamy Paprika Steak Shells truly has a special place in my heart. This dish doesn’t just fill up our bellies; it brings us together around the table, creating laughter and connection. The balance of flavors is heavenly, making it a go-to for busy nights or cozy family meals. The creamy sauce wraps around the pasta like a warm embrace, promising satisfaction with each bite. So, whether you’re impressing guests or simply enjoying a night in, this recipe is bound to bring joy to your kitchen. Happy cooking!


    Print

    clock clock iconcutlery cutlery iconflag flag iconfolder folder iconinstagram instagram iconpinterest pinterest iconfacebook facebook iconprint print iconsquares squares iconheart heart iconheart solid heart solid icon

    Description

    A delicious creamy pasta dish featuring tender steak and a rich paprika sauce.


    • 12 ounces shell pasta
    • 1 pound sirloin or ribeye steak, cut into bite-sized pieces
    • Salt, to taste
    • Black pepper, to taste
    • 1 1/2 teaspoons smoked paprika
    • 1 tablespoon olive oil
    • 1 tablespoon butter
    • 3 garlic cloves, minced
    • 1 cup heavy cream
    • 1/2 cup beef broth
    • 1/2 cup Parmesan cheese, grated
    • Chopped fresh parsley for garnish

    1. Boil shell pasta in a large pot of salted water until al dente according to package instructions. Drain well and set aside.
    2. Pat steak dry with paper towels. Toss steak pieces with salt, black pepper, and smoked paprika to coat evenly.
    3. Heat olive oil in a large skillet over medium-high heat. Add steak in a single layer and cook for 2 to 3 minutes per side until well browned. Transfer steak to a plate and set aside.
    4. Reduce heat to medium. Add butter to the same skillet. Once melted, add minced garlic and sauté for 1 minute until fragrant.
    5. Pour in heavy cream and beef broth, stirring to combine. Simmer for 3 to 4 minutes, allowing the sauce to thicken slightly.
    6. Stir grated Parmesan cheese into the sauce until fully melted and the mixture is smooth and creamy.
    7. Return the drained pasta and seared steak to the skillet. Gently toss to coat the pasta and steak evenly with the creamy sauce.
    8. Remove from heat. Top with chopped fresh parsley and serve immediately while hot.

    Notes

    • For extra flavor, let the steak marinate in the spices for 30 minutes before cooking.
    • Feel free to substitute the steak with chicken or shrimp if desired.
    • This dish can be made ahead of time and reheated before serving.
    • Prep Time: 15 minutes
    • Cook Time: 20 minutes
    • Category: Main Course
    • Method: Stovetop
    • Cuisine: Italian

    Nutrition

    • Serving Size: 1 plate
    • Calories: 650
    • Sugar: 2g
    • Sodium: 800mg
    • Fat: 40g
    • Saturated Fat: 20g
    • Unsaturated Fat: 15g
    • Trans Fat: 0g
    • Carbohydrates: 50g
    • Fiber: 3g
    • Protein: 35g
    • Cholesterol: 100mg

    Sharing is caring!

  • Snickerdoodle Muffins

    Snickerdoodle Muffins


    Introduction to Snickerdoodle Muffins

    As a passionate home cook, I know how chaotic life can get, especially when juggling work and family. That’s why these Snickerdoodle Muffins are my go-to recipe for a quick solution on busy days. Imagine warm, cinnamon-sugar topped muffins filling your kitchen with a delightful aroma, making everyone feel at home. They’re not just a treat; they’re a way to show love to your family, turning ordinary moments into special ones. Whether for breakfast, a snack, or dessert, these muffins are bound to impress your loved ones and bring smiles all around!

    Why You’ll Love This Snickerdoodle Muffins

    These Snickerdoodle Muffins are a delightful combination of sweet and spice, creating a heavenly treat. They’re incredibly easy to make, so you won’t spend hours in the kitchen. In just under an hour, you’ll have a dozen warm muffins ready to share! The fluffy texture pairs beautifully with that irresistible cinnamon-sugar topping, making every bite feel like a warm hug. Perfect for family gatherings or a cozy night in, these muffins are sure to become a favorite!

    Ingredients for Snickerdoodle Muffins

    Gathering the right ingredients is key to creating those delectable Snickerdoodle Muffins. Read on for what you’ll need:

    • Flour: This is the backbone of your muffins, providing structure. I opt for all-purpose flour for the perfect fluffy texture.
    • Baking Powder and Baking Soda: These leavening agents work together to give your muffins the lift they need. A pinch of science for fluffy goodness!
    • Cream of Tartar: This adds a tangy flavor and helps stabilize the batter, ensuring your muffins are soft and tender.
    • Nutmeg: A warm spice that pairs wonderfully with cinnamon, offering a subtle twist in flavor that elevates the muffins.
    • Salt: Just a touch to balance the sweetness and enhance the overall flavor profile.
    • Unsalted Butter: Softened butter is essential for that rich, buttery taste. It creates a lovely base for your batter.
    • Sugar: The sweetener of choice! It not only sweetens but contributes to that lovely golden crust on top.
    • Eggs: They act as a binder and help to create a light and fluffy texture. Essential for that moist muffin experience.
    • Vanilla Extract: A dash of vanilla adds depth and enhances the sweetness in the muffins.
    • Sour Cream: This might sound surprising, but sour cream keeps the muffins moist and brings a delightful tanginess to the flavor.
    • Buttermilk: A softening ingredient that enhances flavor while ensuring the muffins are rich and creamy.
    • For the Topping: A simple blend of sugar and cinnamon creates that signature sweet, crunchy topping we all love!

    For exact measurements, check the bottom of the article—you’ll find them ready for printing! Enjoy experimenting with these ingredients and watch the magic happen in your kitchen!

    How to Make Snickerdoodle Muffins

    Ready to whip up a batch of those delightful Snickerdoodle Muffins? Here’s how you can make these sweet treats in just a few simple steps. Each step is filled with love and a sprinkle of joy!

    Step 1: Preheat the Oven and Prepare Muffin Tins

    Your first task is to preheat the oven to 350ºF. This is key for even baking. While it warms up, line your muffin tins with muffin liners. Trust me, the liners not only make for easy cleanup but also help keep the muffins intact.

    Step 2: Prepare the Dry Ingredients

    In a large bowl, combine your flour, baking powder, baking soda, cream of tartar, nutmeg, and salt. Whisk them together well! This step is crucial as it evenly distributes the leavening agents, ensuring your muffins rise beautifully when baked.

    Step 3: Cream the Butter and Sugar

    Now, in the bowl of your stand mixer (or a large mixing bowl if you’re using a hand mixer), beat together the softened butter and sugar until light and fluffy. Aim for a texture that’s creamy and airy, about three minutes. This will create a wonderful base for your Snickerdoodle Muffins.

    Step 4: Incorporate Eggs and Vanilla

    Next, add the eggs one at a time, mixing well after each addition. After that, stir in the vanilla extract. Mixing each egg properly ensures your muffins are properly aerated and have that lovely lightness we all adore.

    Step 5: Combine Dry Ingredients and Wet Ingredients

    It’s time to bring everything together! First, add half of the dry mixture to your wet ingredients. Mix well, then add the sour cream and buttermilk. Finally, mix in the remaining dry ingredients until just combined. Be careful not to overmix; a soft batter will lead to fluffy muffins!

    Step 6: Make the Topping

    In a small bowl, mix together sugar and cinnamon for the topping. This is what turns your muffins into the iconic Snickerdoodle treats we all love! You can even add a pinch of extra vanilla to this mixture for an extra kick of flavor.

    Step 7: Portion and Roll in Topping

    Using an ice cream scoop or a large cookie scoop, drop a scoop of batter into the sugar-cinnamon mixture. Roll it around until it’s fully covered. This not only adds flavor but also gives each muffin a beautiful, sugary crust. Place that rolled delight into the muffin liner and repeat!

    Step 8: Bake the Muffins

    Now that your muffin tins are filled to perfection, it’s time to bake! Pop them into your preheated oven and let them bake for 18 to 22 minutes. You’ll know they’re done when the tops are golden brown and a toothpick inserted into the center comes out with a few moist crumbs.

    Step 9: Cool and Serve

    Once baked, let the muffins cool in the tin for about five minutes. Then, gently remove them and let them rest on a wire rack. For the best experience, serve them warm. Nothing beats that soft, fluffy texture enjoyed fresh out of the oven!

    Tips for Success

    • Make sure your butter is softened to room temperature for easier creaming.
    • Don’t skip the muffin liners; they prevent sticking and make cleanup a breeze.
    • For fluffier muffins, avoid overmixing your batter—just blend until combined.
    • Consider using a kitchen scale for precise ingredient measurements if you’re baking frequently.
    • For extra flavor, try incorporating chocolate chips or nuts into the batter.

    Equipment Needed

    • Muffin Tin: A standard muffin tin works best. Alternatively, use silicone muffin molds for easy release.
    • Mixing Bowls: Use large bowls for mixing ingredients. Pot for a glass or stainless steel bowl for durability.
    • Stand Mixer or Hand Mixer: A stand mixer is ideal, but a hand mixer will work just as well.
    • Whisk: Essential for combining dry ingredients quickly, but a fork will do in a pinch.
    • Ice Cream Scoop: Use this for even muffin portions; a large spoon can also work.

    Variations

    • Gluten-Free: Substitute all-purpose flour with a gluten-free blend to enjoy these delicious muffins without the gluten.
    • Add Chocolate Chips: Fold in a cup of chocolate chips for a decadent twist that chocolate lovers will adore.
    • Nuts for Crunch: Mix in chopped pecans or walnuts for a delightful crunch that complements the soft texture.
    • Maple Syrup Flavor: Replace some of the sugar with maple syrup for a deeper, richer flavor in your muffins.
    • Dairy-Free Option: Use coconut oil and almond milk instead of butter and buttermilk to make these muffins dairy-free.

    Serving Suggestions

    • Coffee or Tea: Pair your Snickerdoodle Muffins with a warm cup of coffee or tea for a cozy treat.
    • Fresh Fruit: Serve alongside fresh berries or sliced apples for a refreshing contrast.
    • Yogurt: A dollop of yogurt can add a creamy texture and balance the sweetness.
    • Presentation: Arrange on a decorative plate and sprinkle a little extra cinnamon sugar on top for a beautiful touch.

    FAQs about Snickerdoodle Muffins

    As you embark on your Snickerdoodle Muffin adventure, you might have a few questions. Here are some common ones I’ve heard:

    Can I use whole wheat flour instead of all-purpose flour?

    Yes, you can! Whole wheat flour will give your muffins a nuttier flavor and slightly denser texture. You may want to adjust the liquid slightly, as whole wheat flour absorbs more moisture.

    What’s the best way to store leftover muffins?

    To maintain their freshness, store your Snickerdoodle Muffins in an airtight container at room temperature for up to three days. For longer storage, consider freezing them. Just wrap each muffin tightly in plastic wrap and place them in a freezer-safe bag!

    Can I make these muffins in advance?

    Absolutely! You can prepare the batter a day in advance and keep it covered in the refrigerator. Just make sure to bring it to room temperature before baking for even results.

    What can I substitute for sour cream?

    If you don’t have sour cream on hand, plain yogurt or even cottage cheese blended until smooth can work as a good substitute, providing similar moisture and tanginess.

    How can I make these muffins more festive for the holidays?

    Why not add festive spices like ginger or cloves, along with a splash of eggnog instead of buttermilk? These little changes can turn your Snickerdoodle Muffins into a seasonal delight!

    Final Thoughts

    There’s something truly magical about baking Snickerdoodle Muffins. The process fills my kitchen with warmth, joy, and that sweet, cinnamon-spiced aroma that welcomes everyone home. These muffins not only satisfy the sweet tooth but also bring your family together, creating moments of love and laughter. Whether they’re enjoyed fresh from the oven or tucked into lunchboxes, each bite is a reminder of the comfort found in simple, homemade treats. I hope you find as much joy in making and sharing these muffins as I do, turning every day into a delicious celebration!


    Print

    clock clock iconcutlery cutlery iconflag flag iconfolder folder iconinstagram instagram iconpinterest pinterest iconfacebook facebook iconprint print iconsquares squares iconheart heart iconheart solid heart solid icon

    Description

    Delicious Snickerdoodle Muffins with a sweet cinnamon sugar topping.


    • 2 ¼ cups flour
    • 3/4 teaspoon baking powder
    • 3/4 teaspoon baking soda
    • 3/4 teaspoon cream of tartar
    • 1/2 teaspoon nutmeg
    • 1/2 teaspoon salt
    • 2 sticks (16 tablespoons) unsalted butter, softened
    • 1 cup sugar
    • 2 large eggs
    • 2 teaspoons vanilla
    • 1 cup sour cream
    • 1/4 cup buttermilk
    • For the Topping:
    • 2/3 cup sugar
    • 2 tablespoons cinnamon

    1. Preheat the oven to 350ºF. Line muffin cups with muffin liners (do not use cooking spray).
    2. In a large bowl, whisk together flour, baking powder, baking soda, cream of tartar, nutmeg, and salt; set aside.
    3. In the bowl of a stand mixer fitted with the paddle attachment, cream the butter and sugar until light and fluffy, about 3 minutes. Add eggs, one at a time, beating well after each addition. Beat in vanilla extract.
    4. Beat in half of the dry ingredients. Beat in the sour cream and buttermilk. Beat in remaining dry ingredients until just incorporated (batter will be soft).
    5. To make the topping, in a small bowl, combine the sugar and cinnamon.
    6. Using an ice cream or large cookie scooper, drop the scoop of batter into the bowl with the sugar and cinnamon. Sprinkle the dough with the mixture and roll it around until it is covered completely in cinnamon sugar. Place the ball into the muffin liner. Repeat with remaining batter. Sprinkle the leftover cinnamon sugar onto the tops of the muffins.
    7. Bake until muffin tops are golden brown, 18 to 22 minutes, or until a toothpick inserted into the center of a muffin comes out with a few moist crumbs attached.
    8. Set on a wire rack to cool slightly, about 5 minutes. Remove muffins from the tin and serve warm.

    Notes

    • Ensure the butter is softened for better creaming.
    • For more flavor, consider adding a pinch of vanilla extract to the topping mixture.
    • Store leftovers in an airtight container to maintain freshness.
    • Prep Time: 20 minutes
    • Cook Time: 22 minutes
    • Category: Dessert
    • Method: Baking
    • Cuisine: American

    Nutrition

    • Serving Size: 1 muffin
    • Calories: 220
    • Sugar: 16g
    • Sodium: 180mg
    • Fat: 10g
    • Saturated Fat: 6g
    • Unsaturated Fat: 3g
    • Trans Fat: 0g
    • Carbohydrates: 30g
    • Fiber: 1g
    • Protein: 3g
    • Cholesterol: 40mg

    Sharing is caring!

  • Pumpkin Spice Oreo Truffles

    Pumpkin Spice Oreo Truffles


    Introduction to Pumpkin Spice Oreo Truffles

    As the leaves change and the air grows crisp, my craving for cozy flavors kicks into high gear. That’s where these delightful Pumpkin Spice Oreo Truffles come in! This no-bake treat combines the creamy goodness of Oreos with the warm embrace of pumpkin spice. Perfect for busy days or those moments when you want to impress your family, these truffles are a breeze to whip up. Imagine making a sweet treat that tastes like fall in every bite. Let’s craft something magic together that will have everyone asking for seconds!

    Why You’ll Love This Pumpkin Spice Oreo Truffles

    These Pumpkin Spice Oreo Truffles are not just easy to make; they pack a flavor punch that’s perfect for fall! In a snap, you can create a dessert that feels indulgent but requires no baking. Plus, they’re a crowd-pleaser, ideal for family gatherings or cozy nights in. If you’re short on time but still want something special, these truffles will become a treasured recipe in your kitchen.

    Ingredients for Pumpkin Spice Oreo Truffles

    Creating delicious Pumpkin Spice Oreo Truffles requires just a few simple ingredients that come together to create a heavenly treat. Here’s what you’ll need:

    • Gluten-free Golden Oreos: These cookies are the star of the truffles. Their sweet, buttery flavor perfectly complements the pumpkin spice.
    • Dairy-free cream cheese: This ingredient adds richness and creaminess to the filling. You can opt for regular cream cheese if you’re not dairy-free!
    • Canned pumpkin puree: Using pure pumpkin not only brings that lovely fall flavor but also adds moisture to the truffle mixture.
    • Pumpkin pie spice: A delightful blend of cinnamon, nutmeg, and ginger that captures the essence of autumn in every bite.
    • Dairy-free white chocolate chips: These give the truffles a sweet and creamy coating. You could substitute with semi-sweet chocolate if preferred!

    Feel free to get creative! While these ingredients are what I recommend for the best flavors, you can play with variations based on your preferences. Exact measurements are noted at the bottom of the article, so be sure to check them out for easy printing!

    How to Make Pumpkin Spice Oreo Truffles

    Now let’s dive into the magic of creating these Pumpkin Spice Oreo Truffles! They’re so simple to make that you’ll barely break a sweat. Just follow along with these easy steps, and savor the exciting flavors of fall!

    Step 1 – Prepare the Oreos

    Start by adding the Gluten-Free Golden Oreos to your food processor. Pulse until they’re fine crumbs. It should look like sandy terrain, but avoid turning them into dust! If you don’t have a food processor, a sealed bag and a rolling pin works too. Imagine crushing those cookies is your way of stress relief!

    Step 2 – Mix the Filling

    Next, to those delightful Oreo crumbs, add the dairy-free cream cheese, canned pumpkin puree, and pumpkin pie spice. Mix these together on high speed for 1 to 2 minutes until the mixture forms a cohesive ball. It should look velvety and smell of autumn. Don’t over-mix; we want it creamy, not gooey!

    Step 3 – Shape the Truffles

    Now, it’s time to get your hands a little messy! Using your hands or a 1-tablespoon cookie scoop, take portions of that delightful mixture and roll them into 1-inch balls. It’s like crafting mini pumpkin spice delights! Place them on a lined baking sheet, keeping some space between each ball—they need room to breathe!

    Step 4 – Freeze the Truffles

    Pop that baking sheet into your freezer and chill the truffles for about 20 minutes. This step is crucial, as it helps the truffles firm up nicely. While you wait, take a moment and enjoy a warm drink; you deserve a cozy break, right?

    Step 5 – Melt the Chocolate

    While the truffles are chilling, melt your dairy-free white chocolate over low heat on the stove. Stir gently, letting it become smooth and shiny. If you prefer a little challenge, you can use a microwave in 20-second intervals. Just make sure to stir well between bursts so it doesn’t burn. Chocolate is often like a diva—it needs attention!

    Step 6 – Coat the Truffles

    Once the truffles are firm and your chocolate is perfectly melted, it’s time for the fun part. Dip each chilled truffle into the melted white chocolate, ensuring they’re fully coated. Use a fork to lift them out and let excess chocolate drip off. Place them back on the baking sheet, where they can shine in all their glory!

    Step 7 – Add Decorative Toppings

    This is where you can get creative! While the chocolate is still soft, sprinkle on some pumpkin pie spice or additional cookie crumbs for that extra touch. It’s a chance to unleash your inner artist! Picture them glimmering like tiny pieces of fall.

    Step 8 – Allow to Set

    At last, allow the white chocolate coating to set. This takes about 10-15 minutes. I know, waiting can be tough, but trust me; the reward is worth it! Once they’re set, celebrate your accomplishment — you’ve just made Pumpkin Spice Oreo Truffles! Treat yourself to one (or two) right away!

    Tips for Success

    • Make sure your cream cheese is at room temperature for easier mixing.
    • Don’t skip the freezing step; it ensures the truffles maintain their shape.
    • Use a microwave-safe bowl for melting chocolate, and stir frequently to prevent burning.
    • Experiment with toppings! Sprinkle on crushed nuts or drizzle caramel for more flavor.
    • Clean your hands between rolling truffles to keep them from getting sticky.

    Equipment Needed

    • Food Processor: A must-have for creating fine Oreo crumbs. A rolling pin and sealed bag work too.
    • Baking Sheet: Use a lined sheet to prevent sticking. A plate works in a pinch!
    • Mixing Bowl: For stirring together your filling. Any large bowl will do!
    • Microwave or Stovetop: To melt the chocolate smoothly.
    • Cookie Scoop: Helpful for even truffle sizes. Use your hands if you like!

    Variations

    • Nutty Delight: Add chopped pecans or walnuts to the filling for a crunchy twist.
    • Spicy Kick: Mix in a dash of cayenne pepper for a surprising heat that complements the sweet pumpkin spice.

    • Chocolate Lovers: Swap the dairy-free white chocolate with semi-sweet or dark chocolate for a richer taste.
    • Vegan with a Creamy Touch: Replace the dairy-free cream cheese with cashew cream for a nutty flavor.
    • Healthier Options: Use coconut oil instead of chocolate for a lighter coating that still packs a flavor punch.

    Serving Suggestions for Pumpkin Spice Oreo Truffles

    • Pair these delightful truffles with a steaming cup of chai or spiced apple cider for a cozy treat.
    • Arrange them on a festive platter, garnished with fall leaves or mini pumpkins for an autumnal touch.
    • For a dessert table, stack them high in a glass jar to create a stunning centerpiece.
    • Serve alongside whipped coconut cream for an extra creamy experience!

    FAQs about Pumpkin Spice Oreo Truffles

    Can I make these Pumpkin Spice Oreo Truffles in advance?

    Absolutely! These truffles can be made a few days ahead of time. Just keep them stored in an airtight container in the fridge. I find they taste even better after chilling, as the flavors meld perfectly!

    What can I substitute for dairy-free cream cheese?

    If you’re not dairy-free, regular cream cheese works wonderfully! Alternatively, for a different twist, you can mix in cashew cream or even yogurt, which adds a nice tang.

    Can I freeze Pumpkin Spice Oreo Truffles?

    Yes, they freeze beautifully! Just place them in a sealed container or bag. They can last for up to three months. Thaw them in the fridge before serving for the best texture.

    How can I make these truffles healthier?

    To amp up their health factor, consider using light cream cheese or reducing the chocolate coating. You can also add some ground flaxseed to the filling for a nutrient boost.

    What’s the best way to serve these truffles?

    These truffles shine as a stand-alone treat, but for an extra touch, pair them with whipped coconut cream or a drizzle of melted dark chocolate. They’re always a hit!

    Final Thoughts

    Creating these Pumpkin Spice Oreo Truffles is not just about baking; it’s about bringing a slice of fall into your home. The joy in crafting these delightful treats comes from the simple pleasure of combining familiar flavors with a touch of creativity. Imagine your loved ones gathering around, smiles lighting up their faces as they indulge in these heavenly bites. It’s a sweet moment that warms the heart and fills the home with happiness. So, roll up your sleeves, and let’s make some delicious memories together—one truffle at a time!


    Print

    clock clock iconcutlery cutlery iconflag flag iconfolder folder iconinstagram instagram iconpinterest pinterest iconfacebook facebook iconprint print iconsquares squares iconheart heart iconheart solid heart solid icon

    Description

    Pumpkin Spice Oreo Truffles are a delightful fall treat that combines the flavors of pumpkin and Oreo cookies into a creamy, decadent dessert.


    • 30 Gluten-free Golden Oreos (1 12oz package)
    • 1.5 ounces dairy-free cream cheese, cut into small pieces
    • 2 tablespoons canned pumpkin puree
    • 1 teaspoon pumpkin pie spice
    • 1 9oz package dairy-free white chocolate chips

    1. Add the Gluten-Free Golden Oreos to a food processor. Pulse until they become fine crumbs.
    2. To the Oreo crumbs, add your dairy-free cream cheese, pumpkin puree, and pumpkin pie spice. Mix in the food processor on high for 1-2 minutes until it forms a ball.
    3. Using your hands or a 1-tablespoon cookie scoop, take portions of the mixture and roll them into 1-inch balls. Place them on a lined baking sheet.
    4. Freeze the tray for about 20 minutes to firm up the truffles.
    5. While the truffles are chilling, melt the dairy-free white chocolate over low heat on the stove.
    6. Dip each chilled truffle into the melted white chocolate, fully coating them, and place them back on the baking sheet.
    7. Add decorative toppings immediately before the chocolate sets, like a sprinkle of pumpkin pie spice or additional cookie crumbs.
    8. Allow the white chocolate coating to fully set (about 10-15 minutes) before enjoying!

    Notes

    • Store leftovers in an airtight container in the fridge for up to a week.
    • Truffles can be frozen in a sealed container for up to 3 months.
    • Do not over-mix the truffle mixture in the food processor.
    • Prep Time: 30 minutes
    • Cook Time: 15 minutes
    • Category: Dessert
    • Method: No-bake
    • Cuisine: American

    Nutrition

    • Serving Size: 1 truffle
    • Calories: 130
    • Sugar: 10g
    • Sodium: 50mg
    • Fat: 7g
    • Saturated Fat: 3.5g
    • Unsaturated Fat: 3g
    • Trans Fat: 0g
    • Carbohydrates: 15g
    • Fiber: 1g
    • Protein: 1g
    • Cholesterol: 0mg

    Sharing is caring!

  • Charred Corn and Arugula Salad

    Charred Corn and Arugula Salad


    Introduction to Charred Corn and Arugula Salad

    If you’re anything like me, juggling life’s responsibilities can sometimes feel overwhelming. That’s where this Charred Corn and Arugula Salad comes in! It’s the perfect blend of simplicity and flavor, making it a fantastic quick meal. With the crunch of fresh corn and the peppery kiss of arugula, this salad isn’t just good; it’s an experience. Whether you’re looking to impress your family or simply need something refreshing on a busy day, this dish is a delightful way to brighten any meal. Plus, it comes together in just 25 minutes!

    Why You’ll Love This Charred Corn and Arugula Salad

    This Charred Corn and Arugula Salad isn’t just a salad; it’s a celebration of summer flavors! It’s quick to prepare, taking only 25 minutes from start to finish. The sweet and smoky corn pairs beautifully with the freshness of arugula. It’s the kind of dish that ticks all the boxes: healthy, vibrant, and utterly satisfying. Plus, it’s versatile enough to serve at casual cookouts or family dinners!

    Ingredients for Charred Corn and Arugula Salad

    Every element in this Charred Corn and Arugula Salad brings a unique touch to the plate! You’ll need fresh corn kernels, which provide a sweet crunch. Arugula offers a peppery flavor, perfect for balance. Cherry tomatoes add a burst of color and juiciness, while the thinly sliced red onion brings a kick of zest.

    For dressing, extra virgin olive oil adds richness, while aged balsamic vinegar contributes a hint of sweetness and acidity. You might also consider adding feta cheese for creaminess or creamy avocado for an extra layer of flavor. All ingredients with exact measurements are available at the bottom for printing!

    How to Make Charred Corn and Arugula Salad

    Step 1: Grill the Corn

    First things first, let’s get that corn charred! Preheat your grill to medium-high heat.

    Take those fresh corn ears and place them directly on the grill. Let them bask in that glorious heat for about 10-15 minutes.

    Remember to turn them occasionally. You want those beautiful char marks! They should be slightly blackened but not totally burnt.

    After grilling, let the corn cool for a bit. Once it’s safe to touch, grab a bowl to catch those kernels and slice them off the cob. Voila!

    Step 2: Prepare the Vegetables

    Next up, gather your arugula, cherry tomatoes, and red onion.

    Wash the arugula and let it dry. Its pepperiness adds depth to the salad.

    Slice those cherry tomatoes in half. Their sweetness complements the charred corn perfectly.

    For the red onion, thinly slice it to keep the flavor punchy but not overpowering.

    Step 3: Combine Ingredients

    Time to put everything together! Grab a large mixing bowl and toss in the arugula first.

    Next, add the charred corn, halved cherry tomatoes, and the sliced red onion. Mix them gently, ensuring everything is nicely distributed.

    Step 4: Dress the Salad

    Now comes the magic touch: the dressing! Drizzle about three tablespoons of extra virgin olive oil over the salad.

    Follow that with two tablespoons of aged balsamic vinegar. It adds such a beautiful flavor!

    Toss everything again, carefully coating each ingredient with the dressing. This step is crucial for taste!

    Step 5: Season and Serve

    Let’s finish it up with a sprinkle of salt and a dash of pepper. Taste and adjust how you like it!

    Now, you can serve it immediately or even chill it for a bit. Either way, enjoy your delightful charred corn and arugula salad!

    Tips for Success

    • For optimal flavor, choose fresh, in-season corn for grilling.
    • Let the grilled corn cool before cutting; it’ll be easier to handle.
    • Use a large bowl for mixing to avoid spills and make tossing easier.
    • Feel free to customize your dressing—more vinegar for tang, less for a mellow taste.
    • Leftovers can last in the fridge for a day or two, making a quick lunch!

    Equipment Needed

    • Grill or grill pan (a stovetop frying pan works too!)
    • Cutting board for chopping
    • Chef’s knife to slice the veggies
    • Large mixing bowl for combining ingredients
    • Bowl for catching corn kernels while slicing

    Variations

    • Add crumbled feta or goat cheese for a creamy twist.
    • Include diced avocado for extra creaminess and healthy fats.
    • Swap arugula for spinach or mixed greens if you prefer a milder flavor.
    • For a spicy kick, toss in some sliced jalapeños or red pepper flakes.
    • Try a citrus dressing instead of balsamic for a refreshing change!

    Serving Suggestions

    • Pair this Charred Corn and Arugula Salad with grilled chicken or fish for a hearty meal.
    • Serve alongside crusty Italian bread or garlic bread to soak up the dressing.
    • For drinks, consider a light white wine or sparkling water with fresh lemon.
    • Your salad will shine on a large platter or in a colorful bowl!

    FAQs about Charred Corn and Arugula Salad

    Can I use frozen corn for this salad?
    Absolutely! Just make sure to thaw and drain the corn before grilling or adding it. Grilled corn adds a nice smoky flavor, but frozen corn can work in a pinch.

    How can I store leftovers?
    Keep leftovers in an airtight container in the fridge. It’s best enjoyed within a day or two for optimal freshness.

    Can I make this salad in advance?
    Yes! You can prep the ingredients a few hours ahead and combine just before serving. This keeps the arugula crisp!

    What other vegetables can I add?
    Feel free to incorporate bell peppers, cucumbers, or even roasted zucchini for extra flavor and texture.

    Is this salad gluten-free?
    Yes! All the ingredients in this Charred Corn and Arugula Salad are naturally gluten-free, making it a great option for those with dietary restrictions.

    Final Thoughts

    There’s something truly special about a dish that combines vibrant flavors like in this Charred Corn and Arugula Salad. It’s more than just food; it’s a way to savor summertime while enjoying quality moments with loved ones. The joy of grilled corn mingling with peppery arugula creates a symphony of taste that invites everyone to the table. Whether you’re hosting a gathering or enjoying a quiet dinner, this salad brings a burst of freshness. It’s quick, healthy, and oh-so-delicious! Trust me, every bite will remind you why home-cooked meals are so valuable.


    Print

    clock clock iconcutlery cutlery iconflag flag iconfolder folder iconinstagram instagram iconpinterest pinterest iconfacebook facebook iconprint print iconsquares squares iconheart heart iconheart solid heart solid icon

    Description

    A refreshing salad featuring charred corn and peppery arugula, topped with cherry tomatoes and red onion, drizzled with olive oil and balsamic vinegar.


    • 2 cups fresh corn kernels (about 2 ears of corn)
    • 4 cups arugula
    • 1 cup cherry tomatoes, halved
    • 1/2 cup red onion, thinly sliced
    • 3 tablespoons extra virgin olive oil
    • 2 tablespoons aged balsamic vinegar
    • Salt and pepper to taste

    1. Grill the corn on medium-high heat for 10-15 minutes, turning occasionally until charred. Let cool slightly before removing kernels.
    2. In a large bowl, combine arugula, cherry tomatoes, red onion, and grilled corn.
    3. Drizzle olive oil and balsamic vinegar over the salad; toss gently to mix.
    4. Season with salt and pepper to taste.
    5. Serve immediately or chill before serving.

    Notes

    • For added flavor, consider adding feta cheese or avocado.
    • Can be made in advance and stored in the refrigerator for a few hours before serving.
    • Adjust the level of char on the corn based on your preference.
    • Prep Time: 10 minutes
    • Cook Time: 15 minutes
    • Category: Salad
    • Method: Grilling
    • Cuisine: American

    Nutrition

    • Serving Size: 1 serving
    • Calories: 180
    • Sugar: 3g
    • Sodium: 50mg
    • Fat: 14g
    • Saturated Fat: 2g
    • Unsaturated Fat: 10g
    • Trans Fat: 0g
    • Carbohydrates: 15g
    • Fiber: 4g
    • Protein: 4g
    • Cholesterol: 0mg

    Sharing is caring!

  • Mexican Ground Beef and Potato Skillet

    Mexican Ground Beef and Potato Skillet


    Introduction to Mexican Ground Beef and Potato Skillet

    As a passionate home cook, I cherish the moments spent preparing meals that bring my family together. The Mexican Ground Beef and Potato Skillet is a delightful one-pan dish that embodies everything I love about home cooking: it’s quick, easy, and utterly delicious. With just a handful of ingredients, you can whip up a vibrant meal that will have your family asking for seconds. Perfect for busy weeknights, this skillet dish takes the hassle out of dinner while delivering comforting flavors that everyone will adore.

    Why You’ll Love This Mexican Ground Beef and Potato Skillet

    If you’re juggling a busy schedule, the Mexican Ground Beef and Potato Skillet can be your culinary lifesaver. It combines minimal prep time with incredible flavors, making it perfect for those hectic weeknights. The hearty ingredients come together seamlessly, ensuring the whole family will enjoy every bite. Plus, the one-pan approach means less cleanup, giving you more time to unwind after dinner. What’s not to love?

    Ingredients for Mexican Ground Beef and Potato Skillet

    The beauty of this Mexican Ground Beef and Potato Skillet lies in its versatility. You’ll need avocado oil for sautéing, but feel free to swap it with olive oil if that’s what you have on hand. Potatoes are the star, cut into small cubes for even cooking. Lean ground beef is essential for that hearty flavor, but turkey or chicken could work, too. Don’t forget diced onions and red bell peppers for sweetness. Spice things up with green chiles, chili powder, cumin, and smoked paprika. Top it off with melted cheese and cilantro for a vibrant finish. For exact measurements, check the printable recipe!

    How to Make Mexican Ground Beef and Potato Skillet

    Step 1: Heat the Oil

    To kick off your Mexican Ground Beef and Potato Skillet, start by choosing a good quality oil like avocado oil. It has a high smoke point, perfect for frying. Heat 2 tablespoons of the oil in a large skillet over medium-high heat until it shimmers. Swirl the oil to coat the bottom of the pan. This initial step is crucial. If the oil’s not hot enough, your potatoes will just soak up the oil instead of frying nicely.

    Step 2: Prepare the Potatoes

    Once your oil is heated, it’s time to add the potatoes. Cut them into 1/2 inch cubes—uniformity promotes even cooking. Toss them into the skillet and let them sizzle for about 6 minutes. Stir them occasionally to get that lovely golden-brown color. This step is all about patience! When they’re tender inside but crispy outside, you’ll know you’ve nailed it. If they’re browning too fast, reduce the heat slightly to prevent burning.

    Step 3: Cook the Ground Beef and Vegetables

    With the potatoes getting beautifully golden, push them to one side of the skillet. Add 1 pound of lean ground beef to the other side. Use a wooden spoon to crumble the beef into bite-sized pieces, making sure to break it apart as it cooks. Mix in 1/2 cup of diced yellow onion and 1 diced red bell pepper. This is where we start to build that delicious flavor profile! Season with kosher salt and freshly ground black pepper to taste. Stir everything together, letting those veggies soften and mingle with the beef, which should take around 5-7 minutes.

    Step 4: Add the Seasonings and Combine

    Now for the fun part—adding flavor! Toss in 4 ounces of diced green chiles, 2 1/2 teaspoons of chili powder, 1 teaspoon of ground cumin, and 1/2 teaspoon of smoked paprika. This combination will transport you to a vibrant Mexican fiesta. Stir everything to ensure the spices are well mixed. It’s also a great time to taste and adjust seasoning. If it needs more salt or spice, don’t hesitate to add it. Cook for an additional 6-8 minutes until the potatoes are tender, and the beef is cooked through. The aroma alone will have your family buzzing with excitement!

    Step 5: Melt Cheese and Serve

    Finally, it’s time to get cheesy! Sprinkle 1/2 cup of shredded cheese over the top of the skillet. Cover it with a lid for about a minute or until the cheese melts into gooey perfection. It’s those little finishing touches that make the difference. If you really want to impress, garnish with fresh cilantro before serving. This adds a pop of color and flavor—absolutely delightful! Now, serve hot and watch your family devour it. Each bite is a warm, comforting hug in a skillet.

    Tips for Success

    • Pre-chop vegetables and store in airtight containers for quick meal prep.
    • Ensure potatoes are cut evenly to cook all at the same rate.
    • Taste as you go! Adjust seasonings for your family’s preferences.
    • Use a non-stick skillet for easier cleanup and less sticking.
    • Keep a lid handy to speed up cooking by trapping heat.

    Equipment Needed

    • Large skillet (a non-stick option makes for easy cleanup).
    • Wooden spoon or spatula for stirring.
    • Knife and cutting board for chopping vegetables.
    • Measuring spoons for accurate seasoning.
    • Lid for covering the skillet while the cheese melts.

    Variations

    • For a vegetarian twist, substitute ground beef with crumbled tempeh or lentils for a hearty texture.
    • Want to spice things up? Add chopped jalapeños or a dash of cayenne pepper for extra heat.
    • Try using sweet potatoes instead of regular potatoes for a unique flavor and added nutrients.
    • Experiment with different cheeses like pepper jack or feta for a distinct taste.
    • For a low-carb option, swap potatoes with cauliflower florets for a lighter skillet dish.

    Serving Suggestions

    • Pair the Mexican Ground Beef and Potato Skillet with a refreshing side salad drizzled with lime vinaigrette.
    • Serve with warm tortillas for a fun DIY taco experience.
    • A chilled glass of horchata complements the dish beautifully.
    • Garnish with extra cilantro and a squeeze of lime for added freshness.

    FAQs about Mexican Ground Beef and Potato Skillet

    I often receive questions about the Mexican Ground Beef and Potato Skillet, so let’s dive in and address the most common ones!

    Can I use chicken instead of beef? Absolutely! Ground chicken or turkey is a great substitute if you prefer a leaner protein. Just keep an eye on cook times as chicken may take a bit less time to brown.

    How can I make it spicier? If you like a kick, add chopped jalapeños or a dash of your favorite hot sauce. You can also increase the chili powder for that extra heat!

    Can I make this ahead of time? Yes, indeed! Prepare everything up to the cooking step, then store it in the fridge. When you’re ready, just heat it up in a skillet, add the cheese, and you’re good to go. This makes dinner a breeze on busy nights!

    Final Thoughts

    Making the Mexican Ground Beef and Potato Skillet is more than just a cooking task; it’s an opportunity to create joyful moments at the dinner table. As you savor each bite, you’ll feel the warmth of family connections and the satisfaction of preparing something both tasty and comforting. I encourage you to put on your apron and try this recipe! It’s a delightful meal that brings vibrancy and flavor to your busy nights. With each skillet, you’re not just feeding hungry bellies—you’re building beautiful memories that will last a lifetime.


    Print

    clock clock iconcutlery cutlery iconflag flag iconfolder folder iconinstagram instagram iconpinterest pinterest iconfacebook facebook iconprint print iconsquares squares iconheart heart iconheart solid heart solid icon

    Description

    A delicious one-pan meal of Mexican ground beef and potatoes, seasoned with spices and topped with cheese.


    • 2 tablespoons avocado oil
    • 1 pound potatoes cut into 1/2 inch cubes
    • 1 pound lean ground beef
    • 1/2 cup diced yellow onion
    • 1 red bell pepper diced
    • Kosher salt and freshly ground black pepper to taste, approximately 1 – 1 1/2 teaspoons kosher salt
    • 4 ounces diced green chiles
    • 2 1/2 teaspoons chili powder
    • 1 teaspoon ground cumin
    • 1/2 teaspoon smoked paprika
    • 1/4 cup cilantro chopped
    • 1/2 cup shredded cheese

    1. Heat the oil in a large skillet over medium-high heat. When the oil is hot, swirl it to coat the bottom of the skillet and reduce the heat to medium.
    2. Add the potatoes and cook them, stirring often, for about 6 minutes or until the potatoes are turning golden and start to become tender.
    3. Push the potatoes to one side of the skillet and add in the ground beef. Crumble the beef, then add in the onion and red bell pepper. Season with salt and pepper and cook, continuing to break the beef apart as it cooks.
    4. Add in the green chiles, spices, and cilantro. Stir everything together and cook until the potatoes are tender and the beef is cooked through, about 6-8 minutes.
    5. Taste for seasoning and add additional salt if needed. Top with the cheese and cook for another minute until it melts. Garnish with cilantro if desired and serve hot.

    Notes

    • Feel free to adjust the spice levels to your preference.
    • You can use any cheese you prefer for topping.
    • Ensure the potatoes are cut uniformly for even cooking.
    • Prep Time: 15 minutes
    • Cook Time: 20 minutes
    • Category: Main Course
    • Method: Skillet
    • Cuisine: Mexican

    Nutrition

    • Serving Size: 1 serving
    • Calories: 450
    • Sugar: 2g
    • Sodium: 720mg
    • Fat: 24g
    • Saturated Fat: 10g
    • Unsaturated Fat: 14g
    • Trans Fat: 0g
    • Carbohydrates: 33g
    • Fiber: 4g
    • Protein: 30g
    • Cholesterol: 80mg

    Sharing is caring!

  • Ground Turkey & Roasted Veggie Rice Bowl

    Ground Turkey & Roasted Veggie Rice Bowl


    Introduction to Ground Turkey & Roasted Veggie Rice Bowl

    In my whirlwind days of balancing family, work, and life, I often find myself hunting for quick, hearty meals. That’s where the Ground Turkey & Roasted Veggie Rice Bowl comes in! This dish is not just a meal; it’s a celebration of convenience without sacrificing flavor. Imagine a bowl brimming with rich ground turkey, vibrant roasted veggies, and fluffy rice, all drizzled with a squeeze of lime. It’s the perfect go-to for busy evenings or when you’re looking to impress your loved ones with something delicious yet simple!

    Why You’ll Love This Ground Turkey & Roasted Veggie Rice Bowl

    What’s not to love about the Ground Turkey & Roasted Veggie Rice Bowl? First off, it’s incredibly easy to whip up, even on the busiest of days. In just 50 minutes, you can serve up a nutritious and delicious meal that will satisfy everyone at the table. Plus, the combination of flavors and textures—from the savory turkey to the sweet, caramelized veggies—makes it a hit with both kids and adults alike!

    Ingredients for Ground Turkey & Roasted Veggie Rice Bowl

    Gathering the right ingredients is key for a successful Ground Turkey & Roasted Veggie Rice Bowl. Let’s dive into what you’ll need for this delicious meal:

    • Brown rice: A wholesome choice for a nutty flavor, but feel free to use white rice if you prefer a milder taste.
    • Water or chicken broth: Cooking your rice in broth adds an extra layer of flavor. It’s a little trick I love; just don’t forget a pinch of salt!
    • Salt: A touch of salt is crucial for accentuating flavors. Adjust according to your taste.
    • Ground turkey: Lean and packed with protein, it serves as the star of this dish, giving a satisfying texture.
    • Olive oil: A drizzle of this heart-healthy fat helps the veggies caramelize beautifully and keeps the turkey moist.
    • Garlic powder and onion powder: These staples add depth and enhance the savory goodness of the turkey.
    • Smoked paprika: Its smoky flavor elevates the dish, creating a comforting, savory aroma.
    • Ground cumin: A hint of earthiness makes the turkey flavorful and adds warmth.
    • Pepper: A must for bringing a little zing to the meat and veggies.
    • Red bell pepper, zucchini, and carrot: The trio of colorful veggies adds crunch, sweetness, and nutrients. Feel free to switch them up based on your family’s favorites!
    • Dried oregano: This herb contributes a lovely aroma and enhances the freshness of the veggies.
    • Fresh cilantro or parsley: These bright herbs are perfect for garnishing, offering a fresh kick.
    • Lime wedges: A squeeze of lime brings everything together with a zesty brightness.
    • Avocado slices (optional): Creamy avocado is a delightful addition, packing in healthy fats!

    For precise measurements, don’t worry—they’re listed at the bottom of the article, ready for you to print out and take on your next cooking adventure!

    How to Make Ground Turkey & Roasted Veggie Rice Bowl

    Getting your Ground Turkey & Roasted Veggie Rice Bowl on the table is easier than you think! Follow these simple steps, and you’ll have a nourishing meal ready in no time. Let’s dive in!

    Step 1: Cook the Rice

    Start by bringing your water or chicken broth to a boil in a medium saucepan. Add the brown rice and a pinch of salt.

    Then, cover and reduce the heat to low.

    Let it simmer for 25-30 minutes, or according to the package instructions. When the rice is fluffy and all the liquid is absorbed, remove it from heat.

    Keep it covered for 5 minutes to let it steam; this helps keep the grains nice and fluffy.

    Step 2: Roast the Vegetables

    While your rice is cooking, preheat your oven to 400°F (200°C).

    On a baking sheet, toss the chopped bell pepper, zucchini, and carrot with olive oil, garlic powder, dried oregano, salt, and pepper.

    Spread the veggies out evenly.

    Roast them for 20-25 minutes, stirring halfway through. You’re looking for tender, lightly browned vegetables that offer a sweet aroma!

    Step 3: Prepare the Ground Turkey

    Now, let’s focus on the turkey.

    Heat olive oil in a large skillet over medium-high heat.

    Add the ground turkey and break it up with a spoon. Cook until it’s browned and fully cooked through, which takes about 6 to 8 minutes.

    Season the turkey with garlic powder, onion powder, smoked paprika, cumin, salt, and pepper.

    Stir everything well and let it cook for an additional 2 to 3 minutes to meld those flavors.

    Step 4: Assemble the Bowl

    It’s time to bring everything together!

    Divide the cooked rice into serving bowls.

    On top of each bowl, layer the seasoned ground turkey followed by the beautifully roasted vegetables.

    To finish, garnish with fresh cilantro or parsley, squeeze a lime wedge over the top, and add avocado slices if you want that extra creaminess.

    Serve immediately and enjoy every bite of your hearty Ground Turkey & Roasted Veggie Rice Bowl!

    Tips for Success

    • Rinse the rice before cooking to remove excess starch for fluffier grains.
    • Experiment with different veggies based on seasonal produce or family favorites.
    • For added flavor, marinate the turkey in spices for 15 minutes before cooking.
    • Don’t skip the resting time for the rice; it makes a big difference!
    • Double the recipe for easy meal prep and leftovers for the week!

    Equipment Needed

    • Medium saucepan: Any medium-sized pot works if you don’t have a specific saucepan.
    • Baking sheet: A simple cookie sheet will do just fine for roasting the veggies.
    • Large skillet: A non-stick frying pan is great for cooking the turkey.
    • Measuring cups and spoons: If you don’t have these, you can use common kitchen utensils.
    • Mixing spoon: Any wooden or silicone spoon can help stir everything together.

    Variations

    • Swap the protein: Try ground chicken or beef for a different flavor profile and texture.
    • Go vegetarian: Replace the turkey with black beans or chickpeas for a protein-packed veggie option.
    • Change the grains: Quinoa or cauliflower rice can be used for a lighter, gluten-free alternative.
    • Spice it up: Add crushed red pepper flakes or jalapeños for a spicy kick.
    • Mix up the veggies: Broccoli, asparagus, or sweet potatoes can be great substitutes based on your preference.
    • Creamy twist: Incorporate a dollop of Greek yogurt or a drizzle of tahini for added creaminess.

    Serving Suggestions

    • Pair your Ground Turkey & Roasted Veggie Rice Bowl with a side salad for added crunch.
    • A glass of sparkling water with lime complements the meal nicely.
    • For a cozy presentation, serve in colorful bowls with a sprinkle of extra herbs on top.
    • Sliced cucumbers or pickled onions make refreshing side options.

    FAQs about Ground Turkey & Roasted Veggie Rice Bowl

    Can I make this recipe ahead of time?

    Absolutely! You can prepare the Ground Turkey & Roasted Veggie Rice Bowl in advance. Just cook the rice, turkey, and veggies, and store them separately in the fridge. When you’re ready to serve, reheat everything together or assemble it fresh for a quick meal.

    Is this meal suitable for meal prep?

    This dish is perfect for meal prep! Its ingredients hold up well in the refrigerator for up to three days. Just portion them into individual containers so you can grab a wholesome meal on the go.

    What can I substitute for ground turkey?

    If turkey isn’t your thing, feel free to swap it out! Ground chicken or beef both work beautifully in this rice bowl. For a vegetarian option, try black beans or lentils for a healthy, protein-rich alternative.

    Can I add more vegetables to this dish?

    Definitely! The beauty of the Ground Turkey & Roasted Veggie Rice Bowl is its versatility. Feel free to toss in your favorite vegetables, like broccoli, asparagus, or even sweet potatoes, to amp up the nutrition and flavor.

    How can I make this dish spicier?

    If you like a bit of heat, you can add chili powder, crushed red pepper flakes, or even hot sauce. Spice it up according to your taste for a flavorful kick!

    Final Thoughts

    There’s something truly special about savoring a homemade Ground Turkey & Roasted Veggie Rice Bowl. This dish captures the essence of family meals—it’s nutritious, colorful, and packed with flavor. I love knowing that I can whip this up on a hectic night, yet still enjoy a comforting, satisfying meal. As you gather around the table, it sparks joy and conversation, transforming a busy evening into a delightful dining experience. Don’t be surprised if this bowl becomes a staple in your home—it certainly has in mine, and I can’t wait for you to make it yours!


    Print

    clock clock iconcutlery cutlery iconflag flag iconfolder folder iconinstagram instagram iconpinterest pinterest iconfacebook facebook iconprint print iconsquares squares iconheart heart iconheart solid heart solid icon

    Description

    A delicious and nutritious bowl featuring ground turkey, roasted vegetables, and rice, perfect for a healthy meal.


    • 1 cup brown rice (or white rice if preferred)
    • 2 cups water or chicken broth
    • Salt to taste
    • 1 lb ground turkey
    • 1 tablespoon olive oil
    • 1 teaspoon garlic powder
    • 1 teaspoon onion powder
    • 1 teaspoon smoked paprika
    • ½ teaspoon ground cumin
    • Salt and pepper to taste
    • 1 red bell pepper, chopped
    • 1 zucchini, chopped
    • 1 large carrot, peeled and chopped
    • 1 tablespoon olive oil
    • 1 teaspoon dried oregano
    • ½ teaspoon garlic powder
    • Salt and pepper to taste
    • Fresh cilantro or parsley, chopped (for garnish)
    • Lime wedges (for garnish)
    • Avocado slices (optional)

    1. In a medium saucepan, bring the water or chicken broth to a boil. Add the rice and a pinch of salt. Reduce the heat to low, cover, and simmer for 25-30 minutes (or according to package instructions) until the rice is cooked and the liquid is absorbed. Remove from heat and let it sit, covered, for 5 minutes before fluffing with a fork.
    2. Preheat the oven to 400°F (200°C). On a baking sheet, toss the chopped bell pepper, zucchini, and carrot with olive oil, garlic powder, dried oregano, salt, and pepper. Spread the vegetables in an even layer. Roast the veggies for 20-25 minutes, or until they are tender and lightly browned, stirring halfway through cooking.
    3. While the rice and veggies are cooking, heat olive oil in a large skillet over medium-high heat. Add the ground turkey and cook, breaking it apart with a spoon, until browned and cooked through (about 6-8 minutes). Season the turkey with garlic powder, onion powder, smoked paprika, cumin, salt, and pepper. Stir well to combine and let the flavors meld for another 2-3 minutes.
    4. To assemble, divide the cooked rice between bowls. Top with the seasoned ground turkey and roasted vegetables. Garnish with fresh cilantro or parsley, lime wedges, and avocado slices if desired.
    5. Serve immediately and enjoy your savory and nutritious Ground Turkey & Roasted Veggie Rice Bowl!

    Notes

    • Feel free to customize the veggies based on your preferences.
    • To make it spicier, add some chili powder or hot sauce.
    • Leftovers can be stored in the refrigerator for up to 3 days.
    • Prep Time: 15 minutes
    • Cook Time: 35 minutes
    • Category: Main Course
    • Method: Baking and Pan-frying
    • Cuisine: American

    Nutrition

    • Serving Size: 1 bowl
    • Calories: 450
    • Sugar: 3g
    • Sodium: 700mg
    • Fat: 15g
    • Saturated Fat: 2g
    • Unsaturated Fat: 10g
    • Trans Fat: 0g
    • Carbohydrates: 58g
    • Fiber: 6g
    • Protein: 30g
    • Cholesterol: 85mg

    Sharing is caring!

  • Greek Tzatziki Chicken Salad Bowl

    Greek Tzatziki Chicken Salad Bowl


    Introduction to Greek Tzatziki Chicken Salad Bowl

    Hey there, fellow food lovers! If you’re anything like me, you’re always on the lookout for quick and delicious meals that bring joy to the table. Enter the Greek Tzatziki Chicken Salad Bowl—your new go-to dish! Perfect for those busy days when you need a healthy pick-me-up, this salad is fresh, flavorful, and oh-so-easy to whip up. Imagine the vibrant colors of mixed greens, tender chicken, and creamy tzatziki dancing together in a bowl, just waiting to impress your loved ones. Let’s dive into this delightful recipe, shall we?

    Why You’ll Love This Greek Tzatziki Chicken Salad Bowl

    This Greek Tzatziki Chicken Salad Bowl is a breath of fresh air! It’s incredibly easy to make, taking just ten minutes from start to finish. Imagine tossing together tender chicken, refreshing tzatziki sauce, and crisp veggies. Each bite bursts with flavor, offering a satisfying meal without the fuss. Plus, it’s healthy! Packed with protein and nutritious greens, it’s a guilt-free way to treat yourself, even on the busiest of days.

    Ingredients for Greek Tzatziki Chicken Salad Bowl

    To create a delightful Greek Tzatziki Chicken Salad Bowl, you’ll need a handful of simple yet vibrant ingredients. Here’s what you’ll need:

    • Cooked chicken: I prefer using leftover rotisserie chicken for its flavor and convenience, but you can grill or bake your chicken too.
    • Tzatziki sauce: This creamy mixture brings a refreshing tang to the dish. You can make your own or grab a store-bought version for a time saver.
    • Mixed greens: Choose your favorite leafy greens like spinach, arugula, or romaine. They deliver that essential crunch!
    • Sliced red onion: This adds a lovely bite. If it’s a bit too sharp for your taste, a quick soak in water can soften its flavor.
    • Kalamata olives: These briny gems provide a savory punch. Feel free to substitute with green olives if preferred.

    Don’t forget, you can always customize your salad bowl! Throw in some sliced cucumbers or bell peppers for an extra crunch, or add some feta cheese if you crave that classic Greek twist. Ingredients with exact quantities are available at the bottom for printing!

    How to Make Greek Tzatziki Chicken Salad Bowl

    Ready to dive into this delicious creation? It’s time to put together your very own Greek Tzatziki Chicken Salad Bowl. Follow these simple steps, and you’re just a few minutes away from enjoying a vibrant, fresh meal.

    Step 1: Prepare the Chicken

    Start by pulling out your cooked chicken. If you’re using leftover rotisserie chicken, just shred it into bite-sized pieces. If you’re cooking your chicken from scratch, it’s best to grill or bake it first. Trust me, those smoky flavors will totally level up your salad!

    Step 2: Mix with Tzatziki Sauce

    Now, grab that delicious tzatziki sauce. In a mixing bowl, combine your chicken with the sauce. Toss it well until every piece is coated. This creamy mixture brings so much flavor to your dish and is a perfect match for the chicken. I can practically taste the freshness already!

    Step 3: Arrange the Salad Bowl

    Next, take a big serving bowl and arrange your mixed greens at the bottom. These greens are your salad’s foundation, so pile them on! Then, elegantly distribute the chicken mixture on top. Add your sliced red onions and kalamata olives around for a pop of color and flavor. The visual appeal alone is enough to make your mouth water!

    Step 4: Add Additional Ingredients (optional)

    If you want to elevate your bowl even more, this is the time to toss in any additional ingredients. Craving crunch? Slice up some cucumbers or bell peppers. Want to add a classic feta cheese touch? Crumble some over the top! The beauty of this recipe is that it’s so customizable, allowing you to create the perfect salad for your taste buds.

    Tips for Success

    • Prep your ingredients ahead of time for a quick assembly during busy days.
    • Use fresh, high-quality tzatziki sauce for best flavor.
    • Ensure your chicken is at room temperature before mixing for even flavor distribution.
    • Experiment with different greens to keep your salads exciting.
    • Store leftover salad separately from greens to maintain crispness!

    Equipment Needed

    • Mixing bowl: A medium-sized bowl will do, but a large one makes mixing easier!
    • Salad serving bowl: Any large bowl works, or you could use individual bowls for a personal touch.
    • Measuring cups: Great for precise ingredients, but eyeballing is just fine!
    • Sharp knife: Essential for slicing vegetables and chicken evenly.
    • Cutting board: Protect your countertop while prepping ingredients.

    Variations

    • Protein Swaps: Try substituting chicken with grilled shrimp or chickpeas for a vegetarian option. Both bring their unique textures and flavors!
    • Greek-inspired Additions: Add artichoke hearts or sun-dried tomatoes for a delightful Mediterranean twist that will have your taste buds dancing.
    • Herb Infusion: Toss in some fresh herbs like dill, parsley, or mint. This will add a vibrant freshness and take your salad to the next level.
    • Vegan Version: Replace chicken with diced avocado or a bean mix and use a dairy-free tzatziki made from coconut yogurt.
    • Spice it Up: Sprinkle some red pepper flakes or a dash of hot sauce over your salad for an added kick of flavor.

    Serving Suggestions

    • Pair with pita bread: Soft, warm pita makes a lovely side, perfect for scooping up delicious bites.
    • Complement with a crisp white wine: A chilled Sauvignon Blanc or Pinot Grigio enhances those vibrant flavors.
    • Presentation: Serve in colorful bowls and garnish with fresh herbs for a visually stunning meal.
    • Add a fruit salad: A refreshing fruit medley pairs well and adds a sweet contrast.

    FAQs about Greek Tzatziki Chicken Salad Bowl

    Can I make the Greek Tzatziki Chicken Salad Bowl ahead of time?

    Absolutely! You can prep the ingredients and store them separately in the fridge. Assemble the salad just before serving to keep those mixed greens crisp and fresh.

    What can I serve with the Greek Tzatziki Chicken Salad Bowl?

    This salad pairs wonderfully with warm pita bread, a fruit salad, or even some crunchy pita chips. It’s all about balancing the flavors!

    Can I use store-bought tzatziki sauce?

    Yes, using store-bought tzatziki is a great time-saver! Just choose one with quality ingredients for the best flavor. Homemade is fabulous, but store-bought is wonderfully convenient.

    Is this chicken salad bowl suitable for meal prep?

    Definitely! This Greek Tzatziki Chicken Salad Bowl is perfect for meal prep. Just prepare each component and enjoy it throughout the week. Just remember to keep the dressing separate to maintain freshness.

    Can I customize the salad’s ingredients based on dietary needs?

    Of course! The beauty of this salad is its versatility. You can easily swap out proteins and veggies, making it suitable for various dietary preferences or restrictions. Enjoy experimenting!

    Final Thoughts

    This Greek Tzatziki Chicken Salad Bowl isn’t just a meal; it’s a celebration of flavors and textures that come together in a delightful way. Each bite is like a refreshing breeze on a warm summer day, reminding me of sun-soaked picnics and joyful gatherings with family. The best part? It’s a breeze to make, so you can enjoy your time with loved ones rather than spending hours in the kitchen. I hope this vibrant salad bowls brings as much joy to your table as it has to mine. Happy cooking, and may your meals be filled with love and laughter!


    Print

    clock clock iconcutlery cutlery iconflag flag iconfolder folder iconinstagram instagram iconpinterest pinterest iconfacebook facebook iconprint print iconsquares squares iconheart heart iconheart solid heart solid icon

    Description

    A fresh and delicious Greek Tzatziki Chicken Salad Bowl, perfect for a light meal.


    • 2 cups cooked chicken, diced
    • 1/2 cup tzatziki sauce
    • 2 cups mixed greens
    • 1/2 cup sliced red onion
    • 1/4 cup Kalamata olives

    1. Toss chicken with tzatziki sauce.
    2. Arrange greens, chicken, onion, and olives in a bowl.

    Notes

    • This salad can be served chilled or at room temperature.
    • Feel free to add other vegetables like cucumbers or bell peppers for extra crunch.
    • Prep Time: 10 minutes
    • Cook Time: 0 minutes
    • Category: Salad
    • Method: No-cook
    • Cuisine: Greek

    Nutrition

    • Serving Size: 1 bowl
    • Calories: 350
    • Sugar: 2g
    • Sodium: 600mg
    • Fat: 20g
    • Saturated Fat: 4g
    • Unsaturated Fat: 15g
    • Trans Fat: 0g
    • Carbohydrates: 12g
    • Fiber: 3g
    • Protein: 30g
    • Cholesterol: 70mg

    Sharing is caring!

  • Crispy Cheddar Corn Potato Fritters

    Crispy Cheddar Corn Potato Fritters


    Introduction to Crispy Cheddar Corn Potato Fritters

    Picture this: it’s a busy evening, and you’re scrambling to get dinner on the table. Enter the hero of the night—Crispy Cheddar Corn Potato Fritters! This delightful dish is not just a quick solution but a flavorful adventure that your family will rave about. I just love how these fritters combine creamy mashed potatoes, sweet corn, and sharp cheddar cheese for a mouthwatering bite. Whether it’s an appetizer for a gathering or a snack for your family, this recipe ticks all the boxes. Trust me, you’ll want to keep this one on repeat!

    Why You’ll Love This Crispy Cheddar Corn Potato Fritters

    Let’s be honest—life gets hectic. These Crispy Cheddar Corn Potato Fritters are the perfect blend of ease and deliciousness that every busy mom dreams about. They come together in just 35 minutes, making meal prep a breeze. The crispy, golden exterior gives way to a creamy, cheesy center that will make your taste buds dance. Plus, they’re a hit with both kids and adults alike!

    Ingredients for Crispy Cheddar Corn Potato Fritters

    Gathering the right ingredients is crucial for these Crispy Cheddar Corn Potato Fritters. Let’s explore what you’ll need to create this scrumptious morsel. Don’t worry; some substitutions can be made if you’re missing something!

    • Mashed Potatoes: The base of our fritters, giving them that wonderful creamy texture. Feel free to use leftover homemade or store-bought mashed potatoes.
    • Corn Kernels: Fresh or frozen, corn adds a sweet crunch that perfectly contrasts the softness of the potatoes. If you’re using frozen corn, just thaw and drain it first.
    • Sharp Cheddar Cheese: The star of the show! It brings a rich, tangy flavor that elevates the fritters. Substitute with mild cheddar or even pepper jack for a spicy kick.
    • All-Purpose Flour: This helps bind the ingredients together, giving your fritters that lovely crispiness. For gluten-free options, try using oat flour or almond flour.
    • Eggs: Beaten eggs act as a binding agent and add richness, keeping everything together perfectly. Vegan? Use a flaxseed meal or chia seed mixture instead.
    • Green Onions: Finely chopped, they add a burst of freshness and a bit of zing. Feel free to swap with regular onions or chives if that’s what you have on hand.
    • Smoked Paprika: A touch of smokiness to elevate the flavor profile. If you’re not a fan, skip it or use regular paprika instead.
    • Salt and Pepper: Essential for seasoning, adjust to your taste. A little goes a long way!
    • Vegetable Oil: For frying, giving your fritters that irresistible golden brown. If you prefer, avocado oil or canola oil work well too.

    For exact quantities of each ingredient, check the bottom of the article where everything’s laid out for easy printing. Happy cooking!

    How to Make Crispy Cheddar Corn Potato Fritters

    Ready to dive into the delightful world of Crispy Cheddar Corn Potato Fritters? Let’s break it down step by step! Follow these simple instructions for a tasty treat that will have everyone coming back for more. I’ll guide you through it, making sure your kitchen becomes a haven of cheesy deliciousness!

    Step 1: Combine the Ingredients

    Start by grabbing a large bowl—this is where the magic happens!

    Toss in your mashed potatoes, corn kernels, shredded cheddar cheese, flour, beaten eggs, green onions, smoked paprika, salt, and pepper.

    Use a spatula or wooden spoon to mix everything together until it’s nice and even.

    It should look like a colorful, gooey masterpiece!

    Step 2: Heat the Oil

    Now, let’s turn up the heat!

    In a skillet, pour in about 1/4 inch of vegetable oil and heat it over medium.

    The oil should shimmer but not smoke—if it does, turn down the heat.

    You want that perfect frying temperature to ensure crispy, not greasy, fritters!

    Step 3: Form the Fritters

    With the oil heating, it’s time to shape your fritters!

    Using about 2 tablespoons of the mixture, scoop it out with a spoon and form it into a patty in your hands.

    Carefully place it in the hot oil.

    Repeat until your skillet is filled, but make sure you leave room in between each fritter—they need their space to crisp up beautifully!

    Step 4: Fry Until Golden

    Your fritters are sizzling away!

    After about 2-3 minutes, carefully flip them using a spatula.

    Cook until both sides are golden brown and crispy.

    That beautiful golden hue means they’re done—trust me, the aroma is heavenly!

    Step 5: Drain and Serve

    Once your fritters are golden, it’s time to drain them.

    Transfer each fritter to a plate lined with paper towels.

    This will soak up any excess oil.

    Now, serve them up warm, perhaps with a delicious dipping sauce. The perfect snack or appetizer awaits!

    Tips for Success

    • Don’t overcrowd the skillet! Fry in batches for even crispiness.
    • Use leftover mashed potatoes for a quicker prep time.
    • Test the oil temperature with a small drop of batter; it should sizzle immediately.
    • Adjust the spices to suit your family’s palate—add herbs for flavor!
    • Serve with different dipping sauces, like ranch or spicy mayo, for variety!

    Equipment Needed

    • Skillet: A non-stick skillet works great, but any frying pan will do.
    • Large Bowl: For mixing ingredients—use a sturdy mixing bowl.
    • Spatula: Perfect for flipping fritters and serving them up.
    • Paper Towels: Essential for draining excess oil.
    • Spoon: To scoop and shape the fritters; a cookie scoop simplifies this!

    Variations of Crispy Cheddar Corn Potato Fritters

    • Herbed Fritters: Add fresh chopped herbs like parsley, cilantro, or dill for a burst of flavor.
    • Spicy Kick: Mix in diced jalapeños or cayenne pepper to give your fritters a spicy twist.
    • Cheese Lovers: Try using a mix of cheeses, such as mozzarella or gouda, for extra melty goodness.
    • Vegetable Medley: Incorporate finely chopped bell peppers, zucchini, or spinach for added nutrition and color.
    • Vegan Option: Replace eggs with a flaxseed or chia seed mixture and use plant-based cheese to make it vegan-friendly.
    • Sweet Potato Variation: Swap out regular potatoes for sweet potatoes for a subtly sweet flavor and extra nutrients.

    Serving Suggestions for Crispy Cheddar Corn Potato Fritters

    • Dipping Sauces: Pair with ranch dressing, chipotle mayo, or homemade spicy ketchup for a delightful flavor boost.
    • Fresh Salads: Serve alongside a crisp mixed greens salad drizzled with vinaigrette for a lovely contrast.
    • Presentation: Arrange fritters on a colorful platter garnished with fresh herbs for an eye-catching display.
    • Drinks: Enjoy with a chilled sparkling water or iced tea for a refreshing touch.

    FAQs about Crispy Cheddar Corn Potato Fritters

    Can I make these fritters ahead of time?
    Absolutely! You can prepare the mixture a day in advance and store it in the fridge. Just be sure to mix well before frying. This allows flavors to meld, making your Crispy Cheddar Corn Potato Fritters even more delectable!

    How can I store leftover fritters?
    If you have any leftover fritters (which is rare in my house!), store them in an airtight container in the refrigerator. They can last for up to three days. To reheat, pop them in the oven for a few minutes to restore that crispy goodness!

    Can I bake these fritters instead of frying?
    Yes! For a healthier option, you can bake them. Place the formed fritters on a baking sheet, lightly brush with oil, and bake at 400°F (200°C) for about 20-25 minutes, flipping halfway through. They won’t be as crispy, but they’ll still be delicious!

    What can I serve with these fritters?
    These Crispy Cheddar Corn Potato Fritters are delightful with various dipping sauces like ranch, salsa, or even a creamy garlic dip. You can also serve them alongside a fresh salad for a wholesome meal.

    Can I freeze the fritters?
    Yes! To freeze, cook the fritters first, then let them cool completely. Lay them flat on a baking sheet, freeze until solid, then transfer them to a freezer bag. Reheat directly from frozen, adding a couple of extra minutes to the cooking time!

    Final Thoughts on Crispy Cheddar Corn Potato Fritters

    There’s something truly heartwarming about serving up a plate of Crispy Cheddar Corn Potato Fritters. The moment they come out golden brown, it’s like a cozy hug from your kitchen. This recipe isn’t just about feeding your family; it’s about creating joyful memories around the table. Whether it’s a busy weeknight or a special gathering, these fritters bring smiles and satisfied appetites. Enjoy the laughter and good times that come with each bite, and know that your culinary adventures make everyday moments feel extraordinary. Happy cooking—you’ll be the star of your kitchen!


    Print

    clock clock iconcutlery cutlery iconflag flag iconfolder folder iconinstagram instagram iconpinterest pinterest iconfacebook facebook iconprint print iconsquares squares iconheart heart iconheart solid heart solid icon

    Description

    Deliciously crispy fritters made with mashed potatoes, sweet corn, and sharp cheddar cheese, perfect as an appetizer or snack.


    • 2 cups mashed potatoes
    • 1 cup corn kernels (fresh or thawed if frozen)
    • 1 cup shredded sharp cheddar cheese
    • 1/4 cup all-purpose flour
    • 2 large eggs, beaten
    • 2 green onions, finely chopped
    • 1/2 teaspoon smoked paprika
    • Salt and pepper to taste
    • Vegetable oil for frying

    1. In a large bowl, combine mashed potatoes, corn kernels, cheddar cheese, flour, beaten eggs, green onions, smoked paprika, salt, and pepper. Mix until well combined.
    2. Heat about 1/4 inch of vegetable oil in a skillet over medium heat.
    3. Scoop approximately 2 tablespoons of the mixture, form into a patty, and carefully place into the hot oil.
    4. Flatten slightly with a spatula and cook for 2-3 minutes on each side, or until golden brown and crispy.
    5. Transfer fritters to a plate lined with paper towels to drain excess oil.
    6. Repeat with the remaining mixture, adding more oil to the skillet as needed.

    Notes

    • Ensure the oil is hot enough before adding the patties to prevent them from absorbing too much oil.
    • You can add additional spices or herbs according to your taste preferences.
    • These fritters can be served with a dipping sauce of your choice.
    • Prep Time: 15 minutes
    • Cook Time: 20 minutes
    • Category: Appetizer
    • Method: Frying
    • Cuisine: American

    Nutrition

    • Serving Size: 1 fritter
    • Calories: 150
    • Sugar: 1g
    • Sodium: 250mg
    • Fat: 8g
    • Saturated Fat: 3g
    • Unsaturated Fat: 4g
    • Trans Fat: 0g
    • Carbohydrates: 15g
    • Fiber: 2g
    • Protein: 5g
    • Cholesterol: 50mg

    Sharing is caring!

  • Garlic Butter Steak with Creamy Parmesan Rigatoni

    Garlic Butter Steak with Creamy Parmesan Rigatoni


    Introduction to Garlic Butter Steak with Creamy Parmesan Rigatoni

    As a busy mom, I know how challenging it can be to balance work, kids, and finding time to cook. That’s why I absolutely love this Garlic Butter Steak with Creamy Parmesan Rigatoni! It’s the kind of dish that makes weeknight dinners feel like a gourmet experience, perfect for impressing those you love or simply indulging after a hectic day.

    This delightful meal comes together in just 35 minutes, making it an easy solution when time is tight. With rich flavors and creamy pasta, it has all the comfort you crave, ready to bring a smile to your family’s faces.

    Why You’ll Love This Garlic Butter Steak with Creamy Parmesan Rigatoni

    Let’s talk about why this dish will quickly become a favorite in your home. First off, it’s incredibly easy to whip up, which is a blessing after a long day of juggling tasks. The savory garlic butter perfectly complements the tender steak, while the creamy Parmesan rigatoni adds a touch of indulgence. It’s a delightful blend of comfort and elegance that makes weeknight dinners special without any added stress!

    Ingredients for Garlic Butter Steak with Creamy Parmesan Rigatoni

    Gathering the right ingredients is half the fun of cooking! For this mouthwatering Garlic Butter Steak with Creamy Parmesan Rigatoni, you’ll need both protein and pasta that create a satisfying balance. Here’s what you’re looking for:

    • Ribeye or sirloin steak: These cuts are tender and slice beautifully. They grill to perfection, providing a rich flavor.
    • Olive oil: A staple in my kitchen. It enhances the searing process while adding healthy fats.
    • Unsalted butter: This adds creaminess and richness. I love using unsalted, so I can control the seasoning.
    • Garlic: Freshly minced garlic is a must! It infuses a lovely aroma into the dish.
    • Heavy cream: The base for that luscious creamy sauce. It’s what dreams are made of!
    • Parmesan cheese: Freshly grated cheese melts perfectly into the sauce, lending a savory punch.
    • Rigatoni pasta: Perfectly shaped, this pasta holds sauces beautifully. A good choice for this meal!
    • Salt and black pepper: Essential for seasoning, don’t skip on these to elevate the flavors!
    • Fresh parsley: A touch of green adds brightness and a fresh taste as a garnish.

    If you’re looking for swaps, feel free to swap the steak with chicken for a lighter protein option. And, remember—if you prefer a gluten-free version, you can easily use gluten-free pasta. For exact measurements, don’t forget to check out the bottom of the article, where you’ll find everything available for printing!

    How to Make Garlic Butter Steak with Creamy Parmesan Rigatoni

    Alright, let’s dive into the heart of the recipe! Making Garlic Butter Steak with Creamy Parmesan Rigatoni is a breeze when you follow these simple steps. Trust me, this method will have your kitchen smelling heavenly and your family raving in no time!

    Step 1: Sear the Steak

    First, grab a cast iron skillet and heat about two tablespoons of olive oil over high heat. You want that oil sizzling hot!

    Once the oil is shimmering, add your steak cubes in batches. It’s important not to crowd the pan; otherwise, they won’t get that perfect golden crust. Sear each side for about 3-4 minutes or until beautifully browned. Season with a sprinkle of salt and pepper as they cook!

    Once done, remove the steak from the skillet and set them aside. Keep those delicious juices for later!

    Step 2: Prepare the Garlic Butter

    Now, lower the heat to medium. In the same skillet, toss in the unsalted butter and minced garlic. I can already smell that garlicky goodness!

    Cook the garlic gently for about 1-2 minutes, or until it becomes fragrant. But watch carefully; we don’t want it browned—just a little golden. Return your seared steak to the skillet and coat it with the garlic butter. Remove from heat and set aside to keep warm.

    Step 3: Cook the Rigatoni

    Next, let’s get that rigatoni going. In a pot, boil salted water and add your pasta. Cook until it reaches al dente, which usually takes around 11-12 minutes.

    While it’s cooking, feel free to grab a glass of wine or make sure the kiddos are occupied. Once done, drain the pasta, but don’t forget to reserve about half a cup of that pasta water. We’ll need it for the sauce!

    Step 4: Make the Creamy Parmesan Sauce

    In a separate saucepan, gently heat the heavy cream over medium-low heat—a little patience goes a long way here.

    Once warmed, gradually whisk in the freshly grated Parmesan cheese. Stir until it melts into a velvety mix. If it’s too thick, this is where your reserved pasta water comes into play. Add it a tablespoon at a time until you reach that creamy consistency.

    Step 5: Combine Everything

    Here comes the fun part! Stir the cooked rigatoni into the creamy Parmesan sauce until each piece is generously coated.

    Then, gently toss in the garlic butter steak mixture. Make sure everything is well combined.

    Plate it up, and don’t be shy with the garnishing—add a sprinkle of fresh parsley and extra Parmesan on top. Voila! You’ve just made a delicious Garlic Butter Steak with Creamy Parmesan Rigatoni!

    Tips for Success

    • Don’t rush the searing process! Giving the steak enough time to develop a nice crust is key.
    • Keep an eye on the garlic. Cooking it until fragrant prevents any bitter taste.
    • Using freshly grated Parmesan elevates the dish’s flavor; pre-grated cheese can be bland.
    • Feel free to adjust the cream sauce’s thickness with the reserved pasta water to your liking.
    • Garnishing with parsley not only adds color but also freshens the dish’s flavor!

    Equipment Needed

    • Cast Iron Skillet: Perfect for searing steak. If you don’t have one, a stainless-steel skillet works too.
    • Pasta Pot: A large pot is essential for boiling rigatoni. A Dutch oven can also do the trick.
    • Whisk: Useful for combining the creamy sauce; a fork can work in a pinch.
    • Measuring Cups and Spoons: Handy for precision, but you can eyeball ingredients if necessary!

    Variations

    • Chicken Option: Substitute the steak with grilled chicken breast for a lighter, yet equally satisfying dish. A quick marinade can add extra flavor!
    • Vegetarian Delight: Replace the steak with sautéed mushrooms and spinach for a delicious vegetarian version that brings earthy flavors and color.
    • Gluten-Free Swap: Use gluten-free pasta instead of rigatoni to make this dish suitable for gluten-sensitive family members.
    • Savory Additions: Consider adding sun-dried tomatoes or roasted red peppers into the creamy sauce for a burst of flavor and texture.
    • Herb Infusion: Experiment with different fresh herbs like basil or thyme for extra aroma and taste!

    Serving Suggestions

    • Side Salad: Serve with a crisp mixed greens salad drizzled with a light vinaigrette for a refreshing contrast.
    • Wine Pairing: A smooth red wine, like a cabernet sauvignon or a malbec, complements the steak beautifully.
    • Presentation: For a fancy touch, plate the rigatoni in a shallow bowl, arranging the steak on top and garnishing with parsley and extra Parmesan.

    FAQs about Garlic Butter Steak with Creamy Parmesan Rigatoni

    Can I use a different type of pasta?

    Absolutely! While rigatoni is perfect for holding onto that creamy Parmesan sauce, you can use penne, fettuccine, or even spaghetti if that’s what you have on hand.

    How can I make this dish lower in calories?

    For a lighter version of Garlic Butter Steak with Creamy Parmesan Rigatoni, opt for lean cuts of steak, use less butter, or substitute heavy cream with half-and-half. Every little change can help!

    What can I serve with Garlic Butter Steak with Creamy Parmesan Rigatoni?

    A light side salad or steamed vegetables pairs beautifully with this dish. The freshness complements the rich flavors and balances the meal nicely.

    Can I prepare this dish ahead of time?

    You can prep the steak and sauce a few hours in advance, but it’s best to cook the rigatoni just before serving. That way, everything stays fresh and delicious!

    Is it possible to freeze leftovers?

    Yes, you can freeze the Garlic Butter Steak with Creamy Parmesan Rigatoni! Just store it in an airtight container. Reheat gently to prevent the sauce from breaking.

    Final Thoughts

    Cooking Garlic Butter Steak with Creamy Parmesan Rigatoni isn’t just about satisfying hunger; it’s an experience that brings joy to your kitchen and your table. The rich flavors and creamy textures make every bite a celebration! I love how this dish transforms an ordinary evening into something memorable, from its enticing aroma to the smiles shared over dinner. It’s amazing how a little garlic and butter can create such magic. Whether you’re feeding your family or hosting friends, this dish garners rave reviews every time. Honestly, I can’t wait for you to try it! Enjoy every delectable moment!


    Print

    clock clock iconcutlery cutlery iconflag flag iconfolder folder iconinstagram instagram iconpinterest pinterest iconfacebook facebook iconprint print iconsquares squares iconheart heart iconheart solid heart solid icon

    Description

    A delicious dish featuring seared steak coated in garlic butter, served with creamy Parmesan rigatoni.


    • 1 lb ribeye or sirloin steak, cut into cubes
    • 2 tbsp olive oil
    • 4 tbsp unsalted butter
    • 4 garlic cloves, minced
    • 1 cup heavy cream
    • 1 ½ cups freshly grated Parmesan cheese
    • 12 oz rigatoni pasta
    • Salt and black pepper, to taste
    • 2 tbsp fresh parsley, chopped

    1. Heat olive oil in a cast iron skillet over high heat. Sear steak cubes in batches until browned on all sides. Season with salt and pepper and set aside.
    2. Lower heat to medium and add butter and minced garlic to the skillet. Cook until garlic is fragrant but not browned. Return steak to coat in garlic butter, then remove from heat.
    3. Boil rigatoni in salted water until al dente. Drain and reserve ½ cup of pasta water.
    4. In a saucepan, gently heat the heavy cream. Slowly whisk in the Parmesan until melted and smooth. Use reserved pasta water to thin the sauce if needed.
    5. Stir rigatoni into the sauce until coated. Plate pasta with garlic butter steak. Garnish with chopped parsley and extra Parmesan.

    Notes

    • Make sure not to overcook the garlic to avoid bitterness.
    • Adjust the consistency of the sauce by using pasta water as needed.
    • Feel free to substitute the steak with chicken for a different protein.
    • Prep Time: 15 minutes
    • Cook Time: 20 minutes
    • Category: Main Course
    • Method: Skillet Cooking
    • Cuisine: Italian-American

    Nutrition

    • Serving Size: 1 serving
    • Calories: 640
    • Sugar: 2g
    • Sodium: 900mg
    • Fat: 36g
    • Saturated Fat: 20g
    • Unsaturated Fat: 10g
    • Trans Fat: 0g
    • Carbohydrates: 60g
    • Fiber: 3g
    • Protein: 30g
    • Cholesterol: 90mg

    Sharing is caring!

  • Moist Chocolate Pumpkin Bread

    Moist Chocolate Pumpkin Bread


    Introduction to Moist Chocolate Pumpkin Bread

    As the leaves begin to fall and the aroma of spices fills the air, nothing comforts me quite like a slice of moist chocolate pumpkin bread. It’s the perfect blend of chocolatey delight and seasonal warmth, making it an ideal treat for both cozy weekends and busy weekday afternoons. Whether you’re looking to impress guests or simply enjoy a quick bite at home, this recipe has you covered. With minimal prep and a wonderfully moist result, it’s bound to become a favorite in your kitchen. Let’s dive into this delicious adventure together!

    Why You’ll Love This Moist Chocolate Pumpkin Bread

    This moist chocolate pumpkin bread is not just a treat; it’s a delightful experience! Its easy-to-follow steps fit perfectly into your busy life, making it a go-to recipe for any occasion. The rich chocolate flavor is beautifully paired with a hint of pumpkin, creating a comforting indulgence. Plus, it’s a fantastic way to sneak some nutrients into your snack. Who wouldn’t love that?

    Ingredients for Moist Chocolate Pumpkin Bread

    Gathering the right ingredients is the first step toward baking this delightful chocolate pumpkin bread. Each element plays a vital role in creating that wonderfully moist texture and delicious flavor. Here’s what you’ll need:

    • Butter: This melted fat adds richness and helps keep the bread moist. You can use unsalted butter to better control the saltiness.
    • Vanilla extract: A dash of vanilla enhances the overall flavor, making each bite feel irresistibly decadent.
    • Egg: Essential for binding the ingredients together, the egg contributes to the bread’s light and fluffy texture.
    • Granulated sugar: This sweetener balances the rich cocoa flavor while adding a bit of structure to the bread.
    • Brown sugar: Providing a subtle hint of caramel, brown sugar deepens the flavor profile and helps with moisture.
    • Kosher salt: A pinch of salt amplifies all the other flavors, ensuring each bite is well-seasoned.
    • Greek yogurt: This ingredient is not only a great source of creaminess but also keeps the bread moist and tender.
    • Cocoa powder: The star of the show, cocoa powder delivers that rich chocolate flavor we all crave.
    • Canned pumpkin puree: Pumpkin adds moisture and a boost of nutrition, being rich in vitamins and flavor.
    • Flour: All-purpose flour provides structure, ensuring the bread rises properly and holds its shape.
    • Baking soda: This leavening agent helps the bread rise, contributing to its lovely texture.
    • Chocolate chips: The cherry on top! These melt into gooey pockets of chocolate goodness throughout the bread.

    Don’t worry; if you need specific measurements or wish to print the recipe, you can find them at the bottom of the article!

    How to Make Moist Chocolate Pumpkin Bread

    Making moist chocolate pumpkin bread is as easy as pie! Follow these simple steps, and you’ll have a delicious treat baked to perfection. Trust me; each step is rewarding, and you’ll smell the tantalizing scent wafting through your home before you know it!

    Step 1: Preheat and Prep

    First things first, preheat your oven to 350°F (180°C). This ensures a lovely rise and browning for your bread. While the oven heats up, grab your loaf pan and line it with parchment paper. This not only helps with easy removal later but also keeps your loaf intact. Plus, who likes scrubbing pans, right?

    Step 2: Combine Wet Ingredients

    In a large mixing bowl, add the pumpkin puree, Greek yogurt, vanilla extract, and cooled melted butter. Next, crack in that egg! Then, sprinkle in the granulated sugar and brown sugar. Use a whisk to mix everything together until it’s just beautiful! Every ingredient should blend seamlessly, creating that velvety batter that’s oh-so-tempting!

    Step 3: Adding Dry Ingredients

    Now it’s time to bring in the dry ingredients. Sift in the cocoa powder, flour, and baking soda. Gently fold them into the wet mixture until everything is just about combined. Remember, we want a few lumps to remain. Too much stirring can lead to a bread that’s dense, and we definitely want it to be light and airy!

    Step 4: Incorporate the Chocolate Chips

    Next, it’s chocolate time! Add in those luscious chocolate chips. Gently fold them into the batter with a spatula, ensuring they’re evenly distributed. These little gems are what make this chocolate pumpkin bread truly irresistible. Can I get a heck yes for chocolate?

    Step 5: Pour and Bake

    Now, it’s showtime! Pour the batter into your parchment-lined loaf pan, smoothing the top for an even bake. If you want to take it up a notch, sprinkle some extra chocolate chips on top. They’ll create a delicious crust as they melt! Pop that beauty into the oven and bake for 50-60 minutes. You’ll know it’s done when a toothpick inserted into the center comes out clean. Your kitchen will smell heavenly!

    Tips for Success

    • Make sure all ingredients are at room temperature for easier mixing.
    • Don’t overmix the batter; a few lumps are okay!
    • For a healthier twist, substitute some flour with whole wheat flour.
    • Keep an eye on the baking time; ovens can vary.
    • Let the bread cool completely in the pan before removing to prevent crumbling.

    Equipment Needed

    • Loaf pan: A standard 9×5 inch pan works perfectly, but you can use a smaller one if needed.
    • Mixing bowls: Use any large bowl you have on hand; even a sturdy pot will do!
    • Whisk: A simple whisk or a fork can help blend ingredients smoothly.
    • Spatula: A rubber spatula is ideal for folding in chocolate chips.
    • Parchment paper: If you don’t have parchment, just grease your pan well.

    Variations for Moist Chocolate Pumpkin Bread

    • Nutty Delight: Add some chopped walnuts or pecans for added crunch and a nutty flavor. Just fold them in with the chocolate chips!
    • Spiced Up: Incorporate autumn spices like cinnamon, nutmeg, or allspice for a warm, cozy flavor that’s perfect for the season.
    • Dairy-Free Option: Substitute Greek yogurt with a dairy-free yogurt or applesauce for a lighter version, suitable for lactose intolerance.
    • Healthier Twist: Use whole wheat flour or a gluten-free blend to cater to dietary preferences while retaining moisture.
    • Fruity Addition: Toss in some dried cranberries or cherries for a burst of flavor and a bit of tartness that pairs beautifully with chocolate.

    Serving Suggestions

    • Enjoy a warm slice with a dollop of whipped cream or a scoop of vanilla ice cream.
    • Pair it with a hot cup of coffee or a spiced chai latte for a cozy afternoon treat.
    • For a festive touch, sprinkle powdered sugar on top before serving.
    • Slice and serve with fresh fruit or a side of yogurt for a balanced snack.

    FAQs about Moist Chocolate Pumpkin Bread

    As you get ready to bake this delicious moist chocolate pumpkin bread, you might have a few lingering questions. Don’t worry; I’ve got you covered! Here are some common queries I’ve encountered, along with my tried-and-true answers.

    Can I use fresh pumpkin instead of canned?

    Absolutely! If you have fresh pumpkin, just cook, puree, and measure out what you need. It’ll taste amazing, making your moist chocolate pumpkin bread even more special!

    How do I store leftover chocolate pumpkin bread?

    To keep your bread wonderfully moist, wrap it tightly in plastic wrap or store it in an airtight container. It should stay fresh for about 3-4 days at room temperature. You can also freeze slices for a quick treat later!

    Can I make this recipe vegan?

    Yes, you can! Substitute the egg with a flax egg (1 tablespoon ground flaxseed mixed with 2.5 tablespoons water), and use a plant-based yogurt instead of Greek yogurt. The results will still be delicious!

    What if my bread is too dry?

    If that happens, it might be due to overbaking or too much flour. Always monitor the baking time closely, and make sure you are measuring your flour correctly. Scooping can pack it down, leading to a denser loaf.

    Can I add other mix-ins to this chocolate pumpkin bread?

    Definitely! Feel free to get creative. Chopped nuts, dried fruits, or even a sprinkle of cinnamon can jazz up your moist chocolate pumpkin bread and make it uniquely yours.

    Final Thoughts

    Baking moist chocolate pumpkin bread isn’t just about following a recipe; it’s about creating a cozy moment in your busy life. The sweet aroma fills your kitchen, wrapping you in warmth, while each slice is a hug in edible form. It offers comfort on a hectic day and a delightful treat for gatherings. The joy this bread brings isn’t merely in taste but in the love shared with family and friends. I hope you find as much pleasure in making it as I do, turning simple ingredients into a cherished memory that will linger long after the last bite.


    Print

    clock clock iconcutlery cutlery iconflag flag iconfolder folder iconinstagram instagram iconpinterest pinterest iconfacebook facebook iconprint print iconsquares squares iconheart heart iconheart solid heart solid icon

    Description

    A deliciously moist chocolate bread with a hint of pumpkin flavor, perfect for any occasion.


    • ¼ cup Butter, melted and cooled
    • 1 teaspoon Vanilla extract
    • 1 Egg
    • ⅓ cup Granulated sugar
    • ½ cup Brown sugar
    • ½ teaspoon Kosher salt
    • ½ cup Greek yogurt
    • ½ cup Cocoa powder
    • 1 ½ cups Canned pumpkin puree
    • 1 cup Flour
    • 1 teaspoon Baking soda
    • 1 cup Chocolate chips

    1. Preheat an oven to 180°C (350°F) and prep a loaf pan with parchment paper.
    2. Into a large mixing bowl, add the pumpkin puree, Greek yogurt, vanilla extract, cooled melted butter, kosher salt, egg, granulated sugar, brown sugar, and sift the cocoa powder. Mix with a whisk until well combined.
    3. Add the flour and baking soda, and mix until almost combined.
    4. Add the chocolate chips and mix until just combined and there are no lumps of flour visible.
    5. Pour the batter into a parchment paper-lined loaf pan and top the batter with extra chocolate chips!
    6. Bake in a 180°C (350°F) preheated oven for 50-60 minutes or until a toothpick inserted into the bread comes out clean.

    Notes

    • Ensure ingredients are at room temperature for better mixing.
    • Store leftover bread in an airtight container to maintain moisture.
    • This bread can be served warm or at room temperature.
    • Prep Time: 15 minutes
    • Cook Time: 50-60 minutes
    • Category: Dessert
    • Method: Baking
    • Cuisine: American

    Nutrition

    • Serving Size: 1 slice
    • Calories: 250
    • Sugar: 14g
    • Sodium: 150mg
    • Fat: 10g
    • Saturated Fat: 5g
    • Unsaturated Fat: 4g
    • Trans Fat: 0g
    • Carbohydrates: 35g
    • Fiber: 2g
    • Protein: 4g
    • Cholesterol: 30mg

    Sharing is caring!