Author: IHAAL Team

  • Honey Garlic Ground Beef And Broccoli

    Honey Garlic Ground Beef And Broccoli


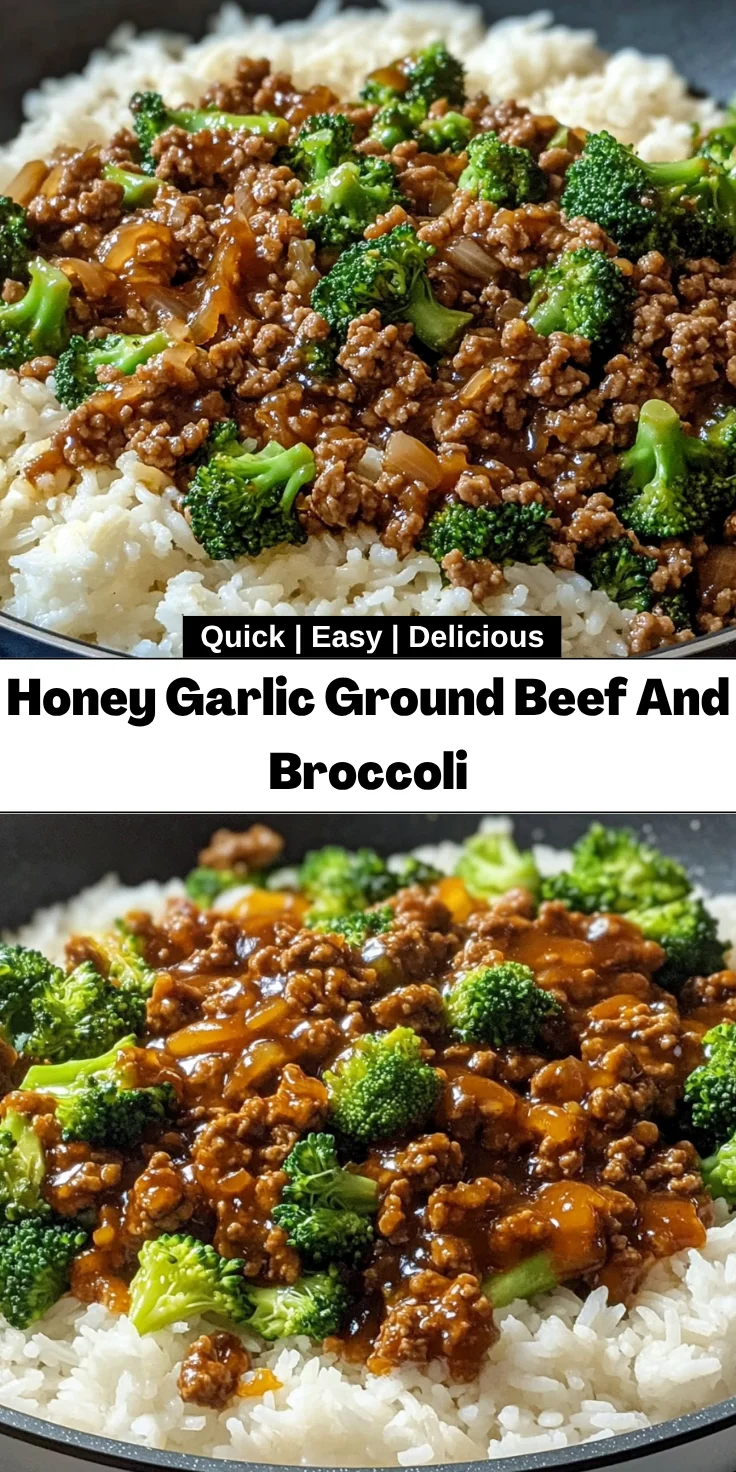
    Introduction to Honey Garlic Ground Beef And Broccoli

    Welcome to the world of easy cooking! If you’re like me, juggling work and family, you know the struggle of getting a delicious dinner on the table without turning into a short-order cook. That’s where this Honey Garlic Ground Beef And Broccoli comes in, and trust me, it’s a game-changer! With a sweet and savory sauce that makes broccoli taste heavenly, this meal will not only satisfy your family’s hunger but also impress them. Perfect for busy nights or as a cozy weeknight treat, this recipe is undeniably a quick solution for your dinner dilemmas!

    Why You’ll Love This Honey Garlic Ground Beef And Broccoli

    This recipe is all about simplicity and flavor. It takes just 25 minutes from start to finish, making it a lifesaver for busy evenings. The delightful combination of sweet honey and robust garlic creates a taste explosion that kids and adults adore. Plus, it’s a one-pan meal, which means less cleanup! The nutritious broccoli adds a pop of color and health to your plate, ensuring dinner is as wholesome as it is delicious.

    Ingredients for Honey Garlic Ground Beef And Broccoli

    Gathering the right ingredients is key to making this delightful meal. Here’s what you’ll need to create the magic of Honey Garlic Ground Beef And Broccoli!

    • Garlic cloves: Freshly minced garlic adds a robust flavor that elevates the dish.
    • Chopped white onion: A medium onion finely chopped brings sweetness and depth to the mix.
    • Lean ground beef: I recommend 93% lean for a juicy texture without excess fat.
    • Broccoli florets: Fresh, vibrant broccoli not only adds crunch but is also packed with nutrients.
    • Honey garlic sauce: Whether store-bought or homemade, this sauce is the star of the show. It blends sweetness with savory goodness.
    • Cooked rice: Perfect for serving! It acts as a comforting base for the beef and broccoli.
    • Olive oil: A dash of olive oil is essential for sautéing the aromatics, making everything richer in flavor.

    Optional variations include using ground turkey or chicken for a leaner option. You can also mix in other veggies like bell peppers or snap peas for added color and nutrients. Don’t forget, if you prefer a healthier carbohydrate, swap out the white rice for brown rice, quinoa, or even cauliflower rice.

    For exact measurements, you can check the bottom of the article. They’re available for printing, making your cooking prep as seamless as possible!

    How to Make Honey Garlic Ground Beef And Broccoli

    Ready to whip up this Honey Garlic Ground Beef And Broccoli? Let’s dive into the steps. Follow along, and before you know it, you’ll have a delicious dinner that brings the family together. Here’s how to get started!

    Step 1: Sauté Aromatics

    Start by heating a large frying pan over medium heat. Add 1 tablespoon of olive oil, followed by minced garlic and chopped onions. Saute for 1-2 minutes. You want those onions to turn translucent and fragrant. The aroma will have you dreaming of dinner already!

    Step 2: Brown the Ground Beef

    Next, add your lean ground beef to the pan. Use a spatula to break it apart as it cooks. In about 3-4 minutes, it should be browned and no longer pink. If there’s too much fat, don’t hesitate to drain it. You want that beef to be juicy, not greasy!

    Step 3: Add Broccoli

    Now it’s time to introduce the showstopper: broccoli! Toss in your chopped broccoli florets and cook for another 3-4 minutes. You want them to be slightly tender yet still crisp. Trust me, that little crunch makes all the difference.

    Step 4: Combine with Sauce

    Pour the honey garlic sauce over the beef and broccoli mixture. Stir it all together, ensuring everything is well coated. Cook for an additional 1-2 minutes to heat it through and thicken that delicious sauce. Your taste buds are in for a treat!

    Step 5: Serve Over Rice

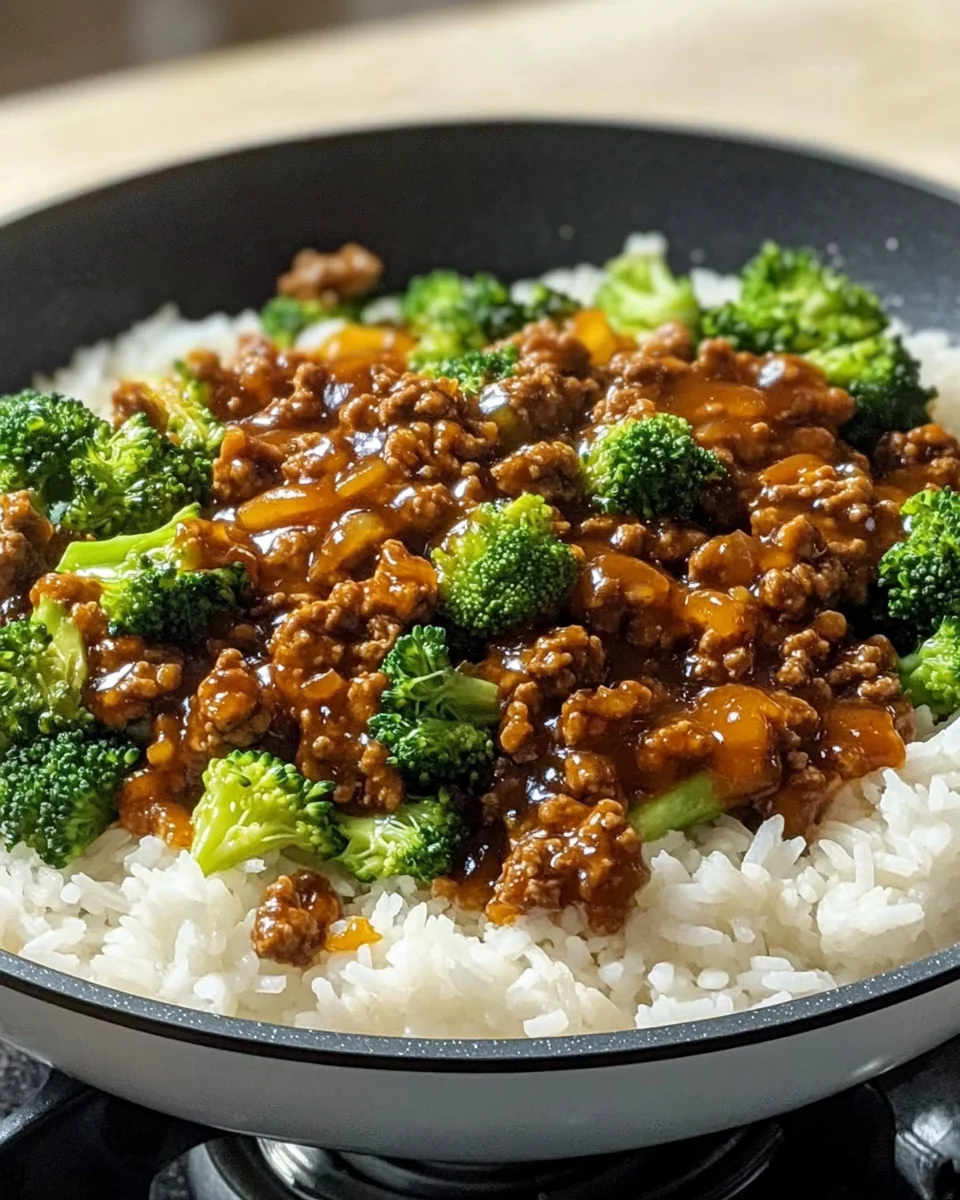
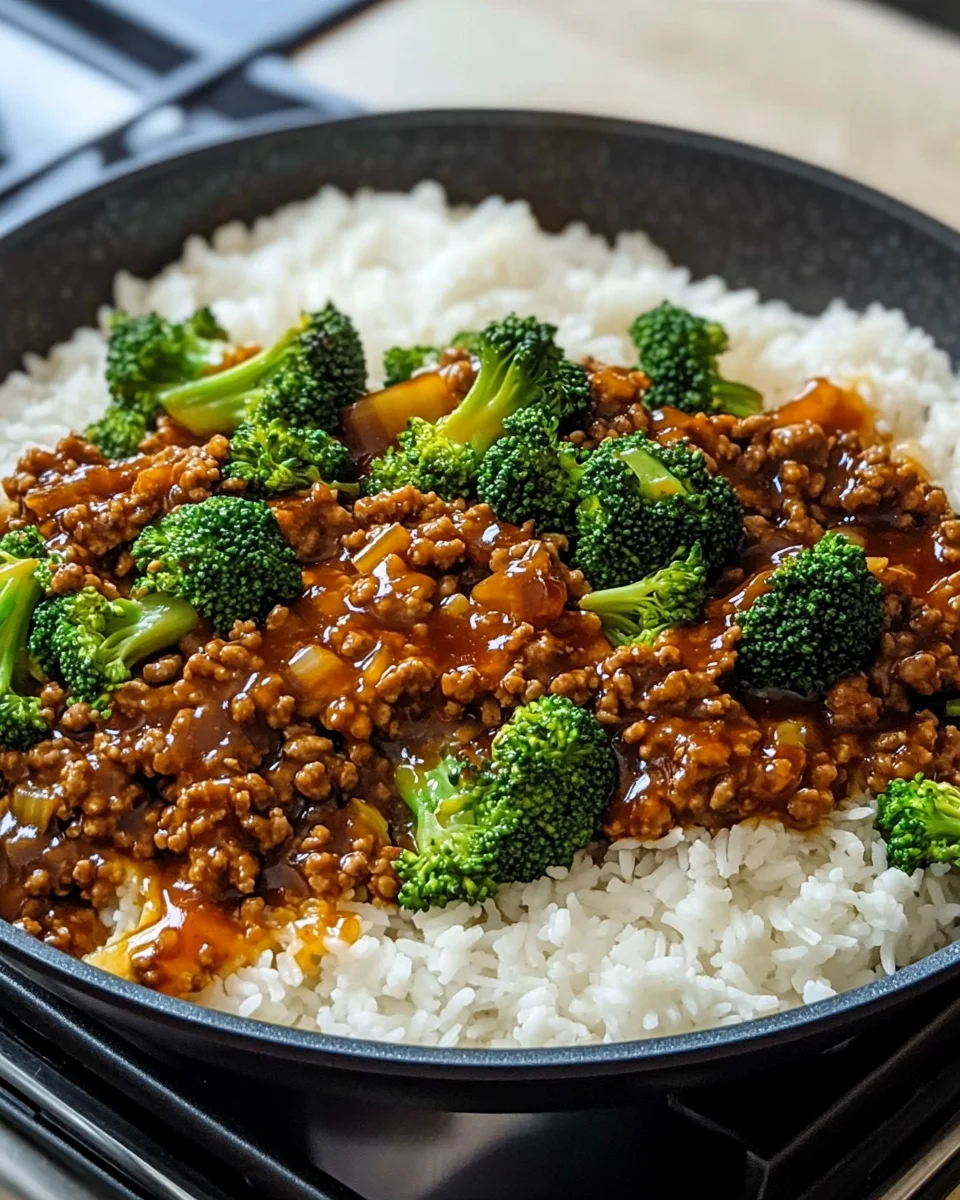
    Finally, scoop the cooked rice into bowls. Top it off with the honey garlic ground beef and broccoli mixture. Serve it hot, and get ready for the compliments! You’ve just created a wholesome, mouthwatering dinner that everyone will love.

    Tips for Success

    • Prep your ingredients ahead of time for a smoother cooking experience.
    • Don’t overcrowd the pan; it helps everything cook evenly.
    • Feel free to adjust the sweetness of the sauce by adding more or less honey.
    • If using frozen broccoli, add it straight to the pan and cook longer.
    • Top with sesame seeds or green onions for extra flavor and flair!

    Equipment Needed

    • Large frying pan: A non-stick skillet works great too.
    • Spatula: For breaking apart the beef as it cooks.
    • Cutting board: Essential for chopping your veggies.
    • Knife: A sharp knife makes prep easy.
    • Measuring cups: Helpful for precise ingredient portions.

    Variations

    • Ground Turkey or Chicken: Swap the beef for ground turkey or chicken for a lighter version.
    • Extra Veggies: Add bell peppers, carrots, or snap peas to the stir-fry for added nutrition and color.
    • Spice it Up: If you like heat, throw in some red pepper flakes or chili sauce to give it a kick!
    • Low-Carb Alternative: Use cauliflower rice instead of regular rice for a low-carb option.
    • Make it Vegan: Substitute ground beef with crumbled tofu or tempeh, and use a vegan honey alternative.

    Serving Suggestions

    • Pair with a crisp salad: A light side salad enhances the meal and adds freshness.
    • Serve with steamed dumplings: These make for a delightful accompaniment.
    • Offer iced green tea: It complements the dish beautifully.
    • Garnish with sesame seeds: A sprinkle adds a touch of elegance.

    FAQs about Honey Garlic Ground Beef And Broccoli

    Can I use frozen broccoli instead of fresh?

    Absolutely! If you’re short on time or fresh produce, frozen broccoli works well. Just add it right to the pan and allow it to cook longer until tender.

    Is the honey garlic sauce hard to make?

    Not at all! While you can certainly use store-bought honey garlic sauce for convenience, making your own is simple. Just mix honey, soy sauce, and minced garlic for a quick and delicious alternative!

    Can I make this recipe in advance?

    You can! Prep everything, then store the cooked dish in an airtight container in the fridge. It’s great for meal prep and reheats nicely!

    What can I serve with honey garlic ground beef and broccoli?

    This dish pairs perfectly with steamed rice, but you can also serve it with quinoa, brown rice, or a side salad for some crunch.

    Can I make this dish gluten-free?

    Yes, just use gluten-free soy sauce for the honey garlic sauce. It’s that easy to adapt this Honey Garlic Ground Beef And Broccoli recipe for gluten-free diets!

    Final Thoughts

    Cooking is more than just a task; it’s a wonderful way to connect with family and create cherished memories. This Honey Garlic Ground Beef And Broccoli dish brings smiles to the dinner table and transforms busy nights into joyous gatherings. The blend of flavors captures the essence of comfort while being effortless to make. It’s a recipe that adapts to your family’s preferences and promises satisfaction every time. So, gather your ingredients and dive into this delightful adventure! You’ll understand why this recipe will become a staple in your home.


    Print

    clock clock iconcutlery cutlery iconflag flag iconfolder folder iconinstagram instagram iconpinterest pinterest iconfacebook facebook iconprint print iconsquares squares iconheart heart iconheart solid heart solid icon

    Description

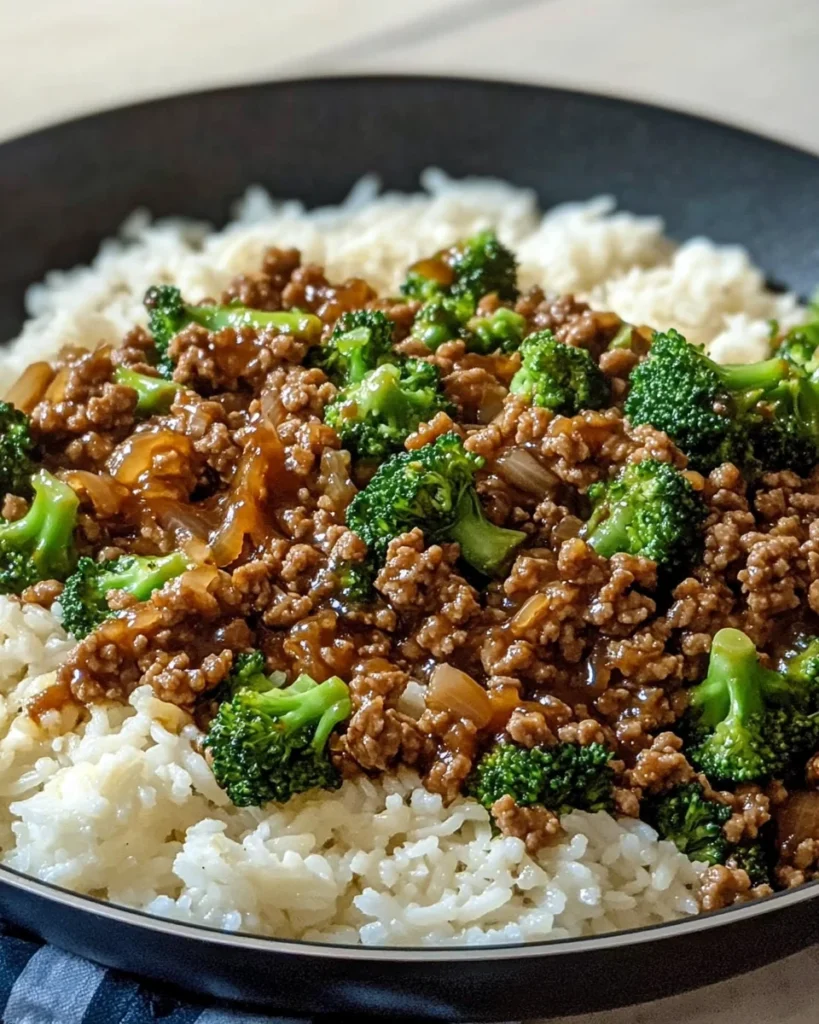
    A quick and delicious dish featuring lean ground beef stir-fried with broccoli and coated in a sweet and savory honey garlic sauce.


    • 3 garlic cloves, minced
    • 1 cup chopped white onion (about 1 medium onion)
    • 1 lb lean ground beef (93% lean recommended)
    • 3 cups broccoli florets, chopped into small pieces
    • 1 cup honey garlic sauce (store-bought or homemade)
    • 4 cups cooked rice, for serving
    • 1 tbsp olive oil, for cooking

    1. Heat a large frying pan over medium heat. Add 1 tablespoon of olive oil, followed by the minced garlic and chopped onion. Cook for about 1-2 minutes, until the onion becomes translucent and fragrant.
    2. Add the lean ground beef to the pan. Break the beef apart using a spatula and cook for about 3-4 minutes, or until it is browned and no longer pink. Drain any excess fat if needed.
    3. Stir in the chopped broccoli florets and cook for another 3-4 minutes, until the broccoli is slightly tender but still has a bit of crispness.
    4. Pour the honey garlic sauce over the beef and broccoli mixture, stirring until well coated. Cook for an additional 1-2 minutes to heat through and thicken the sauce slightly.
    5. Scoop the cooked rice into bowls, then top with the honey garlic ground beef and broccoli mixture. Serve hot and enjoy!

    Notes

    • For a lighter version, substitute ground beef with ground turkey or chicken.
    • Add other vegetables like bell peppers, carrots, or snap peas for variety.
    • Swap white rice with brown rice, quinoa, or cauliflower rice for a healthier base.
    • Prep Time: 10 minutes
    • Cook Time: 15 minutes
    • Category: Dinner
    • Method: Stir-fry
    • Cuisine: Chinese

    Nutrition

    • Serving Size: 1 cup
    • Calories: 450
    • Sugar: 10g
    • Sodium: 600mg
    • Fat: 20g
    • Saturated Fat: 7g
    • Unsaturated Fat: 11g
    • Trans Fat: 0g
    • Carbohydrates: 45g
    • Fiber: 4g
    • Protein: 25g
    • Cholesterol: 75mg

    Sharing is caring!

  • Greek Shrimp Orzo with Feta, Olives, and Tomatoes

    Greek Shrimp Orzo with Feta, Olives, and Tomatoes


    Introduction to Greek Shrimp Orzo with Feta, Olives, and Tomatoes

    Whenever I take a whiff of a Greek-inspired dish, I can’t help but smile. There’s just something enchanting about the aroma of shrimp sizzling in olive oil, mingling with tangy feta and ripe tomatoes. This Greek Shrimp Orzo with Feta, Olives, and Tomatoes is not just a meal; it’s a celebration of flavors in a bowl. Perfect for busy moms and professionals like us, this delightful dish is quick to whip up, making dinner feel special without stealing hours of your precious time. Plus, it’s a vibrant feast for the eyes as much as it is for the taste buds!

    Why You’ll Love This Greek Shrimp Orzo with Feta, Olives, and Tomatoes

    This Greek Shrimp Orzo with Feta, Olives, and Tomatoes is your go-to dish for those hectic weeknights. The quick preparation time means you can enjoy a flavorful, homemade meal in just 45 minutes. Bursting with vibrant Mediterranean flavors, it’s as nutritious as it is delightful. With protein-packed shrimp and colorful veggies, it fits perfectly into a busy lifestyle while satisfying everyone at the dinner table.

    Ingredients for Greek Shrimp Orzo with Feta, Olives, and Tomatoes

    Gathering fresh ingredients truly elevates this Greek Shrimp Orzo with Feta, Olives, and Tomatoes. Here’s what you’ll need:

    • Shrimp: Look for large, raw shrimp that are peeled and deveined for the best texture. If shrimp isn’t your thing, chicken or a hearty vegetable mix can also shine in this dish.
    • Smoked Paprika: This spice adds a wonderful smoky depth. If you’re out, sweet paprika or even chili powder could work as a substitute.
    • Italian Seasoning: A fragrant blend that brings the Mediterranean spirit to your dish. If unavailable, feel free to mix your own using oregano, basil, and thyme.
    • Cherry Tomatoes: Opt for both red and yellow, as they not only taste fantastic but add a splash of color. Any fresh tomatoes will also do, just chop them up nicely.
    • Olives: Kalamata for richness and green olives for a bright note create a beautiful balance. Choose pitted varieties to save time!
    • Feta Cheese: Opt for crumbled or cubed feta. If you’re dairy-free, a nut-based cheese provides a tasty alternative without sacrificing creaminess.

    These fresh ingredients come together to create a symphony of flavor, perfect for satisfying both the eager foodies and busy bees among us. Don’t worry, the exact quantities you need will be available at the end of this post for easy printing!

    How to Make Greek Shrimp Orzo with Feta, Olives, and Tomatoes

    Cooking this Greek Shrimp Orzo with Feta, Olives, and Tomatoes is a delightful adventure! Let’s break it down into manageable steps, so you can create a flavorful dish that feels like a hug on a plate.

    Season the Shrimp

    Start the joy by seasoning the shrimp. In a large bowl, toss your peeled and deveined shrimp with the smoked paprika, chili powder, Italian seasoning, red pepper flakes, and a pinch of salt. Make sure the shrimp are well coated—it’s like giving them a tasty bath!

    Cook the Shrimp

    Now, heat a large, high-sided skillet over medium heat. Drizzle in two tablespoons of olive oil. Once it shimmers (but doesn’t sizzle!), add in your seasoned shrimp in batches. If you overcrowd the pan, they might steam instead of sauté, and we want that lovely char! Cook for about 3-4 minutes, flipping them halfway. You’ll know they’re done when they turn a beautiful pink. Remove them from the skillet and set aside.

    Prepare the Orzo

    In the same skillet, add your orzo and chicken stock. The leftover oil and flavors will add a depth that makes this dish sing! Bring it to a boil, then reduce to a simmer, covering it up. This will only take about 10 minutes. Don’t forget to stir occasionally, so it doesn’t stick to the bottom! If the orzo looks too dry, add a splash more liquid and keep going.

    Combine the Ingredients

    Once your orzo is al dente, it’s time for the magic! Stir in the halved cherry tomatoes, chopped sun-dried tomatoes, Kalamata olives, and green olives. These vibrant ingredients bring color and zest to the dish. Add the crumbled feta cheese (save some for the garnish) and pour in the lemon juice, extra virgin olive oil, smoked paprika, and Italian seasoning. Gently stir to combine, letting the flavors meld together blissfully.

    Final Touches and Serving

    Bring the skillet to low heat, stirring cautiously to avoid breaking the feta too much. Taste and season with salt and pepper to your liking. Next, add the cooked shrimp back into the skillet, heating through gently. When you’re ready to serve, sprinkle the remaining feta cheese and fresh basil on top. Enjoy this dazzling bowl of Greek goodness immediately for the best experience!

    Tips for Success

    Getting the best out of your Greek Shrimp Orzo with Feta, Olives, and Tomatoes is straightforward with a few handy tips:

    • Adjust seasonings to your family’s taste—add more spice for those who crave heat.
    • Make sure the skillet is hot enough when cooking the shrimp; this ensures a nice sear.
    • Serve immediately for the best flavor and texture; reheating can make the orzo a bit gummy.
    • Add a splash of white wine during cooking for a flavor boost!

    Equipment Needed

    Before diving into this delicious Greek Shrimp Orzo with Feta, Olives, and Tomatoes, make sure you have the following kitchen tools:

    • Large high-sided skillet
    • Mixing bowl for seasoning the shrimp
    • Measuring cups and spoons
    • Wooden spoon or spatula for stirring
    • Serving dishes or bowls

    Variations

    While I absolutely adore the classic Greek Shrimp Orzo with Feta, Olives, and Tomatoes, there are so many fun twists you can explore! Here are some variations that cater to different palates and dietary preferences:

    • Vegetarian Delight: Swap the shrimp for a mix of sautéed mushrooms and zucchini for a hearty, meatless option.
    • Spicy Kick: Add diced jalapeños or a sprinkle of cayenne pepper to the seasoning mix if you crave some heat!
    • Herby Freshness: Infuse the dish with additional herbs like dill or parsley for an herbal twist that changes the flavor profile.
    • Seafood Medley: Mix in other seafood like scallops or mussels along with shrimp for an extravagant touch that feels indulgent.
    • Quinoa Substitute: For a gluten-free option, use quinoa instead of orzo; just adjust the cooking time accordingly!

    Serving Suggestions

    To elevate your Greek Shrimp Orzo with Feta, Olives, and Tomatoes experience, consider these delightful pairings:

    • A fresh Greek salad with cucumbers, olives, and a light vinaigrette.
    • Warm, crusty bread to soak up the flavorful sauce.
    • A chilled glass of white wine or sparkling lemonade for a refreshing touch.
    • Sprinkle additional fresh herbs over the dish for a vibrant presentation.

    FAQs about Greek Shrimp Orzo with Feta, Olives, and Tomatoes

    Cooking can raise a few questions, especially with a deliciously layered dish like this Greek Shrimp Orzo with Feta, Olives, and Tomatoes. Here are some common inquiries to help guide your culinary adventure!

    Can I store leftovers of Greek Shrimp Orzo?

    Absolutely! This dish can be stored in an airtight container in the refrigerator for up to two days. Just keep in mind that the orzo may absorb some moisture, so add a splash of broth or water when reheating to keep it delightful!

    What can I use instead of shrimp?

    If shrimp isn’t your favorite, feel free to substitute it with chicken or keep the dish vegetarian by using roasted vegetables or chickpeas for protein. You can still enjoy those fantastic Greek flavors!

    How can I adjust the spiciness level?

    You can easily fine-tune the heat in this recipe. If you’re looking for more spice, add a touch more red pepper flakes or some hot sauce. For a milder dish, reduce the amount of red pepper flakes. Cooking is all about personal preference!

    Can I make this dish in advance?

    While it’s best enjoyed fresh, you can meal prep by cooking the orzo and shrimp separately. Then, mix everything just before serving. This keeps the textures perfect and the flavors intact!

    Is this dish gluten-free?

    Not with traditional orzo, which contains gluten. However, you can swap in gluten-free orzo or use quinoa for a gluten-free alternative. Just adjust the cooking times accordingly!

    These FAQs should help you navigate the ins and outs of making the best Greek Shrimp Orzo with Feta, Olives, and Tomatoes. Happy cooking!

    Final Thoughts

    Cooking this Greek Shrimp Orzo with Feta, Olives, and Tomatoes isn’t just about making dinner; it’s about crafting memories around the table. The delightful aroma filling your kitchen will draw your family in, sparking smiles and eager appetites! Every bite offers a burst of flavors, making it a scrumptious choice for anything from casual weeknight meals to special occasions. So, gather your ingredients, enjoy the cooking process, and let the Mediterranean magic unfold. I promise this dish will quickly become a family favorite that you’ll want to revisit time and again. Happy cooking, friends!


    Print

    clock clock iconcutlery cutlery iconflag flag iconfolder folder iconinstagram instagram iconpinterest pinterest iconfacebook facebook iconprint print iconsquares squares iconheart heart iconheart solid heart solid icon

    Description

    Whenever I take a whiff of a Greek-inspired dish, I can’t help but smile. There’s just something enchanting about the aroma of shrimp sizzling in olive oil, mingling with tangy feta and ripe tomatoes. This Greek Shrimp Orzo with Feta, Olives, and Tomatoes is not just a meal; it’s a celebration of flavors in a bowl. Perfect for busy moms and professionals like us, this delightful dish is quick to whip up, making dinner feel special without stealing hours of your precious time. Plus, it’s a vibrant feast for the eyes as much as it is for the taste buds!


    • 1.5 lb raw shrimp, peeled and deveined (large – about 1520 count per pound)
    • ½ teaspoon smoked paprika
    • ½ teaspoon chili powder
    • ½ teaspoon Italian seasoning
    • ½ teaspoon red pepper flakes
    • ¼ teaspoon salt to taste
    • 2 tablespoons olive oil
    • 1.5 cups orzo
    • 3 cups chicken stock (or vegetable stock or water)
    • 8 oz cherry tomatoes (red and yellow, sliced in half)
    • ⅓ cup sun-dried tomatoes in olive oil, chopped
    • ⅓ cup kalamata olives, sliced
    • ¼ cup green olives, sliced
    • 6 oz feta cheese (crumbled or diced into small cubes)
    • 3 tablespoons lemon juice (or lime juice), freshly squeezed
    • 3 tablespoons extra virgin olive oil
    • ¼ teaspoon smoked paprika
    • ¼ teaspoon Italian seasoning
    • ¼ cup fresh basil, chopped
    • Salt and pepper to taste

    1. In a large bowl, combine shrimp with seasonings (smoked paprika, chili powder, Italian seasoning, red pepper flakes, and salt). Toss to coat.
    2. Heat a large (12-inch), high-sided skillet on medium heat. Add olive oil, and ensure it’s hot but not sizzling or burning.
    3. Add shrimp in batches if needed, without overcrowding. Cook shrimp for 3-4 minutes, flipping once or twice, until pink.
    4. Remove shrimp from the skillet.
    5. In the same skillet, add orzo and chicken stock. Bring to a boil, then reduce heat and simmer, covered, for about 10 minutes (according to package instructions). Stir occasionally to avoid sticking.
    6. Check orzo texture and adjust by adding more water if necessary.
    7. Stir in halved cherry tomatoes, chopped sun-dried tomatoes, sliced Kalamata olives, and green olives.
    8. Add feta cheese (reserve ¼ cup for garnish).
    9. Stir in lemon juice, extra virgin olive oil, smoked paprika, and Italian seasoning.
    10. Reheat gently on low heat, stirring constantly. Season with salt and pepper.
    11. Add cooked shrimp back to the skillet, reheat gently if needed.
    12. When serving, top with remaining feta cheese and fresh chopped basil.

    Notes

    • Adjust seasoning according to your taste preferences.
    • You can substitute shrimp with chicken or keep it vegetarian by omitting the shrimp.
    • This dish is best served fresh but can be stored in the refrigerator for up to 2 days.
    • Prep Time: 15 minutes
    • Cook Time: 30 minutes
    • Category: Main Dish
    • Method: Stovetop
    • Cuisine: Greek

    Nutrition

    • Serving Size: 1 serving
    • Calories: 450
    • Sugar: 3g
    • Sodium: 950mg
    • Fat: 20g
    • Saturated Fat: 6g
    • Unsaturated Fat: 14g
    • Trans Fat: 0g
    • Carbohydrates: 45g
    • Fiber: 3g
    • Protein: 25g
    • Cholesterol: 220mg

    Sharing is caring!

  • Mexican Street Corn Soup

    Mexican Street Corn Soup


    Introduction to Mexican Street Corn Soup

    Let me take you on a flavor adventure with my Mexican Street Corn Soup! This dish is like a warm hug in a bowl, perfect for those busy evenings when you want something comforting yet exciting. I understand how hectic life can be, especially when you’re juggling kids, work, and everything in between. That’s why this recipe is such a gem. It combines sweet corn and tender chicken in a creamy, zesty broth that brings joy to your dinner table. Trust me; your family will be asking for seconds!

    Why You’ll Love This Mexican Street Corn Soup

    You’re going to adore this Mexican Street Corn Soup for so many reasons! First, it’s super easy to make, allowing you to whip it up in under 40 minutes after a long day. The creamy texture and delightful spice create a taste explosion that dances on your palate. Plus, it’s a one-pot wonder, which means fewer dishes to wash! Your family will savor every spoonful, making dinner a truly joyful experience.

    Ingredients for Mexican Street Corn Soup

    Here’s what you’ll need to create this delicious Mexican Street Corn Soup! Each ingredient plays a role in crafting that delightful flavor. For a creamy base, we have olive oil, which adds richness and helps sauté the veggies. Red onion brings a hint of sweetness, while jalapeño adds just the right kick. Don’t skip the garlic; it’s the aromatic powerhouse that makes everything better!

    You’ll need tender boneless, skinless chicken breasts for protein. The fire-roasted corn provides that sweet, smoky flavor we crave, and diced green chiles contribute a subtle zing. The Tajín seasoning elevates the soup with its tangy twist, and the ground cumin and chili powder add warmth and depth. Of course, a bit of salt and black pepper are essential to enhance those flavors.

    To bring it all together, we’ll use chicken stock for that comforting broth base and sour cream or Greek yogurt for a creamy finish. A sprinkle of Monterey Jack cheese adds gooey decadence, while lime juice wakes up the flavors. Finally, fresh cilantro provides a burst of freshness, and queso fresco gives a lovely topping texture.

    Don’t worry; if you’re allergic or don’t have something on hand, substitutions can be quite easy! If you’re looking to skip the chicken, try using chickpeas instead. If you want to ramp up the veggie quotient, throw in some bell peppers or zucchini. You can find the exact measurements for each ingredient at the bottom of this article, available for easy printing!

    How to Make Mexican Street Corn Soup

    Step 1: Prepare the Base

    Start by heating a tablespoon of olive oil in a large pot or Dutch oven over medium-high heat. As the oil shimmers, toss in the diced red onion and jalapeño. Sauté them for about 3-4 minutes until the onions soften and turn translucent. Can you smell that? It’s the sweet and spicy aroma wafting through your kitchen! Add the minced garlic, cooking for another 30 seconds until it becomes fragrant—and trust me, this is where the magic begins!

    Step 2: Combine Key Ingredients

    Now, let’s add the stars of our show! Place the tender chicken breasts into the pot, followed by the fire-roasted corn and diced green chiles. Sprinkle in the Tajín seasoning, ground cumin, chili powder, salt, and black pepper. You can almost feel that sizzle! Stir everything together, making sure the spices coat the chicken and corn evenly. This fusion of flavors is what makes this Mexican Street Corn Soup absolutely irresistible!

    Step 3: Simmer the Mixture

    Carefully pour in the chicken stock, bringing the mixture to a robust boil. Once boiling, reduce the heat, covering the pot to let it simmer gently for 25 minutes. As you wait, take a moment to enjoy the enticing aromas swirling through your home. It’s a savory symphony that promises comfort and warmth. This step is crucial, allowing the chicken to cook fully and the flavors to meld beautifully!

    Step 4: Shred the Chicken

    After 25 minutes, remove the chicken breasts from the pot. Using two forks works wonders here; shred the chicken into bite-sized pieces. The texture will be perfect, and you’ll want to return this shredded goodness back into the pot, ensuring every spoonful is packed with flavor.

    Step 5: Final Touches

    Let’s make this soup creamy! Stir in the sour cream or Greek yogurt along with the shredded Monterey Jack cheese. The lime juice adds a refreshing zest, and the chopped cilantro brings a vibrant pop of color. Keep it on low heat, letting it simmer for another 3 minutes. Trust me; your taste buds will thank you as the soup transforms into a creamy, dreamy delight!

    Step 6: Serve and Enjoy

    Now comes the fun part—ladling that gorgeous Mexican Street Corn Soup into bowls! Don’t forget to top it with crumbled queso fresco for an extra layer of flavor and texture. Picture this: a warm, creamy bowl brimming with colorful ingredients, drizzled with fresh lime juice. Your family will dive in with smiles, and dinner will most certainly be a hit!

    Tips for Success

    • Prep your ingredients ahead of time; it makes the cooking process smoother!
    • Adjust the jalapeño for spice; no one likes a surprise heat wave.
    • For a creamier soup, blend a portion before adding the shredded chicken.
    • Store leftovers in an airtight container; they’ll taste even better the next day.
    • Experiment with toppings like avocado or crispy tortilla strips for added crunch!

    Equipment Needed

    • Large pot or Dutch oven (any heavy-bottomed pot will do)
    • Sharp knife for chopping veggies
    • Cutting board to keep things tidy
    • Wooden spoon for stirring up all those flavors
    • Tongs or two forks for shredding the chicken

    Variations of Mexican Street Corn Soup

    • For a vegetarian twist, substitute the chicken with black beans or chickpeas. They add protein and a lovely texture!
    • Make it spicy by adding diced chipotle peppers or a dash of hot sauce along with the jalapeño.
    • Try using different types of cheese, like Oaxaca or Cotija, for unique flavor variations.
    • If you’re lactose intolerant, use dairy-free cream alternatives or omit the cheese entirely—this soup will still shine!
    • Add extra veggies, such as zucchini or bell peppers, for a boost of nutrients and color.

    Serving Suggestions

    • Pair your soup with warm, crusty bread or homemade tortillas for a delightful contrast.
    • Serve alongside a light, refreshing salad to balance the creamy texture.
    • A chilled glass of limeade or sparkling water complements the zesty flavors perfectly!
    • Garnish with extra cilantro and lime wedges for an appealing presentation.

    FAQs about Mexican Street Corn Soup

    I know you might have a few questions about this delicious Mexican Street Corn Soup, so let’s dive right in!

    Can I make Mexican Street Corn Soup ahead of time? Absolutely! This soup actually tastes even better the next day. Just store it in an airtight container and reheat on the stovetop, adding a bit of broth if it thickens.

    What if I can’t find fire-roasted corn? No worries at all! You can use fresh corn or regular frozen corn instead. The soup will still be delightful, just with a slightly different flavor.

    Can I freeze Mexican Street Corn Soup? Yes, you can freeze it! Just keep in mind that the texture of the cream may change slightly when thawed, so you might want to add a splash of broth when reheating.

    How can I adjust the spice level? Simply tweak the amount of jalapeño and Tajín seasoning according to your preference. If you crave heat, add some diced chipotle peppers too!

    Is there a way to make this soup dairy-free? Certainly! Swap out the sour cream for a dairy-free yogurt or coconut cream, and leave out the cheese. It’ll still be creamy and packed with flavor!

    Final Thoughts

    Cooking should be a joyful experience, and my Mexican Street Corn Soup brings just that to your kitchen! It’s more than just a meal; it’s a celebration of flavors and warmth shared with loved ones. The creamy texture combined with the zesty spices creates a comfort that wraps around you like a blanket.

    Whether it’s a busy weeknight or a cozy gathering, this delicious soup has you covered. So gather your ingredients, unleash your inner chef, and let the delicious aromas fill your home. Your family will feel the love in every bowl!


    Print

    clock clock iconcutlery cutlery iconflag flag iconfolder folder iconinstagram instagram iconpinterest pinterest iconfacebook facebook iconprint print iconsquares squares iconheart heart iconheart solid heart solid icon

    Description

    Let me take you on a flavor adventure with my Mexican Street Corn Soup! This dish is like a warm hug in a bowl, perfect for those busy evenings when you want something comforting yet exciting. I understand how hectic life can be, especially when you’re juggling kids, work, and everything in between. That’s why this recipe is such a gem. It combines sweet corn and tender chicken in a creamy, zesty broth that brings joy to your dinner table. Trust me; your family will be asking for seconds!


    • 1 tbsp olive oil
    • 1 small red onion, diced
    • 1 medium jalapeño, seeded and diced
    • 3 cloves garlic, minced
    • 2 (12 oz.) boneless, skinless chicken breasts
    • 1 (12 oz.) package fire-roasted frozen corn (or fresh corn)
    • 1 (4 oz.) can diced green chiles
    • 1 tbsp Tajín seasoning
    • 2 tsp ground cumin
    • 2 tsp chili powder
    • ½ tsp table salt
    • ¼ tsp finely ground black pepper
    • 4 cups (32 oz.) chicken stock or low-sodium chicken broth
    • 2 cups sour cream (full-fat) or Greek yogurt (full-fat)
    • ½ cup shredded Monterey Jack cheese
    • Juice of one lime
    • ¼ cup chopped cilantro
    • ½ cup crumbled queso fresco

    1. Heat olive oil in a large pot or Dutch oven over medium-high heat. Add the diced red onion and jalapeño, cooking until the onions soften, about 3-4 minutes. Add the minced garlic and cook for another 30 seconds until fragrant.
    2. Add the chicken breasts, fire-roasted corn, and diced green chiles to the pot. Season with Tajín, cumin, chili powder, salt, and black pepper.
    3. Pour in the chicken stock and bring the mixture to a boil. Once boiling, reduce the heat to a simmer, cover, and cook for 25 minutes, allowing the chicken to fully cook and the flavors to meld together.
    4. Remove the chicken breasts from the pot and shred them into bite-sized pieces using two forks. Return the shredded chicken to the pot.
    5. Stir in the sour cream, shredded Monterey Jack cheese, lime juice, and chopped cilantro. Let the soup simmer on low heat for another 3 minutes until everything is well combined and creamy.
    6. Ladle the soup into bowls and top with crumbled queso fresco.

    Notes

    • Adjust the spiciness by adding more or less jalapeño and Tajín seasoning.
    • This soup can be made ahead of time and reheated, adding more broth if it thickens.
    • Add more toppings like avocado or tortilla strips for extra texture.
    • Prep Time: 10 minutes
    • Cook Time: 30 minutes
    • Category: Soup
    • Method: Stovetop
    • Cuisine: Mexican

    Nutrition

    • Serving Size: 1 cup
    • Calories: 360
    • Sugar: 5g
    • Sodium: 800mg
    • Fat: 24g
    • Saturated Fat: 10g
    • Unsaturated Fat: 8g
    • Trans Fat: 0g
    • Carbohydrates: 22g
    • Fiber: 3g
    • Protein: 20g
    • Cholesterol: 75mg

    Sharing is caring!

  • Taco Spaghetti Squash Boats

    Taco Spaghetti Squash Boats


    Introduction to Taco Spaghetti Squash Boats

    Welcome, dear readers! If you’re like me, you’re always on the hunt for a quick solution to busy weeknight dinners. That’s where these delightful Taco Spaghetti Squash Boats come in! This recipe is a scrumptious way to swap out traditional tacos for a healthier twist, without sacrificing flavor. Filled with savory turkey and colorful veggies, they’re not just a feast for the taste buds but also a fun way to get the family involved in dinner prep. So grab your squash, and let’s create something delicious together!

    Why You’ll Love This Taco Spaghetti Squash Boats

    Taco Spaghetti Squash Boats are not only visually stunning but also incredibly easy to whip up on a bustling weeknight. They cut down on carbs while still satisfying your taco cravings, making them a smart choice for busy moms and health-conscious professionals alike. With the added bonus of being gluten-free, they appeal to a wide range of dietary preferences, ensuring everyone at the table is delighted!

    Ingredients for Taco Spaghetti Squash Boats

    Let’s gather the stars of our show—each ingredient plays a vital role in transforming humble spaghetti squash into a fiesta of flavors. Here’s what you’ll need:

    • Spaghetti Squash: The main vessel for our taco filling; it brings a deliciously nutty flavor and a unique texture.
    • Extra-Virgin Olive Oil: Essential for roasting the squash and sautéing the taco filling, adding richness and depth.
    • Kosher Salt: A kitchen staple for enhancing flavors; don’t skimp on it!
    • Black Pepper: A pinch adds warmth and complexity to your dish.
    • Ground Turkey (or Chicken): The lean protein base for our filling, it absorbs all the wonderful spices you’ll add.
    • Green Onions: They provide a mild onion flavor and a pop of color; the whites are cooked in the filling, while the greens serve as a fresh garnish.
    • Red Bell Pepper: Sweet and crunchy, it adds a lovely crunch and nutrients to the mix.
    • Chili Powder: This spice captures that classic taco flavor, perfect for our filling.
    • Garlic Powder: Because who doesn’t love a hint of garlic? It adds another layer of flavor.
    • Smoked Paprika: A must-have for that smoky depth; it makes such a difference!
    • Ground Cumin: Provides an earthy flavor that rounds out the taco experience.
    • Black Beans: They add creaminess, fiber, and protein. A great way to extend the filling!
    • Fire-Roasted Tomatoes: A burst of acidity and flavor; these tomatoes elevate the dish brilliantly.
    • Sharp Cheddar Cheese: This, my friends, is the gooey goodness that brings everything together.
    • Optional Toppings: Think chopped cilantro, creamy avocado, and tangy Greek yogurt or sour cream for that perfect finish.

    For exact quantities, you can find them listed at the bottom of the article, along with a handy printable version!

    How to Make Taco Spaghetti Squash Boats

    Prepare and Roast the Spaghetti Squash

    First, let’s tackle the spaghetti squash. Preheat your oven to 400 degrees F. Cut the squash in half lengthwise. Scoop out the seeds like you’re digging for treasure—you want the inside clean! Brush the cut sides with a teaspoon of olive oil and sprinkle a bit of kosher salt and black pepper for flavor.

    Place the squash halves, cut side down, on a baking sheet lined with parchment paper. Roast in the oven for 30-40 minutes, until the flesh is tender and easily shredded with a fork. When it’s done, turn the halves over and let them cool while we whip up the taco filling. Lower the oven temperature to 350 degrees F for later.

    Cook the Taco Filling

    Now for the heart of it all—the taco filling! In a large saucepan, heat 2 teaspoons of olive oil over medium heat. Add the ground turkey, chopped white parts of the green onions, and red bell pepper. Sprinkle in the chili powder, garlic powder, smoked paprika, ground cumin, kosher salt, and black pepper.

    Cook this savory mix until the turkey is no longer pink and the veggies are tender, about 8 minutes. The aroma will make your mouth water! Stir occasionally to ensure even cooking and enjoy the sights and sounds of your kitchen coming alive.

    Stir in Black Beans and Fire-Roasted Tomatoes

    Let’s add a bit of flair! Stir in the drained black beans and the can of fire-roasted diced tomatoes, juices included. Turn the heat up to high and cook for about 5 minutes. You want the mixture to thicken a bit and the flavors to meld beautifully. Stir in half a cup of the shredded cheese for that creamy richness we crave.

    Prepare the Spaghetti Squash Boats

    Grab your roasted spaghetti squash; it’s time to fluff up that delicious flesh! Use a fork to shred and fluff the insides gently. This part is fun—watch how it transforms into spaghetti-like strands. Carefully divide the taco filling evenly among the squash halves. Pack it in there; you want each bite to be full of flavor!

    Assemble and Bake

    Now we’re ready to take our boats to the next level. Place the stuffed squash halves on a baking sheet. Sprinkle the remaining cheese generously over the tops. It’s okay to be a bit heavy-handed—more cheese equals more joy, right?

    Bake in the oven at 350 degrees F for about 10 minutes or until the cheese is beautifully melted and bubbly. The anticipation is palpable, and my mouth is watering just thinking about it!

    Serve and Enjoy

    After a brief cool-down, it’s time to serve your Taco Spaghetti Squash Boats! Garnish with your favorite toppings—chopped cilantro, creamy diced avocado, or a dollop of Greek yogurt. Each bite is a delightful blend of flavors and textures.

    Gather your family around the table and watch those smiles unfold as they dig into this healthy taco masterpiece. Enjoy every delicious bite together!

    Tips for Success

    • Choose spaghetti squash that feels heavy for its size; it’ll be sweeter and tastier.
    • Don’t rush the roasting; letting it cool helps you handle it safely.
    • Experiment with spices—add your favorites to make it uniquely yours.
    • For easier cleanup, line your baking sheet with parchment paper.
    • Double the filling and save leftovers; they make a great topping for salads or wraps!

    Equipment Needed

    • Sharp Knife: Essential for cutting the spaghetti squash. A sturdy serrated knife works well, too.
    • Baking Sheet: A half-sheet pan is perfect for roasting the squash and baking the stuffed boats.
    • Large Saucepan: For cooking the taco filling. A non-stick skillet is also a great alternative.
    • Parchment Paper: Helps with easy cleanup when roasting and baking.

    Variations

    • Vegetarian Delight: Substitute ground turkey with lentils or a meat alternative for a hearty, plant-based option.
    • Spicy Kick: Add jalapeños or a dash of hot sauce to the taco filling for those who love a fiery flavor.
    • Southwestern Touch: Mix in corn or black olives into the taco filling for extra texture and flavor.
    • Cheese Lovers: Experiment with different cheeses! Try queso fresco or pepper jack for a flavorful twist.
    • Low-Carb Option: Replace spaghetti squash with zucchini boats for a lighter take on this recipe.

    Serving Suggestions for Taco Spaghetti Squash Boats

    • Fresh Salad: Pair your boats with a light side salad drizzled in lime vinaigrette for a refreshing contrast.
    • Cold Beverages: Serve with iced tea or a light margarita for a cheerful twist.
    • Presentation: Garnish with extra cilantro and avocado slices for a colorful and inviting look.
    • Crispy Tortilla Chips: Add a bowl of chips for crunch and serve with your favorite salsa.
    • Make it a Meal: Accompany with a bowl of Spanish rice to round out the feast.

    FAQs about Taco Spaghetti Squash Boats

    As you gather your ingredients and get ready to create these Taco Spaghetti Squash Boats, you may have a few questions. Don’t worry; I’ve got you covered!

    Can I prepare Taco Spaghetti Squash Boats in advance?

    Absolutely! You can make the filling ahead of time and even roast the spaghetti squash. Just assemble and bake when you’re ready to serve. It’s a game changer for busy nights!

    What can I use instead of ground turkey?

    If turkey isn’t your jam, feel free to swap it out with ground chicken or even a meat substitute like lentils. There are many delightful alternatives for a filling that everyone will love!

    How do I store leftovers?

    Leftovers can be easily stored in an airtight container in the refrigerator for up to 3 days. Reheat them in the oven or microwave for delicious meals throughout the week!

    Are Taco Spaghetti Squash Boats kid-friendly?

    Yes! Kids usually love the novelty of a “boat” filled with their favorite taco flavors. Involve them in the topping selection process for even more excitement!

    Can I freeze Taco Spaghetti Squash Boats?

    Yes, they can be frozen! But it’s best to freeze the filling separately from the squash to maintain texture. Thaw and bake when you’re ready for a quick meal.

    Final Thoughts

    Creating Taco Spaghetti Squash Boats is not just about making a meal; it’s about bringing joy into your kitchen and around the dinner table. With vibrant colors and bold flavors, these boats easily turn an ordinary night into something special. Plus, they offer a guilt-free indulgence that doesn’t compromise on taste. I know how hectic life can get, but this recipe is a delightful reminder that healthy eating can be a simple joy. So gather your loved ones, share some laughter, and savor the satisfaction of a nourishing meal. Trust me, you’ll be hooked on these delicious boats!


    Print

    clock clock iconcutlery cutlery iconflag flag iconfolder folder iconinstagram instagram iconpinterest pinterest iconfacebook facebook iconprint print iconsquares squares iconheart heart iconheart solid heart solid icon

    Description

    Welcome, dear readers! If you’re like me, you’re always on the hunt for a quick solution to busy weeknight dinners. That’s where these delightful Taco Spaghetti Squash Boats come in! This recipe is a scrumptious way to swap out traditional tacos for a healthier twist, without sacrificing flavor. Filled with savory turkey and colorful veggies, they’re not just a feast for the taste buds but also a fun way to get the family involved in dinner prep. So grab your squash, and let’s create something delicious together!


    • 3 medium-sized spaghetti squash (each around 2 pounds)
    • 3 teaspoons extra-virgin olive oil
    • 1 1/2 teaspoons kosher salt
    • 3/4 teaspoon black pepper
    • 2 teaspoons extra-virgin olive oil (for filling)
    • 1 pound ground turkey meat (93% lean or use chicken)
    • 1 bunch green onions (about 6, chopped with whites and greens separated)
    • 1 red bell pepper (seeded and chopped)
    • 1 1/2 tablespoons chili powder
    • 2 teaspoons garlic powder
    • 2 teaspoons smoked paprika
    • 1/2 tablespoon ground cumin
    • 1/2 teaspoon kosher salt
    • 1/2 teaspoon black pepper
    • 1 can black beans (15 ounces, drained and rinsed)
    • 1 can diced tomatoes, fire-roasted (14 ounces, with juices)
    • 3/4 cup sharp cheddar cheese, freshly grated (Montrey jack, cheddar jack, or pepper jack, divided)
    • For serving: chopped cilantro, diced avocado, plain Greek yogurt, or sour cream

    1. Prepare and Roast the Spaghetti Squash: Preheat the oven to 400 degrees F and roast the spaghetti squash according to your preferred recipe. Once roasted, remove from oven and let cool. Lower oven temperature to 350 degrees F for baking.
    2. Cook the Taco Filling: Heat 2 teaspoons of olive oil in a large saucepan over medium heat. Add ground turkey, white parts and half of the green parts of the green onion, bell pepper, chili powder, garlic powder, smoked paprika, cumin, salt, and black pepper. Cook until turkey is no longer pink and vegetables are tender.
    3. Stir in black beans and fire-roasted tomatoes, then increase heat to high and cook until the mixture thickens, about 5 minutes. Stir in 1/2 cup of shredded cheese.
    4. Prepare the Spaghetti Squash Boats: Use a fork to shred and fluff the spaghetti squash flesh. Divide taco filling evenly among the squash halves.
    5. Assemble and Bake: Place the stuffed squash boats on baking sheets and sprinkle remaining cheese over the tops. Bake at 350 degrees F until cheese is bubbly and melted, about 10 minutes.
    6. Serve and Enjoy: Cool slightly before serving. Garnish with desired toppings and enjoy!

    Notes

    • For a vegetarian option, substitute ground turkey with lentils or a meat substitute.
    • Feel free to customize toppings based on personal preferences.
    • Leftovers can be refrigerated and reheated for later meals.
    • Prep Time: 15 minutes
    • Cook Time: 25 minutes
    • Category: Main Course
    • Method: Baking
    • Cuisine: Mexican

    Nutrition

    • Serving Size: 1 boat
    • Calories: 350
    • Sugar: 4g
    • Sodium: 600mg
    • Fat: 15g
    • Saturated Fat: 7g
    • Unsaturated Fat: 5g
    • Trans Fat: 0g
    • Carbohydrates: 35g
    • Fiber: 8g
    • Protein: 25g
    • Cholesterol: 70mg

    Sharing is caring!

  • Maple Bourbon Baked Beans

    Maple Bourbon Baked Beans


    Introduction to Maple Bourbon Baked Beans

    As a busy mom, I often find myself searching for a dish that delights the palate without demanding hours in the kitchen. That’s where my Maple Bourbon Baked Beans come in. This flavorful delight combines sweet maple syrup, rich bourbon, and the smoky essence of bacon—perfect for impressing family and friends at gatherings or simply enjoying a cozy night at home. Imagine the warm aroma wafting through your kitchen as these beans bake to perfection. They’re not just tasty; they’re a hug in a bowl, ready to make any day a bit brighter!

    Why You’ll Love This Maple Bourbon Baked Beans

    If you’re juggling a busy day, these Maple Bourbon Baked Beans are your culinary best friend. They’re quick to prepare, requiring just 10 minutes of your time before they transform into a steaming, delicious side dish. With their perfect blend of sweet, savory, and smoky flavors, they’re bound to become a family favorite. Plus, they pair magnificently with just about anything, making mealtime stress a thing of the past!

    Ingredients for Maple Bourbon Baked Beans

    Gathering the right ingredients is half the fun of cooking, especially when it comes to my beloved Maple Bourbon Baked Beans. Here’s what you’ll need:

    • Baked Beans: Start with a high-quality canned baked bean variety where beans are the first ingredient. It ensures a rich, hearty base.
    • Real Grade A Maple Syrup: This adds that lovely sweetness. Trust me, skip the imitation stuff; your taste buds will thank you!
    • Mid-Shelf Bourbon: For you bourbon lovers, a little booze elevates the flavor profile. If you prefer a non-alcoholic option, substitute with apple cider vinegar for some tang.
    • High-Quality Ketchup: A necessity for richness, a good ketchup enhances your beans. Look for ones with minimal additives.
    • Yellow or Dijon Mustard: This adds a zesty note that perfectly balances the sweetness of maple.
    • Onion: A diced small onion brings flavor and sweetness as it caramelizes during baking.
    • Bacon: Smoky, crispy bacon is the star in this dish, giving it that irresistible twist. Want a vegetarian version? Just omit it!
    • Salt and Black Pepper: Essential for seasoning and enhancing the dish. Adjust to your taste!

    For exact measurements, you’ll find them at the bottom of the article, ready for you to print and keep in your recipe collection!

    How to Make Maple Bourbon Baked Beans

    Making Maple Bourbon Baked Beans is a breeze! Just follow these simple steps, and you’ll have a dish that brings everyone to the table. Let’s dive in and enjoy this savory creation together!

    Preheat the Oven

    First things first, preheat your oven to 350°F. This ensures that your beans start baking right at that golden temperature. A warm oven is key for that perfect caramelization you’ll love.

    Cook the Bacon

    Next, grab your bacon. In a skillet over medium heat, cook the bacon slices until they’re crispy. Ah, the sizzle! It’s music to my ears. Crumble the cooked bacon into small pieces and set aside a bit of the rendered fat in the pan. It’ll add incredible flavor to your dish!

    Mix the Ingredients

    Now, in your prepared baking dish, add the can of baked beans as your sturdy base. Pour in the maple syrup, bourbon, ketchup, and mustard. Add the diced onion and half of your crumbled bacon. Mix everything together until well combined. This is where the magic starts to happen! The maple syrup and bourbon blend beautifully with the beans.

    Season to Taste

    Now it’s time to taste! Add salt and freshly ground black pepper to your mixture. Remember, seasoning enhances flavors, so don’t hold back! If it tastes good now, it’ll taste even better after baking.

    Bake the Dish

    Scatter the remaining bacon pieces on top. Now place your dish in the center of the preheated oven. Bake for 45–50 minutes. It’s worth checking around the 40-minute mark. You’re looking for those lovely bubbles at the edges and a slightly caramelized top—pure bliss!

    Allow to Rest

    Once baked to perfection, let your beans rest for about 5 minutes. This gives everything a moment to settle. Besides, who doesn’t enjoy a little anticipation before digging in? Trust me, it’ll be worth the wait!

    Tips for Success

    • Use a wide baking dish for even caramelization—it really makes a difference!
    • Don’t skip resting the beans after baking; it helps the flavors marry beautifully.
    • Feel free to adjust the sweetness by adding more or less maple syrup.
    • If you’re opting for a vegetarian version, smoked paprika can mimic that bacon essence!
    • For an extra kick, throw in some cayenne pepper or red pepper flakes!

    Equipment Needed

    • Baking Dish: A 9×13-inch or similar size works wonders; a cast iron skillet can be used too!
    • Skillet: For cooking bacon, any medium-sized skillet gets the job done.
    • Mixing Spoon: A sturdy spoon to combine all those delicious ingredients.
    • Measuring Cups: Handy for measuring ingredients accurately—use dry measuring cups for syrup and ketchup.

    Variations of Maple Bourbon Baked Beans

    • Spicy Maple Bourbon Baked Beans: Add chopped jalapeños or a few dashes of hot sauce for an extra kick.
    • Sweet and Smoky: Incorporate smoked paprika or chipotle powder to enhance that smoky flavor without bacon.
    • Vegetable Medley: Toss in diced bell peppers and celery for added texture and nutrition—great for making your beans more colorful!
    • Maple Bourbon Vegan Beans: Swap maple syrup with agave nectar and use liquid smoke instead of bacon for a deeper flavor profile.
    • Maple Mustard Baked Beans: Experiment by doubling the mustard for a sharper taste that complements the sweetness of maple.

    Serving Suggestions for Maple Bourbon Baked Beans

    • Pair with grilled chicken or ribs for a hearty meal that’ll impress your guests.
    • Serve alongside cornbread for a classic Southern touch that complements the sweetness.
    • For a refreshing drink, try a fruity iced tea or a light lager beer.
    • Garnish with fresh parsley or chives for a pop of color when serving.
    • Use rustic bowls for a warm, homey presentation that invites everyone to dig in!

    FAQs about Maple Bourbon Baked Beans

    Can I make Maple Bourbon Baked Beans ahead of time?

    Absolutely! You can prepare the beans a day in advance and refrigerate them. Just reheat in the oven before serving. The flavors will deepen overnight!

    What can I substitute if I don’t have bourbon?

    If you’re out of bourbon, try using apple cider vinegar for a tangy kick. For a milder flavor, you can also use chicken or vegetable broth with a splash of vanilla extract.

    Are these Maple Bourbon Baked Beans gluten-free?

    Yes, this recipe is naturally gluten-free! Just double-check your ketchup and bourbon labels for any hidden gluten. It’s a great option for those with dietary restrictions.

    How do I store leftovers?

    Store any leftovers in an airtight container in the fridge for up to 5 days. They’re perfect for quick reheats on busy weekdays!

    Can I freeze Maple Bourbon Baked Beans?

    You sure can! Let the beans cool completely before transferring them to a freezer-safe container. They can be frozen for up to 3 months. Just thaw and reheat when you’re ready to enjoy!

    Final Thoughts

    As the delightful aroma of Maple Bourbon Baked Beans fills your home, I hope you feel that warm embrace of comfort food. This recipe isn’t just about satisfying hunger; it’s about family gatherings, laughter, and creating memories around the dinner table. Every spoonful is a celebration of sweet and smoky flavors that brings joy to even the busiest of days. I can’t wait for you to experience the hugs in a bowl that these beans offer. So, grab your apron, gather your loved ones, and savor the moments that matter. Happy cooking!


    Print

    clock clock iconcutlery cutlery iconflag flag iconfolder folder iconinstagram instagram iconpinterest pinterest iconfacebook facebook iconprint print iconsquares squares iconheart heart iconheart solid heart solid icon

    Description

    Maple Bourbon Baked Beans combine the sweetness of maple syrup with the depth of bourbon and the smokiness of bacon, creating a flavorful dish perfect for any occasion.


    • 1 can (28 oz) baked beans, beans listed as the first ingredient
    • 1/4 cup real Grade A maple syrup
    • 2 tablespoons mid-shelf bourbon
    • 2 tablespoons high-quality ketchup
    • 1 tablespoon yellow or Dijon mustard
    • 1 small onion, diced
    • 4 slices bacon, cooked and crumbled, with reserved fat
    • Salt and black pepper to taste

    1. Preheat oven to 350°F. Select a wide, shallow baking dish to maximize surface area and promote even caramelization.
    2. Cook bacon slices until crisp and crumble into small pieces, reserving a portion of the rendered bacon fat for added flavor.
    3. In the prepared baking dish, add baked beans, maple syrup, bourbon, ketchup, mustard, diced onion, and half of the crumbled bacon.
    4. Thoroughly mix ingredients until evenly combined. Taste and season with salt and freshly ground black pepper, recognizing seasoning may intensify during baking.
    5. Scatter the remaining bacon pieces over the surface. Bake in the center of the oven for 45–50 minutes, or until bubbling at the edges and the top is lightly caramelized, checking at 40 minutes for doneness.
    6. Allow beans to rest 5 minutes before serving to moderate temperature and allow flavors to settle.

    Notes

    • For a vegetarian version, omit the bacon.
    • Adjust the sweetness by adding more or less maple syrup according to your preference.
    • For a spicier flavor, consider adding a pinch of cayenne pepper or red pepper flakes.
    • Prep Time: 10 minutes
    • Cook Time: 50 minutes
    • Category: Side Dish
    • Method: Baking
    • Cuisine: American

    Nutrition

    • Serving Size: 1/2 cup
    • Calories: 250
    • Sugar: 10g
    • Sodium: 600mg
    • Fat: 10g
    • Saturated Fat: 3g
    • Unsaturated Fat: 7g
    • Trans Fat: 0g
    • Carbohydrates: 36g
    • Fiber: 5g
    • Protein: 8g
    • Cholesterol: 15mg

    Sharing is caring!

  • Creamy Pan Fried Chicken

    Creamy Pan Fried Chicken


    Introduction to Creamy Pan Fried Chicken

    If you’re like me, your weeknight dinners often feel like running a marathon. That’s why I adore my Creamy Pan Fried Chicken. It’s a dish that feels gourmet but comes together in just 35 minutes! Tender chicken breasts, coated in a crispy flour mixture, swimming in a rich, creamy gravy—what’s not to love?

    It’s a quick solution for busy evenings and guaranteed to impress your family. Picture this: you, kicking back after a long day, while this delightful dinner does all the talking at your table. Trust me; your loved ones will savor every bite!

    Why You’ll Love This Creamy Pan Fried Chicken

    This Creamy Pan Fried Chicken is not just delicious; it’s also a lifesaver during those hectic weeknights. With minimal prep time and simple ingredients, it gets dinner on the table in a flash. Plus, the combination of crispy chicken and smooth gravy is pure comfort food. It easily satisfies those picky eaters, making it a hit for everyone in the family.

    Ingredients for Creamy Pan Fried Chicken

    This delightful dish comes together with just a few key ingredients, ensuring you have everything you need right in your kitchen. Here’s what you’ll use:

    • Chicken breast: Butterflied to create thinner pieces, ensuring rapid cooking and juiciness.
    • All-purpose flour: Coating for that perfect crispy crust. You could also try gluten-free flour for a gluten-free option.
    • Butter and olive oil: A heavenly combo for frying, adding rich flavor and helping the chicken brown beautifully.
    • Salt, pepper, and garlic powder: Basic seasonings that work wonders, enhancing the taste of the chicken.
    • Minced garlic: Fresh garlic brings out a robust flavor in the gravy, giving it depth.
    • Chicken broth: The base of your creamy gravy, adding a savory punch.
    • Heavy whipping cream: This transforms your ordinary gravy into a luscious, creamy delight.
    • Smoked paprika and onion powder: Additional spices that infuse flavor and warmth into the dish.

    For those wanting to elevate the flavor even more, consider marinating the chicken in buttermilk prior to cooking. It’ll tenderize the meat while adding a delightful tang! Remember, exact measurements and tips are at the bottom of the article and available for printing.

    How to Make Creamy Pan Fried Chicken

    Making this scrumptious Creamy Pan Fried Chicken is as easy as pie! Follow these simple steps, and you’ll have a delightful dinner ready in no time.

    Step 1: Prepare the Chicken

    Start by butterflying your chicken breasts. This means slicing them horizontally to create thinner, even pieces. It’s a quick trick that helps them cook faster and stay juicy. Season both sides generously with salt, pepper, and garlic powder. Let them sit for a few minutes; this helps the flavors really penetrate.

    Step 2: Season the Flour

    In a shallow dish, combine your cup of all-purpose flour with salt, pepper, and a dash of garlic powder. This seasoned flour mix is the key to that irresistible crispy coating. Don’t be shy—seasoning is your friend here, so adjust to your liking.

    Step 3: Dredge the Chicken

    Now comes the fun part! Take each piece of the seasoned chicken and dredge it in the flour mixture. Make sure both sides are coated, ensuring that perfect crunch when you fry it.

    Step 4: Fry the Chicken

    In a large skillet, heat butter and olive oil over medium heat. The mixture should be bubbly and hot, ready to fry. Place each chicken piece in the pan, cooking for about 5-7 minutes per side. Keep an eye on them! You want a beautiful golden brown crust. Use a meat thermometer if you have one; the internal temperature should reach 165°F for safety.

    Step 5: Make the Gravy

    Once the chicken is perfectly fried and set aside, it’s time to create that creamy gravy. In the same hot skillet, toss in your minced garlic along with 2 tablespoons of flour, stirring continuously for about a minute. This forms a flavorful paste. Gradually whisk in chicken broth, followed by the heavy cream. Stir constantly to avoid lumps. Add your seasonings—salt, pepper, garlic powder, smoked paprika, and onion powder. Stir until it’s smooth and creamy; this takes about 2-3 minutes.

    Step 6: Combine and Serve

    Return the crispy chicken to the skillet, coating it in that luscious gravy. If you prefer, pour the gravy over the chicken on your serving plate. This dish is best enjoyed hot, so serve immediately over mashed potatoes or a fluffy bed of rice. Your family will thank you!

    Tips for Success

    • Always use a meat thermometer to check the chicken’s doneness. It should reach 165°F.
    • For extra flavor, let the seasoned chicken rest for 10-15 minutes before dredging it in flour.
    • For a gluten-free option, substitute regular flour with gluten-free flour or almond flour.
    • Adjust seasoning to suit your palate—don’t be afraid to get creative!
    • Keep an eye on the heat to prevent burning the flour in the skillet.

    Equipment Needed for Creamy Pan Fried Chicken

    • Large skillet: A non-stick or cast-iron skillet works wonders for frying.
    • Meat thermometer: Ensures chicken is cooked perfectly; a knife can work in a pinch to check for doneness.
    • Shallow dish: Ideal for mixing flour and seasoning; any plate will do.
    • Whisk: Perfect for combining gravy ingredients; a fork will suffice in a hurry.

    Variations of Creamy Pan Fried Chicken

    • Lemon Herb Chicken: Add lemon zest and fresh herbs such as thyme or rosemary to the flour for a bright twist.
    • Spicy Chicken: Mix chili powder or cayenne pepper into the seasoning for a kick, perfect for spice lovers.
    • Mushroom Gravy: Sauté sliced mushrooms with the garlic before adding flour and the rest of the gravy ingredients for a savory addition.
    • Cauliflower Rice: Serve the chicken over cauliflower rice instead of traditional rice for a low-carb option.
    • Vegetarian Delight: Substitute chicken with firm tofu or tempeh, following the same steps for a plant-based version.

    Serving Suggestions for Creamy Pan Fried Chicken

    • Mashed Potatoes: The classic companion! Creamy mashed potatoes soak up that gravy beautifully.
    • Steamed Vegetables: Brighten your plate with vibrant broccoli or green beans for a pop of color.
    • Fresh Salad: A crisp, green salad with a light vinaigrette balances the richness of the dish.
    • Red Wine: Pair with a glass of merlot or pinot noir for a delightful dinner experience.
    • Presentation: Garnish with fresh parsley or chives for an elegant touch before serving.

    FAQs about Creamy Pan Fried Chicken

    Can I use frozen chicken breasts for this recipe?

    While fresh chicken works best, frozen chicken breasts can be used. Just make sure to fully thaw them first for even cooking. Cooking time may vary slightly with frozen meat.

    What can I substitute for heavy whipping cream?

    If you’re looking for a lighter option, you can use half-and-half or whole milk mixed with a bit of cornstarch to thicken it. For dairy-free alternatives, try coconut cream or cashew cream instead.

    Is Creamy Pan Fried Chicken gluten-free?

    This recipe can easily be made gluten-free. Simply substitute all-purpose flour with a gluten-free flour blend or almond flour when coating the chicken.

    How do I store leftovers?

    Store any leftover Creamy Pan Fried Chicken in an airtight container in the fridge for up to three days. To reheat, warm it gently in a skillet over low heat, adding a splash of cream if the gravy has thickened.

    Can I make the gravy without chicken broth?

    Absolutely! You can use vegetable broth or even water if you want a lighter gravy. Just be sure to adjust the seasonings for the best flavor.

    Final Thoughts

    Cooking should be a celebration, especially when you whip up a dish like Creamy Pan Fried Chicken. It brings a sense of joy, warmth, and satisfaction to the dinner table. I find that the rich flavors and crispy textures create lasting memories, whether I’m serving it on a hectic weeknight or during a cozy family gathering. This recipe not only simplifies my busy evenings, but it also gives me immense pleasure to see smiles as everyone dives in for more. Give it a try, and experience that delightful moment yourself!


    Print

    clock clock iconcutlery cutlery iconflag flag iconfolder folder iconinstagram instagram iconpinterest pinterest iconfacebook facebook iconprint print iconsquares squares iconheart heart iconheart solid heart solid icon

    Description

    Creamy Pan Fried Chicken is a delightful dish where tender chicken breasts are coated in seasoned flour and fried until golden brown, then served with a rich, creamy gravy.


    • 1 lb chicken breast, butterflied
    • 1 cup all-purpose flour
    • 2 tablespoons butter
    • 2 tablespoons olive oil
    • Salt, pepper, and garlic powder for seasoning
    • 2 tablespoons minced garlic
    • 2 tablespoons all-purpose flour (for gravy)
    • 1 cup chicken broth
    • 1 cup heavy whipping cream
    • ½ teaspoon salt (for gravy)
    • ½ teaspoon black pepper (for gravy)
    • 1 teaspoon garlic powder (for gravy)
    • 1 teaspoon smoked paprika
    • 1 teaspoon onion powder

    1. Butterfly cut the chicken breasts to create thinner, even pieces that cook faster. Season both sides generously with salt, pepper, and garlic powder. Let them sit for a few minutes to absorb the seasoning.
    2. In a shallow dish, combine 1 cup of flour with additional salt, pepper, and garlic powder to taste.
    3. Dredge each piece of chicken in the seasoned flour mixture, coating both sides well.
    4. Heat butter and olive oil in a large skillet over medium heat. Fry the chicken for 5-7 minutes per side until golden brown and internal temperature reaches 165°F.
    5. Once the chicken is fully cooked and crispy, remove it from the skillet and set aside on a plate.
    6. In the same hot skillet, add minced garlic and 2 tablespoons of flour. Stir continuously for about 1 minute until it forms a paste.
    7. Gradually whisk in chicken broth, then heavy cream, stirring constantly to prevent lumps.
    8. Add salt, pepper, garlic powder, smoked paprika, and onion powder to the gravy. Stir until smooth and creamy, about 2-3 minutes.
    9. Return chicken to the skillet or pour gravy over the chicken and serve immediately over mashed potatoes or rice.

    Notes

    • For extra flavor, marinate chicken in buttermilk for a few hours before cooking.
    • Make sure to adjust seasoning according to your taste preference.
    • Prep Time: 15 minutes
    • Cook Time: 20 minutes
    • Category: Dinner
    • Method: Pan Frying
    • Cuisine: American

    Nutrition

    • Serving Size: 1 serving
    • Calories: 450
    • Sugar: 2g
    • Sodium: 800mg
    • Fat: 30g
    • Saturated Fat: 15g
    • Unsaturated Fat: 10g
    • Trans Fat: 0g
    • Carbohydrates: 25g
    • Fiber: 1g
    • Protein: 30g
    • Cholesterol: 100mg

    Sharing is caring!

  • Slow Cooker Pork Chops and Sweet Potatoes

    Slow Cooker Pork Chops and Sweet Potatoes


    Introduction to Slow Cooker Pork Chops and Sweet Potatoes

    As a busy mom, I know how important it is to have go-to recipes that deliver comfort without the fuss.
    That’s why I’m excited to share my Slow Cooker Pork Chops and Sweet Potatoes with you!
    This dish is not just about tender, juicy pork; it’s about creating a moment of warmth and connection at the dinner table.
    With minimal prep and the ability to cook while you tackle other tasks, it’s the perfect solution for hectic days.
    So, let’s dive into this heartwarming recipe that’s bound to impress your loved ones!

    Why You’ll Love This Slow Cooker Pork Chops and Sweet Potatoes

    This Slow Cooker Pork Chops and Sweet Potatoes recipe is a game changer for busy lives.
    The ease of throwing everything in the slow cooker means less time in the kitchen.
    What’s more, the flavors meld wonderfully, creating a dish that’s both savory and sweet.
    In just a few hours, you’ll have a nutritious and delicious meal ready, leaving you to focus on what truly matters.
    Trust me; your taste buds will thank you!

    Ingredients for Slow Cooker Pork Chops and Sweet Potatoes

    Gathering the ingredients for my Slow Cooker Pork Chops and Sweet Potatoes is part of the fun!
    This dish is simple, yet every ingredient plays a role in creating that comforting flavor.
    Here’s what you’ll need:

    • Boneless Pork Chops: Tender and juicy, they soak up the rich flavors. Look for chops that are about an inch thick for best results.
    • Sweet Potatoes: These add a natural sweetness and a beautiful color. Peel and cut them into chunks for even cooking.
    • Onion: The savory flavor of onion enhances the dish so well. Slicing it thinly lets it meld beautifully with the other ingredients.
    • Olive Oil: A drizzle of this magic oil adds richness. It’s also great for searing if you choose to go that route.
    • Chicken Broth: Use low-sodium broth for a deeper flavor without overwhelming saltiness. It keeps everything moist during cooking.
    • Maple Syrup or Brown Sugar: This sweetener balances the savory tones. Pick one based on your preference for either natural sweetness or a comforting caramel flavor.
    • Dijon Mustard: Provides a tangy twist that complements the pork perfectly. It’s a little secret that elevates the sauce!
    • Soy Sauce: Just a splash adds umami depth. If sodium is a concern, go for low-sodium versions.
    • Garlic Powder: A must-have for that aromatic touch. It brings a mild yet robust flavor.
    • Cinnamon: This optional spice adds warmth. Its fragrant notes pair surprisingly well with the sweetness of the potatoes.
    • Dried Thyme or Rosemary: Both herbs add a lovely earthy flavor. Choose the one you love best, or even mix them!
    • Salt and Pepper: Simple yet essential for seasoning. Adjust to your taste as everything cooks together.
    • Optional Garnish: Fresh parsley or green onions make for vibrant finishing touches. They also add a crisp bite.

    The exact measurements can be found at the bottom of the article for printing ease.
    Gather these ingredients, and let’s get cooking!

    How to Make Slow Cooker Pork Chops and Sweet Potatoes

    The process of making my Slow Cooker Pork Chops and Sweet Potatoes is as easy as pie!
    With every step, you’ll see how simple it is to create a heartwarming meal.
    Now, let’s break down the steps you’ll take to prepare this delicious dish.

    Step 1: Sear the Pork Chops (Optional)

    To kick things off, you can opt to sear the pork chops for added flavor.
    Heat a tablespoon of olive oil in a skillet over medium-high heat.
    Season both sides of each chop with salt and pepper.
    Sear them for about 2-3 minutes per side until you see a lovely golden-brown crust.
    This step enhances the flavor and locks in moisture, making each bite even more delightful.
    But if you’re short on time, feel free to skip this step!

    Step 2: Prepare the Sweet Potatoes

    Next up, it’s time to tackle those sweet potatoes!
    Peel them carefully to reveal their bright orange goodness.
    Cut them into 1-inch chunks, ensuring they are roughly the same size for even cooking.
    Once chopped, place these sweet potato pieces right at the bottom of the greased slow cooker.
    Add the sliced onion on top to create a foundation of flavor.

    Step 3: Make the Sauce

    Now let’s whip up the sauce that makes this dish sing!
    In a small bowl, combine the chicken broth, maple syrup or brown sugar, Dijon mustard, soy sauce, garlic powder, and optional cinnamon and herbs.
    Whisk everything together until it’s well mixed and smooth.
    This sauce is the heart of the recipe, adding layers of flavor that both blend and elevate the whole dish.

    Step 4: Layer in the Slow Cooker

    It’s time to bring everything together!
    If you seared the pork chops, nestle them on top of the sweet potato and onion layer.
    If you skipped searing, simply place the raw pork chops on top.
    Next, pour that delightful sauce evenly over everything, ensuring all your ingredients get a taste of the magic!
    It’s like a flavor hug for your slow cooker.

    Step 5: Cook

    Now for the waiting game—believe me, it’s worth it!
    Cover your slow cooker and set it to cook on LOW for about 6-7 hours or HIGH for 3-4 hours.
    You’ll know it’s ready when the pork chops are fork-tender and the sweet potatoes are soft but not mushy.
    Use a meat thermometer if you have one, aiming for an internal temperature of 145°F for the pork chops!

    Step 6: Serve

    Finally, the moment of truth!
    Spoon those sweet potatoes onto dinner plates first, creating a beautiful bed for the pork chop.
    Place a chop on top, and don’t forget to drizzle some of that rich sauce over everything.
    For that extra pop, garnish with chopped parsley or green onions for a fresh touch.
    Trust me, your family will be singing your praises with every bite!

    Tips for Success

    • Don’t skip the searing! It adds a fabulous depth of flavor.
    • Choose sweet potatoes that are firm, with no bruises or cracks.
    • Feel free to adjust spices according to your family’s taste.
    • For easier cleanup, consider using a slow cooker liner.
    • Make it a meal—pair with steamed veggies or a nice salad!

    Equipment Needed for Slow Cooker Pork Chops and Sweet Potatoes

    • Slow Cooker: Essential for this recipe; a round or oval shape works great.
    • Skillet: For searing, a non-stick or cast-iron skillet is perfect, though optional.
    • Cutting Board and Knife: Needed to chop your sweet potatoes and onion.
    • Whisk: Handy for mixing your sauce ingredients seamlessly.
    • Meat Thermometer: Useful to ensure your pork chops are cooked to perfection!

    Variations for Slow Cooker Pork Chops and Sweet Potatoes

    • Add Veggies: Toss in some carrots or green beans for added color and nutrition.
    • Swap the Protein: Try chicken thighs or turkey cutlets instead of pork chops for a different twist.
    • Spice it Up: Add a pinch of red pepper flakes or a splash of hot sauce for a spicy kick.
    • Change the Sweetener: Use honey or agave syrup instead of maple syrup for a unique sweetness.
    • Herb Adaptation: Experiment with fresh herbs like rosemary or sage for a fragrant twist.

    Serving Suggestions for Slow Cooker Pork Chops and Sweet Potatoes

    • Steamed Broccoli: Bright green broccoli adds color and nutrition to your plate.
    • Fresh Salad: A crisp green salad is a light and refreshing contrast to the hearty dish.
    • Red Wine: Pair with a glass of red wine for a lovely dinner experience.
    • Presentation: Serve family-style for a warm gathering or plate individually for a more formal touch.

    FAQs about Slow Cooker Pork Chops and Sweet Potatoes

    I often get questions about my Slow Cooker Pork Chops and Sweet Potatoes, so let me address a few common ones.
    These answers might help you navigate your cooking journey with this delicious recipe!

    Can I use frozen pork chops for this recipe?
    Yes, you can! Just make sure to adjust the cooking time, keeping an eye on the tenderness of the pork.
    Frozen chops may take about 1–2 hours longer to cook to perfection.

    Can I prep this dish the night before?
    Absolutely! You can prepare everything in the slow cooker the night before and refrigerate it.
    Just plug it in the next day and let it cook while you handle your morning routines.

    What can I use instead of sweet potatoes?
    If sweet potatoes aren’t your thing, feel free to swap them out for regular potatoes, carrots, or even parsnips.
    These veggies will still absorb all that wonderful sauce!

    How can I thicken the sauce if it’s too thin?
    You can mix a tablespoon of cornstarch with cold water to create a slurry.
    Add it to the slow cooker during the last 30 minutes of cooking for a thicker consistency.

    How can I store leftovers?
    Leftover pork chops and sweet potatoes can be stored in an airtight container in the fridge for up to 3 days.
    Reheat gently in the microwave or on the stove, adding a splash of broth if needed to refresh the dish.

    Final Thoughts on Slow Cooker Pork Chops and Sweet Potatoes

    Creating my Slow Cooker Pork Chops and Sweet Potatoes is more than just a meal—it’s an experience.
    The aroma that fills your kitchen as it cooks sets the stage for good memories, laughter, and family bonding.
    Each bite is like a warm hug, offering that perfect blend of savory and sweet.
    Plus, knowing that you didn’t have to spend hours in the kitchen is a delightful bonus!
    Whether it’s a busy weeknight or a family gathering, this recipe transforms everyday moments into lasting memories.
    I can’t wait for you to enjoy it as much as I do!


    Print

    clock clock iconcutlery cutlery iconflag flag iconfolder folder iconinstagram instagram iconpinterest pinterest iconfacebook facebook iconprint print iconsquares squares iconheart heart iconheart solid heart solid icon

    Description

    A delicious slow cooker recipe featuring tender pork chops and sweet potatoes, perfect for a comforting meal.


    • 4 boneless pork chops (about 1 inch thick)
    • 3 large sweet potatoes, peeled and sliced into 1-inch chunks
    • 1 medium onion, sliced
    • 2 tablespoons olive oil
    • ¾ cup chicken broth
    • 2 tablespoons maple syrup or brown sugar
    • 1 tablespoon Dijon mustard
    • 1 tablespoon soy sauce
    • 1 teaspoon garlic powder
    • ½ teaspoon cinnamon (optional)
    • ½ teaspoon dried thyme or rosemary
    • Salt and pepper, to taste
    • Optional garnish: chopped parsley or green onions

    1. Sear the Pork Chops (Optional): Heat olive oil in a skillet over medium-high heat. Season pork chops with salt and pepper. Sear each chop for 2–3 minutes per side until lightly golden.
    2. Prepare the Sweet Potatoes: Peel and cut sweet potatoes into chunks. Add them to the bottom of your greased slow cooker along with the sliced onions.
    3. Make the Sauce: In a small bowl, whisk together chicken broth, maple syrup (or brown sugar), Dijon mustard, soy sauce, garlic powder, cinnamon, and herbs.
    4. Layer in the Slow Cooker: Place seared (or raw) pork chops on top of the sweet potatoes. Pour the sauce evenly over everything.
    5. Cook: Cover and cook on LOW for 6–7 hours or HIGH for 3–4 hours, until pork chops are fork-tender and sweet potatoes are soft but not mushy.
    6. Serve: Spoon sweet potatoes onto plates, place a pork chop on top, and drizzle with sauce from the slow cooker. Garnish with parsley or green onions if desired.

    Notes

    • Searing the pork chops is optional but adds flavor.
    • Adjust the amount of maple syrup or brown sugar according to your sweetness preference.
    • This dish can be easily doubled for larger gatherings.
    • Prep Time: 20 minutes
    • Cook Time: 6-7 hours on LOW or 3-4 hours on HIGH
    • Category: Main Course
    • Method: Slow Cooking
    • Cuisine: American

    Nutrition

    • Serving Size: 1 pork chop with sweet potatoes
    • Calories: 360
    • Sugar: 10g
    • Sodium: 800mg
    • Fat: 15g
    • Saturated Fat: 3g
    • Unsaturated Fat: 9g
    • Trans Fat: 0g
    • Carbohydrates: 34g
    • Fiber: 5g
    • Protein: 25g
    • Cholesterol: 75mg

    Sharing is caring!

  • Italian Herb and Cheese Bread

    Italian Herb and Cheese Bread


    Introduction to Italian Herb and Cheese Bread

    As a busy mom, I know how hectic life can get. Between juggling work, kids, and everything in between, finding time to whip up something delicious can feel like a real challenge. That’s why I’m excited to share my recipe for Italian Herb and Cheese Bread. This bread is not only quick and easy to make, but it’s bursting with flavor and will impress your loved ones. Just imagine pulling warm, cheesy loaves out of the oven—it’s not just a feast for the stomach but a warm hug for the soul. Let’s dive in!

    Why You’ll Love This Italian Herb and Cheese Bread

    This Italian Herb and Cheese Bread is a dream come true for busy households. It’s a simple recipe that delivers exceptional taste without requiring hours in the kitchen. The delightful blend of herbs and cheeses creates a mouthwatering aroma that’ll have everyone gathering around. Plus, your family will love how soft and savory each slice is. Trust me, this bread will soon become a staple on your dinner table!

    Ingredients for Italian Herb and Cheese Bread

    Gathering the right ingredients is the first step in crafting your delicious Italian Herb and Cheese Bread. Here’s what you’ll need:

    • Warm water: This helps activate the yeast, kickstarting your bread journey.
    • Yeast: Instant or active dry varieties are both great for making the dough rise.
    • Sugar: Just a touch to feed the yeast, ensuring a fluffy texture.
    • Vegetable or avocado oil: This adds moisture and richness to the bread.
    • Fine salt: Essential for flavor; it balances the sweetness from sugar.
    • Large egg: This provides richness and helps with the bread’s structure.
    • Dried potato flakes: An optional ingredient that boosts softness and texture.
    • Bread flour or all-purpose flour: The backbone of your bread; choose based on availability and preference.
    • Monterey Jack cheese: Adds creaminess and a mild flavor.
    • Sharp cheddar cheese: Offers a delicious tang and depth of flavor.
    • Parmesan cheese: A little sprinkle gives a nutty finish.
    • Garlic powder: Fantastic for adding a savory kick without the fuss of chopping.
    • Dried oregano and parsley: These herbs lend an aromatic touch, bringing Italy to your kitchen.

    If you’re curious about exact measurements, don’t worry! Those details are conveniently located at the bottom of this article for easy printing. With these ingredients, you’re well on your way to baking up some incredible Italian Herb and Cheese Bread!

    How to Make Italian Herb and Cheese Bread

    Making this Italian Herb and Cheese Bread is a rewarding adventure that comes with aromatic moments and fluffy results. Let’s walk through the steps together!

    Step 1: Activate the Yeast

    Start by combining warm water, yeast, and sugar in a bowl or the bowl of your stand mixer. Give it a gentle stir and let it sit for about 5 to 10 minutes. You want it to become foamy, which means your yeast is happy and ready to work its magic!

    Step 2: Combine Ingredients

    Once your yeast mixture is bubbly, it’s time to add in the oil, fine salt, egg, and optional potato flakes. Then, toss in the flour. Mix everything on low with a dough hook until it comes together. This is where the fun starts, and your kitchen begins to smell amazing!

    Step 3: Knead the Dough

    Increase the mixer speed to medium and let it knead for about 6 to 8 minutes. The dough should become smooth and slightly tacky. If it’s too sticky, sprinkle a tiny bit of flour. Remember, kneading is like giving the dough a little workout—this will help it rise beautifully!

    Step 4: First Rise

    Transfer your dough to a greased bowl and cover it with a towel. Now comes the hardest part—waiting! Allow it to rise in a warm area for about an hour or until it doubles in size. This is when the magic of bread-making happens!

    Step 5: Prepare Herb and Cheese Mixture

    While the dough is rising, mix the garlic powder, dried oregano, and dried parsley in one bowl. In another bowl, combine the shredded Monterey Jack, sharp cheddar, and grated Parmesan. These flavors will make your bread sing!

    Step 6: Shape the Loaves

    Once the dough has risen, punch it down gently to release some air. Divide the dough into four equal portions and roll each piece into a log about 10 to 12 inches long. Place the shaped loaves on a parchment-lined baking sheet. They’re starting to look like bread now!

    Step 7: Second Proof

    Cover your loaves with a towel again and let them proof for another 20 to 30 minutes. You want them to look slightly puffy. Patience is key, but trust me, the results will be worth it!

    Step 8: Add Toppings

    Here’s where you can get creative! Lightly brush the tops of the loaves with water or oil, which helps the toppings stick. First, sprinkle the herb mixture evenly on top, followed by the cheese blend. Press them down gently to ensure they adhere. This step adds not just flavor but also a delightful texture!

    Step 9: Bake the Loaves

    Preheat your oven to 375°F (190°C). Before placing the loaves in, make shallow diagonal slashes on the tops with a sharp knife. This helps them rise properly in the oven. Bake for 18 to 22 minutes until the loaves turn golden brown and crispy. The aroma will undoubtedly drive you wild!

    Step 10: Cool and Serve

    After baking, transfer the loaves to a wire rack to cool for at least 30 minutes. This wait will be worth it, trust me! Once cooled, slice it up and enjoy warm, cheesy goodness with your family or guests. They’ll be singing your praises!

    Tips for Success

    • Use fresh herbs for the best flavor in your Italian Herb and Cheese Bread.
    • Let the dough rise in a warm, draft-free area; this boosts yeast activity.
    • For extra fluffiness, don’t skip the potato flakes—they really help!
    • Experiment with cheese types to find your family’s favorite combination.
    • Make sure to cool completely before storing or freezing to retain texture.

    Equipment Needed

    • Stand mixer: Ideal for mixing and kneading; however, a large bowl and wooden spoon work just as well.
    • Dough hook: Helps knead the dough; you can use your hands if you prefer a workout!
    • Parchment paper: Great for lining the baking sheet, but a silicone mat is a perfect alternative.

    Variations of Italian Herb and Cheese Bread

    • Herbed Garlic Cheese Bread: Add a tablespoon of minced fresh garlic to the dough for an extra punch of flavor.
    • Spicy Pepper Cheese Bread: Mix in some crushed red pepper flakes or diced jalapeños for a spicy kick.
    • Olive and Feta Twist: Incorporate chopped olives and crumbled feta cheese for a Mediterranean flair.
    • Gluten-Free Option: Substitute the bread flour with a gluten-free all-purpose blend and add a teaspoon of xanthan gum.
    • Herb Variations: Experiment with fresh herbs like rosemary, thyme, or basil for different flavor profiles.

    Serving Suggestions

    • Pair your Italian Herb and Cheese Bread with a fresh garden salad drizzled with balsamic vinaigrette.
    • Serve it warm with a side of marinara sauce for dipping, adding a burst of flavor.
    • Complement with a glass of robust red wine, like Chianti or Merlot, for a delightful evening.
    • Slice it into smaller pieces and use it for sandwiches filled with your favorite deli meats and veggies.
    • Present loaves on a rustic wooden board for an inviting touch to your table.

    FAQs about Italian Herb and Cheese Bread

    Can I use fresh herbs instead of dried for the Italian Herb and Cheese Bread?

    Absolutely! Fresh herbs can enhance the flavor. Just remember to use about three times the quantity of fresh herbs compared to dried ones.

    How do I store leftover Italian Herb and Cheese Bread?

    Once cooled, store your bread in an airtight container at room temperature for up to 3 days. Alternatively, you can freeze it for several months—just make sure it’s completely cool before wrapping.

    Can I make Italian Herb and Cheese Bread ahead of time?

    Yes! You can prepare the dough a day in advance. Let it rise once, then punch it down and refrigerate it overnight. Let it come to room temperature before shaping and baking.

    What’s the best way to reheat Italian Herb and Cheese Bread?

    Reheat slices in a toaster oven or regular oven at 350°F (175°C) for a few minutes. This will restore the lovely crust and warmth, making it taste freshly baked.

    Is this Italian Herb and Cheese Bread suitable for freezing?

    Yes! This bread freezes wonderfully. Just slice and wrap each loaf tightly in plastic wrap, then store in a freezer bag. Thaw at room temperature when you’re ready to enjoy.

    Final Thoughts

    Baking this Italian Herb and Cheese Bread is more than just a recipe; it’s an experience filled with warmth and joy. As the aroma fills your kitchen, you’ll find yourself transported to a cozy Italian bakery, even if you’re tucked away at home. The delight of sharing freshly baked loaves with family creates cherished memories, turning an ordinary dinner into a special occasion. Plus, watching your loved ones enjoy each cheesy, herb-infused bite is a reward like no other. So roll up your sleeves, grab those ingredients, and let the baking adventure begin!


    Print

    clock clock iconcutlery cutlery iconflag flag iconfolder folder iconinstagram instagram iconpinterest pinterest iconfacebook facebook iconprint print iconsquares squares iconheart heart iconheart solid heart solid icon

    Description

    This Italian Herb and Cheese Bread is a delightful blend of flavors and textures, perfect for any meal or occasion.


    • 320 ml warm water (approximately 37°C)
    • 2 tablespoons instant or active dry yeast
    • 2 tablespoons granulated sugar
    • 3 tablespoons vegetable oil or avocado oil
    • 0.5 tablespoon fine salt
    • 1 large egg, room temperature
    • 30 g dried potato flakes (optional, for extra softness)
    • 470 g bread flour or all-purpose flour
    • 30 g shredded Monterey Jack cheese
    • 30 g shredded sharp cheddar cheese
    • 10 g grated Parmesan cheese
    • 1 tablespoon garlic powder
    • 0.5 tablespoon dried oregano
    • 0.5 tablespoon dried parsley

    1. In the bowl of a stand mixer, blend warm water, yeast, and sugar. Allow to rest for 5–10 minutes until foamy, ensuring the yeast is active.
    2. Add oil, salt, egg, potato flakes (if using), and flour to the bowl. Mix on low speed with a dough hook until incorporated, then knead on medium speed for 6–8 minutes until smooth and slightly tacky.
    3. Transfer dough to a greased bowl, cover, and allow to rise in a warm area for approximately 1 hour or until doubled in volume.
    4. In a small bowl, combine garlic powder, dried oregano, and dried parsley. In a separate bowl, mix Monterey Jack, cheddar, and Parmesan cheeses.
    5. Gently punch down the risen dough and divide into four equal portions. Roll each into a log, about 25–30 cm long. Arrange loaves on a parchment-lined baking sheet or silicone baguette tray.
    6. Cover the shaped loaves with a towel and let them proof for 20–30 minutes until slightly puffed.
    7. Lightly brush the tops with water or oil to help toppings adhere. Sprinkle the herb mixture first, then distribute the cheese blend evenly on each loaf, pressing gently for adherence.
    8. Preheat oven to 190°C. Using a sharp knife, make shallow diagonal slashes in the tops for optimal oven spring. Bake for 18–22 minutes until golden and crusty.
    9. Transfer loaves to a wire rack and cool for at least 30 minutes. Slice as desired or serve warm.

    Notes

    • For an extra flavorful bread, ensure that the herbs are fresh and high-quality.
    • This bread can be frozen for later use, just make sure to cool it completely before wrapping.
    • Experiment with different cheese combinations to suit your taste.
    • Prep Time: 15 minutes
    • Cook Time: 22 minutes
    • Category: Bread
    • Method: Baking
    • Cuisine: Italian

    Nutrition

    • Serving Size: 1 slice
    • Calories: 150
    • Sugar: 1 g
    • Sodium: 180 mg
    • Fat: 6 g
    • Saturated Fat: 2 g
    • Unsaturated Fat: 4 g
    • Trans Fat: 0 g
    • Carbohydrates: 20 g
    • Fiber: 1 g
    • Protein: 5 g
    • Cholesterol: 30 mg

    Sharing is caring!

  • Gluten Free Pumpkin Cake

    Gluten Free Pumpkin Cake


    Introduction to Gluten Free Pumpkin Cake

    As the crisp autumn air drapes over us, there’s nothing quite like a slice of Gluten Free Pumpkin Cake to bring warmth and comfort to a busy day. With its rich spices and moist texture, this cake celebrates the essence of fall while being a delightful treat for everyone, even those with dietary restrictions. If you’re like me, juggling kids, work, and everything in between, this recipe is a quick solution that impresses family and friends alike. Let’s create unforgettable moments around the dinner table with this luscious dessert!

    Why You’ll Love This Gluten Free Pumpkin Cake

    This Gluten Free Pumpkin Cake is everything you want in a dessert: it’s easy to whip up, tastes divine, and brings that cozy fall vibe to your kitchen. In just over an hour, you can serve a moist cake that impresses at every gathering. Plus, you can indulge without worry, knowing it’s gluten-free. Whether it’s a family celebration or a simple weeknight treat, this cake fits seamlessly into your busy life!

    Ingredients for Gluten Free Pumpkin Cake

    Gathering the right ingredients is key to crafting the perfect Gluten Free Pumpkin Cake. Here’s what you’ll need:

    • Oil and Melting Butter: These help keep the cake moist and tender. Feel free to substitute with coconut oil for a hint of tropical flavor!
    • Eggs: Four room-temperature eggs provide structure and richness. Room temperature ensures even mixing — trust me, it makes a difference!
    • Sugars: A mix of white sugar and light brown sugar adds sweetness and depth. Brown sugar brings that lovely caramel flavor we all adore.
    • Pumpkin Puree: The star of the show! Use canned pumpkin for convenience or roast your own for a fresh twist.
    • Vanilla Extract: A splash of vanilla enhances the flavors beautifully and adds warmth.
    • Gluten Free All-Purpose Baking Flour: This is essential for a seamless bake without the gluten. Look for a blend that includes xanthan gum for best results.
    • Baking Powder and Baking Soda: Both help the cake rise, ensuring a light texture. Double-check expiration dates for maximum potency!
    • Spices: Pumpkin pie spice and cinnamon burst with fall flavor. Feel free to adjust the spices to match your family’s taste buds.
    • Salt: Just a pinch balances the sweetness and elevates the overall flavor.
    • For the Frosting: Cream cheese and butter create a luscious topping that pairs wonderfully with the cake. Powdered sugar helps achieve that perfect sweetness and creamy texture. If you’re feeling adventurous, add a dash of maple syrup for an extra flavor kick!

    All ingredient quantities and measurements are located at the bottom of this article, perfect for printing. Happy baking!

    How to Make Gluten Free Pumpkin Cake

    Preparing the Cake Pans

    To start, line two 8-inch cake pans with parchment paper. Cut the paper to fit the bottom of the pan, then grease the sides lightly with butter or oil for easy removal. This step is crucial! It prevents the cake from sticking and allows for a beautiful release. Trust me; there’s nothing more satisfying than a perfect cake flip!

    Mixing Wet Ingredients

    In a large mixing bowl, combine all your wet ingredients: oil, melted butter, eggs, sugars, pumpkin puree, and vanilla extract. Beat these together using an electric mixer on medium speed for about 30 seconds until everything is combined. Be sure your eggs and butter are at room temperature. This helps achieve a smooth and creamy batter that bakes evenly!

    Combining Dry Ingredients

    Now, let’s measure the dry ingredients. Use the spooning and leveling method for your gluten-free all-purpose flour. This means spooning the flour into the measuring cup and leveling it off with a knife. This little trick ensures you don’t pack it down, leading to consistency in the cake’s texture. Nobody wants a dense pumpkin cake, right?

    Baking the Cake

    Once your wet and dry ingredients are combined, divide the thick batter evenly between the two prepared pans. Smooth the tops with a spatula for an even bake. Bake your cakes in a preheated oven at 350°F for 28-34 minutes. To check for doneness, insert a toothpick into the center—if it comes out clean, you’re good to go!

    Cooling the Cake

    After baking, let the cakes cool in the pans for about 15 minutes. This helps them set before removing. Carefully flip the cakes onto a wire rack to cool completely. It’s important to let them cool fully before frosting! A warm cake and cream cheese frosting don’t make the best pairing.

    Making the Cream Cheese Frosting

    To whip up your frosting, beat the room-temperature butter and cream cheese together in a large bowl with an electric mixer for 2-3 minutes. This will ensure your frosting is creamy. Gradually add the powdered sugar in two batches and mix well. If the frosting seems too thick, add 1-2 tablespoons of milk to achieve your desired consistency.

    Frosting the Cake

    Once the cake is completely cool, it’s time to frost! Spread your cream cheese frosting generously between the two layers and on top of the cake. For a special twist, top with a drizzle of homemade caramel and sprinkle crushed pecans for an extra touch! Every bite promises to be a delightful experience!

    Tips for Success

    • Always measure flour accurately using the spooning and leveling method for the best texture.
    • Ensure all your wet ingredients are at room temperature before mixing. This creates a smoother batter.
    • Don’t overmix the batter; mix just until combined to keep your cake light and fluffy.
    • Let the cake layers cool completely before frosting to avoid melting the cream cheese frosting.
    • For a moist cake, store leftovers in an airtight container in the fridge.

    Equipment Needed

    • Two 8-Inch Cake Pans: If you don’t have these, any similar-sized pans will work.
    • Parchment Paper: Alternatively, you can grease your pans well if parchment isn’t available.
    • Electric Mixer: A hand whisk can do the job, just a bit more elbow grease is required!
    • Measuring Cups and Spoons: Essential for accuracy in your recipe.
    • Wire Rack: If you lack this, just use a plate to cool the cakes.

    Variations on Gluten Free Pumpkin Cake

    • Spiced Pumpkin Cake: Add extra spices like nutmeg or ginger for an even more robust flavor.
    • Pecan Pumpkin Cake: Fold in chopped pecans into the batter for a delightful crunch in every bite.
    • Chocolate Chip Pumpkin Cake: Stir in some semi-sweet or dark chocolate chips for a decadent twist.
    • Vegan Pumpkin Cake: Substitute eggs with flaxseed or applesauce, and use coconut oil in place of butter.
    • Layered Pumpkin Cake: Increase the recipe to create a multi-layered masterpiece or use this cake as a base for a pumpkin trifle!

    Serving Suggestions for Gluten Free Pumpkin Cake

    • Coffee or Tea: Perfectly pairs with a warm beverage to enhance flavors.
    • Ice Cream: A scoop of vanilla or cinnamon ice cream adds a delightful creaminess.
    • Garnishes: Fresh whipped cream and a sprinkle of cinnamon make for an elegant finish.
    • Fruit: Serve with sliced pears or apples for a fresh contrast.

    FAQs about Gluten Free Pumpkin Cake

    Can I use regular flour instead of gluten-free flour?
    This recipe is specifically designed for gluten-free all-purpose flour. Using regular flour might affect the texture and moisture, so I recommend sticking to gluten-free options.

    How should I store leftover Gluten Free Pumpkin Cake?
    To keep your cake fresh, store it in an airtight container in the refrigerator. If wrapped well, it can last for about 3-4 days. You can also freeze the cake for up to three months!

    Can I make this cake in advance?
    Absolutely! This Gluten Free Pumpkin Cake can be made a day ahead. Just frost it on the day you plan to serve for the best flavor and presentation.

    What can I substitute for cream cheese in the frosting?
    If you want a dairy-free option, try using a vegan cream cheese alternative or whipped coconut cream. Both will give you a delicious frosting while keeping it gluten-free!

    How can I adjust the sweetness of the cake?
    You can adjust the sugar levels according to your taste preferences. Consider using a sugar substitute for a lower-calorie option if needed, just ensure it is gluten-free!

    Final Thoughts on Gluten Free Pumpkin Cake

    This Gluten Free Pumpkin Cake is more than just a dessert; it’s a celebration of flavors that perfectly captures the spirit of fall. Whether you’re sharing it with loved ones or savoring a slice on your own, it brings the warmth of the season right to your table. The delightful aroma wafting from the oven is irresistible, inviting everyone to gather and indulge. I hope this recipe adds a sprinkle of joy to your busy lives, making every bite a reminder of the simple, sweet moments that connect us all. Happy baking, friends!


    Print

    clock clock iconcutlery cutlery iconflag flag iconfolder folder iconinstagram instagram iconpinterest pinterest iconfacebook facebook iconprint print iconsquares squares iconheart heart iconheart solid heart solid icon

    Description

    A moist and delicious gluten-free pumpkin cake perfect for fall celebrations.


    • Wet
      ½ cup oil
      ½ cup butter melted
      4 eggs room temperature
      ½ cup white sugar
      ¾ cup light brown sugar
      1 15 ounce can pumpkin puree
      2 teaspoons vanilla extract
    • Dry
      2 cups gluten free all purpose baking flour
      2 teaspoons baking powder
      1 teaspoon baking soda
      3 teaspoons pumpkin pie spice
      1 teaspoon cinnamon
      ½ teaspoon salt
    • Cream Cheese Frosting
      ½ cup butter room temperature
      8 ounces cream cheese room temperature
      4 cups powdered sugar
      1 teaspoon vanilla extract
      ½ teaspoon salt

    1. Line two 8 inch cake pans with parchment paper and set aside.
    2. Preheat the oven to 350 Fahrenheit.
    3. In a large mixing bowl, add all wet ingredients and beat with an electric mixer until combined, about 30 seconds.
    4. Add in the dry ingredients, spooning and leveling the flour, and mix until combined. The batter will be thick.
    5. Divide among prepared pans and smooth the tops.
    6. Bake for 28-34 minutes or until a toothpick comes out clean.
    7. Let cool in the pans for about 15 minutes, then flip onto a wire rack to finish cooling.
    8. Once cool, in a large bowl, beat the butter and cream cheese with an electric mixer for about 2-3 minutes.
    9. Add in the powdered sugar in about 2 batches and mix until well combined.
    10. Add in the salt and vanilla. If the frosting is too thick, add in 1-2 tablespoons of milk.
    11. Once the cake is completely cool, frost and enjoy! Optionally, top with homemade caramel and crushed pecans.

    Notes

    • For best results, make sure all ingredients are at room temperature.
    • This recipe can be multiplied to create additional layers as needed.
    • Store leftover cake in an airtight container in the fridge.
    • Prep Time: 30 minutes
    • Cook Time: 34 minutes
    • Category: Dessert
    • Method: Baking
    • Cuisine: American

    Nutrition

    • Serving Size: 1 slice
    • Calories: 350
    • Sugar: 30g
    • Sodium: 250mg
    • Fat: 20g
    • Saturated Fat: 10g
    • Unsaturated Fat: 8g
    • Trans Fat: 0g
    • Carbohydrates: 40g
    • Fiber: 2g
    • Protein: 4g
    • Cholesterol: 85mg

    Sharing is caring!

  • Red velvet crinkle cookies

    Red velvet crinkle cookies


    Introduction to Red Velvet Crinkle Cookies

    When life gets busy, we all need a little something special to brighten our day. That’s where red velvet crinkle cookies come in! These delightful treats not only satisfy your sweet tooth, but they also add a pop of color and flair to any occasion. Picture this: a quick evening with friends or a last-minute gathering, and you’re set to wow everyone in no time. Trust me, these cookies are soft, chewy, and irresistibly fun. Plus, they make you look like a baking superstar without needing hours in the kitchen!

    Why You’ll Love This Red Velvet Crinkle Cookies

    These red velvet crinkle cookies are a busy mom’s dream! They come together quickly, meaning you won’t have to spend your entire afternoon in the kitchen. The rich, chocolatey flavor combined with their vibrant red hue makes them a stunning addition to any dessert table. Plus, their soft, chewy texture is sure to delight kids and adults alike. Trust me, these cookies are not just tasty; they’re a total showstopper!

    Ingredients for Red Velvet Crinkle Cookies

    Gathering the right ingredients is key to creating these scrumptious red velvet crinkle cookies. Here’s what you’ll need:

    • All-purpose flour: This is the backbone of your cookies, providing structure.
    • Unsweetened cocoa powder: Adds that rich chocolate flavor without the sweetness.
    • Baking powder: Helps the cookies rise and gives them a fluffy texture.
    • Salt: Just a pinch enhances all the sweet flavors.
    • Unsalted butter: Gives your cookies a rich, creamy taste; just remember to melt it for better mixing.
    • Granulated sugar: Sweetens your cookies to perfection.
    • Light brown sugar: Adds moisture and a subtle caramel flavor.
    • Eggs: They bind everything together, adding richness.
    • Vanilla extract: A classic flavor booster that brings warmth.
    • Red gel food coloring: This is what gives the cookies that iconic red hue! Gel is best for vibrant color without extra liquid.
    • Granulated sugar (for coating): Adds texture and sweetness to the outside of each cookie.
    • Powdered sugar (for coating): For that classic crinkle finish that looks fabulous!

    If you’re feeling adventurous, you can swap the granulated sugar with coconut sugar for a hint of caramel flavor. The quantities for each of these ingredients are available at the bottom of this article for easy printing. Happy baking!

    How to Make Red Velvet Crinkle Cookies

    Making red velvet crinkle cookies is a delightful journey, and I’m excited to share the steps with you! Each part is crucial to ensure your cookies are soft, chewy, and eye-catching. Let’s dive in!

    Step 1: Prepare the Dry Ingredients

    In a medium bowl, whisk together the all-purpose flour, cocoa powder, baking powder, and salt. This step is vital for your cookies’ texture. Mixing them ensures that the leavening agent is well dispersed, so your cookies rise evenly. You want a smooth, lump-free blend to guarantee perfect cookies!

    Step 2: Mix the Wet Ingredients

    Now, let’s move to the wet ingredients! Melt your butter in the microwave for about 45 seconds. Make sure to stir well, allowing any small unmelted pieces to dissolve. Cooling the butter slightly is essential. It should be warm but not hot. Then, whisk the melted butter with granulated sugar and light brown sugar until creamy. Next, add the eggs, vanilla extract, and red gel food coloring. This combination adds richness and vibrant color to our cookie dough!

    Step 3: Combine the Mixtures

    With a flexible spatula or a spoon, gently mix the dry ingredients into the wet ones. Be careful not to over-mix! You want just enough blending to combine everything smoothly without developing the gluten too much. This ensures your cookies stay tender and chewy!

    Step 4: Chill the Dough

    Once your dough is combined, cover it with plastic wrap and pop it in the fridge for at least 60 minutes, or even overnight if time allows. Chilling the dough helps deepen the flavors and improves the texture of the cookies. Plus, it makes it easier to scoop out later.

    Step 5: Bake the Cookies

    When you’re ready to bake, preheat your oven to 350°F (177°C) and line two baking sheets with parchment paper. Scoop out tablespoon-sized balls of dough. Roll them first in granulated sugar, then in powdered sugar for that signature crinkle effect! Space them about 2 inches apart on the baking sheets. Bake for 11-14 minutes, keeping an eye on them. You want the edges set and the tops dry, but don’t let them overbake! They’ll continue to cook slightly as they cool.

    Tips for Success

    • Chill the dough for at least an hour; it makes for better texture.
    • Don’t skip the sugar coating! It creates that fabulous crinkle crust.
    • Keep an eye on your baking time; underbaked cookies are soft and chewy.
    • Try using gel food coloring for vibrant results without altering the dough.
    • Don’t be afraid to get creative with flavor extracts for a unique twist!

    Equipment Needed for Red Velvet Crinkle Cookies

    • Mixing bowls: Use glass or stainless steel; plastic works too!
    • Whisk: A standard or balloon whisk will do the trick.
    • Spatula: A flexible rubber or silicone spatula makes mixing easy.
    • Baking sheets: Parchment-lined or non-stick baking sheets are ideal.
    • Cookie scoop: A tablespoon-sized scoop simplifies portioning!

    Variations of Red Velvet Crinkle Cookies

    • Chocolate Chips: Add a handful of semi-sweet or white chocolate chips to the dough for an extra layer of sweetness.
    • Nutty Flavor: Mix in chopped walnuts or pecans for a delightful crunch and nutty taste.
    • Gluten-Free Option: Substitute the all-purpose flour with a gluten-free baking blend to accommodate dietary needs.
    • Vegan Twist: Replace the eggs with flaxseed meal mixed with water and use vegan butter for a plant-based treat.
    • Minty Fresh: A few drops of peppermint extract can transform your cookies into a refreshing delight!

    Serving Suggestions for Red Velvet Crinkle Cookies

    • Pair with Milk: A classic pairing! Dunk these cookies in a cold glass of milk for pure bliss.
    • Serve with Ice Cream: Warm cookies atop a scoop of vanilla or mint ice cream create a decadent dessert.
    • Elegant Presentation: Stack them on a cake stand or tiered platter for a gorgeous visual display.
    • Festive Garnish: Sprinkle some edible glitter or colored sprinkles on top for special occasions!

    FAQs about Red Velvet Crinkle Cookies

    Can I freeze red velvet crinkle cookies? Absolutely! Once baked, let the cookies cool completely. Then, place them in a single layer on a baking sheet and freeze until solid. Transfer them to an airtight container or freezer bag for up to three months. Just thaw at room temperature when you’re ready to enjoy!

    What can I substitute for eggs in this recipe? If you’re looking for an egg substitute, try using flaxseed meal mixed with water. Simply combine 1 tablespoon of flaxseed meal with 2.5 tablespoons of water to replace one egg. It works wonders and keeps your cookies vegan!

    How can I make the cookies more chocolatey? If you’re a chocolate lover, you can increase the unsweetened cocoa powder by an extra tablespoon. Just remember to adjust the flour a bit to keep the consistency right. These adjustments will leave you with an even richer flavor!

    What’s the secret to achieving that perfect crinkle effect? The secret lies in rolling the cookie dough in both granulated and powdered sugar before baking. The sugar coating dissolves while baking, creating those beautiful cracks on the surface—just like a winter wonderland!

    Can I use regular food coloring instead of gel? While you can use regular food coloring, gel food coloring is recommended for vibrant, deeper colors without adding too much liquid to the dough. If using liquid coloring, start with a smaller amount and build up to your desired color!

    Final Thoughts

    Baking red velvet crinkle cookies is not just about creating a tasty treat; it’s about sharing joy and creating lasting memories. Each bite transports you to a cozy space filled with laughter and love. Whether you’re whipping up a batch for family or impressing guests, these cookies are a delightful addition to any occasion. They radiate happiness with their vibrant color and melt-in-your-mouth texture. So, gather your ingredients, embrace the process, and watch as these cookies turn an ordinary day into something extraordinary. Happy baking, and may your kitchen always be filled with sweet aromas!


    Print

    clock clock iconcutlery cutlery iconflag flag iconfolder folder iconinstagram instagram iconpinterest pinterest iconfacebook facebook iconprint print iconsquares squares iconheart heart iconheart solid heart solid icon

    Description

    Delicious red velvet crinkle cookies that are soft, chewy, and perfect for impressing guests.


    • 2 cups (240 g) all purpose flour
    • ¼ cup (20 g) unsweetened cocoa powder
    • 1½ teaspoons baking powder
    • ¼ teaspoon salt
    • 6 tablespoons (85 g) unsalted butter, melted and slightly cooled
    • ¾ cup (150 g) granulated sugar
    • ¼ cup (50 g) light brown sugar
    • 2 large eggs, room temperature
    • 1 teaspoon vanilla extract
    • 2 teaspoons (10 ml) red gel food coloring
    • ½ cup (100 g) granulated sugar (for coating)
    • ½ cup (60 g) powdered sugar (for coating)

    1. In a medium bowl, whisk the flour, cocoa powder, baking powder, and salt together until well combined. Set aside.
    2. Melt the butter in the microwave for 45 seconds. Stir well to mix the melted butter with the smaller unmelted pieces. Cool the butter until warm and no longer hot. Whisk the melted and slightly cooled butter with the granulated and light brown sugar until smooth and well combined. Whisk in the eggs, vanilla extract, and red gel food coloring until creamy and well combined. Scrape the sides and bottom of the mixing bowl as needed.
    3. With a flexible spatula or spoon, mix in the dry ingredients until just combined. Cover the dough with plastic wrap. Chill the dough in the fridge for 60 minutes or up to overnight.
    4. Preheat the oven to 350°F (177°C) for 30 minutes. Line two large baking sheets with parchment paper. Pour granulated sugar in one bowl and powdered sugar in another small shallow bowl.
    5. Using a small, tablespoon-sized cookie scoop, scoop tablespoon (15 g) sized balls of red velvet cookie dough. Roll the cookie dough ball into the granulated sugar first and powdered sugar second until well coated in both sugars.
    6. Place the cookie balls on the parchment-lined baking sheet about 2 inches apart.
    7. Bake the cookies for 11 – 14 minutes until the edges are set and the cookies no longer look wet on top.
    8. Remove the cookie sheet to cool on a cooling rack for 5 minutes, then remove the cookies from the warm cookie sheet to fully cool on the cooling rack.

    Notes

    • For best results, chill the dough overnight.
    • Store leftovers in an airtight container.
    • For a stronger red color, use more gel food coloring.
    • Prep Time: 15 minutes
    • Cook Time: 14 minutes
    • Category: Dessert
    • Method: Baking
    • Cuisine: American

    Nutrition

    • Serving Size: 1 cookie
    • Calories: 130
    • Sugar: 10g
    • Sodium: 50mg
    • Fat: 5g
    • Saturated Fat: 3g
    • Unsaturated Fat: 2g
    • Trans Fat: 0g
    • Carbohydrates: 18g
    • Fiber: 0g
    • Protein: 2g
    • Cholesterol: 25mg

    Sharing is caring!