Author: IHAAL Team

  • Strawberry cheesecake cookies

    Strawberry cheesecake cookies


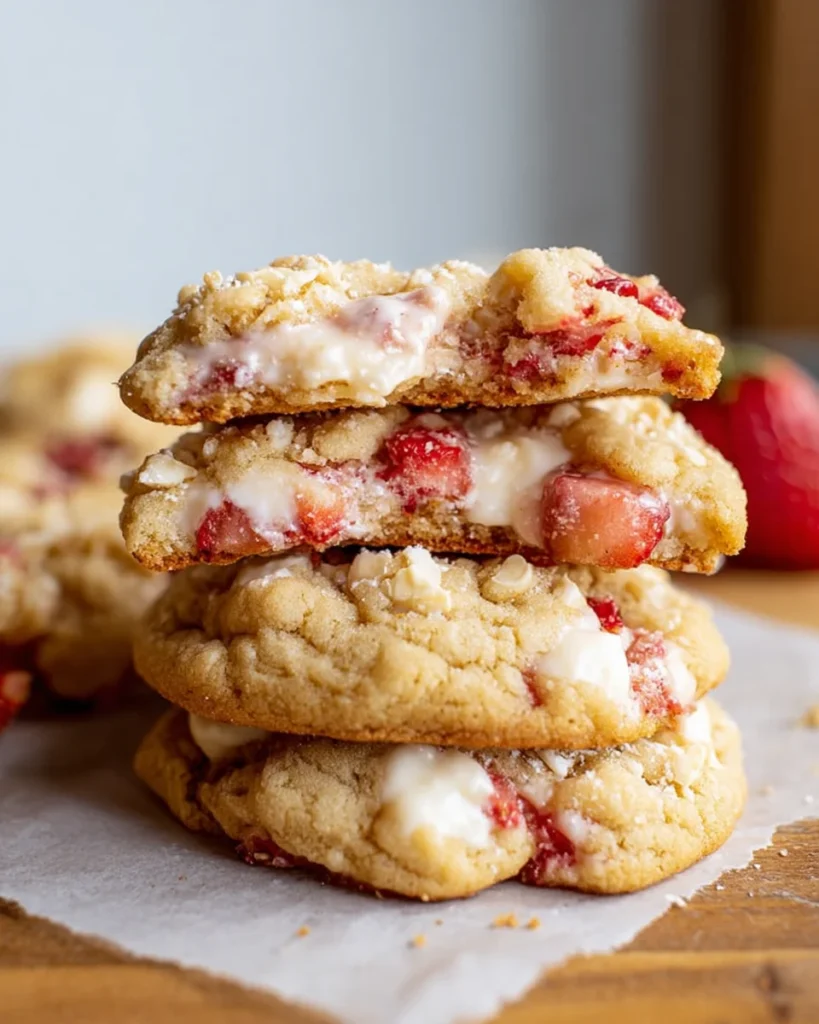
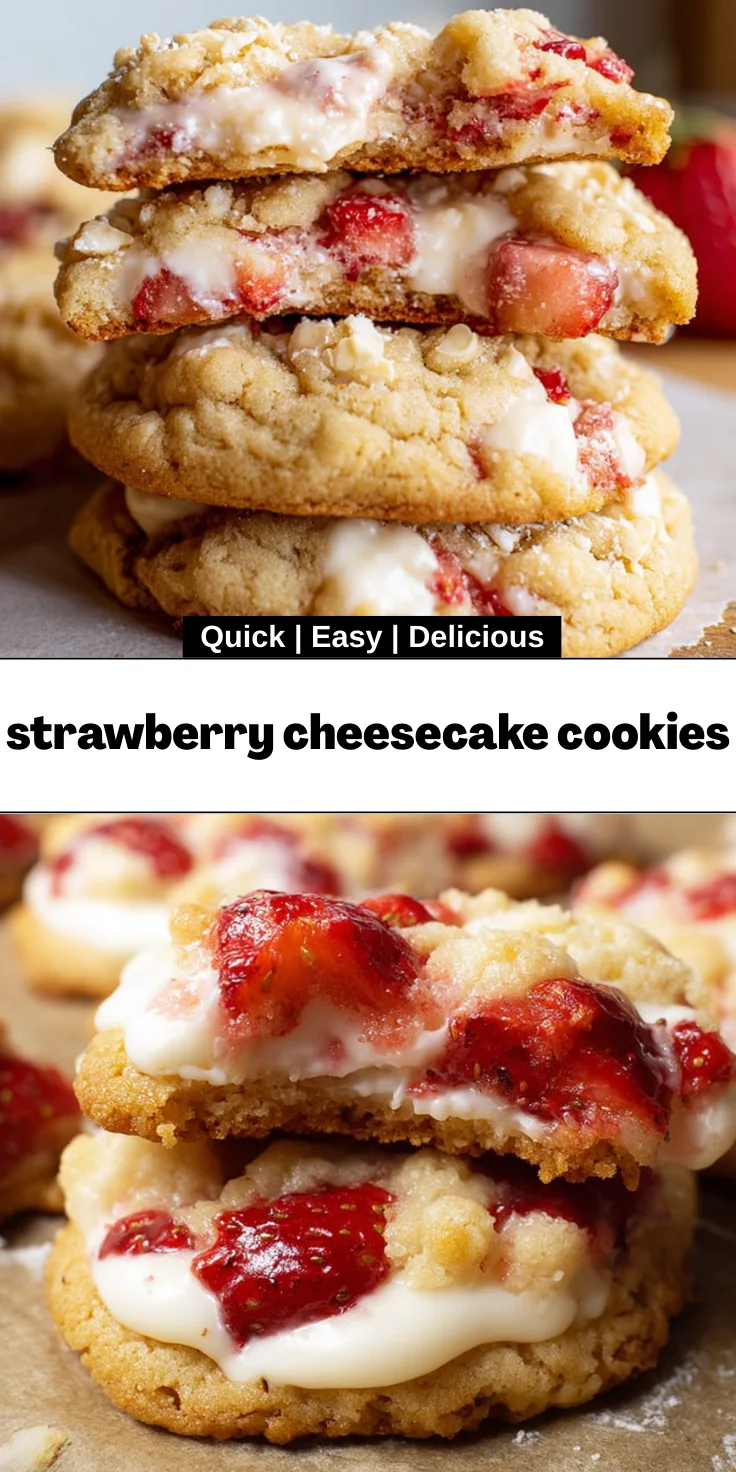
    Introduction to Strawberry Cheesecake Cookies

    Let’s face it, life can get pretty hectic. Between juggling work, family, and everything in between, finding time to bake might feel like a luxury. But what if I told you that strawberry cheesecake cookies are a delightful treat that brings a burst of joy without draining your energy? These cookies combine the sweet, vibrant flavor of fresh strawberries with the creamy goodness of cheesecake, all wrapped in a soft cookie. Perfect for quick snacks, impressing guests, or simply indulging yourself, they’re a little piece of happiness you deserve in your busy life.

    Why You’ll Love This Strawberry Cheesecake Cookies

    These strawberry cheesecake cookies are everything you need in a treat! They come together quickly, making them perfect for moms on the go or busy professionals looking for a sweet escape. With a delightful combination of tart strawberries and rich cheesecake flavor, each bite feels like a mini celebration. Plus, the ease of preparation means you can whip them up in no time, leaving you free to enjoy your day!

    Ingredients for Strawberry Cheesecake Cookies

    Now, let’s dive into what you’ll need to create these scrumptious strawberry cheesecake cookies. Here’s the scoop:

    • Butter: Softened butter is your base here, adding richness. You can use regular or vegan butter based on your preferences.
    • White Sugar: Adds sweetness and contributes to the cookie’s delicate texture.
    • Brown Sugar: This will bring in a hint of caramel flavor while keeping the cookies soft and chewy.
    • Egg: One whole egg enhances moisture and helps bind everything together.
    • Egg Yolk: Adding an extra yolk lends richness, making the cookies extra decadent.
    • Vanilla Extract: A dash of vanilla elevates the flavor profile and brings warmth.
    • Baking Soda: This leavening agent ensures your cookies rise perfectly.
    • Salt: A pinch of salt always enhances the flavors and balances sweetness.
    • All-Purpose Flour: The bulk of your cookie dough, it creates that delightful chewy texture.
    • Fresh Strawberries: Diced small, these juicy gems are the star of the show! Look for ripe, sweet strawberries for the best flavor.
    • Cream Cheese: Whether you go for regular or vegan, cream cheese adds that creamy cheesecake richness we all love.
    • Powdered Sugar: This sweetener is mixed with the cream cheese, adding sweetness without grittiness.

    You’ll find the exact measurements and additional tips for these ingredients at the bottom of the article, ready for you to print out and make baking a breeze!

    How to Make Strawberry Cheesecake Cookies

    Ready to bring a touch of sweetness to your life? Let’s dive into how you can make these amazing strawberry cheesecake cookies. Follow these steps, and you’ll be enjoying warm cookies in no time!

    Preparing Your Cream Cheese Filling

    Start by taking a small bowl and mixing your cream cheese with powdered sugar. Whisk them together until it’s nice and smooth. This is the creamy filling that will surprise everyone when they bite into your cookies!

    Once combined, use a spoon to drop 10-12 heaping teaspoons of that cream cheese mix onto a parchment-lined baking sheet. Pop it in the freezer for at least one hour. This freezing step keeps the filling from melting away during baking.

    Mixing the Cookie Dough

    While the cream cheese filling firms up, it’s time for the cookie dough. Grab two large baking sheets and line them with parchment paper. In a mixing bowl, whisk together your all-purpose flour, baking soda, and salt. This dry mix is important for structure.

    In another bowl, beat the softened butter with both sugars until it’s light and fluffy. This should take about 2-3 minutes. Then, mix in the whole egg, egg yolk, and vanilla extract. They add moisture and flavor that’s hard to resist!

    Next, slowly add your flour mixture to the butter mixture. Mix just until combined; over-mixing will lead to tough cookies. Finally, gently fold in those delightful diced strawberries. Their juicy bites will enhance every cookie!

    Forming the Cookies

    Now comes the fun part—forming the cookies! Scoop 12 heaping tablespoons of dough onto each lined baking sheet. Then, take a teaspoon and gently press it into the top of half the dough balls.

    Once you’ve done that, remove your cream cheese filling from the freezer. Place one frozen dollop into the center of each cookie. To seal them, take another dough ball and place it on top of the filling, firmly pressing the edges to close. This ensures a gooey surprise inside!

    Baking the Cookies

    Your cookies are almost ready! Refrigerate the prepared cookie dough balls for about 30 minutes while you preheat the oven to 350°F. This helps them hold their shape while baking, leading to perfect edges.

    Bake one sheet at a time for 13-17 minutes. You’ll know they’re done when the edges turn golden and the tops are set. After baking, let them cool on a rack. You’ll want to let them rest for a few minutes before the first bite; trust me, they’re worth the wait!

    Tips for Success

    • Softened butter is key! If it’s too hard, your cookies won’t be as fluffy.
    • Use fresh, ripe strawberries for the best flavor. Frozen won’t give you the same juicy burst.
    • Don’t skip the freezing step for the cream cheese filling. It keeps everything intact during baking.
    • Chill the dough before baking. It helps maintain that perfect shape.
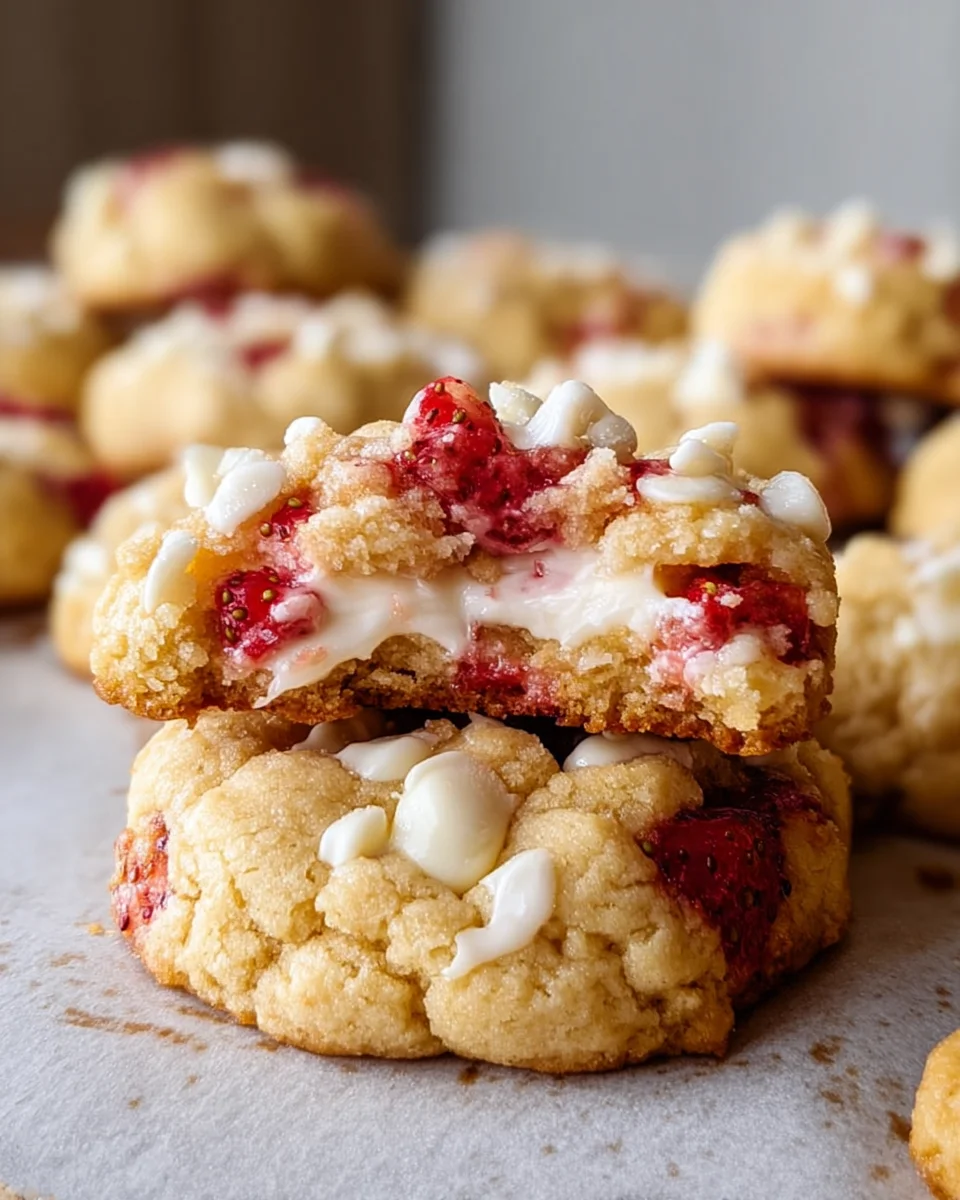
    • Experiment with add-ins like white chocolate chips or nuts for extra flair!

    Equipment Needed

    • Baking sheets: Regular cookie sheets work fine, but stoneware gives an even bake.
    • Parchment paper: If you don’t have this, silicone baking mats are a great alternative.
    • Mixing bowls: A medium-sized bowl is perfect for mixing the dough.
    • Electric mixer: A hand mixer is easier for quick mixing, but you can use a whisk.
    • Freezer-safe plate: Any plate will do for freezing the cream cheese filling.

    Variations

    • Gluten-Free: Substitute all-purpose flour with a 1:1 gluten-free blend for a celiac-friendly option.
    • Vegan: Use plant-based butter, vegan cream cheese, and a flaxseed egg for a fully vegan cookie.
    • Chocolate Chip: Add a half cup of mini chocolate chips for a delightful chocolate-strawberry combination.
    • Orange Zest: Mix in a teaspoon of orange zest for a bright citrus twist that complements the strawberries.
    • Nutty Flavor: Incorporate chopped walnuts or pecans for added crunch and richness.

    Serving Suggestions for Strawberry Cheesecake Cookies

    • Pair these strawberry cheesecake cookies with a chilled glass of milk for a classic combination.
    • Serve them alongside a scoop of vanilla ice cream for an indulgent dessert experience.
    • To elevate presentation, dust the cookies with a light sprinkle of powdered sugar.
    • Enjoy with a refreshing fruit salad for a delightful contrast of textures.
    • Great for picnics, package in colorful cellophane bags for a sweet gift!

    FAQs about Strawberry Cheesecake Cookies

    Wondering about these irresistible strawberry cheesecake cookies? I’ve got you covered! Here are some common questions I’ve come across, along with their answers to help you out:

    Can I use frozen strawberries instead of fresh?

    While fresh strawberries provide the best flavor and texture, frozen strawberries can work in a pinch. Just be sure to thaw and drain them well to avoid extra moisture.

    How do I store leftover cookies?

    To keep your cookies fresh, store them in an airtight container at room temperature for up to a week. You can also freeze them for a special treat later on!

    Can I make these cookies ahead of time?

    Absolutely! You can prepare the cookie dough and freeze the shaped balls. Just pop them in the oven when you’re ready to bake a fresh batch!

    What if I don’t have cream cheese?

    If you’re out of cream cheese, you can substitute it with Greek yogurt, although the flavor will change a bit. For a non-dairy alternative, use vegan cream cheese for a similar result.

    How can I make smaller cookies?

    To whip up smaller strawberry cheesecake cookies, simply use less dough for each cookie. Check the baking time around 8-10 minutes, as they will bake faster!

    Final Thoughts

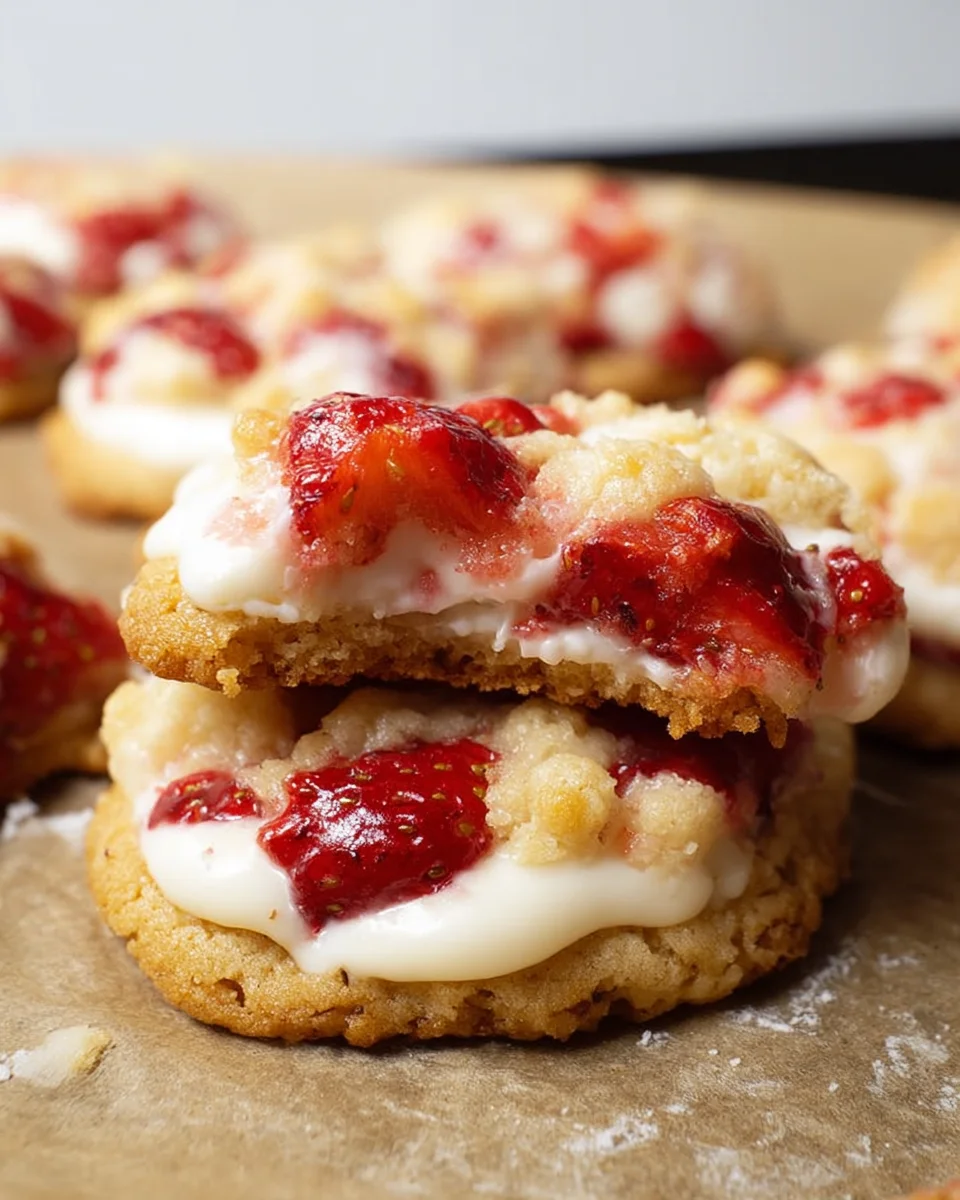
    Creating these delightful strawberry cheesecake cookies is not just about the end result; it’s about bringing sweetness into your life, even on the busiest of days. Each cookie bites back with a burst of strawberry joy, reminiscent of warm summer days. The soft, chewy texture combined with that gooey cheesecake surprise makes every bite a treat. So whether you’re sharing them with loved ones or enjoying a quiet moment with a cup of coffee, these cookies are sure to uplift your spirit. Baking should be fun, and with this recipe, you’re just a few steps away from happiness!


    Print

    clock clock iconcutlery cutlery iconflag flag iconfolder folder iconinstagram instagram iconpinterest pinterest iconfacebook facebook iconprint print iconsquares squares iconheart heart iconheart solid heart solid icon

    Description

    Strawberry cheesecake cookies are a delightful treat combining the flavors of fresh strawberries and creamy cheesecake into a delicious cookie.


    • 1 cup butter (regular or vegan), softened
    • ¾ cup white sugar
    • ¼ cup brown sugar
    • 1 egg
    • 1 egg yolk
    • 1 teaspoon vanilla extract
    • 1 teaspoon baking soda
    • ¼ teaspoon salt
    • 2¾ cup all-purpose flour * SEE NOTES
    • ½ cup fresh strawberries, diced small* SEE NOTES
    • ¾ cup cream cheese (regular or vegan)* (6 oz) SEE NOTES
    • ¼ cup powdered sugar* SEE NOTES if using regular (not vegan) cream cheese

    1. Line a small baking sheet or plate with parchment paper.
    2. In a small bowl, mix the cream cheese with powdered sugar until smooth.
    3. Place 10-12 heaping teaspoons of cream cheese on the baking sheet and freeze for at least one hour.
    4. Line two large baking sheets with parchment paper and whisk together flour, salt, and baking soda.
    5. In a mixer, beat the butter and sugars together until light and fluffy.
    6. Mix in the egg, egg yolk, and vanilla extract.
    7. Add in the flour mixture and mix until just combined. Fold in the diced strawberries gently.
    8. Scoop 12 heaping tablespoons of dough onto each baking sheet. Press a teaspoon into the top of half the balls of dough.
    9. Remove the cream cheese filling from the freezer and place one into each of the cookies. Seal with a second ball of dough.
    10. Refrigerate the prepared cookie dough balls. Preheat the oven to 350°F.
    11. Bake one sheet at a time for 13-17 minutes, until edges are golden and tops are set. Cool on a rack.

    Notes

    • For smaller cookies, see notes below recipe.
    • Be careful while mixing strawberries to avoid squishing them.
    • Ensure cream cheese is cold before mixing to achieve smooth consistency.
    • Prep Time: 30 minutes
    • Cook Time: 17 minutes
    • Category: Dessert
    • Method: Baking
    • Cuisine: American

    Nutrition

    • Serving Size: 1 cookie
    • Calories: 220
    • Sugar: 12g
    • Sodium: 150mg
    • Fat: 10g
    • Saturated Fat: 6g
    • Unsaturated Fat: 4g
    • Trans Fat: 0g
    • Carbohydrates: 30g
    • Fiber: 1g
    • Protein: 2g
    • Cholesterol: 30mg

    Sharing is caring!

  • Mint Chocolate Chip Protein Balls

    Mint Chocolate Chip Protein Balls


    Introduction to Mint Chocolate Chip Protein Balls

    There’s something truly magical about snacking, isn’t there? It’s that little moment of joy we steal in our hectic day. Especially for busy moms and professionals, finding healthy snacks can feel like a treasure hunt. Enter Mint Chocolate Chip Protein Balls! These delightful bites are not only delicious but also packed with protein to keep your energy up. Whether you need an afternoon pick-me-up or a post-workout boost, these tasty treats fit seamlessly into your lifestyle, helping you tackle your day with a smile and a sweet, minty crunch.

    Why You’ll Love This Mint Chocolate Chip Protein Balls

    These Mint Chocolate Chip Protein Balls are a game-changer for your snack routine! Packed with protein and bursting with flavor, they’re perfect for on-the-go moms and professionals. The convenience of a no-bake recipe means you can whip them up in just minutes. Plus, their delightful taste combines the freshness of mint with rich chocolate, making healthy snacking feel indulgent. Who says nutritious can’t be delightful?

    Ingredients for Mint Chocolate Chip Protein Balls

    Let’s talk ingredients! The stars of this show are rolled oats, which provide a hearty base and added fiber. Next up is almond butter, lending creaminess and healthy fats that will keep you satisfied. Honey brings natural sweetness, while vanilla protein powder boosts the protein content—perfect for a snack or post-workout treat. A splash of peppermint extract gives these balls their refreshing flavor, and of course, mini dark chocolate chips are a must for that delightful chocolatey pop!

    Feel free to swap almond butter for any nut or seed butter you prefer. If you want an extra minty zing, just increase the peppermint extract a smidge. For exact measurements, check the bottom of the recipe for easy printing!

    How to Make Mint Chocolate Chip Protein Balls

    Now for the fun part—making your Mint Chocolate Chip Protein Balls! Don’t worry; it’s a straightforward process that’s perfect for busy days. You’ll see how easy it is to mix up these little bites of joy. Just follow these simple steps, and you’ll have a batch ready to go in no time!

    Step 1 – Combine Ingredients

    Start by grabbing a large mixing bowl—this is where the magic begins! Add the rolled oats, almond butter, honey, vanilla protein powder, and a dash of peppermint extract. Using a strong spoon or spatula, mix everything together thoroughly. You want it well combined; think of it as a delicious puzzle coming together. As I mix, I can’t help but notice the sweet scent of mint wafting through the air. It’s like a breath of fresh air on a sunny day!

    Step 2 – Adjust Consistency

    Sometimes, the mixture can feel a bit dry, and that’s perfectly normal. If that happens, don’t fret! It’s easy to fix. Just add unsweetened almond milk, one tablespoon at a time. Keep stirring until you reach a consistency that’s easy to roll into balls. Aim for a texture that holds together without crumbling apart. You want each ball to be a little firm yet not too hard. Remember, we’re going for protein-packed joy here, not a workout for your jaw!

    Step 3 – Add Chocolate Chips

    Once your mixture is just right, it’s time to fold in those mini dark chocolate chips. Gently, mix them in until they’re evenly distributed. I always get excited at this point! The rich chocolate pieces blend with the mint flavor, creating a delightful contrast. Trust me; these little morsels are what take your protein balls from good to absolutely fantastic!

    Step 4 – Form the Balls

    Now for the fun part—you’re going to create those perfectly round protein balls! Scoop out about one tablespoon of the mixture and roll it into a ball with your hands. It’s a bit like playing with dough, and I find it oddly therapeutic. Repeat this process until you’ve formed all the mixture into balls. Place them on a baking sheet lined with parchment paper to keep them from sticking. You’ll notice the excitement building; you’re one step closer to tasty minty goodness!

    Step 5 – Refrigerate

    Here comes the easiest step—refrigeration! Pop the baking sheet into your fridge and let the protein balls chill for at least 20 minutes. This helps them firm up nicely, making them easier to grab and go when you need a quick snack. Occasionally, I sneak a little taste right after mixing! But waiting pays off, as the texture becomes just perfect once set.

    Step 6 – Store Properly

    Once they’ve chilled, transfer your delightful Mint Chocolate Chip Protein Balls into an airtight container. These can be stored in your fridge for up to a week—if they last that long! I usually stash mine right at the front, so I grab them as a quick pick-me-up between meetings or in my kids’ lunchboxes. Keep the joy of snacking alive!

    Now you’re all set to enjoy these tasty treats! Making them can be a fun family activity, so consider involving your kids—they’ll love rolling the balls and, of course, taste-testing afterward. Happy snacking!

    Tips for Success

    To ensure your Mint Chocolate Chip Protein Balls turn out perfect every time, keep these tips in mind:

    • Mix the ingredients in a large bowl to prevent spills.
    • Use a cookie scoop for even-sized balls.
    • Chill the mixture a bit before rolling for easier handling.
    • Keep wet hands when rolling to reduce stickiness.
    • Experiment with adding nuts or seeds for extra crunch!

    Equipment Needed

    Gathering the right tools can make all the difference in your kitchen adventure! For these Mint Chocolate Chip Protein Balls, you’ll need:

    • A large mixing bowl
    • A strong spoon or spatula
    • A baking sheet
    • Parchment paper (or wax paper as an alternative)
    • A cookie scoop (optional but helpful)

    Variations

    Feel like mixing things up with your Mint Chocolate Chip Protein Balls? You’re in luck! Here are some fun variations to cater to your taste or dietary needs:

    • Replace almond butter with peanut or sunflower seed butter for a different flavor.
    • Add a handful of chopped nuts or seeds for extra crunch.
    • Substitute chocolate chips with dried fruit for a fruity twist.
    • Use peppermint-flavored protein powder to amp up that minty essence.
    • Mix in a scoop of greens powder if you’re feeling adventurous!

    Serving Suggestions

    Elevate your snacking experience with these Mint Chocolate Chip Protein Balls! Pair them with a refreshing smoothie for a satisfying breakfast or enjoy with a cup of herbal tea for an afternoon pick-me-up. For a fun presentation, arrange them on a colorful platter and sprinkle a few extra chocolate chips on top!

    FAQs about Mint Chocolate Chip Protein Balls

    Curious about Mint Chocolate Chip Protein Balls? You’re not alone! Here are some common questions that pop up:

    Are these protein balls suitable for vegans? Absolutely! With almond butter and plant-based protein powder, they’re a fantastic vegan treat.

    How long can I store these protein balls? In an airtight container, these tasty nibbles can last up to a week in the fridge. Trust me; they go fast!

    Can I freeze them? Yes! You can freeze Mint Chocolate Chip Protein Balls for up to three months. Just make sure to separate them with parchment paper to prevent sticking.

    What if I’m not a fan of mint? No problem! You can leave out the peppermint extract and maybe add a touch of cinnamon or your favorite flavor. Flexibility is key in the kitchen!

    Feel free to enjoy these delicious protein balls anytime you need a healthy snack! They’re tasty, nutritious, and perfect for any busy lifestyle!

    Final Thoughts

    Making Mint Chocolate Chip Protein Balls is more than just a cooking task; it’s a joyful experience that brightens up your week! These little morsels of energy are not only delicious but also incredibly convenient for a busy lifestyle. Imagine having a tasty snack ready to greet you after a hectic day, keeping you fueled and satisfied!

    So, why not give this recipe a try? You’ll love the satisfaction that comes from creating something fresh and nutritious right in your kitchen. Trust me, once you make these, they’ll become a staple in your home!


    Print

    clock clock iconcutlery cutlery iconflag flag iconfolder folder iconinstagram instagram iconpinterest pinterest iconfacebook facebook iconprint print iconsquares squares iconheart heart iconheart solid heart solid icon

    Description

    Mint Chocolate Chip Protein Balls are a tasty treat packed with protein and flavor, perfect for a quick snack or post-workout boost.


    • 1/2 cup (50g) rolled oats
    • 1 cup (240g) almond butter
    • 2 tbsp (42g) honey
    • 1/4 cup (30g) vanilla protein powder
    • 1/4 tsp peppermint extract
    • 1/4 cup (40g) mini dark chocolate chips
    • 12 tbsp (15-30ml) unsweetened almond milk (if needed)

    1. In a large mixing bowl, combine rolled oats, almond butter, honey, vanilla protein powder, and peppermint extract. Mix thoroughly.
    2. If the mixture is too dry, add 1 tablespoon of almond milk at a time until desired consistency is reached.
    3. Gently fold in the mini dark chocolate chips.
    4. Scoop out 1 tablespoon of the mixture and roll into a ball. Repeat.
    5. Place the protein balls on a baking sheet lined with parchment paper.
    6. Refrigerate for at least 20 minutes to firm up.
    7. Store in an airtight container in the refrigerator for up to a week. Enjoy!

    Notes

    • Ensure to use unsweetened almond milk to maintain the flavor balance.
    • Feel free to substitute almond butter with any nut or seed butter of your choice.
    • For added mint flavor, you can increase the amount of peppermint extract slightly.
    • Prep Time: 10 minutes
    • Cook Time: 0 minutes
    • Category: Snack
    • Method: No-Bake
    • Cuisine: American

    Nutrition

    • Serving Size: 1 protein ball
    • Calories: 150
    • Sugar: 4g
    • Sodium: 5mg
    • Fat: 9g
    • Saturated Fat: 1g
    • Unsaturated Fat: 8g
    • Trans Fat: 0g
    • Carbohydrates: 15g
    • Fiber: 2g
    • Protein: 5g
    • Cholesterol: 0mg

    Sharing is caring!

  • Creamy Garlic Butter Tuscan Mushrooms

    Creamy Garlic Butter Tuscan Mushrooms


    Introduction to Creamy Garlic Butter Tuscan Mushrooms

    Let me tell you about one of my all-time favorite dishes, the Creamy Garlic Butter Tuscan Mushrooms. This recipe is like a warm hug on a busy day, ready to impress your loved ones with minimal effort. With rich, earthy flavors and a luscious creaminess, it’s perfect as both a side or main course. I promise, it comes together quicker than your family can say, “What’s for dinner?” So, let’s dive into this creamy delight that can turn an ordinary weeknight into something truly special.

    Why You’ll Love This Creamy Garlic Butter Tuscan Mushrooms

    If you’re like me, you treasure delicious meals that don’t consume precious hours in the kitchen. This dish is a game changer! It takes just 25 minutes from start to finish, which means more time with family and less time cleaning up. Plus, the flavors are simply out of this world! Imagine a creamy, savory medley that dances on your taste buds, making it a beloved favorite for any occasion.

    Ingredients for Creamy Garlic Butter Tuscan Mushrooms

    Before we jump into the creamy goodness, let’s gather our stars. Here’s what you’ll need:

    • Butter: The base for rich flavor, I prefer unsalted butter for better control over seasoning.
    • Garlic: Freshly minced garlic adds that irresistible aroma and taste. A must-have for this dish!
    • Mushrooms: Use cremini or button mushrooms. They’re tender and soak up all that creamy goodness.
    • Sun-Dried Tomatoes: These little jewels bring a burst of tangy sweetness. They’re a great flavor booster!
    • Heavy Cream: This is what transforms the dish into a creamy dream. You may substitute with half and half for a lighter option, though.
    • Parmesan Cheese: Grated Parmesan enhances the richness. It melts beautifully and thickens the sauce.
    • Italian Seasoning: A blend of herbs that gives a classic Italian vibe, easy to find in any grocery store.
    • Fresh Spinach: Adds a pop of color and nutrition. Feel free to use kale or Swiss chard too!
    • Salt and Pepper: Essential for flavoring. Season to your taste, adjusting bit by bit.
    • Fresh Parsley: For garnish, adding freshness and a vibrant touch! Dried parsley works in a pinch.

    For precise measurements, you can find them at the bottom of the article for easy printing. Now, let’s make something delicious!

    How to Make Creamy Garlic Butter Tuscan Mushrooms

    Now, let’s dive into the delicious steps of making Creamy Garlic Butter Tuscan Mushrooms. Follow along and you’ll see just how easy it is to whip up this delightful dish!

    Step 1: Melt the Butter

    Start by melting two tablespoons of butter in a large skillet over medium heat. It’s essential to use medium heat to prevent the butter from burning. The gentle warmth allows the flavor to bloom, setting the stage for the magic to come.

    Step 2: Sauté Garlic

    Once the butter is melted, add in three cloves of minced garlic. Sauté it for about a minute. You’ll know it’s ready when your kitchen fills with that delightful garlicky aroma, but be careful—don’t let it brown, or you’ll lose that fresh taste!

    Step 3: Cook Mushrooms

    Next, toss in ten ounces of sliced cremini or button mushrooms. Cook these for 5-7 minutes, stirring occasionally. Keep an eye out for their transformation; they should turn tender and golden brown, creating a lovely foundation for the creamy sauce.

    Step 4: Add Sun-Dried Tomatoes and Seasoning

    Now it’s time for a flavor boost! Stir in a quarter-cup of chopped sun-dried tomatoes and a teaspoon of Italian seasoning. Let this mixture cook for another 1-2 minutes, allowing the tomatoes to mingle with the mushrooms and infuse their zesty essence.

    Step 5: Pour in Heavy Cream

    Pour in half a cup of heavy cream, bringing the mixture to a gentle simmer. This step is crucial as it allows the flavors to meld together and the cream to thicken slightly, transforming every bite into a rich experience.

    Step 6: Stir in Parmesan Cheese

    Once simmering, stir in a quarter-cup of grated Parmesan cheese. As the cheese melts, it will thicken the sauce, turning it into a creamy dream that coats the mushrooms beautifully. Just wait until you see that luscious texture!

    Step 7: Incorporate Spinach

    Add in a quarter-cup of roughly chopped fresh spinach, cooking it just until wilted. This not only adds vibrant color but also packs in some nutrients, making your dish a bit healthier without sacrificing flavor.

    Step 8: Final Seasoning

    Before you finish, taste the sauce and season it with salt and pepper according to your preference. A touch of seasoning can really elevate the flavors, making this creamy garlic butter Tuscan mushrooms truly shine!

    Step 9: Garnish and Serve

    Finally, remove the skillet from heat and garnish with fresh chopped parsley. Serve the dish immediately for the best flavor and enjoy this creamy goodness with your favorite side. You’re in for a real treat!

    Tips for Success

    • Always use fresh ingredients for the best flavor. Fresh garlic and herbs make a noticeable difference.
    • Don’t rush the sautéing process; take the time to let the garlic become fragrant before adding mushrooms.
    • Adjust the cream quantity according to your preference for a thicker or lighter sauce.
    • Taste as you go! This way, you can adjust seasoning to suit your family’s taste.
    • For added flavor, try incorporating a splash of white wine before the cream.

    Equipment Needed

    • Large Skillet: A non-stick skillet works best, but any large pan will do.
    • Wooden Spoon: Ideal for stirring, but a silicone spatula is a great alternative.
    • Measuring Cups: Essential for accurate ingredient measurement. Use a simple glass measuring cup!
    • Cutting Board: A sturdy board is perfect for prepping your veggies and mushrooms.

    Variations

    • Herb Variation: Swap out Italian seasoning for fresh herbs like thyme or basil for a unique twist.
    • Vegan Option: Use plant-based butter, coconut cream, and nutritional yeast instead of cheese for a creamy vegan delight.
    • Meat Lover’s Touch: Add cooked chicken, shrimp, or Italian sausage for a protein-packed version.
    • Spicy Kick: Incorporate a pinch of red pepper flakes for a hint of heat in your creamy dish.
    • Cheesy Delight: Experiment with different cheeses, like feta or goat cheese, to enhance creaminess and flavor.

    Serving Suggestions

    • Serve the Creamy Garlic Butter Tuscan Mushrooms over fluffy pasta or alongside rice for a filling meal.
    • Pair it with a crisp salad dressed with balsamic vinaigrette for a refreshing contrast.
    • A chilled glass of white wine, like Chardonnay, complements the dish beautifully.
    • For presentation, sprinkle extra parsley on top and serve in rustic bowls for that cozy feel.

    FAQs about Creamy Garlic Butter Tuscan Mushrooms

    Is this recipe suitable for gluten-free diets?

    Yes! The Creamy Garlic Butter Tuscan Mushrooms can easily be made gluten-free by serving them over gluten-free pasta or rice. Just check your ingredients to ensure they are labeled gluten-free.

    What can I serve with Creamy Garlic Butter Tuscan Mushrooms?

    This dish is versatile! It pairs beautifully with pasta, grilled chicken, or even as a topping on crusty bread. You could also serve it alongside a simple salad for a balanced meal.

    Can I add other vegetables to this dish?

    Absolutely! Feel free to toss in any of your favorite veggies, like bell peppers, zucchini, or asparagus. They’ll add a delightful crunch and extra nutrients to your garlic mushrooms recipe.

    How can I make this dish spicier?

    If you crave a bit of heat, add a pinch of red pepper flakes when you sauté the garlic. It’ll infuse your Creamy Garlic Butter Tuscan Mushrooms with a warm kick that will make your taste buds dance.

    How do I store leftovers?

    Leftovers can be stored in an airtight container in the fridge for up to 3 days. To reheat, warm them in a skillet over medium heat, adding a splash of cream to restore the creamy consistency.

    Final Thoughts

    There’s something truly magical about the Creamy Garlic Butter Tuscan Mushrooms. It’s more than just a dish; it’s a moment shared among family and friends, a way to create delicious memories without spending hours in the kitchen. The rich flavors and creamy texture bring a sense of comfort and warmth to any meal. Whether it’s a cozy weeknight dinner or a special gathering, this recipe will surely leave everyone craving more. So, roll up your sleeves, embrace your inner chef, and treat yourself and your loved ones to this delightful culinary experience!


    Print

    clock clock iconcutlery cutlery iconflag flag iconfolder folder iconinstagram instagram iconpinterest pinterest iconfacebook facebook iconprint print iconsquares squares iconheart heart iconheart solid heart solid icon

    Description

    A rich and creamy dish featuring mushrooms, garlic, and Italian flavors, perfect as a side or main course.


    • 2 tablespoons butter
    • 3 cloves garlic, minced
    • 10 ounces cremini or button mushrooms, sliced
    • 1/4 cup sun-dried tomatoes, chopped
    • 1/2 cup heavy cream
    • 1/4 cup grated Parmesan cheese
    • 1 teaspoon Italian seasoning
    • 1/4 cup fresh spinach, roughly chopped
    • Salt and pepper, to taste
    • Fresh parsley, chopped (for garnish)

    1. Melt the butter in a large skillet over medium heat.
    2. Add the minced garlic and sauté for about 1 minute, until fragrant but not browned.
    3. Add the sliced mushrooms and cook for 5-7 minutes, stirring occasionally, until mushrooms are tender and golden.
    4. Stir in the chopped sun-dried tomatoes and Italian seasoning; cook for another 1-2 minutes.
    5. Pour in the heavy cream and bring to a gentle simmer.
    6. Stir in the Parmesan cheese until melted and the sauce thickens slightly.
    7. Add the chopped spinach and cook for 1-2 minutes until wilted.
    8. Season with salt and pepper to taste.
    9. Remove from heat, garnish with fresh parsley, and serve immediately.

    Notes

    • This dish pairs well with pasta, rice, or as a topping for grilled chicken.
    • Use gluten-free pasta or rice for a gluten-free option.
    • Feel free to add other vegetables like bell peppers or zucchini.
    • Prep Time: 10 minutes
    • Cook Time: 15 minutes
    • Category: Main Course
    • Method: Sautéing
    • Cuisine: Italian

    Nutrition

    • Serving Size: 1 cup
    • Calories: 350
    • Sugar: 2g
    • Sodium: 500mg
    • Fat: 30g
    • Saturated Fat: 15g
    • Unsaturated Fat: 10g
    • Trans Fat: 0g
    • Carbohydrates: 10g
    • Fiber: 2g
    • Protein: 8g
    • Cholesterol: 70mg

    Sharing is caring!

  • Blueberry Cream Cheese Bread

    Blueberry Cream Cheese Bread


    Introduction to Blueberry Cream Cheese Bread

    Let me tell you about a delightful treat that has stolen my heart: Blueberry Cream Cheese Bread. Imagine moist, tender bread bursting with fresh blueberries and a creamy filling that dances on your taste buds. As a busy mom, I know how challenging it can be to whip up something special during hectic days. This recipe is the perfect solution! It’s simple enough for a quick breakfast yet impressive enough for a gathering with loved ones. Trust me, once you make this, you’ll want to share it with everyone!

    Why You’ll Love This Blueberry Cream Cheese Bread

    This Blueberry Cream Cheese Bread is a true game-changer for busy schedules. It’s incredibly easy to make, thanks to straightforward steps that even novice bakers can tackle. The vibrant blueberries add a burst of flavor, while the cream cheese filling brings a creamy richness that feels indulgent without all the fuss. Plus, it’s perfect for breakfast, snack time, or even dessert. What’s not to love?

    Ingredients for Blueberry Cream Cheese Bread

    Let’s gather our ingredients for this scrumptious Blueberry Cream Cheese Bread! You’ll need a mix of pantry staples and a few delightful extras to make this loaf sing.

    • All-purpose flour: The base of your bread, creating that perfect fluffy texture.
    • Baking powder: Helps the bread rise, ensuring it’s light and airy.
    • Baking soda: Works together with baking powder for an extra lift.
    • Salt: Just a pinch to enhance the flavors.
    • Unsalted butter: This adds richness and moisture; always soften it for easier mixing.
    • Granulated sugar: Sweetens the bread, balancing out the tartness of the blueberries.
    • Eggs: They bind everything while adding moisture and fluffiness.
    • Vanilla extract: A splash of warmth and sweetness that enhances flavor.
    • Milk (or buttermilk): Contributes to a moist crumb; buttermilk adds a slight tang.
    • Blueberries: Fresh or frozen, they bring a burst of flavor; just toss them in flour to prevent sinking!
    • Cream cheese: The star of the show, providing that luxurious creamy filling!
    • Additional sugar for the filling: To sweeten the cream cheese, complementing the blueberries.

    For those looking to customize, feel free to swap in whole wheat flour for a nuttier flavor, or add a sprinkle of cinnamon for extra warmth. Check out the bottom of the article for exact measurements, and don’t forget; you can print the recipe for later!

    How to Make Blueberry Cream Cheese Bread

    Now, let’s dive into the delightful process of creating this Blueberry Cream Cheese Bread. Follow these simple steps, and your kitchen will soon smell heavenly!

    Step 1: Preheat and Prepare

    First things first, preheat your oven to 350°F (175°C). While that’s warming up, grease a 9×5-inch loaf pan. For easier removal, I like to line the bottom with parchment paper. It’s a little trick that never fails me!

    Step 2: Mix Dry Ingredients

    In a medium bowl, whisk together the all-purpose flour, baking powder, baking soda, and salt. This step is key because it incorporates the leavening agents evenly. It’s like giving your bread the lift-off it needs!

    Step 3: Cream Butter and Sugar

    In a large bowl, grab your electric mixer and cream together the softened butter and sugar until it’s light and fluffy. This usually takes about 3 minutes. Next, add in the eggs, one at a time, beating well after each addition. Stir in that lovely splash of vanilla extract, letting it make your kitchen smell divine!

    Step 4: Combine Wet and Dry Ingredients

    Now, it’s time to mix things up! Gradually add the dry ingredients to the wet mixture, alternating with the milk. Start and end with the flour mixture. Be careful not to overmix. Just fold in the floured blueberries gently. They add that wonderful burst of flavor!

    Step 5: Prepare Cream Cheese Filling

    In a separate bowl, beat together the softened cream cheese, additional sugar, egg, and another splash of vanilla until smooth and creamy. This step is where the magic happens, transforming your bread into a luxurious treat.

    Step 6: Layer the Batter

    Pour half of the bread batter into your prepared loaf pan, spreading it evenly. Then, gently spread the cream cheese mixture over this layer. Top it off with the remaining batter, carefully spreading it to cover that luscious cream cheese layer. You’re building flavor upon flavor!

    Step 7: Bake

    Slide your loaf pan into the oven and bake for 55-65 minutes. Check for doneness by inserting a toothpick into the center; it should come out clean. If you notice the top browning too fast, loosely cover it with aluminum foil for the last 15 minutes. Let it cool for 10 minutes in the pan before transferring it to a wire rack to cool completely. Your Blueberry Cream Cheese Bread is nearly ready to steal the show!

    Tips for Success

    • Make sure you soften your cream cheese to avoid lumps in the filling.
    • Toss blueberries in flour before adding them to the batter to prevent sinking.
    • For extra flavor, consider adding a sprinkle of cinnamon or nutmeg.
    • Check your bread a few minutes early to avoid overbaking.
    • Let it cool completely for the best texture and flavor before slicing.

    Equipment Needed

    • 9×5-inch loaf pan (a standard bread pan will work too)
    • Electric mixer (a whisk and strong arm can do the job as well)
    • Mixing bowls (any size will do)
    • Whisk (or fork if you’re feeling adventurous)
    • Rubber spatula (great for scraping every last bit!)

    Variations of Blueberry Cream Cheese Bread

    • Whole wheat flour: Substitute half or all of the all-purpose flour for whole wheat flour for a nuttier flavor and added fiber.
    • Stir in nuts: Add some chopped walnuts or pecans for a delightful crunch and extra texture.
    • Citrus zest: Incorporate lemon or orange zest into the batter for a bright, refreshing twist!
    • Chocolate chips: Mix in semi-sweet or white chocolate chips for a sweet, decadent option.
    • Dairy-free version: Use plant-based butter and a dairy-free cream cheese alternative for a dairy-free bread that’s equally delicious.

    Serving Suggestions

    • Enjoy slices of Blueberry Cream Cheese Bread warm with a pat of butter or cream cheese.
    • Pair it with a steaming cup of coffee or a refreshing glass of iced tea.
    • For a delightful brunch, serve alongside fresh fruit or yogurt.
    • Dress it up on a pretty platter for a stunning presentation!

    FAQs about Blueberry Cream Cheese Bread

    Can I use frozen blueberries for this recipe?
    Absolutely! Frozen blueberries work perfectly in this Blueberry Cream Cheese Bread. Just toss them in flour before adding to the batter to prevent sinking. They’ll be delicious!

    How should I store leftover Blueberry Cream Cheese Bread?
    Store any leftovers in an airtight container at room temperature for up to three days. If you’d like to keep it longer, slice it up and freeze individual pieces. Just thaw when you’re ready to enjoy!

    Can I substitute the cream cheese?
    Definitely! For a lighter option, you can use Greek yogurt or a dairy-free cream cheese alternative. Just know that the taste and texture will vary slightly, but it’ll still be tasty!

    Is Blueberry Cream Cheese Bread suitable for breakfast?
    Yes! This bread is perfect for breakfast, especially when paired with a cup of coffee or tea. It’s a sweet treat that still feels wholesome.

    What are some great toppings for this bread?
    You can top it with a drizzle of glaze, a sprinkle of powdered sugar, or even some fresh fruit for added flair. Get creative with what you have on hand!

    Final Thoughts

    Cooking can be a joyful escape from our busy lives, and this Blueberry Cream Cheese Bread embodies that joy. Each bite transforms a simple moment into a celebration, whether it’s a quiet breakfast or a delightful treat for guests. The warm, inviting aroma fills your kitchen, while the creamy filling and bursts of blueberry flavor dance on your palate. As a passionate home cook, sharing this recipe with you is my way of bringing a little sweetness into your life. So, gather your ingredients, and let’s create something magical together—after all, baked goods are meant to be shared and savored!


    Print

    clock clock iconcutlery cutlery iconflag flag iconfolder folder iconinstagram instagram iconpinterest pinterest iconfacebook facebook iconprint print iconsquares squares iconheart heart iconheart solid heart solid icon

    Description

    A moist and delicious Blueberry Cream Cheese Bread that features a rich cream cheese filling and is loaded with fresh blueberries.


    • 1 3/4 cups all-purpose flour
    • 1 teaspoon baking powder
    • 1/2 teaspoon baking soda
    • 1/2 teaspoon salt
    • 1/2 cup unsalted butter, softened
    • 3/4 cup granulated sugar
    • 2 large eggs
    • 1 teaspoon vanilla extract
    • 1/2 cup milk (or buttermilk)
    • 1 cup fresh or frozen blueberries (tossed in 1 tablespoon flour to prevent sinking)
    • 8 oz cream cheese, softened
    • 1/4 cup granulated sugar
    • 1 large egg
    • 1 teaspoon vanilla extract

    1. Preheat your oven to 350°F (175°C). Grease a 9×5-inch loaf pan and line it with parchment paper for easier removal.
    2. In a medium bowl, whisk together the flour, baking powder, baking soda, and salt.
    3. In a large bowl, using an electric mixer, cream together the softened butter and sugar until light and fluffy. Add in the eggs, one at a time, beating well after each addition. Stir in the vanilla extract.
    4. Gradually mix in the dry ingredients, alternating with the milk, starting and ending with the flour mixture. Mix just until combined. Fold in the floured blueberries gently.
    5. In a separate bowl, beat the cream cheese, sugar, egg, and vanilla until smooth and creamy.
    6. Pour half of the bread batter into the prepared loaf pan and spread it evenly. Then, spread the cream cheese mixture evenly over the batter. Top with the remaining batter, carefully spreading it to cover the cream cheese layer.
    7. Bake for 55-65 minutes, or until a toothpick inserted into the center comes out clean. If the top starts to brown too much, cover it loosely with aluminum foil during the last 15 minutes of baking.
    8. Allow the bread to cool in the pan for 10 minutes before transferring it to a wire rack to cool completely.

    Notes

    • Make sure to toss the blueberries in flour to prevent them from sinking to the bottom of the bread.
    • This bread can be served warm or at room temperature and is perfect for breakfast or as a snack.
    • Store any leftovers in an airtight container at room temperature for up to 3 days.
    • Prep Time: 15 minutes
    • Cook Time: 60 minutes
    • Category: Baked Goods
    • Method: Baking
    • Cuisine: American

    Nutrition

    • Serving Size: 1 slice
    • Calories: 210
    • Sugar: 10g
    • Sodium: 180mg
    • Fat: 9g
    • Saturated Fat: 5g
    • Unsaturated Fat: 3g
    • Trans Fat: 0g
    • Carbohydrates: 29g
    • Fiber: 1g
    • Protein: 3g
    • Cholesterol: 50mg

    Sharing is caring!

  • Focaccia Cheesy Garlic Bread

    Focaccia Cheesy Garlic Bread


    Introduction to Focaccia Cheesy Garlic Bread

    Have you ever craved a warm, cheesy snack that feels like a hug for your taste buds? That’s where my Focaccia Cheesy Garlic Bread steps in! With its fluffy texture and rich flavors, it’s not just a treat; it’s a delightful solution for busy moms or professionals looking to impress without the fuss. Whether you’re gearing up for family movie night or simply want to pamper yourself after a long day, this easy-to-make dish will leave everyone asking for seconds. It’s the kind of comfort food that brightens your day and brings your loved ones together.

    Why You’ll Love This Focaccia Cheesy Garlic Bread

    Let’s face it, life can get hectic. This Focaccia Cheesy Garlic Bread is here to save the day! It’s quick to prepare and packed with flavor, making it a hit for any occasion. You’ll love how easy it is to whip up, and the aroma that fills your kitchen is simply divine. Plus, the cheesy goodness is irresistible, ensuring your family will be cheering for more long after the last slice is gone.

    Ingredients for Focaccia Cheesy Garlic Bread

    Gathering the right ingredients is key to making my Focaccia Cheesy Garlic Bread a standout dish. Here’s what you’ll need:

    • All-Purpose Flour: This is the backbone of your bread, providing structure and chewiness. It’s versatile and easy to work with.
    • Warm Water: Essential for activating the yeast. Make sure it’s at about 110°F, not too hot, or it might kill the yeast.
    • Active Dry Yeast: This is what makes your bread rise, creating that lovely fluffy texture we all adore.
    • Sugar: Just a touch of sweetness helps to activate the yeast and enhances the flavor of the bread.
    • Salt: It brings out the flavors and balances the overall taste. A must-have for any bread recipe!
    • Olive Oil: Wonderful for adding richness and moisture to your dough. Plus, it makes the crust crispy and golden.
    • Garlic: Minced garlic gives this focaccia its signature flavor, bursting with aromatic goodness.
    • Shredded Mozzarella Cheese: melts beautifully for that stretchy, gooey texture you can’t resist.
    • Grated Parmesan Cheese: adds a nutty depth and a slightly salty kick that perfectly complements the Mozzarella.
    • Fresh Parsley: Chopped parsley brings a pop of color and a fresh flavor. It’s not just for garnish!
    • Dried Oregano: A classic herb in Italian cooking, it adds an earthy flavor that really shines in this bread.
    • Red Pepper Flakes: Optional, but these little flakes can add a welcome kick if your family enjoys a bit of heat!

    For precise measurements, check the bottom of this article where you’ll find the quantities listed and available for printing. Happy cooking!

    How to Make Focaccia Cheesy Garlic Bread

    Creating my Focaccia Cheesy Garlic Bread is not just easy; it’s a fun and rewarding experience! Follow these simple steps to delight your family and enjoy the process:

    Step 1: Activate the Yeast

    Start by grabbing a small bowl. Combine the warm water, sugar, and active dry yeast. Give it a gentle stir and let it sit for about 5-10 minutes. This helps the yeast become frothy and alive.

    Step 2: Prepare the Dough

    In a large mixing bowl, mix the all-purpose flour and salt. Create a well in the center and pour in the yeast mixture along with the olive oil. Stir until a sticky dough forms. It’s like a warm hug waiting to be shaped!

    Step 3: Knead the Dough

    On a floured surface, place your dough. Knead it for about 5-7 minutes until it’s smooth and elastic. If it’s too sticky, sprinkle a little more flour. Think of this as giving the dough a spa day!

    Step 4: First Rise

    Place the dough in a greased bowl, cover it with a damp cloth, and let it rise in a warm spot. This should take about an hour. You want it to double in size, becoming a fluffy cloud!

    Step 5: Prepare the Topping

    While the dough rises, in a small bowl, mix the minced garlic, chopped parsley, oregano, and red pepper flakes if you like a bit of spice. This herb-infused mixture will elevate the flavor of your focaccia.

    Step 6: Shape the Focaccia

    Once your dough has risen, punch it down to release the air. Transfer it to a lightly oiled baking sheet and press it out with your fingers. Shape it into a rectangle about 1/2-inch thick. Imagine you’re flattening a cloud!

    Step 7: Create Dimples

    Use your fingers to create deep dimples all over the surface of the dough. This is where the olive oil will go, creating those delightful pockets of flavor.

    Step 8: Add Toppings

    Drizzle olive oil generously over the dough, ensuring it fills the dimples. Then, evenly sprinkle the garlic herb mixture on top. Finally, cover it with shredded mozzarella and grated Parmesan cheese. The more cheese, the merrier, right?

    Step 9: Second Rise

    Cover the focaccia loosely with a cloth and let it rise for another 20-30 minutes. During this time, the aroma will start to work its magic, calling everyone to the kitchen!

    Step 10: Preheat the Oven

    Now, it’s time to get your oven ready. Preheat it to 400°F (200°C). This ensures your focaccia will bake to perfection!

    Step 11: Bake

    Place your focaccia in the oven and bake for 20-25 minutes. You’ll want it to be golden brown, with bubbly cheese on top. That’s the moment you’ve been waiting for!

    Step 12: Cool and Slice

    Once baked, let the bread cool slightly before slicing. Serve it warm for the best cheesy experience. Each piece is like a piece of heaven—perfectly indulging!

    Tips for Success

    • Ensure your water is warm, not hot, for the yeast to activate.
    • Keep your workspace clean and lightly floured to prevent sticking.
    • Knead until the dough is smooth and elastic for the best texture.
    • Let the dough rise in a warm area for optimal fluffiness.
    • Don’t skip the dimples—this helps to create amazing pockets of flavor!

    Equipment Needed for Focaccia Cheesy Garlic Bread

    • Mixing Bowls: Having a large bowl and a smaller one is ideal. Alternatively, use any deep, wide container.
    • Baking Sheet: A standard baking sheet works perfectly. You can also use a cast iron skillet for a crispy crust.
    • Floured Surface: A clean countertop or a cutting board will do.
    • Measuring Cups and Spoons: Essential for accuracy, but you can eyeball it if you’re experienced!
    • Damp Cloth: Use a kitchen towel or plastic wrap to cover the dough while it rises.

    Variations on Focaccia Cheesy Garlic Bread

    • Herb Infusion: Experiment with fresh herbs like rosemary or thyme instead of parsley for a different flavor profile.
    • Cheese Lovers: Mix different cheeses—try feta or goat cheese for a tangy twist!
    • Veggie Boost: Add thinly sliced bell peppers or sun-dried tomatoes to the topping for an extra layer of flavor.
    • Gluten-Free Option: Substitute all-purpose flour with a gluten-free flour blend for a delicious gluten-free focaccia.
    • Sweet Dish: Transform it into a dessert by skipping the garlic and topping with cinnamon and sugar before baking.

    Serving Suggestions for Focaccia Cheesy Garlic Bread

    • Pair it with a fresh green salad drizzled with balsamic vinaigrette for a light meal.
    • Serve with a rich marinara or garlic dipping sauce for an extra kick.
    • Enjoy alongside your favorite pasta dish for a comforting Italian feast.
    • A glass of red wine complements the flavors beautifully—perfect for date night!
    • Present it on a wooden board, garnished with extra herbs for a rustic touch.

    FAQs about Focaccia Cheesy Garlic Bread

    Can I make Focaccia Cheesy Garlic Bread ahead of time?

    Absolutely! You can prepare the dough ahead and store it in the fridge overnight. Just let it come to room temperature before shaping and allowing it to rise again.

    What can I use instead of active dry yeast?

    If you’ve got instant yeast, you can use that instead. Just mix it directly with the flour, skipping the activation step. Your focaccia will still rise beautifully!

    Is it possible to freeze Focaccia Cheesy Garlic Bread?

    Yes! After baking, let it cool completely. Then, wrap it tightly in plastic wrap and place it in a freezer bag. It can last for up to three months. Thaw and reheat before serving!

    How can I customize the flavors?

    The beauty of focaccia is its versatility! You can add olives, caramelized onions, or even different cheese blends. Don’t hesitate to get creative with toppings!

    What do I do if my dough doesn’t rise?

    If your dough isn’t rising, it could be due to the yeast being old or the water being too hot. Make sure your yeast is fresh and that your water is warm but not scalding. If all else fails, give it a little more time in a warm spot.

    Final Thoughts

    Making Focaccia Cheesy Garlic Bread is more than just a recipe; it’s a delightful experience that brings warmth and joy to any kitchen. The aroma that fills your home as it bakes is simply intoxicating, igniting appetites and sparking conversations. Each gooey, cheesy slice is a burst of happiness that creates cherished memories with your family and friends. This dish is not only satisfying to make but also a surefire way to impress. So, grab your ingredients, roll up your sleeves, and enjoy the delicious journey of crafting this comforting bread. You won’t regret it!


    Print

    clock clock iconcutlery cutlery iconflag flag iconfolder folder iconinstagram instagram iconpinterest pinterest iconfacebook facebook iconprint print iconsquares squares iconheart heart iconheart solid heart solid icon

    Description

    Deliciously cheesy garlic bread baked in focaccia style, perfect as an appetizer or side dish.


    • 2 cups all-purpose flour
    • 1 cup warm water (about 110°F)
    • 1 tablespoon active dry yeast
    • 1 teaspoon sugar
    • 1 teaspoon salt
    • 1/4 cup olive oil (plus extra for drizzling)
    • 4 cloves garlic, minced
    • 1/2 cup shredded mozzarella cheese
    • 1/2 cup grated Parmesan cheese
    • 2 tablespoons fresh parsley, chopped
    • 1 teaspoon dried oregano
    • Pinch of red pepper flakes (optional)

    1. Activate the Yeast: In a small bowl, combine warm water, sugar, and active dry yeast. Stir gently and let it sit for about 5-10 minutes until frothy.
    2. Prepare the Dough: In a large mixing bowl, combine the flour and salt. Create a well in the center and pour in the yeast mixture and olive oil. Mix until a sticky dough forms.
    3. Knead the Dough: On a floured surface, knead the dough for about 5-7 minutes until smooth and elastic. If it’s too sticky, add a little more flour as needed.
    4. First Rise: Place the dough in a greased bowl, cover it with a damp cloth, and let it rise in a warm place for about 1 hour, or until it doubles in size.
    5. Prepare the Topping: In a small bowl, combine the minced garlic, chopped parsley, oregano, and a pinch of red pepper flakes for added heat.
    6. Shape the Focaccia: Once the dough has risen, punch it down and transfer it to a lightly oiled baking sheet. Press it out with your fingers to form a rectangle about 1/2-inch thick.
    7. Create Dimples: Using your fingers, make deep dimples all over the surface of the dough. Drizzle olive oil generously over the top, spreading it into the dimples.
    8. Add Toppings: Evenly sprinkle the garlic herb mixture over the dough. Top with shredded mozzarella and grated Parmesan cheese.
    9. Second Rise: Cover the focaccia loosely with a cloth and let it rise for another 20-30 minutes.
    10. Preheat the Oven: Preheat your oven to 400°F (200°C).
    11. Bake: Bake the focaccia for 20-25 minutes or until it’s golden brown on top and the cheese is bubbly.
    12. Cool and Slice: Once baked, let the bread cool slightly before slicing. Serve warm.

    Notes

    • For added flavor, use fresh herbs instead of dried.
    • Store any leftovers in an airtight container for up to 2 days.
    • Prep Time: 20 minutes
    • Cook Time: 25 minutes
    • Category: Appetizer
    • Method: Baking
    • Cuisine: Italian

    Nutrition

    • Serving Size: 1 piece
    • Calories: 250
    • Sugar: 0g
    • Sodium: 300mg
    • Fat: 12g
    • Saturated Fat: 3g
    • Unsaturated Fat: 9g
    • Trans Fat: 0g
    • Carbohydrates: 30g
    • Fiber: 1g
    • Protein: 8g
    • Cholesterol: 10mg

    Sharing is caring!

  • Taco Cottage Cheese Bowl: A Quick, Delicious Recipe!

    Taco Cottage Cheese Bowl: A Quick, Delicious Recipe!


    Introduction to Taco Cottage Cheese Bowl

    Hey there! If you’re anything like me, some days feel like a whirlwind, and cooking a full meal seems like climbing a mountain. That’s where this Taco Cottage Cheese Bowl comes in—a quick solution for a busy day, packed with nutrition and flavor!

    Whether you’re juggling work, kids, or simply trying to find something delicious to eat, this recipe promises both ease and satisfaction. Trust me, nothing beats enjoying a colorful, tasty bowl that takes just 10 minutes to whip up. It’s a delightful dish to impress your loved ones or to indulge in all by yourself. Let’s dive into this scrumptious experience together!

    Why You’ll Love This Taco Cottage Cheese Bowl

    This Taco Cottage Cheese Bowl is a lifesaver for busy weekdays. It’s quick, taking only 10 minutes to prepare. Plus, it’s a nutritious meal that’s bursting with flavors. The combination of creamy cottage cheese with zesty taco-inspired ingredients creates a taste explosion. Best of all, it’s easily customizable, so you can cater it to your family’s preferences. Who knew a bowl could be so versatile and delicious?

    Ingredients for Taco Cottage Cheese Bowl

    Getting the right ingredients set the stage for your Taco Cottage Cheese Bowl. Here’s what you’ll need to create this quick and nutritious meal:

    • Cottage Cheese: The creamy base that gives the bowl its wonderful texture. Choose low-fat or regular based on your preference.
    • Seasoned Ground Beef: Adds that meaty, taco flavor. Don’t have beef? Try turkey or mushrooms for a lighter option!
    • Black Beans: These little powerhouses bring protein and fiber. Canned ones are super convenient—just rinse and go!
    • Corn Kernels: Their sweet crunch provides a lovely contrast to the savory elements. You can use frozen or canned corn for ease.
    • Salsa: A vibrant addition to brighten up the flavors. Choose your spice level; mild to hot salsa can change the experience!
    • Shredded Cheddar Cheese: This brings a melty, gooey goodness. Feel free to swap with pepper jack for a spicy kick!
    • Avocado: Creamy slices elevate this dish while adding healthy fats. If you’re in a pinch, guacamole works too.
    • Lime Wedge: A squeeze of lime juice adds freshness and tang, rounding out the flavor profile beautifully.
    • Fresh Cilantro: Makes for a delightful garnish and brings a burst of freshness. If you’re not a cilantro fan, fresh parsley can be a great substitute!

    If you’d like exact measurements for everything, you’ll find them at the bottom of the article, along with a handy print option!

    How to Make Taco Cottage Cheese Bowl

    Creating your Taco Cottage Cheese Bowl is a breeze, and I’m here to guide you through it step by step. With just a few quick layers, you’ll have a colorful and nutritious meal ready to enjoy. Let’s get started!

    Layering the Ingredients

    First off, grab a bowl and start with the cottage cheese. This creamy delight forms the base, giving the entire dish a lovely texture. I like to scoop it in and spread it around the bowl. This helps to maintain that silky consistency with every bite. Layering should be simple; make sure it covers the bottom completely. It’s like a blank canvas awaiting its vibrant toppings! Plus, the cottage cheese will hold everything together perfectly. As you add your toppings later, this creamy base will introduce a delightful contrast to the savory and crunchy textures. You’ll see what I mean when you dig in!

    Adding the Protein

    Next, let’s introduce the star of the show—seasoned ground beef! If you’ve got leftover beef from taco night, even better. Warm it up slightly and generously spoon it atop the cottage cheese layer. The seasoned beef lends that comforting, savory experience we all crave. Don’t worry if you’re not a beef fan; turkey or crispy chickpeas work just as well. What matters is that you enjoy every flavorful bite!

    Completing the Bowl

    Now, it’s time to build upon our foundation! Add some black beans, corn, and a hearty scoop of salsa. Each ingredient plays a crucial role, creating texture and enhancing flavors. The creamy beans blend beautifully with the crunch of corn, while the salsa adds zing and freshness. I can’t stress enough how these layers work in harmony. As you spoon them in, think about how each flavor will come together. It’s the culinary equivalent of a beautiful painting!

    Final Touches

    Let’s give our bowl a pop of color and freshness! Sprinkle a generous handful of shredded cheddar cheese right on top. The melty goodness will intertwine with everything else, making it irresistible. Next, add those gorgeous avocado slices—think creamy, dreamy perfection. Finally, garnish with fresh cilantro for the finishing touch. This isn’t just about taste; it’s about creating a visually stunning dish. The vibrant colors will make your heart sing and your taste buds dance!

    Tips for Success

    • Use leftover taco meat for a no-cook option—saves time!
    • Rinse canned beans to cut back on sodium and enhance flavor.
    • Prepare extra ingredients in advance for quick assembly during the week.
    • Taste as you go; adjust spices or toppings based on your cravings.
    • Don’t hesitate to mix and match toppings to keep things exciting!

    Equipment Needed

    • Bowl: A simple mixing bowl works wonders. No fancy dishes required!
    • Spoon: Any spoon will do for layering and serving. Use your favorite!
    • Cutting Board: Handy for slicing avocado and lime.
    • Knife: A sharp knife makes quick work of toppings.

    Variations

    • Vegetarian Option: Swap the ground beef for sautéed mushrooms or a mix of your favorite veggies.
    • Spicy Twist: Add jalapeños or a dollop of spicy salsa for an extra kick.
    • Southwestern Flavor: Incorporate diced bell peppers and a sprinkle of chili powder to change things up.
    • Whole30 Friendly: Replace cheese with nutritional yeast and skip the beans for a compliant dish.
    • Low-Carb Adaptation: Use cauliflower rice instead of beans and corn for a lighter bowl.

    Serving Suggestions

    • Pair with a side of crispy tortilla chips for extra crunch.
    • Enjoy with a refreshing iced tea or a fruity lemonade to balance flavors.
    • For a festive touch, serve in colorful bowls topped with extra lime wedges.
    • Present with a vibrant salad on the side for added freshness.

    FAQs about Taco Cottage Cheese Bowl

    Can I make the Taco Cottage Cheese Bowl ahead of time?

    Absolutely! You can prepare all your ingredients in advance and store them separately in the fridge. When you’re ready to eat, simply layer them in your bowl. This is a great option for those busy weekday lunches.

    Is the Taco Cottage Cheese Bowl suitable for kids?

    Yes! Kids generally enjoy colorful and customizable meals. You can let them pick their favorite toppings, making it a fun meal they can make themselves.

    How can I make this meal more filling?

    If you’re looking to add more substance, consider including quinoa or brown rice as an extra layer beneath the cottage cheese. You’ll get additional fiber and nutrients, turning it into a more satisfying meal!

    Are there vegetarian options for the protein?

    For sure! You can swap out the ground beef for seasoned lentils, black beans, or even sautéed veggies. It keeps the flavor profile intact while accommodating dietary preferences!

    Can I use different cheeses in the Taco Cottage Cheese Bowl?

    Of course! While cheddar is a classic choice, feel free to experiment with Monterey Jack, pepper jack, or queso fresco. Each brings its unique flavor and texture!

    Final Thoughts

    The Taco Cottage Cheese Bowl isn’t just a meal; it’s a warm hug in a bowl! With its colorful layers and rich flavors, this dish brings joy to the dinner table, even on the busiest days. I love how simple yet satisfying it is, reminding me that healthy meals can also be delicious without breaking a sweat. Whether you’re enjoying it solo or sharing with family, this bowl captures the essence of comfort food. So grab your ingredients, gather your loved ones, and let this bowl be the star of your next mealtime adventure!


    Print

    clock clock iconcutlery cutlery iconflag flag iconfolder folder iconinstagram instagram iconpinterest pinterest iconfacebook facebook iconprint print iconsquares squares iconheart heart iconheart solid heart solid icon

    Description

    A quick and delicious Taco Cottage Cheese Bowl recipe, perfect for a nutritious meal.


    • 1/2 cup cottage cheese
    • 1/2 cup seasoned ground beef
    • 1/4 cup black beans
    • 1/4 cup corn kernels
    • 1/4 cup salsa
    • 1/4 cup shredded cheddar cheese
    • 1/2 avocado, sliced
    • 1 lime wedge
    • Fresh cilantro

    1. In a bowl, layer cottage cheese, ground beef, black beans, corn, and salsa.
    2. Sprinkle with shredded cheese and top with avocado slices and cilantro.
    3. Squeeze lime juice over the top and serve immediately.

    Notes

    • Feel free to customize with your choice of toppings.
    • This bowl can be made in advance and stored in the fridge for a quick meal.
    • Prep Time: 10 minutes
    • Cook Time: 0 minutes
    • Category: Lunch/Dinner
    • Method: No Cook
    • Cuisine: Mexican

    Nutrition

    • Serving Size: 1 bowl
    • Calories: 450
    • Sugar: 3g
    • Sodium: 600mg
    • Fat: 24g
    • Saturated Fat: 10g
    • Unsaturated Fat: 7g
    • Trans Fat: 0g
    • Carbohydrates: 30g
    • Fiber: 8g
    • Protein: 30g
    • Cholesterol: 80mg

    Sharing is caring!

  • Keto Greek Cauliflower Rice: Delight in Healthy Flavor!

    Keto Greek Cauliflower Rice: Delight in Healthy Flavor!


    Introduction to Keto Greek Cauliflower Rice

    Hey there, fellow food lovers! If you’re looking for a quick, healthy meal that doesn’t skimp on flavor, let me introduce you to my favorite dish: Keto Greek Cauliflower Rice. As a busy mom, I often find myself racing against the clock. This recipe not only saves time but also delights the taste buds. It’s the perfect solution for those hectic weeknights when you want to impress your loved ones without spending hours in the kitchen. Plus, with the enticing Mediterranean flavors, it’s a dish everyone can enjoy, without the guilt!

    Why You’ll Love This Keto Greek Cauliflower Rice

    This Keto Greek Cauliflower Rice is a game-changer for busy nights. In just 15 minutes, you can whip up a dish that’s bursting with flavor and vibrant colors.

    With fresh veggies and feta cheese, it’s not only delicious but also healthy. Plus, it’s low in carbs and calories, making it an ideal choice for anyone on a keto journey. Trust me, it’s a tasty way to eat well and feel great!

    Ingredients for Keto Greek Cauliflower Rice

    Let’s talk about the vibrant, fresh ingredients that make this dish shine. Each element adds a special touch to the overall flavor, turning a simple meal into a culinary delight.

    • Cauliflower Rice: The star of this recipe! It’s a low-carb alternative to traditional rice, packed with vitamins and fiber.
    • Cucumber: A refreshing crunch! It adds a light, crisp texture that’s perfect for balancing the creaminess of feta.
    • Tomato: Juicy and vibrant, tomatoes bring a burst of color and sweetness to your salad, enriching the flavor profile.
    • Red Onion: With its zesty bite, red onion adds a nice contrast, bringing depth to the dish.
    • Feta Cheese: This tangy cheese crumbles beautifully over the rice, adding creaminess and an authentic Greek touch.
    • Lemon Juice: The zesty acidity brightens the entire dish and enhances the flavors of the ingredients. A squeeze of sunshine!
    • Olive Oil: A drizzle of this heart-healthy oil adds richness and helps bind the ingredients together for that silky mouthfeel.
    • Dry Dill: This herb infuses a lovely flavor reminiscent of traditional Greek dishes and pairs well with the cucumber and feta.
    • Garlic Powder: A little sprinkle adds a warm, comforting depth of flavor without overpowering the dish.

    For those who adore even more feta, feel free to add extra for a creamier texture. You can find all ingredient measurements at the bottom of the article for your convenience!

    How to Make Keto Greek Cauliflower Rice

    Now let’s dive into the cooking part! Making Keto Greek Cauliflower Rice is straightforward and enjoyable. With just a few simple steps, you’ll have a delicious dish ready in no time. Gather your ingredients, roll up your sleeves, and let’s create some culinary magic in your kitchen!

    Step 1: Prepare the Cauliflower Rice

    Start by preparing your cauliflower rice according to the package instructions. If you’re using frozen cauliflower rice, you might need to microwave or sauté it briefly. This will ensure it’s fluffy and not waterlogged. Think of this step as setting up your flavor foundation for the dish. Once it’s ready, set it aside to cool a bit while you chop your fresh veggies.

    Step 2: Chop Fresh Vegetables

    Next, grab your cutting board and a sharp knife. Chop the cucumber, tomato, and red onion into small, bite-sized pieces. The lovely crunch of cucumber and the juicy sweetness of tomatoes will create a delightful contrast with the soft cauliflower rice. Try to make the pieces uniform in size to ensure every bite is a flavor-packed experience!

    Step 3: Combine Ingredients in a Bowl

    In a large mixing bowl, combine your prepared cauliflower rice with the chopped veggies. Add in that crumbled feta cheese, too! Here’s where the magic starts to happen. As you combine these ingredients, imagine the colors and textures melding together—the vibrant greens, reds, and whites are just as delicious to the eyes as they are to the palate!

    Step 4: Add Seasonings and Mix

    Time for the flavor boost! Drizzle olive oil and squeeze in the fresh lemon juice over the mixture. Sprinkle in the dry dill and garlic powder. Gently stir everything together until the ingredients are well-coated and evenly mixed. This step is crucial for ensuring each bite is a flavorful explosion. The aroma should be tantalizing, making your kitchen feel like a Greek taverna!

    Step 5: Serve and Enjoy!

    Finally, it’s time to serve up your masterpiece! You can enjoy Keto Greek Cauliflower Rice warm or chilled—it’s versatile that way. If desired, add a pinch of salt and pepper to taste. Present it in a beautiful bowl or on a plate, and watch your loved ones swoon over this healthy dish. Enjoy the compliments; you’ve earned them!

    Tips for Success

    • Use fresh ingredients for the best flavor. Quality veggies make a big difference!
    • If you prefer a warmer dish, sauté the cauliflower rice in olive oil before adding it to the salad.
    • Allow the salad to sit for a few minutes before serving; this helps the flavors meld beautifully.
    • Adjust the seasonings according to your taste; don’t be afraid to experiment!
    • For a pop of color, consider adding bell peppers or olives.

    Equipment Needed

    • Mixing Bowl: A large bowl is essential for combining your ingredients. A glass or stainless steel bowl works great.
    • Cutting Board: A sturdy cutting board will keep your workspace tidy while chopping vegetables.
    • Knife: A sharp chef’s knife ensures precise cuts for your fresh produce.
    • Measuring Cups: Handy for portioning ingredients if you’re not comfortable eyeballing it.

    Variations

    • Add Protein: For a heartier meal, toss in cooked chicken, shrimp, or chickpeas. It makes the dish even more filling!
    • Spice It Up: Add a dash of red pepper flakes or chili powder for those who enjoy a bit of heat in their meals.
    • Herb Swaps: Experiment with fresh herbs like parsley or mint for a fresh twist that brightens the flavors.
    • Vegan Option: Omit the feta cheese or replace it with a dairy-free feta for a vegan-friendly adaptation.
    • Grain-Free Variations: Substitute the cauliflower rice with shredded zucchini or spiralized veggies to keep it low-carb.


    Serving Suggestions

    • Pair with Grilled Meat: This dish complements grilled chicken, shrimp, or lamb beautifully. The flavors meld perfectly!
    • Serve with Tzatziki: A side of tzatziki sauce adds an extra layer of refreshing tang.
    • Garnish: Top with fresh herbs like parsley or mint for a pop of color and freshness.
    • Bright Colors: Present in a colorful bowl to make the dish visually appealing and appetizing.
    • Wine Pairing: A chilled Sauvignon Blanc or rosé complements the medley of flavors perfectly.

    FAQs about Keto Greek Cauliflower Rice

    Can I make Keto Greek Cauliflower Rice ahead of time? Absolutely! This dish can be prepared a few hours in advance. Just store it in the refrigerator until you’re ready to serve. The flavors even enhance after a little time together!

    Is this recipe suitable for meal prep? Yes! It’s fantastic for meal prep. Each serving is a healthy option you can pack for lunches or quick dinners. Just enjoy it within a day or two for the best flavor and freshness.

    Can I use fresh cauliflower instead of frozen? Certainly! If you have fresh cauliflower, simply rice it using a food processor or box grater. Just remember to sauté it lightly before mixing it with the other ingredients.

    How do I store leftovers? Store any leftovers in an airtight container in the refrigerator. They should keep well for up to 24 hours. Just be sure to add a splash of lemon juice before serving again to revitalize the flavors!

    What makes this a low-carb salad? The use of cauliflower rice instead of traditional rice keeps the carb count low. Plus, the fresh vegetables and feta add nutrients without unnecessary carbs, making it a great choice for anyone on a keto diet.

    Final Thoughts

    As I wrap up sharing my Keto Greek Cauliflower Rice recipe, I can’t help but feel a deep sense of joy. It’s more than just a meal; it’s a celebration of fresh ingredients and vibrant flavors that gather family around the table. Whether it’s a casual weeknight dinner or a delightful lunch, this dish brings a taste of Greece right to your kitchen. Plus, with its simplicity and health benefits, it transforms everyday cooking into an enjoyable experience. So, roll up your sleeves and savor the smiles that come from sharing this delightful dish!


    Print

    clock clock iconcutlery cutlery iconflag flag iconfolder folder iconinstagram instagram iconpinterest pinterest iconfacebook facebook iconprint print iconsquares squares iconheart heart iconheart solid heart solid icon

    Description

    A healthy and refreshing Keto Greek Cauliflower Rice recipe that combines the goodness of cauliflower with fresh vegetables and feta cheese.


    • 10 ounces Cauliflower Rice (frozen)
    • 1/2 Cucumber (chopped, approximately 1 cup)
    • 1/4 cup Tomato (chopped)
    • 1/3 cup Red Onion (chopped)
    • 1/4 cup Feta Cheese (crumbled)
    • 1 Lemon (juiced)
    • 2 tbsp Olive Oil
    • 1/2 tsp Dry Dill
    • 1/2 tsp Garlic Powder

    1. Prepare the cauliflower rice, per bagged instructions. Set aside.
    2. Chop cucumber, tomato and red onion.
    3. In a large bowl, combine rice with chopped ingredients and crumbled feta.
    4. Stir in olive oil, the juice of 1 lemon, dill and garlic powder. Stir well, so all ingredients are well coated.
    5. Top with a dash of salt & pepper, if desired. You can serve this warm or cold.

    Notes

    • Best served fresh but can be stored in the refrigerator for a day.
    • Add more feta for a creamier texture if desired.
    • Adjust seasoning according to taste.
    • Prep Time: 10 minutes
    • Cook Time: 5 minutes
    • Category: Salad
    • Method: Mixing
    • Cuisine: Greek

    Nutrition

    • Serving Size: 1 serving
    • Calories: 150
    • Sugar: 3g
    • Sodium: 200mg
    • Fat: 12g
    • Saturated Fat: 3g
    • Unsaturated Fat: 8g
    • Trans Fat: 0g
    • Carbohydrates: 8g
    • Fiber: 3g
    • Protein: 6g
    • Cholesterol: 15mg

    Sharing is caring!

  • Creamy cheesecake brownies that will delight your taste buds!

    Creamy cheesecake brownies that will delight your taste buds!


    Introduction to Creamy Cheesecake Brownies

    As a passionate home cook, I know how hectic life can get, especially for busy moms and professionals. There are days when you crave something decadent yet simple to whip up. That’s where these creamy cheesecake brownies come in! This delightful recipe marries fudgy brownies with a luscious cheesecake layer, making it a perfect treat for any occasion. Whether you’re trying to impress guests or indulge during family movie night, these brownies are a quick solution that will charm your taste buds and those of your loved ones.

    Why You’ll Love This Creamy Cheesecake Brownies

    These creamy cheesecake brownies are the best of both worlds—rich, fudgy brownies wrapped in a velvety cheesecake layer.

    They come together so quickly, making them a lifesaver for busy weeknights or spontaneous gatherings.

    Plus, they’re easy to adapt to suit your family’s preferences.

    You can whip these up in under an hour, leaving you more time to enjoy life’s little moments.

    Ingredients for Creamy Cheesecake Brownies

    Let’s talk ingredients because this is where the magic starts! You’ll need a mix of familiar staples and a few delightful extras to bring these creamy cheesecake brownies to life. Each ingredient plays a special role in creating that dreamy texture and flavor. Here’s what you’ll need:

    • Chocolate chips: Semi-sweet or bittersweet will do the trick! They give the brownies a rich depth. Feel free to experiment with dark chocolate if you’re craving something more intense.
    • Unsalted butter: This will add moisture and richness to your brownies. Cubing it helps it melt evenly.
    • Granulated sugar: For sweetness! It balances the rich chocolate. Brown sugar could work here, too, for a hint of caramel flavor.
    • Vanilla extract: The gentle aroma of vanilla elevates the flavor profile. Pure vanilla extract is worth the investment.
    • Eggs: Room temperature eggs create a smoother batter and help lift your brownies for that chocolaty goodness.
    • Cocoa powder: Unsweetened cocoa powder adds that essential chocolate flavor! It’s what makes brownie lovers swoon.
    • Cornstarch: This helps give the brownies a chewy texture. A gluten-free option if you’re looking to accommodate dietary needs!
    • Salt: Just a pinch enhances all the flavors. Don’t skip it!
    • Mini chocolate chips: These little gems create bursts of chocolatey joy throughout your brownies. They’re an unexpected treat in every bite!
    • Cream cheese: This is the heart of the cheesecake layer! Softened cream cheese mixes beautifully into a smooth, creamy filling.
    • Granulated sugar (for cheesecake layer): A little more sugar to sweeten the cheesecake layer. It balances the tartness of the cream cheese.
    • Egg (for cheesecake layer): Similar to the brownie mixture, this binds everything beautifully and contributes to a rich texture.
    • Vanilla extract (for cheesecake layer): Because who wouldn’t want an extra layer of delightful flavor?

    For precise measurements of each ingredient, don’t forget to check the end of the article, where you’ll find everything neatly organized for printing. Happy baking!

    How to Make Creamy Cheesecake Brownies

    Now that you’ve gathered your ingredients, let’s dive into the joy of baking! This process might feel like a whirlwind, but trust me, the outcome is absolutely worth it. Follow these steps carefully, and soon you’ll be indulging in the scrumptious world of creamy cheesecake brownies.

    Step 1: Preheat the Oven

    First, you’ll want to preheat your oven to 350°F. This step is crucial because it ensures your brownies bake evenly.

    Next, grease a 9-inch square pan with butter or cooking spray, then line it with parchment paper.

    Leave a bit of an overhang, as this will help you lift out your brownies later on!

    Step 2: Melt the Chocolate and Butter

    In a microwave-safe bowl, combine the semi-sweet chocolate chips and cubed butter.

    Microwave in 30-second intervals, stirring after each session until the mixture is smooth and glossy.

    Watch closely—overheating can cause the chocolate to seize. You want it silky, not chunky!

    Step 3: Combine Ingredients

    Once your chocolate and butter mixture has cooled slightly, stir in the granulated sugar and vanilla extract.

    Mix until it’s fully combined.

    This is where sweet dreams begin, creating a lovely balance between the chocolate and sugar.

    Step 4: Add Eggs and Dry Ingredients

    Now, crack in the room temperature eggs one at a time.

    Stir well after each addition; this helps create a velvety batter.

    Then, whisk together your cocoa powder, cornstarch, and salt in a separate bowl.

    Add this dry mixture into the wet ingredients, and stir until you have a smooth batter that easily pulls away from the sides.

    Step 5: Fold in Chocolate Chips

    Here comes the fun part—fold in the mini chocolate chips!

    These little joys add burst after burst of chocolatey goodness into your brownies.

    Make sure they’re evenly distributed for that delicious surprise in every bite.

    Step 6: Prepare the Cheesecake Layer

    In a separate bowl, beat the softened cream cheese until fluffy.

    Add the sugar, single egg for the cheesecake layer, and vanilla extract.

    Mix until you achieve a smooth and creamy consistency.

    Smooth cream cheese mixture creates a rich contrast to the fudgy brownie base.

    Step 7: Layer and Swirl

    Pour about two-thirds of the brownie batter into your lined pan, smoothing the top.

    Now, spread the cheesecake mixture evenly over this layer.

    Drizzle the remaining brownie batter on top and use a knife to gently swirl everything together.

    This creates a marbled effect that’s just as pleasing to the eyes as it is to the taste buds!

    Step 8: Bake to Perfection

    It’s time to pop your pan into the preheated oven and bake for 30 to 35 minutes.

    Use a toothpick to check for doneness; it should come out with moist crumbs.

    Once baked, let your creamy cheesecake brownies cool completely in the pan before lifting them out and slicing into squares.

    You’ll want that perfect texture when you take that first delicious bite.

    Tips for Success

    • Always use room temperature eggs and cream cheese for a smoother batter.
    • Don’t overmix your brownie batter; stir just until combined.
    • Let the brownies cool completely before slicing for clean edges.
    • For added flavor, sprinkle some sea salt on top before baking.
    • Experiment with flavored extracts like almond for a unique twist!

    Equipment Needed

    • 9-inch square pan: A baking dish is essential, but an 8-inch round pan works too!
    • Mixing bowls: Use glass or stainless steel for durability. You might even grab a large zip-top bag for easy mixing!
    • Microwave-safe bowl: This is key for melting chocolate safely.
    • Rubber spatula: Perfect for scraping every last bit of batter from the bowl.
    • Electric mixer: While a whisk can work, a mixer will save time and arm strength!

    Variations for Creamy Cheesecake Brownies

    • Nutty Delight: Add chopped walnuts or pecans to the brownie batter for an extra crunch and flavor.
    • Fruit-Filled: Swirl in some raspberry or strawberry puree before baking for a fruity contrast with the chocolate.
    • Cheesecake Twist: Mix in lemon or orange zest into the cheesecake layer for a refreshing citrus kick.
    • Gluten-Free Option: Substitute cornstarch for regular flour and check all ingredient labels to ensure they’re gluten-free.
    • Vegan Variation: Use plant-based butter, dairy-free chocolate, and a vegan cream cheese alternative for a plant-based treat.

    Serving Suggestions

    • Pair your creamy cheesecake brownies with a scoop of vanilla ice cream for an indulgent dessert.
    • Serve alongside fresh berries to add a bright and fruity contrast.
    • Drizzle some chocolate ganache on top for extra decadence and visual appeal.
    • Accompany with a hot cup of coffee or a chilled glass of milk for the perfect finish.

    FAQs about Creamy Cheesecake Brownies

    I often get questions about my creamy cheesecake brownies, and I love addressing them! Here are some common queries that can help you navigate through your baking adventure.

    Can I use different types of chocolate for these brownies?

    Absolutely! While I recommend semi-sweet or bittersweet chocolate for that classic taste, feel free to experiment with dark chocolate. It adds a rich depth to your creamy cheesecake brownies!

    What can I substitute for cream cheese if I have a dairy allergy?

    You can use a dairy-free cream cheese alternative. There are many delicious brands available that can still give you that creamy cheesecake texture without the dairy. Perfect for everyone to enjoy!

    How do I store leftover brownies to keep them fresh?

    Store your creamy cheesecake brownies in an airtight container in the refrigerator. This helps maintain their firmness and flavor. Just make sure they’re cooled completely before you tuck them away!

    Can I freeze these brownies for later?

    Yes! You can freeze them for up to three months. Just wrap them tightly in plastic wrap and then place them in a freezer bag. Thaw in the fridge when you’re ready to indulge again!

    What’s the key to achieving a perfect swirl between the brownie and cheesecake layers?

    The trick is to drizzle the brownie batter gently on top of the cheesecake layer and then use a knife to swirl it lightly.

    Don’t overdo it—the goal is to create beautiful marbling without completely mixing the layers!

    Final Thoughts

    Indulging in creamy cheesecake brownies is not just about satisfying a sweet tooth; it’s about creating memories.

    Whether it’s a cozy family gathering or a moment of self-care with a movie, these brownies bring joy to every occasion.

    The combination of rich chocolate and velvety cheesecake will have your taste buds dancing with delight.

    So, gather your loved ones, whip up a batch, and embrace the smiles that follow.

    With each bite, you’ll savor the love and passion that comes from being a home cook.

    Happy baking!


    Print

    clock clock iconcutlery cutlery iconflag flag iconfolder folder iconinstagram instagram iconpinterest pinterest iconfacebook facebook iconprint print iconsquares squares iconheart heart iconheart solid heart solid icon

    Description

    Delicious and rich creamy cheesecake brownies that combine fudgy brownies with a smooth cheesecake layer.


    • 12 ounces semi-sweet or bittersweet chocolate chips
    • 6 tablespoons unsalted butter, cubed
    • 3/4 cup granulated sugar
    • 1 teaspoon vanilla extract
    • 3 eggs, room temperature
    • 1/4 cup unsweetened cocoa powder
    • 1/3 cup cornstarch
    • 1/2 teaspoon salt
    • 1 cup mini semi-sweet chocolate chips
    • 8 ounces cream cheese, softened
    • 1/2 cup granulated sugar (for cheesecake layer)
    • 1 egg, room temperature (for cheesecake layer)
    • 1/2 teaspoon vanilla extract (for cheesecake layer)

    1. Preheat the oven to 350°F. Grease a 9-inch square pan and line it with parchment paper, leaving some overhang.
    2. In a microwave-safe bowl, melt the chocolate chips and butter in 30-second intervals, stirring until smooth.
    3. Stir in the sugar and vanilla extract until fully combined.
    4. Mix in the eggs one at a time, stirring well after each addition.
    5. Whisk together the cocoa powder, cornstarch, and salt, then add to the wet ingredients. Stir until the batter is smooth and pulls away from the sides.
    6. Fold in the mini chocolate chips and pour two-thirds of the batter into the prepared pan, smoothing the top.
    7. In a separate bowl, beat the cream cheese until fluffy. Add sugar, egg, and vanilla extract, and mix until smooth.
    8. Spread the cheesecake mixture over the brownie batter. Drizzle the remaining brownie batter on top and swirl gently.
    9. Bake for 30–35 minutes, or until a toothpick comes out with moist crumbs. Let cool completely before slicing.

    Notes

    • Allow the brownies to cool completely for easier slicing.
    • Store leftovers in an airtight container in the refrigerator.
    • Feel free to use dark chocolate for a richer flavor.
    • Prep Time: 20 minutes
    • Cook Time: 35 minutes
    • Category: Dessert
    • Method: Baking
    • Cuisine: American

    Nutrition

    • Serving Size: 1 brownie
    • Calories: 250
    • Sugar: 20g
    • Sodium: 100mg
    • Fat: 14g
    • Saturated Fat: 8g
    • Unsaturated Fat: 4g
    • Trans Fat: 0g
    • Carbohydrates: 28g
    • Fiber: 2g
    • Protein: 4g
    • Cholesterol: 50mg

    Sharing is caring!

  • Roasted Jalapeno Popper Grilled Cheese

    Roasted Jalapeno Popper Grilled Cheese


    Introduction to Roasted Jalapeno Popper Grilled Cheese

    Welcome, fellow foodies! Let’s talk about one of my all-time favorite comfort foods: the Roasted Jalapeno Popper Grilled Cheese. This lively spin on a classic sandwich is perfect for busy days when you need something quick and satisfying. Picture biting into crispy, buttery bread, bursting with smoky jalapenos, creamy cheese, and crispy bacon—heaven, right? It’s deliciously spicy, easy to whip up, and guaranteed to impress your family or friends. Whether you’re winding down after a long day or hosting a cozy gathering, this sandwich is sure to bring smiles all around.

    Why You’ll Love This Roasted Jalapeno Popper Grilled Cheese

    This Roasted Jalapeno Popper Grilled Cheese is a game-changer for busy evenings. It comes together in just 30 minutes, making it a quick solution when time is tight. The flavor? Absolutely jaw-dropping! Creamy, smoky, spicy, and a little crispy, every bite feels like a warm hug. Plus, who doesn’t love a grilled cheese that lets you indulge and enjoy a little kick? It’s comfort food with a twist!

    Ingredients for Roasted Jalapeno Popper Grilled Cheese

    Ready to dive into this mouthwatering Roasted Jalapeno Popper Grilled Cheese? Here’s what you’ll need:

    • Beef bacon: This crispy delight adds smoky flavor. You can substitute turkey bacon for a lighter option.
    • Jalapenos: Roasted, they bring the perfect spicy kick. If you’re feeling adventurous, try serrano peppers for more heat!
    • Onion powder: A sprinkle of this adds depth. Fresh onions can be used instead, just sauté them lightly before mixing.
    • Black pepper: A dash adds warmth. Swap for cayenne if you like extra spice.
    • Garlic salt: It brings that savory pop. You can mix garlic powder and regular salt if needed.
    • Olive oil: This is what you’ll coat the jalapenos with before roasting. Feel free to use avocado oil for a different flavor.
    • Texas toast (or thick-cut bread): Its thickness holds up wonderfully to all that cheesy goodness. Sourdough also works nicely!
    • Unsalted butter: For spreading on the bread, it creates a lovely golden crust. You can always use margarine if that’s what you have.
    • Mild cheddar cheese: This creamy delight is perfect for melting. Experiment with pepper jack for an extra spicy twist!
    • Cream cheese: It adds a luscious creaminess that binds everything together. Neufchâtel can be a lighter substitute.

    Exact quantities for each ingredient can be found at the bottom of the article for your convenience. Happy cooking!

    How to Make Roasted Jalapeno Popper Grilled Cheese

    Step 1: Roast the Jalapenos

    First things first, let’s roast those jalapenos! Preheat your oven to 400°F (200°C). Grab those beautiful green peppers and give them a good wash. Next, coat them in olive oil and lay them on a baking sheet. Roast for about 10-12 minutes. Keep an eye on them until they start to blister and turn slightly charred. This process brings out their smoky flavor, making them irresistible. Once they’re out of the oven, let them cool for a bit before slicing them into small pieces. Trust me, these roasted jalapenos are the real stars of your Roasted Jalapeno Popper Grilled Cheese!

    Step 2: Cook the Beef Bacon

    Now, let’s cook that beef bacon! In a skillet over medium heat, add your strips of bacon. Cook until they’re crispy, which usually takes about 5-7 minutes. Make sure to turn them occasionally to avoid burning. Once they’re golden brown, transfer the bacon to a paper towel-lined plate. This will help drain any excess grease. Once cooled, crumble the bacon into smaller pieces. The flavor and crunch it adds will elevate your grilled cheese to celestial levels!

    Step 3: Prepare the Cheese Filling

    Next up is crafting the heavenly cheese filling. In a mixing bowl, combine your softened cream cheese and shredded mild cheddar cheese. Then, sprinkle in the onion powder, garlic salt, and black pepper. This combo creates a creamy, flavorful base. Now, toss in your crumbled bacon and those glorious roasted jalapenos. Mix everything well until it forms a delicious, gooey filling. The cream cheese really helps in binding everything together, and the flavors? Oh, they make an incredible symphony in your mouth. Set this aside; you’ll want to dive right into it soon!

    Step 4: Assemble the Sandwich

    Let’s bring this delightful sandwich to life! Start by buttering one side of each slice of Texas toast. This will give your sandwich that golden, crispy exterior we all love. Next, take two slices and place them butter side down on a clean surface. Spread a generous amount of your cheese mixture on the unbuttered side of one slice. Top it with the second slice, ensuring the buttery sides are facing out. This is the point where you know you’re creating something truly magical!

    Step 5: Grill the Sandwiches

    Now comes the best part: grilling! Heat your skillet over medium heat. Once it’s nice and hot, place the assembled sandwich in the skillet. Let it cook for 3-4 minutes until it’s beautifully golden brown. Don’t rush this step! Keep it moving to avoid burning. After that, carefully flip the sandwich to brown the other side. If you like extra meltiness, cover the skillet for a minute. When both sides are crispy and the cheese is gooey, it’s time to take it off the heat!

    Step 6: Serve and Enjoy

    Your Roasted Jalapeno Popper Grilled Cheese is ready to shine! Slice those sandwiches in half to reveal the melty goodness inside. For an added touch, serve them with pickles, chips, or a side of salad for some freshness. Don’t forget to take a moment to savor the inviting aroma wafting from the sandwich before diving in. It’s comfort food perfection, and I can’t wait for you to experience the joy of every bite!

    Tips for Success

    • Prepare everything beforehand to streamline the cooking process.
    • Keep the heat on medium to avoid burning the bread while achieving a nice golden crust.
    • Don’t rush the grilling! Patience makes those sandwiches perfectly crispy.
    • Experiment with cheese varieties for unique flavors.
    • Serve immediately for the best melty experience.

    Equipment Needed

    • Skillet: A non-stick skillet works well, but a cast-iron skillet gives excellent heat distribution.
    • Baking sheet: This is essential for roasting jalapenos; feel free to use any rimmed tray.
    • Mixing bowl: Any size will do for your cheese mixture.
    • Spatula: A sturdy spatula helps flip those sandwiches with ease!

    Variations

    • Spicy Twist: Add extra heat by mixing in diced fresh serrano peppers or a dash of hot sauce to the cheese filling.
    • Vegetarian Delight: Swap the beef bacon for crispy tempeh or smoked tofu for a delicious meatless option.
    • Cheese Lovers: Use a blend of cheeses like pepper jack and mozzarella for an even more indulgent flavor.
    • Gluten-Free: Opt for gluten-free bread to keep this sandwich suitable for everyone.
    • Herb Infusion: Mix in chopped fresh herbs like cilantro or chives into the cheese filling for an extra burst of flavor.

    Serving Suggestions

    • Pair with tangy pickles for a delightful contrast in flavors.
    • Serve alongside a fresh side salad for a light and satisfying meal.
    • Accompany with your favorite chips for that satisfying crunch.
    • Try it with a chilled glass of lemonade for a refreshing touch.
    • For a cozy presentation, serve on wooden boards with dips like salsa or guacamole.

    FAQs about Roasted Jalapeno Popper Grilled Cheese

    Can I make this Roasted Jalapeno Popper Grilled Cheese in advance?

    Absolutely! You can prepare the cheese filling ahead of time and store it in the fridge. Just assemble and grill the sandwiches when you’re ready to go. This works wonders for fast weeknight dinners!

    What should I serve with my Roasted Jalapeno Popper Grilled Cheese?

    I love pairing this spicy grilled cheese with a fresh salad, crunchy chips, or even some zesty pickles. If you’re feeling extra indulgent, make a warm tomato soup for dipping!

    Can I use a different type of cheese?

    Definitely! While mild cheddar is my go-to for this recipe, feel free to experiment with pepper jack for added heat or mozzarella for a gooey texture. Cheese lovers will appreciate the creativity!

    How can I store leftovers?

    If you have any leftover sandwiches, wrap them in foil and store them in the fridge for up to three days. Just reheat in a skillet to get that crispy texture back!

    Are there any vegetarian options for this recipe?

    Yes! You can easily replace beef bacon with crispy tempeh or even skip it altogether for a hearty vegetarian version. The roasted jalapenos and creamy cheese still pack a flavorful punch without the meat!

    Final Thoughts

    What a delightful adventure it has been sharing this Roasted Jalapeno Popper Grilled Cheese with you! Each bite is a joyous blend of smoky, spicy, and creamy goodness that never fails to lift my spirits. This sandwich isn’t just a meal; it’s a moment of comfort and warmth that you can enjoy on a busy day or as a cozy weekend treat. I hope it brings as much joy to your table as it does to mine. So gather your loved ones, whip up these mouthwatering sandwiches, and savor the smiles that follow. Happy cooking!


    Print

    clock clock iconcutlery cutlery iconflag flag iconfolder folder iconinstagram instagram iconpinterest pinterest iconfacebook facebook iconprint print iconsquares squares iconheart heart iconheart solid heart solid icon

    Description

    A deliciously smoky and spicy sandwich combining roasted jalapenos, creamy cheese, and crispy bacon, perfect for grilled cheese lovers.


    • 6 strips beef bacon (cooked)
    • 4 medium jalapenos
    • 1/2 tsp onion powder
    • 1/4 tsp black pepper
    • 1/2 tsp garlic salt
    • 1 tbsp olive oil
    • 4 slices Texas toast (or your favorite thick-cut bread)
    • 4 tbsp unsalted butter (for spreading on the bread)
    • 1 cup mild cheddar cheese, shredded
    • 4 oz cream cheese, softened

    1. Roast the jalapenos by preheating the oven to 400°F (200°C), coating with olive oil, and roasting for 10-12 minutes until blistered.
    2. Cook the beef bacon in a skillet until crispy, then crumble and set aside.
    3. Prepare the cheese filling by combining softened cream cheese, shredded cheddar, onion powder, garlic salt, black pepper, chopped jalapenos, and crumbled bacon in a bowl.
    4. Butter one side of each slice of Texas toast.
    5. Assemble the sandwich with cheese mixture on non-buttered side, topping with another slice with butter side out.
    6. Grill the sandwiches in a skillet over medium heat for 3-4 minutes on each side until golden brown.
    7. Slice the sandwiches in half and serve immediately.

    Notes

    • For extra heat, leave some seeds in the jalapenos.
    • Pair with pickles, chips, or a fresh salad.
    • Prep Time: 15 minutes
    • Cook Time: 15 minutes
    • Category: Sandwich
    • Method: Grilling
    • Cuisine: American

    Nutrition

    • Serving Size: 1 sandwich
    • Calories: 550
    • Sugar: 2g
    • Sodium: 900mg
    • Fat: 38g
    • Saturated Fat: 18g
    • Unsaturated Fat: 15g
    • Trans Fat: 0g
    • Carbohydrates: 42g
    • Fiber: 2g
    • Protein: 18g
    • Cholesterol: 80mg

    Sharing is caring!

  • Cheesy Ranch Potatoes and Smoked Sausage

    Cheesy Ranch Potatoes and Smoked Sausage


    Introduction to Cheesy Ranch Potatoes and Smoked Sausage

    As a busy mom, I know how challenging it can be to put together a meal that’s both satisfying and easy to prepare. That’s why I’m excited to share my Cheesy Ranch Potatoes and Smoked Sausage recipe! It’s a delightful blend of flavors that everyone will love, all while taking minimal effort on your part.

    This dish is perfect for gatherings or a comforting family dinner after a hectic day. The combination of cheesy goodness and smoky sausage will have everyone asking for seconds. Trust me, this one’s a crowd-pleaser!

    Why You’ll Love This Cheesy Ranch Potatoes and Smoked Sausage

    This Cheesy Ranch Potatoes and Smoked Sausage recipe is a true gem in busy households. It’s quick to prepare and absolutely bursting with flavor, making it ideal for any night of the week. Plus, it requires minimal cleanup, which is always a win in my book! With comforting cheese and hearty sausage, it captures that irresistible comfort food vibe, perfect for satisfying picky eaters and busy bellies alike.

    Ingredients for Cheesy Ranch Potatoes and Smoked Sausage

    Let’s gather our cast of characters for the ultimate comfort dish! Here’s what you’ll need:

    • Smoked sausage: Opt for halal-certified versions, like turkey or beef sausage, for a delicious and juicy bite.
    • Baby potatoes: These little gems are perfect when halved or quartered. Their creamy texture complements the cheese and sausage beautifully.
    • Olive oil: A drizzle of this liquid gold adds richness and helps to crisp up the potatoes during baking.
    • Ranch seasoning mix: Use a trusted brand that’s halal-certified to provide the flavor backbone of the dish. It brings a tangy zing that pairs perfectly with the sausage.
    • Garlic powder: This pantry essential adds a warm and aromatic kick, making every bite delightful.
    • Onion powder: A sprinkle of onion powder enhances the savory notes without being overpowering.
    • Black pepper: Just a dash of this familiar spice will elevate the flavors and add a touch of warmth.
    • Shredded cheddar cheese: Feel free to experiment with your favorite cheese, but cheddar is the classic choice for that melty goodness!
    • Sour cream: Optional, but it serves as a cool and creamy topping that balances the heat from the sausage.
    • Fresh parsley: A sprinkle of this bright herb adds a pop of color and a fresh finish, making it look as good as it tastes!

    For exact measurements, check the bottom of this article where I’ve made a handy print-friendly version just for you!

    How to Make Cheesy Ranch Potatoes and Smoked Sausage

    Preheat the Oven

    First things first, let’s get that oven hot! Preheat it to 400°F (200°C). This step is essential for achieving the crispy, golden brown potatoes we all crave. It’s like giving your dish a warm hug before it goes in the oven!

    Prepare the Potatoes

    Now, let’s give our baby potatoes some love. In a large mixing bowl, add the halved or quartered potatoes. Drizzle in a couple of tablespoons of olive oil, ensuring every little piece is well-coated. Then, toss in that ranch seasoning mix, along with garlic powder, onion powder, and a dash of black pepper. Mixing these flavors together makes the potatoes sing! Toss until the potatoes are evenly coated, and you’ll set the stage for something delicious.

    Combine Ingredients

    Once your potatoes are prepped, it’s time to unite the ingredients! Spread those seasoned potatoes evenly in a baking dish. This creates a nice base for all the flavors to meld. Trust me, you want to include every bit of that seasoning for maximum flavor!

    Add the Sausage

    Next up, grab your smoked sausage. Slice it into bite-sized pieces, about an inch thick. Sprinkle the sausage over the seasoned potatoes in the baking dish. The combination of smoky sausage and ranch potatoes is pure magic. It’ll infuse every bite with that savory goodness we love!

    Bake to Perfection

    Now that our baking dish is loaded with love, it’s time to let it cook! Pop it into your preheated oven and bake for about 25-30 minutes. You’ll want to keep an eye on it. The potatoes should become fork-tender and golden brown. The smell wafting through your kitchen will be irresistible, and it’s a sign of deliciousness on the way!

    Cheese It Up

    Here comes the fun part! After 30 minutes, take the dish out and sprinkle the shredded cheddar cheese generously on top. The cheese will melt into gooey perfection. Return it to the oven for an additional 5-7 minutes, until you see that glorious, bubbly cheese. It’s all about that melty goodness!

    Serve and Garnish

    Time to enjoy this scrumptious dish! Serve the Cheesy Ranch Potatoes and Smoked Sausage hot from the oven, and consider adding a dollop of sour cream on top for an extra touch of creaminess. Garnish with freshly chopped parsley for that pop of color and freshness. Enjoy every savory, cheesy bite!

    Tips for Success

    • Ensure even cooking by cutting potatoes into uniform sizes.
    • For extra flavor, consider marinating the sausage in ranch seasoning the night before.
    • If you’re in a rush, use pre-cooked smoked sausage.
    • Feel free to mix in seasonal vegetables like bell peppers or zucchini for added nutrients.
    • Store leftovers in an airtight container for up to three days in the fridge.

    Equipment Needed

    • Baking dish: A standard 9×13 inch baking dish works best, but any oven-safe dish will do.
    • Mixing bowl: A large bowl for combining ingredients; you can also use a resealable bag for easy mixing!
    • Knife: A sharp knife for slicing the sausage and potatoes with ease.
    • Measuring spoons: Useful for accurately measuring your seasonings.

    Variations

    • Vegetarian Option: Substitute smoked sausage with plant-based sausage or add extra beans to keep it hearty.
    • Spicy Kick: Add a teaspoon of chili powder or diced jalapeños for a spicy twist that adds excitement!
    • Herb Infusion: Experiment with fresh herbs like thyme, rosemary, or basil for a fragrant alternative to ranch seasoning.
    • Cheese Lovers: Mix in a blend of cheeses, such as pepper jack for a bit of heat or mozzarella for extra gooeyness.
    • Low-Carb Version: Swap the baby potatoes with cauliflower florets for a lower-carb adaptation that still packs flavor.

    Serving Suggestions

    • Pair with a simple green salad to balance the richness of the dish.
    • Serve alongside crusty garlic bread or dinner rolls for a comforting meal.
    • Offer chilled beverages like iced tea or sparkling lemonade to refresh your palate.
    • For a beautiful presentation, serve in individual bowls, garnished with parsley.

    FAQs about Cheesy Ranch Potatoes and Smoked Sausage

    Can I make Cheesy Ranch Potatoes and Smoked Sausage ahead of time?
    Absolutely! This dish is perfect for meal prep. You can assemble it a day in advance, store it in the fridge, and bake it just before serving. It’s a fabulous time-saver for busy nights!

    What can I use instead of smoked sausage?
    If smoked sausage isn’t your thing, feel free to substitute it with turkey or beef sausage, or even a veggie sausage for a meat-free version. The flavors will still shine through!

    How do I store leftovers?
    Leftovers can be stored in an airtight container in the fridge for up to three days. Just reheat in the oven for a few minutes to regain that delicious texture!

    Can I add other vegetables to the dish?
    Definitely! You can include seasonal vegetables like bell peppers, zucchini, or even green beans. Just be sure to cut them into similar sizes as the potatoes for even cooking.

    Is there a way to make this dish spicier?
    For those who love a kick, try adding diced jalapeños or a teaspoon of chili powder to the ranch seasoning. It’ll give your Cheesy Ranch Potatoes and Smoked Sausage an exciting twist!

    Final Thoughts

    Making Cheesy Ranch Potatoes and Smoked Sausage is more than just preparing a meal; it’s about creating memorable moments around the dinner table. This dish wraps everyone in a warm embrace of comfort and flavor, making it a favorite for busy weeknights or special gatherings alike. I love how it brings my family together, sparking laughter and conversation. Plus, it’s so easy to whip up that you can enjoy the cooking process rather than stress over it. So grab your ingredients and let’s make a dish that will leave your loved ones smiling from ear to ear!


    Print

    clock clock iconcutlery cutlery iconflag flag iconfolder folder iconinstagram instagram iconpinterest pinterest iconfacebook facebook iconprint print iconsquares squares iconheart heart iconheart solid heart solid icon

    Description

    Cheesy Ranch Potatoes and Smoked Sausage is a delicious and savory dish that’s easy to prepare and packed with flavor. Perfect for gatherings or a hearty family meal.


    • 1 pound smoked sausage (halal-certified, no pork)
    • 4 cups baby potatoes, halved or quartered
    • 2 tablespoons olive oil
    • 1 packet ranch seasoning mix (make sure it’s halal-certified)
    • 1 teaspoon garlic powder
    • 1 teaspoon onion powder
    • 1/2 teaspoon black pepper
    • 1 1/2 cups shredded cheddar cheese (or a mix of your favorite cheeses)
    • 1/2 cup sour cream (optional, for serving)
    • Fresh parsley, chopped (optional, for garnish)

    1. Preheat your oven to 400°F (200°C).
    2. In a large mixing bowl, combine the halved baby potatoes with olive oil, ranch seasoning mix, garlic powder, onion powder, and black pepper. Toss until the potatoes are well-coated.
    3. Spread the seasoned potatoes evenly in a baking dish.
    4. Slice the smoked sausage into pieces and add it to the dish over the potatoes.
    5. Bake in the preheated oven for about 25-30 minutes, or until the potatoes are fork-tender and golden brown.
    6. Remove from the oven and sprinkle the shredded cheddar cheese over the top.
    7. Return to the oven and bake for an additional 5-7 minutes, until the cheese is melted and bubbly.
    8. Serve hot, with a dollop of sour cream on top if desired, and garnish with fresh parsley.

    Notes

    • Use turkey or beef sausage to ensure the dish is pork-free.
    • Feel free to customize the cheese according to your preference.
    • This dish can be made ahead of time and reheated in the oven.
    • Prep Time: 15 minutes
    • Cook Time: 35 minutes
    • Category: Main Course
    • Method: Baking
    • Cuisine: American

    Nutrition

    • Serving Size: 1 cup
    • Calories: 450
    • Sugar: 2g
    • Sodium: 800mg
    • Fat: 30g
    • Saturated Fat: 10g
    • Unsaturated Fat: 15g
    • Trans Fat: 0g
    • Carbohydrates: 30g
    • Fiber: 4g
    • Protein: 20g
    • Cholesterol: 60mg

    Sharing is caring!